Clothes
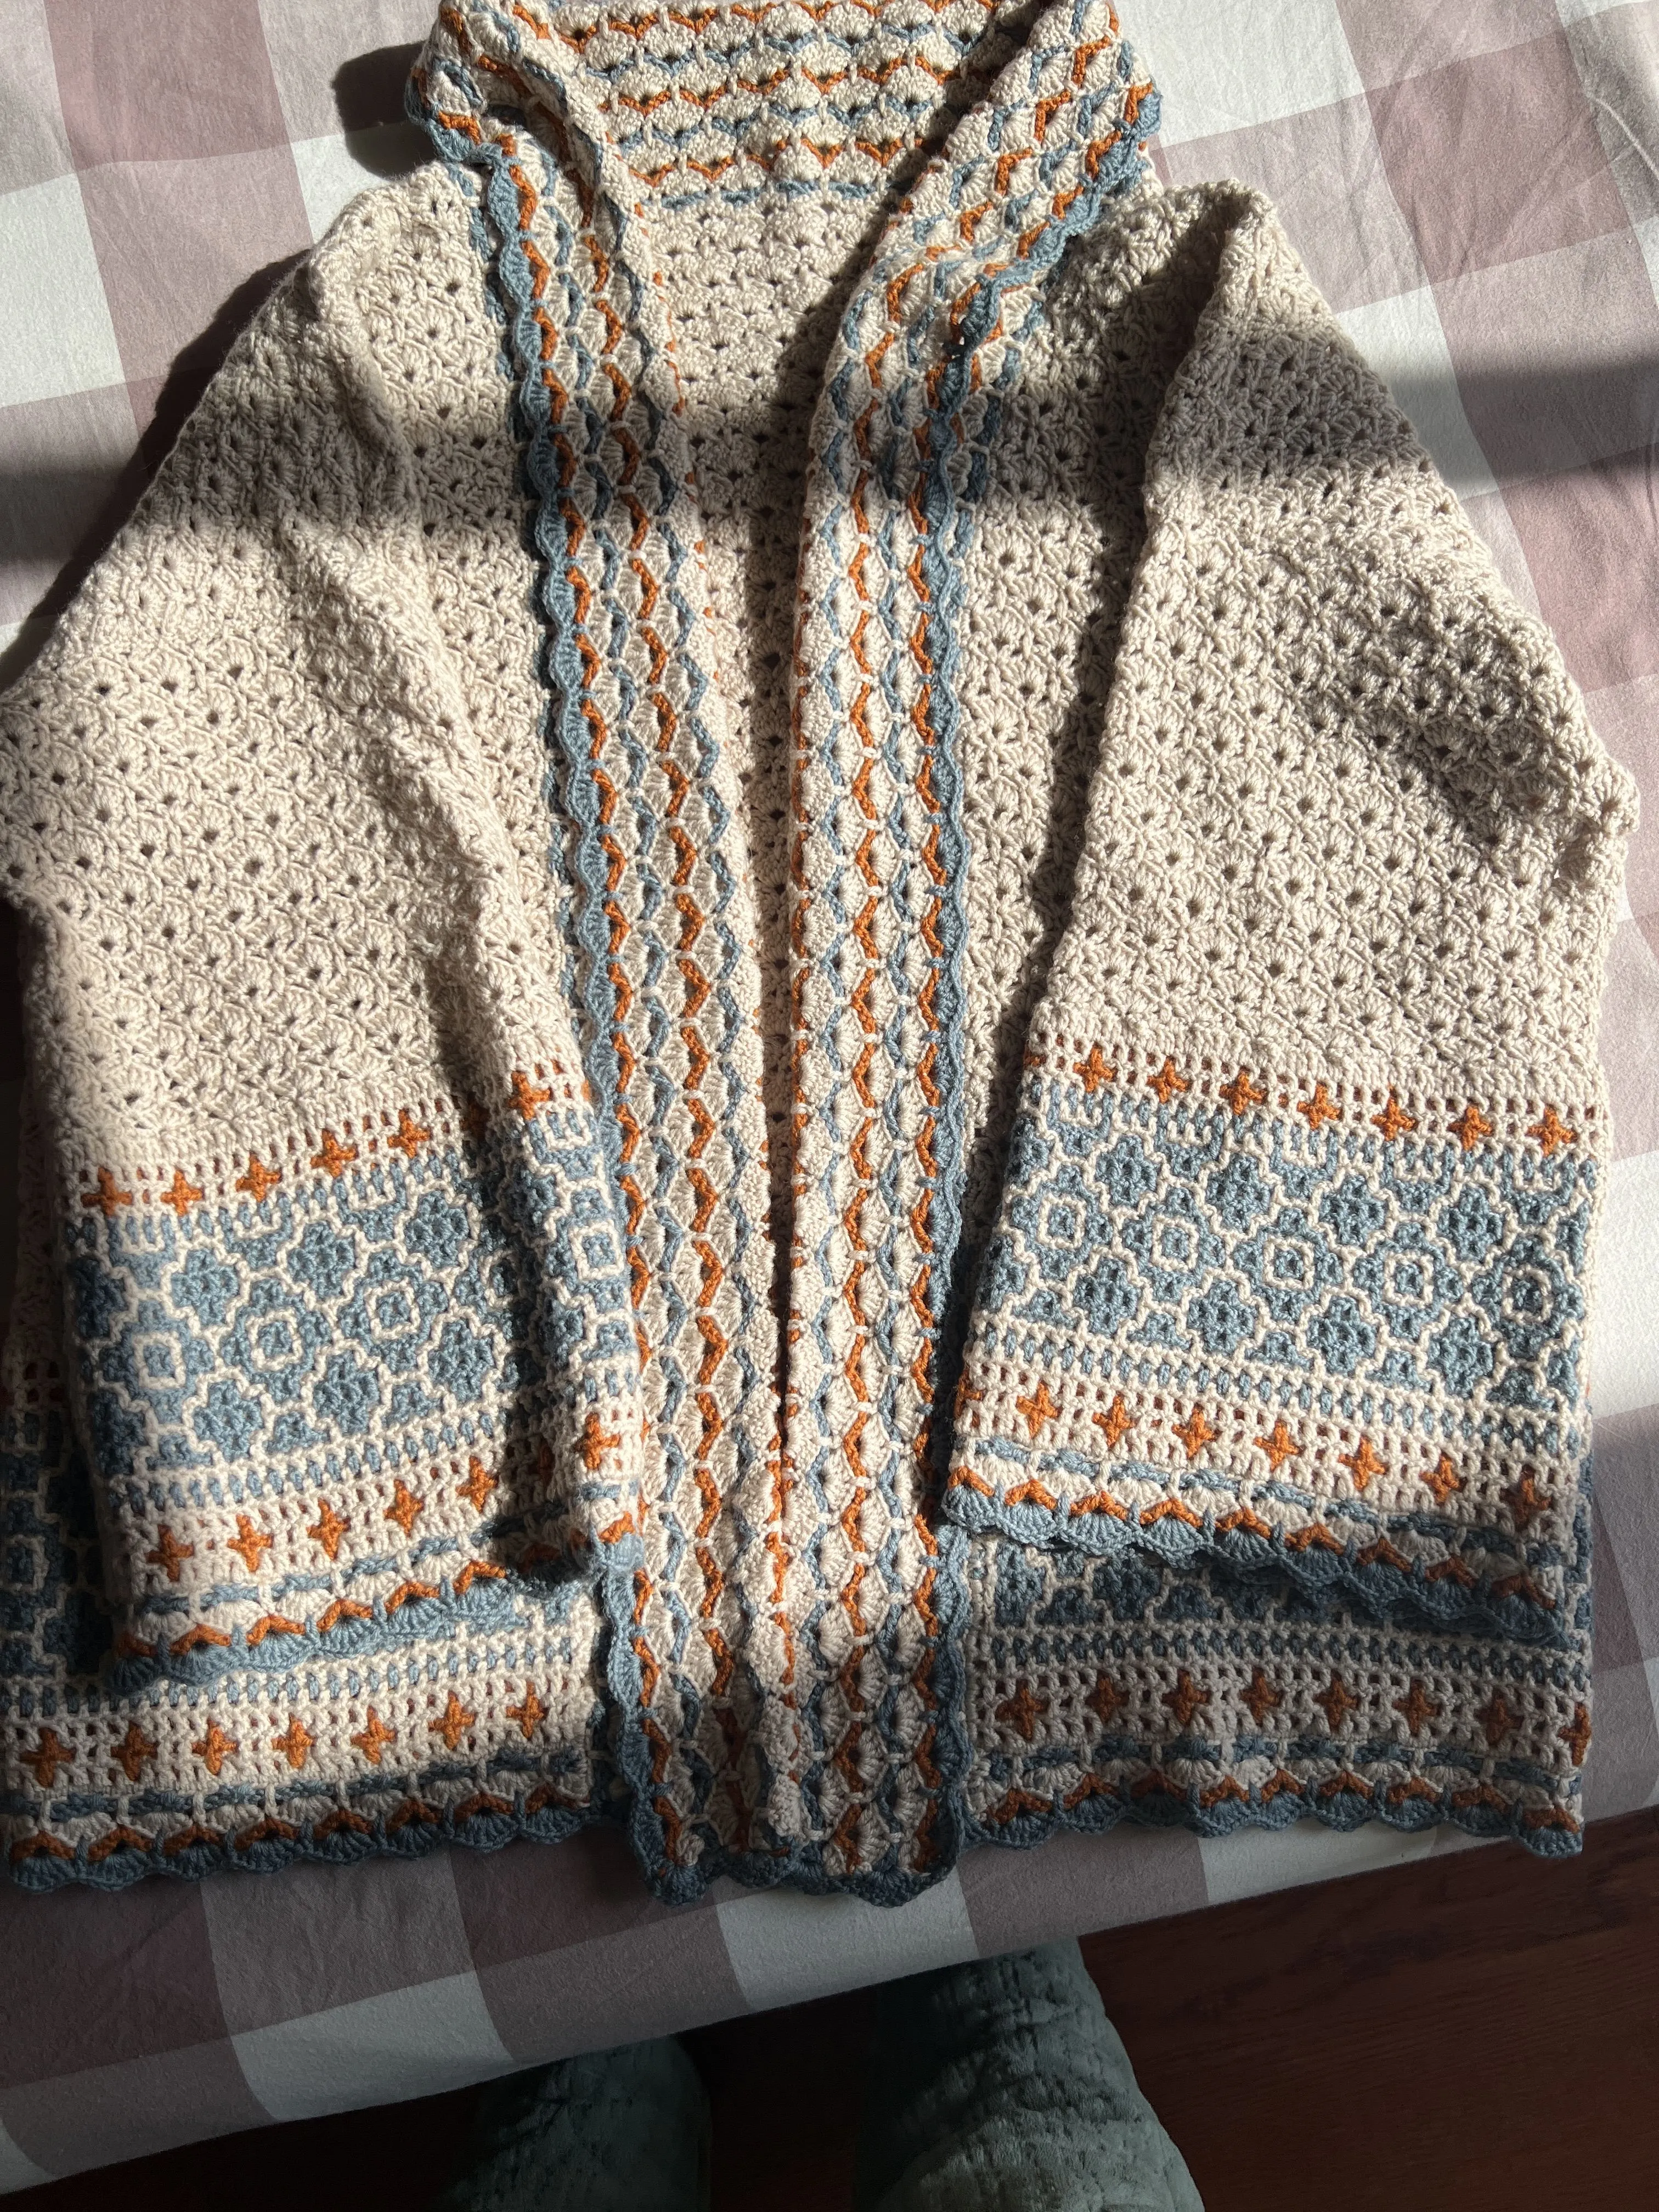
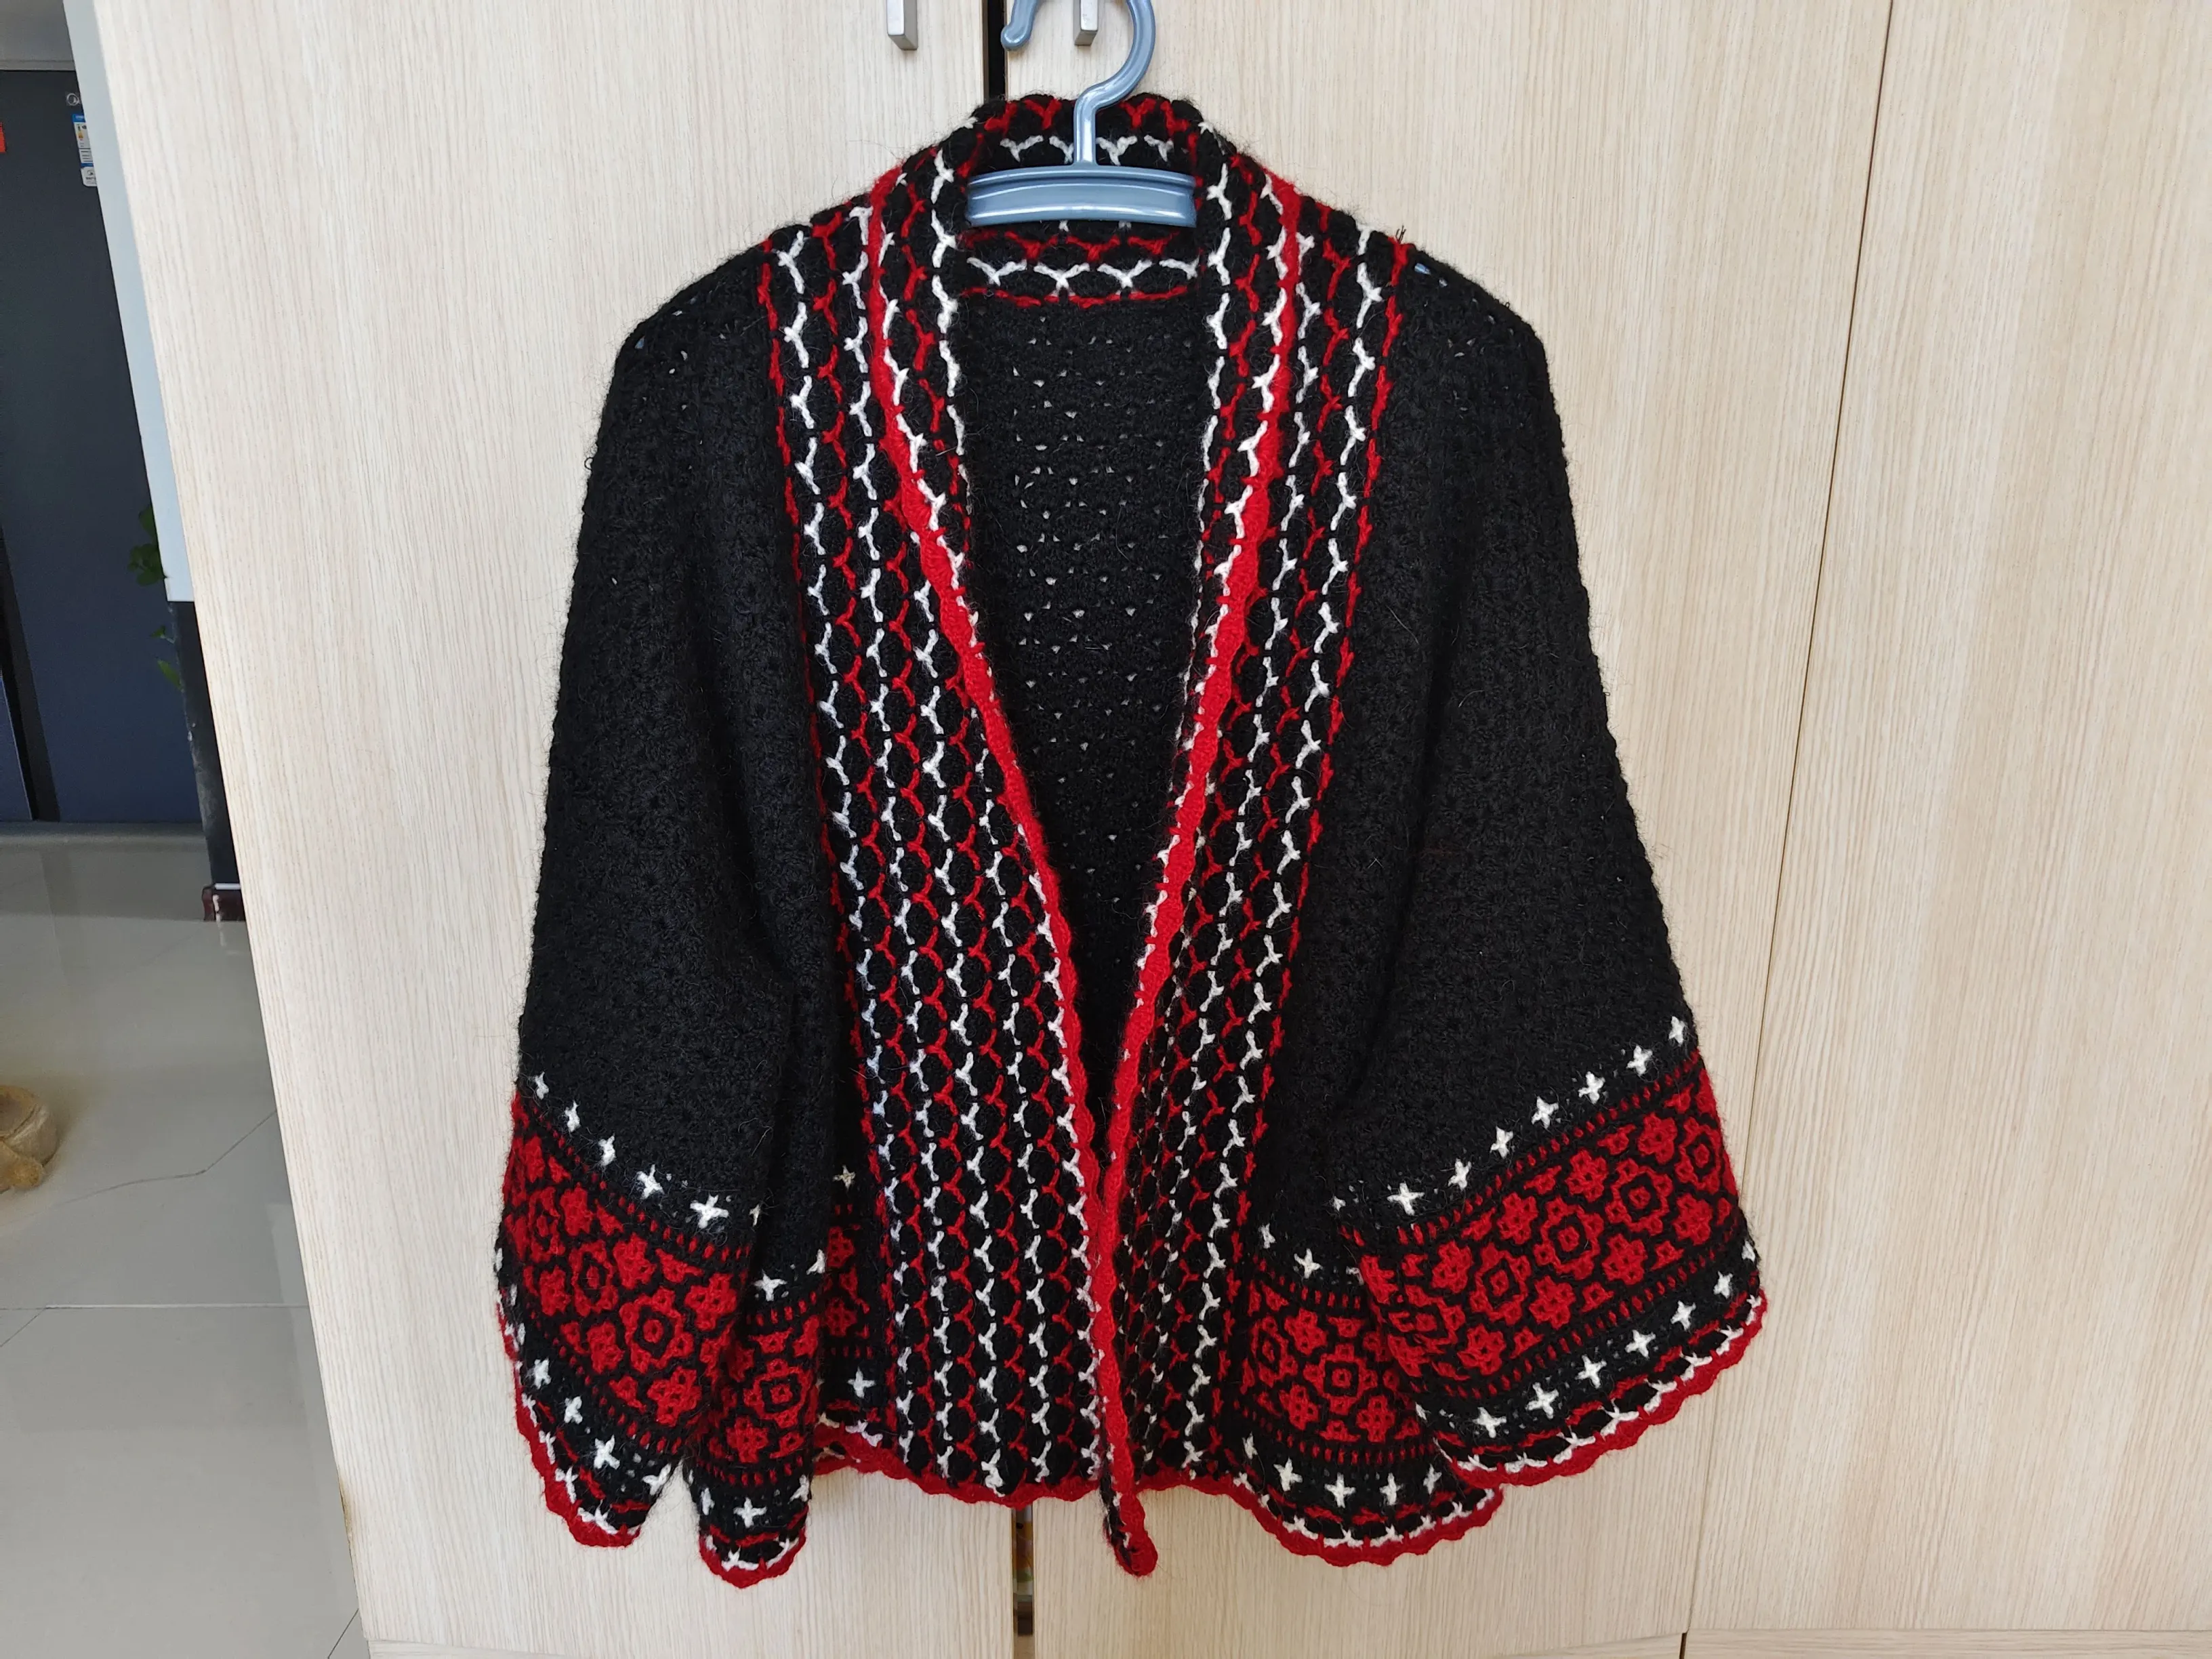
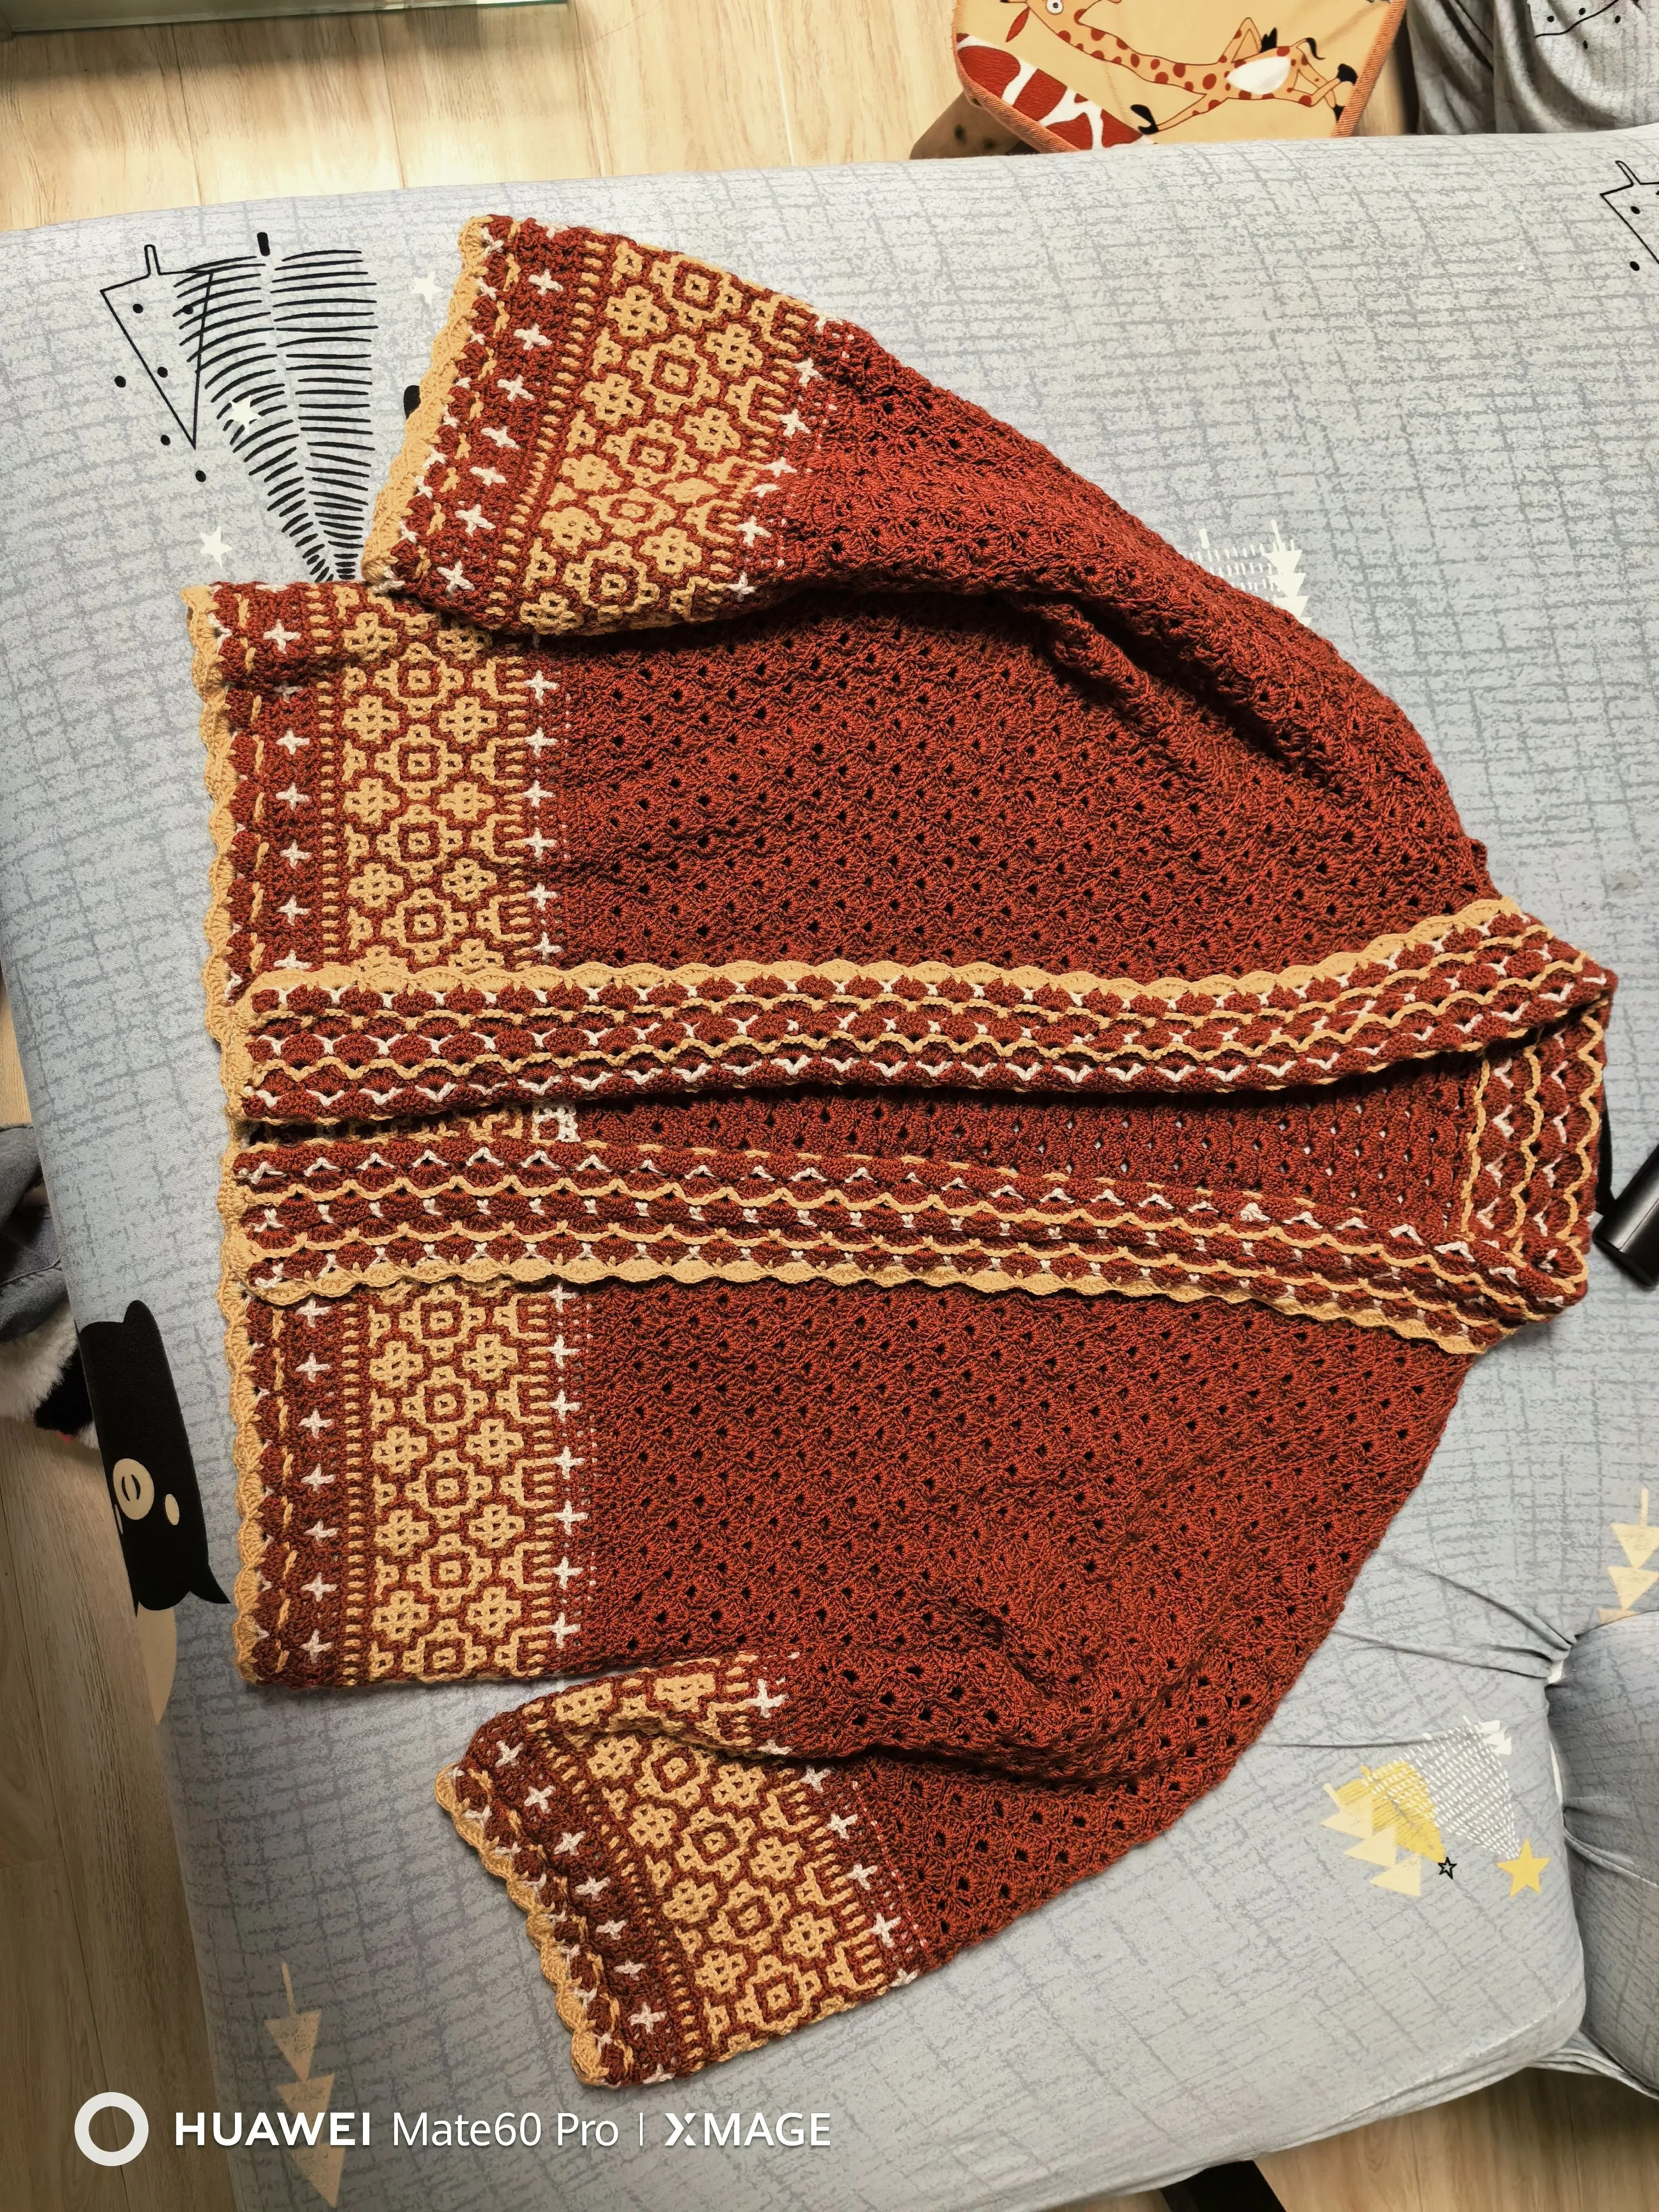
Jintang Reversible Coat
Project preview
See the finished project
Pattern format
Instructions
Watch and follow
Video tutorial
This coat consist of body, chest piece, hem, band, sleeves and decorations. Firstly,crochet the body, then the parts of the chest piece are crocheted in sections, the shoulders are sewn together to join the shoulders, then the hem and band are crocheted separately, followed by making and sewing the sleeves, and finally embroidering the decorations.
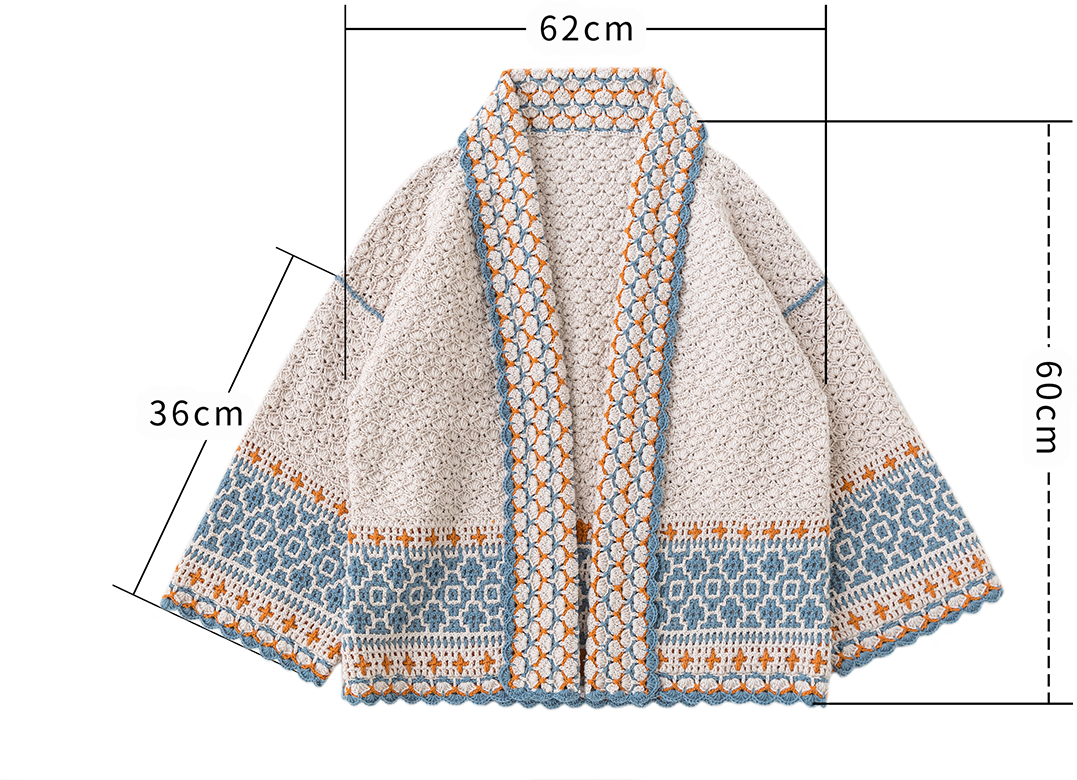
The handcrafted measurements may have an error of 1 to 2cm. Due to variations in individual tension, the size of the sample is for reference only.
Chart Key




Material: Susan's Family Morandi 4#
Hook: 3.00mm crochet hook
Note:
This pattern is making in Chinese crochet pattern terms, and the stitch name is written using American terminology. All measurements in charts are in cm.
Structure Diagram
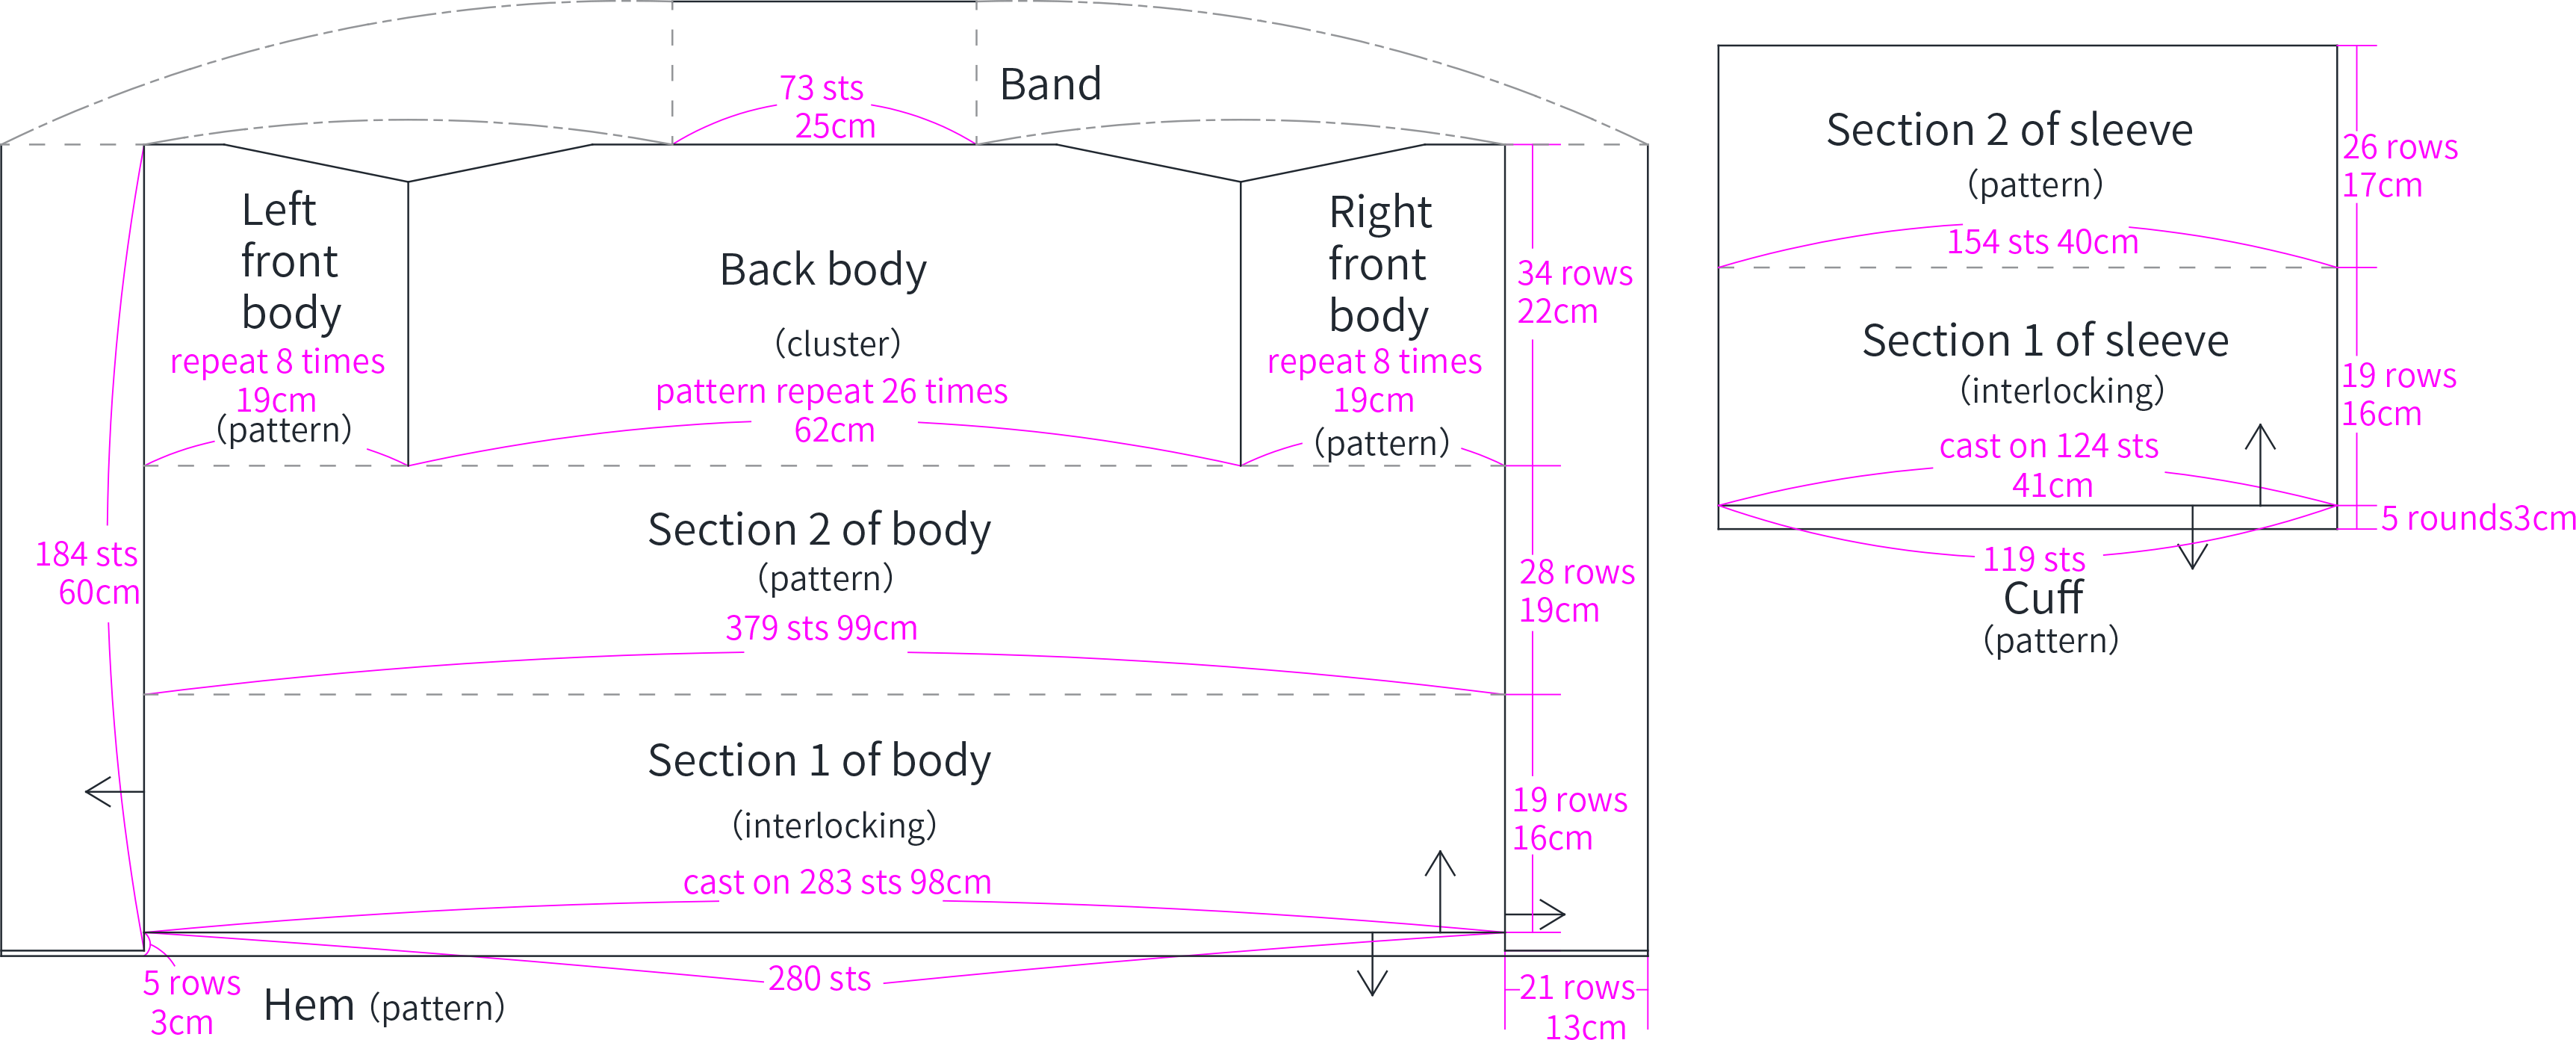
Note:
The left and right here refer to the left and right when the garment is worn.
Key points:
1.Interlocking for section 1 of the body 00' 33''
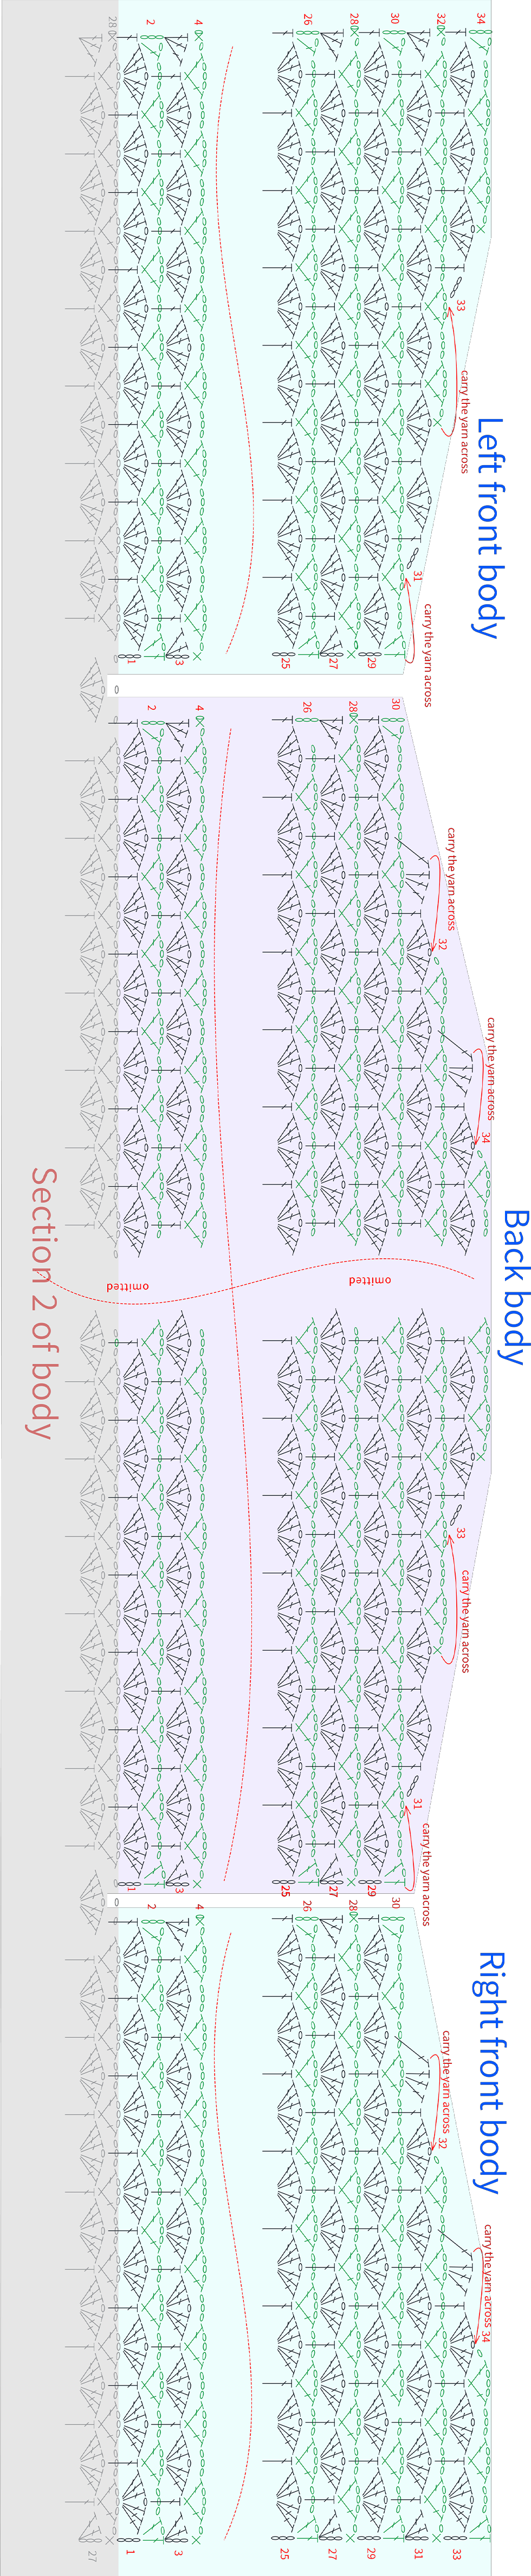
2.Carry the yarn across for the chest piece 20' 22''
3.Embroider cables as decorations 21' 28''
Part 1 Body
Section 2 of body
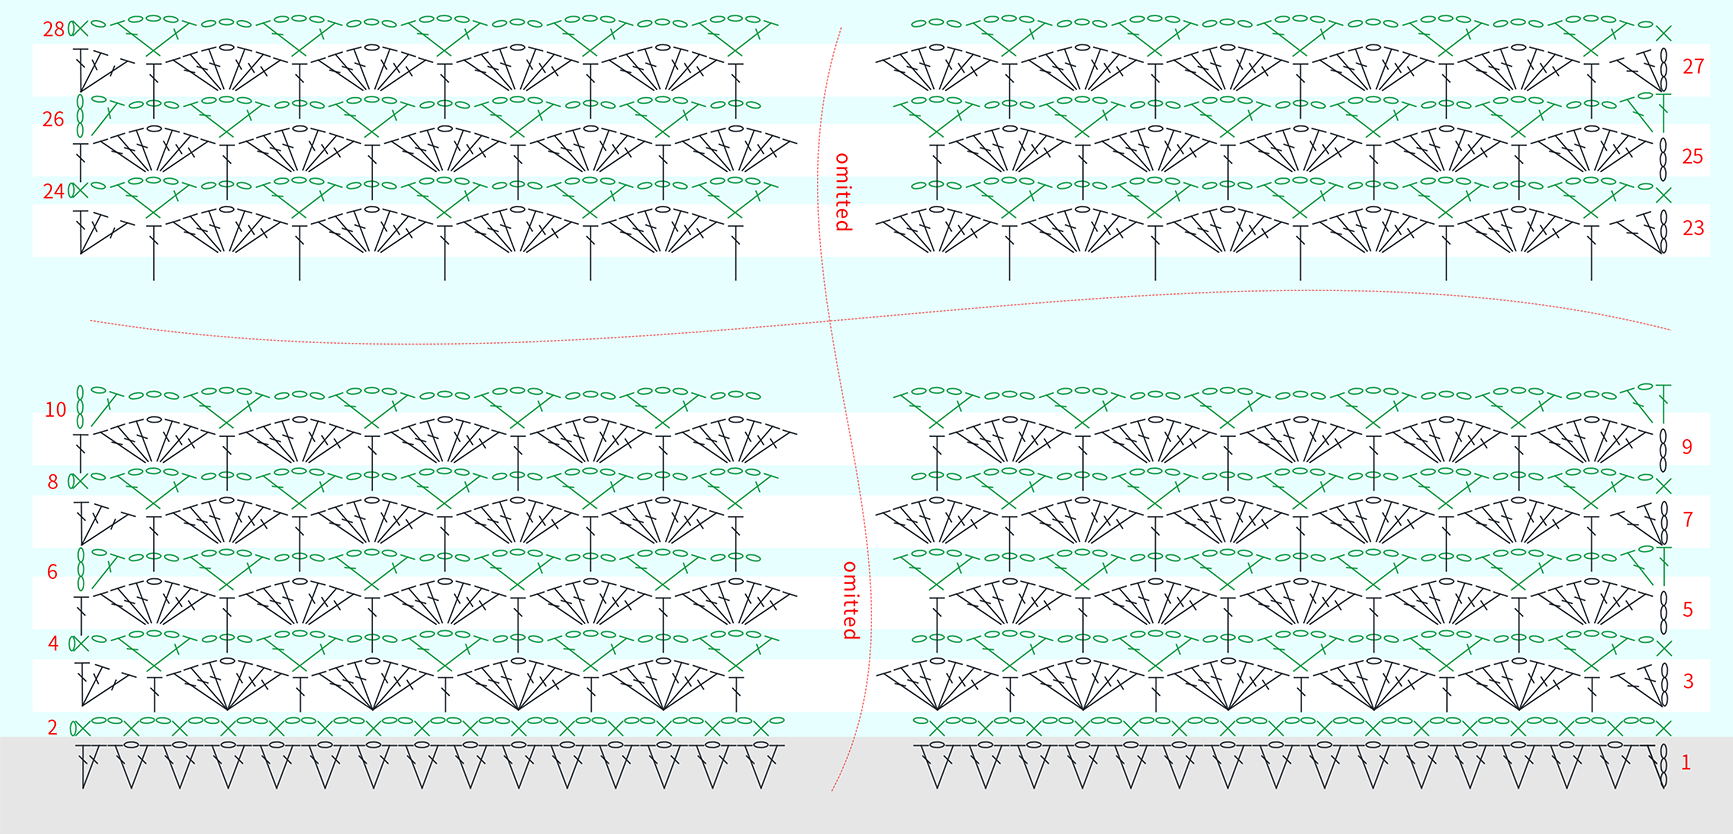
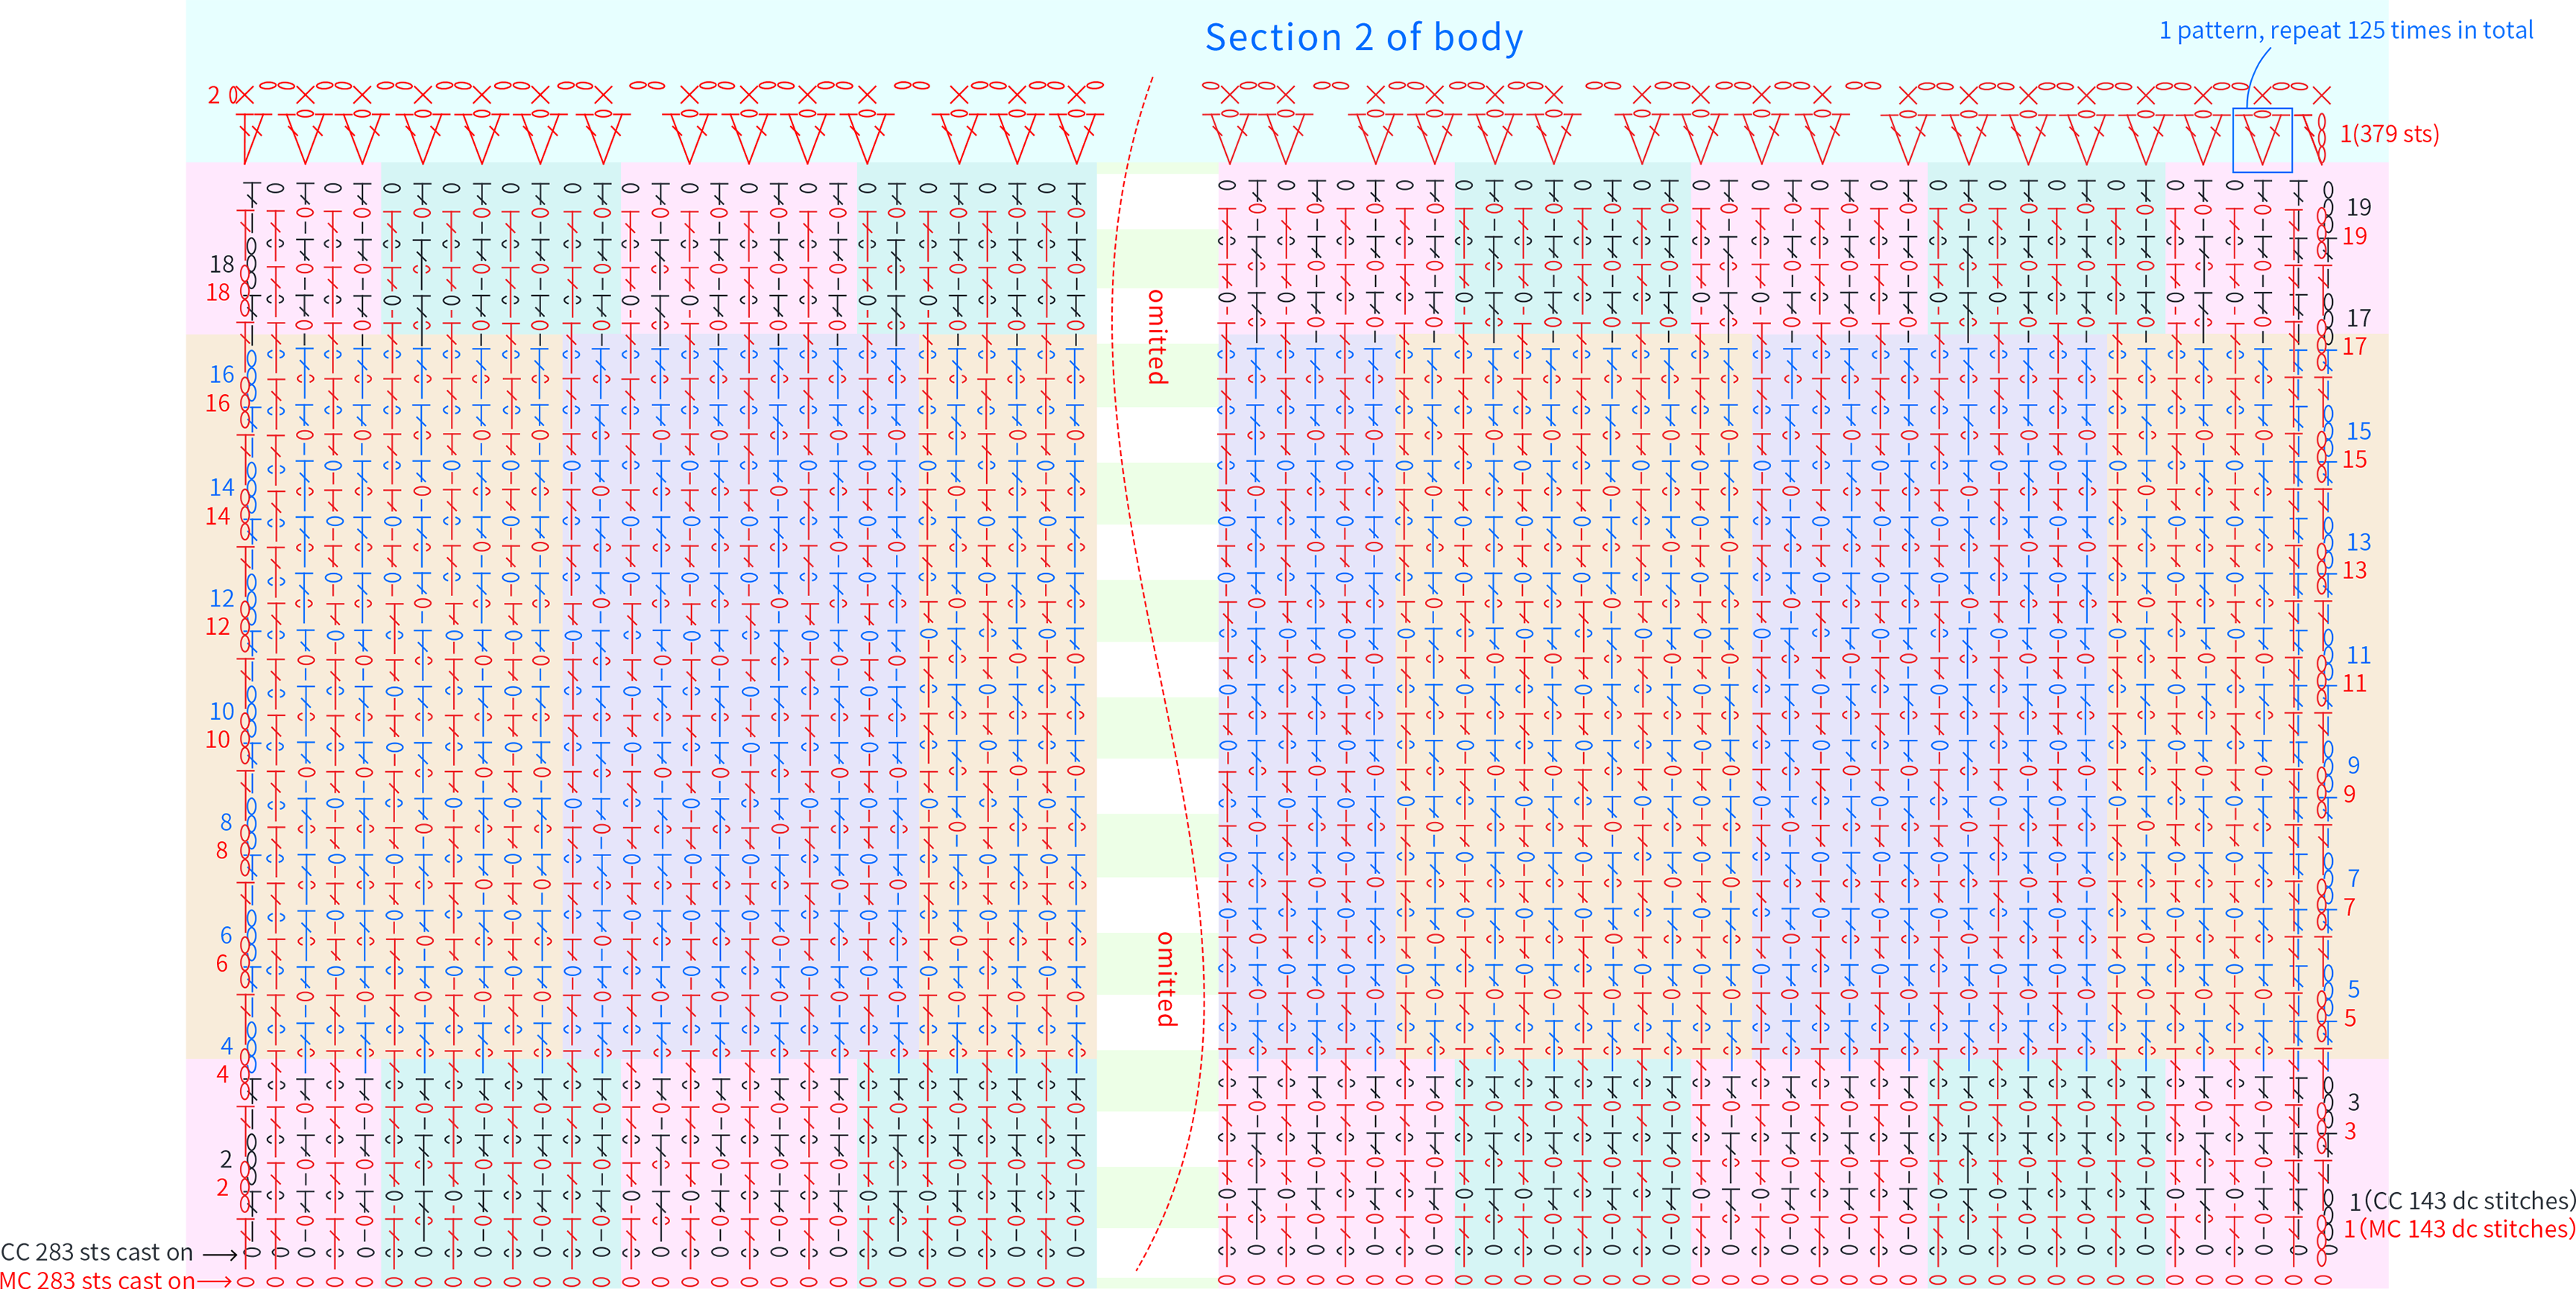
Note:
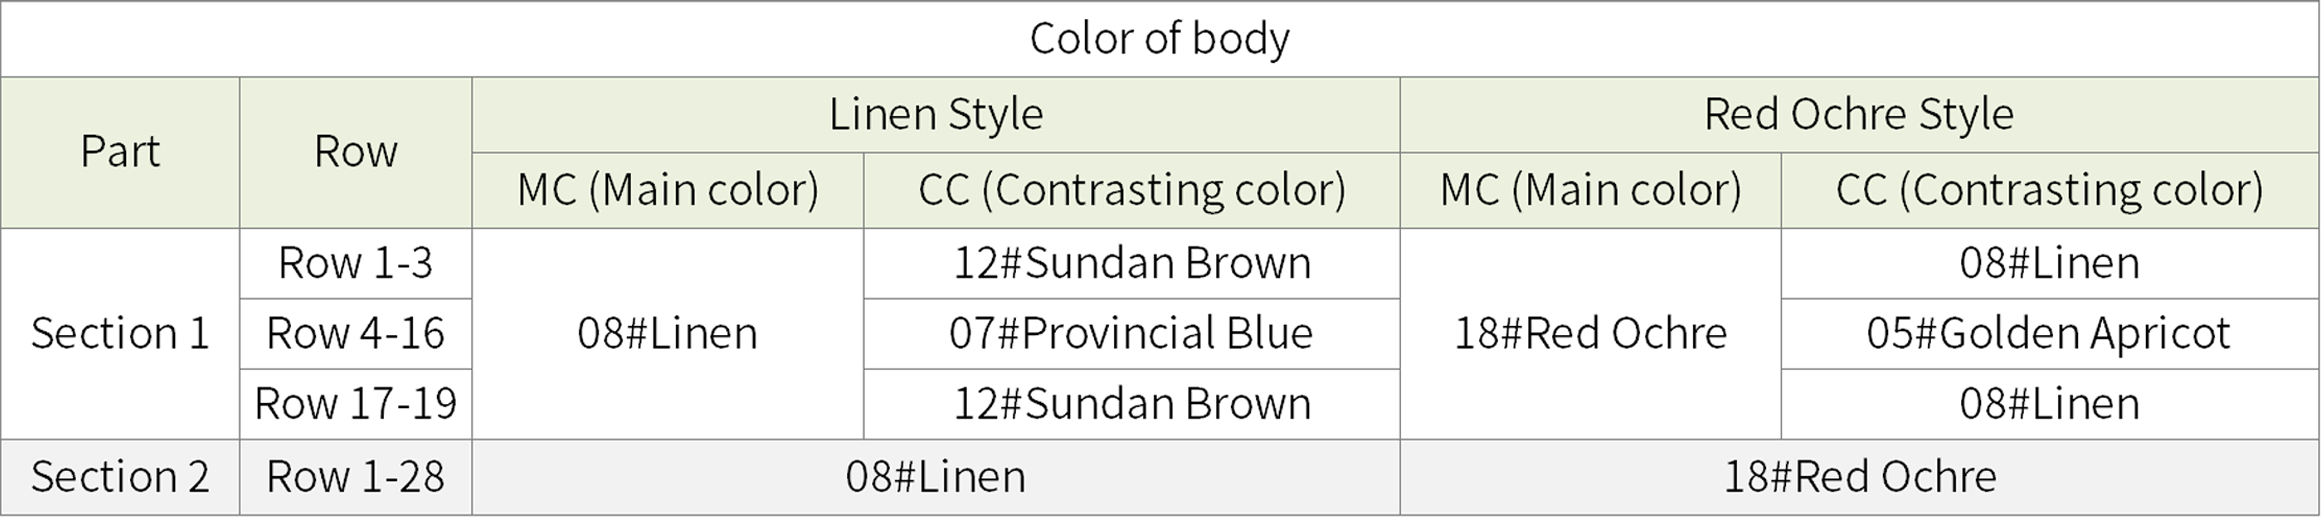
1. For Section 1 of the body, crochet interlocking with the main color and contrasting color. Fasten off yarn separately when completed. Consider the side where the first row is the right side as the front of the garment.
2. For the first row of Section 2 of the body, you need to adjust the number of stitches. You can follow the cluster or adjust according to your preference, working out the corresponding number of clusters roughly evenly.
Part 2 Chest piece
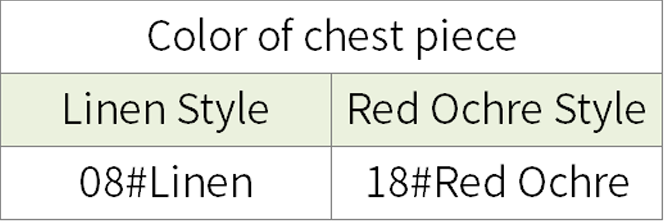
Note: After completing, sew the shoulders together using the whip stitch method.
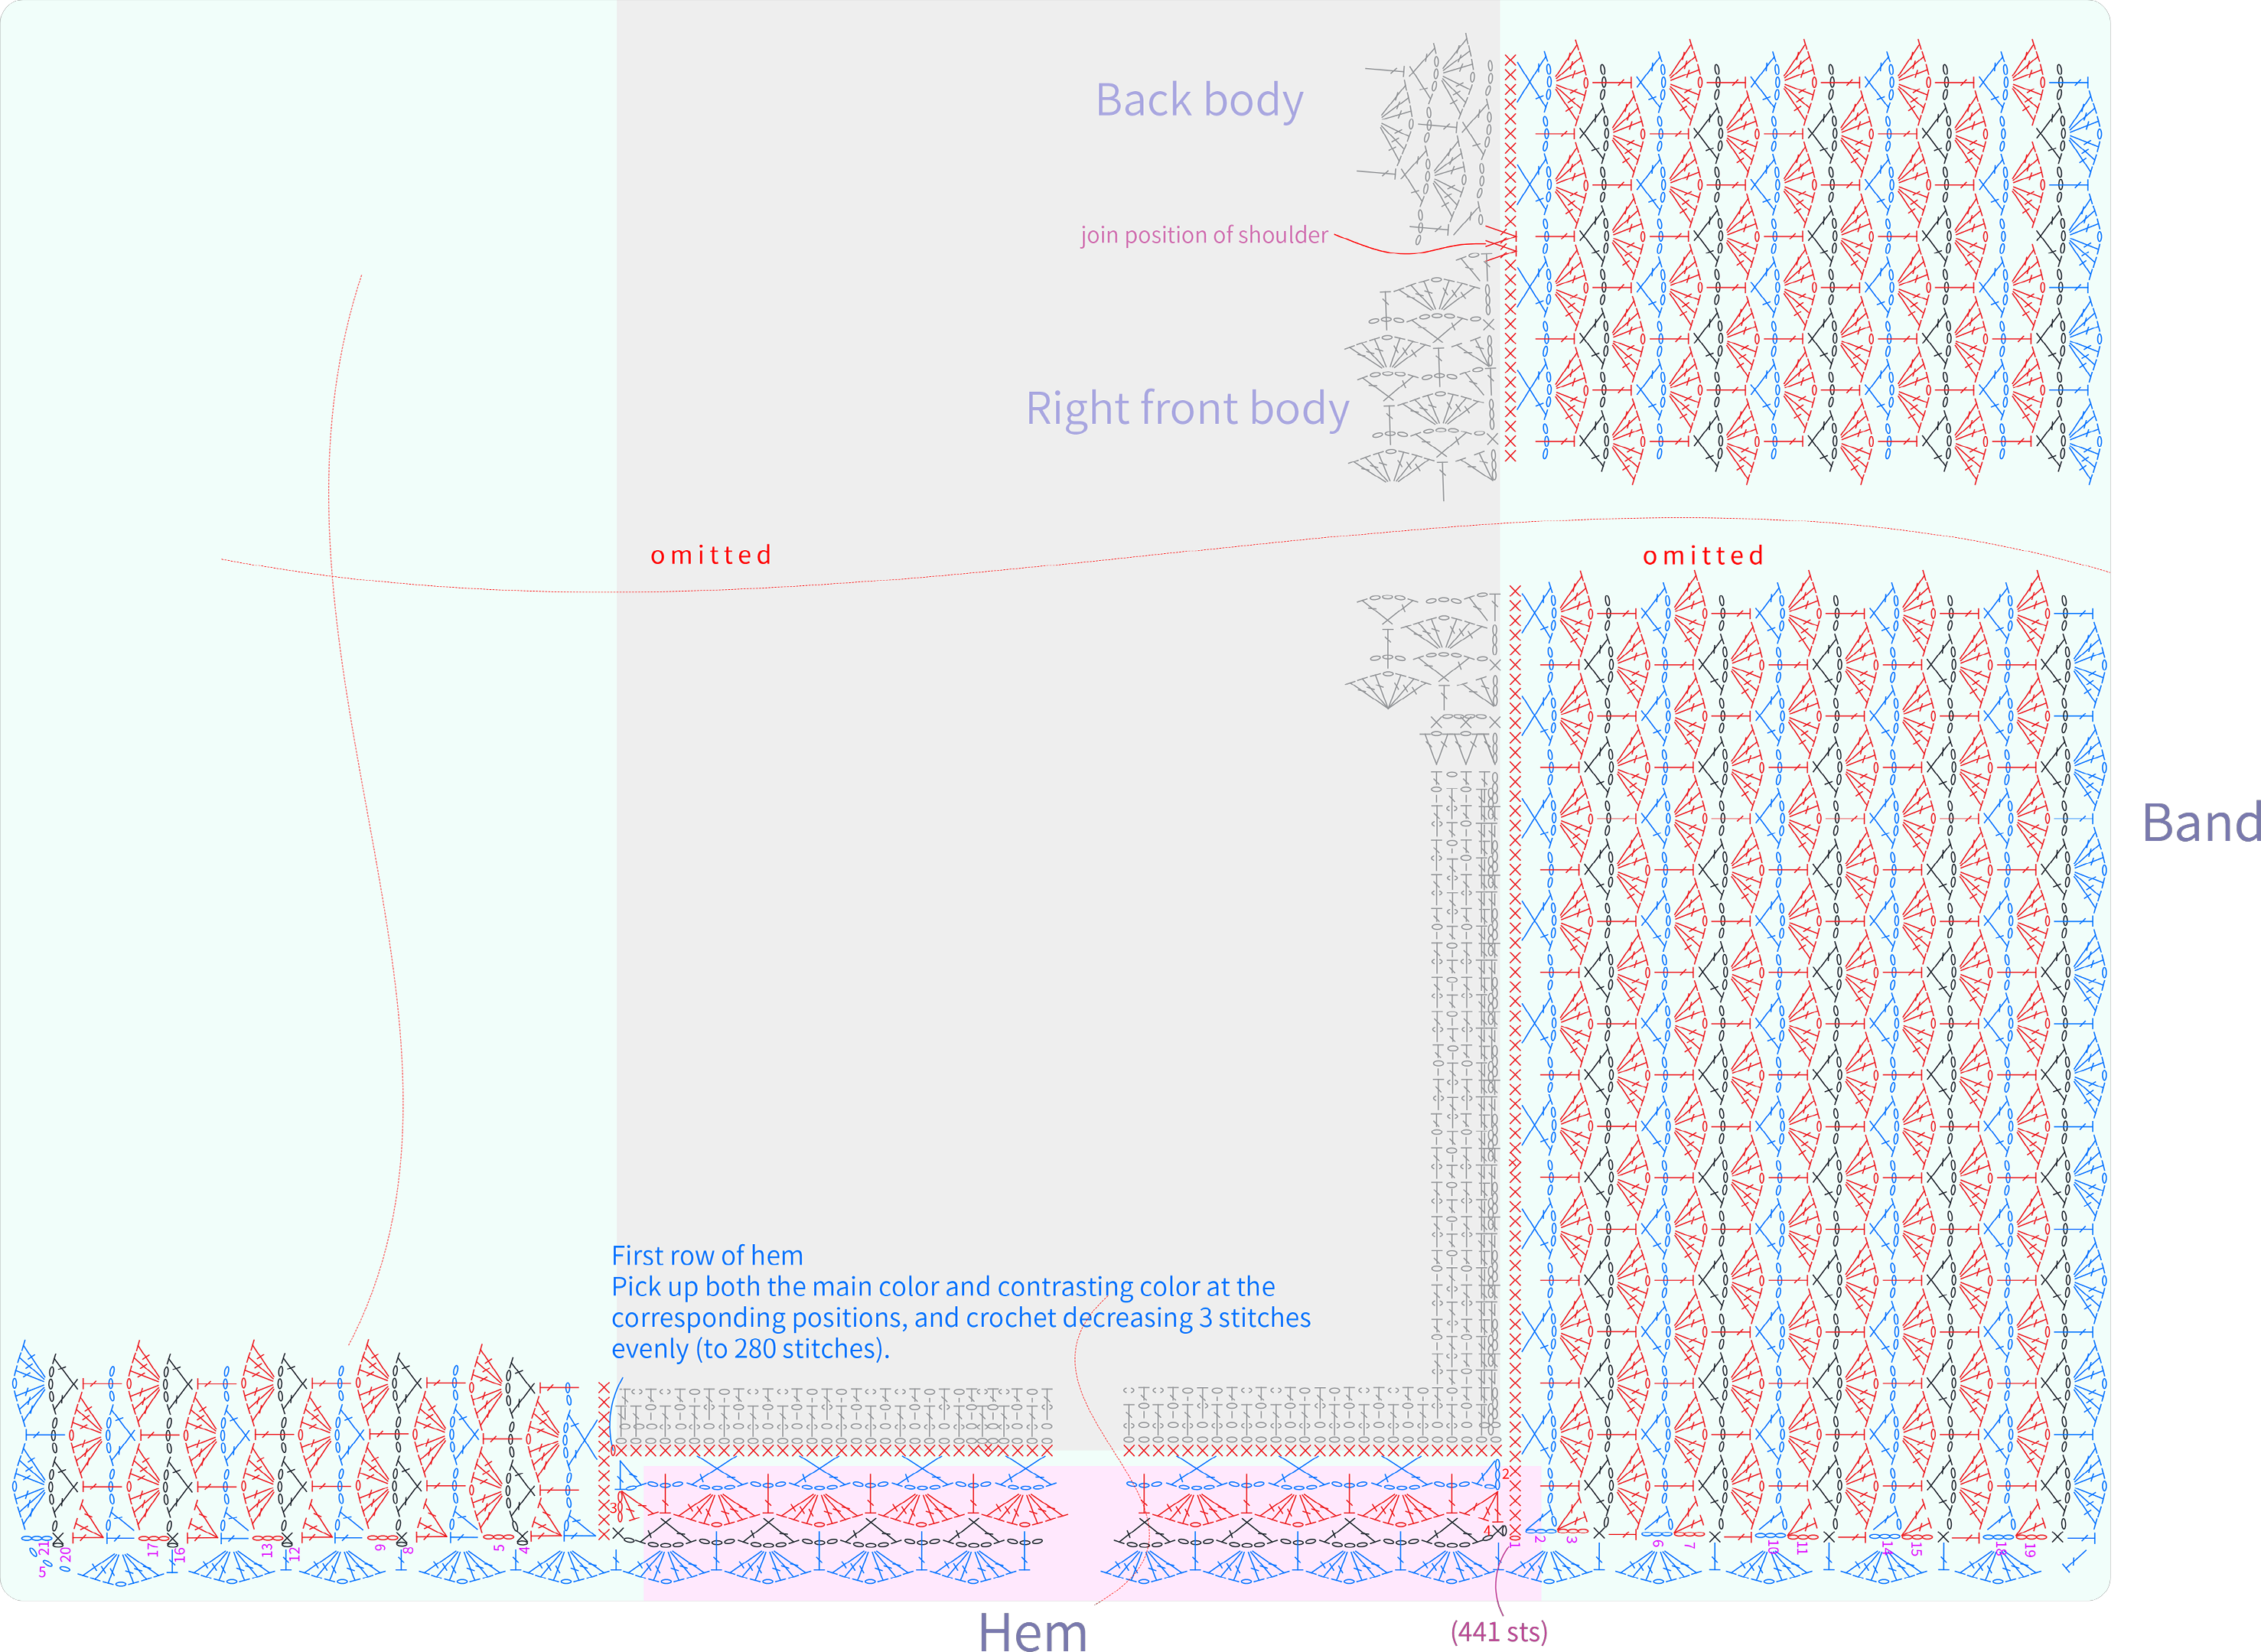
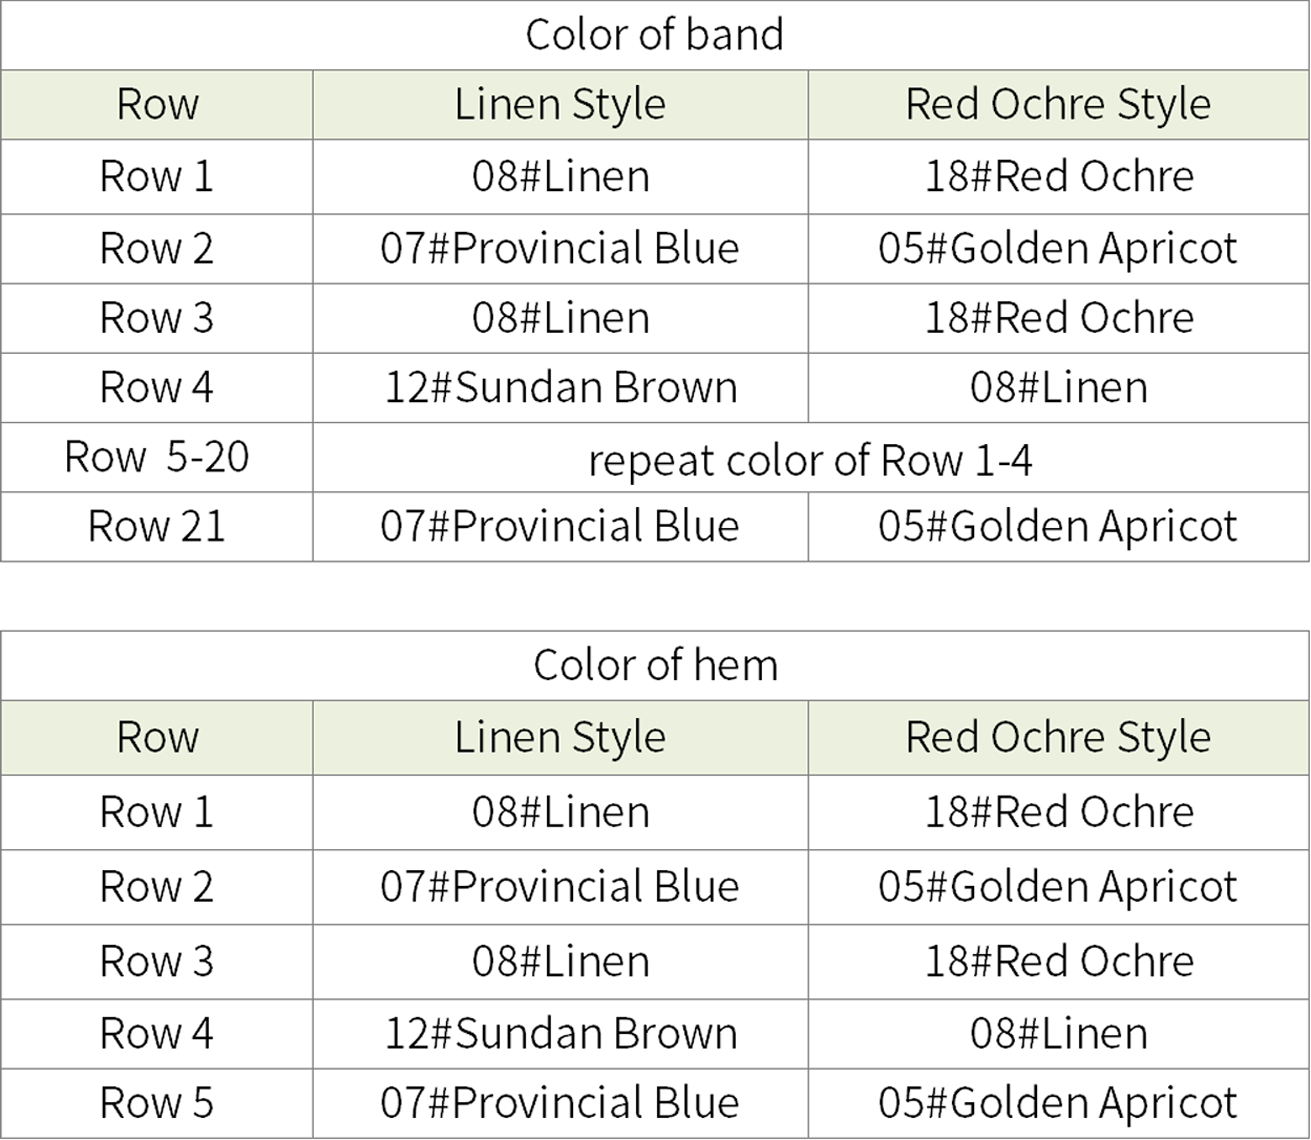
Part 3 Hem and band
First crochet the hem for the first 4 rows, then crochet the front band, and finally crochet the hem for the 5th row.
PART4 Sleeves and decorations
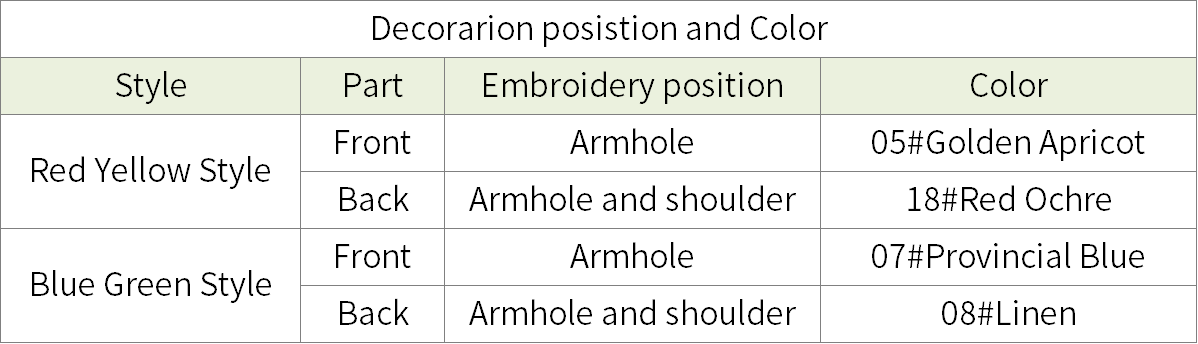
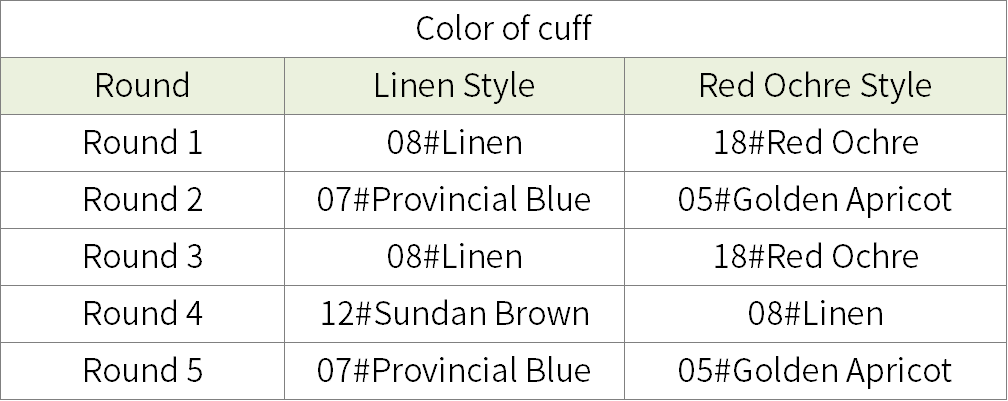
The two sleeves are identical. First, crochet the sleeve body back and forth, then sew the sides together using the whip stitch method after it's completed. Next, crochet the cuff in rounds and sew it onto the corresponding position of the armhole. Finally, add cable embroidery decorations at the sewing positions on the shoulders and armholes.
Section 2 of sleeve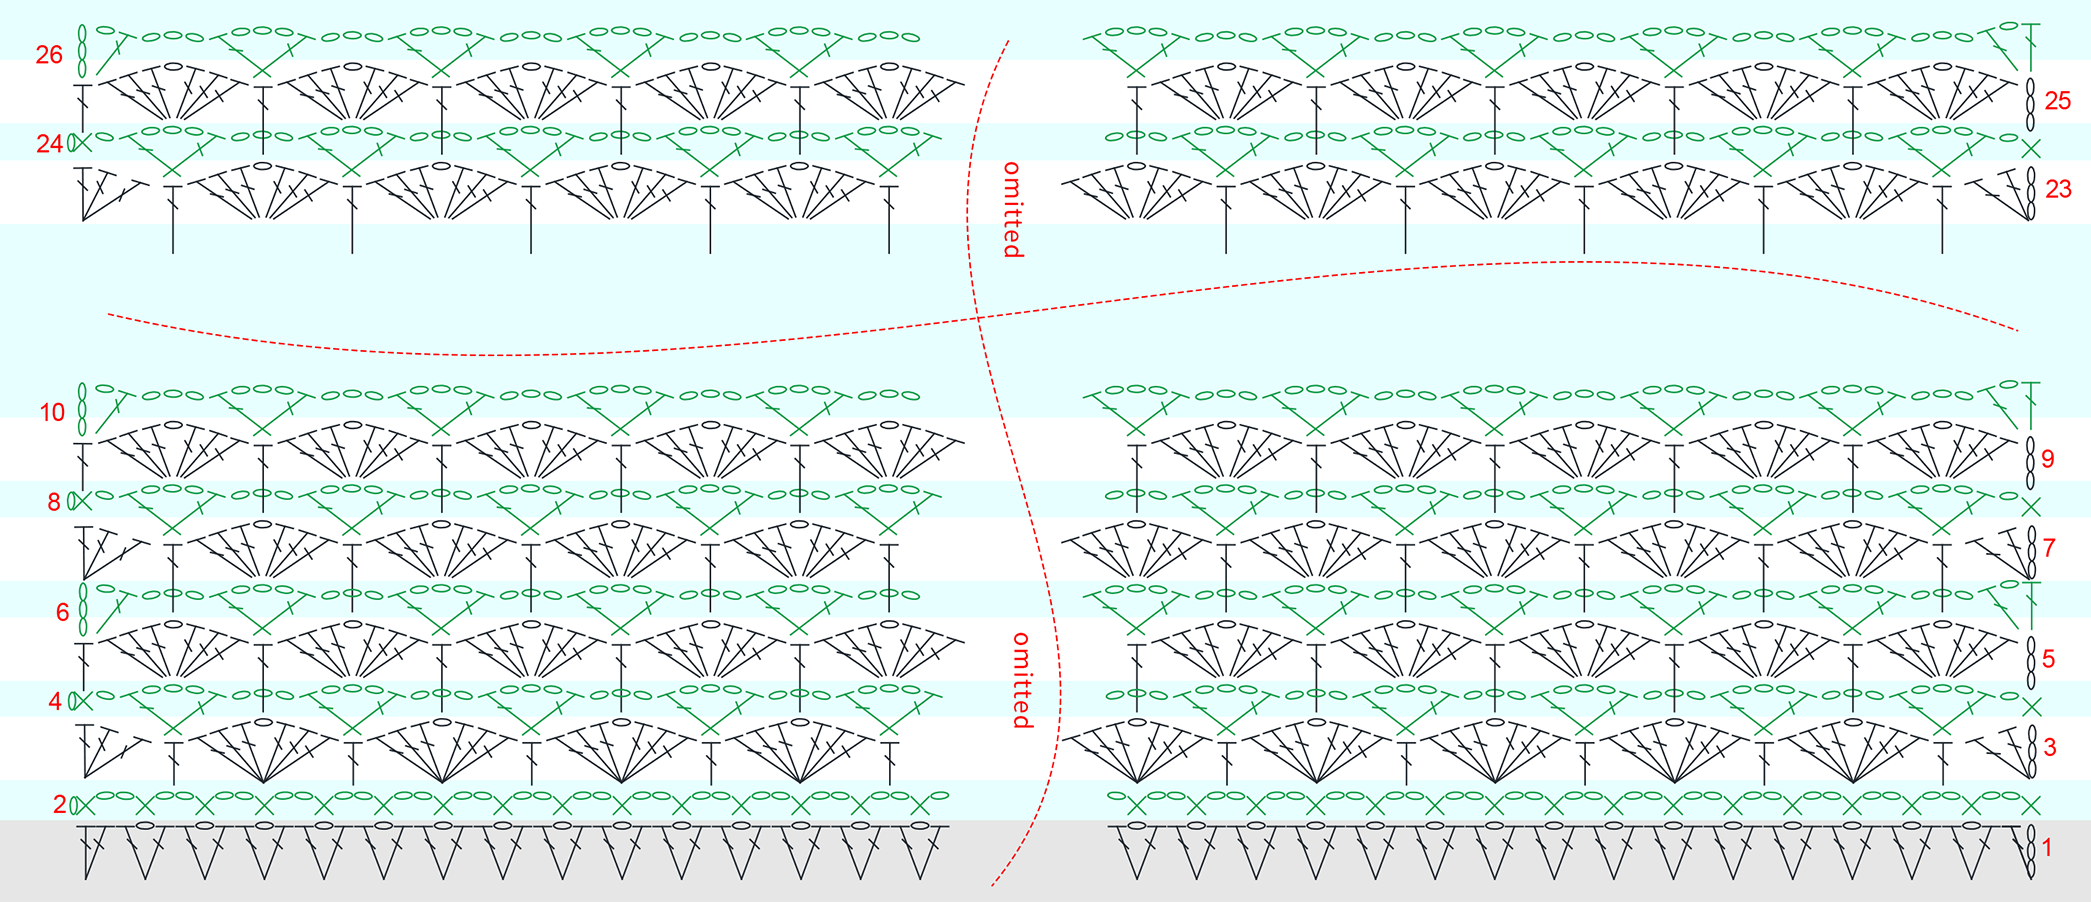
Section 1 of sleeve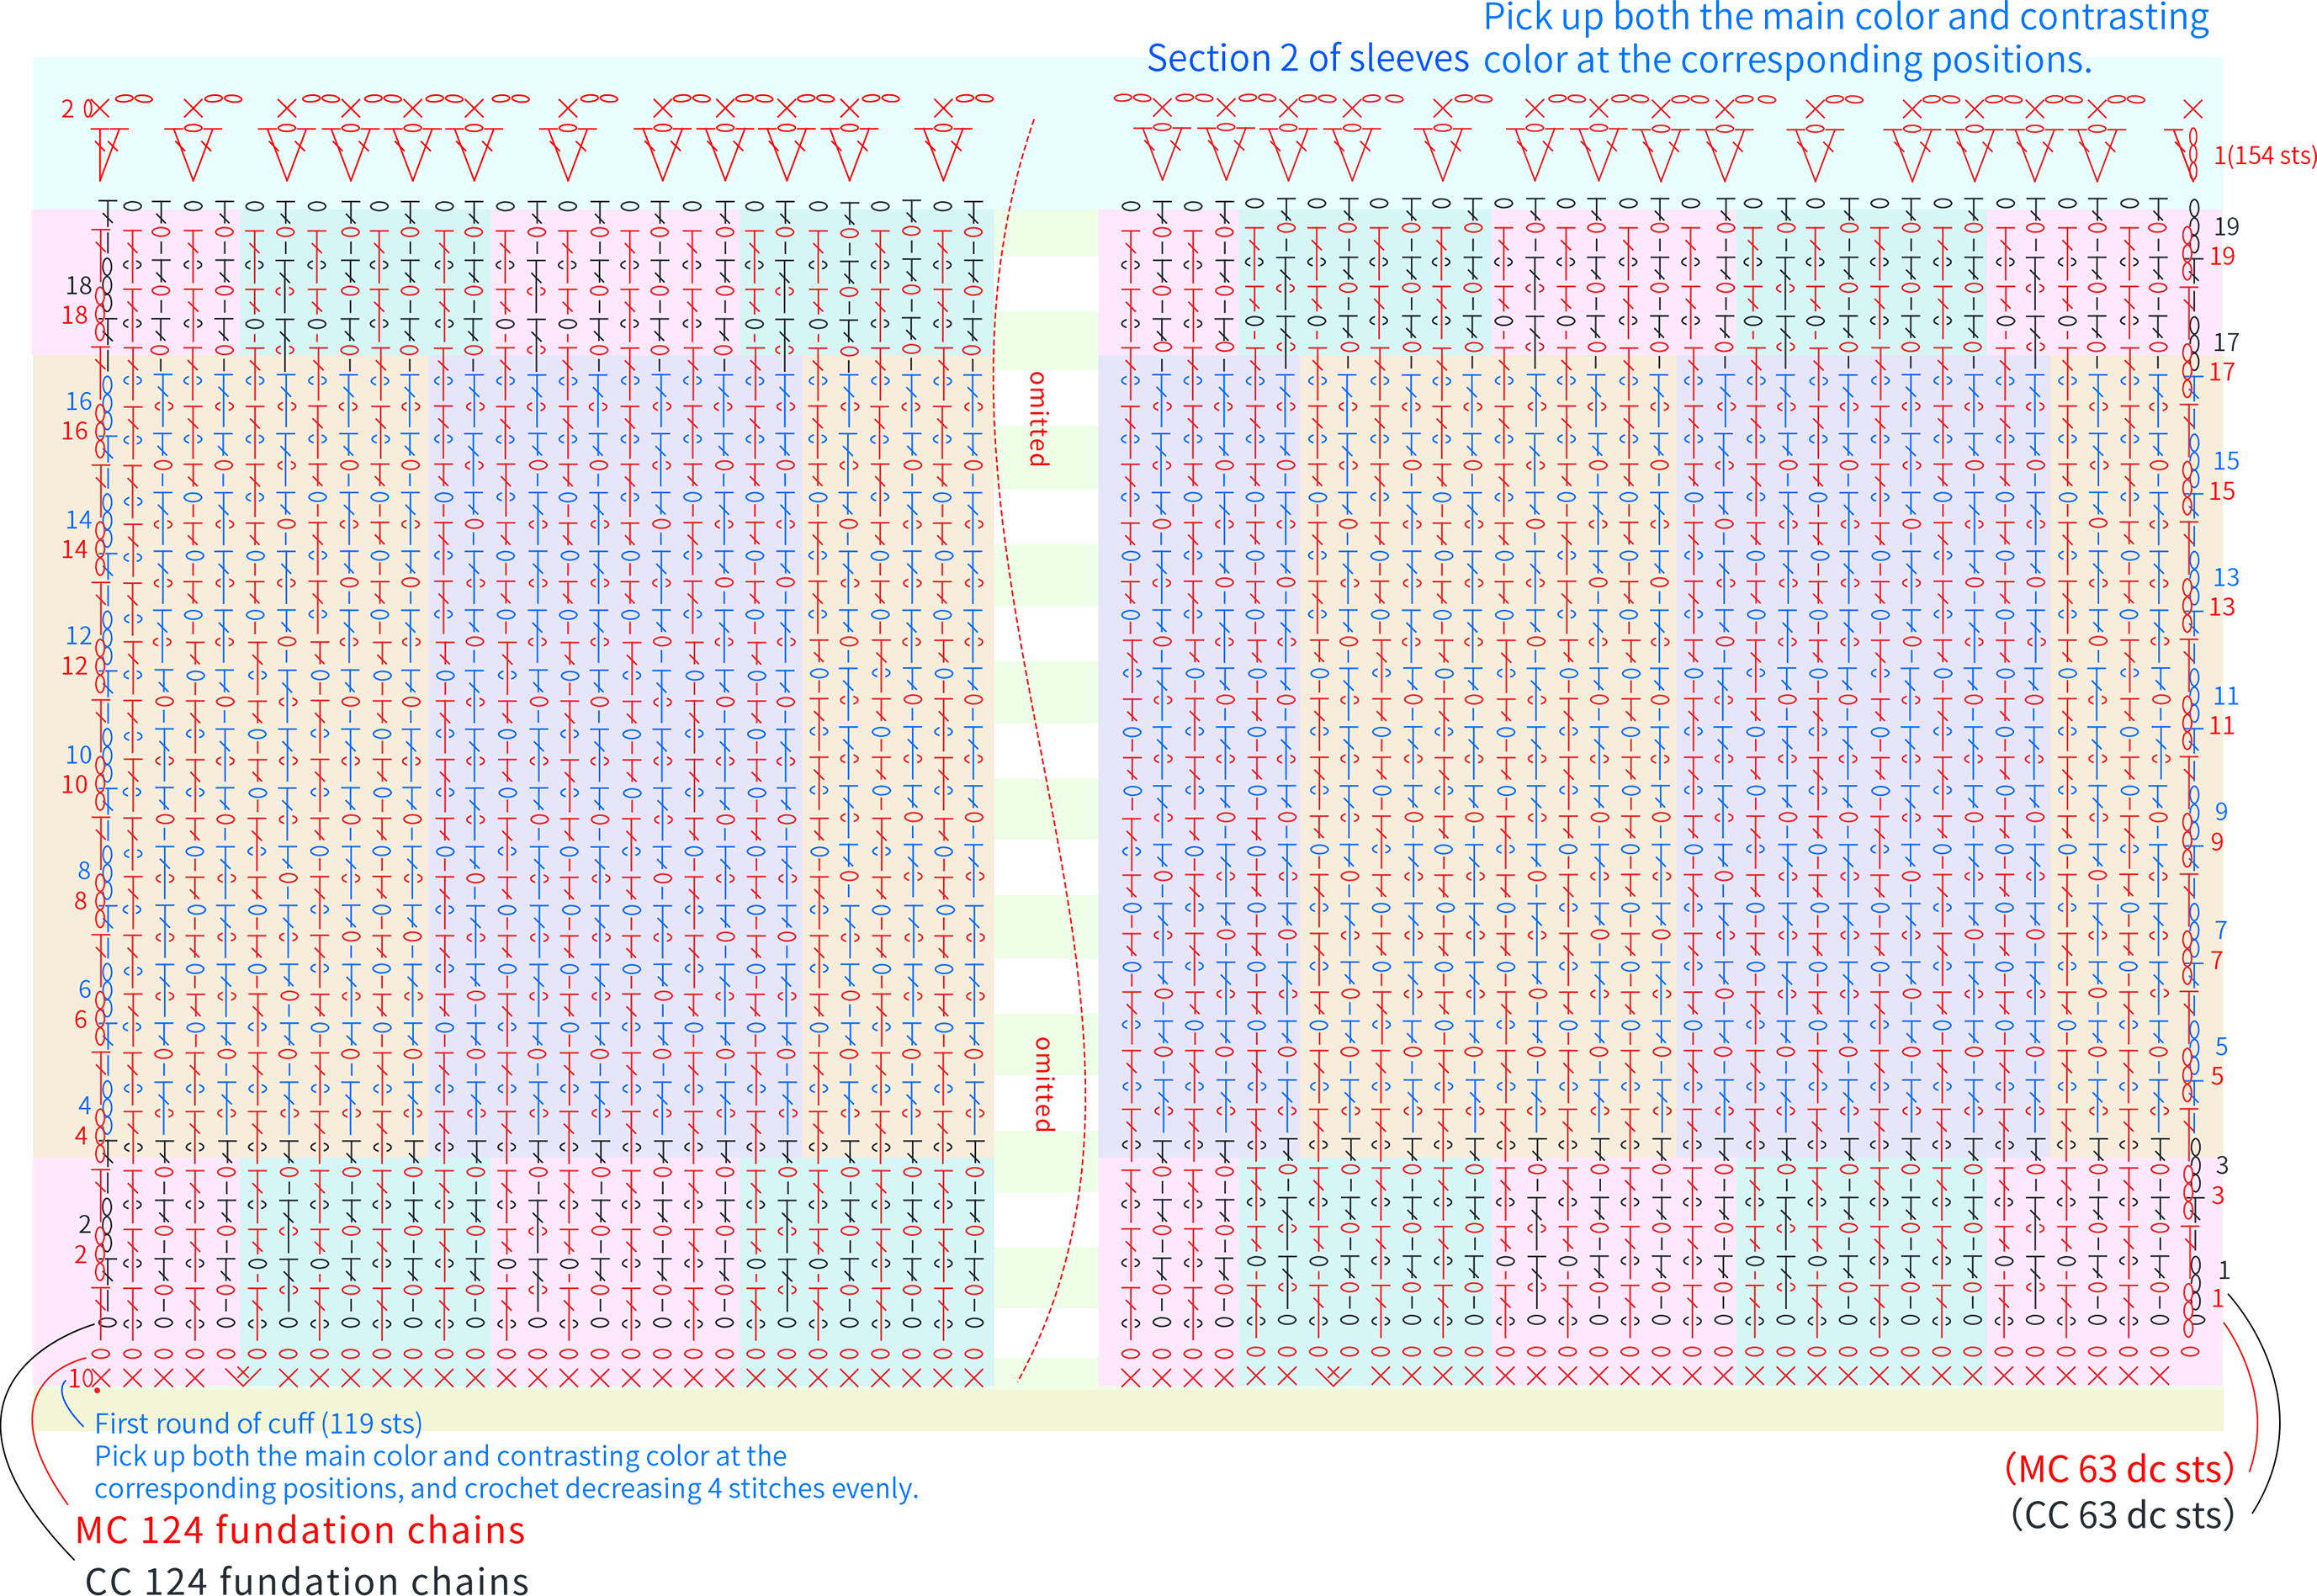
Cuff

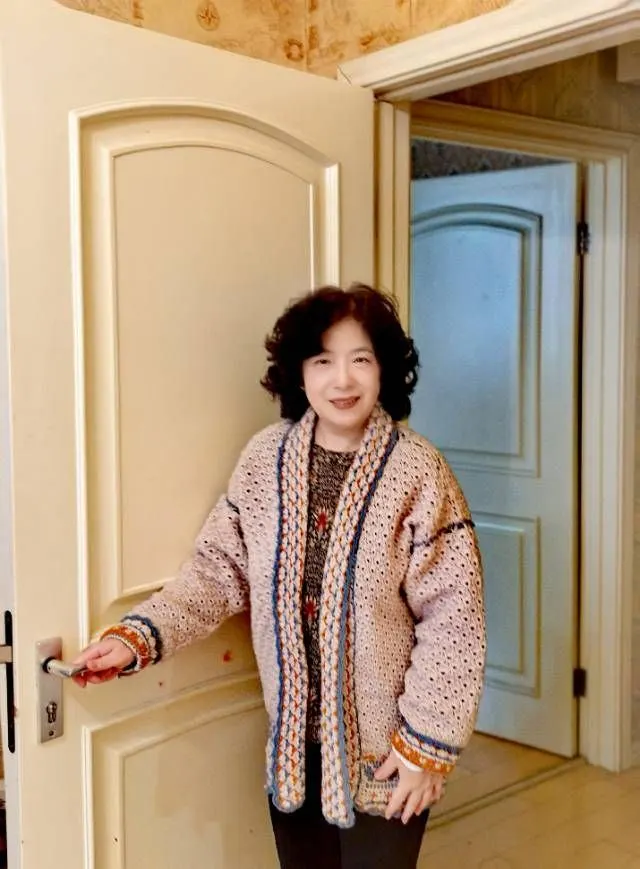
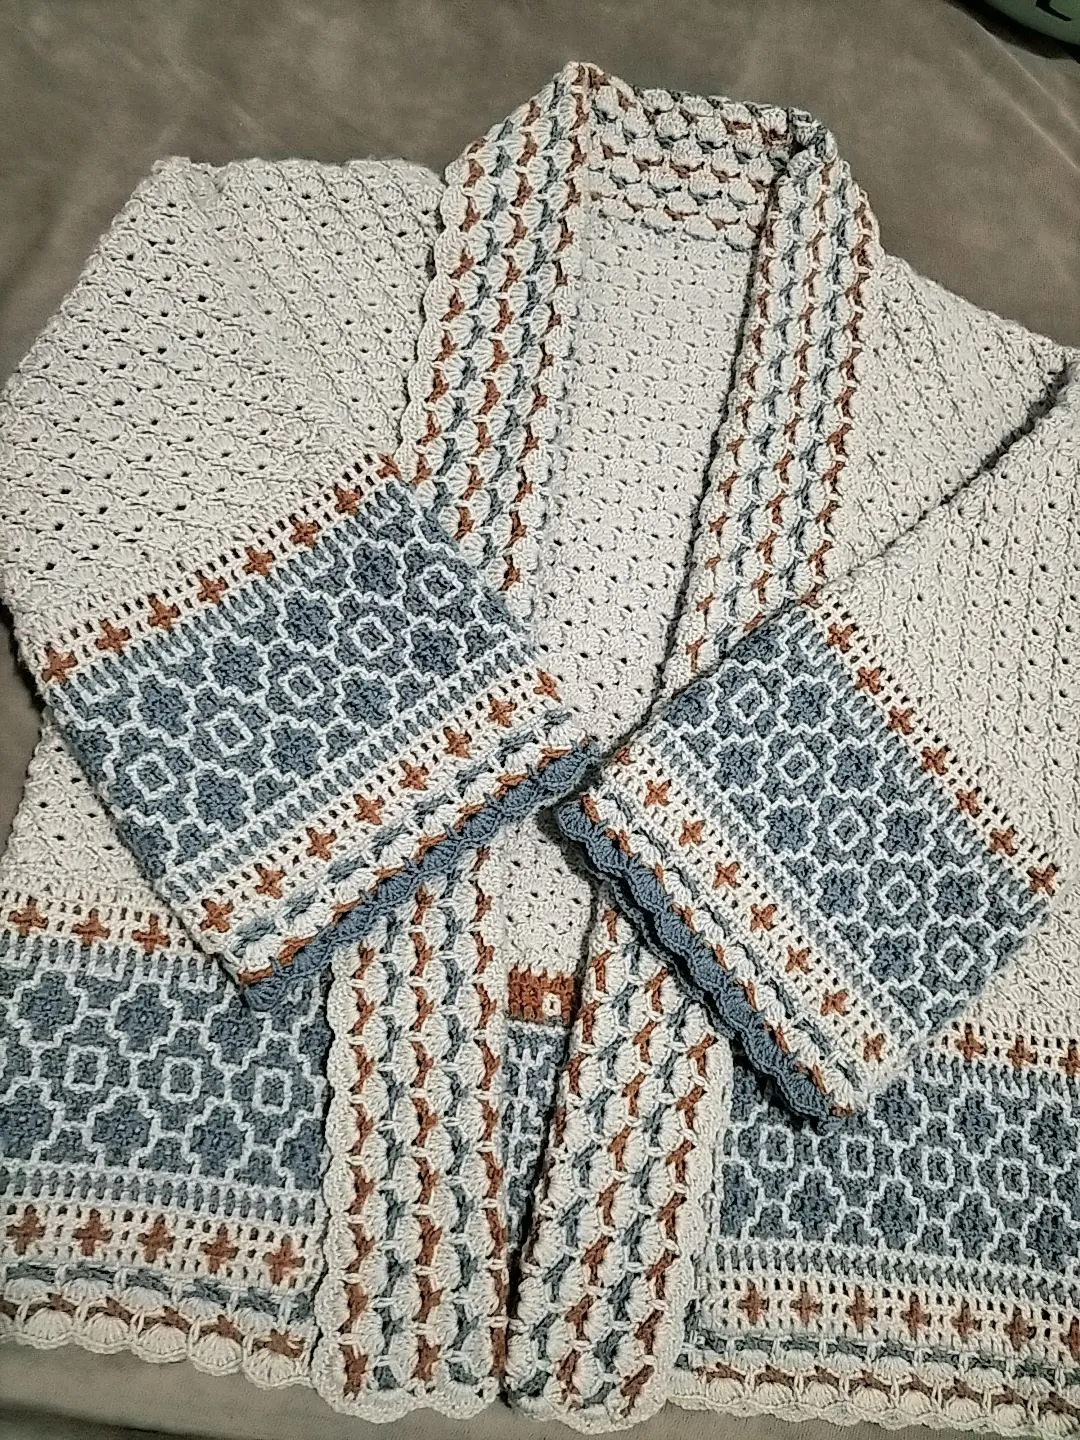
Made by the community