
Clothes
Jolie Blouse
Project preview
See the finished project
Pattern format
Instructions
Watch and follow
Video tutorial
This sweater consists of the hem, the body, the sleeves, the collar and decorations. First, we'll knit the hem and the body in sequence. Then, we'll pick up stitches at the sleeve cap position and knit the sleeves. Finally, we'll make the decorations.
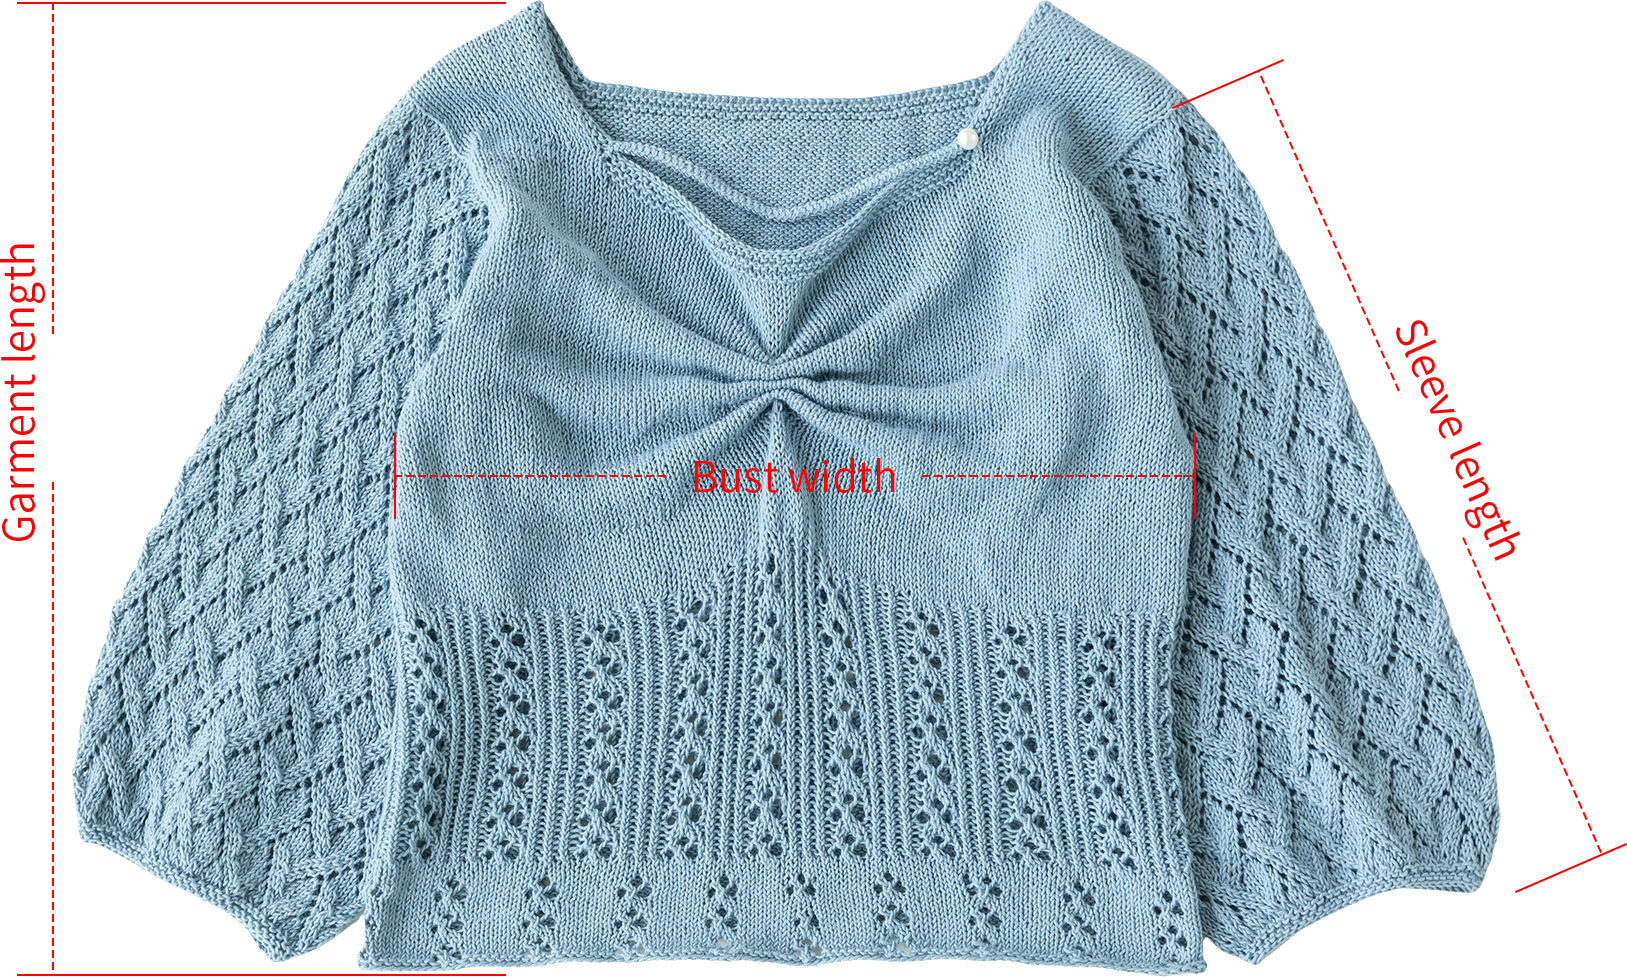

The handcrafted measurements may have an error of 1 to 2 cm. Due to variations in individual tension, the size of the sample is for reference only.
Materials: Susan's Family Morandi flax Lace yarn
Needle & Hook: 3.25 mm circular needle & short knitting needle, 3.00mm crochet hook
Knit pattern Guage [10 × 10 cm = 24.5 sts × 33 rows]
Hem pattern Guage [10 × 10 = 23.5 sts × 36.5 rows]
Sleeves pattern Guage [10 × 10 = 27 sts × 37.5 rows]

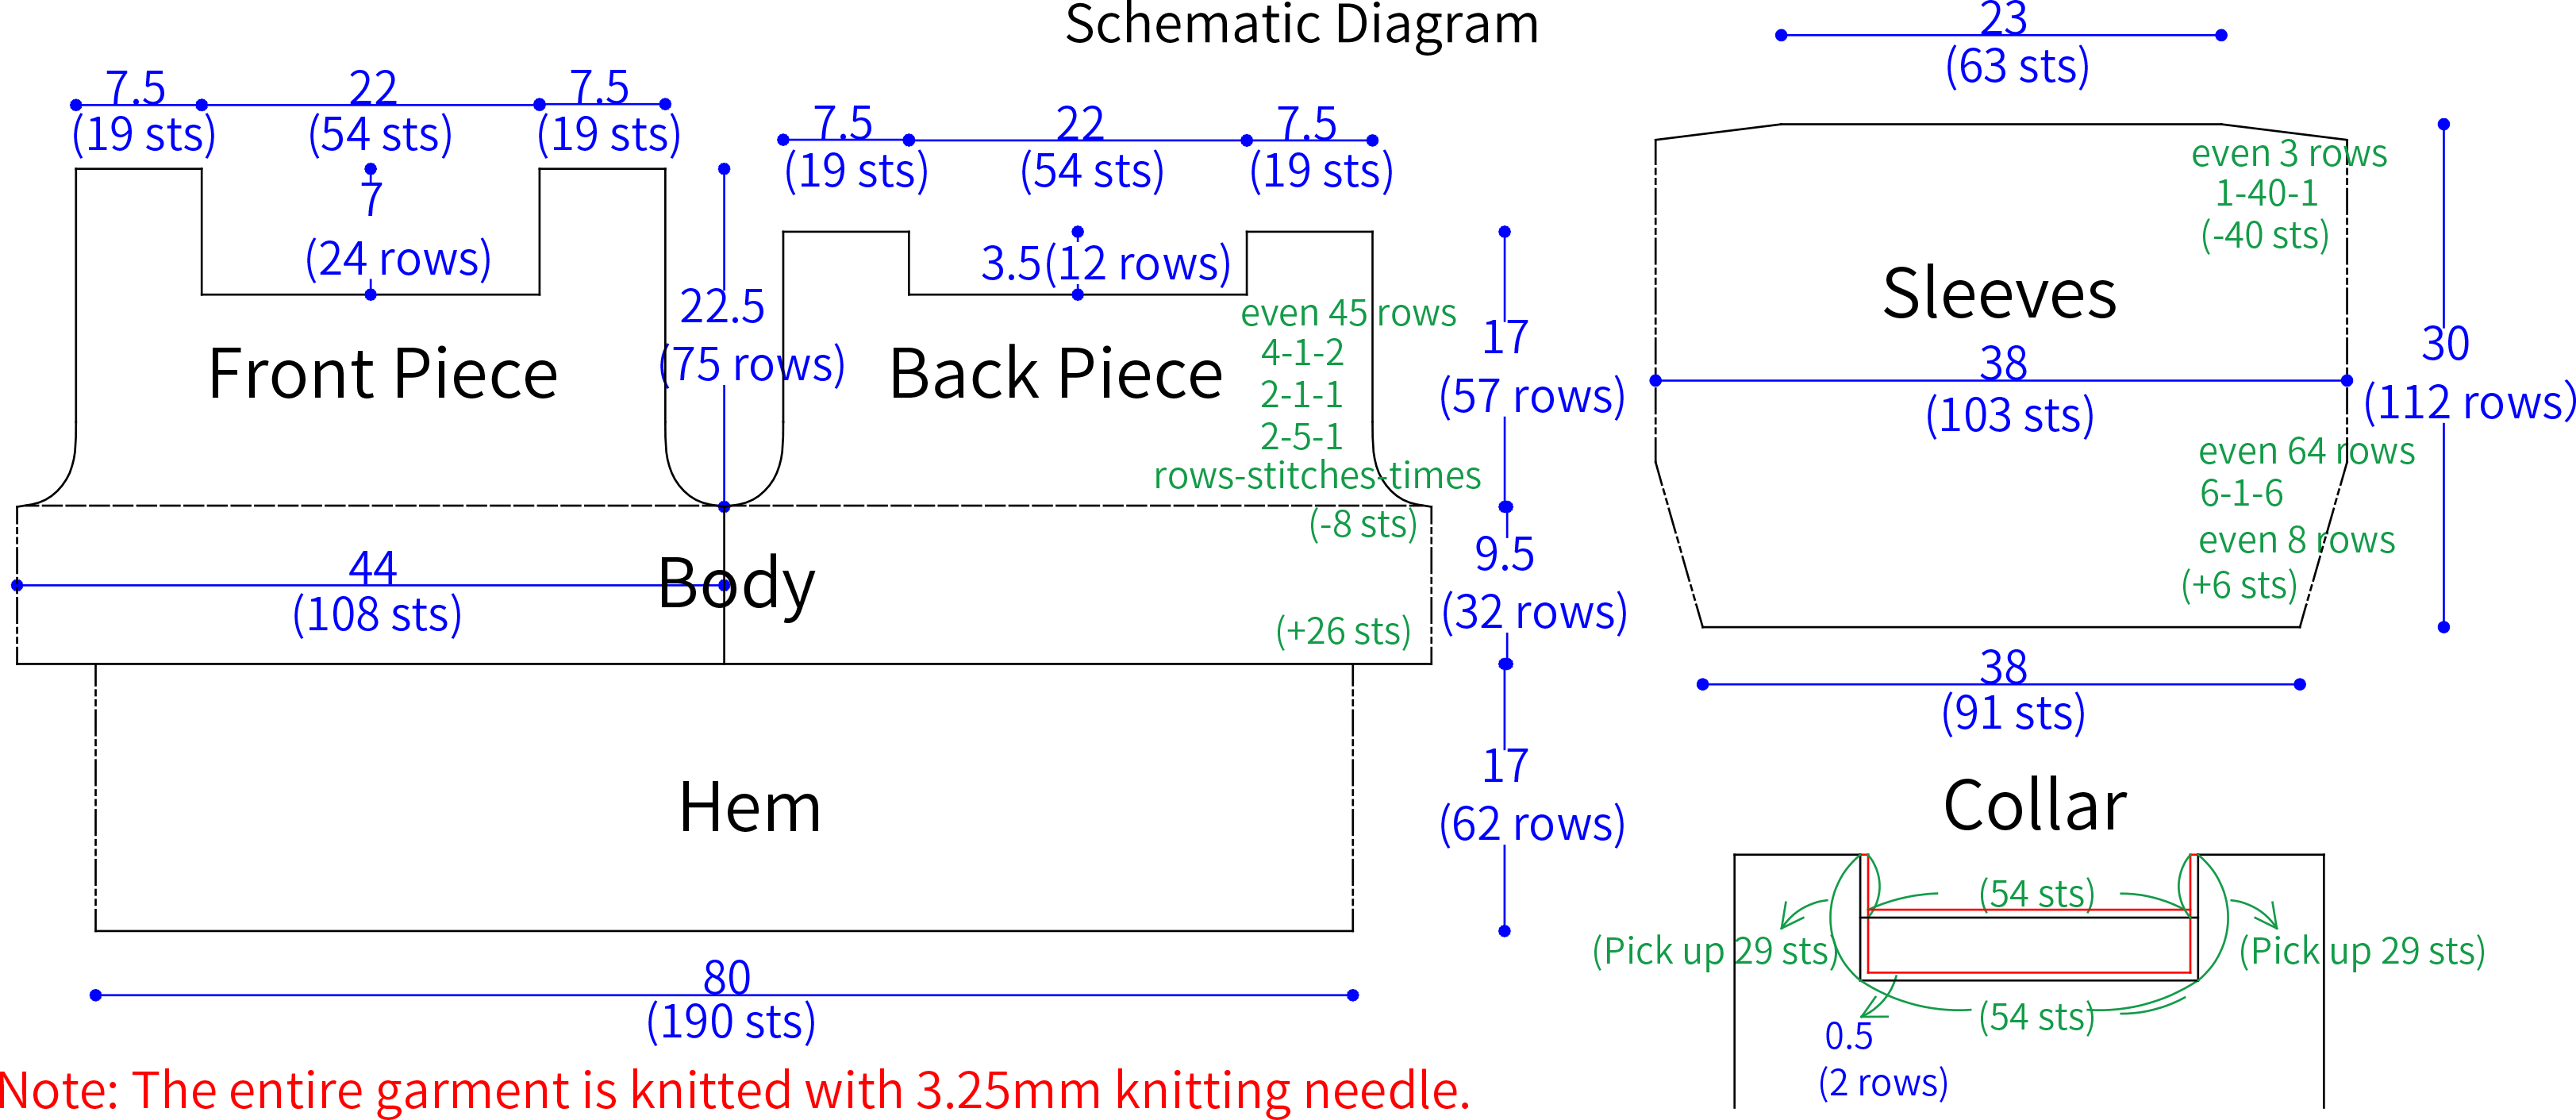

Chart Key



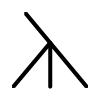


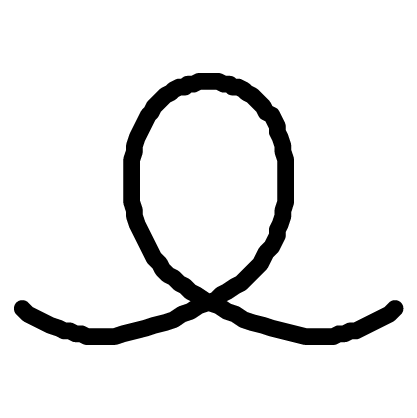

Note: 1. This pattern is making in Chinese crochet pattern terms, and the stitch name is written using American terminology. All measurements in charts are in cm.
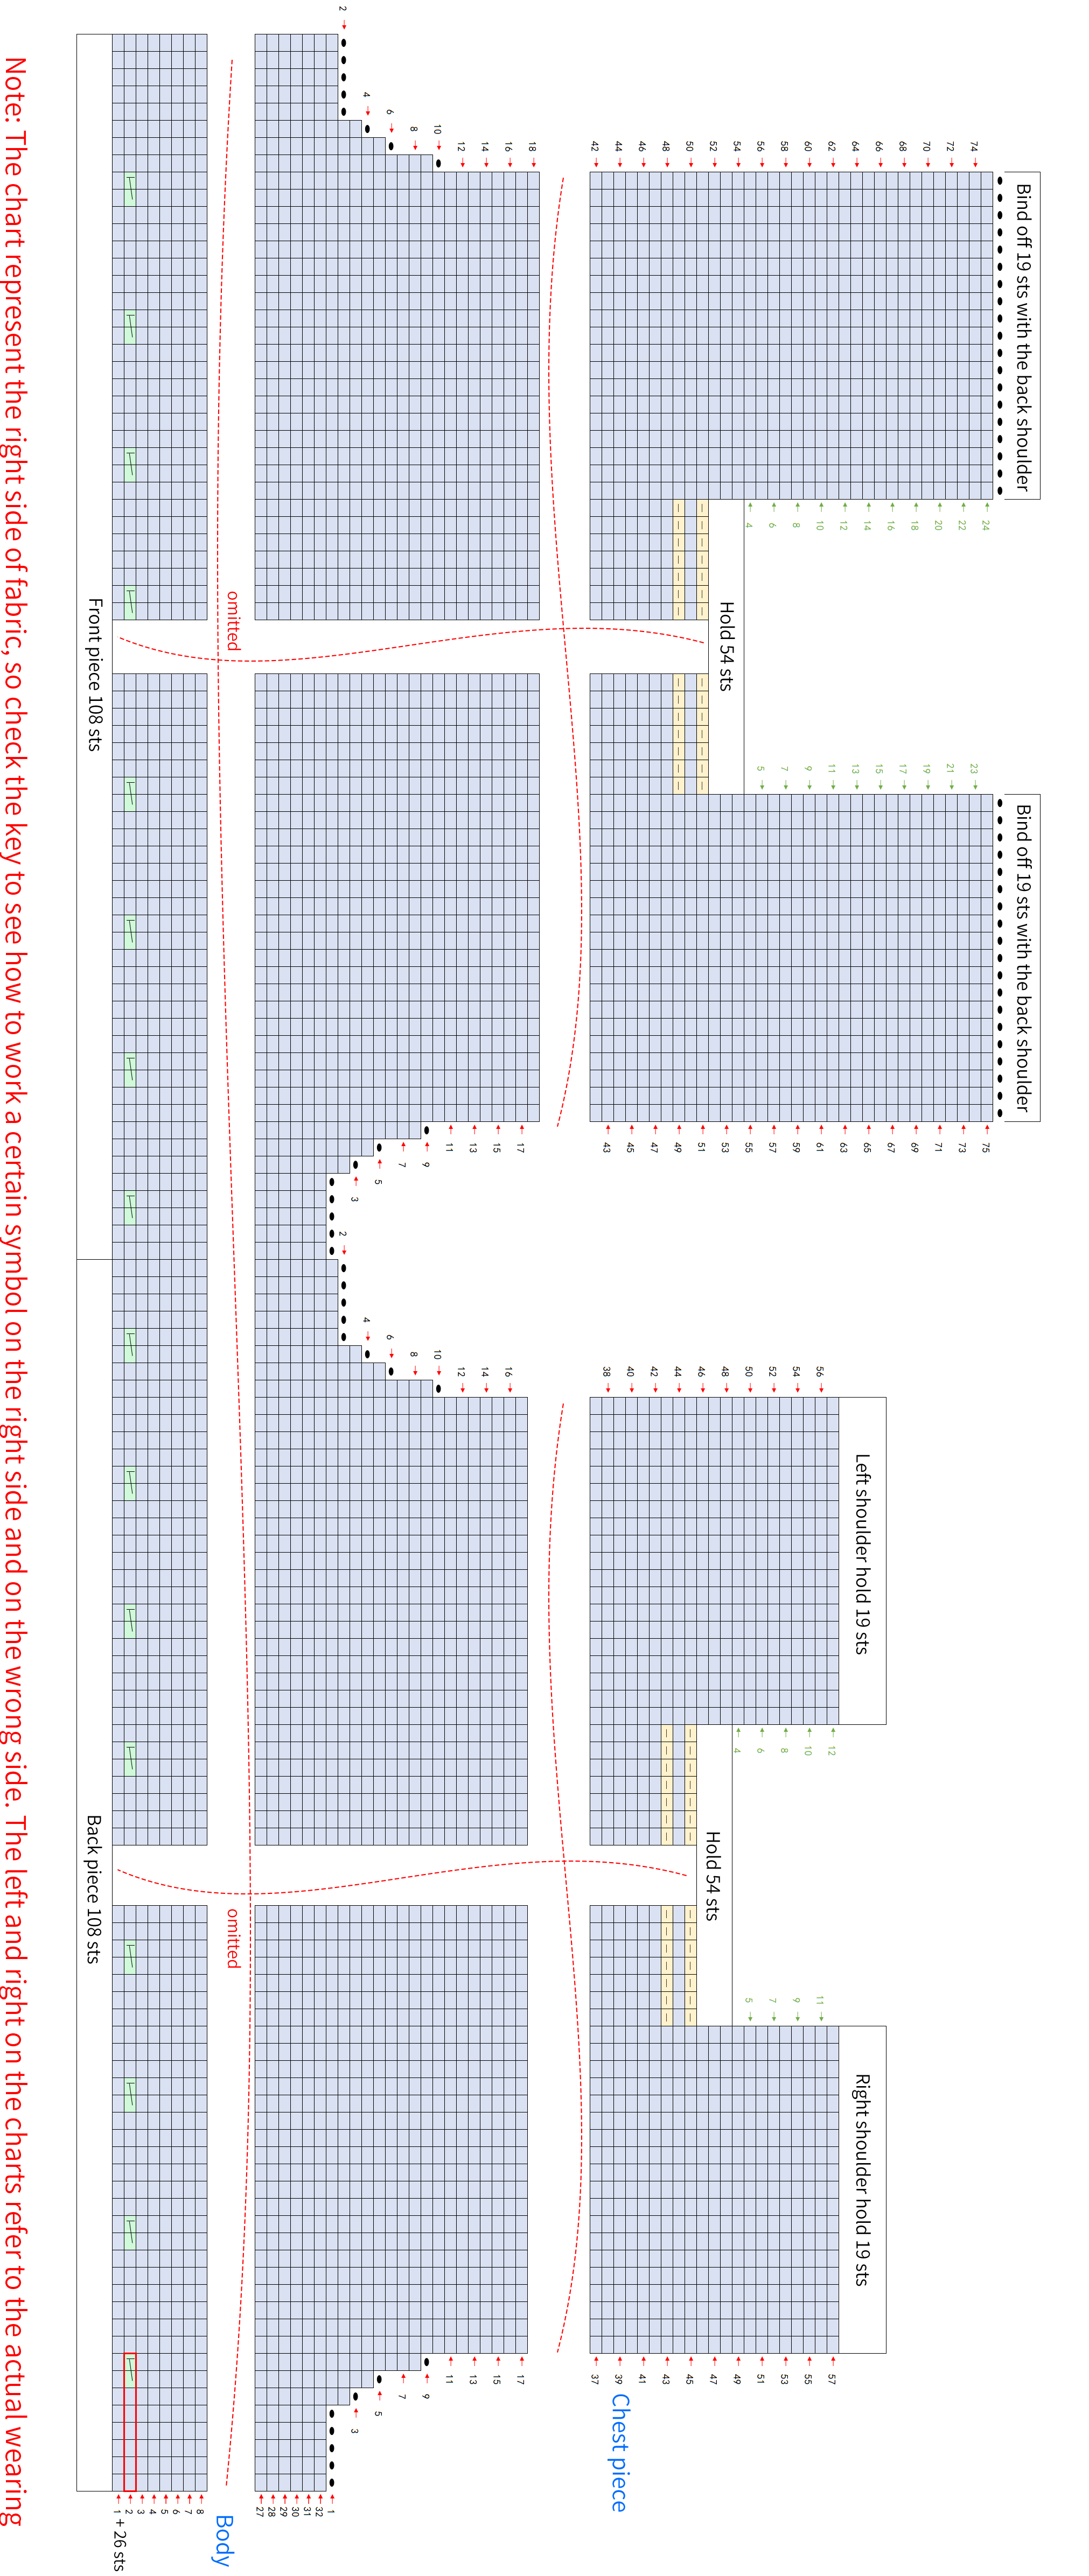
2. The chart represent the right side of fabric, so check the key to see how to work a certain symbol on the right side and on the wrong side.

Part 1 HemA 00' 50''
For the hem, we'll use the right-hand long-tail cast-on method. Knit around in a circle starting from the cast-on. Please refer to the video demonstration for more details.
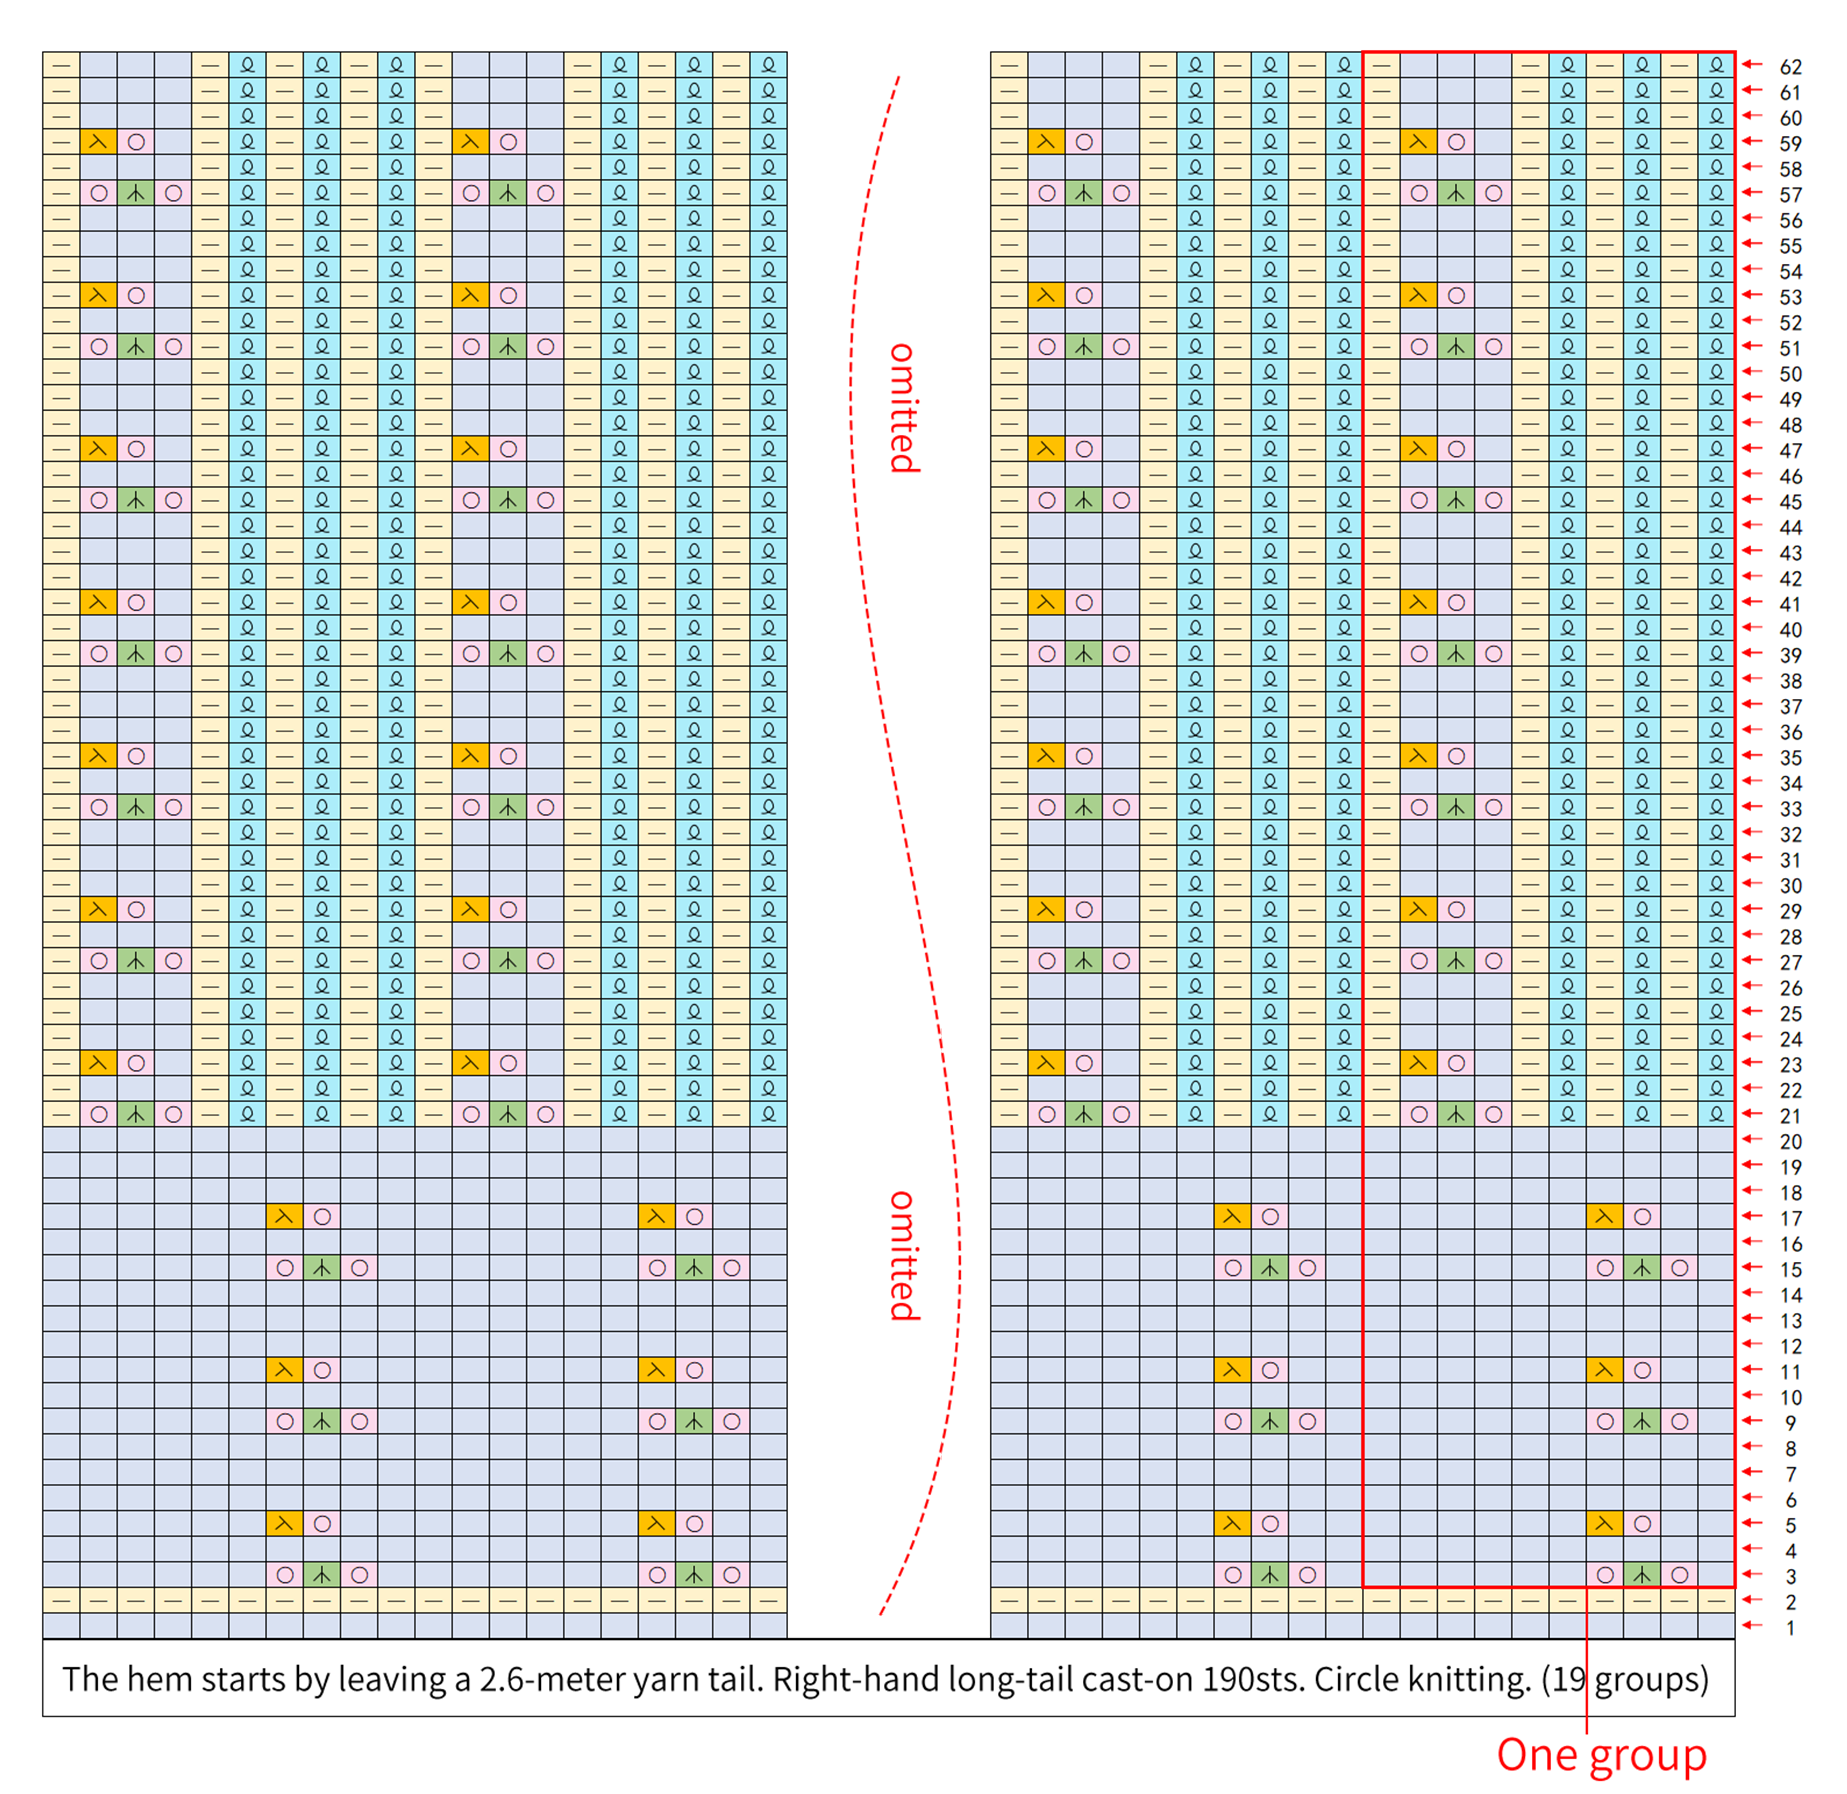
Part 2 BodyB Front and Back PiecesC 12' 47''
Continue circle knitting upwards from the hem to knit the body. After completing, knit back and forth for the front piece, back piece and shoulder-parts. Please refer to the video demonstration for more details.
Part 3 SleevesD 33' 11''
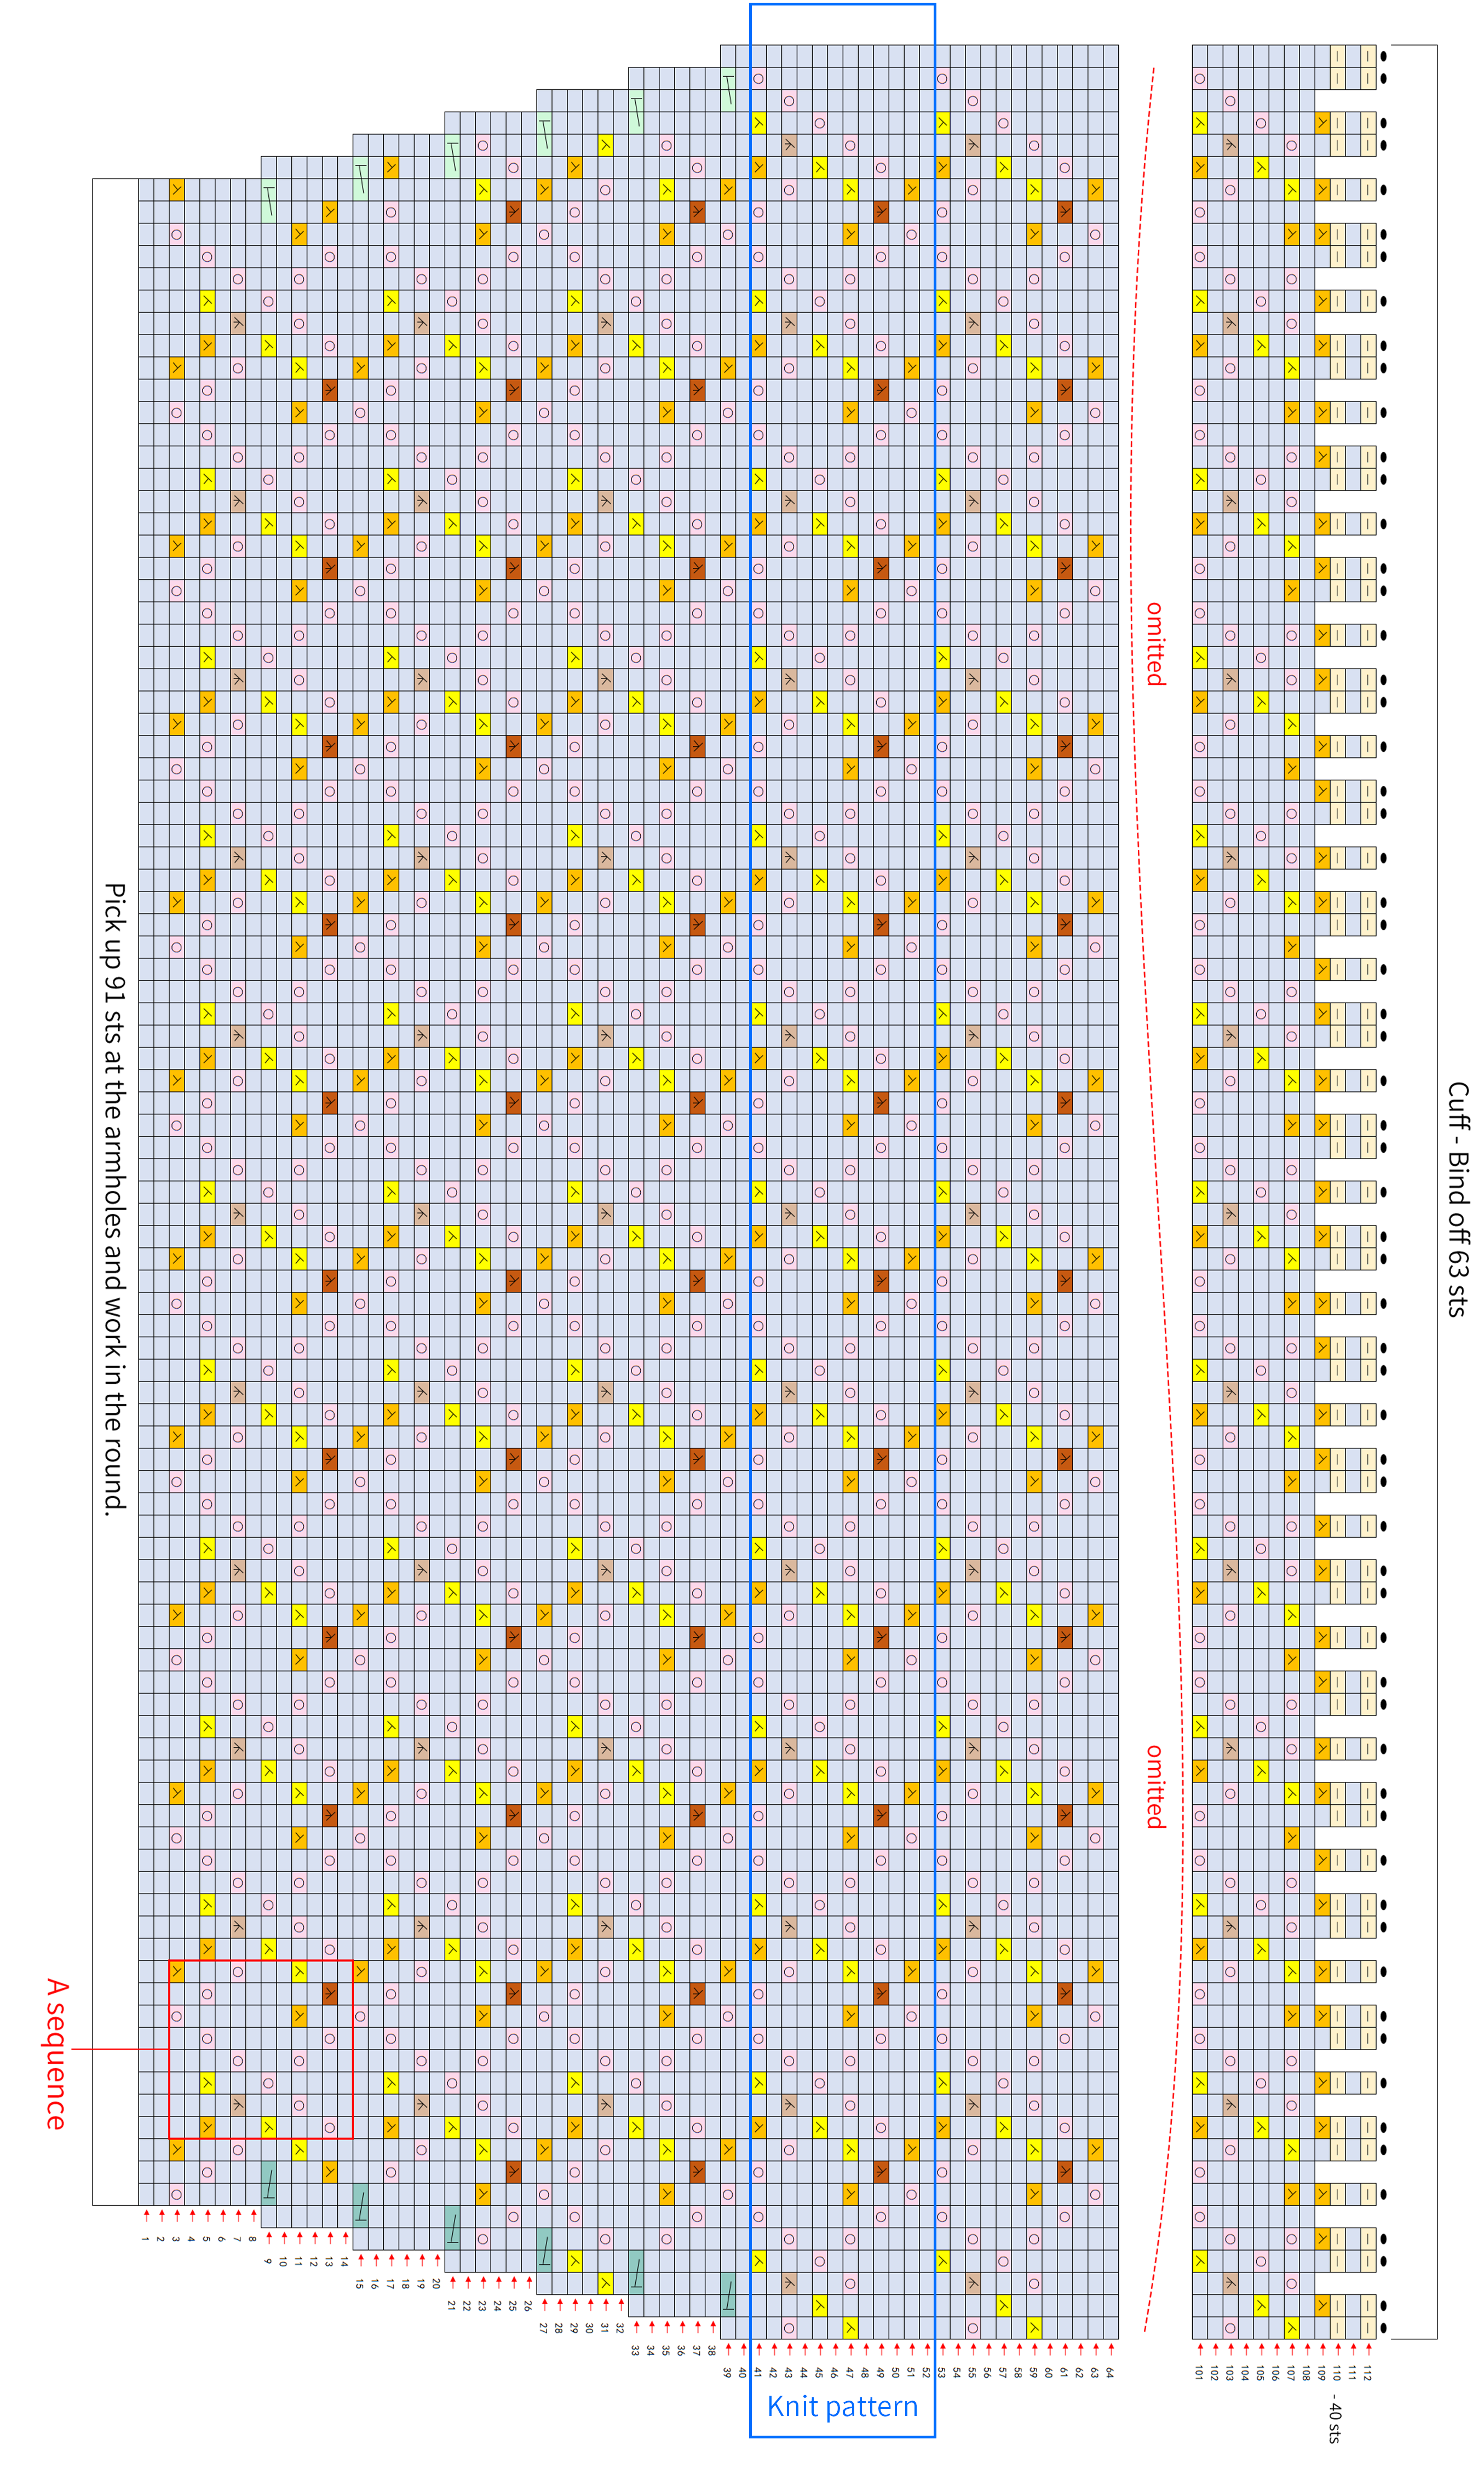
There are two identical sleeves. The method is the same for both. Start by picking up the corresponding number of stitches at the armholes. Then, work in the round. Please refer to the video demonstration for more details.
Part 4 CollarE 40' 49''
Part 5 DecorationsF 41' 31''
The decorations include the pleats on the front piece and the decorations on the neckline. Please refer to the video demonstration for more details.
Note: ① Before making the pleats, measure the length of the curve from the bottom of your chest to where you want the collar edge to be (When measuring, try to keep it tight) to ensure the garment fits well over the chest. Then, measure the length of the sweater to make sure it fits properly.
② Refer to the video for the shrimp stitch and crochet to the corresponding length, leaving about 10cm of yarn tail at both ends before and after crocheting. After completing, sew it onto the corresponding position.
Made by the community




