
Clothes
Kerrie
Project preview
See the finished project
Pattern format
Instructions
| Style | Yarn | Color |
|---|---|---|
| Golden Ochre Style | Morandi Cashmere 3# |  14#Golden Ochre x 6 14#Golden Ochre x 6 |
| Elm Green Style | Morandi Cashmere 3# |  25#Elm Green x 6 25#Elm Green x 6 |
| Neutral Gray Style | Morandi Cashmere 3# |  37#Neutral Gray x 6 37#Neutral Gray x 6 |
| Blue Moon Style | Morandi Cashmere 3# |  30#Blue Moon x 6 30#Blue Moon x 6 |
| Linden Green Style | Morandi Cashmere 3# |  28#Linden Green x 6 28#Linden Green x 6 |
Golden Ochre Style
14#Golden Ochre x 6Elm Green Style
25#Elm Green x 6Neutral Gray Style
37#Neutral Gray x 6Blue Moon Style
30#Blue Moon x 6Linden Green Style
28#Linden Green x 6This sweater divides into the sleeves, back body, front body, and collar sections.
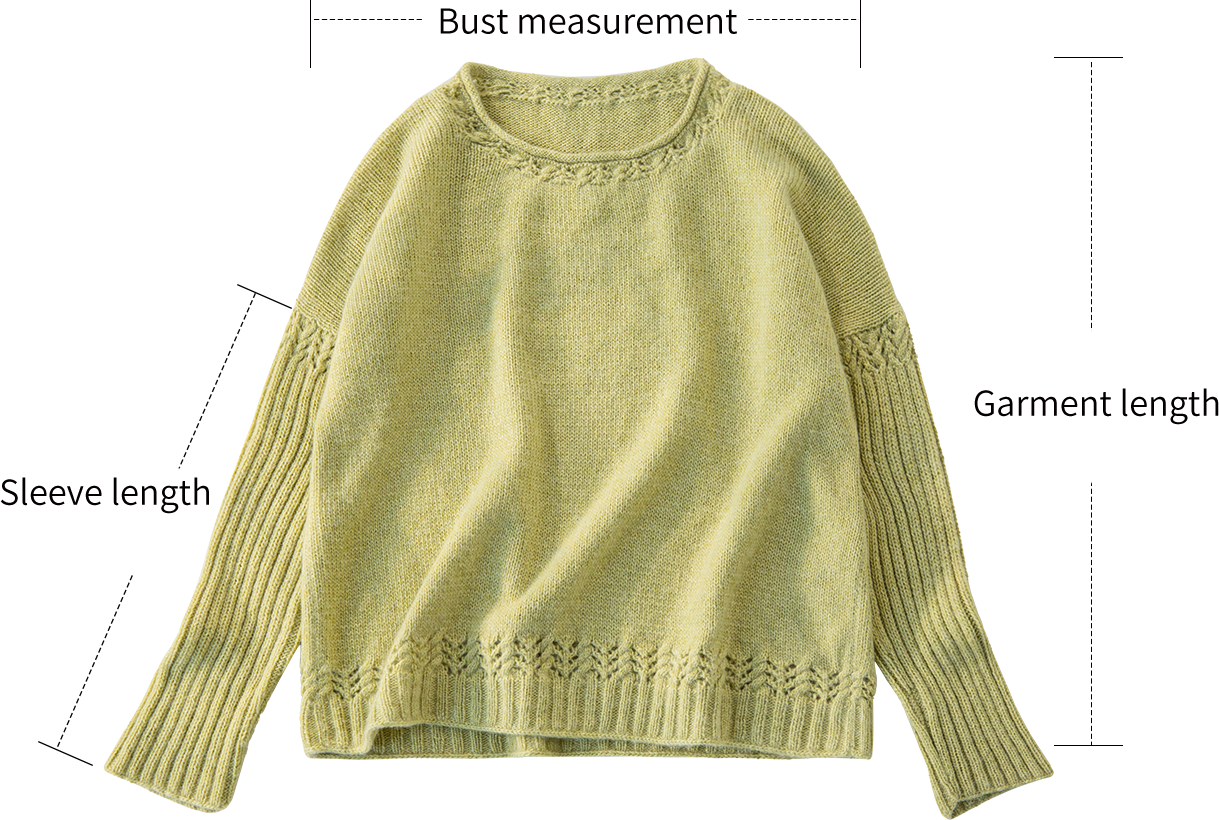
Due to variations in individual tension, the size of the sample is for reference only.
Materials: Susan’s family Moriandi Cashmere 3#
Needles: 10#-3.25 mm circular needle,12#-2.75 mm circular needle & long straight needle.
Stockinette stitch gauge:10 c㎡=27 sts×37 row.


Chart Key



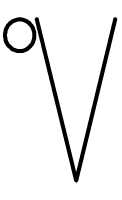
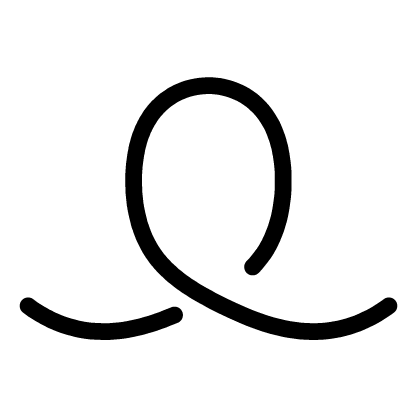



Note:
1. This pattern is making in Chinese crochet pattern terms, and the stitch name is written using American terminology. All measurements in charts are in cm.
2. The chart represent the right side of fabric, so check the key to see how to work a certain symbol on the right side and on the wrong side.
3.The left and right on the charts refer to the actual wearing position.
Structural diagram
Note: Please refer to the structural diagram for the needle sizes used in each section.
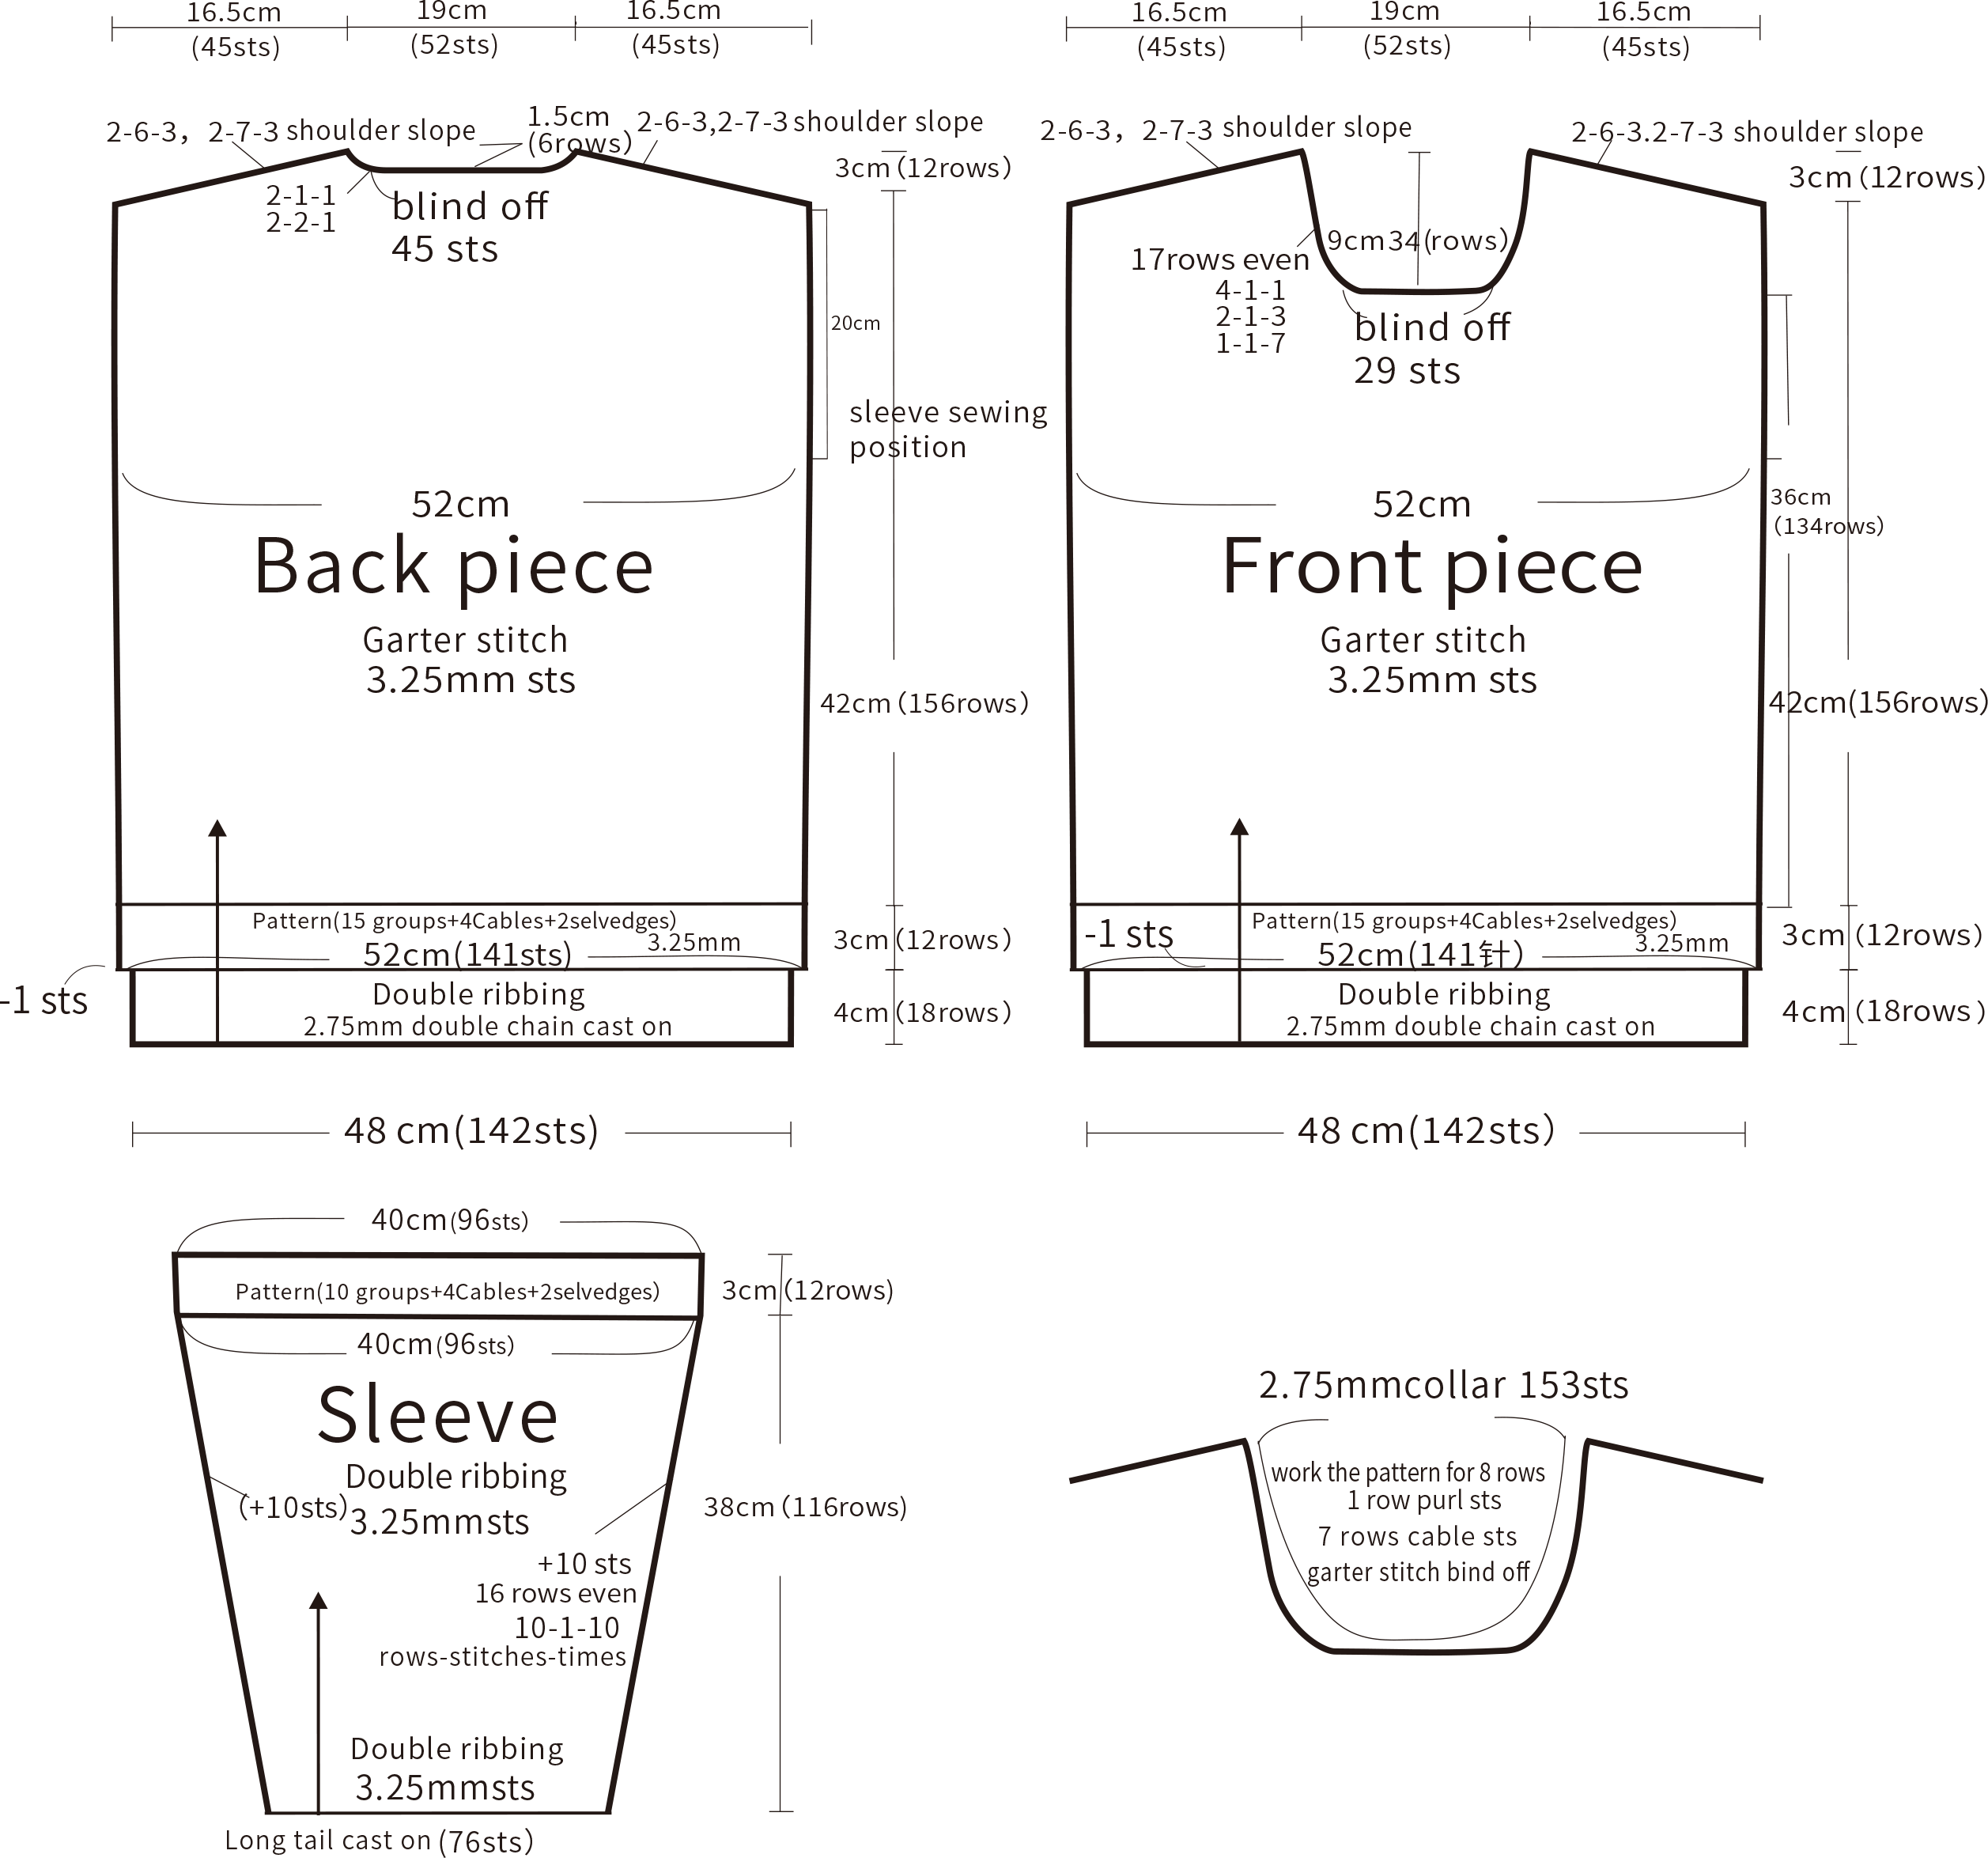
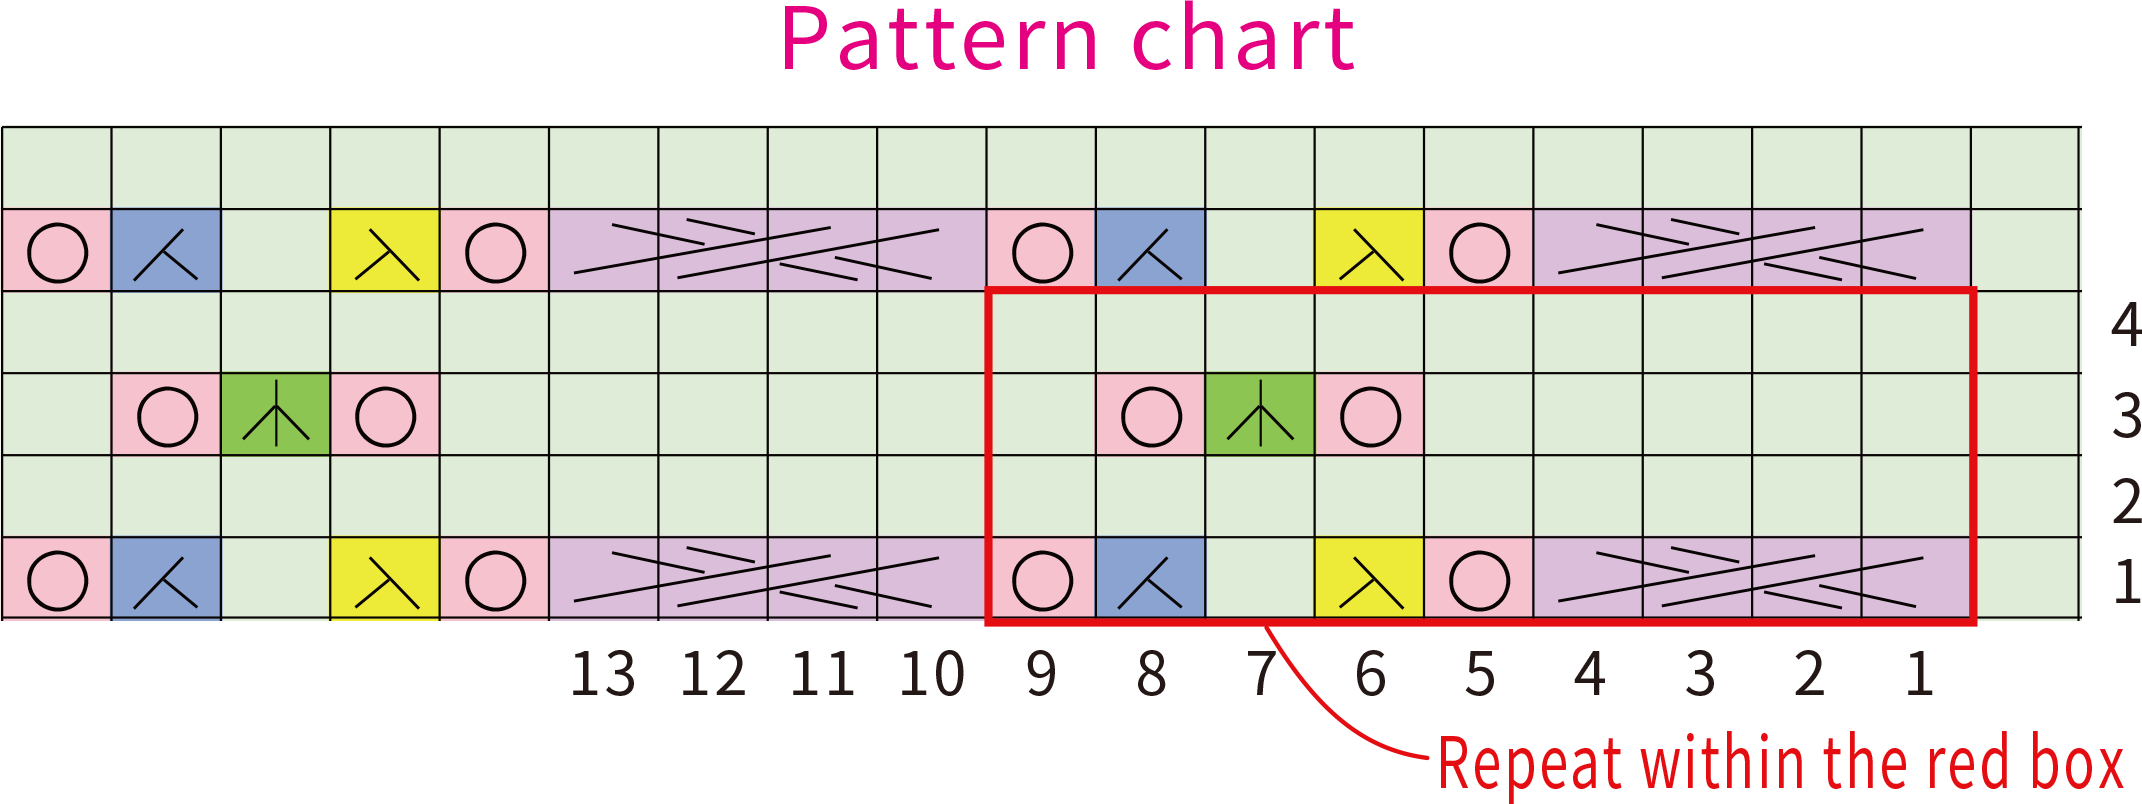
Part 1 Sleeves(Note: Please refer to the structural diagram for the needle sizes used in each section.)
There are two sleeve pieces, both of which are crocheted back and forth using the long-tail cast-on method. Leave a long yarn tail at the end to sew together the side seam of the sleeve.
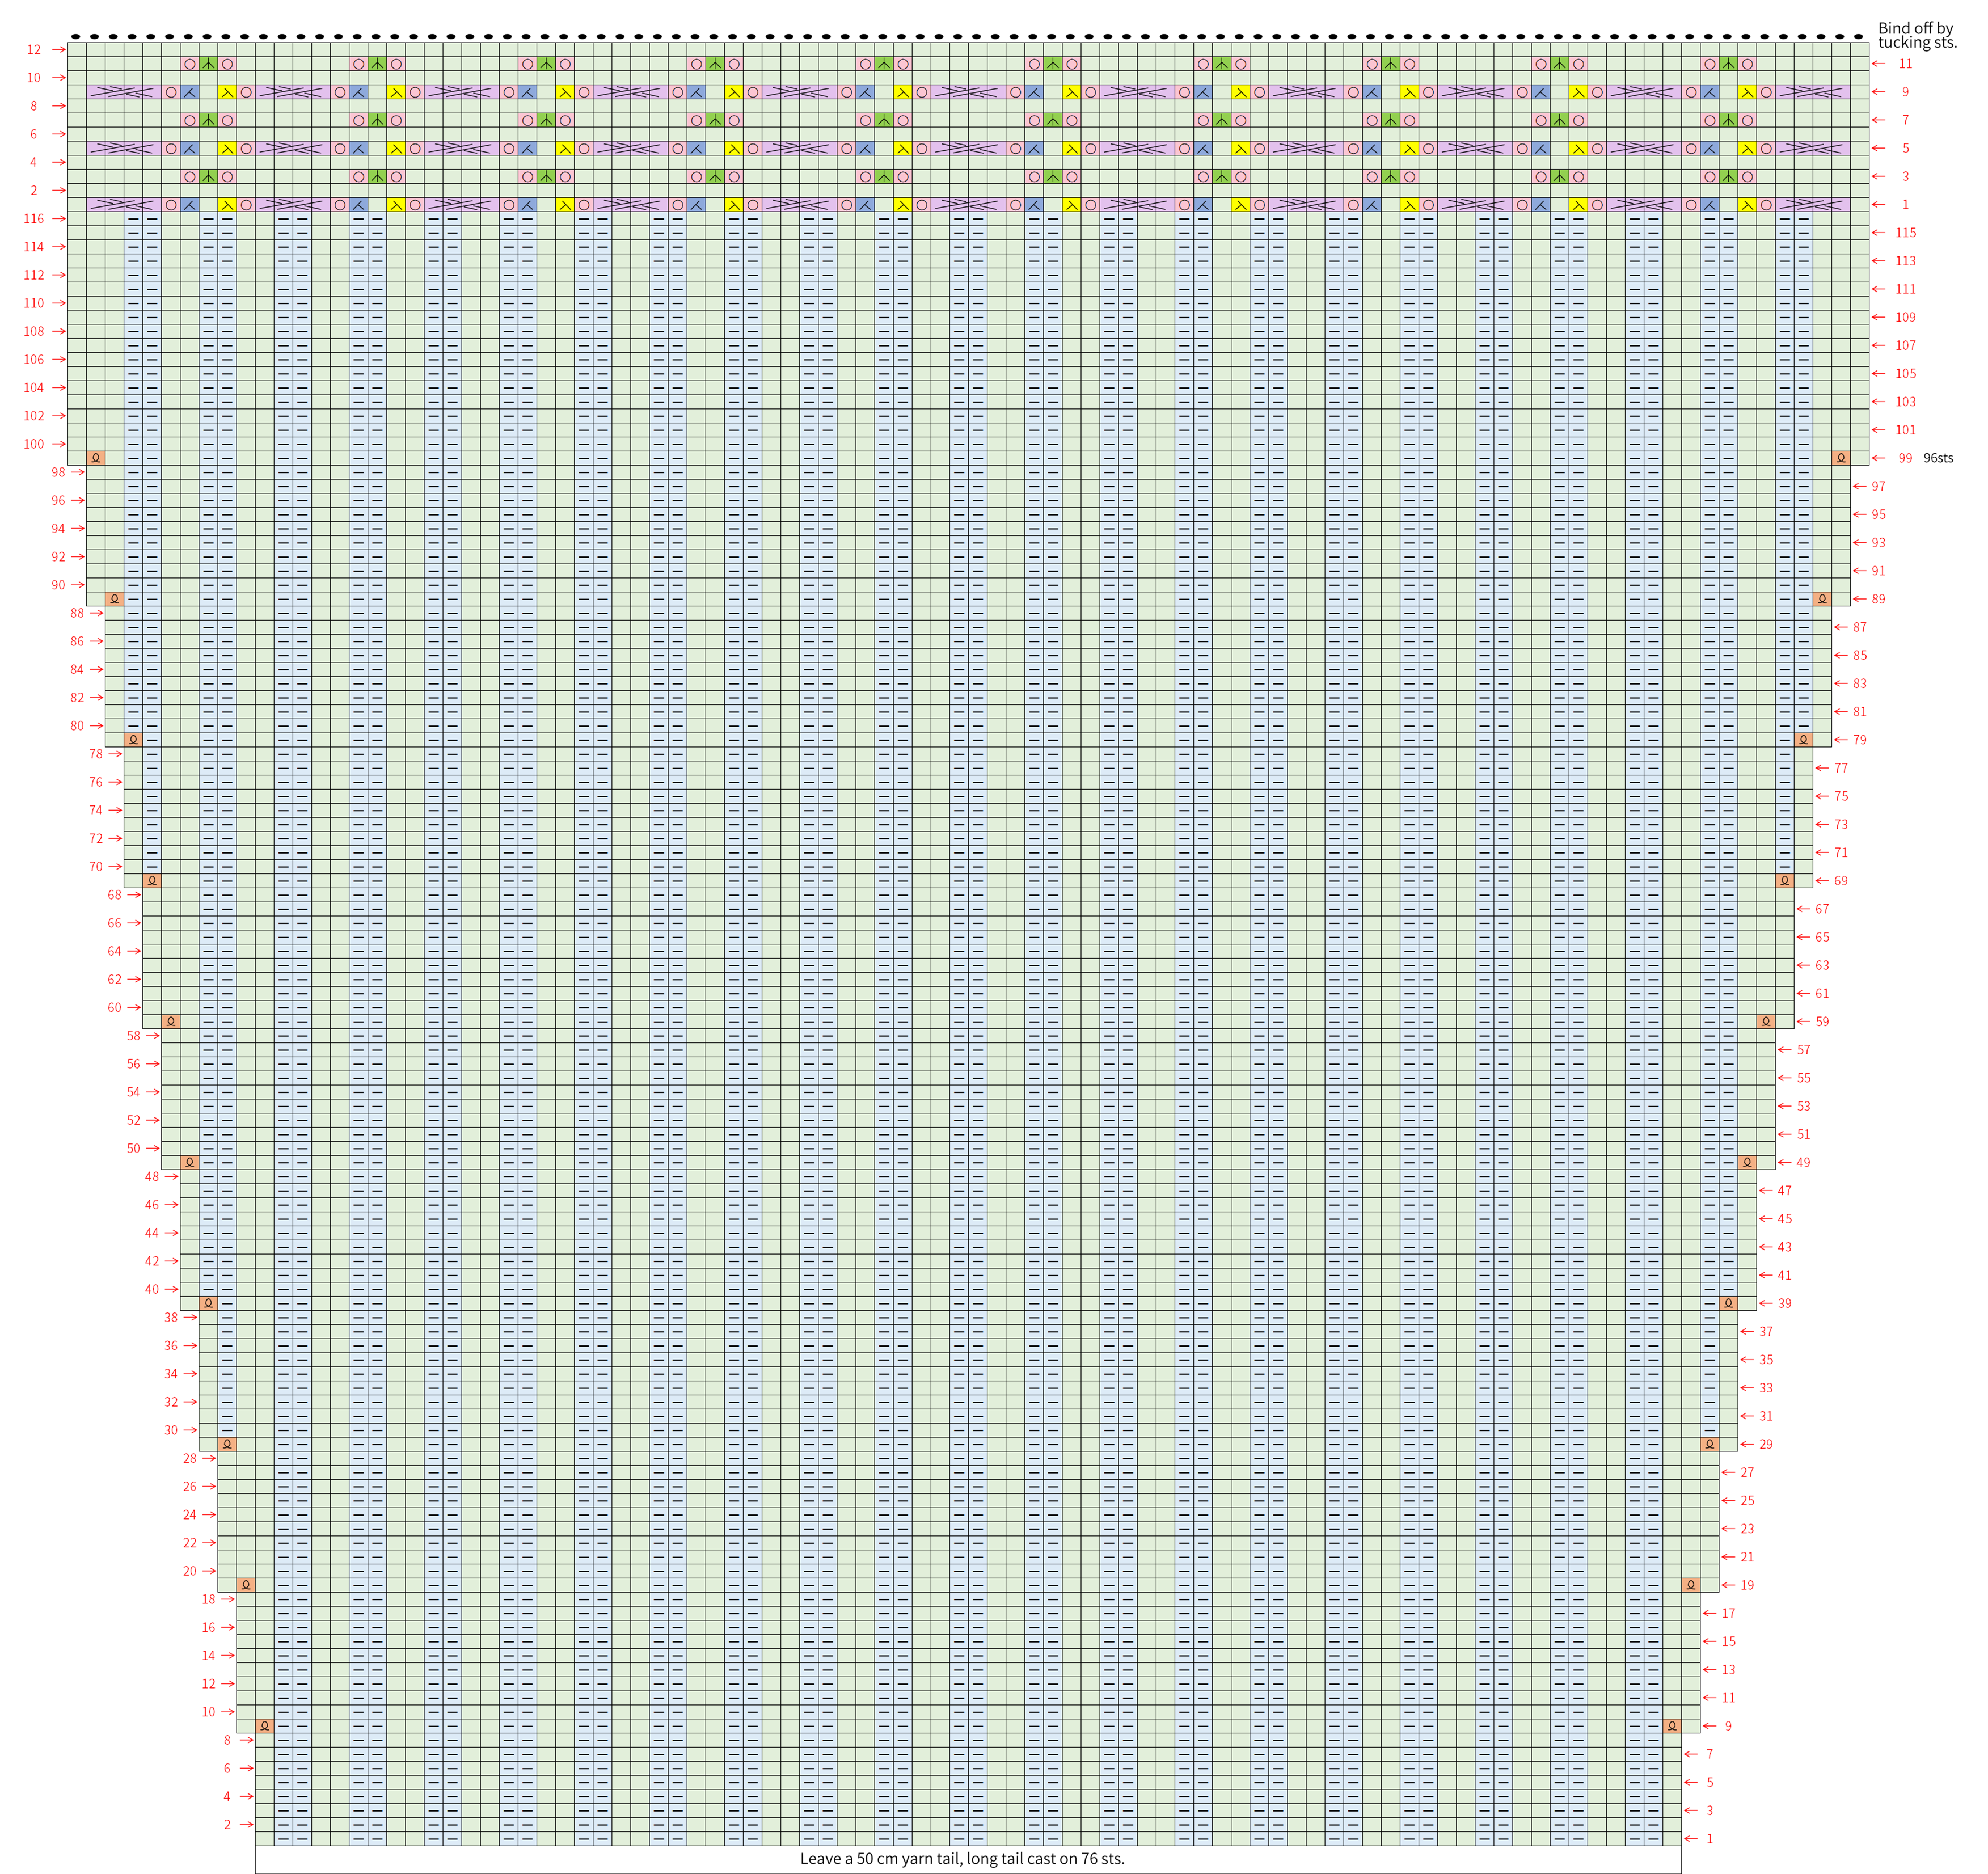
Part 2 Back piece
The back piece is worked back and forth using the double braid cast on method.
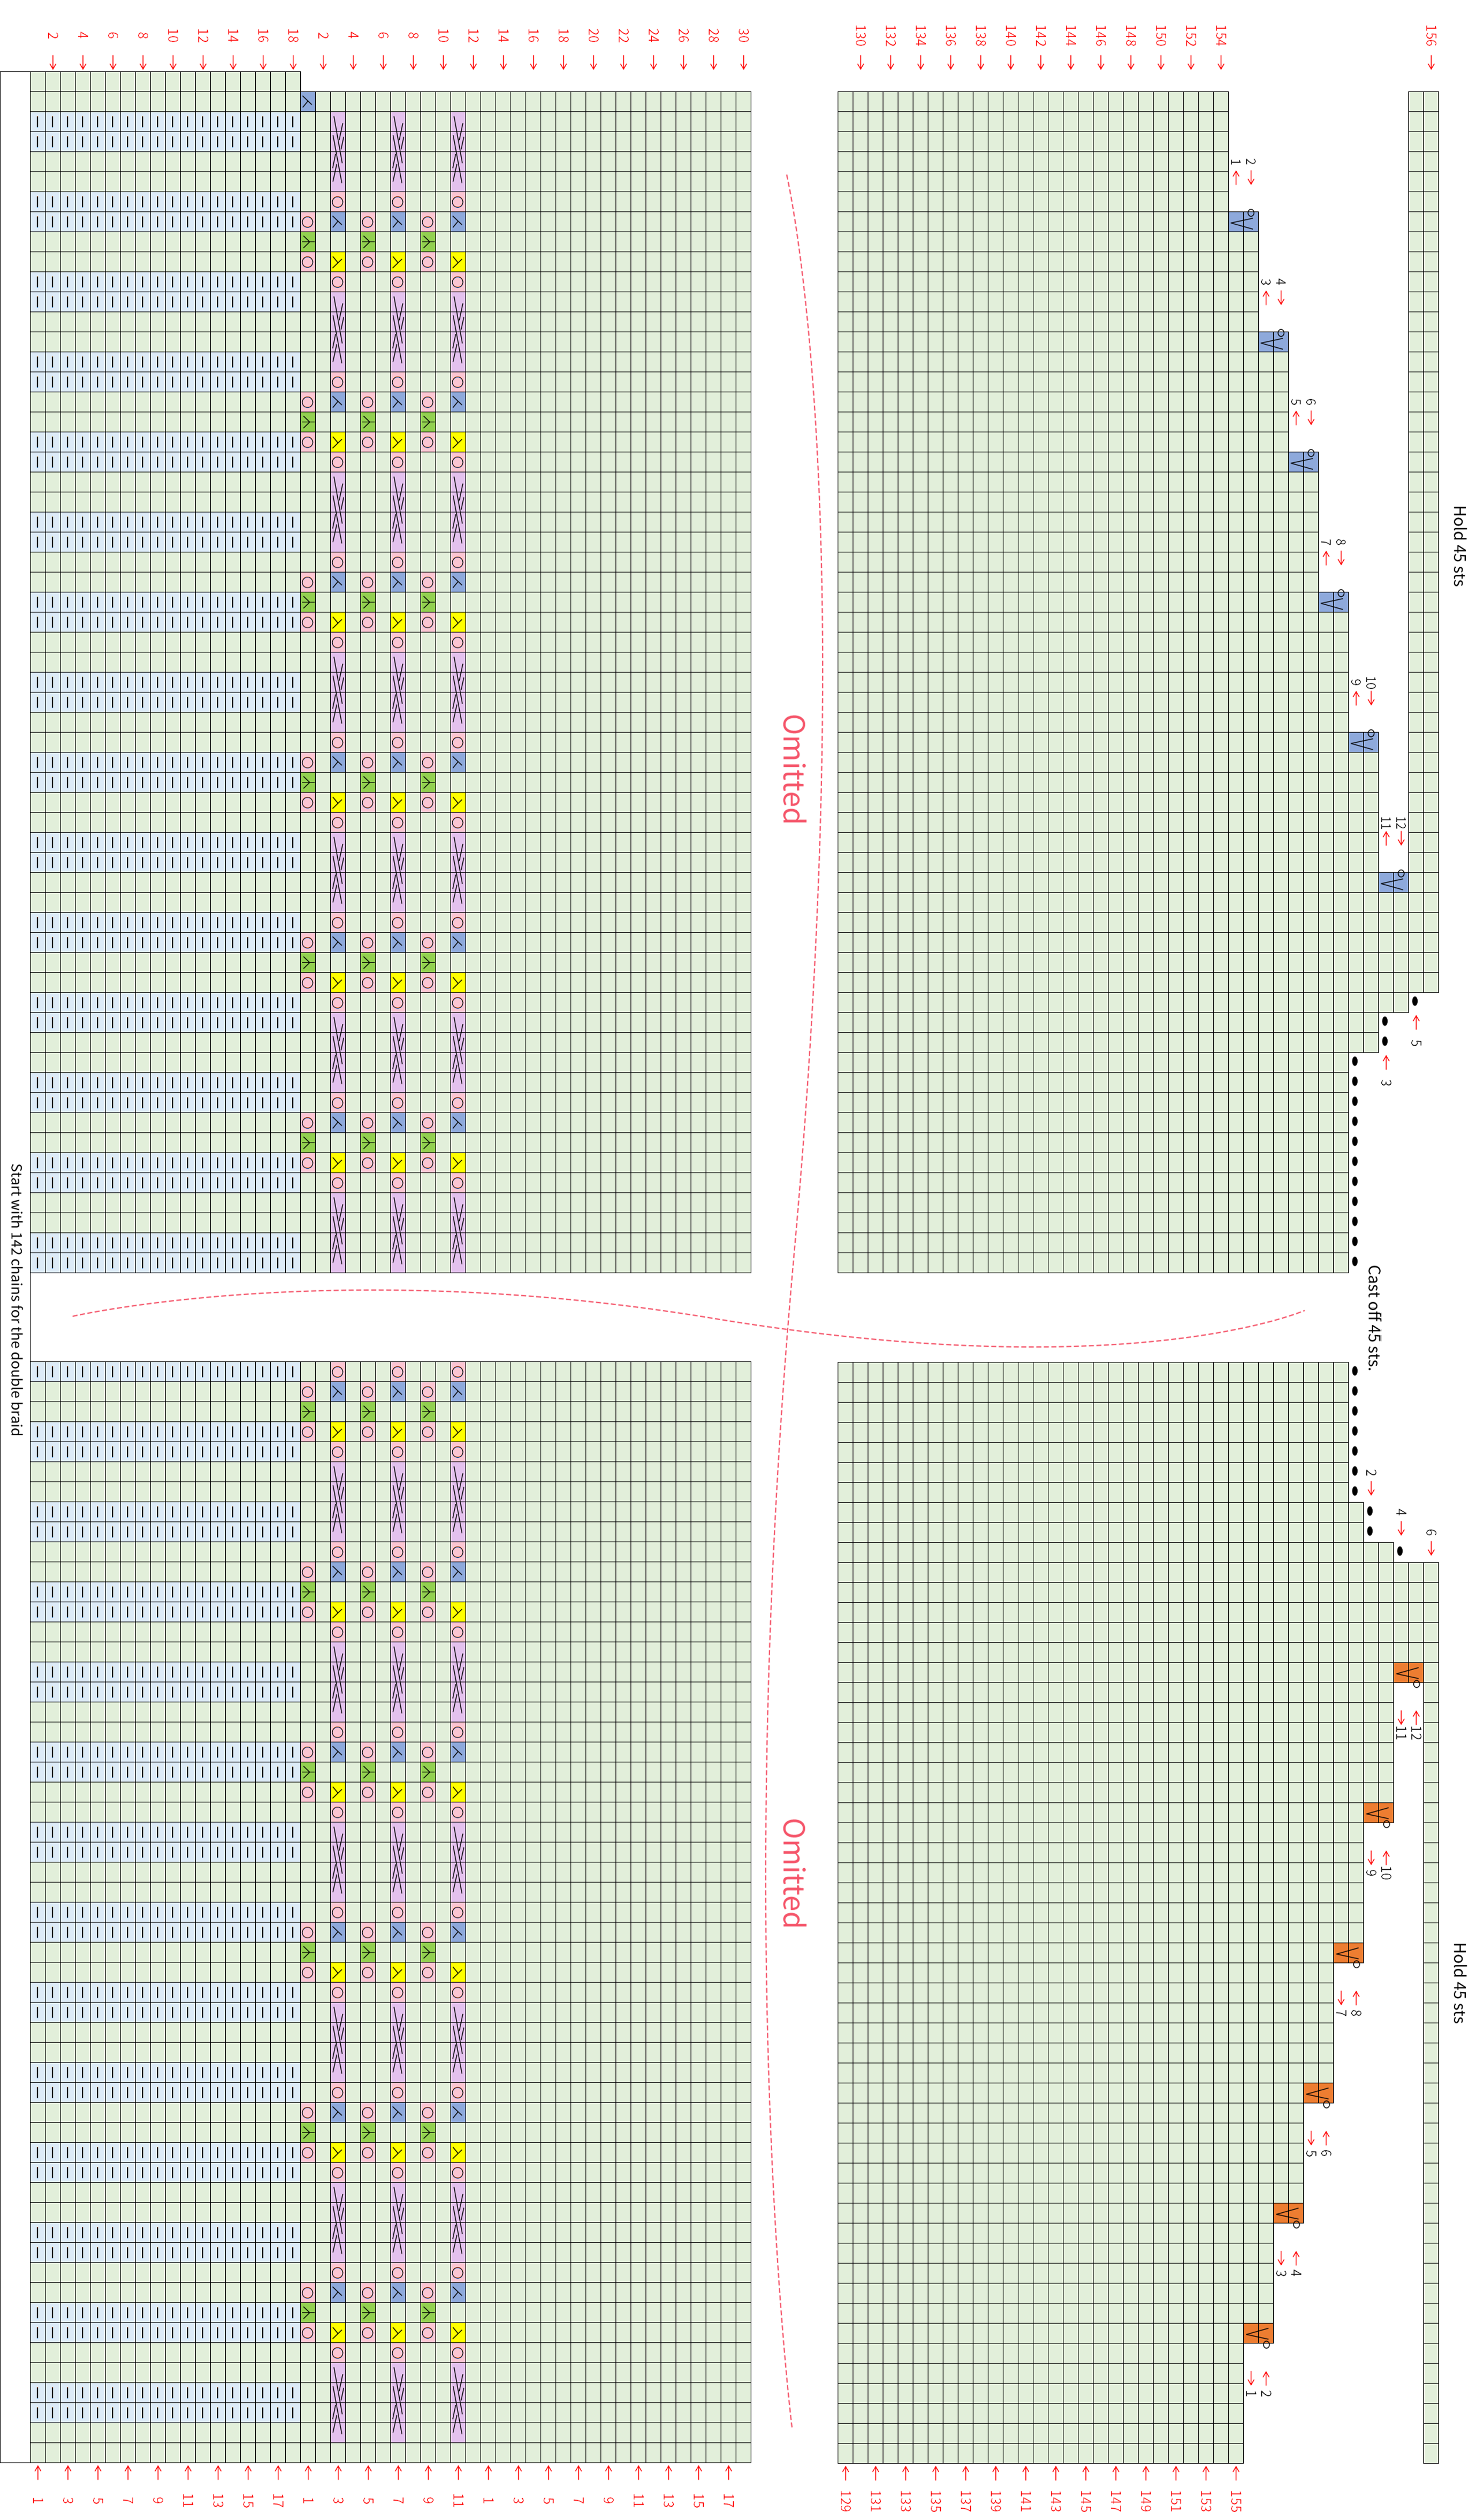
Part 3 Front piece
The front piece is worked back and forth using the double crochet chain cast on method. Finally, join and bind off at the shoulders with the back piece. After completion, sew the sleeves to the armhole positions at the shoulders, and sew together the side seams corresponding to the armholes of the front and back pieces.
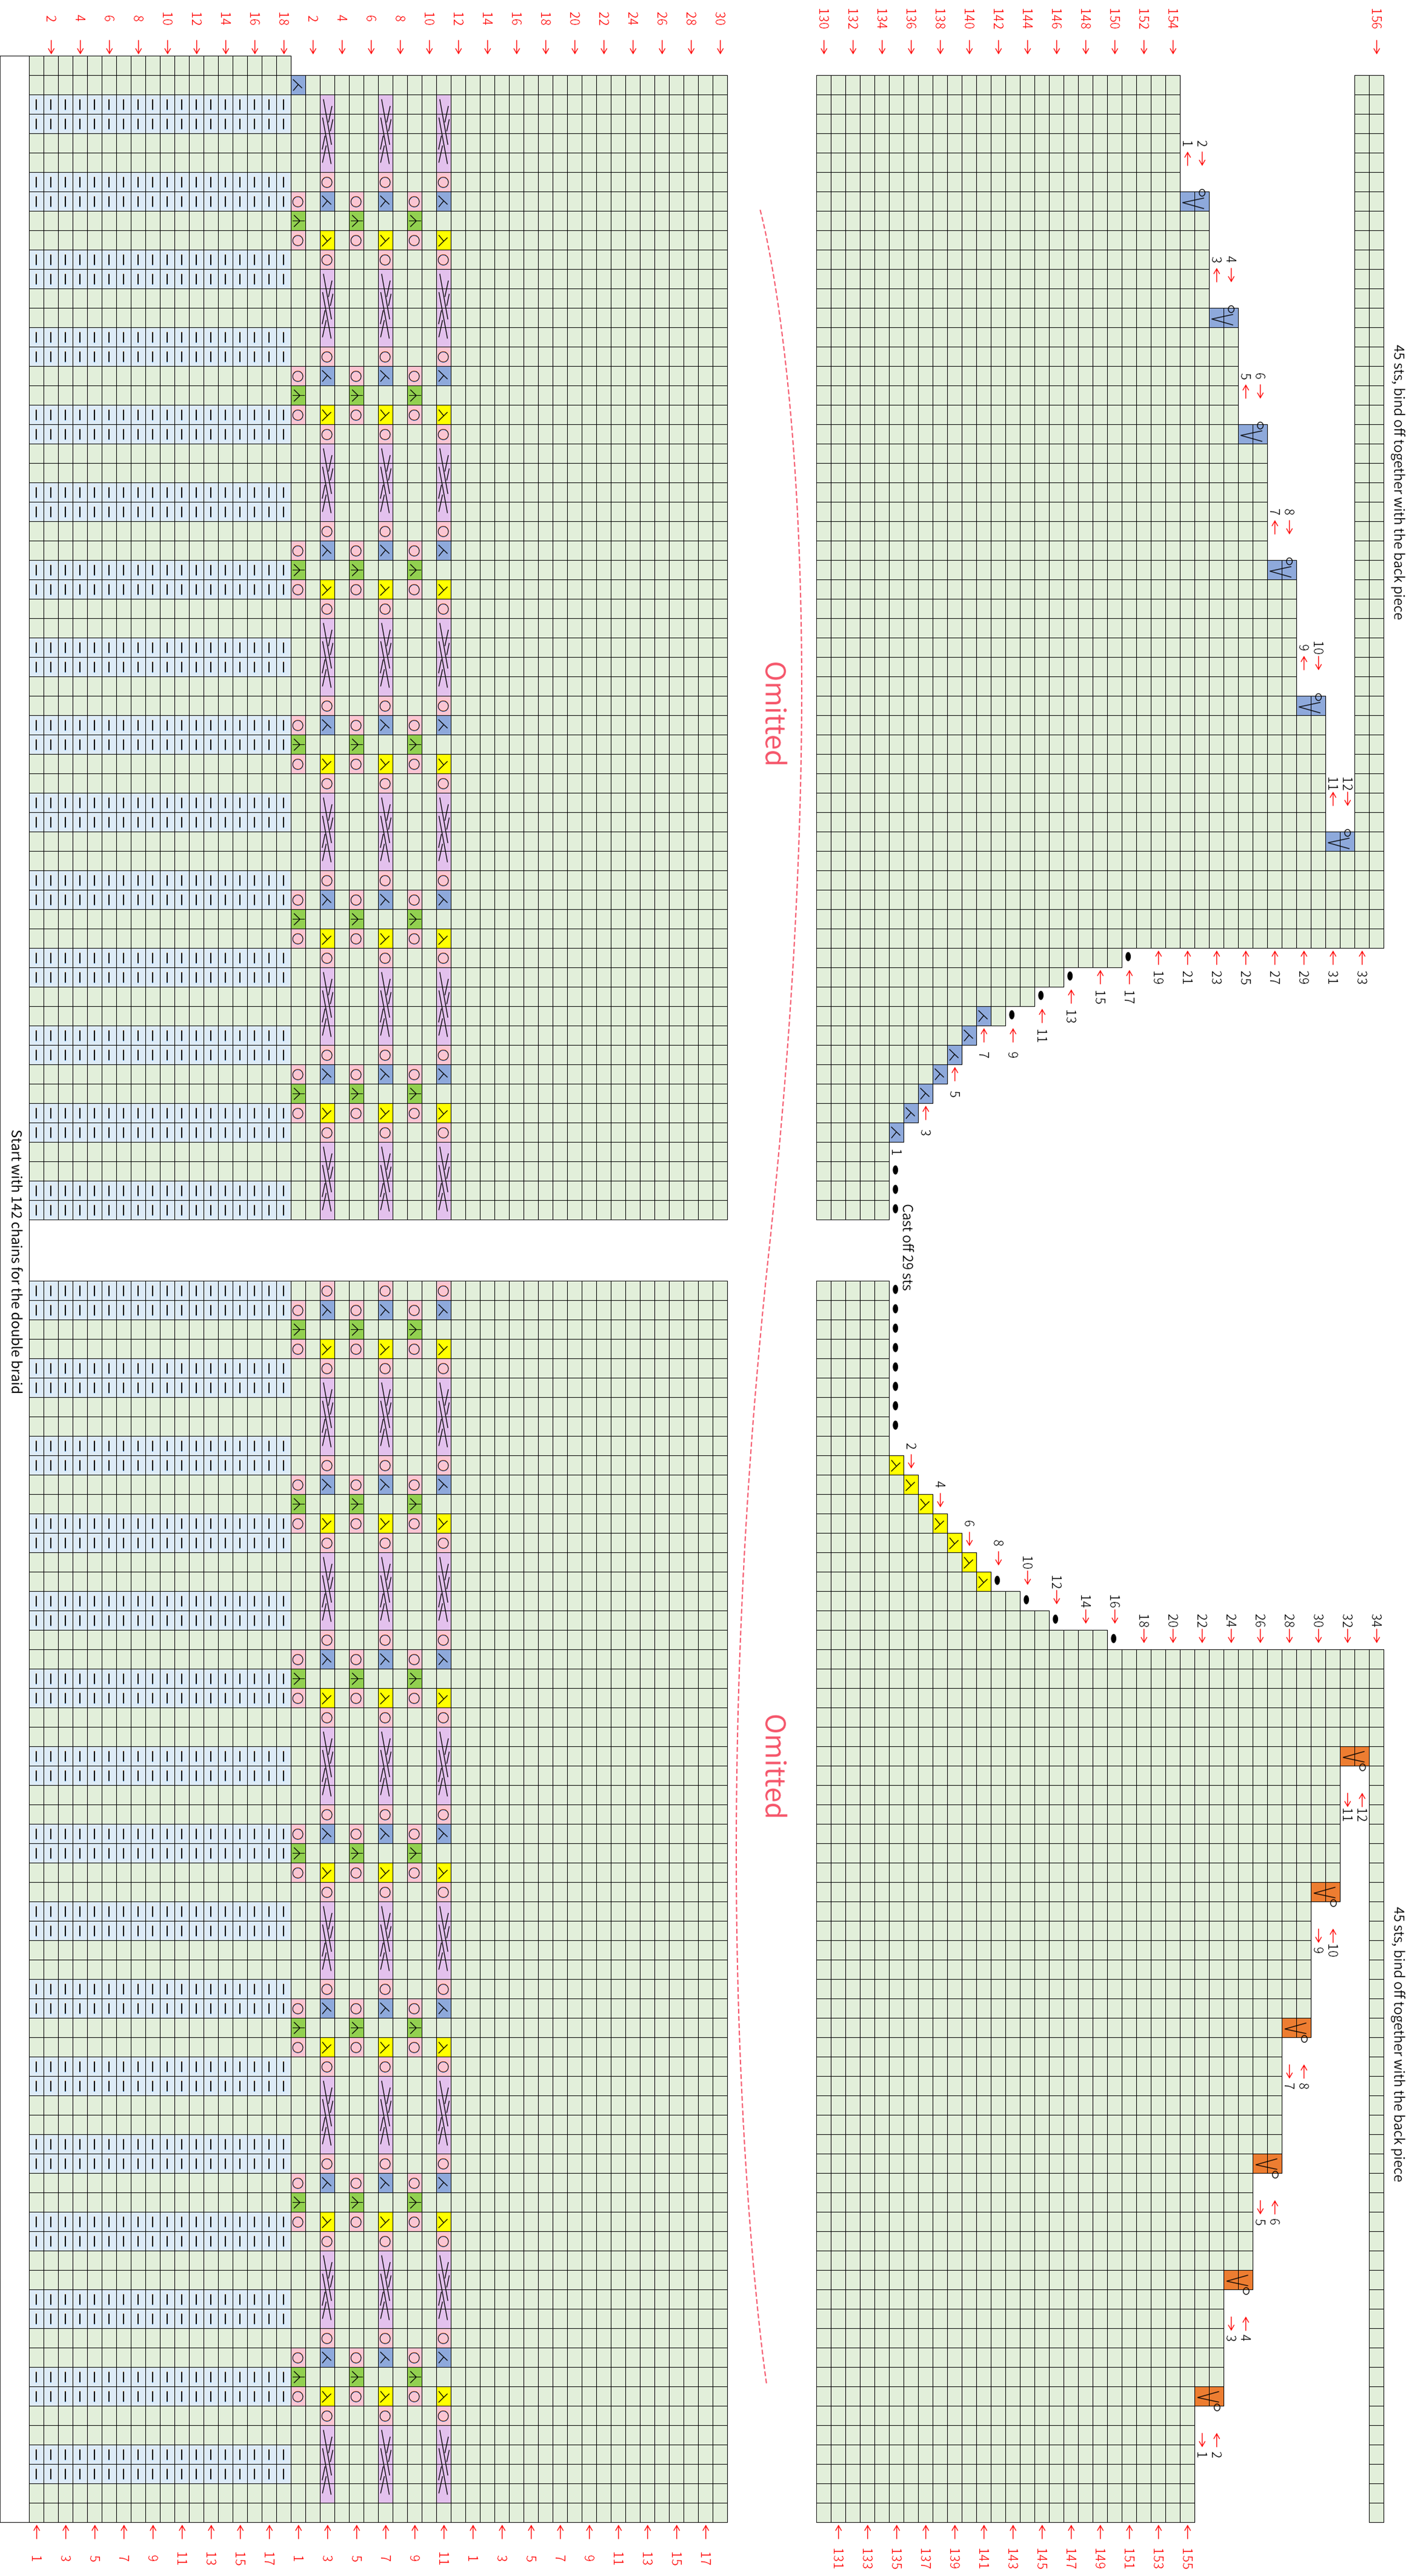
Part 4 Collar
Finally, crochet the collar in rounds around the neckline position of the front and back pieces.

Made by the community





