
Accessories / Ornament
Key Ring For Couples
Project preview
See the finished project
Pattern format
Instructions
Watch and follow
Video tutorial
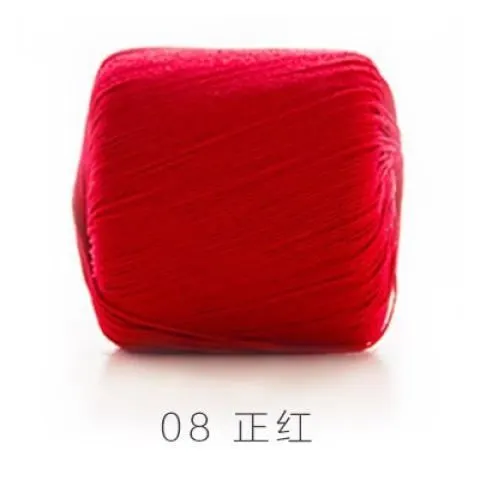

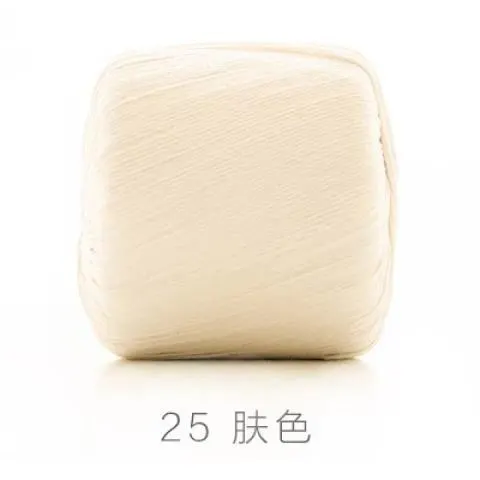
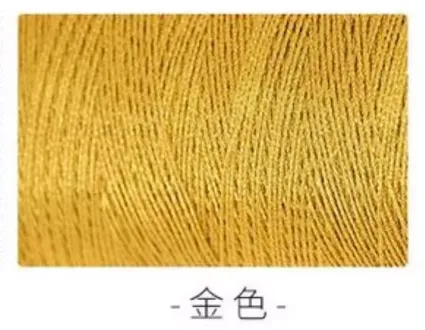
There are a total of 2 keyrings, including a boy style and a girl style. Both are divided into 2 parts: upper and lower. First, make the lower part, and once it's completed, proceed to make the upper part.
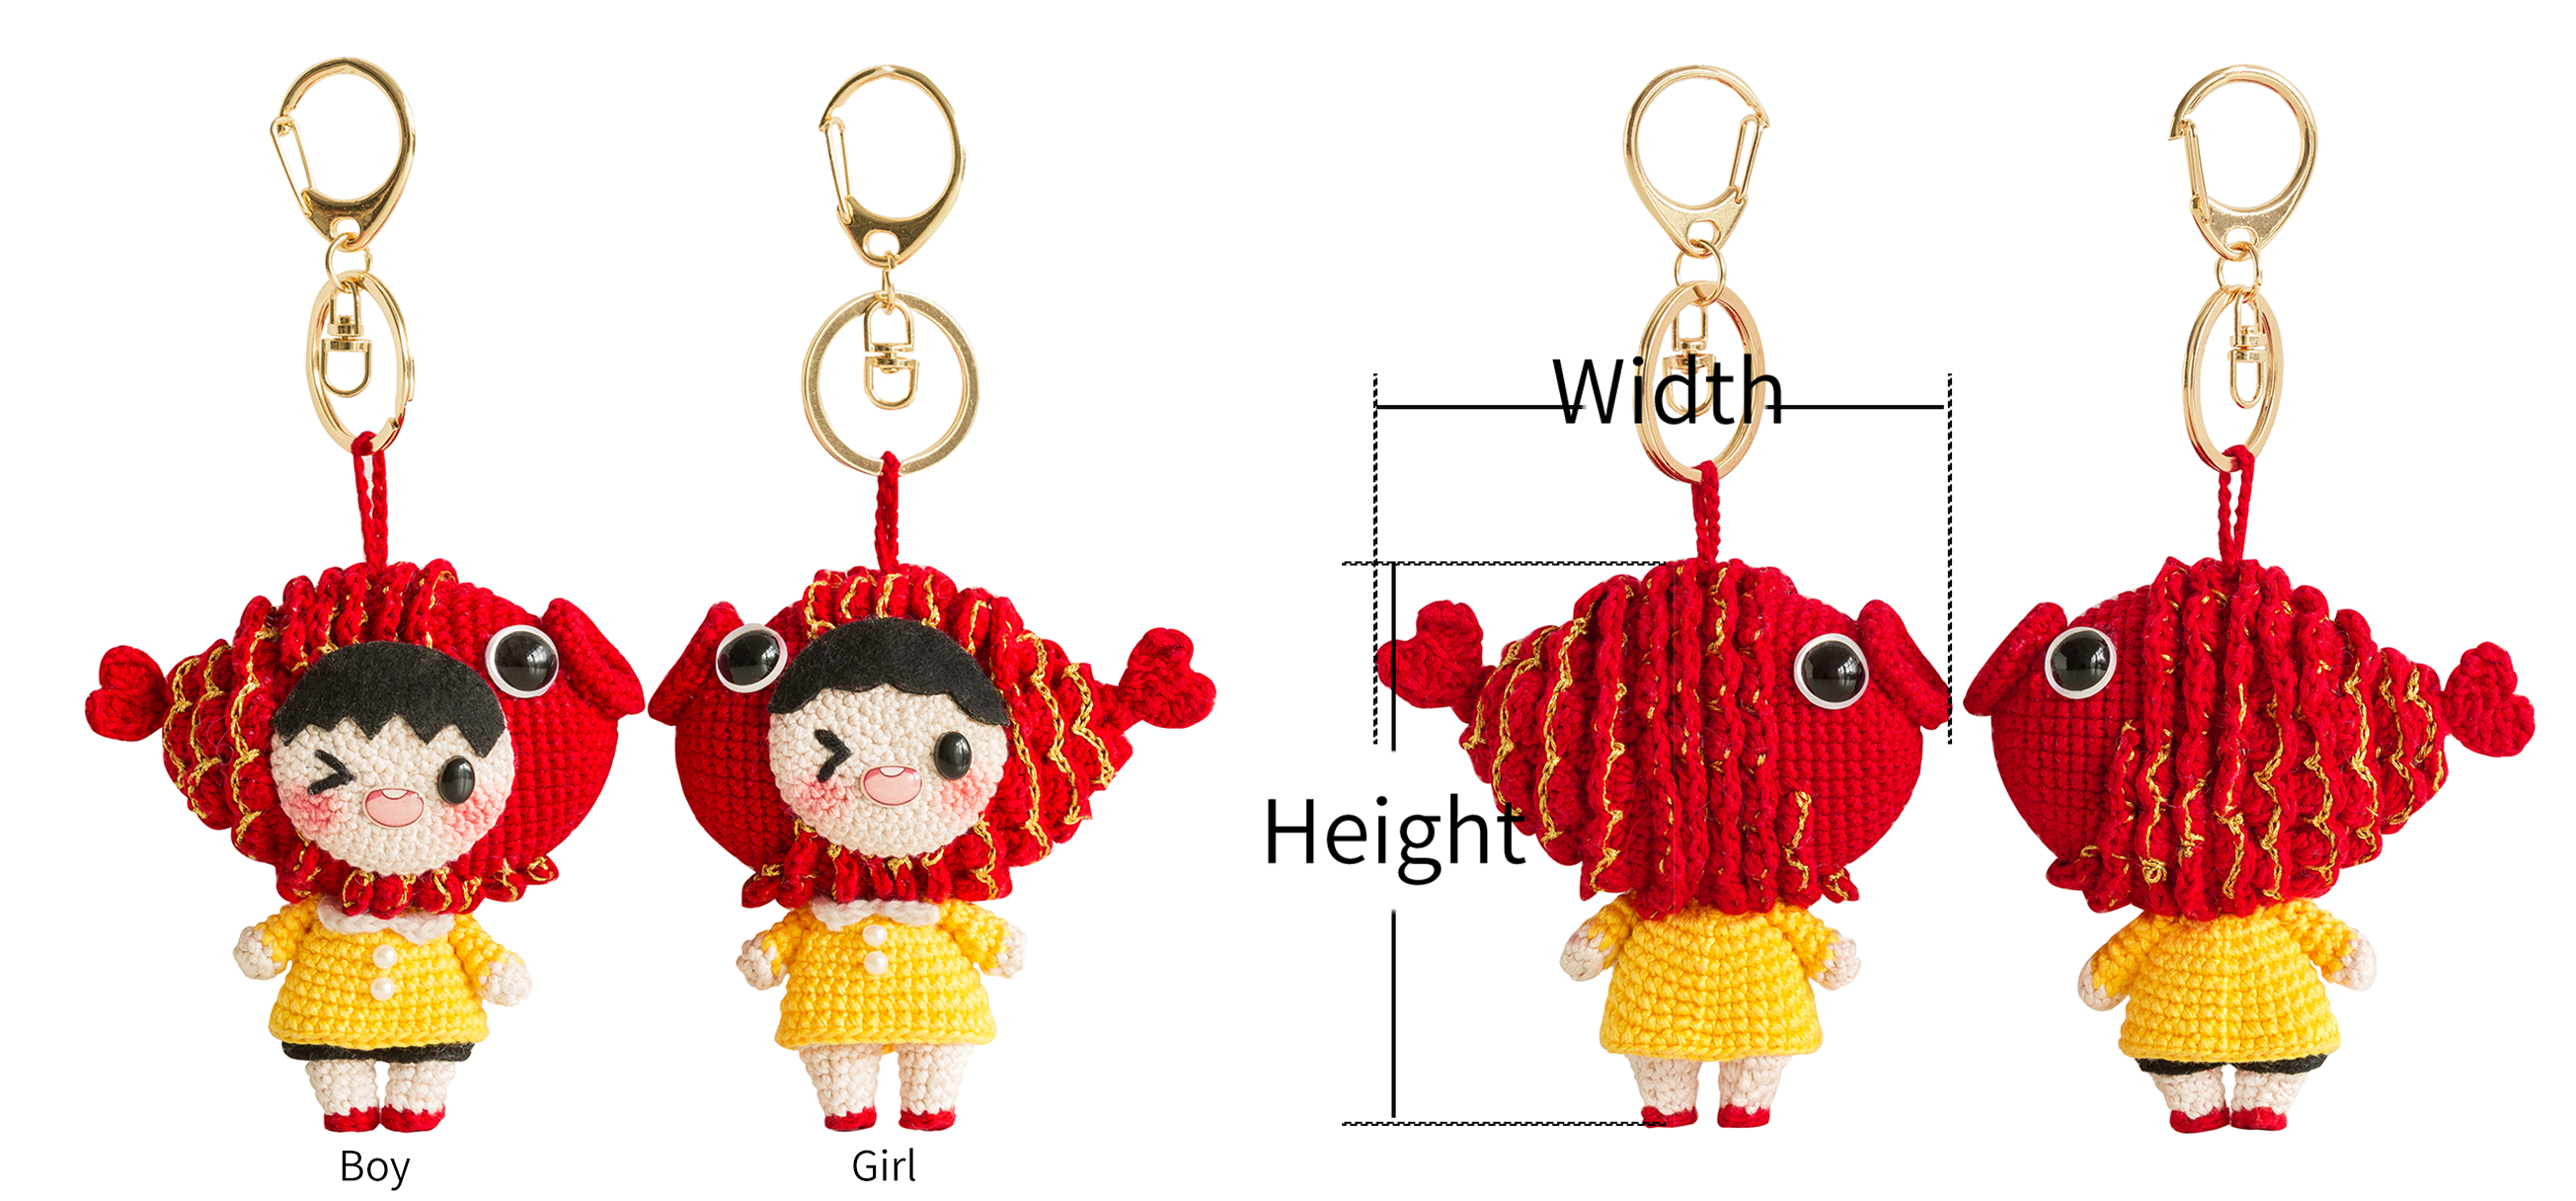
Finished Dimension: height 9cm, width 9cm
Due to variations in individual tension, the size of the sample is for reference only.
Materials: Combed 3# Lace & 4-Ply Combed Cotton & Acrylic Fibre Hand Knitting Yarn
Hook: 1.75 mm crochet hook

ABBREVIATIONS
Note:
1. This pattern is making in Chinese crochet pattern terms, and the stitch name is written using American terminology. All measurements in charts are in cm.
2. Working in joined round
When crocheting in rounds without further guidance, working in closed rounds, start each round with a set number of beginning chains and close with a slip stitch. The beginning chain preceding a single crochet and the slip stitch used for joining rounds are not included in the total stitches.
3.Working in spiral round
When crocheting in spiral rounds, each round working without beginning chain and slip stitch to joining the rounds. instead, work directly into the next stitch.

Part 1 Lower PartA
The arms, legs, body, clothes, and collar of the two versions are identical. Additionally, the male version requires making pants. Apart from the collar, the rest of the lower part is worked using the slip stitch method.
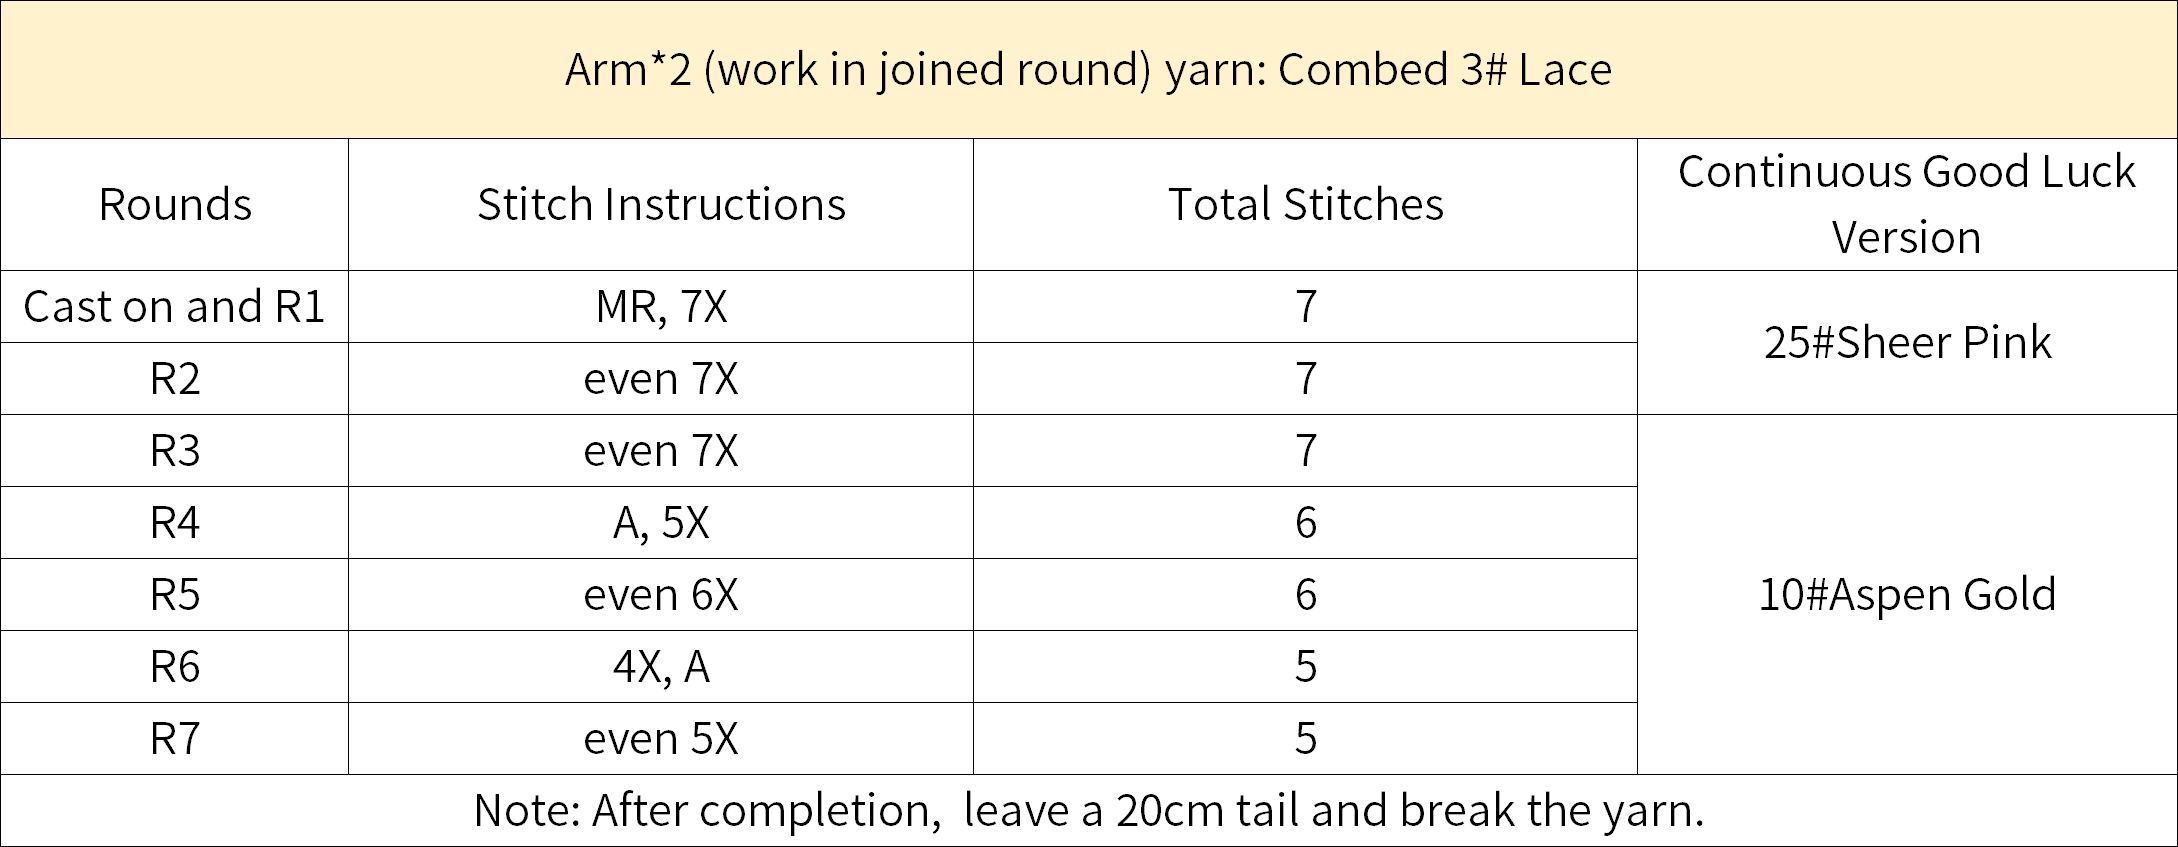
Step 1 ArmA1 01' 04''
The arm is started with a magic ring method, and you crochet in rounds counterclockwise along the magic ring loop, with color changes during the process. Please refer to the video demonstration for more details.
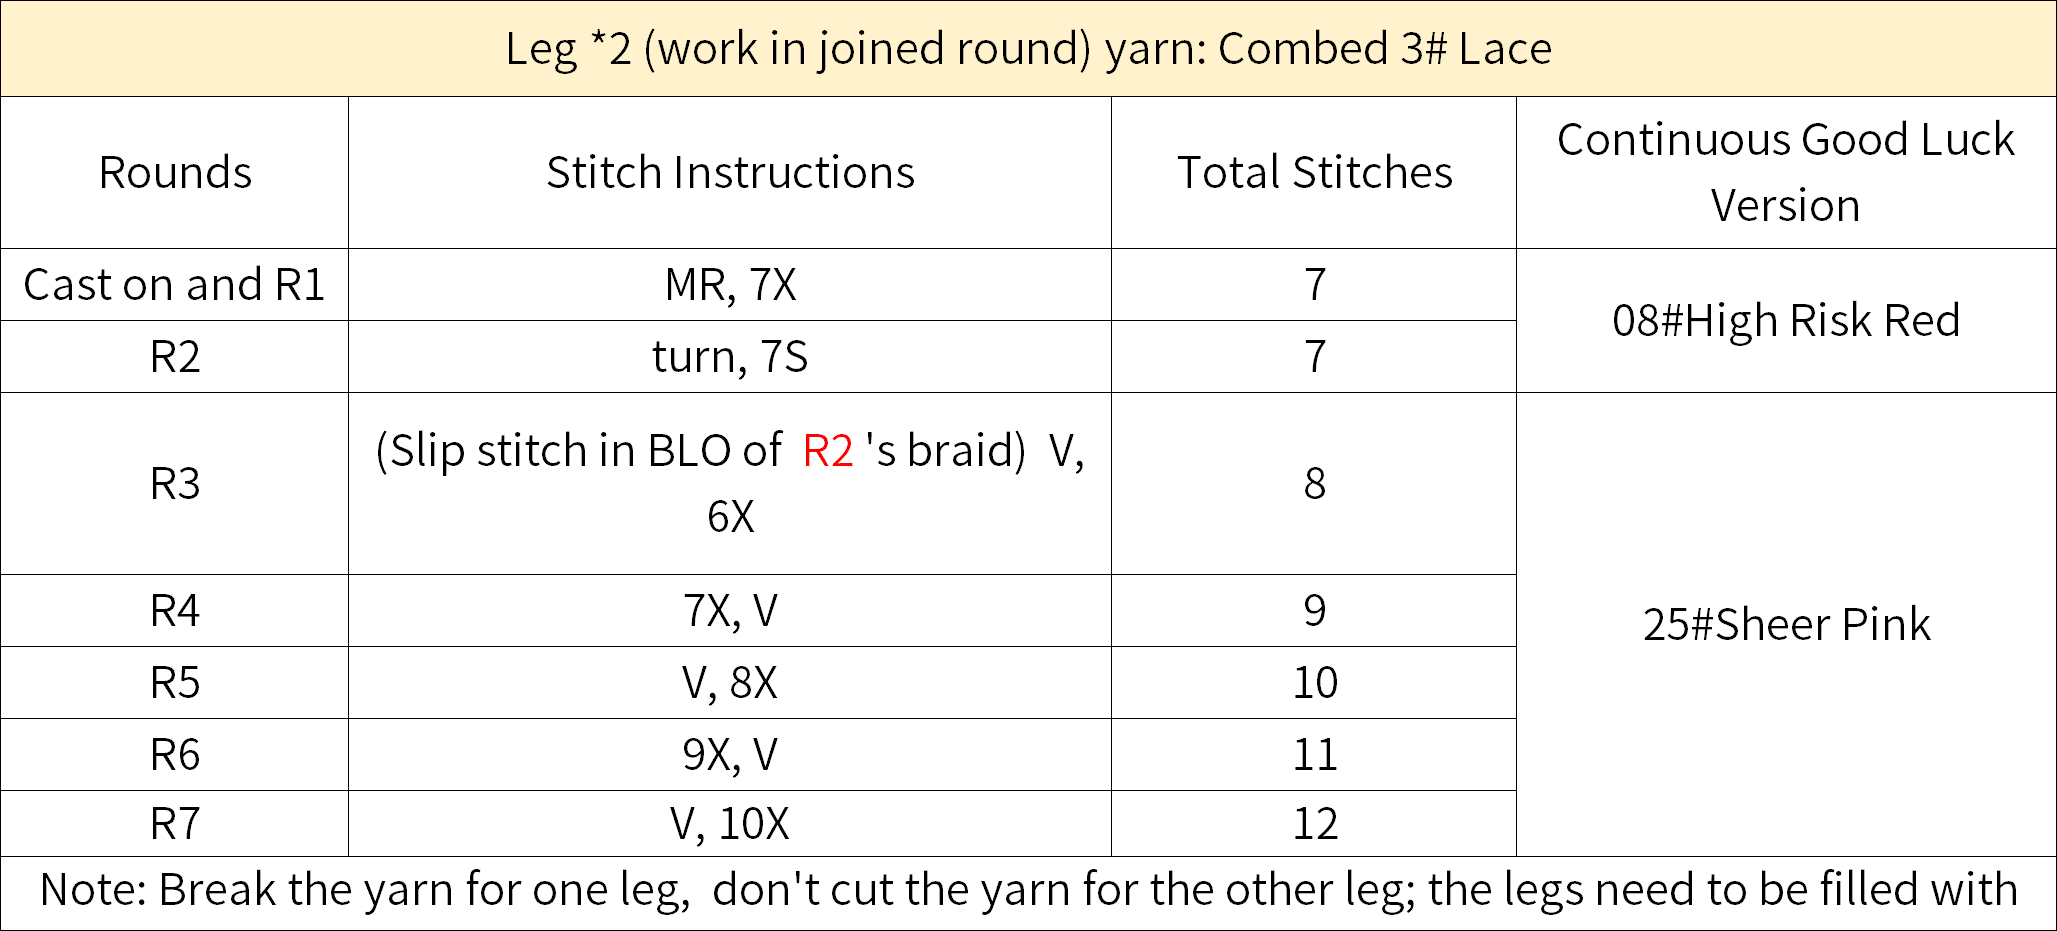
Step 2 LegA2 18' 13''
The crocheting method for both legs is identical. They both use the magic ring method, working counter clockwise around the loop of the magic ring. During the process, you need to change colors and add stuffing. Please refer to the video demonstration for more details.
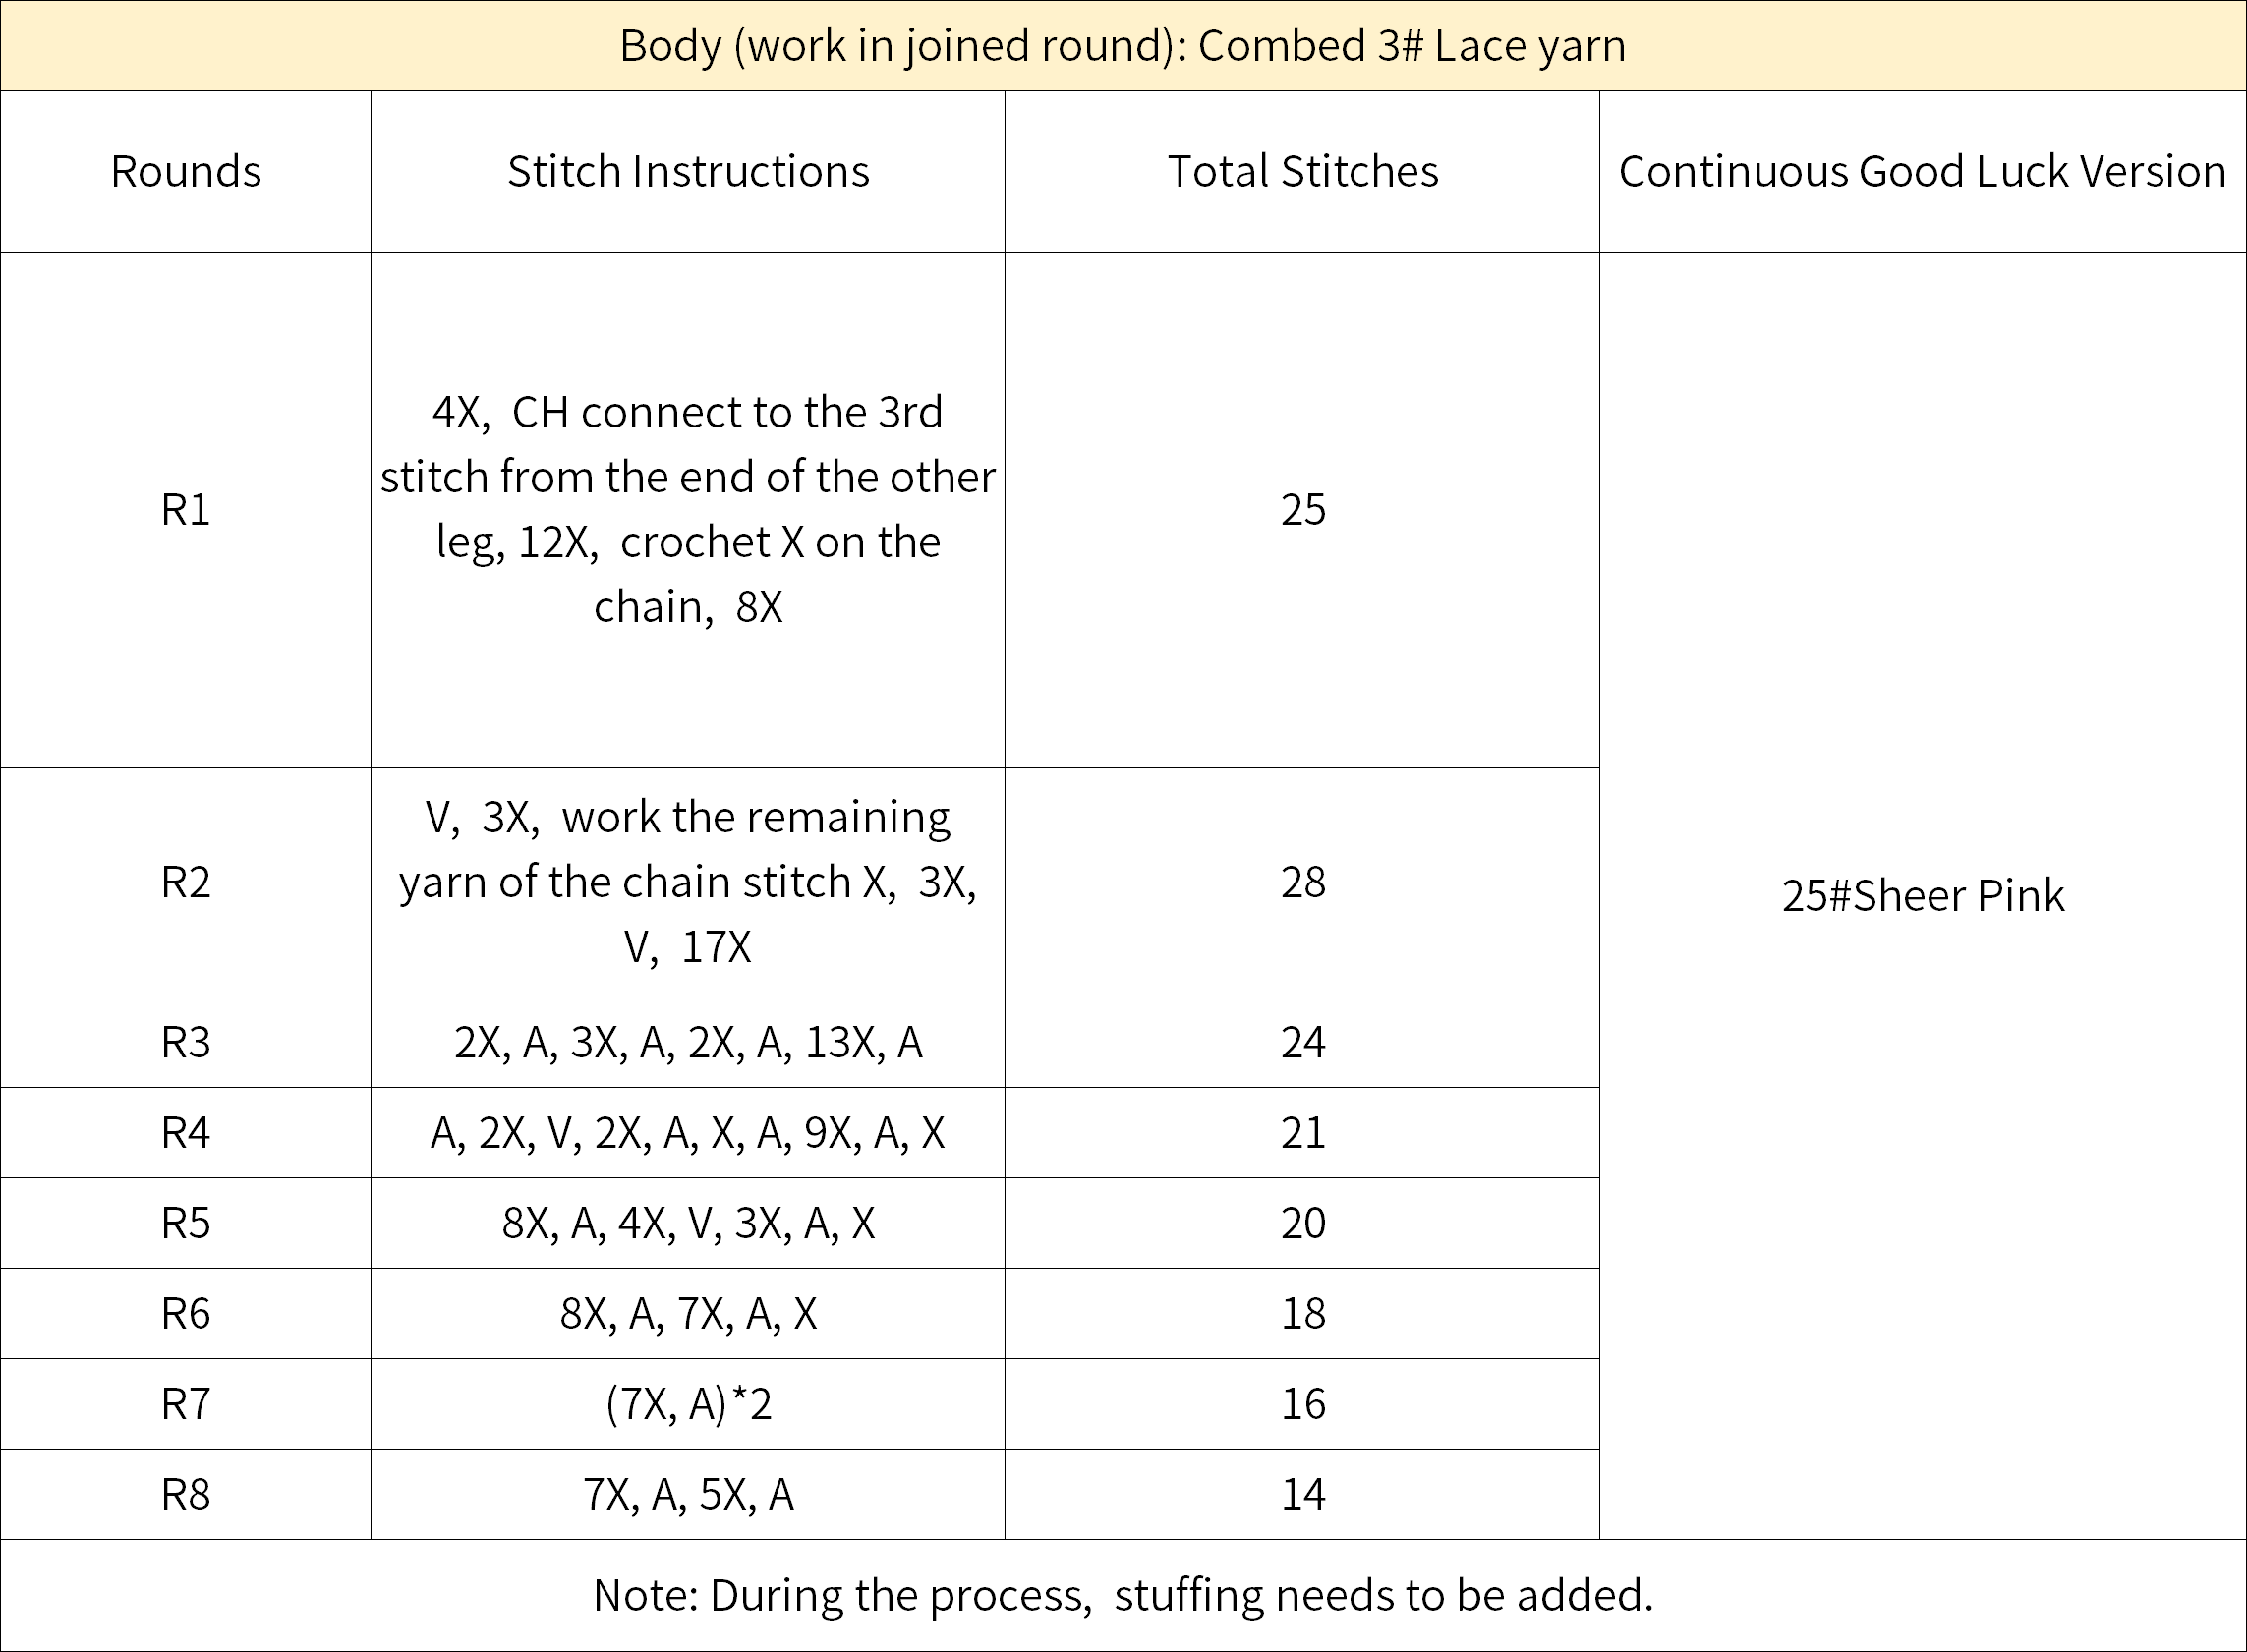
Step 3 BodyA3 26' 16''
First, connect the 2 legs, then continue crocheting in rounds upward along the legs to work the body section, and add stuffing throughout the process. Please refer to the video demonstration for more details.
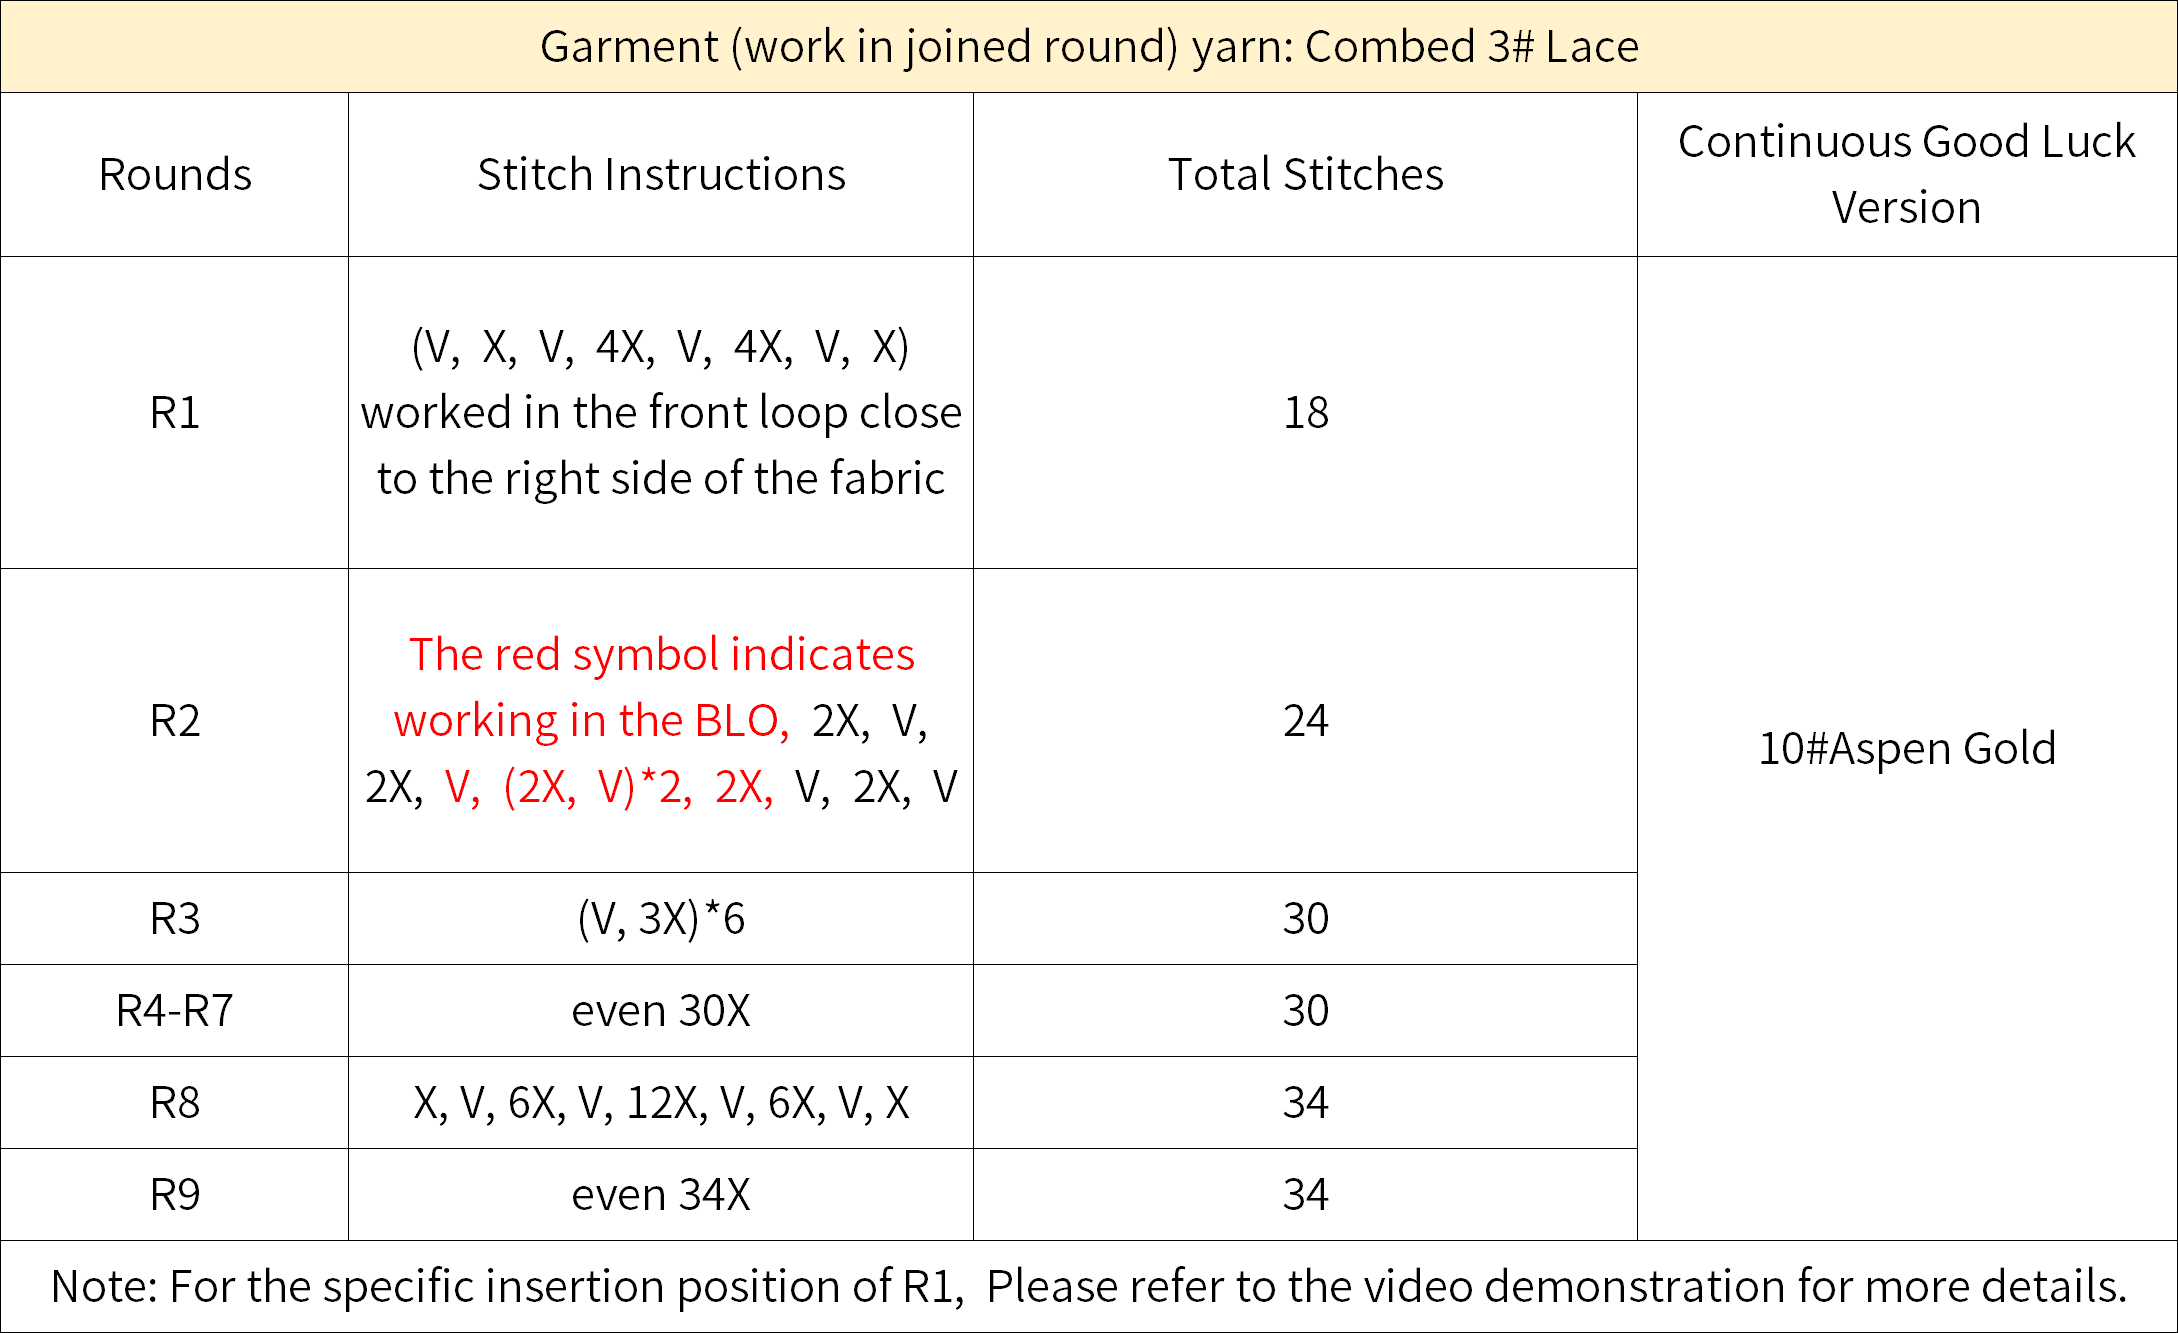
Step 4 GarmentA4 33' 21''
Join the yarn and crochet in the last round of the body section, please refer to the video demonstration for more details.
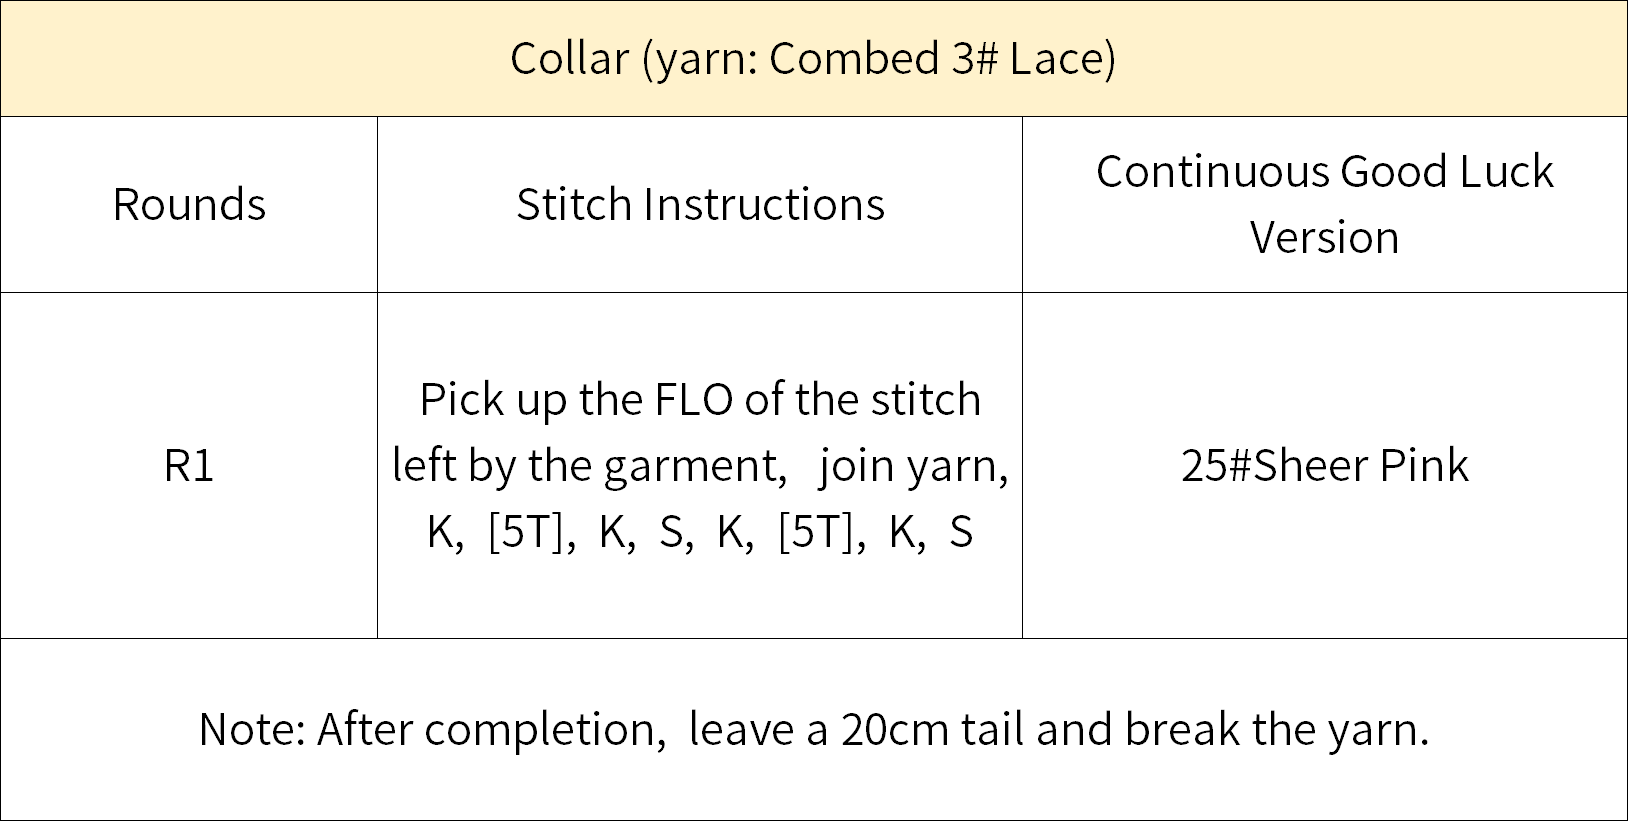
Step 5 CollarA5 38' 47''
Join the yarn at the half stitch left in the second round of the garment, then crochet. After completing, sew together and attach two half-round pearls on the front of the garment. Once done, sew the arms onto the sides of the garment. Please refer to the video demonstration for more details.
Step 6 PantA6 48' 24''
Make pants on one of the versions (using 4-Ply Combed Cotton & Acrylic Fibre Hand Knitting Yarn 21#Black Beauty, wrap 3 circles around the top of the thighs and secure with glue), the version with pants will be the male version, while the female version does not require pants. Please refer to the video demonstration for more details.
Part 2 Upper PartB
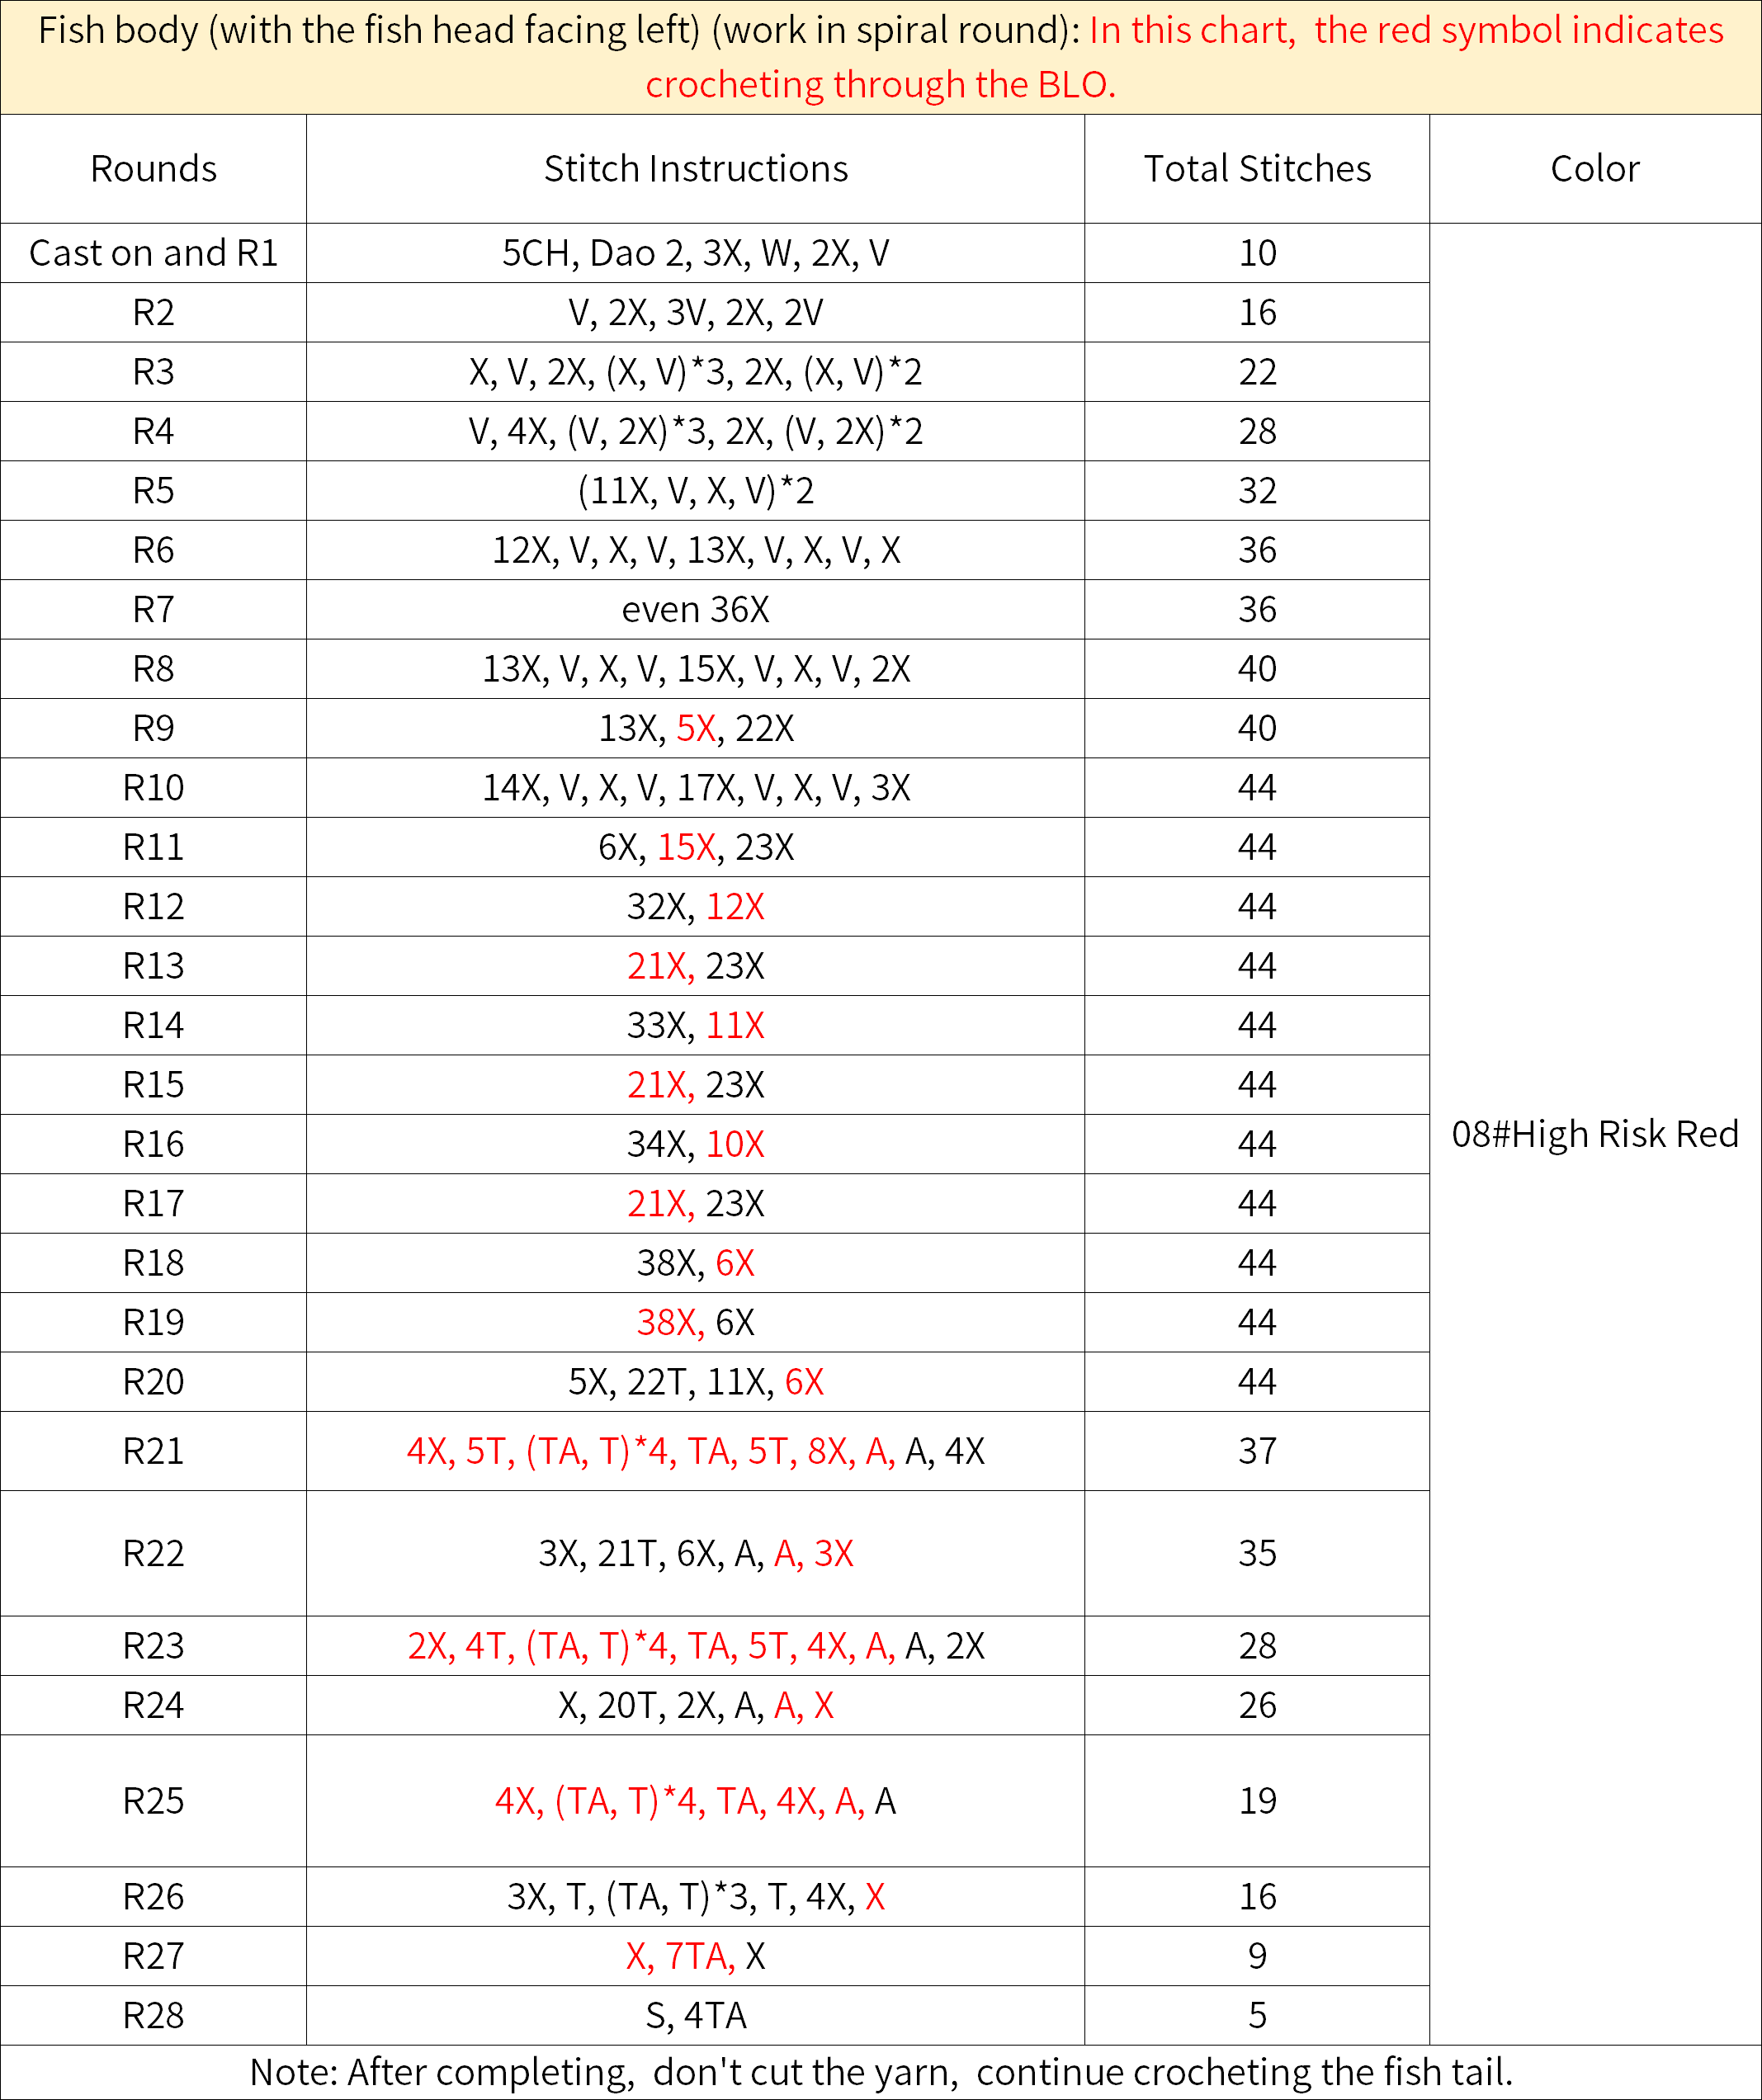
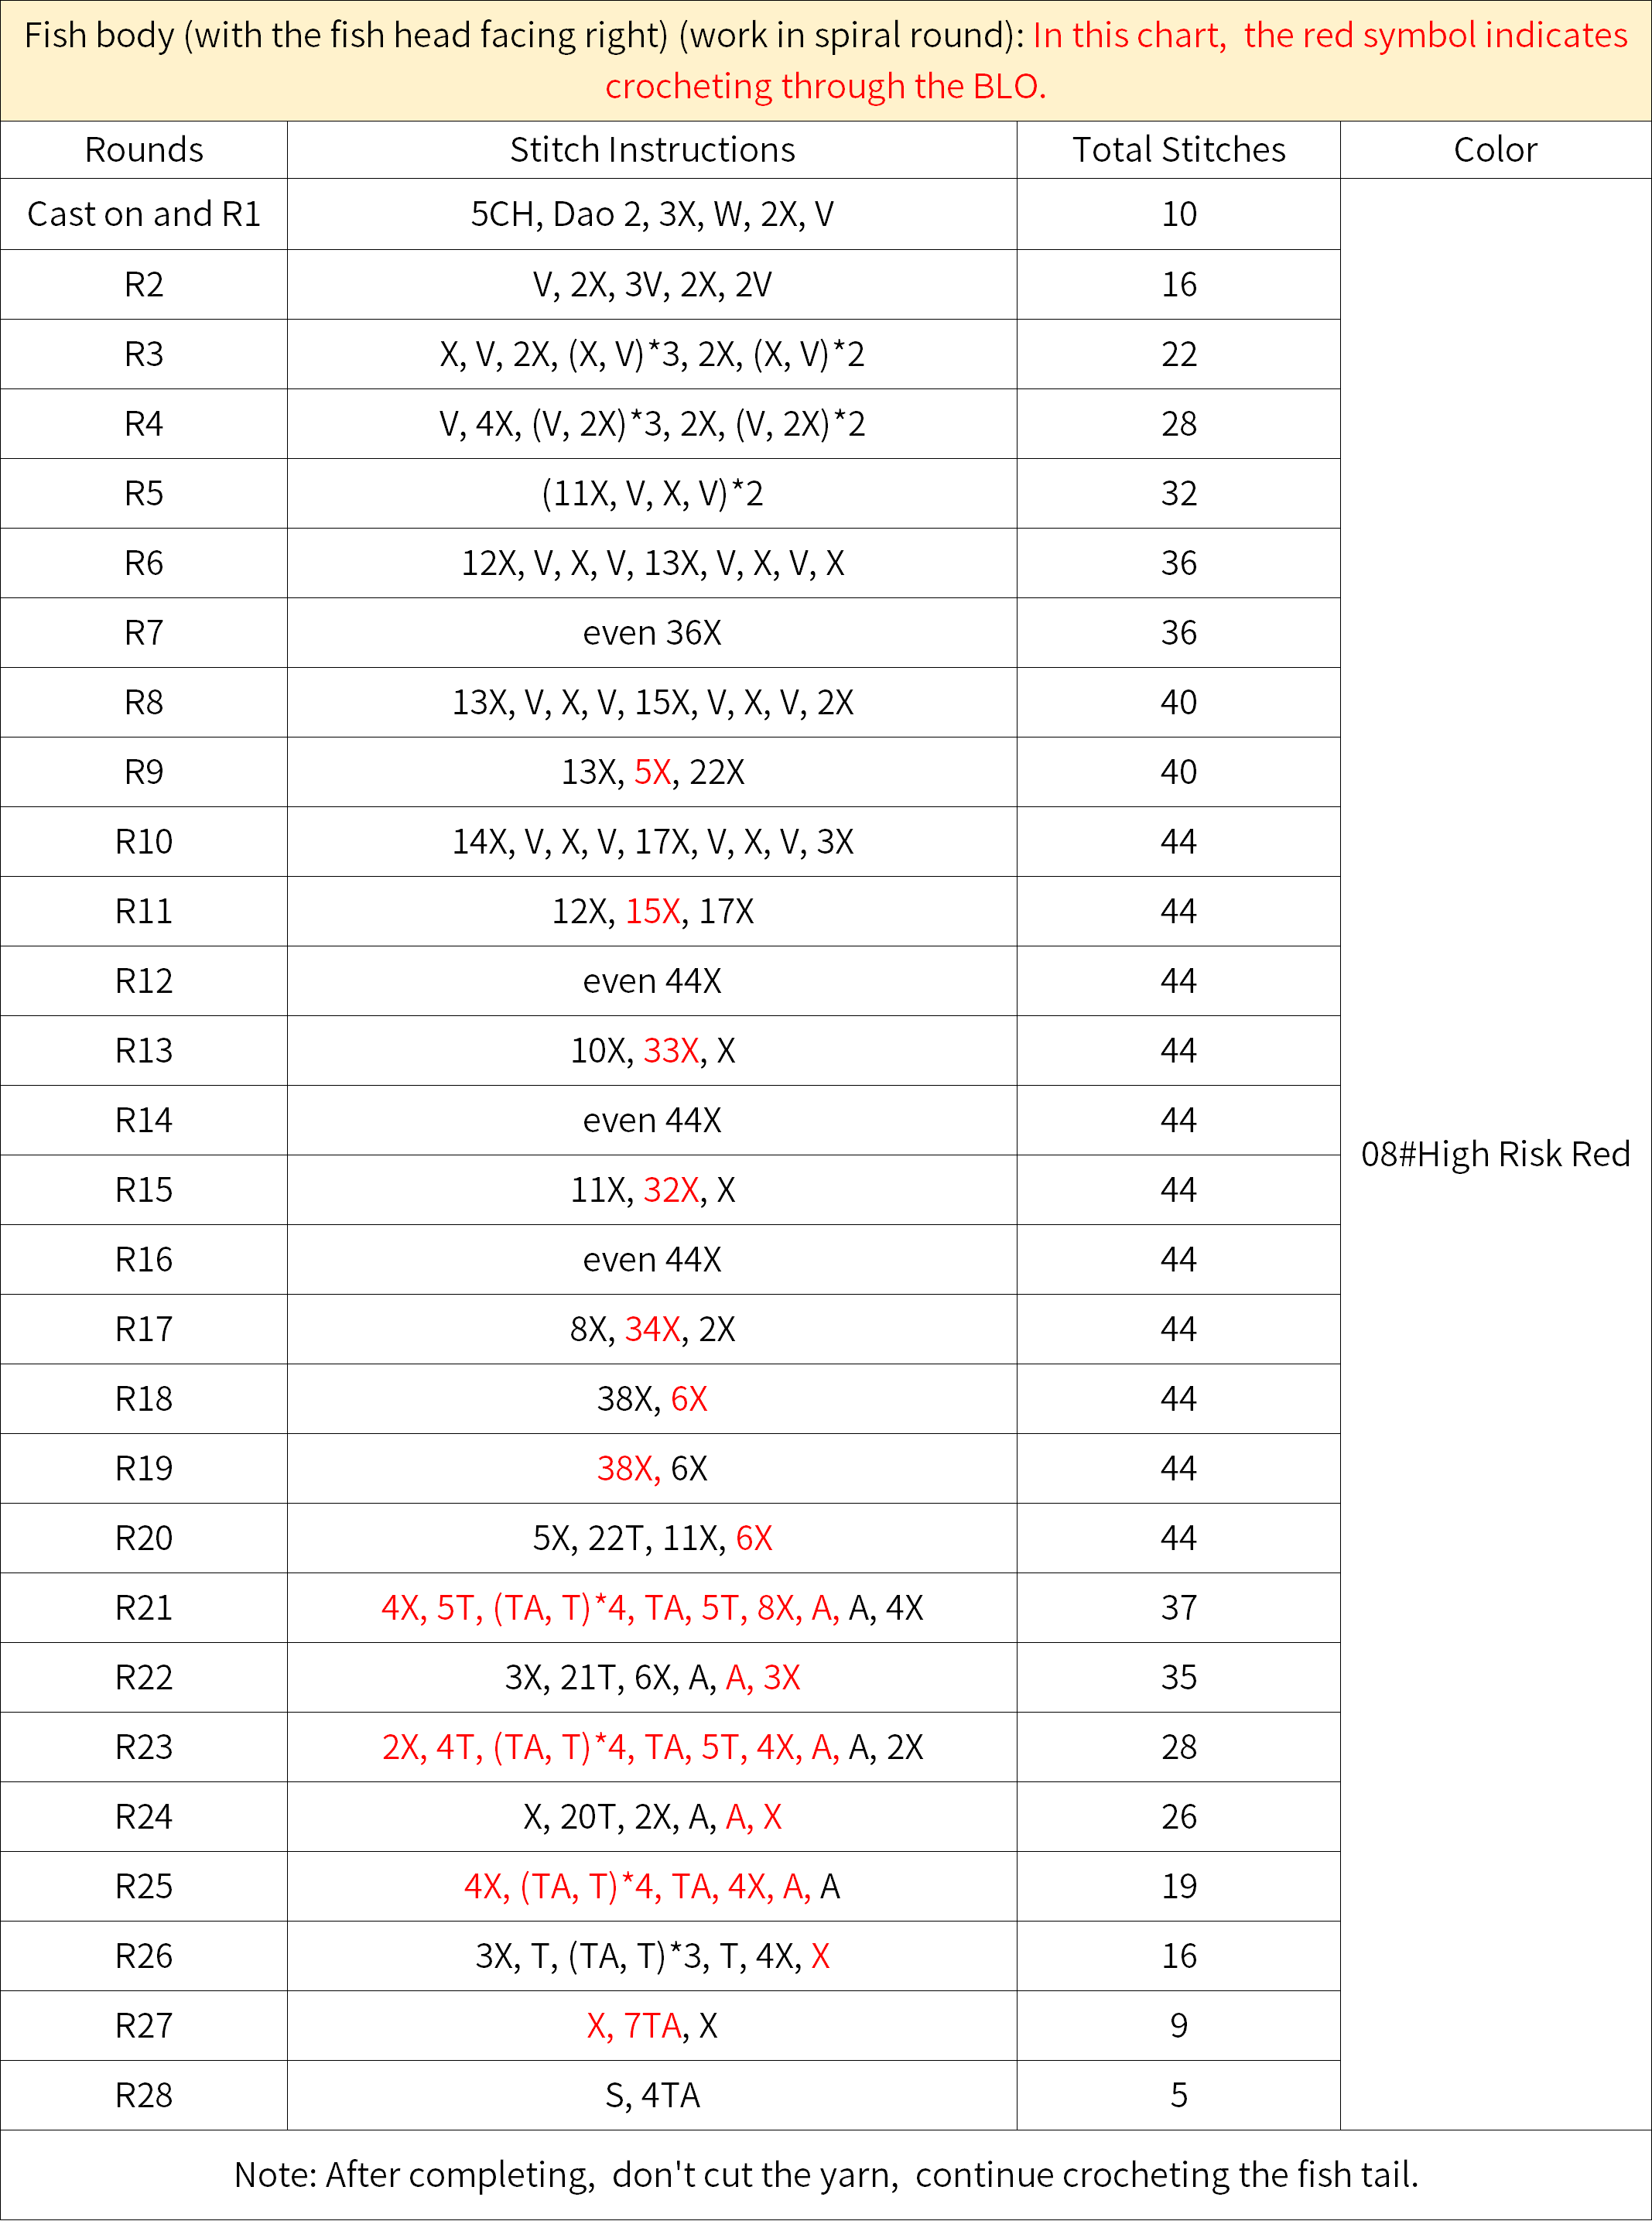
The upper part includes the fish body, fish tail, face, mouth, scales, and hanging ring. After completion, attach the eyes. The faces and mouths of both designs are crocheted in the identical way, while the other sections have slightly different stitch patterns.
Step 1 Fish BodyB1 51' 00''
Both fish bodies start with a foundation chain and are crocheted in rounds counterclockwise. The stitch patterns are identical, but the placement of the half loops differs. During the process, fiberfill needs to be added. Please refer to the video demonstration for more details.
Step 2 Fish TailB2 63' 58''
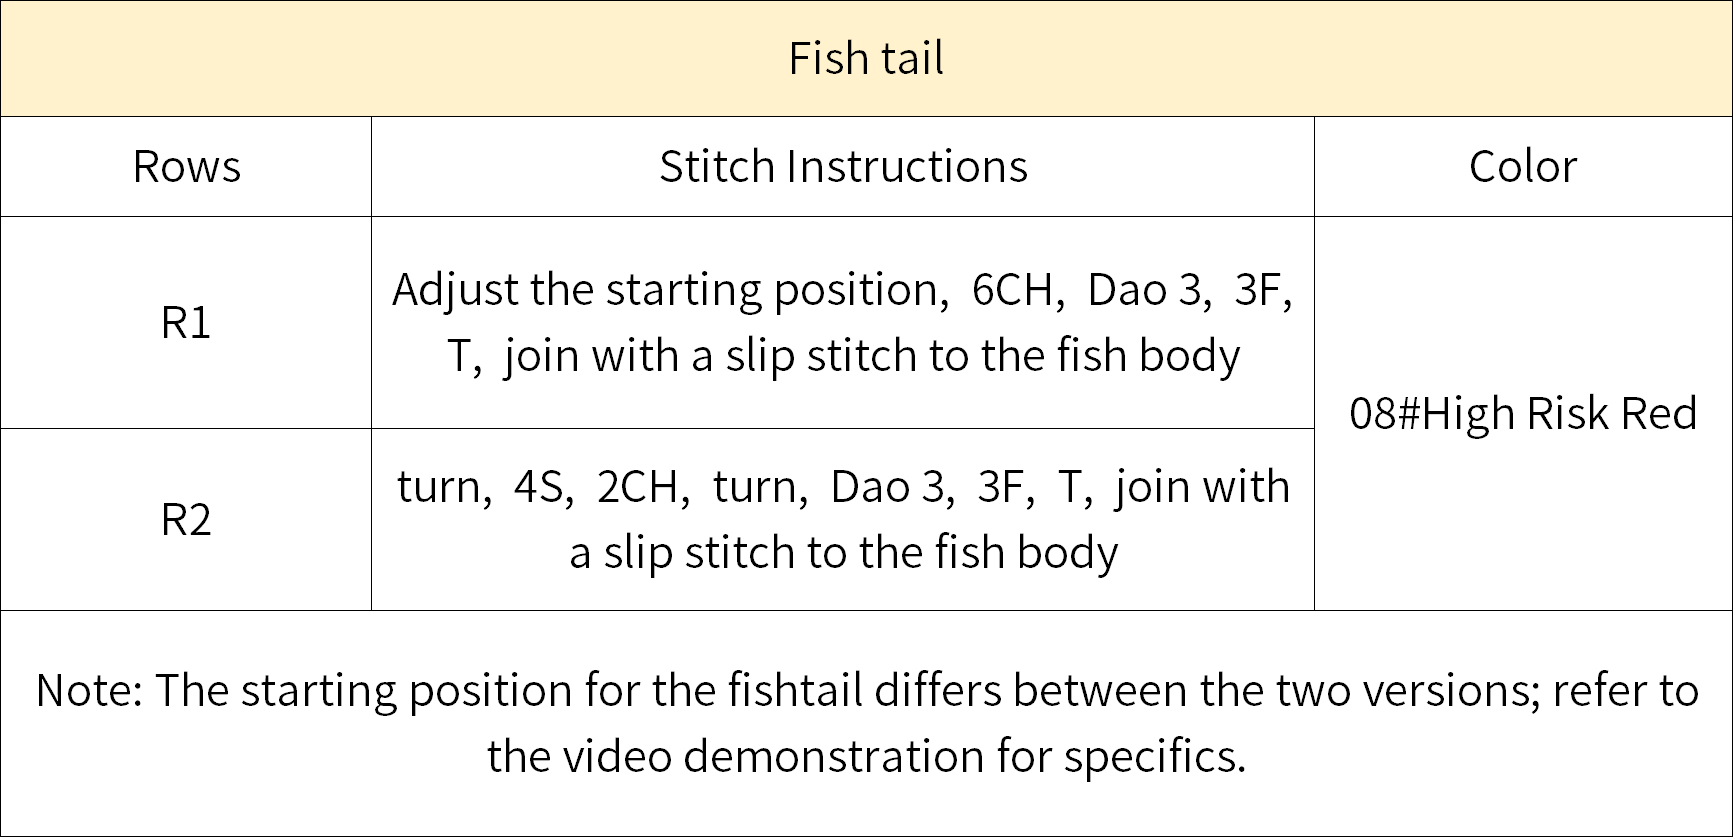
The fish tail is crocheted continuing from the body of the fish. Please refer to the video demonstration for more details.
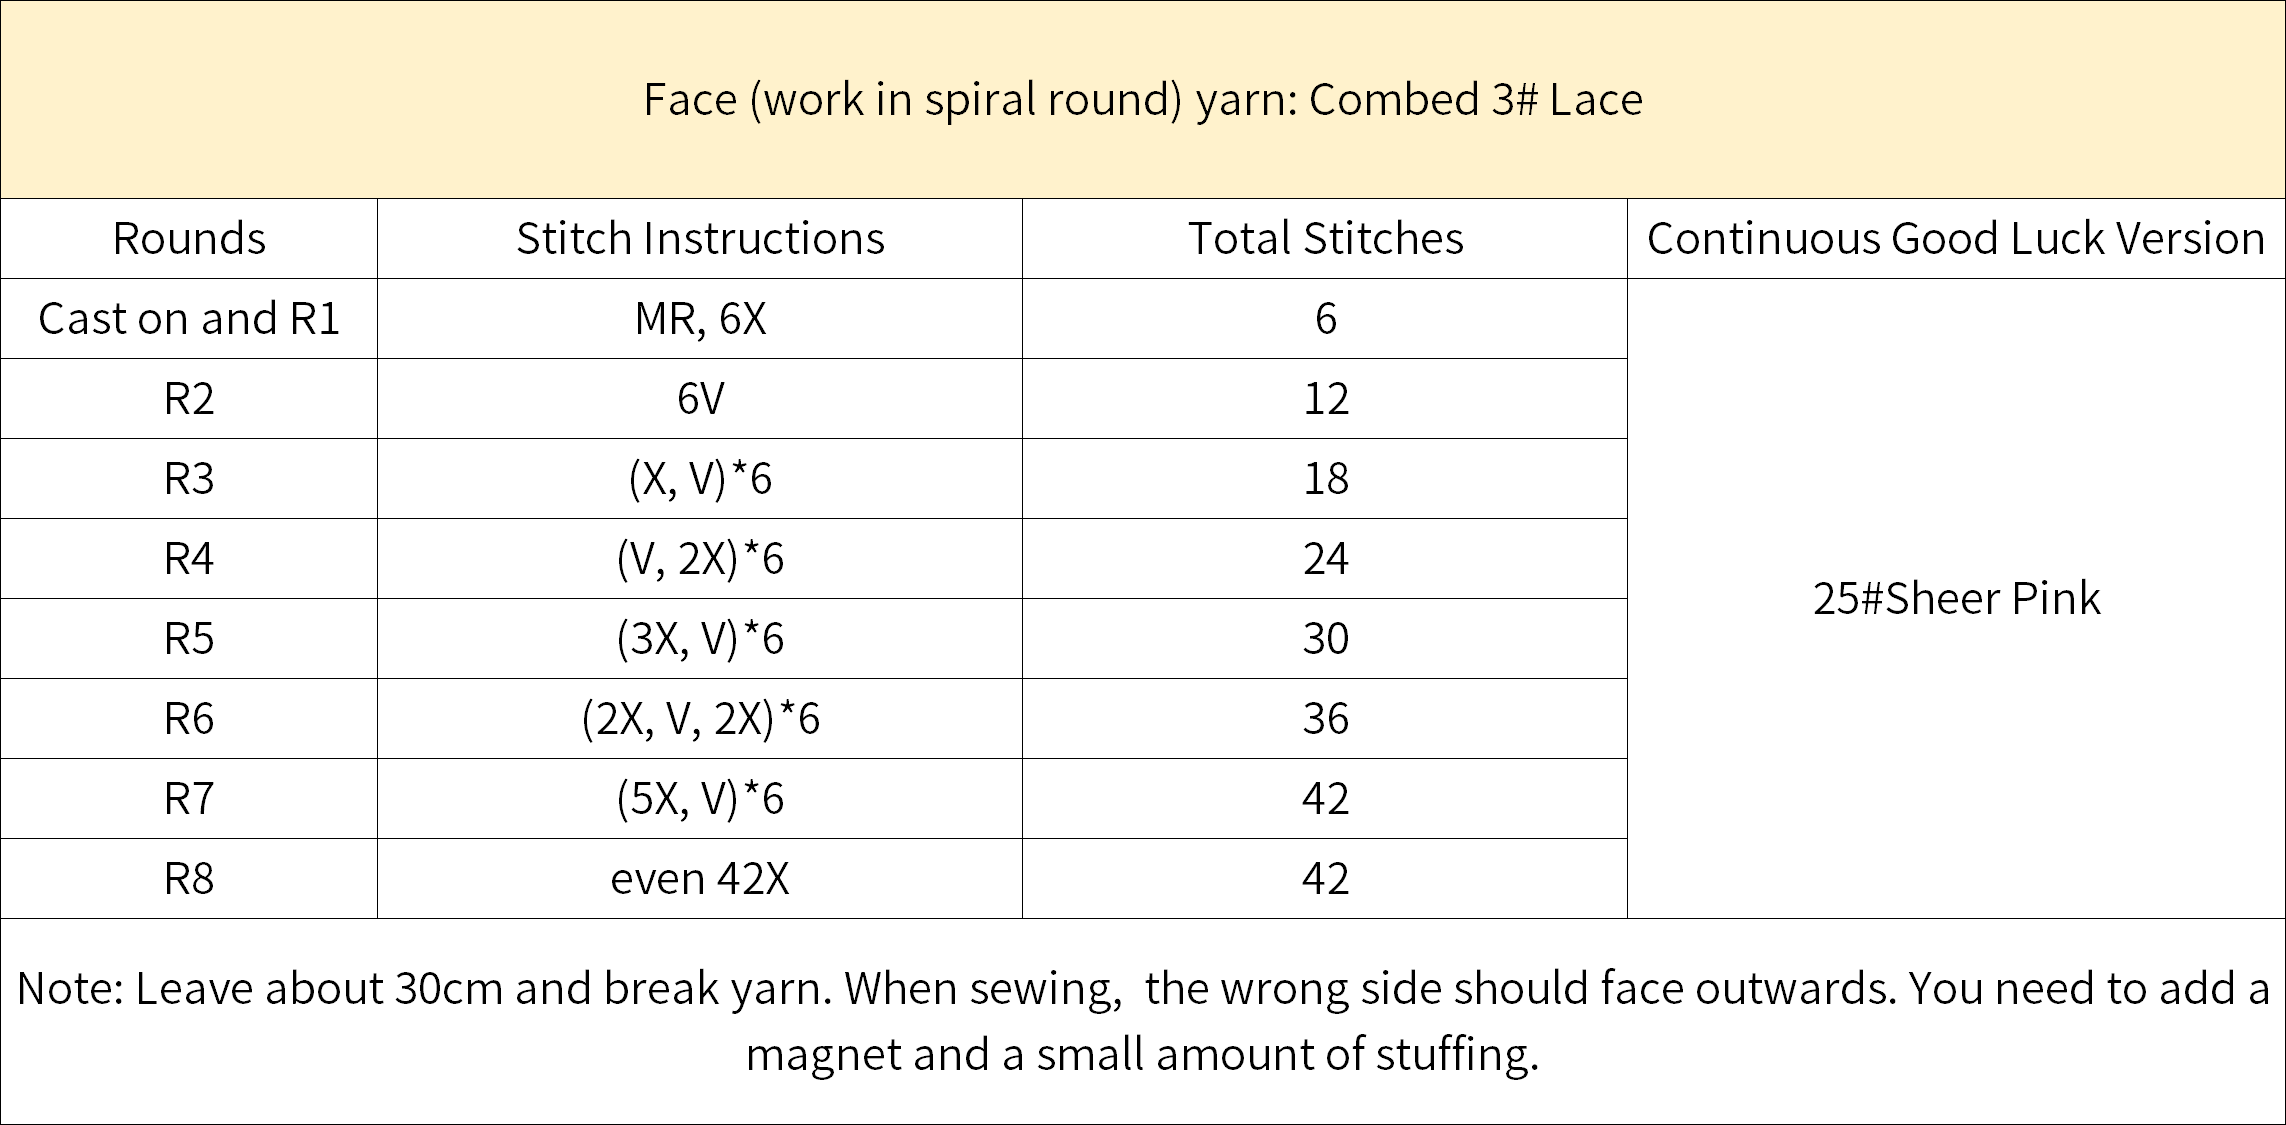
Step 3 FaceB3 70' 36''
The face is worked using the magic ring method, crocheting in spirals counterclockwise along the magic ring. After completing the face, make the expressions and bangs (the two versions have different bangs designs), and finally attach it to the corresponding position on the fish body. Please refer to the video demonstration for more details.
Step 4 Fish MouthB4 83' 09''
The fish mouth is worked using the chain ring method, crocheting in rounds counterclockwise from the starting point. After completion, sew it onto the corresponding position on the fish body. Please refer to the video demonstration for more details.

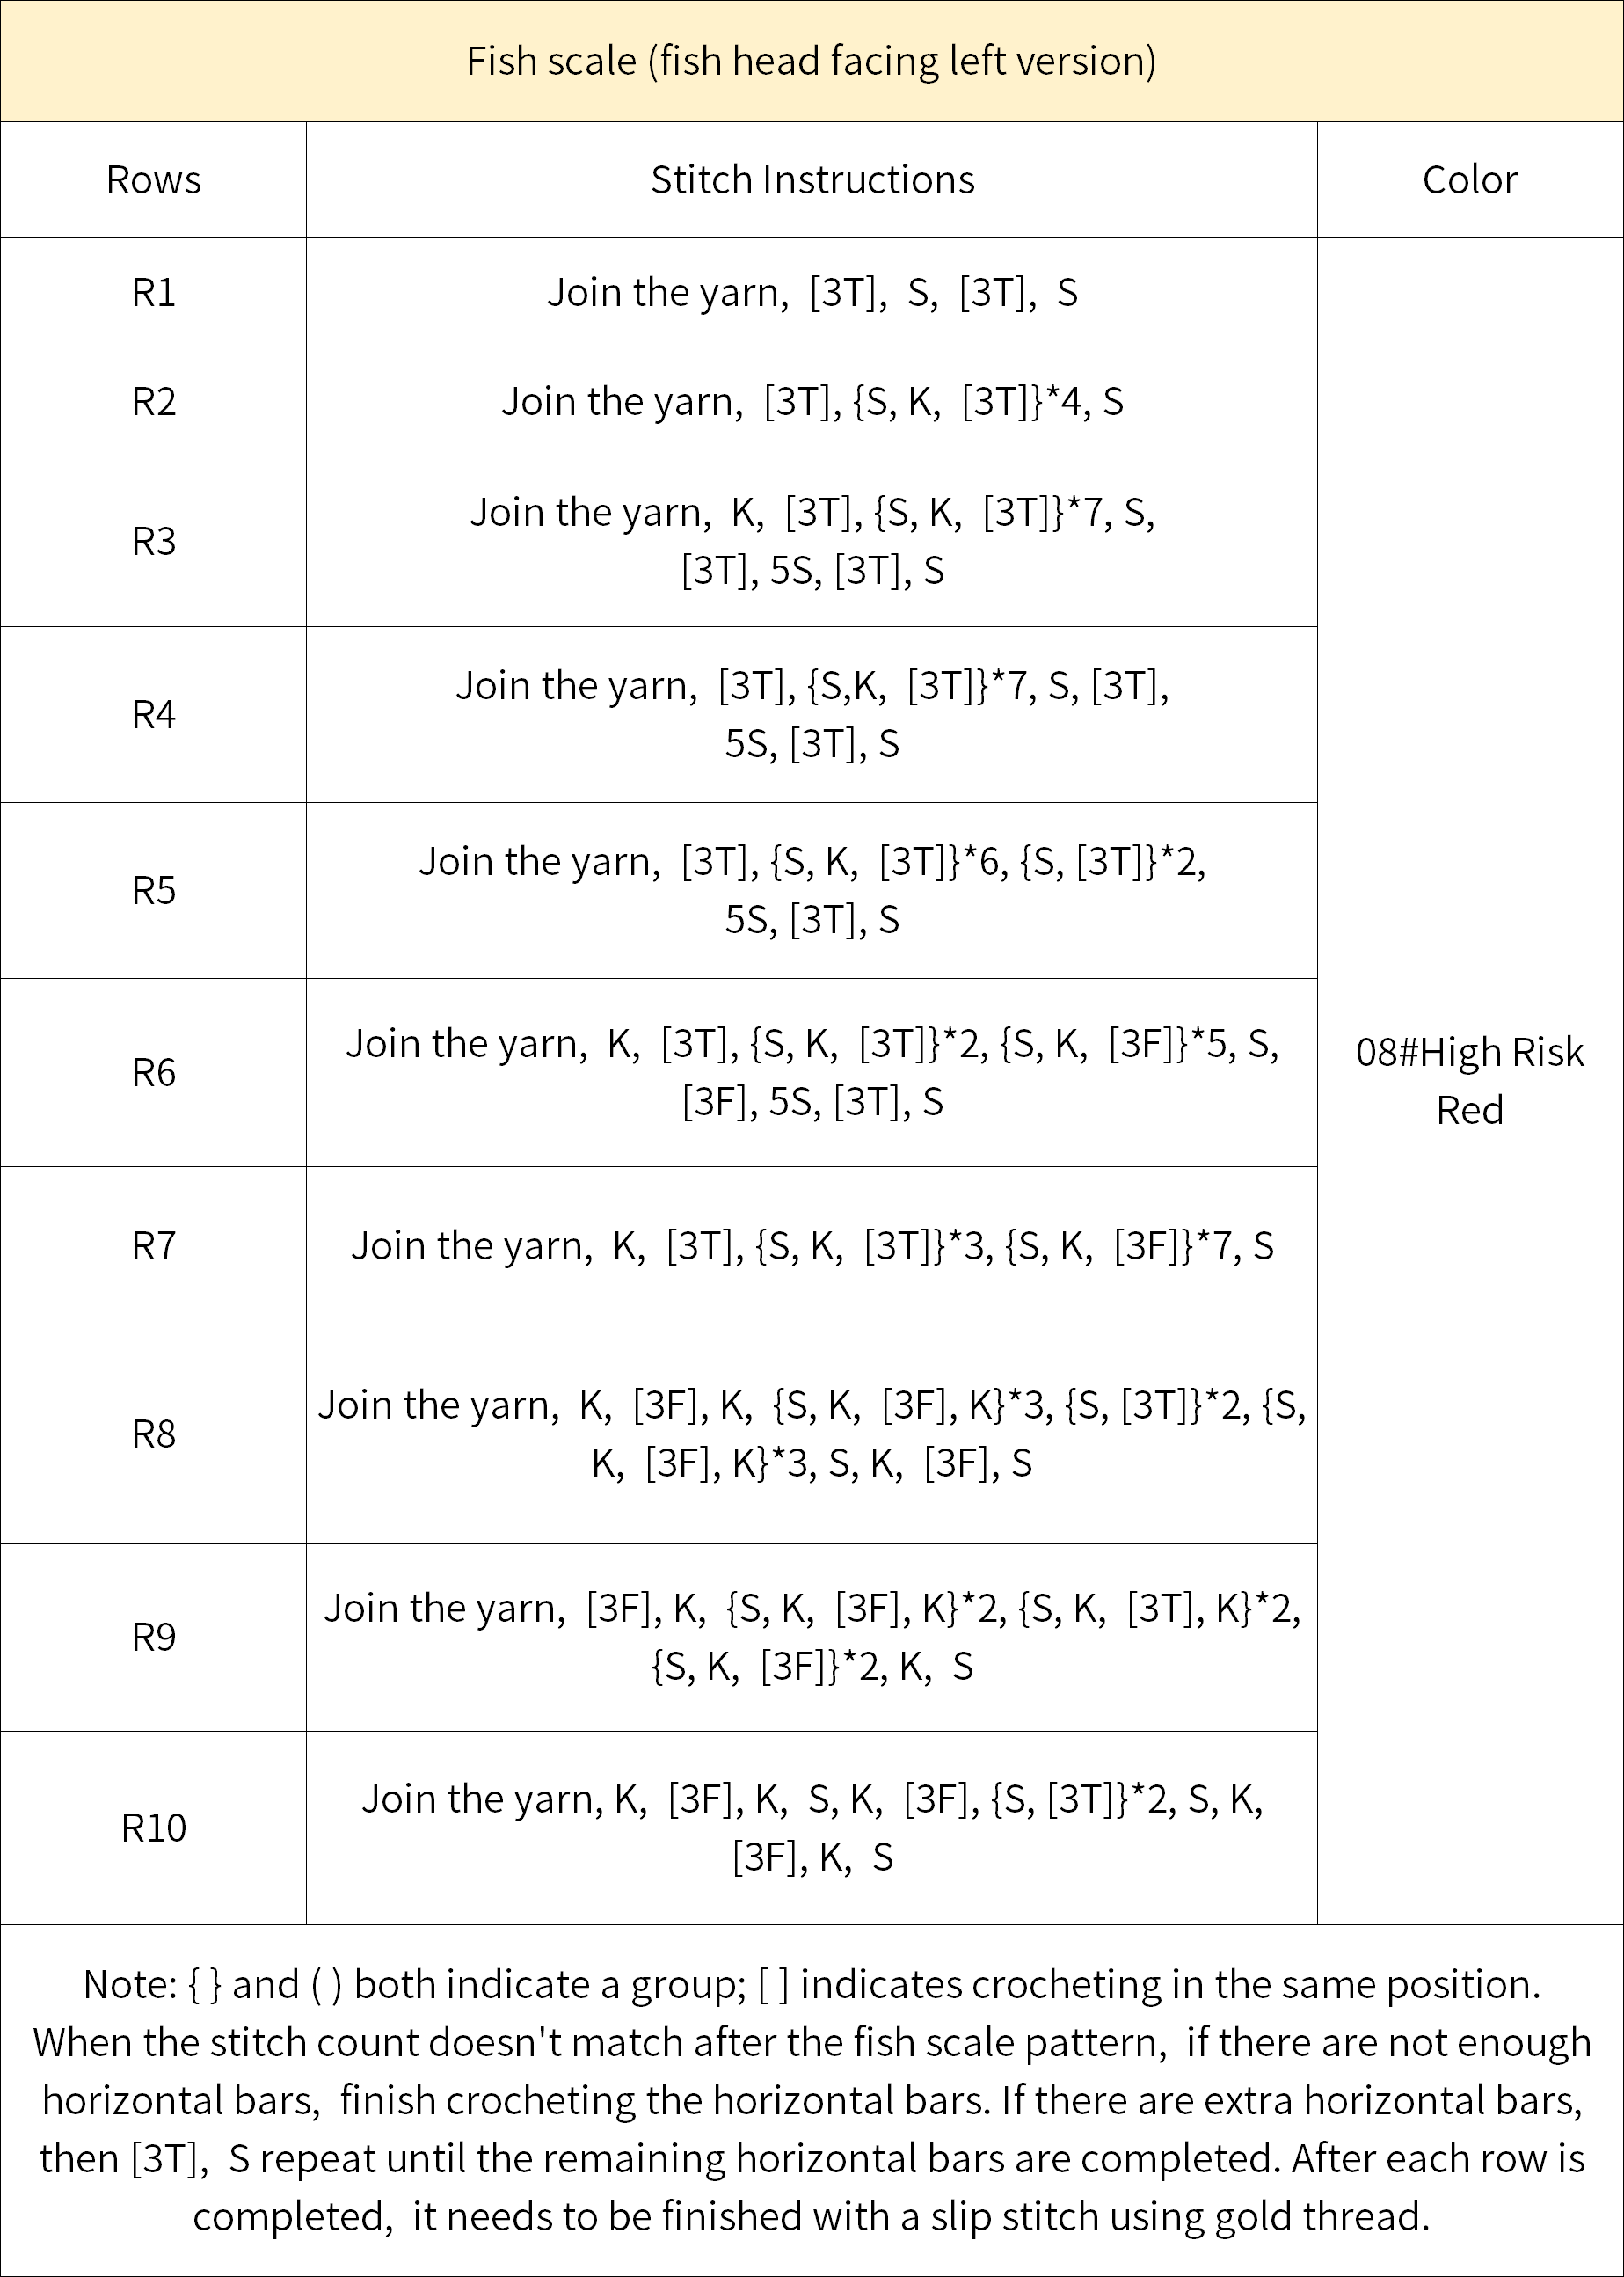
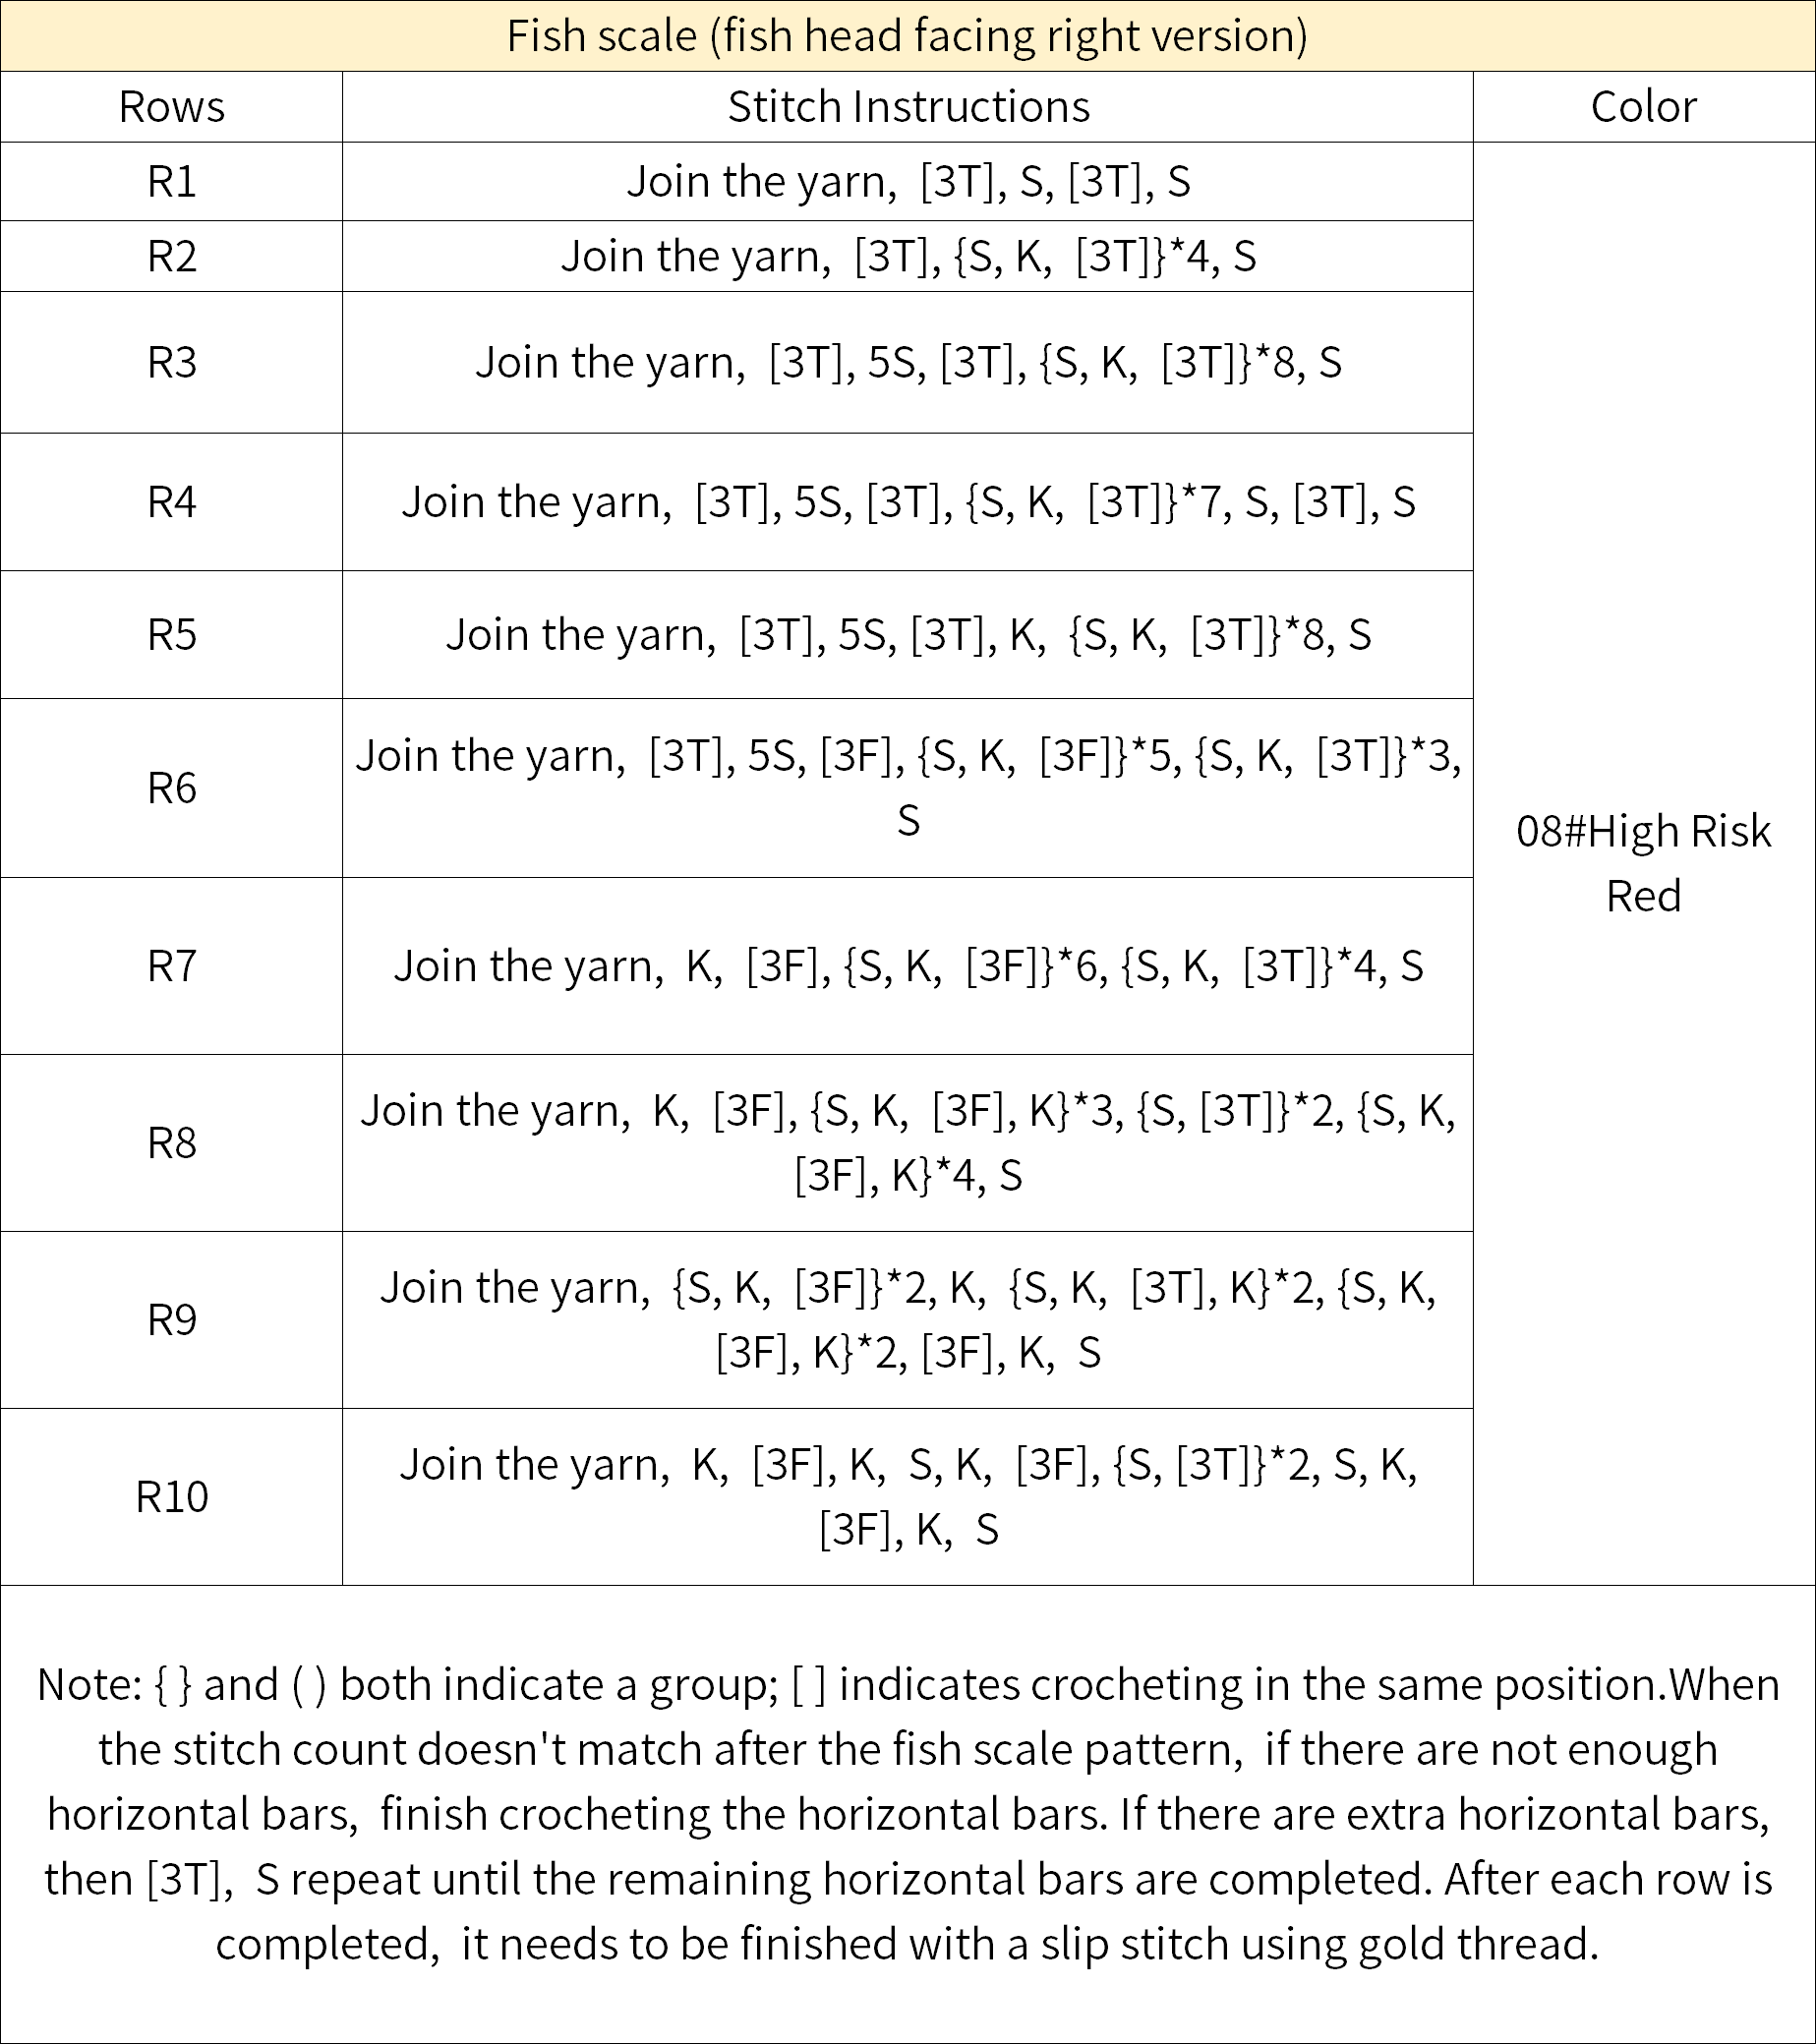
Step 5 Fish ScalesB5 89' 40''
Join the yarn at the half loop left on the fish body and crochet the fish scales. Please refer to the video demonstration for more details.
Step 6 Hang RingB6 107' 21''
Hang ring (08#High Risk Red): Make a foundation chain of 18 stitches, leave a tail of about 20cm, then break the yarn. Please refer to the video demonstration for more details.
Step 7 AssembleB7 109' 19''
First, sew together the top and bottom parts with the same color yarn as the garment, then attach the hanging ring. Please refer to the video demonstration for more details.
Made by the community


