Home / Pillow
Kitty Sofa Cushion Cover
Project preview
See the finished project
Pattern format
Instructions
Watch and follow
Video tutorial
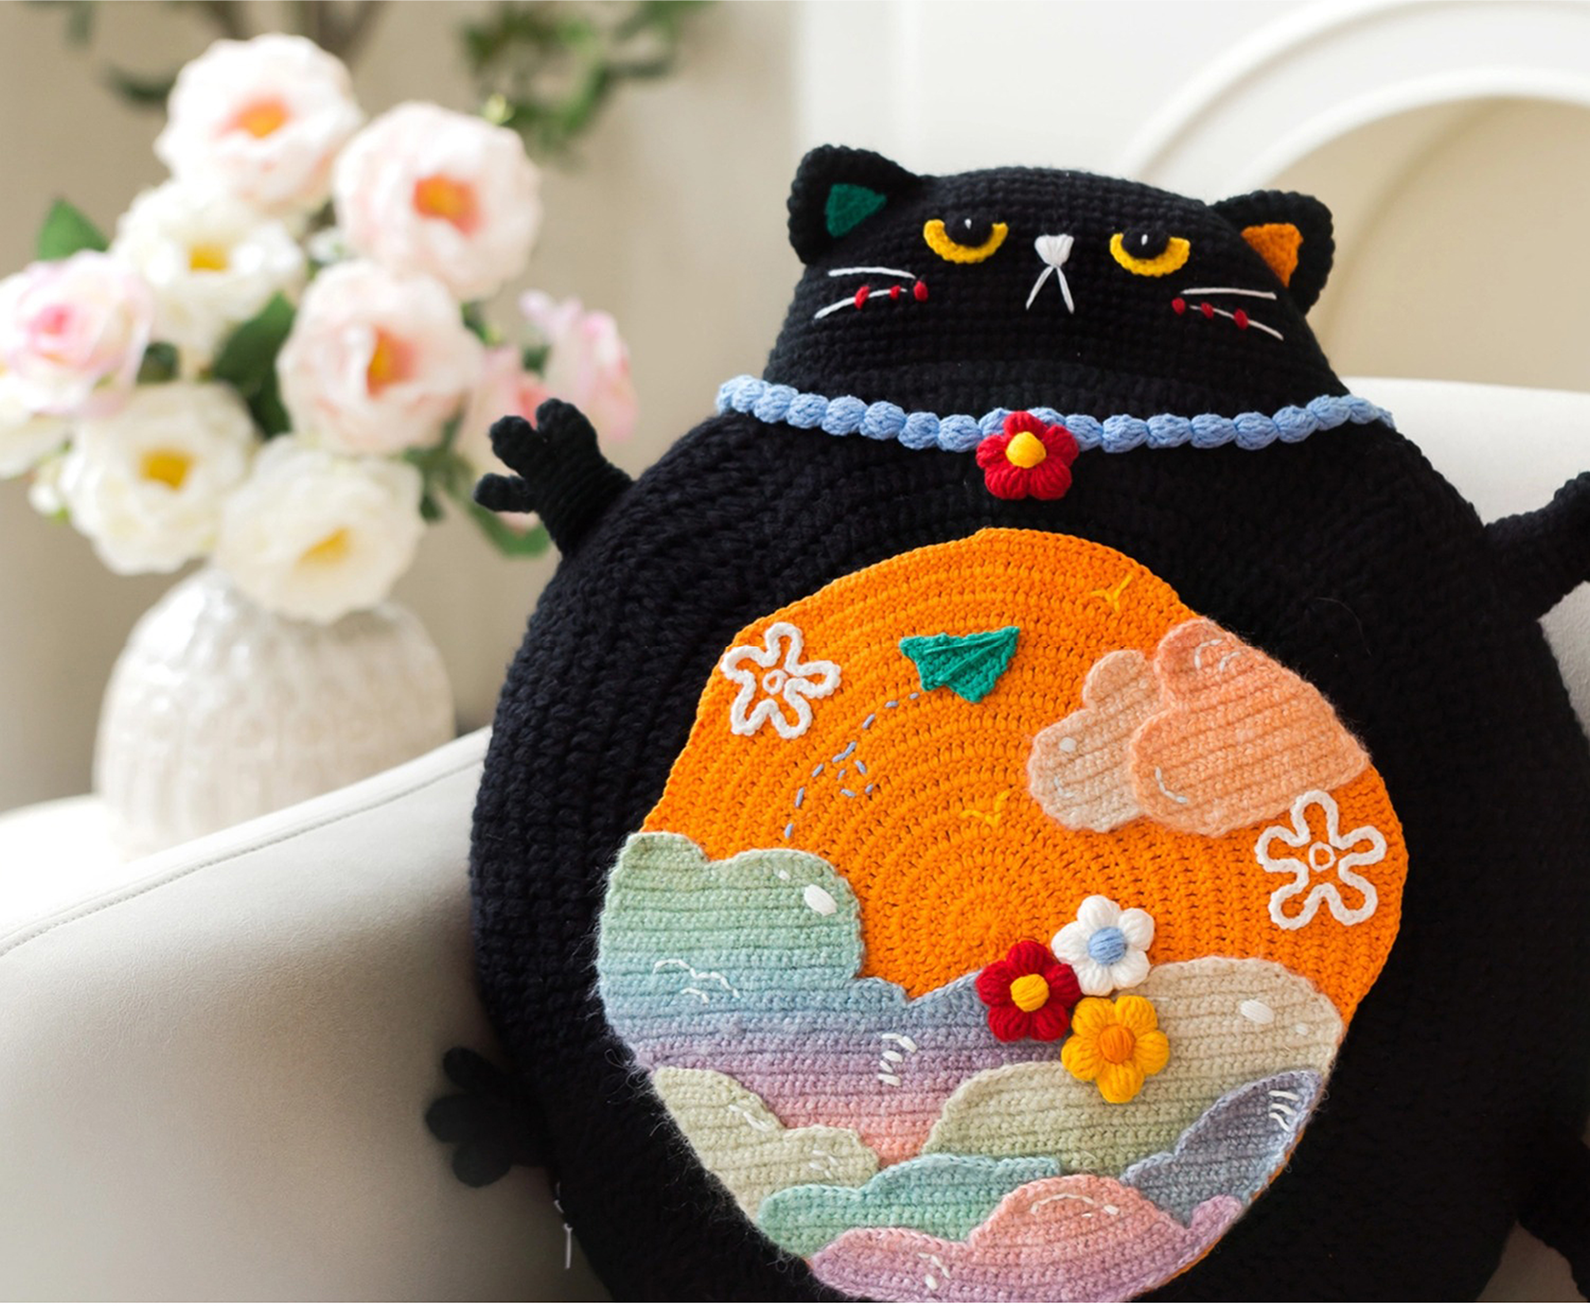
This cushion cover consists of the main body, the belly, and decorations. The main body includes fabric, head, ears, limbs, tail, and assembly. The belly piece has a base fabric and fabric 1 through 8. Everything else is for decoration.
Materials:4-Ply Combed Cotton & Acrylic Fibre Hand Knitting Yarn and Susan's Family Dawn Impression(2.5mm crochet hook),Susan's Family Handcrafted No.2 Knit Thread(3.5mm crochet hook)
Hook:2.5mm crochet hook, 3.5mm crochet hook
Note:
1.This pattern is making in Chinese crochet pattern terms, and the stitch name is written using American terminology. All measurements in charts are in cm.
2.When crocheting in rounds without further guidance, working in closed rounds, start each round with a set number of beginning chains and close with a slip stitch. The beginning chain preceding a single crochet and the slip stitch used for joining rounds are not included in the total stitches.
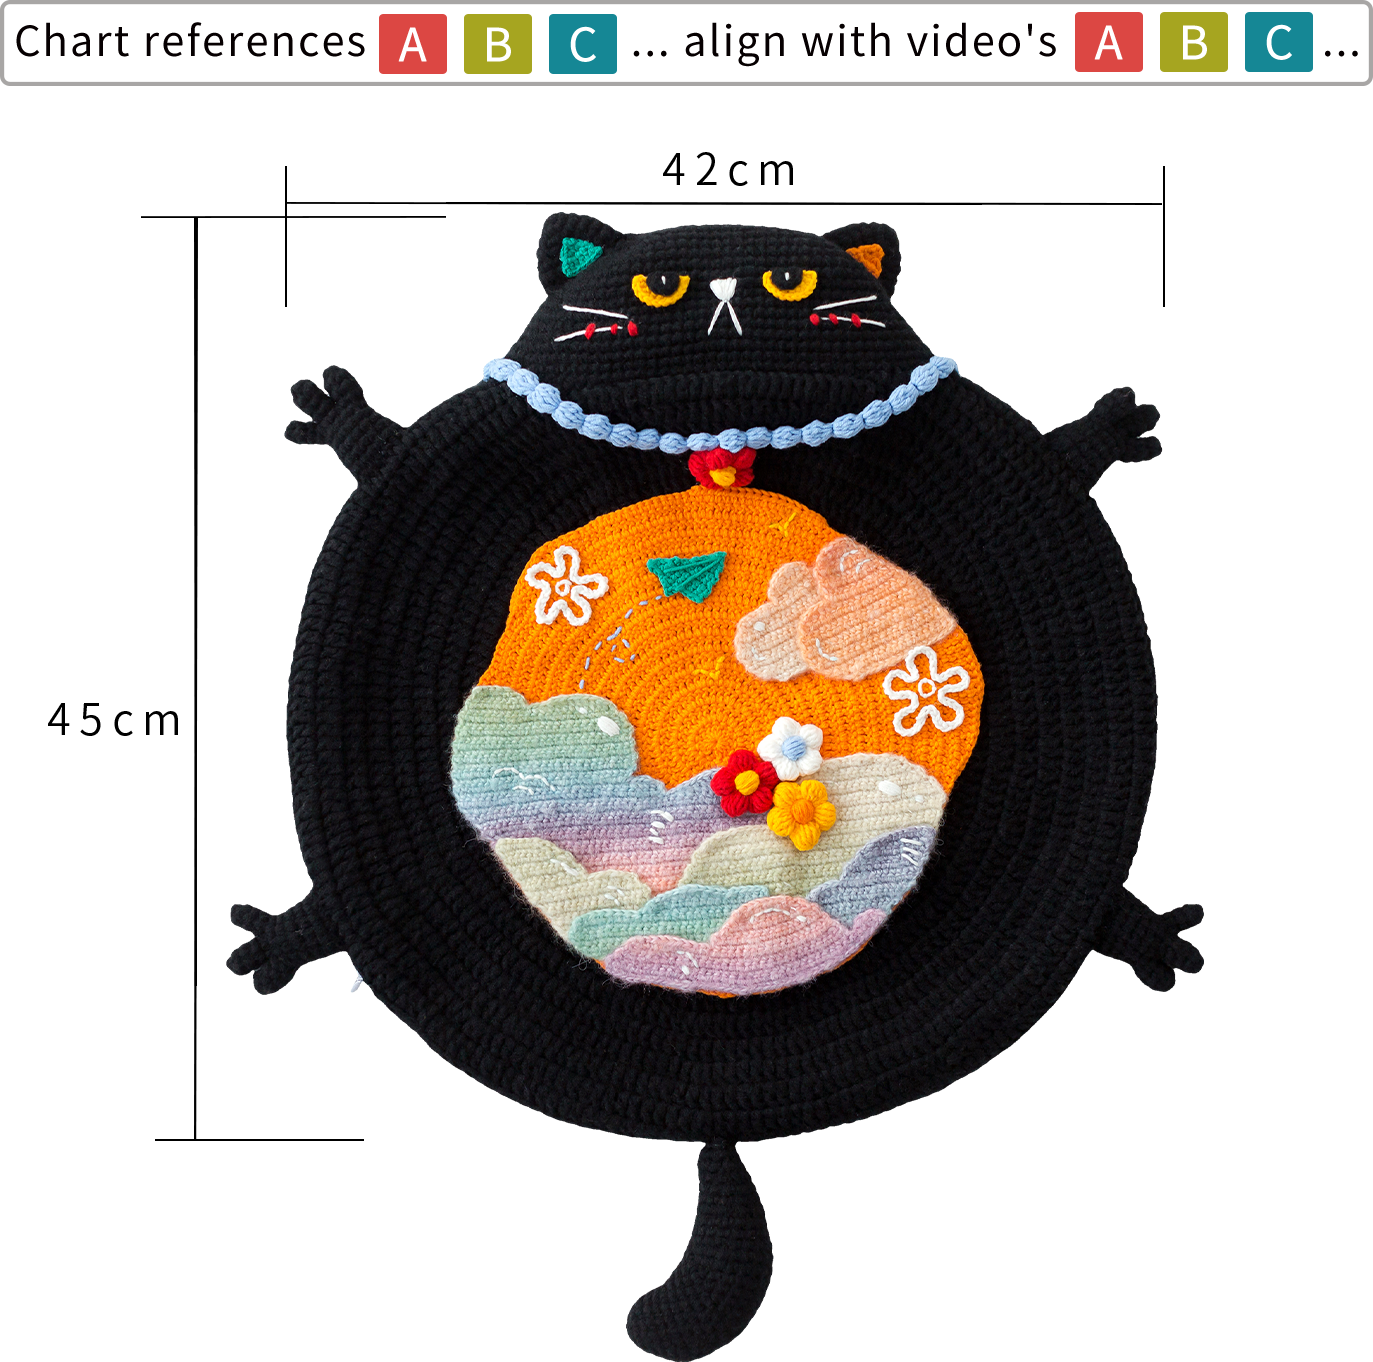
The handcrafted measurements may have an error of 1 to 2cm. Due to variations in individual tension, the size of the sample is for reference only.
ABBREVIATIONS
MRadjustable magic ring
CHchain
SLslip stitch
Xsingle crochet
Thalf double crochet
Fdouble crochet
Etreble crochet
A = sc2togsingle crochet 2 stitches together
V = sc2-in-12 single crochets into the same stitch
W = sc3-in-13 single crochets into the same stitch
FV = dc2-in-12 double crochets into the same stitch
EV = tr2-in-12 treble crochets into the same stitch
[(5F)Q] = dc5-bobble5 double crochets into the same stitch and crocheted together
[(FW + FW)Q] = dc6-cluster6 double crochets into the same stitch and crocheted together
Kskip
turnturn the piece
M = sc3togsingle crochet 3 stitches together
[...]in the same stitch
(...)×6crochet item in the parentheses six times
DTRdouble treble crochet
dtr2-in-12 double treble crochets into the same stitch
[(5T)Q] = hdc5-bobble5 half double crochets into the same stitch and crocheted together
Part 1 Main bodyA
Step 1 Fabric piecsA1 00' 45''
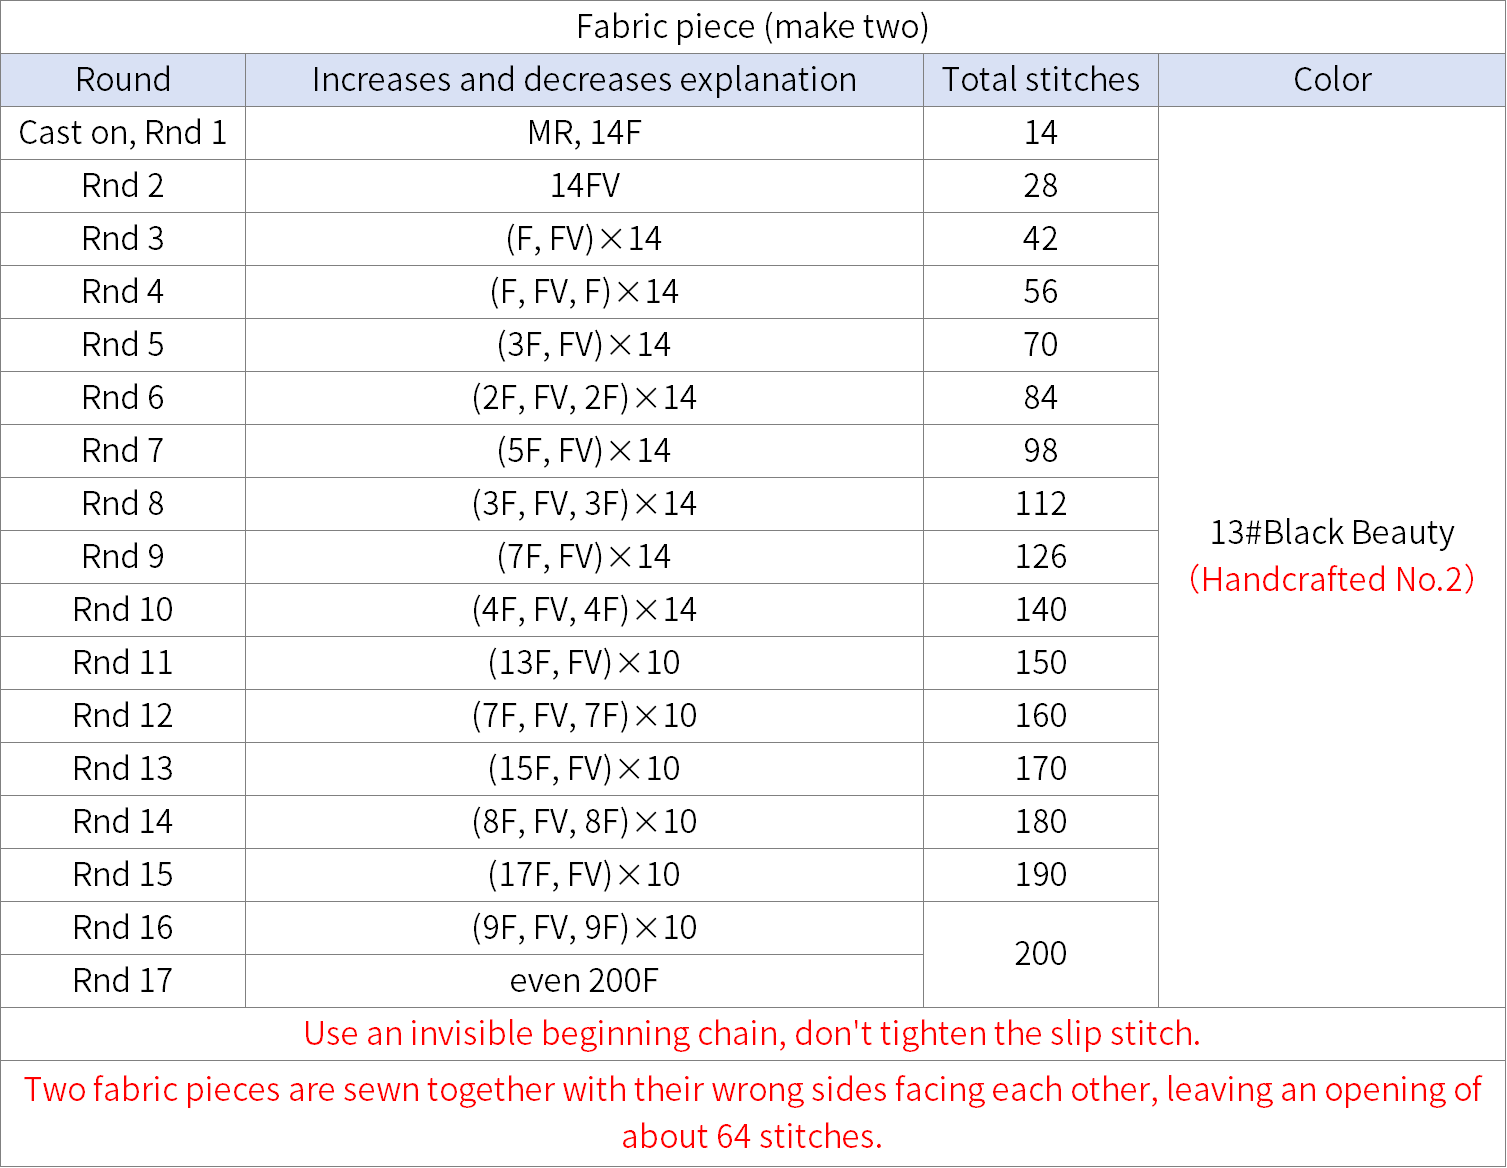
The fabric begin by using the adjustable magic ring. Crochet in rounds counter-clockwise. You'll need to crochet two pieces. For one of them, leave a yarn tail twice the length of the circumference for sewing the pieces together. Remember to attach the zipper at the designated opening. Please refer to the video demonstration for more details.
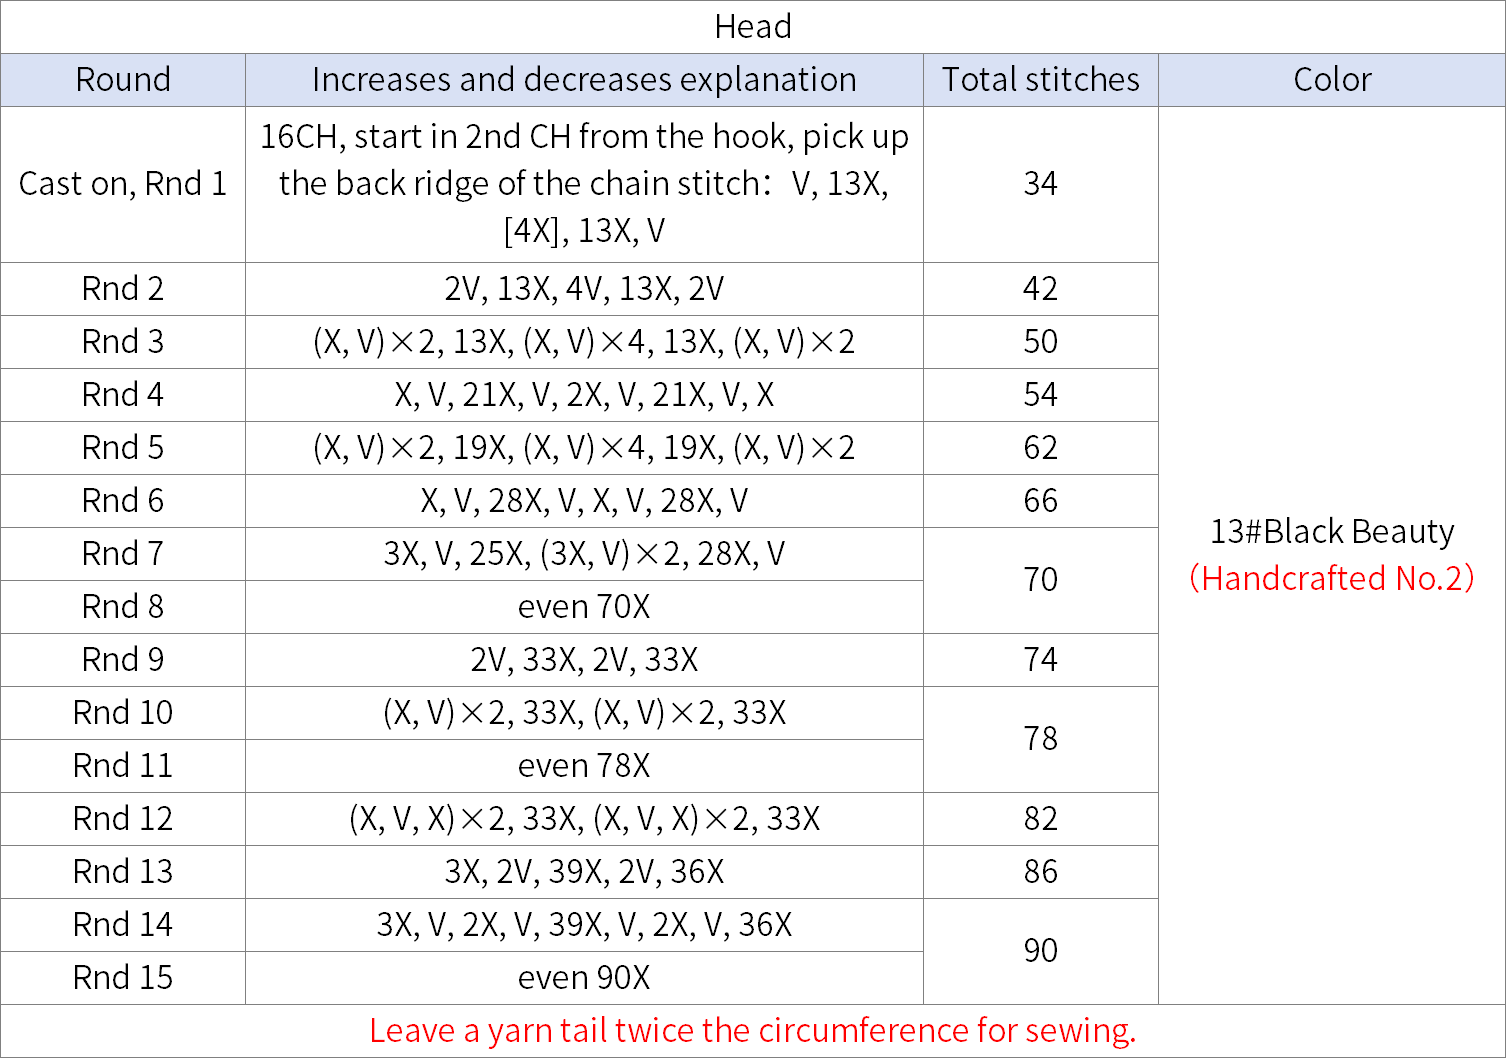
Step 2 HeadA2 08' 18''
The head is started with a beginning chain and crochet in rounds counterclockwise, then join it to the main body. Please refer to the video demonstration for more details.
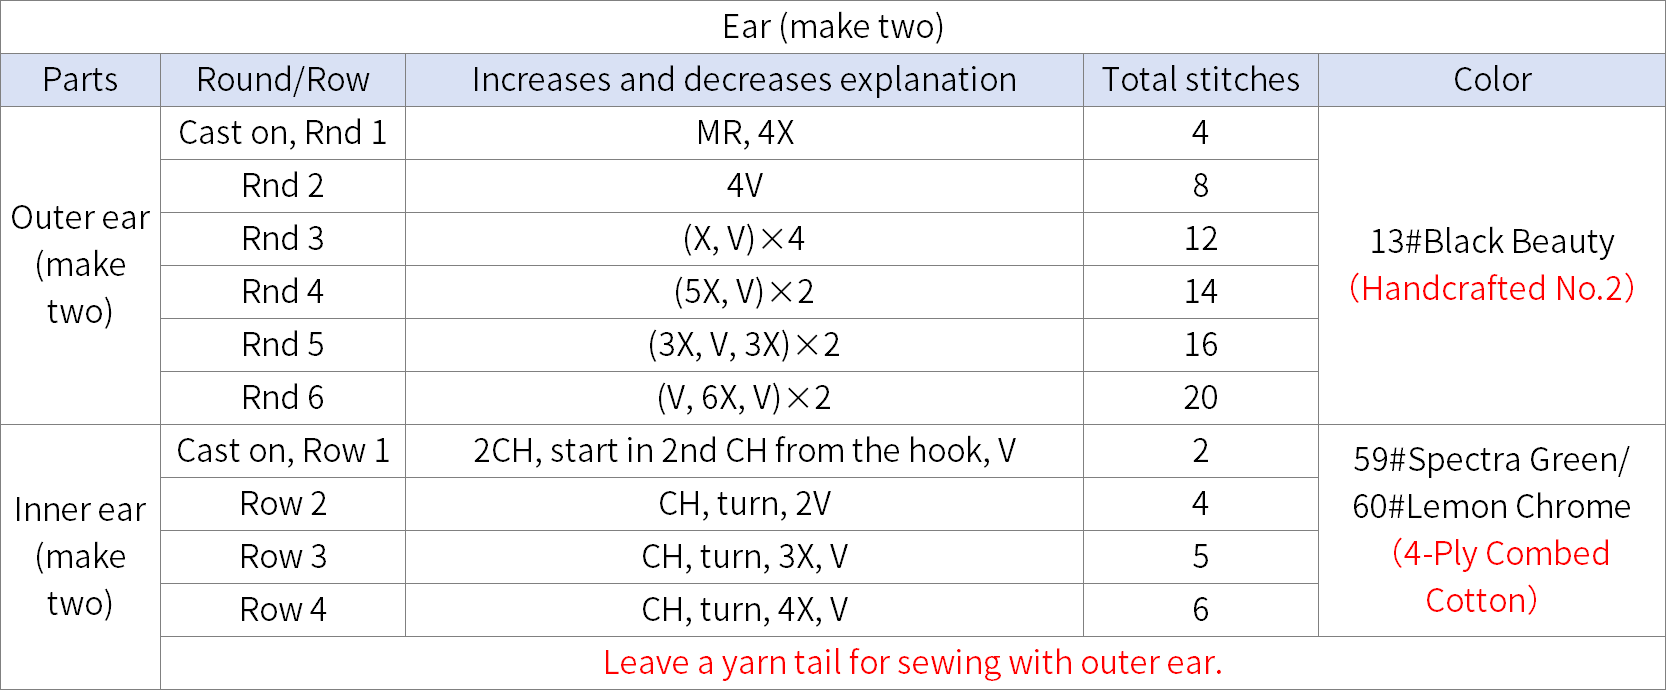
Step 3 EarsA3 12' 40''
There are two ears in total. Each ear consists of an outer and inner part. Start the outer ear with a magic ring and crochet in rounds counterclockwise. For the inner ear, begin with chain stitch. Work back and forth in rows. Please refer to the video demonstration for more details.
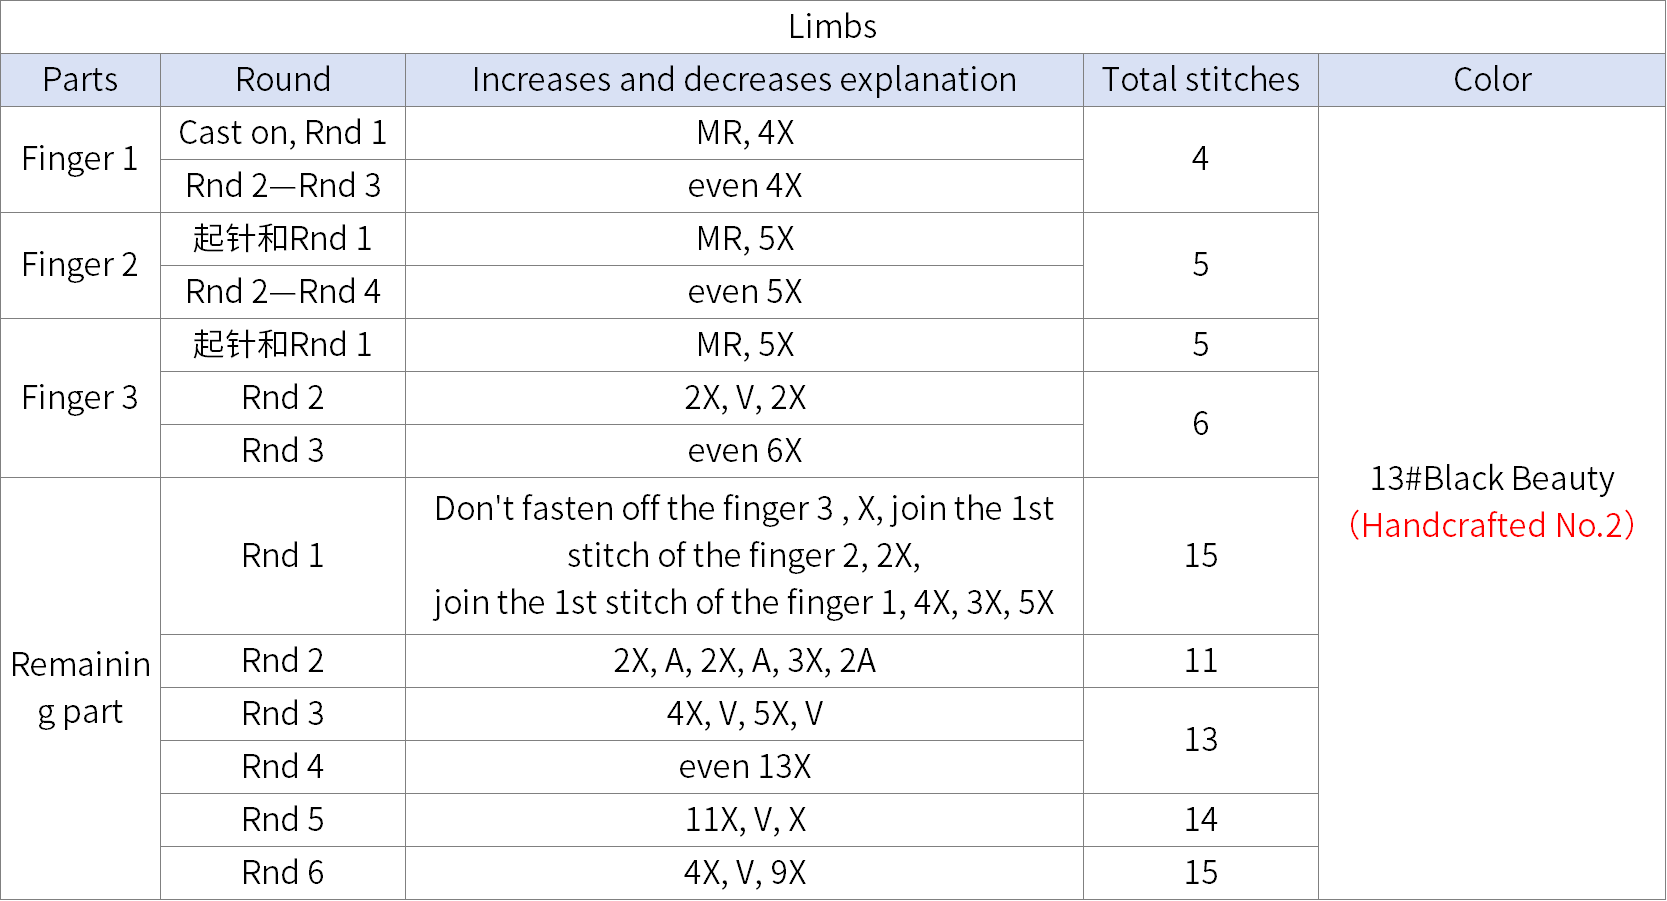
Step 4 LimbsA4 15' 36''
The limbs consist of 3 fingers and the rest. Crochet 3 fingers one by one, then join them together and crochet the remaining part. Please refer to the video demonstration for more details.
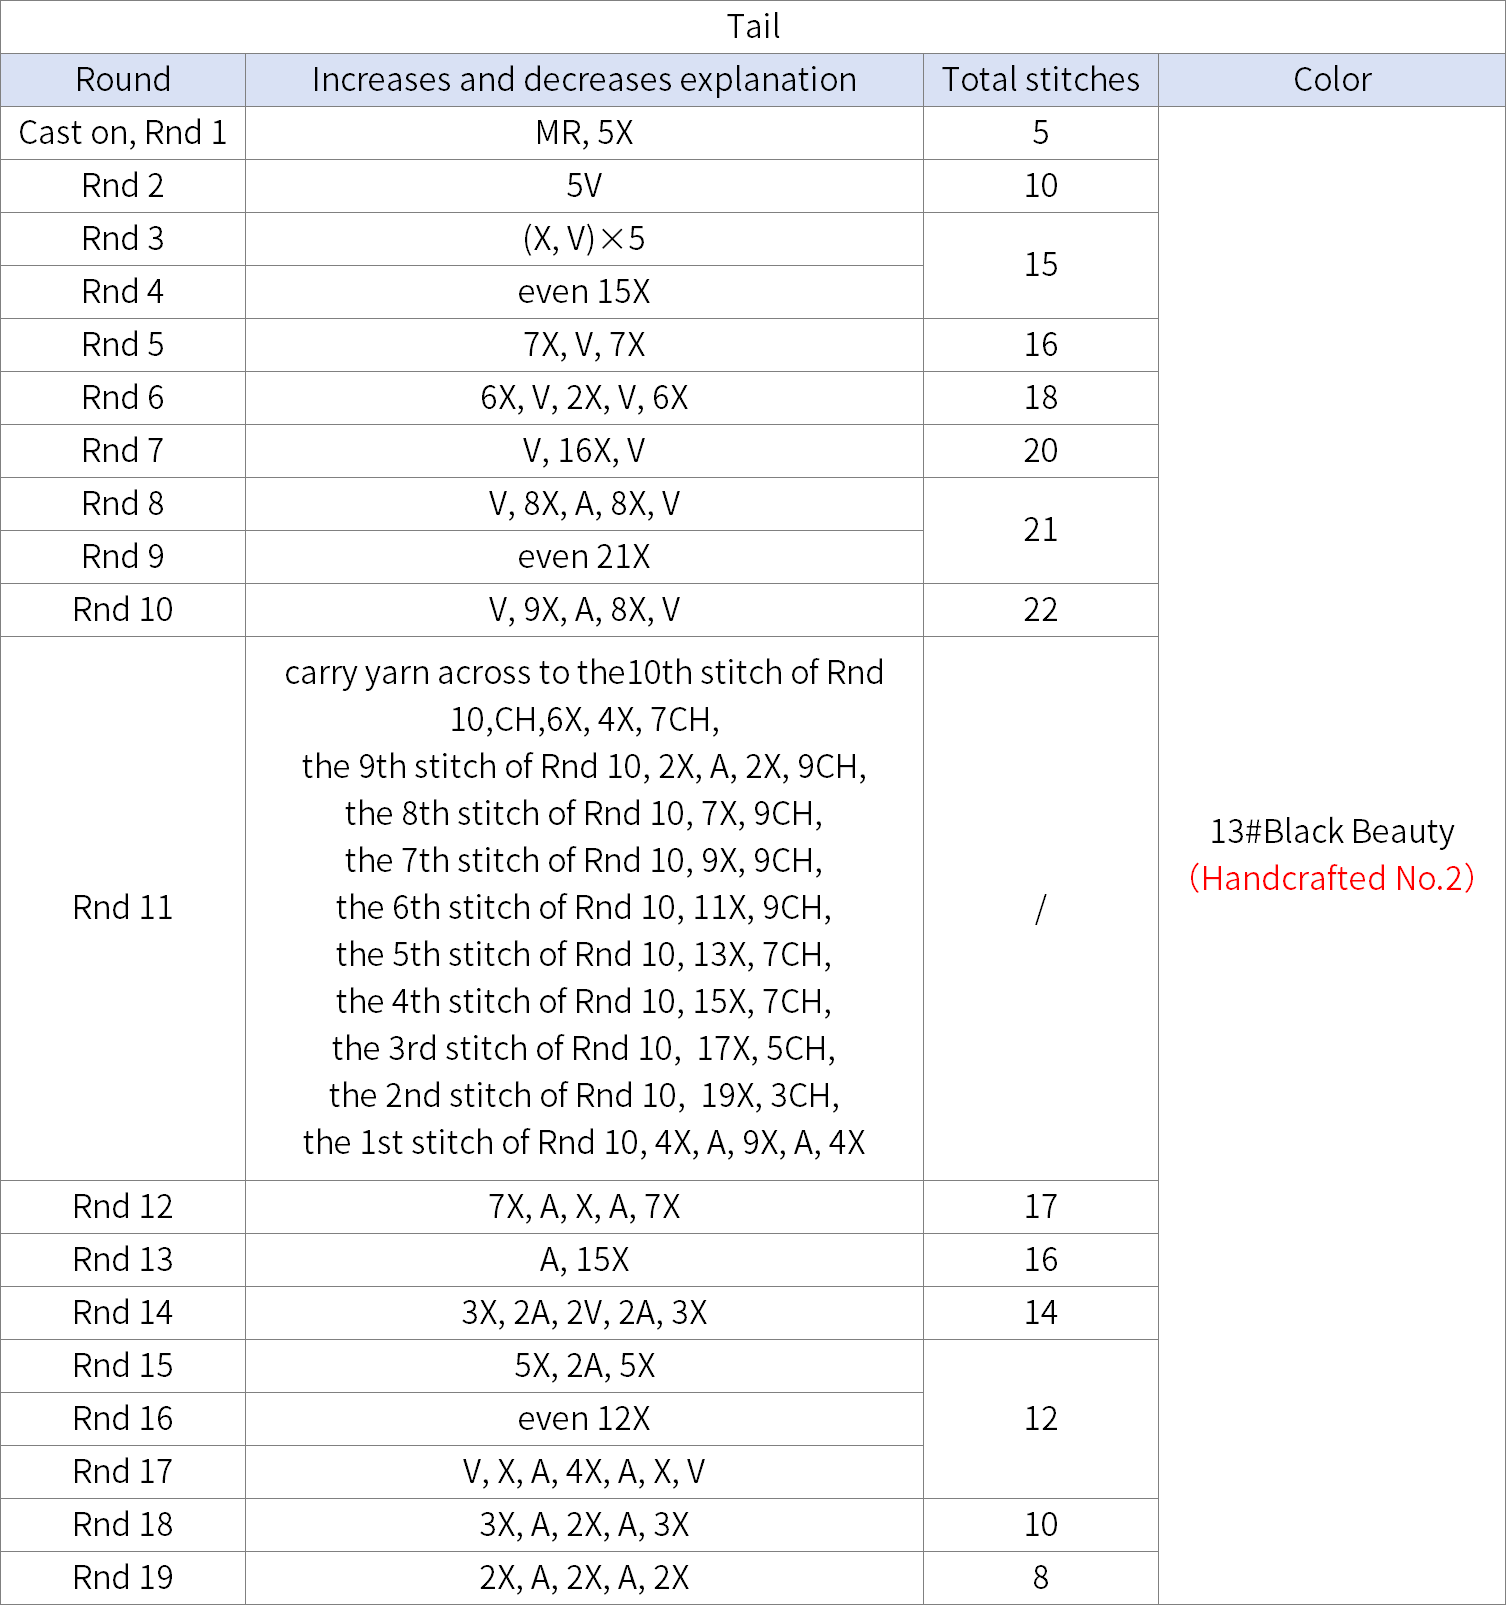
Step 5 TailA5 22' 08''
The tail is started with a beginning chain and crochet in rounds counterclockwise, After completing the crochet, attach it to the right side of the piece, in the middle of the opening.Please refer to the video demonstration for more details.
Part 2 BellyB 47' 59''
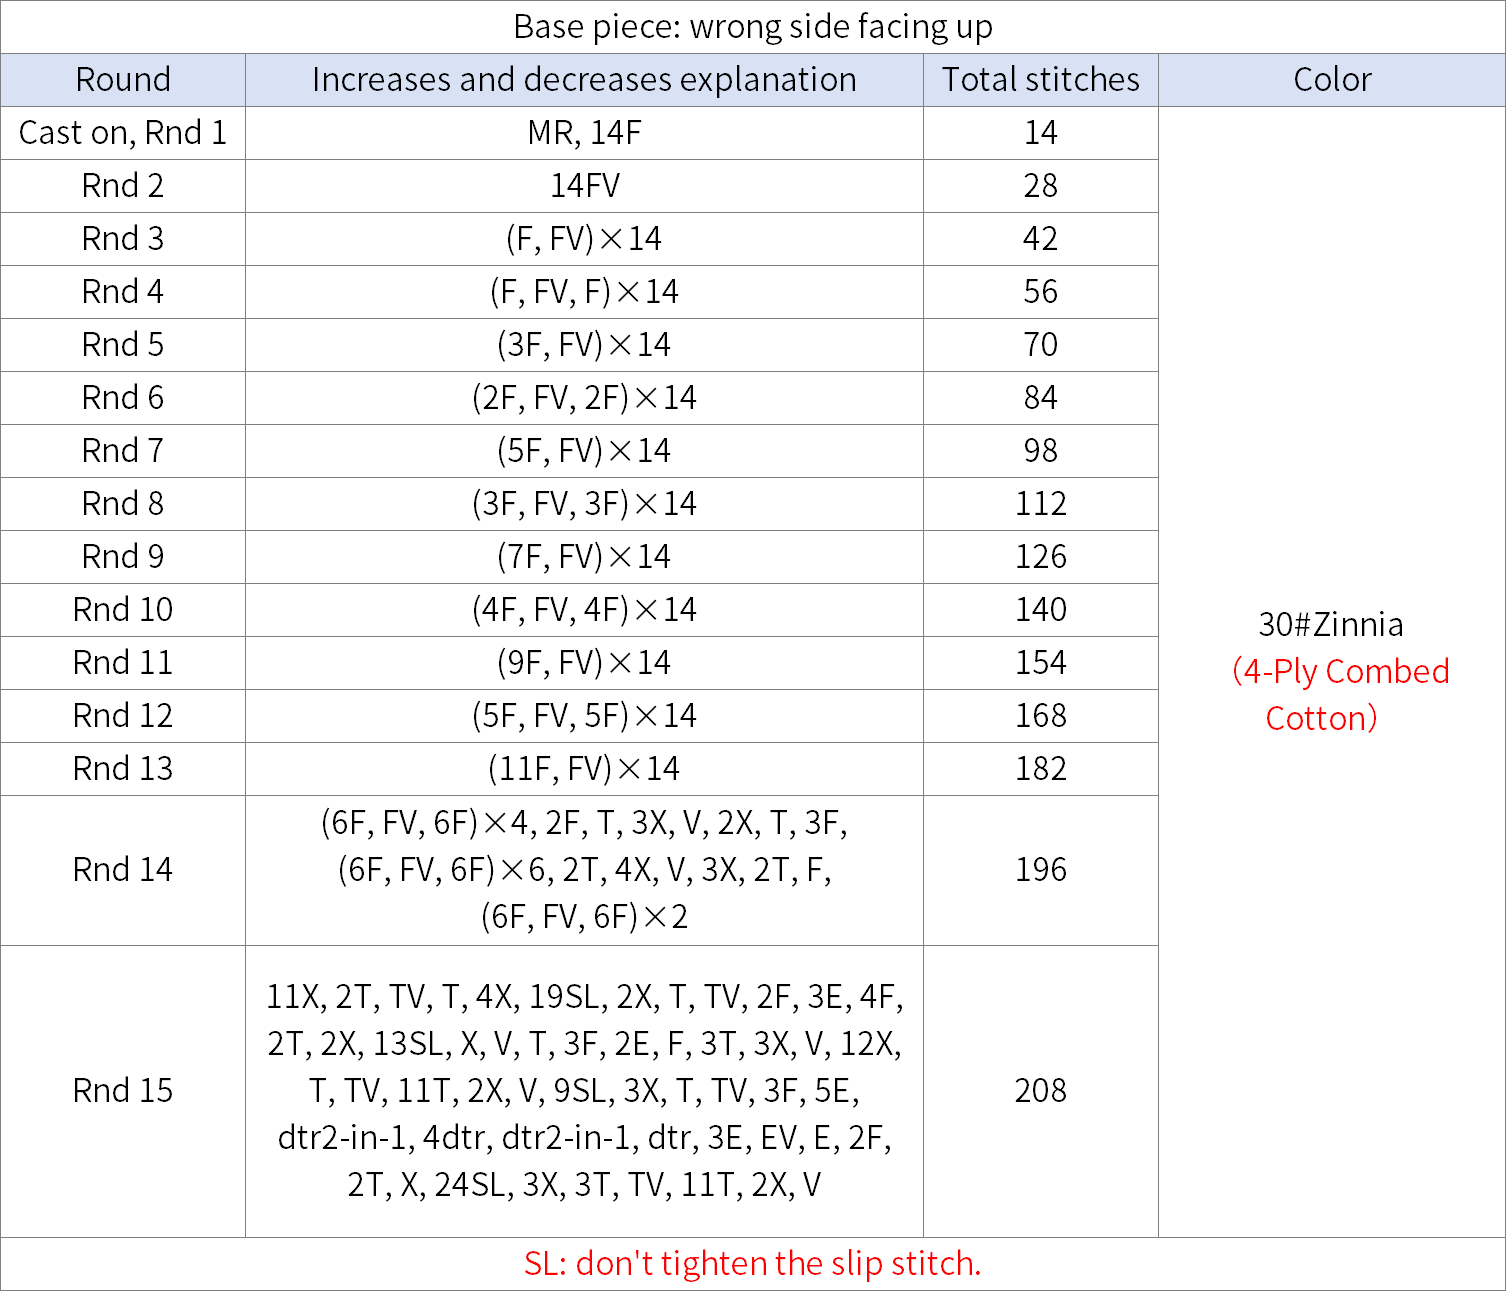
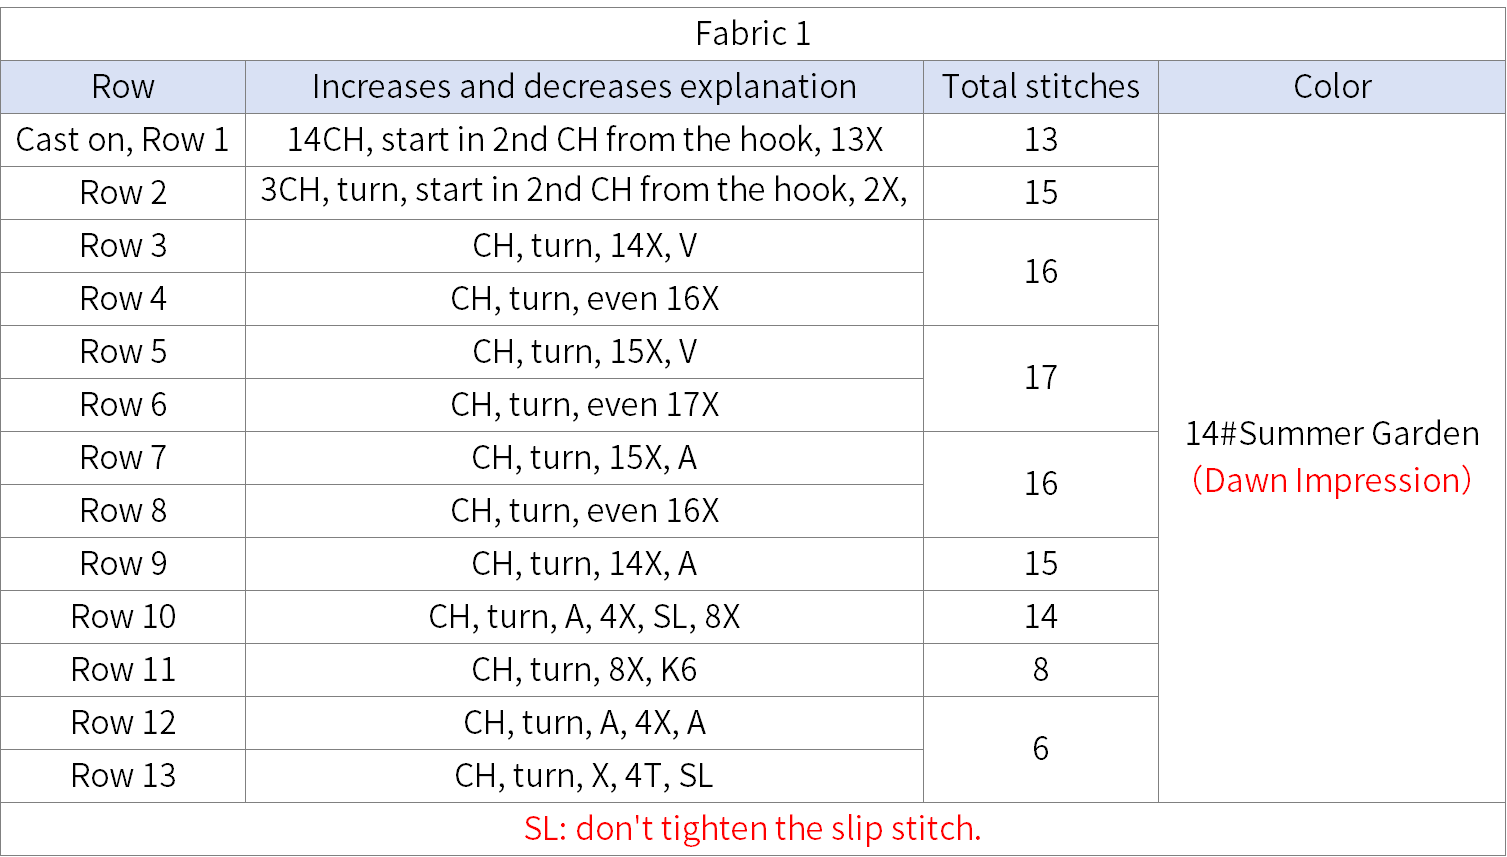
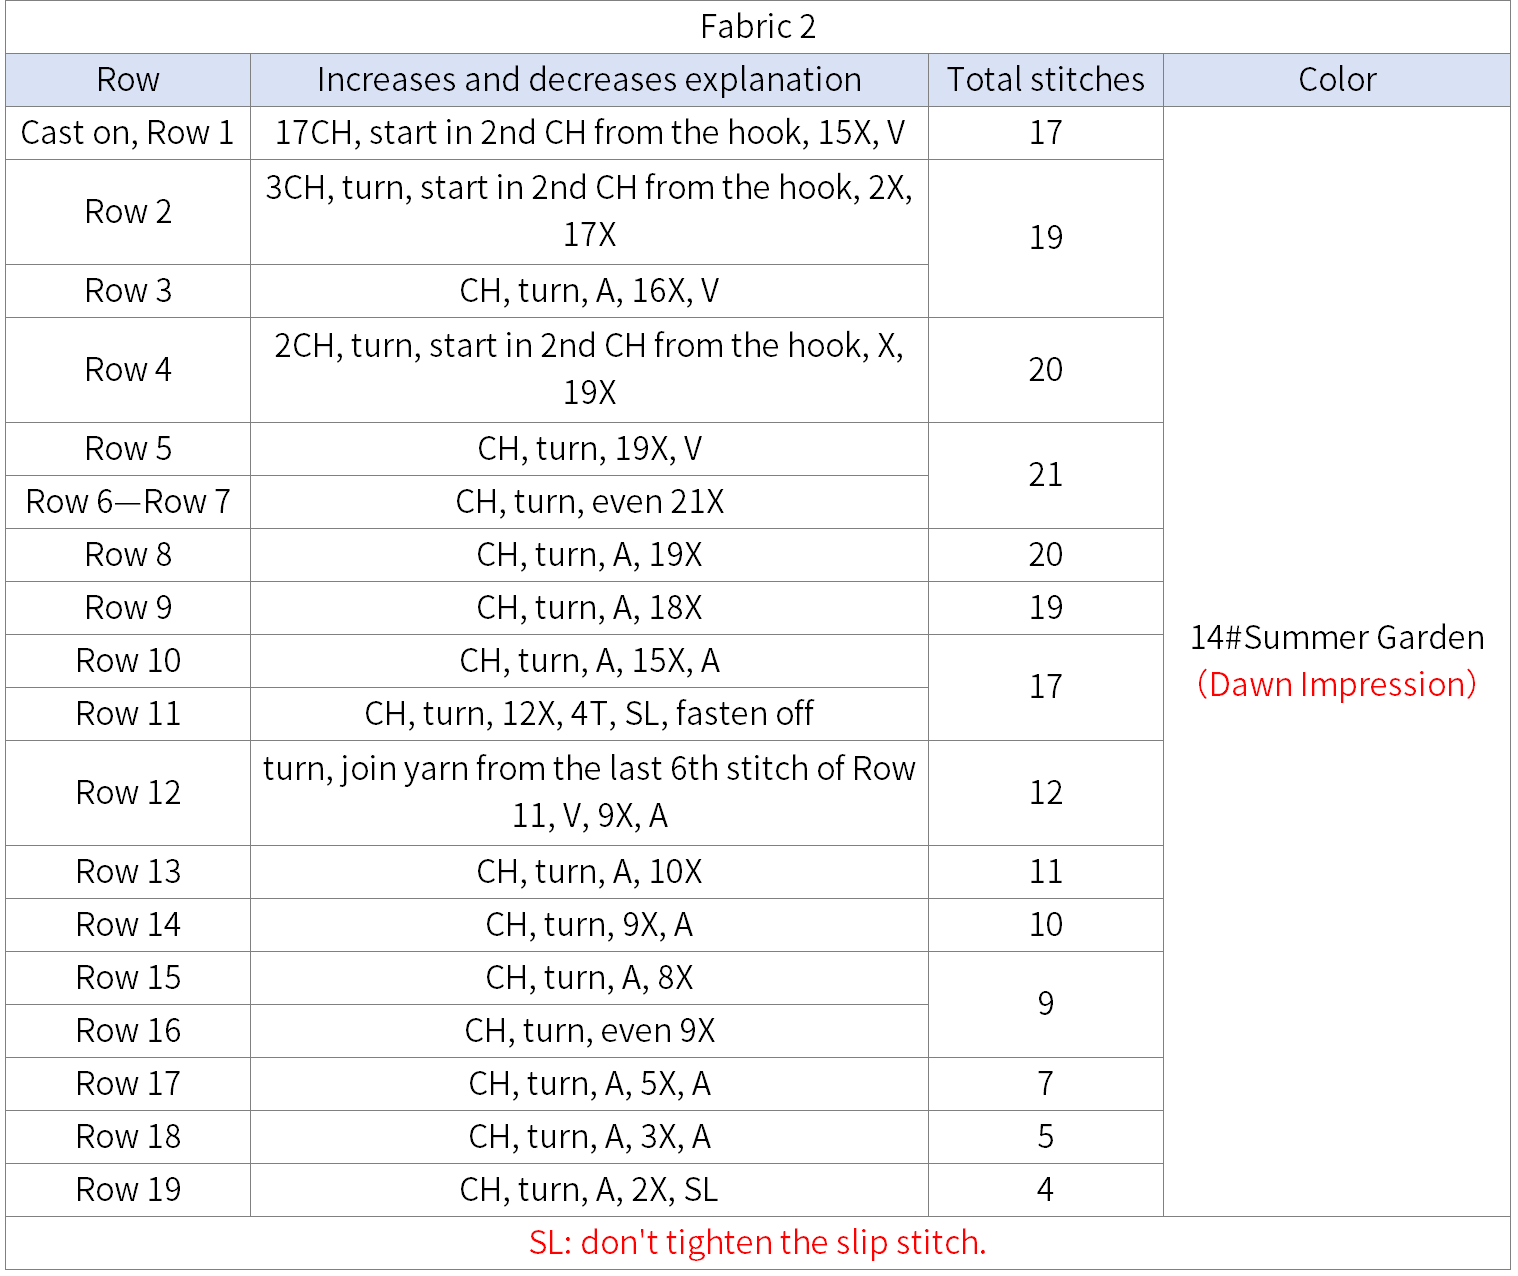
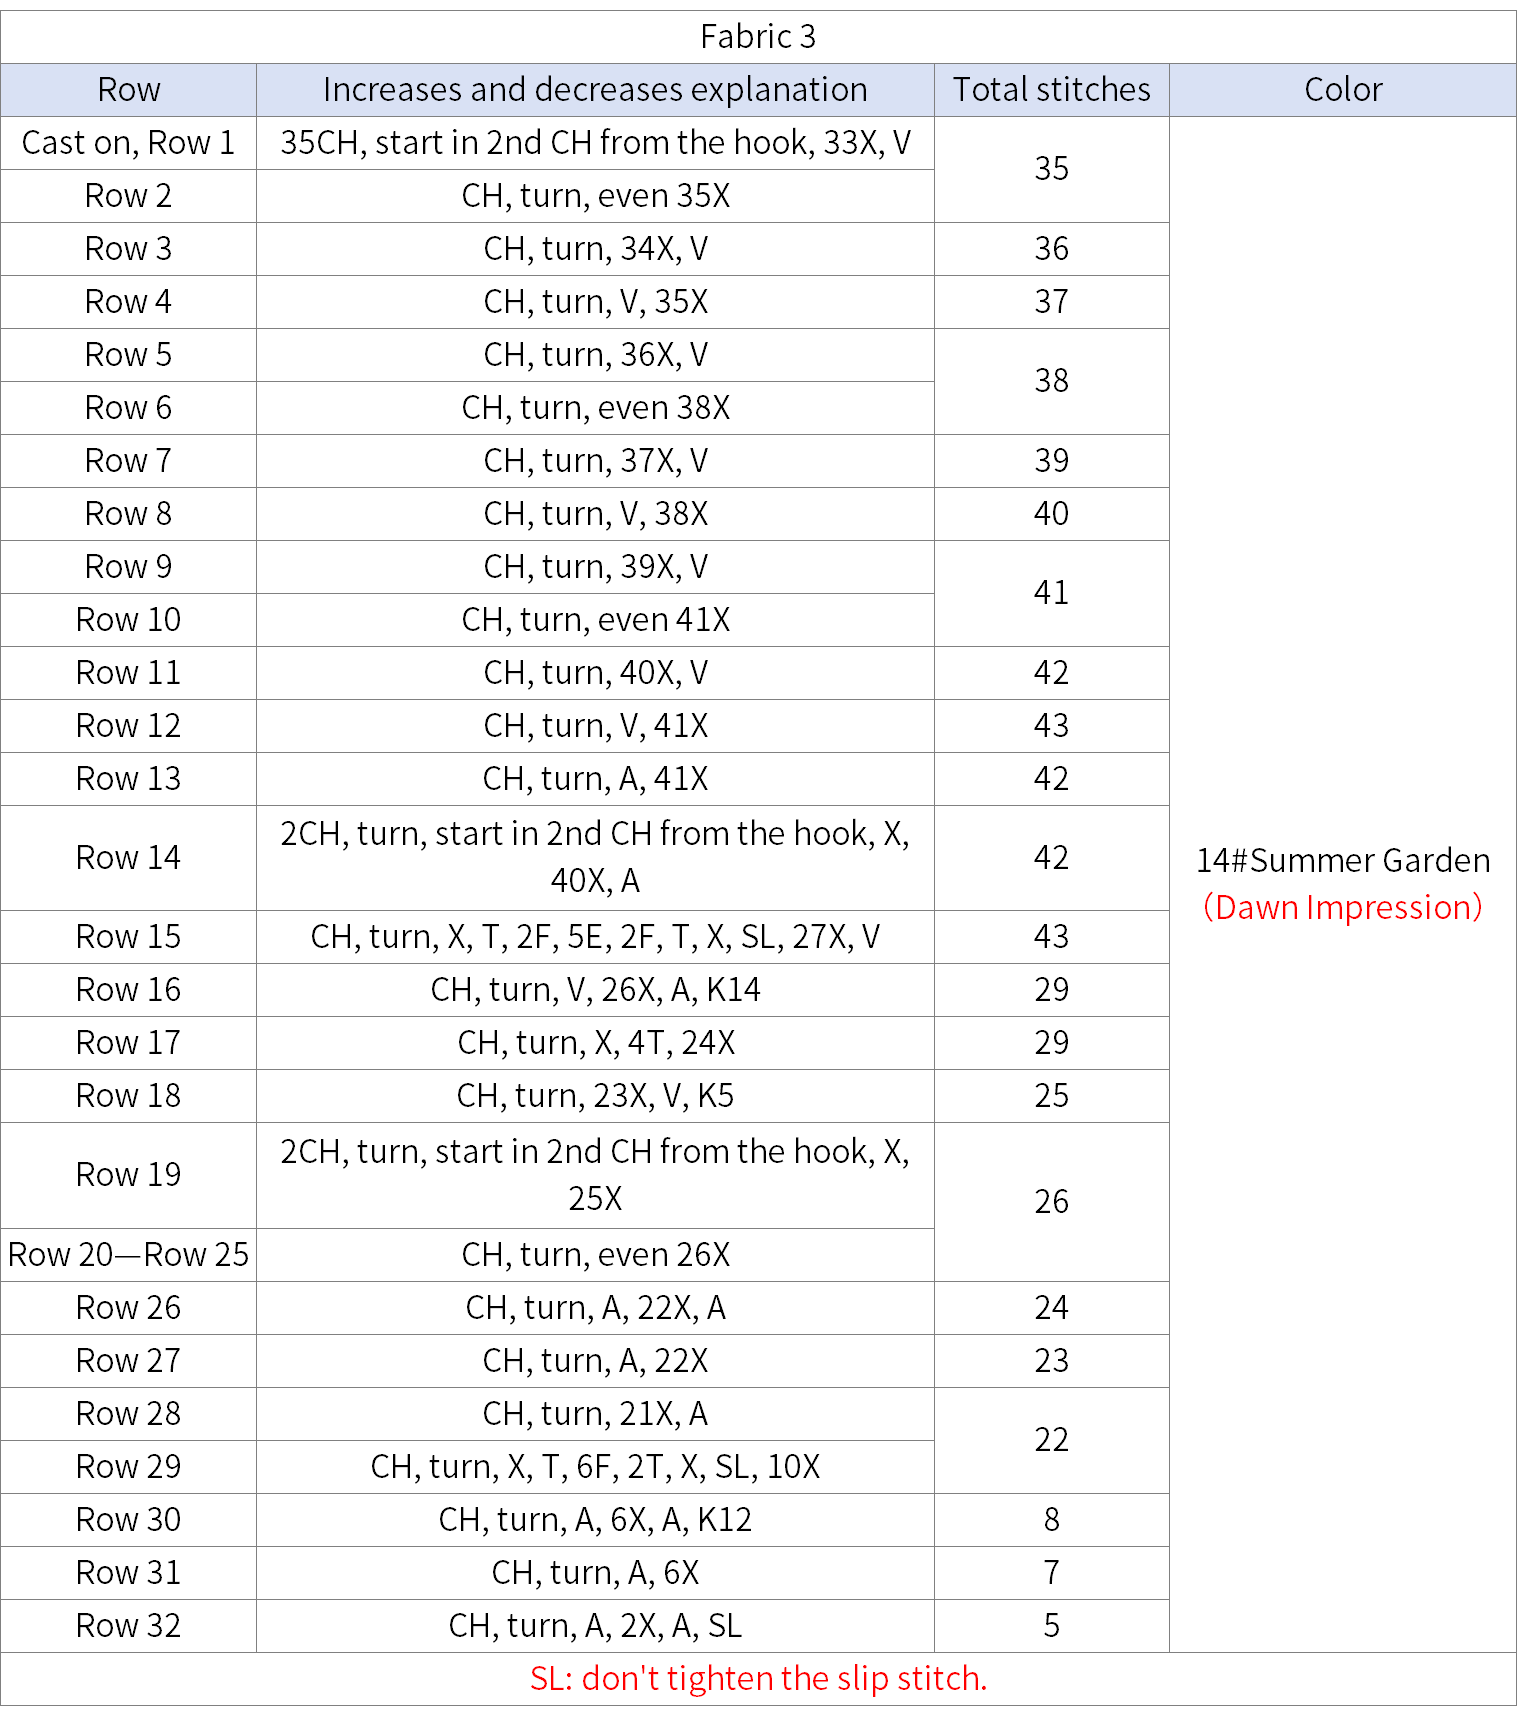
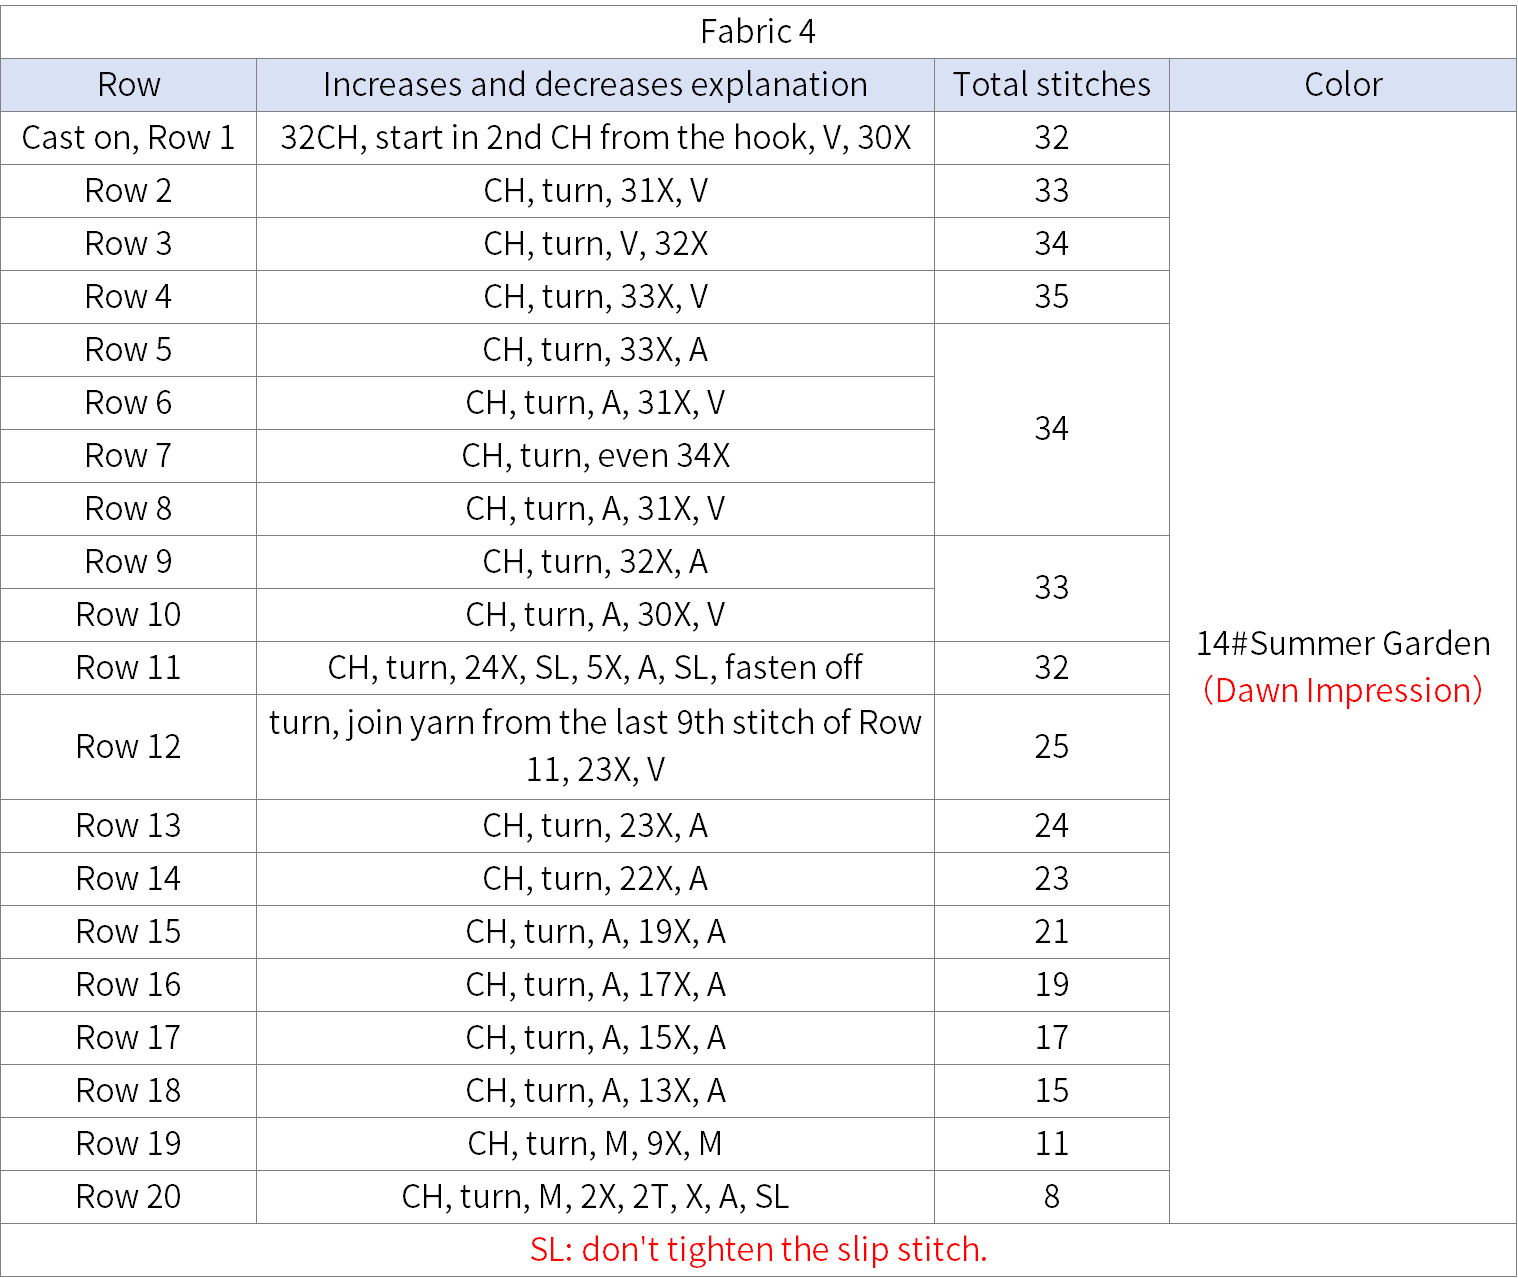
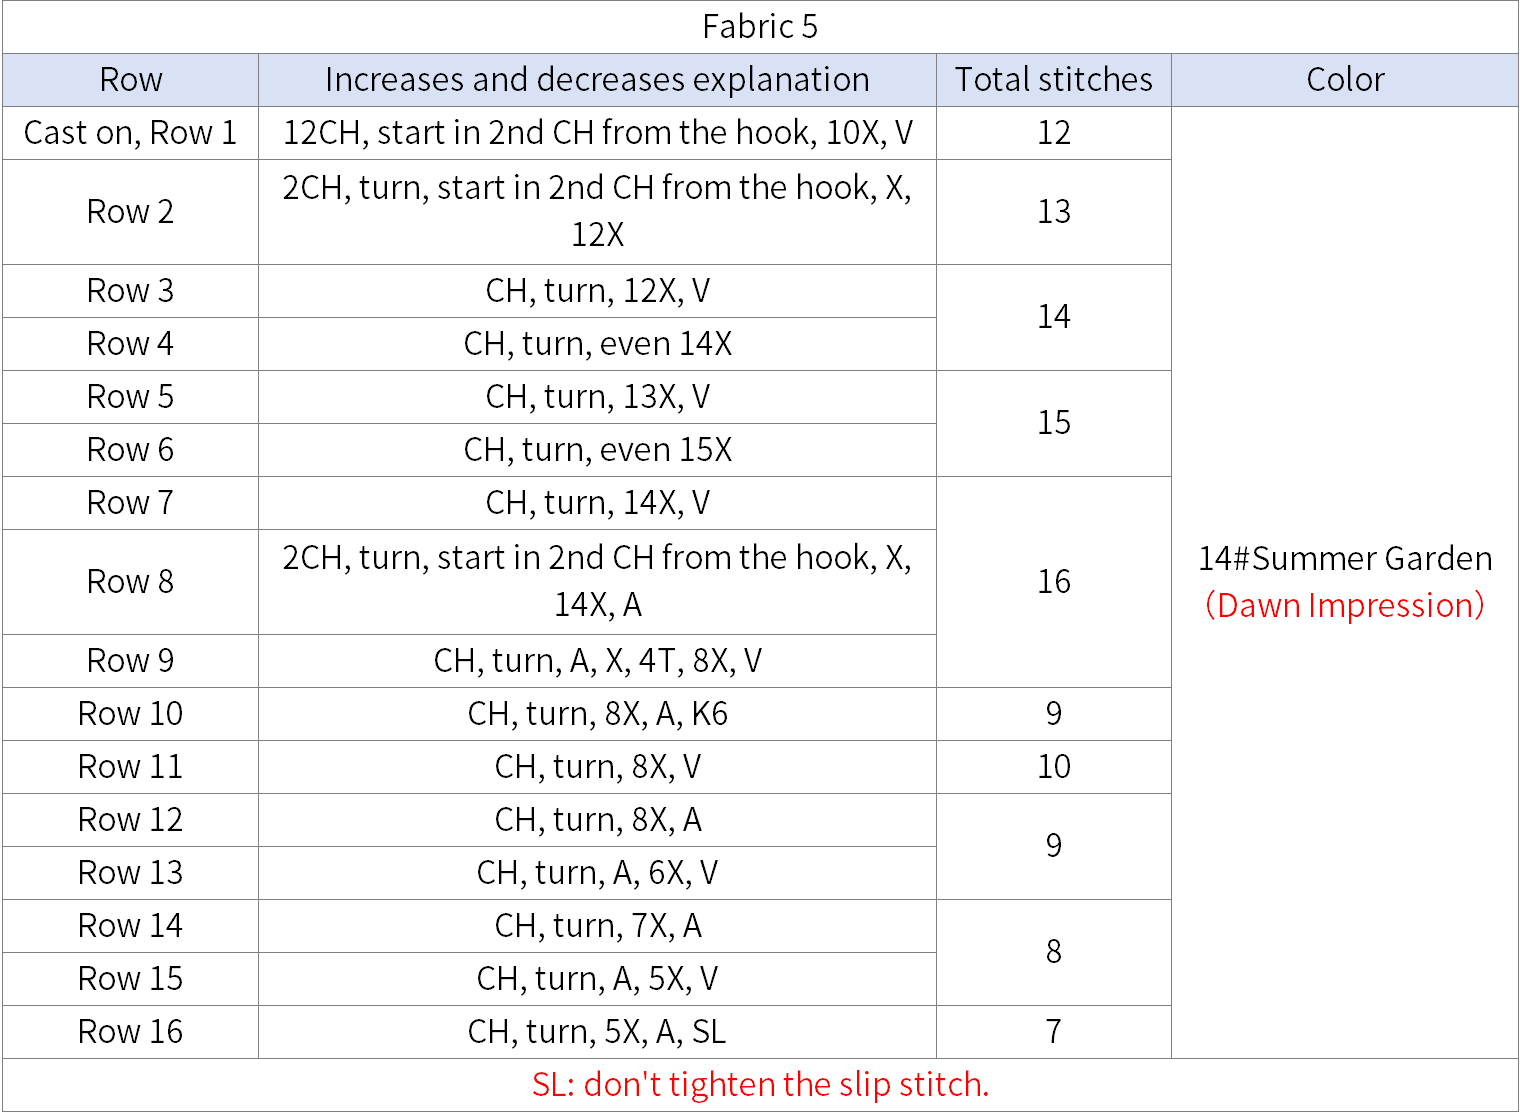
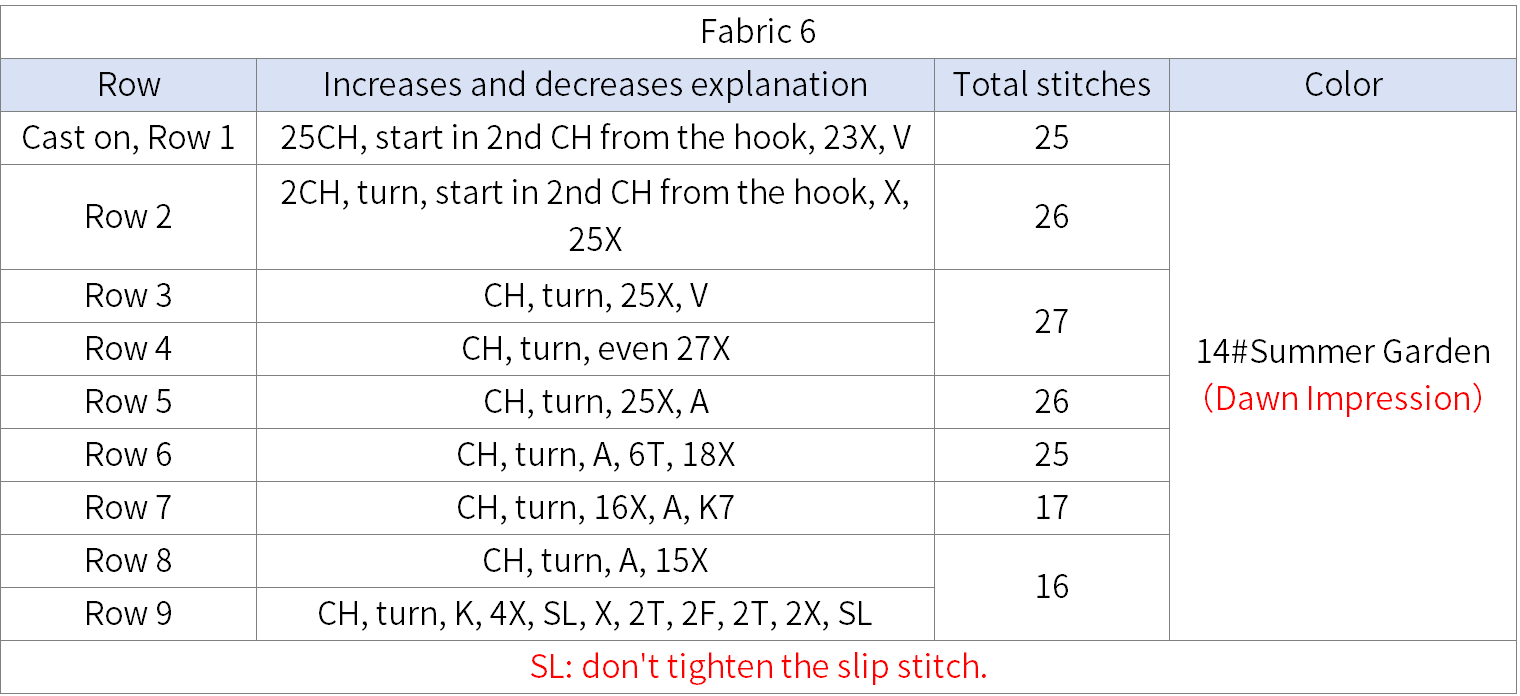
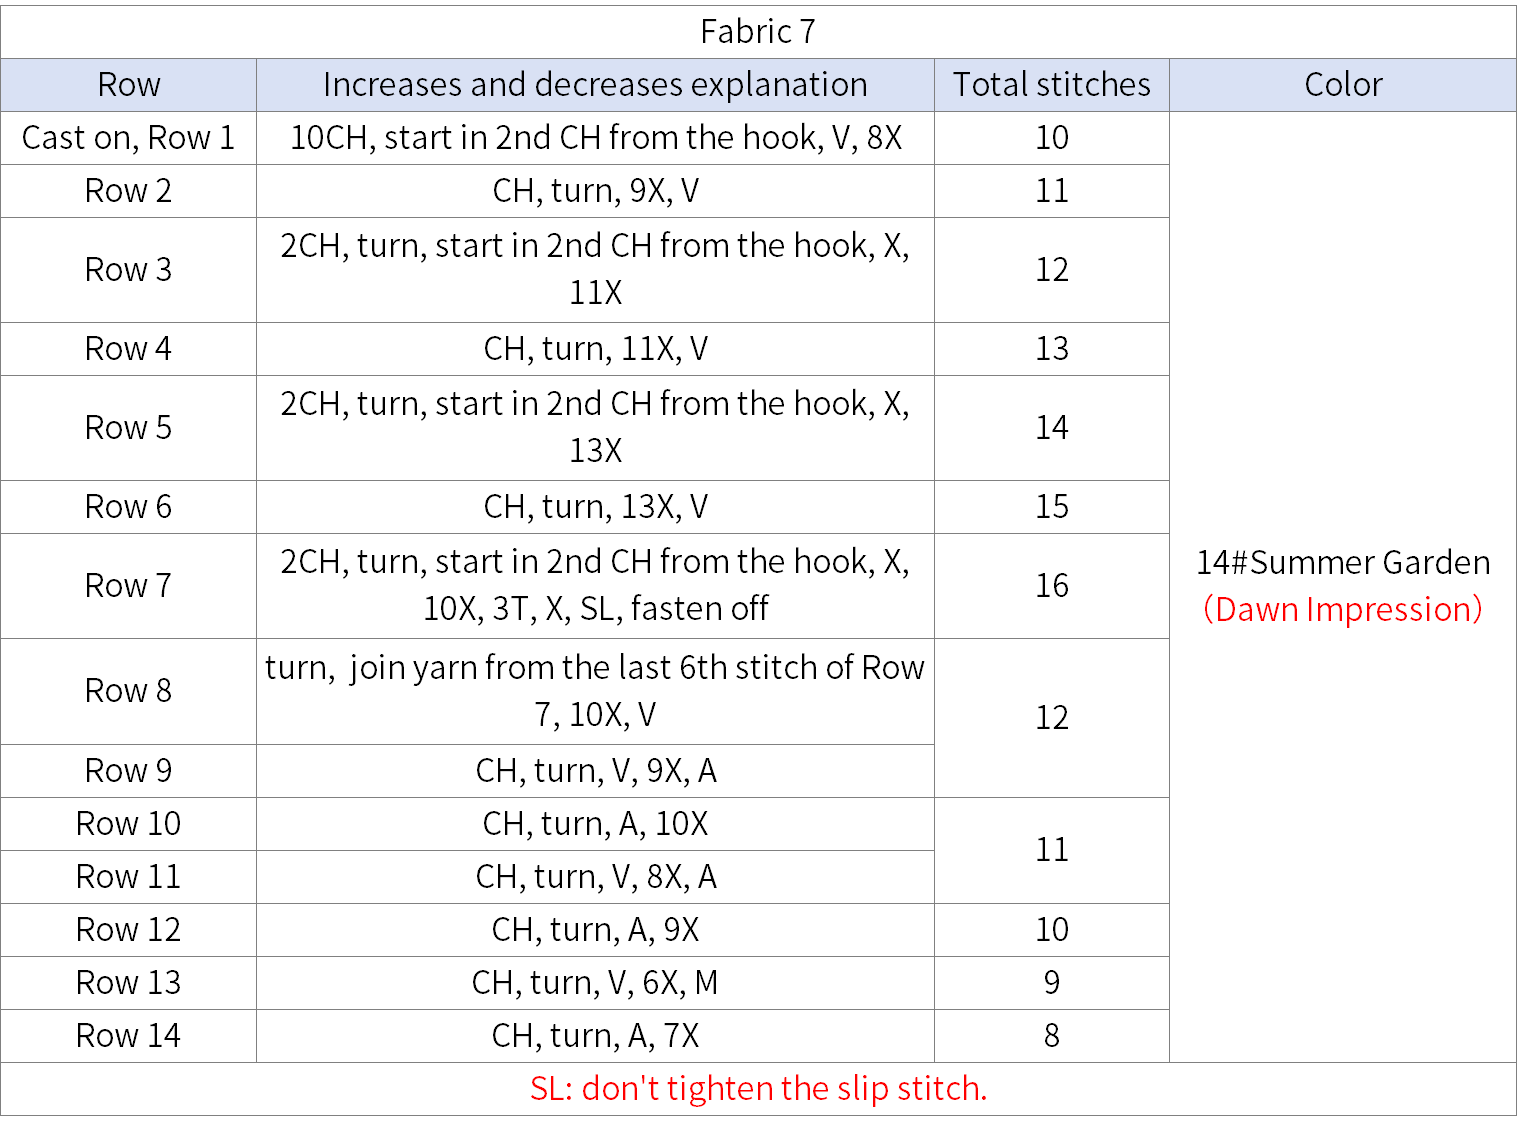
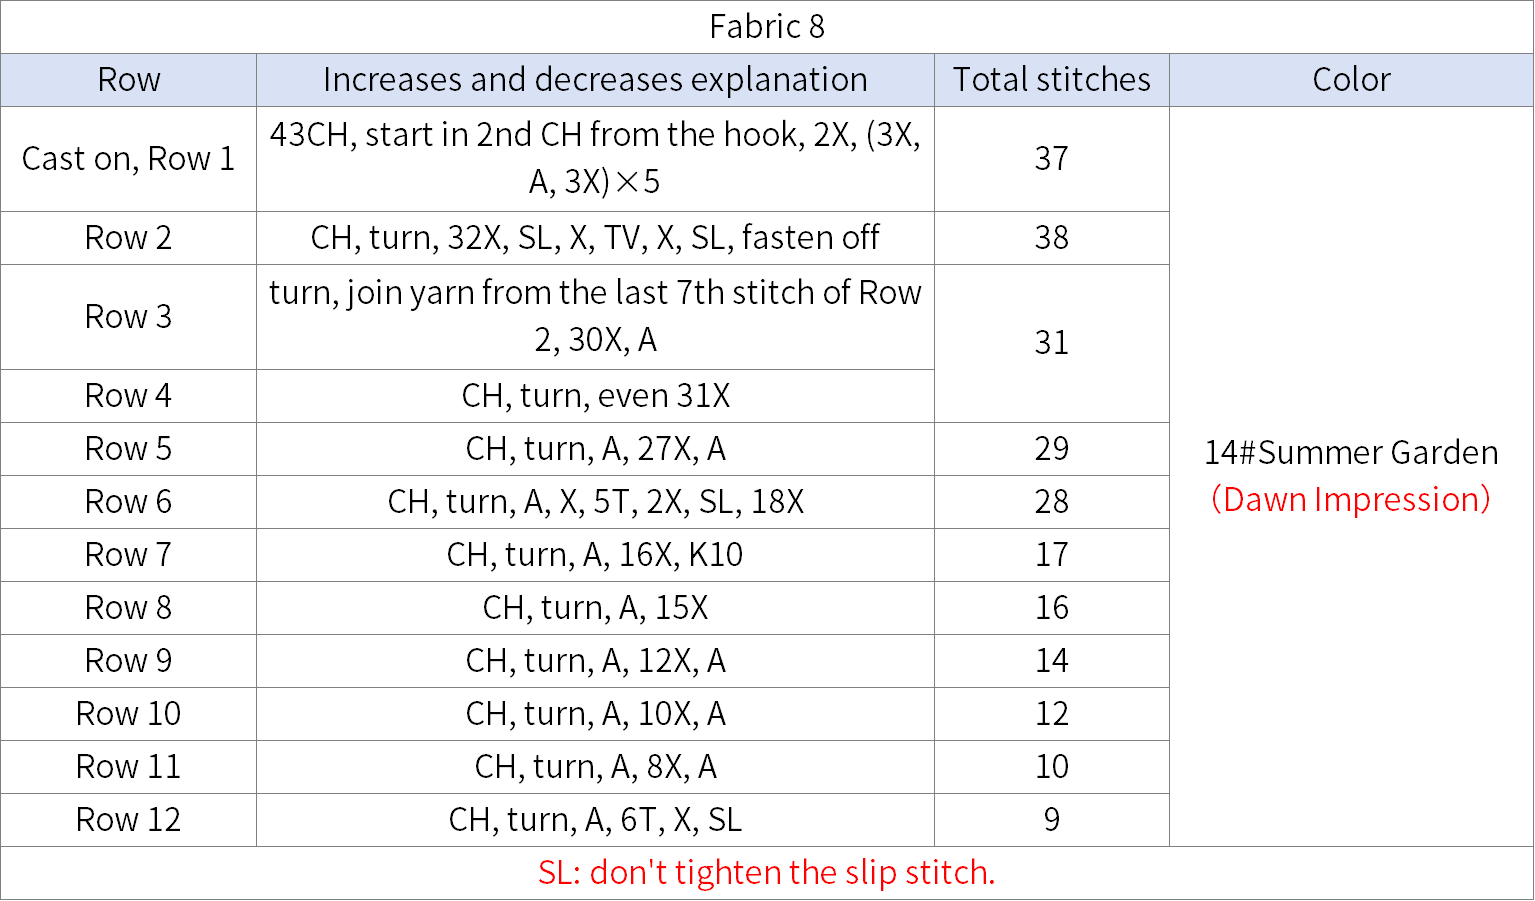
The belly consists of the base piece and fabric 1 through 8. There are a total of 9 crochet pieces. The base piece starts with a magic ring and crochet in rounds counter-clockwise. The fabric 1 through 8 start with chain stitches and worked back and forth. All the crochet pieces, from 1 to 8, should be sewn together in their final positions, picking up stitches along the surface for a neat attachment. Please refer to the video demonstration for more details.
Part 3 decorationsC 53' 47''
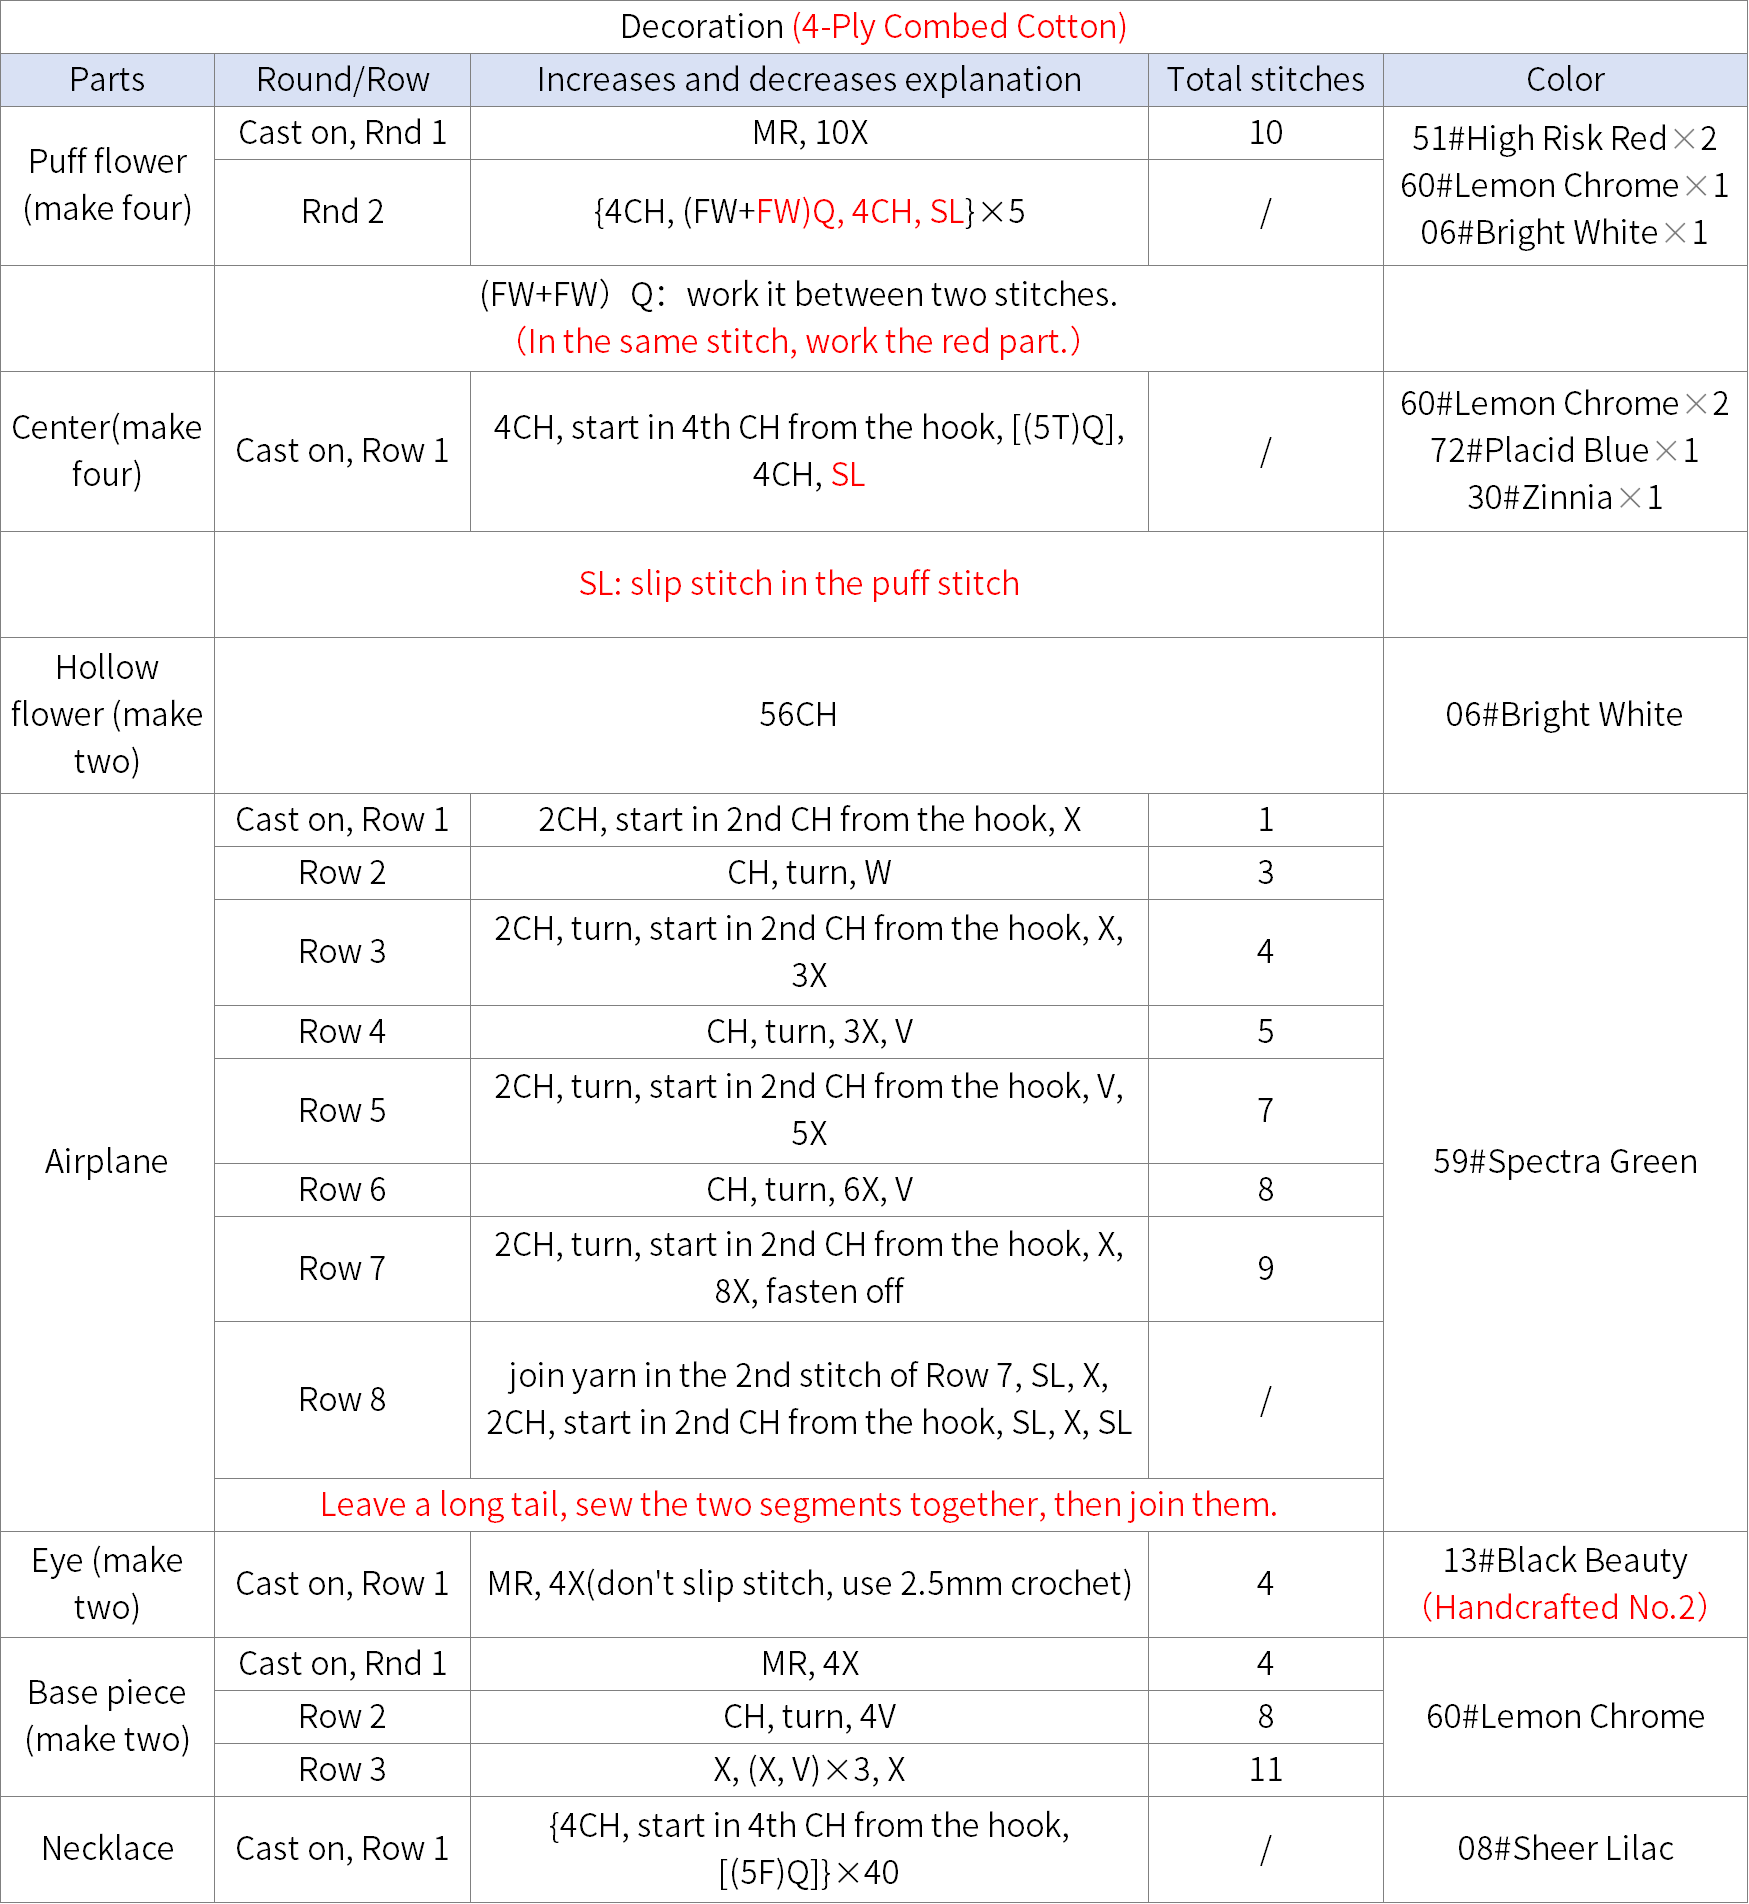
The decorations consist of various embroidered pieces and nonwoven fabric, complete the pieces. Then, refer to the finished product for assembly. For the embroidery, you can lightly sketch the approximate positions with a water-soluble pen before stitching them in place. Please refer to the video demonstration for more details.
Embroidery Schematic
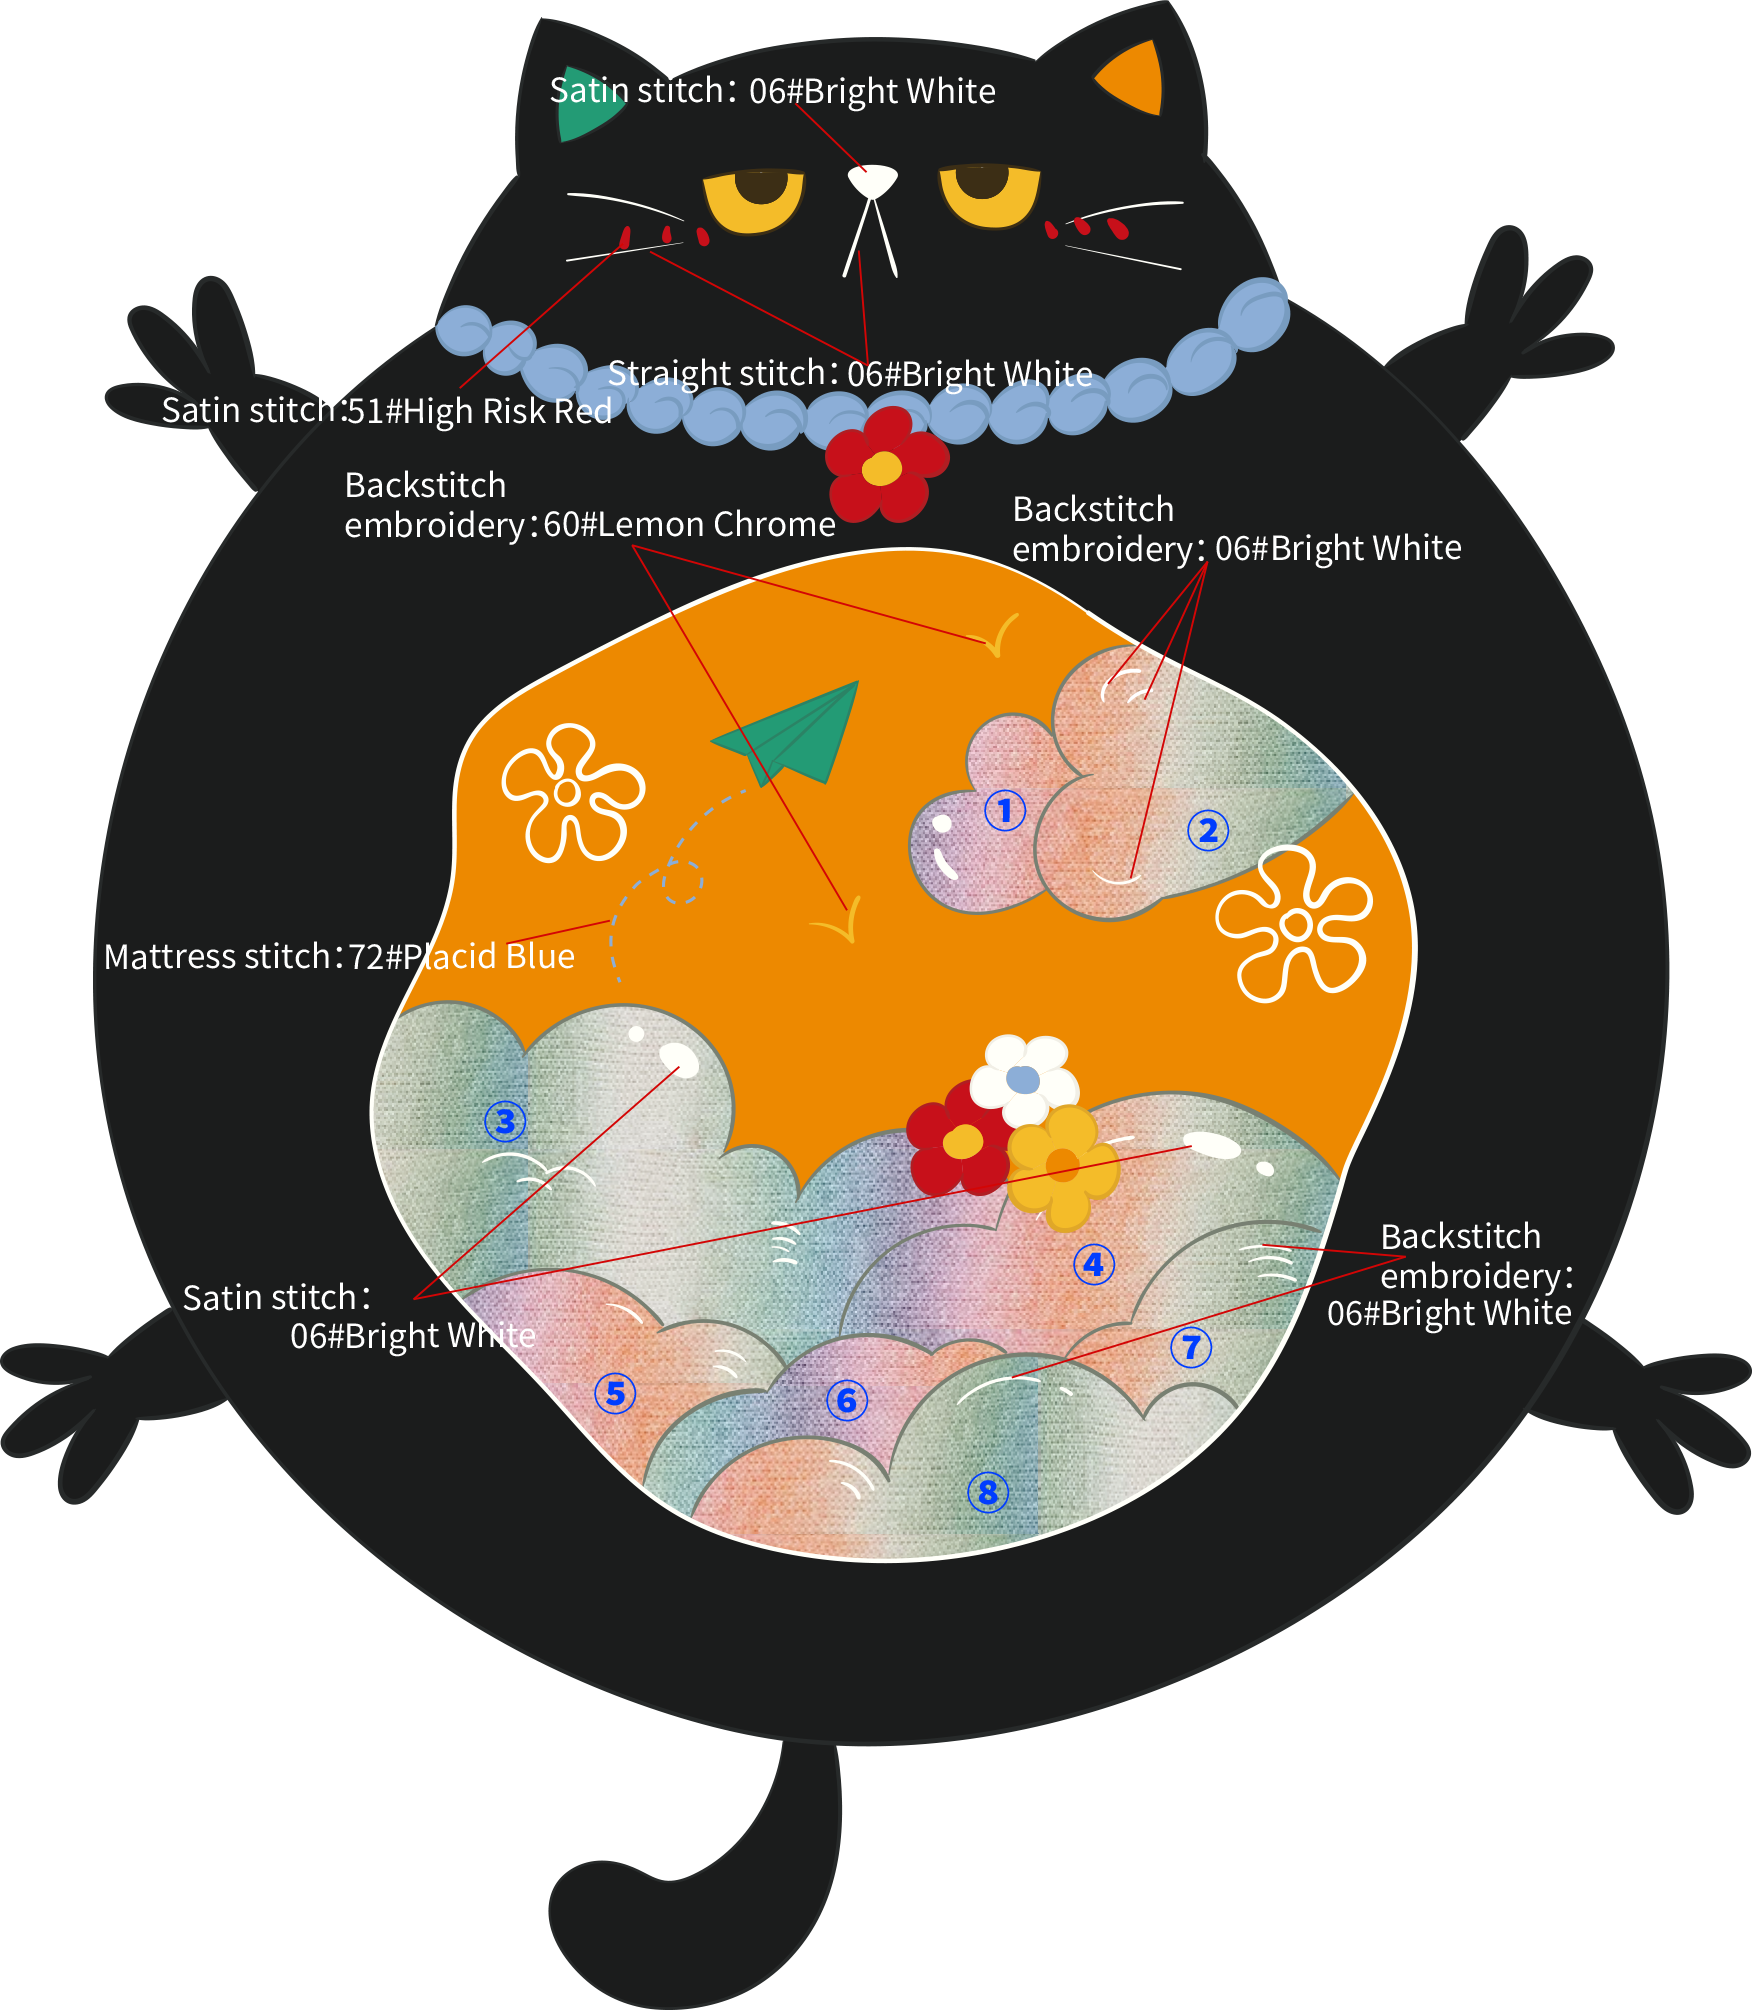
Note : ①②③... refer to Fabric 1, Fabric 2, Fabric 3, and so on....

Made by the community