Clothes
Light Breeze
Project preview
See the finished project
Pattern format
Instructions
Watch and follow
Video tutorial
| Style | Yarn | Color |
|---|---|---|
| Breeze Cotton-Linen Top - Vest - Bright White Version | Morandi flax Lace yarn |  01#Bright White x 5 01#Bright White x 5 |
| Breeze Cotton-Linen Top - Vest - Khaki Version | Morandi flax Lace yarn | 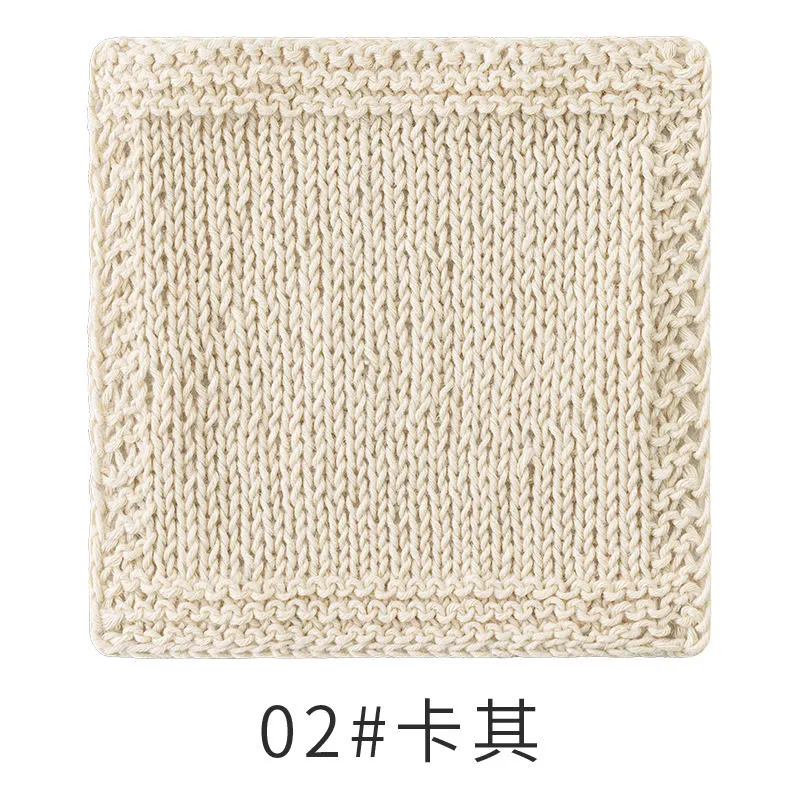 02#Khaki x 5 02#Khaki x 5 |
| Breeze Cotton-Linen Top - Vest - Nile Green Version | Morandi flax Lace yarn |  14#Nile Green x 5 14#Nile Green x 5 |
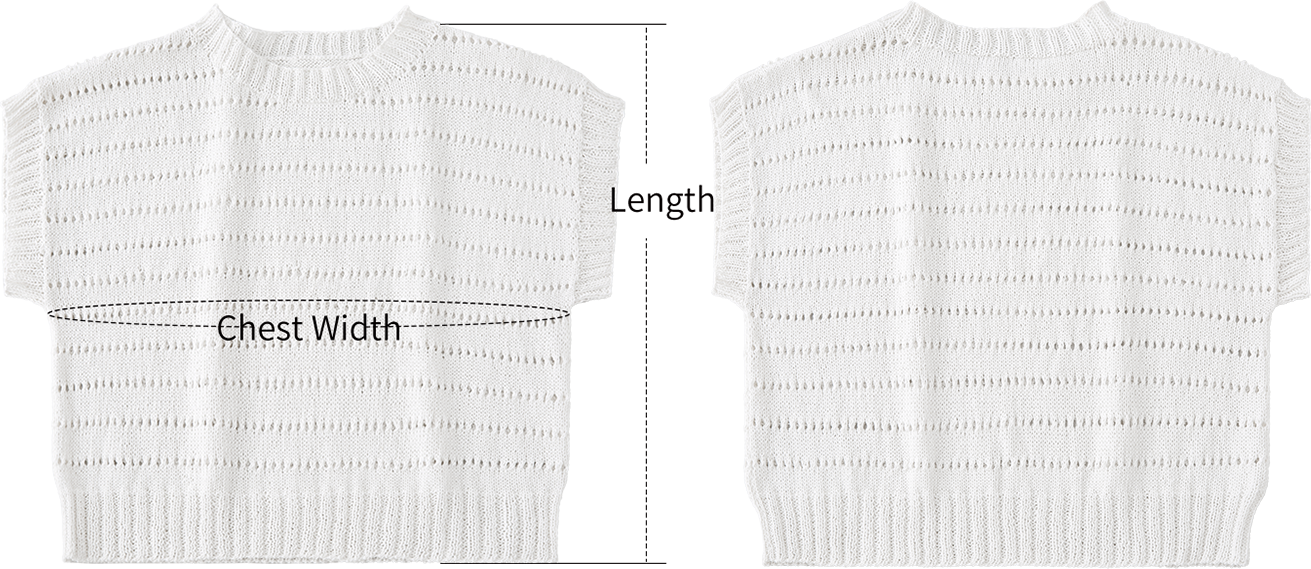
| Unit:cm | Chest Width | Length |
| Small | 97 | 45 |
The handcrafted measurements may have an error, the size of the sample is for reference only.
Materials: Morandi flax Lace yarn
Tool: 10# - 3.25 mm Circular Needle & Short Straight Needle
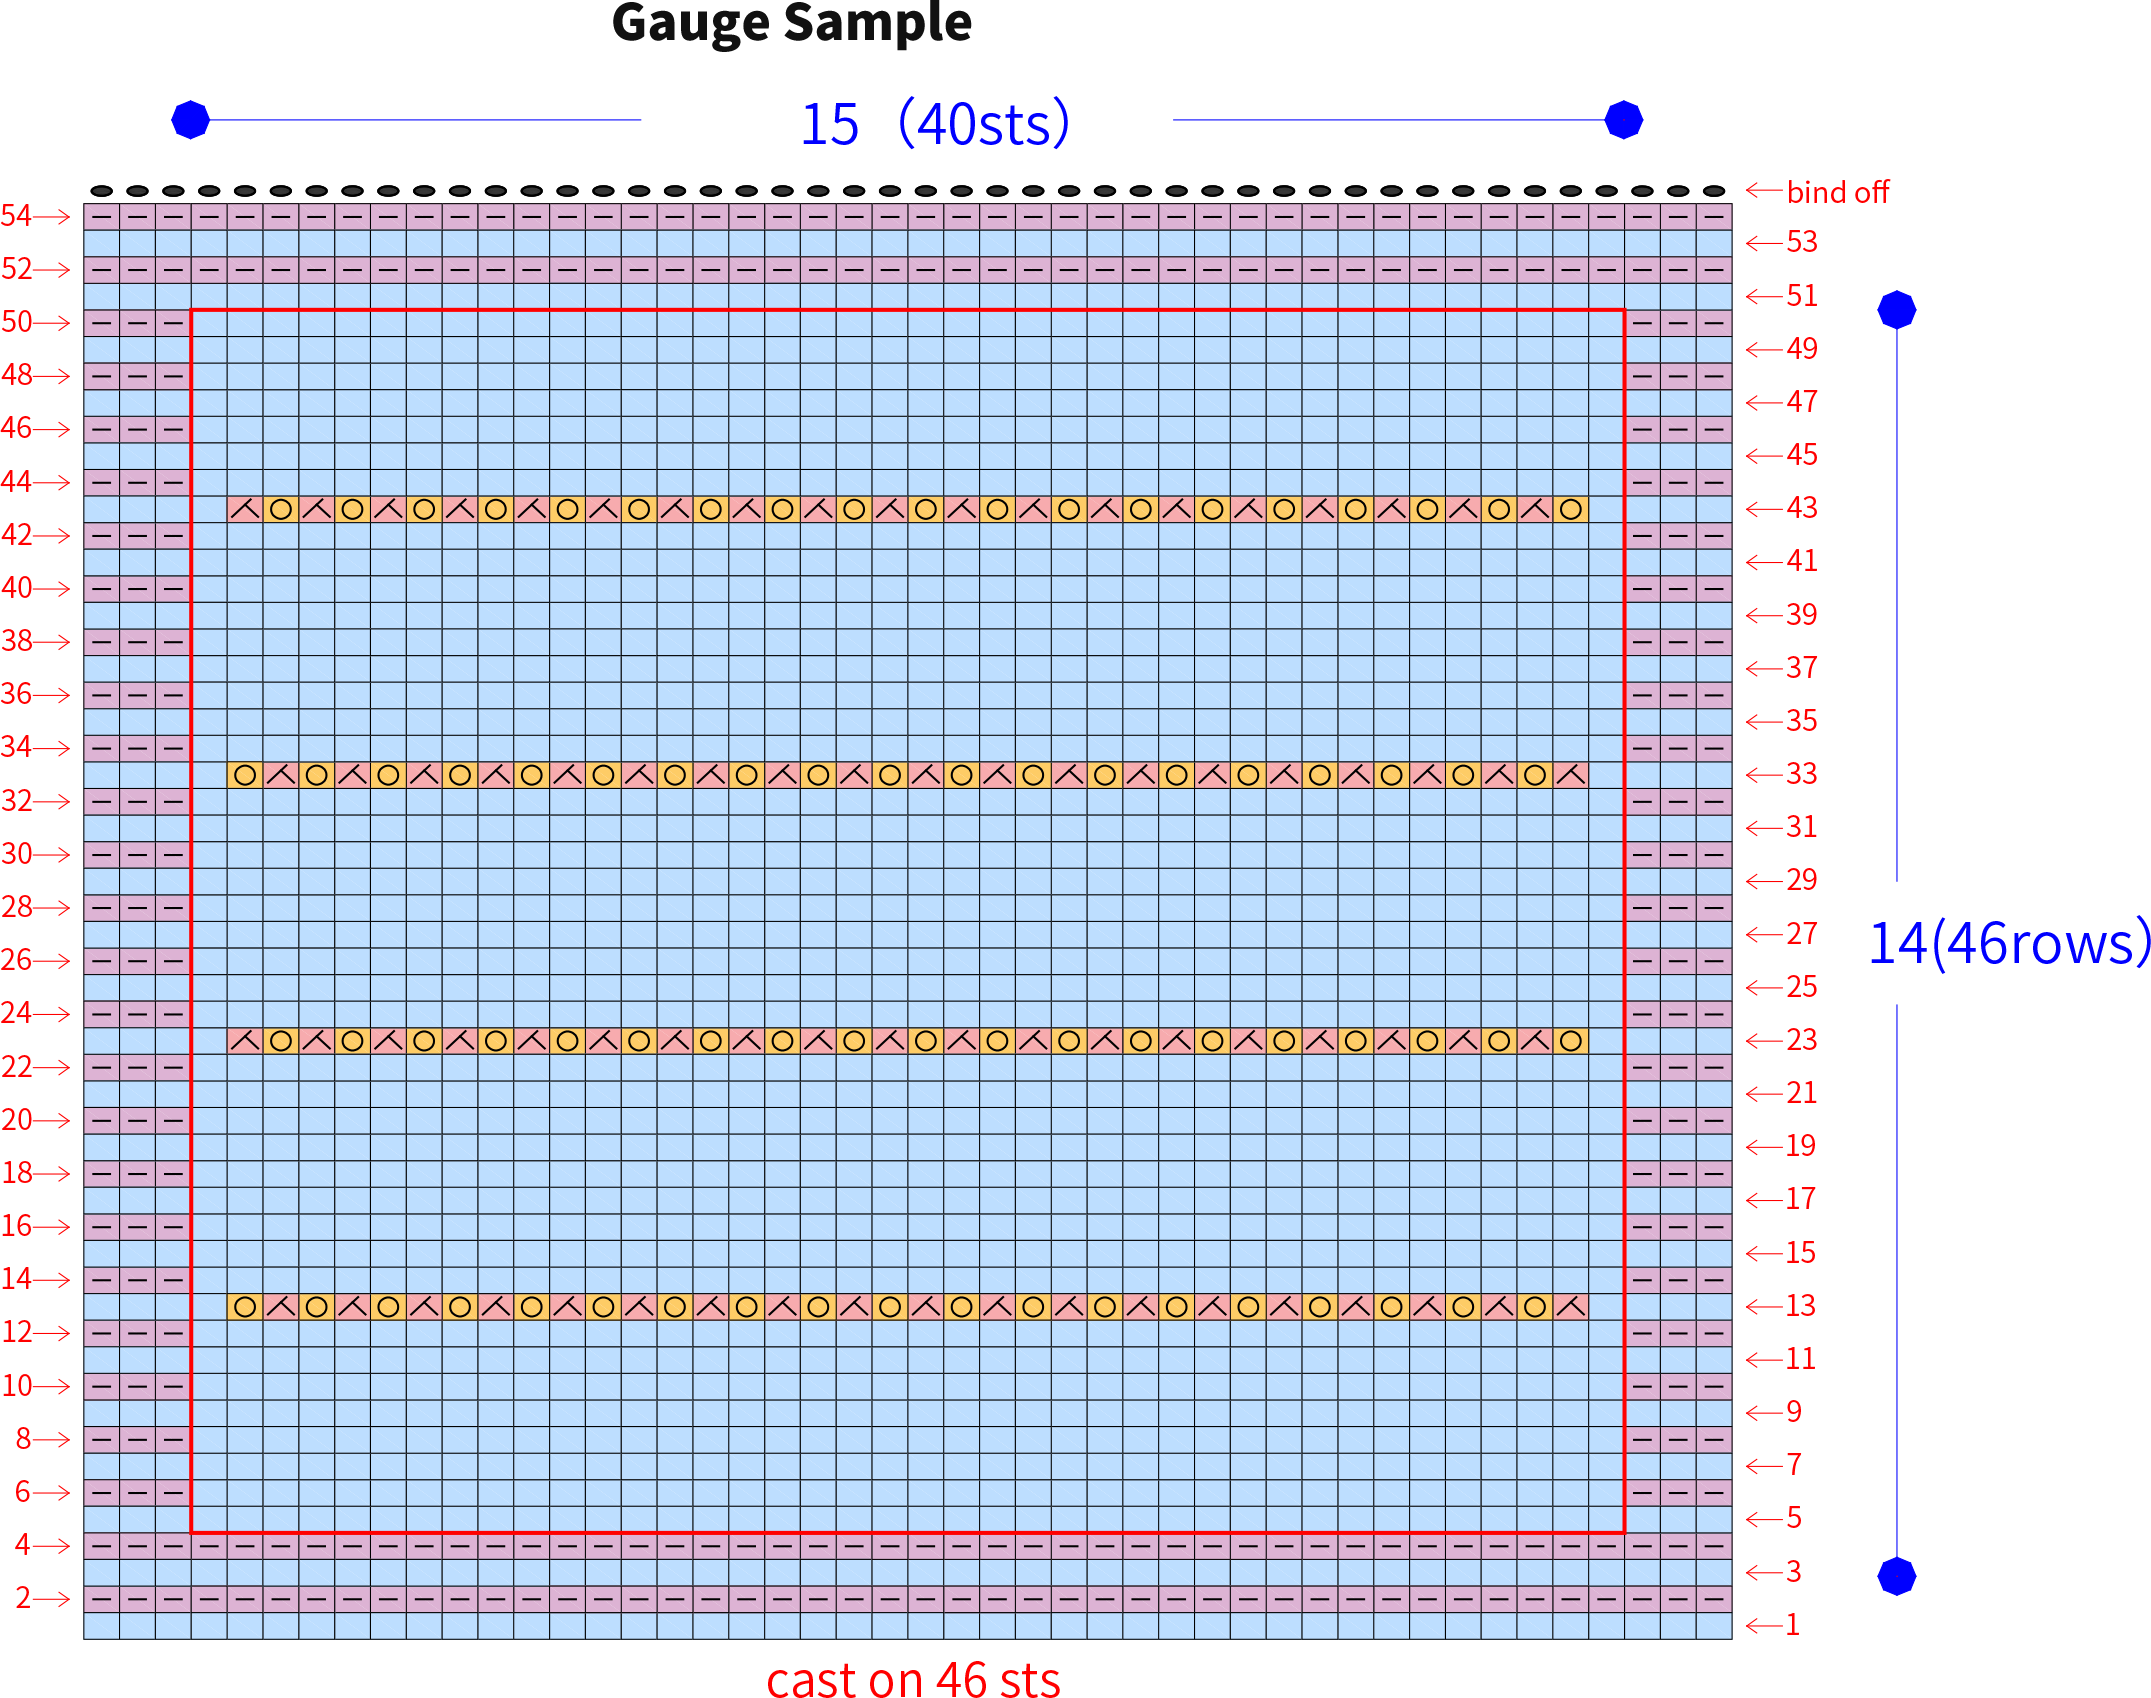
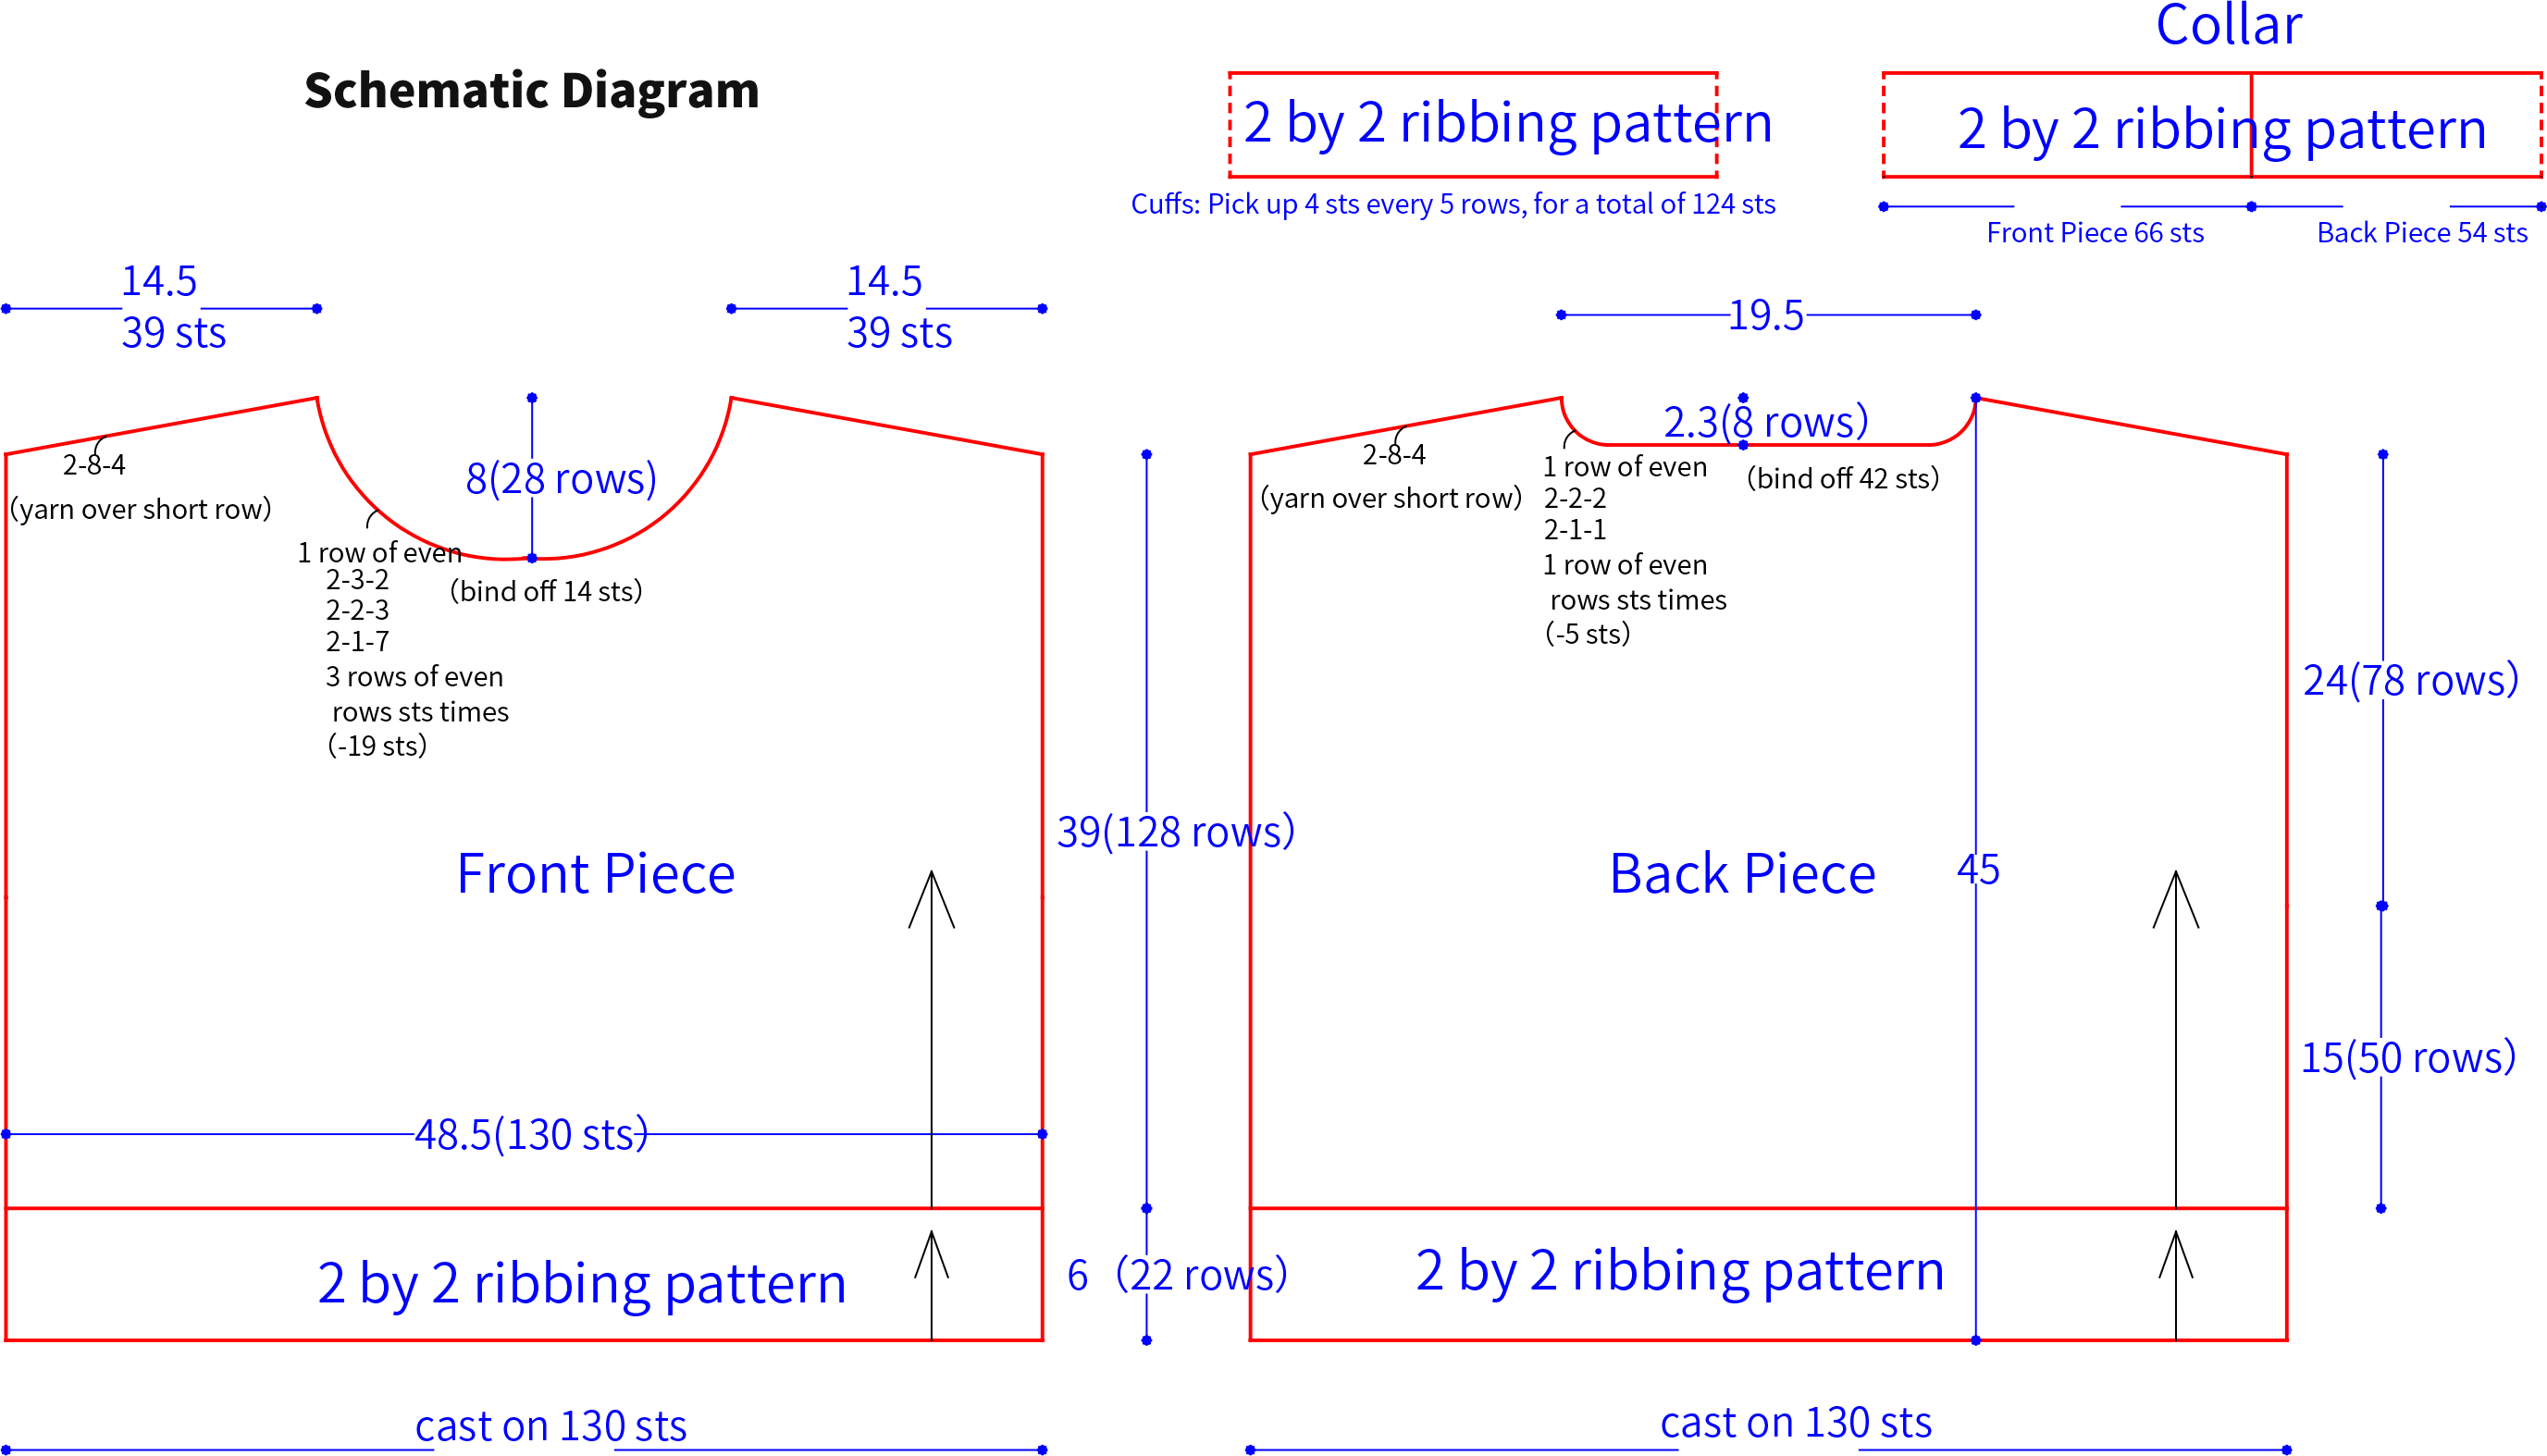

Chart Key





Note:
1. This pattern is making in Chinese crochet pattern terms, and the stitch name is written using American terminology. All measurements in charts are in cm.
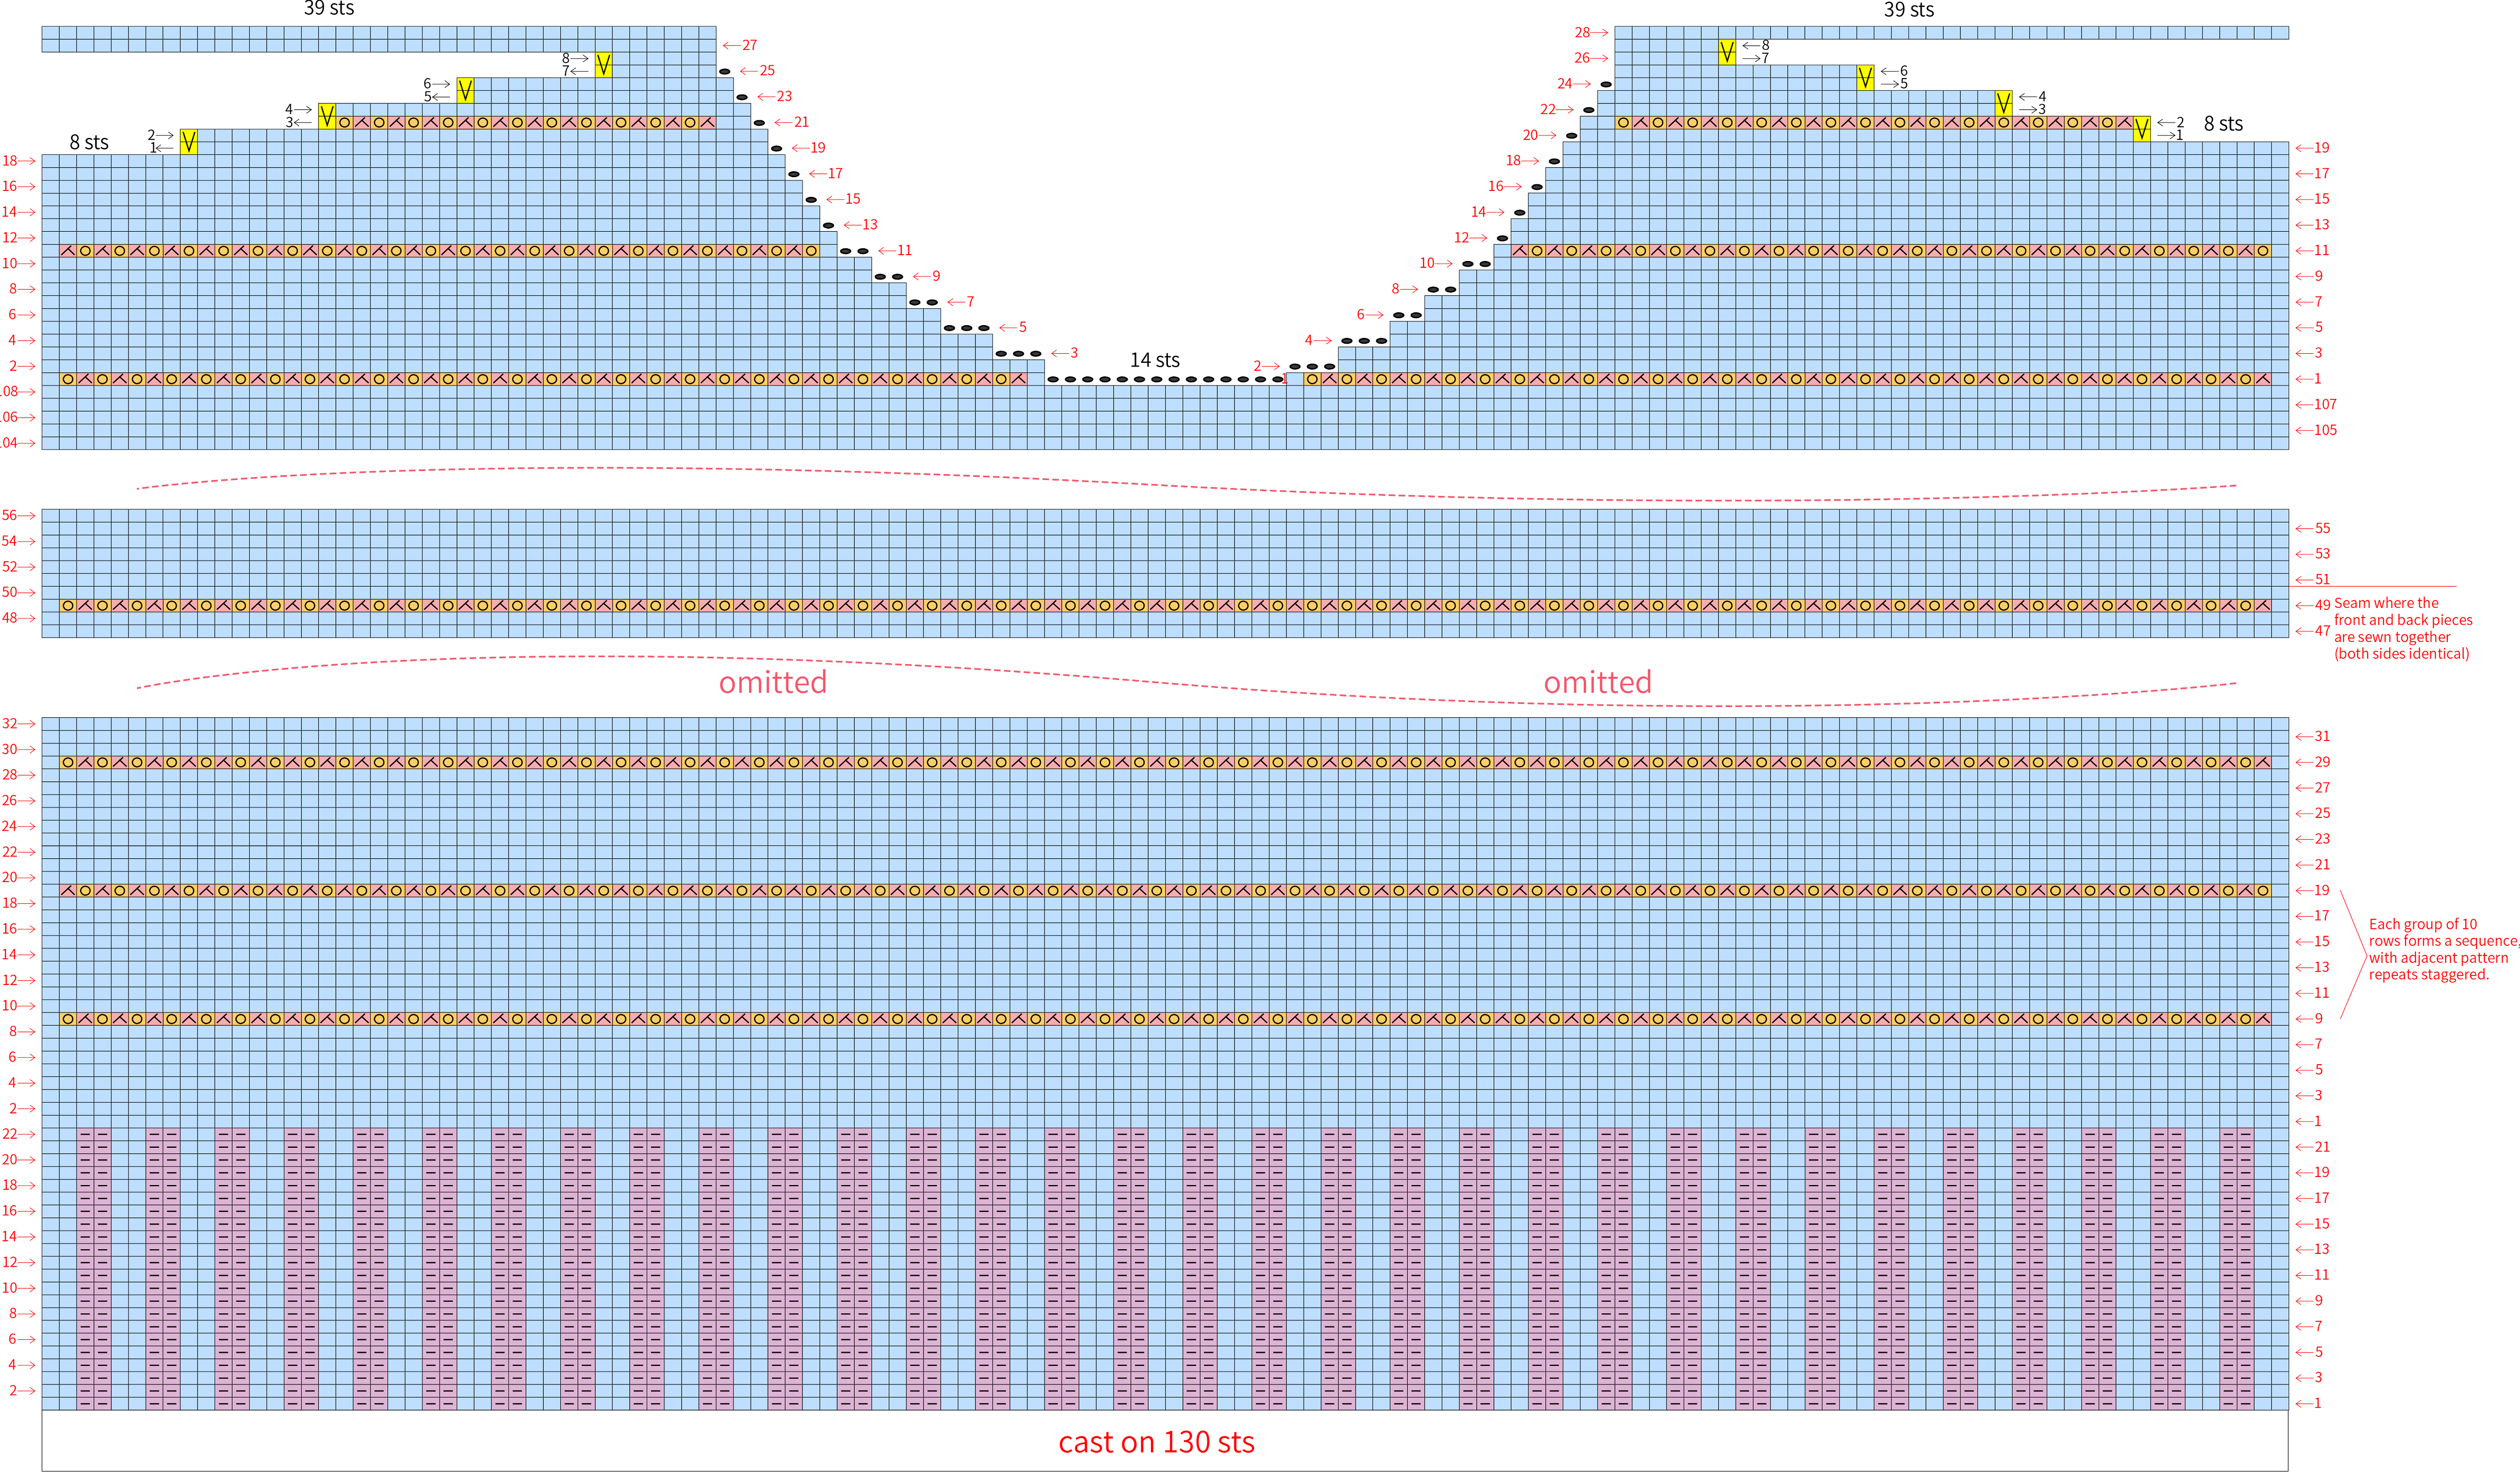
Part 1 Front Piece A 00' 38''
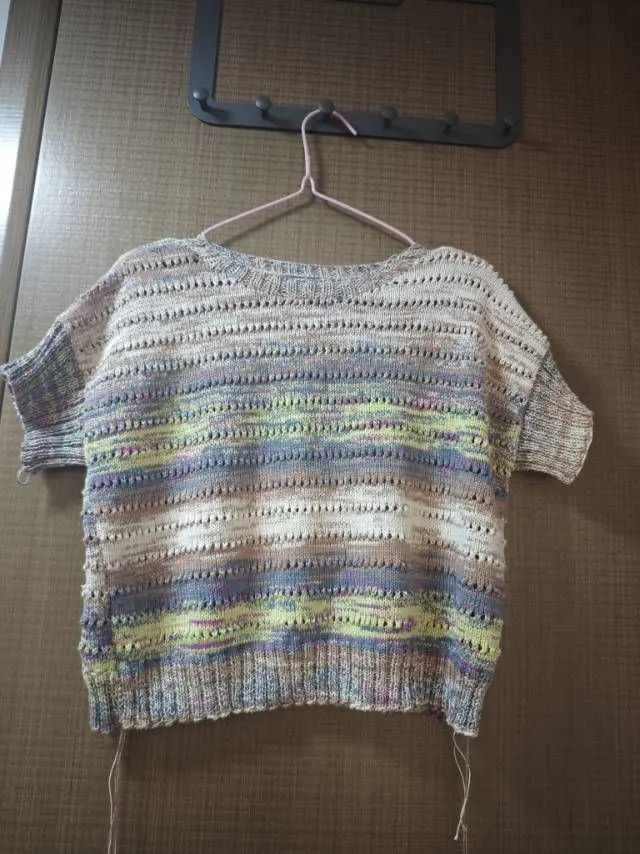
The front piece is divided into the hem, body, and shoulder-parts. Use a casting-on method that alternates 2 knit stitches and 2 purl stitches, then knit in rows back and forth. After finishing, use waste yarn to pick up strands and hold stitches. Please refer to the video demonstration for more details.
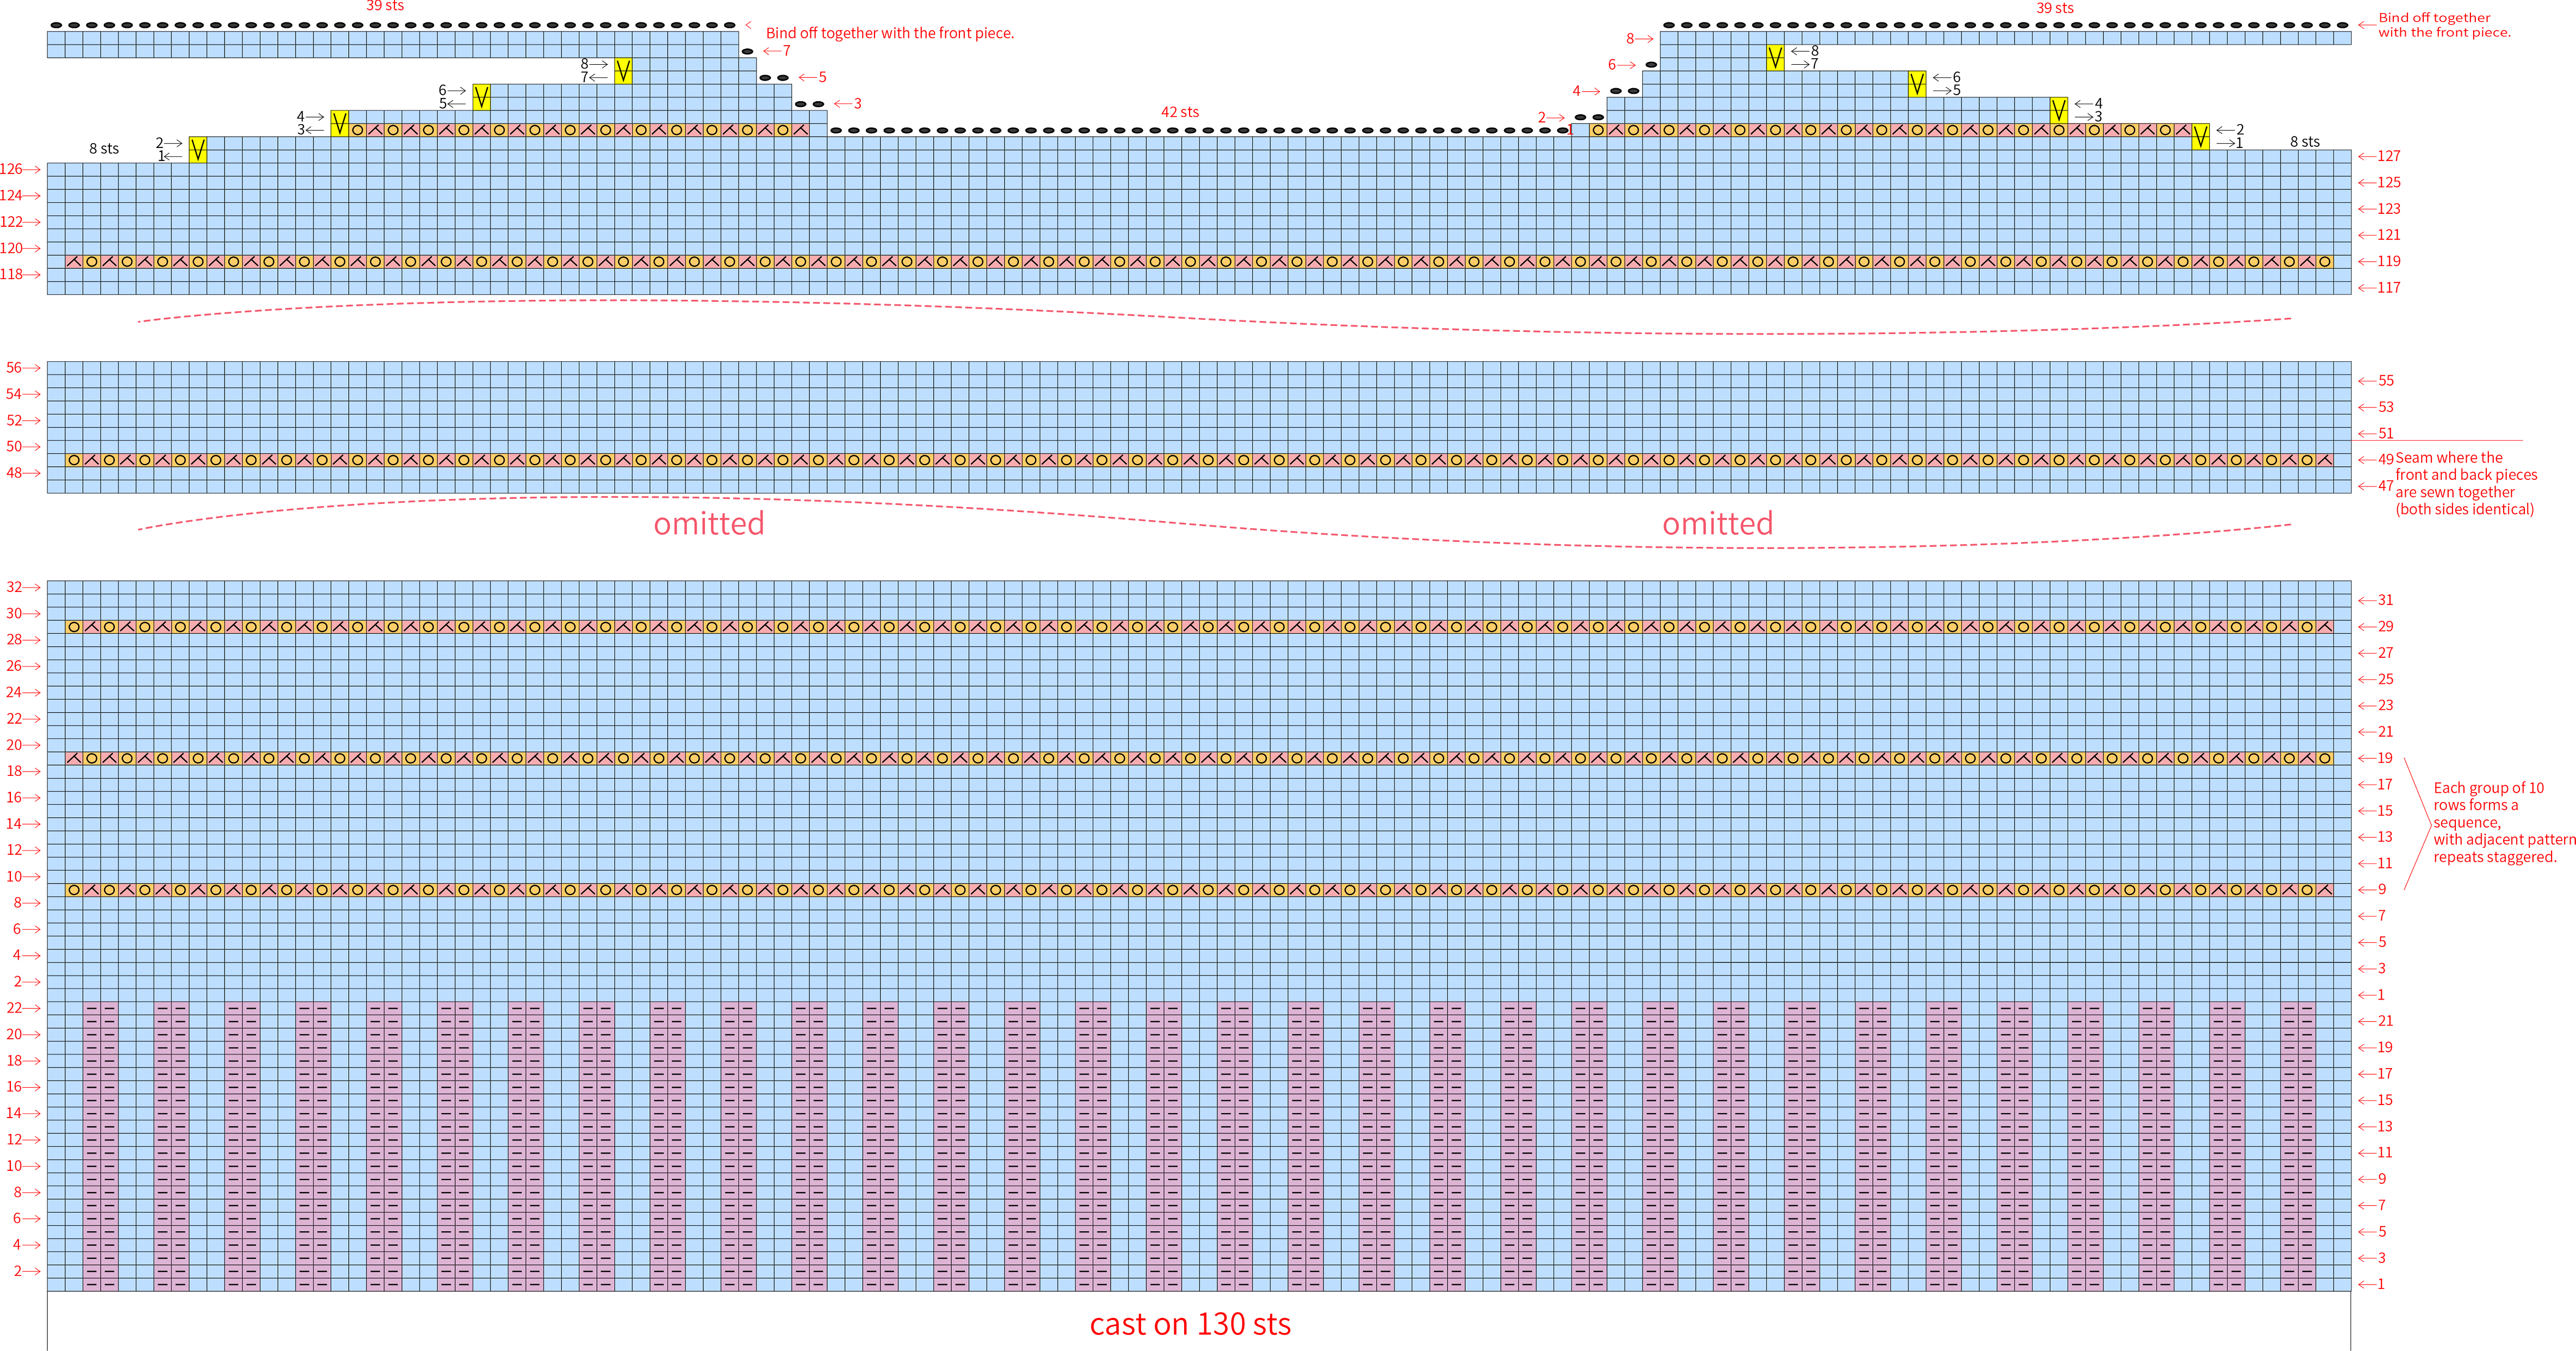
Part 2 Back Piece B 28' 43''
The back piece is divided into the hem, body, and shoulder-parts. Use a casting-on method that alternates 2 knit stitches and 2 purl stitches. Knit in rows, working back and forth. After finishing, join and bind off with the front piece. Please refer to the video demonstration for more details.
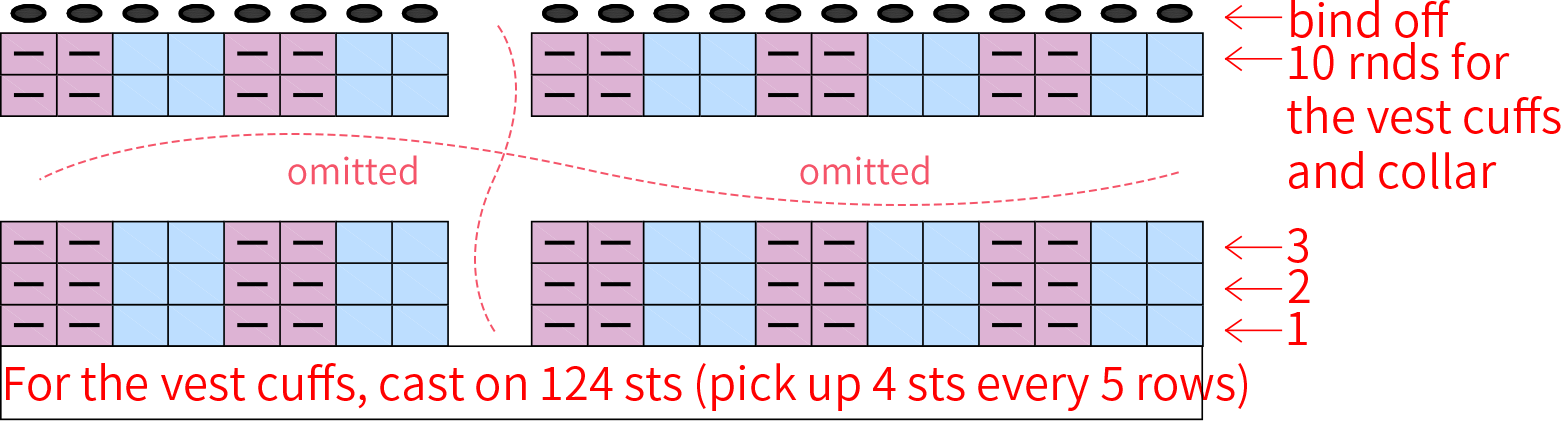
Part 3 Collar C 33' 26''
Pick up stitches along the neckline where the front and back pieces meet, then work in 2 by 2 ribbing. After completing the required number of rounds, bind off with a slip stitch bind off.Please refer to the video demonstration for more details.
Part 4 Cuff D 38' 29''
First, sew the front and back pieces together according to the markers. Then, pick up stitches along the formed armhole and work in 2 by 2 ribbing. After completing the required number of rounds, bind off loosely. Please refer to the video demonstration for more details.
Collar 120 sts: 26 sts on each side of the front piece + 14 sts in the middle + 6 sts on each side of the back piece + 42 sts in the middle
Made by the community