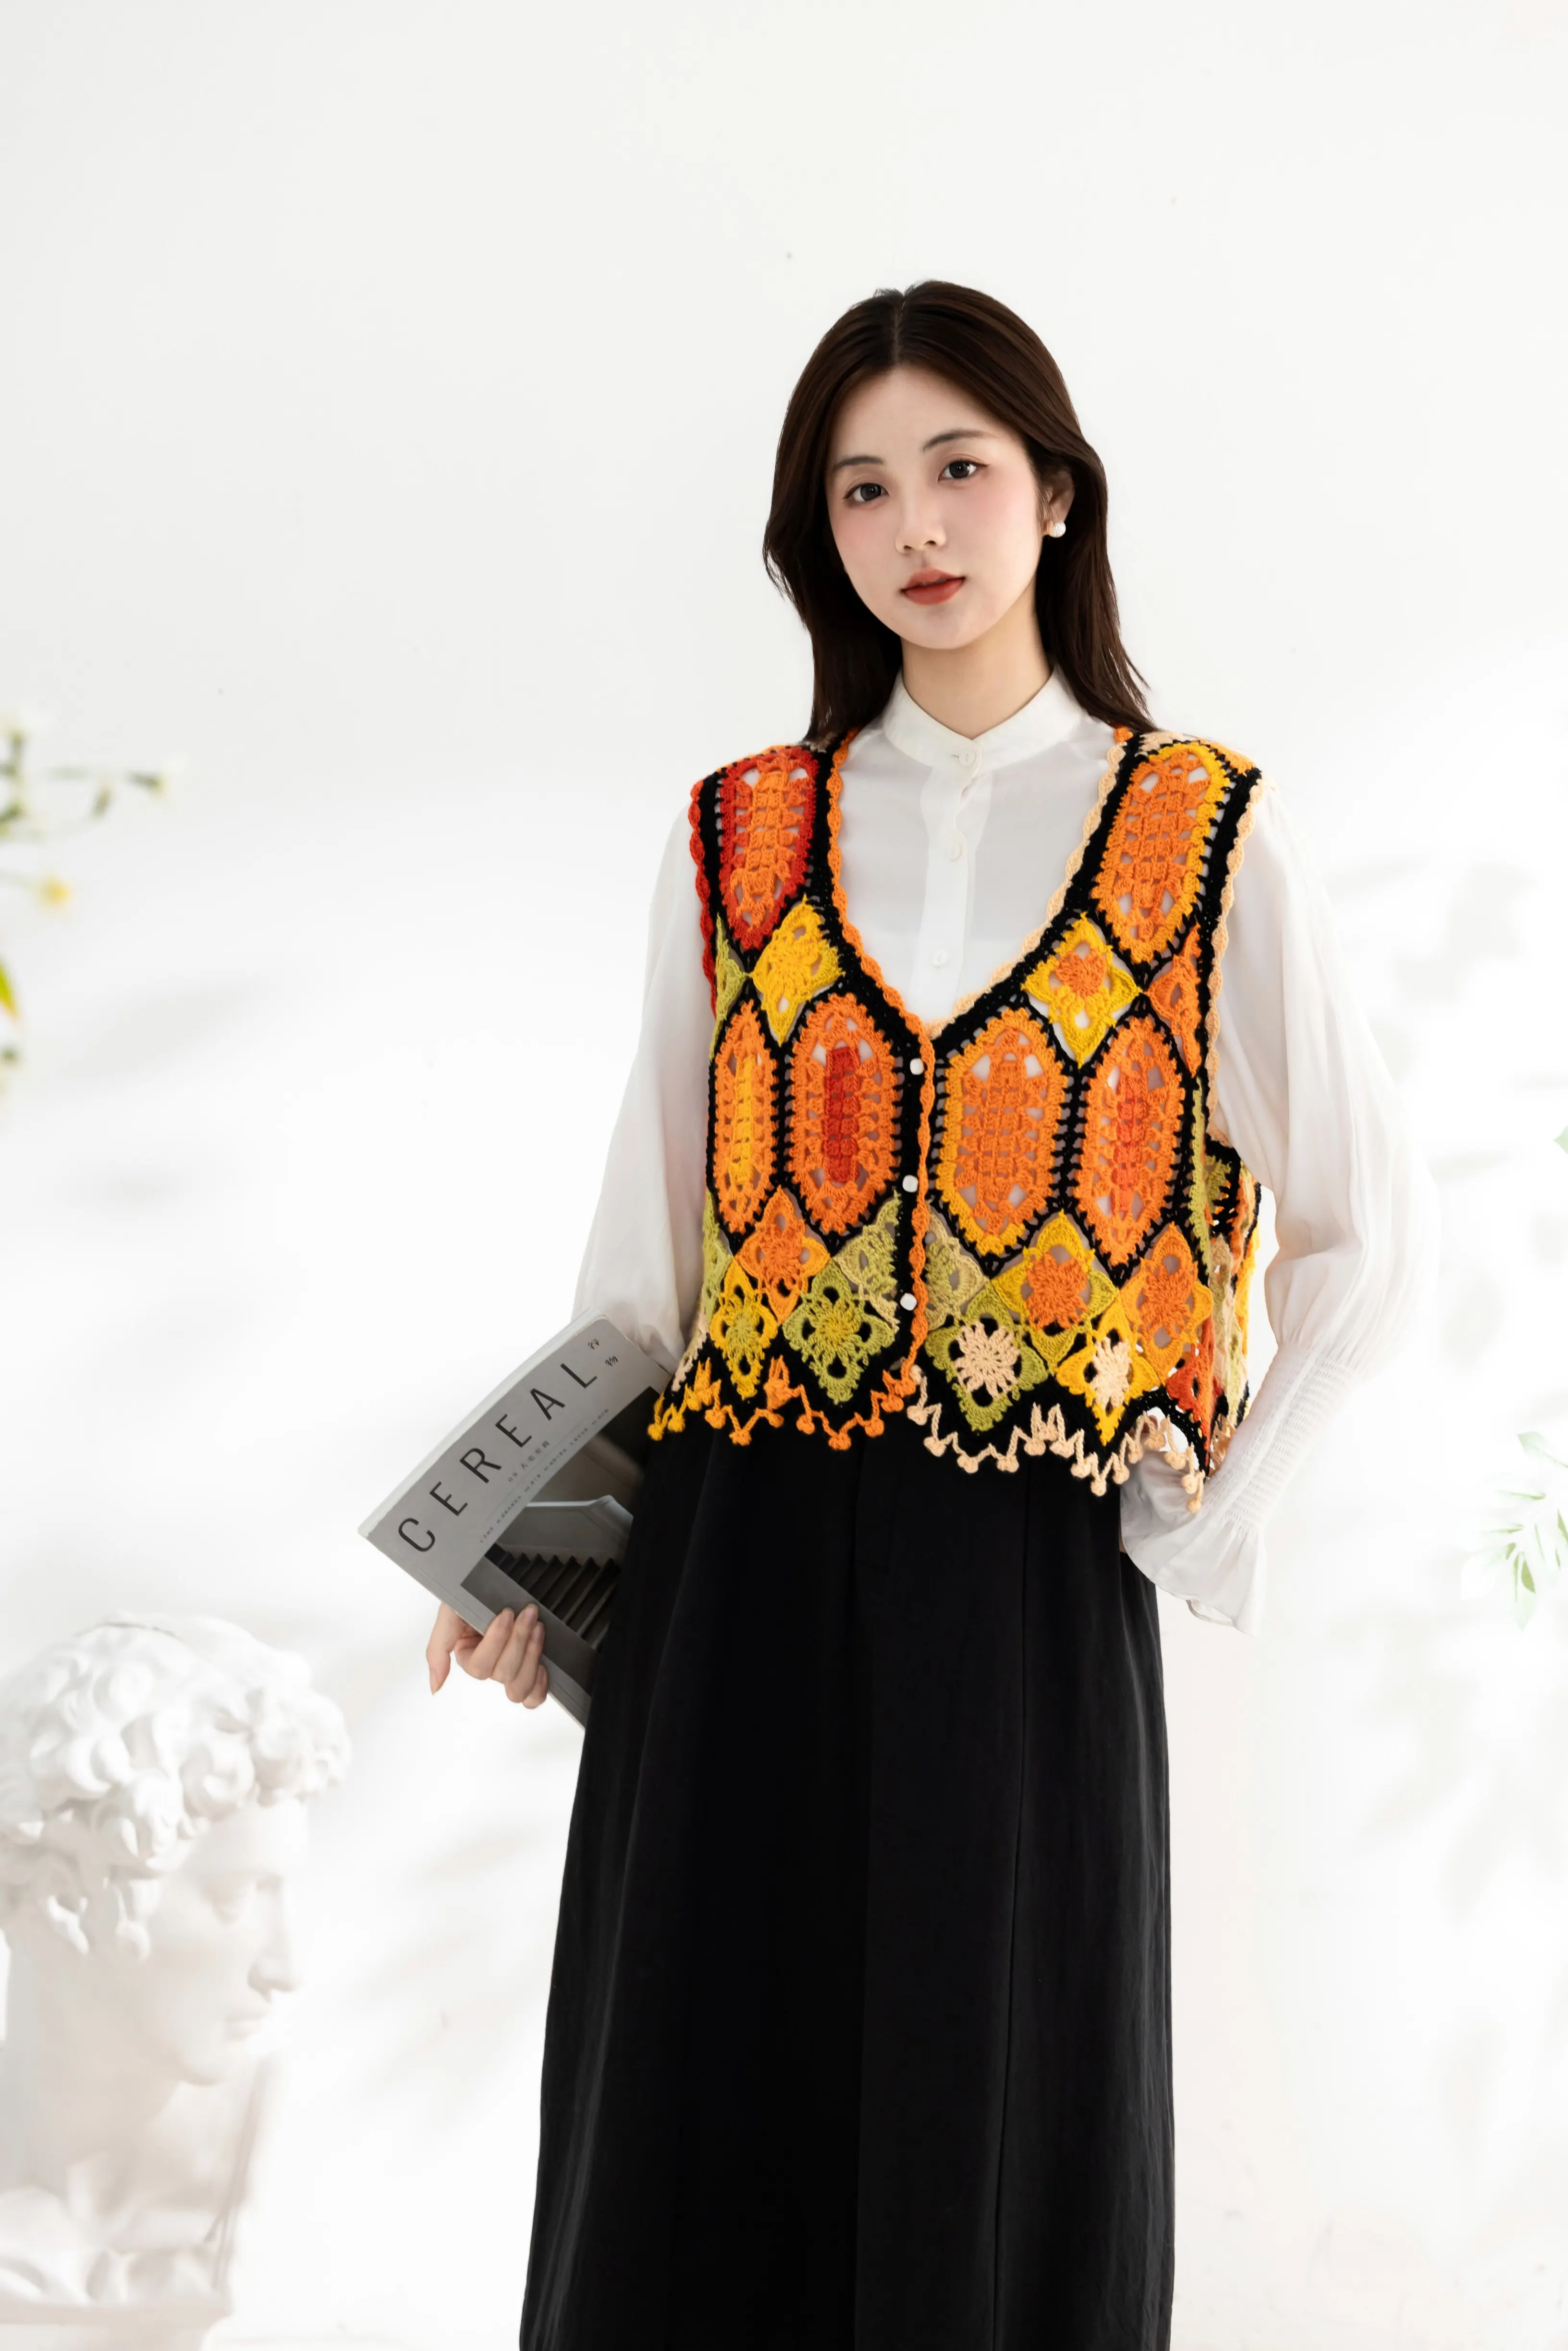
Clothes
Linjing
Project preview
See the finished project
Pattern format
Instructions
Watch and follow
Video tutorial
| Style | Yarn | Color |
|---|---|---|
| Style #1 | Morandi 4# |  06#Milky Blue  13#Bluefin  22#Argyle Purple  33#Whispering Blue |
| Style #2 | South African Soft Mohair Mixed Hand-Knitting Yarn |  11#Saxony Blue  15#Muted Clay  16#Orchid Petal |
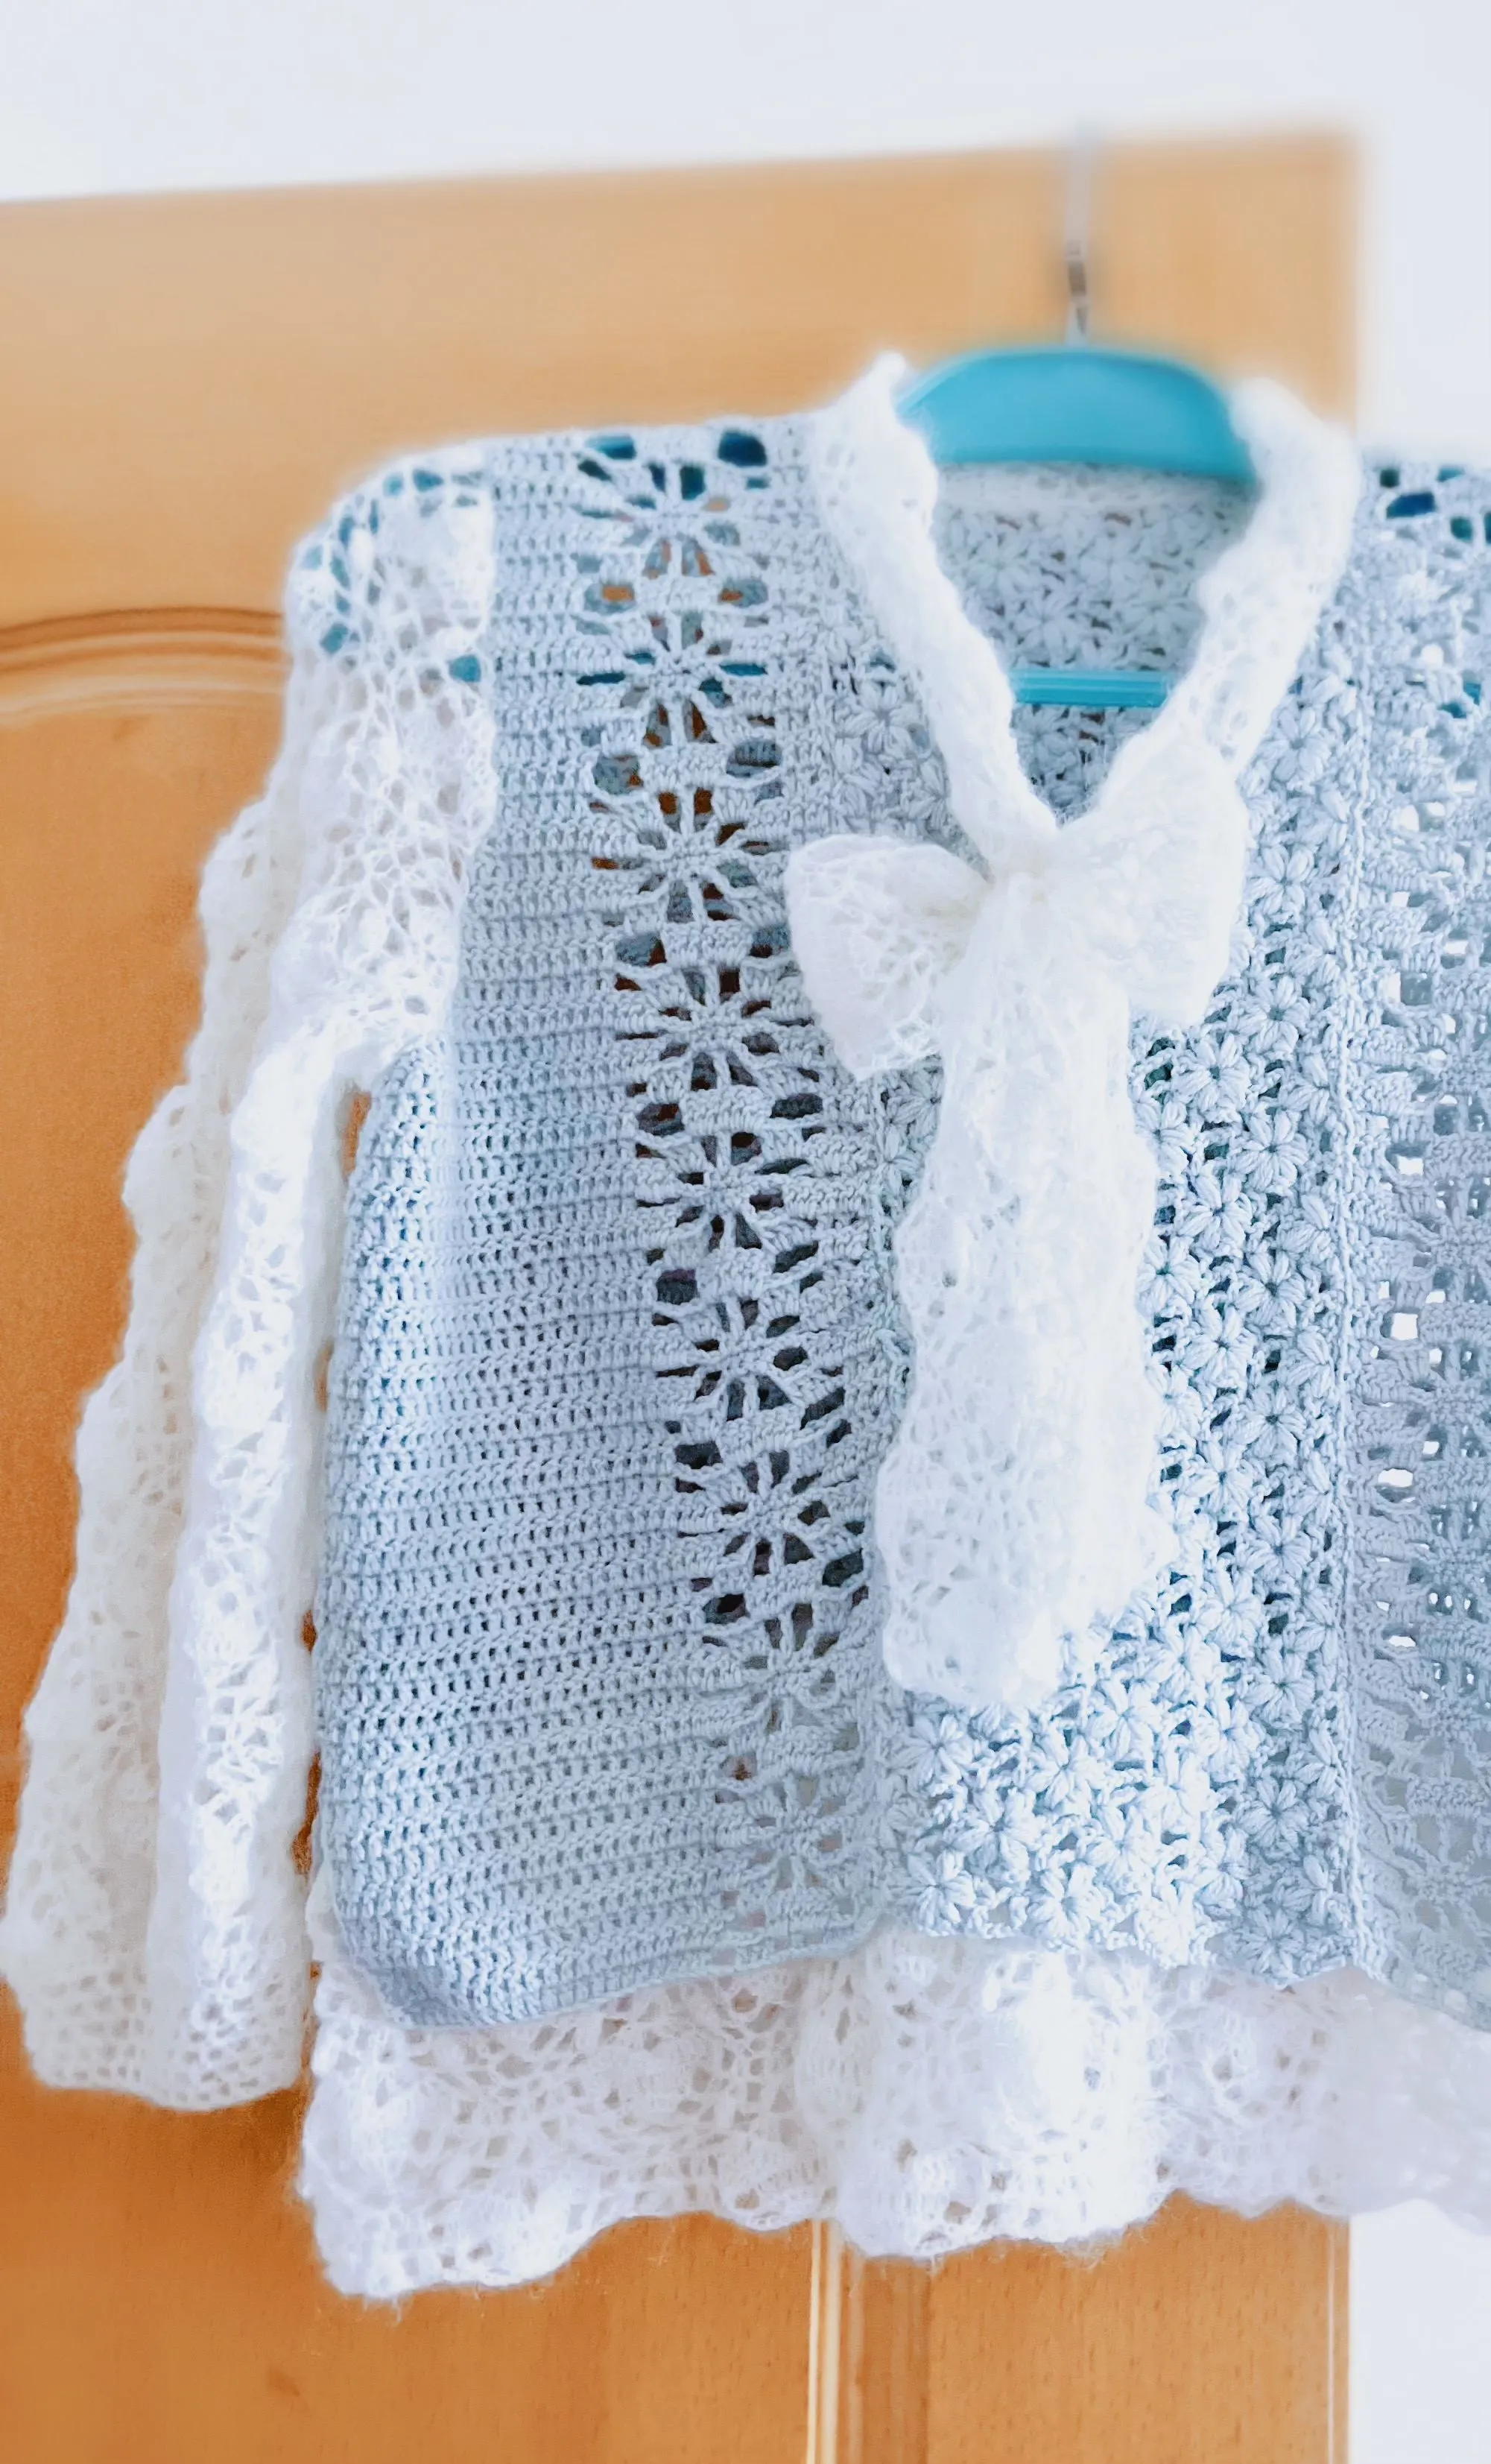
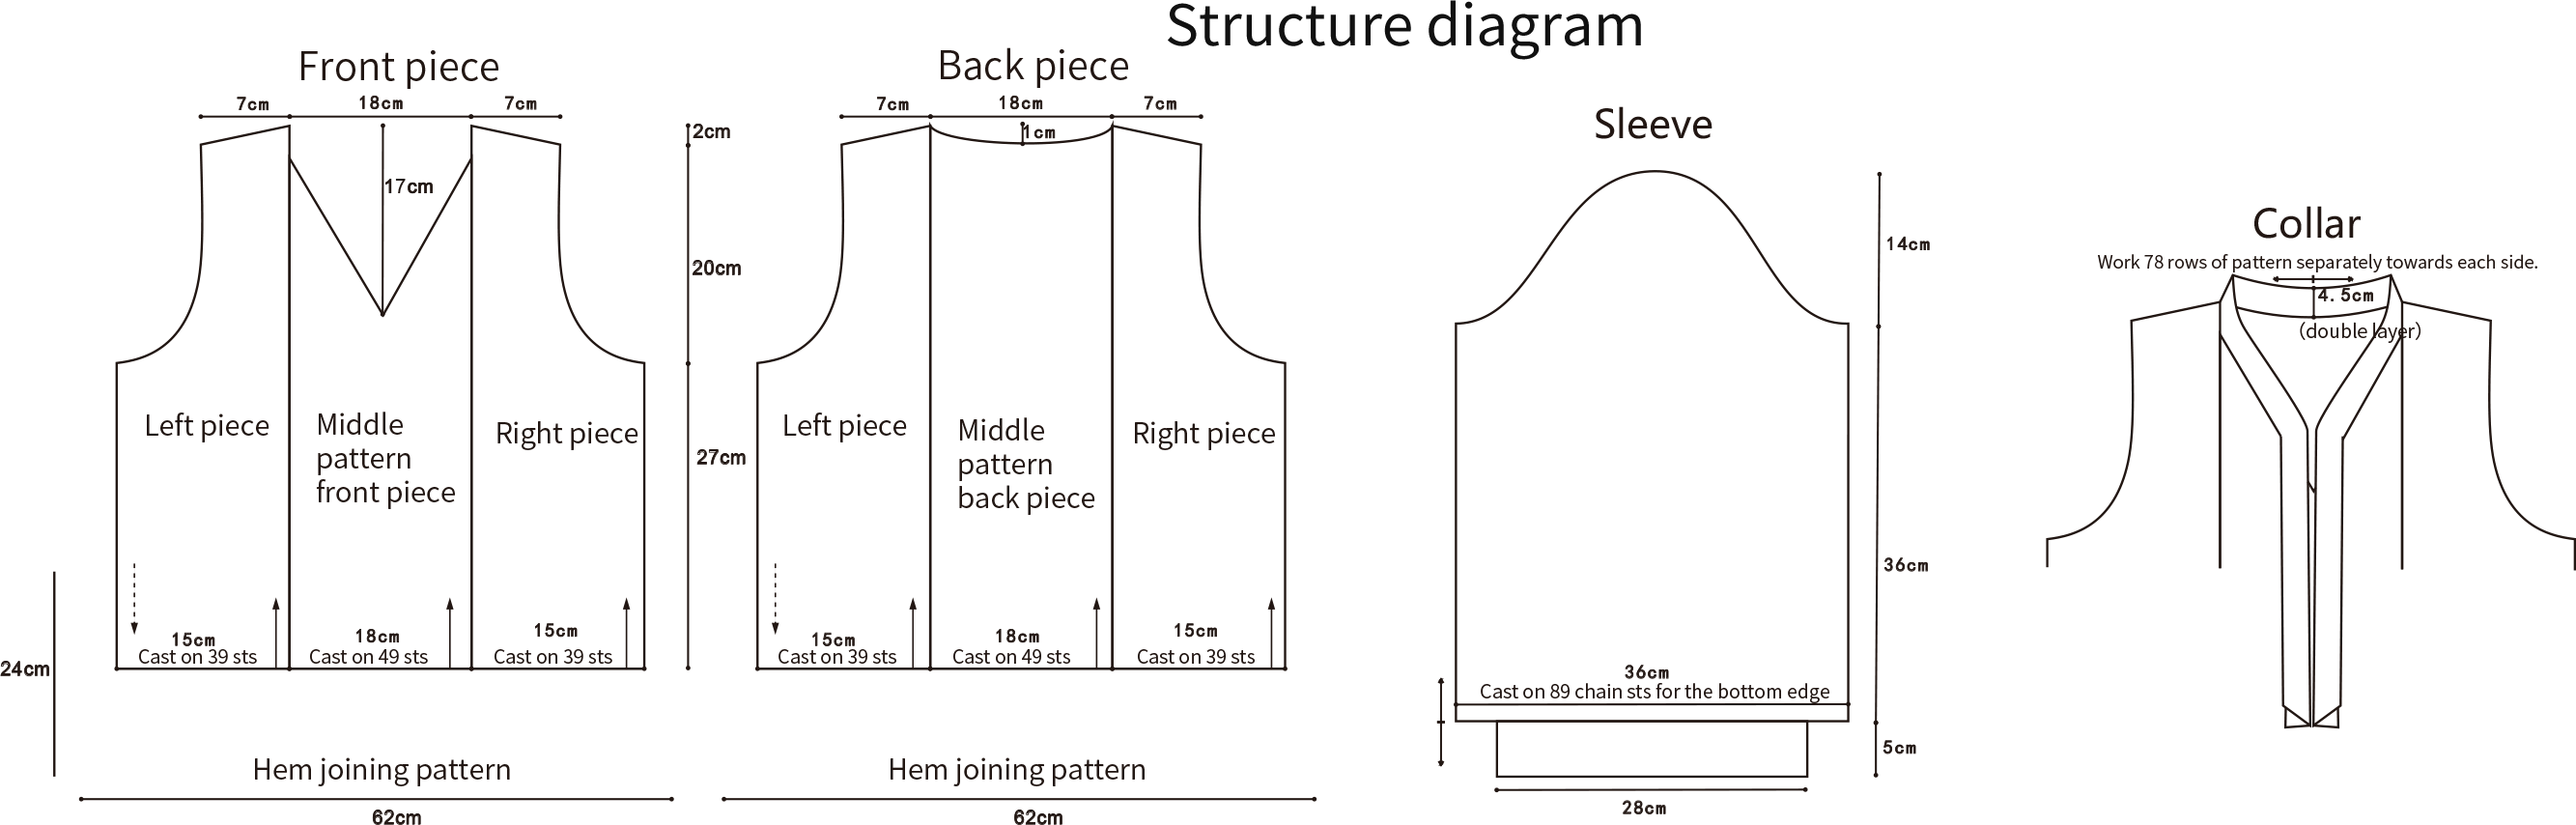
This cardigan is made up of seven parts: the front piece, back piece, sleeves, collar, ribbon ends part, hem pattern, joining together, and edges section.
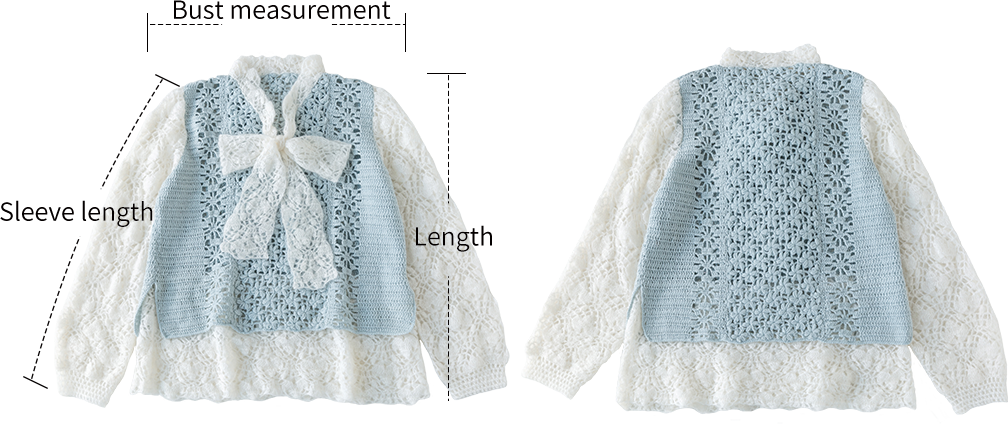
| Unit:cm | Bust measurement | Length | Sleeve length |
| Small | 48 | 56 | 55 |
The handcrafted measurements may have an error of 1 to 2 cm.
Due to variations in individual tension, the size of the sample is for reference only.
Materials: Morandi 4# and South African Soft Mohair Mixed Hand-Knitting Yarn
Tool : 2.50 mm crochet hook

Chart Key





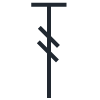




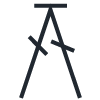
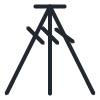
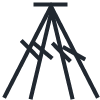
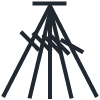
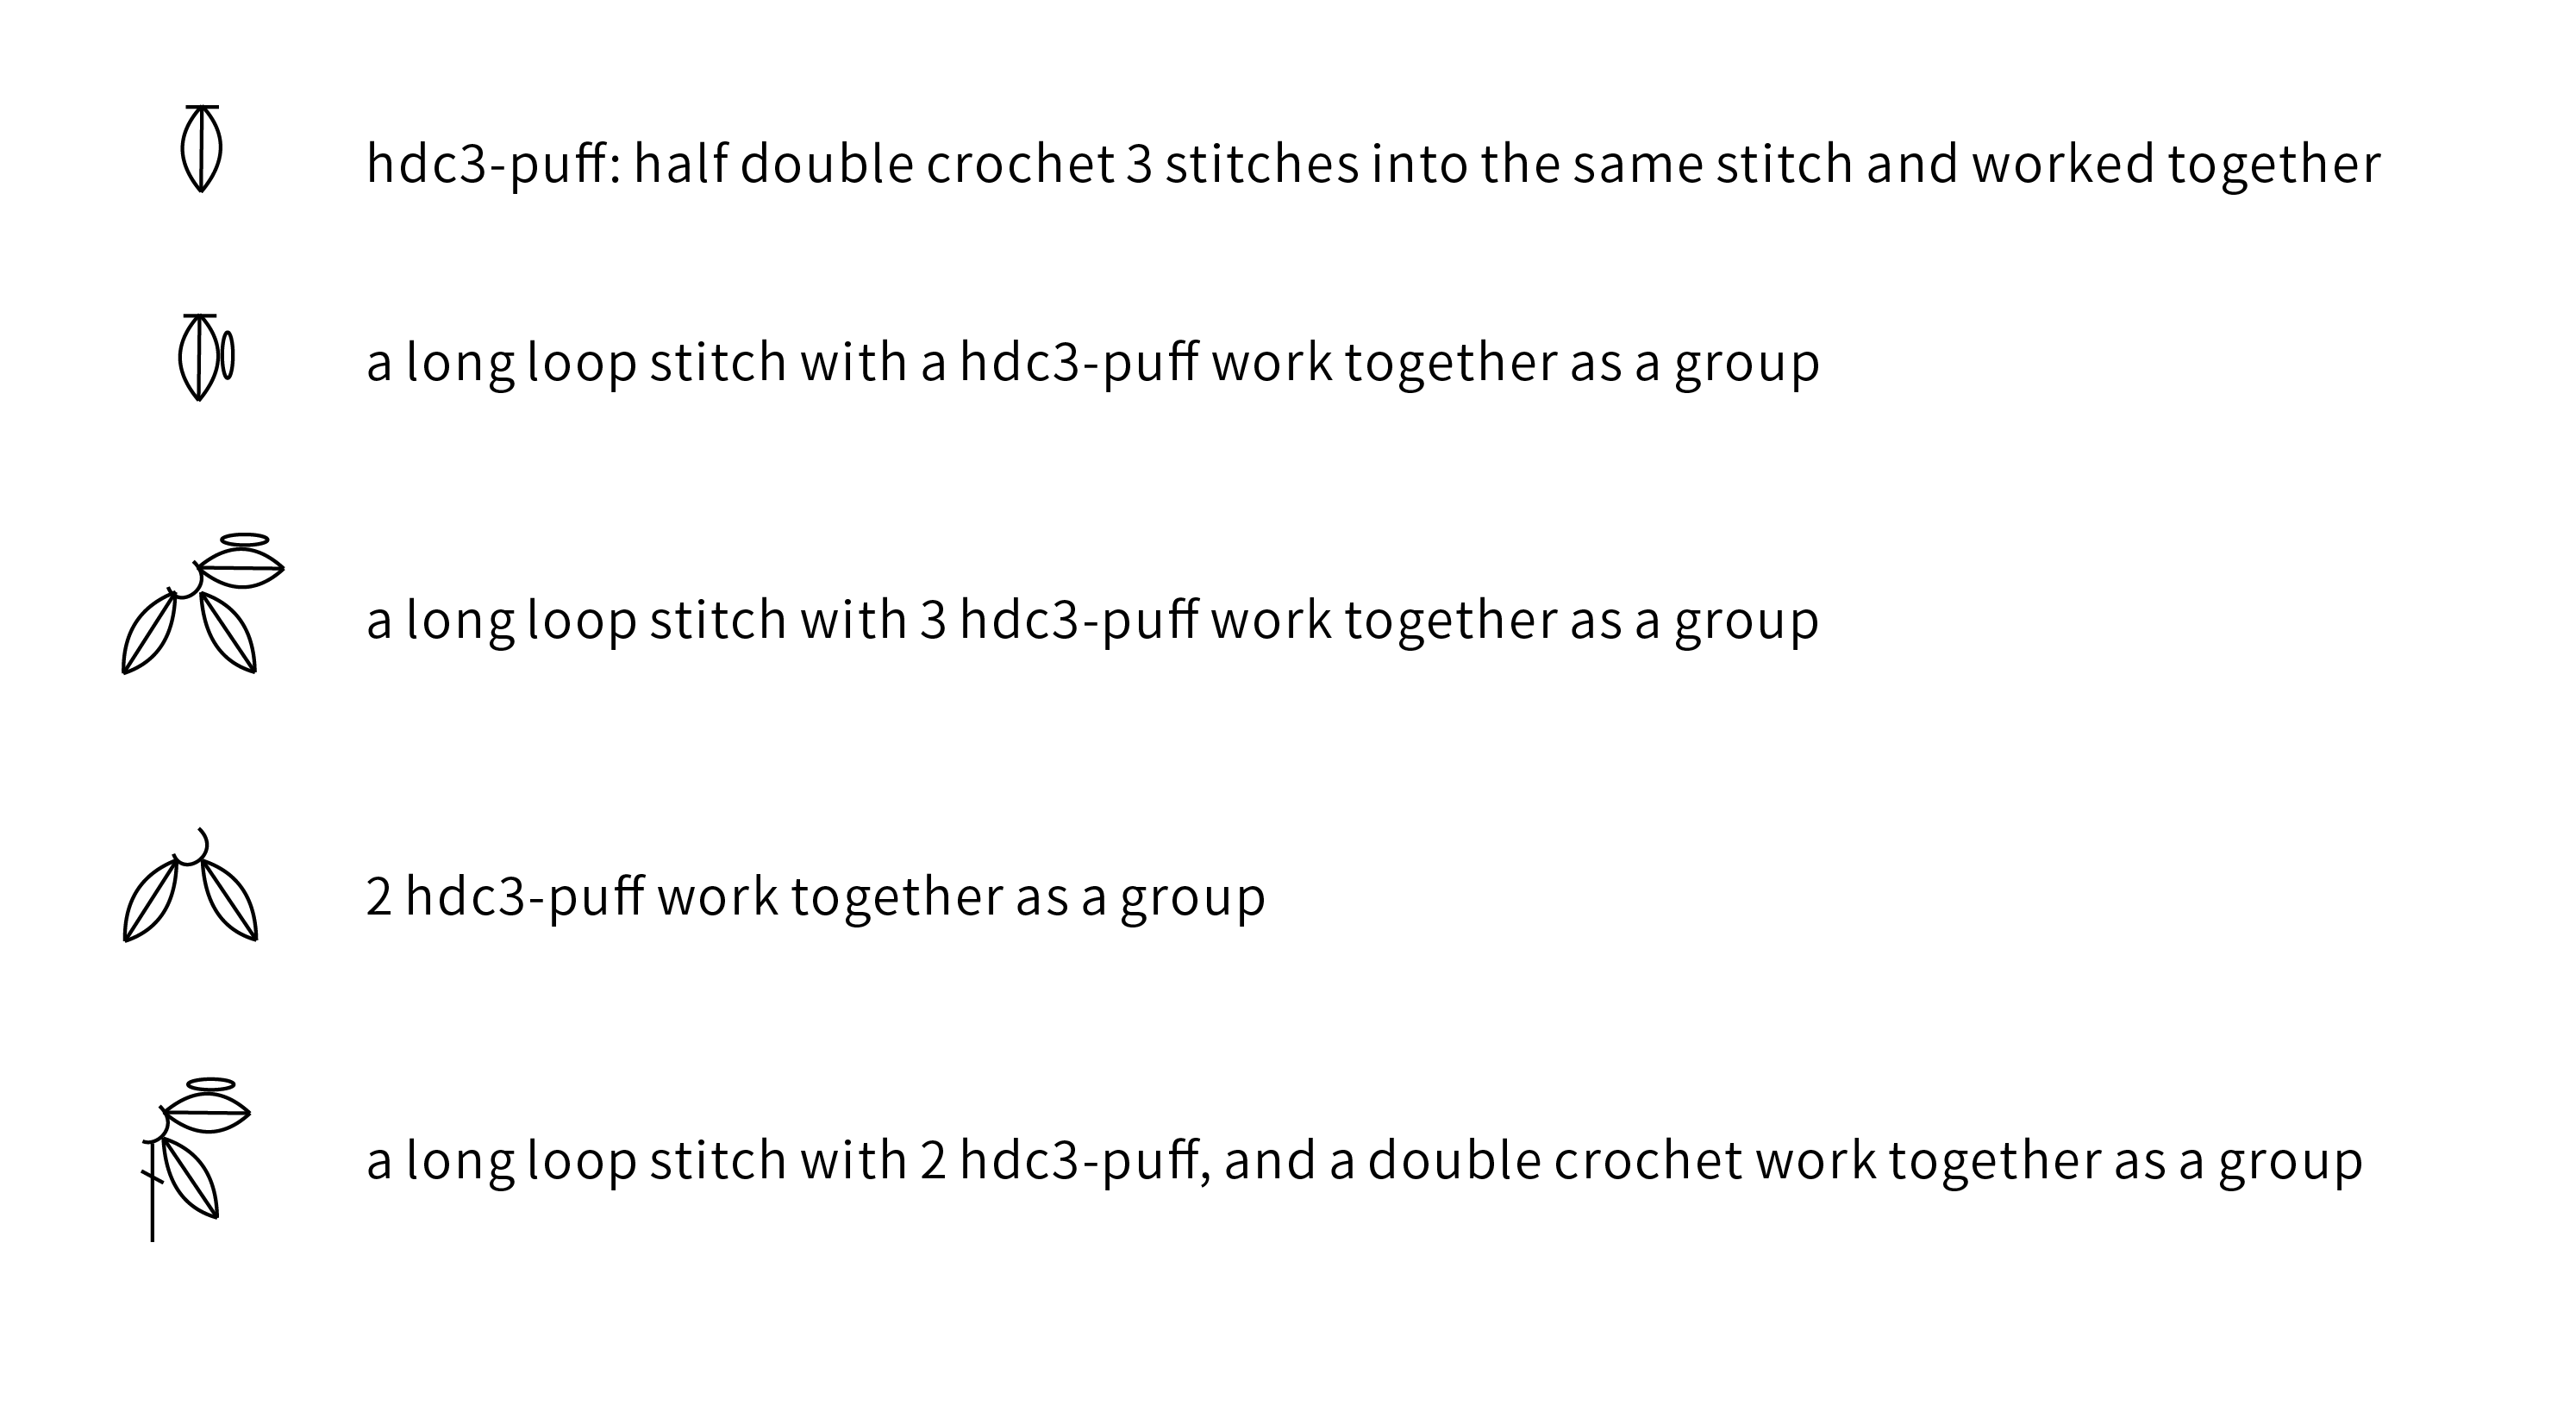
Note:
This pattern is making in Chinese crochet pattern terms, and the stitch name is written using American terminology. All measurements in charts are in cm.
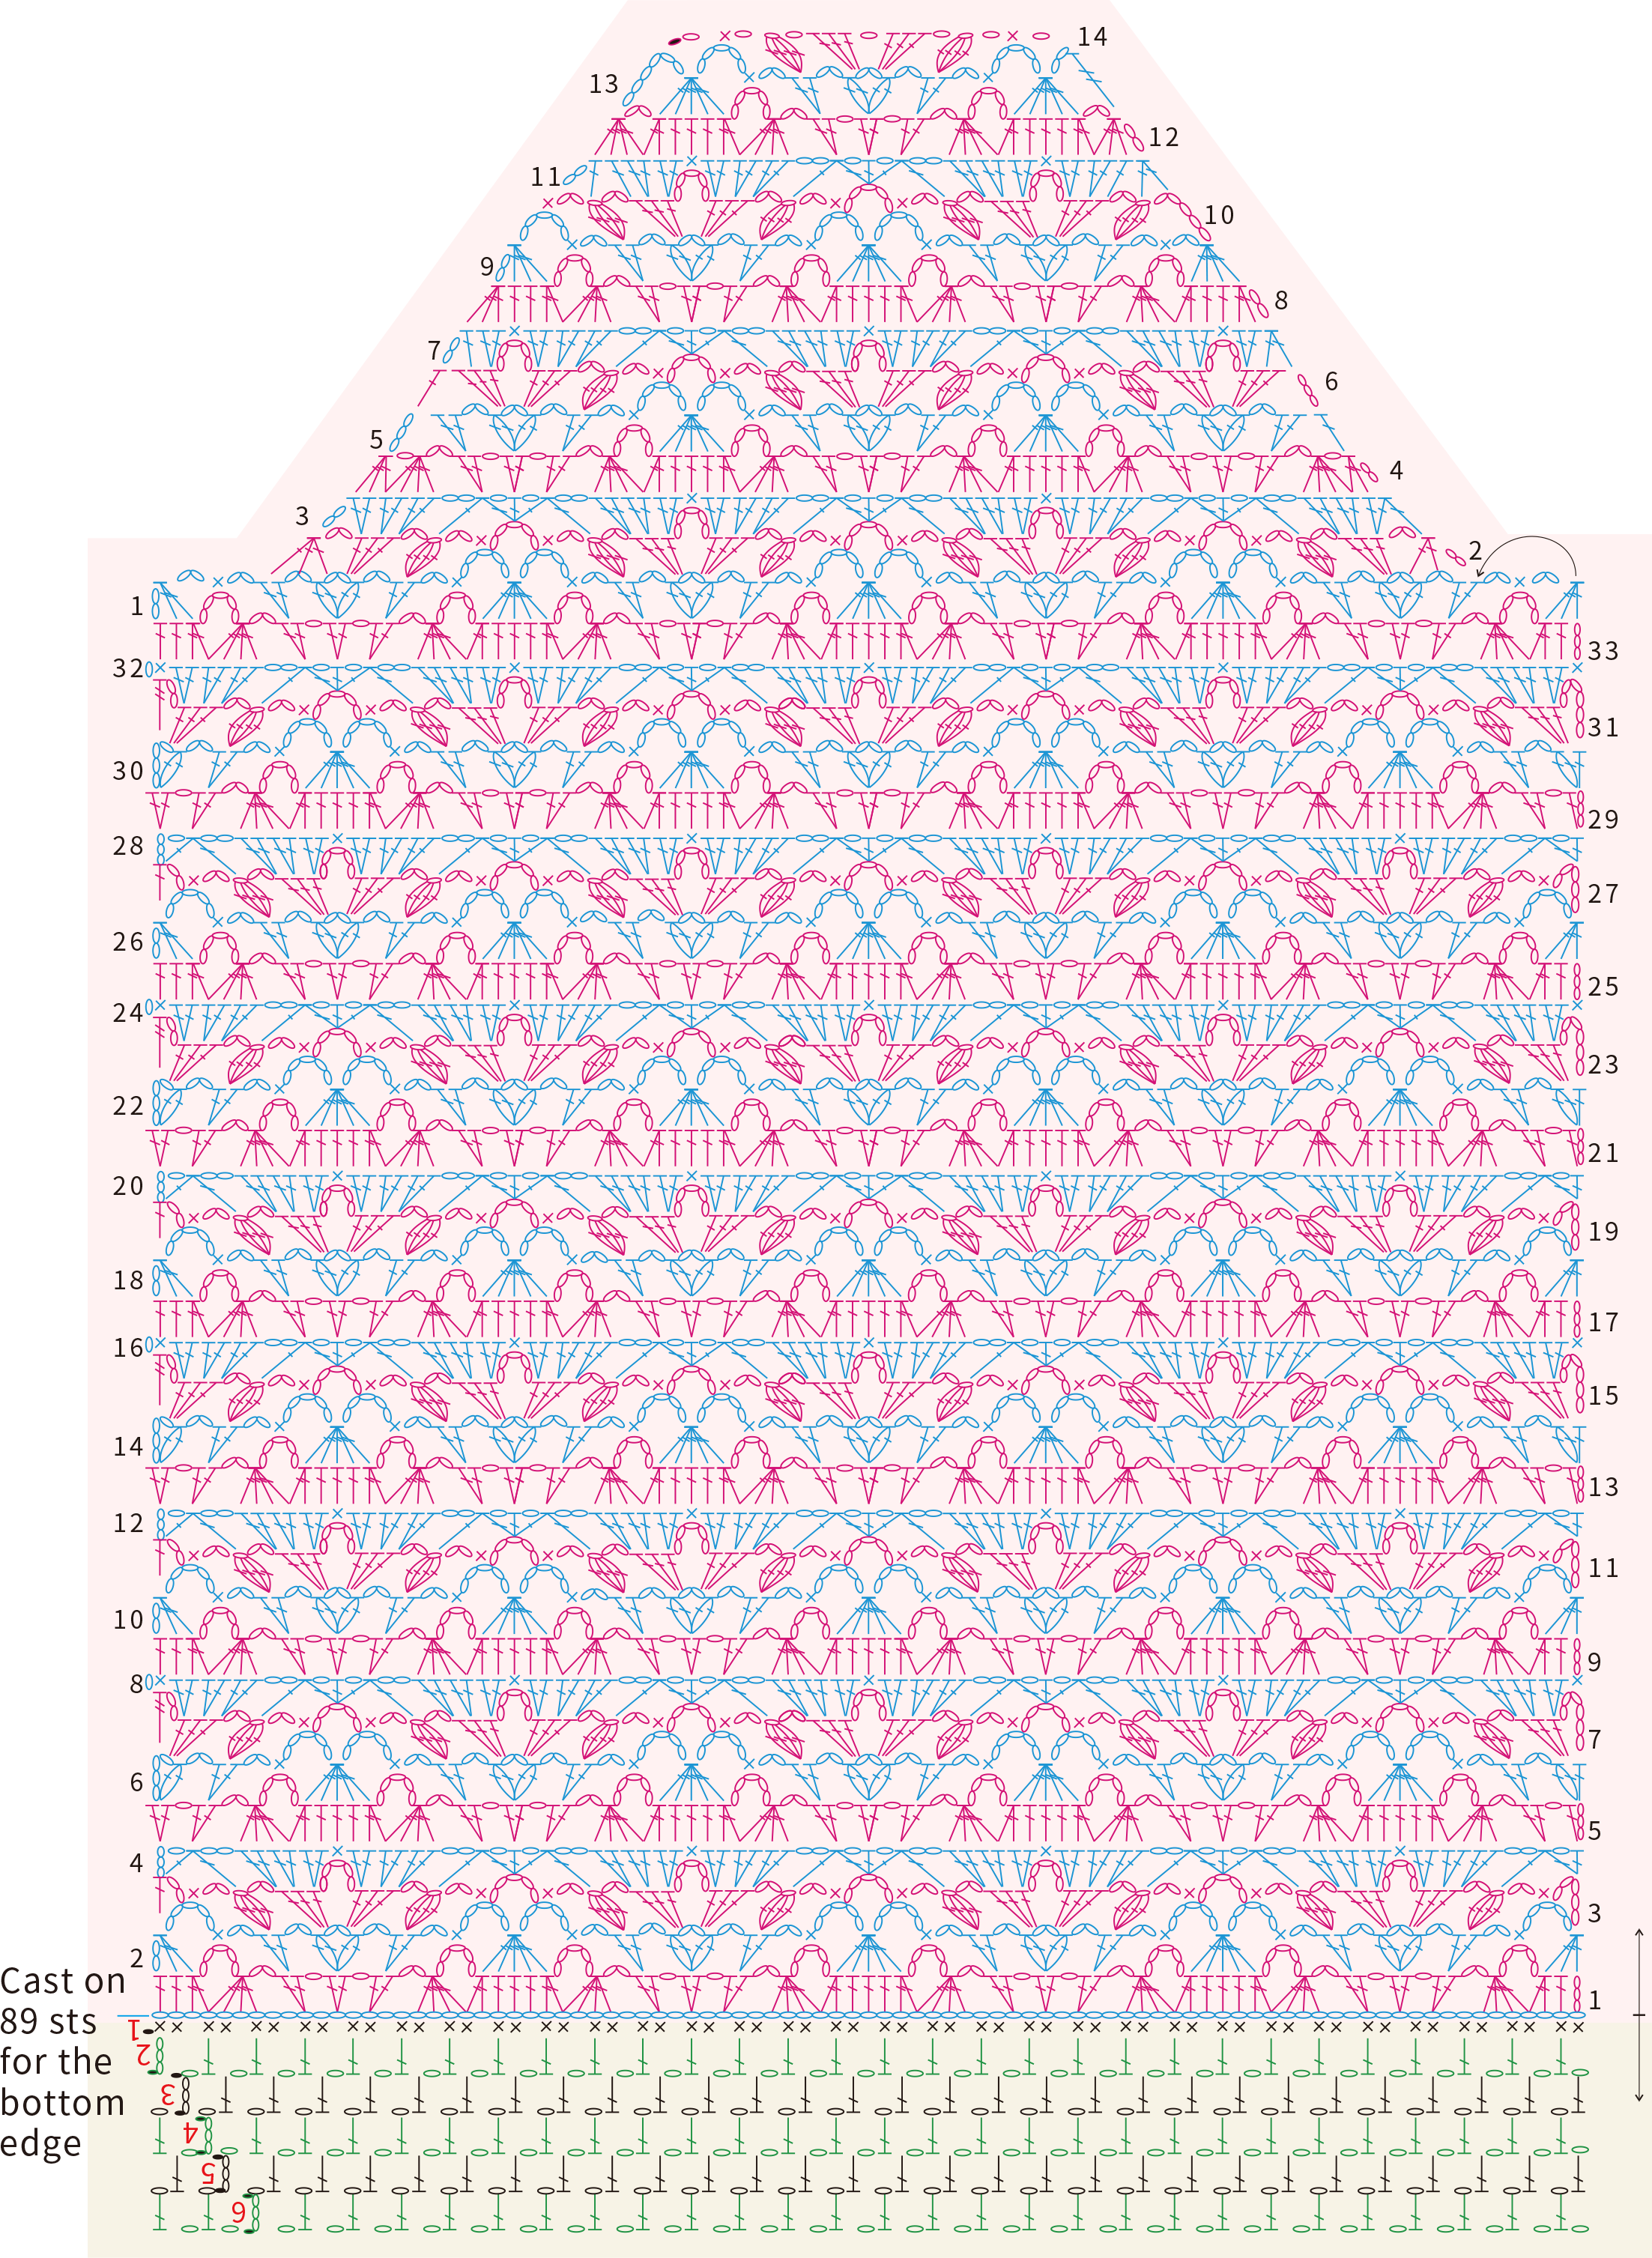
Part 1 Middle pattern
We will start from foundation chain, and crochet back and forth upward along the starting point. The lower part of the middle pattern is exactly the same. When you crochet to the neck opening position, due to the difference in decreasing stitches, it is divided into the back body and front body of the middle pattern.
Yarn usage for each part: The front body, back body, and edges are crocheted with Morandi No.4, and the other parts are crocheted with Mohair.
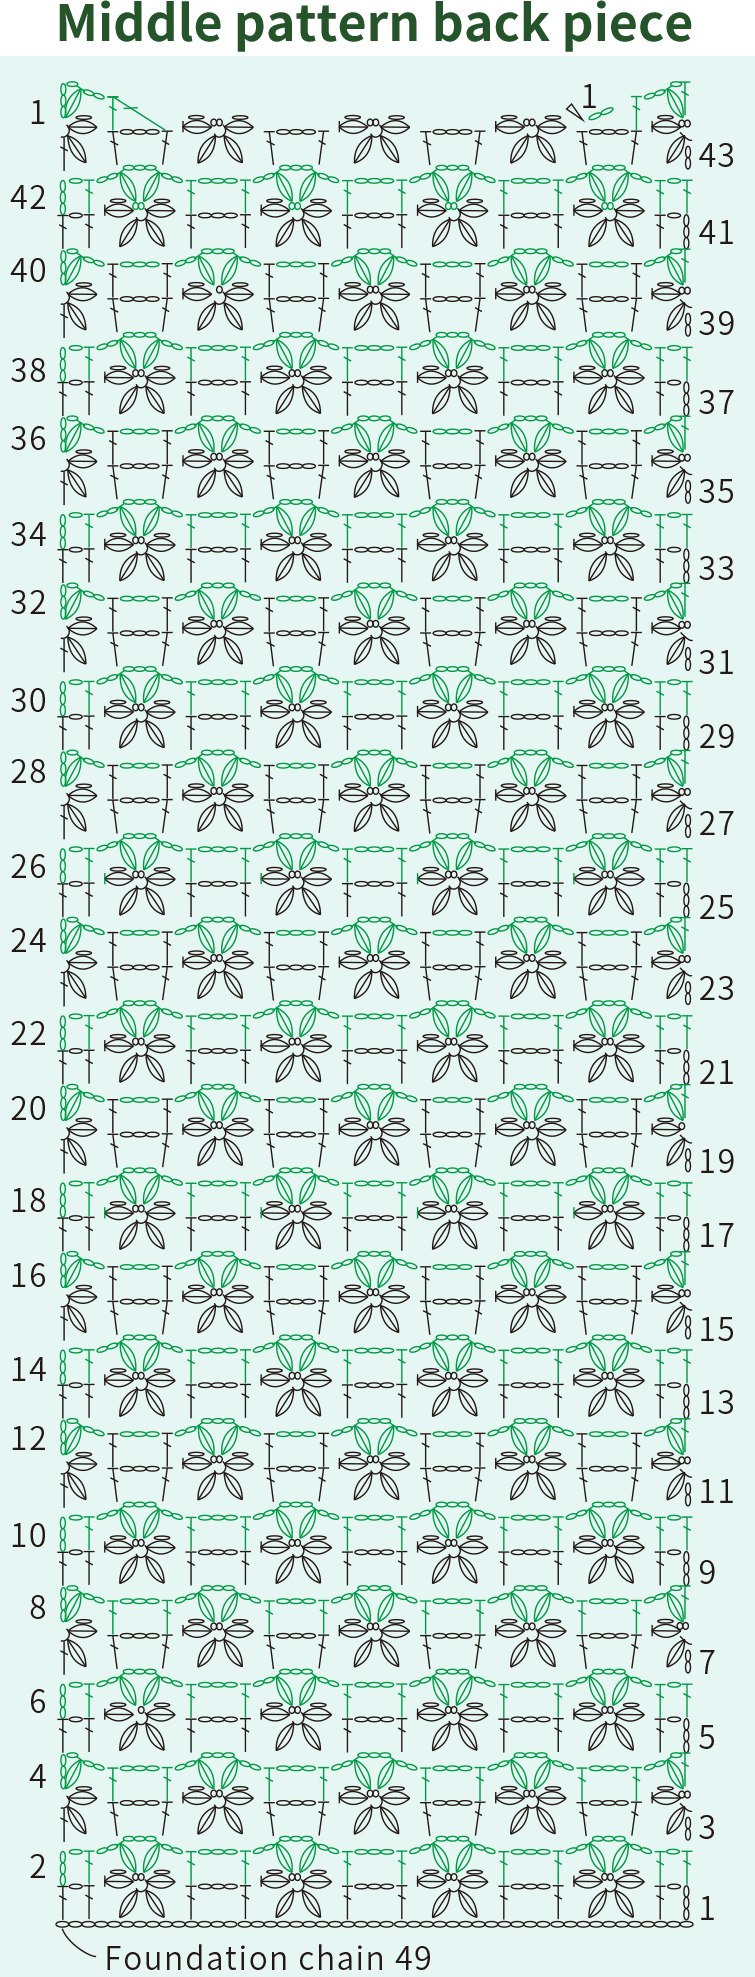
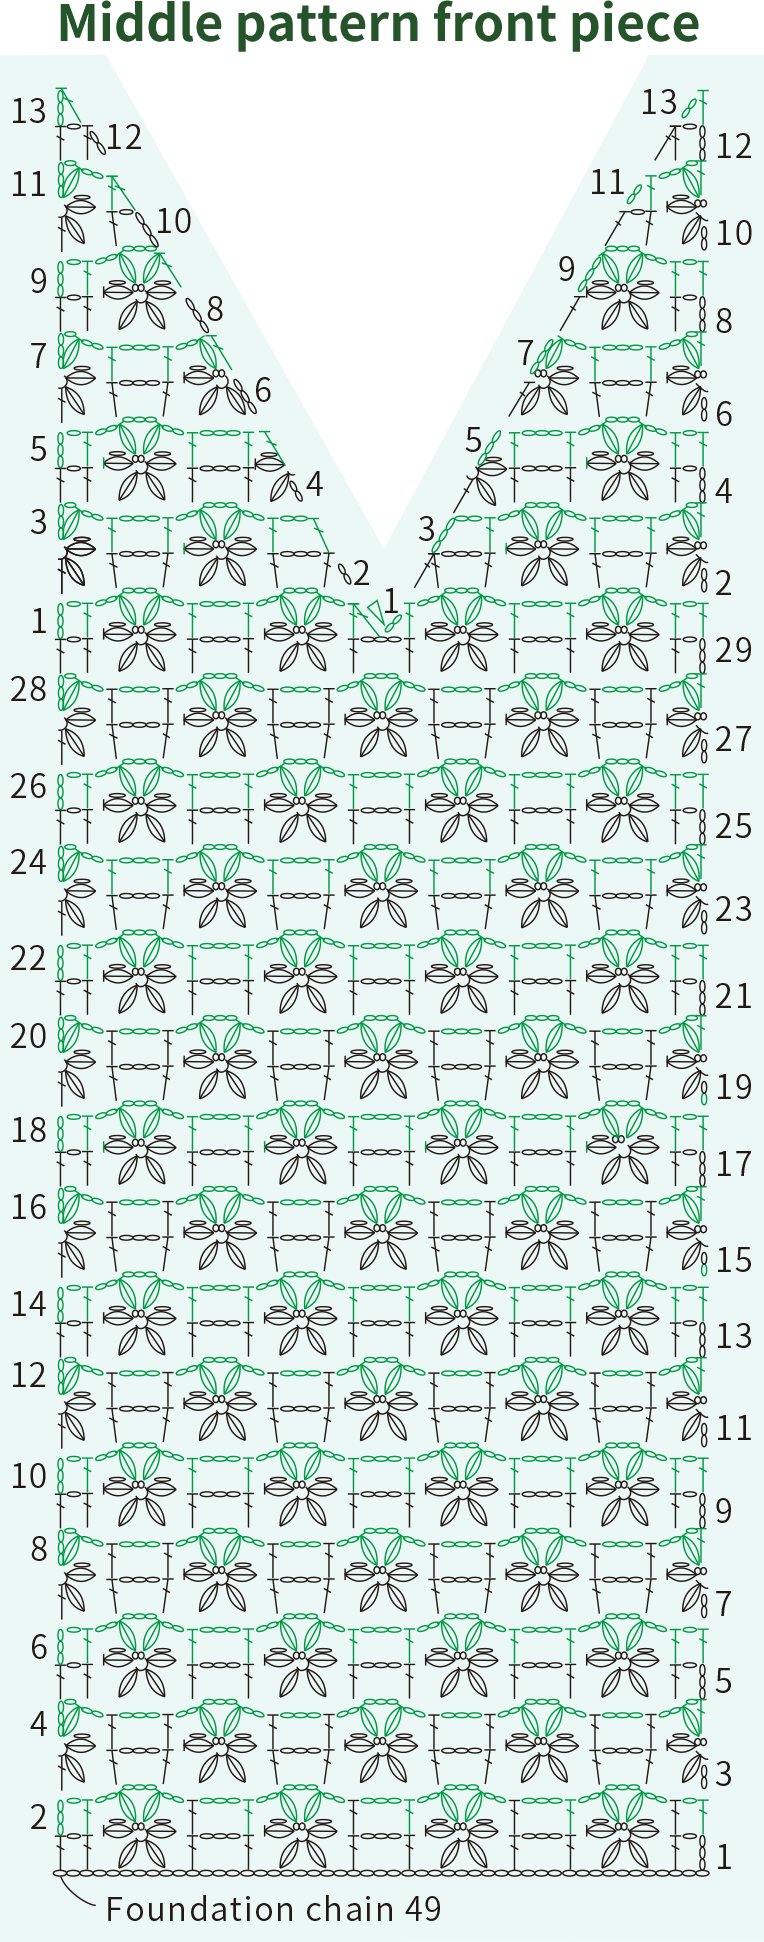
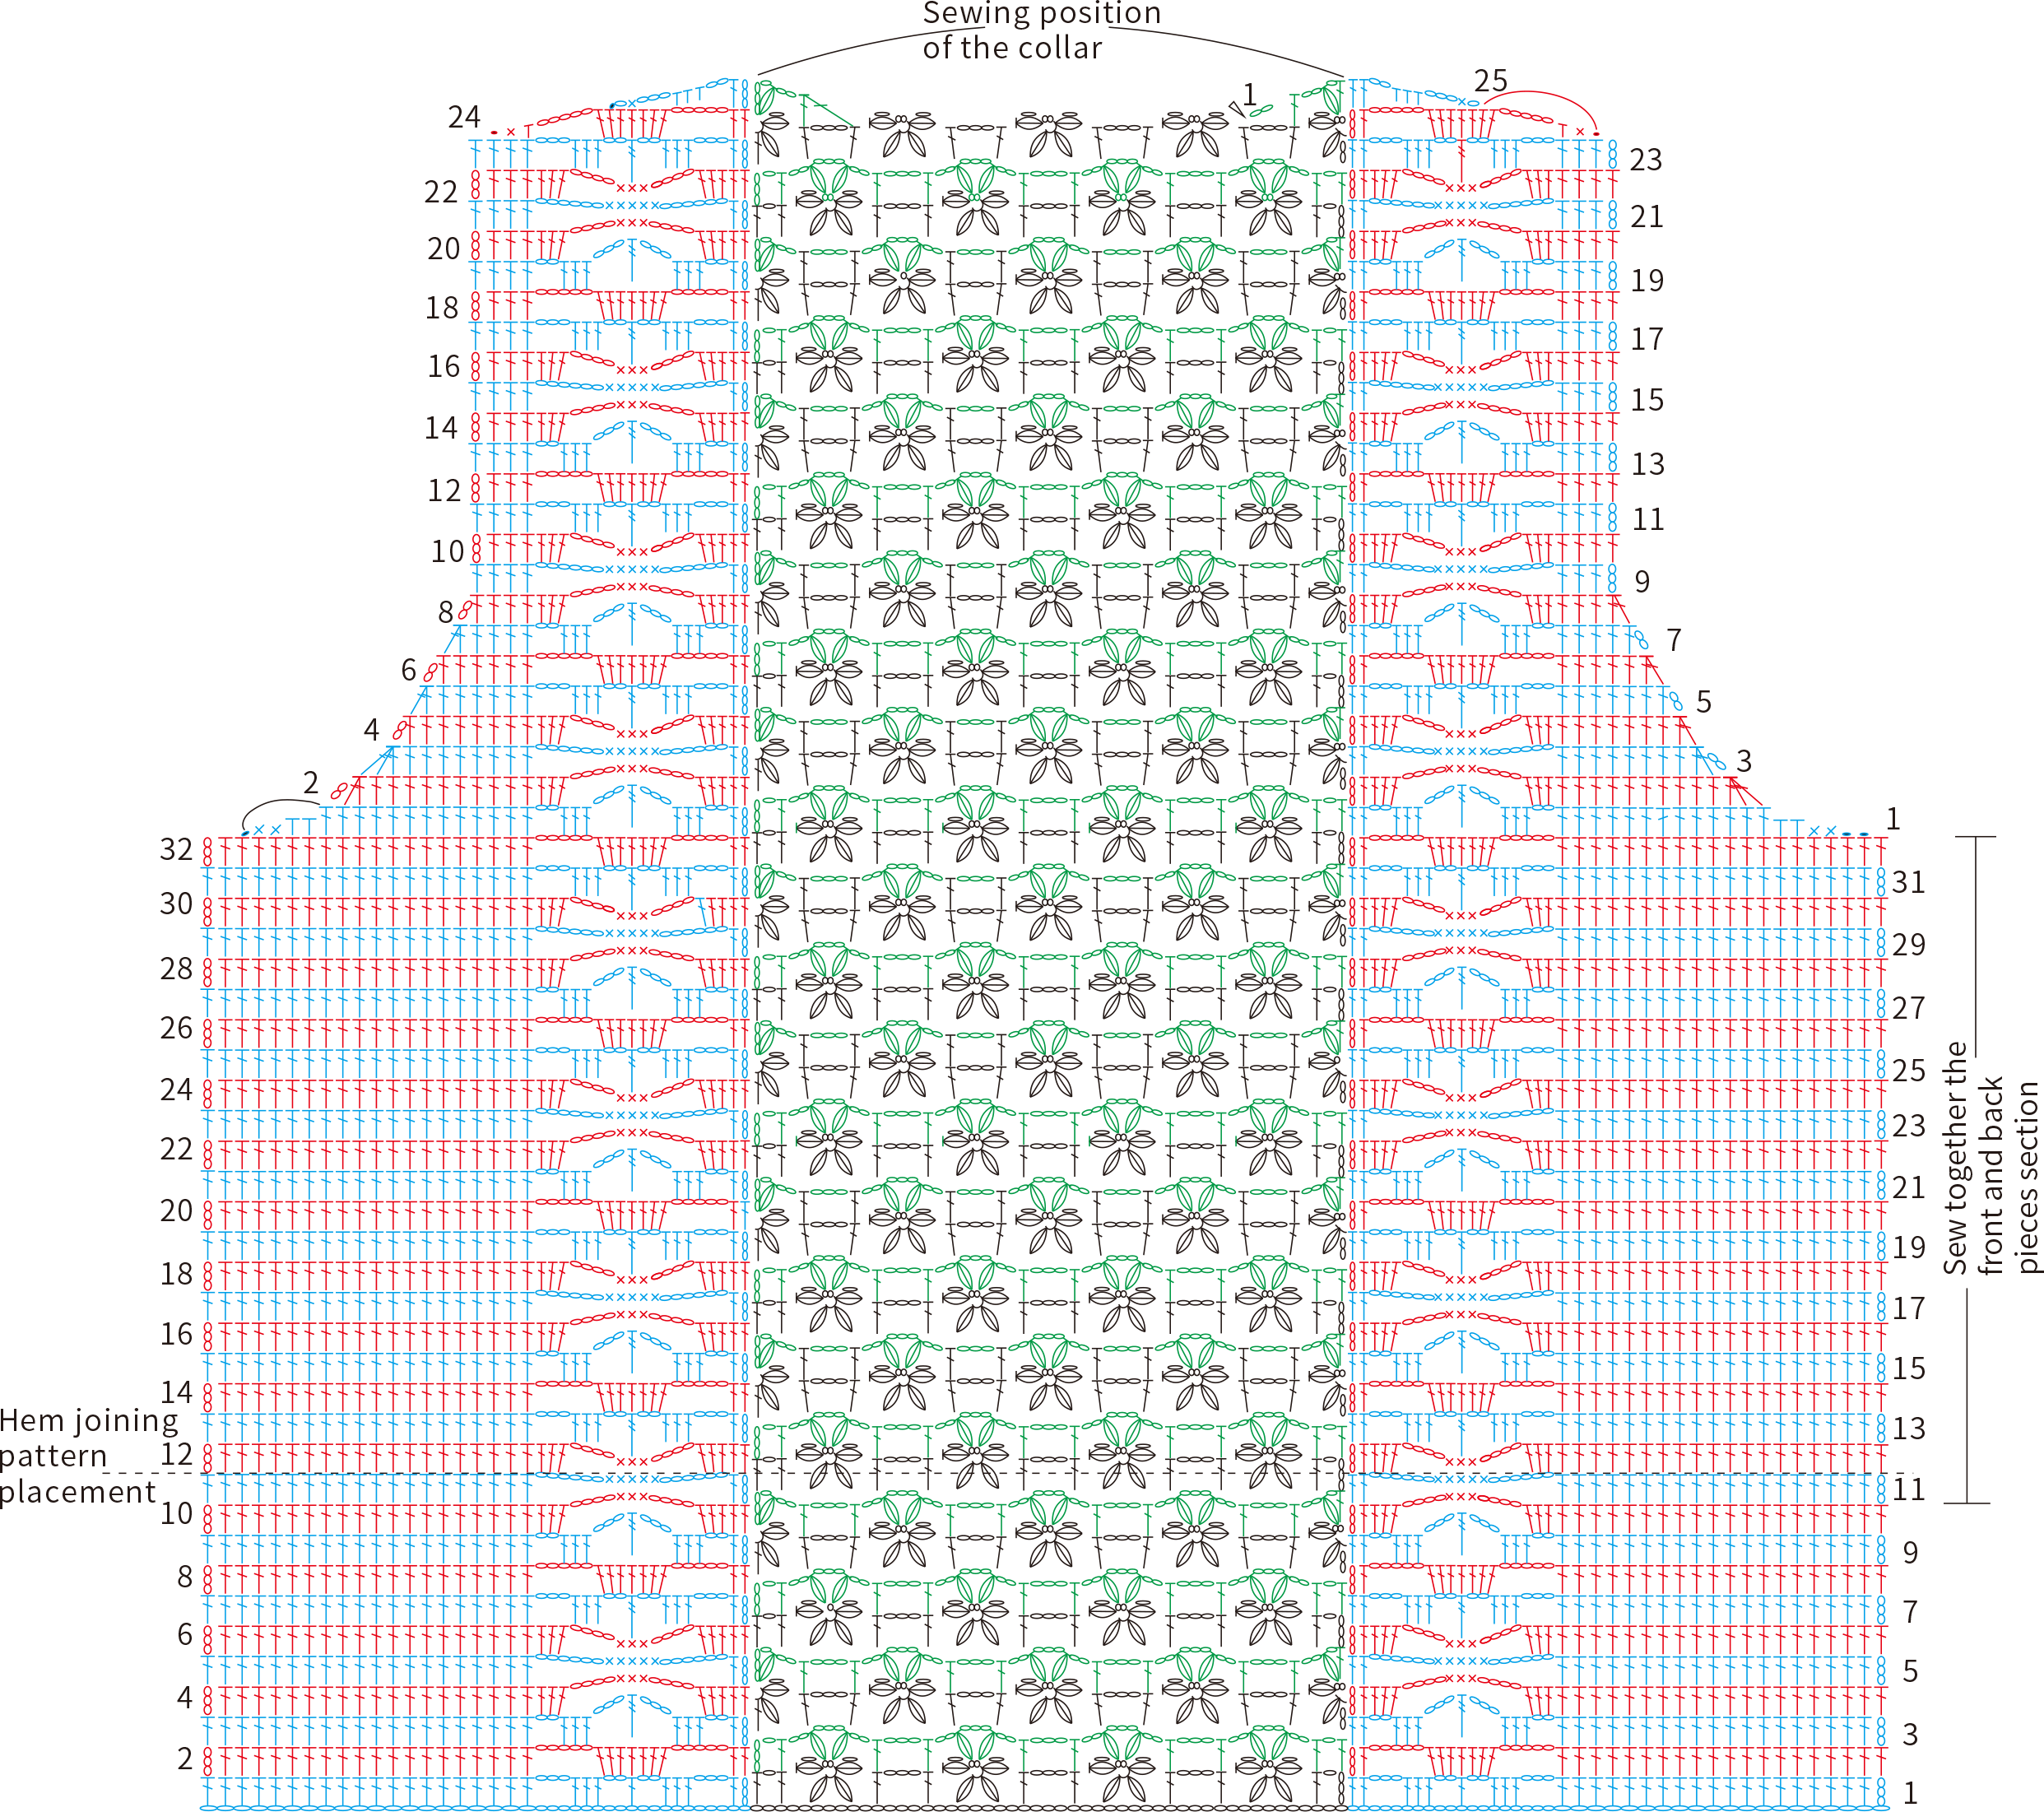
Part 2 Symmetrical garment pieces on both sides
Here, the right side of the actual project is considered as the right piece, and the left side of the actual project is considered as the left piece. Both the right and left pieces are composed of long needles and lace patterns, but in opposite orders.
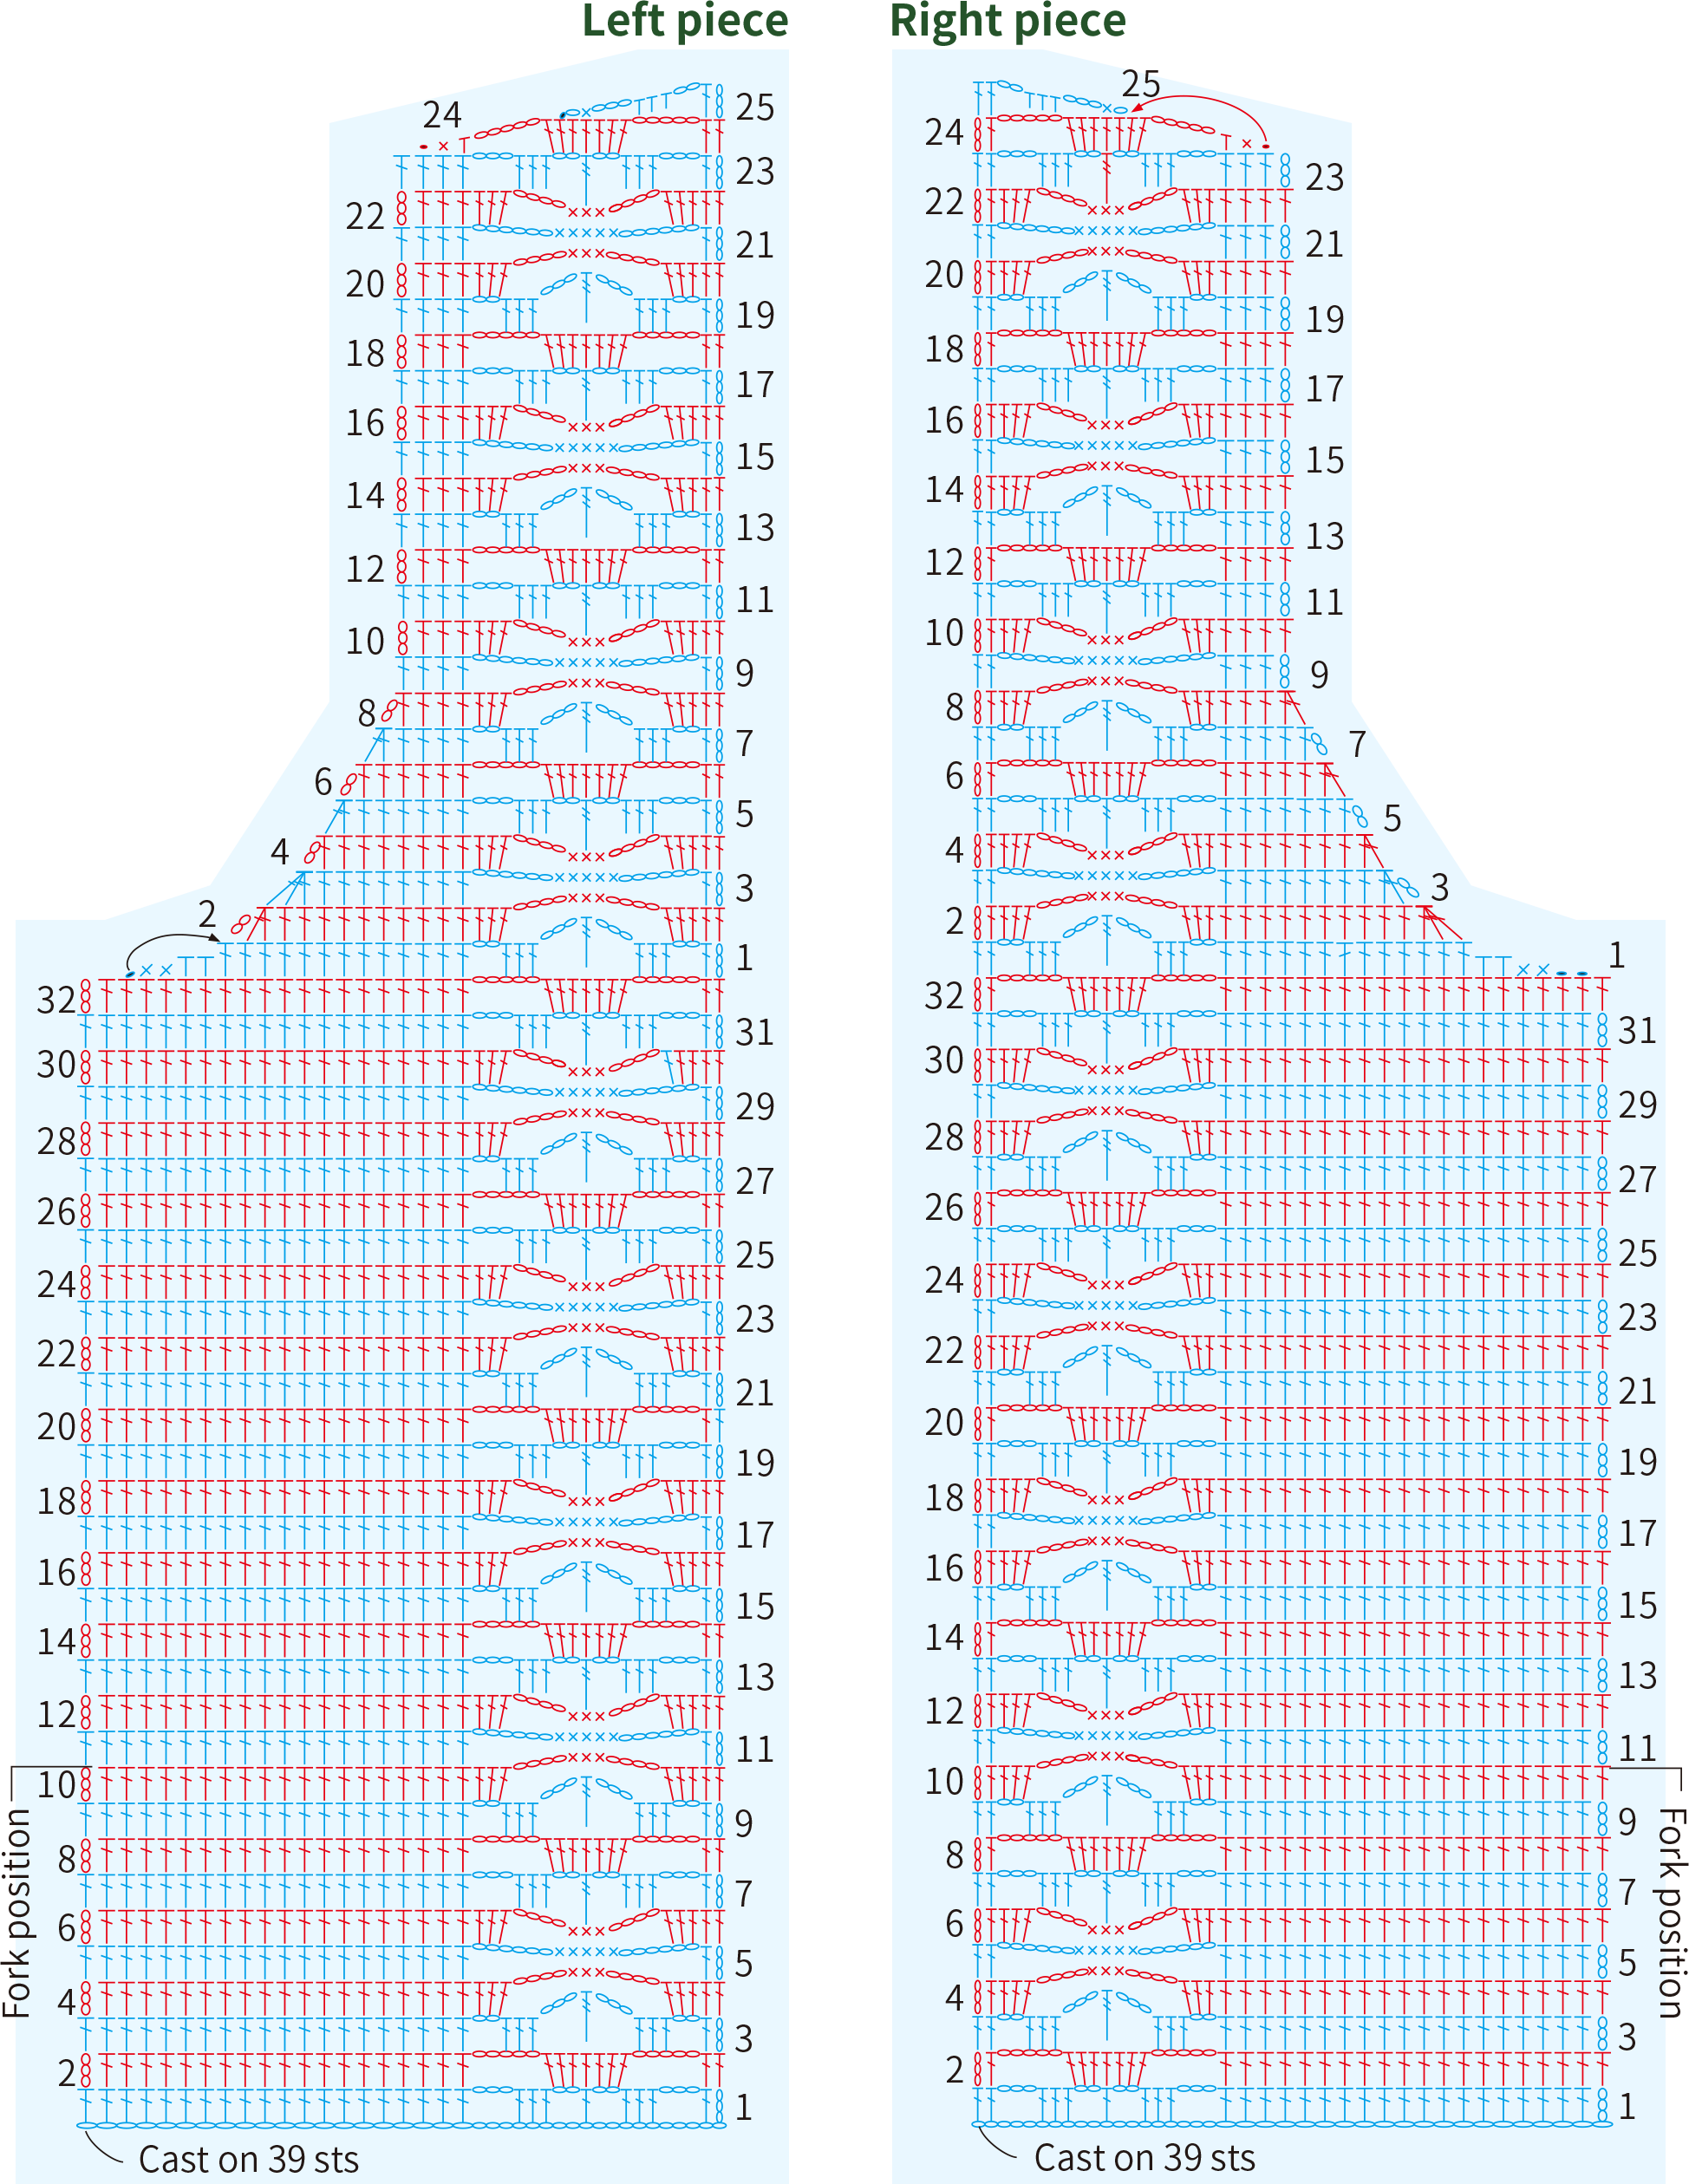
Part 3 Sleeve
The sleeve is divided into two parts. First, crochet the sleeve panel part as a flat piece, working back and forth. After finishing the sleeve panel, join it to form a sleeve tube. Then, at the cuff position, pick up stitches according to the chart and continue crocheting downward to create the cuff.
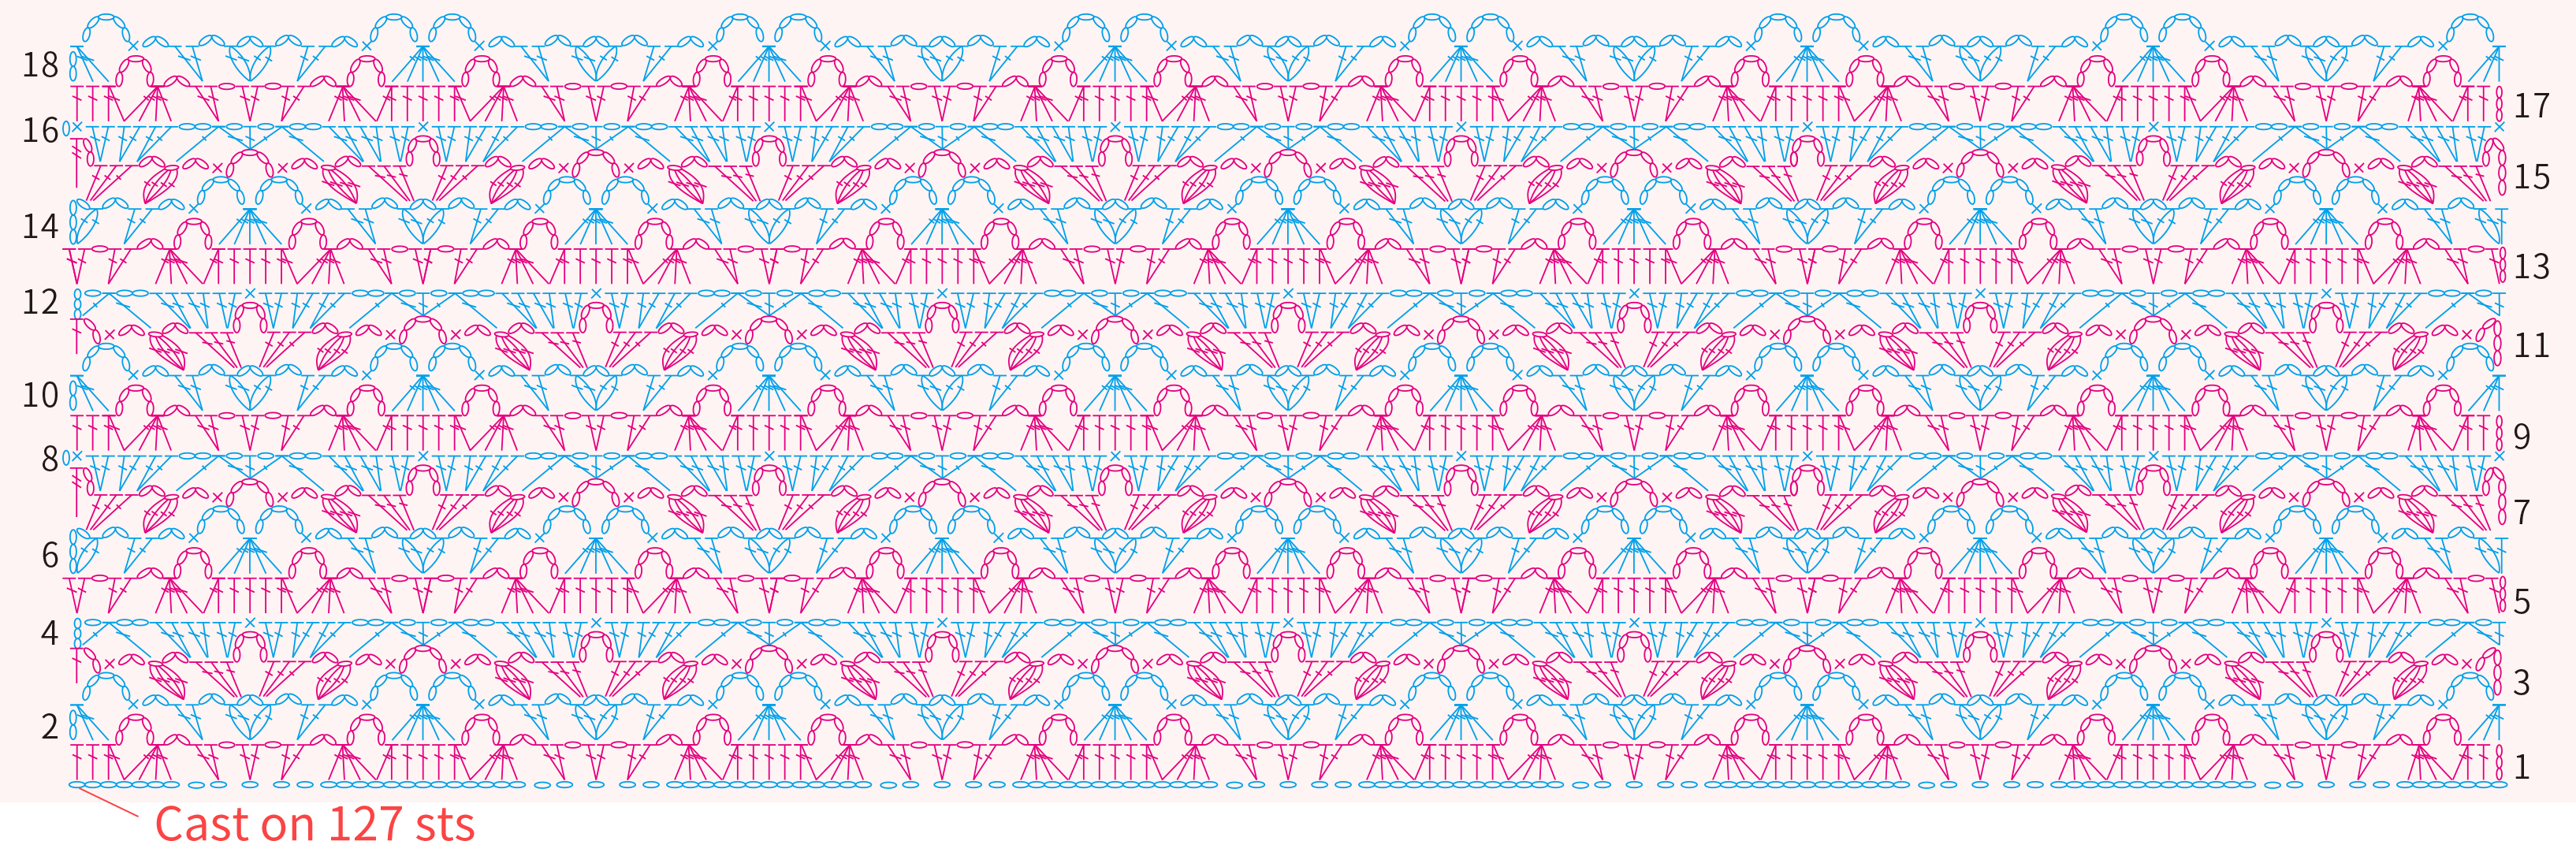
Part 4 Hem joining pattern
The hem joining pattern is crocheted from top to bottom. The crochet technique is identical to the sleeve pattern, but the number of starting stitches for each pattern group is 4 stitches less than the sleeves.
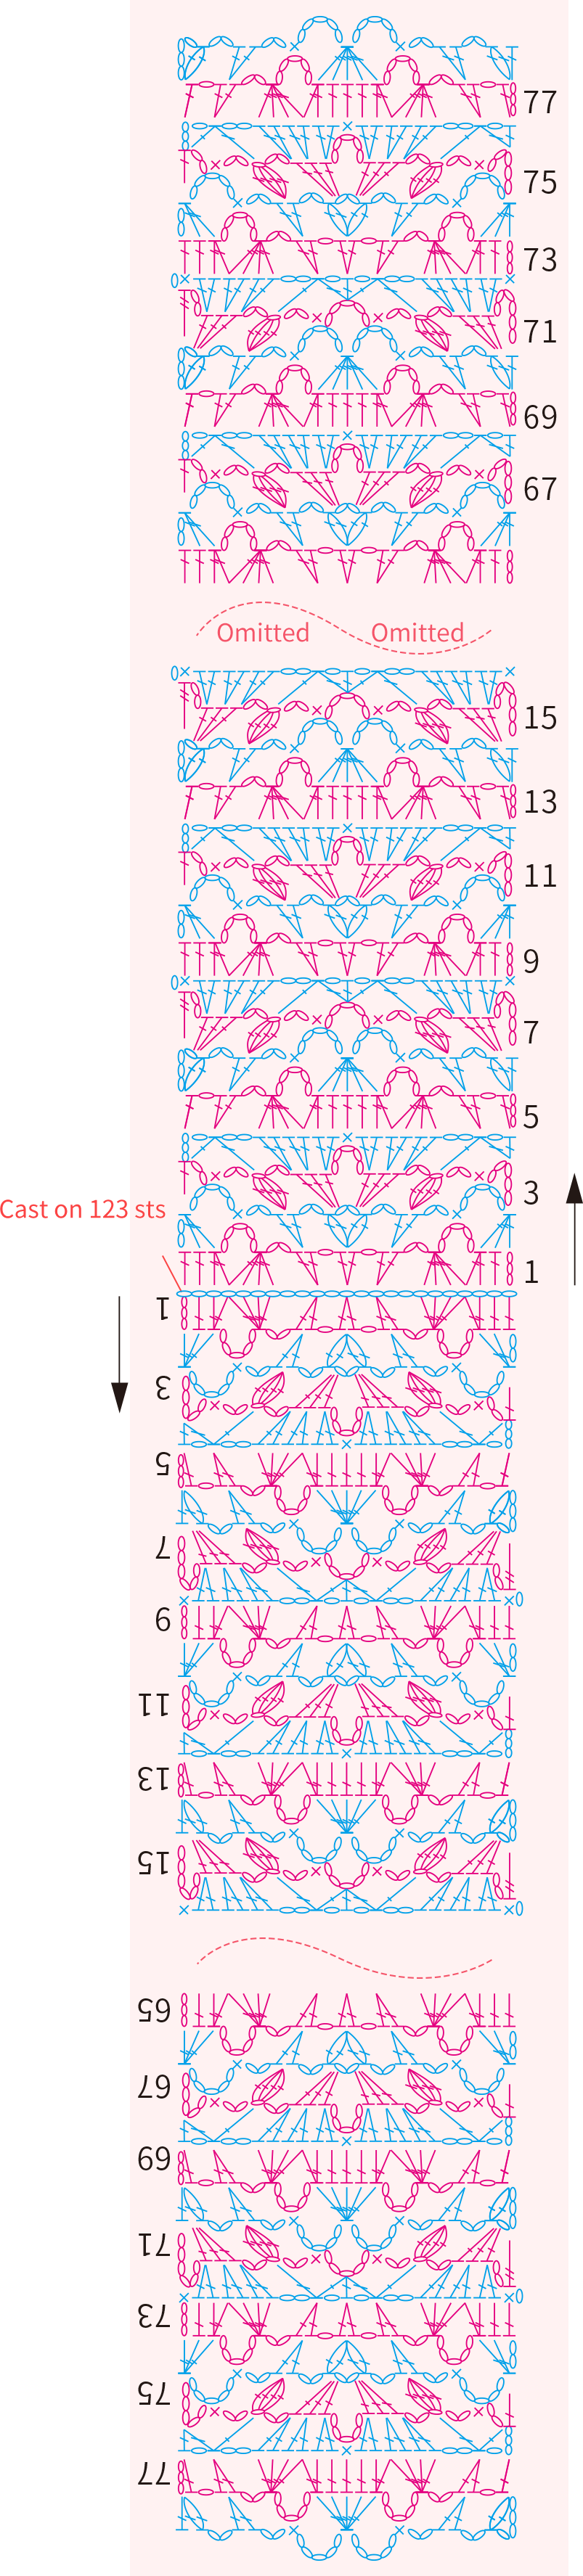
Part 5 Collar and ends of the ribbons section
The collar and ribbon sections have the same pattern as the sleeves, but with only one group of the pattern. Start hooking from the middle position and work towards both ends separately. Use a yarn needle to sew it onto the corresponding position of the collar, and fold the part where it joins the neckline in half to create a double layer.
Part 6 Joining together and sewing
After completing each part, join them together according to the placement shown in the chart. Mind the positions where openings are required.
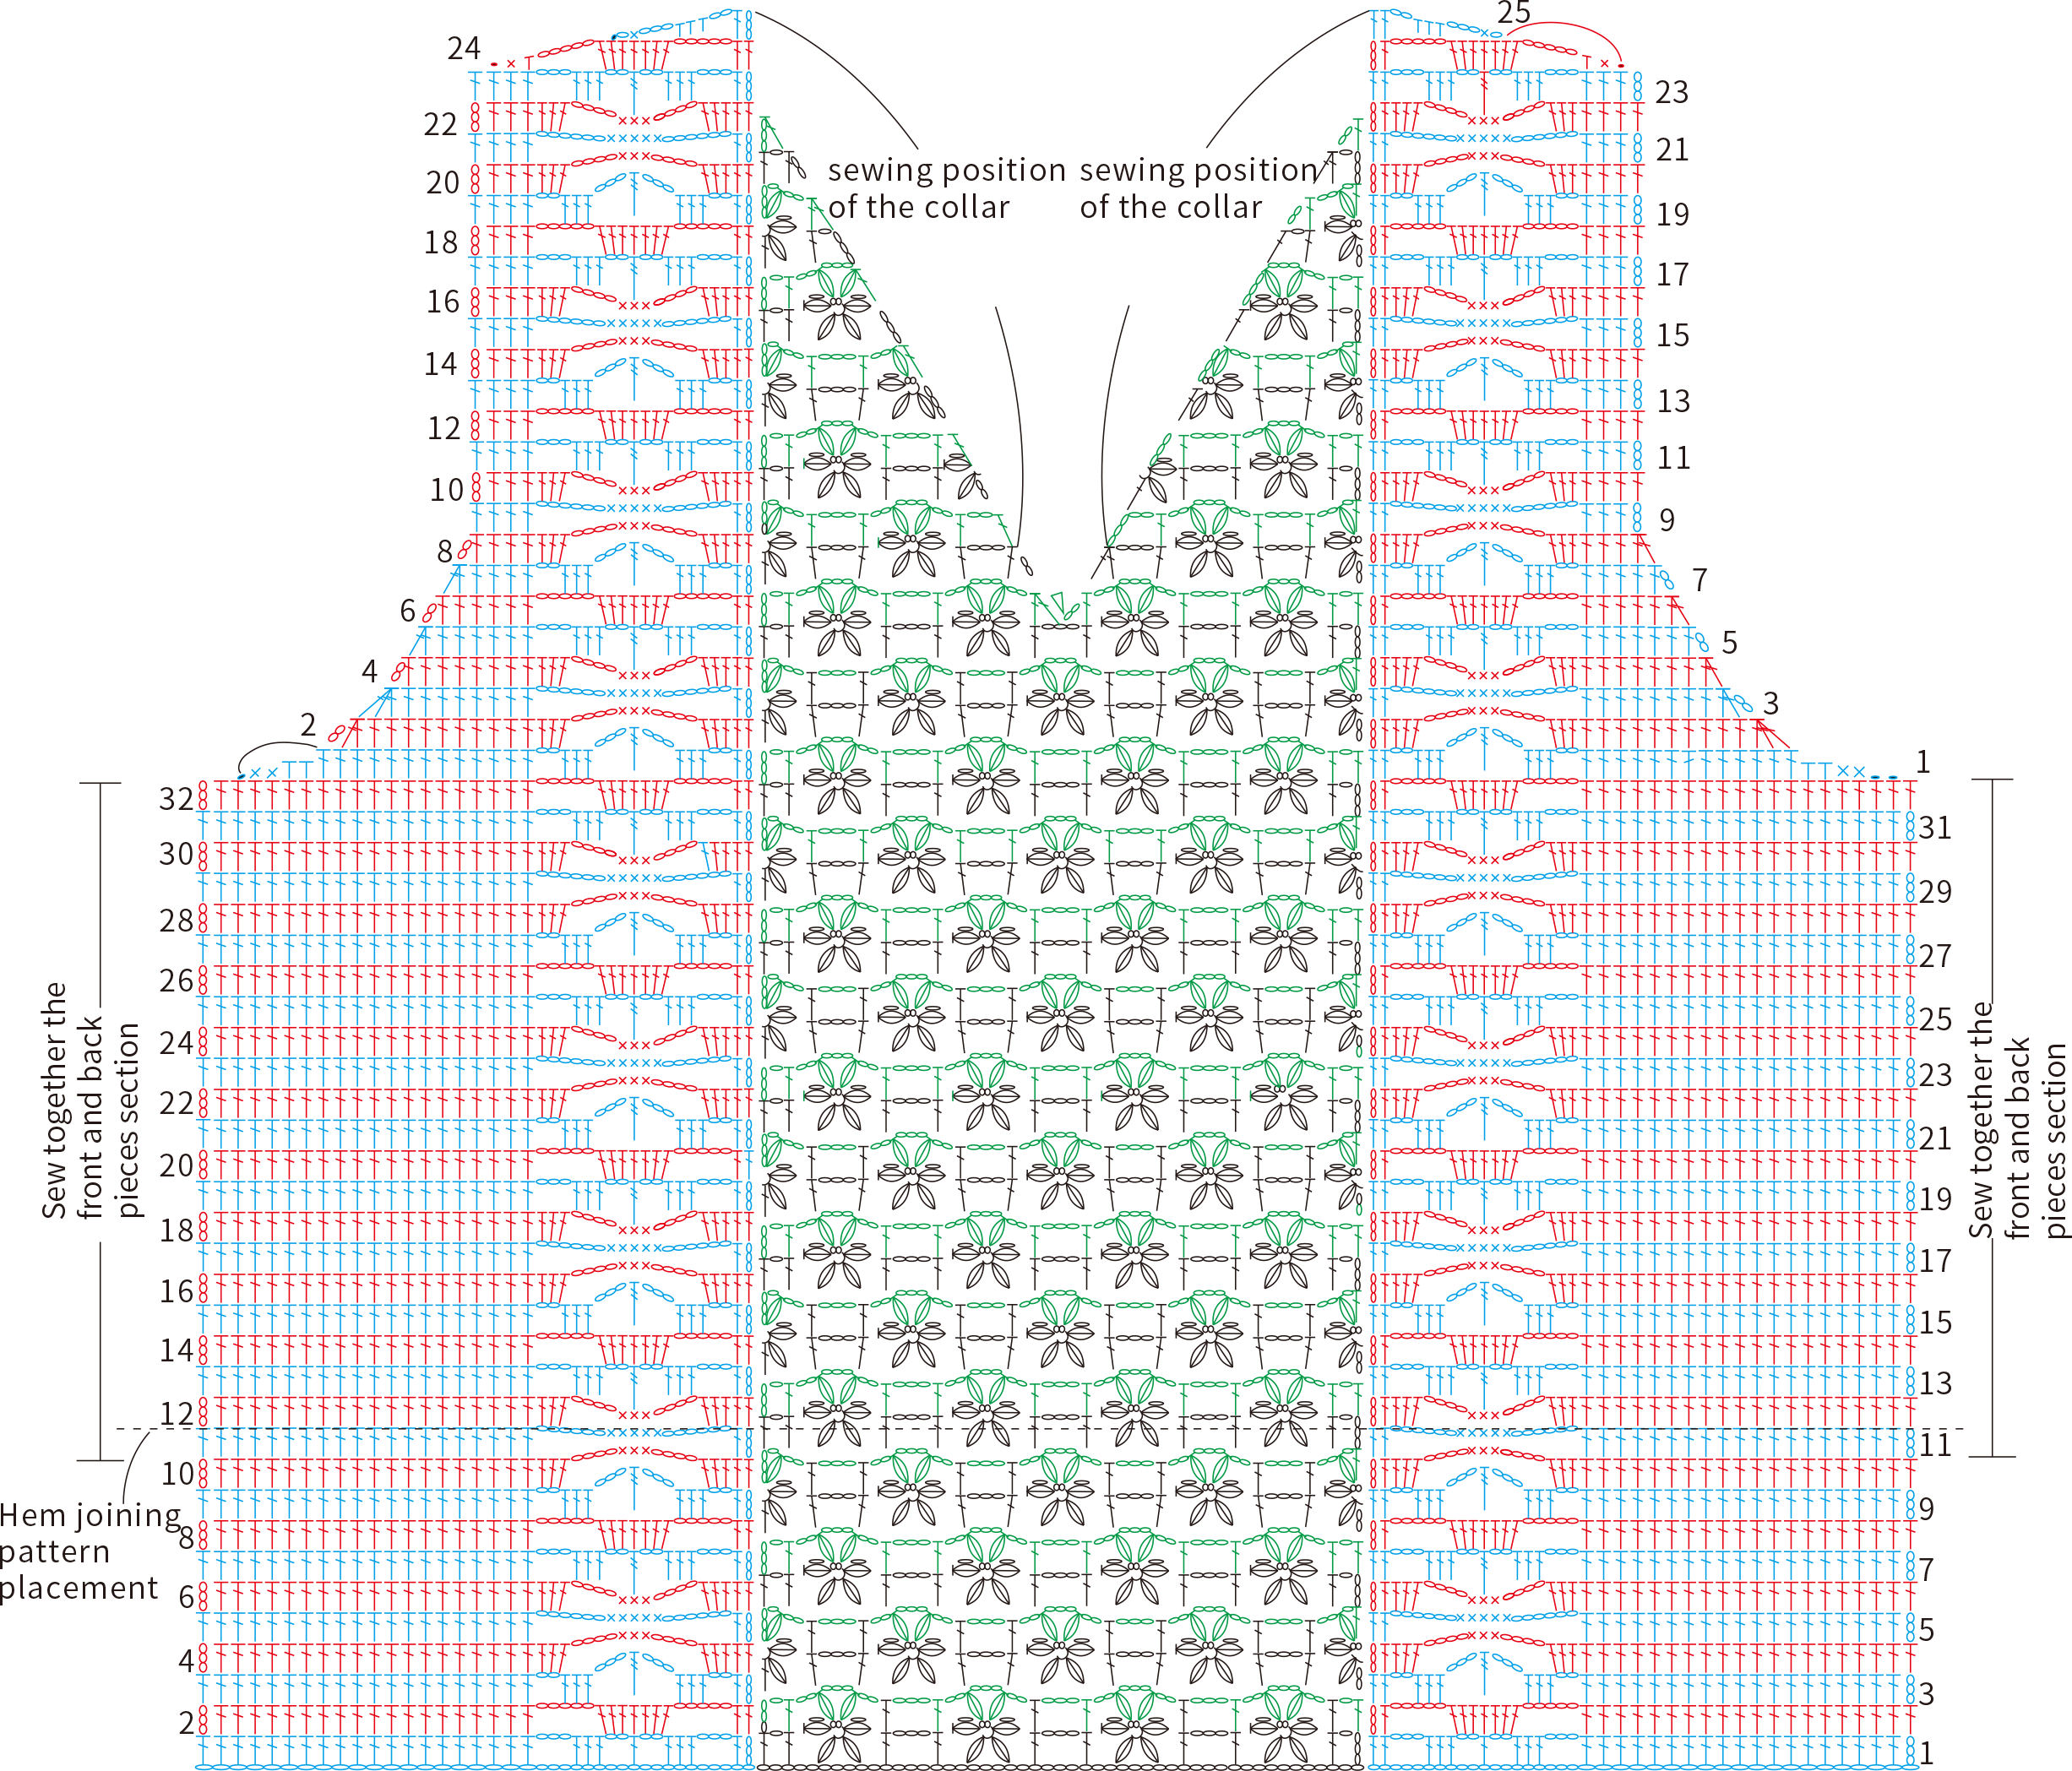
Part 7 Edge section
Complete the edge part, and for the hem positions of the front and back pieces, refer to the chart to crochet 1 round of single crochets.

Made by the community