
Home / Blanket
Lotus Prosperity Pillow-Case Blanket
Project preview
See the finished project
Pattern format
Instructions
Watch and follow
Video tutorial
The blanket consists of the main body and decorations. Start by making the main body. After completing it, make and attach the decorations.
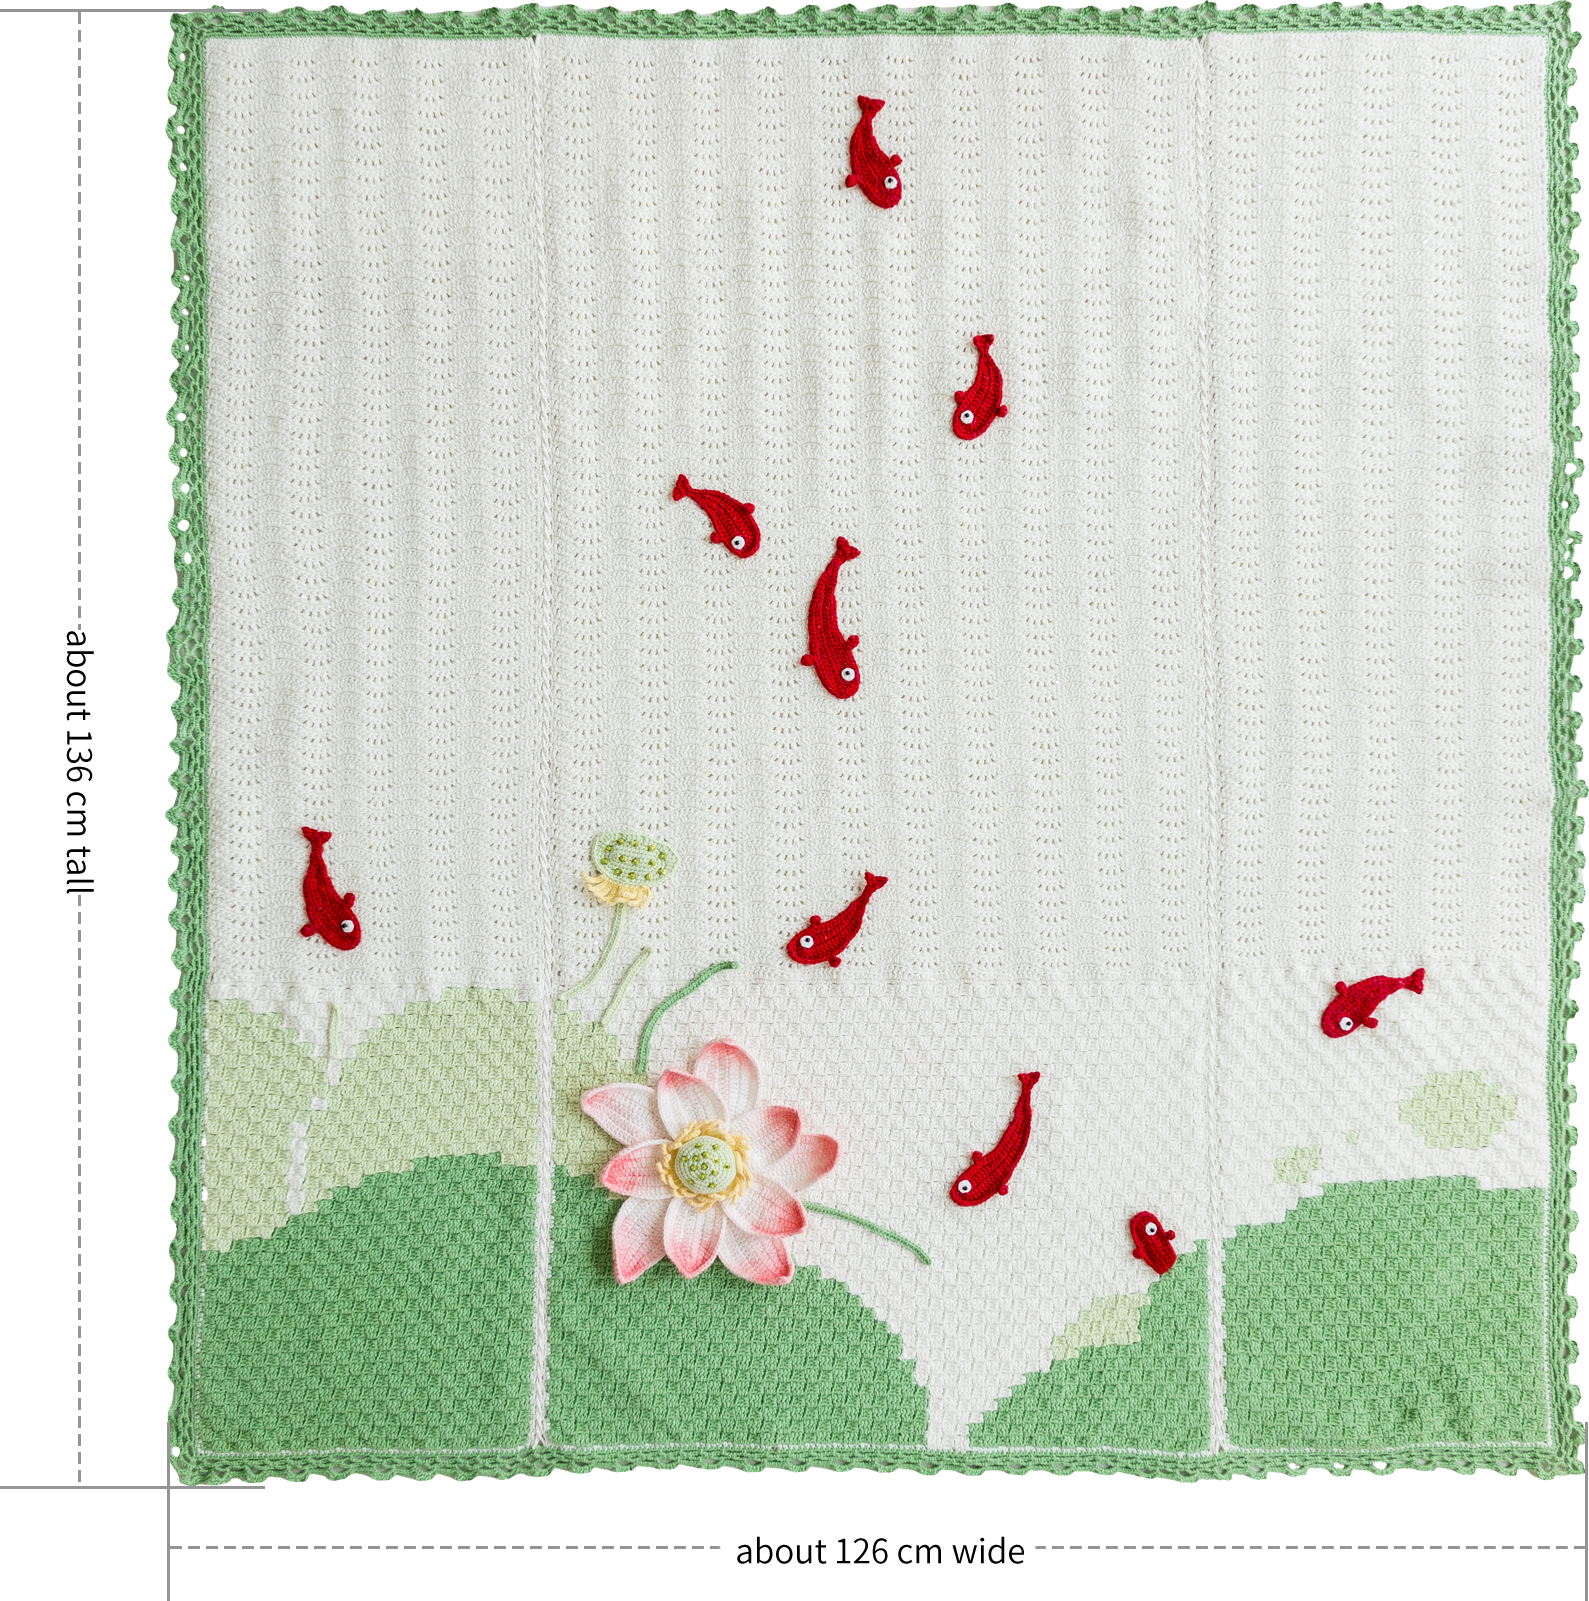
The handcrafted measurements may have an error of 1 to 2 cm. Due to variations in individual tension, the size of the sample is for reference only.
Materials: Susan's Family 4-Ply Combed Cotton & Acrylic Fibre Hand Knitting Yarn and Sequin Mohair
Hook: 3.00 mm crochet hook

Chart Key







ABBREVIATIONS
MRadjustable magic ring
Dao2start in 2nd CH from the hook
RRound
XX stitch single crochet
V = sc2-in-12 single crochets into the same stitch
Kskip
[...]in the same stitch
Thalf double crochet
SLslip stitch
EV = tr2-in-12 treble crochets into the same stitch
CHchain
Fdouble crochet
FV = dc2-in-12 double crochets into the same stitch
W = sc3-in-13 single crochets into the same stitch
FLOfront loop only
BLOback loop only
Note: This pattern is making in Chinese crochet pattern terms, and the stitch name is written using American terminology. All measurements in charts are in cm.

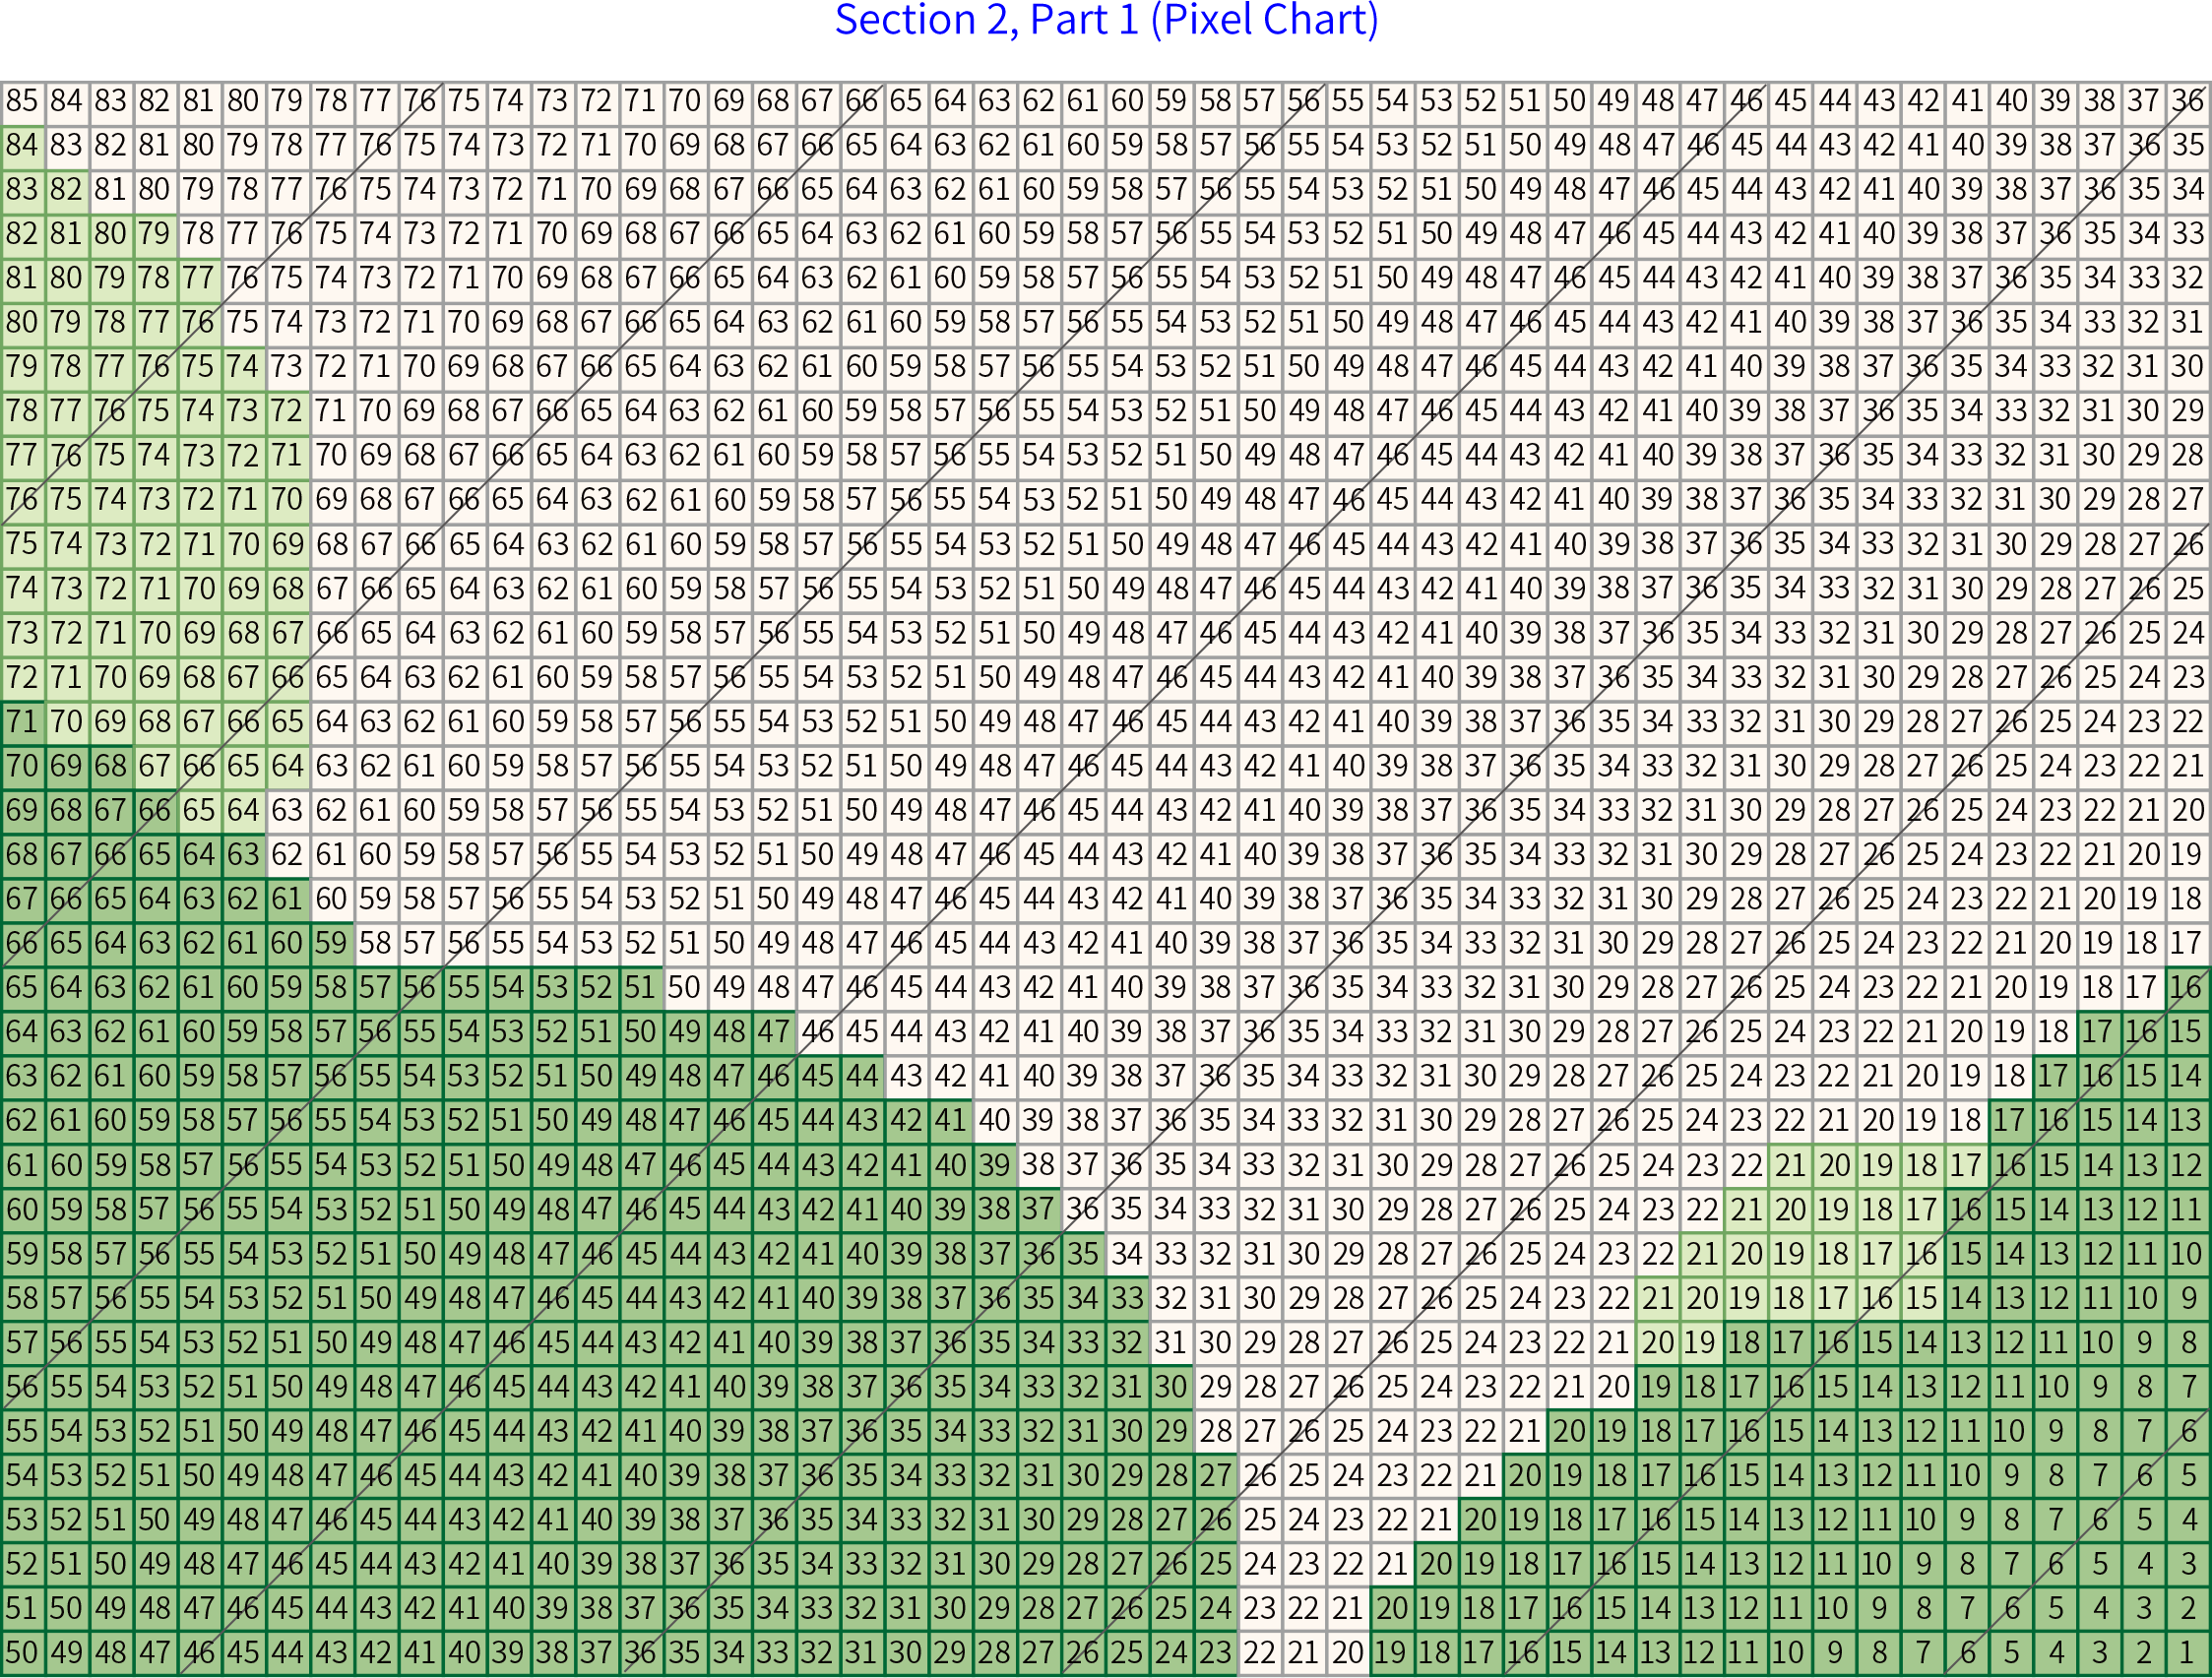
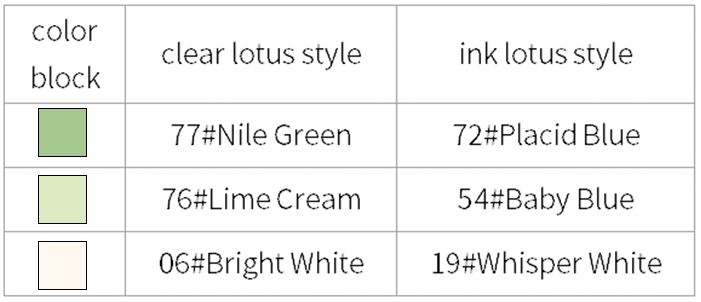
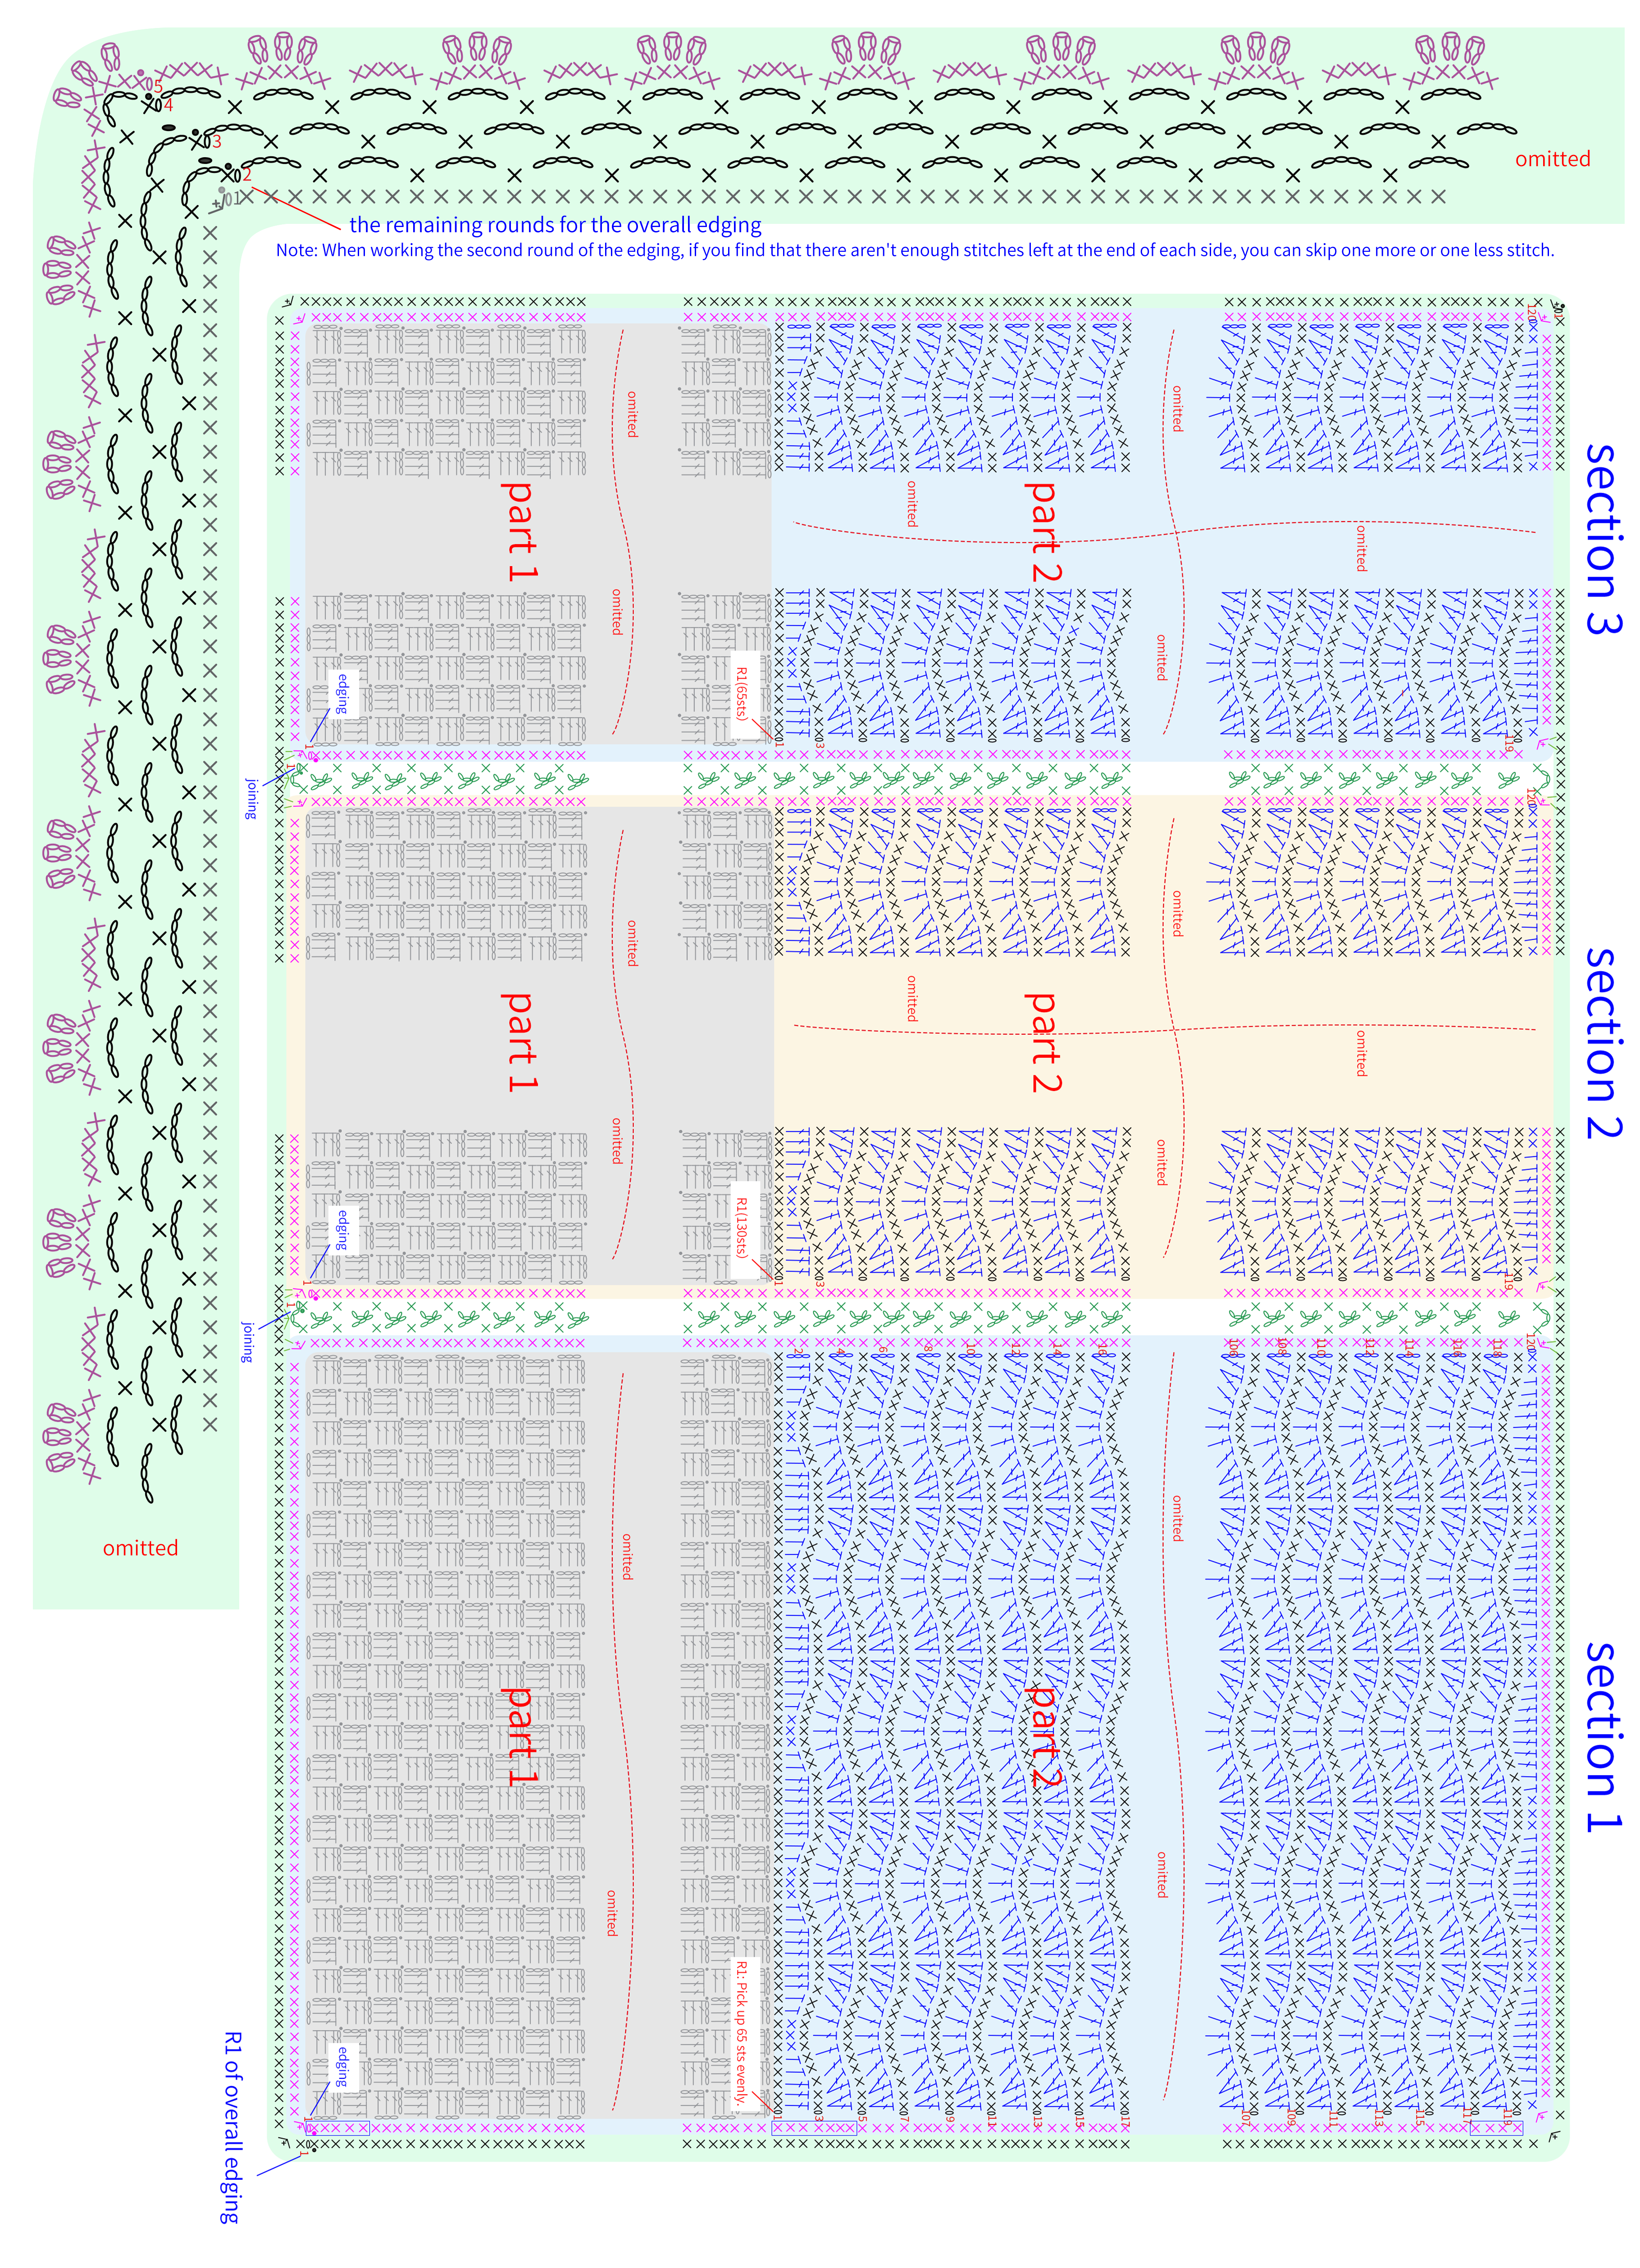
Part 1 Main bodyA 00' 49'' (Part 1)
The main part consists of Section 1A1, Section 2, and Section 3. After completing each section separately, connect them togetherA2, and finally crochet the edging around the entire fabric piece. Each of the three sections is divided into Part 1, Part 2, and the edging. Part 2 involves joining a new yarn and crocheting on top of Part 1. Once completed, crochet the edging around each respective section. Please refer to the video demonstration for more details.
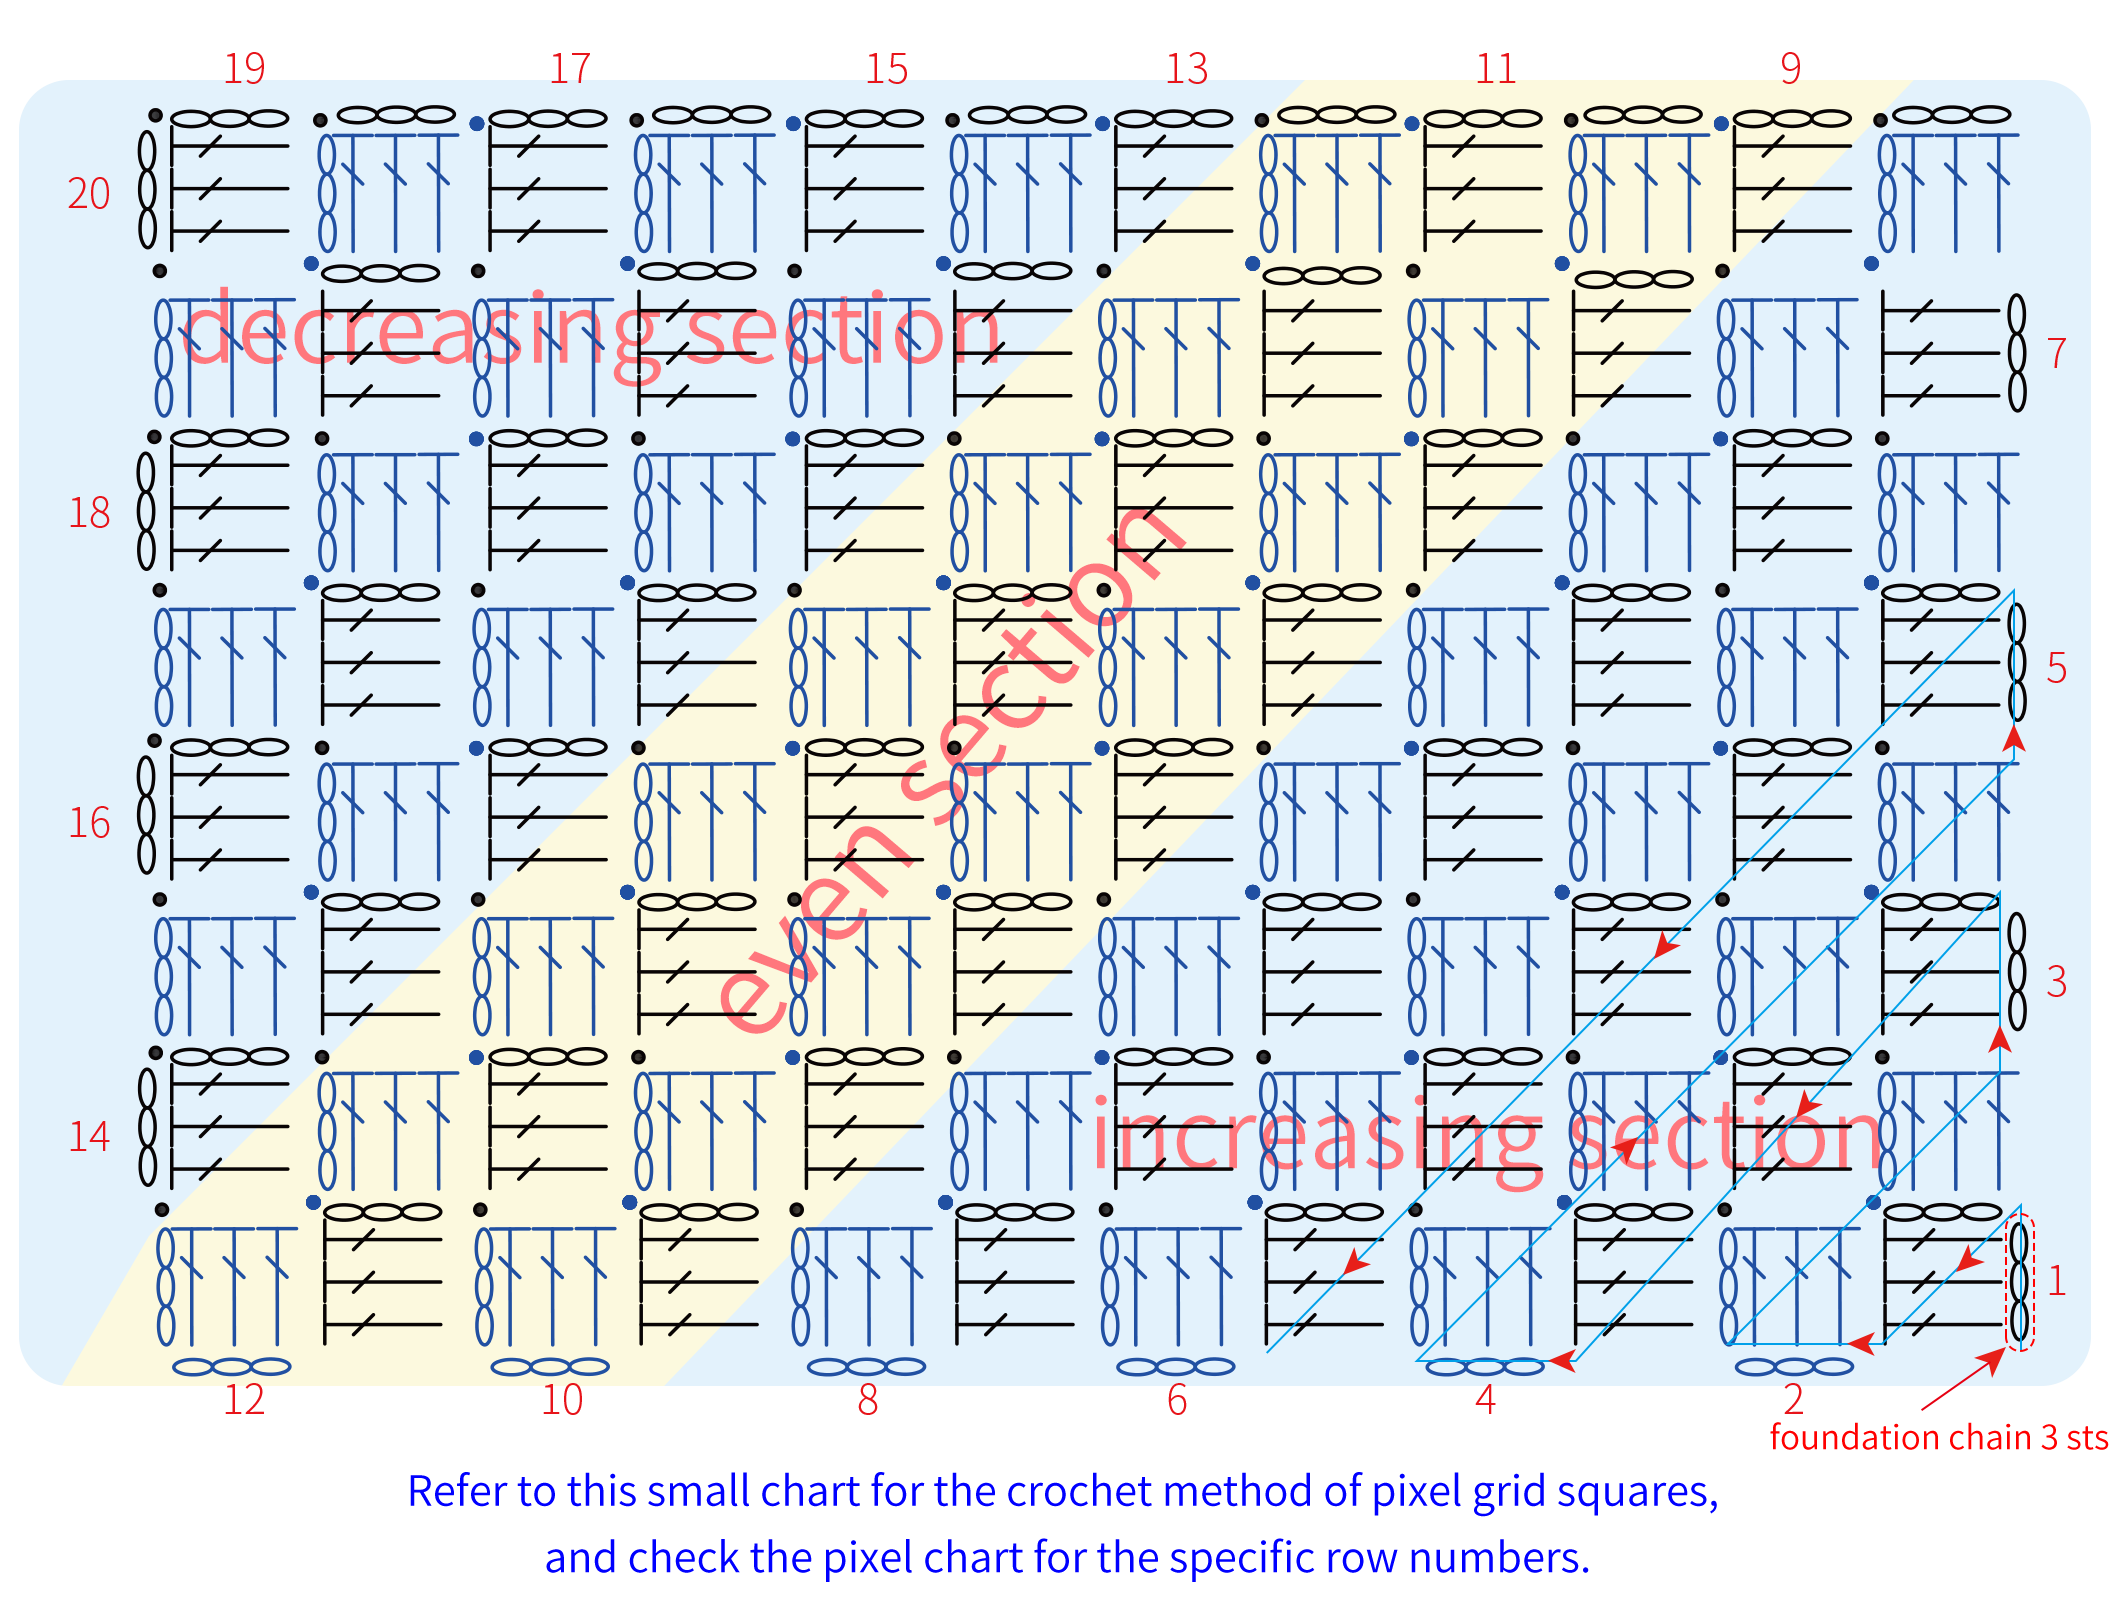
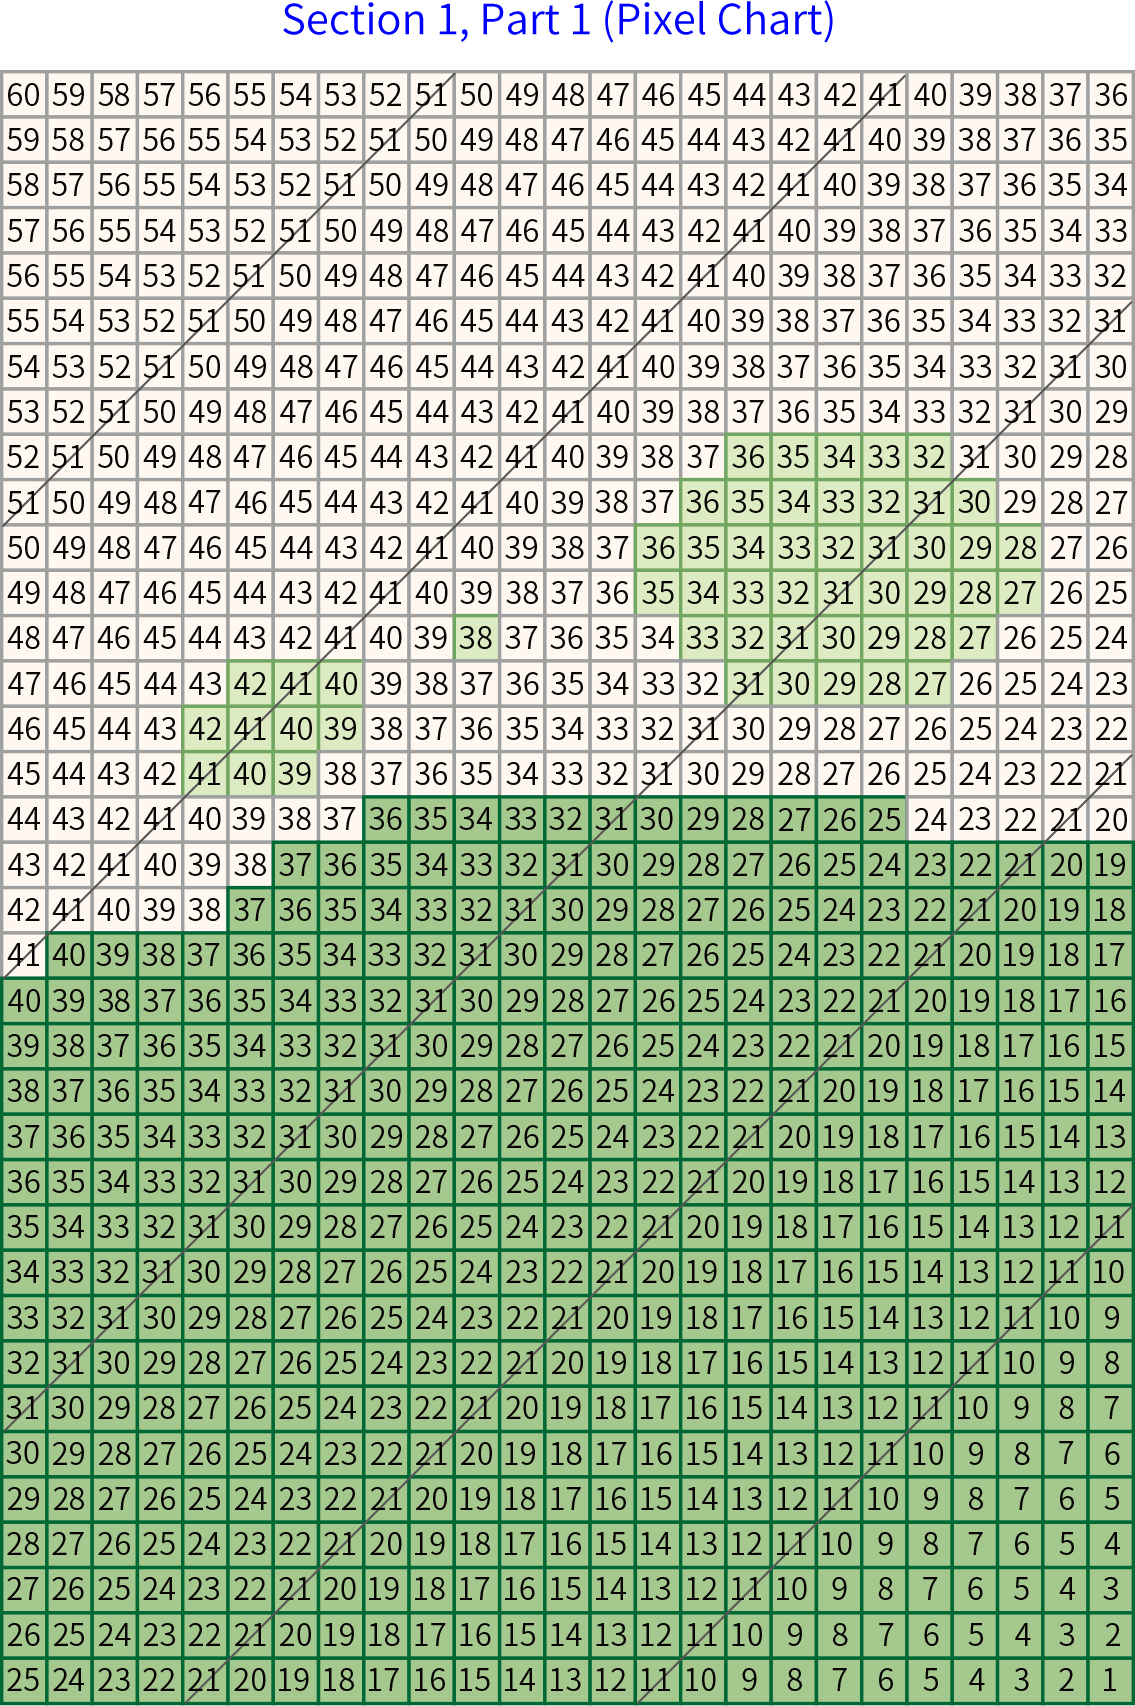
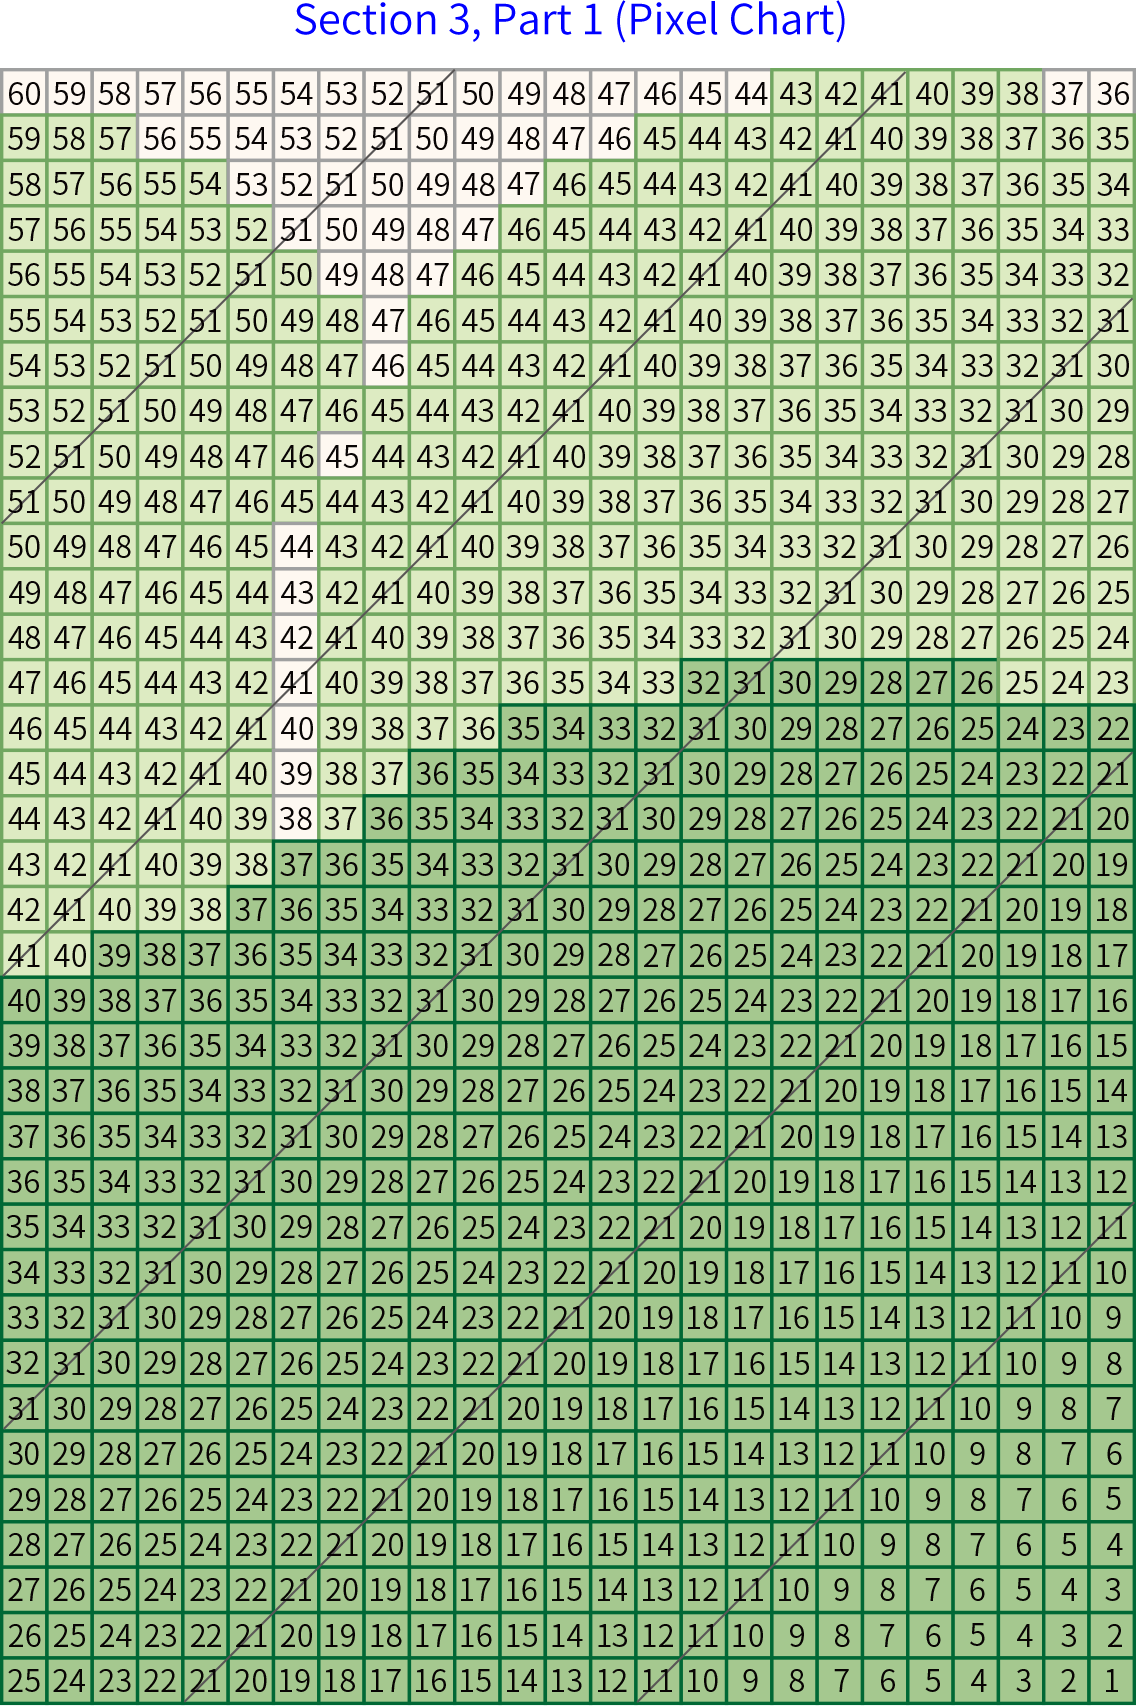

Part 2 DecorationsB 00' 09'' (Part 2)
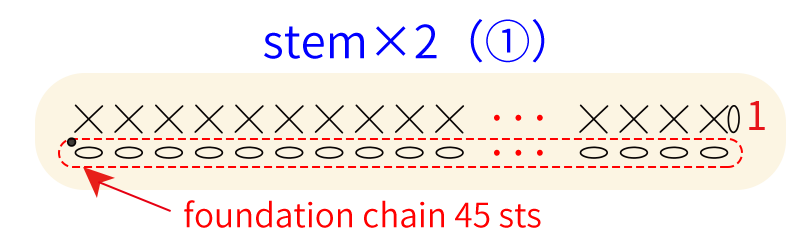
Divide into lotusB1 and carpB2. The lotus consists of the stem, petals, and seedpod. After completing these parts, sew them together for assembly. The carp is divided into large, medium, and small sizes, all of which are crocheted using the foundation chain method. Please refer to the video demonstration for more details.
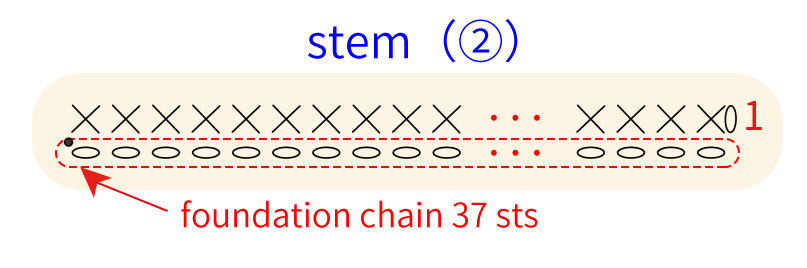
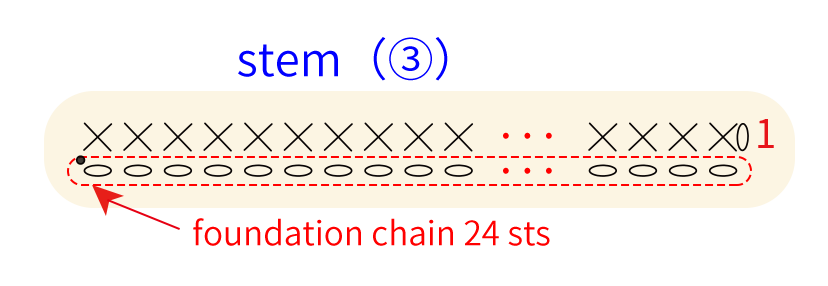
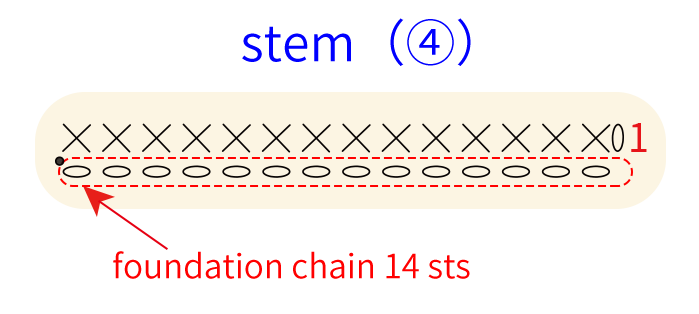
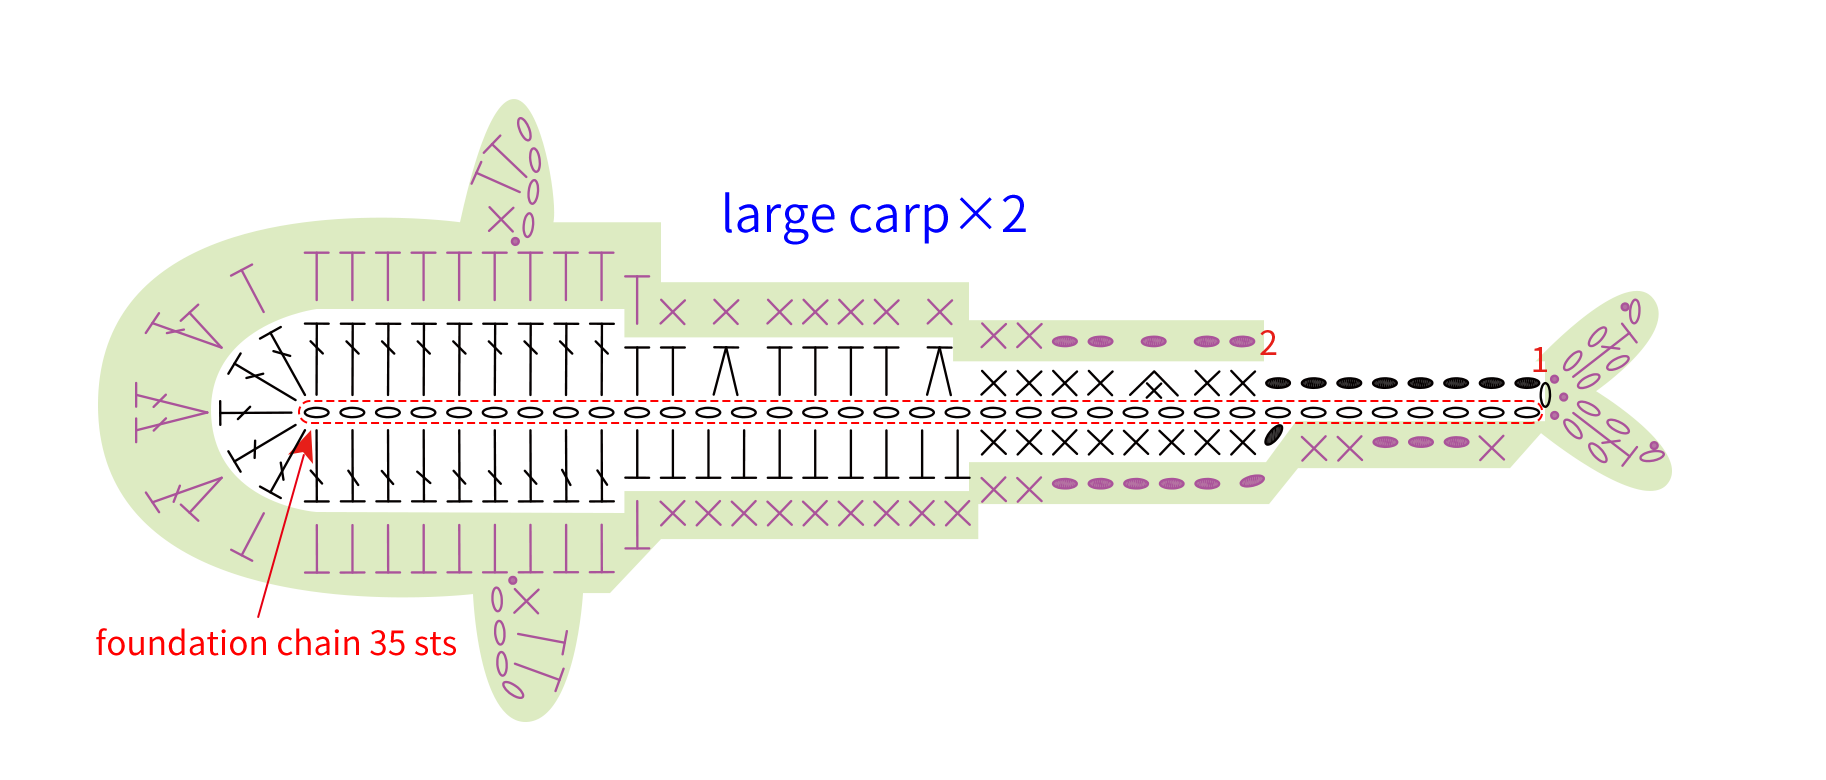
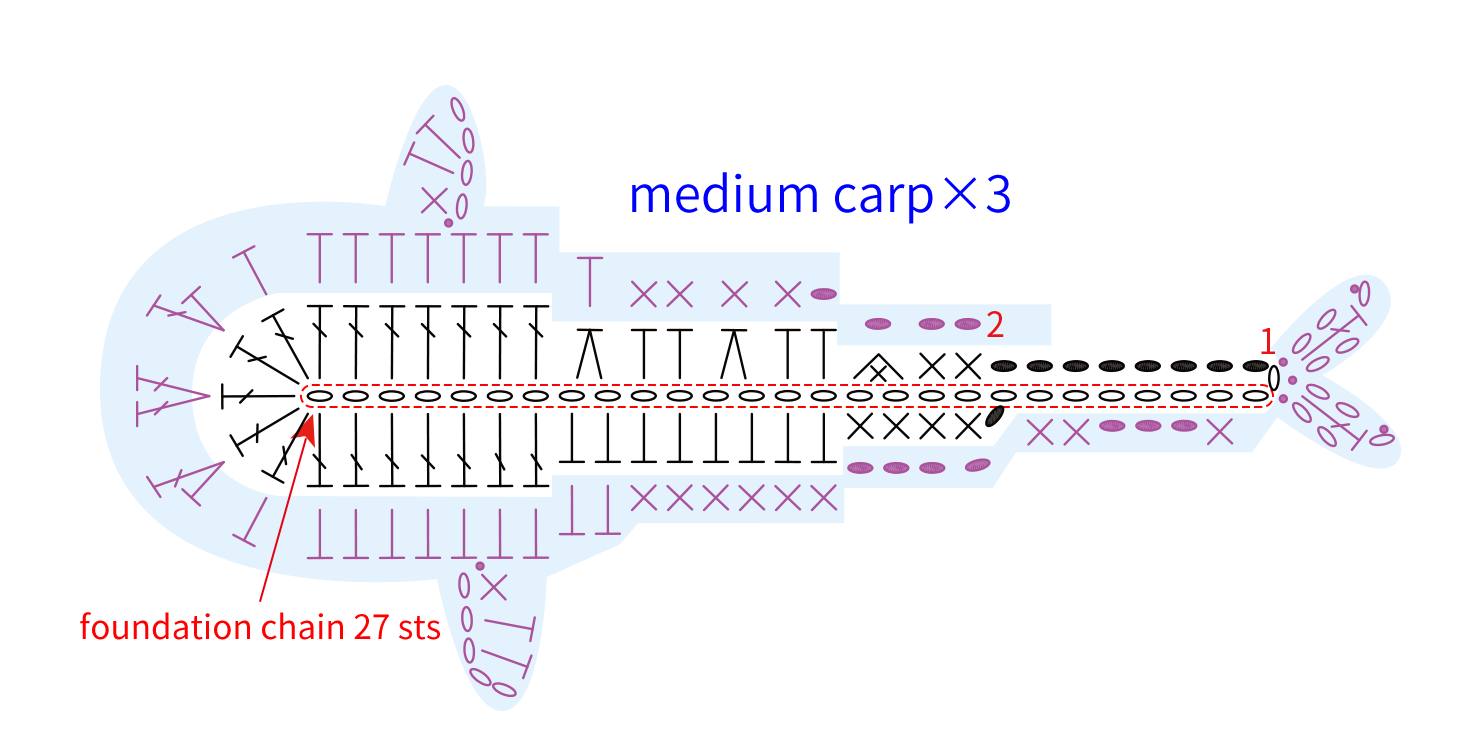
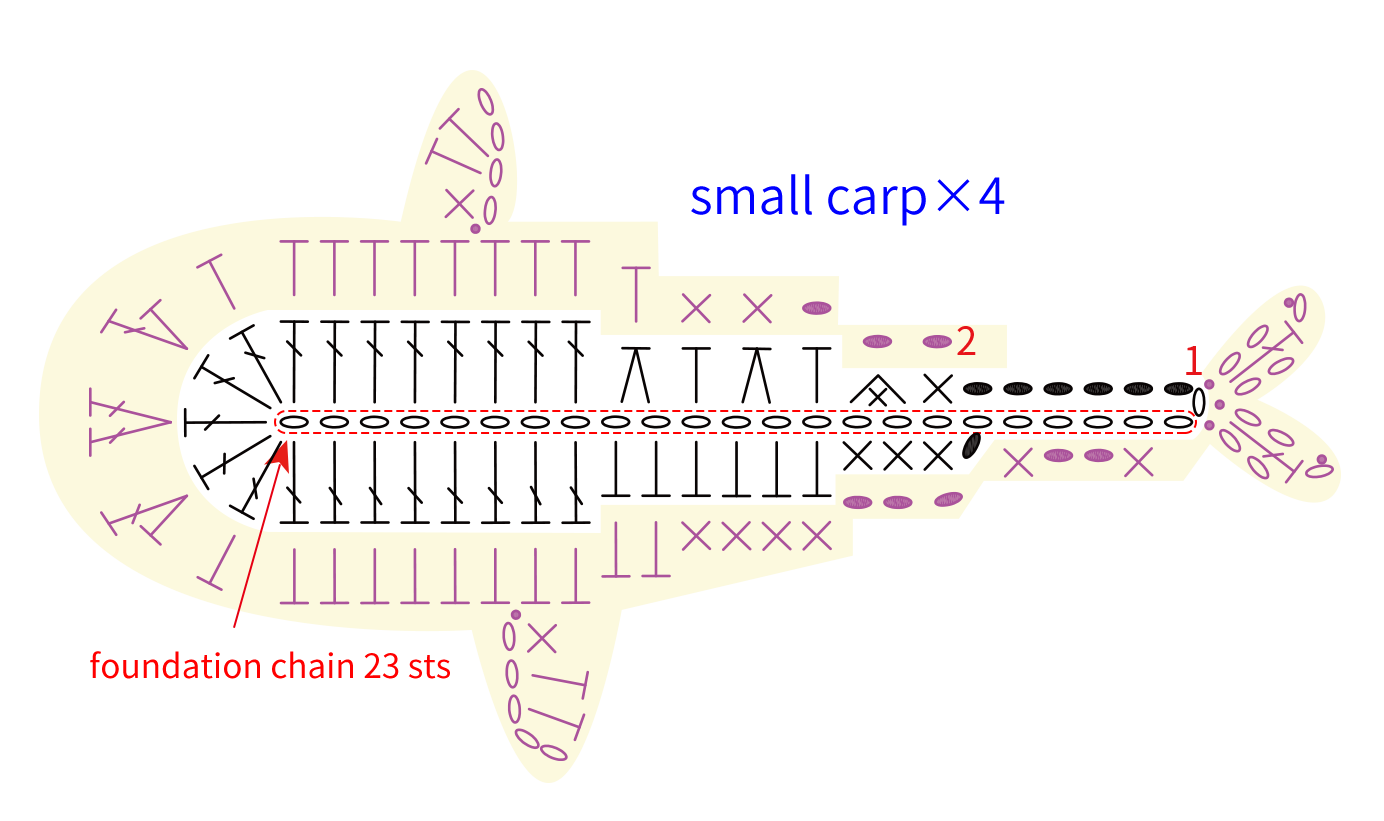
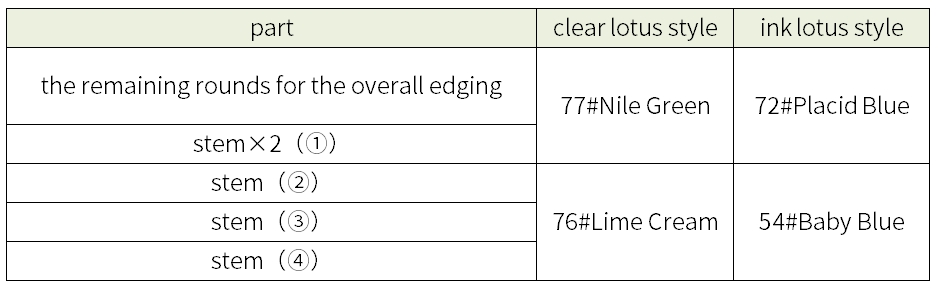

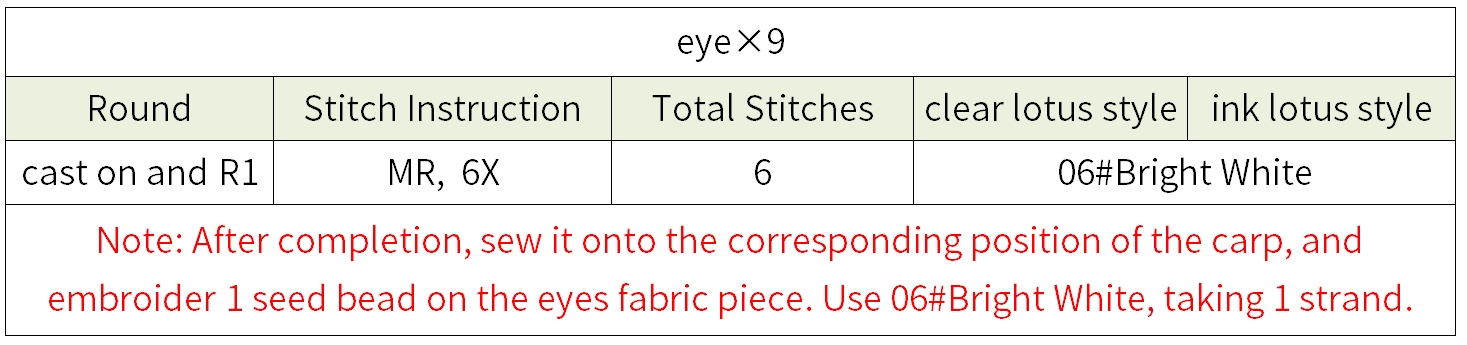
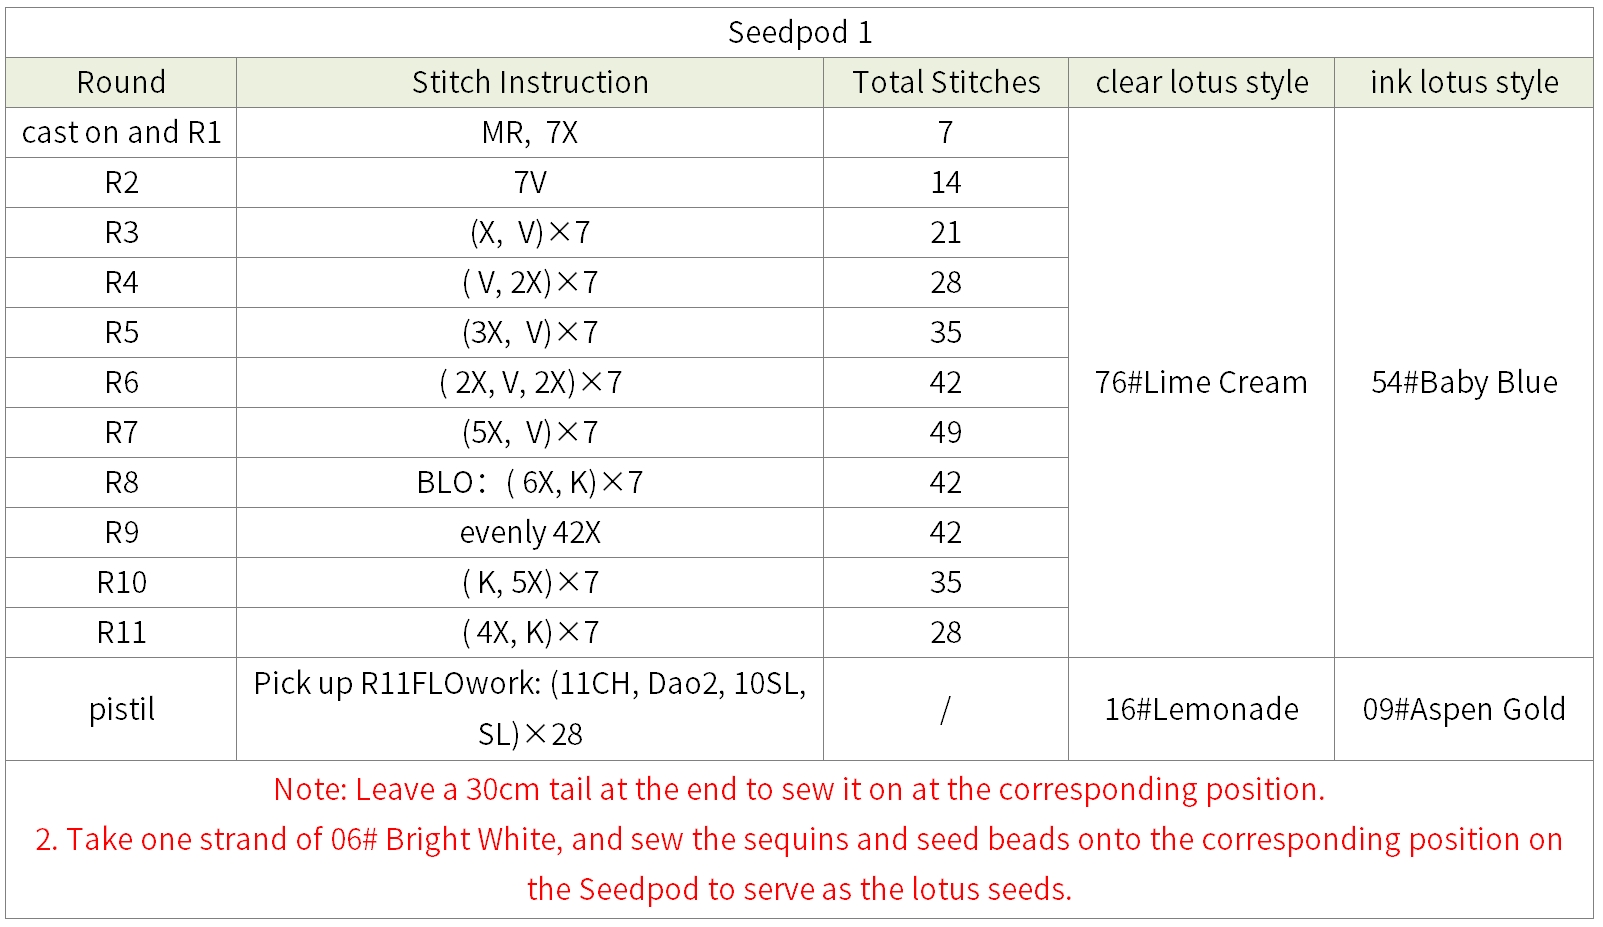
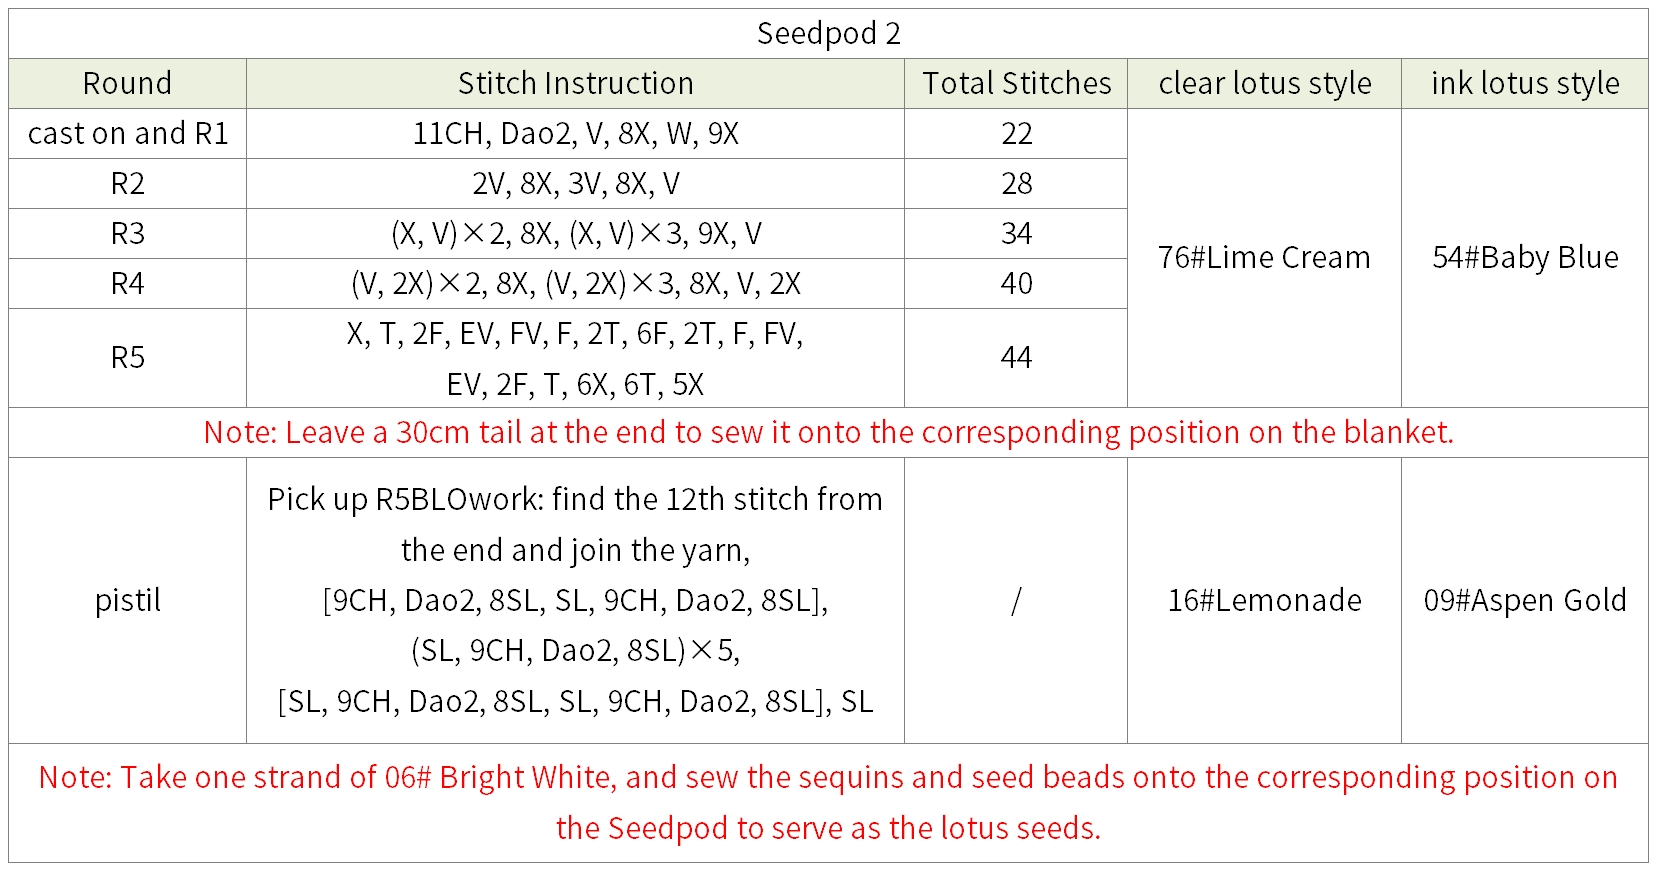
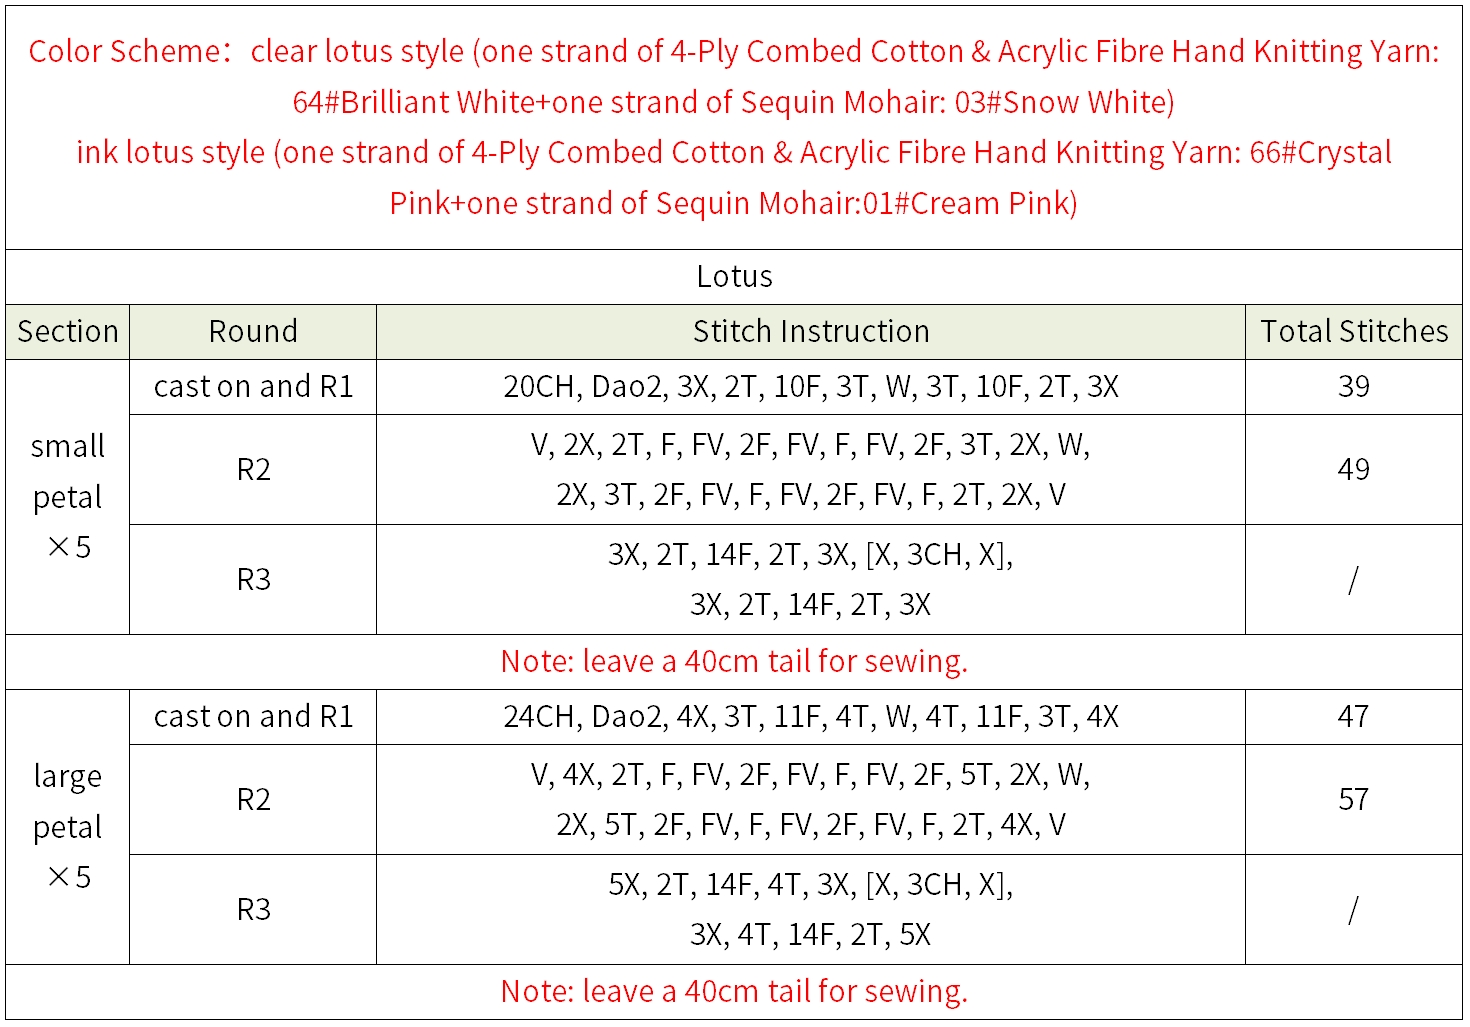
Note: After all the decorations are completed, take out the buttons and sew them on one side of the edge in Section 2 roughly evenly. Please refer to the video demonstration for more details..
Made by the community





