
Clothes
Luna Buttoned Coat
Project preview
See the finished project
Pattern format
Instructions
Watch and follow
Video tutorial
This garment is divided into left and right back pieces, left and right front pieces, sleeves, connections, edging, cuffs, lace trim, decorations, knot button, and hidden buttons.
First, crochet the two back pieces, two front pieces, and the sleeves. After completing these, connect them together. Then, pick up and crochet the edging along the edges of the four pieces, and merge certain areas of the back piece. Once this is done, pick up and crochet the cuffs and lace trim in the corresponding areas. Finally, make and attach the decorations, knot button, and hidden buttons.
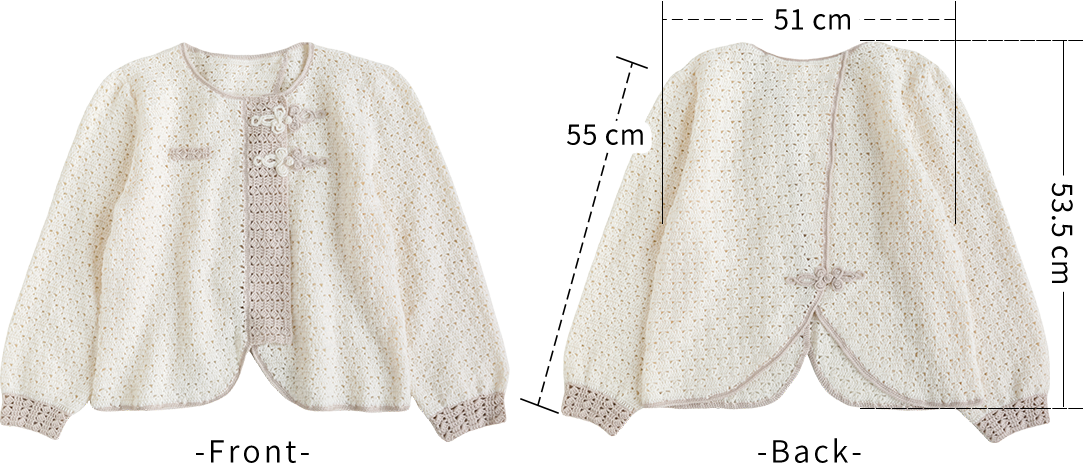
The handcrafted measurements may have an error of 1 to 2 cm. Due to variations in individual tension, the size of the sample is for reference only.
Materials: Susan's Family Morandi 4#
Hook: 2.50 mm crochet hook
2.00 mm crochet hook (for knot button)

Chart Key 1









Chart Key 2
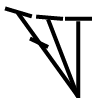
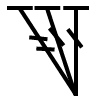
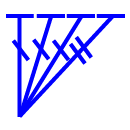
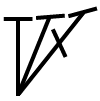
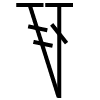
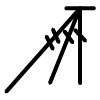
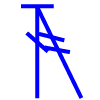




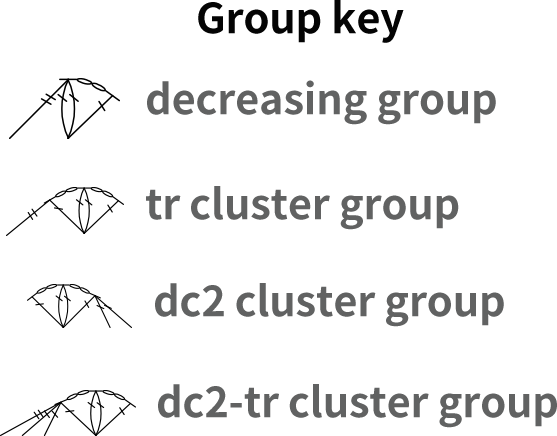
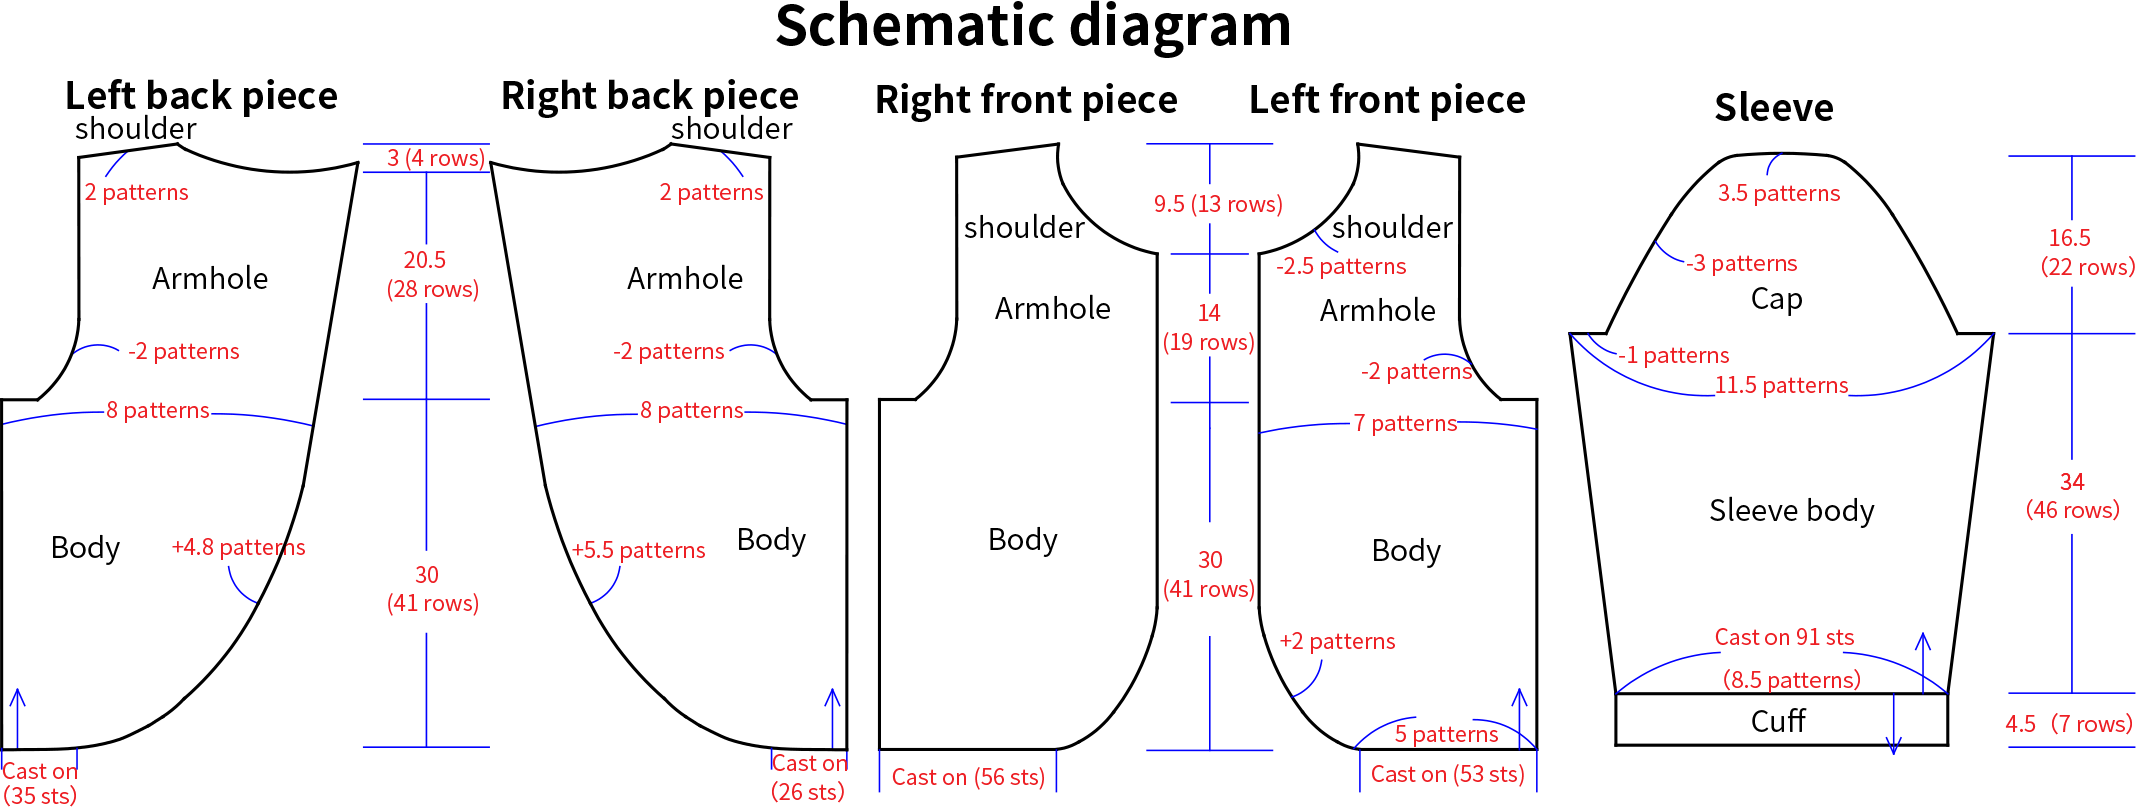

Note: This pattern is making in Chinese crochet pattern terms, and the stitch name is written using American terminology. All measurements in charts are in cm. 
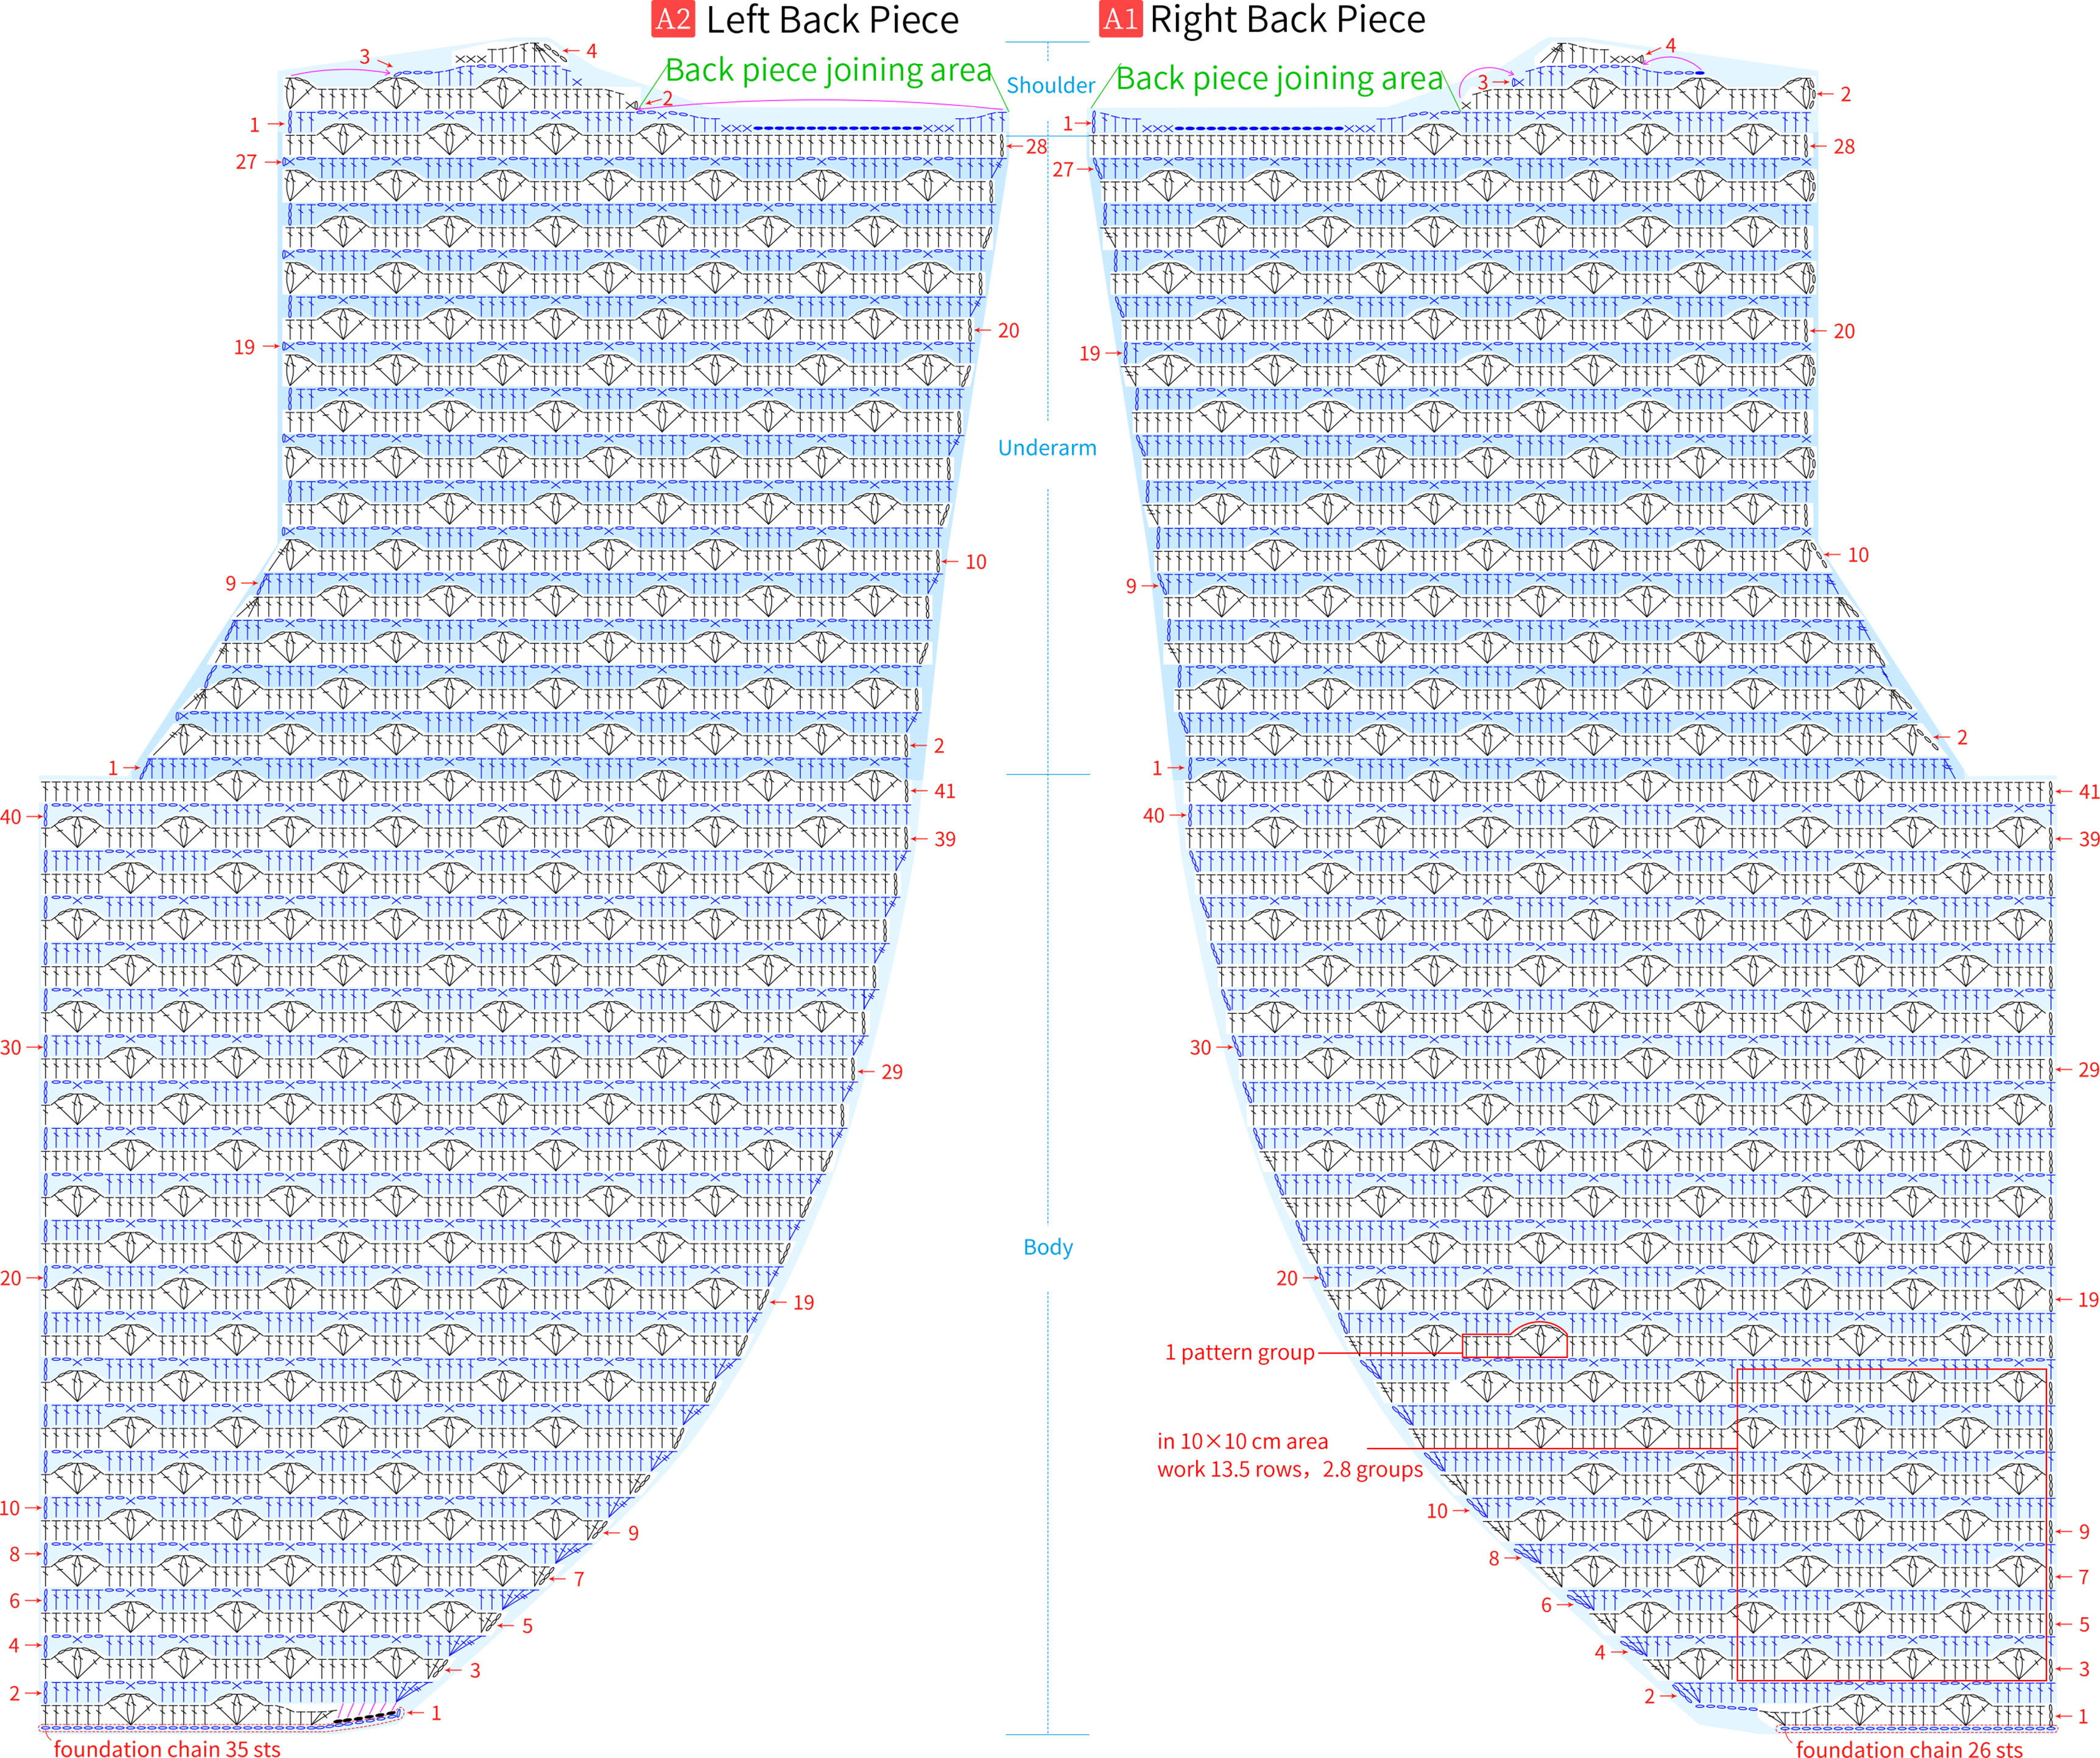
Part 1 Left and Right Back PieceA 01' 26''
The single back piece is divided into three areas: the body, the underarm, and the shoulder. Please refer to the charts and video demonstration for details.
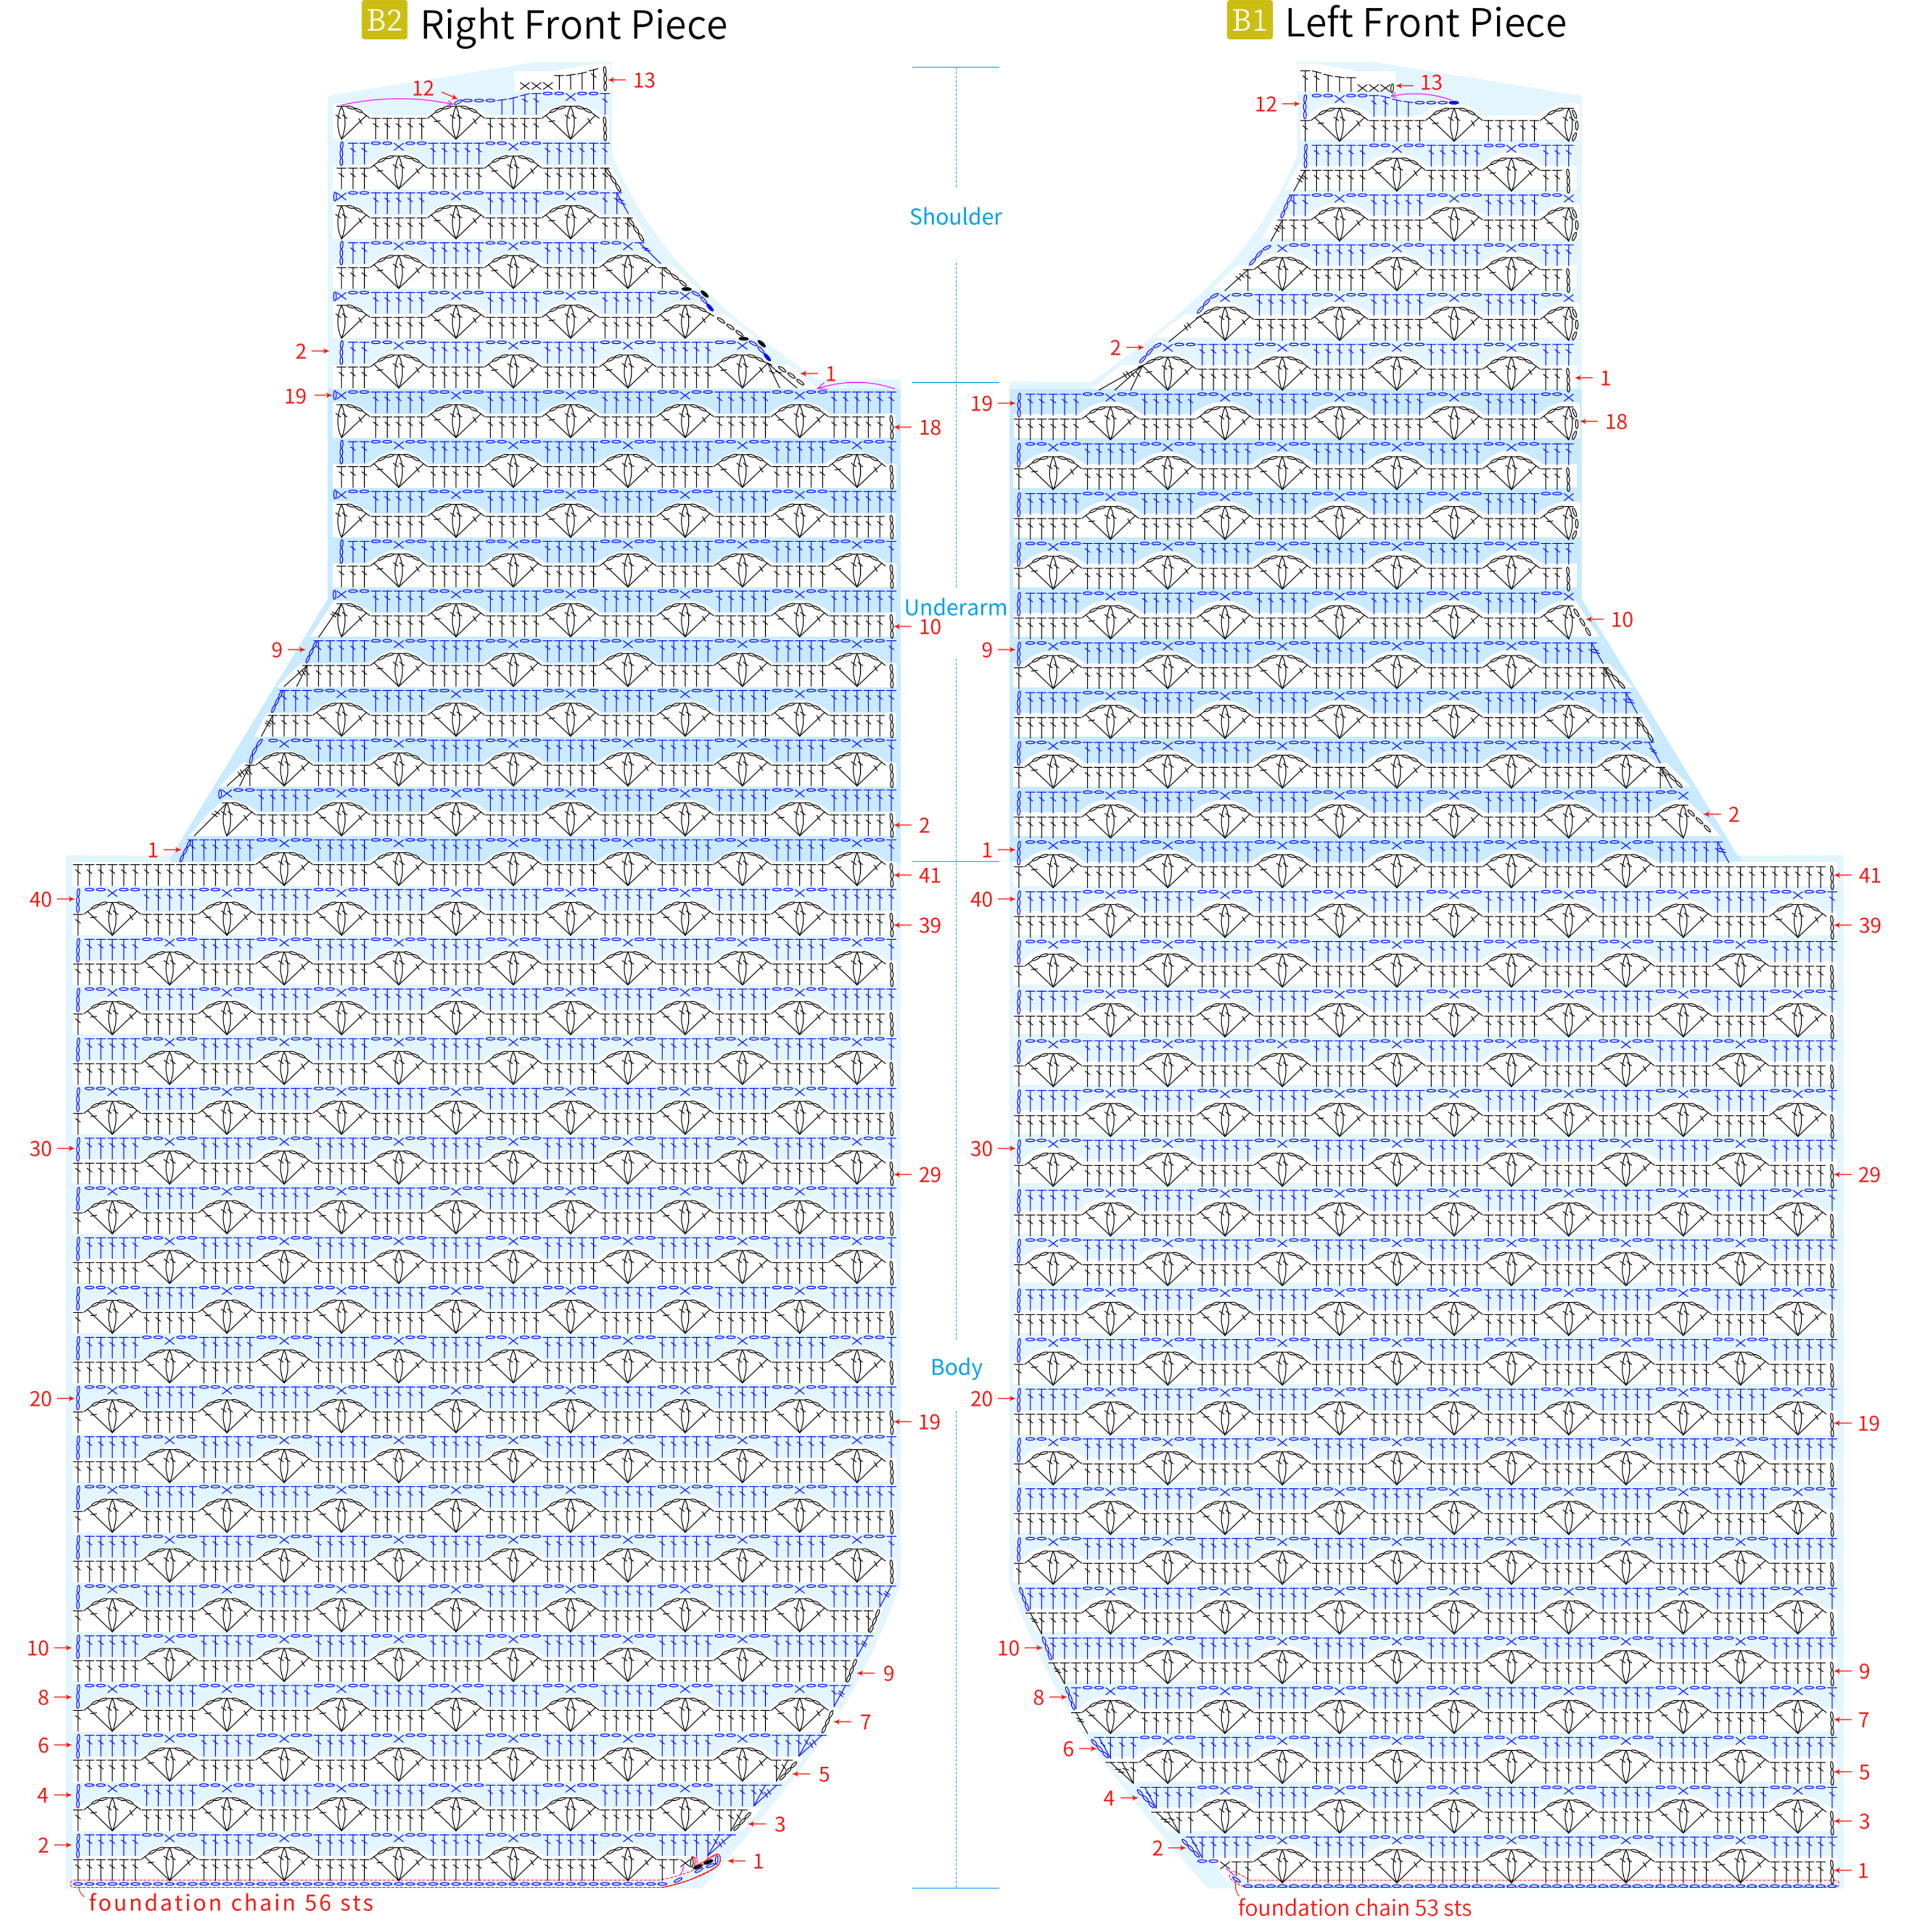
Part 2 Left and Right Front PieceB 23' 46''
The single front piece is divided into three areas: the body, the underarm, and the shoulder. Please refer to the charts and video demonstration for details.
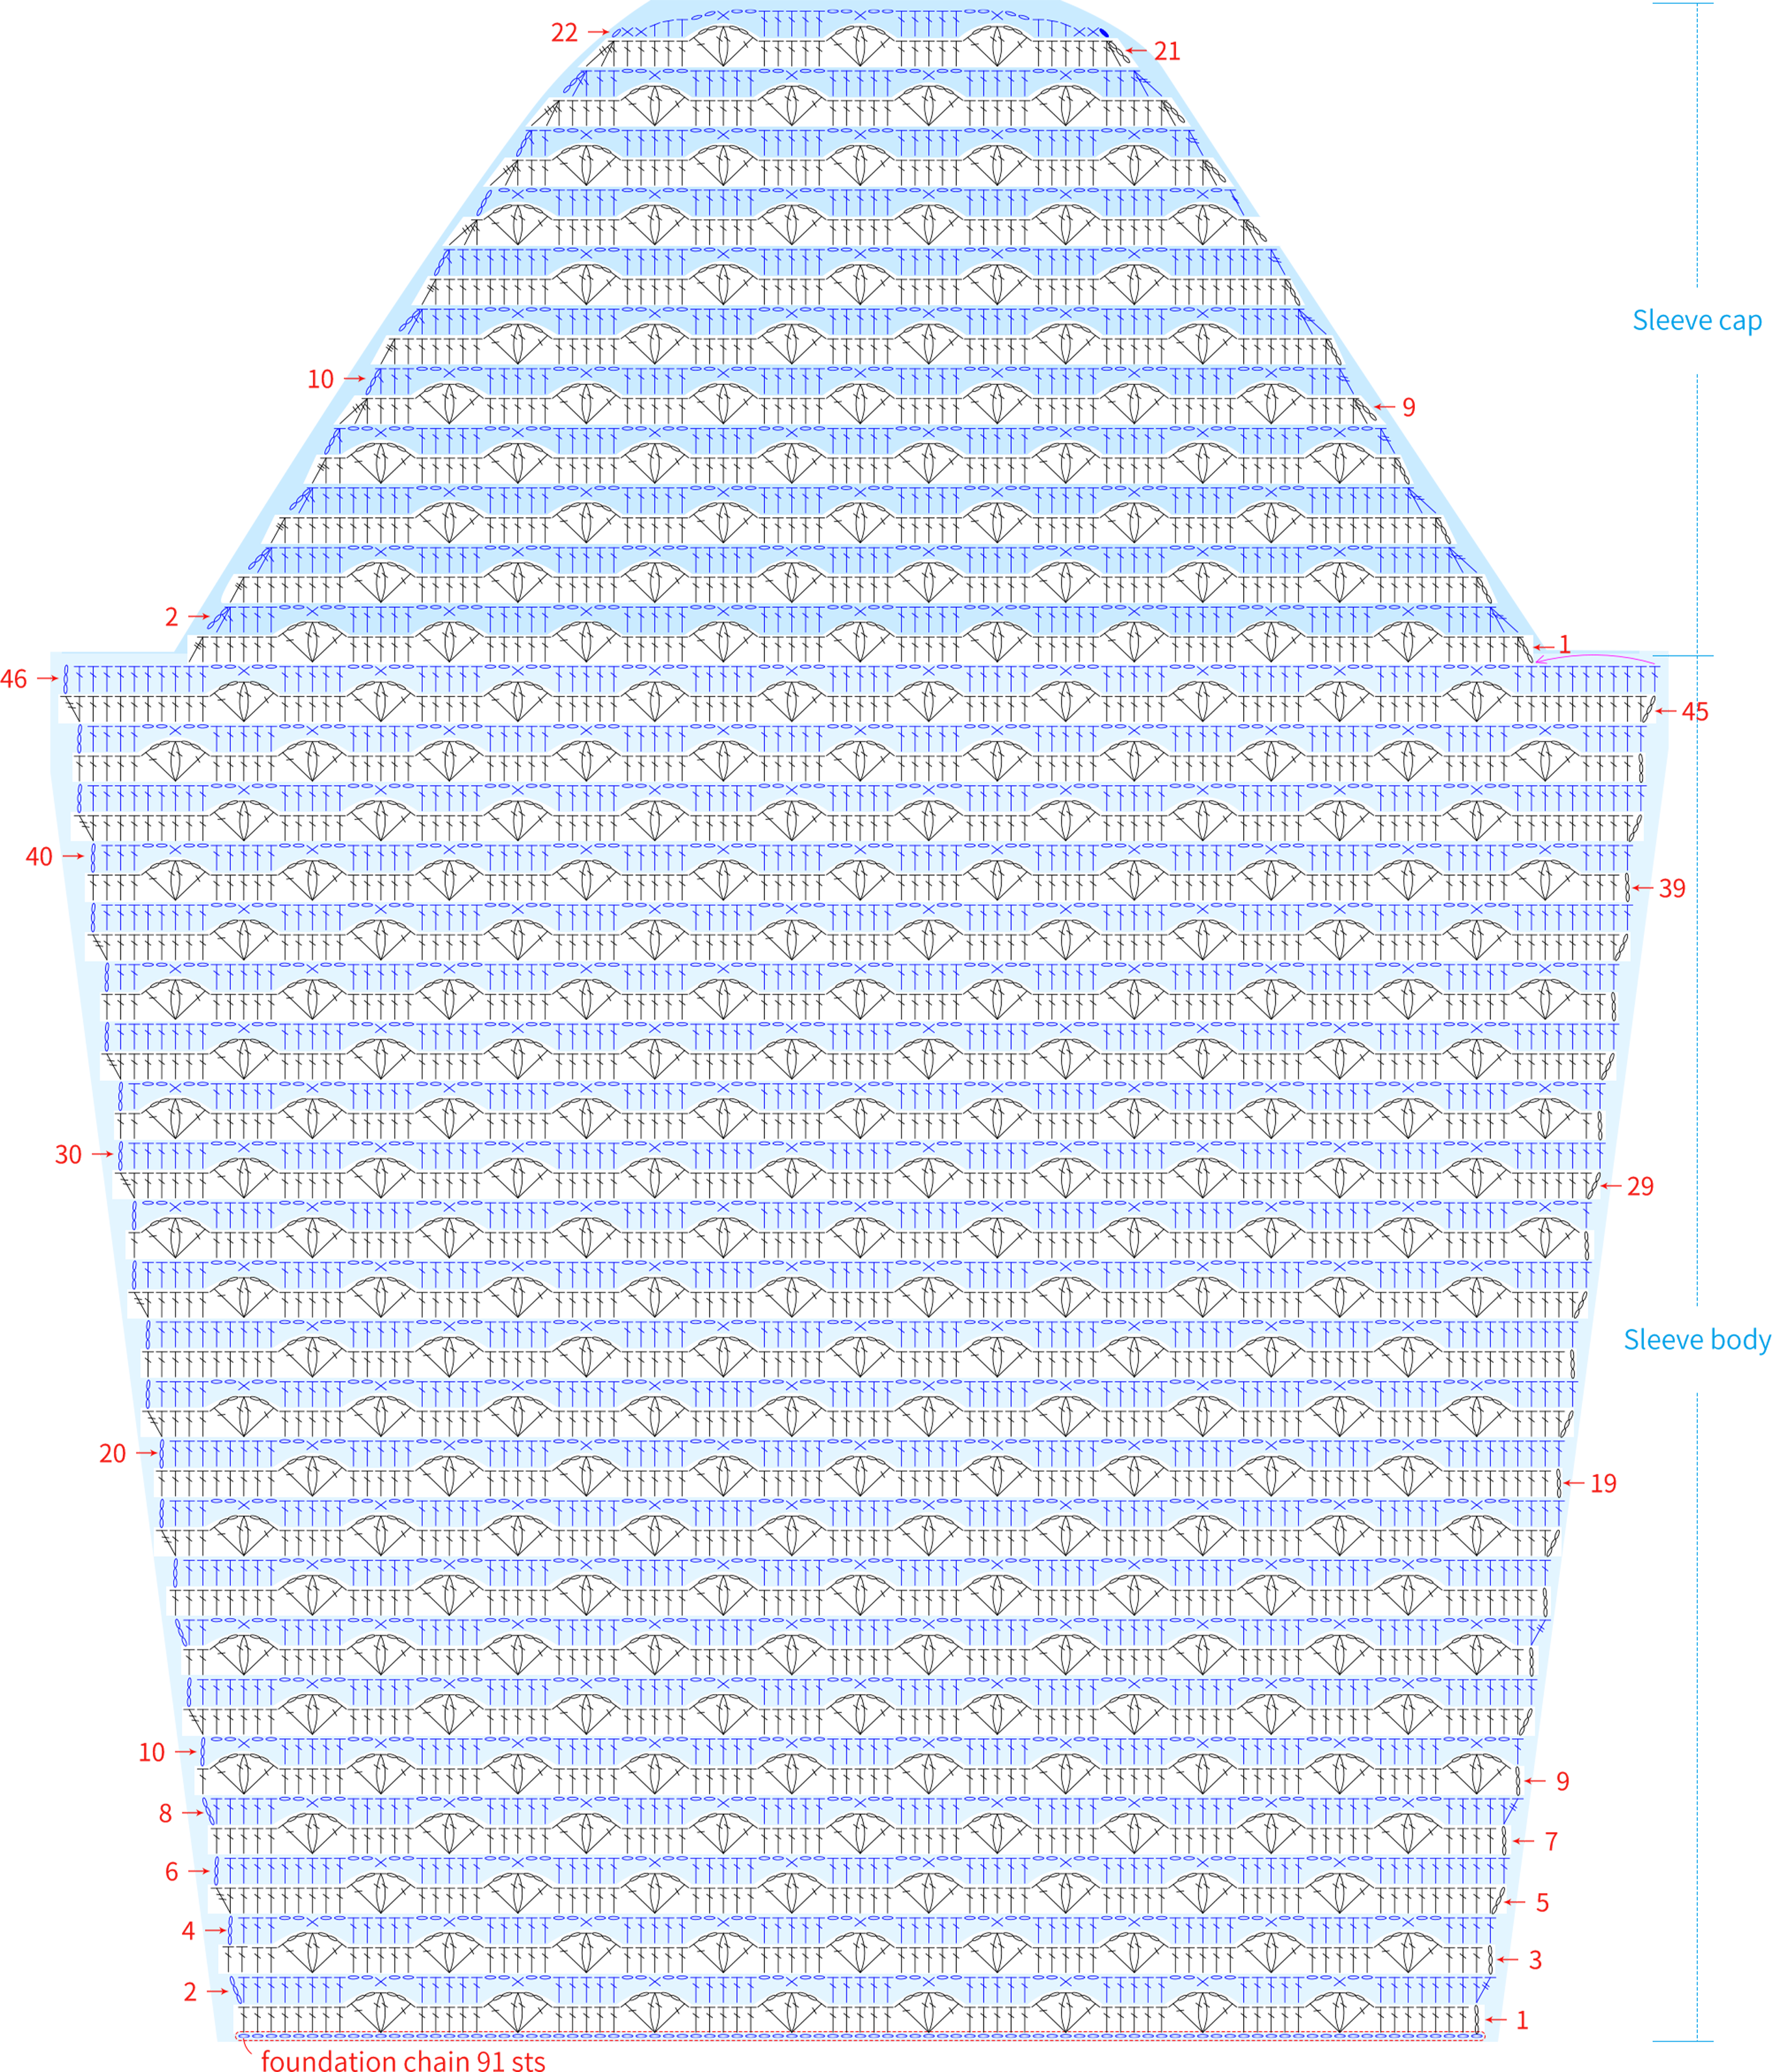
Part 3 SleeveC and JoiningD 29' 51''
First, crochet the sleeves. Then, joining the front and back body pieces and the shoulders. After completing these steps, join the beginning and ending of the sleeves, and finally attach them to the armholes of the front and back pieces. Please refer to the charts and video demonstration for details.

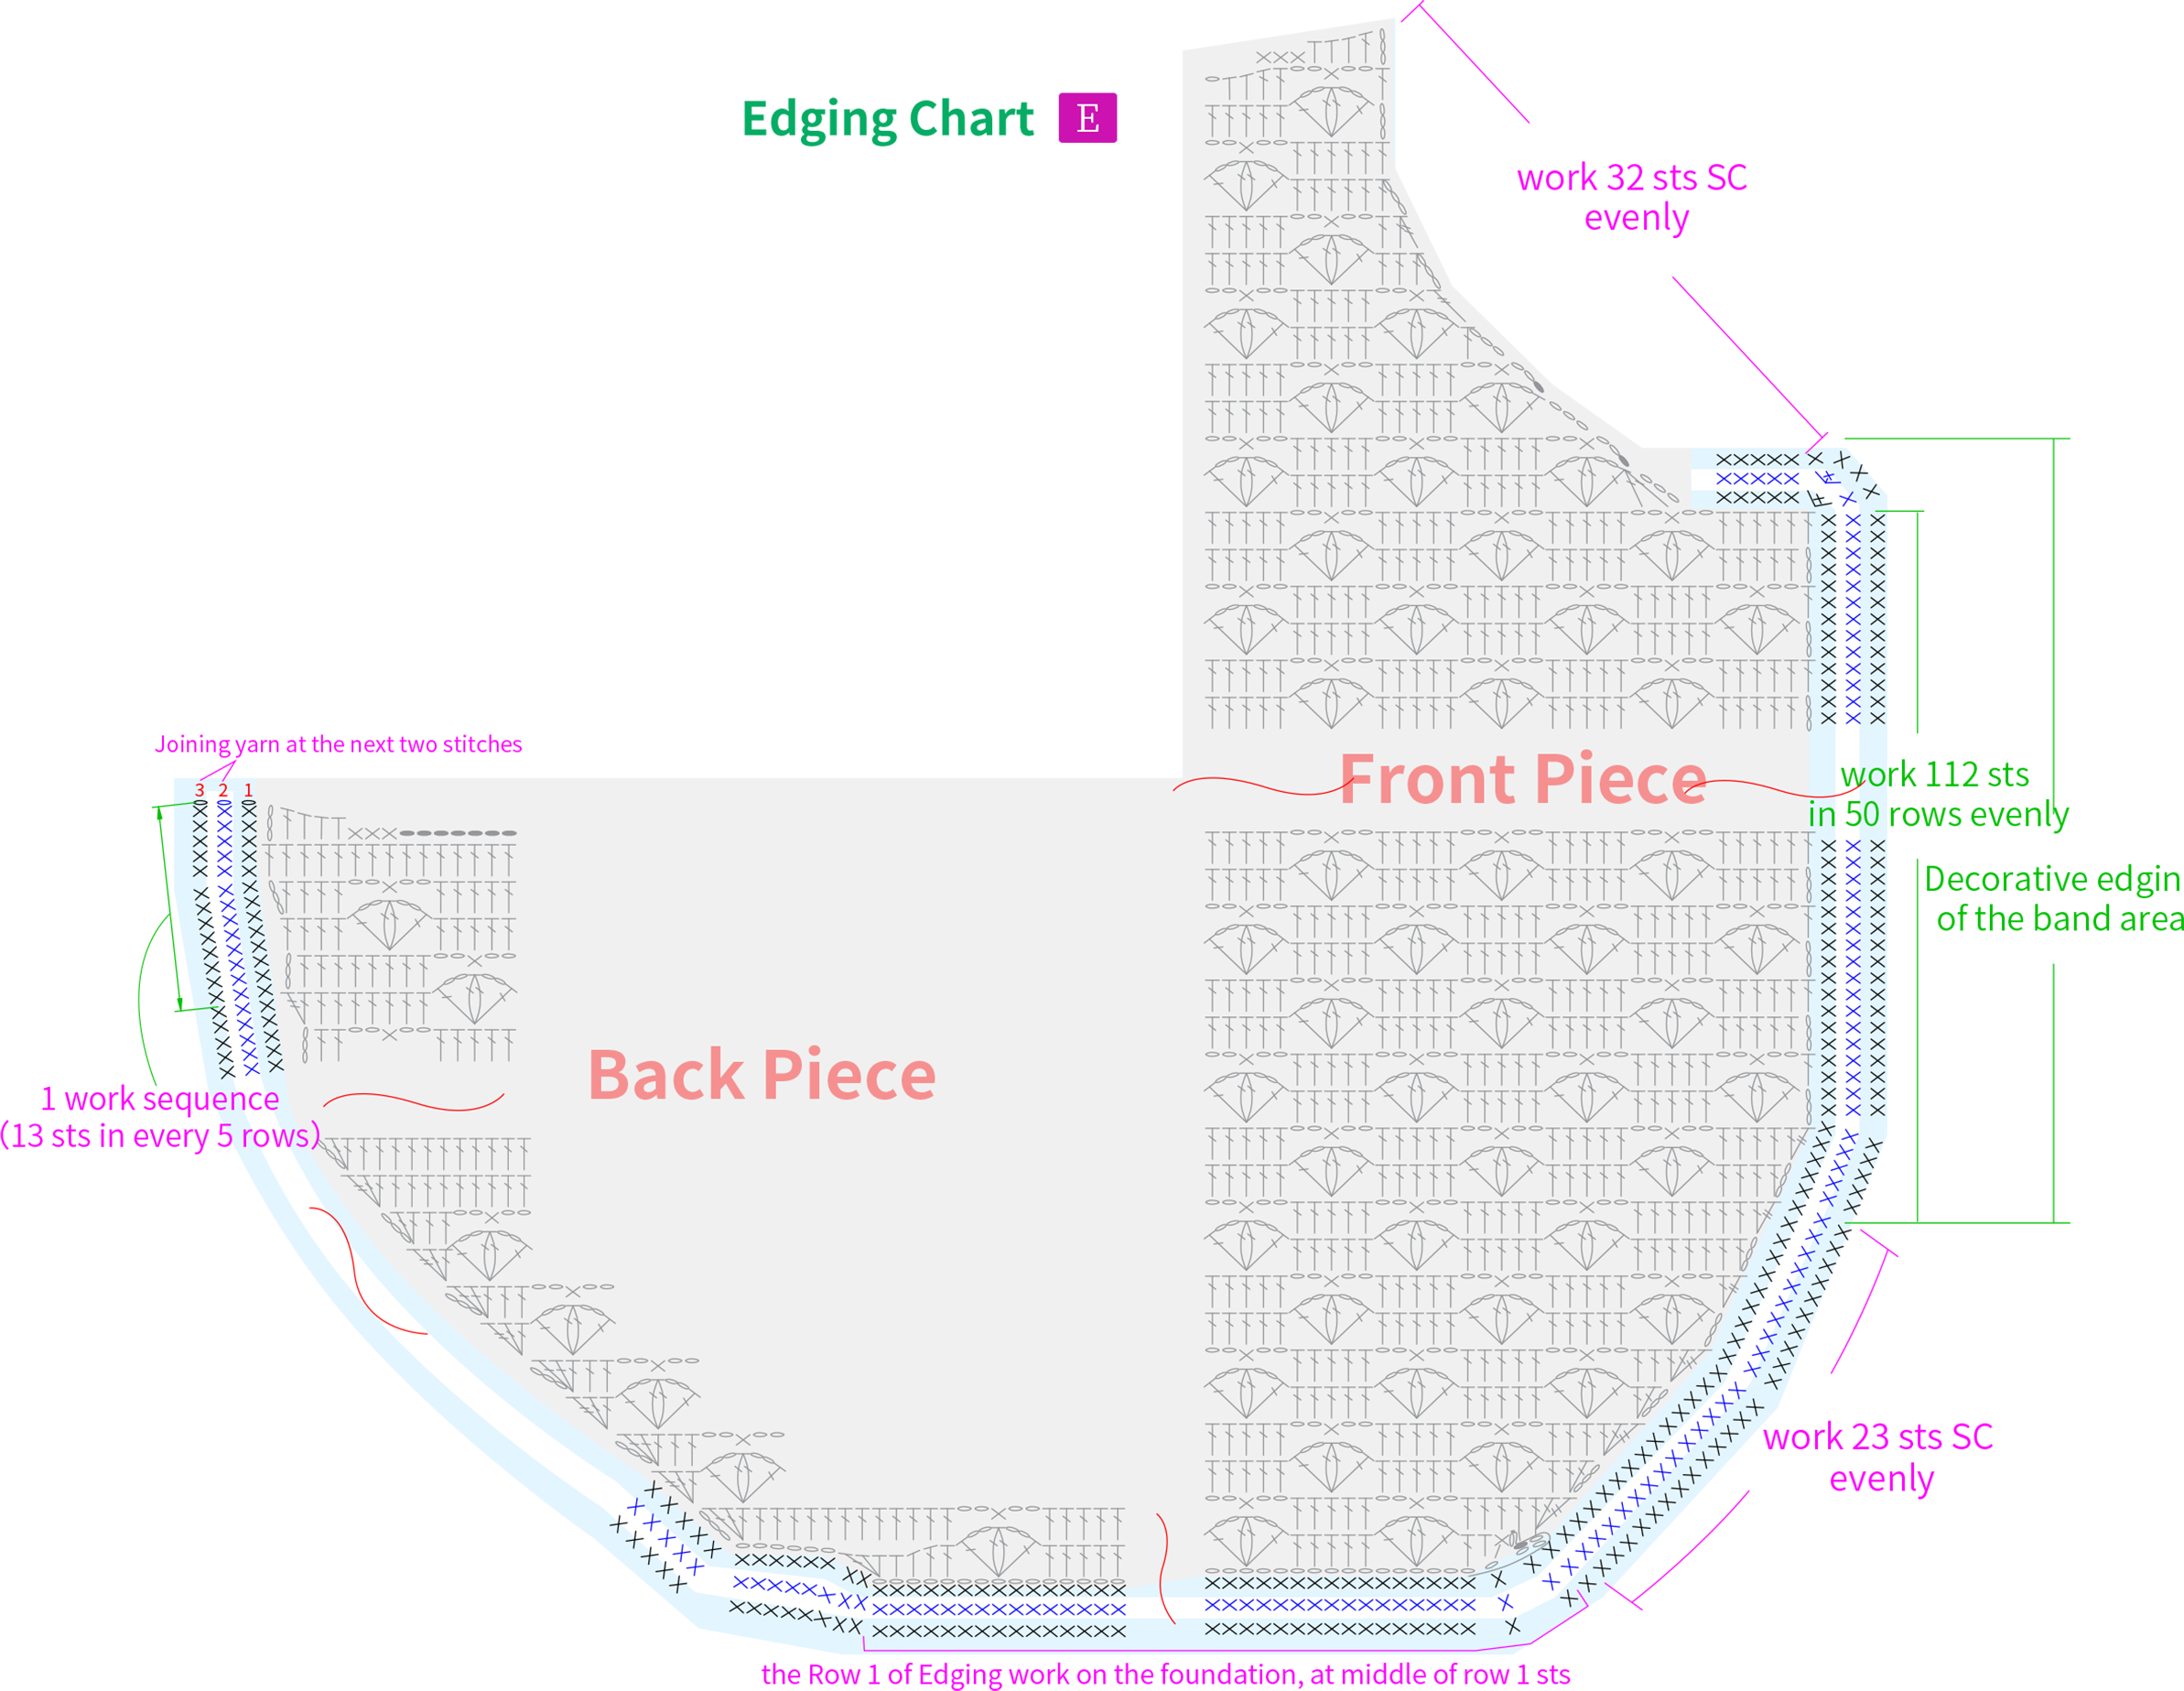
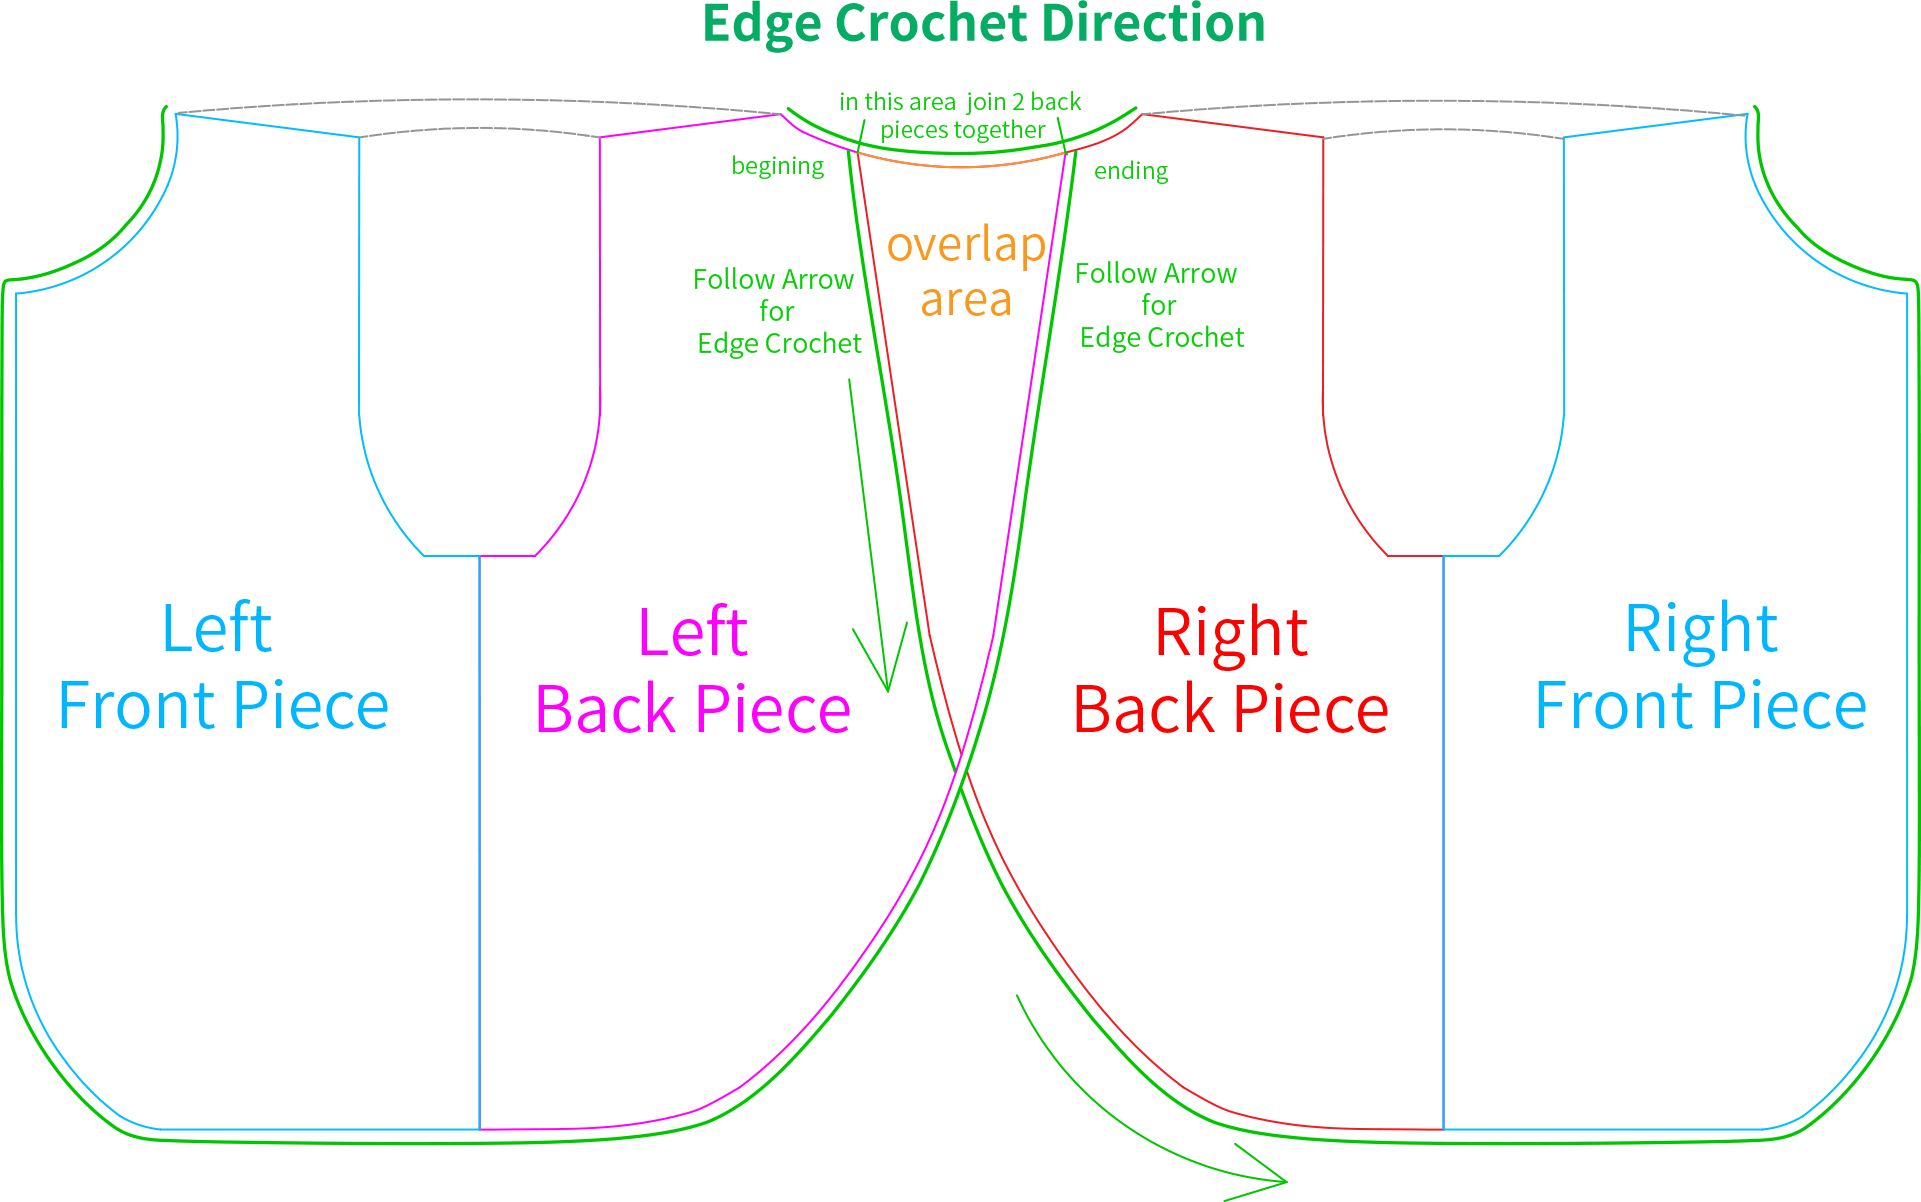
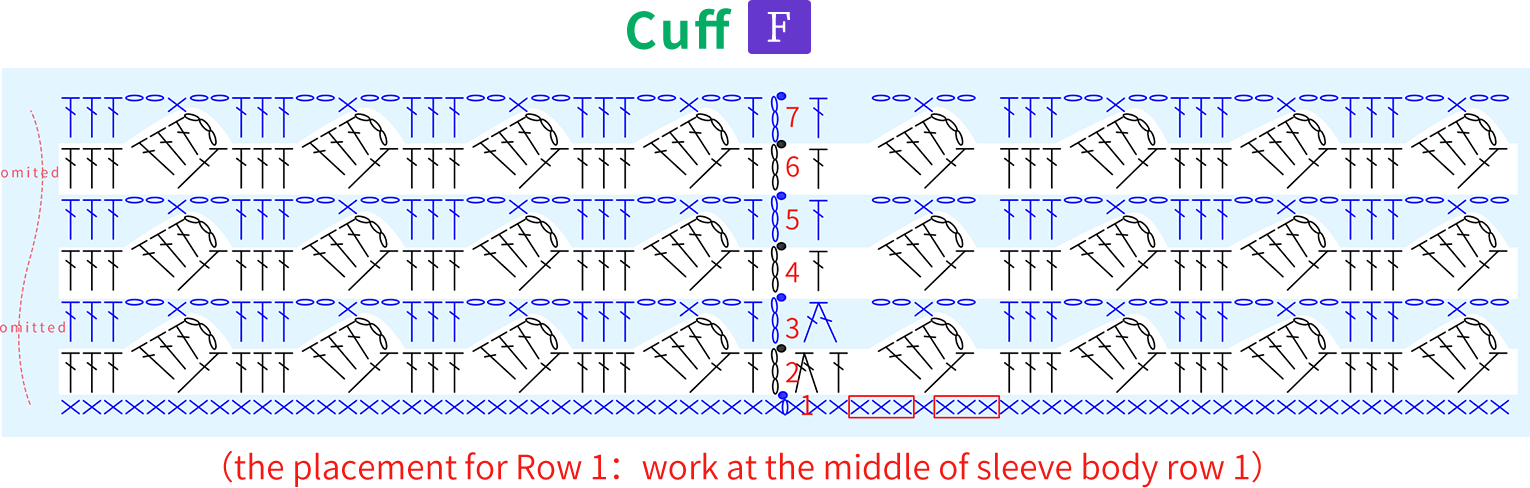
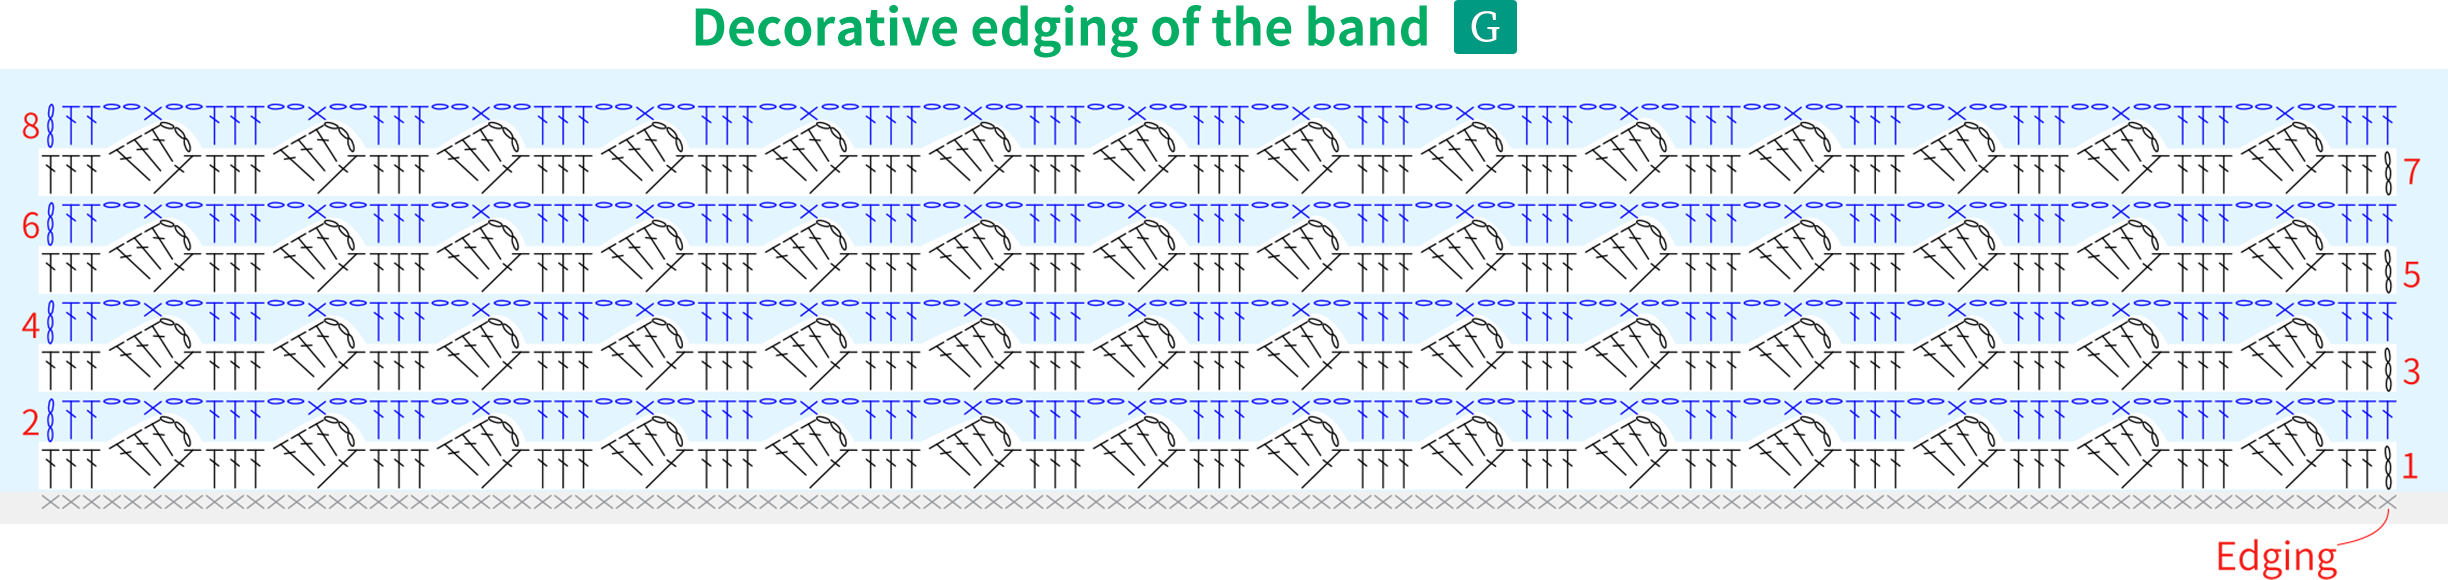
Part 4 Edging, Cuff and the Decorative edging 35' 04''
The collar is worked in rounds around the neckline. Please refer to the video demonstration for specifics.
Note:
1. The pattern chart is demonstrated using the small size, but the crocheting method is identical for all sizes.
2. When crocheting the edging, except for the areas that require lace trim, you can adjust the number of stitches picked up based on actual conditions.
3. At the end of each row, pick up the two adjacent threads and secure them with a slip stitch.
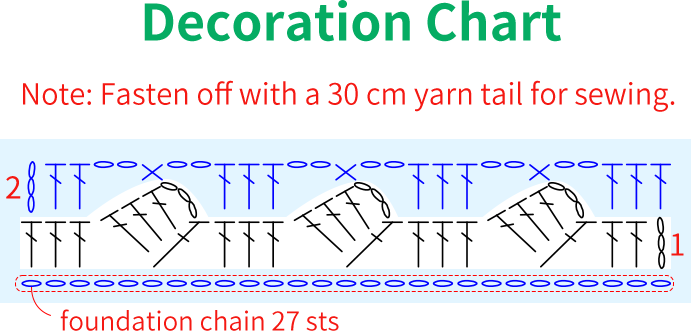
Part 5 Decorations, Chinese Frogs and Snap Buttons 52' 04''
First, crochet and attach decoration H. Once completed, make the Chinese frog and install it at the corresponding positionI. Finally, install the snap buttonJ. Please refer to the pattern chart and video demonstration for specifics.
Made by the community





