
Clothes
Matcha Coat
Project preview
See the finished project
Pattern format
Instructions
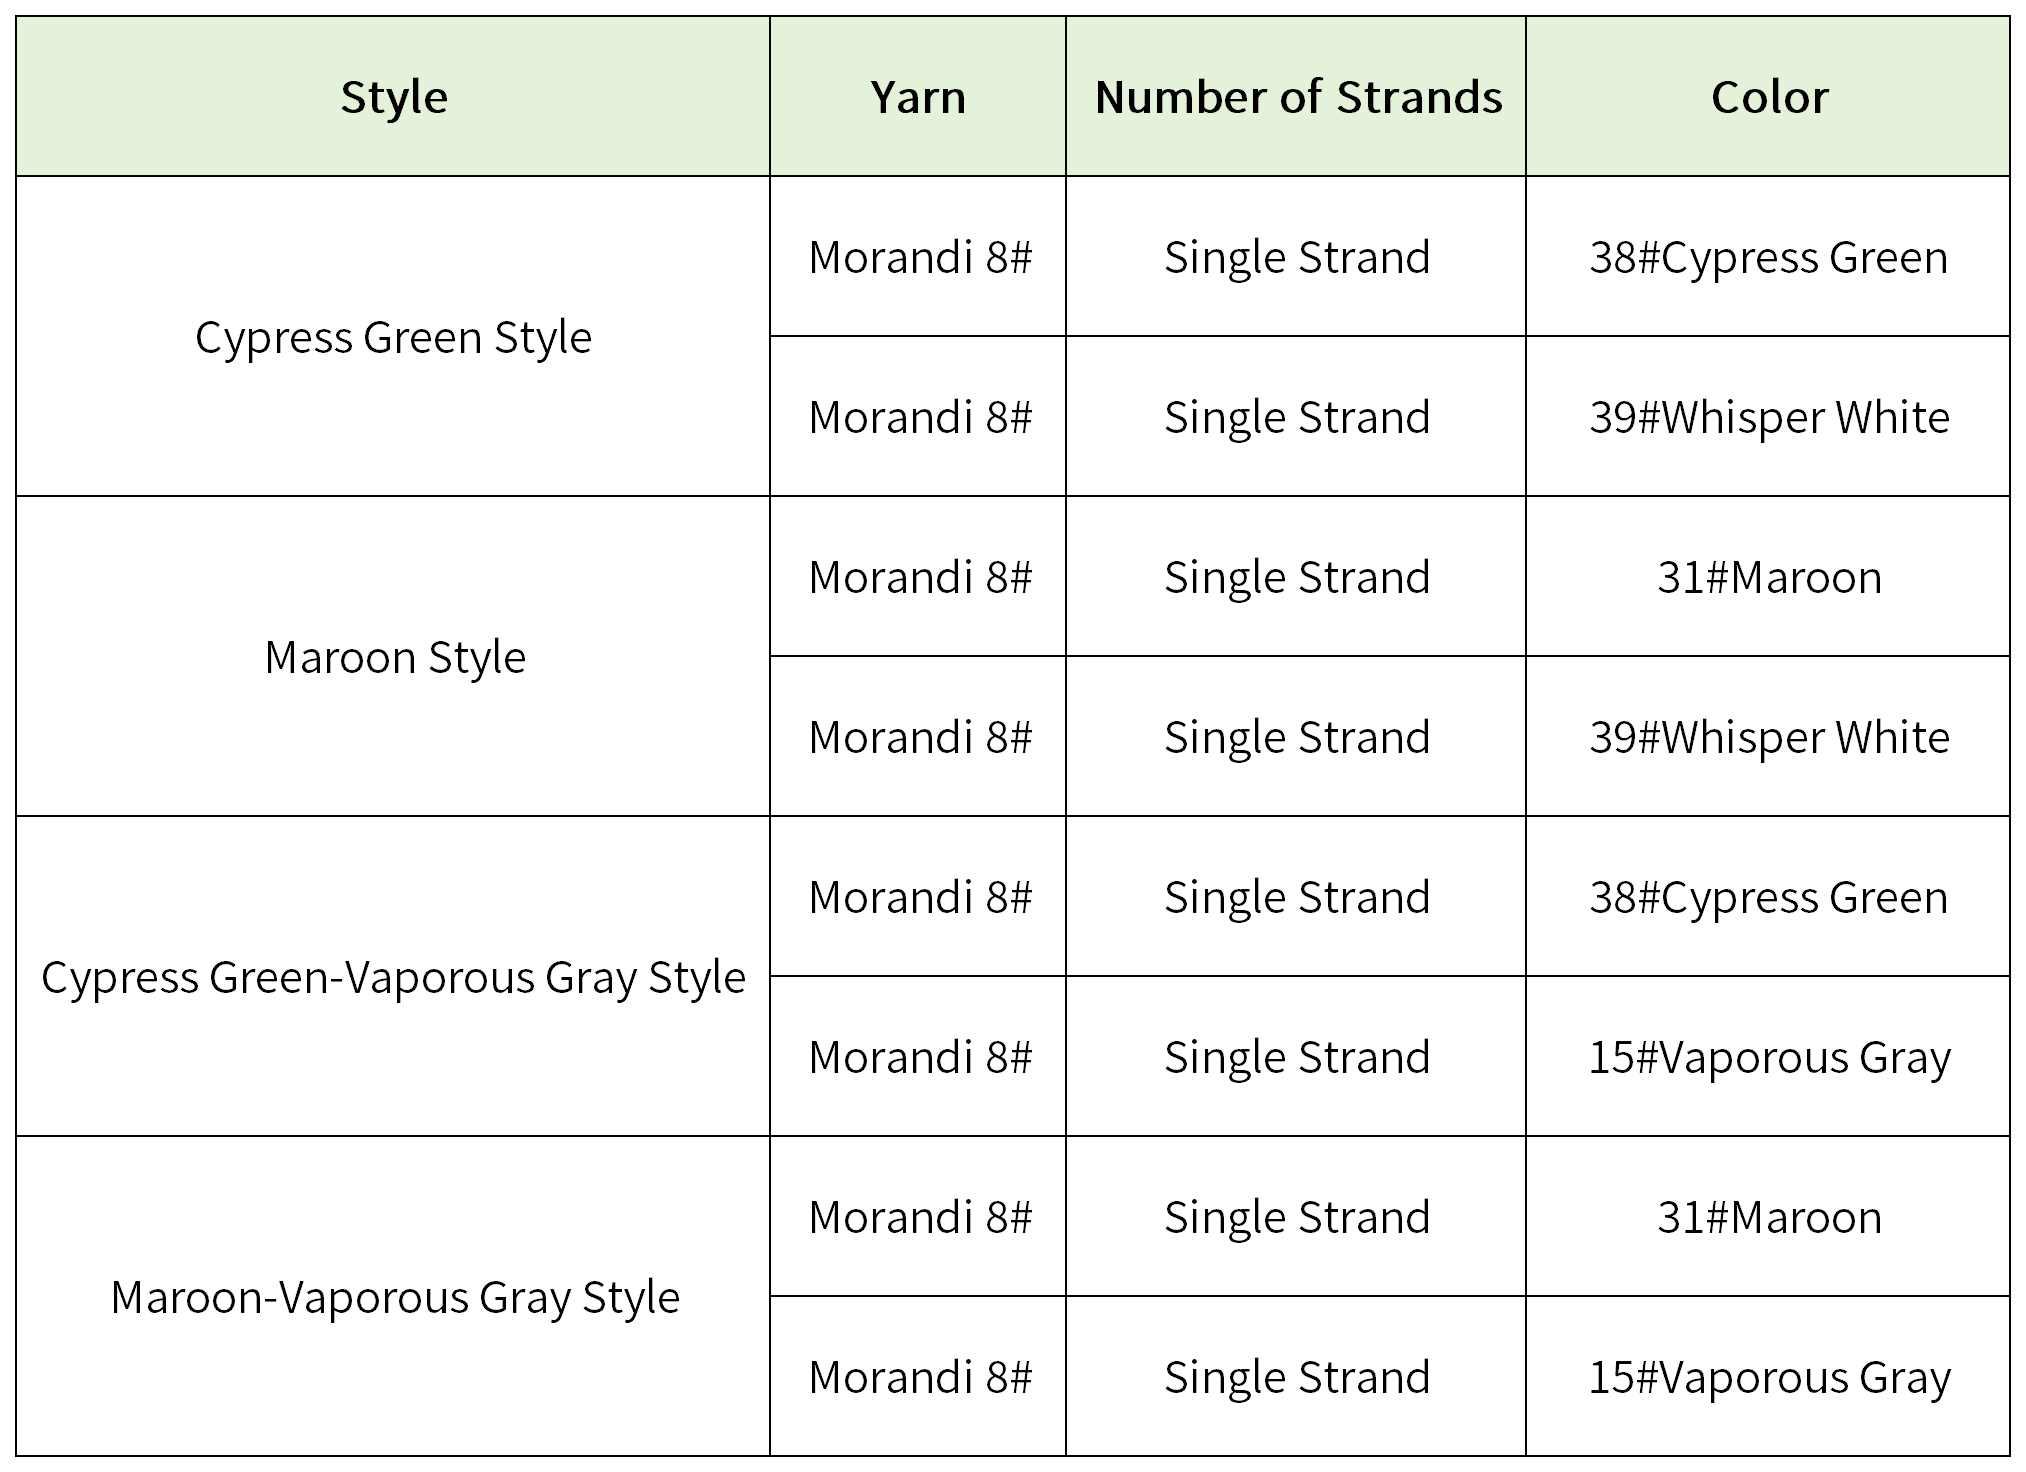
| Style | Yarn | Color |
|---|---|---|
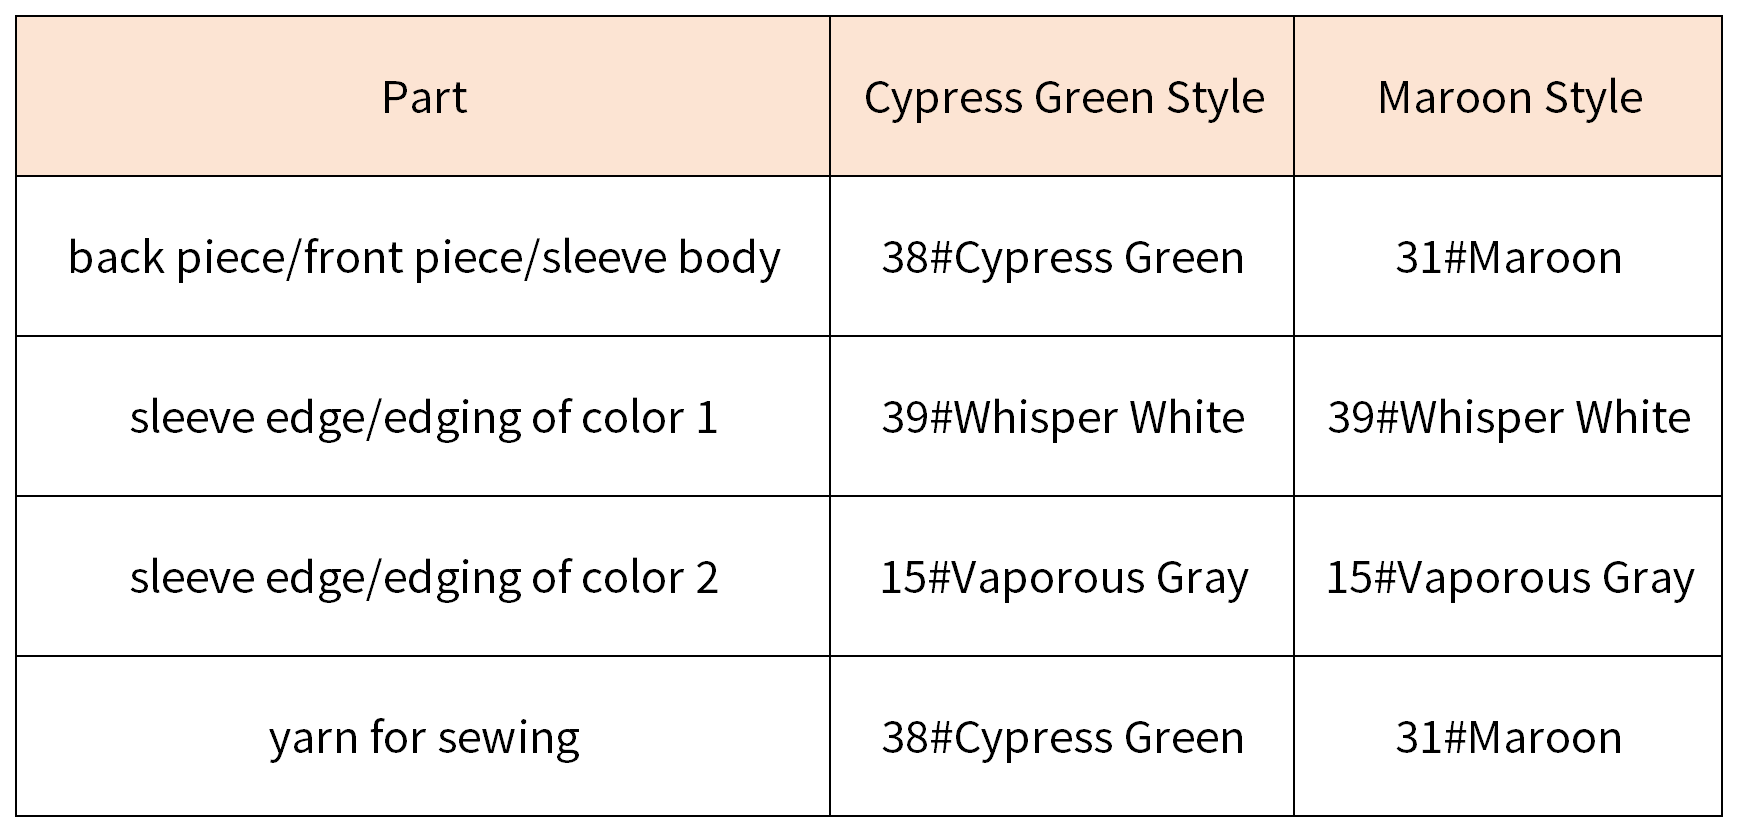
| Cypress Green Version | Morandi 8# |  38#Cypress Green x 21 38#Cypress Green x 21 39#Whisper White x 2 39#Whisper White x 2 |
| Maroon Version | Morandi 8# |  31#Maroon x 2139#Whisper White x 2 31#Maroon x 2139#Whisper White x 2 |
| Green Gray Version | Morandi 8# |  15#Vaporous Gray x 238#Cypress Green x 21 15#Vaporous Gray x 238#Cypress Green x 21 |
| Maroon Gray Version | Morandi 8# | 15#Vaporous Gray x 231#Maroon x 21 |
This garment consists of the back piece, left and right front pieces, sleeves, and edging. Crochet each part separately first, then sew them together.
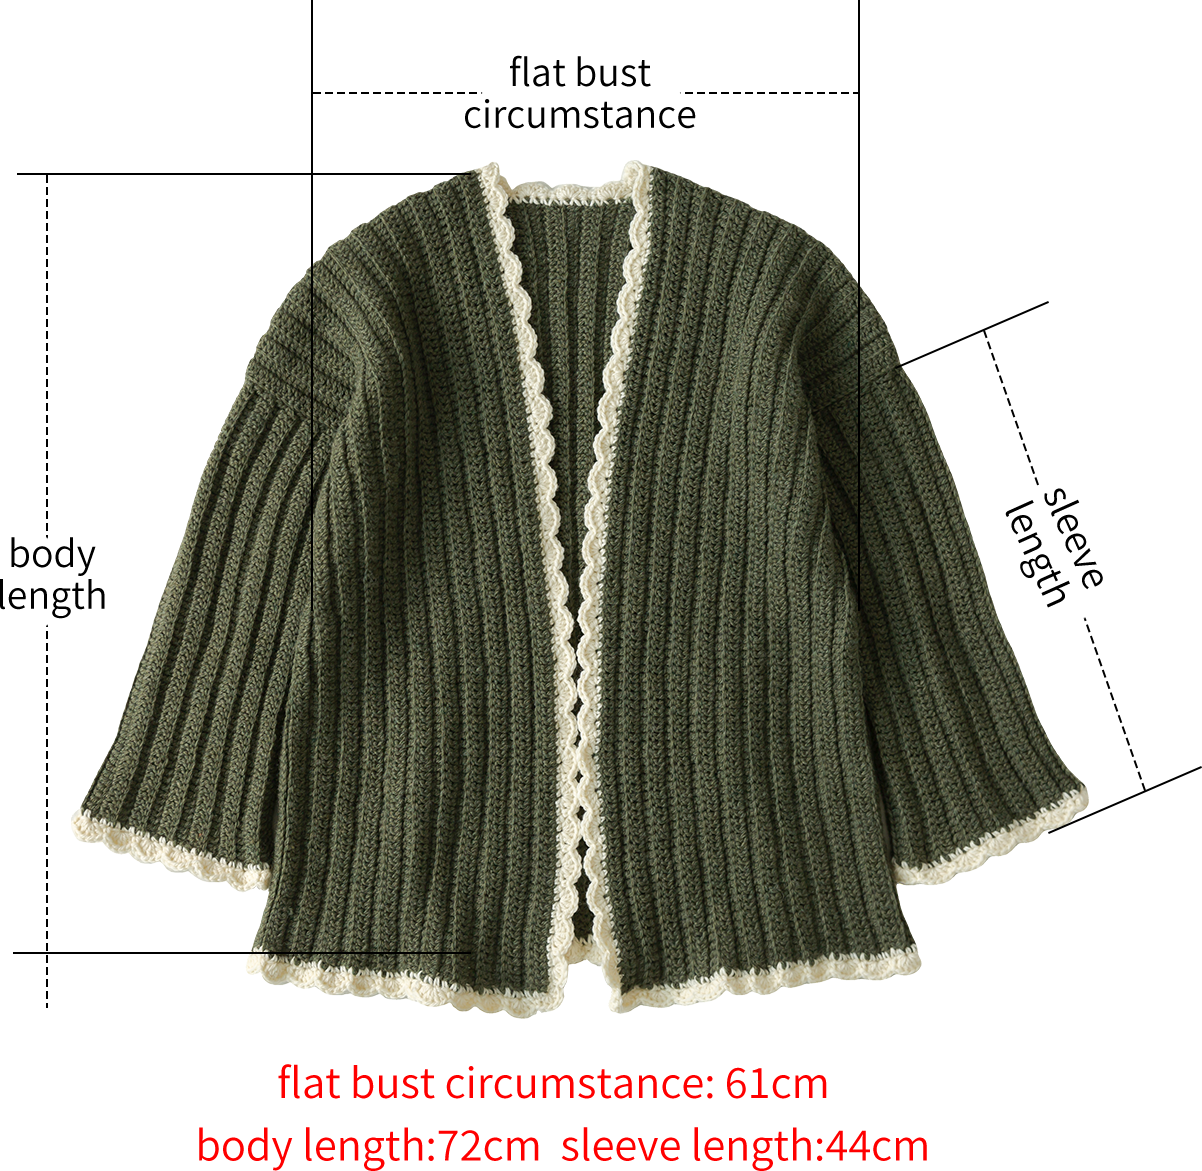
Note: Hand-measured, with an error margin of 1-2 cm.
Due to variations in individual tension, the size of the sample is for reference only.
Materials: Morandi 8#
Hook: 4.50 mm crochet hook
Chart Key






Note: This pattern is making in Chinese crochet pattern terms, and the stitch name is written using American terminology. All measurements in charts are in cm.
Note:
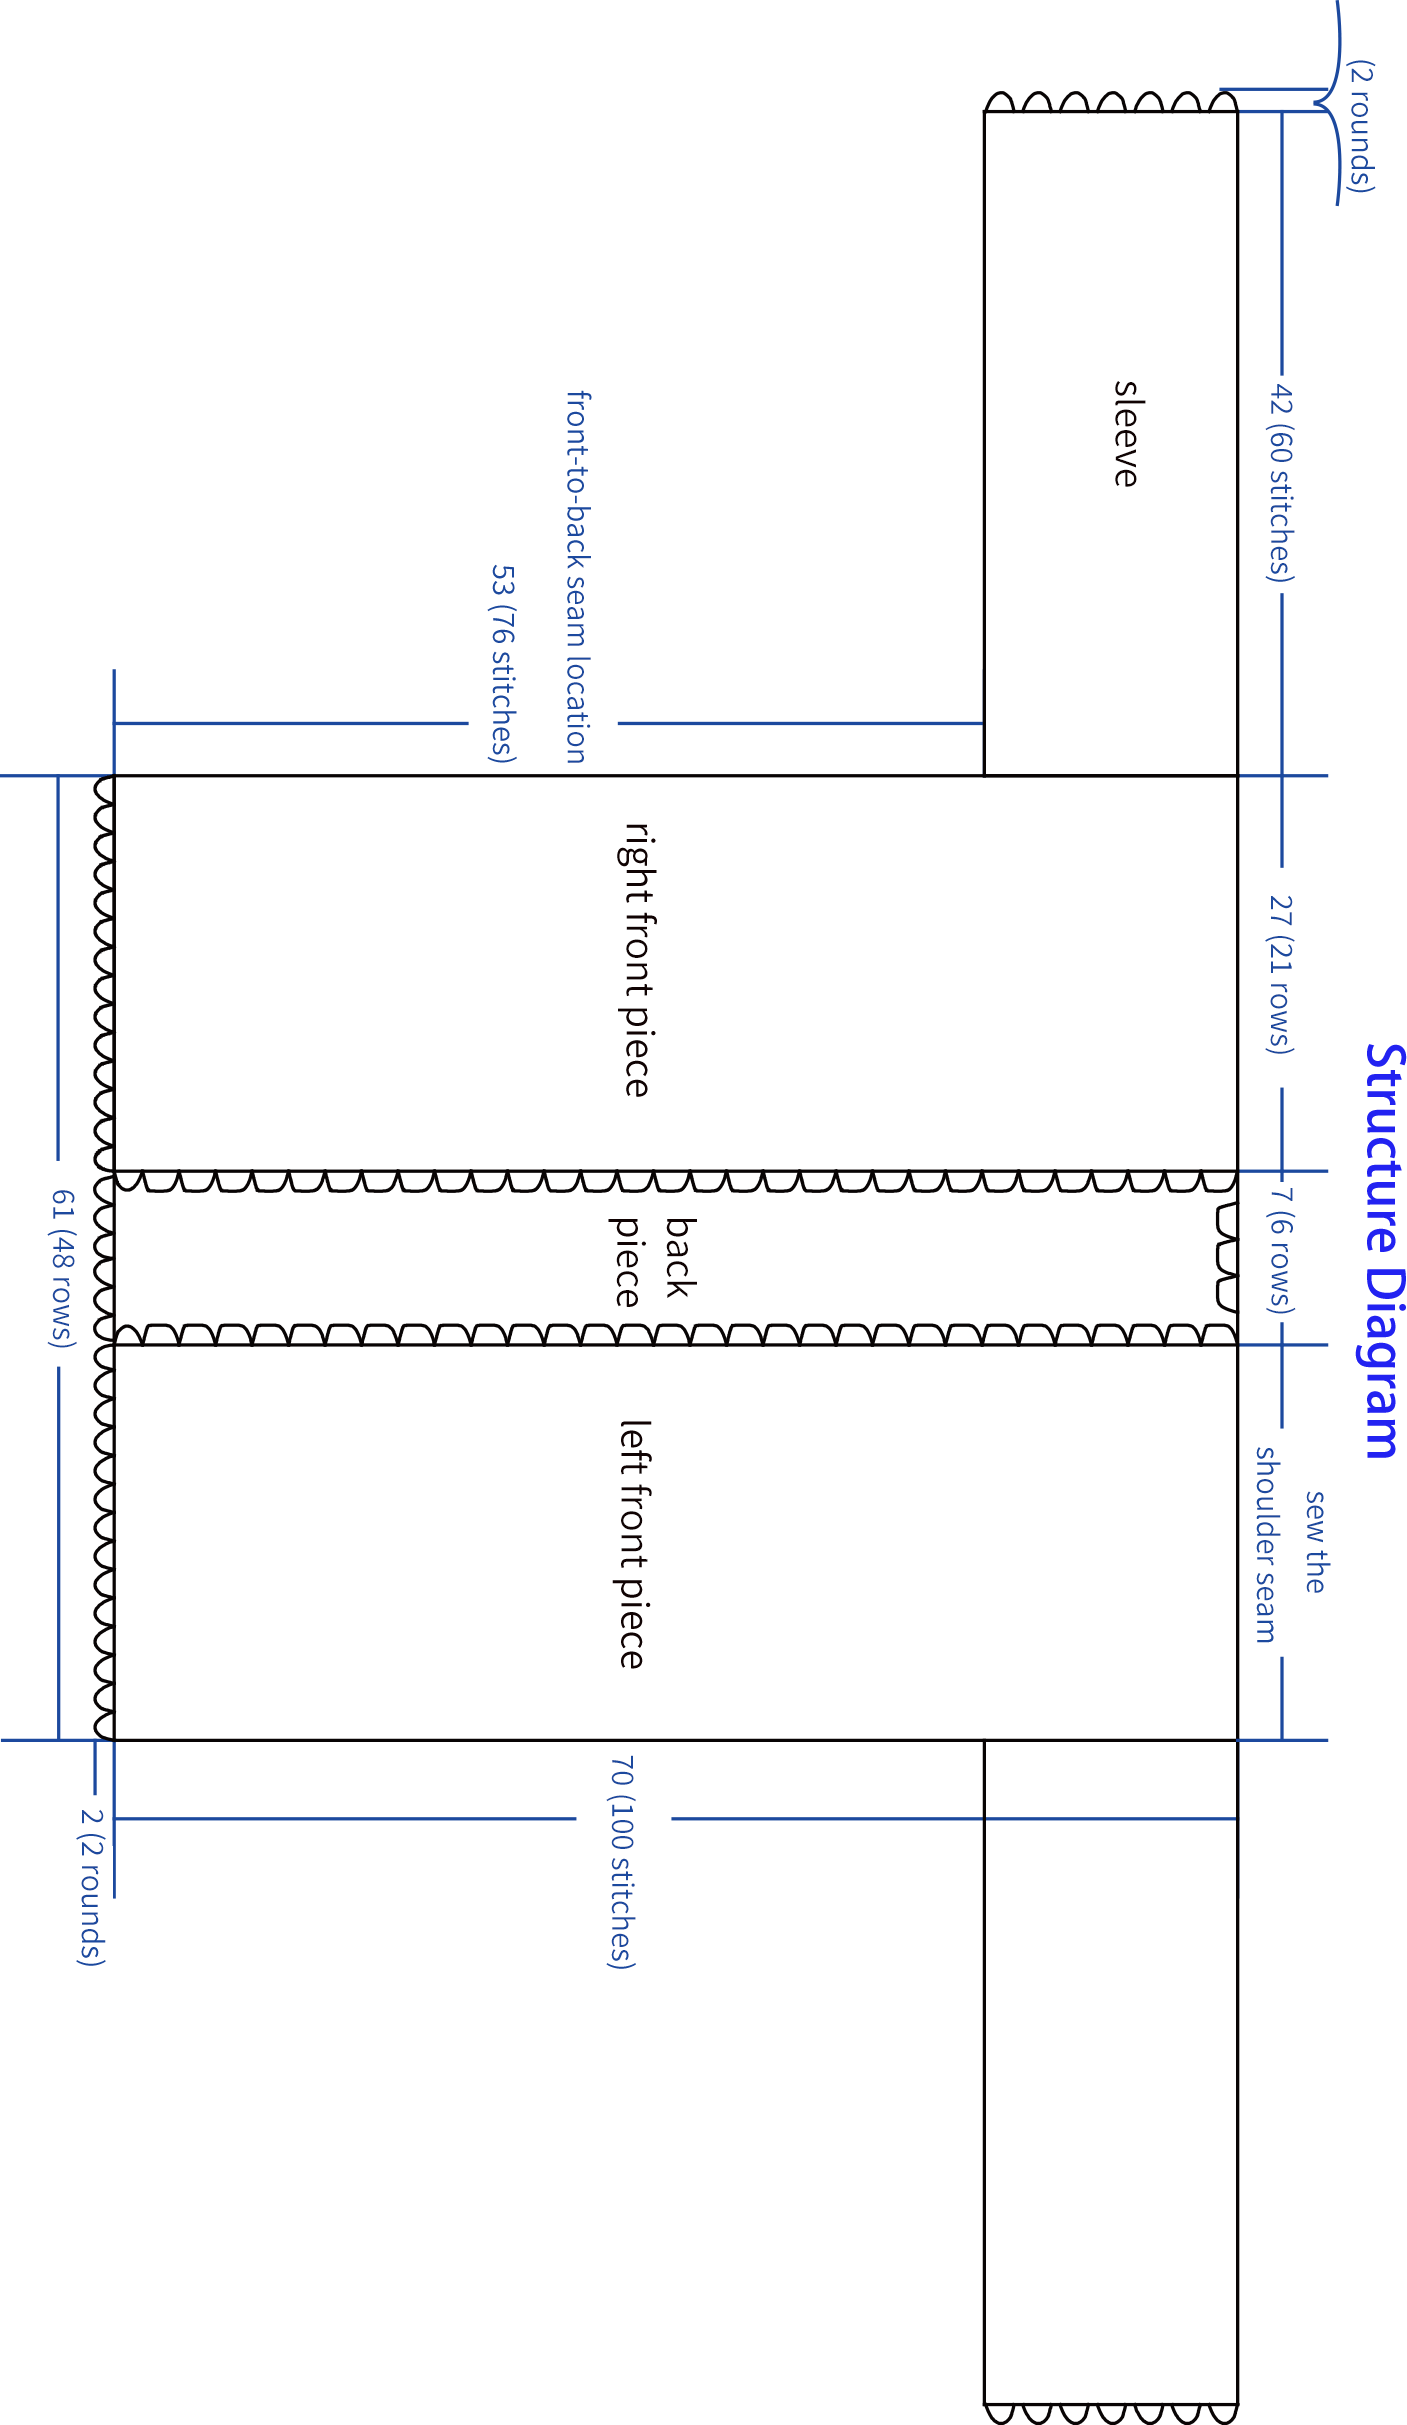
After crocheting the front and back pieces as well as the sleeves, place the front and back pieces together (no fixed right or wrong side), then refer to the structure diagram for sewing positions, or refer to the pattern of Part 4, sew along the side seams and shoulders. After sewing, armholes will form, then sew the sleeves to the armhole positions. All sewing can be done using the whip stitch method, or you can choose your preference for sewing. Just make sure it lays flat after sewing. The reserved position for the armholes is for reference only and can also be adjusted according to personal needs.
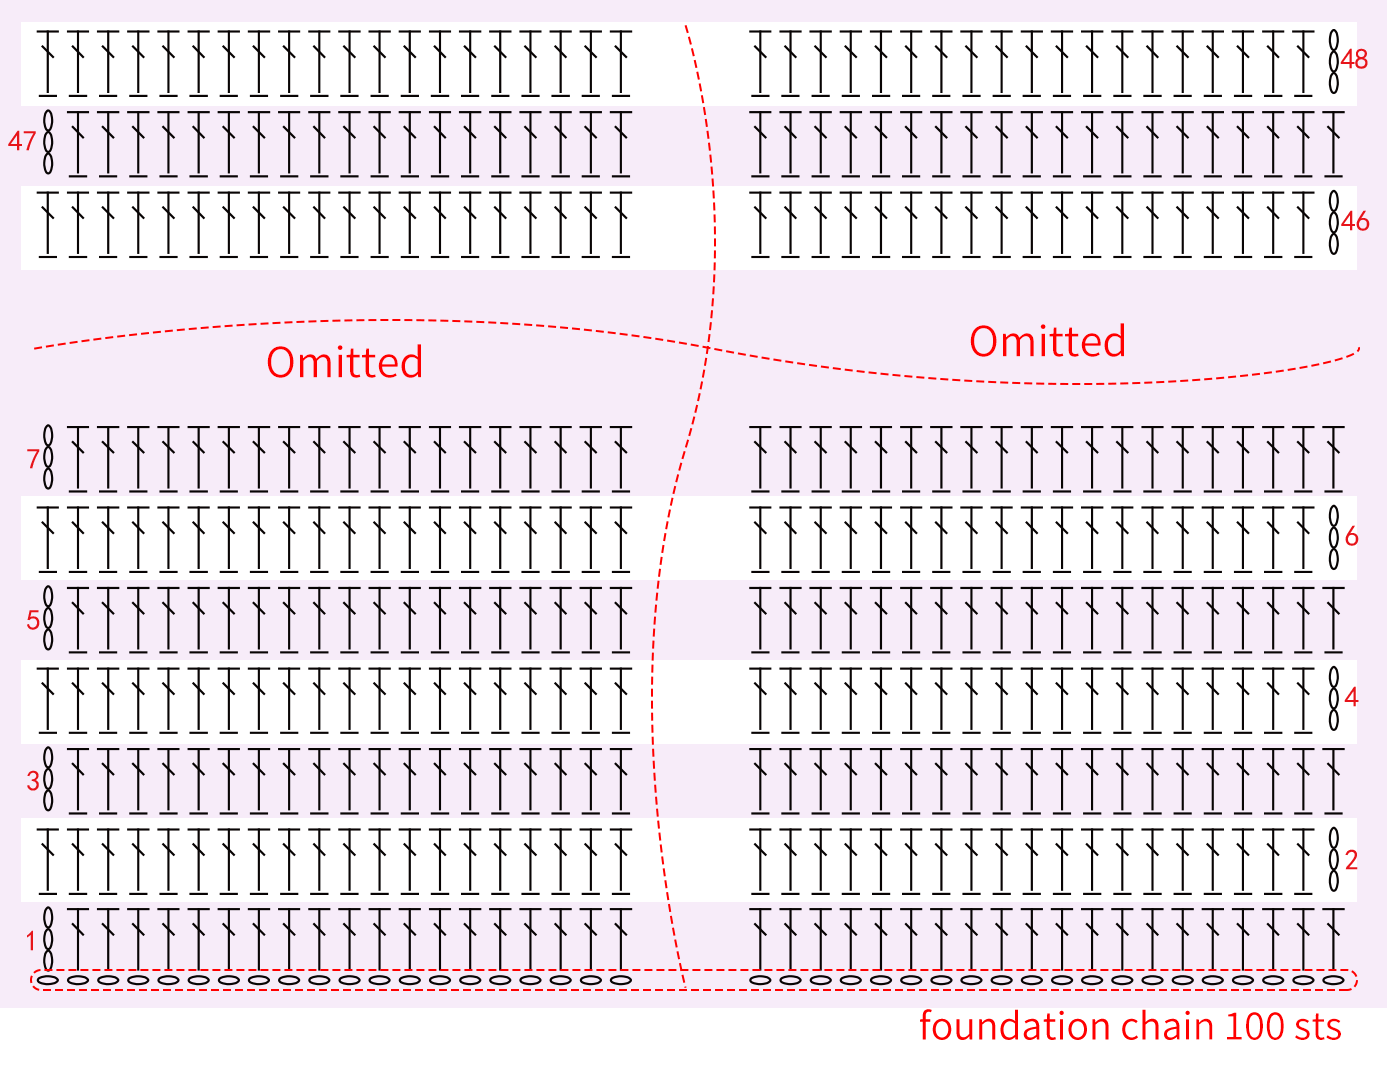
Part 1 Back Piece
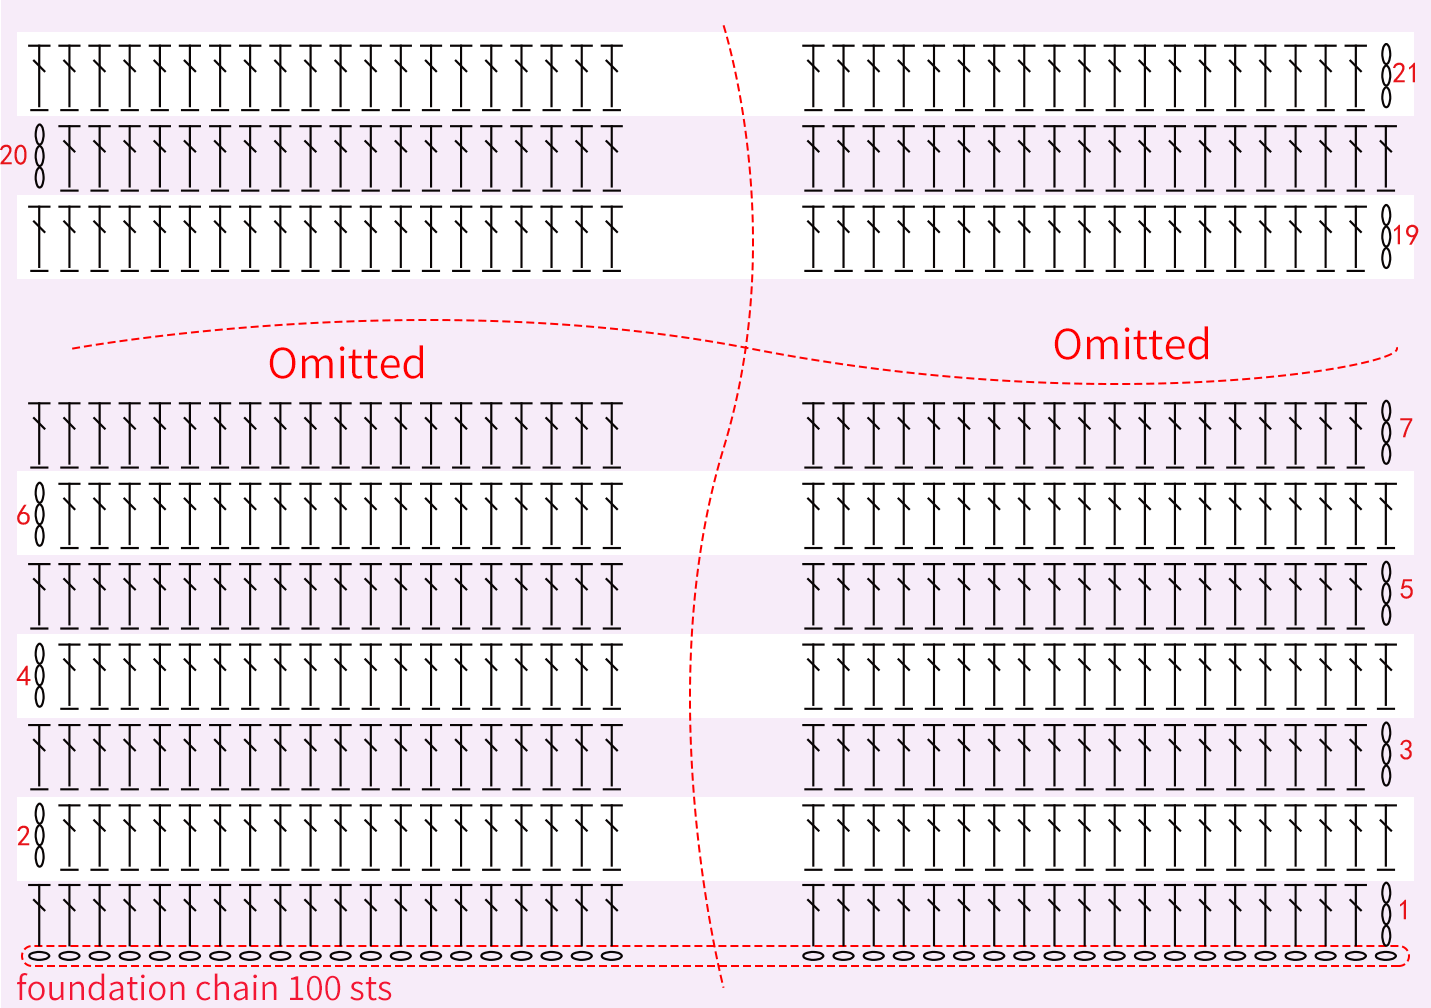
Part 2 Left and Right Front Piece
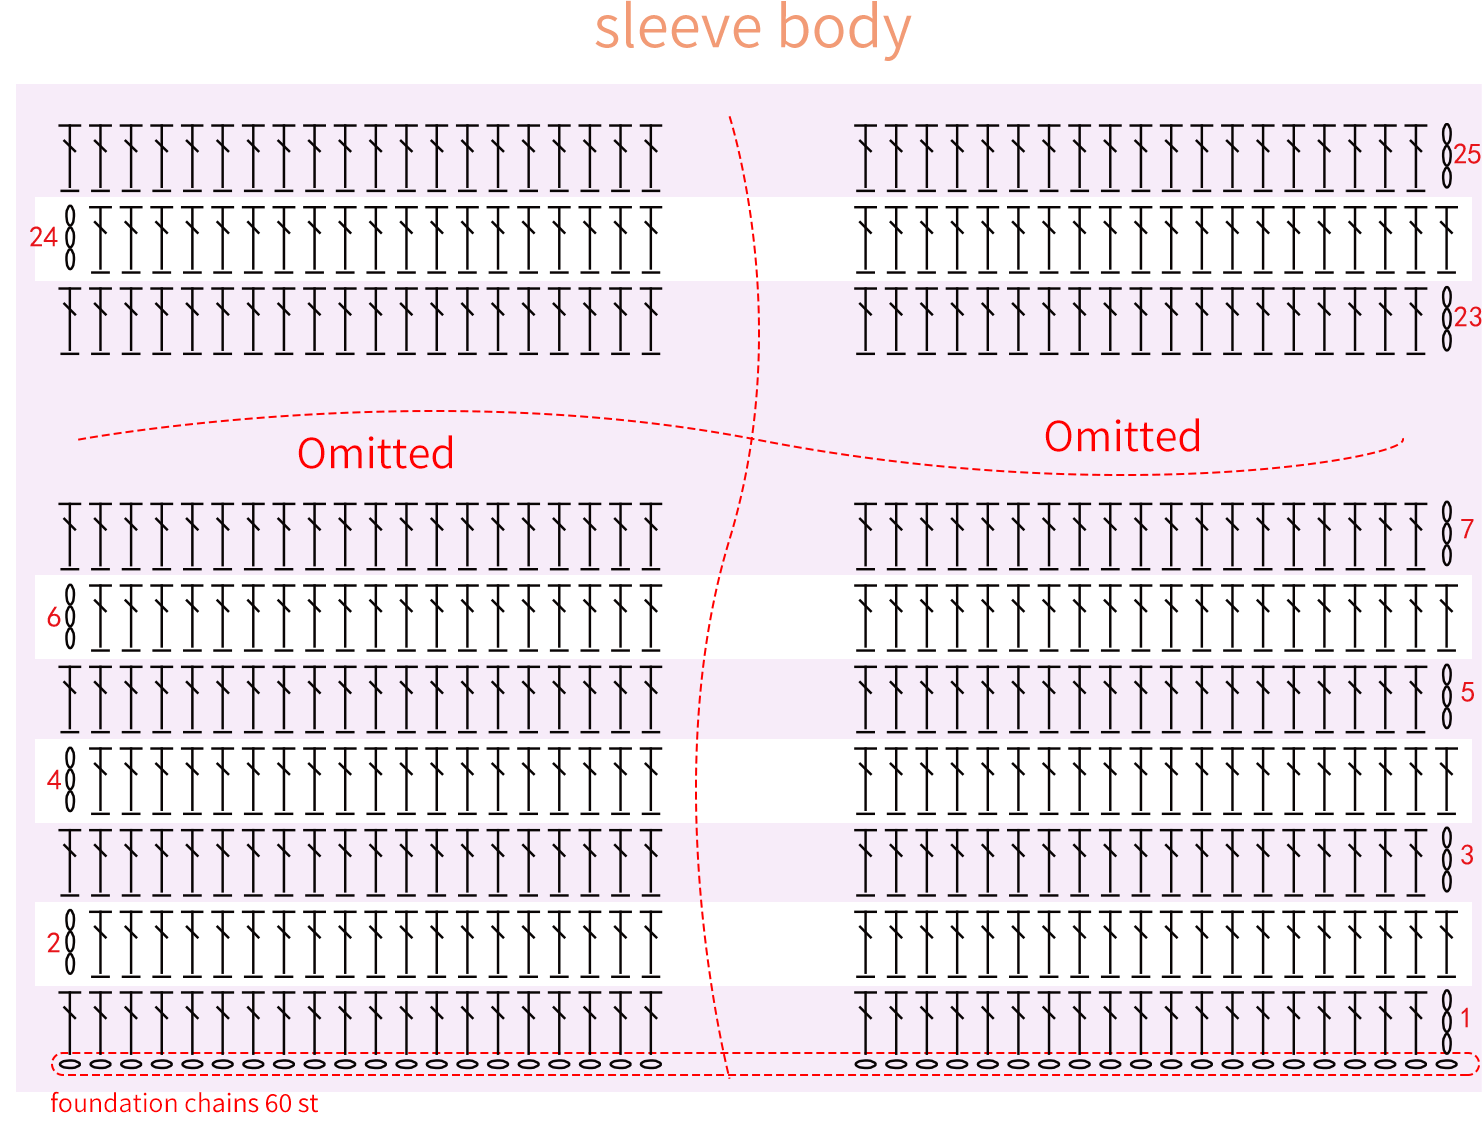
Part 3 Sleeve
The sleeve is divided into the sleeve body and the sleeve edge. First, crochet the sleeve body. After finishing, fold it in half and sew together the last row and the beginning placement. Then crochet the sleeve edge and finally sew it to the armhole.
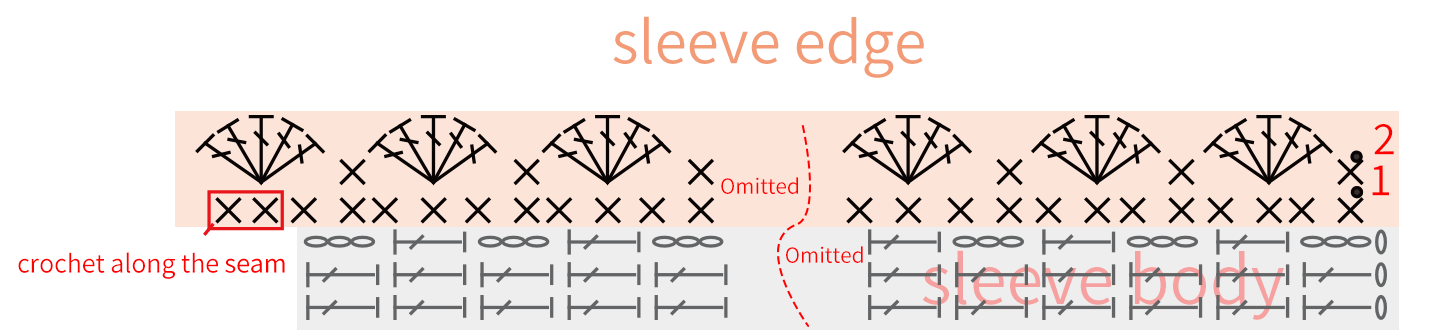
Part 4 Edging
Sew up and then crochet the edging, crocheting around the edges in rounds.
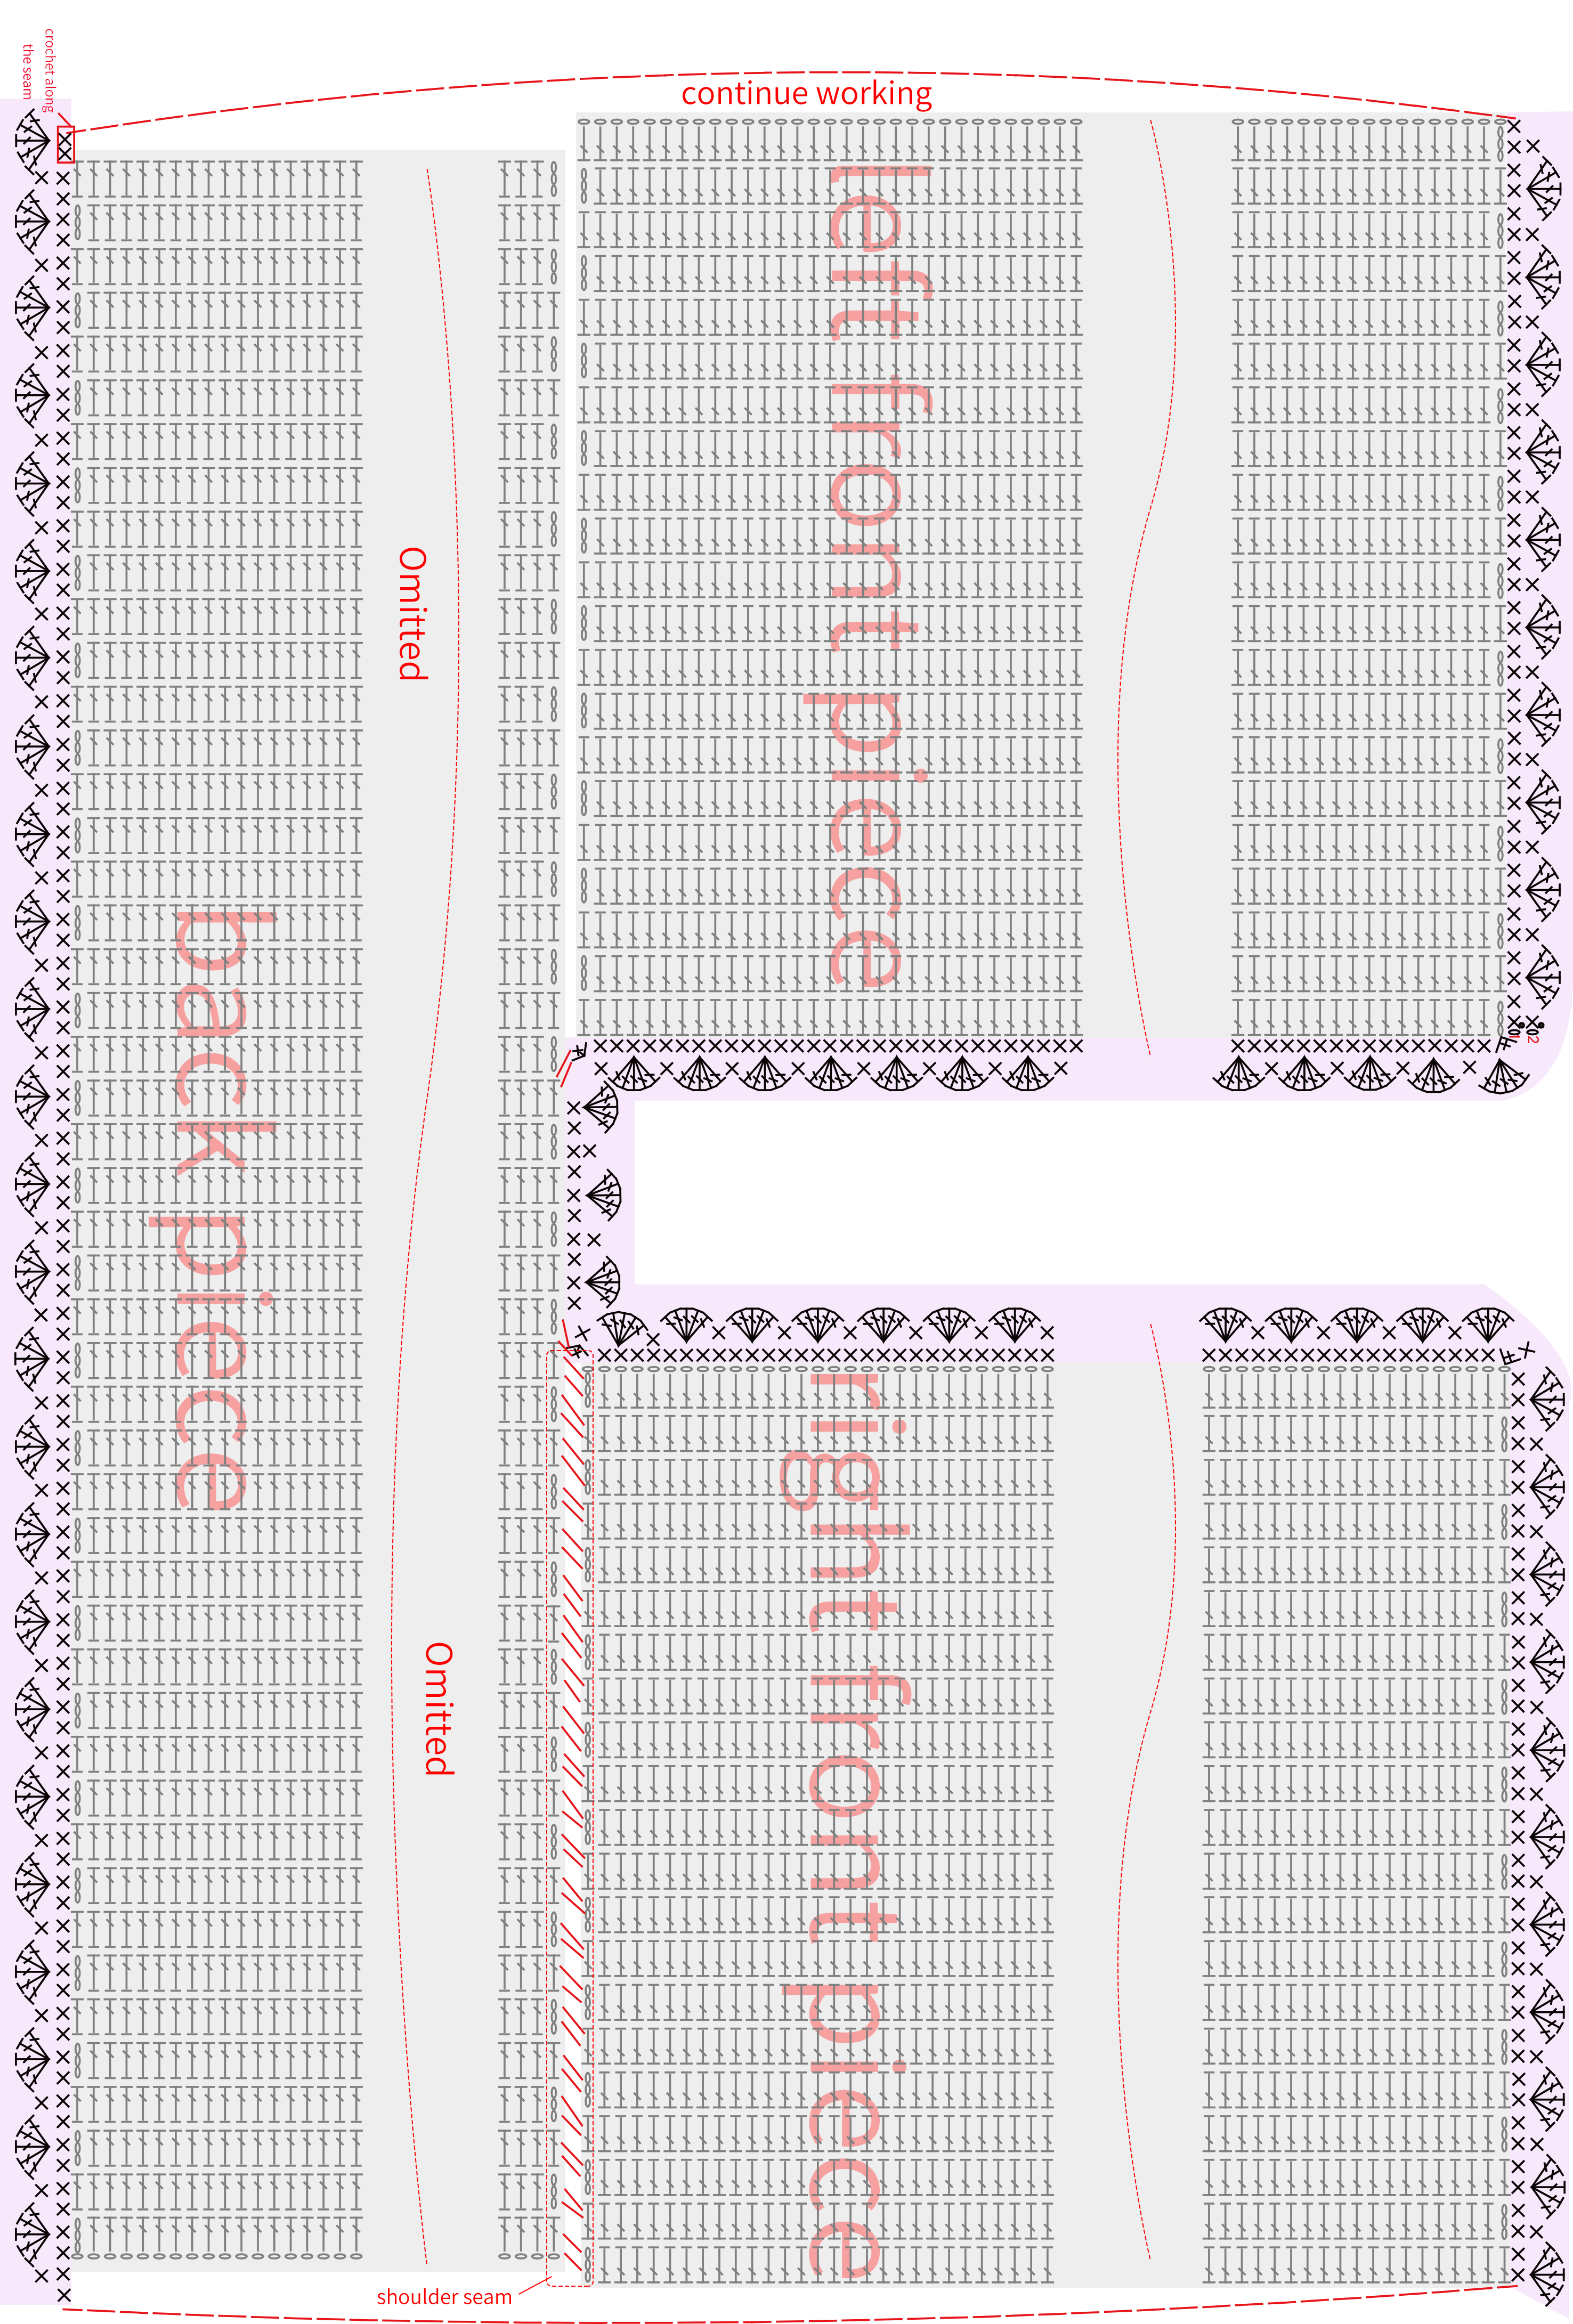
Made by the community





