
Home / Blanket
Meadow Patchwork Blanket
Project preview
See the finished project
Pattern format
Instructions
Watch and follow
Video tutorial
The blanket consists of motifs, sewing together motifs, lace trim, and lining. First, knit the motifs. After finishing them, sew the motifs together in the order shown in the diagram. Then, knit the lace trim afterward. Lastly, sew on the lining.
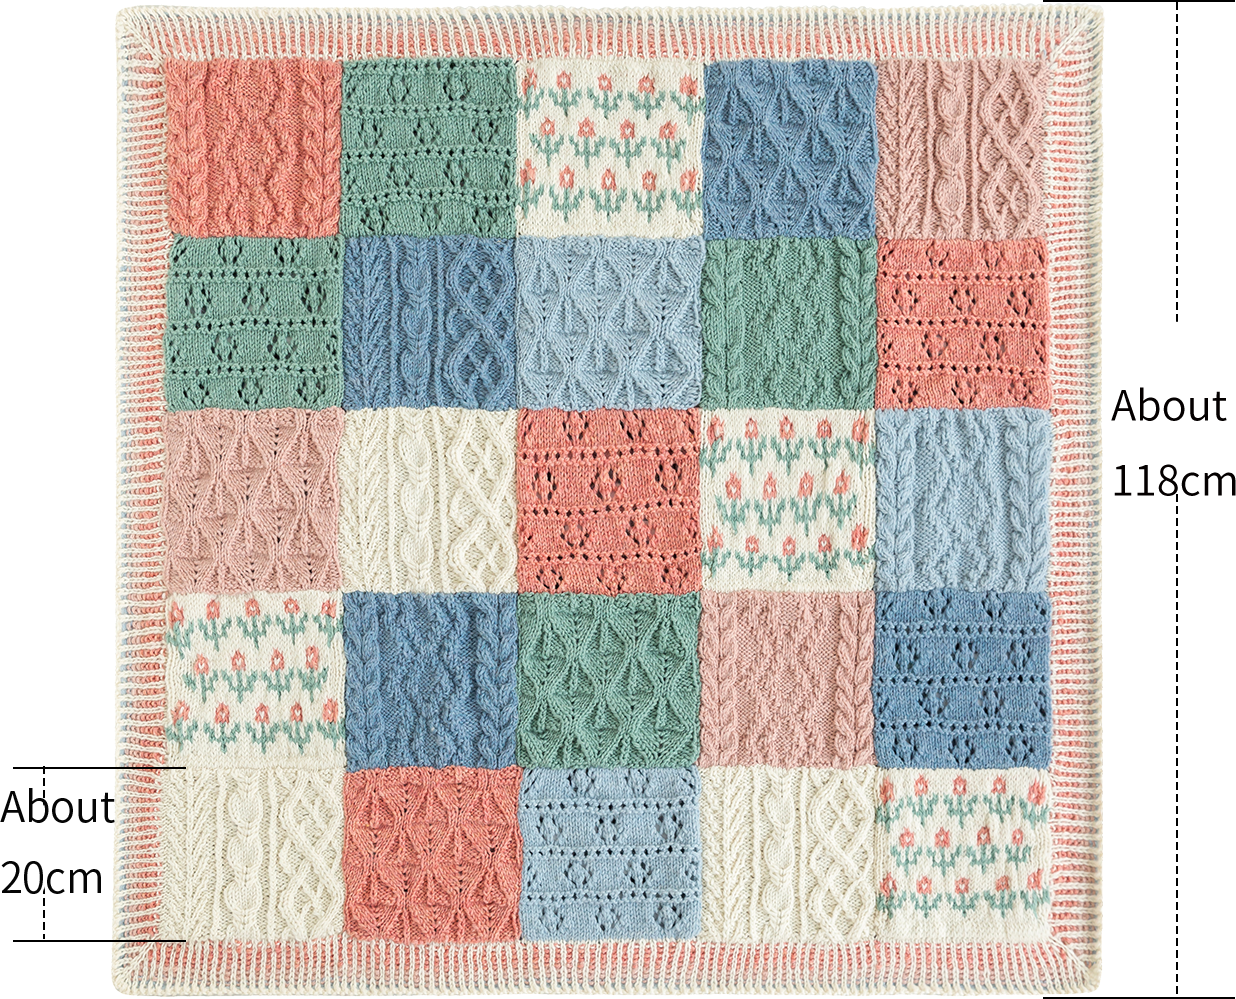
Note: All dimensions are measured by hand after sewing, so there may be some errors. The sample dimensions are for reference only
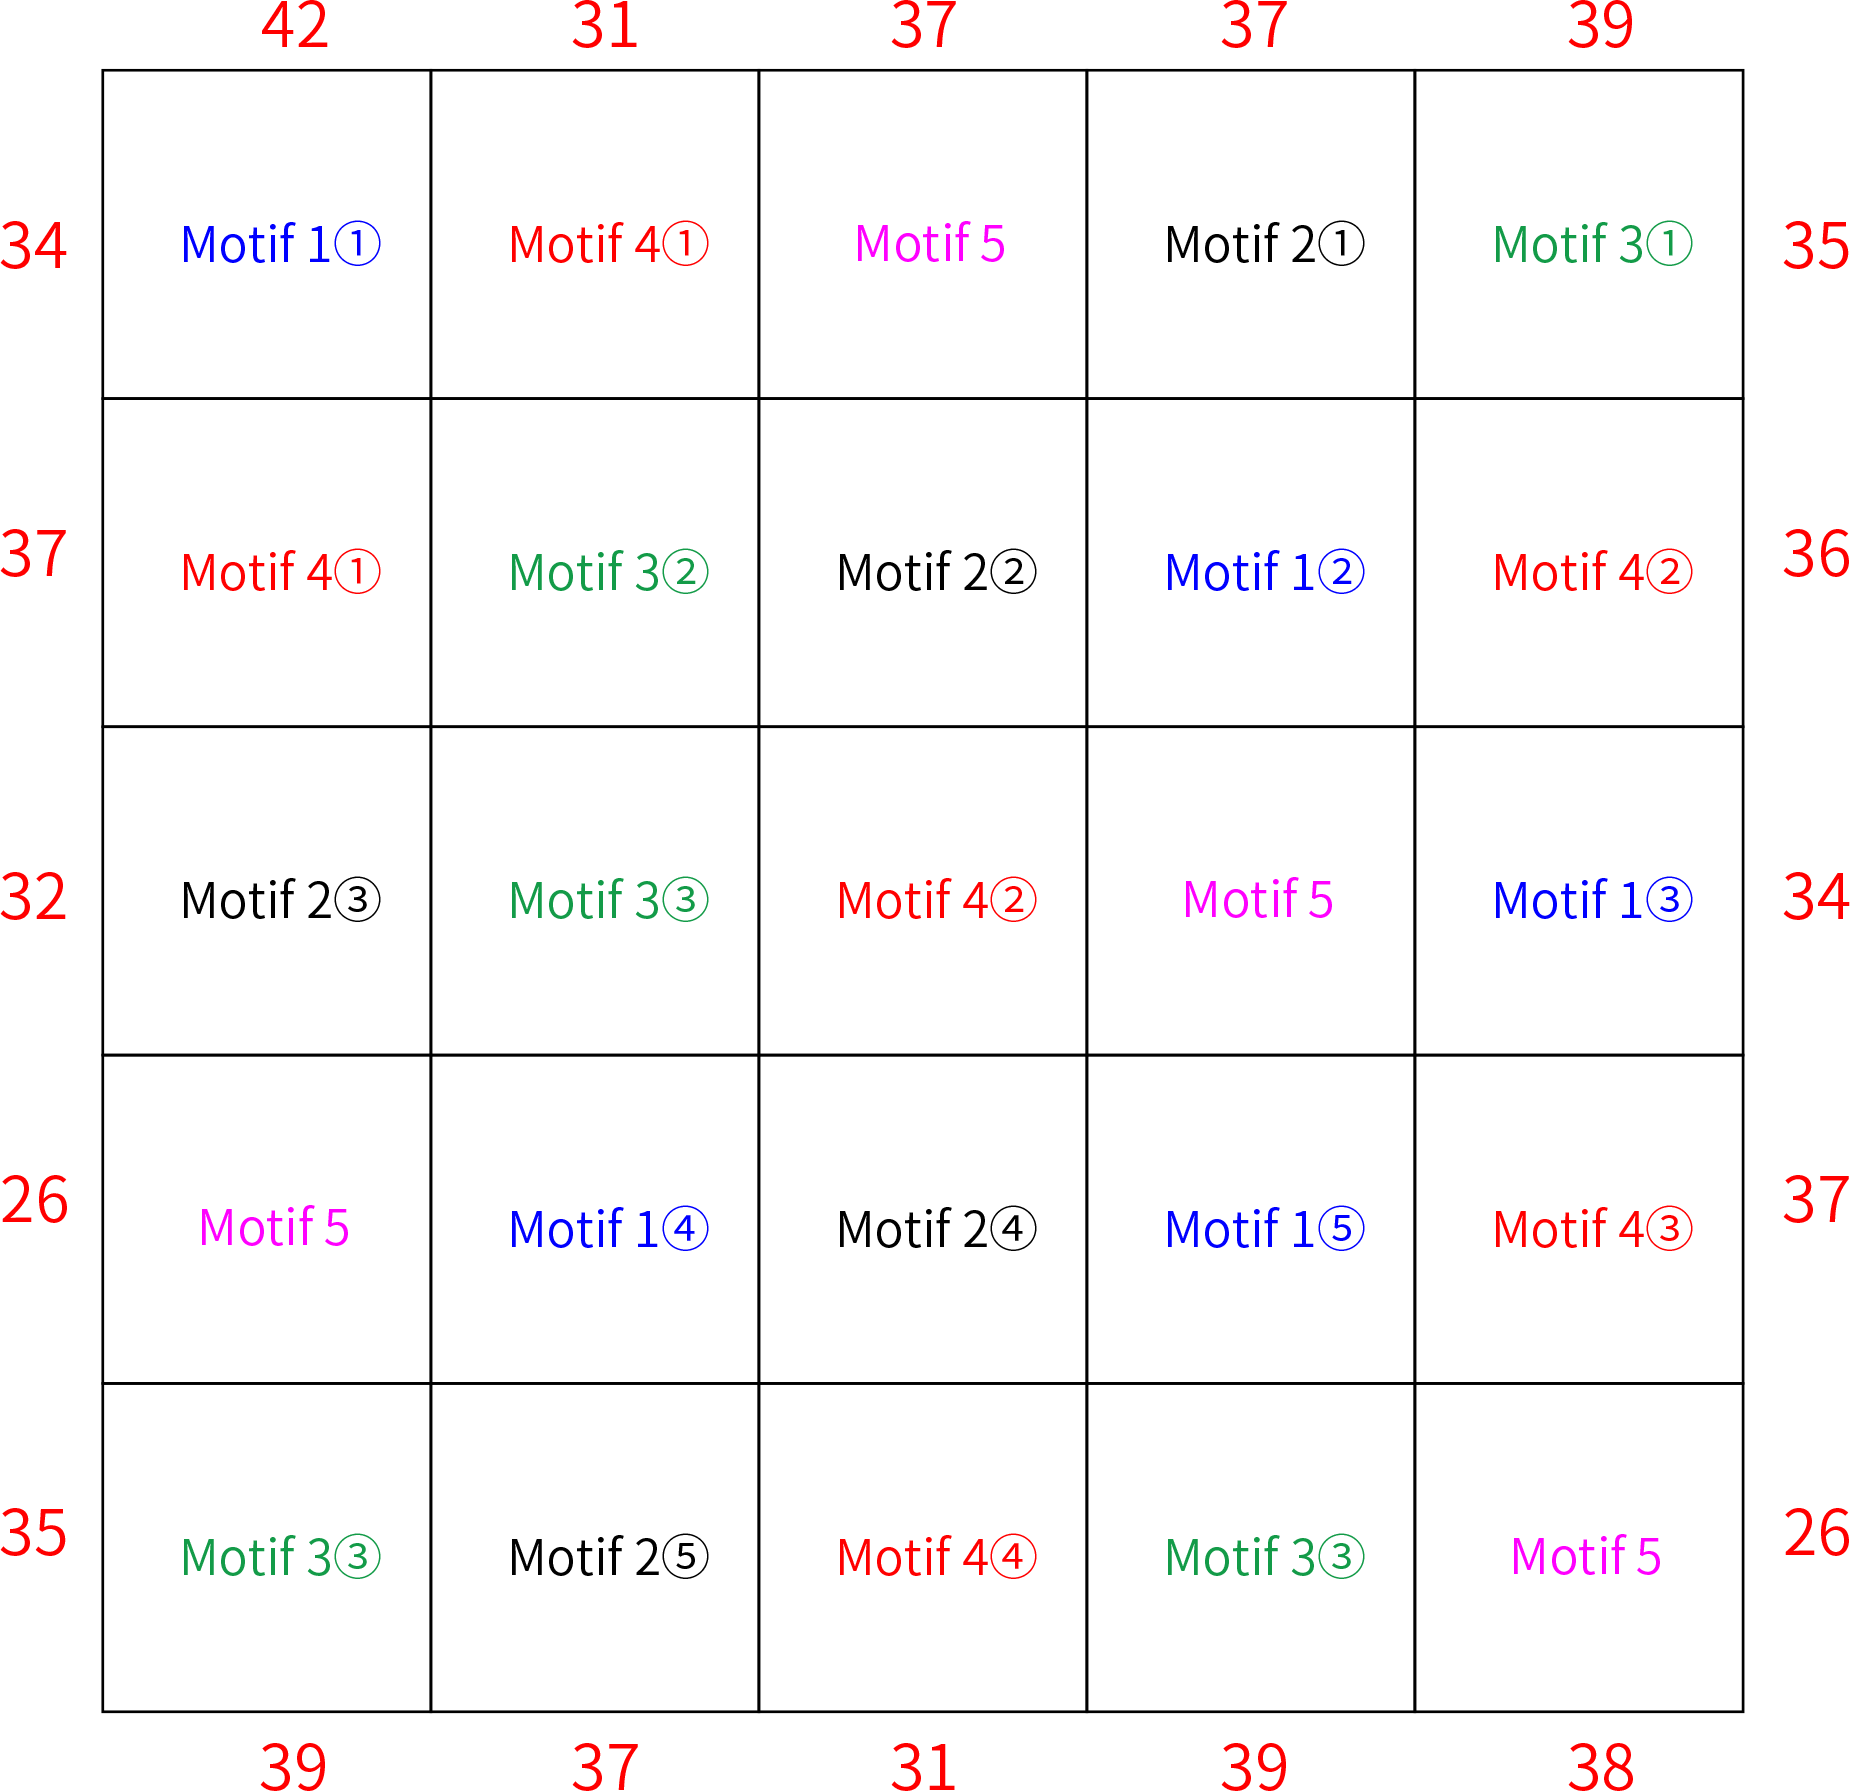
Motif arrangement diagram
Note: 1. The arrangement of motifs can refer to the illustrative diagram, or you can arrange according to your preference.
2. The numbers on the outer edge are the stitch counts for the first round of the lace trim that needs to be picked up. You can pick up stitches by referring to the chart, or adjust according to the actual situation to ensure that the number of stitches picked up is a multiple of 2.
Note:1. Due to the special yarn and pattern, the chest circumference will increase after washing.
2. The chart shows the texture on the right side of the fabric piece.
On the wrong side, you need to work the opposite stitches as shown in the chart.
Materials: Morandi 8#
Needle: #6 - 5.00 mm circular needles

Chart Key













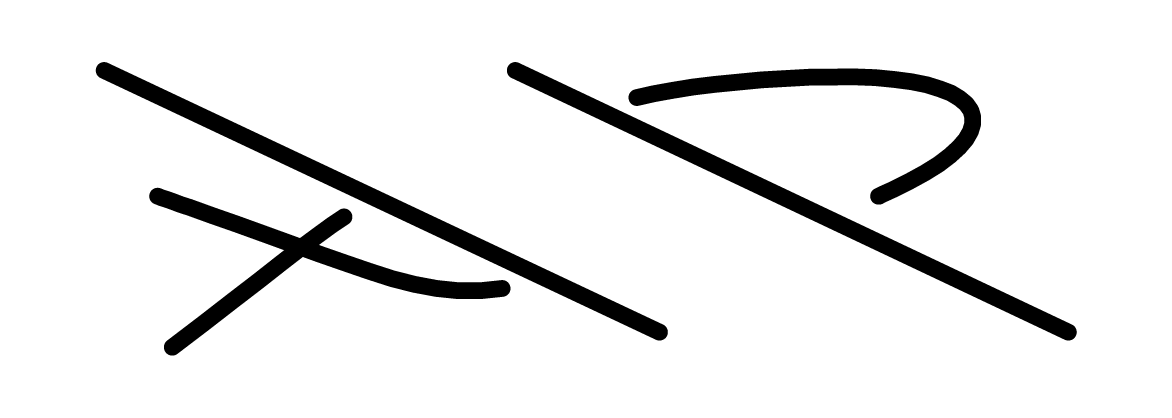
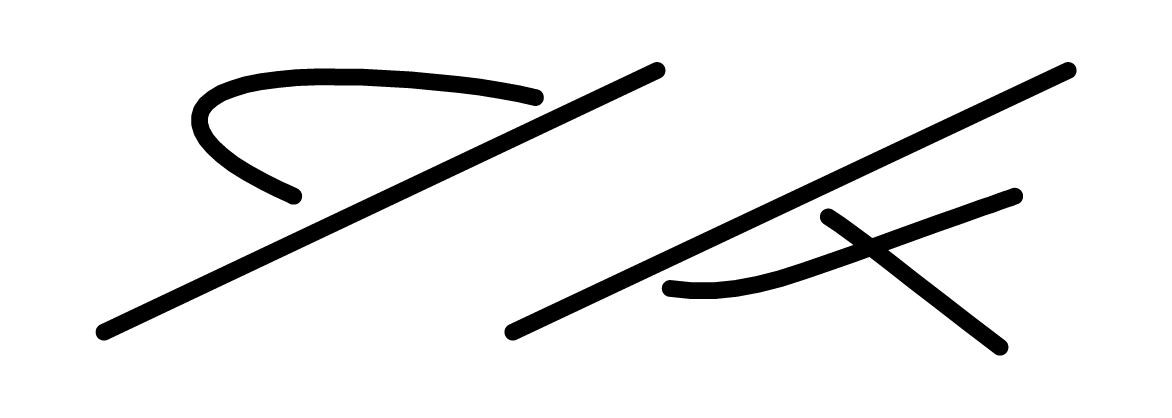
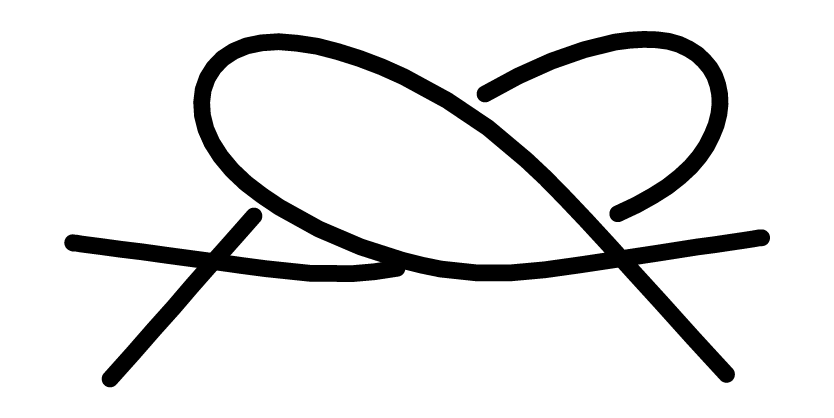


Note:
1. This pattern is making in Chinese crochet pattern terms, and the stitch name is written using American terminology. All measurements in charts are in cm.
Part 1 Motifs A 00' 41''
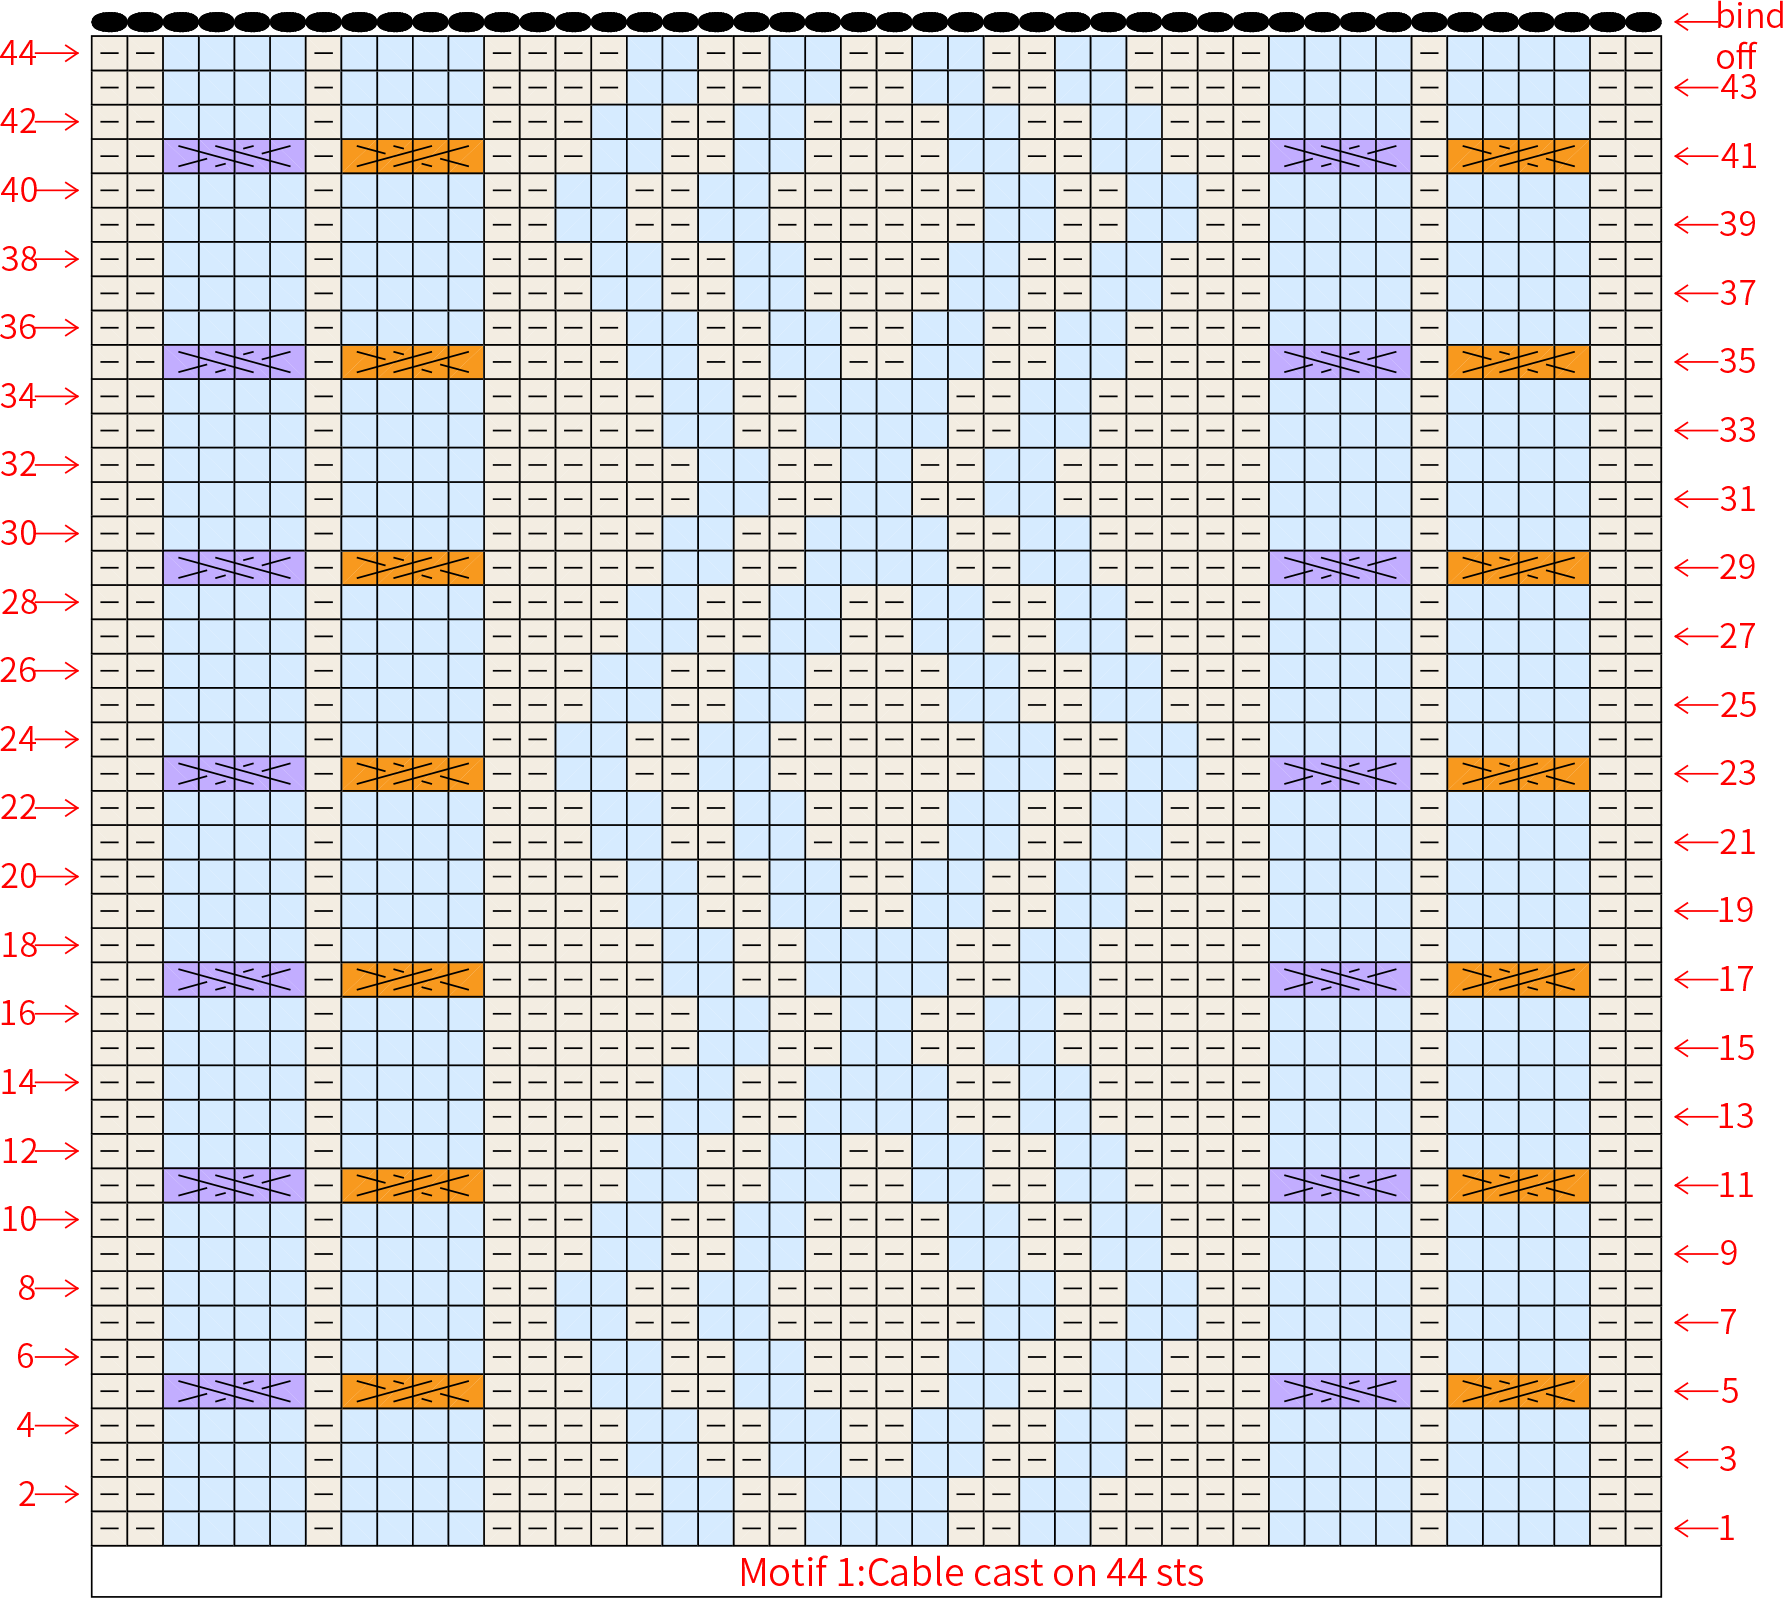
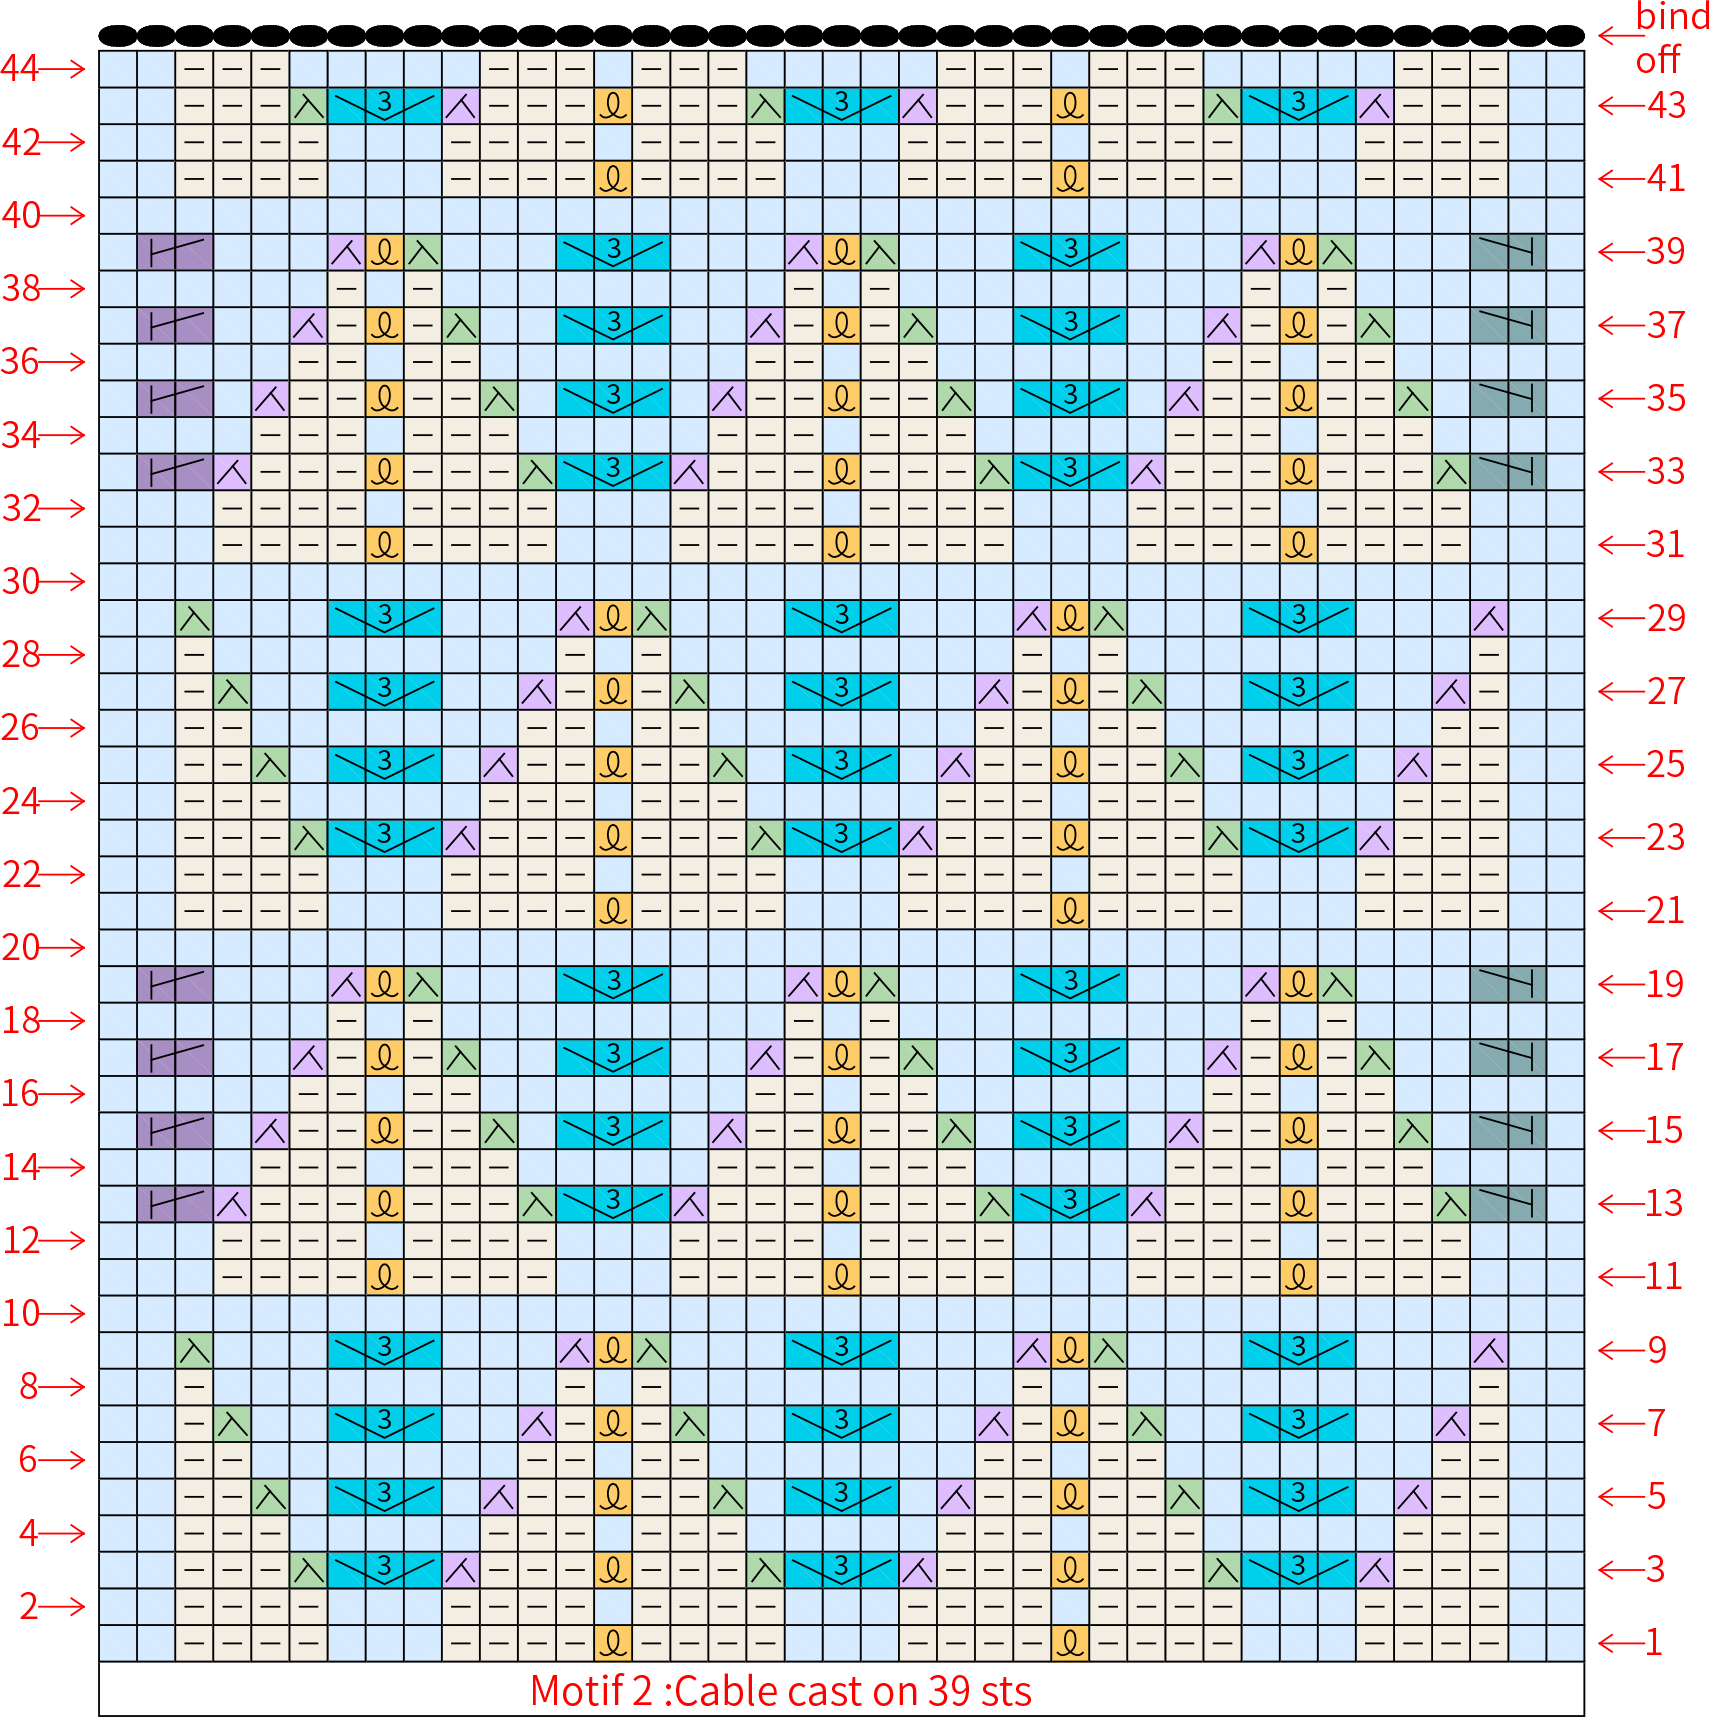
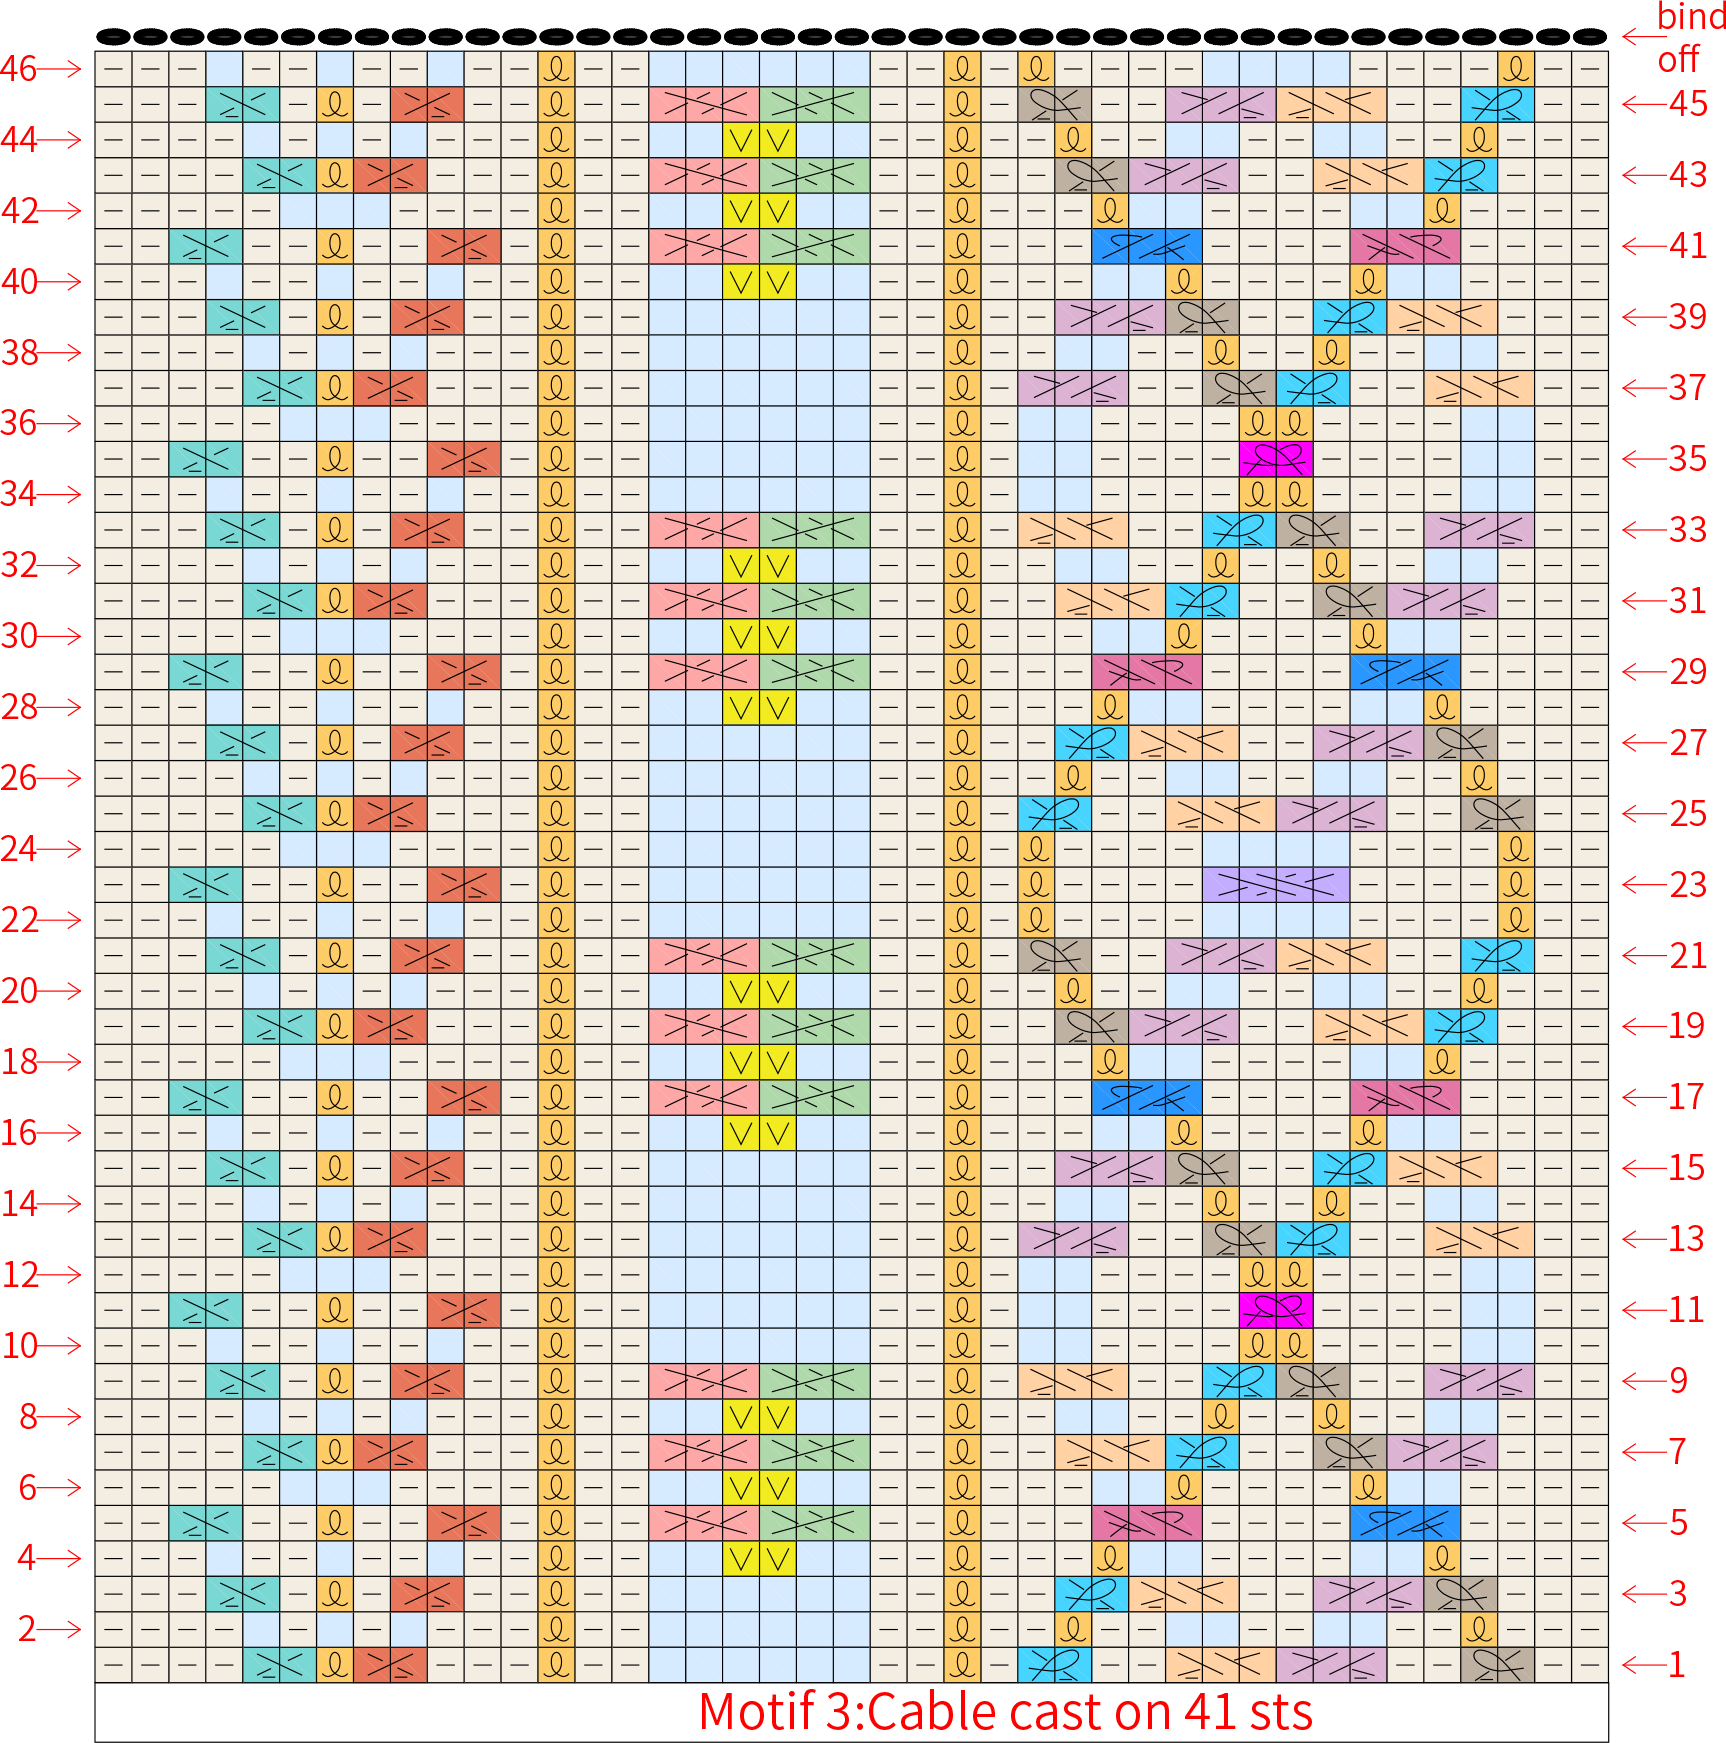
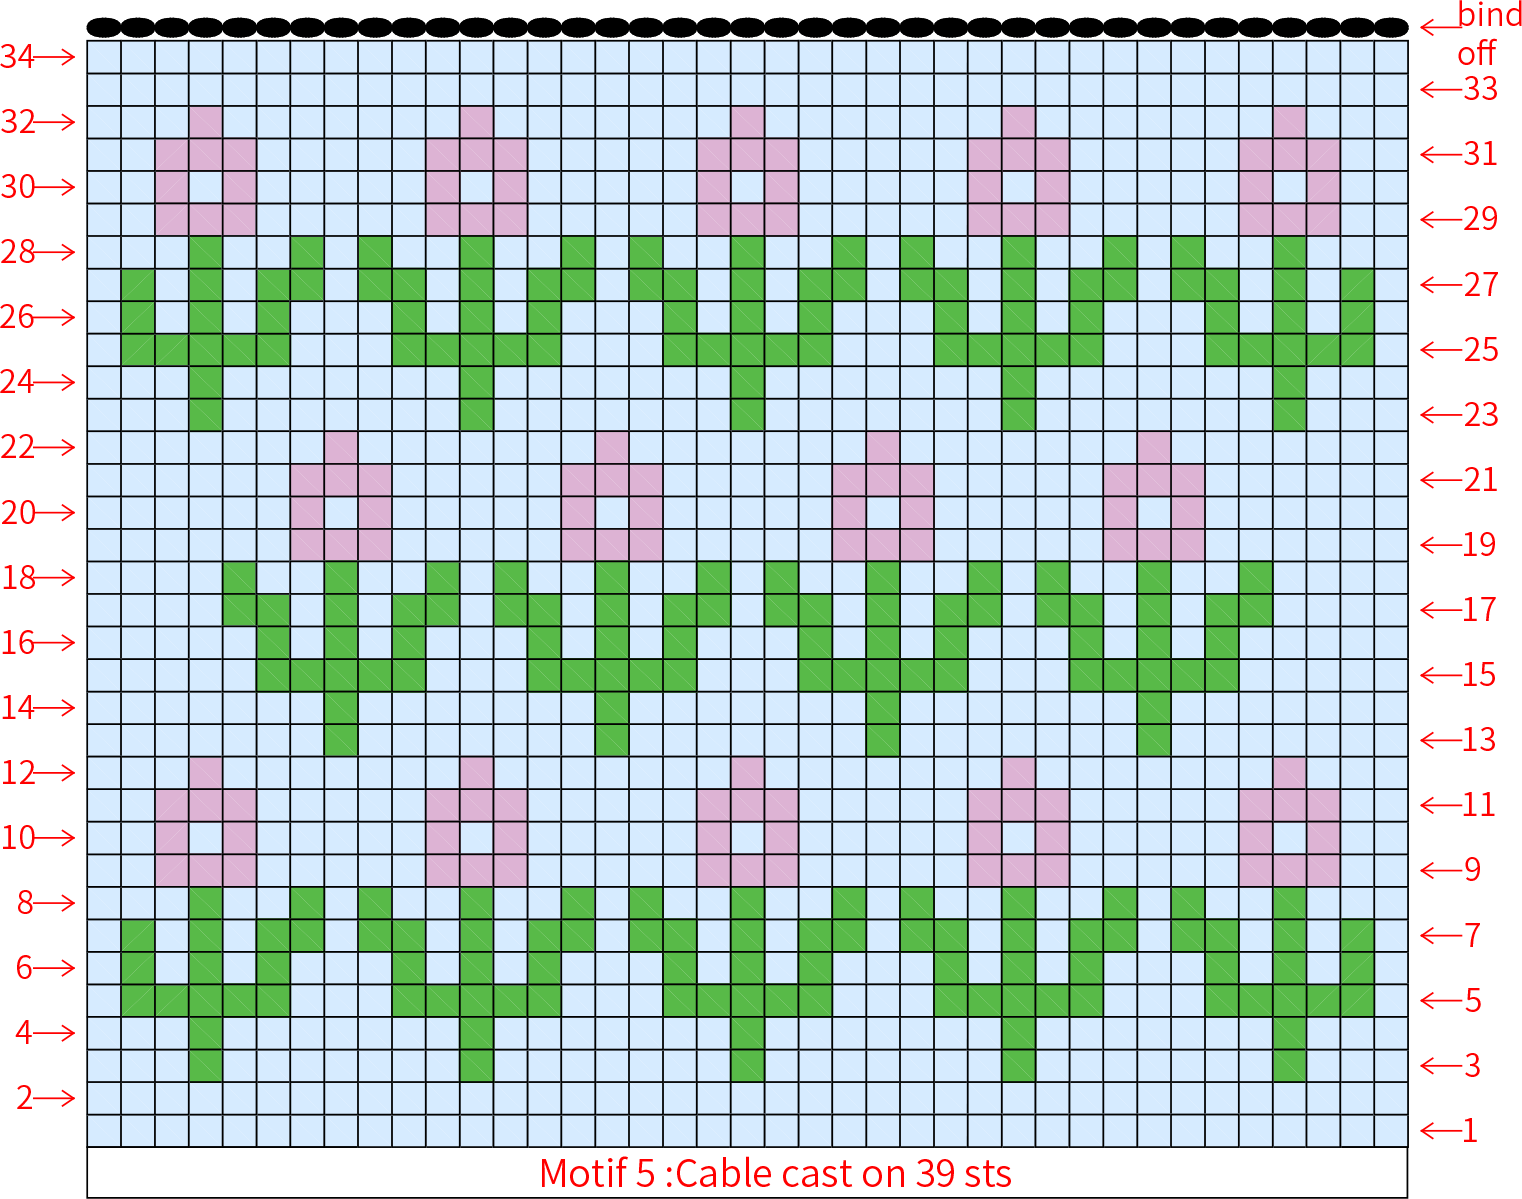
The motif is divided into 5 types in total, and all of them use the cable cast on method for casting on. After completing the cast on, knit back and forth. Please refer to the video demonstration for more details.
Note: On the wrong side, you need to knit the stitches opposite to the pattern chart.
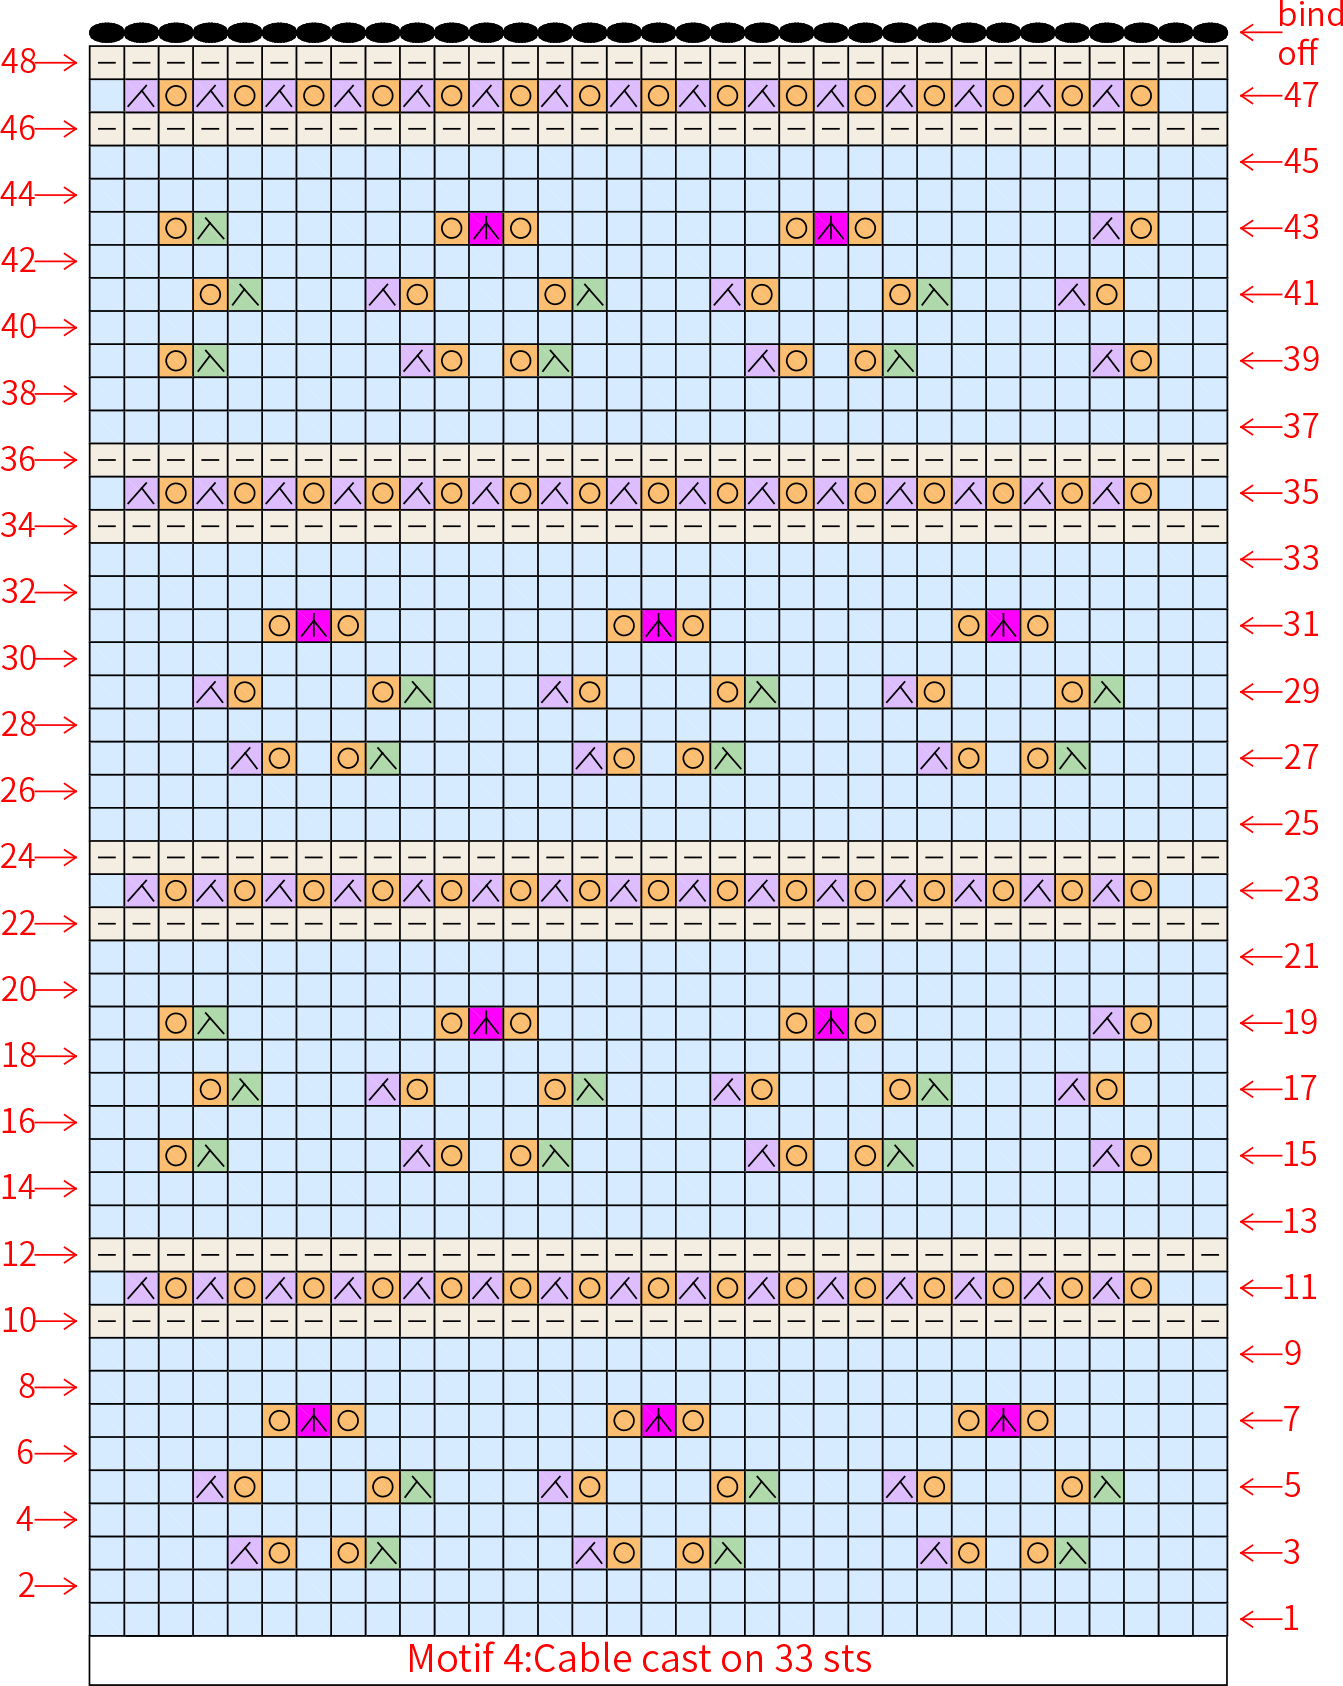
| Motif 4 | Number | Retro Version | Fresh Version |
| ① | 48#Smoke Blue×2 | 52#Sprucestone×2 | |
| ② | 42#Pompeiian Red×2 | 44#Peach Pink×2 | |
| ③ | 06#Toffee | 13#Ashley Blue | |
| ④ | 24#Khaki Brown | 08#Baby Blue |
| Lace | Retro Version | Fresh Version |
| Color 1■ | 02#Linen | 39#Whisper White |
| Color 2■ | 42#Pompeiian Red | 44#Peach Pink |
| Color 3■ | 29#Autumnal | 22#Mellow Rose |
| Color 4■ | 24#Khaki Brown | 08#Baby Blue |
Part 2 Sewing Together Motifs B 40' 08''
After all the motifs are knitted, refer to the motif joining diagram and position them correctly with all ending positions facing up. Pay attention to the direction of the motifs so they don't get wrong.Please refer to the video demonstration for more details.
| Motif 1 | Number | Retro Version | Fresh Version |
| ① | 42#Pompeiian Red | 44#Peach Pink | |
| ② | 48#Smoke Blue | 52#Sprucestone | |
| ③ | 24#Khaki Brown | 08#Baby Blue | |
| ④ | 06#Toffee | 13#Ashley Blue | |
| ⑤ | 29#Autumnal | 22#Mellow Rose |
| Motif 2 | Number | Retro Version | Fresh Version |
| ① | 06#Toffee | 13#Ashley Blue | |
| ② | 24#Khaki Brown | 08#Baby Blue | |
| ③ | 29#Autumnal | 22#Mellow Rose | |
| ④ | 48#Smoke Blue | 52#Sprucestone | |
| ⑤ | 42#Pompeiian Red | 44#Peach Pink |
| Motif 3 | Number | Retro Version | Fresh Version |
| ① | 29#Autumnal | 22#Mellow Rose | |
| ② | 06#Toffee | 13#Ashley Blue | |
| ③ | 02#Linen×3 | 39#Whisper White×3 |
| Motif 5(4 pcs) | Retro Version | Fresh Version |
| Color 1:02#Linen | Color 1:39#Whisper White | |
| Color 2:48#Smoke Blue | Color 2:52#Sprucestone | |
| Color 3:42#Pompeiian Red | Color 3:44#Peach Pink |
Part 3 Lace trim C, lining D 55' 10''
Pick up strands and knit counterclockwise around the edges. After completing, sew the lining on the wrong side. Please refer to the video demonstration for more details.

Made by the community





