Home / Blanket
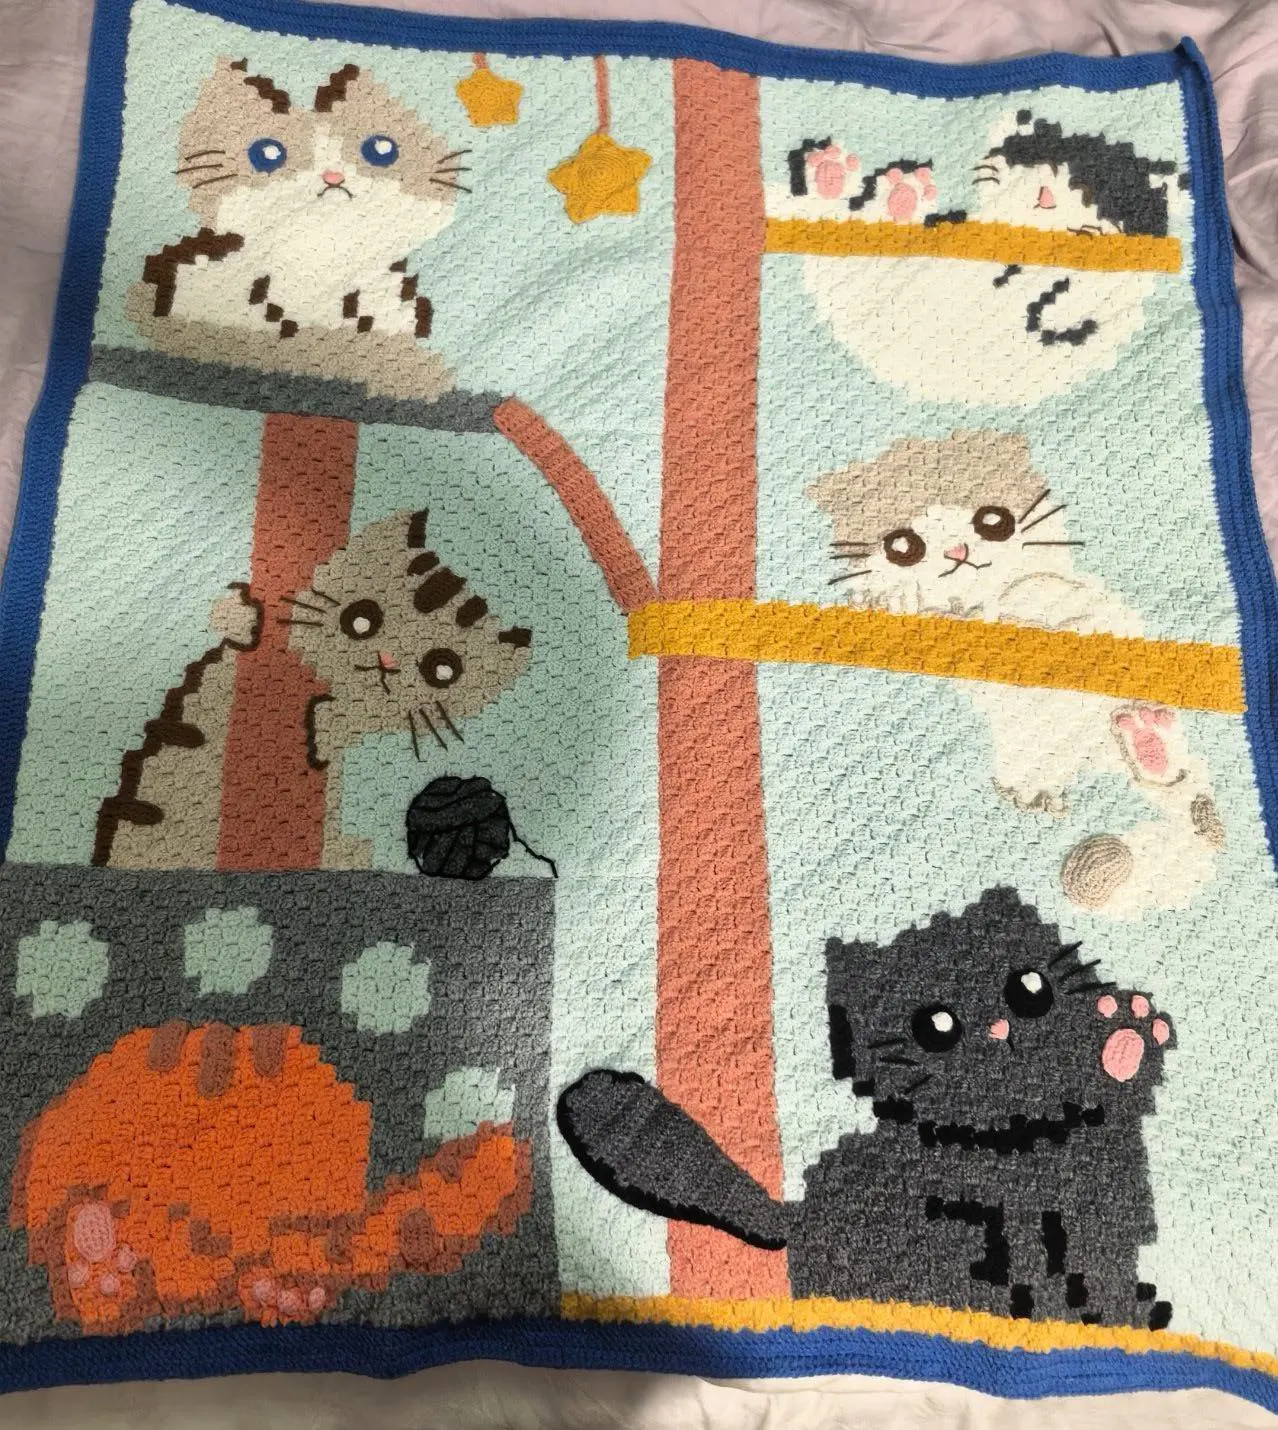
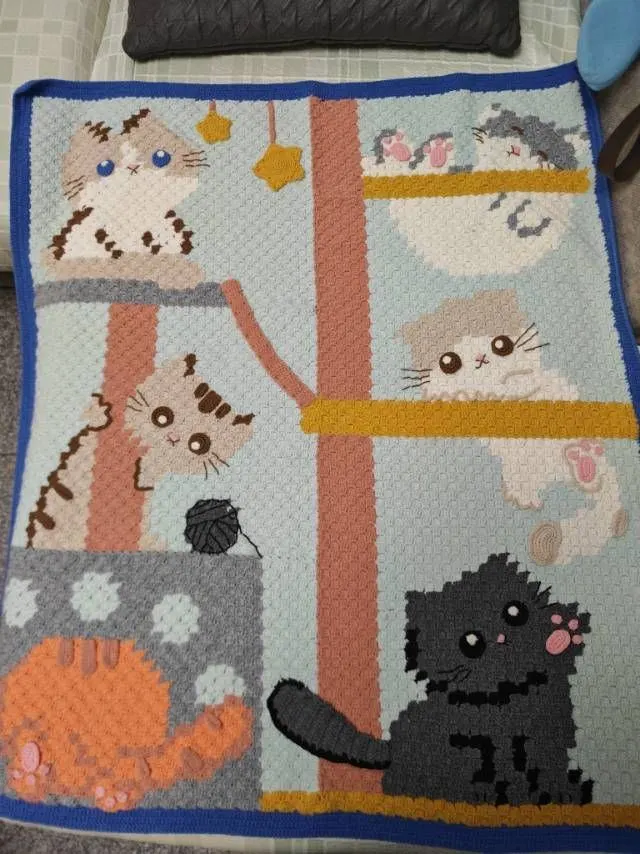
Meow Pixel Blanket
Project preview
See the finished project
Pattern format
Instructions
Watch and follow
Video tutorial
The cushion consists of the main part and accessories. Start by making the main part, then complete and attach the accessories.
Susan's Family Alpaca is worked with 2 strands, while the 4-Ply Combed Cotton & Acrylic Fibre Hand Knitting Yarn is worked with 1 strand.
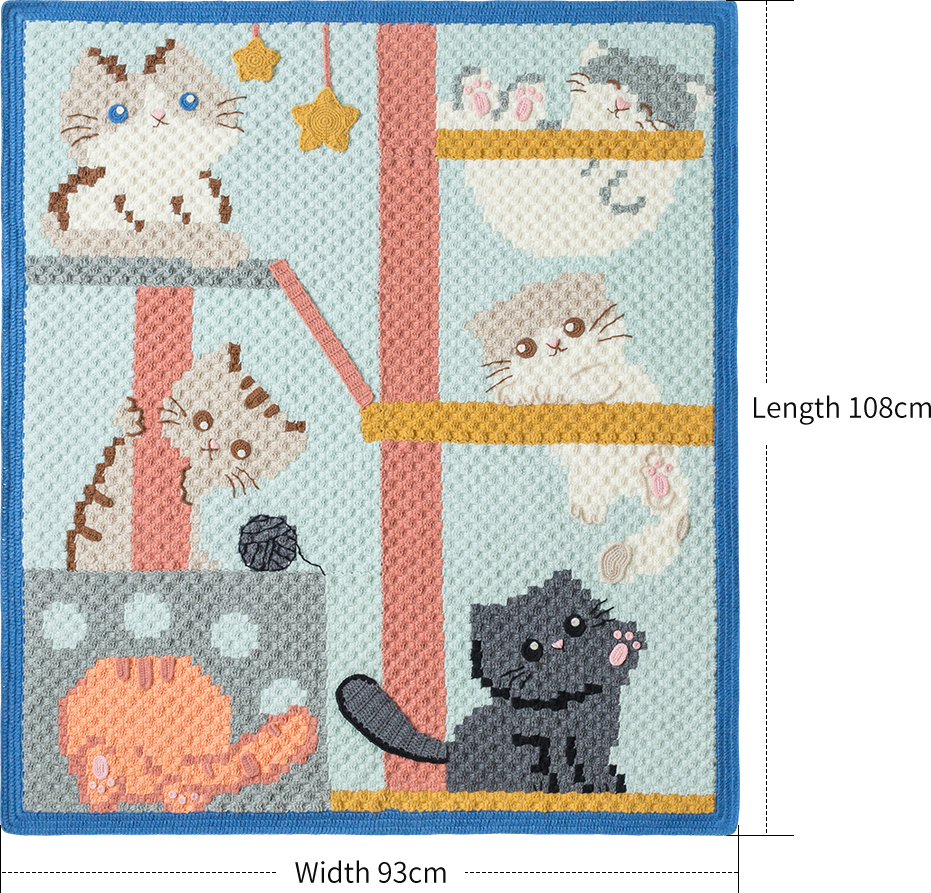
The handcrafted measurements may have an error of 1 to 2 cm. Due to variations in individual tension, the size of the sample is for reference only.
Materials: Susan's Family 4-Ply Combed Cotton & Acrylic Fibre Hand Knitting Yarn, Susan's Family Alpaca
Hook: 3.00 mm crochet hook
Chart Key










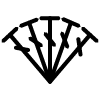



Note: This pattern is making in Chinese crochet pattern terms, and the stitch name is written using American terminology. All measurements in charts are in cm. 
Part 1 Main partA
The main part includes several sizes of crochet pieces, piece connecting, and edging the entire blanket. First, make the crochet pieces. Once the crocheting is finished, connect the pieces, and finally, crochet the edging along the edges.
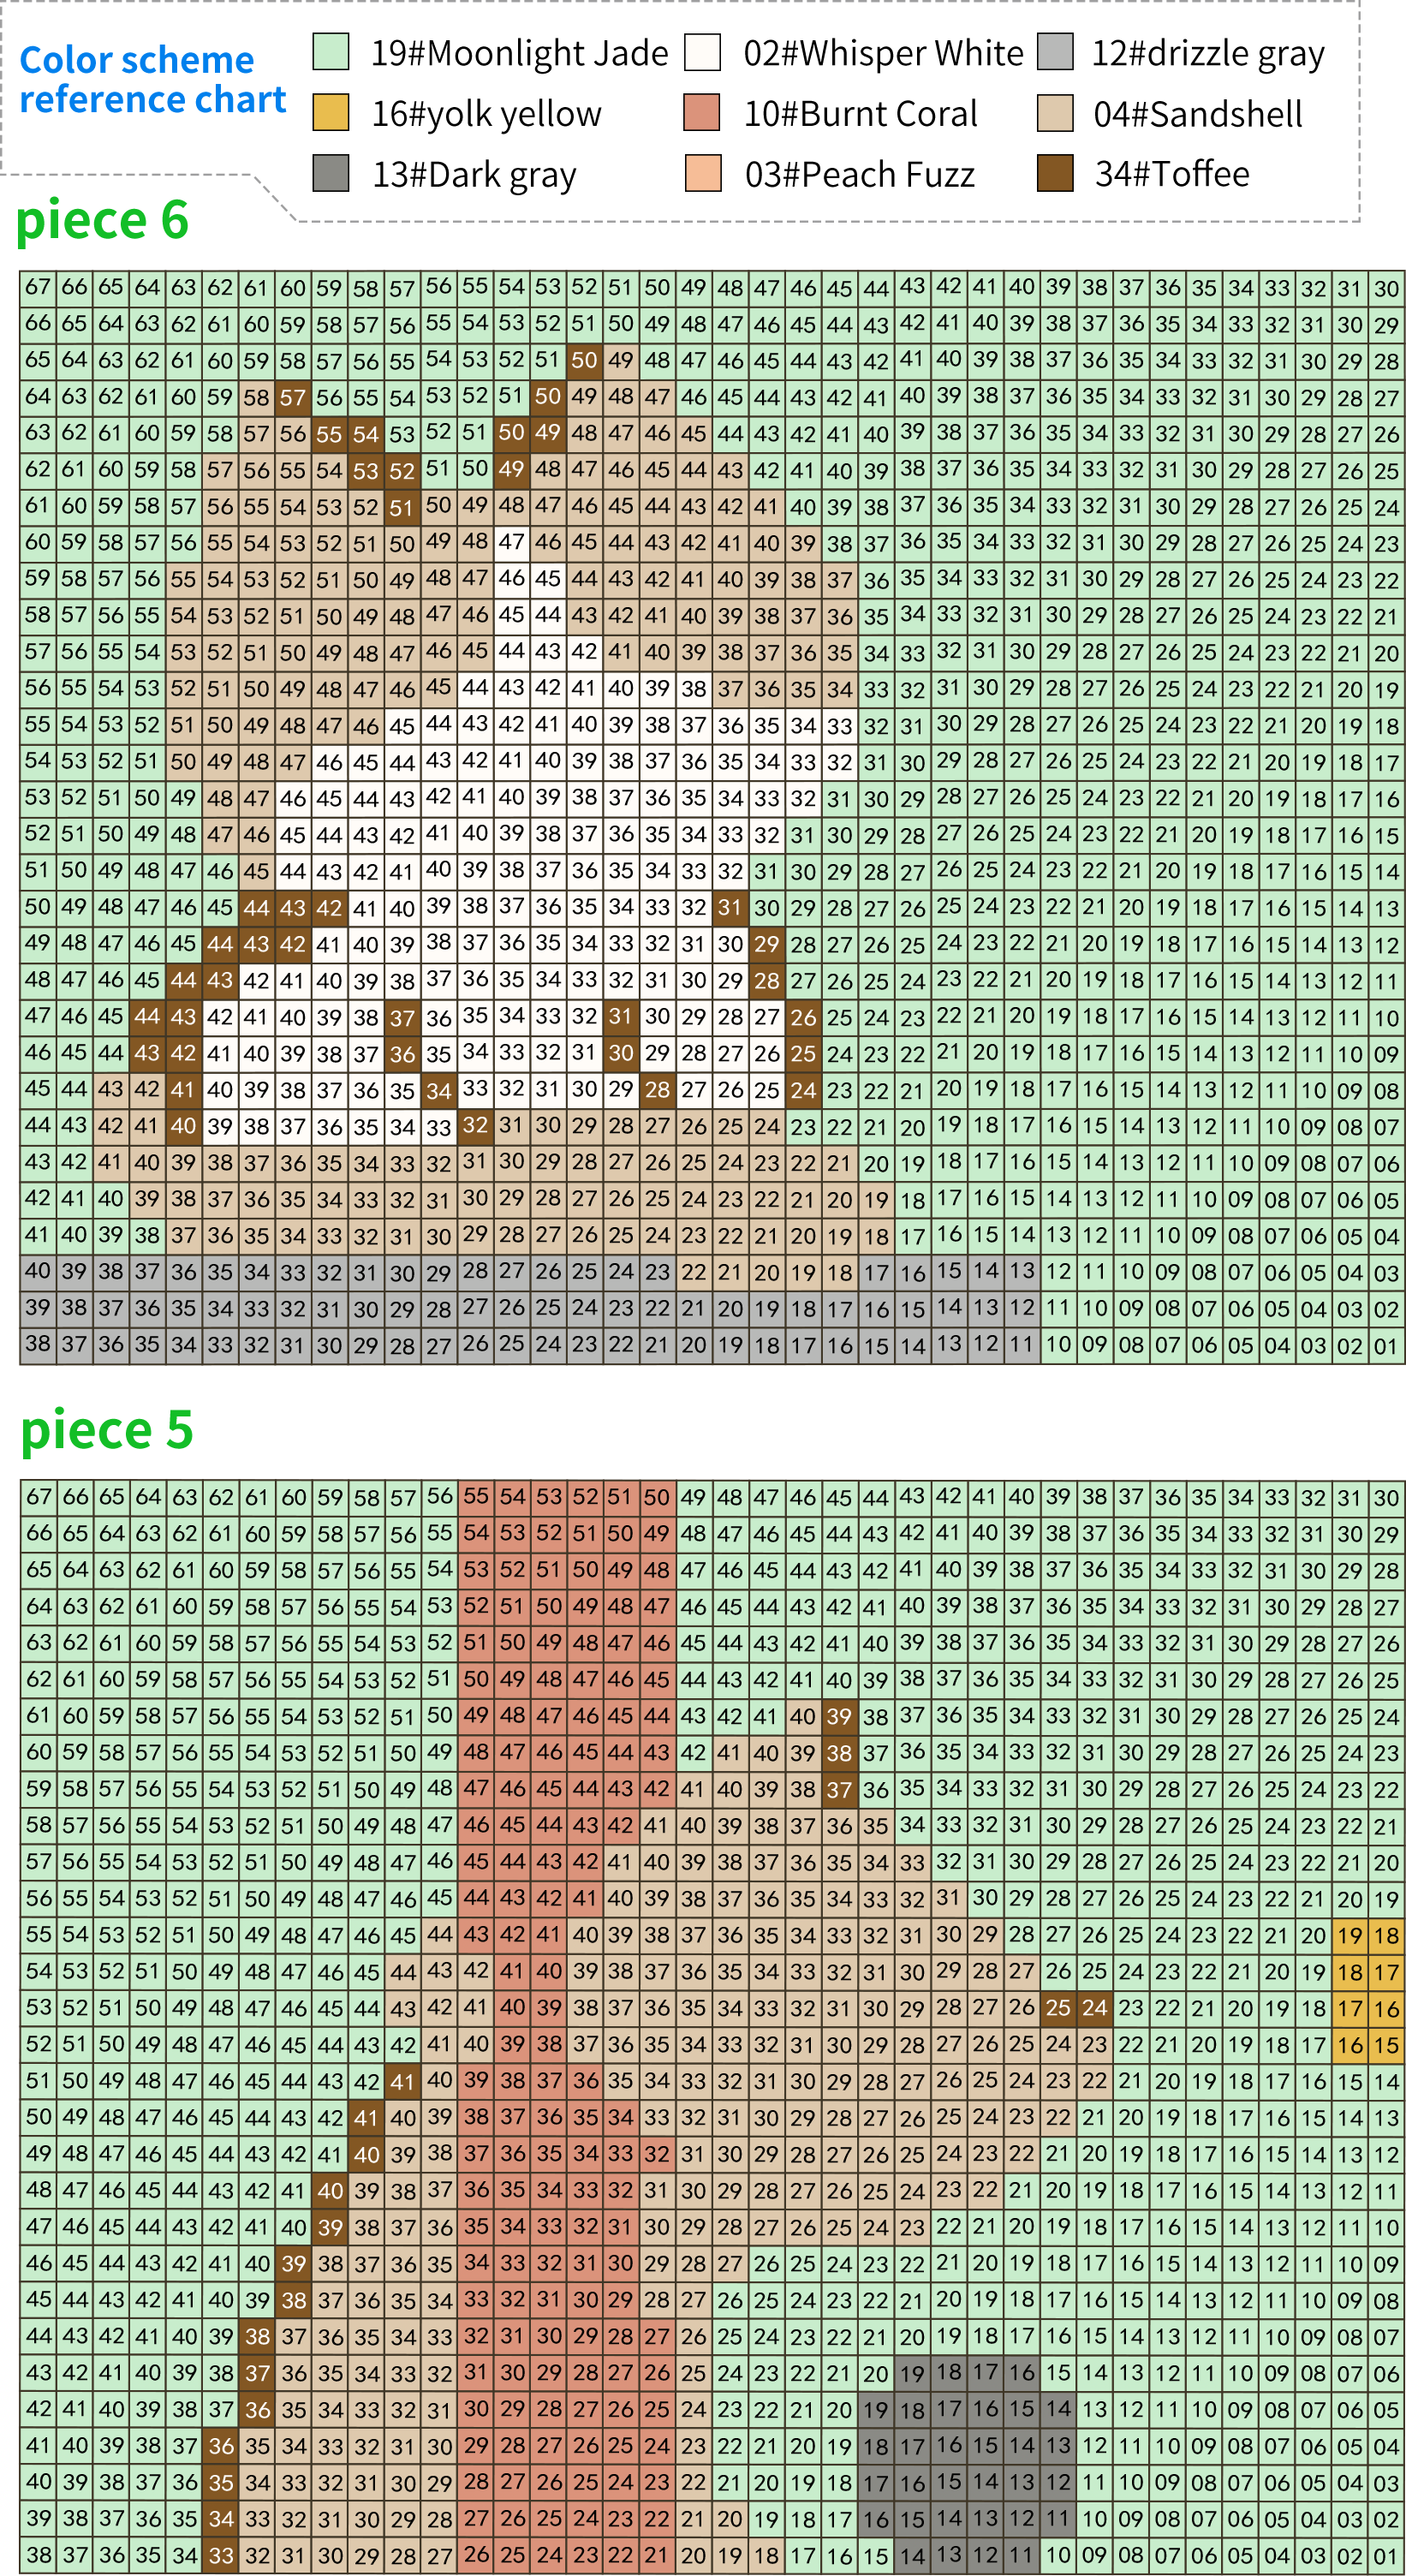
Step 1 PieceA1 01' 24''
All crochet methods for the fabric pieces are the same, only the number of rows and the corresponding pattern repeats differ. The fabric pieces are worked using a diagonal method, crocheting back and forth. They are divided into increasing sections, even sections, and decreasing sections. Midway through, new yarn is joined and colors are changed to create the corresponding patterns. Please refer to the video demonstration for more details.
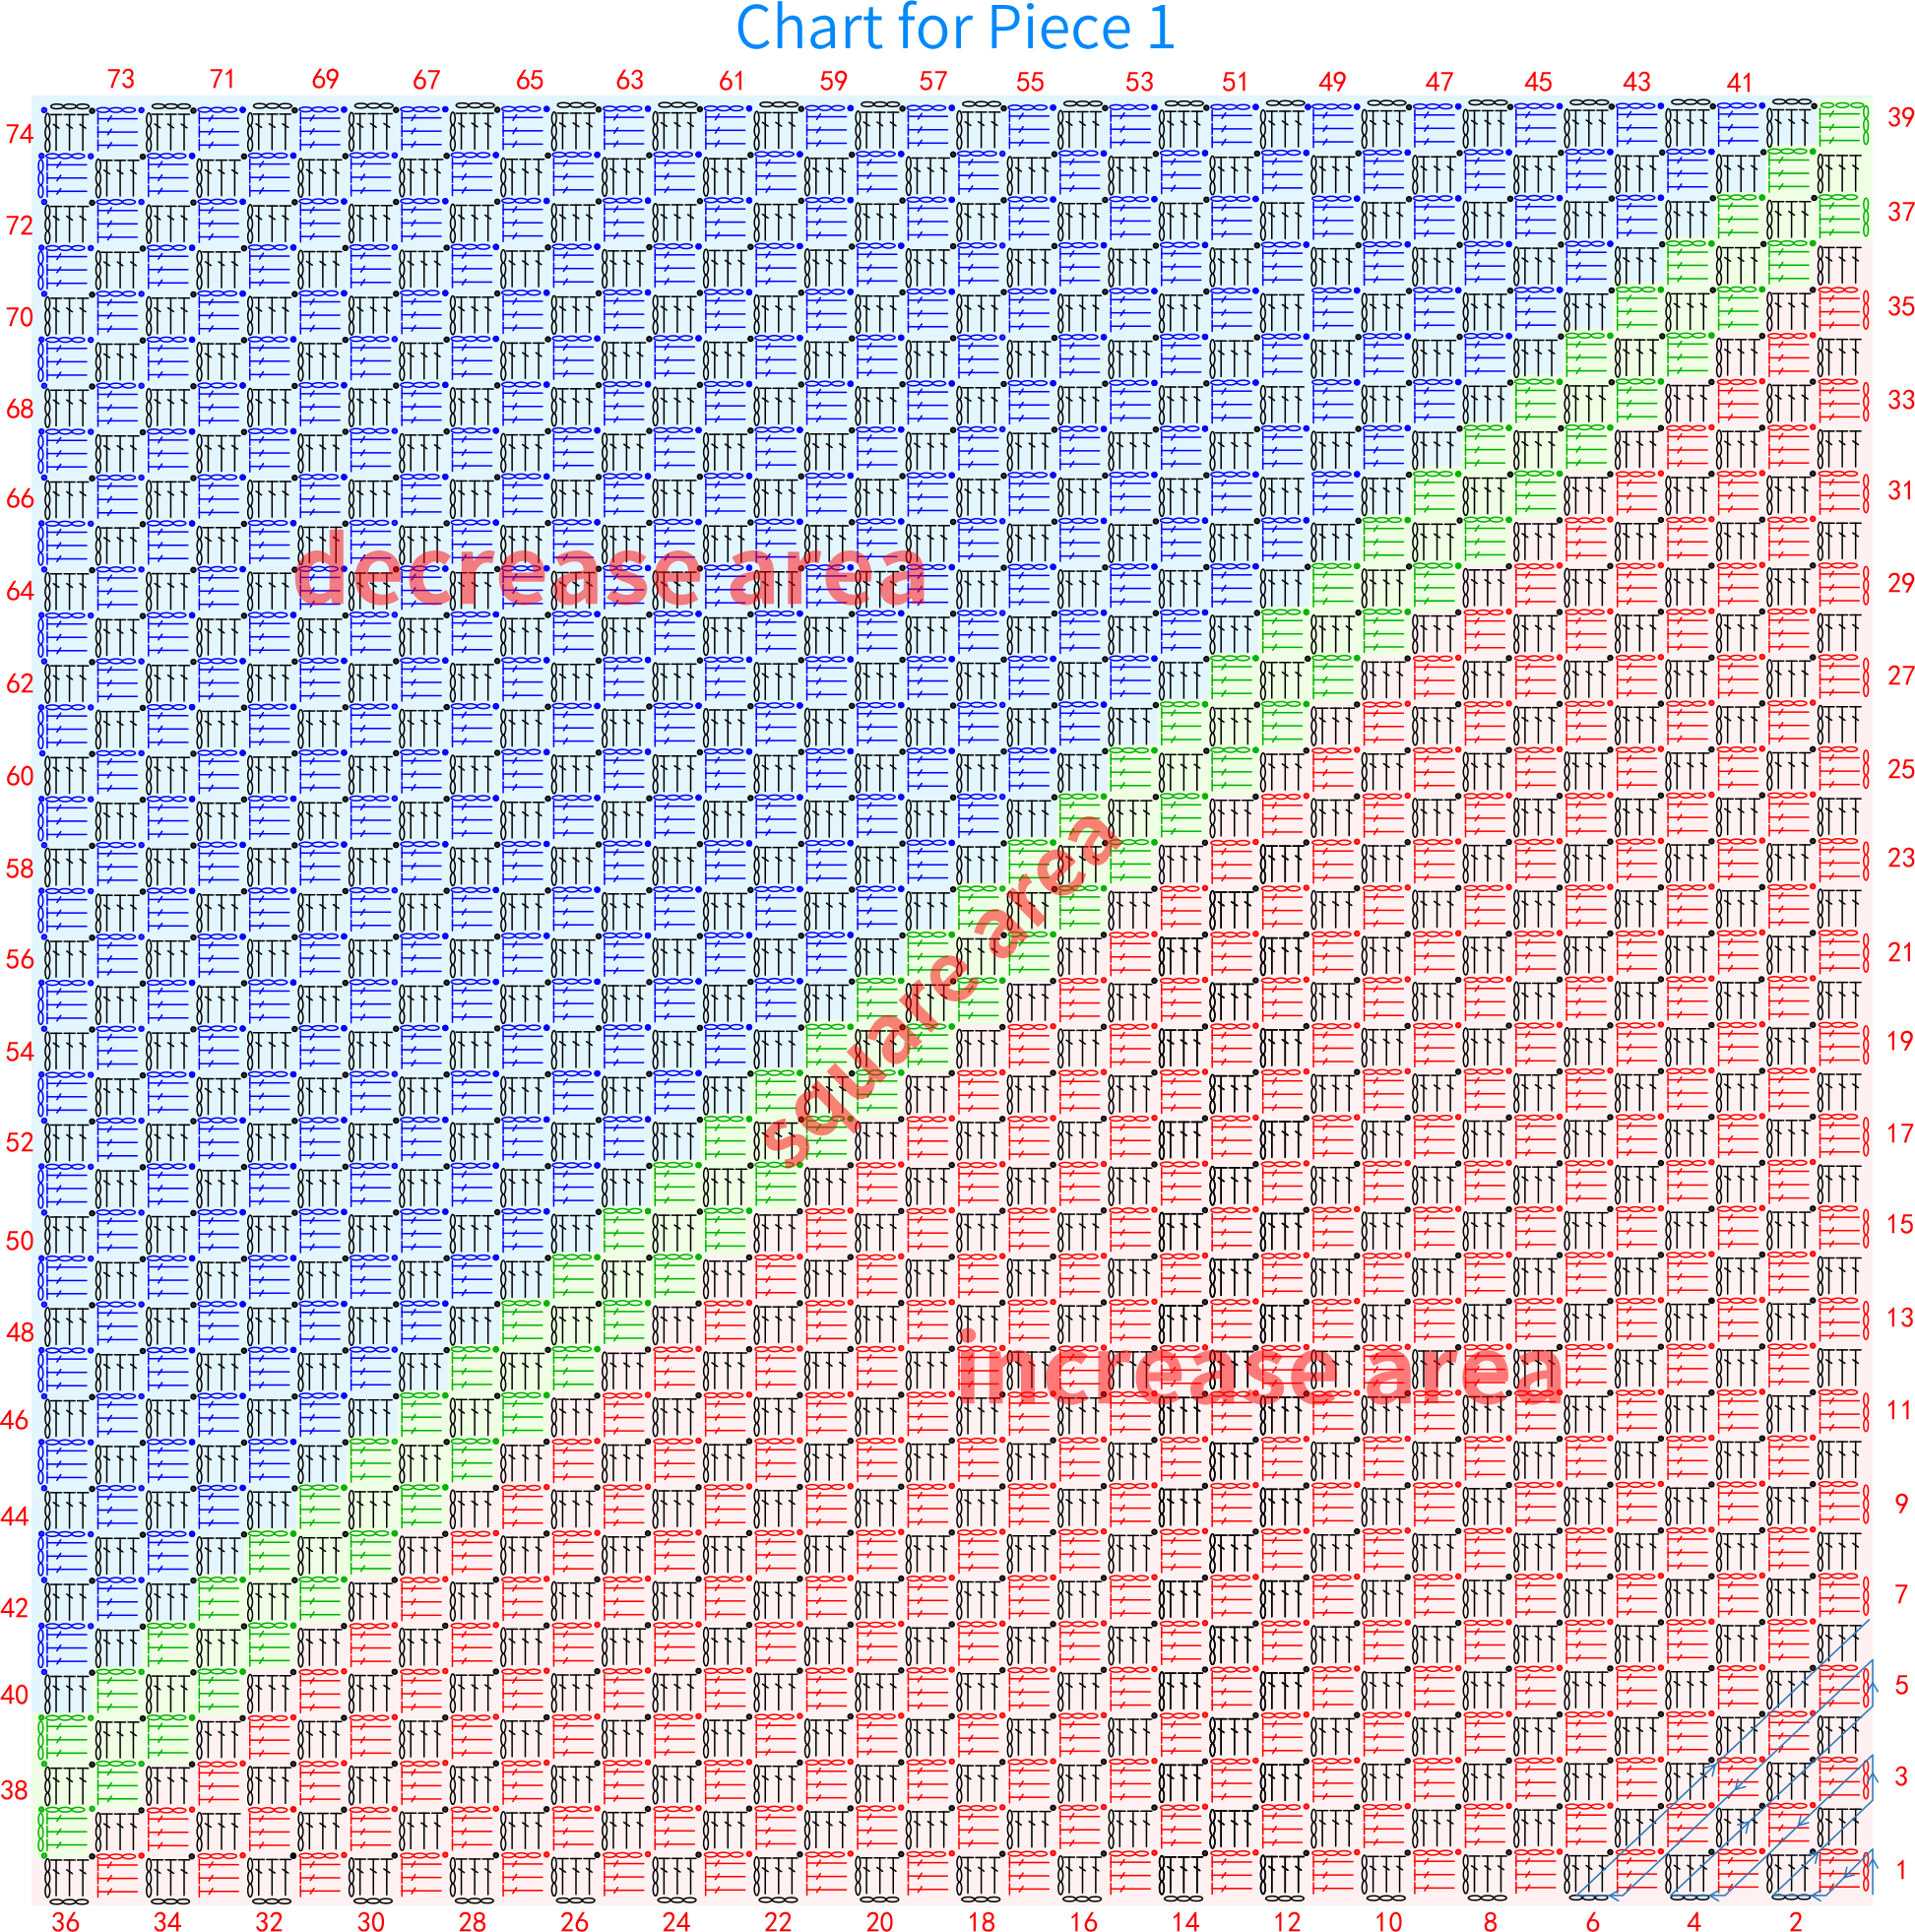
Note: The slip stitch for the transition here should not be pulled too tight.
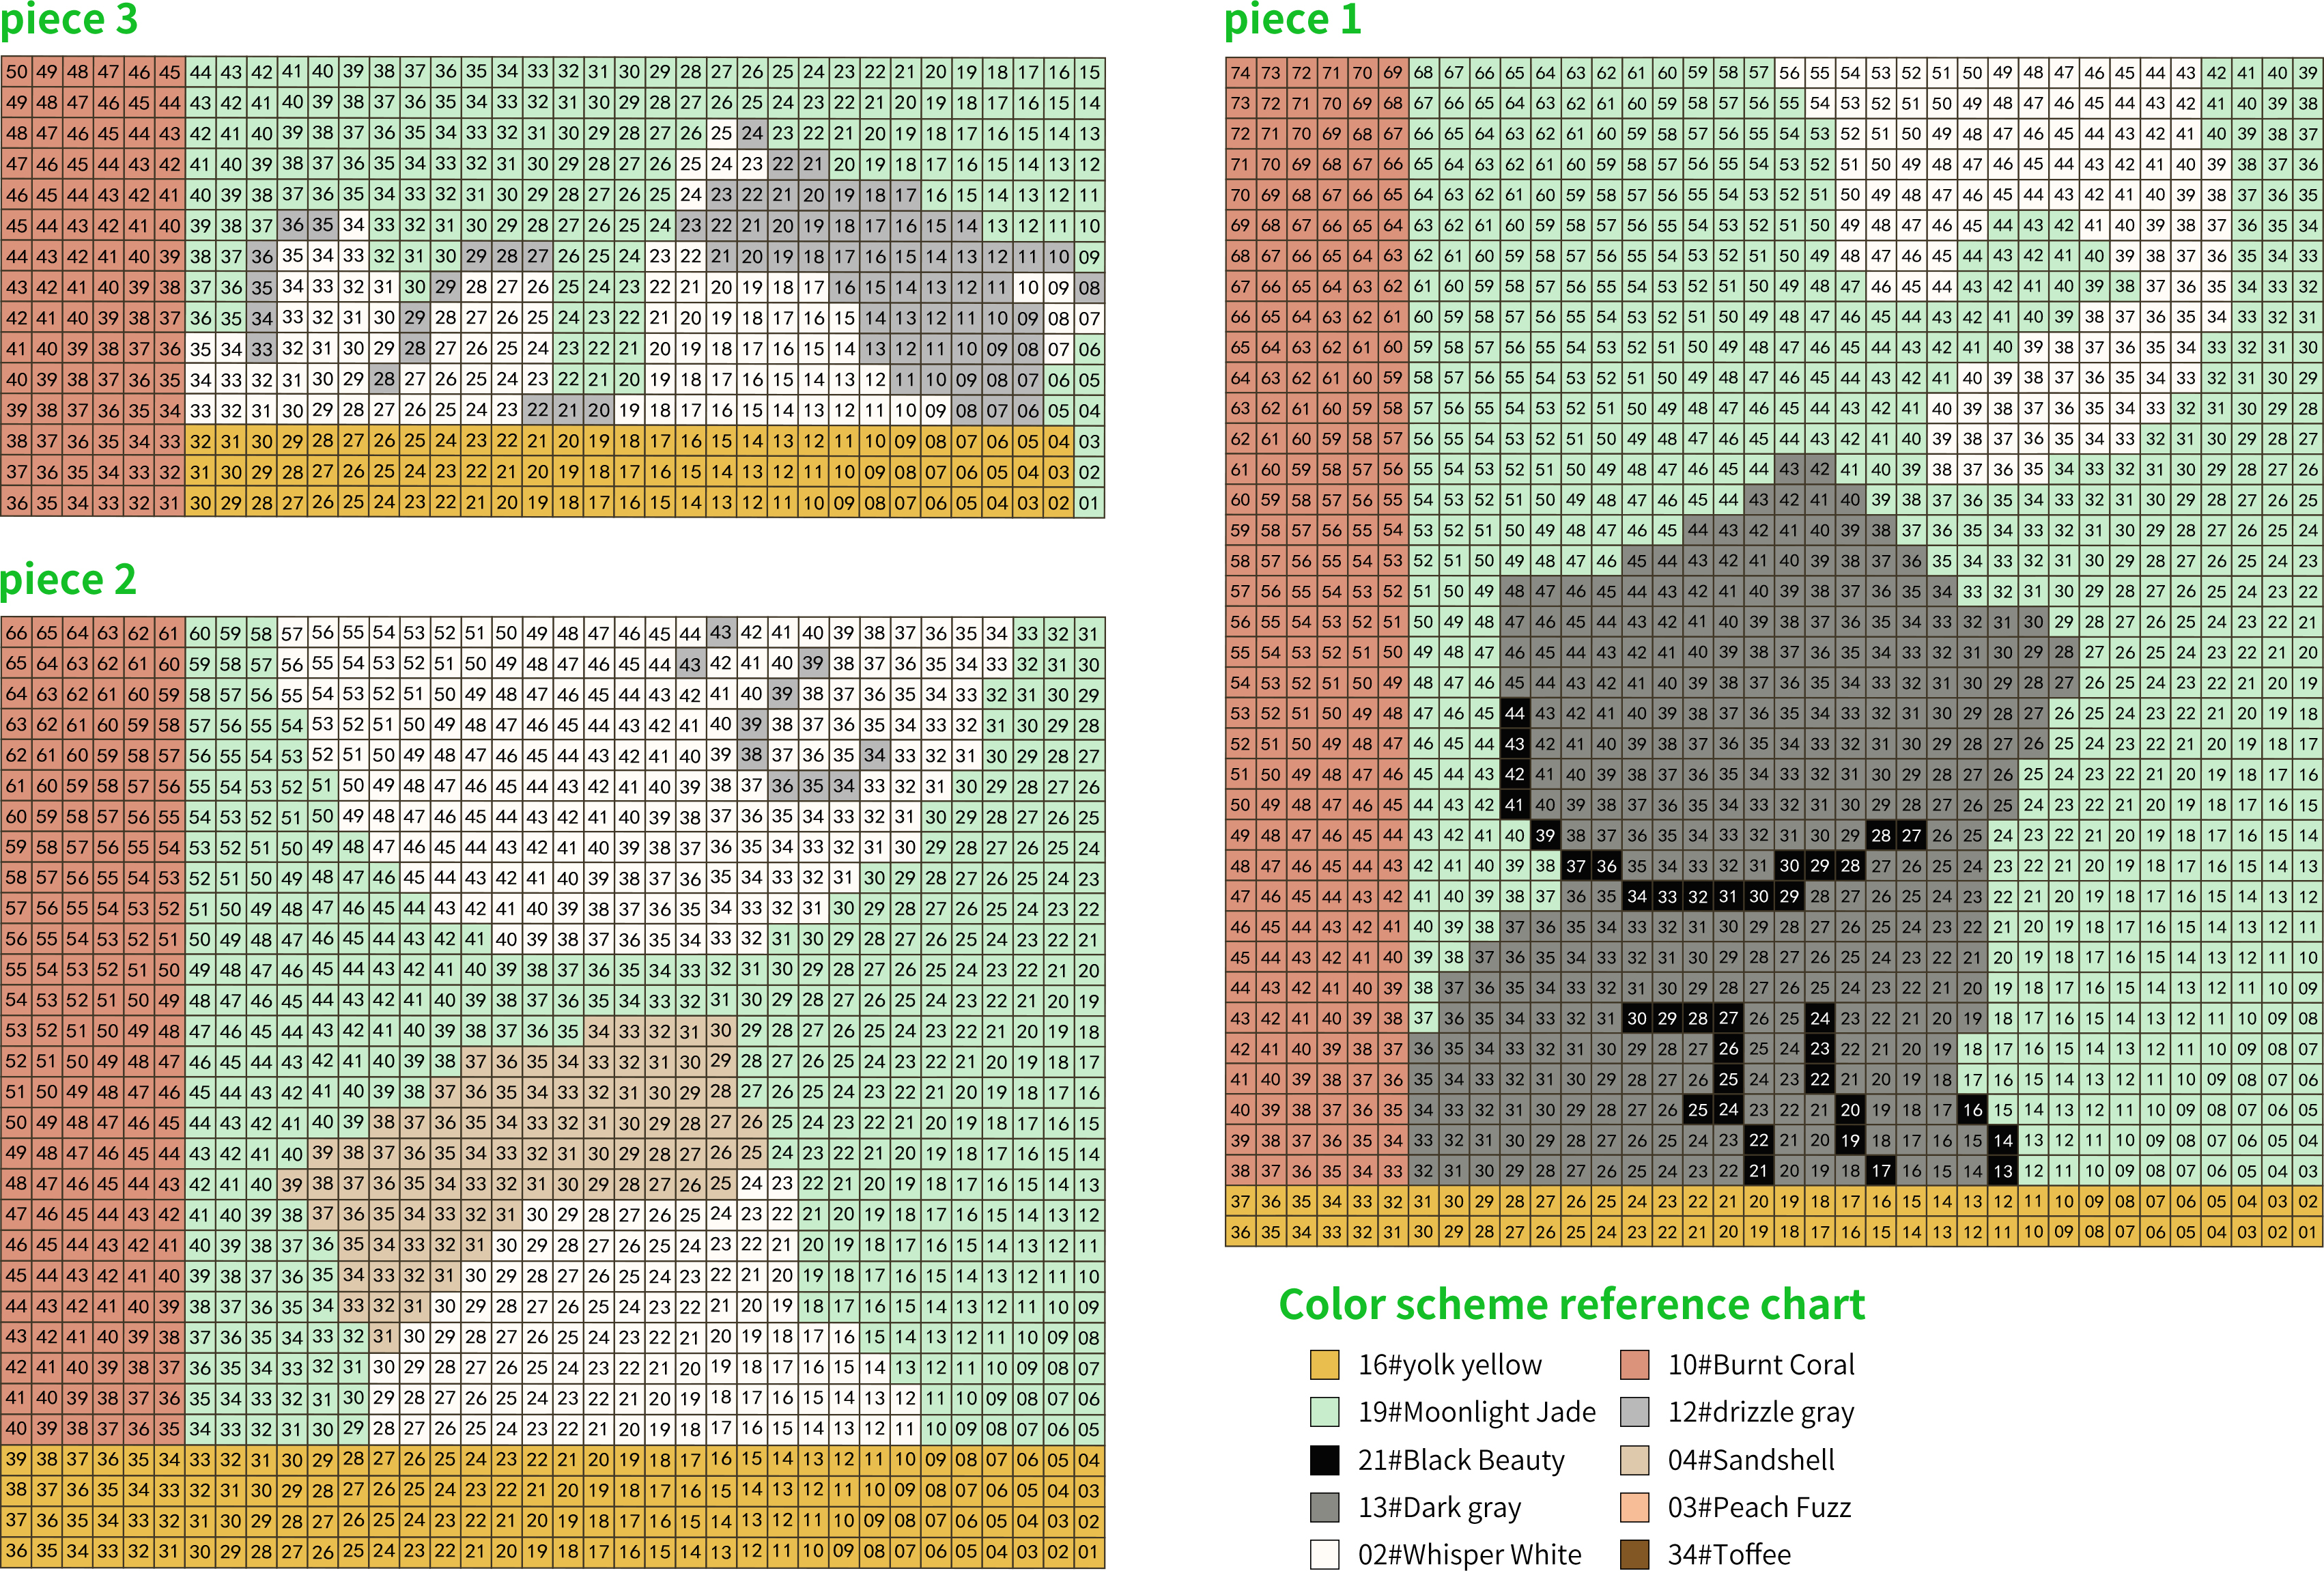
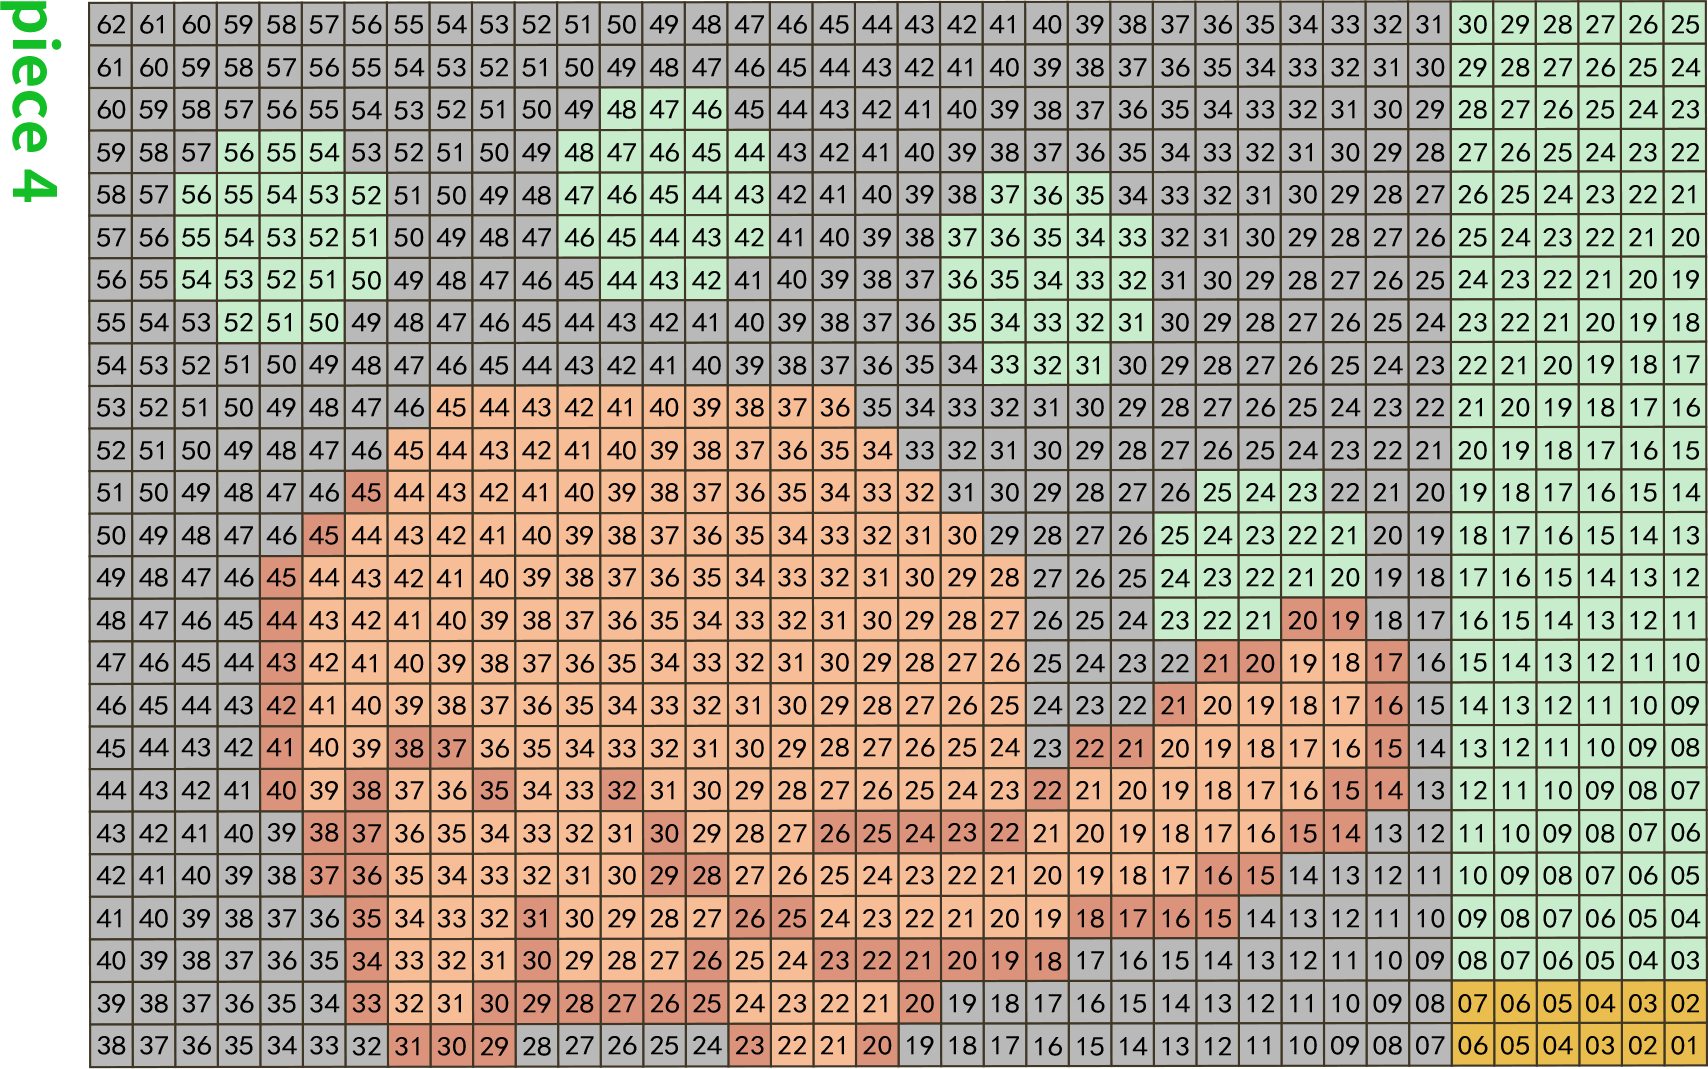
Step 2 Pieces joiningA2 28' 23''
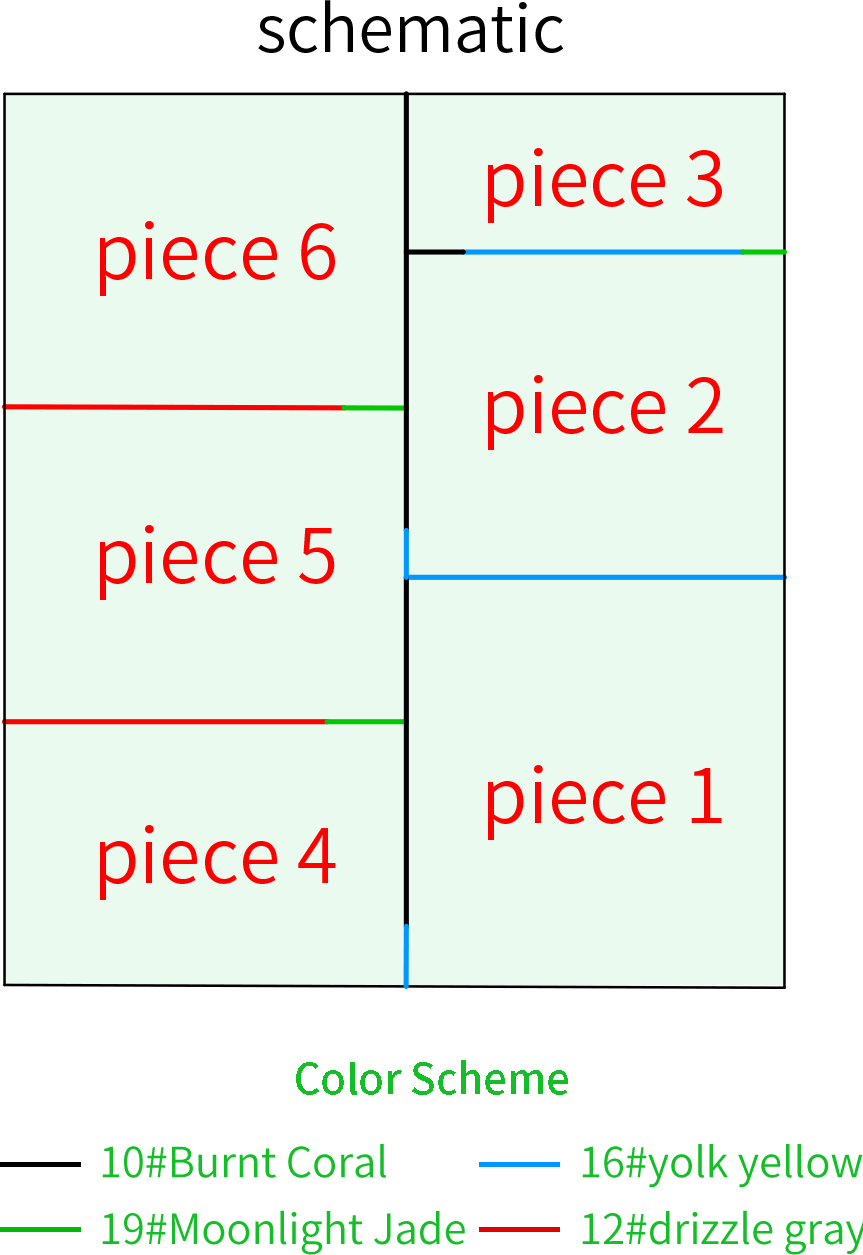
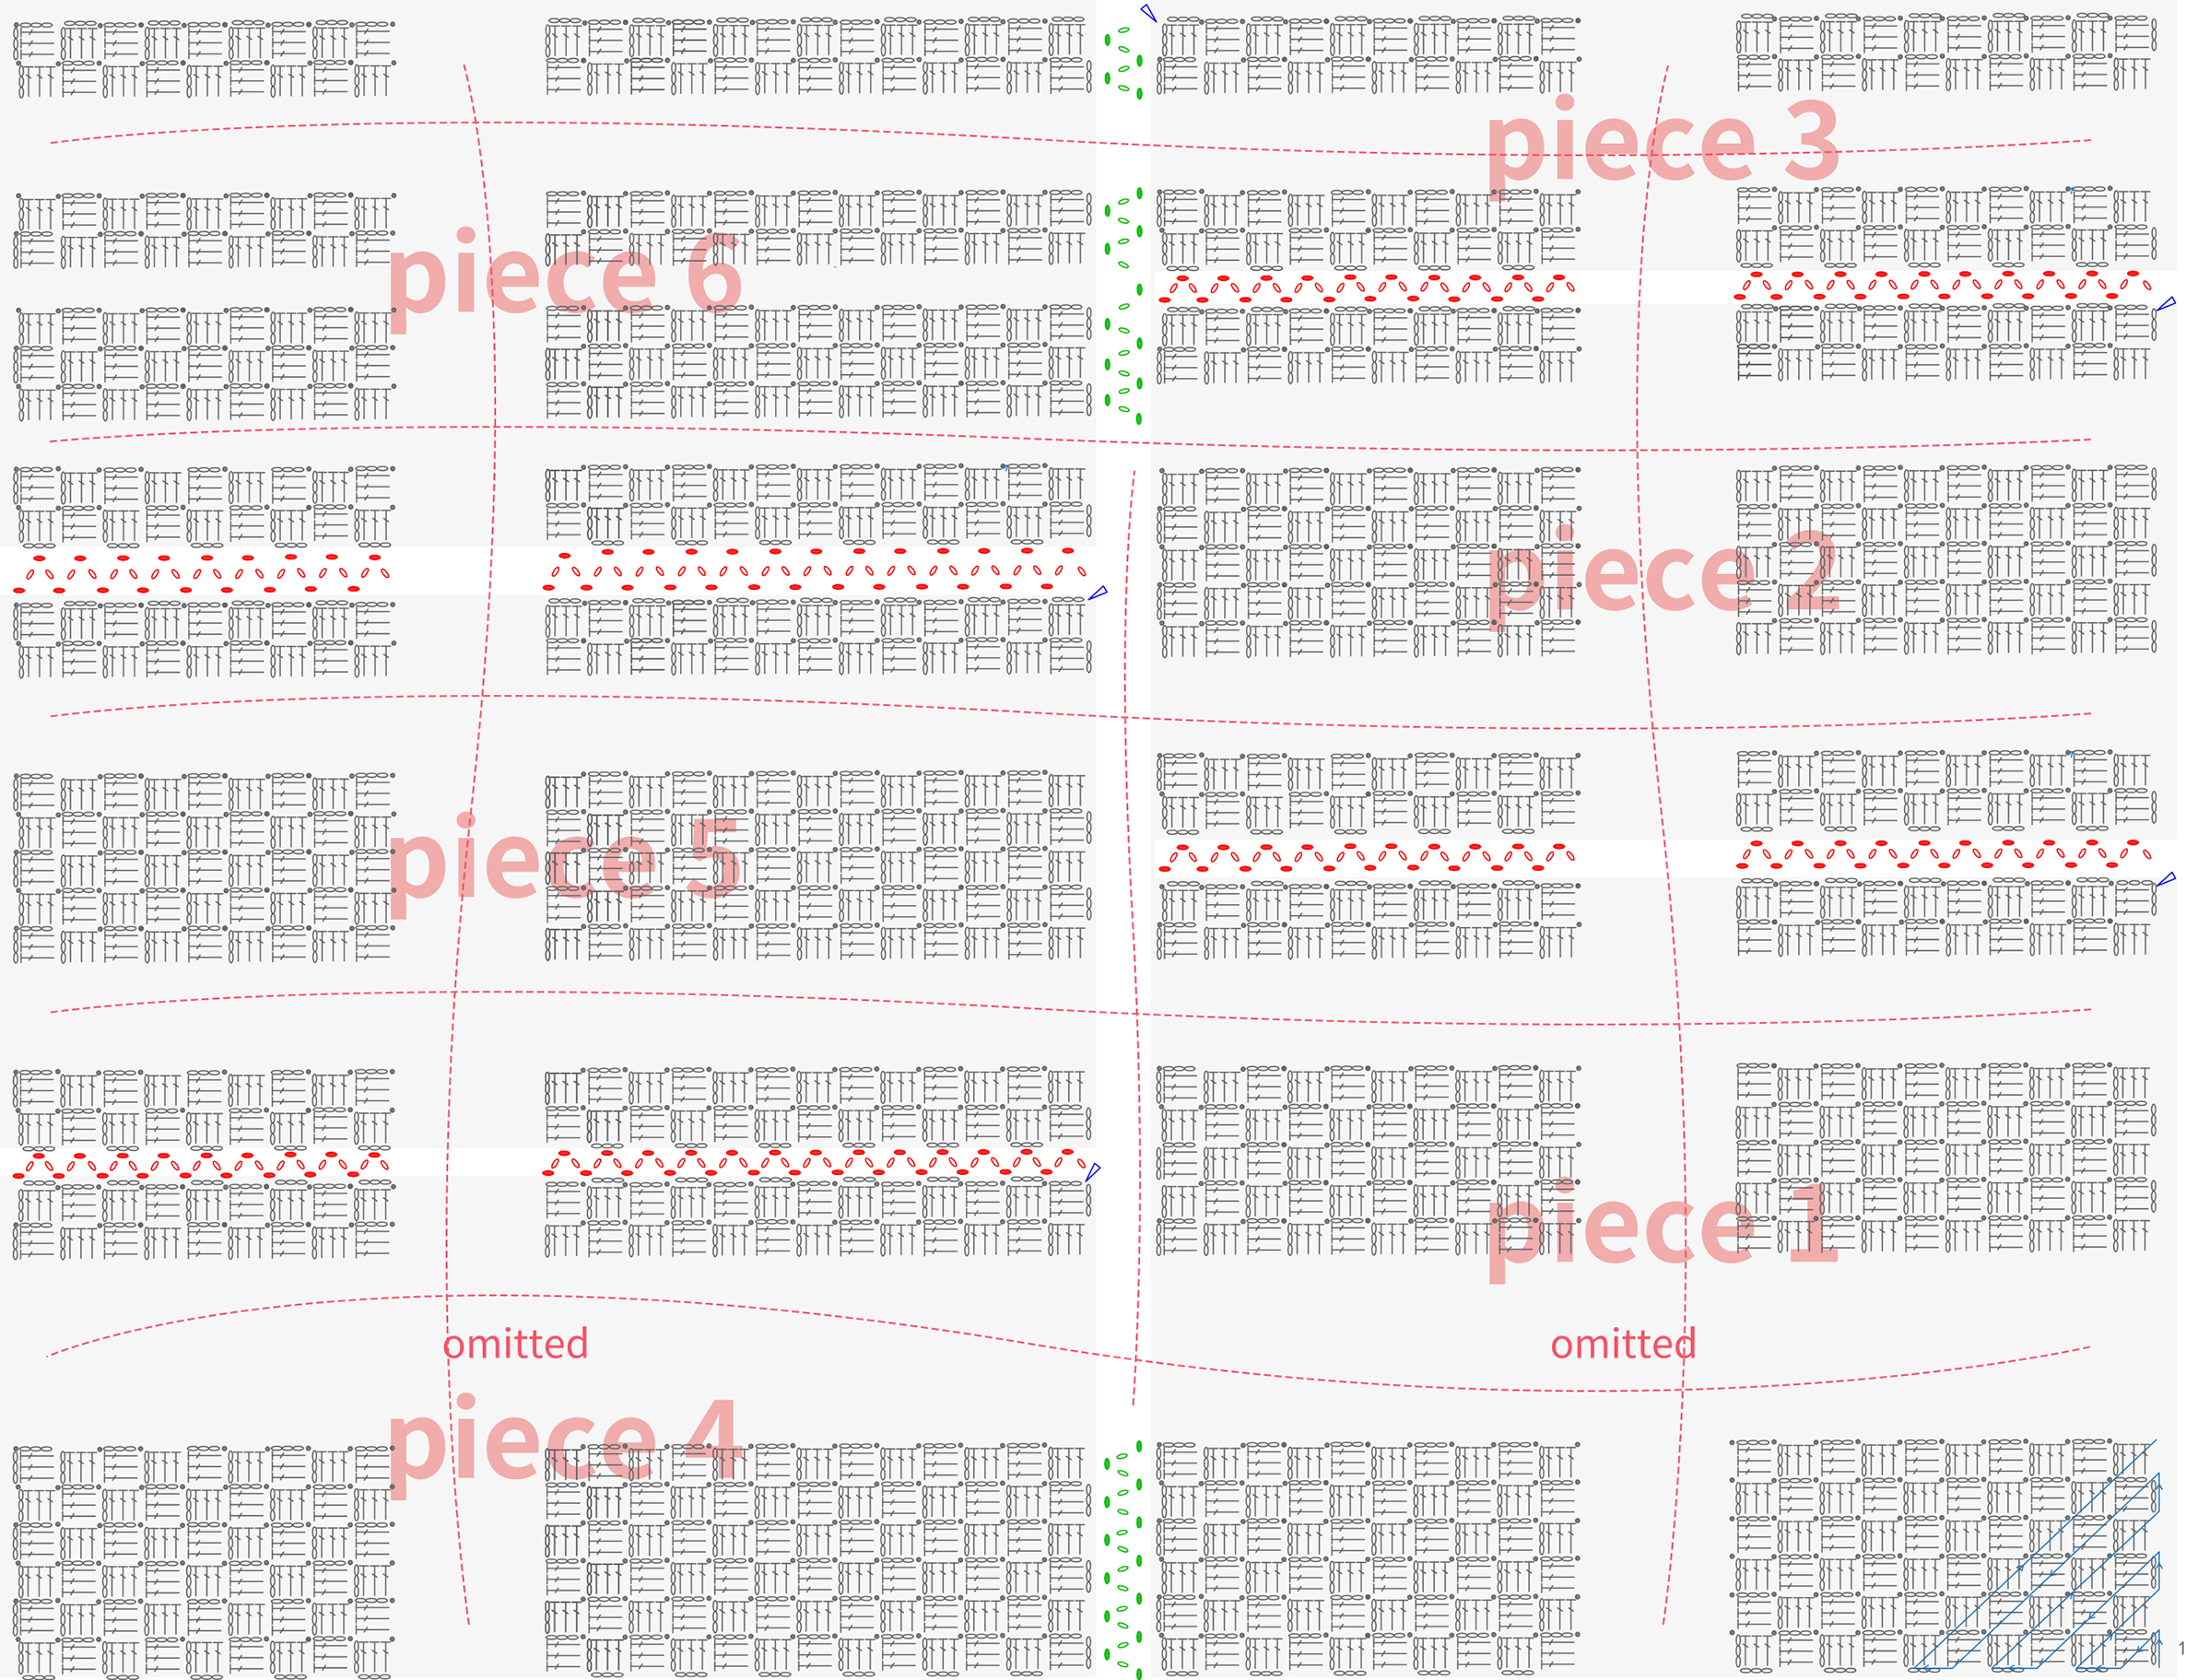
After all the pieces are completed, start by referring to the finished product and the layout diagram to position the pieces correctly. Then, connect them in order, starting from the bottom up, and then from right to left. Please refer to the video demonstration for more details.
Step 3 Crochet the edging for the blanketA3 40' 24''
After the connection is done, crochet the edging for the blanket, working around the outer edge in rounds. Please refer to the video demonstration for more details.
Color: 28#Azure blue
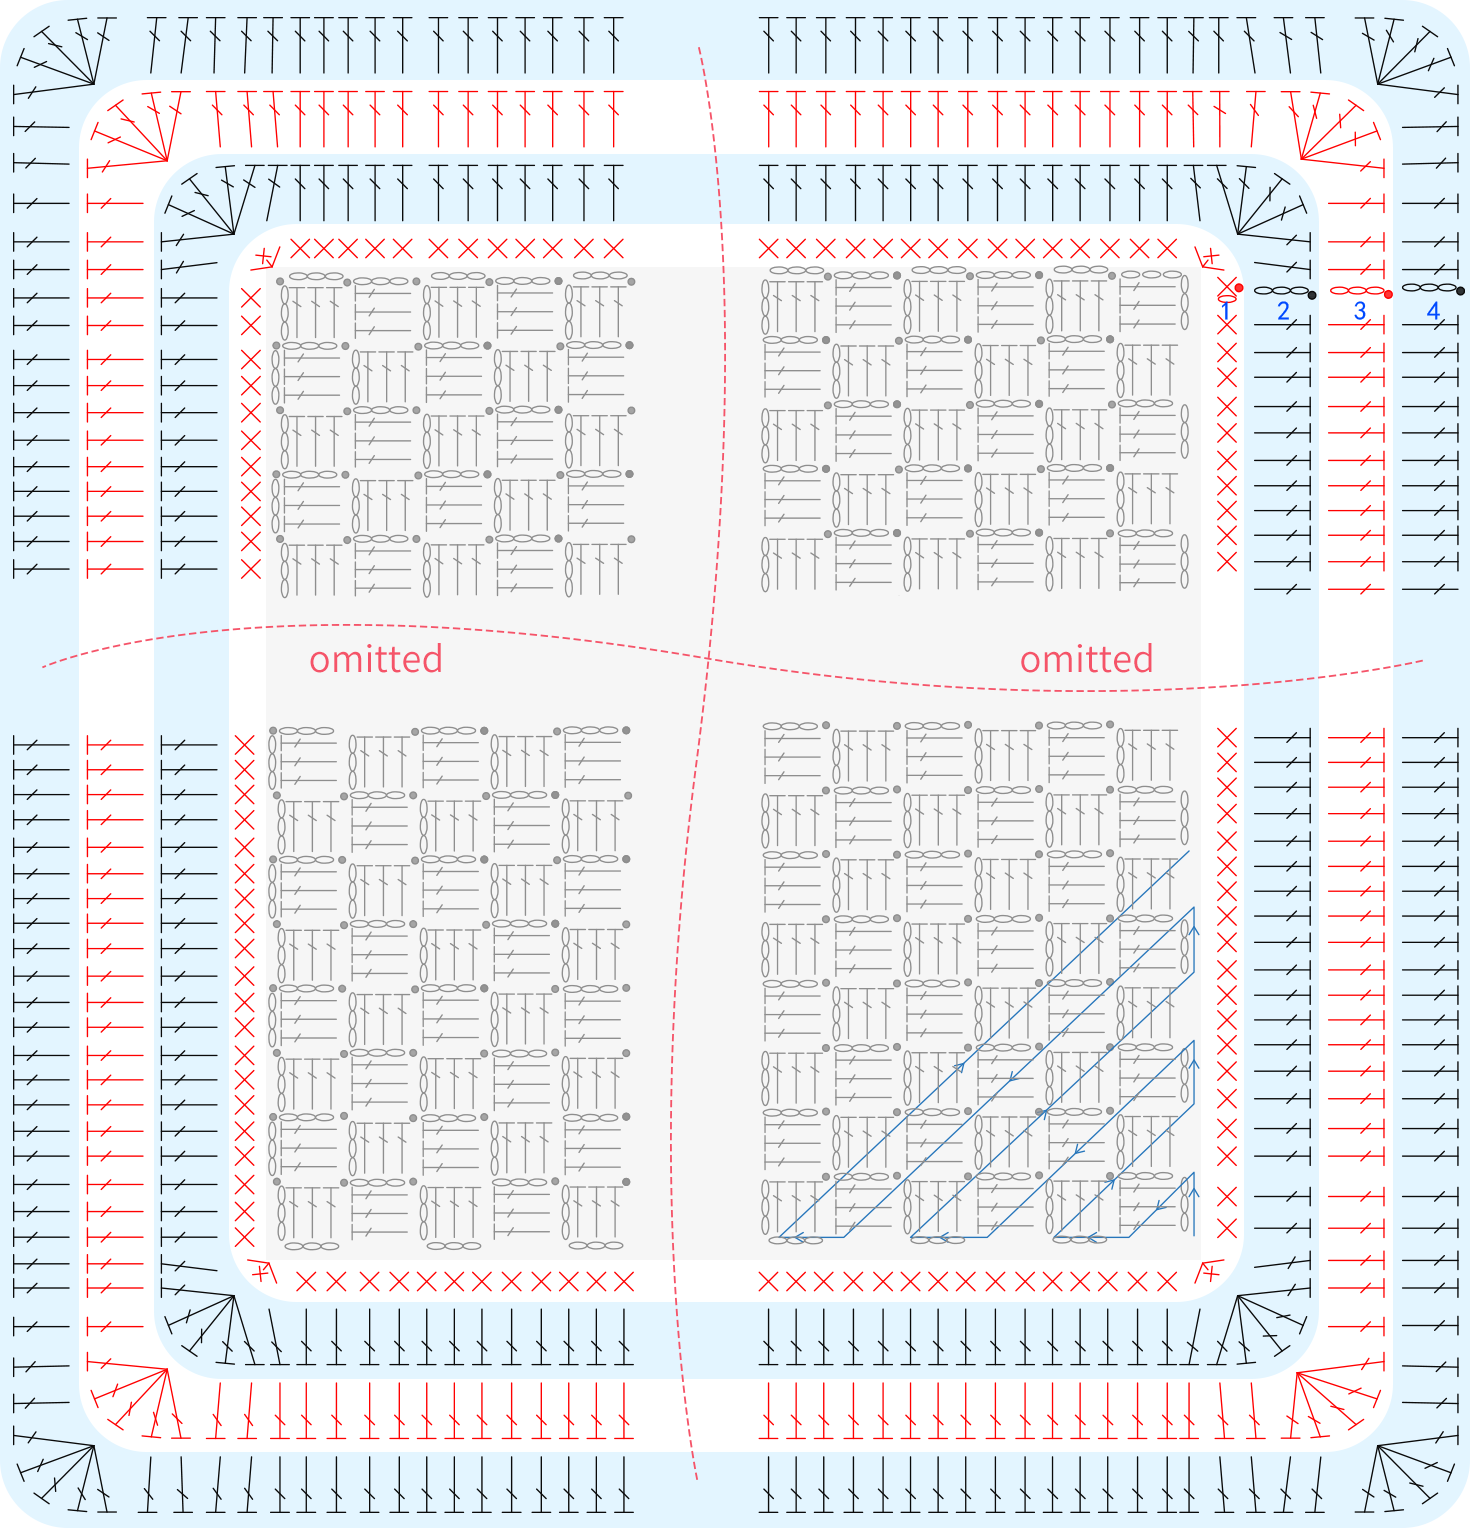
Note: The number of single crochets for the first round on each side of the blanket can be adjusted based on your actual project to ensure the blanket lays flat.
Part 2 AccessoriesB 47' 25''
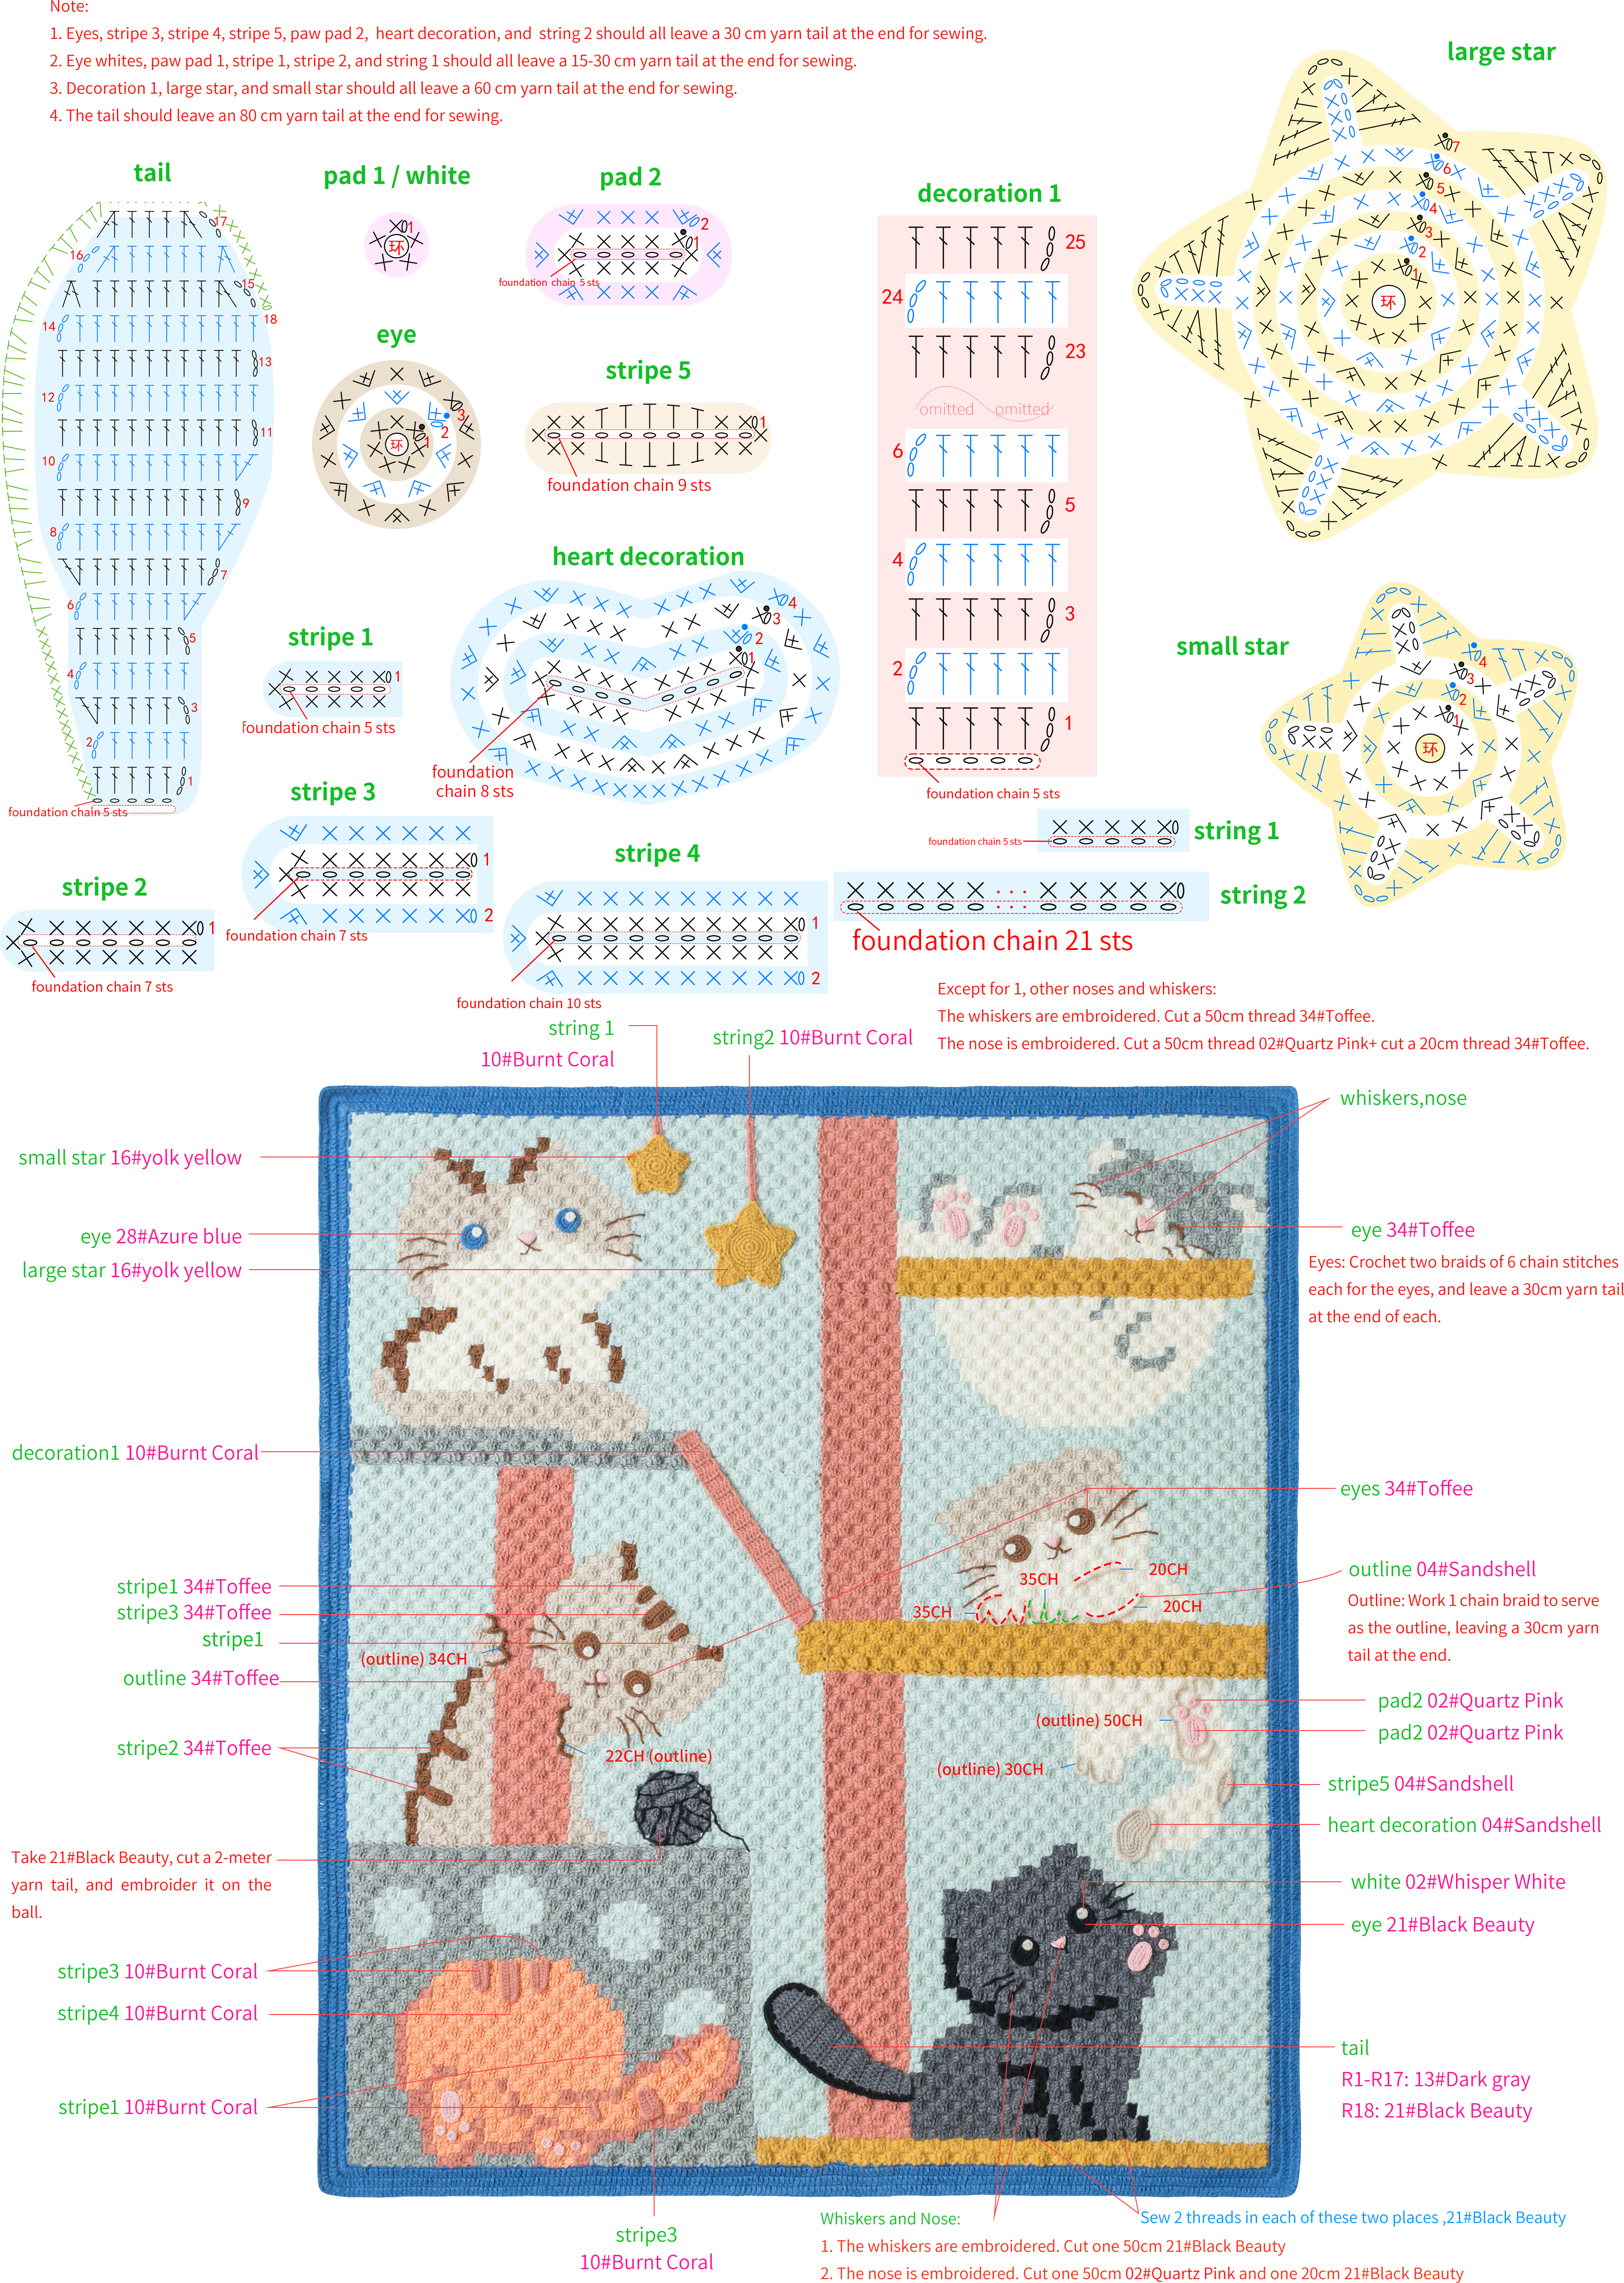
The overall design includes decorative elements such as eyes, nose, whiskers, paw pads, stripes, tail, heart decorations, braids, and star lanterns. Each piece has slightly different decorations, which are specifically marked on the images of each piece. Please refer to the video demonstration for more details.
Note: When crocheting the decorations on each piece, make sure to check the number shown in the sample picture before you start.
Made by the community