
Home / Blanket
Miao Village Pillow-Case Blanket
Project preview
See the finished project
Pattern format
Instructions
Watch and follow
Video tutorial
This blanket is made up of motifs, piecing, edging, border and buttons. First, we'll make the motifs. We have Motif A, Motif B, Motif C, Motif D, and Motif E. After completing them, we join them together. Then, make the edging, and the border. Finally, add the buttons.
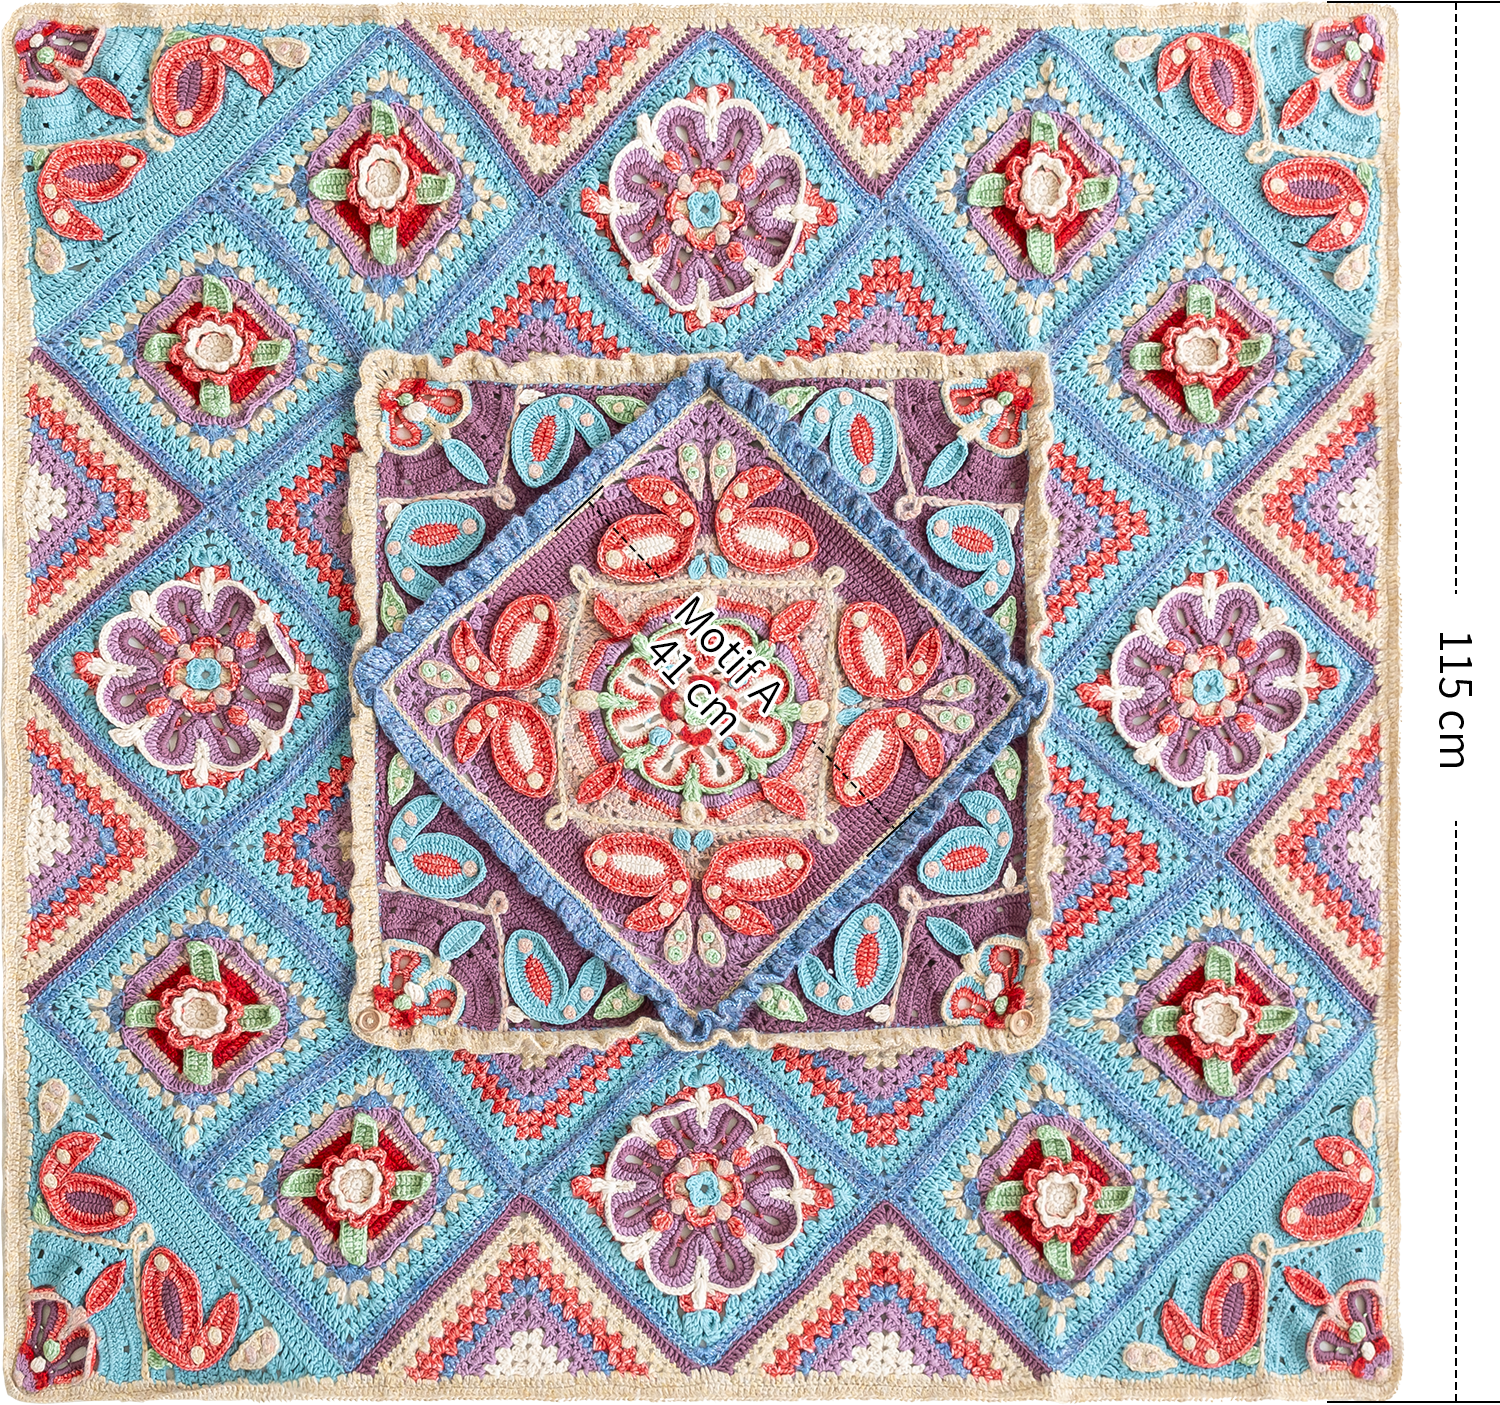
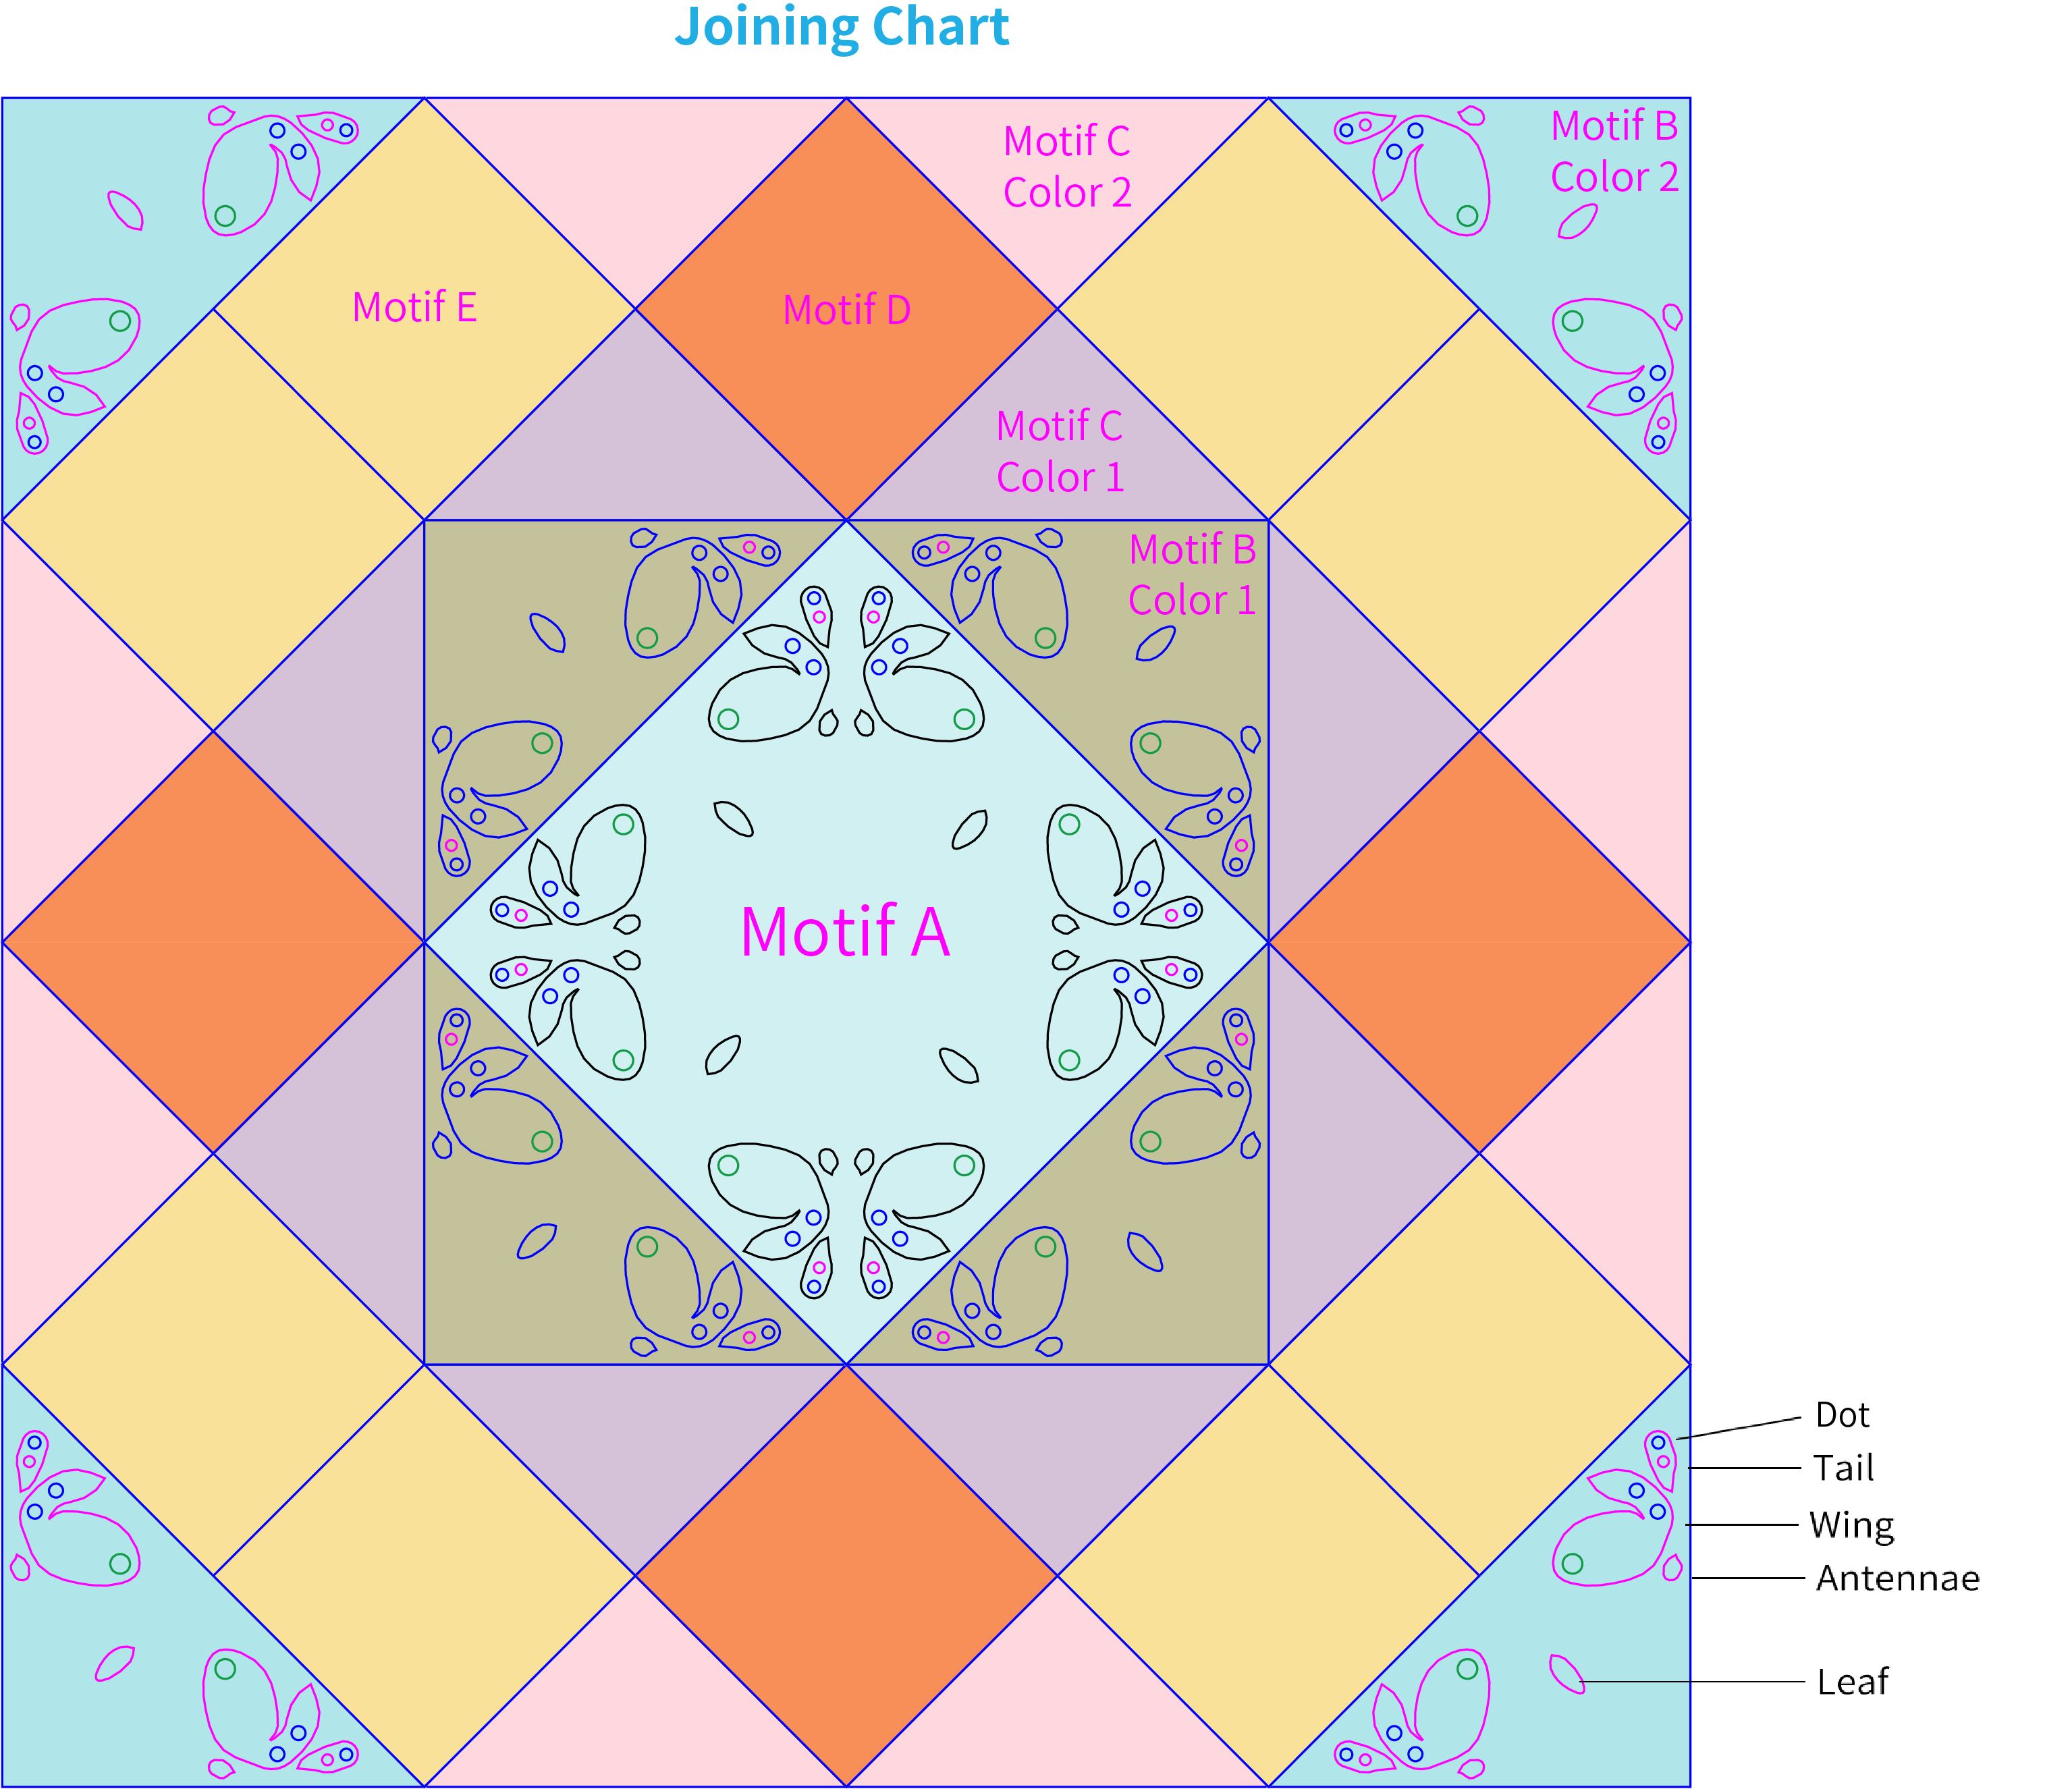
The handcrafted measurements may have an error of 1 to 2 cm. Due to variations in individual tension, the size of the sample is for reference only.
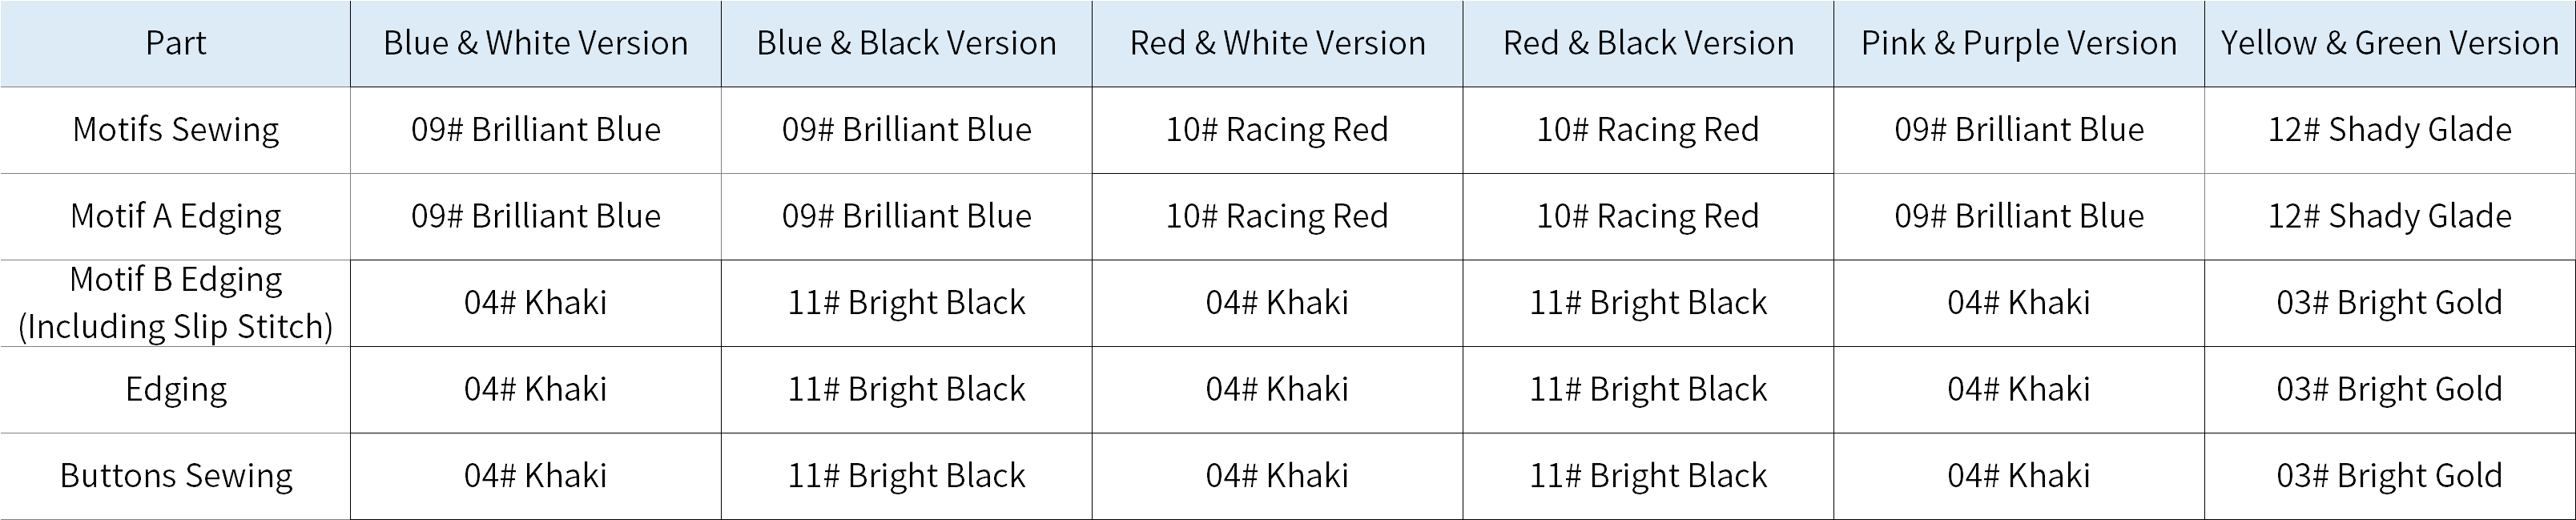
Materials: Diamond Thread Wool, Susan's Family Impression Misty Feather & 4-Ply Combed Cotton & Acrylic Fibre Hand Knitting Yarn
Hook: 3.00 mm crochet hook

Chart Key
















Note:
1,This pattern is making in Chinese crochet pattern terms, and the stitch name is written using American terminology. All measurements in charts are in cm.

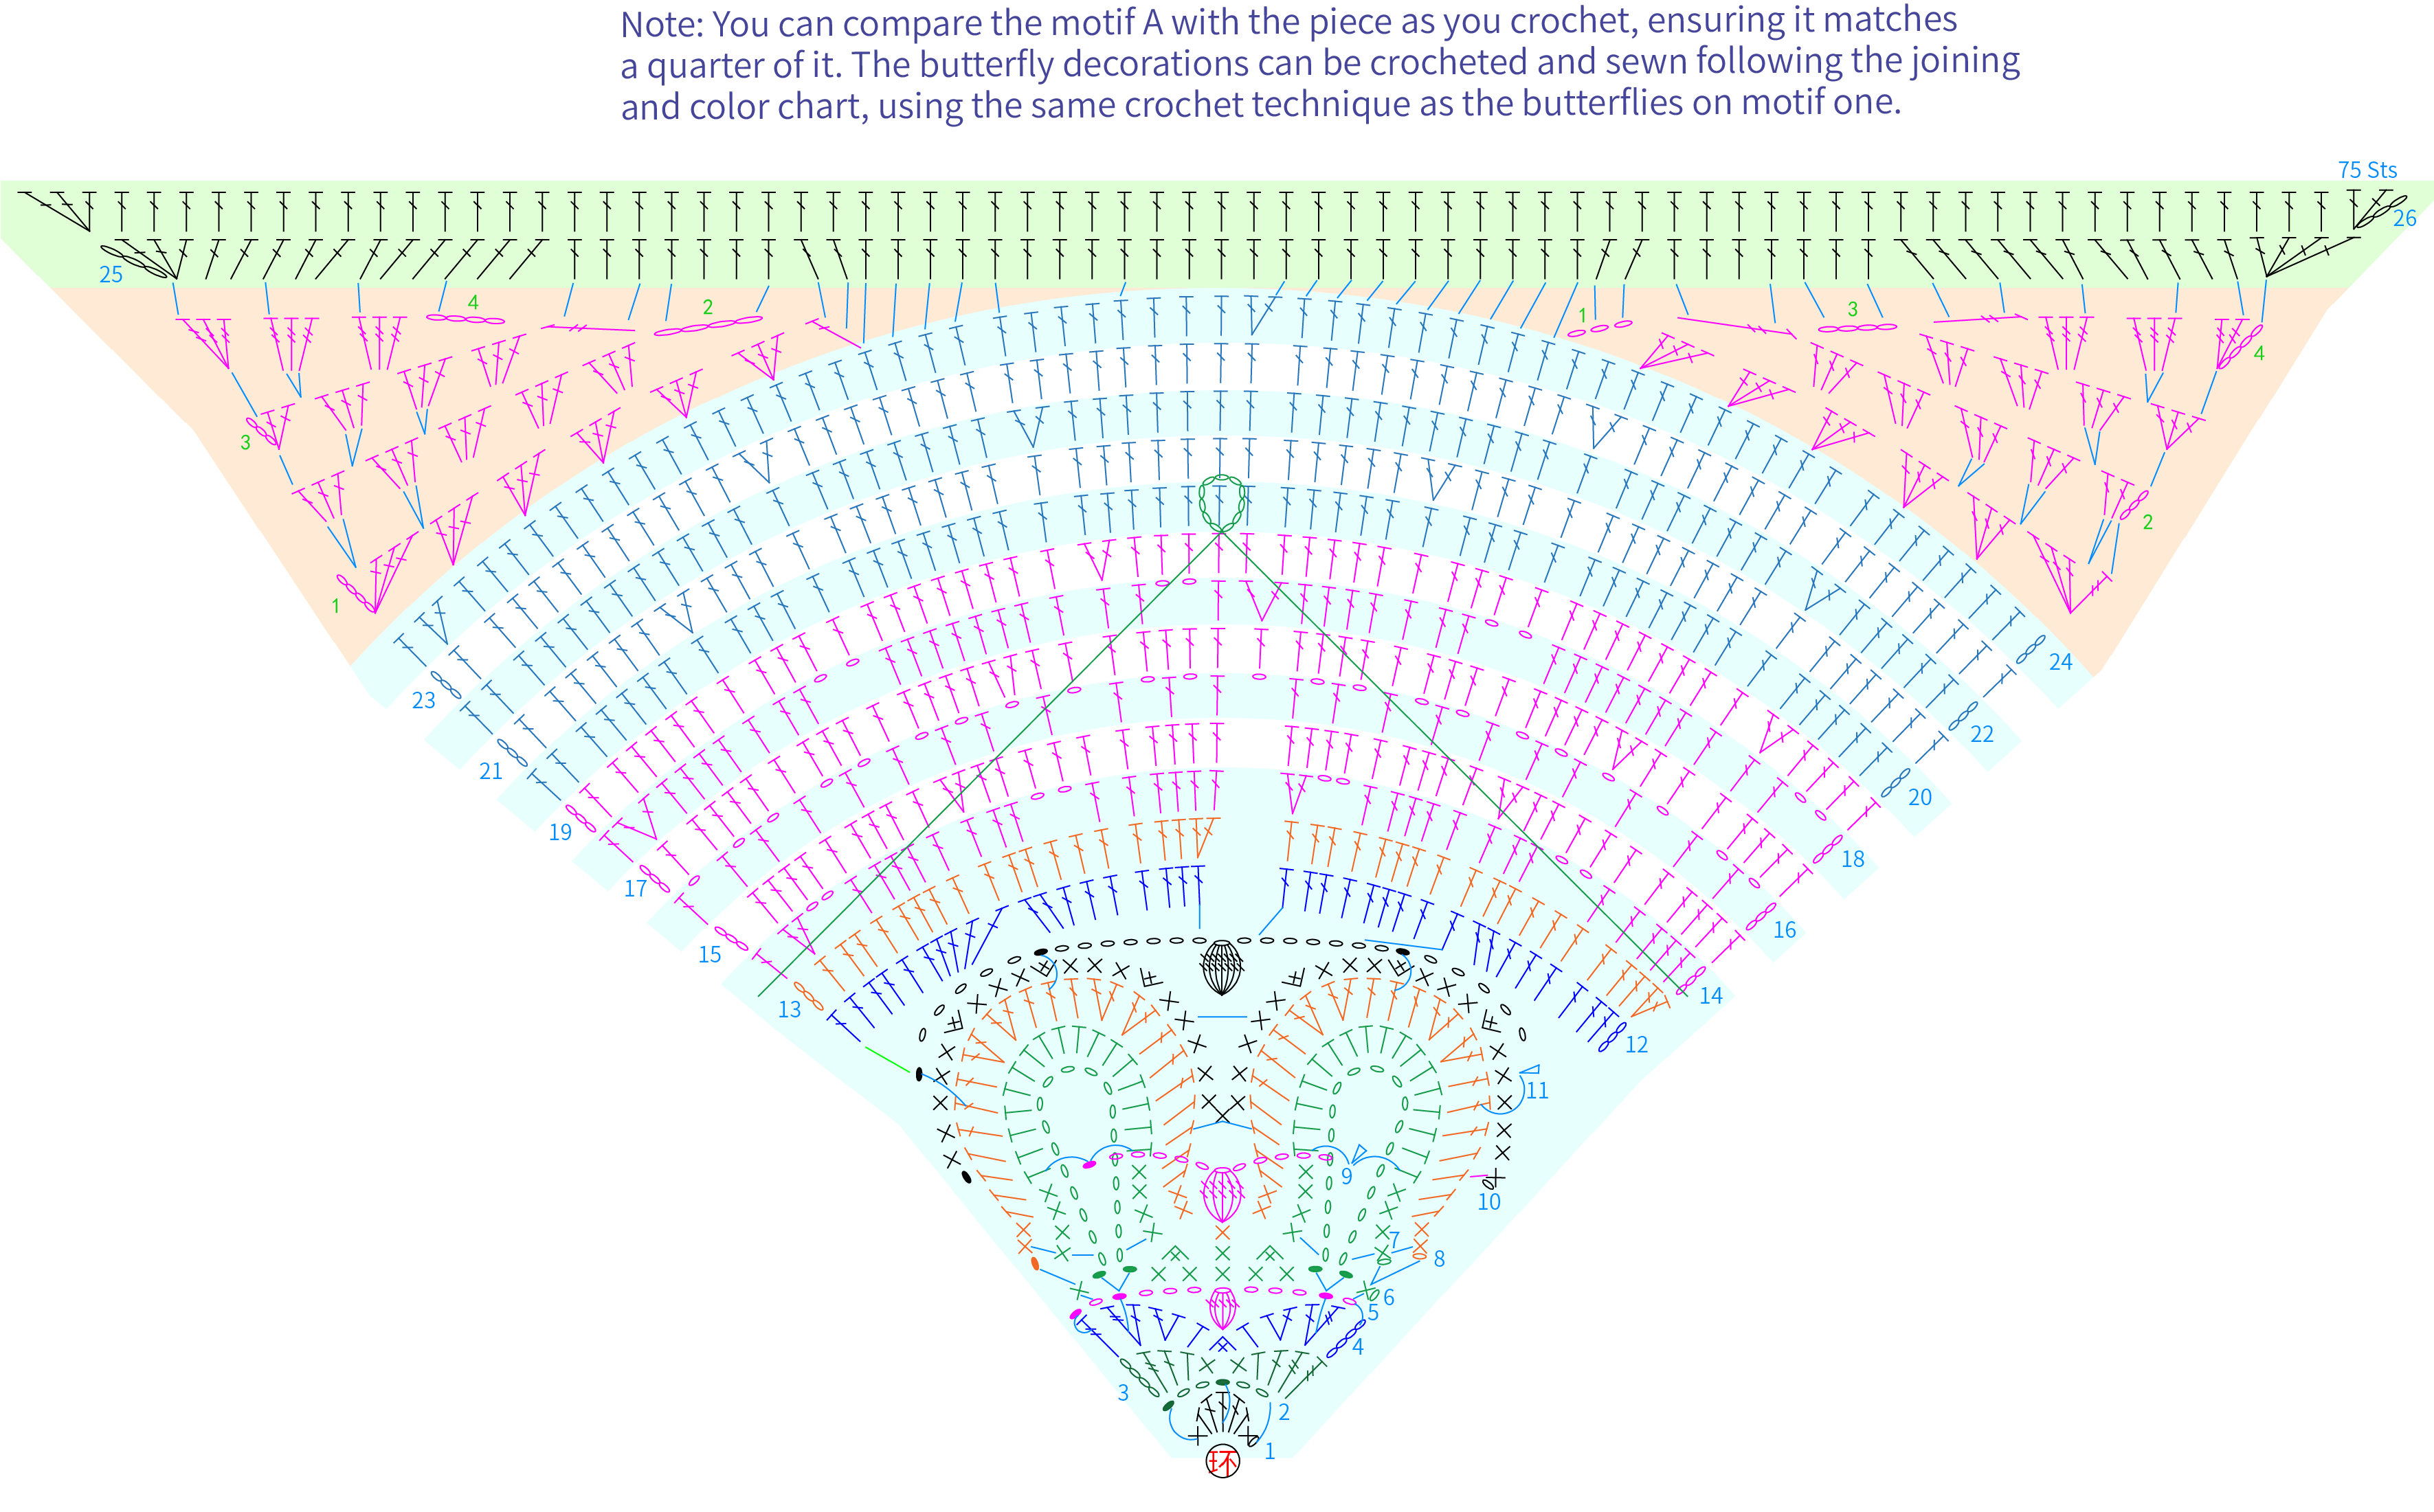
Part 1 Motif AA 01' 12'' (Part 1)
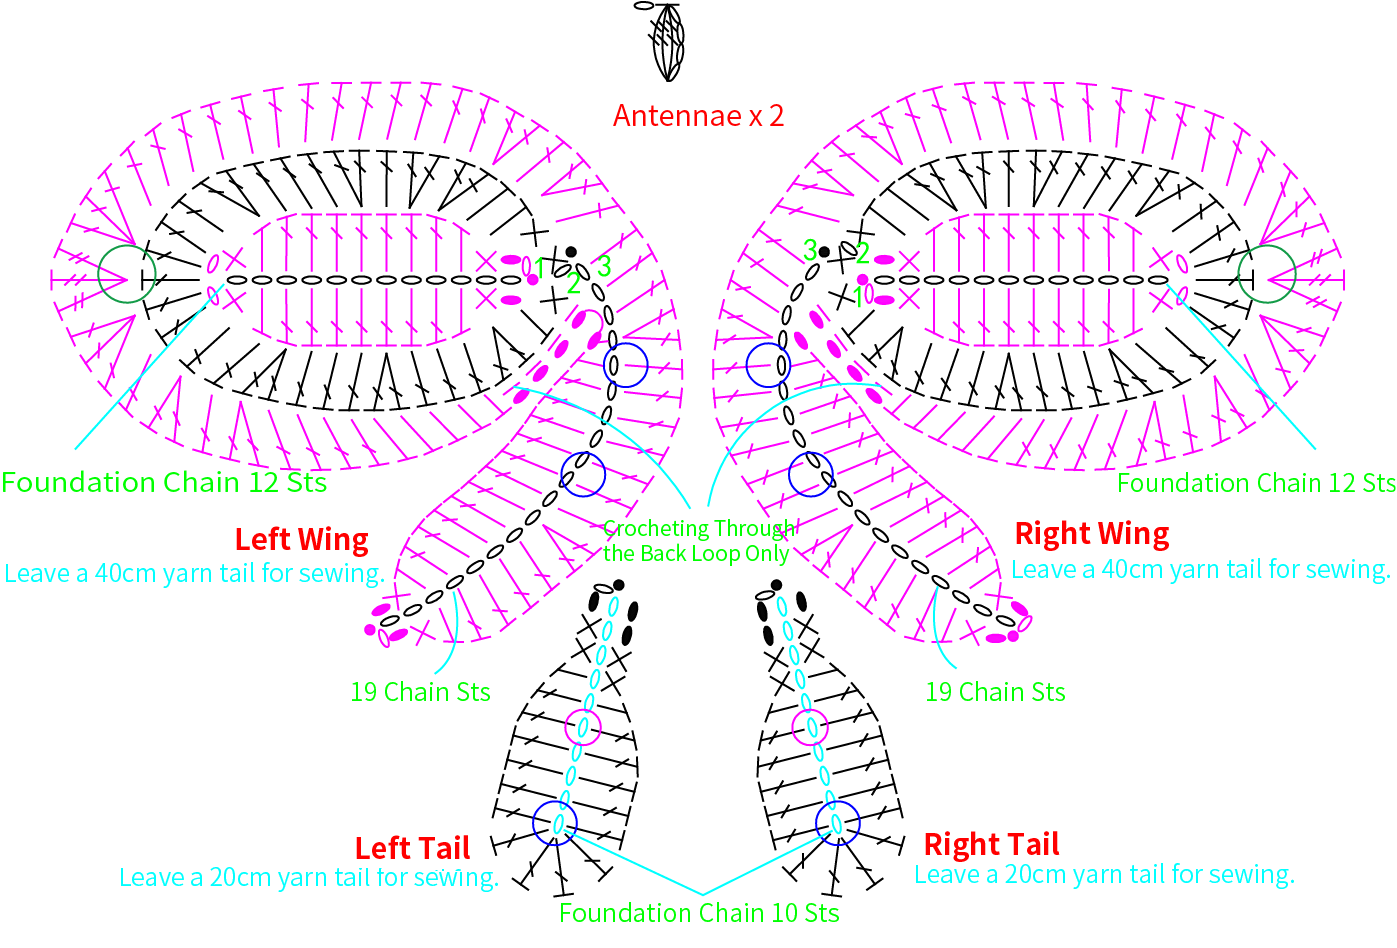
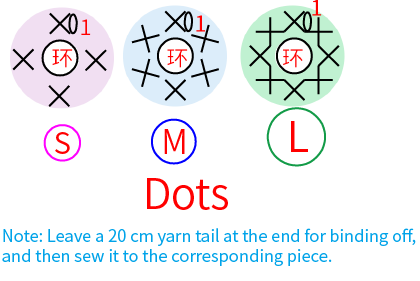
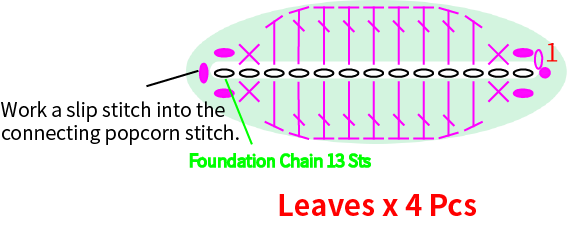
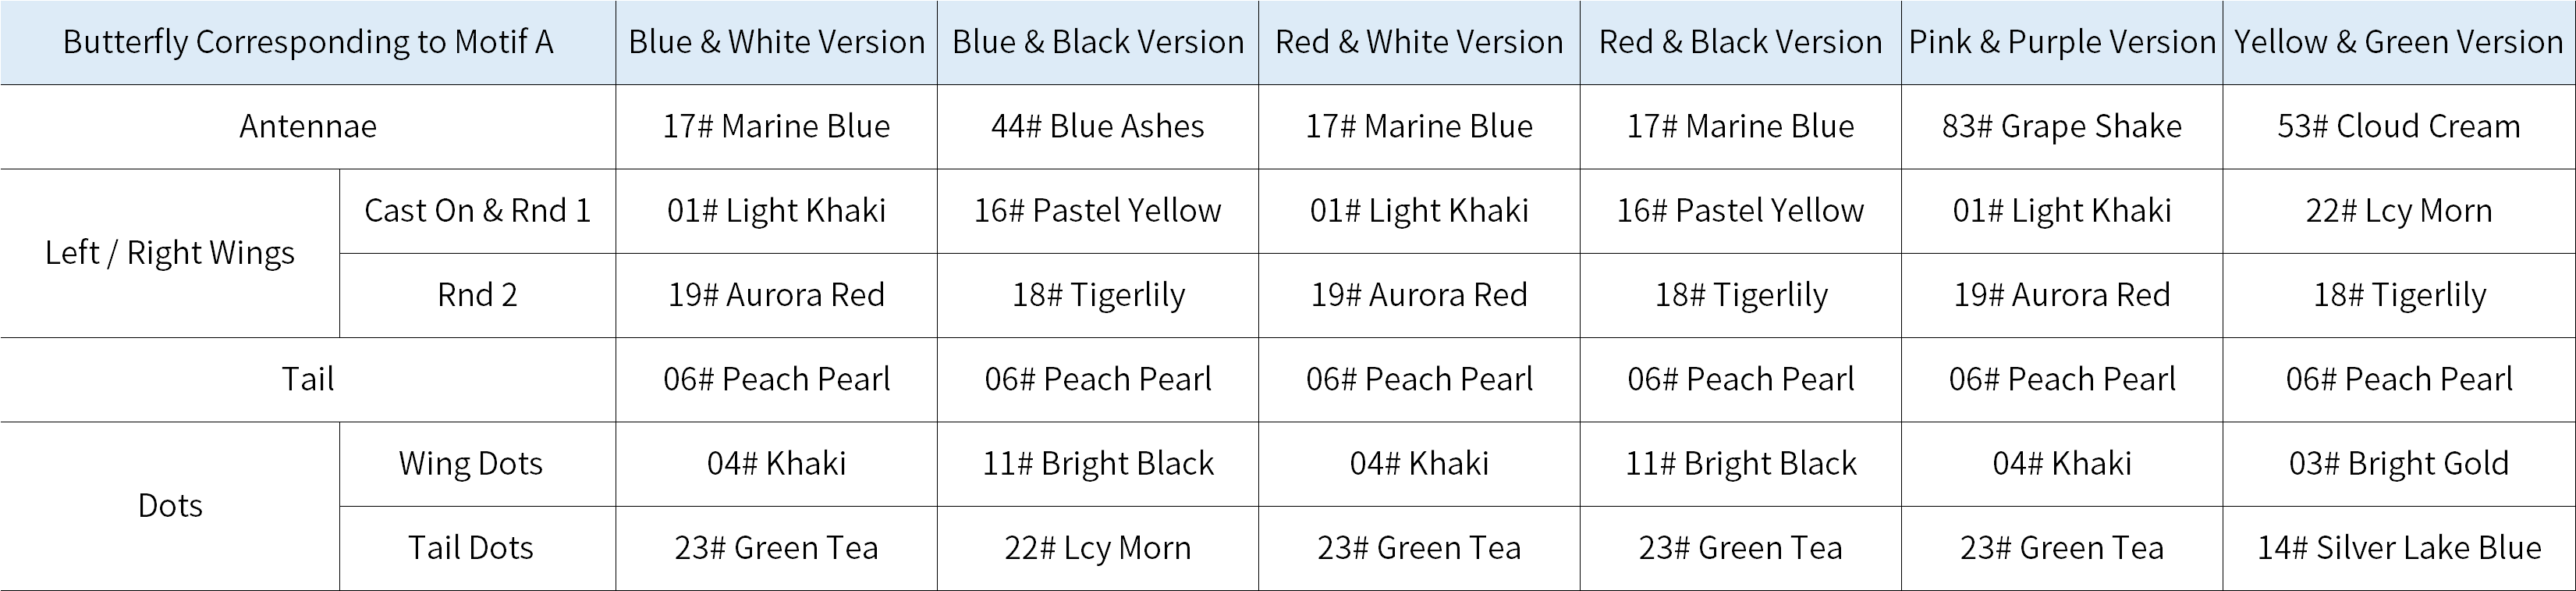
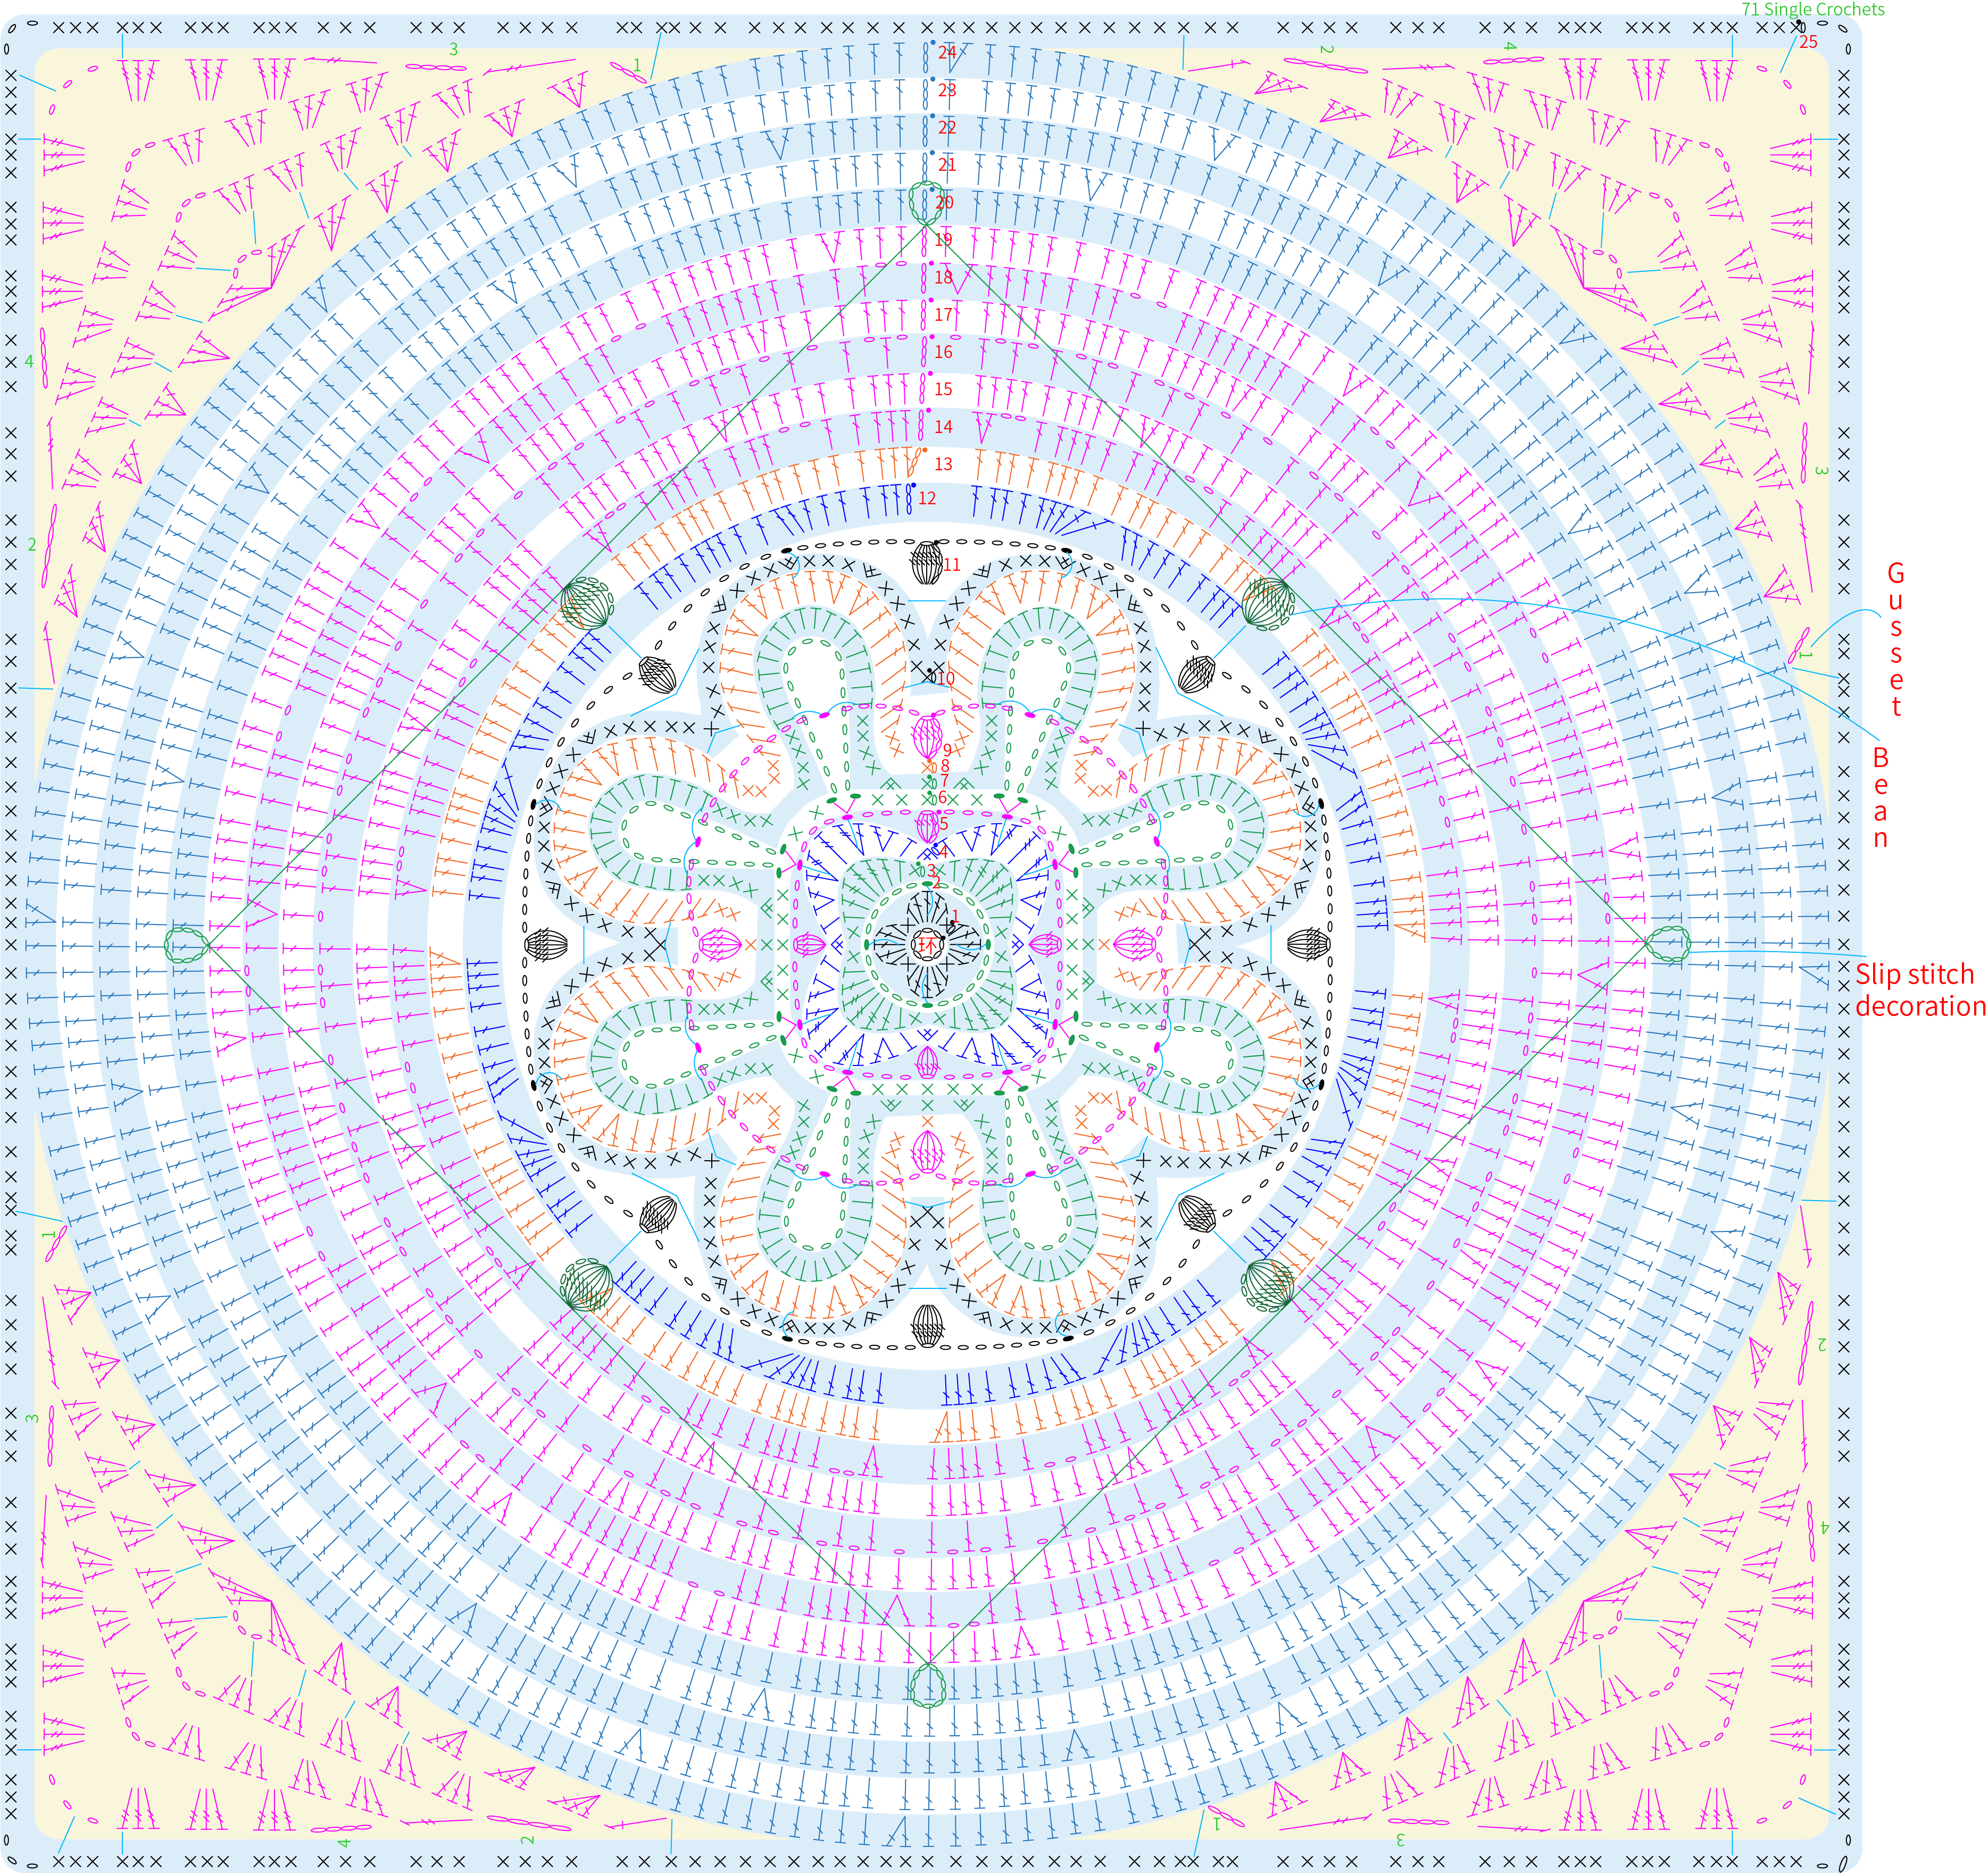
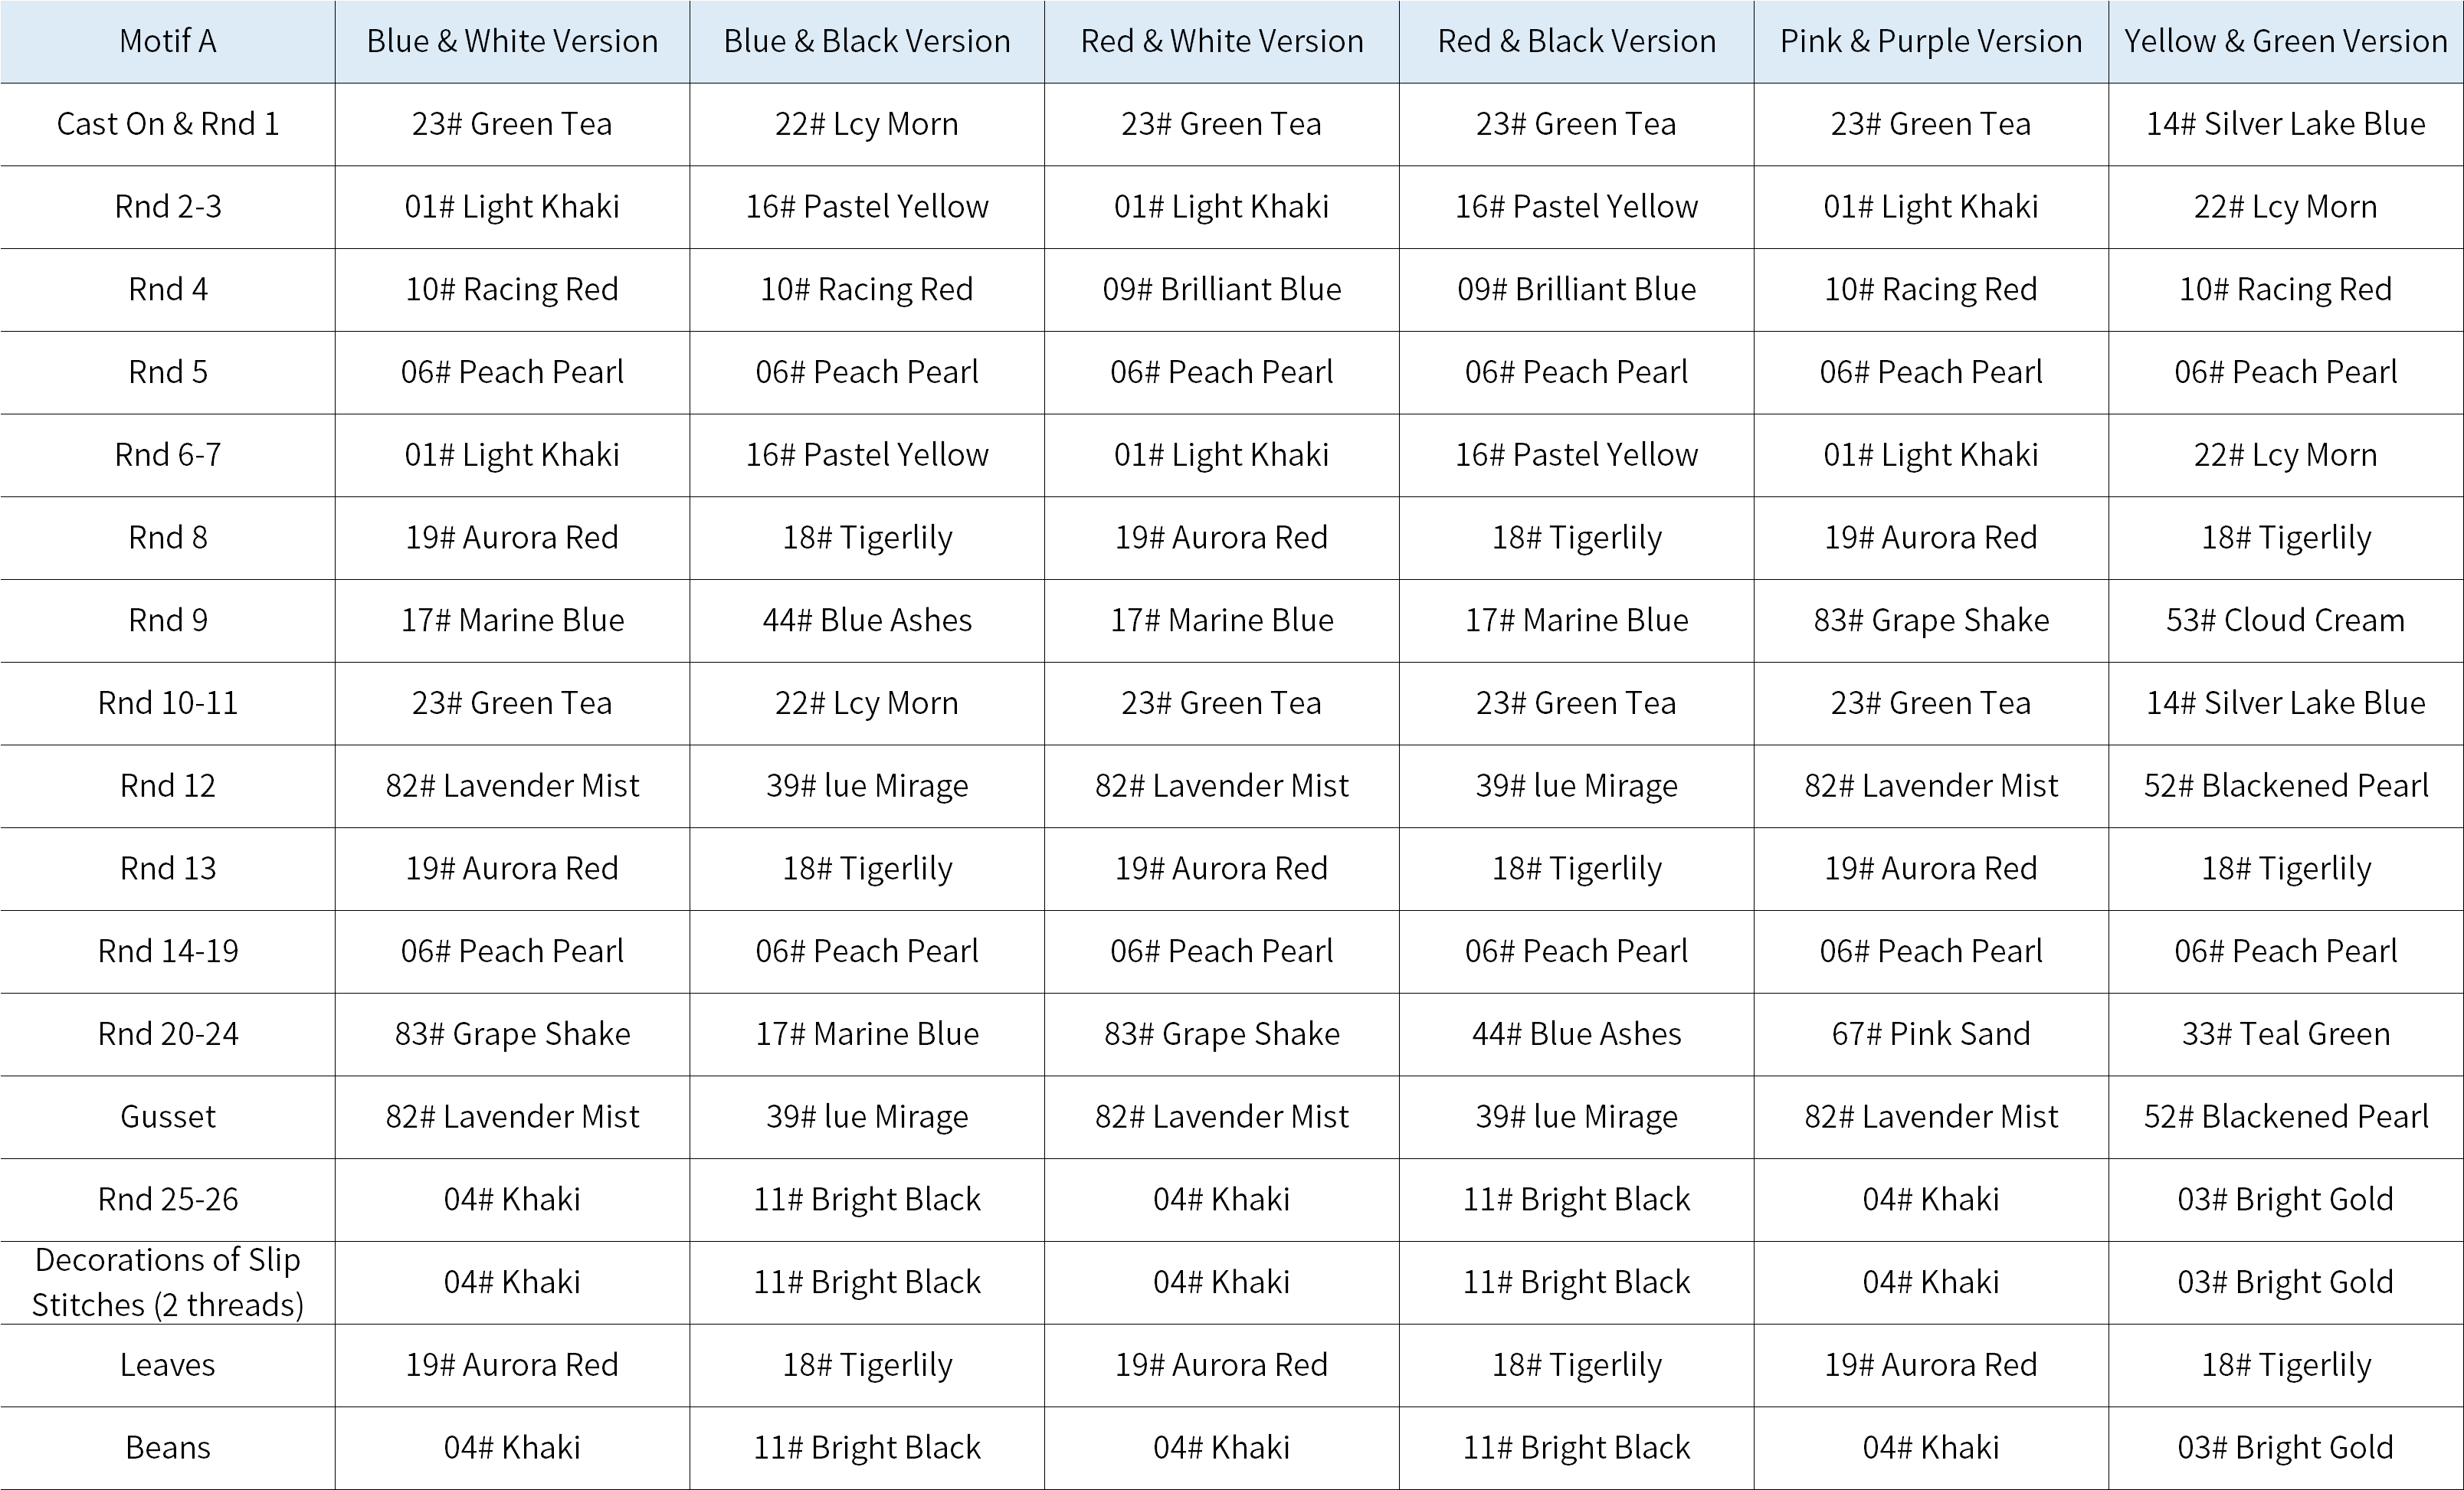
Motif A starts with a chain ring method, first crocheting in rounds counterclockwise, then working back and forth to create 4 corner triangles, followed by crocheting in rounds again. Finally, add decorations. The decorations include slip stitch embellishments, leaves, beads, and butterflies. The butterflies consist of antennae, left and right wings, left and right tail wings, and large, medium, and small spots, which are crocheted separately and then sewn onto the fabric to secure them in place. Please refer to the video demonstration for more details.
Part Motif BB 00' 09'' (Part 2)
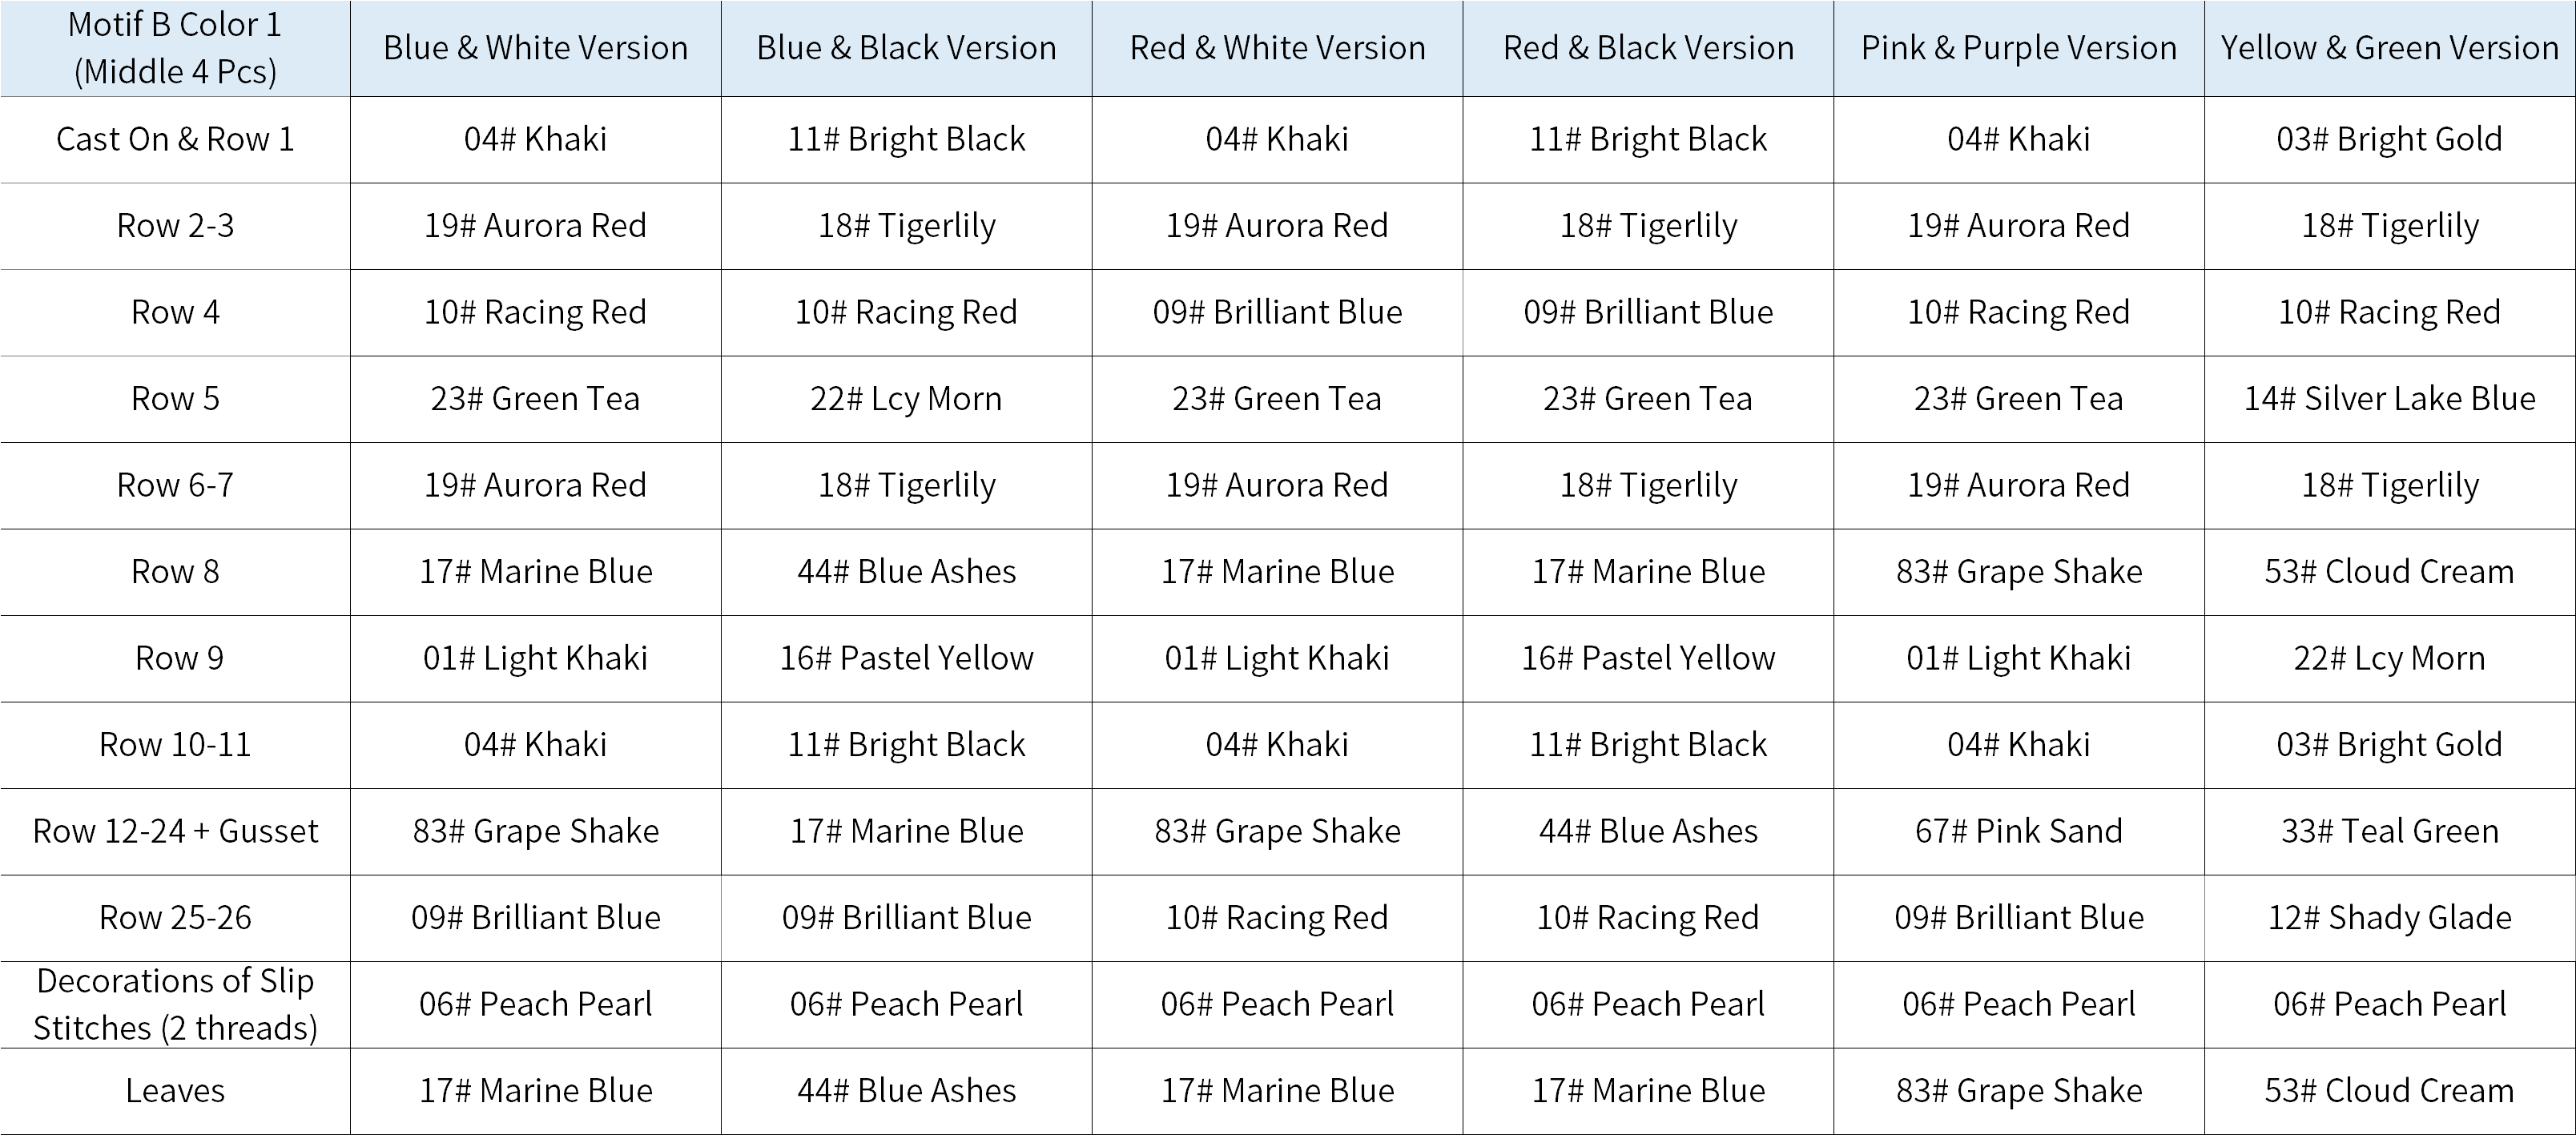
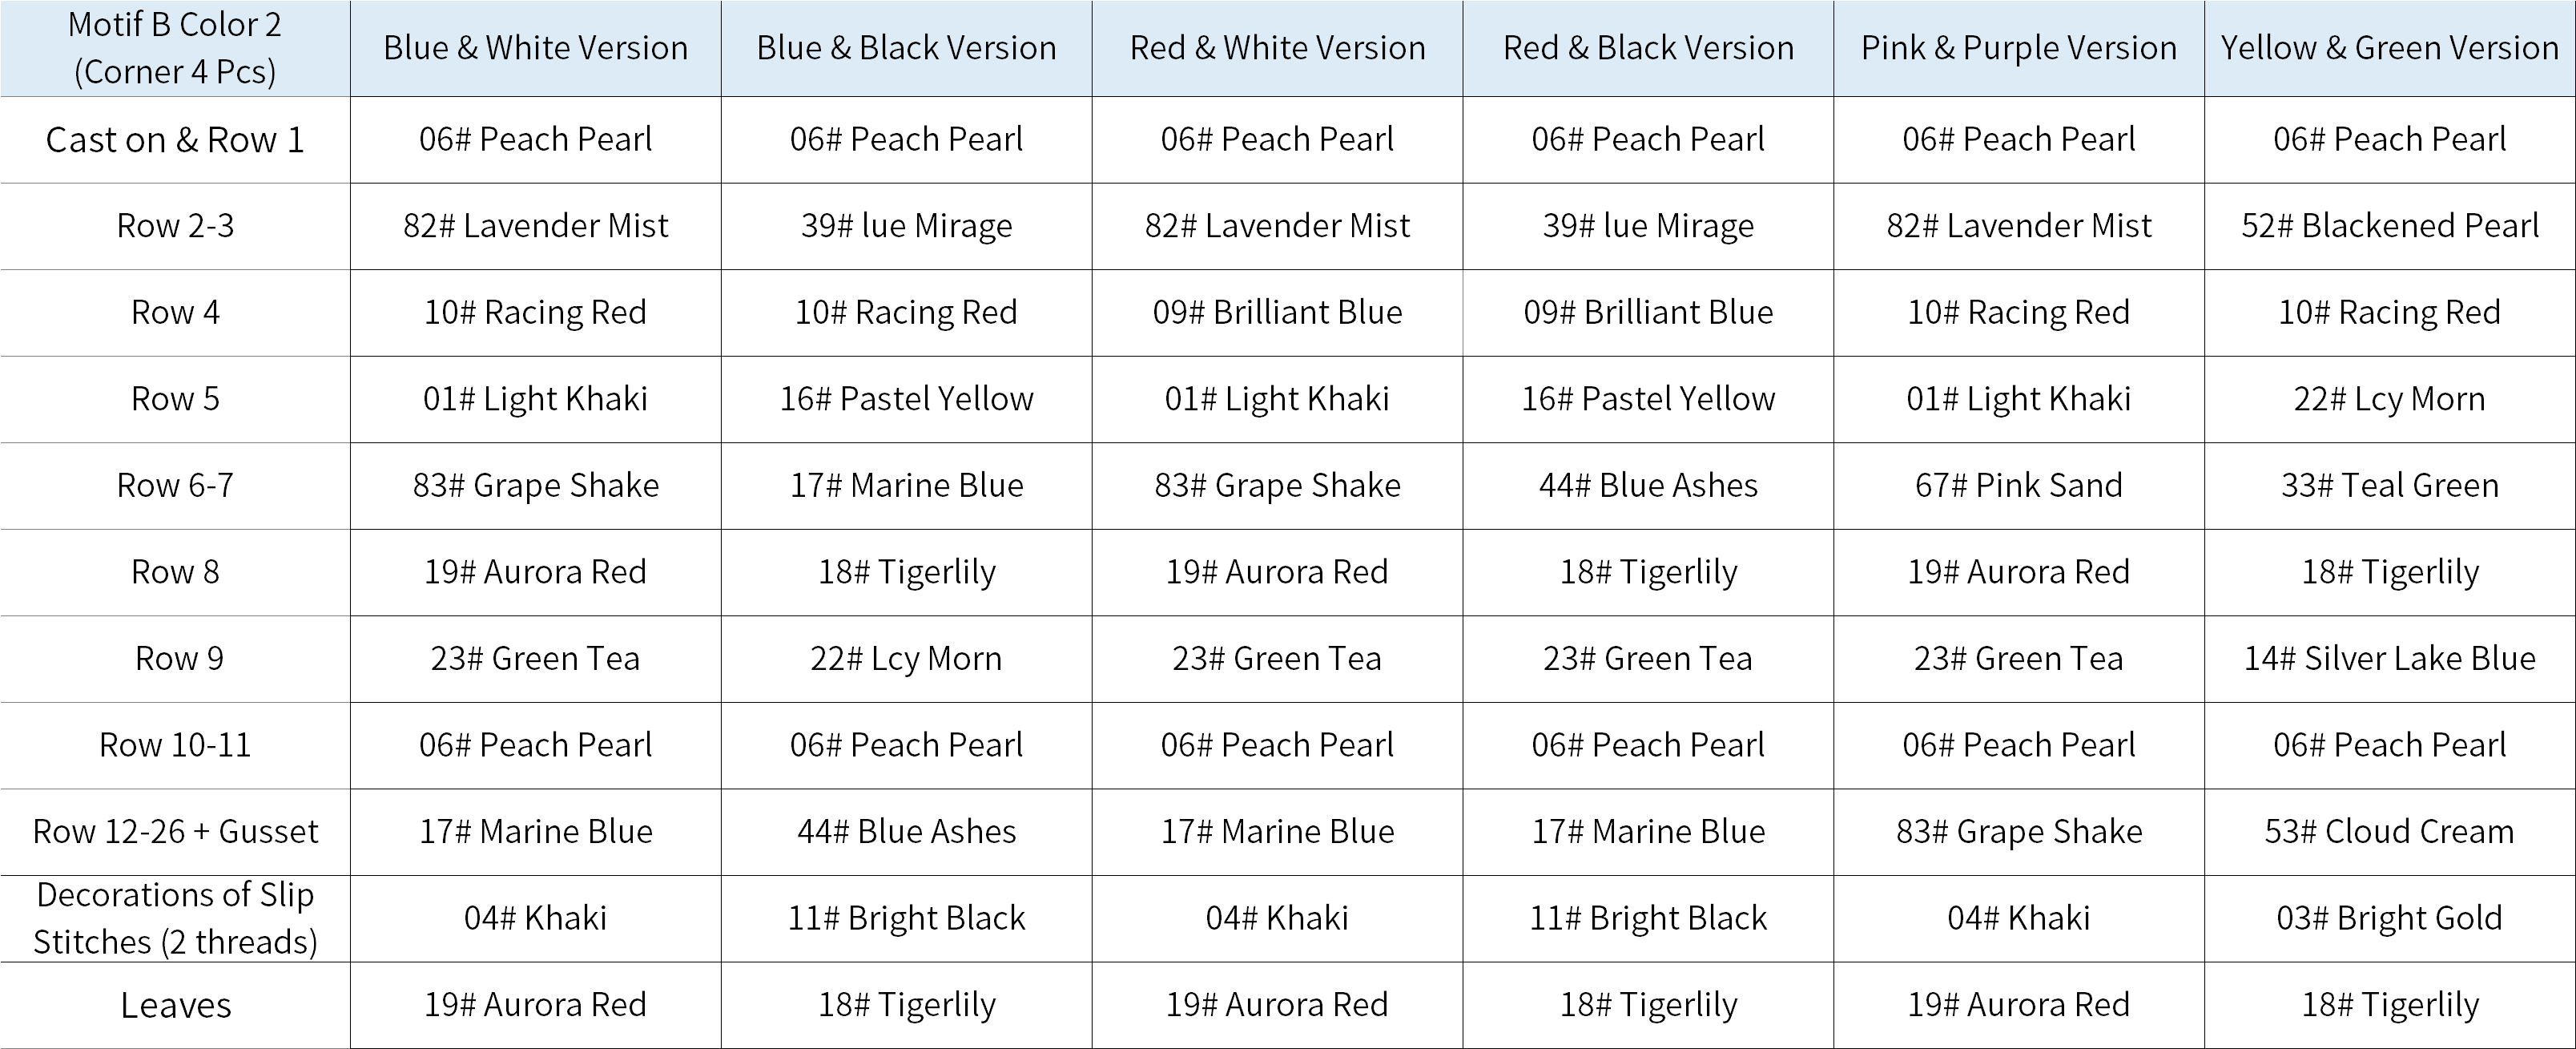
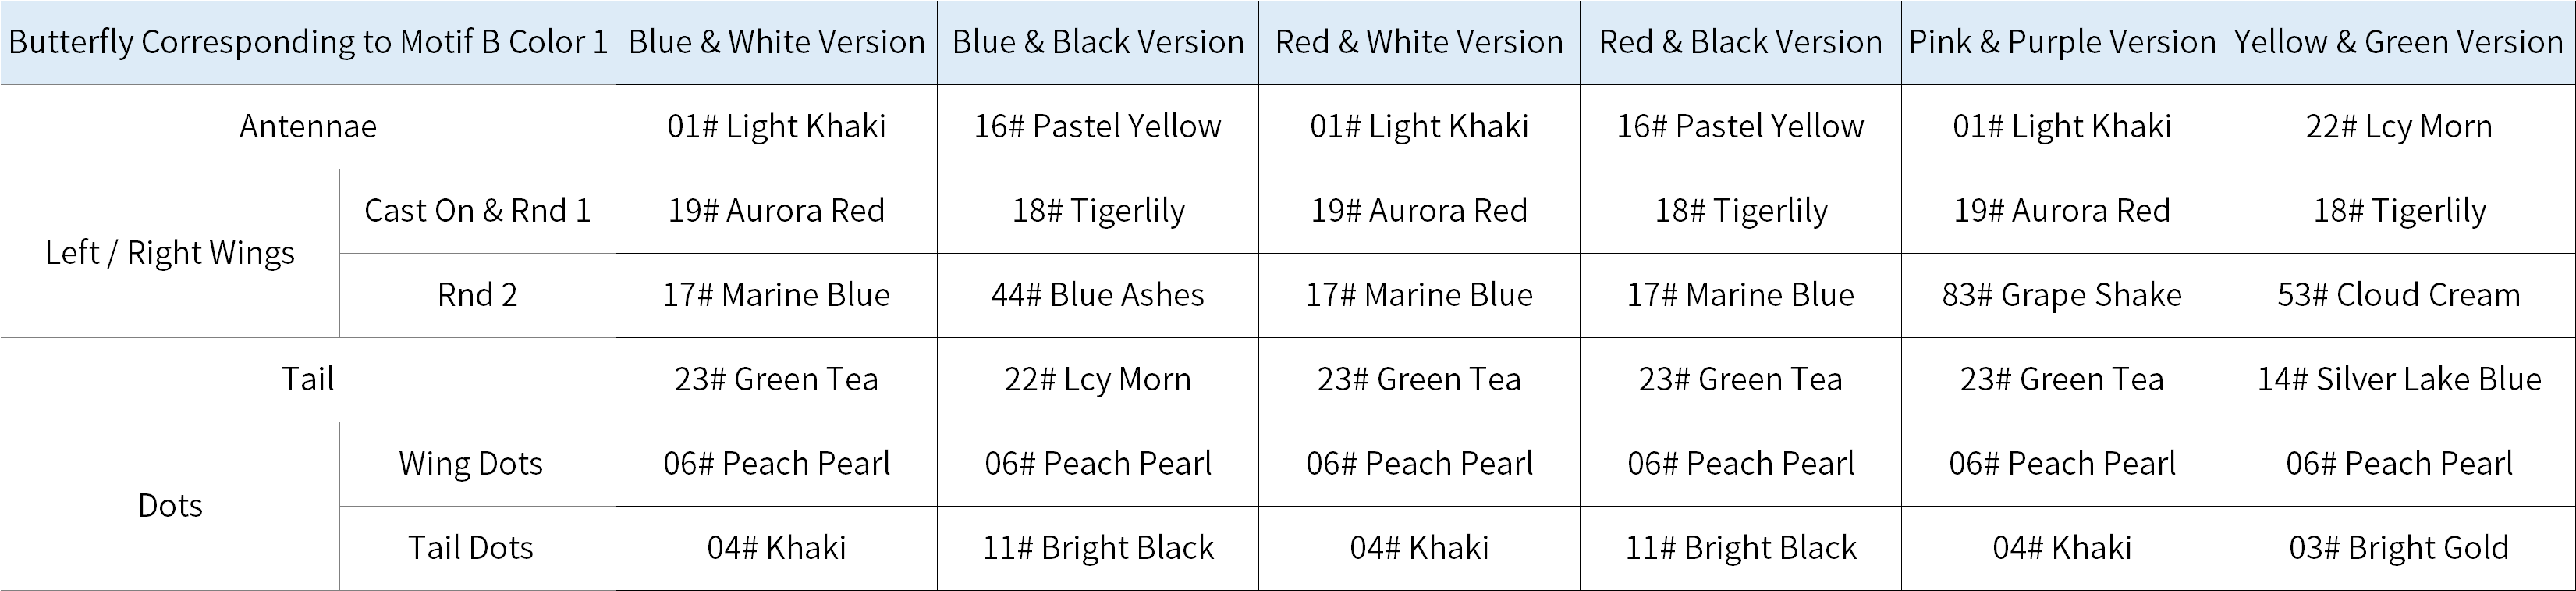
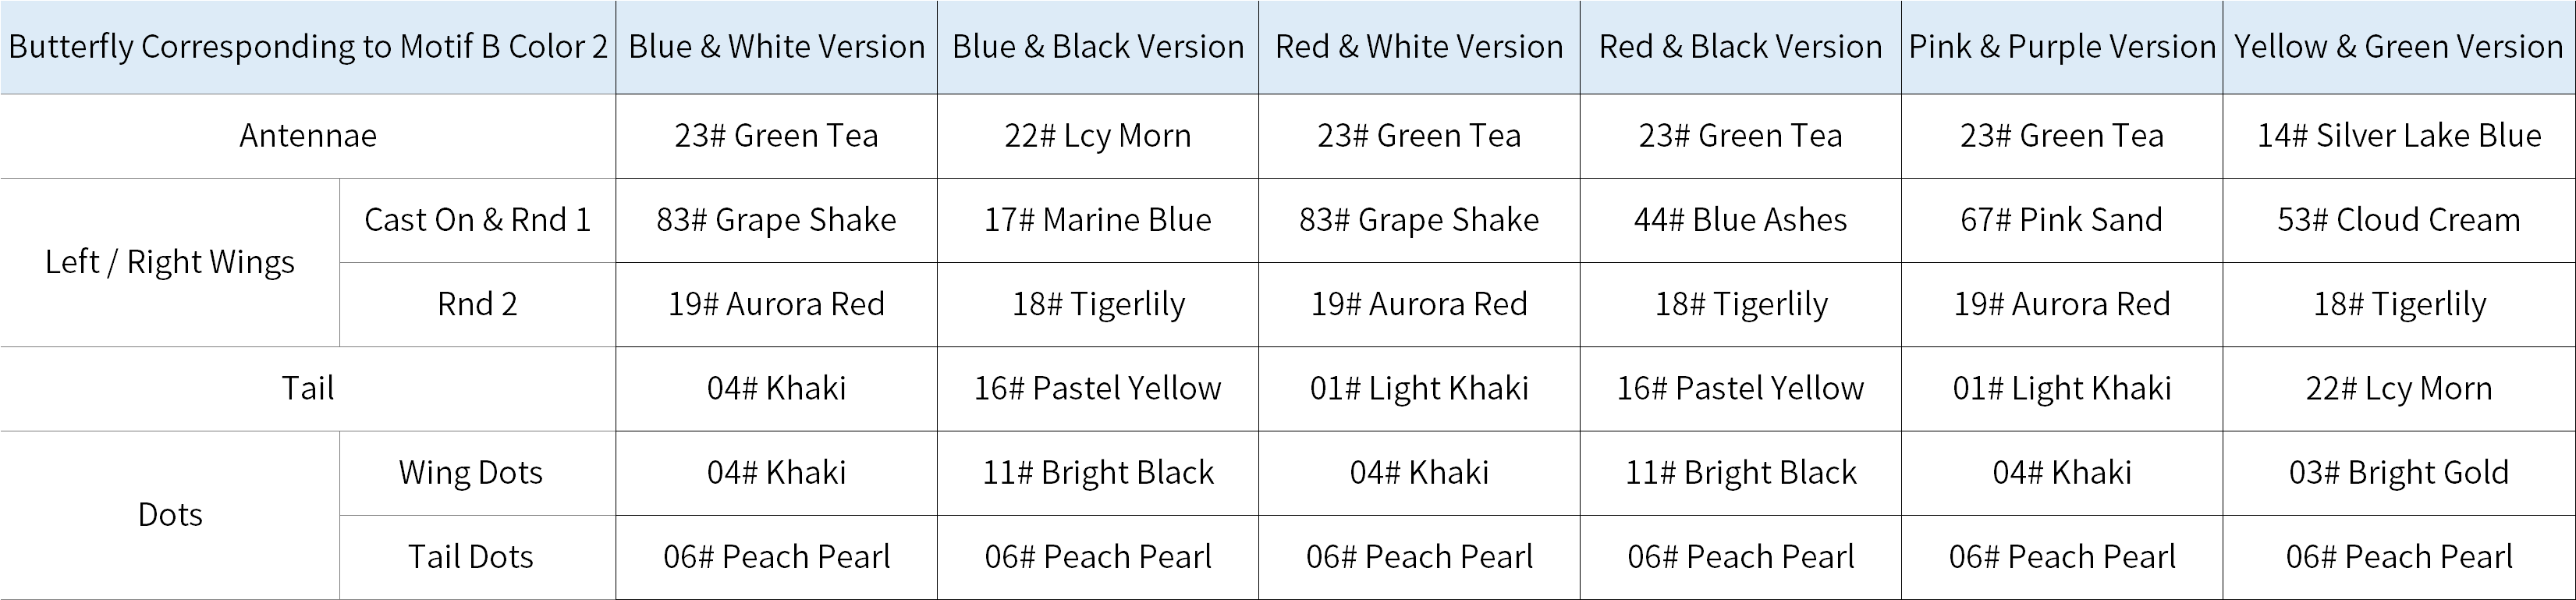
Motif B starts with a magic ring and is worked back and forth. While crocheting, you need to switch colors, then move on to work a corner triangle, and continue working back and forth. Once completed, add decorations, which include slip stitch decorations, leaves, and butterflies. Please refer to the video demonstration for more details.
Part 3 Motif CC 12' 10'' (Part 2)
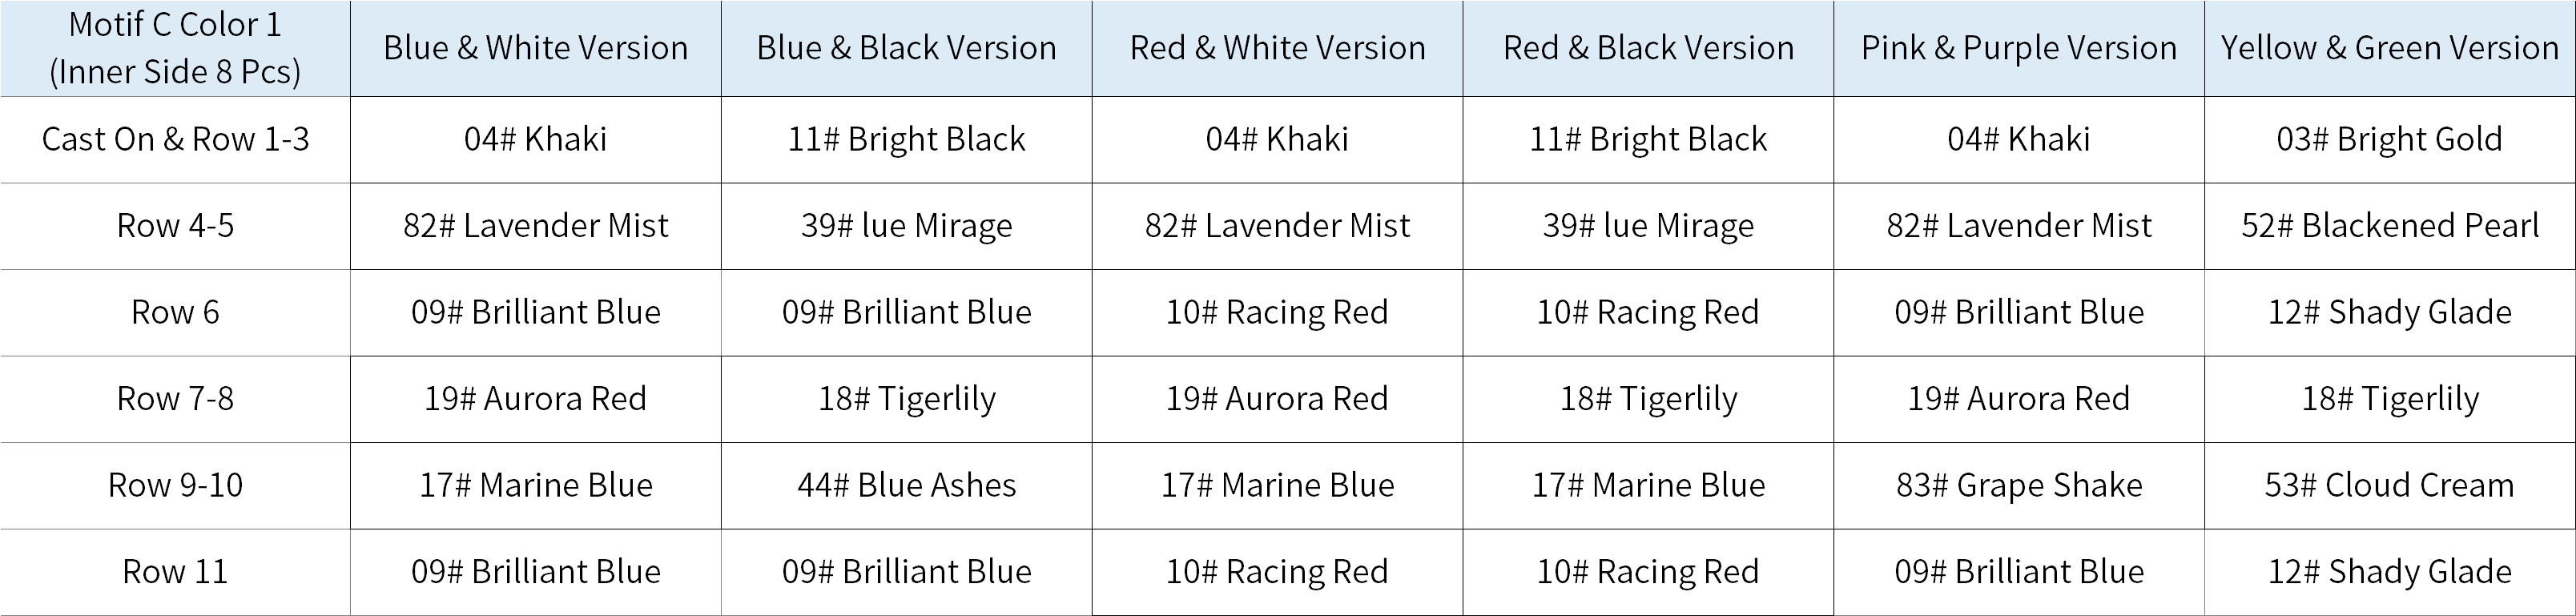
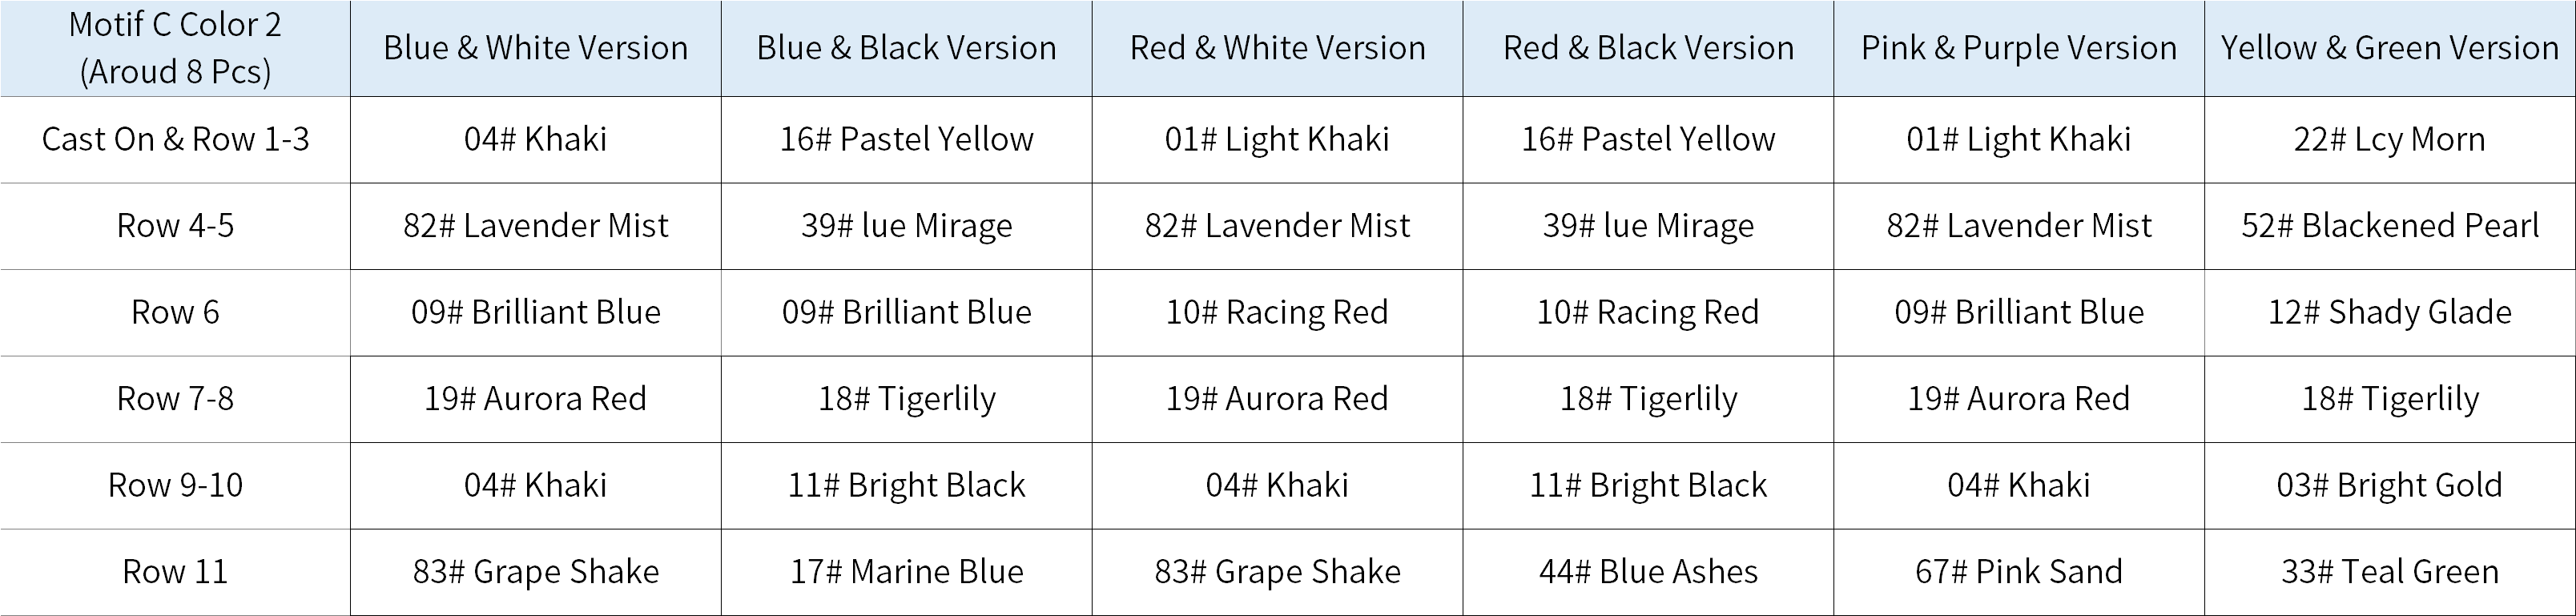
Motif C starts with a magic ring and is worked back and forth. You'll need to switch colors during the crocheting process. Please refer to the video demonstration for details.
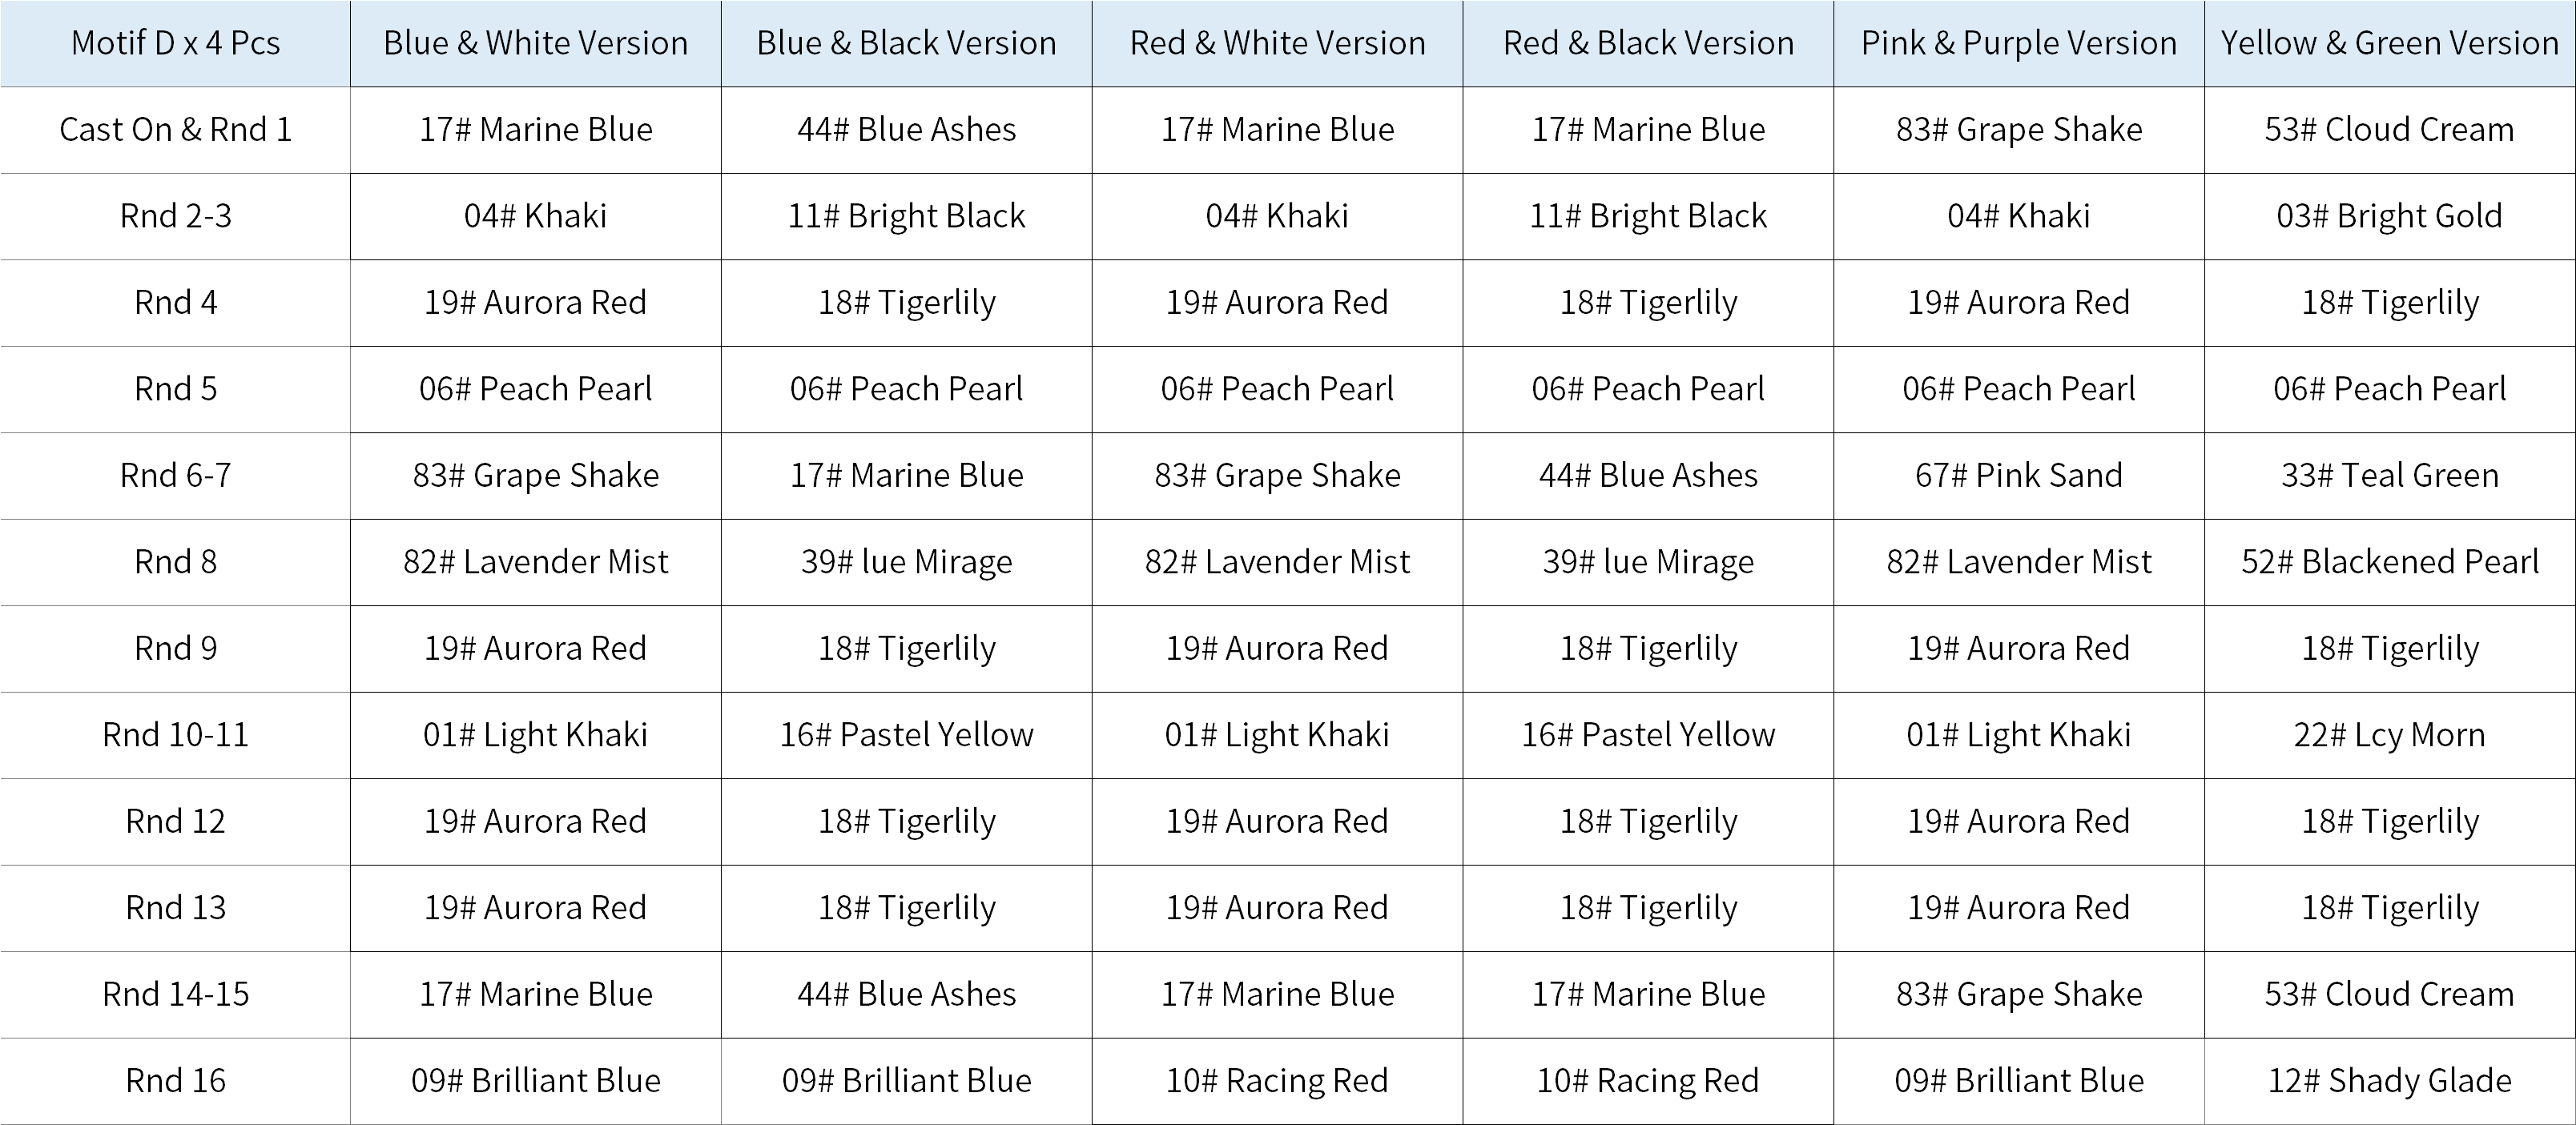
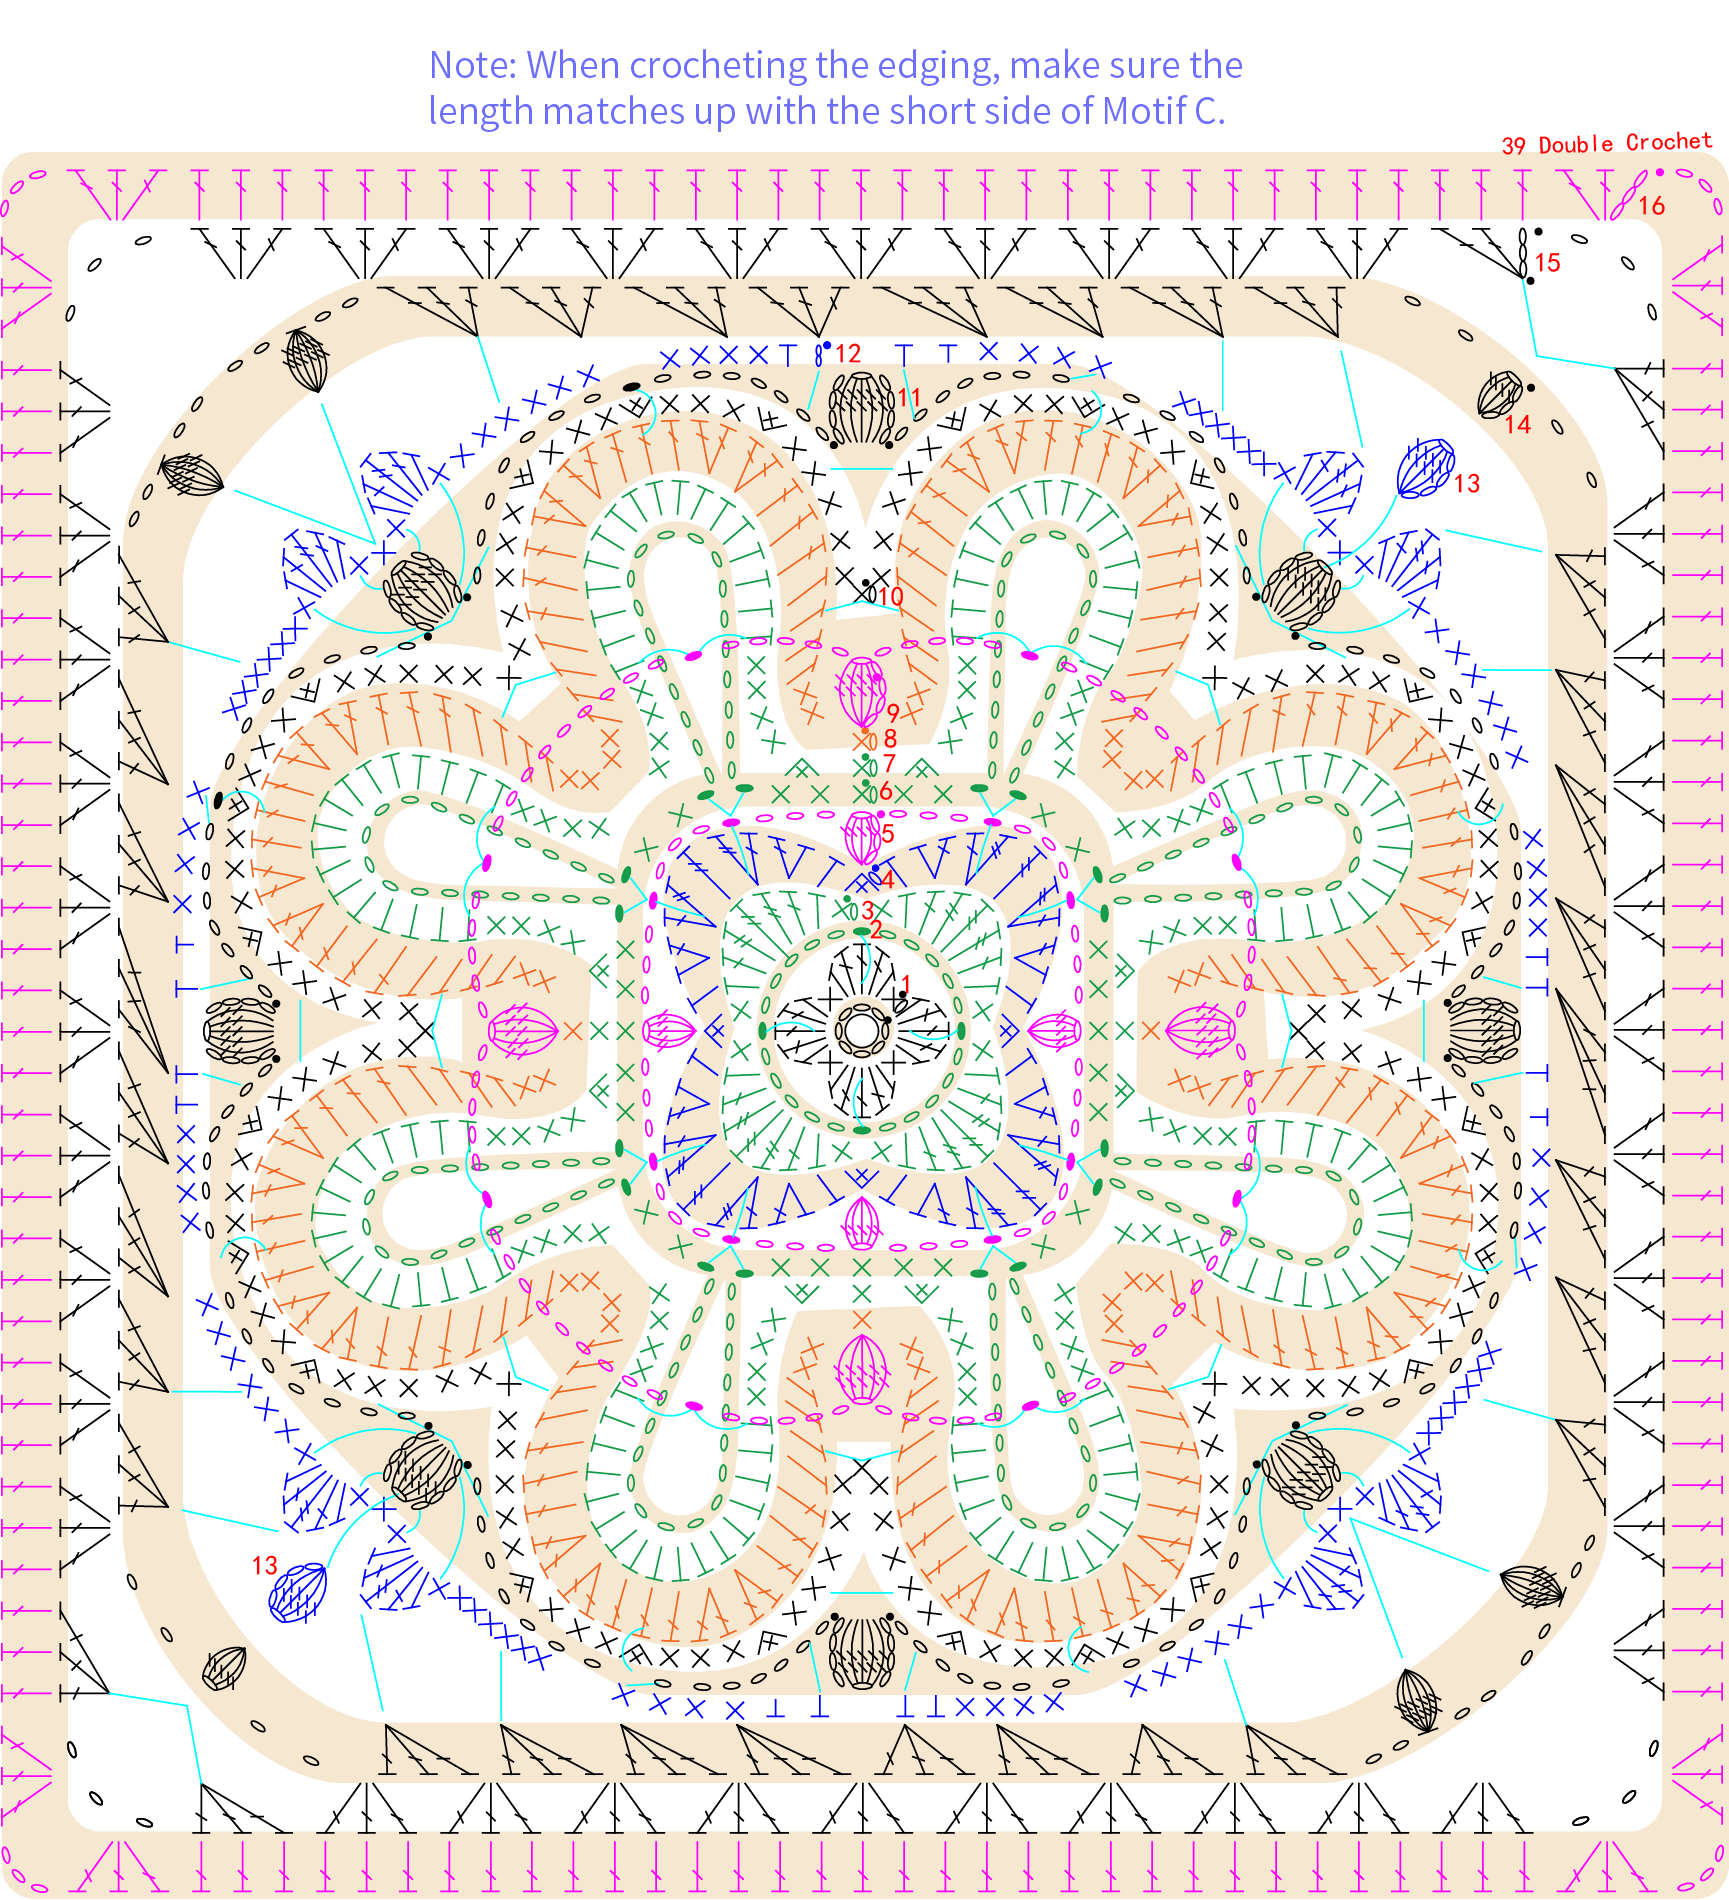
Part 4 Motif DD 13' 11'' (Part 2)
Motif D uses the chain ring method to start, and is crocheted in rounds counterclockwise. Please refer to the video demonstration for details.
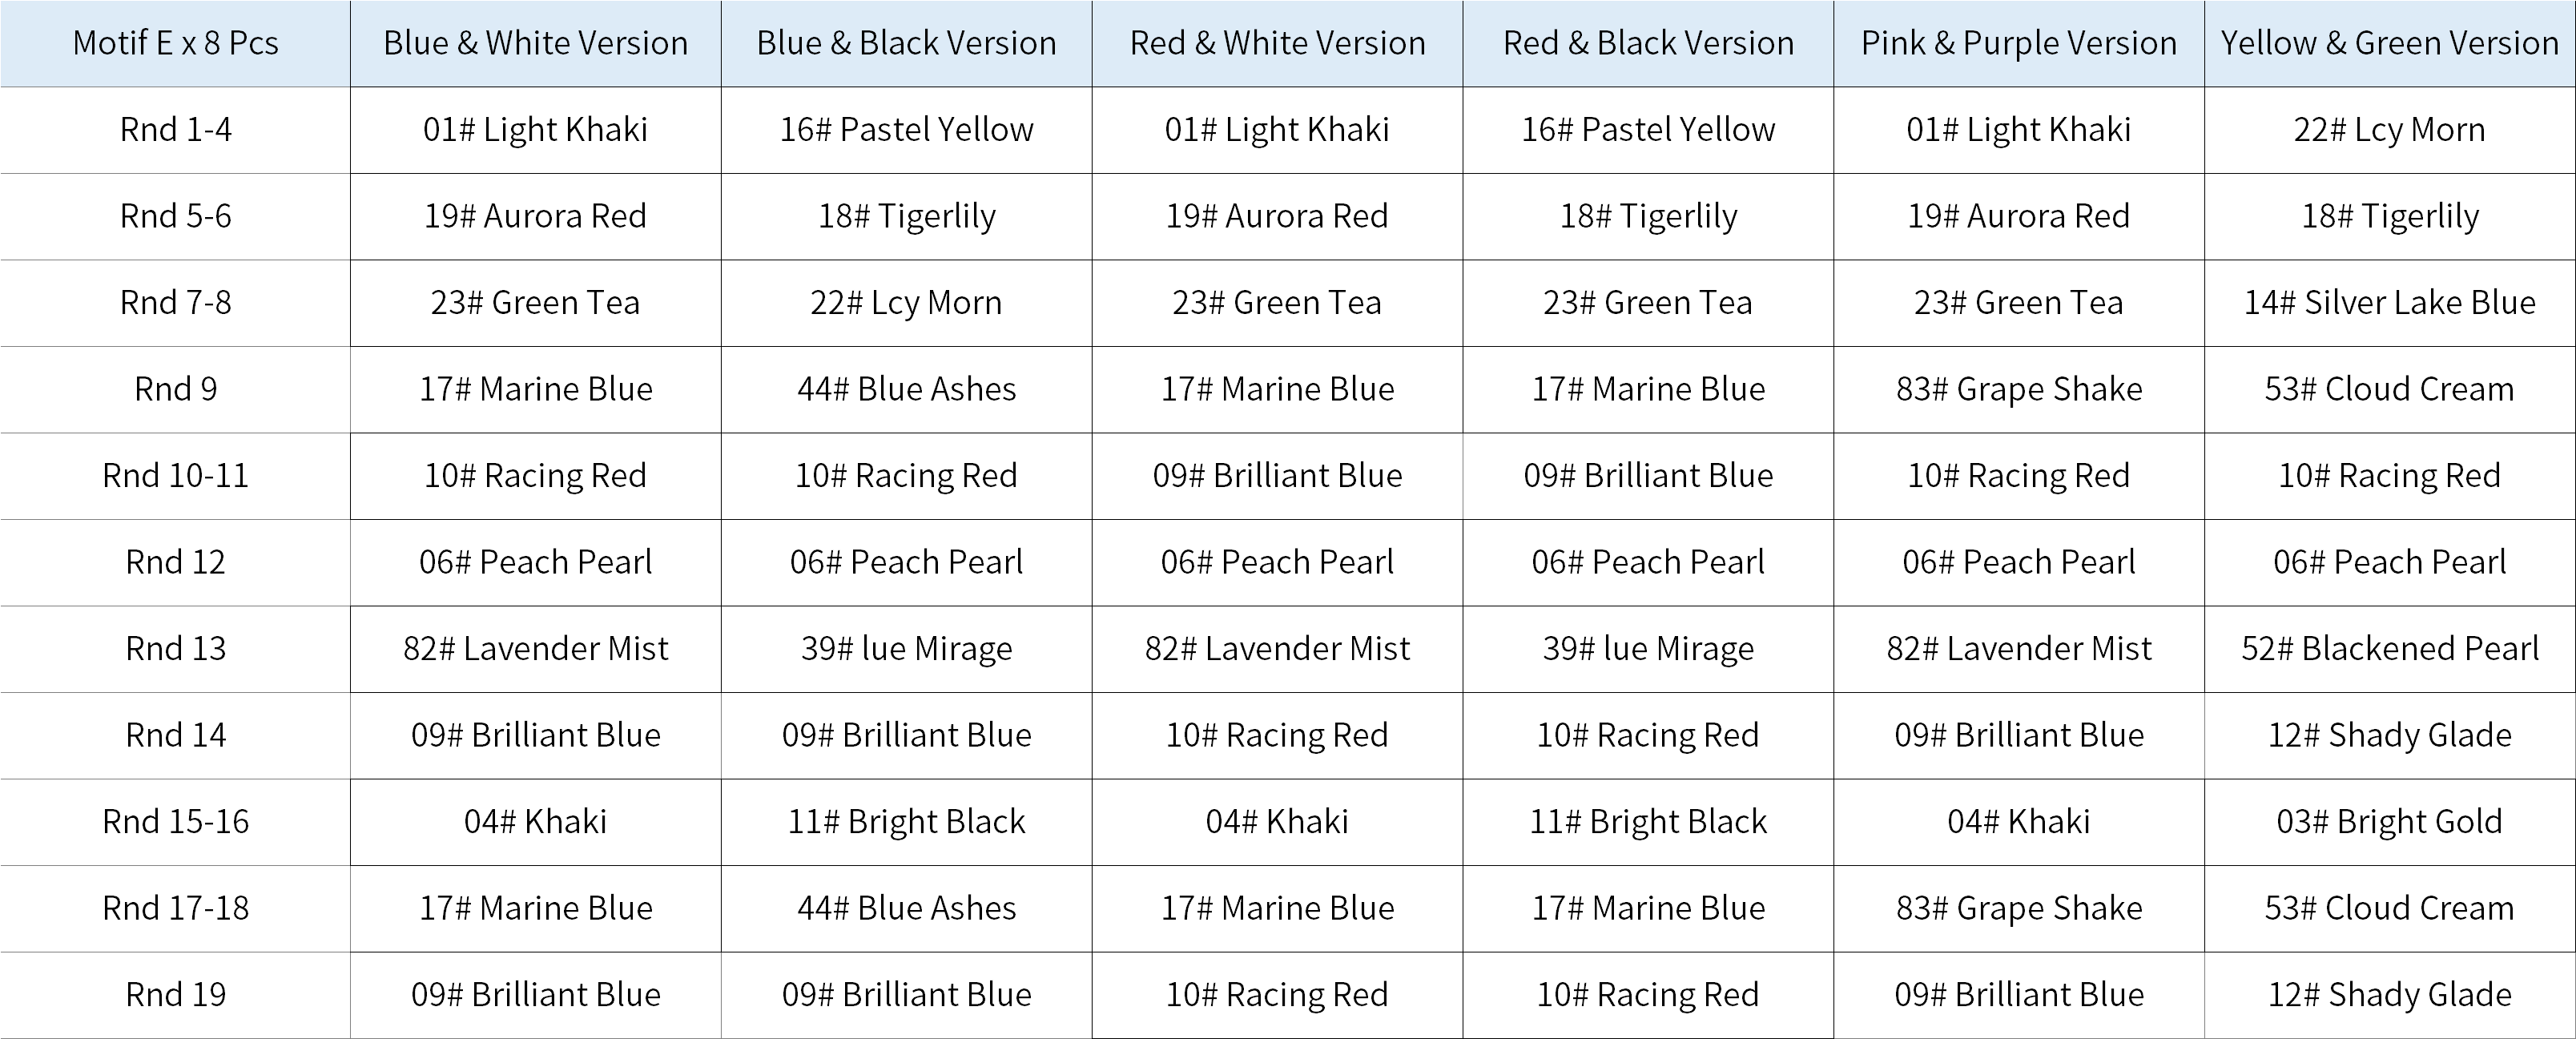
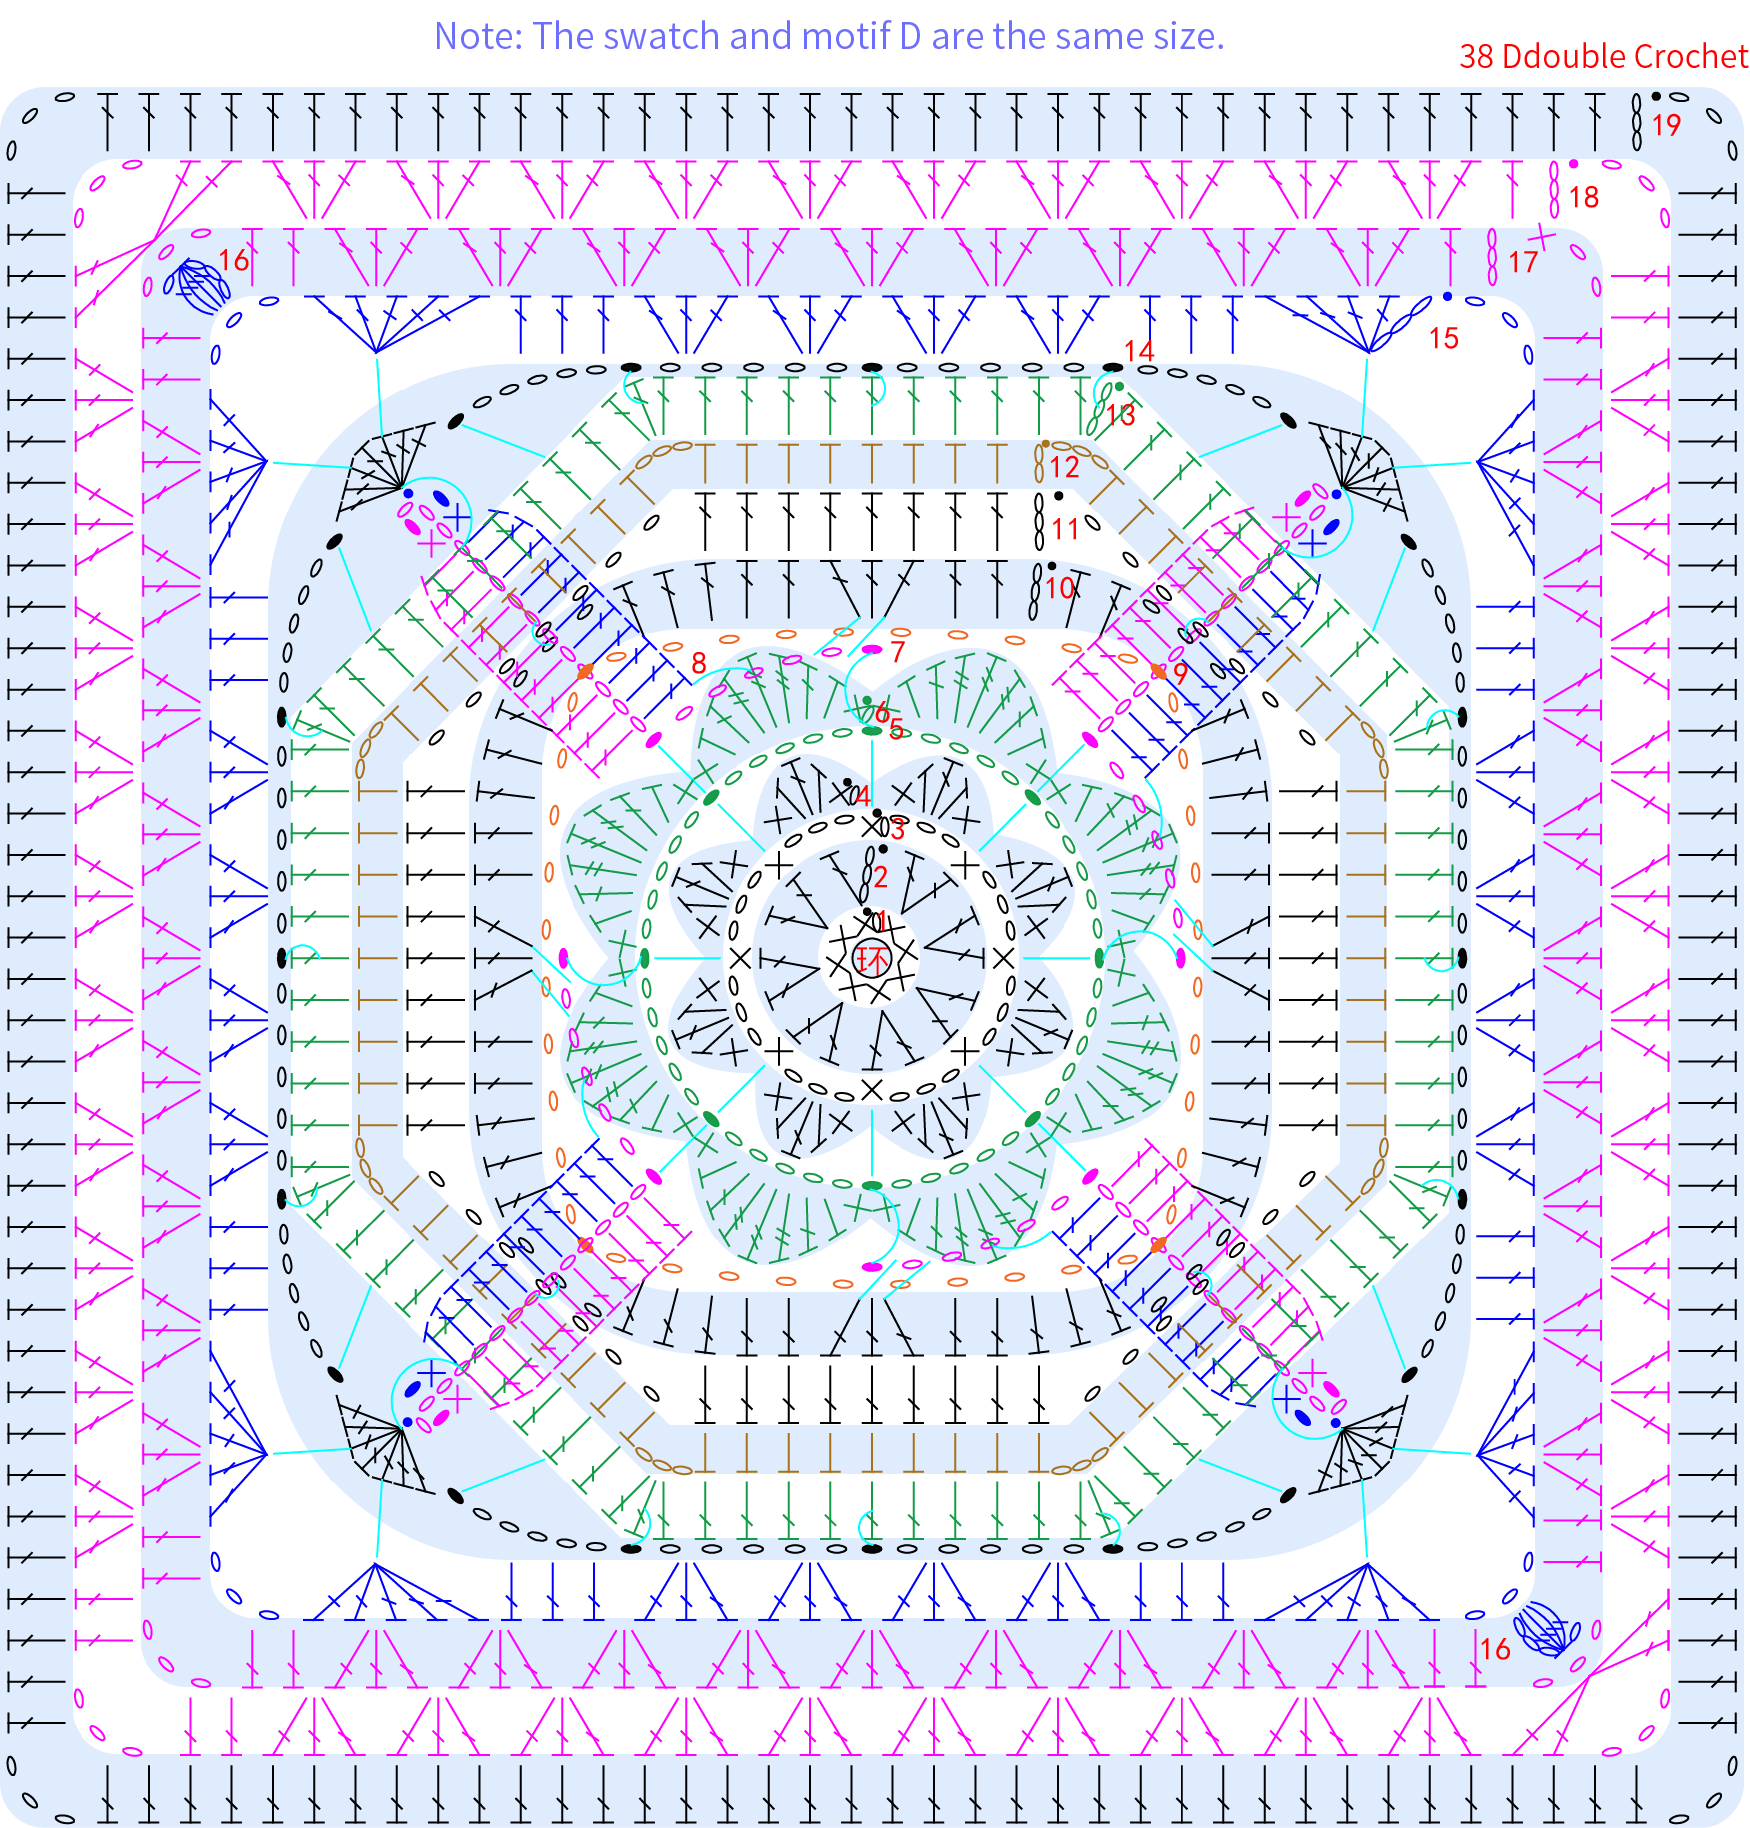
Part 5 Motif EE 30' 37'' (Part 2)
Motif E uses the magic ring method, and is crocheted in rounds counterclockwise. You need to switch colors while crocheting. Please refer to the video demonstration for details.
Part 6 Piecing F and EdgingG 64' 10'' (Part 2)
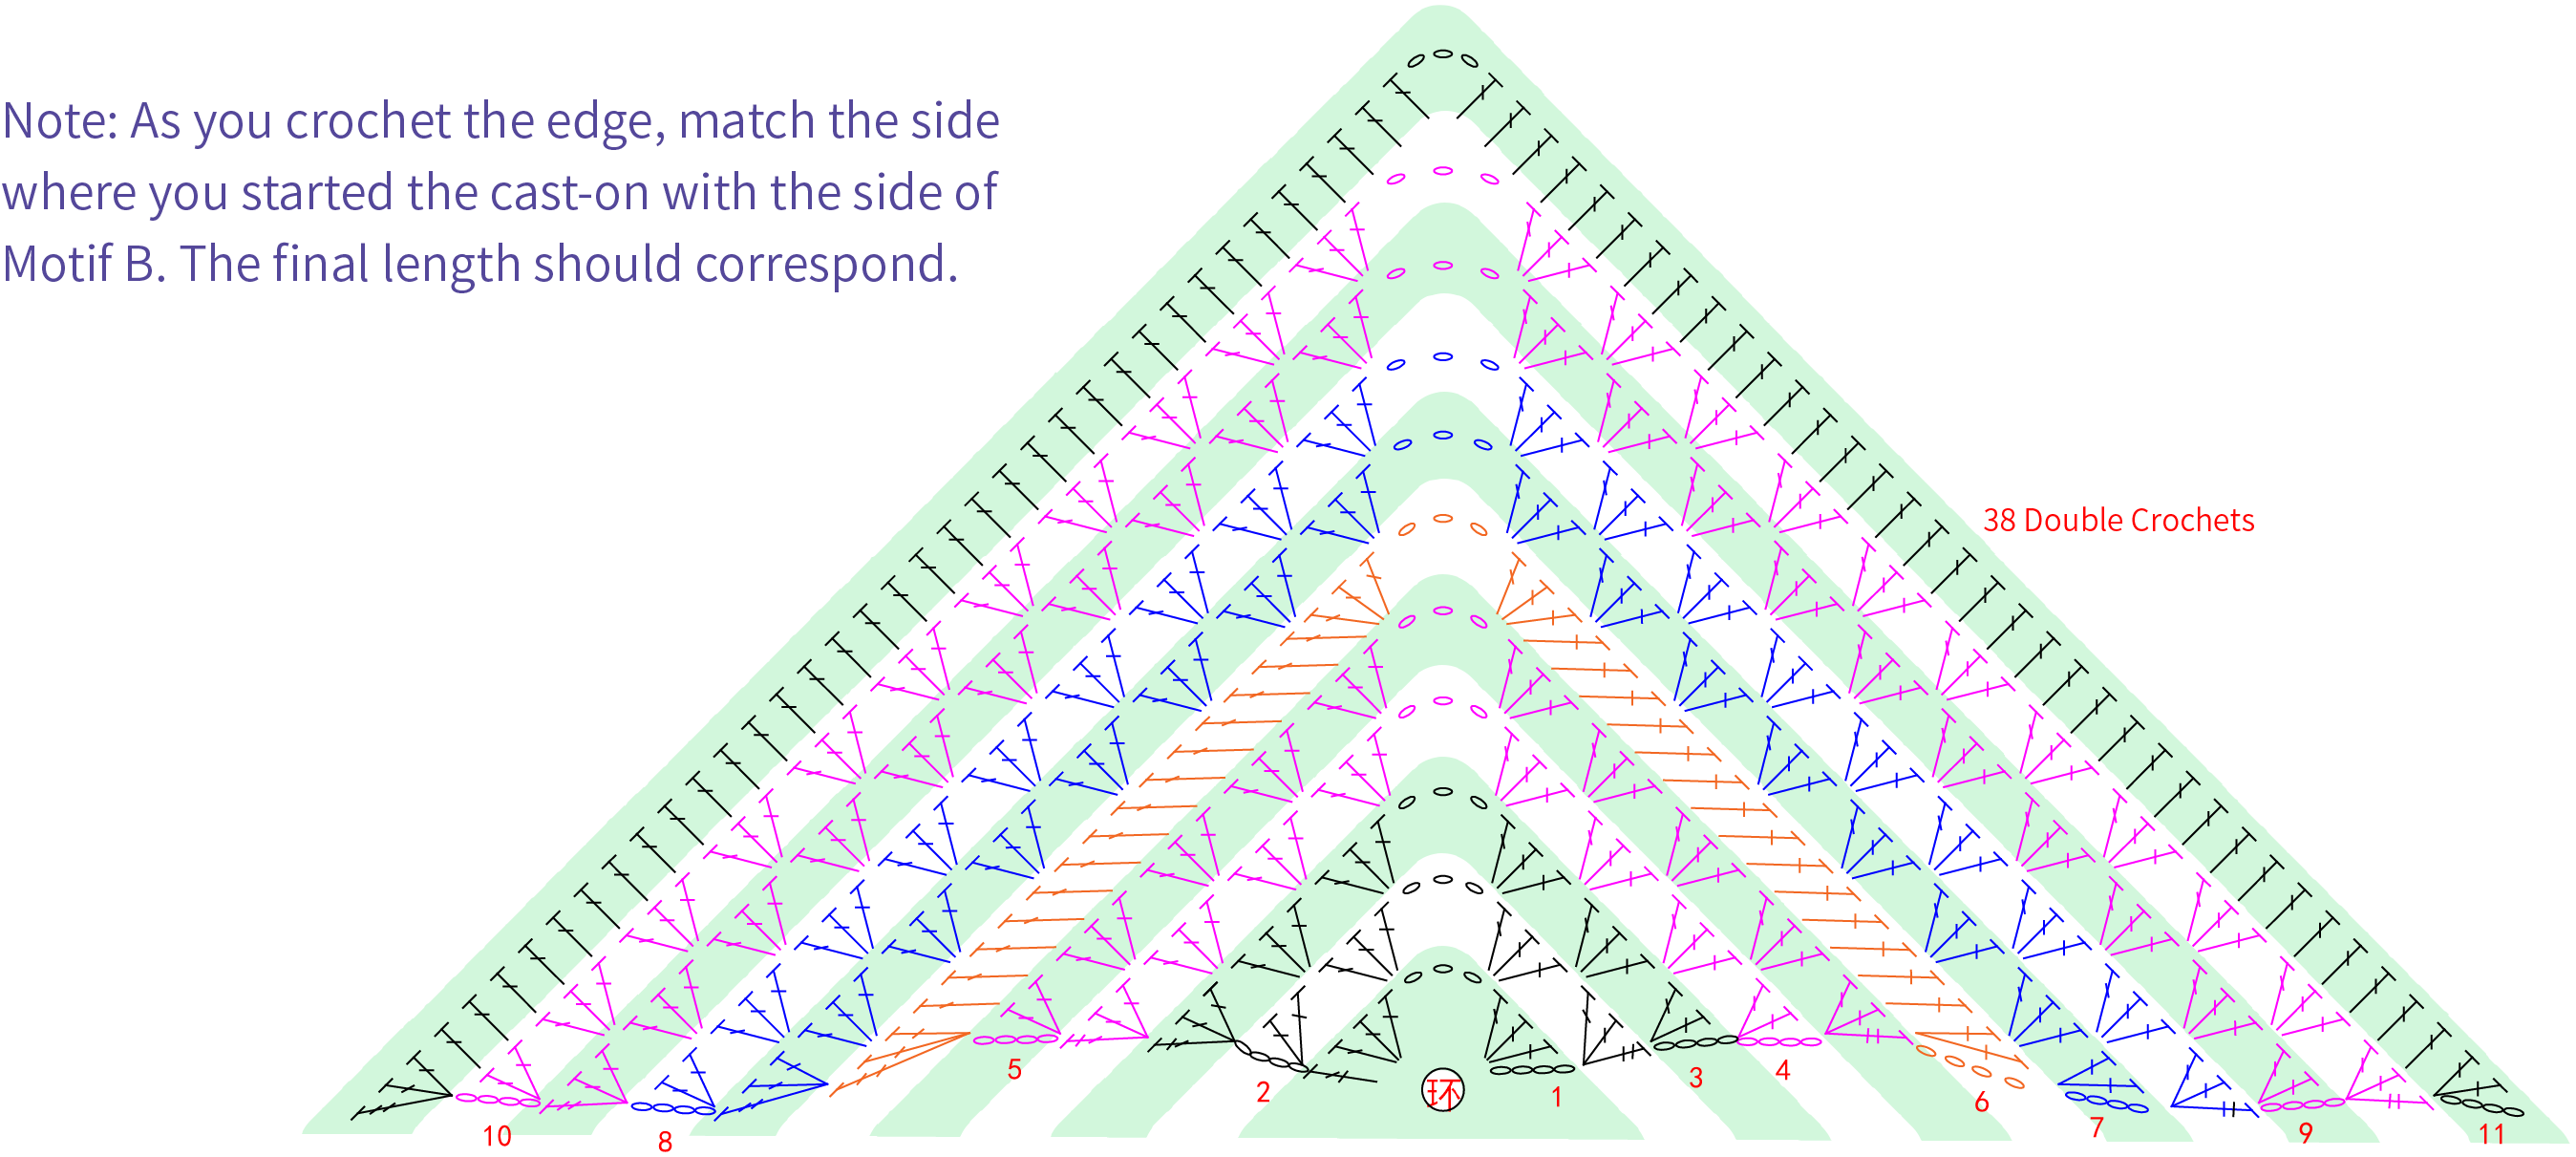
After crocheting the motifs, follow the joining diagram to attach them together. Then, crochet a lace trim around Motif A and Motif B separately. Pay attention that you need to start with a round of slip stitches around Motif B. For more details, please refer to the video demonstration.

Part 7 BorderH and ButtonsI 78' 55'' (Part 2)
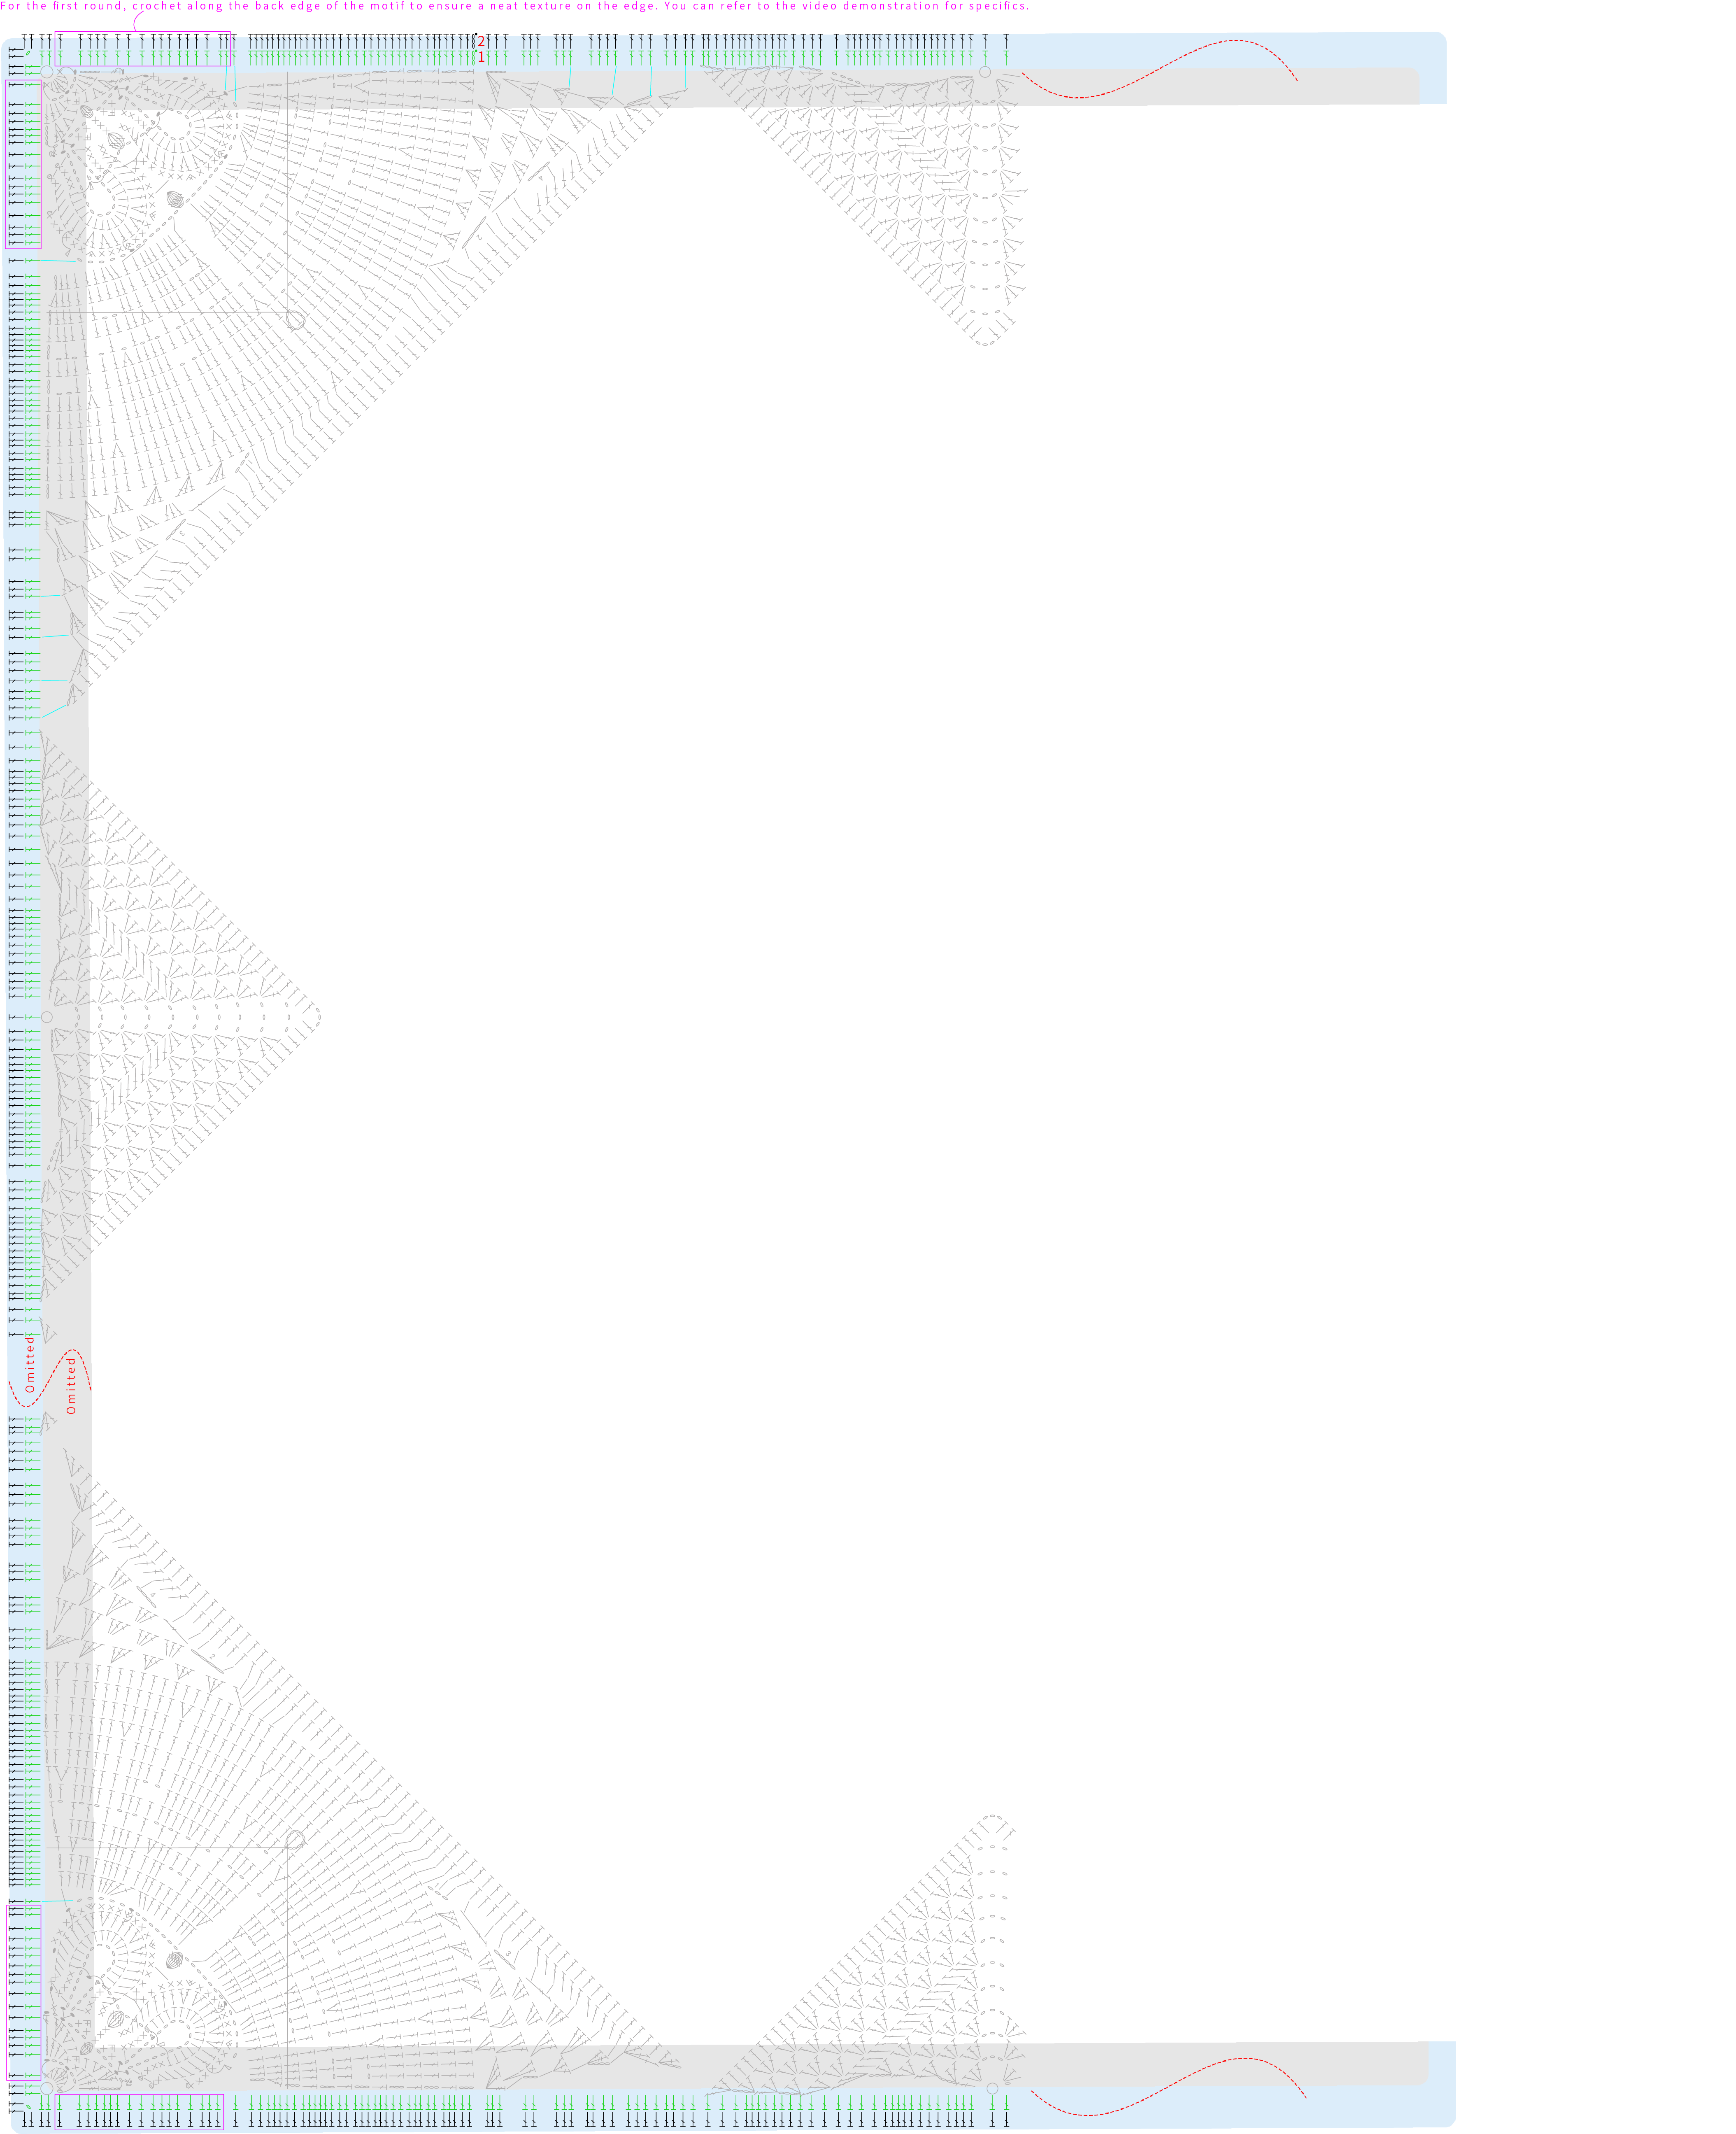
Crochet the edging counterclockwise around the connected motifs, and after completing it, secure 2 buttons on the edging of Motif B. Please refer to the video demonstration for details.
Made by the community




