Clothes
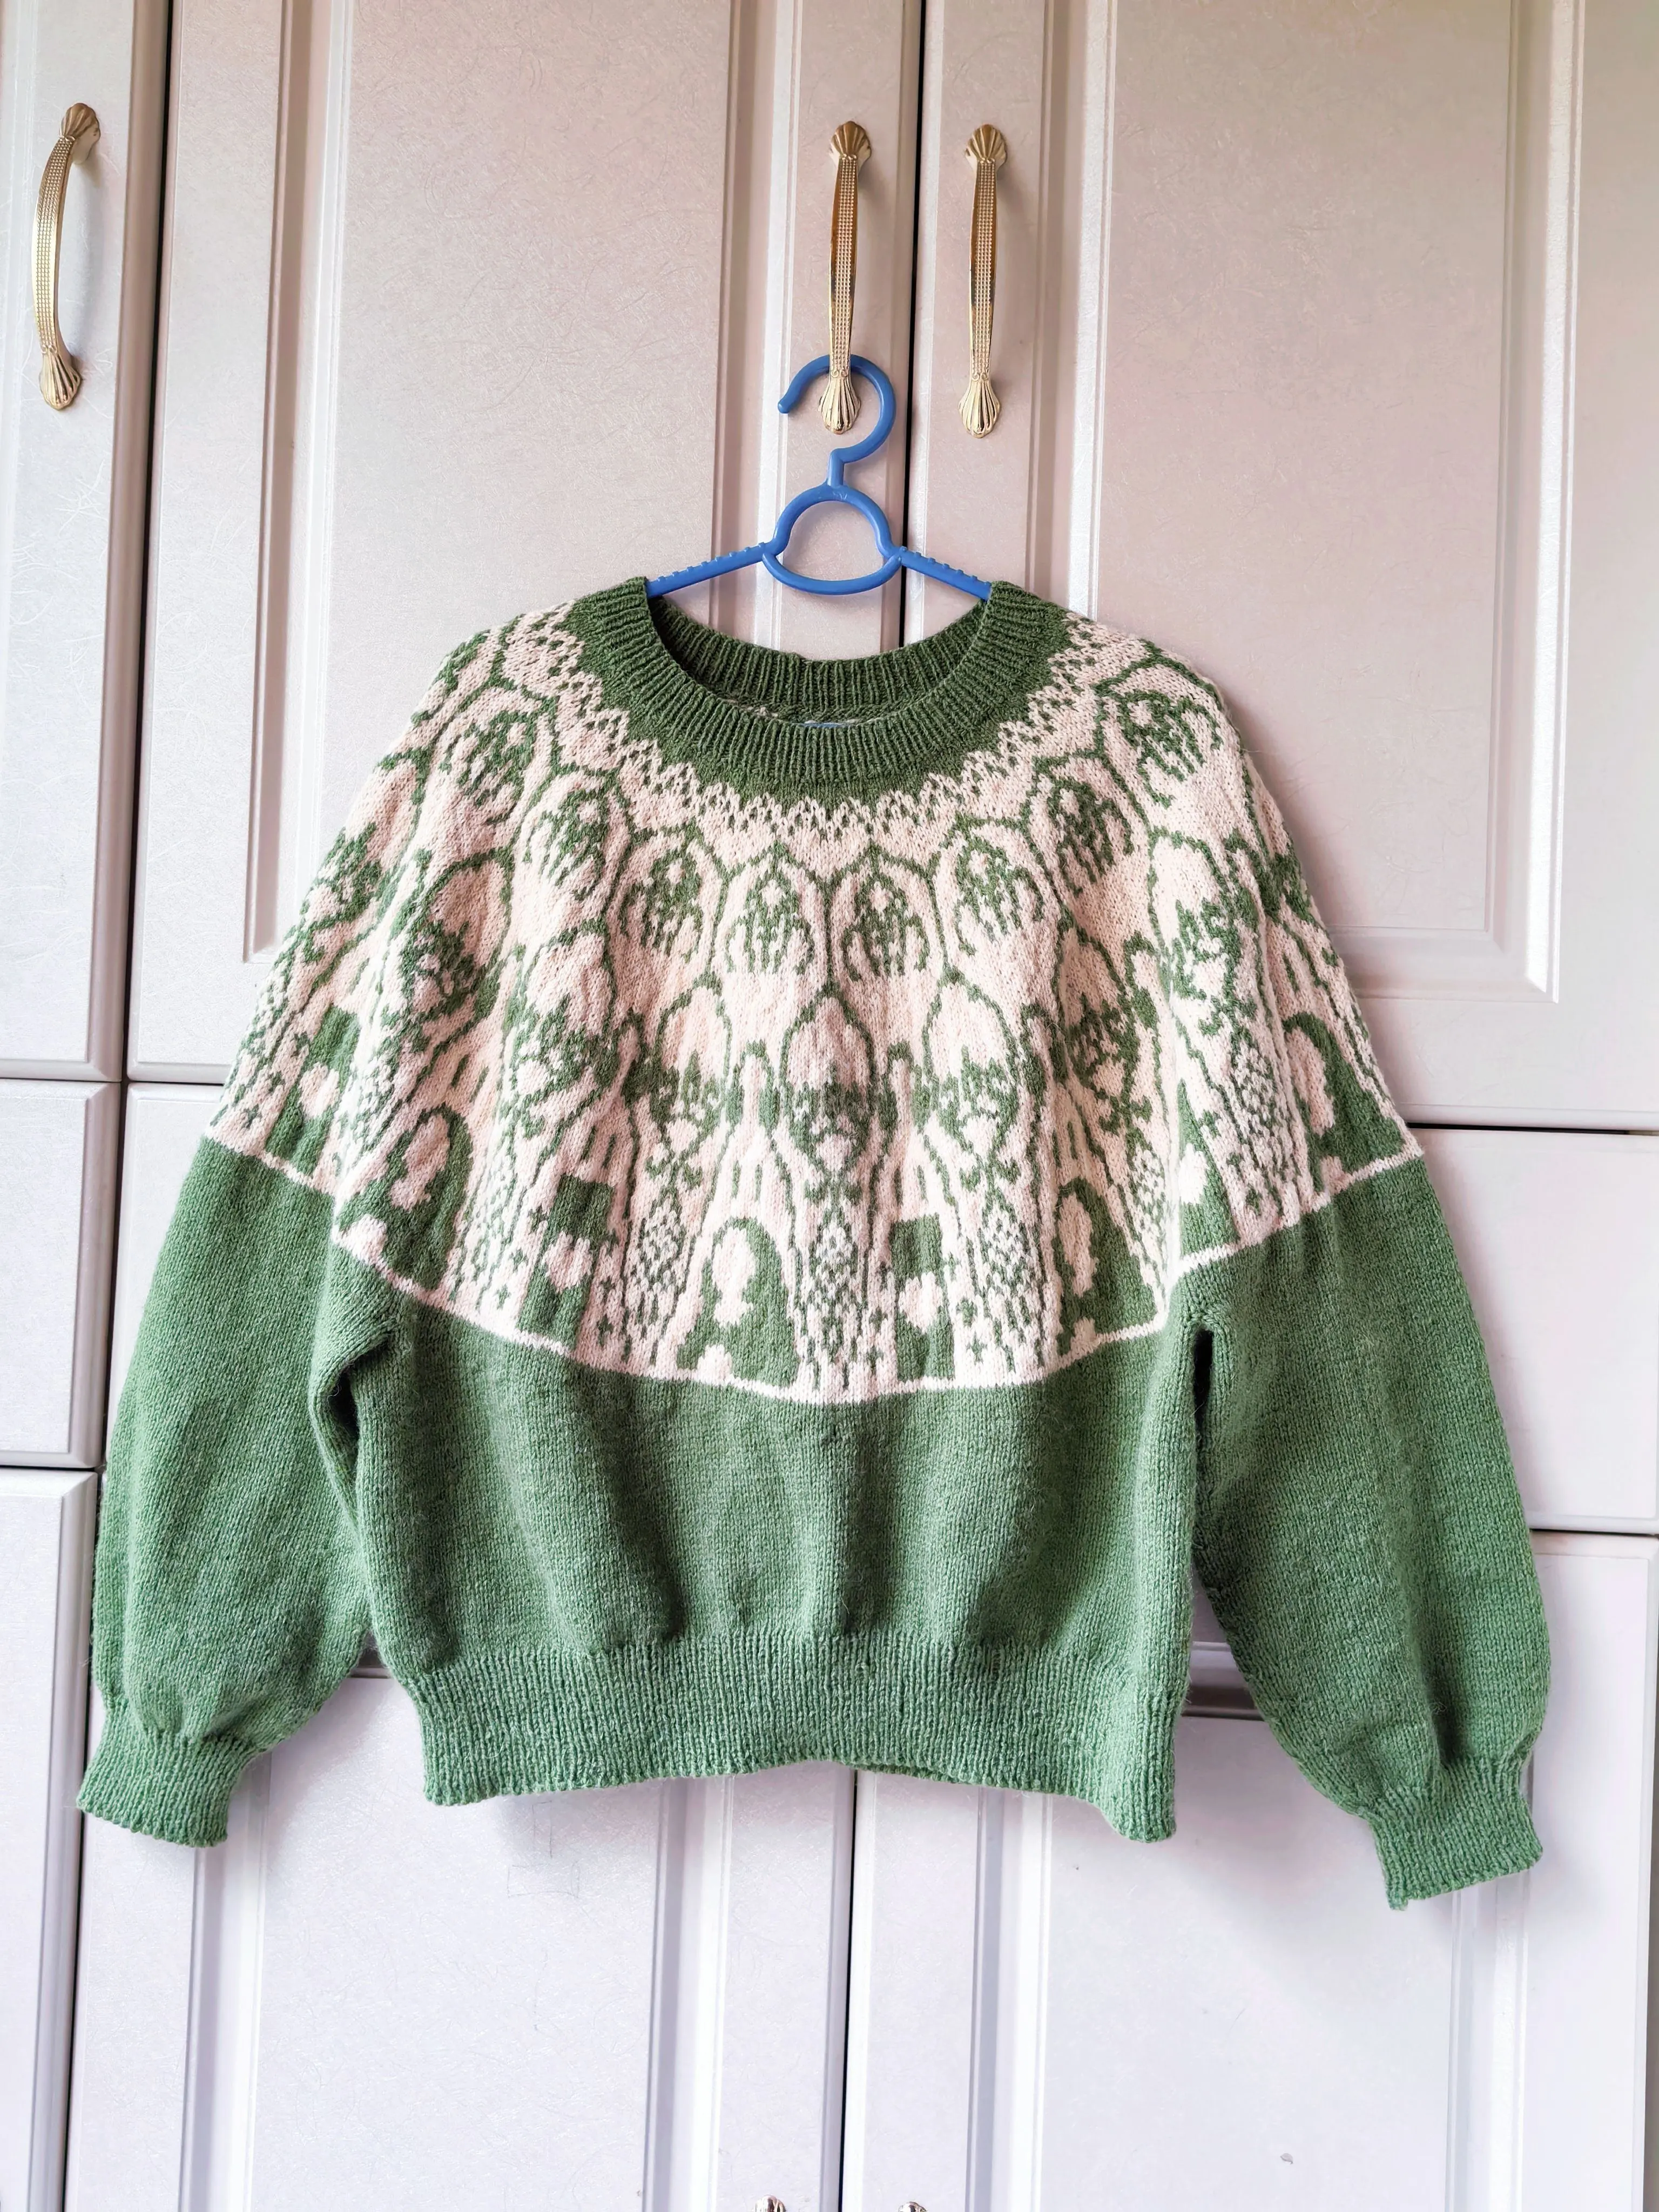
Mona Lisa Sweater
Project preview
See the finished project
Pattern format
Instructions
Watch and follow
Video tutorial
| Style | Yarn | Color |
|---|---|---|
| Stone Green Short Version | Alpaca |  03#Sheer Pink x 3 03#Sheer Pink x 3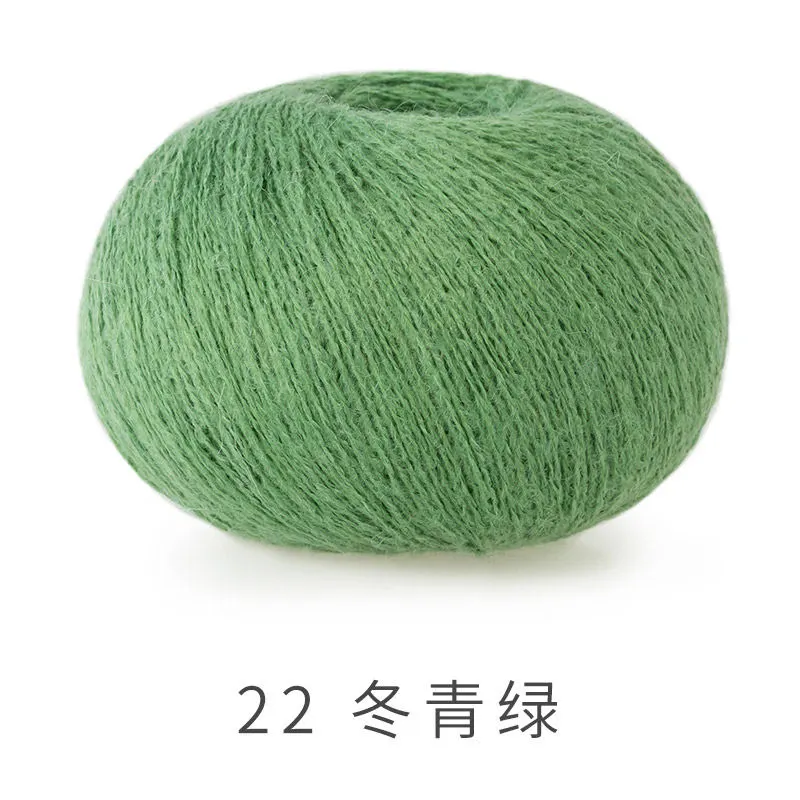 22#Stone Green x 6 22#Stone Green x 6 |
| Stone Green Short Version | Alpaca | 03#Sheer Pink x 322#Stone Green x 7 |
| Spiced Coral Short Version | Alpaca | 03#Sheer Pink x 3 11#Spiced Coral x 6 11#Spiced Coral x 6 |
| Spiced Coral Long Version | Alpaca | 03#Sheer Pink x 311#Spiced Coral x 7 |
| Glazed Ginger Short Version | Alpaca | 03#Sheer Pink x 3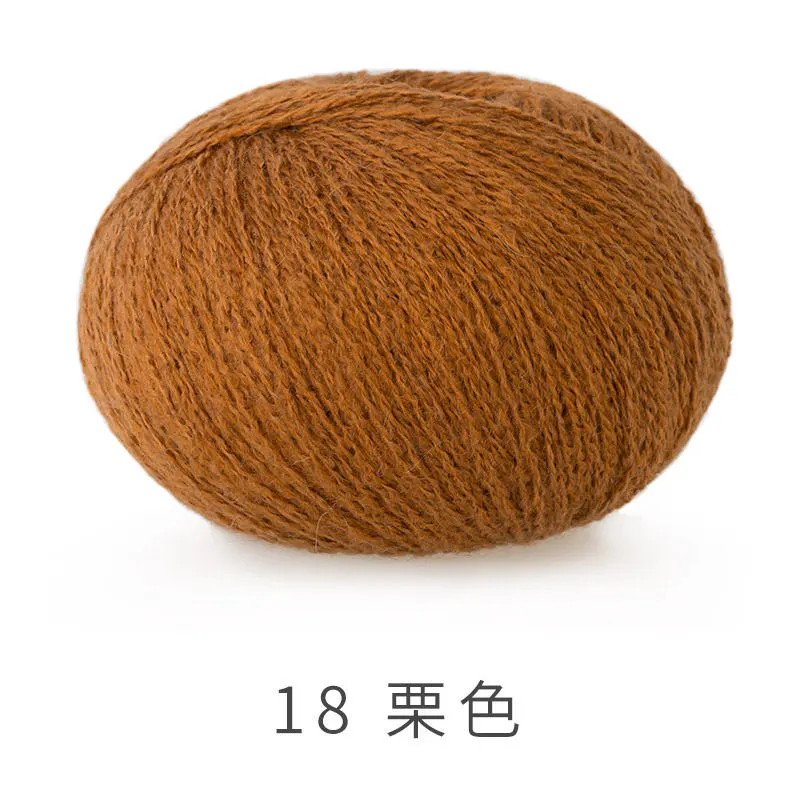 18#Glazed Ginger x 6 18#Glazed Ginger x 6 |
| Glazed Ginger Long Version | Alpaca | 03#Sheer Pink x 318#Glazed Ginger x 7 |
| Azure Blue Short Version | Alpaca | 03#Sheer Pink x 3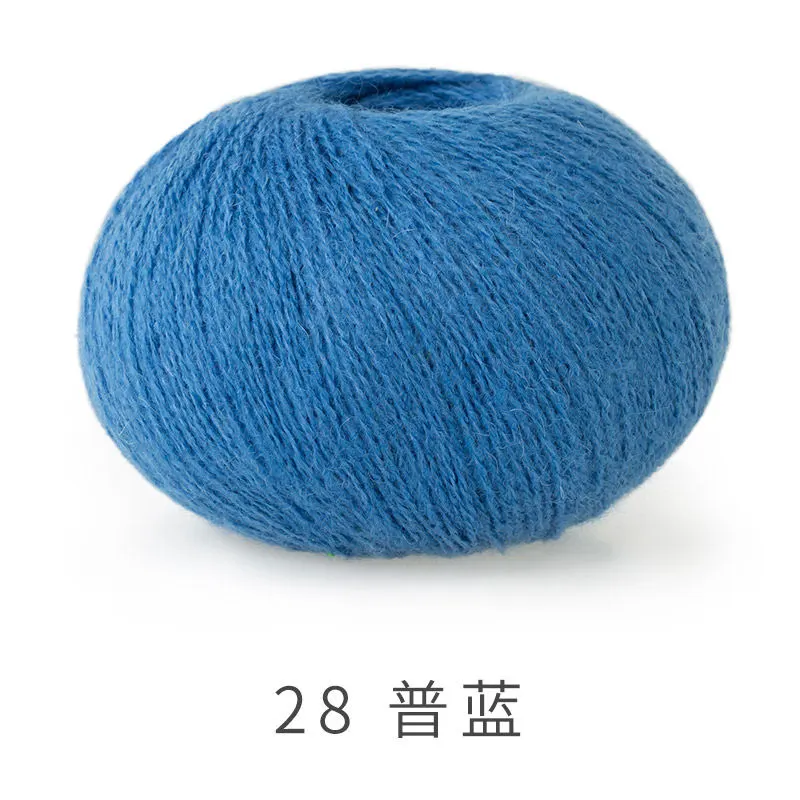 28#Azure Blue x 6 28#Azure Blue x 6 |
| Azure Blue Long Version | Alpaca | 03#Sheer Pink x 328#Azure Blue x 7 |
| Colorful Embroidery Yarn Pack | Alpaca |  06#Crystal Pink x 1 06#Crystal Pink x 1 15#Samoan Sun x 1 15#Samoan Sun x 1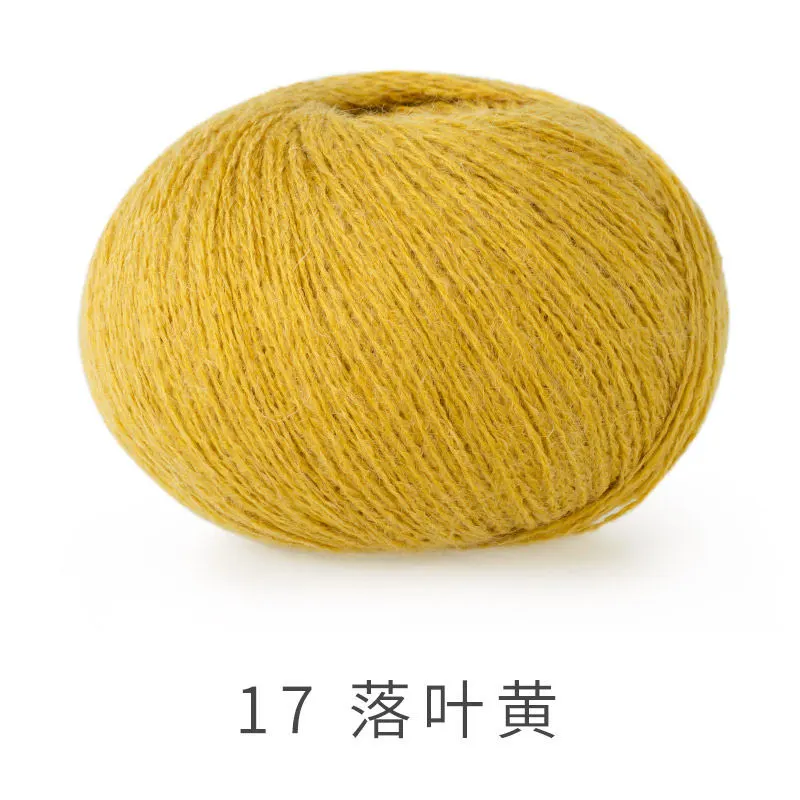 17#Tawny Olive x 1 17#Tawny Olive x 1 |
| Sheep Curly |  08#Vermillion Orange x 1 08#Vermillion Orange x 1 10#Mocha Brown x 1 10#Mocha Brown x 1 |
Stone Green Short Version
Stone Green Short Version
Spiced Coral Short Version
Spiced Coral Long Version
Glazed Ginger Short Version
Glazed Ginger Long Version
Azure Blue Short Version
Azure Blue Long Version
Colorful Embroidery Yarn Pack
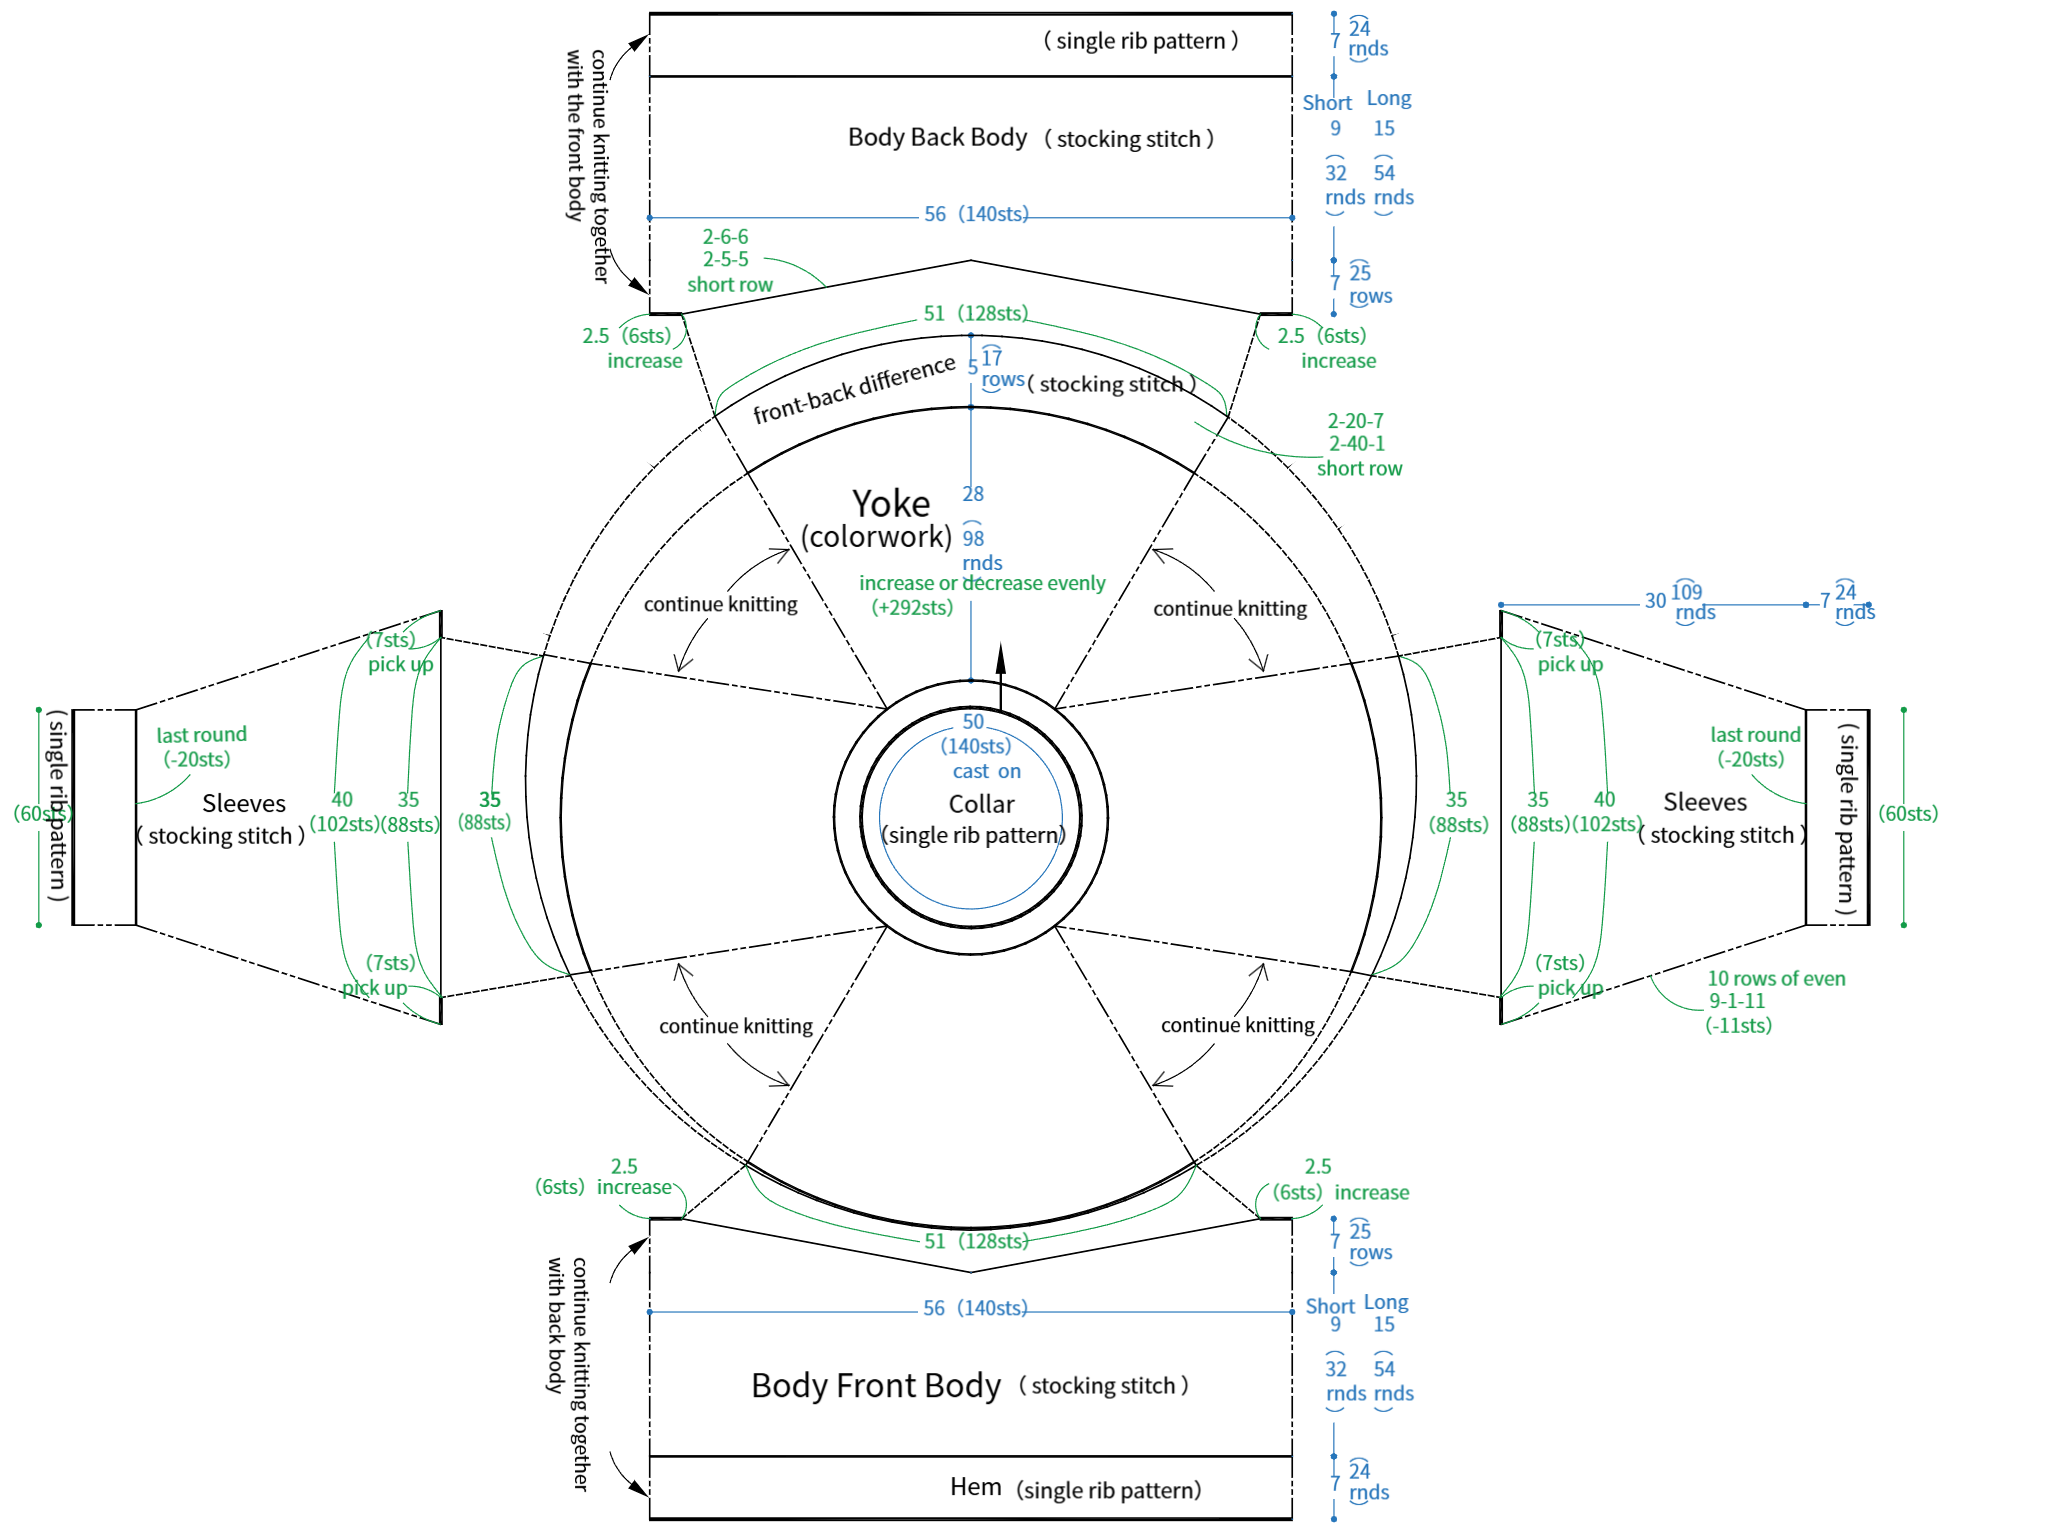
08#Vermillion Orange x 110#Mocha Brown x 1This sweater is divided into the collar, yoke, front-back difference, body, hem, sleeves, and embroidery sections.
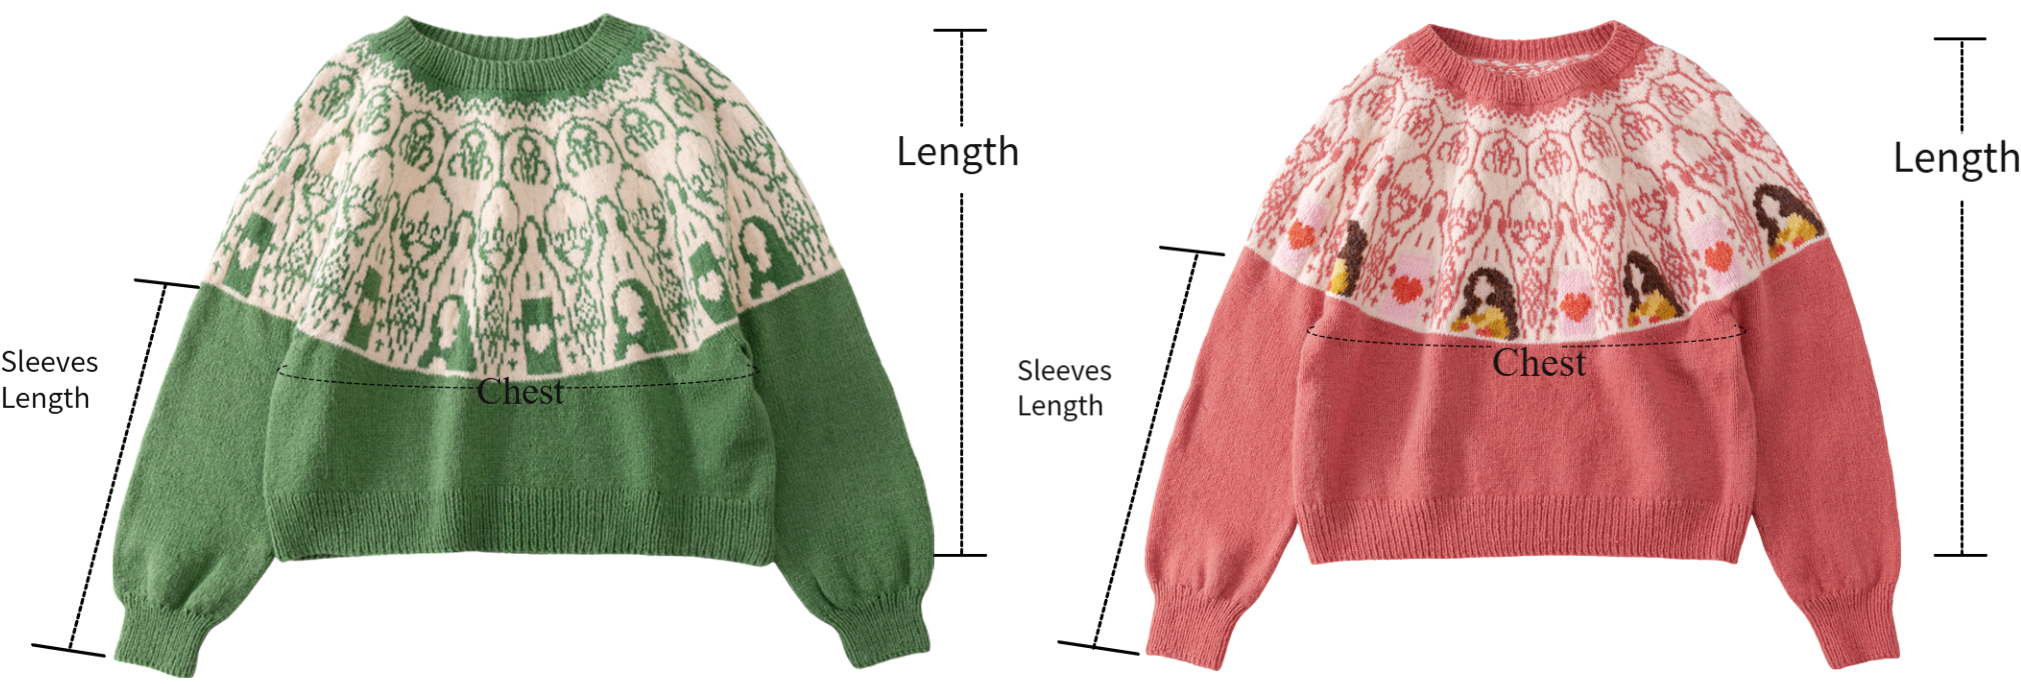
| Unit: cm | Chest | Length | Sleeves Length |
| Long Version | 112 | 58 |
37 |
| Short Version | 112 | 52 | 37 |
Note:
1. Hand-measured, please allow 1-2 cm difference. Due to varying knitting tension, sample measurements are for reference only.
2. Size 10 (3.25 mm) straight needles and size 10 (3.25 mm) circular needles are used for the ribbed sections; all other parts are worked with size 9 (3.75 mm) straight needles and size 9 (3.75 mm) circular needles.
3. Left and right refer to the garment as worn.
4. Flat knitting is used (back and forth rows). The chart shows the right side view; when working the wrong side rows, knit the opposite of what's shown in the chart.
Materials : Alpaca (use 2 strands together as 1 throughout) .
Tools: 10# (3.25 mm) straight needles, 9# (3.75 mm) straight needles, 10# (3.25 mm) circular needle, 9# (3.75 mm) circular needle.

Structure diagram
Gauge Swatch
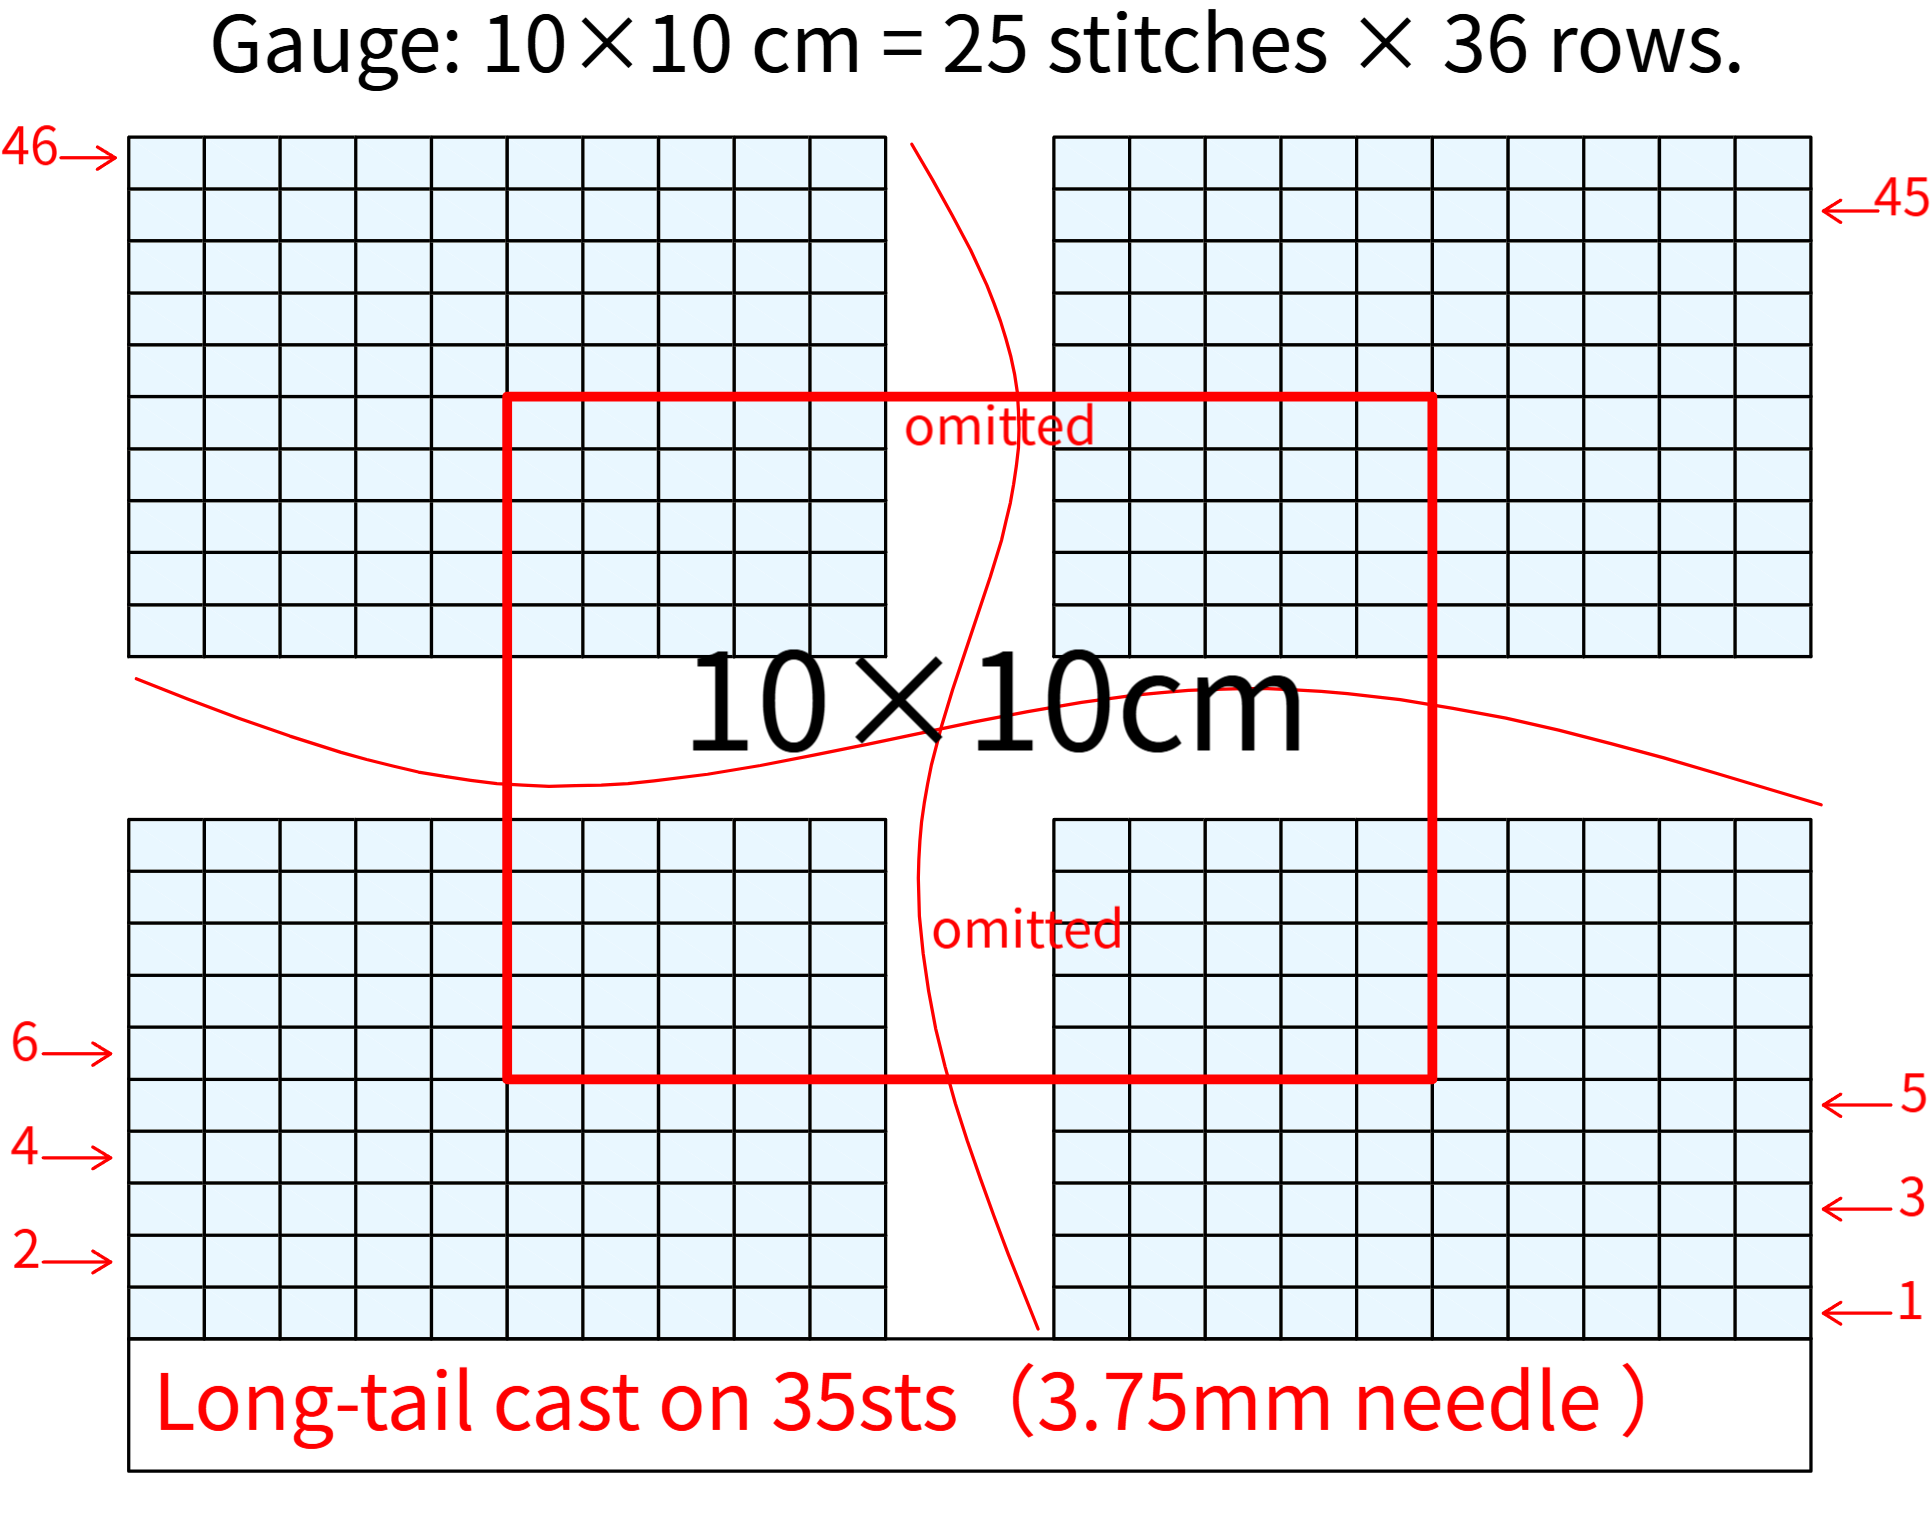
Chart Key
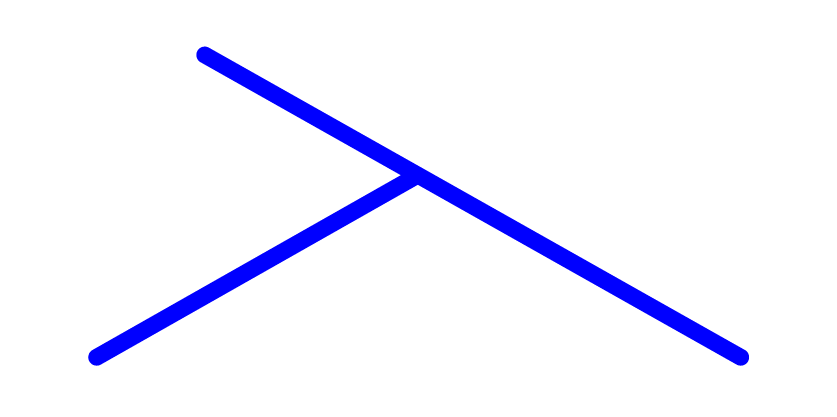
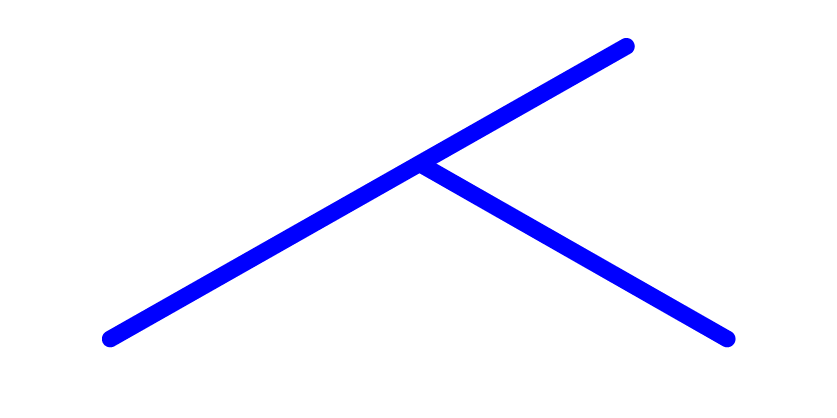




Note:
1. This pattern is making in Chinese crochet pattern terms, and the stitch name is written using American terminology. All measurements in charts are in cm.
2. The chart shows the right side of the work. When working on the wrong side, crochet a back post stitch wherever the chart shows a front post stitch.

PART 1 Collar A, Yoke B 16' 51''
Use the right-hand long-tail cast-on method for the collar and work in the round with single ribbing. After finishing, continue working the yoke in the round to create the stranded color pattern. Please refer to the video demonstration for more details.
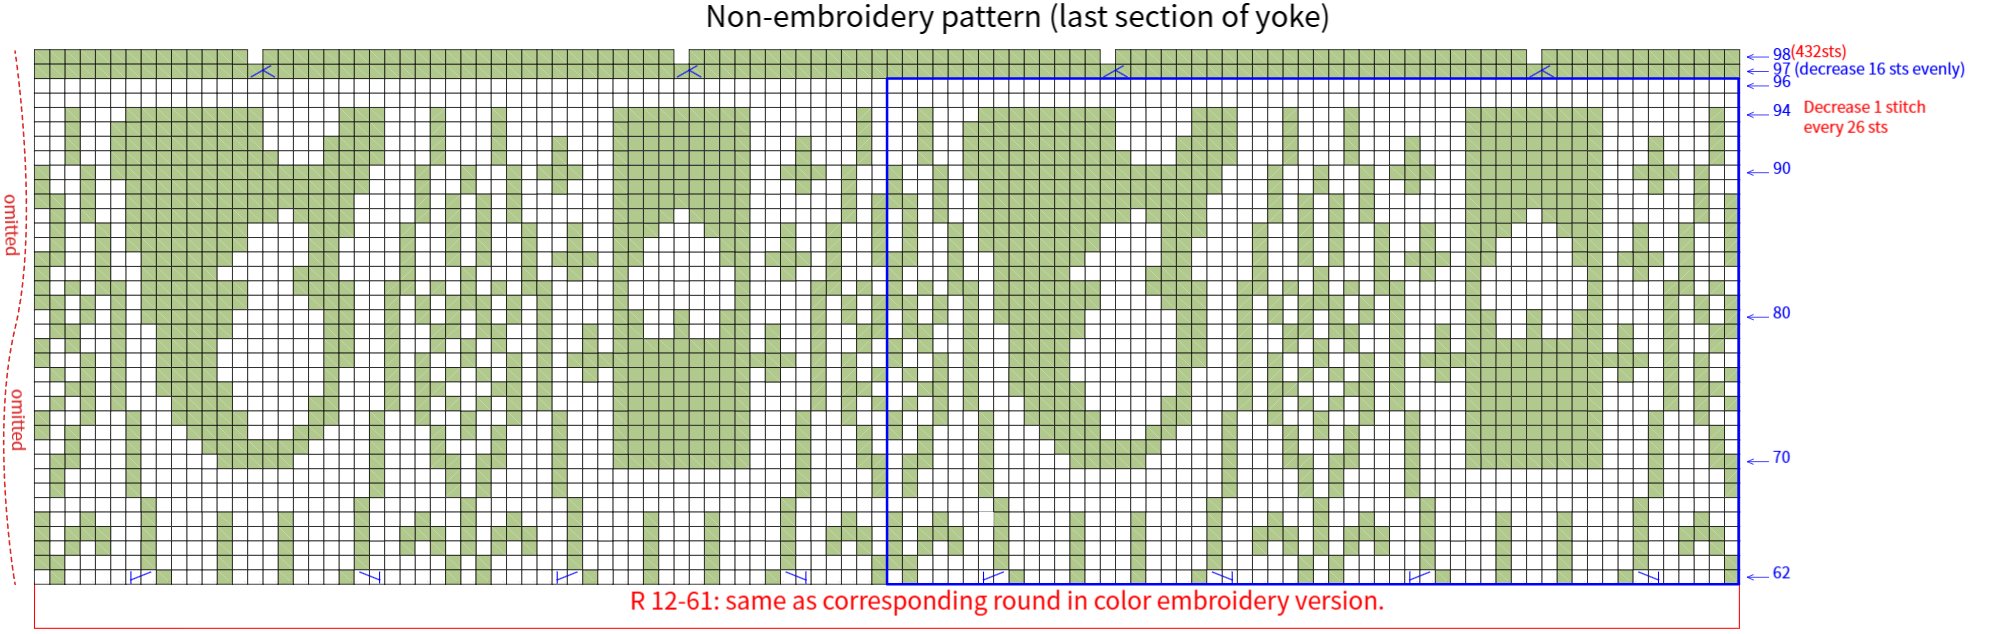
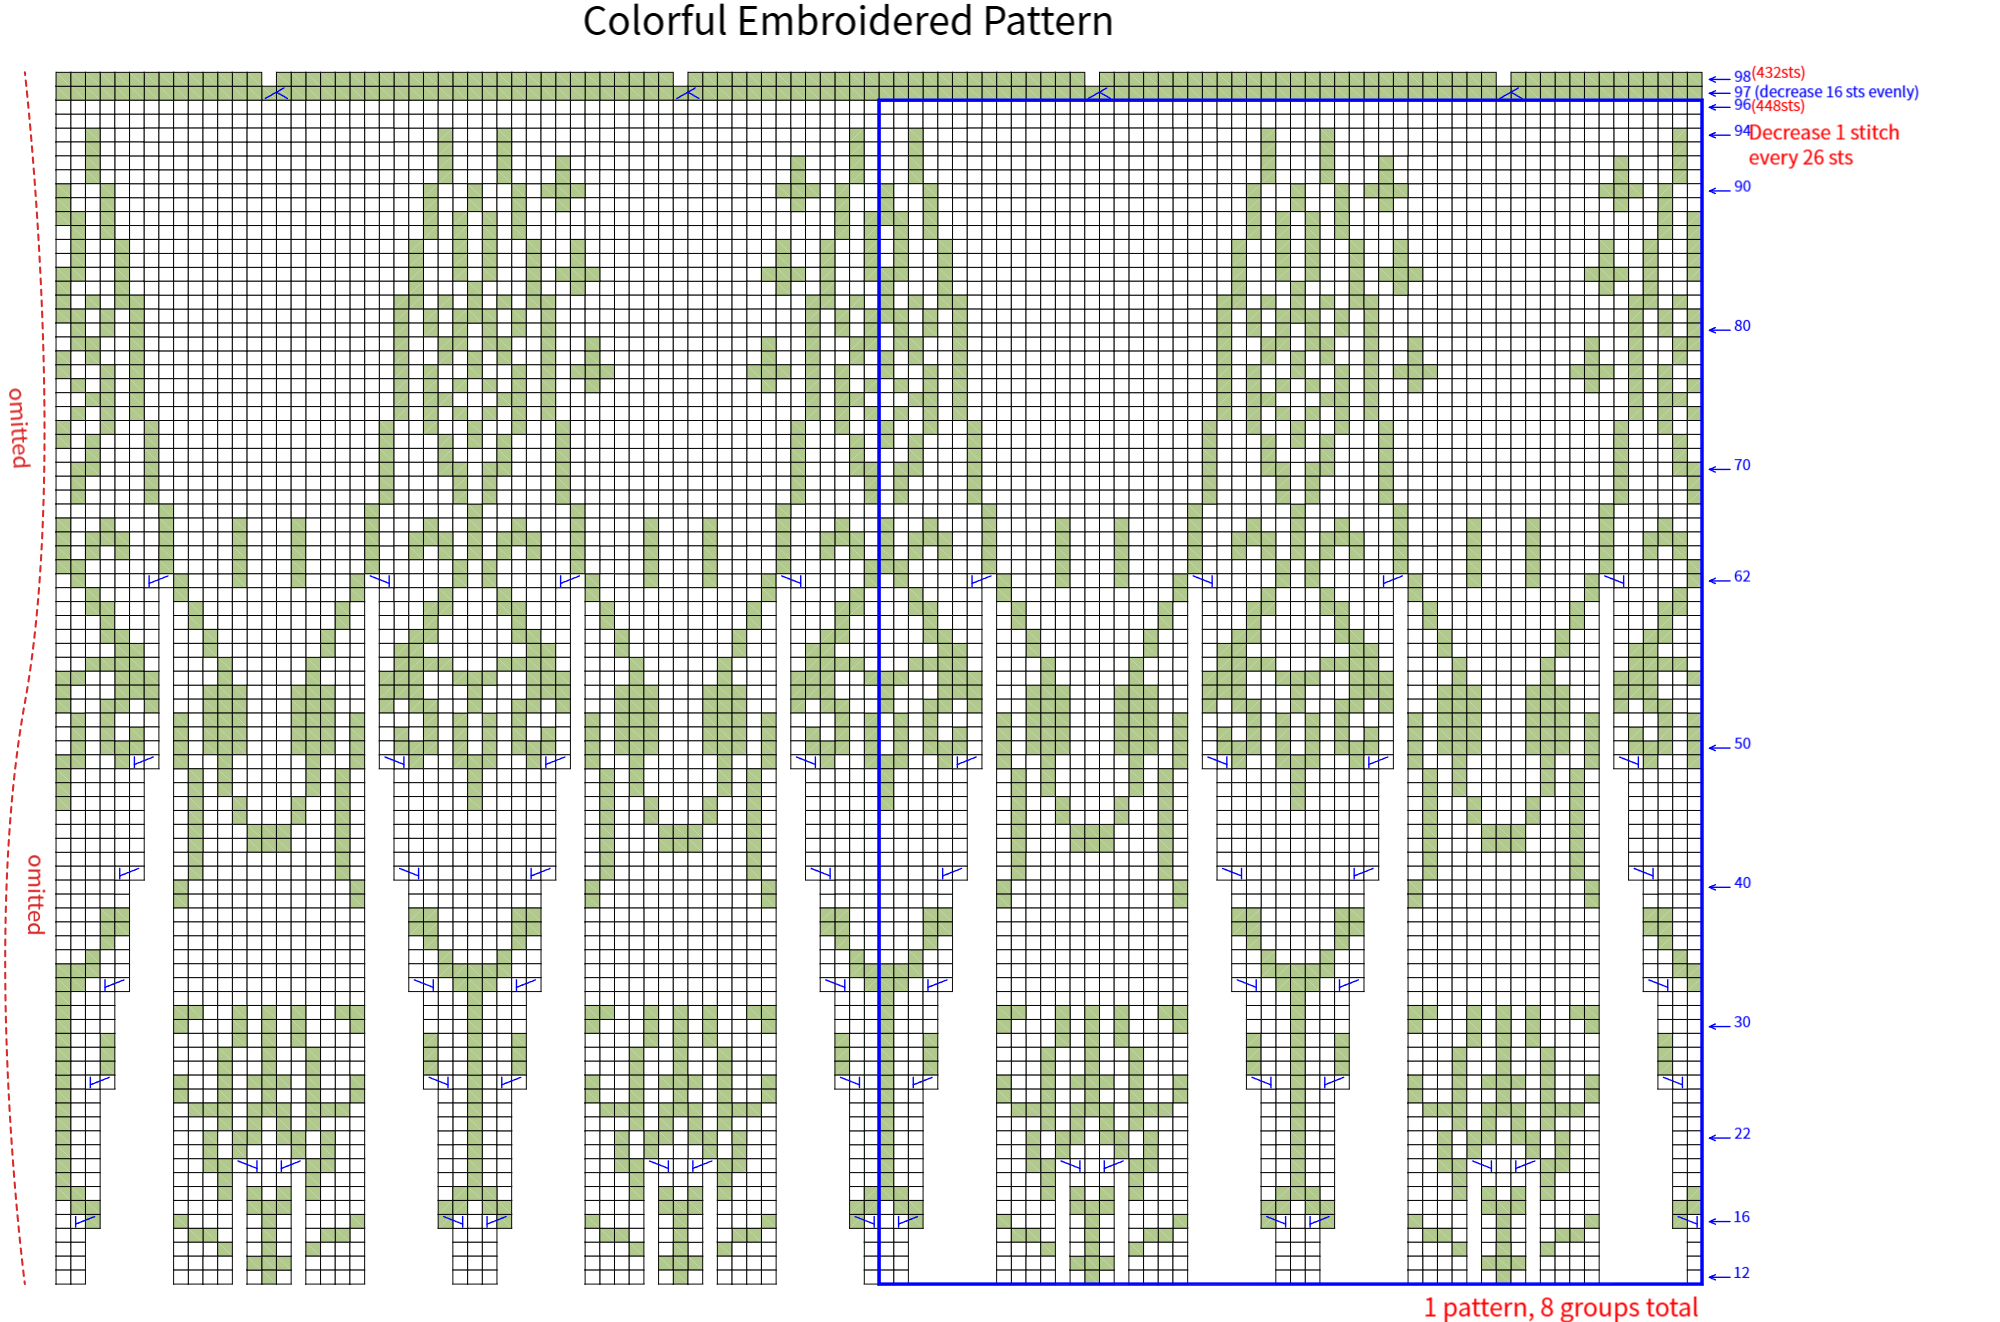
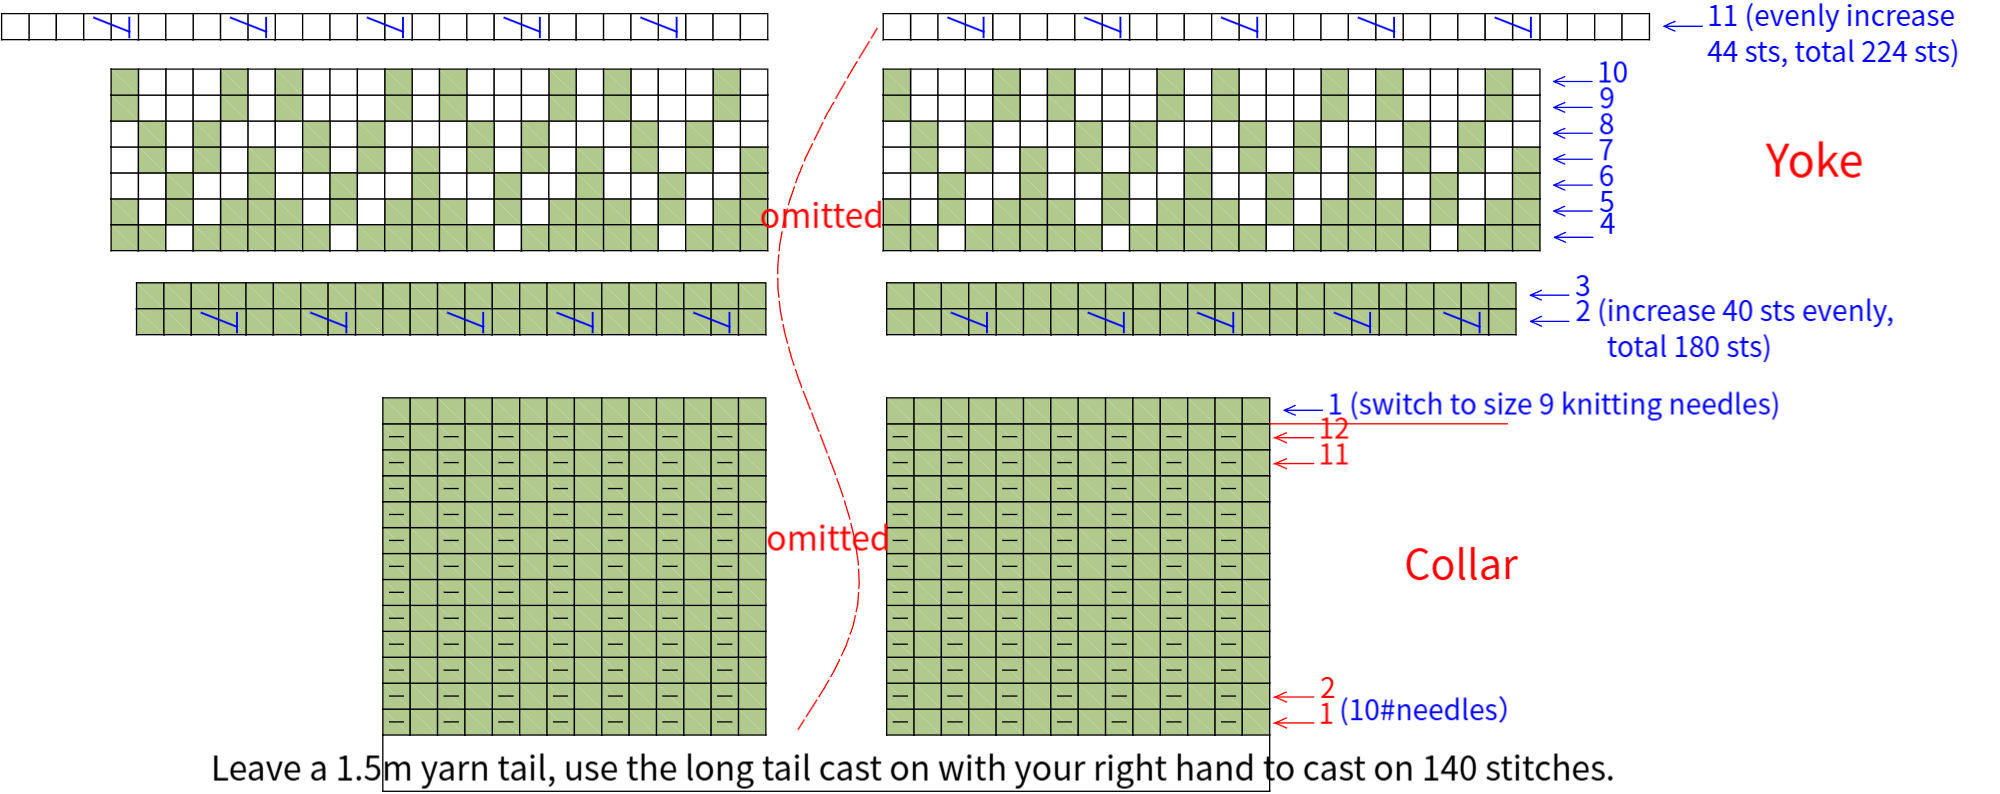
Note: The fair isle ending part has different patterns for the embroidered and non-embroidered versions. Follow the corresponding chart accordingly.
| checkered pattern | Stone Green Version | Spiced Coral Version | Glazed Ginger Version | Azure Blue Version |
| 22# Stone Green | 11# Spiced Coral | 18# Glazed Ginger | 28# Azure Blue | |
| 03# Sheer Pink | ||||
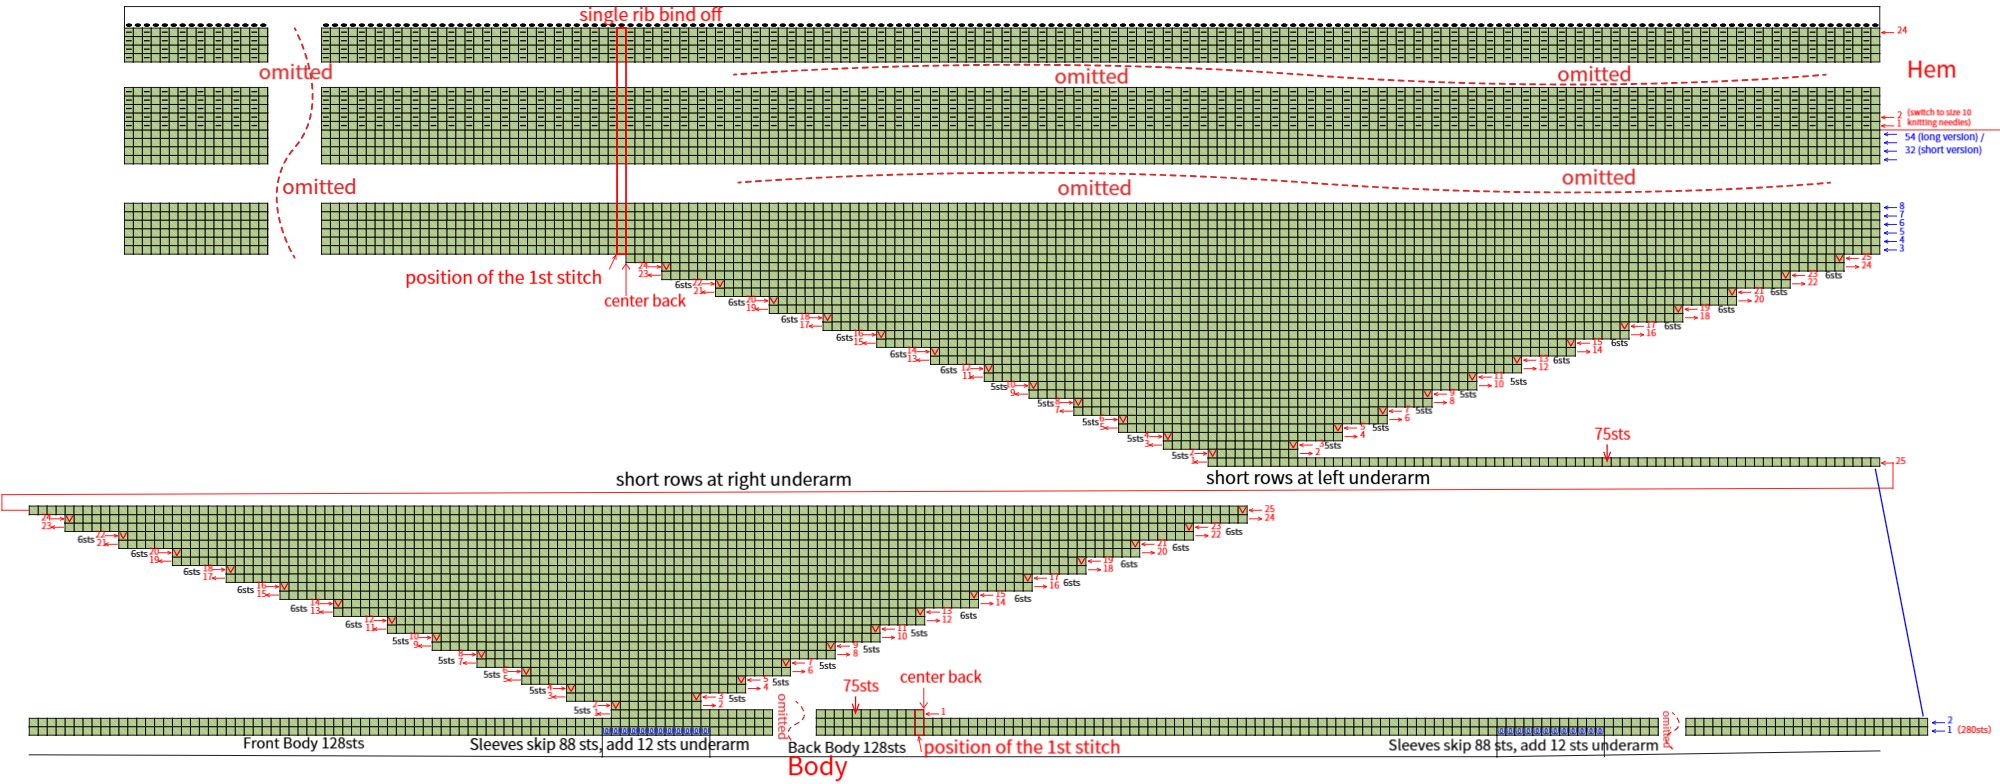
PART 2 Front and Back Difference C 56' 55''
The front-back difference is worked in the yoke section using short rows . From the right side, it looks like plain stockinette stitch, but when working the wrong side, you need to knit the opposite of what's shown in the chart. Please refer to the video demonstration for more details.

PART 3 Body D, Hem E 65' 28''
Continue knitting the body with front-back difference, pick up stitches at the underarm area, and perform short rows. After completing those, switch to working in the round with stockinette stitch, then finish off with a round of single rib pattern for the hem. Please refer to the video demonstration for more details.
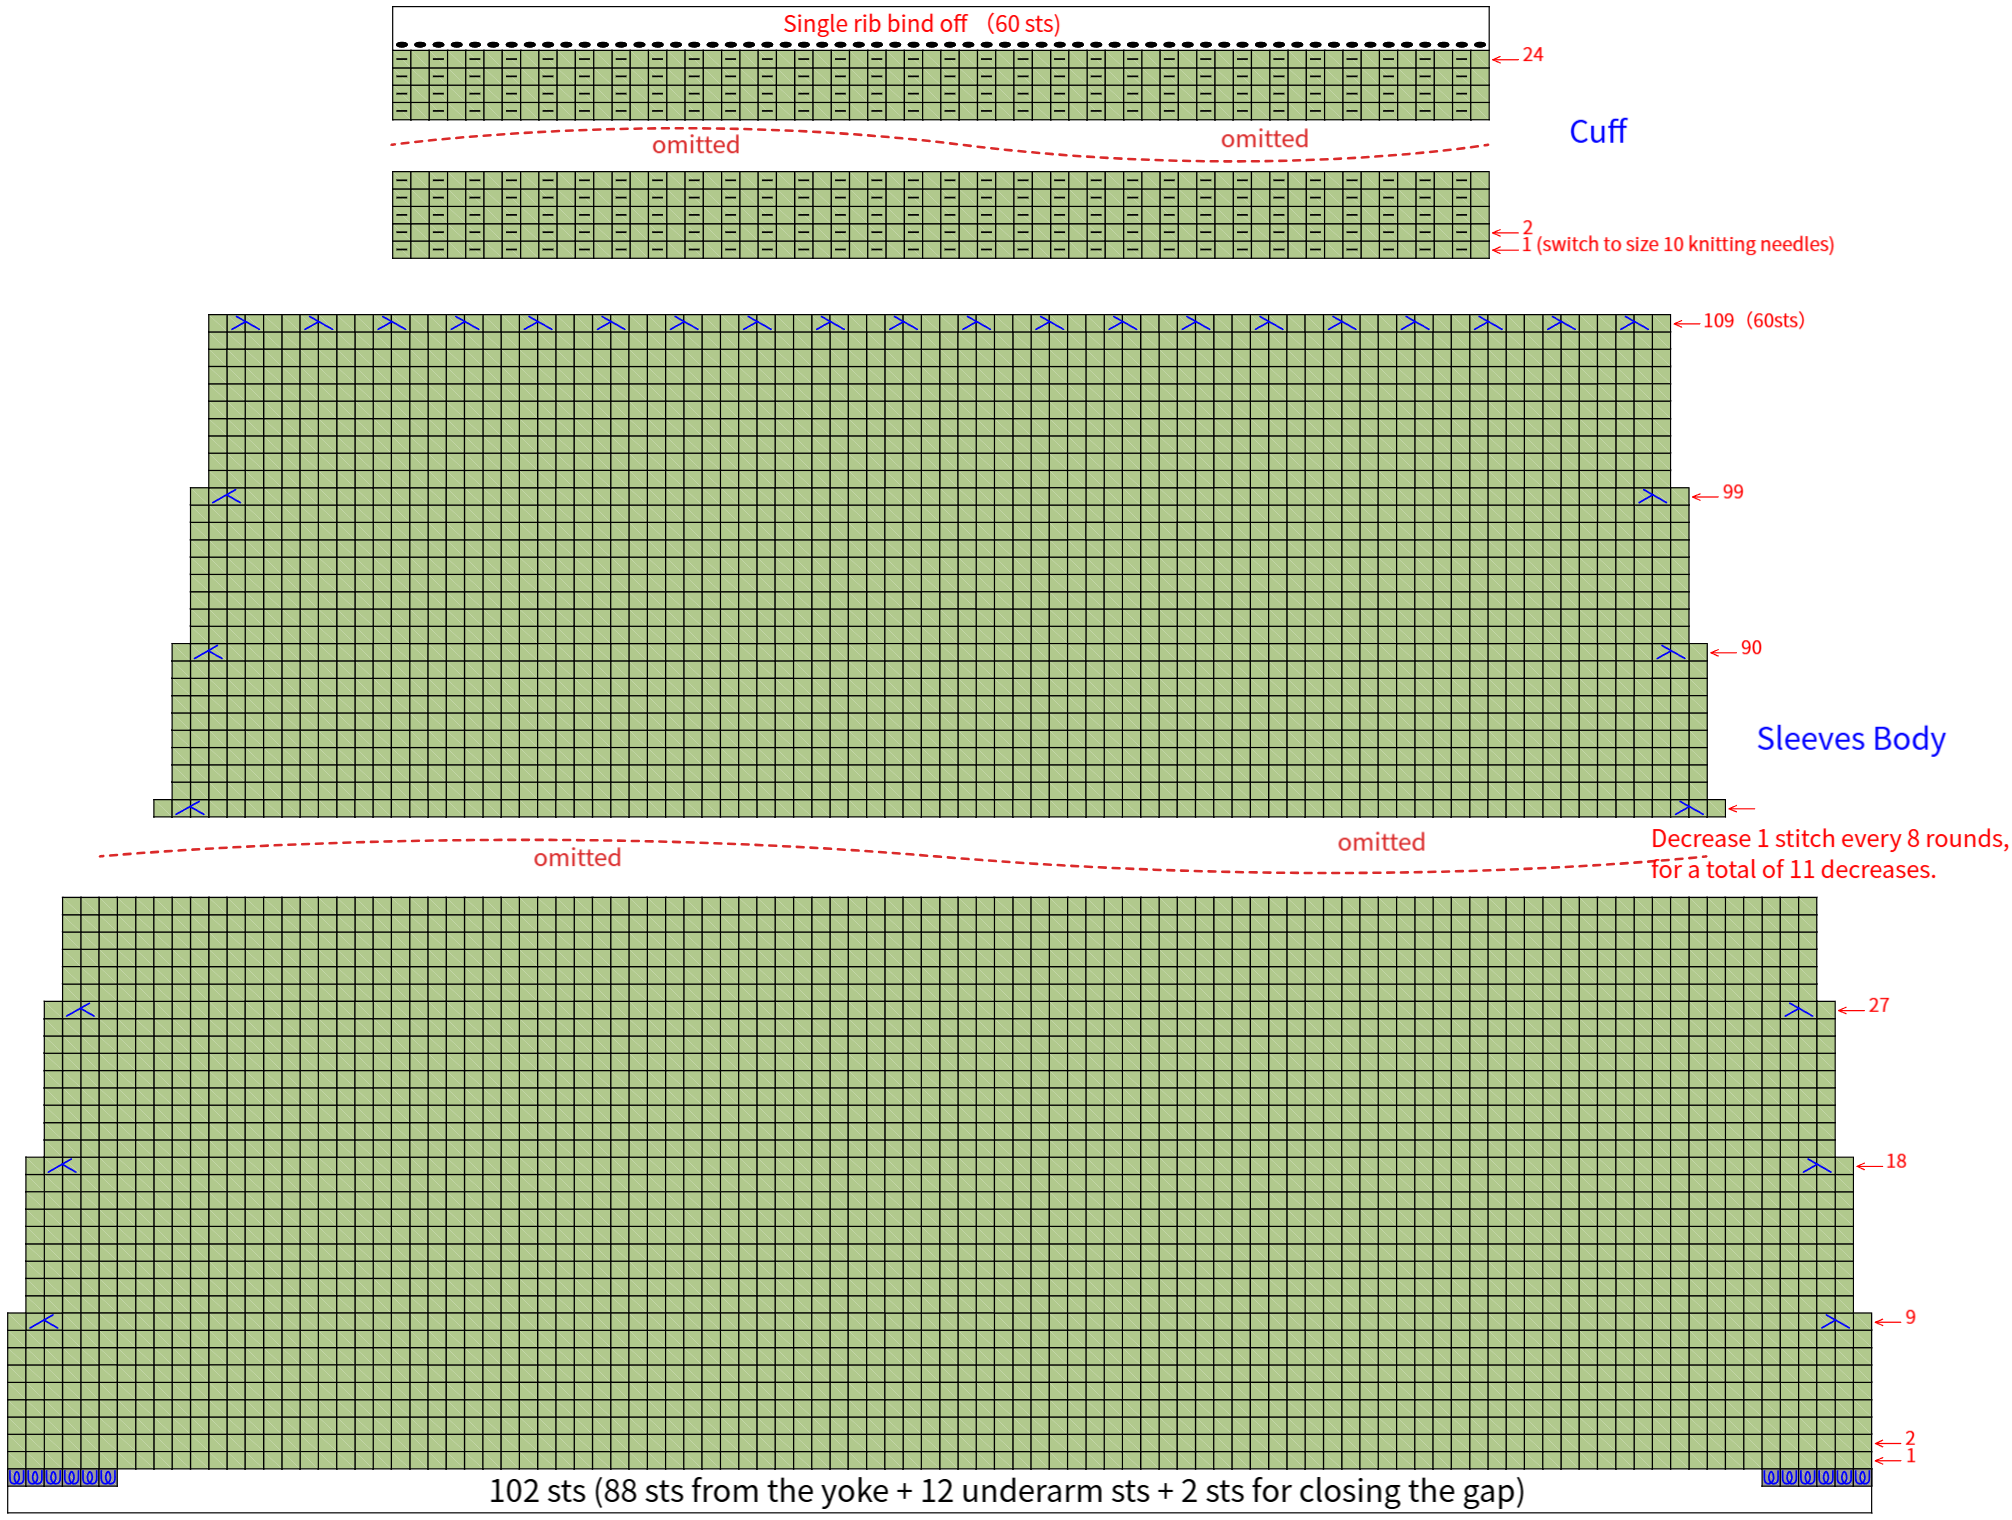
PART 4 Sleeves F 82' 26''
The sleeves are worked in the round by picking up stitches along the yoke sleeve area, divided into two sections: sleeve body and cuff. The left and right sleeves are worked the same. Please refer to the video demonstration for more details.
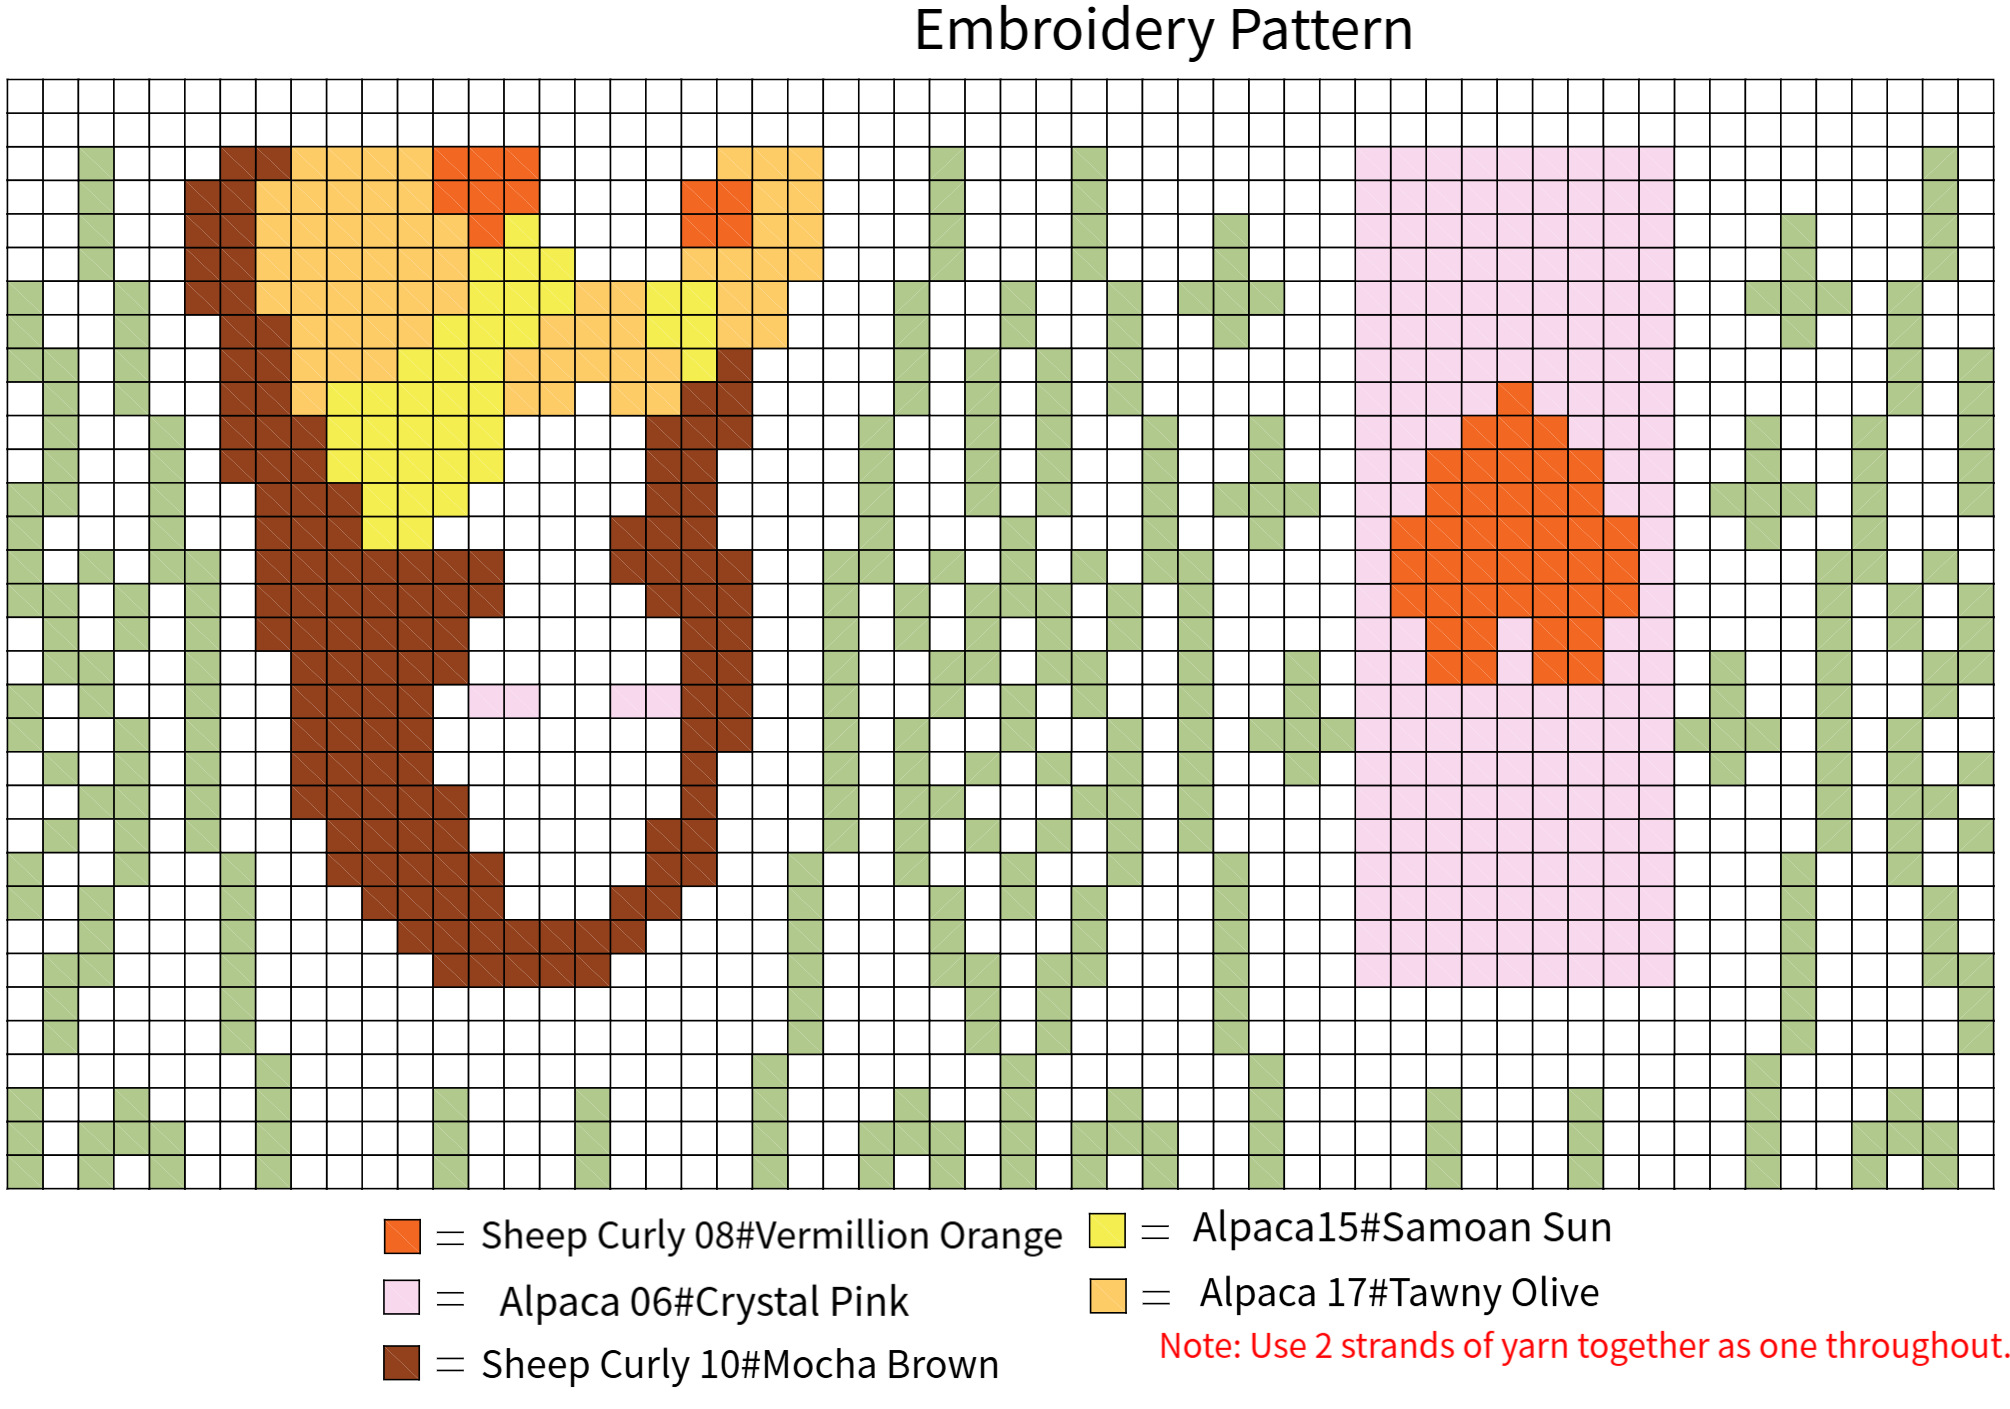
PART 5 Embroider G 92' 51''
For the color embroidery version, you'll need to alternately embroider the Mona Lisa and rectangular heart patterns onto the blank area at the end of the yoke. Please refer to the video demonstration for more details.
Made by the community