Clothes
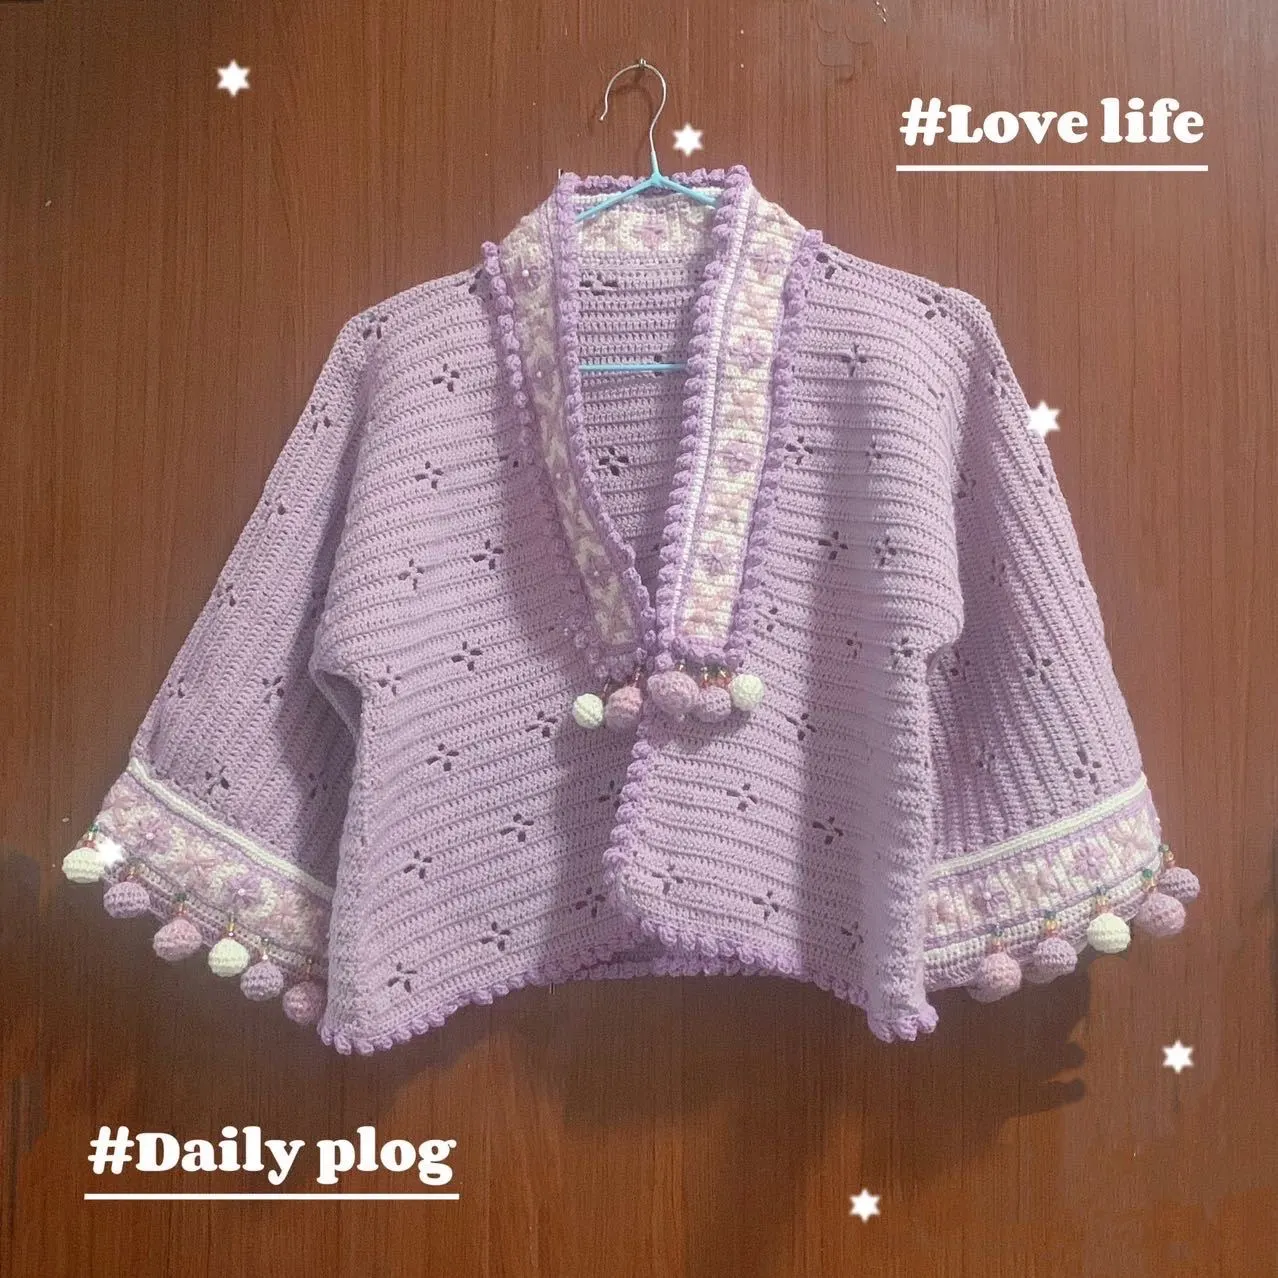
Morning Clouds Cardigan
Project preview
See the finished project
Pattern format
Instructions
Watch and follow
Video tutorial
This product consists of the back piece, front pieces, sleeve cuffs, band, the overall edging and the decorations. First, crochet and sew together the front and back pieces. Next, crochet the edging around the garment, then crochet and connect the sleeve cuffs. After that, crochet and sew the band, and finally, complete the overall edging and make the decorations.
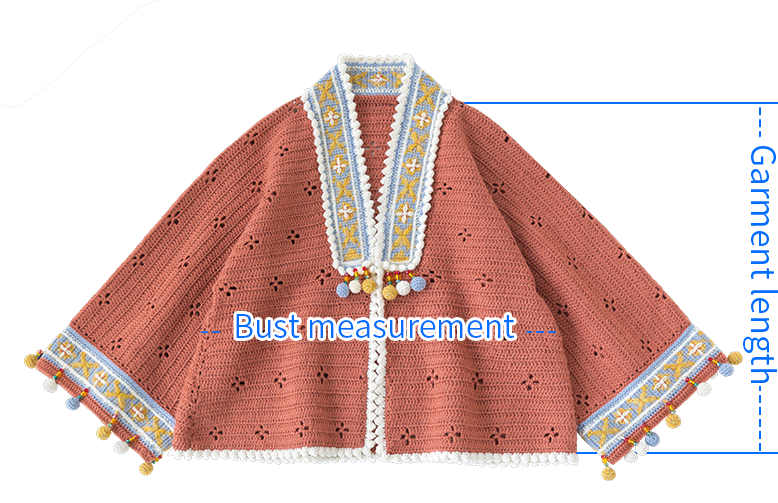

The handcrafted measurements may have an error of 1 to 2 cm. Due to variations in individual tension, the size of the sample is for reference only.
Materials: Susan's Family Morandi 4# and Diamond Thread Wool
Hook: 3.0 mm crochet hook

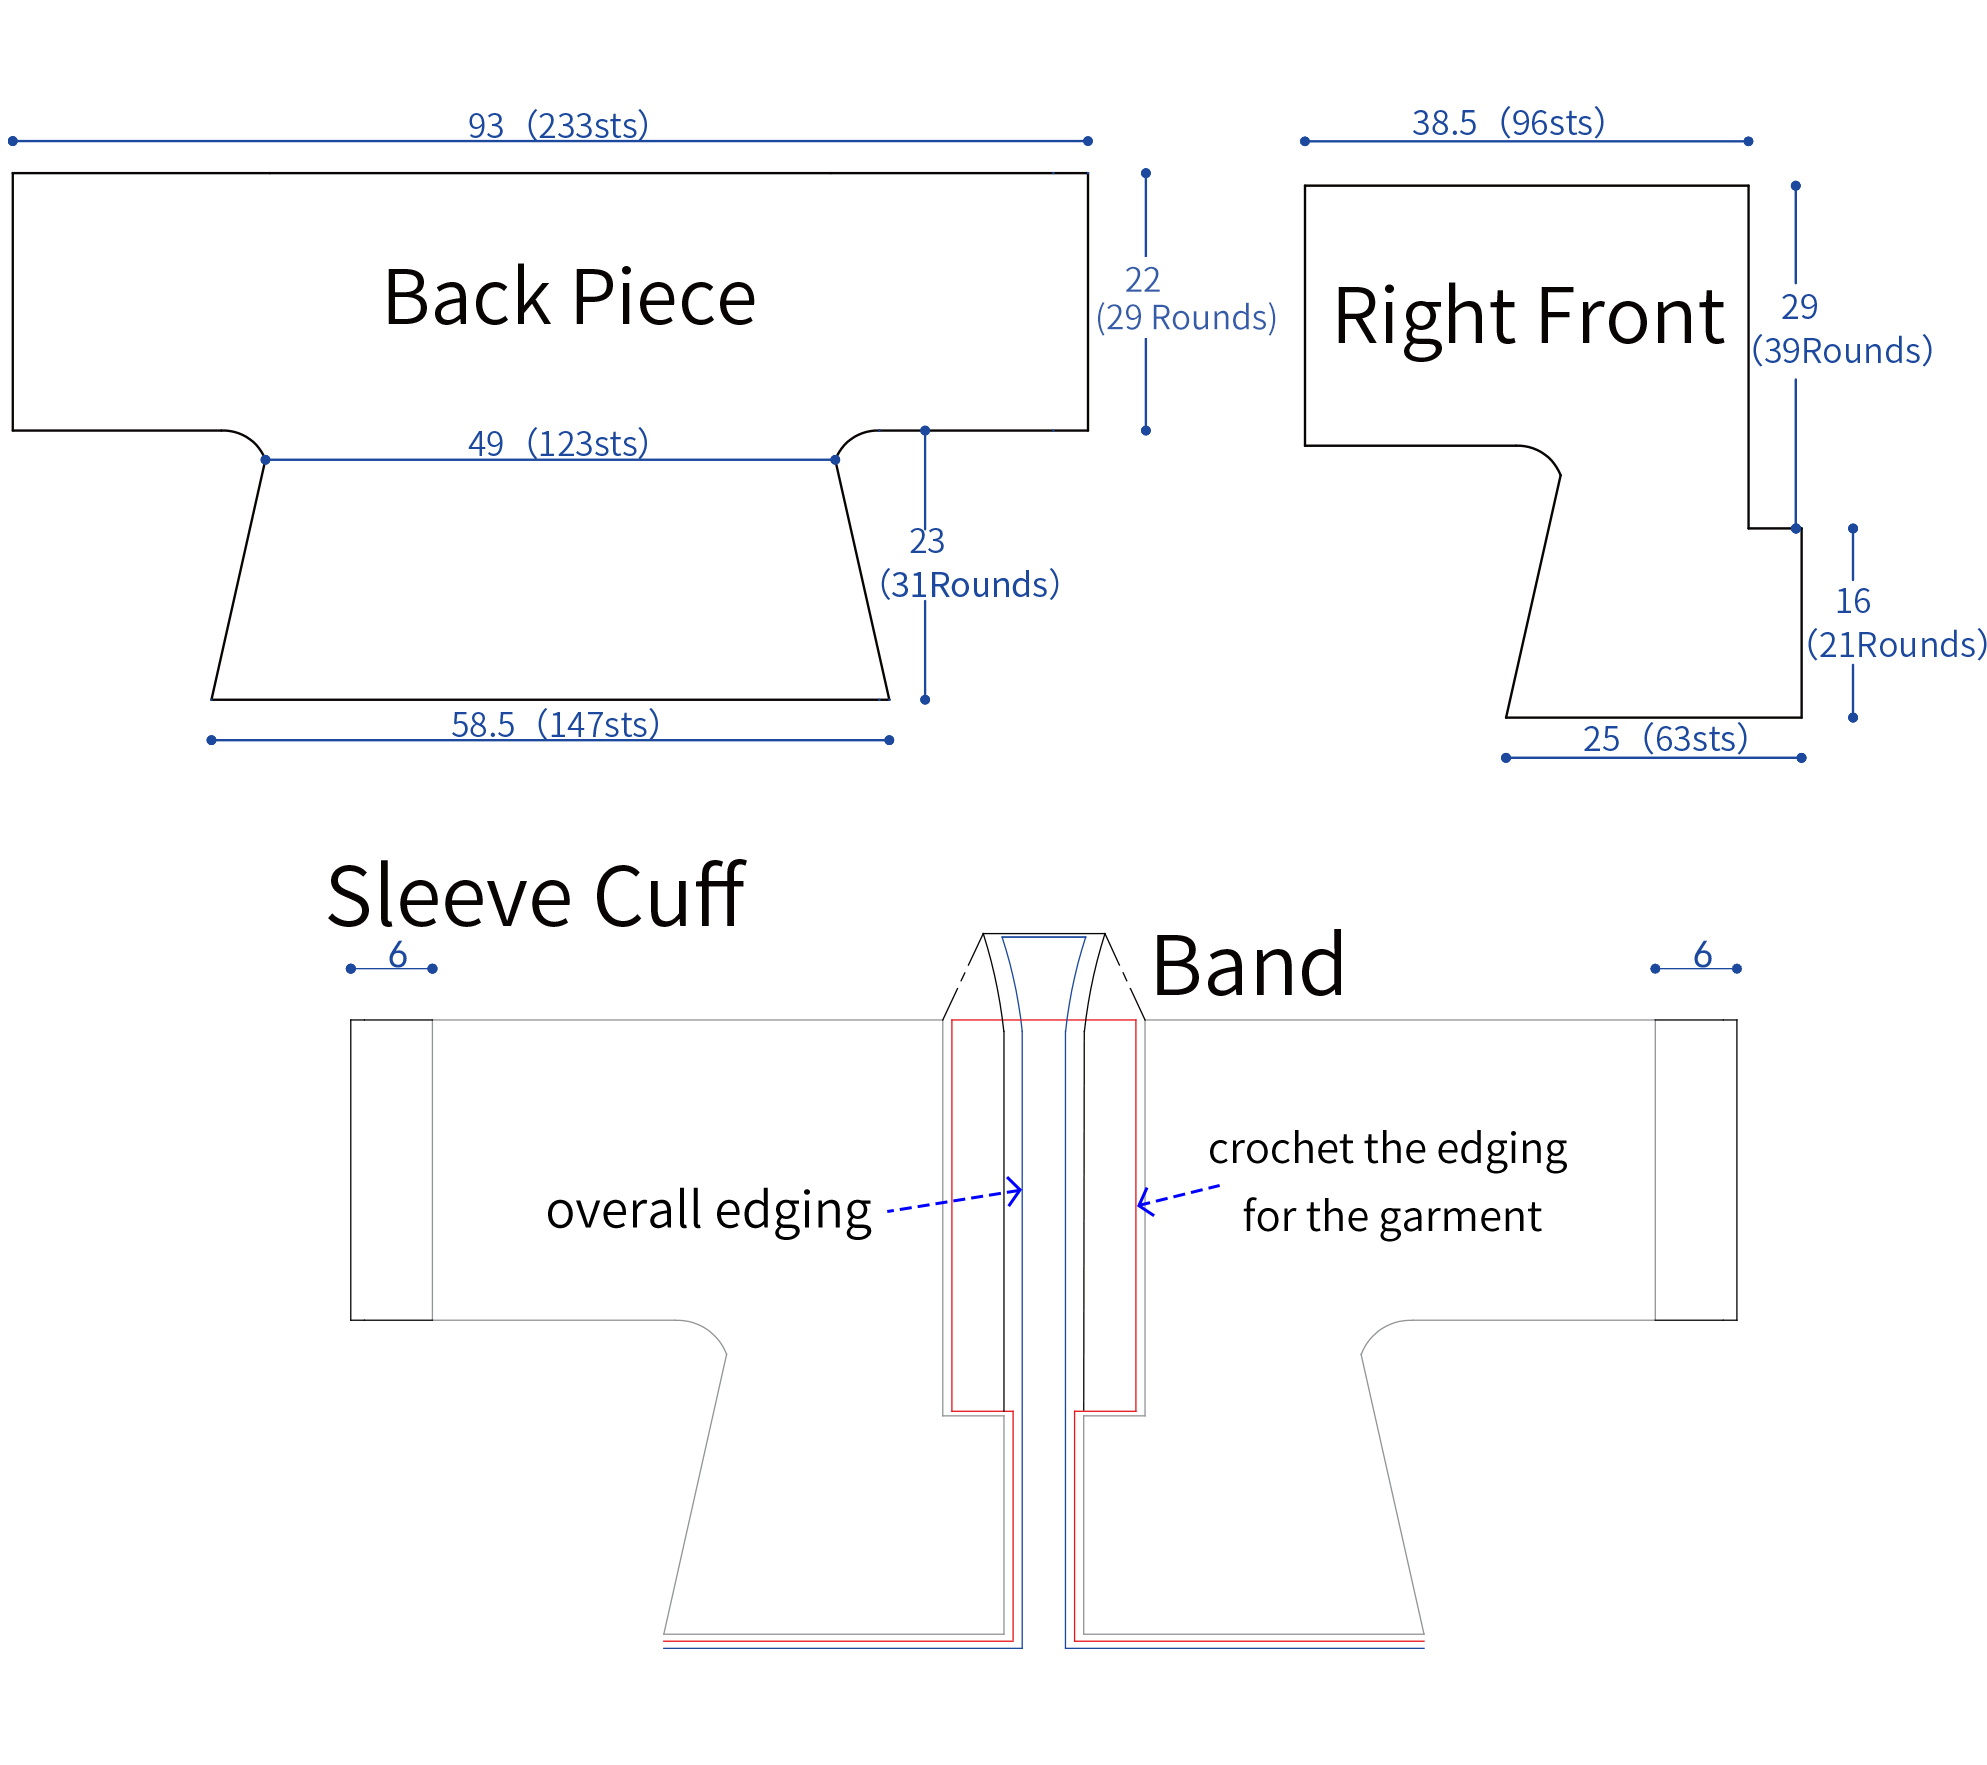
Chart Key











Note:
1. This pattern is making in Chinese crochet pattern terms, and the stitch name is written using American terminology. All measurements in charts are in cm. 
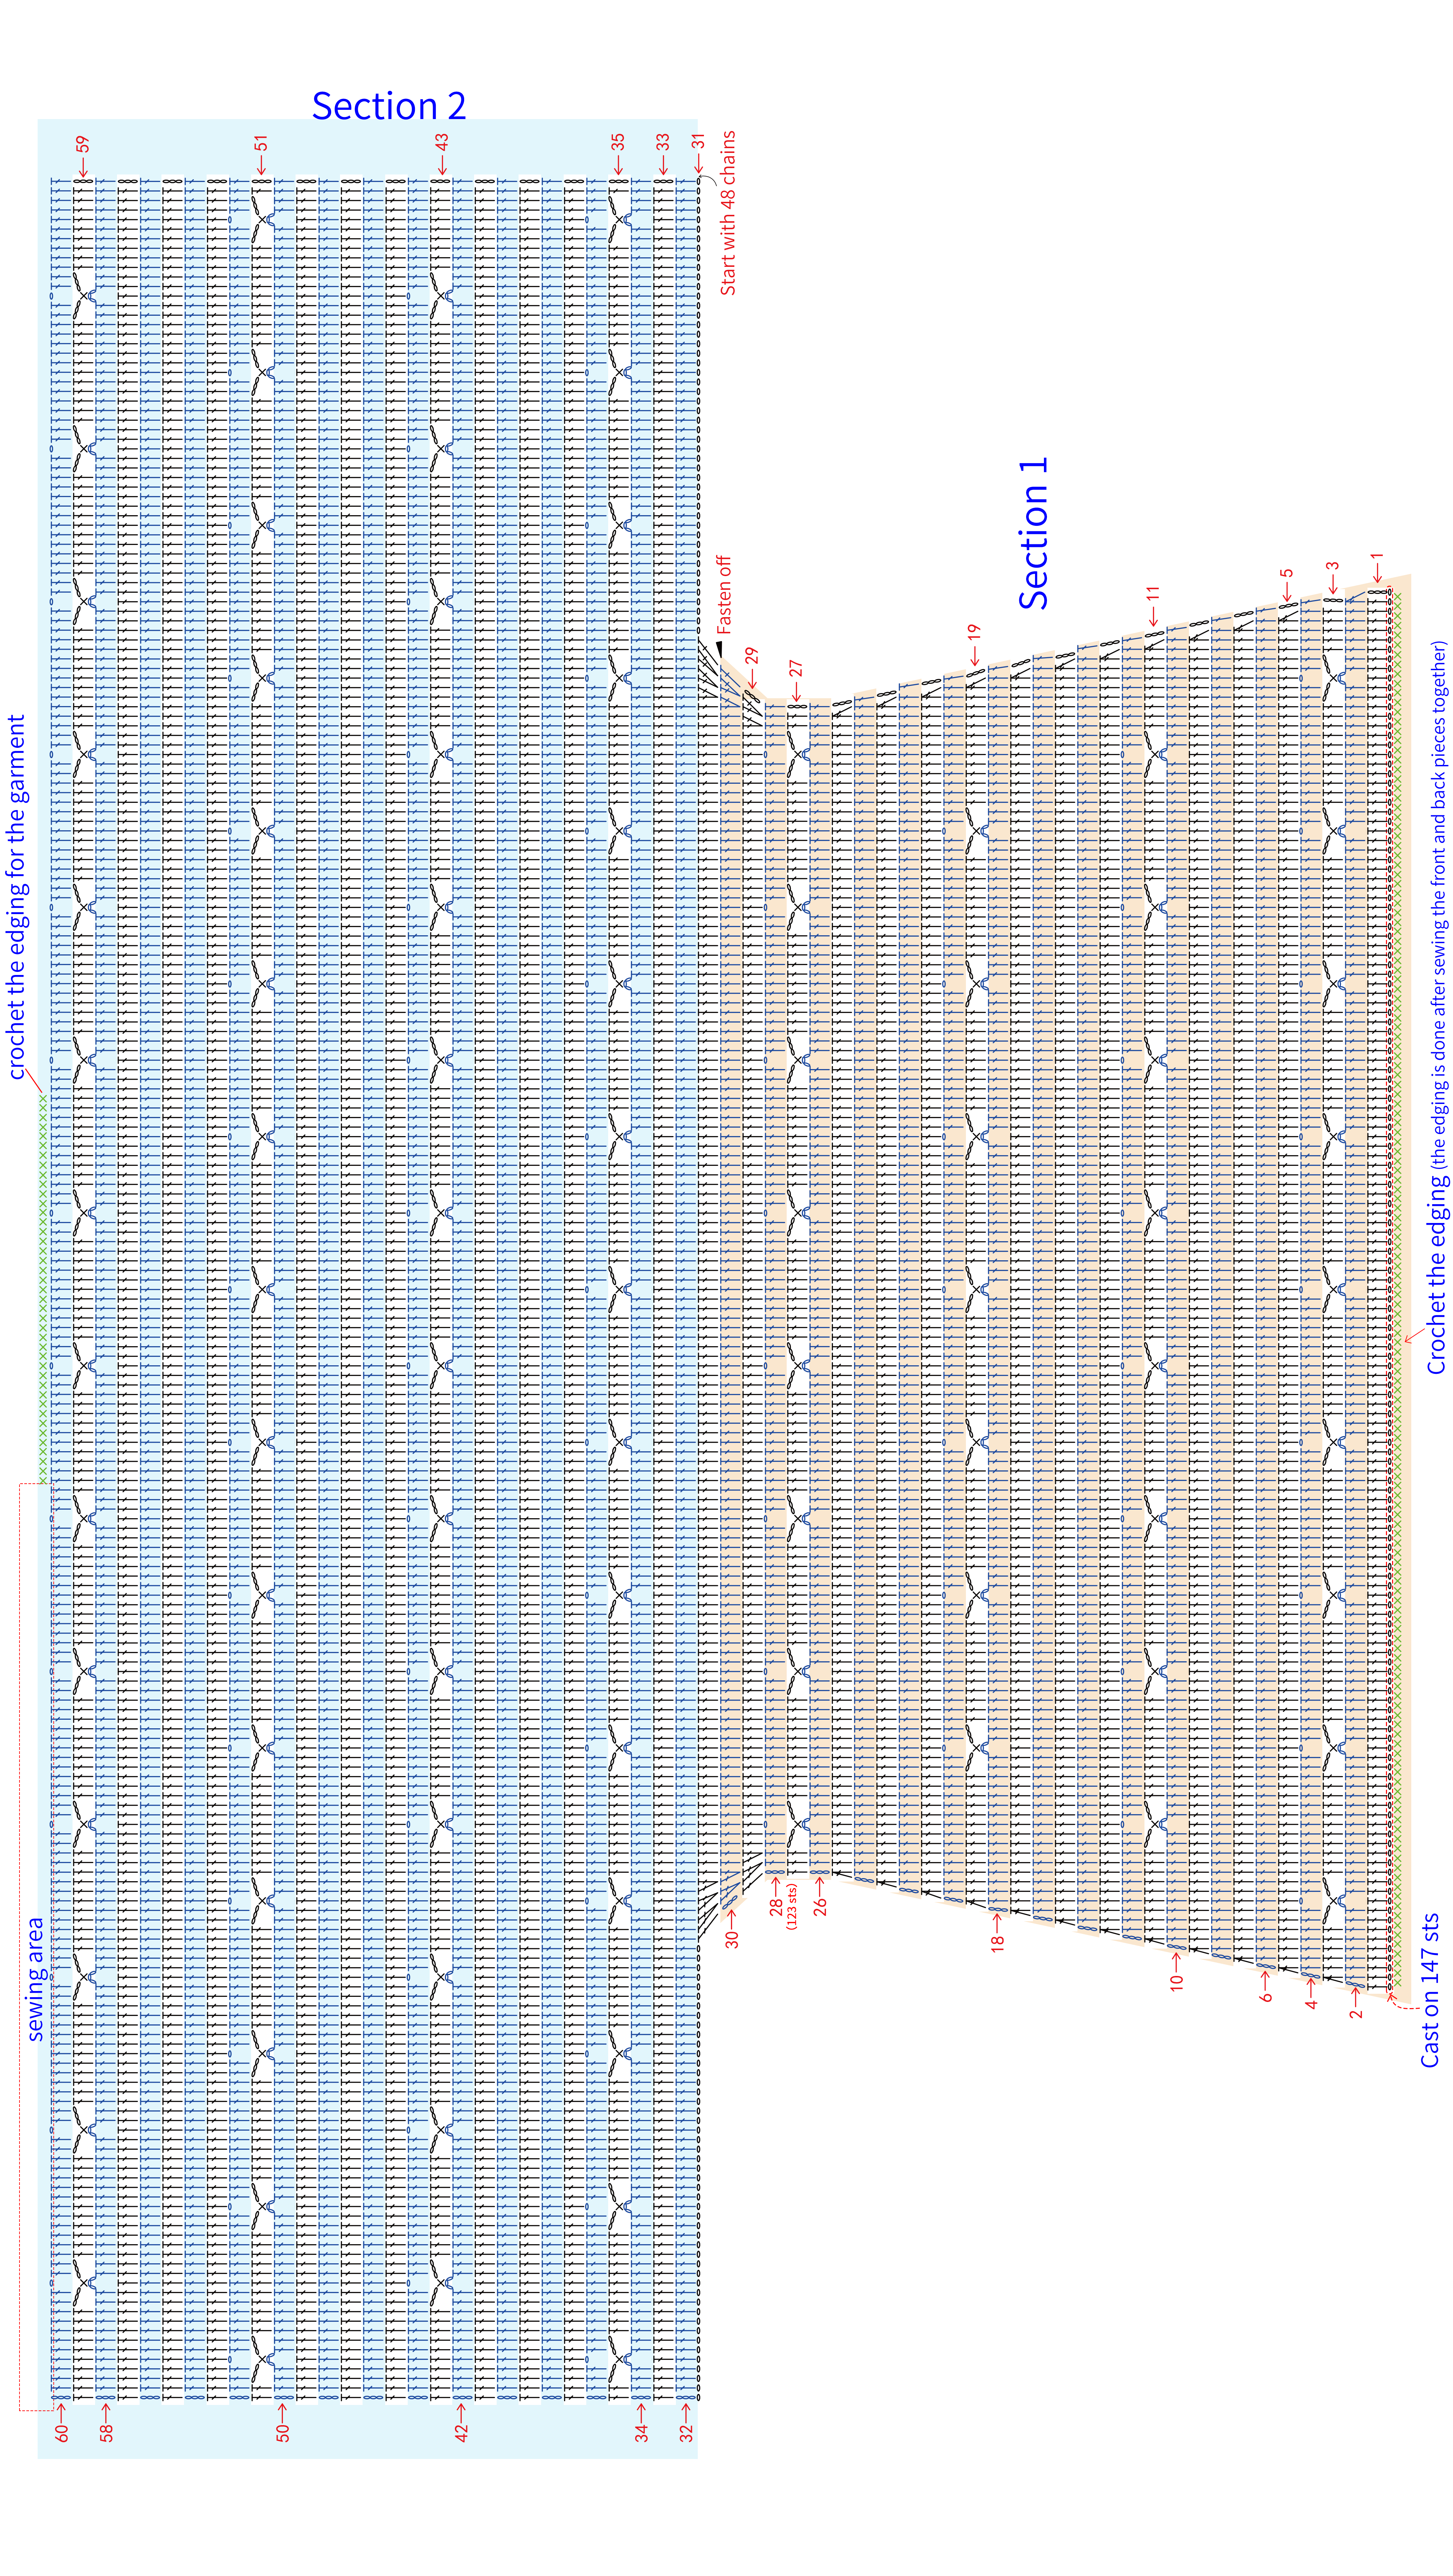
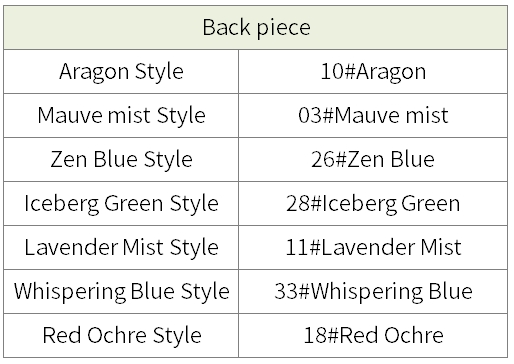
Part 1 Back pieceA1 01' 36''
Divide into Section 1 and Section 2. Section 1 begins with a foundation chain for casting on and works back and forth. Section 2 requires casting on again and continues to work back and forth based on Section 1. Please refer to the video demonstration for more details.
Note: After completing the first 4 rows, you can measure the size (it should be about 3 cm tall). If it's too different, you need to adjust your tension or switch to a different hook and start over.
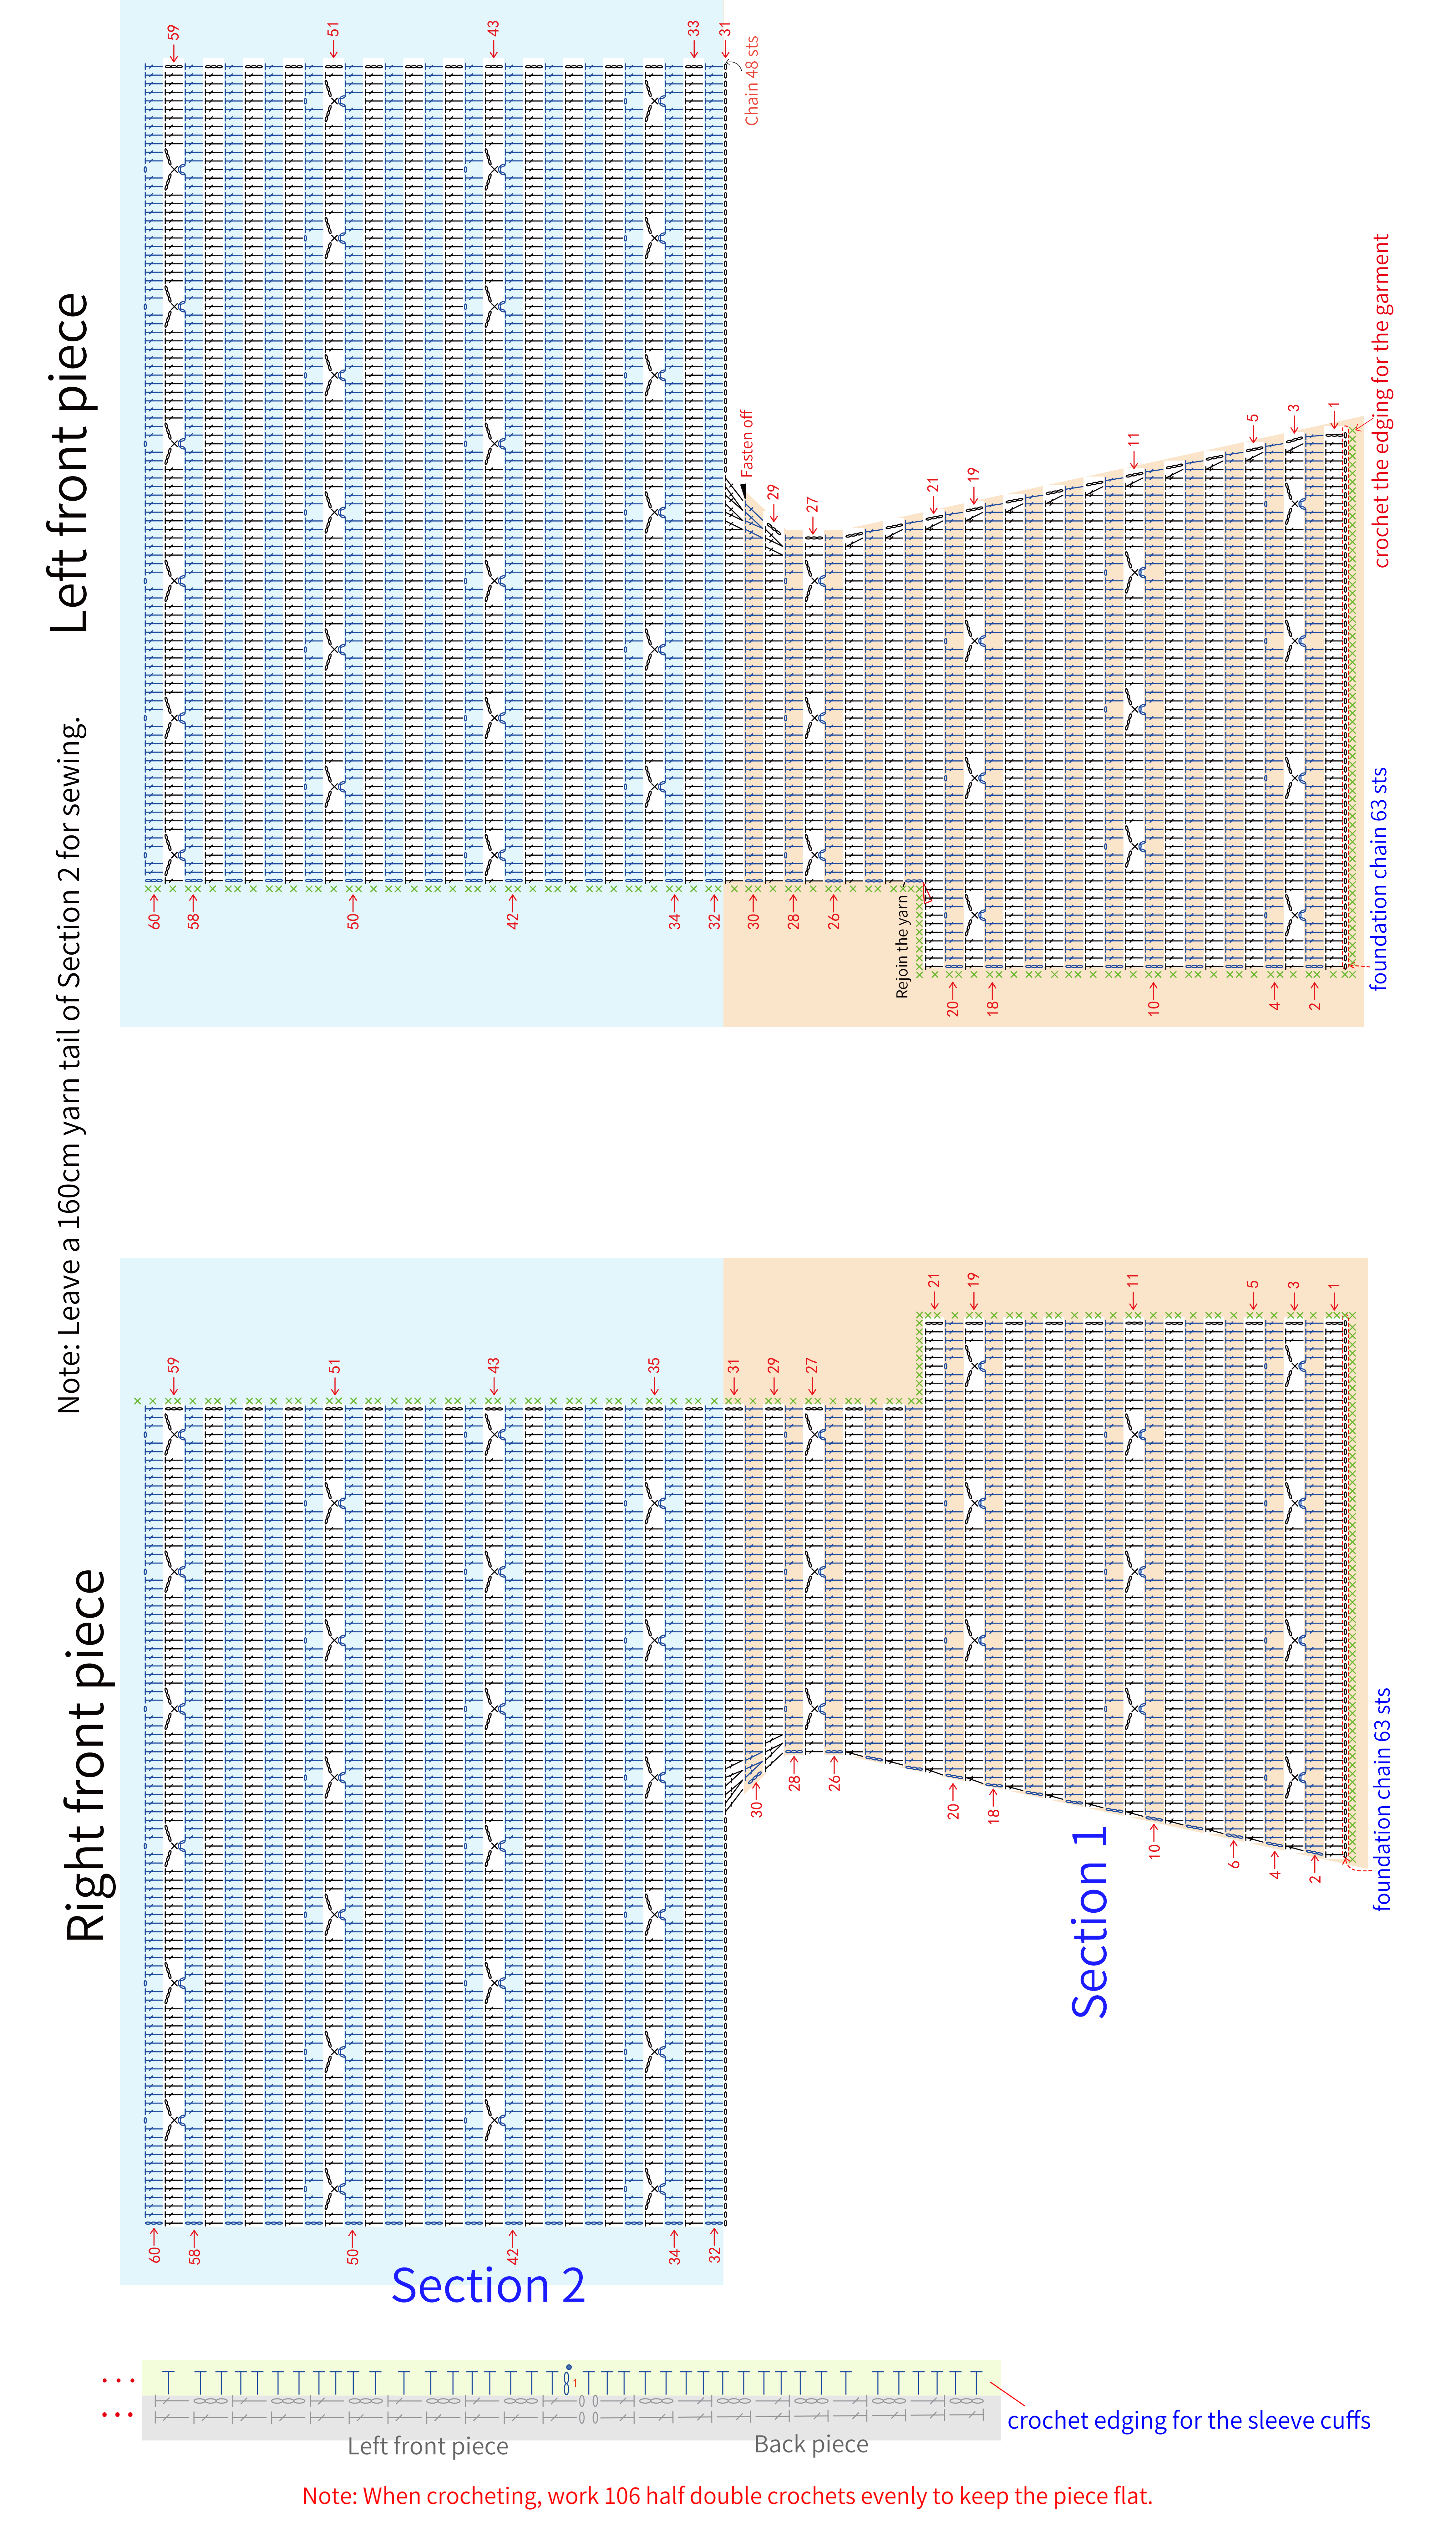
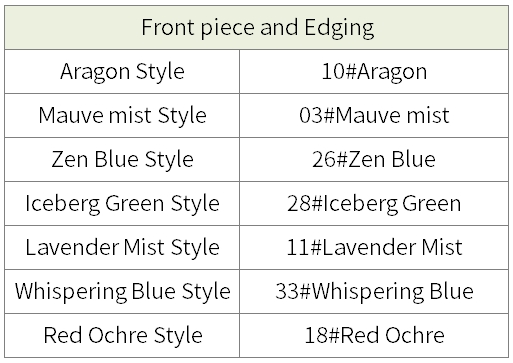
Part 2 Front piecesA2 Sew the front and back pieces together and crochet the edgingA3 13' 50''
The front body is divided into left and right front pieces, distinguished by the left and right sides when worn. After completing them, sew them to the back piece with a whip stitch, then crochet the edging for the garment and the sleeve cuffs. Please refer to the video demonstration for more details.
Part 3 sleeve cuffsB1 23' 25''
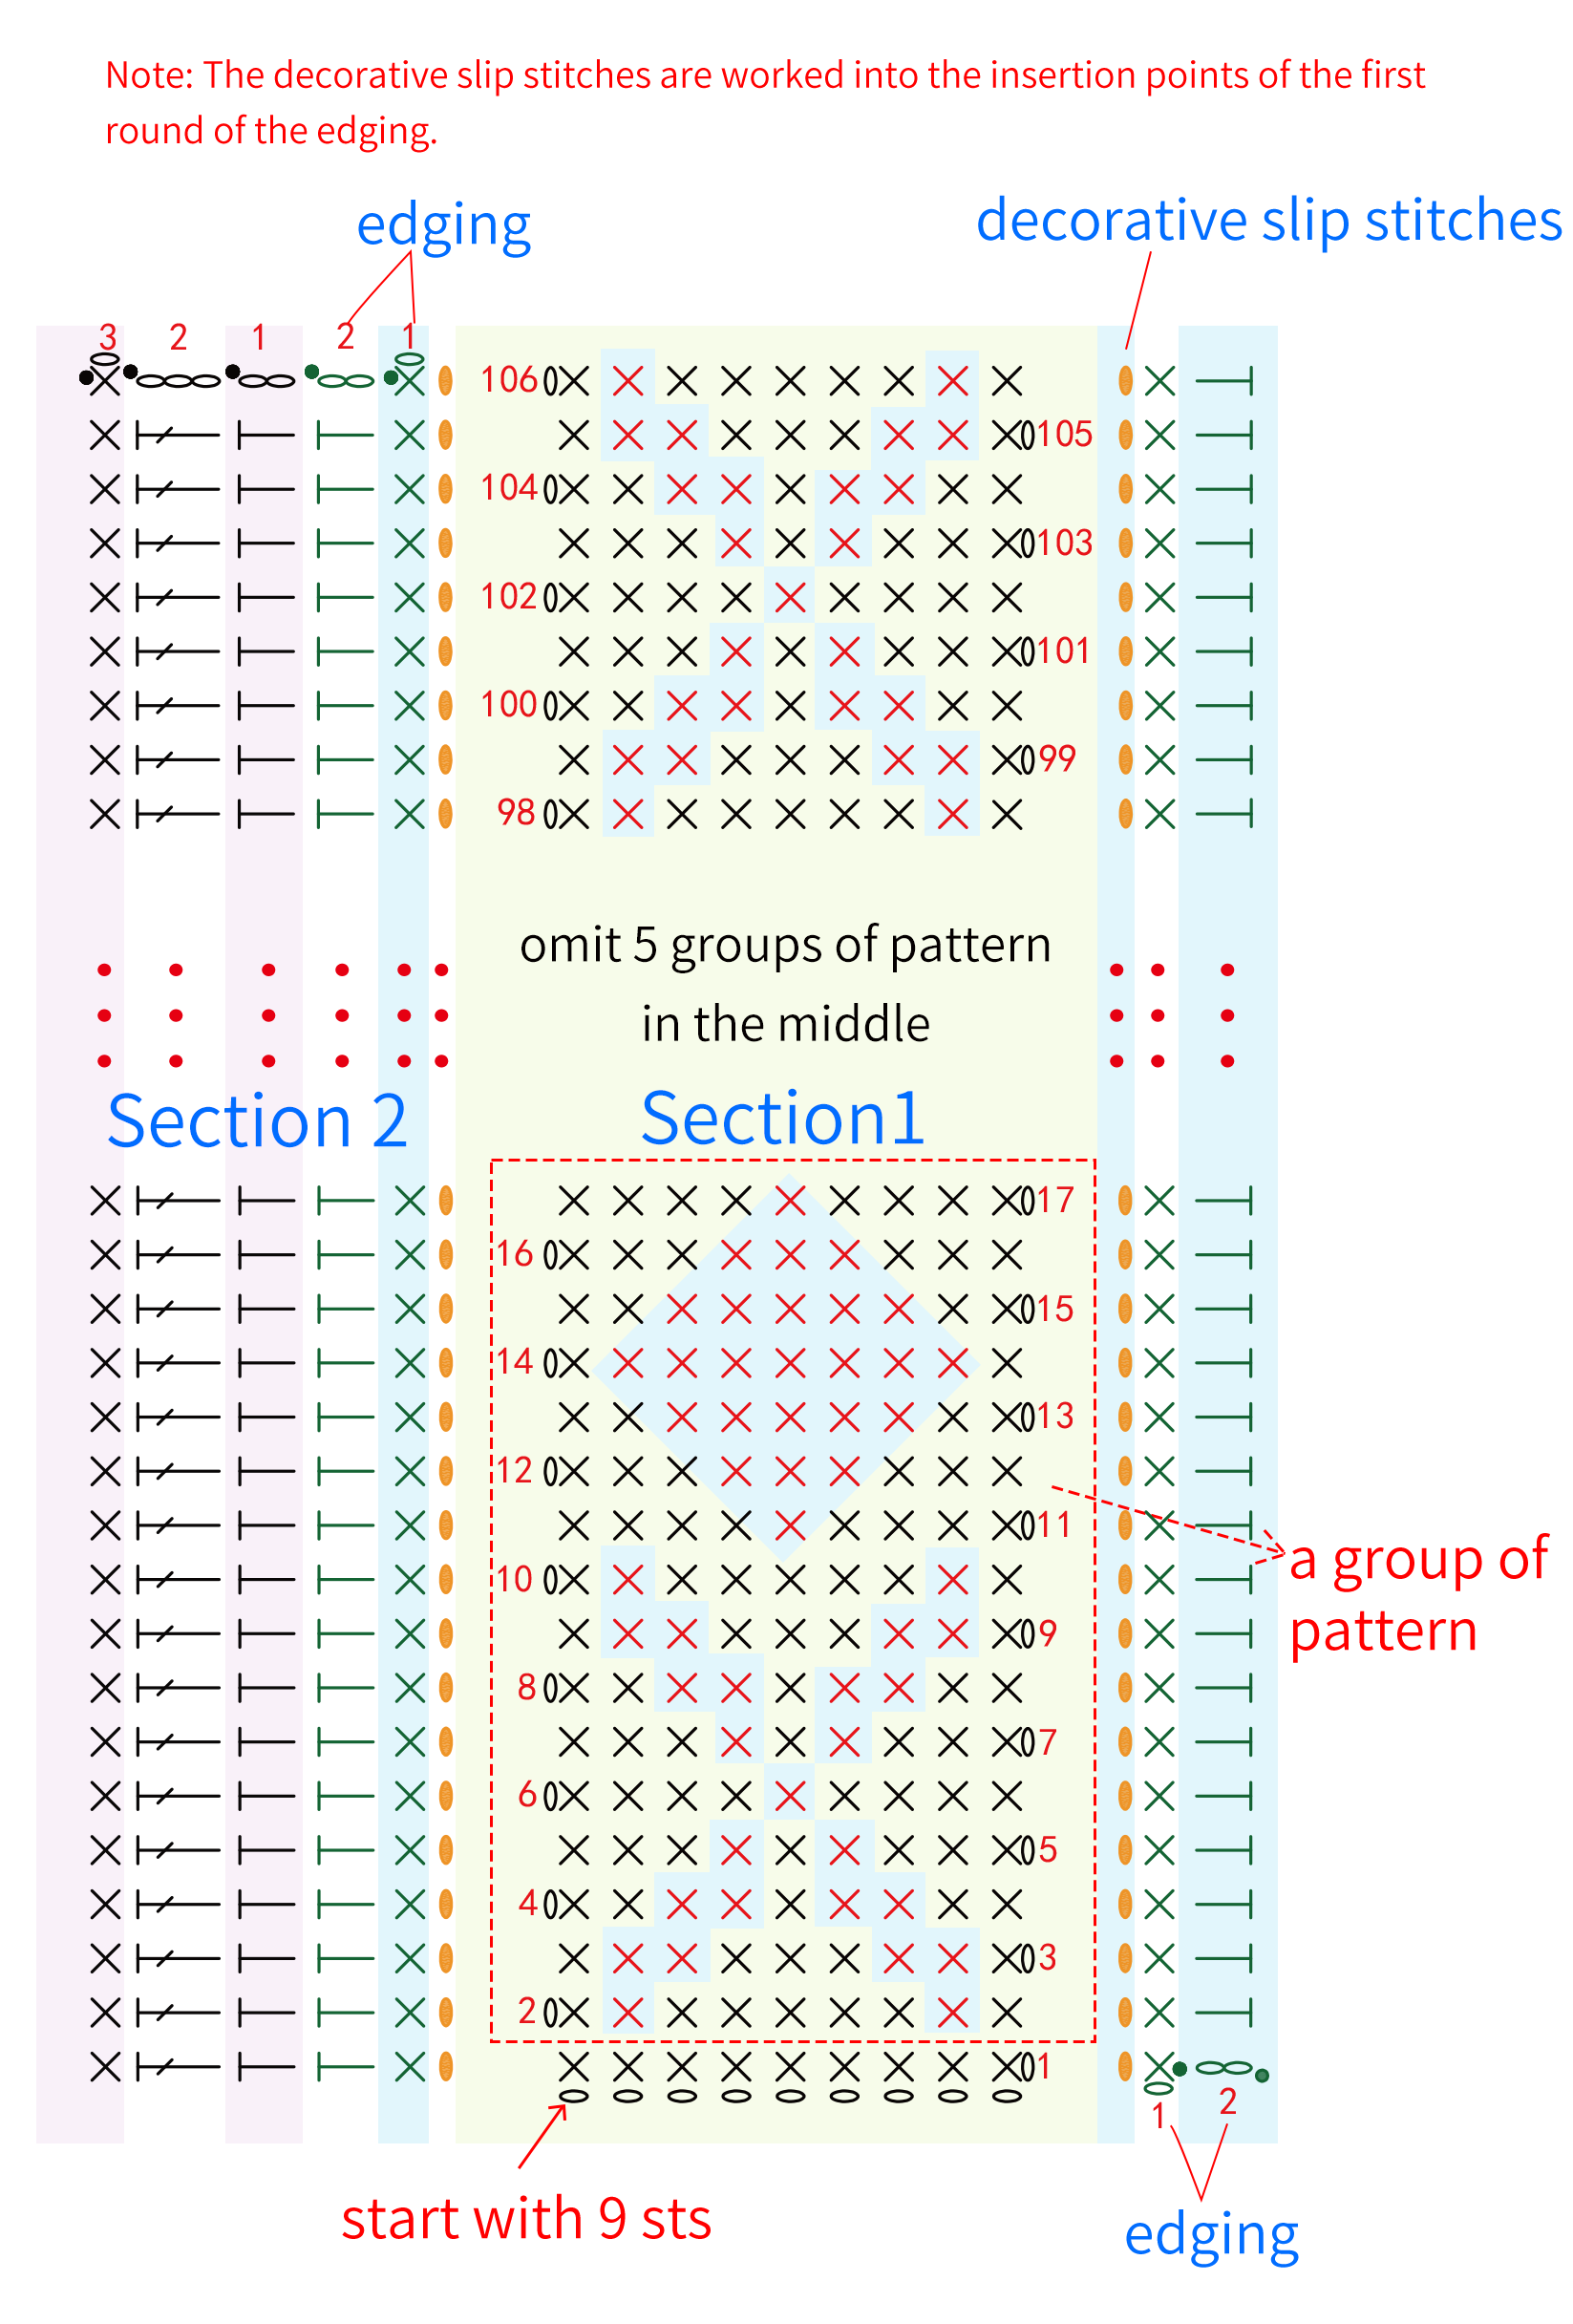
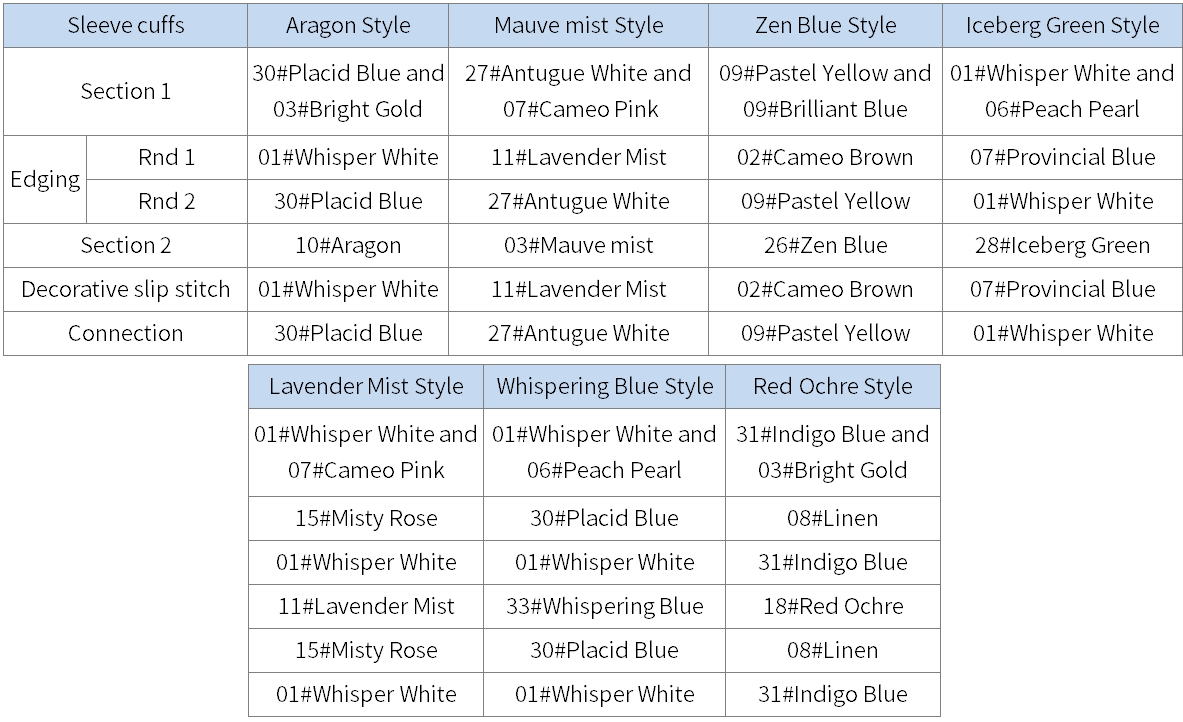
The sleeve cuff is divided into Section 1 and Section 2. For Section 1, start with foundation chain and work back and forth, changing colors midway. After completing this section, sew the beginning and end together, then add an edging and decorative slip stitches. Next, connect it to the sleeve cuff using slip stitches. Finally, crochet Section 2. Please refer to the video demonstration for more details.
Part 4 BandB2 34' 37''
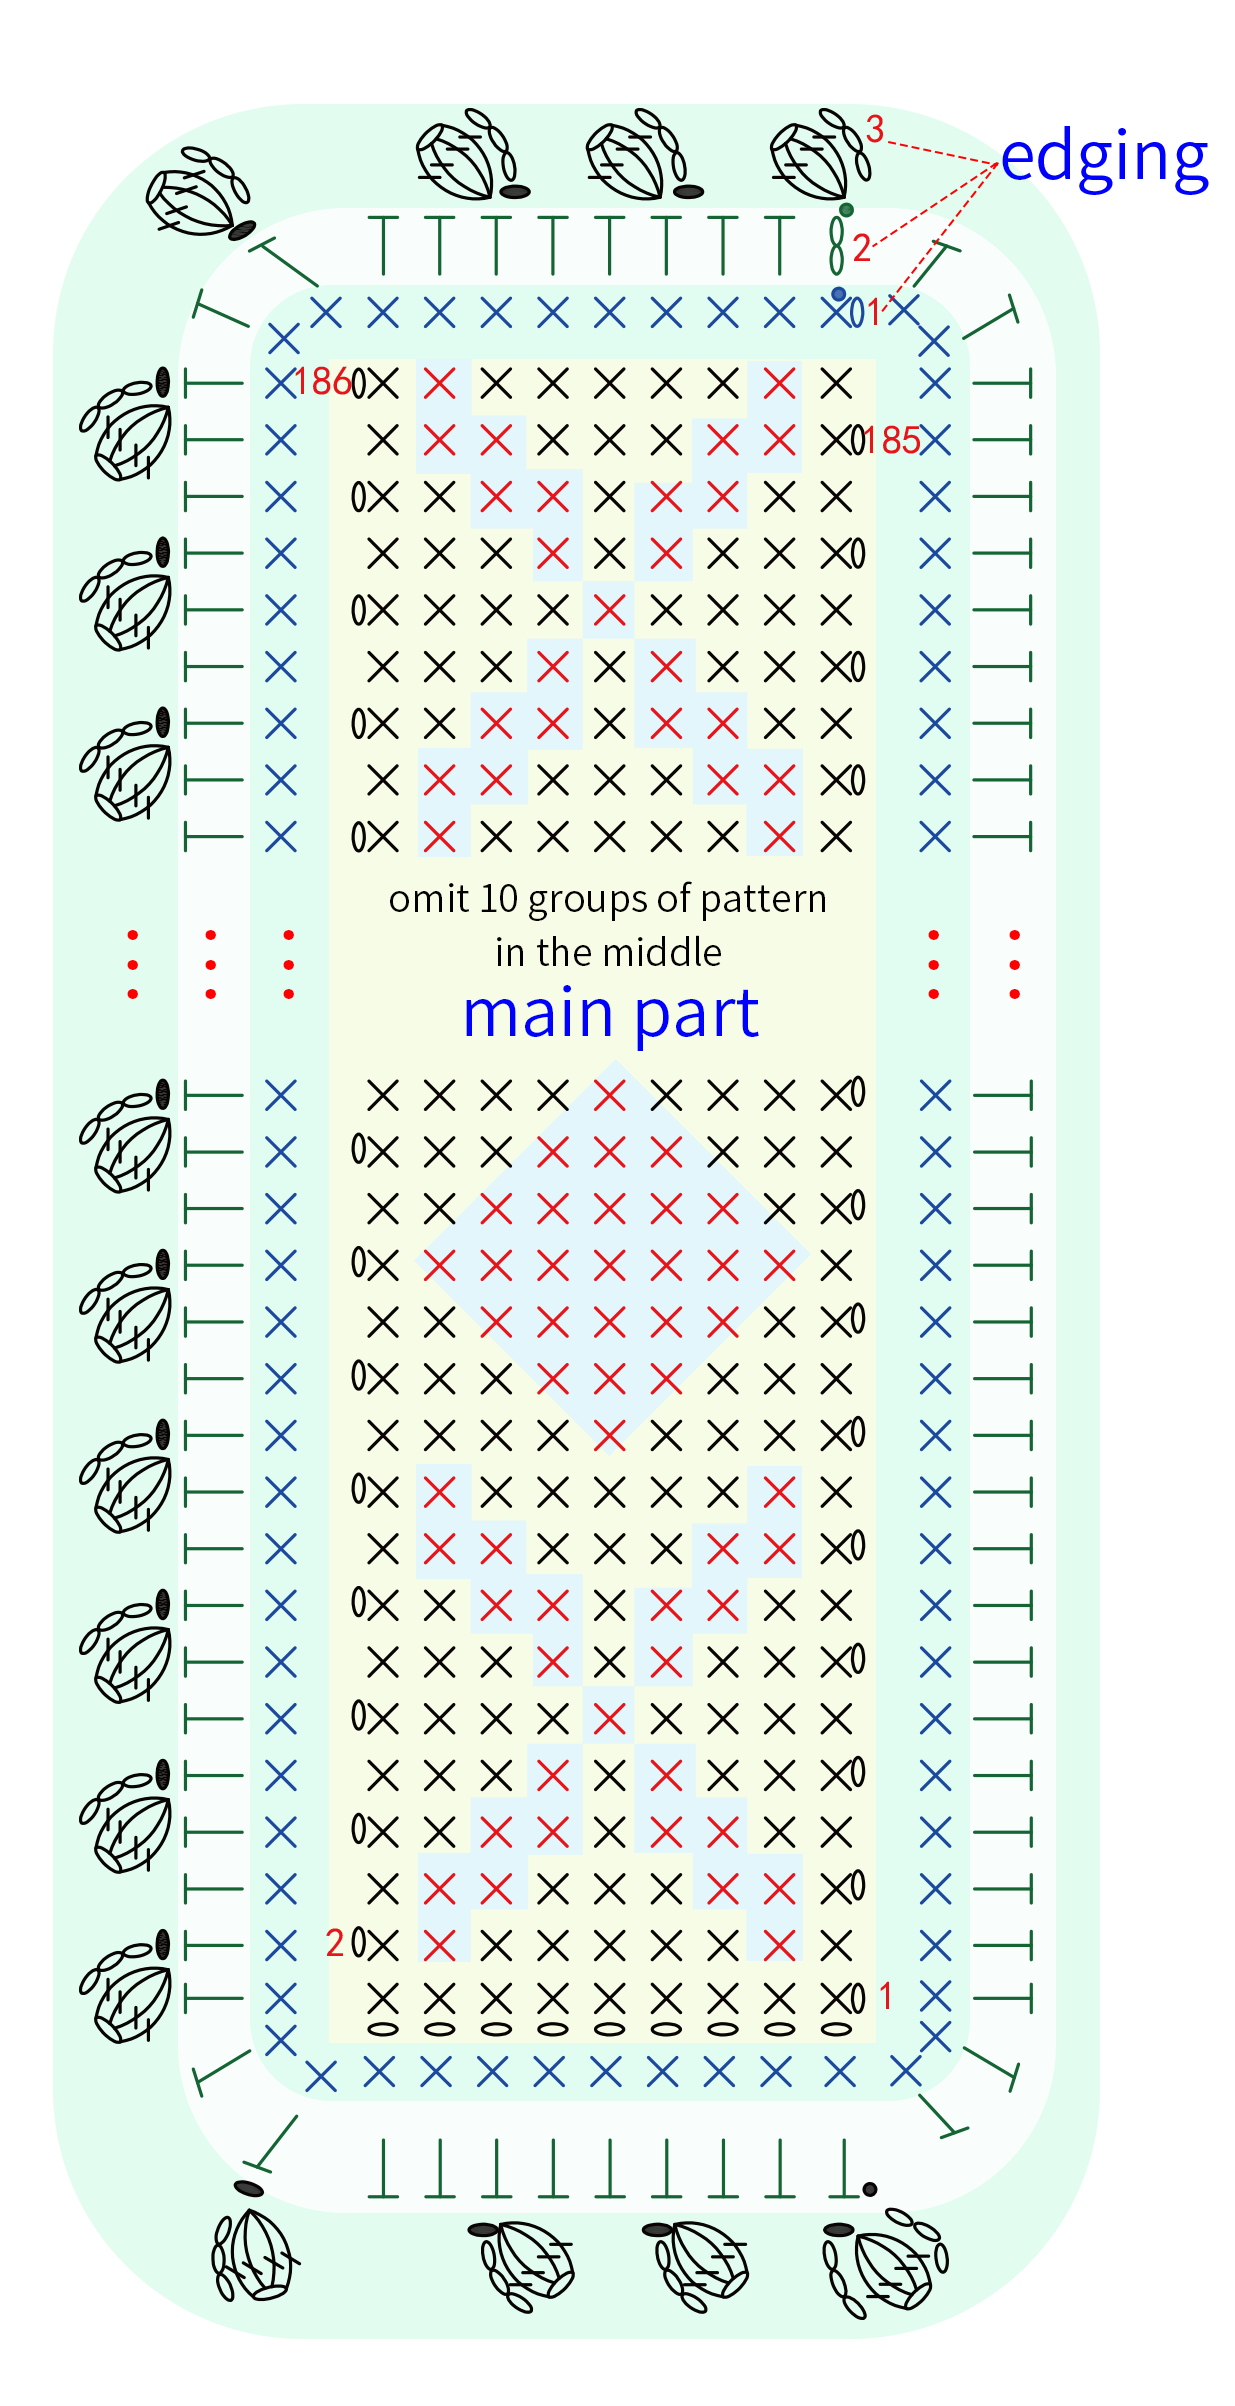
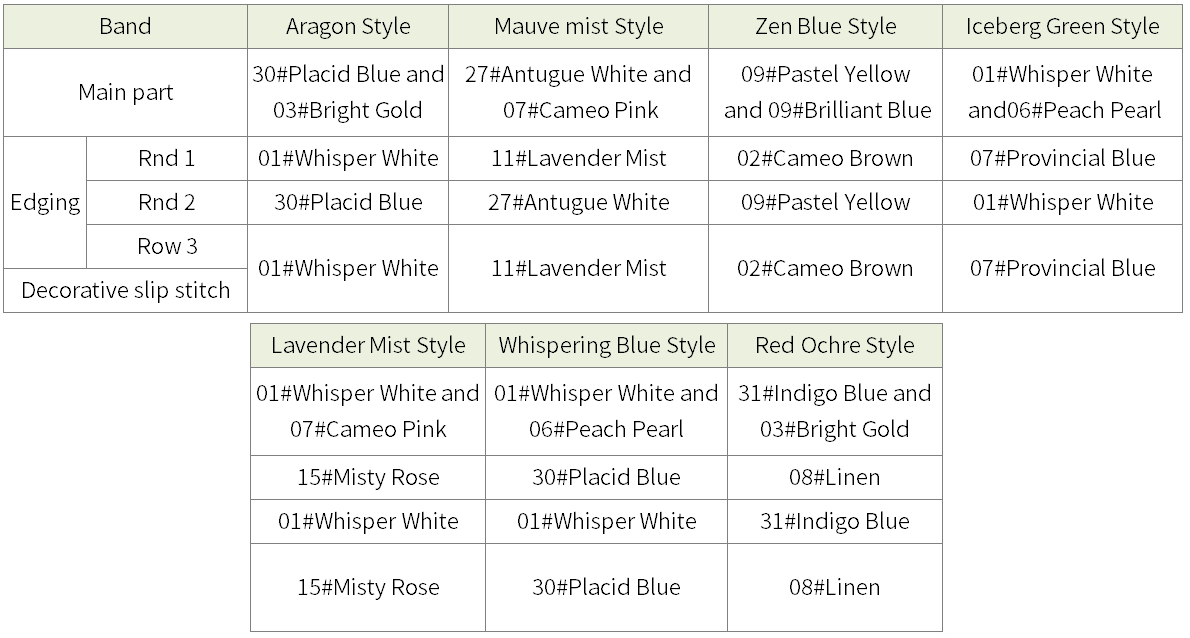
Divide into the main part and the edging. After completing, sew the band using the whip stitch. Please refer to the video demonstration for more details.
1. After completing the first round of the edging, work a round of decorative slip stitches at the insertion points.
2. At the corners of the first and second rounds of the edging, you can work 2 or 3 single crochets or half double crochets, just enough to keep the fabric flat.
3. At the end of the third row of the edging, adjust as needed.
4. Compare the edging of the main part with the band position, and adjust the row count if necessary.
5. Leave a long tail for sewing.
Part 5 Overall edging and decorationsC 40' 28''
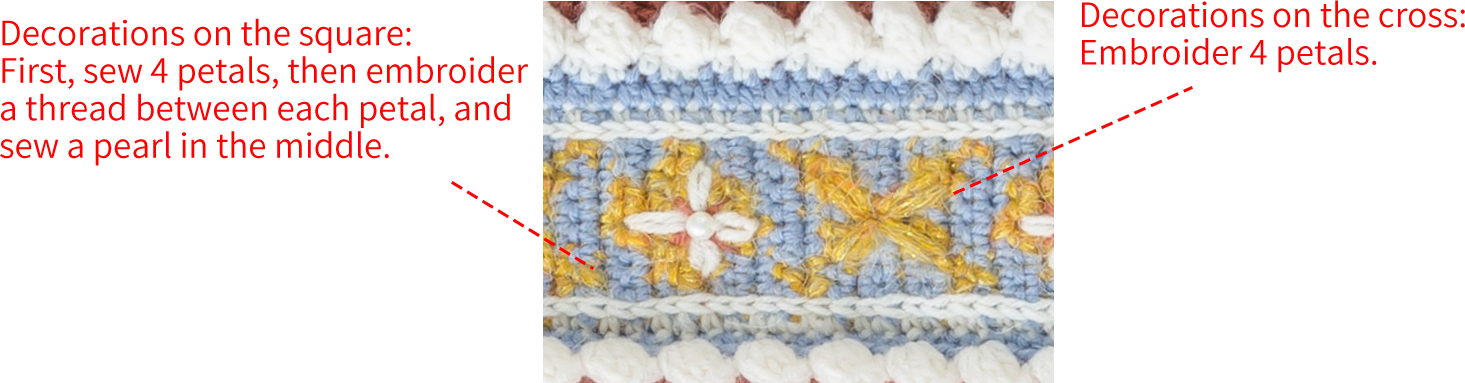
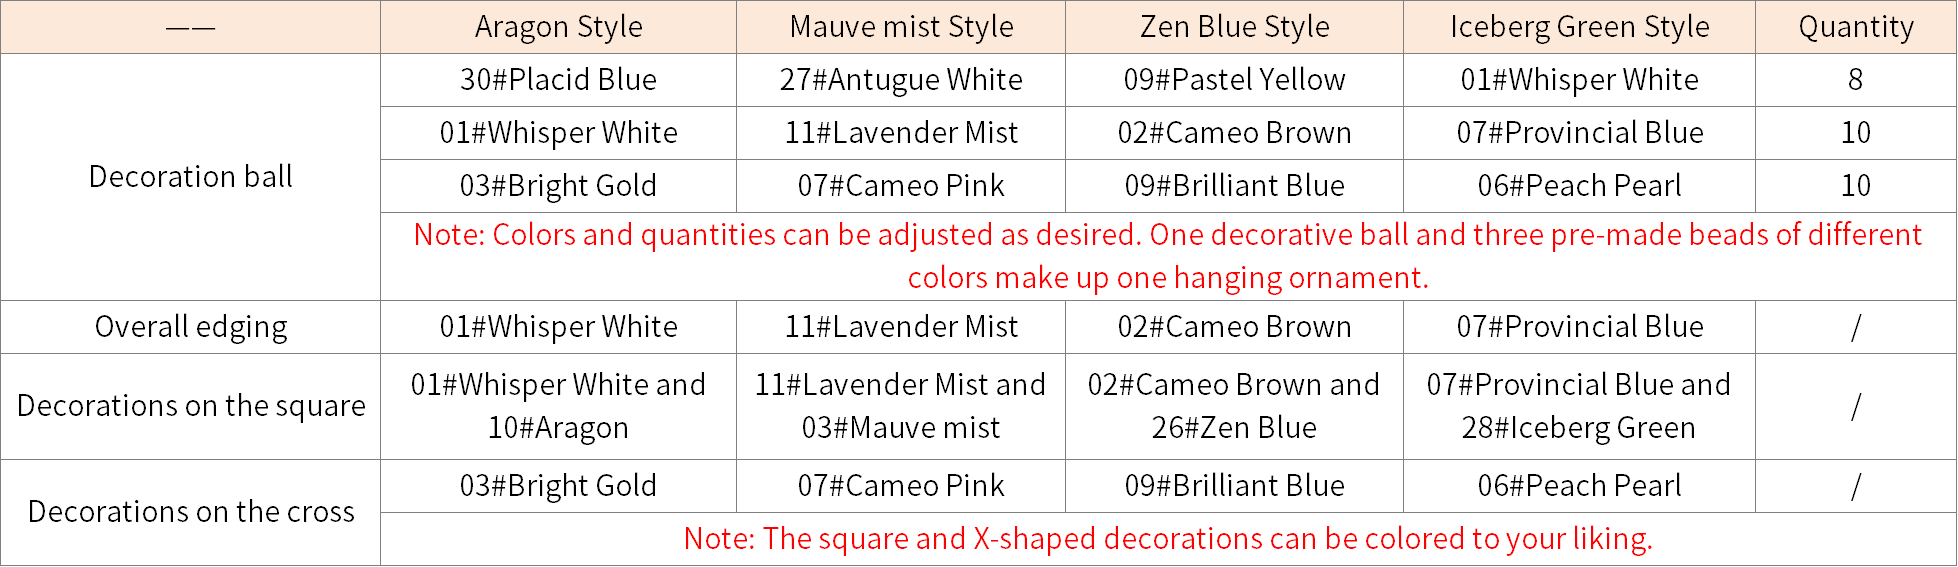
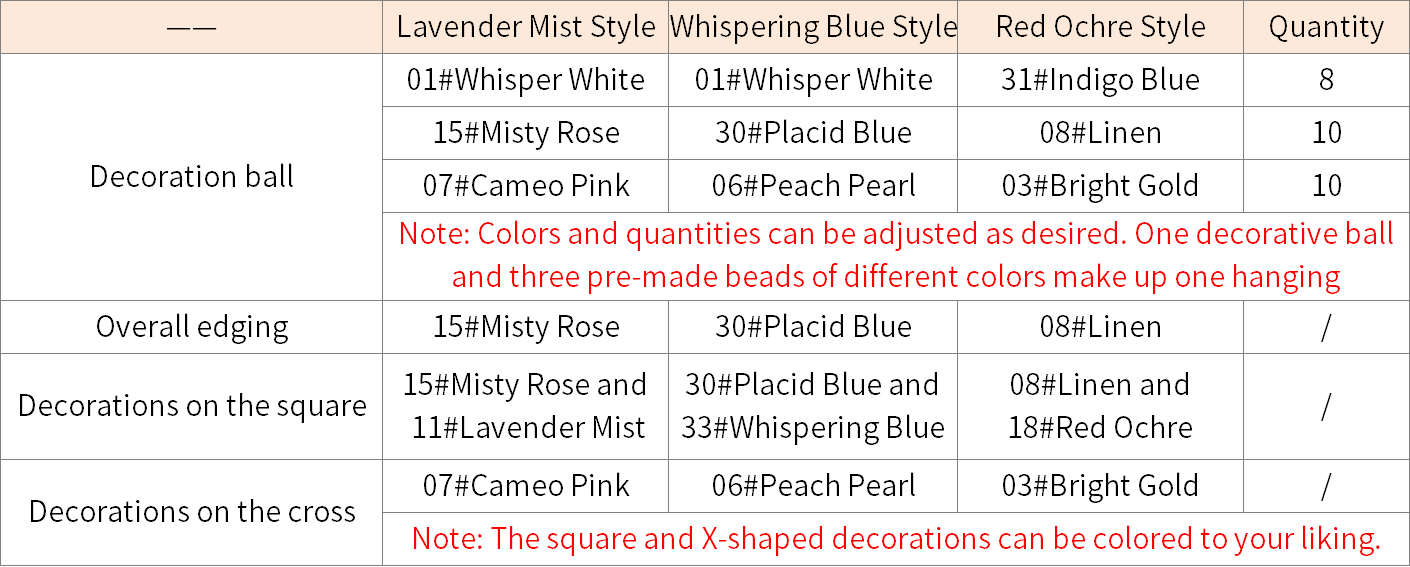
Divide into embroidered decorations and hanging ornaments. Please refer to the video demonstration for more details.
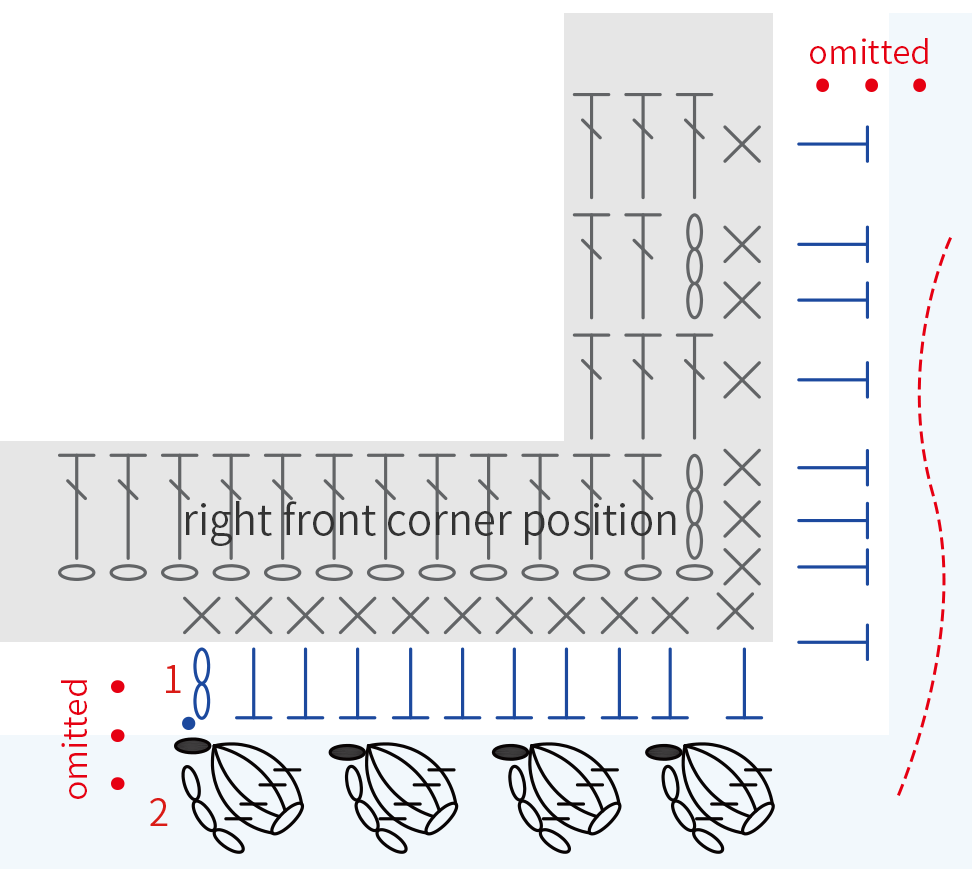
Note: For the first round of the overall edging, work 2 stitches at each corner, and work into each stitch evenly elsewhere.
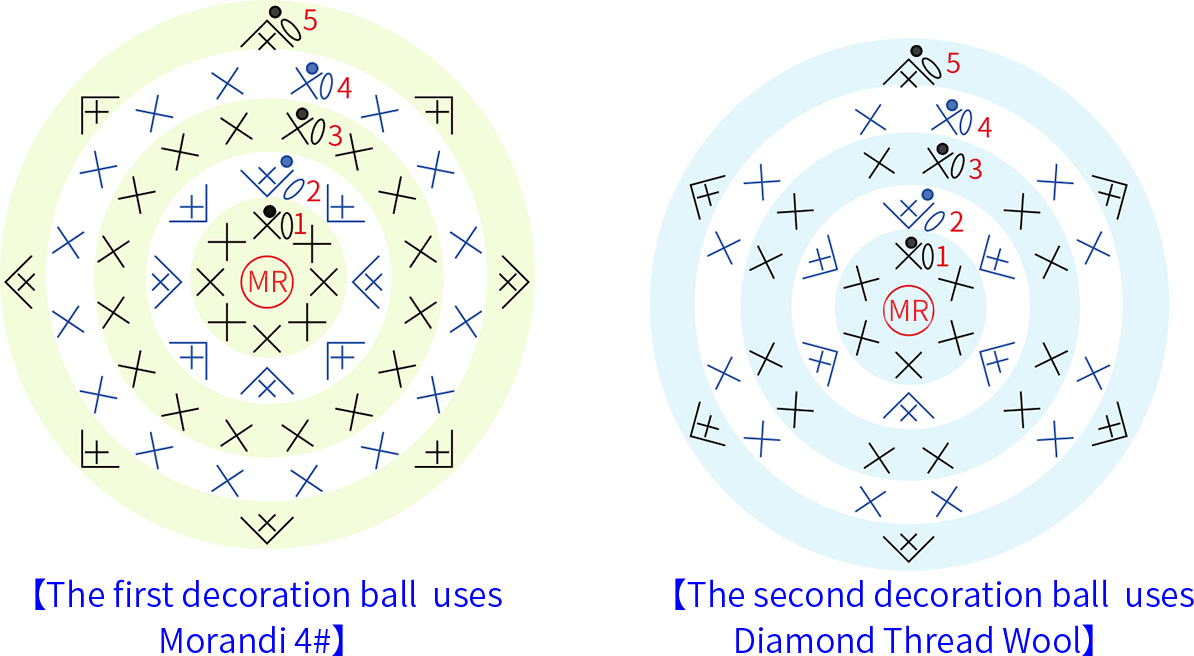
Note: Leave a 30cm yarn tail at the end of the decorative ball.
Made by the community