Home / Blanket
Morocco Zellige Patchwork Blanket
Project preview
See the finished project
Pattern format
Instructions
Watch and follow
Video tutorial
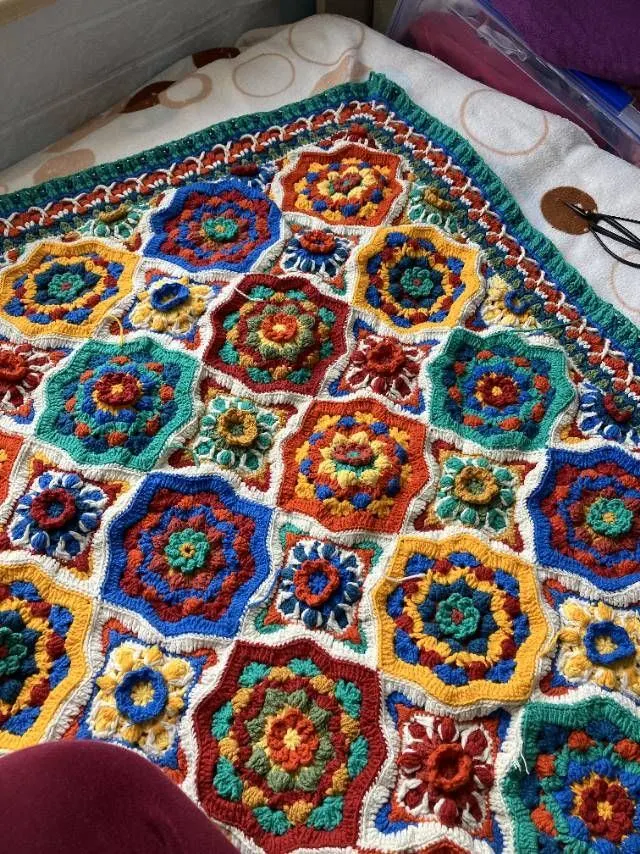
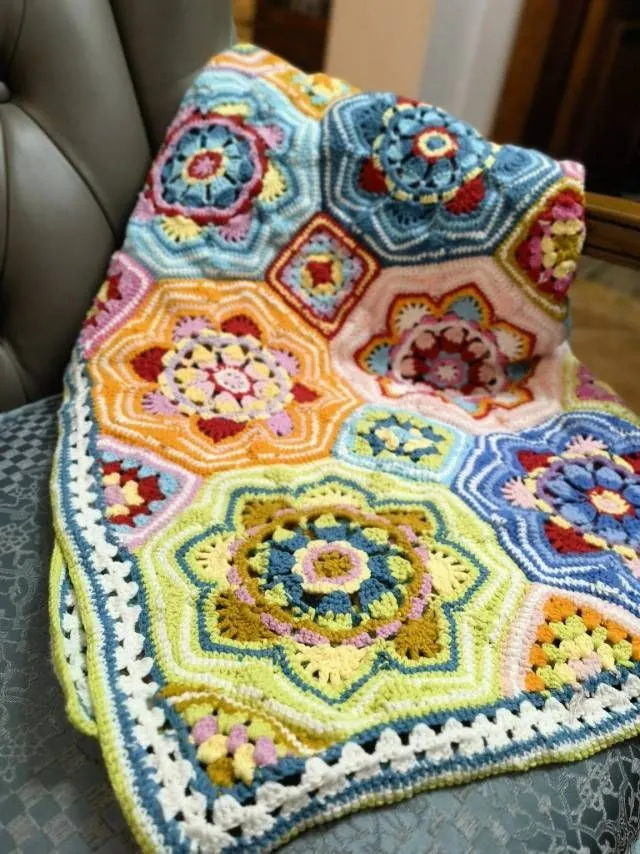
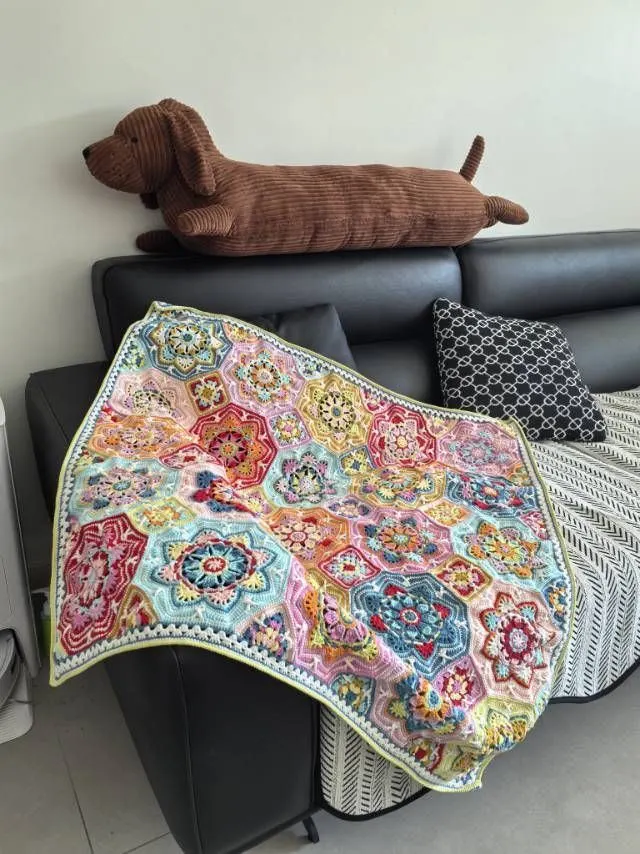
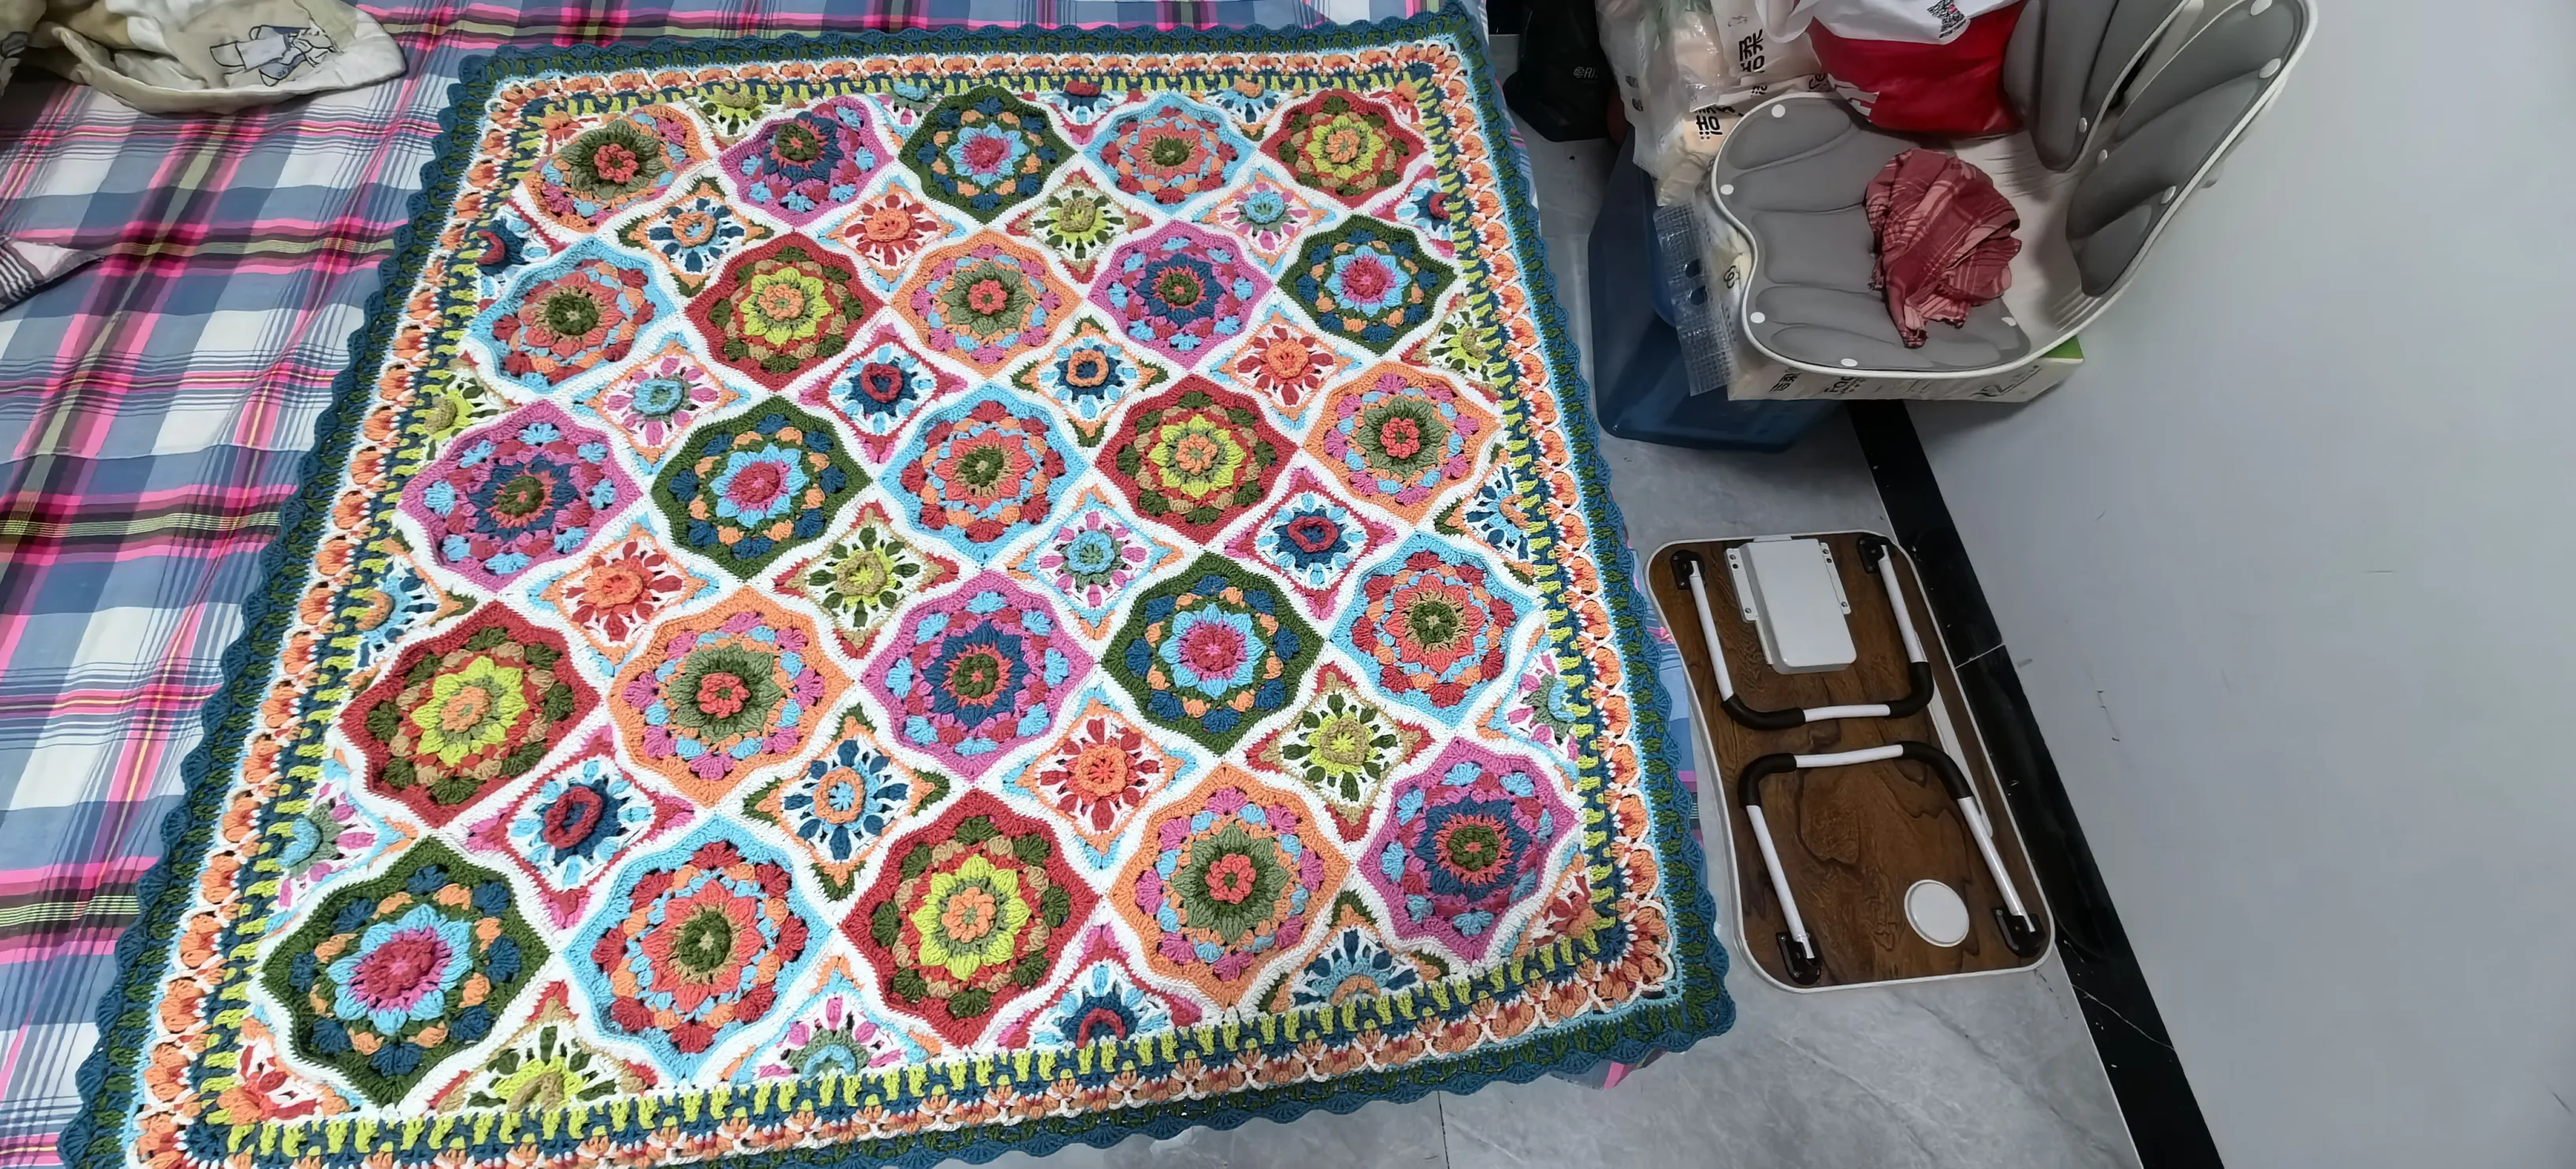
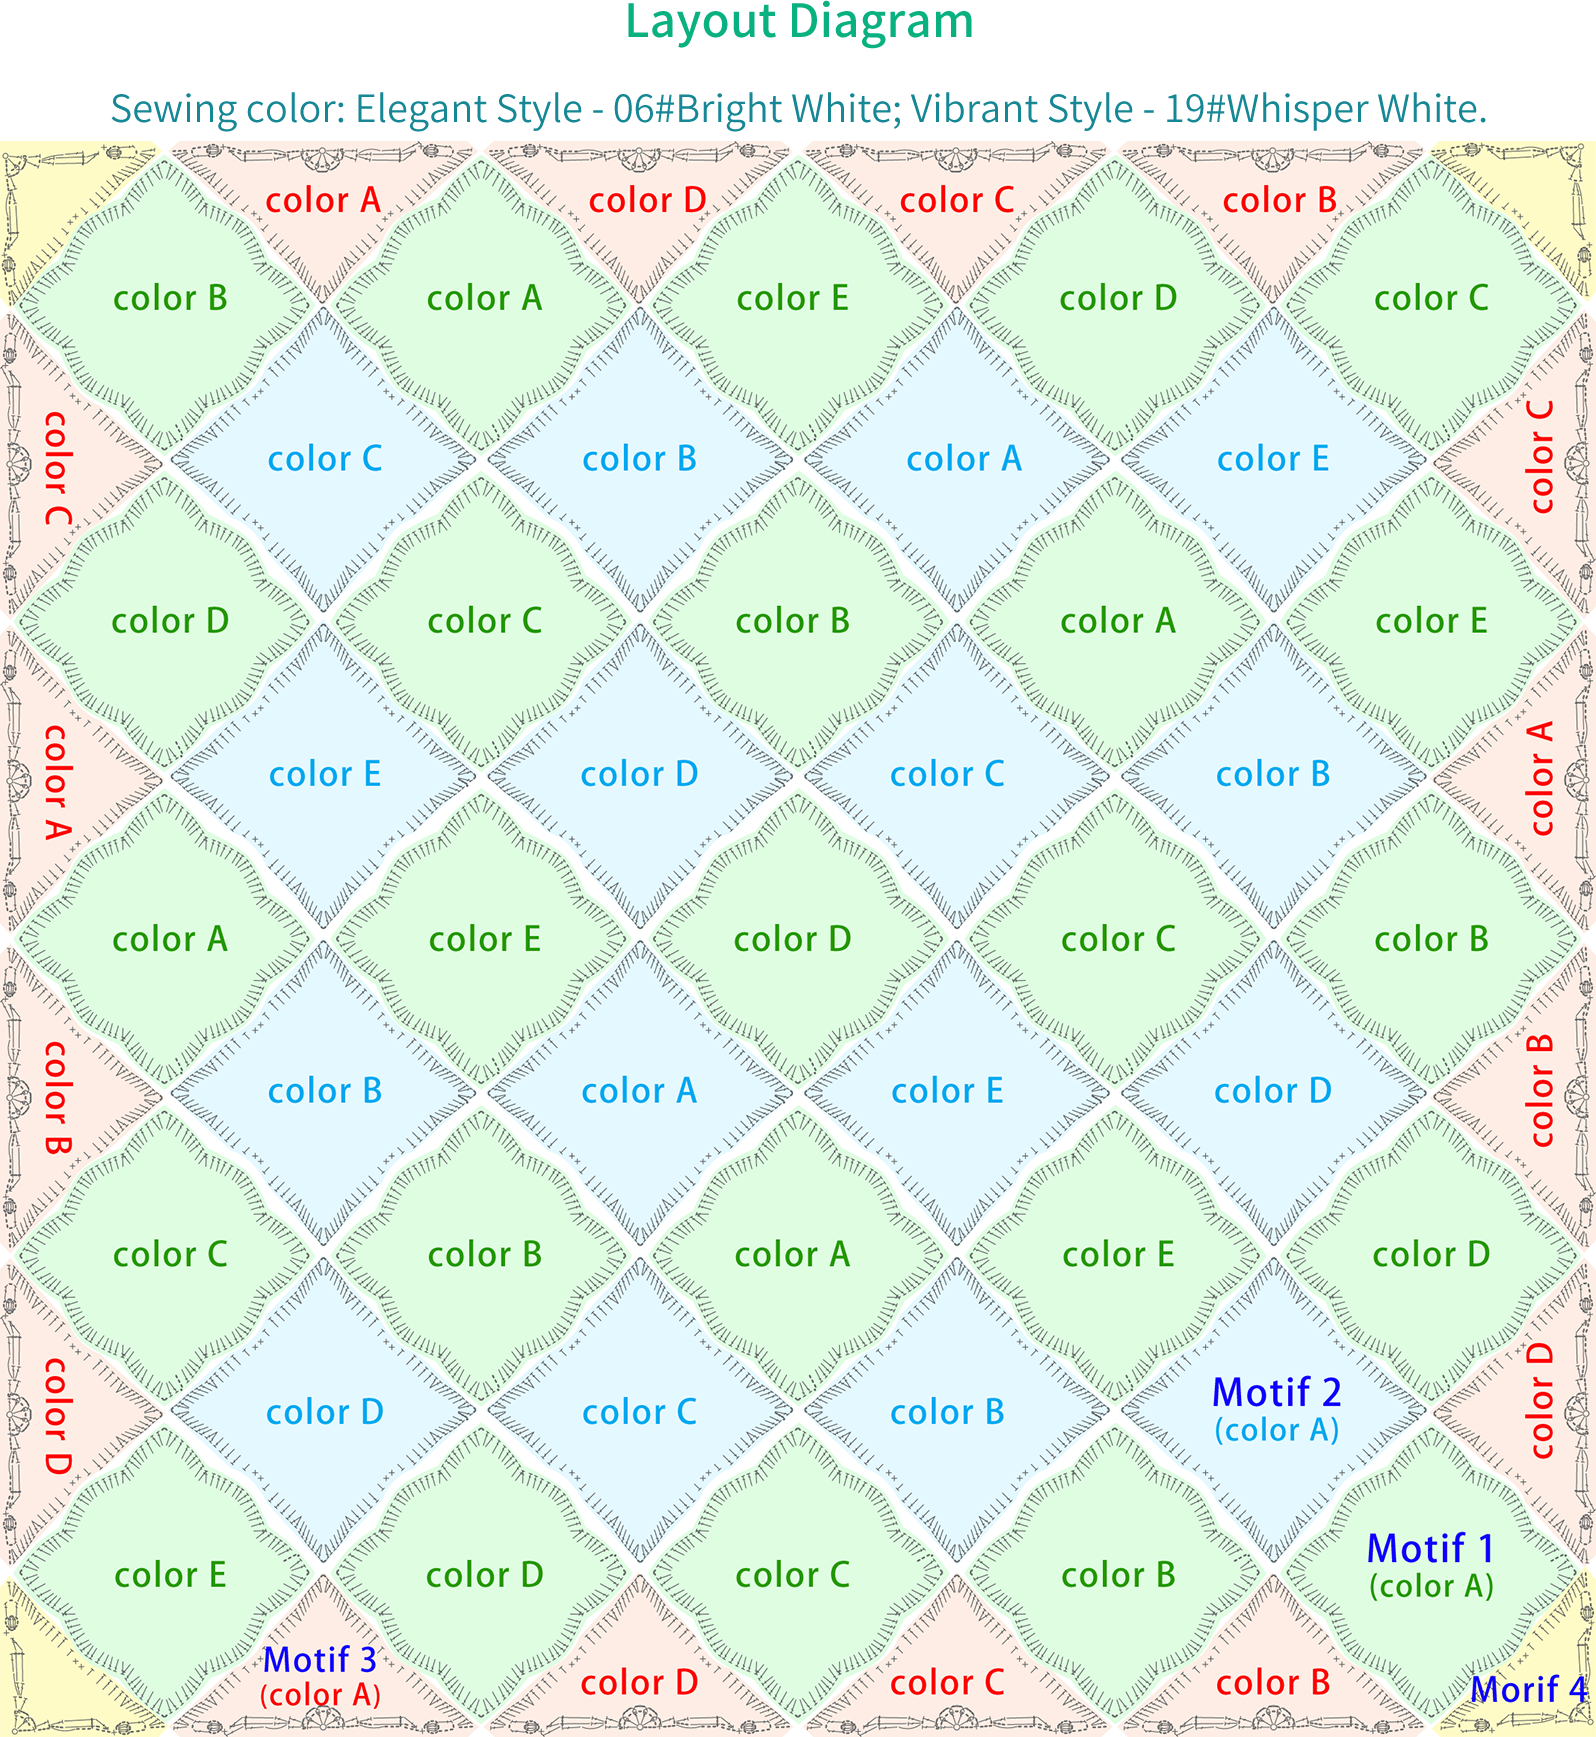
This blanket consists of motifs, sewing and edging. There are four types of motifs, refer as Motif One, Motif Two, Motif Three, and Motif Four. First, crochet and sew all the motifs together. Then, edge around the border.
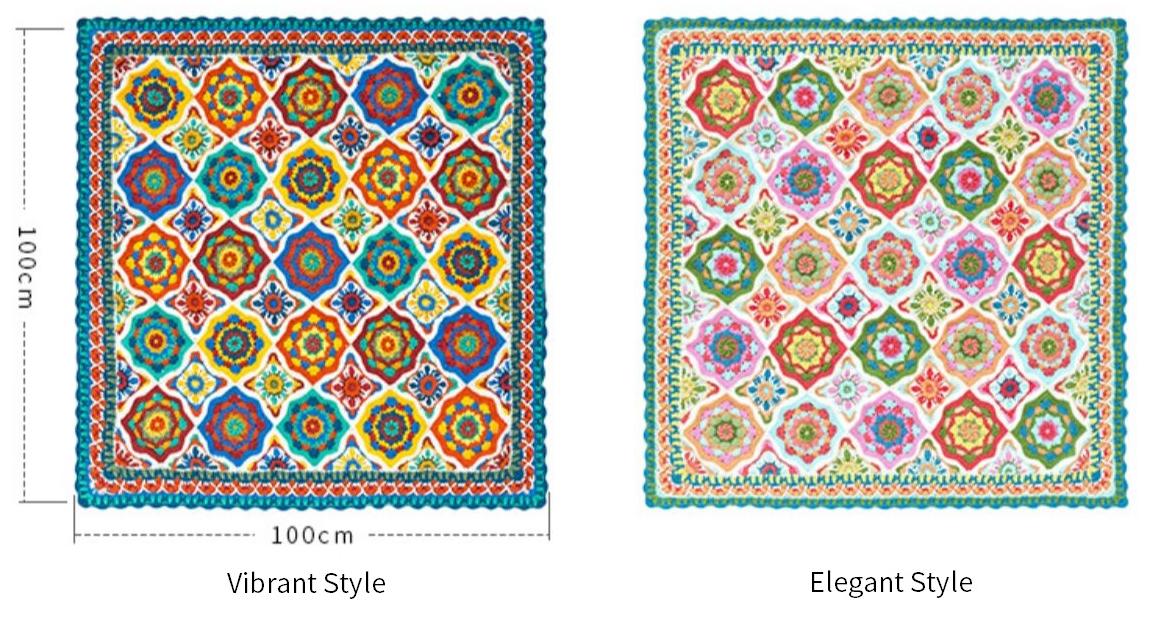
The completed blanket size: 100 cm × 100 cm
The single motif measures in about 12 cm square
The handcrafted measurements may have an error of 1 to 2cm. Due to variations in individual tension, the size of the sample is for reference only.
Material: 4-Ply Combed Cotton & Acrylic Fibre Hand Knitting Yarn
Hook: 3.00mm crochet hook

Chart Key















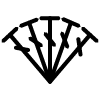
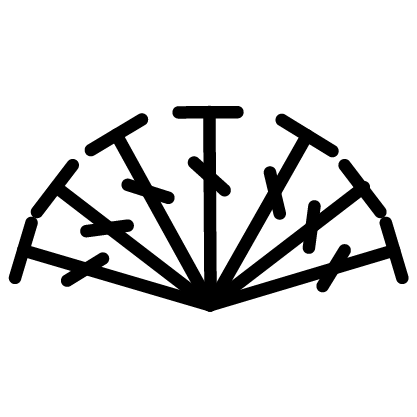
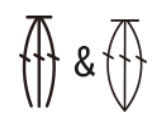




Note: This pattern is making in Chinese crochet pattern terms, and the stitch name is written using American terminology. All measurements in charts are in cm.
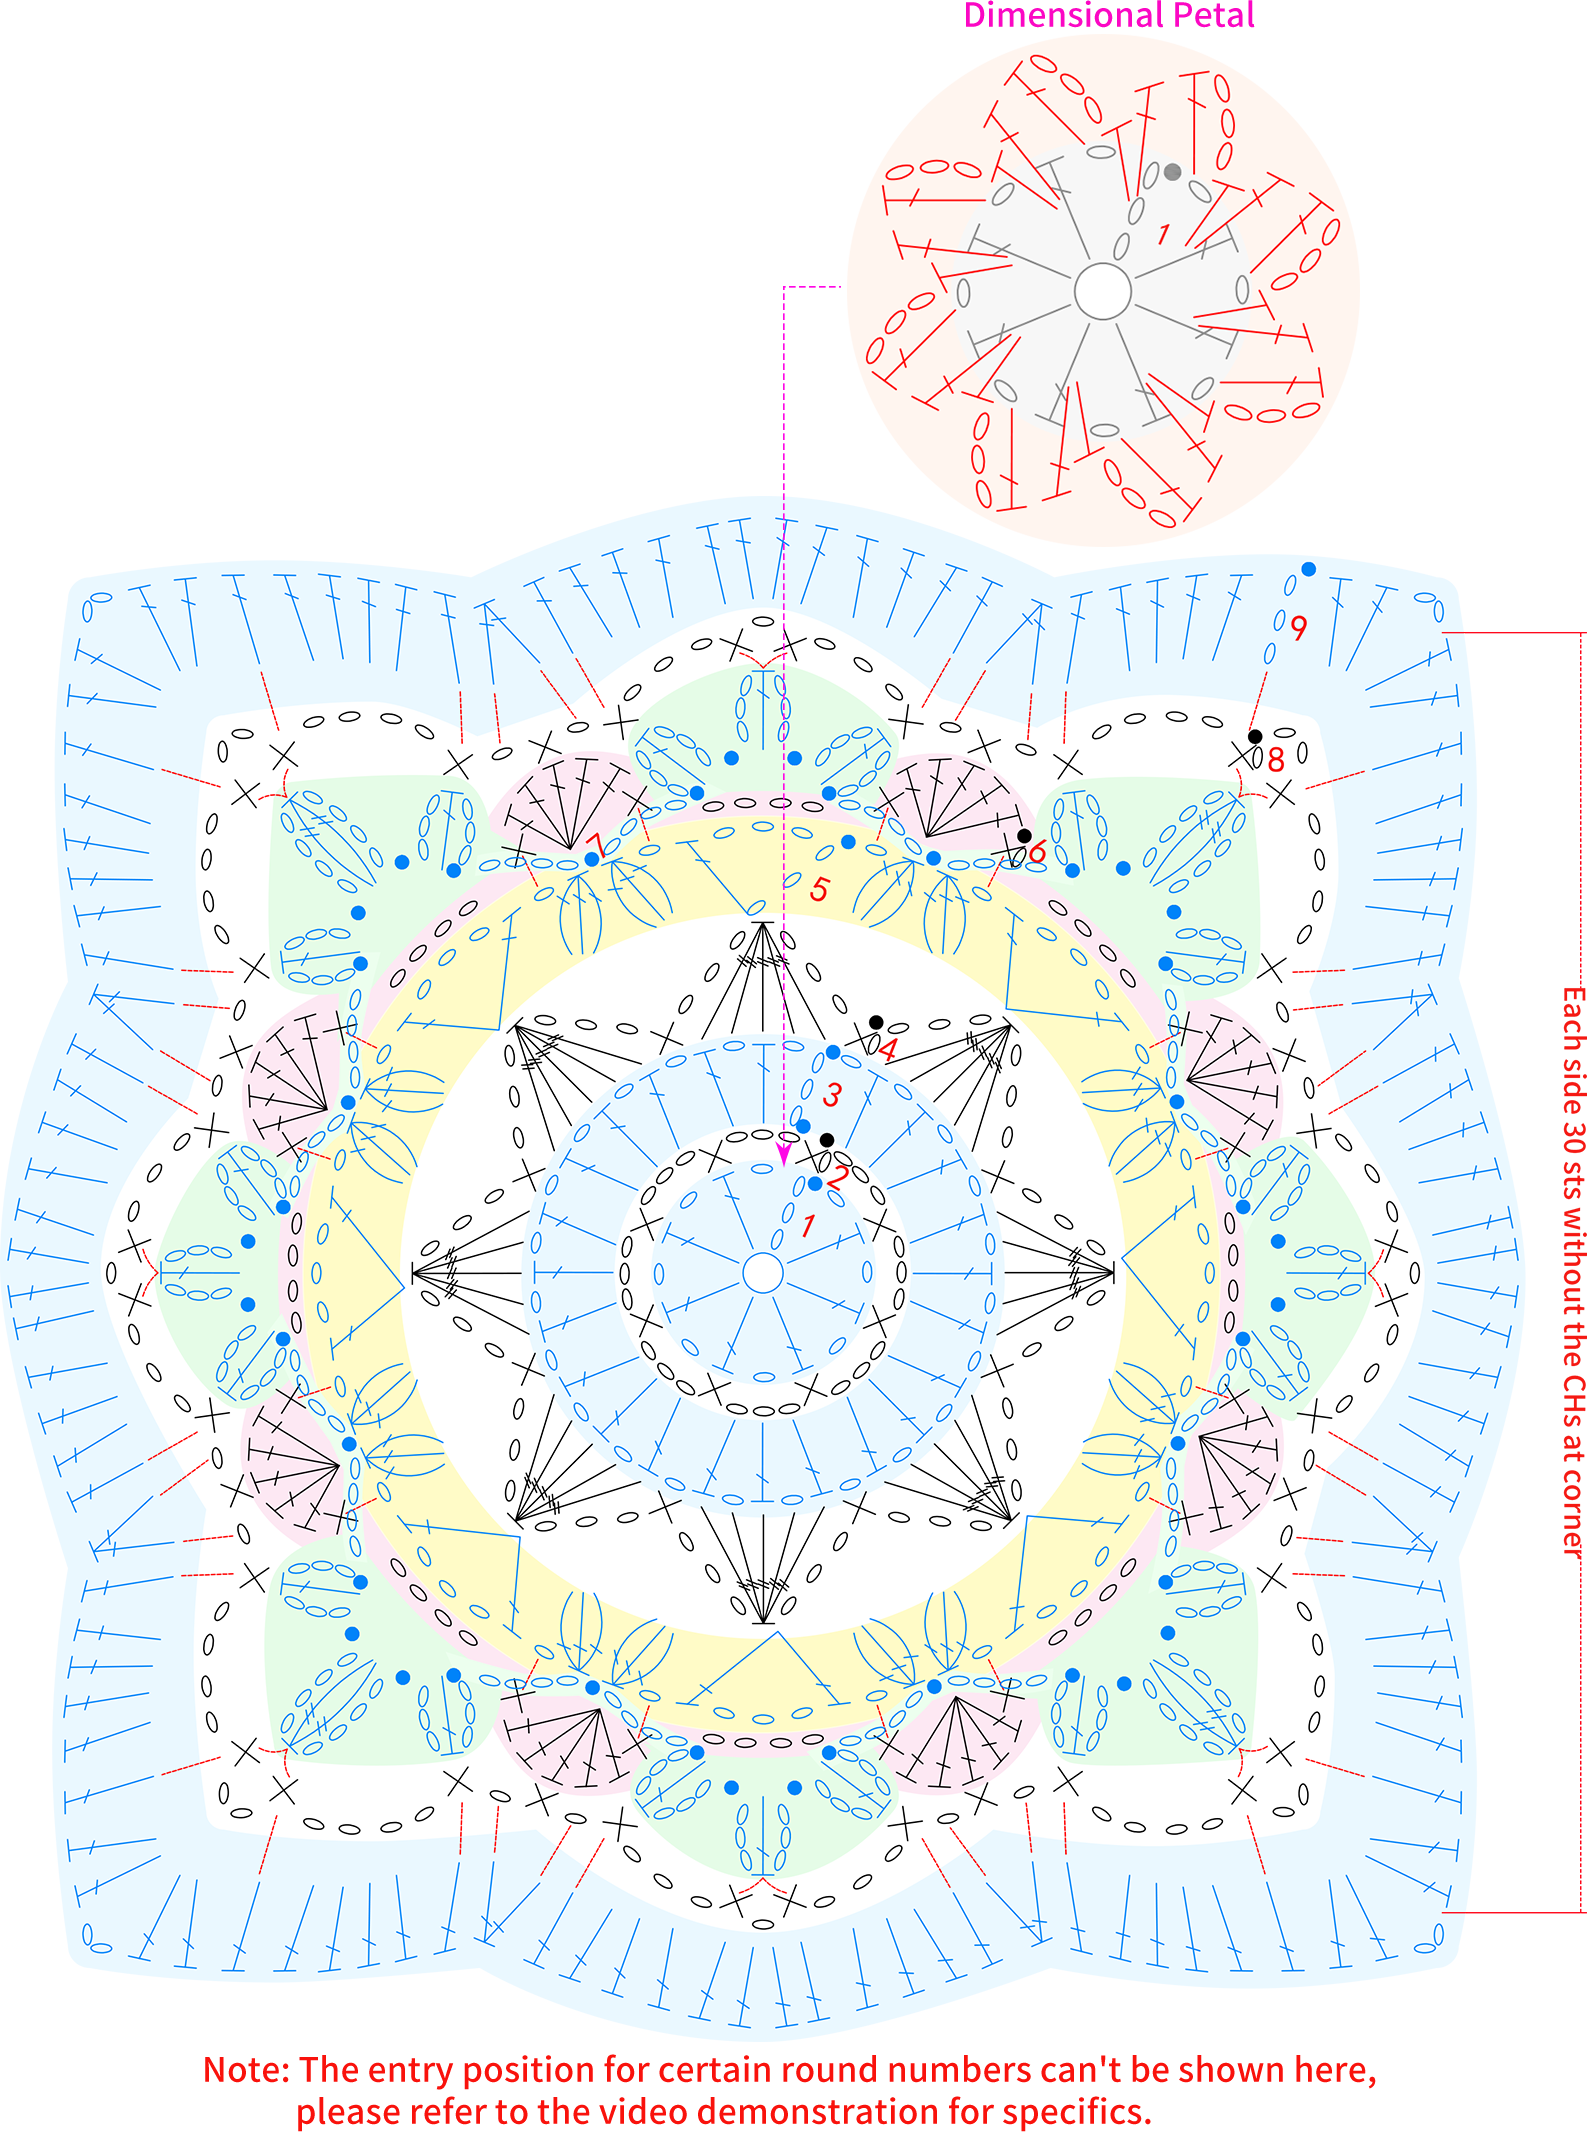
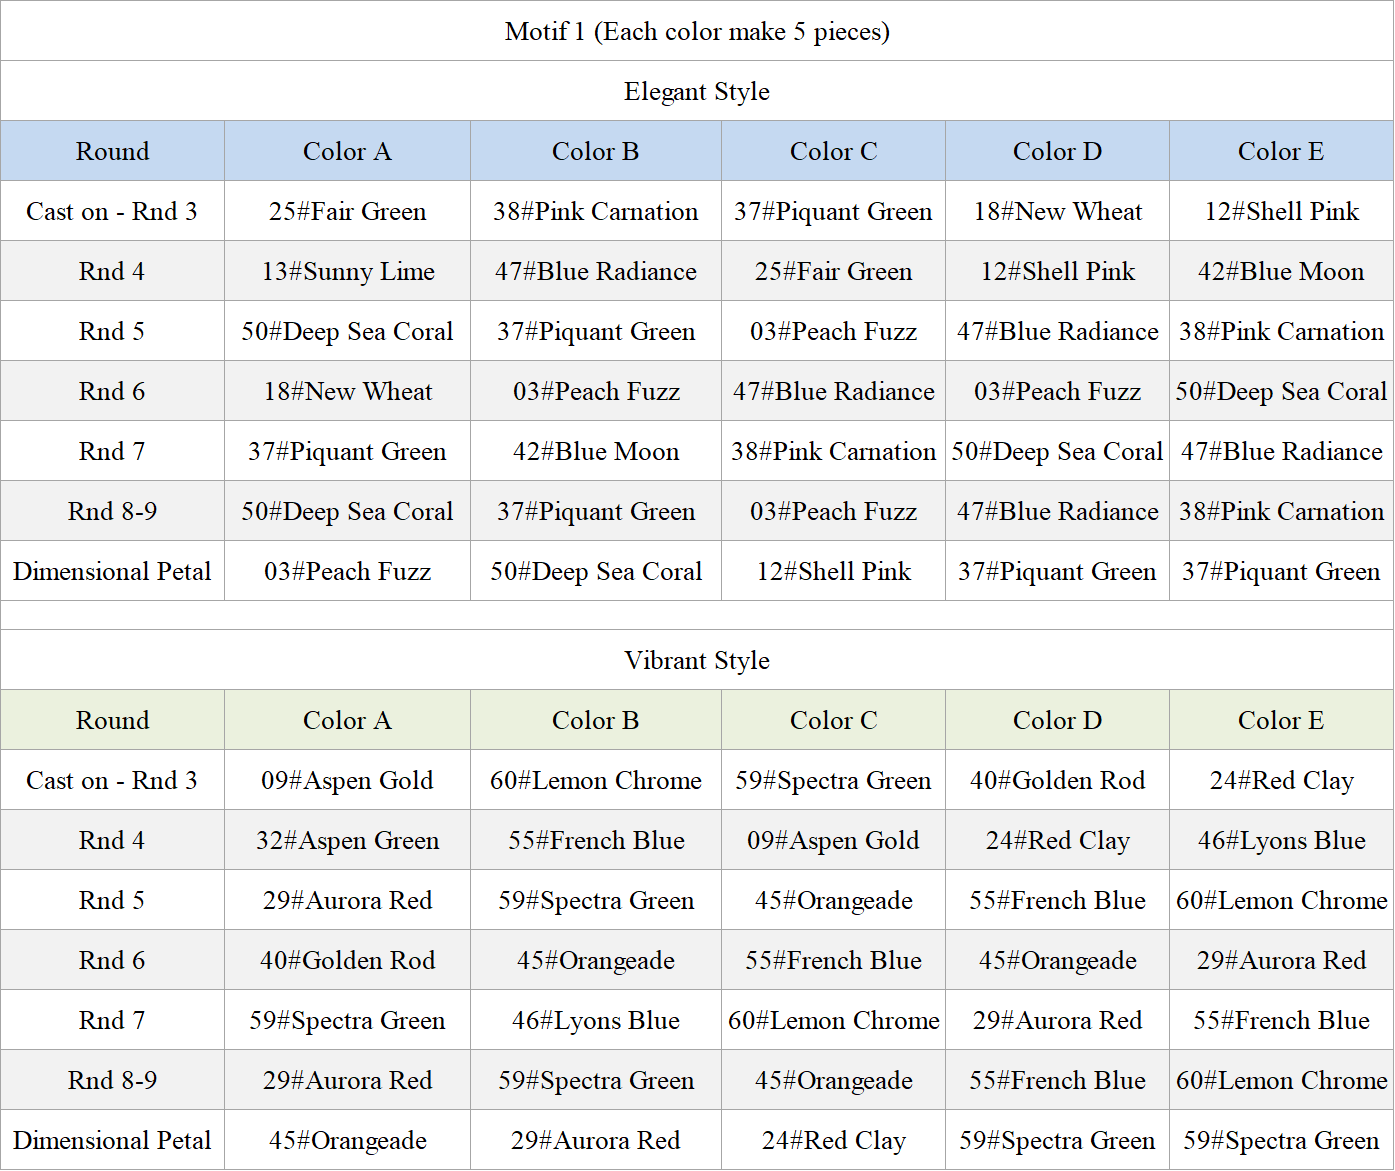
PART 1 Motif 1A 00' 45'' (Part 1)
Start from the magic ring, crochet counter clockwise in round. Finally, make dimensional petal on Round 1. Please refer to the video demonstration for specifics.
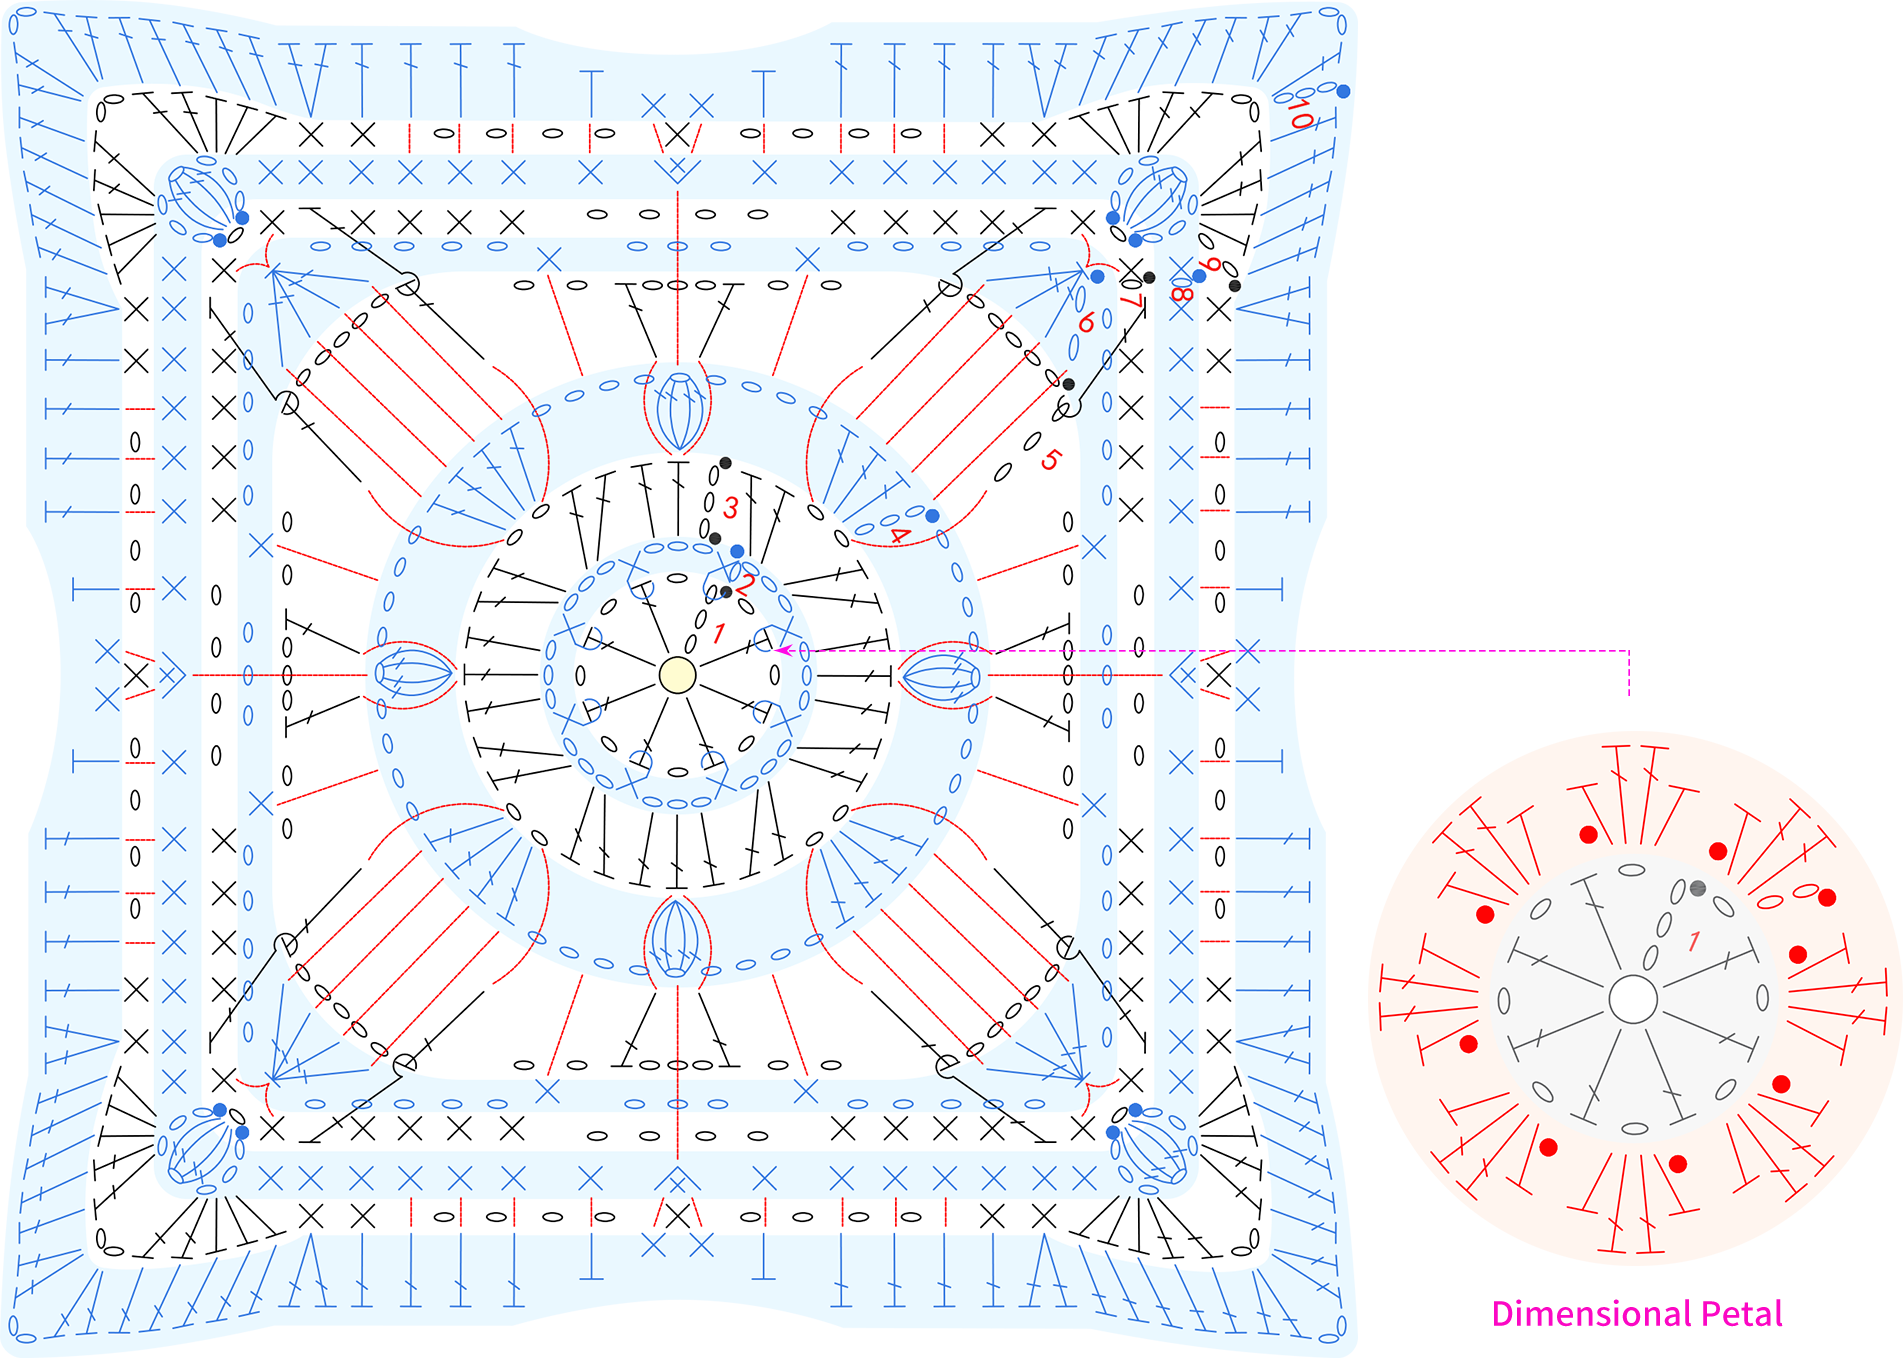
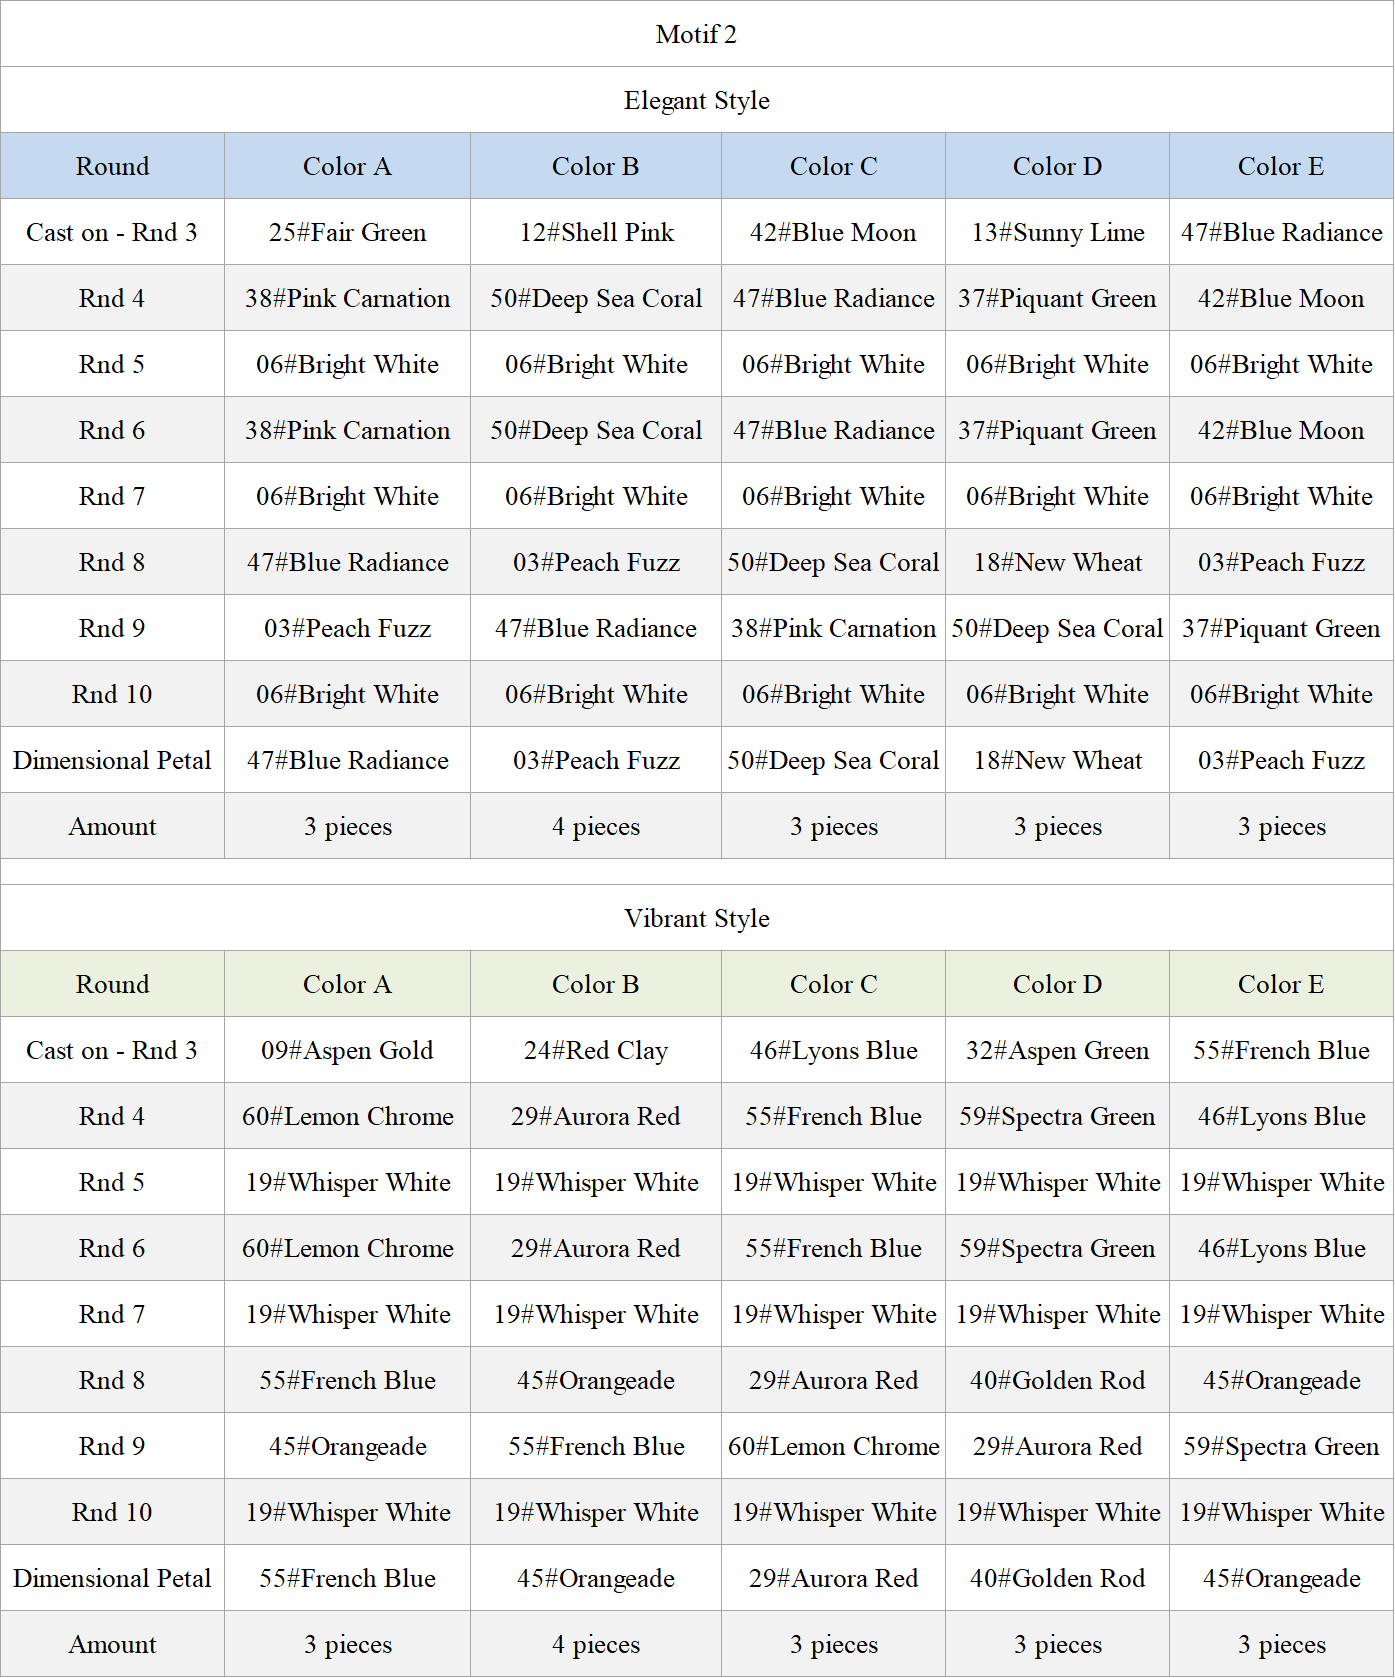
PART 2 Motif 2B 57' 50'' (Part 1)
Start from the magic ring, crochet counter clockwise in round. Finally, make dimensional petal on Round 1. Please refer to the video demonstration for specifics.
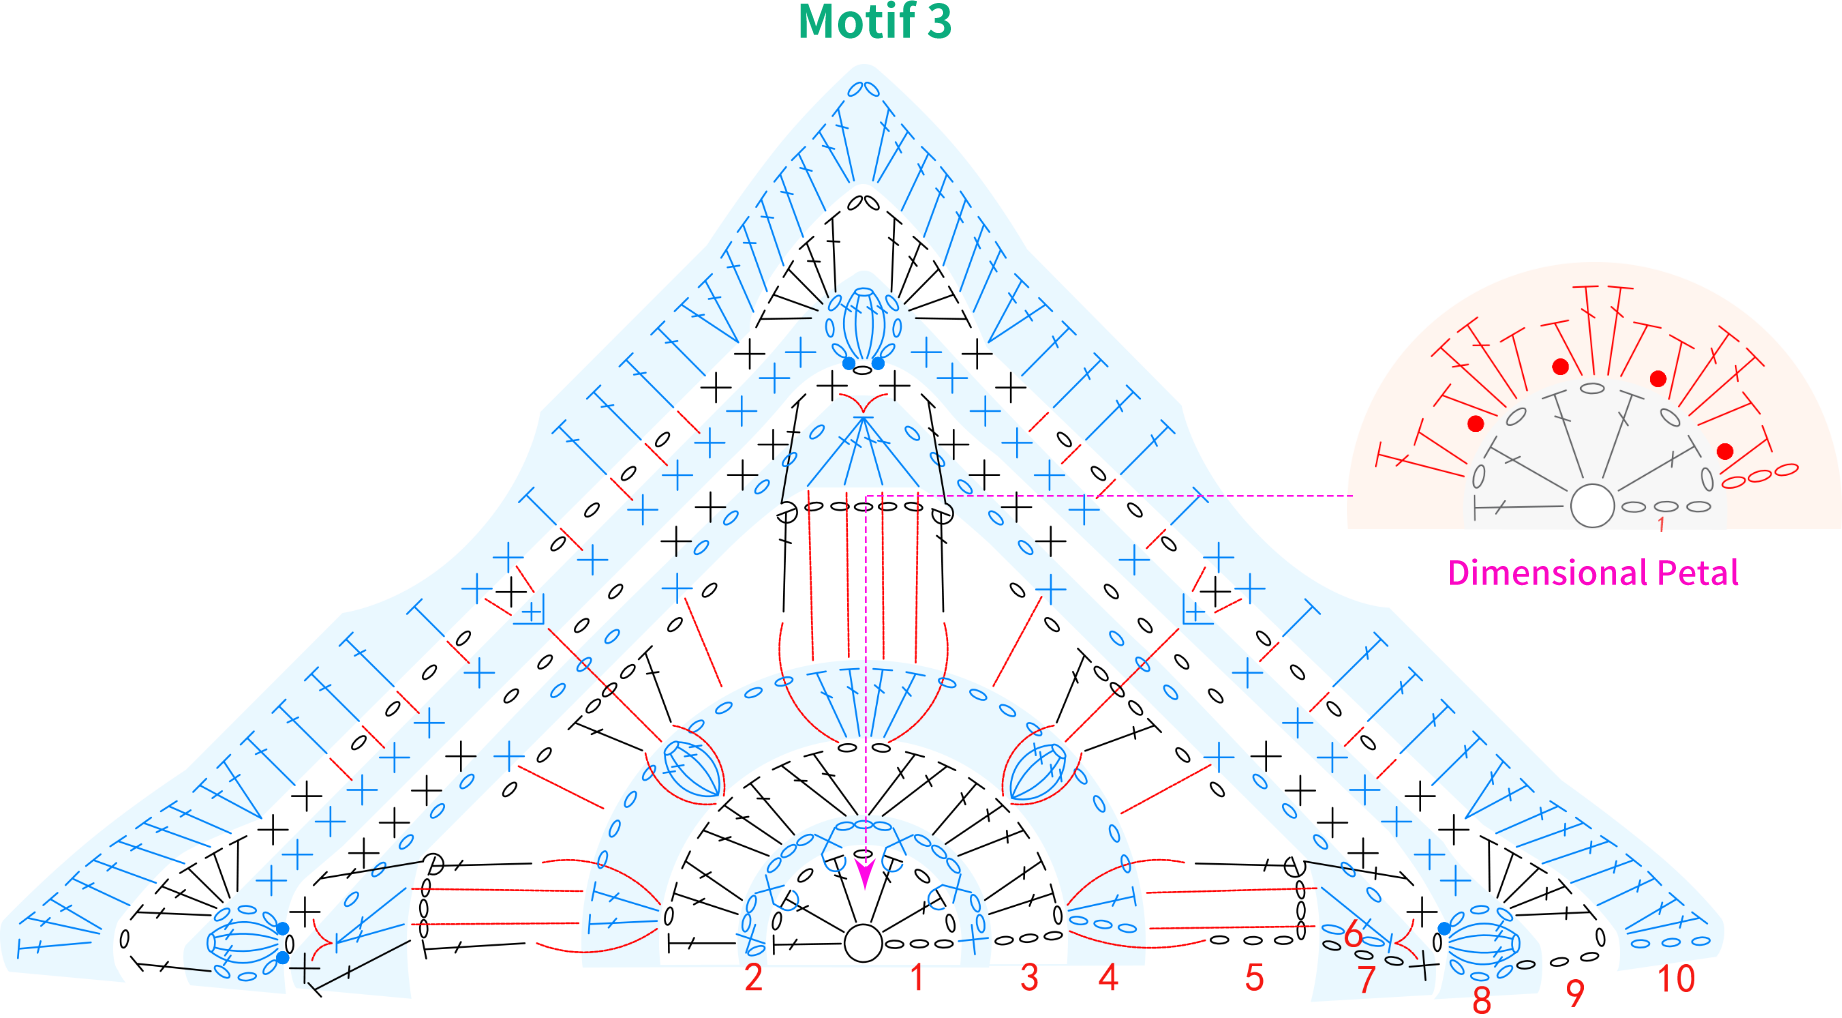
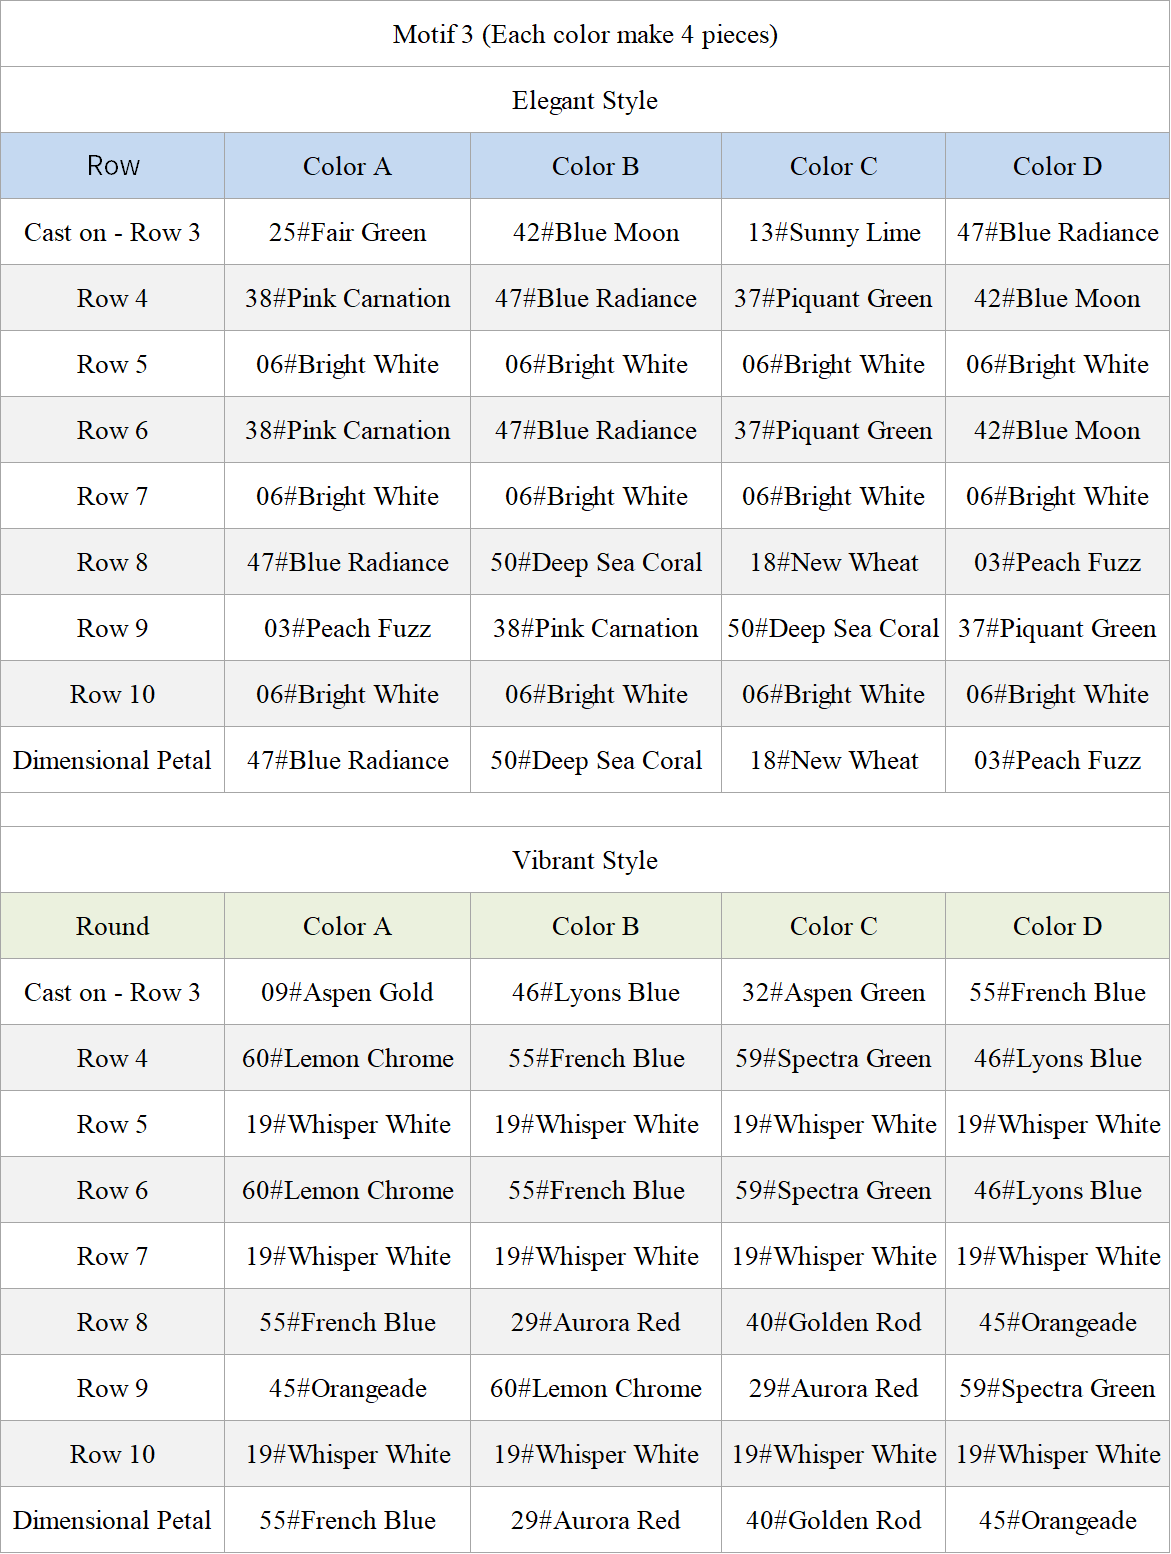
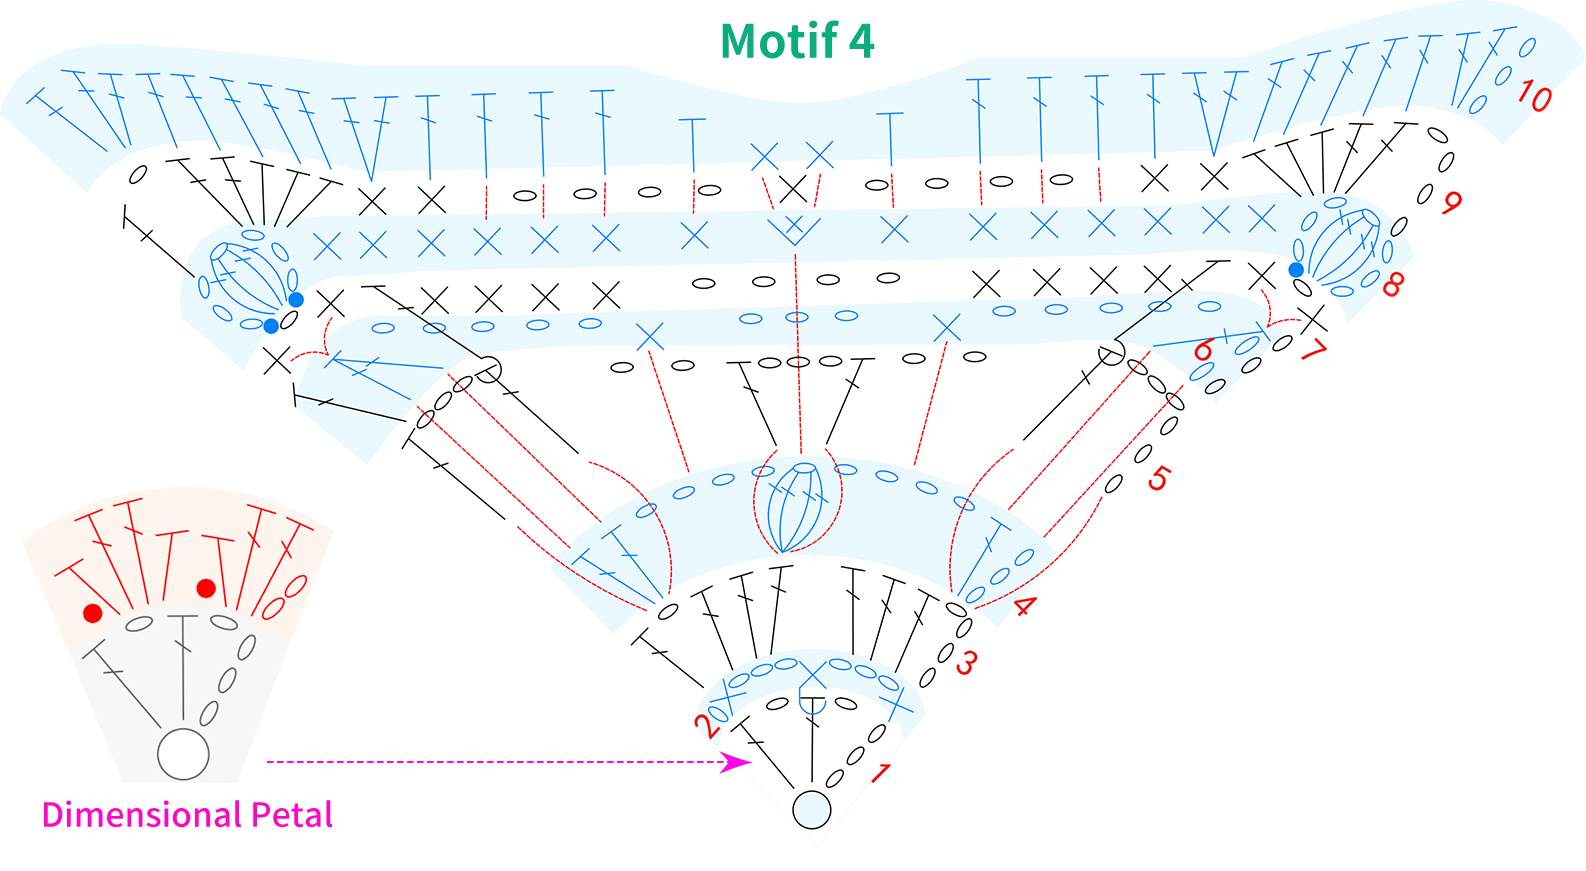
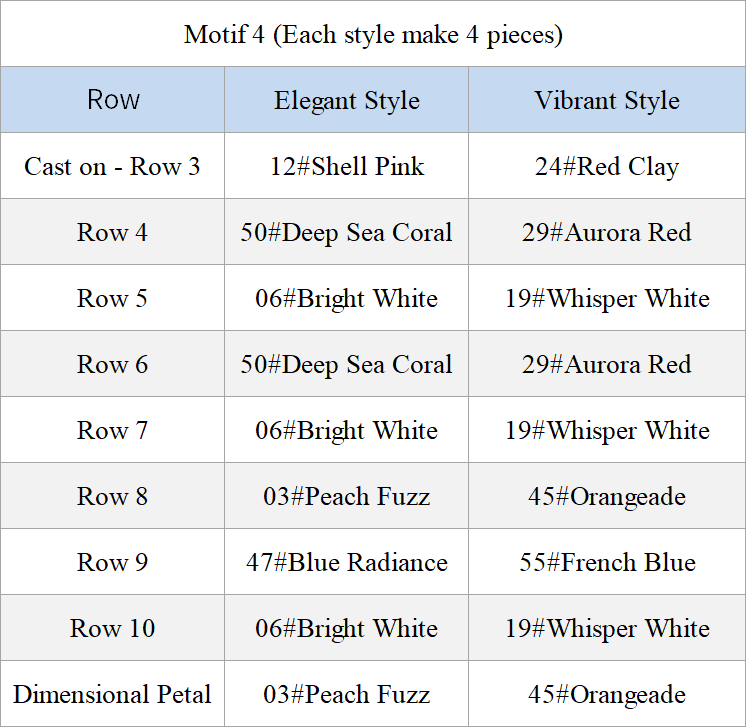
PART 3 Motif 3 C, Motif 4 00' 12'' (Part 2)
All start from the magic ring. Motif 3 is roughly half of Motif 2, and Motif 4 is roughly a quarter of Motif 2. Please refer to the video for specific details.
PART 4 SewingD 13' 06'' (Part 2)
Once all motifs are crocheted, we will sew them together. Refer to the layout diagram for positioning. Watch the video demonstration of the sewing method first, then start sewing them together.
PART 5 EdgingE 23' 25'' (Part 2)
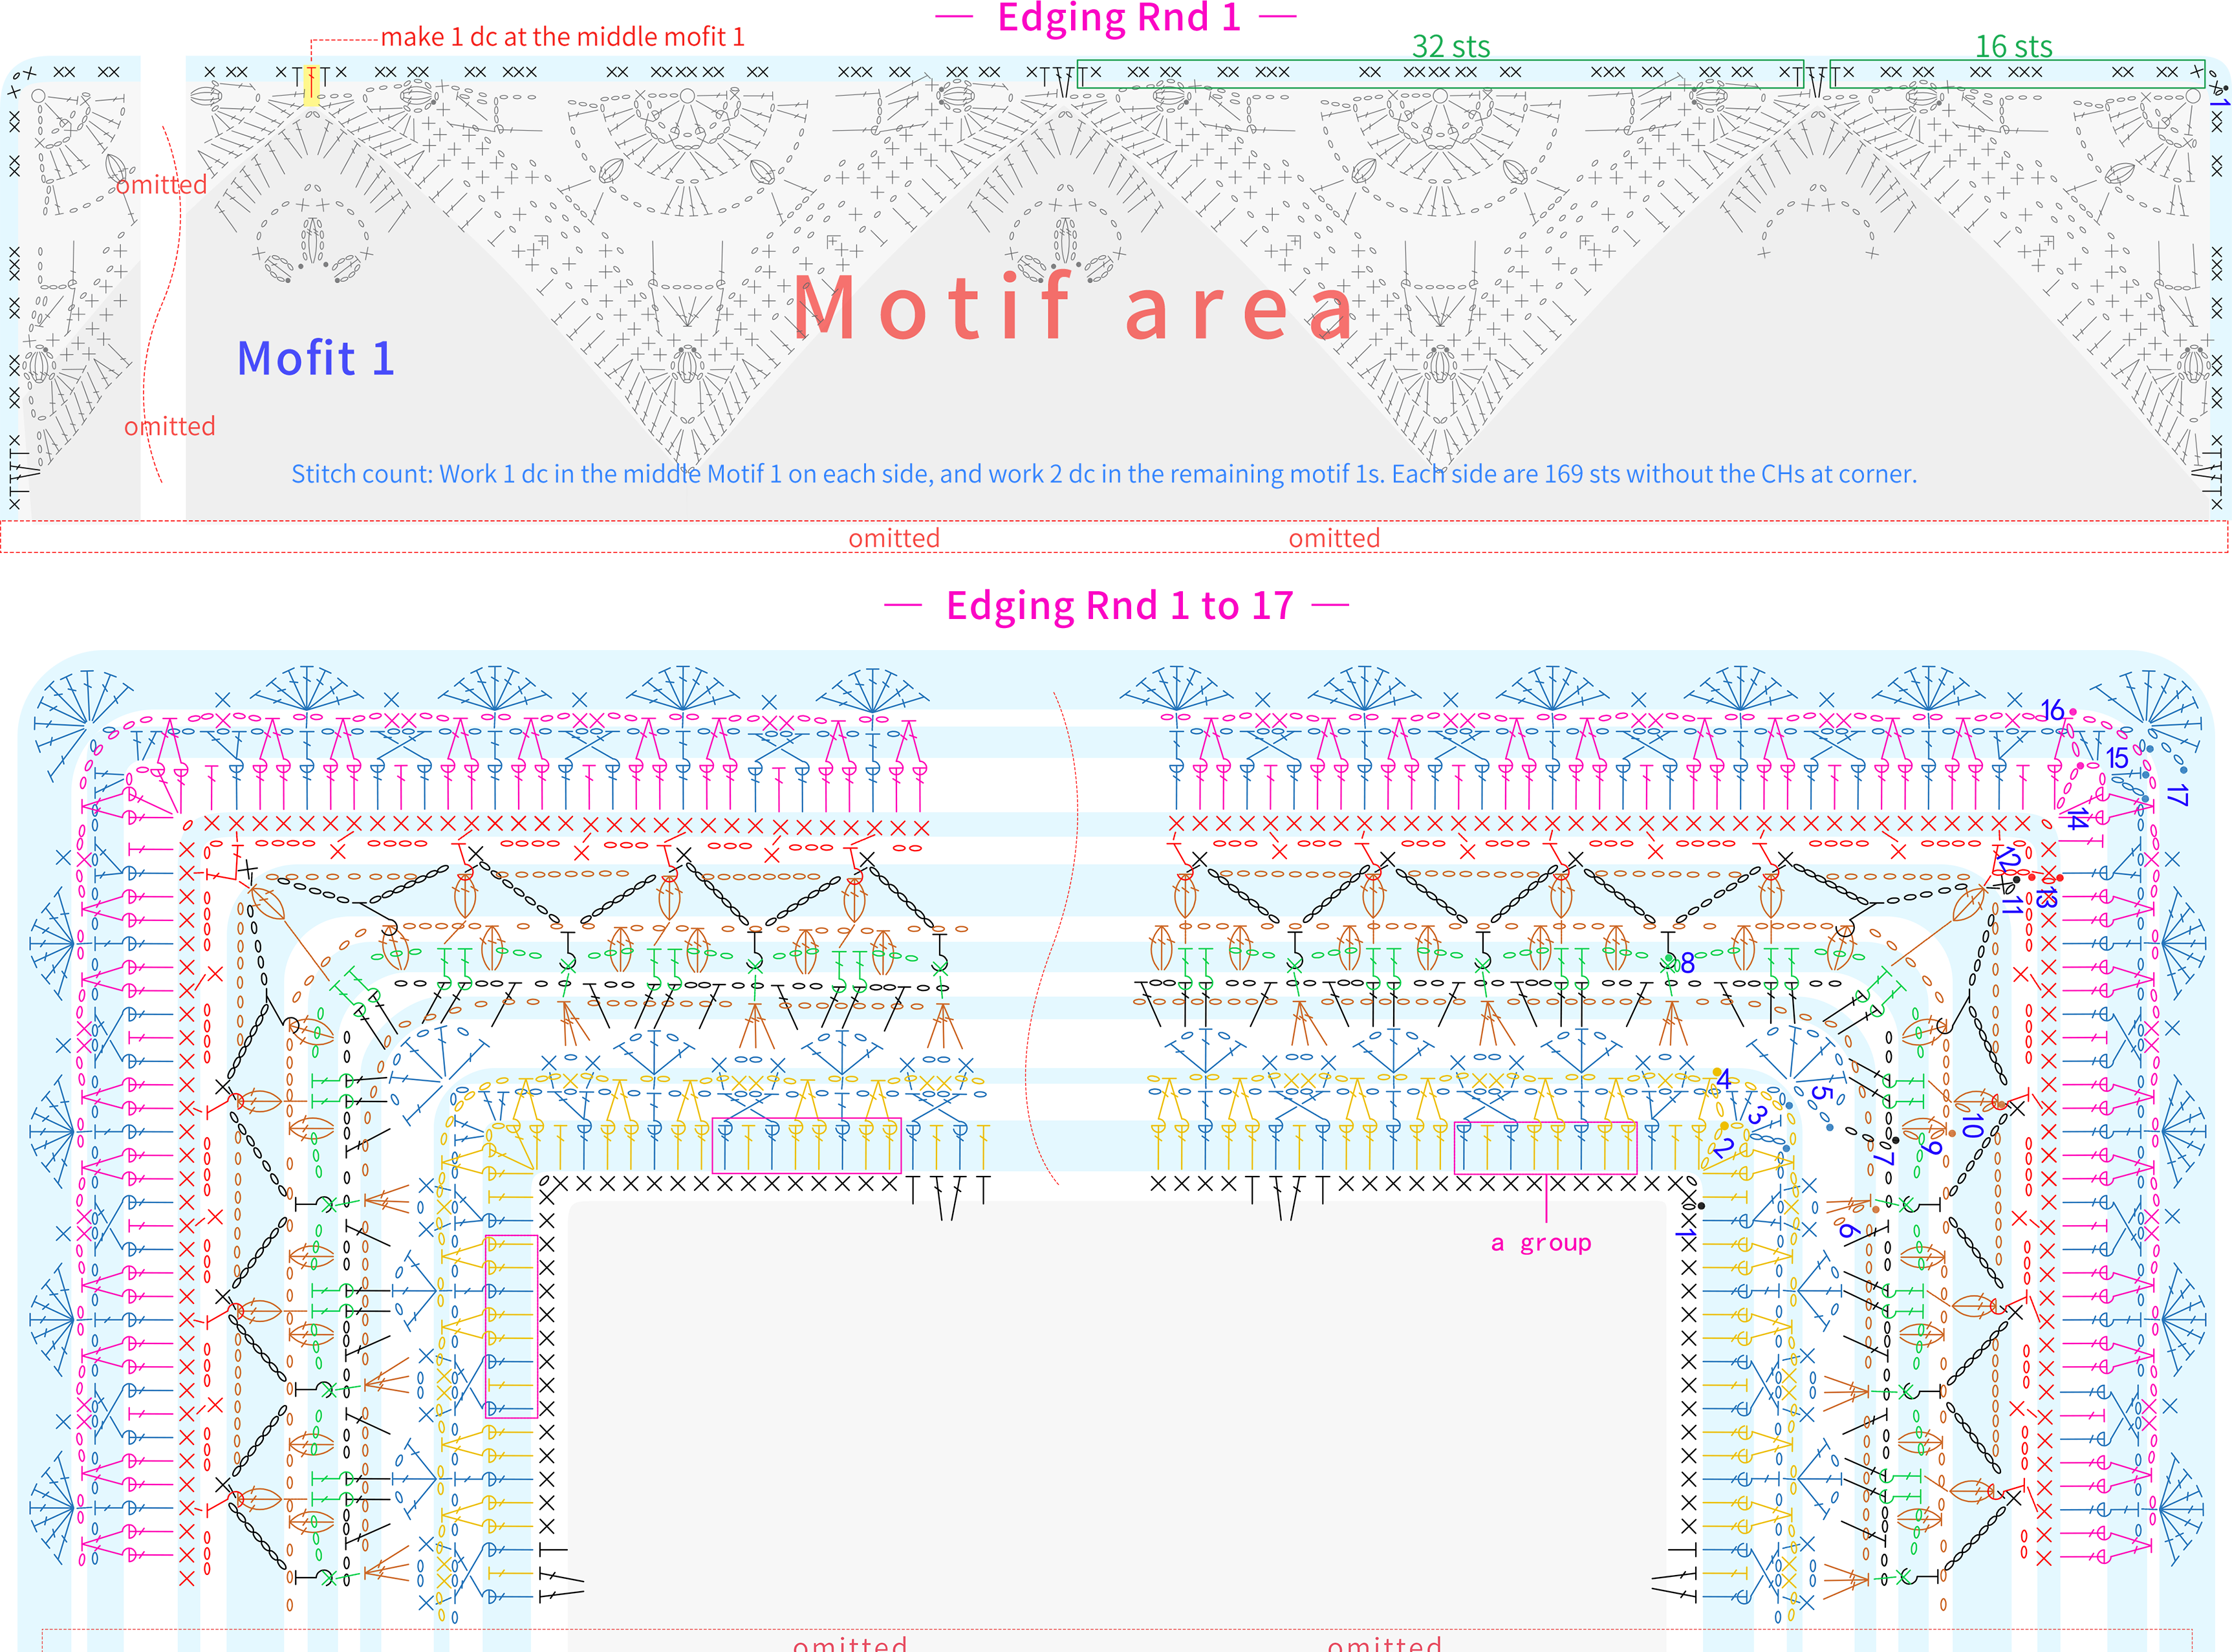
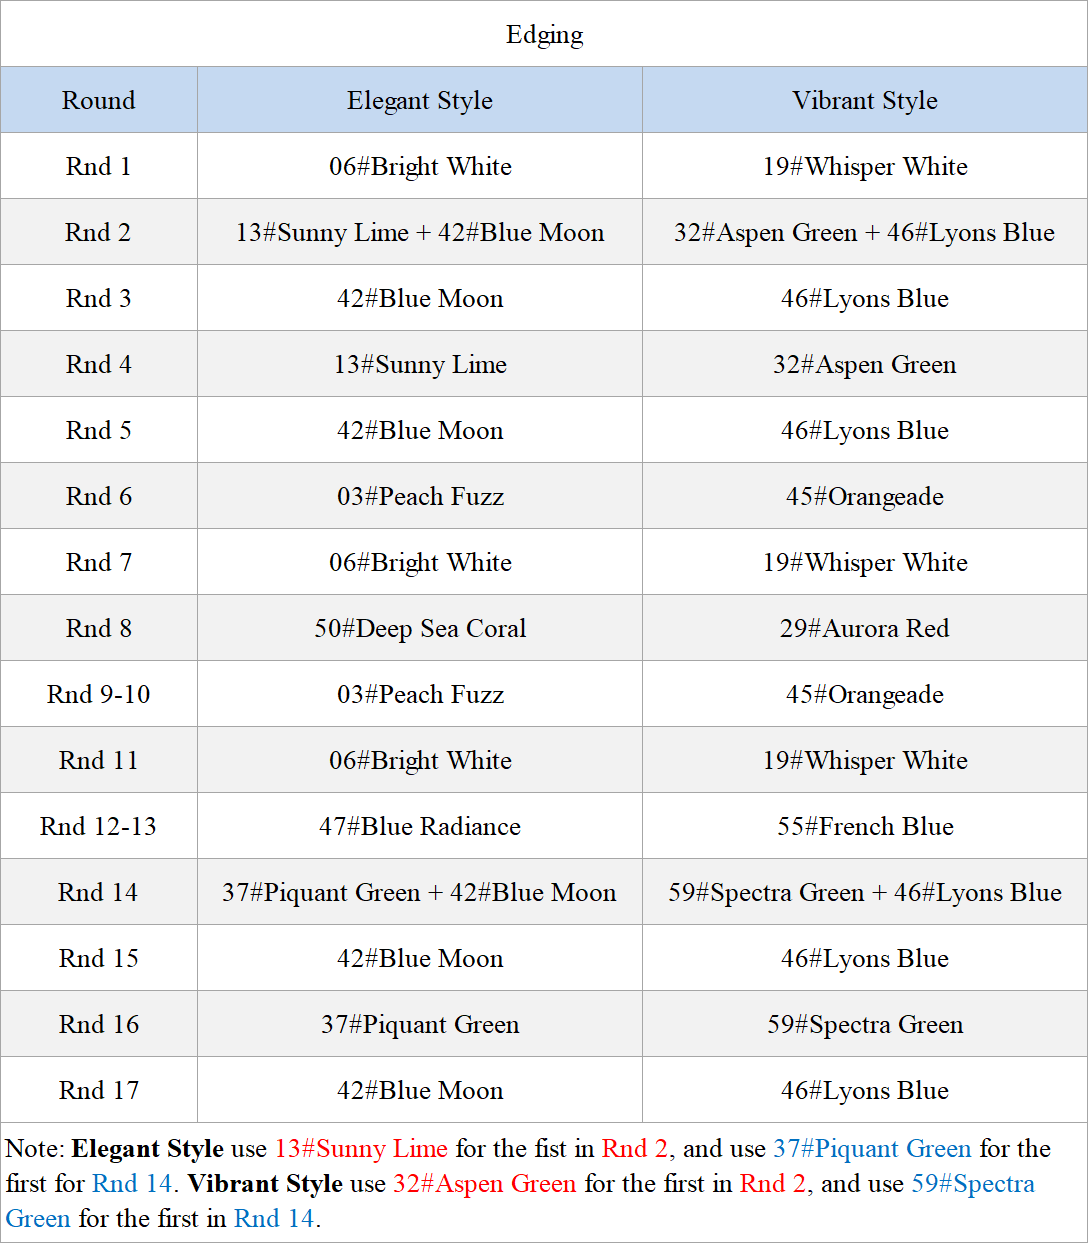
After sewing up the motifs, we need to work an edging around the edges. Please refer to the video for specific details.
Note:
① In Rnd 2, there are 20 complete groups in the middle of each side;
② Don't work the edging too tight, ensuring the fabric piece stays flat;
③ The position for the dcs in Rnd 7 is special, please refer to the video demonstration for specifics;
④ After completing all the work, you can lightly steam block the edging to make it flat.
Made by the community