Flowers
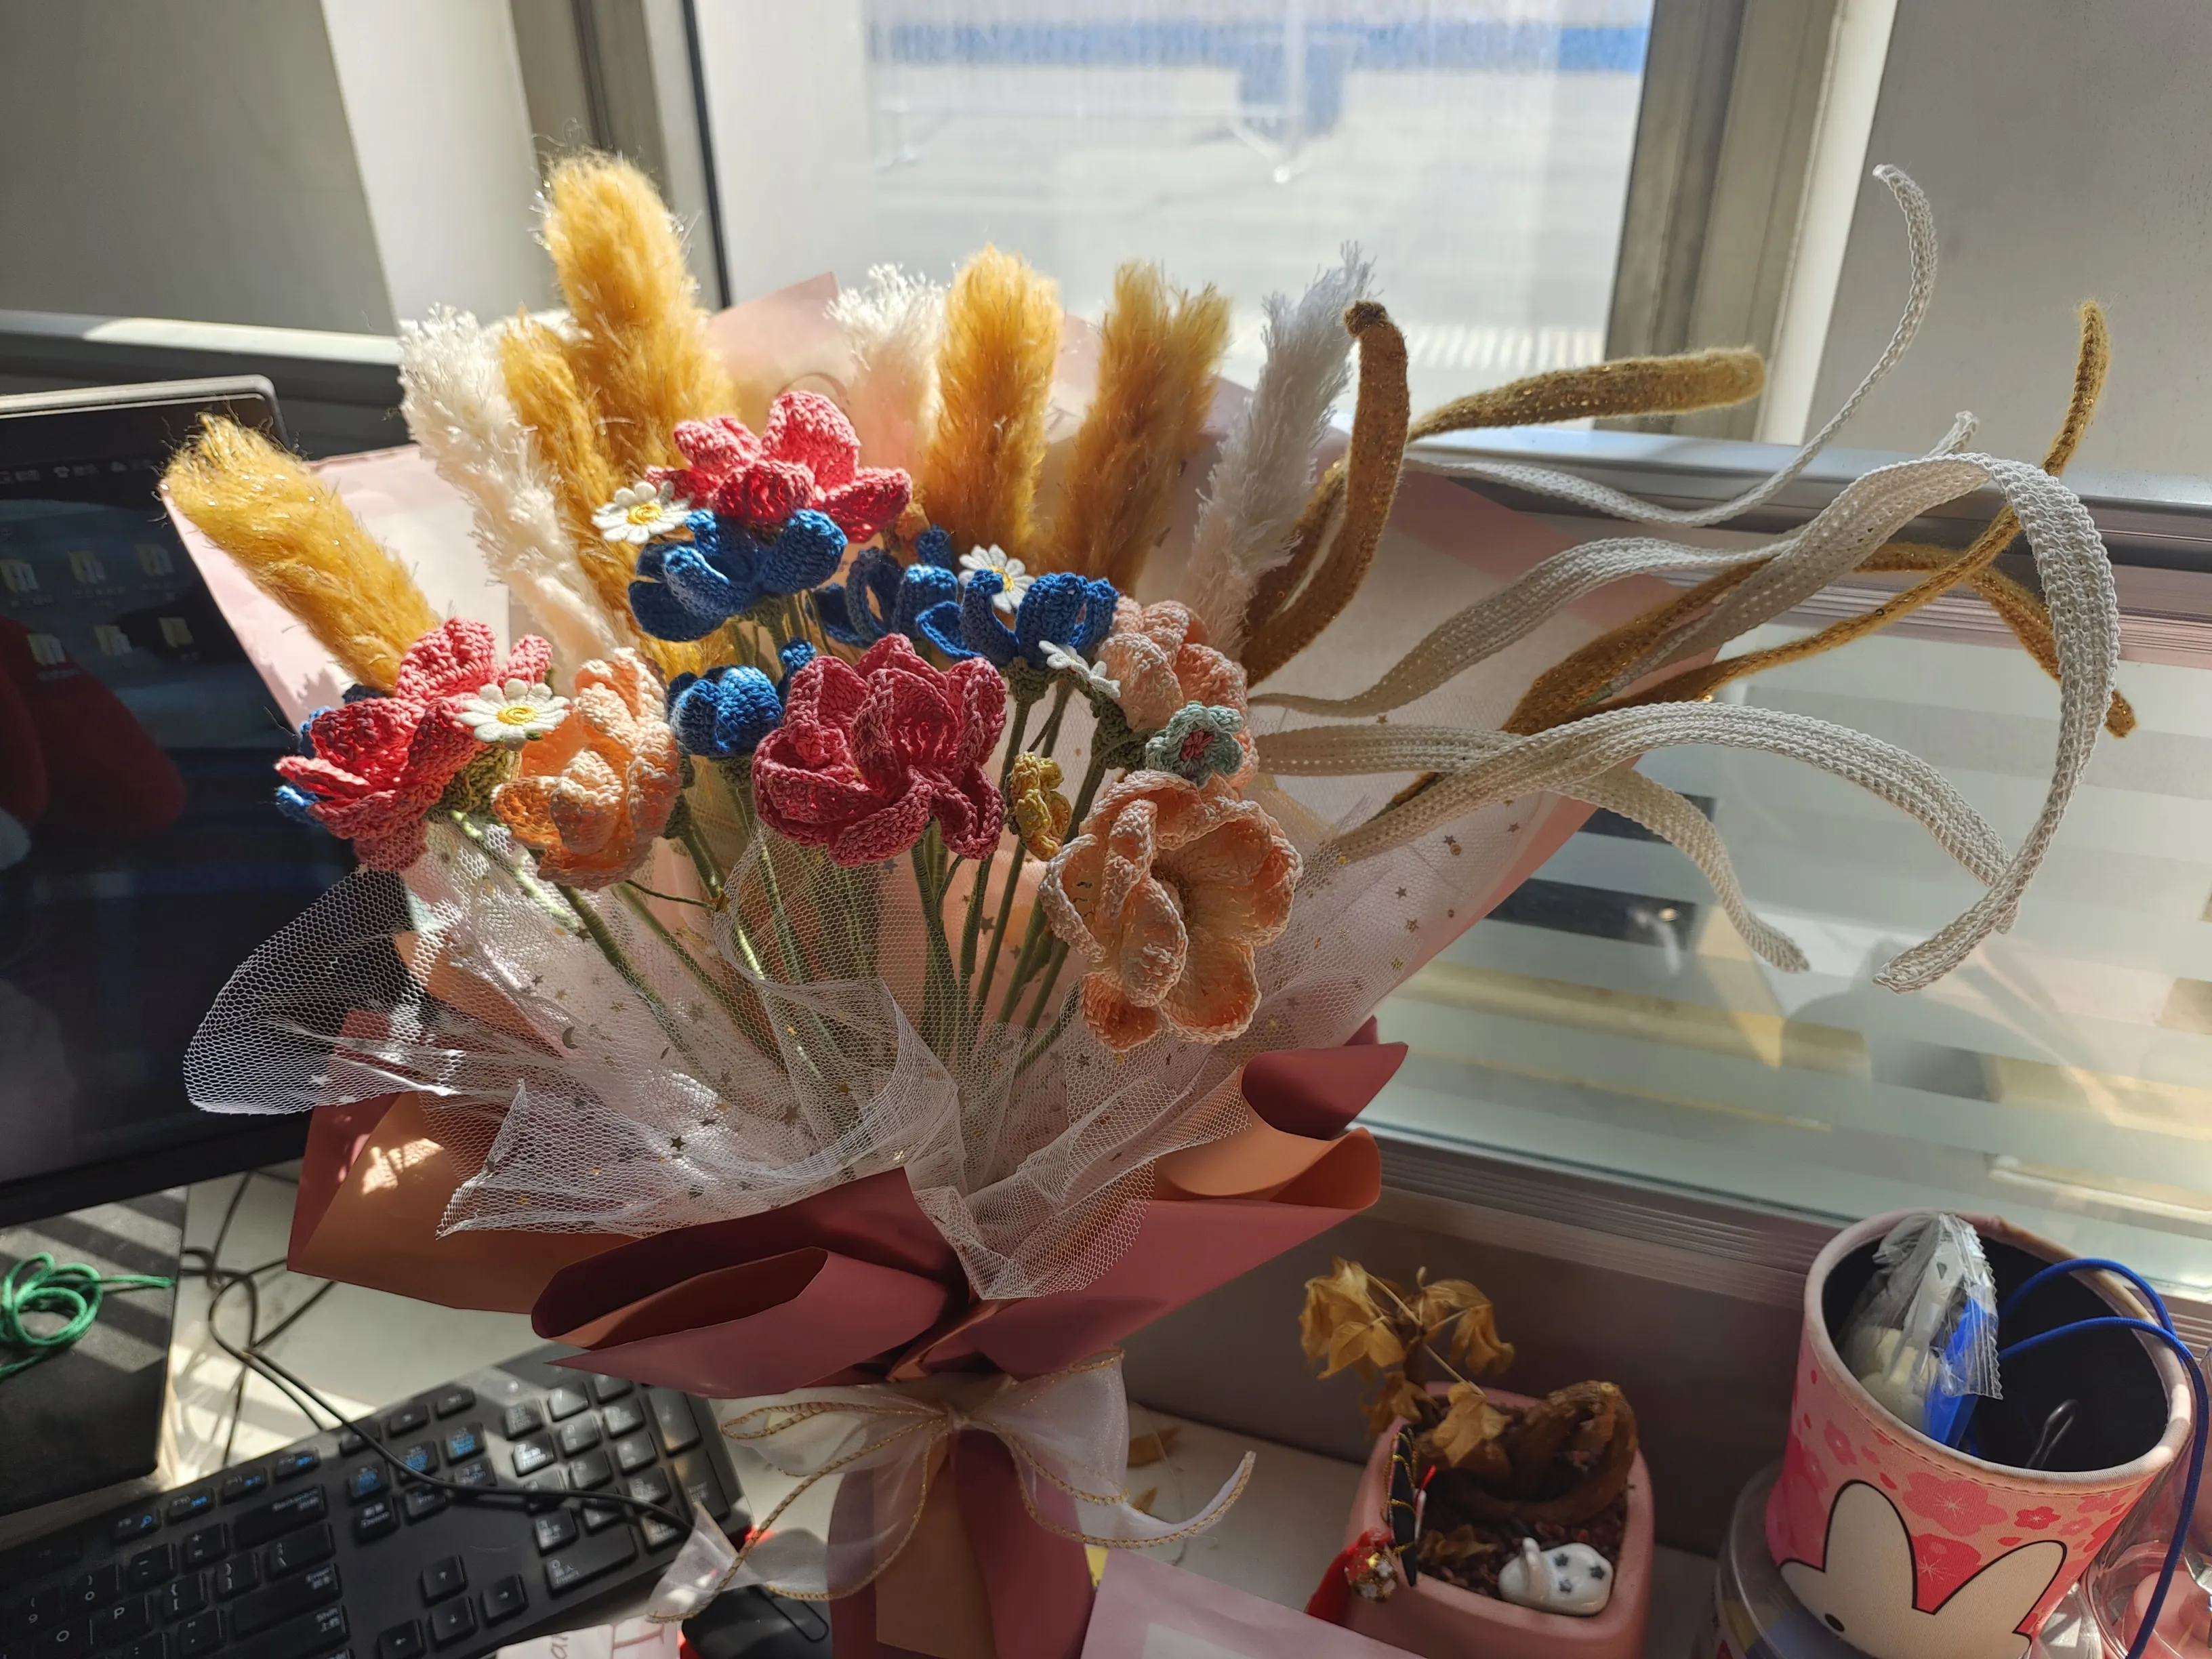
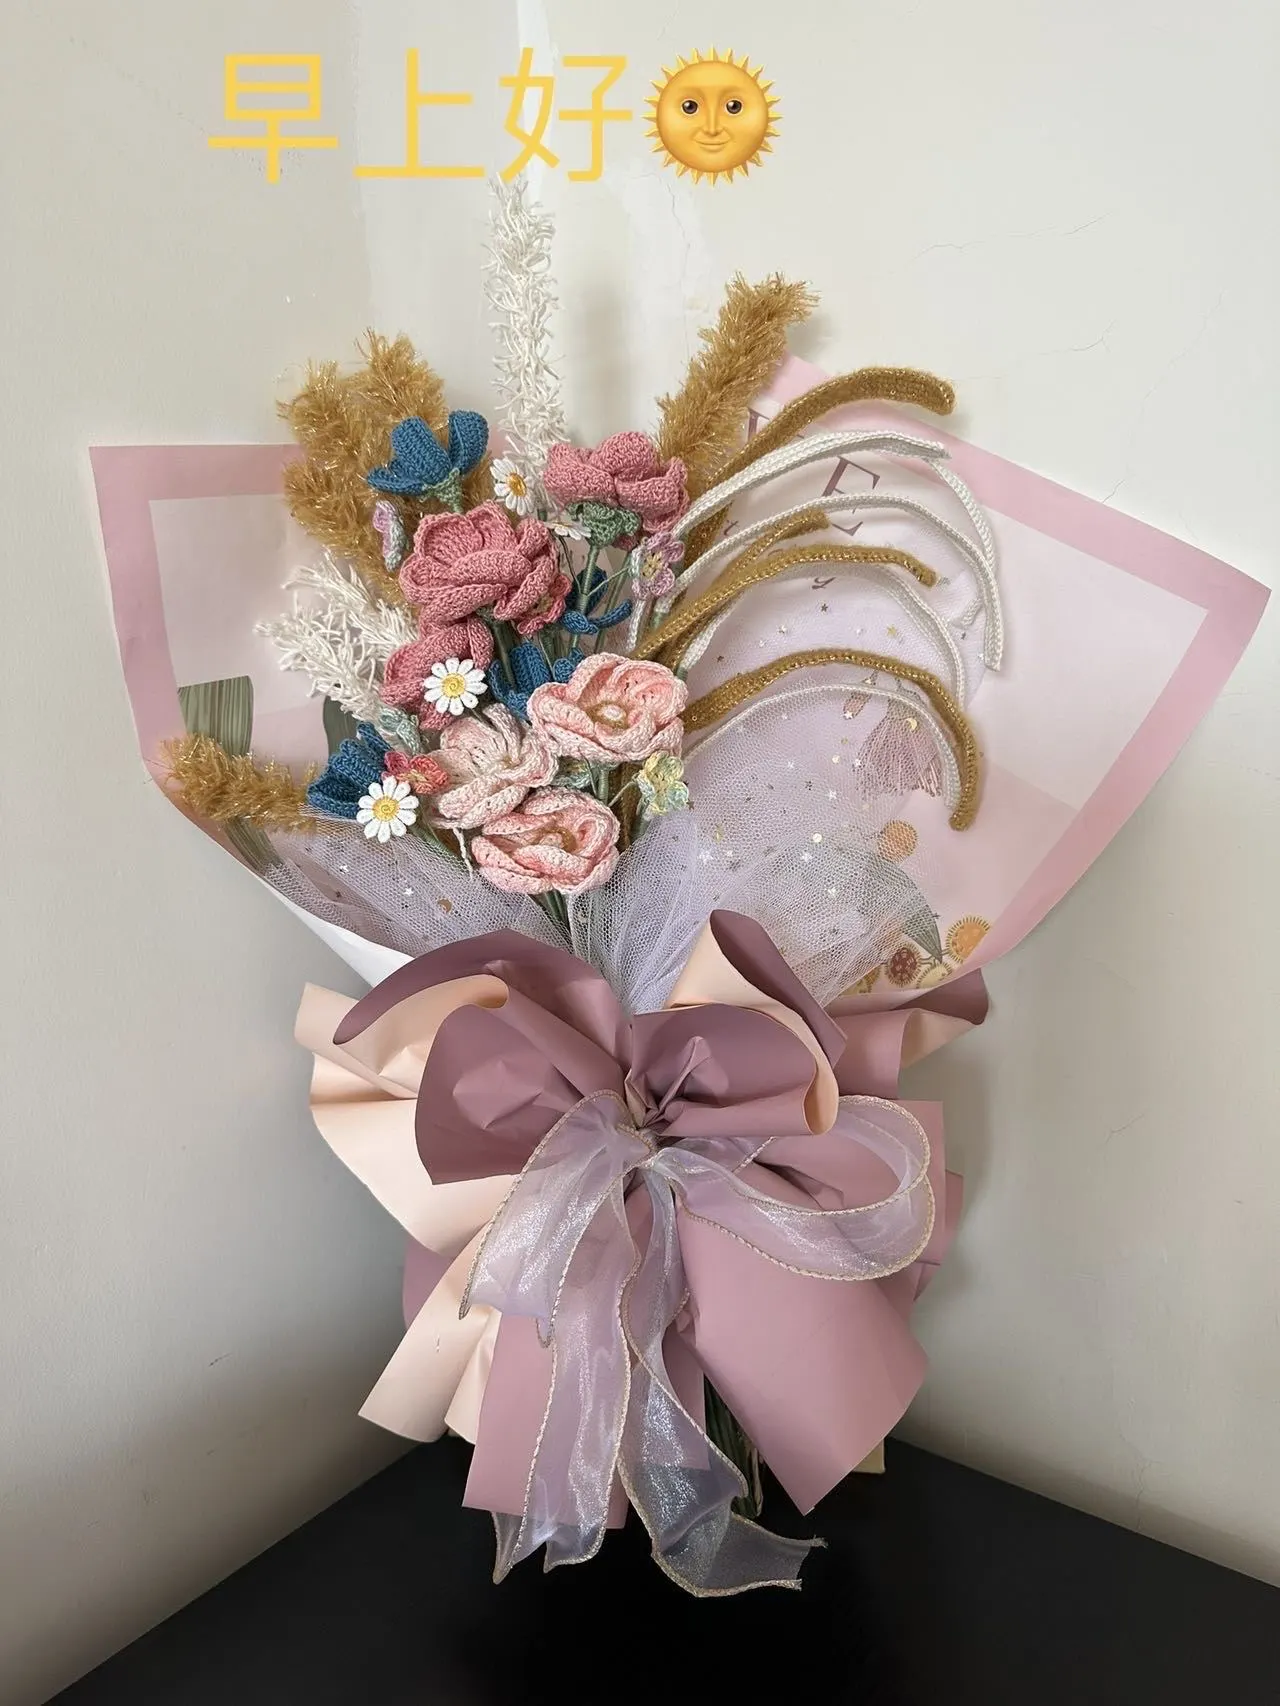
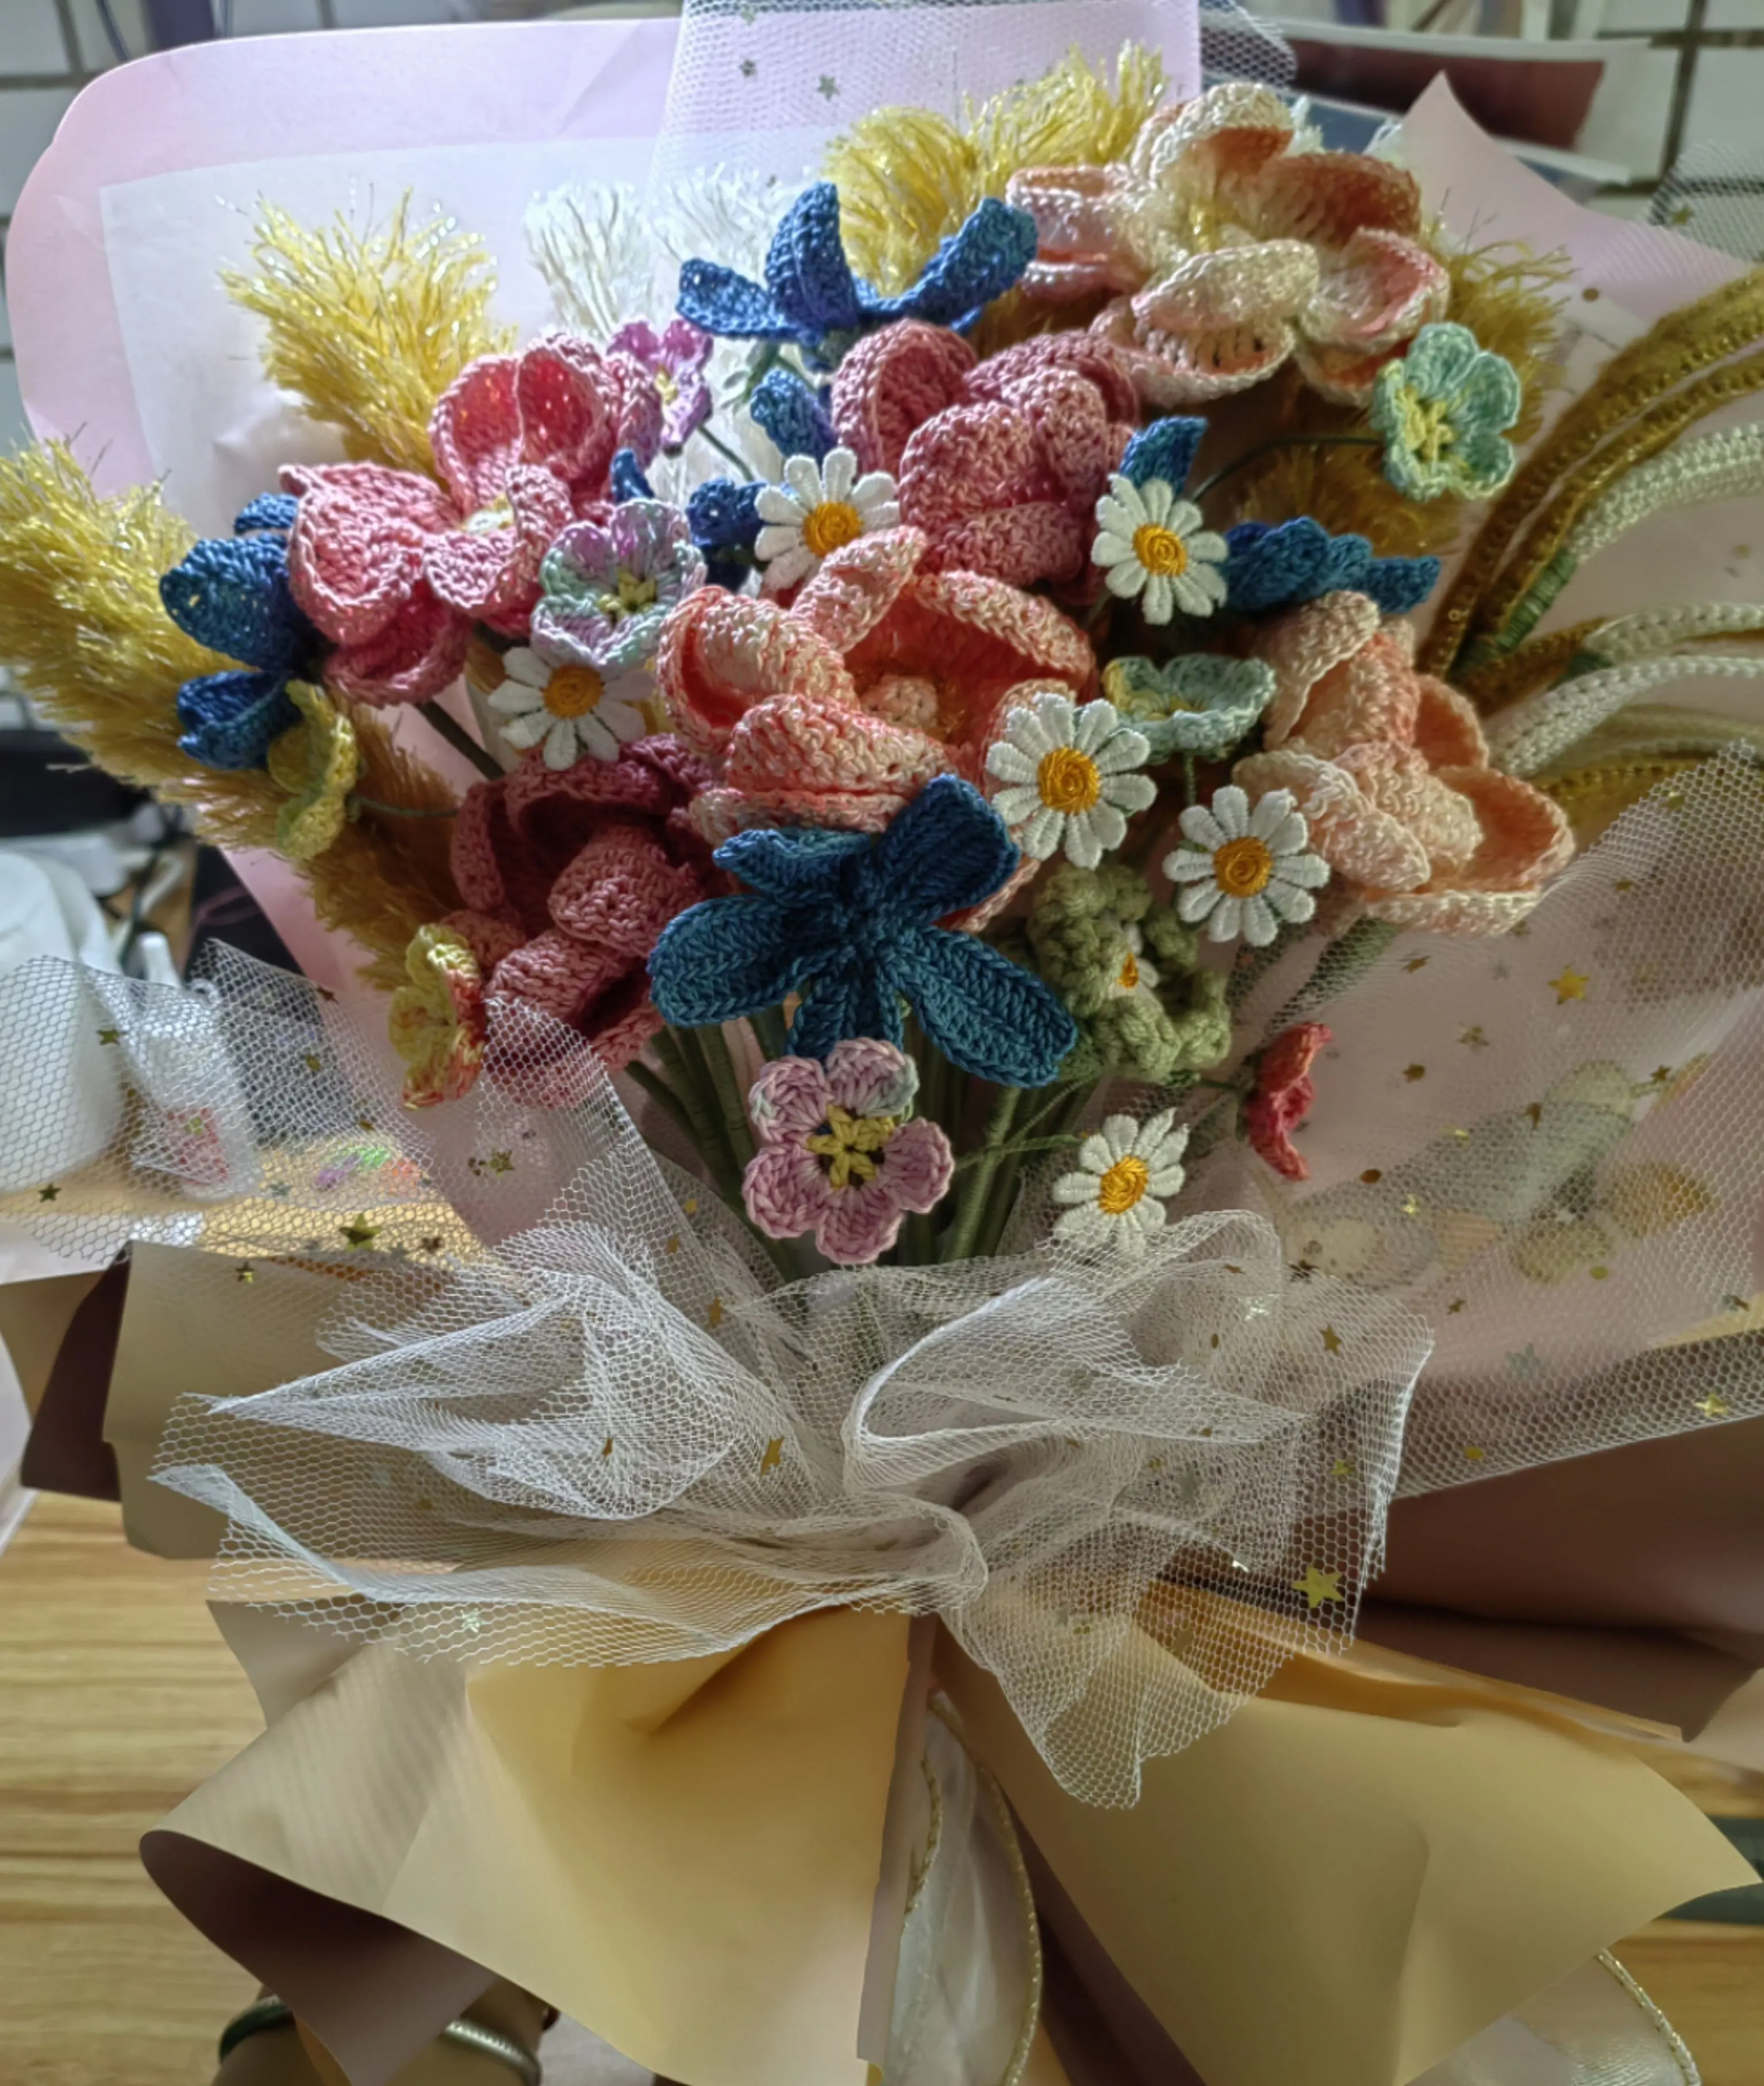
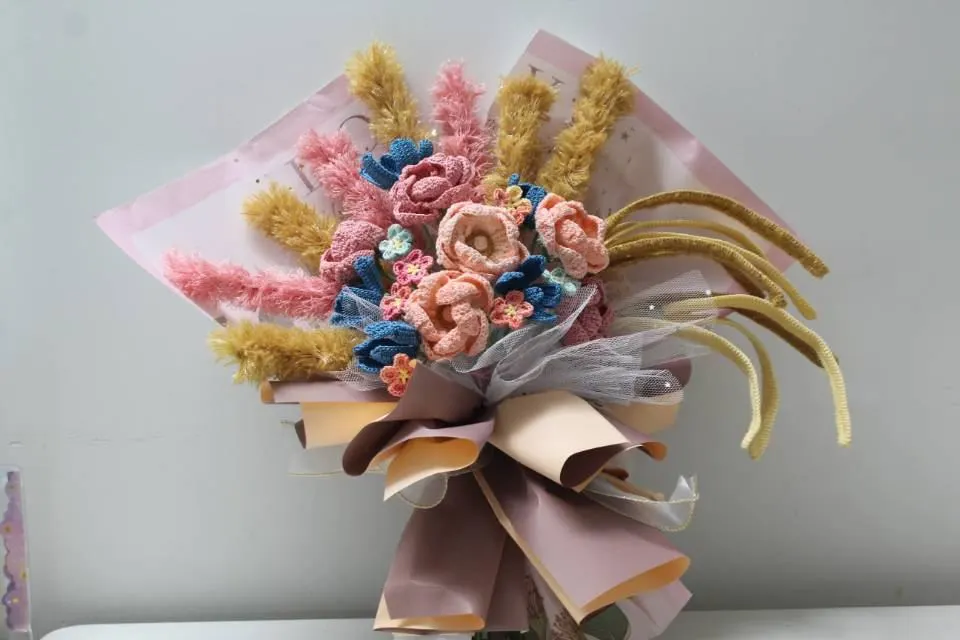
Mucha Bouquet
Project preview
See the finished project
Pattern format
Instructions
Watch and follow
Video tutorial
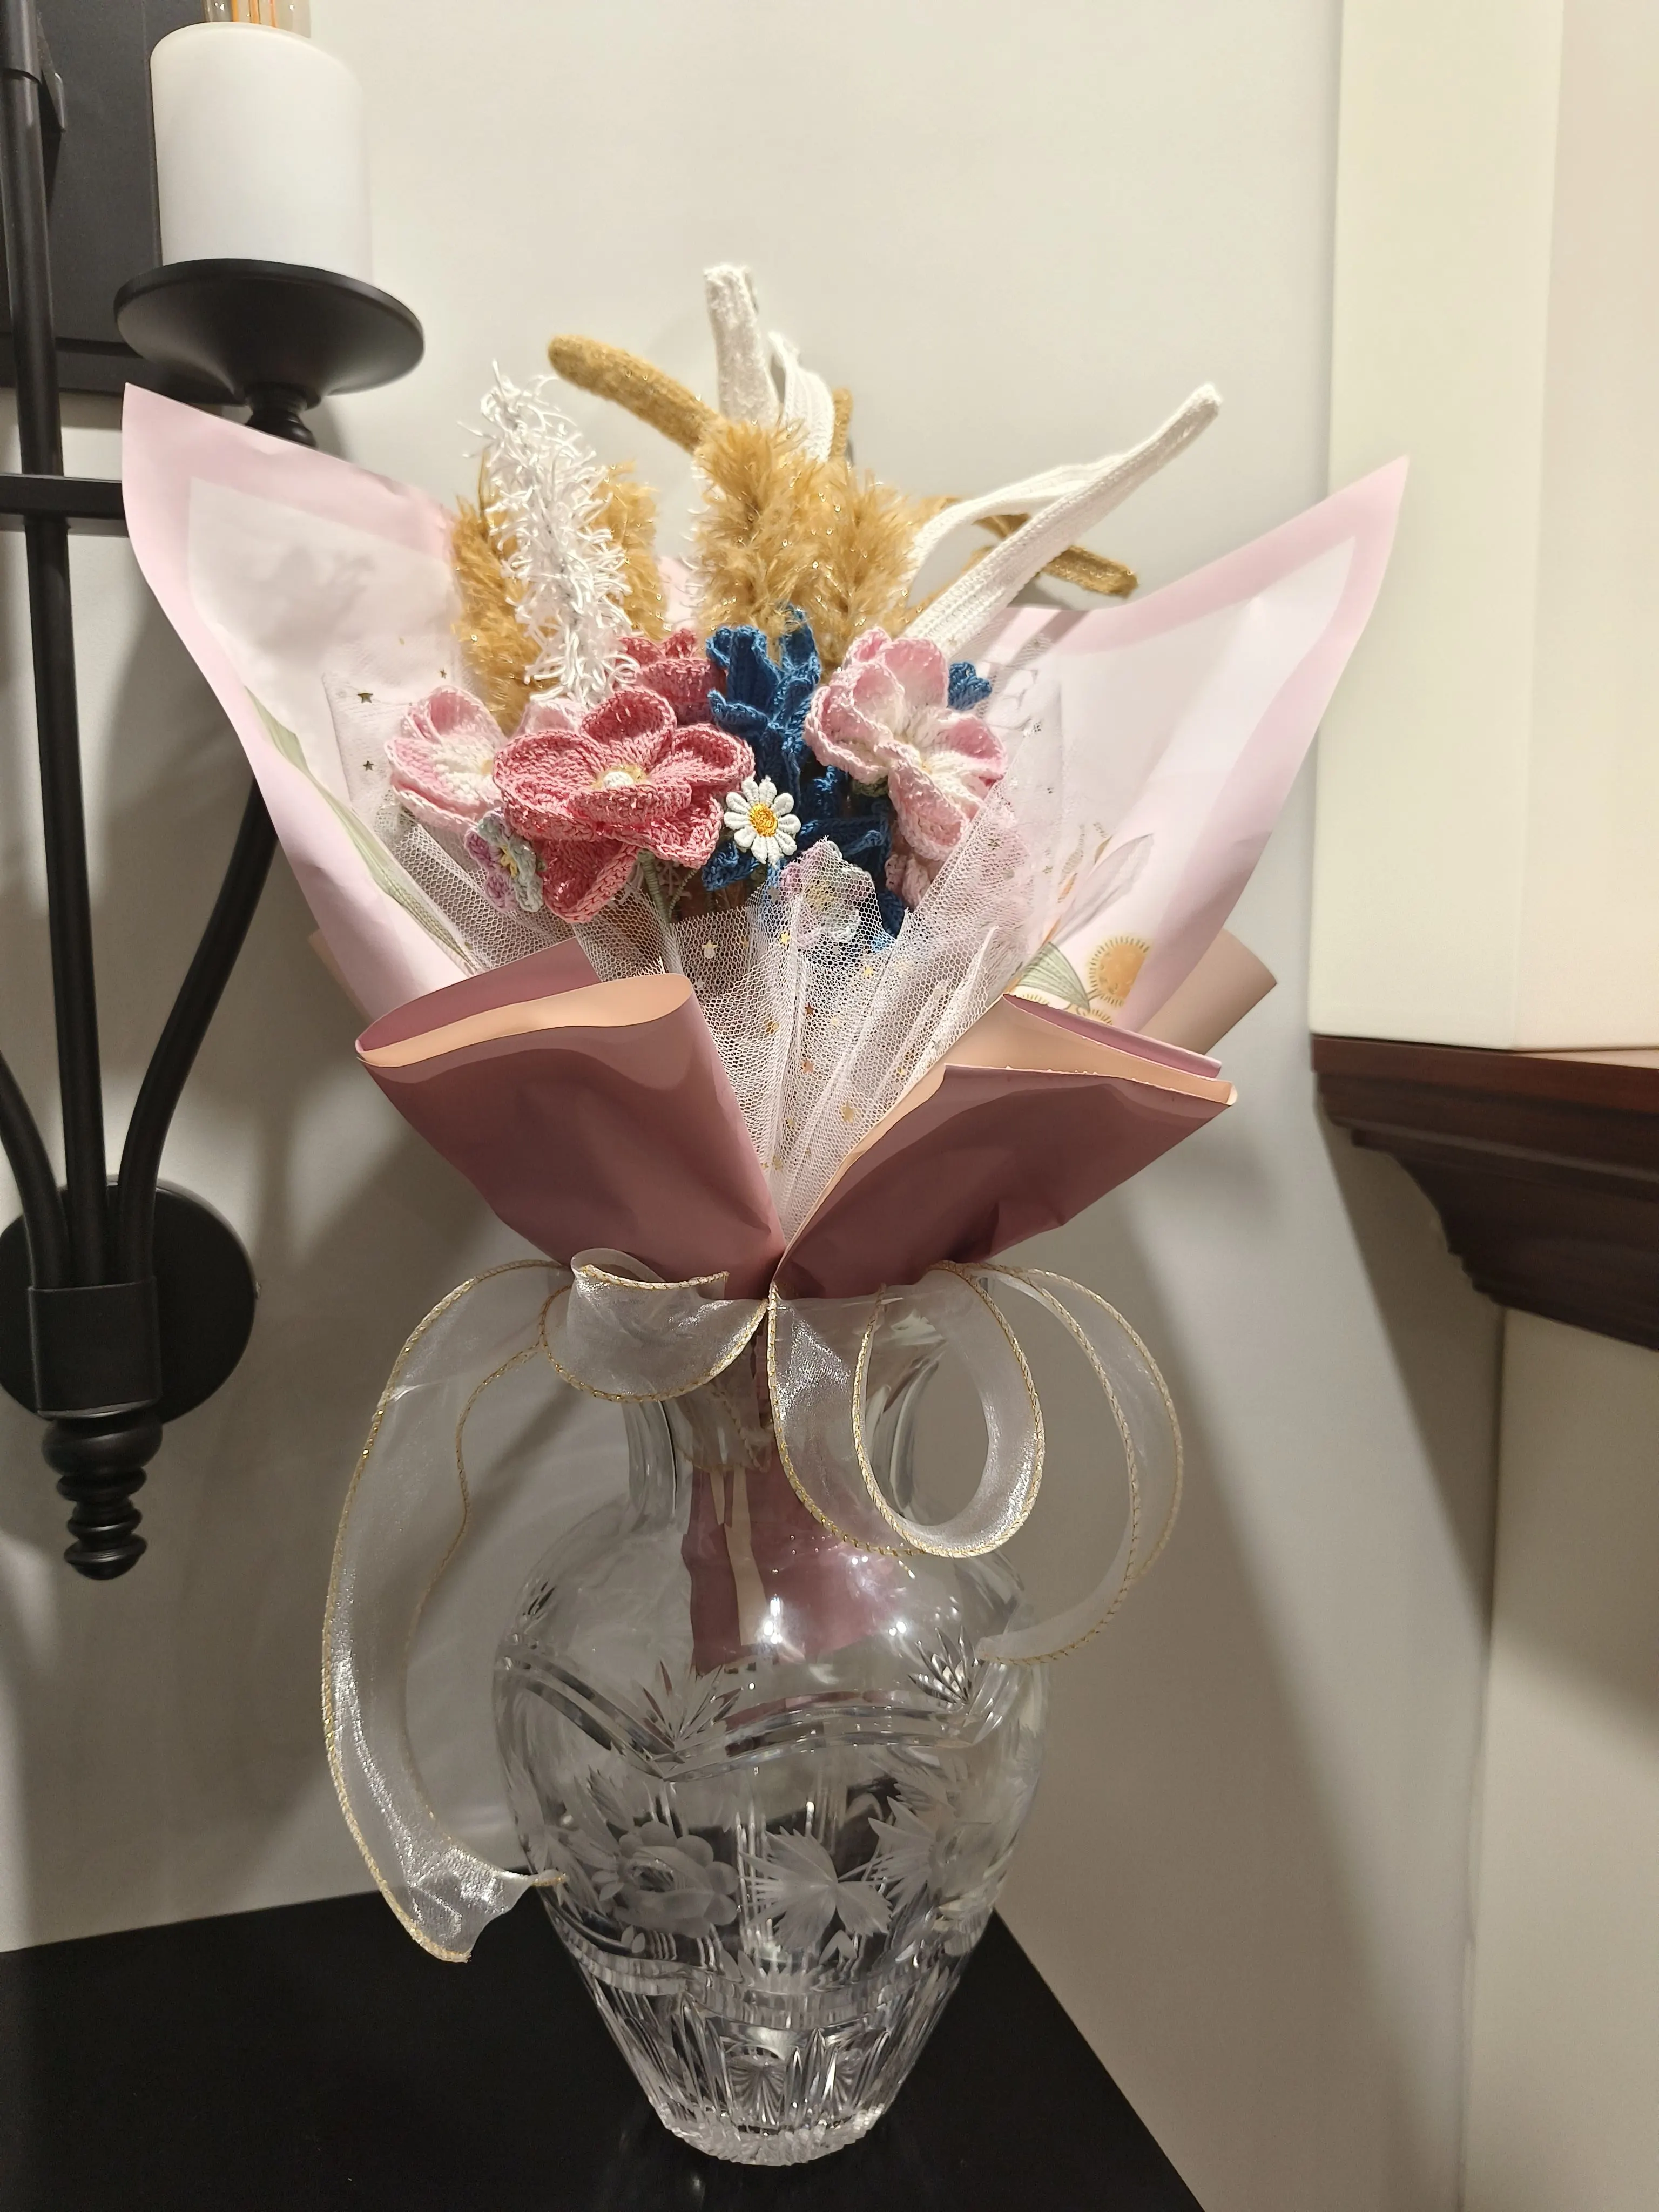
This flower bouquet consists of three sections: the flowers, assembly, and packaging. First, we'll work all the different flowers. Then, we'll proceed with the assembly. And finally, we'll do the packaging.
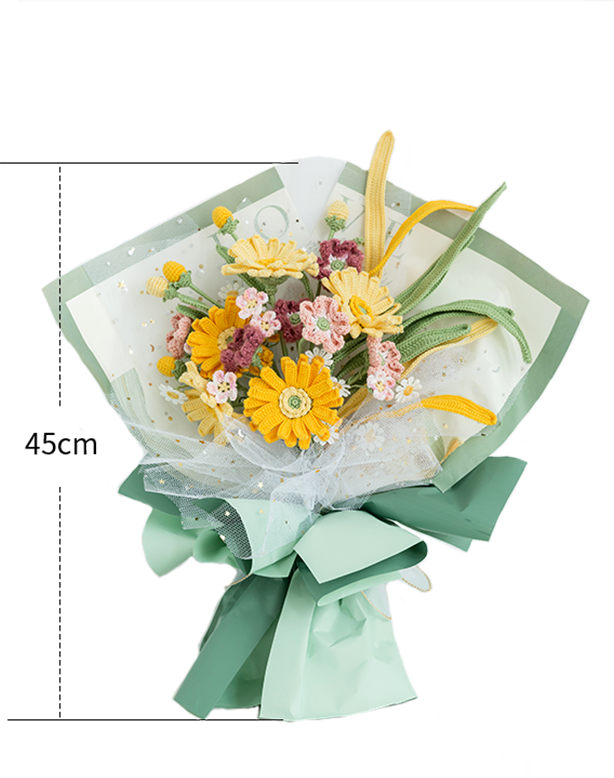
The handcrafted measurements may have an error of 1 to 2 cm. Due to variations in individual tension, the size of the sample is for reference only.
Materials: Susan's Family Sequin Mohair,
Susan's Family Fancy Dyed Lace,
Susan's Family Combed 3# Lace
Hook: 1.75 mm crochet hook

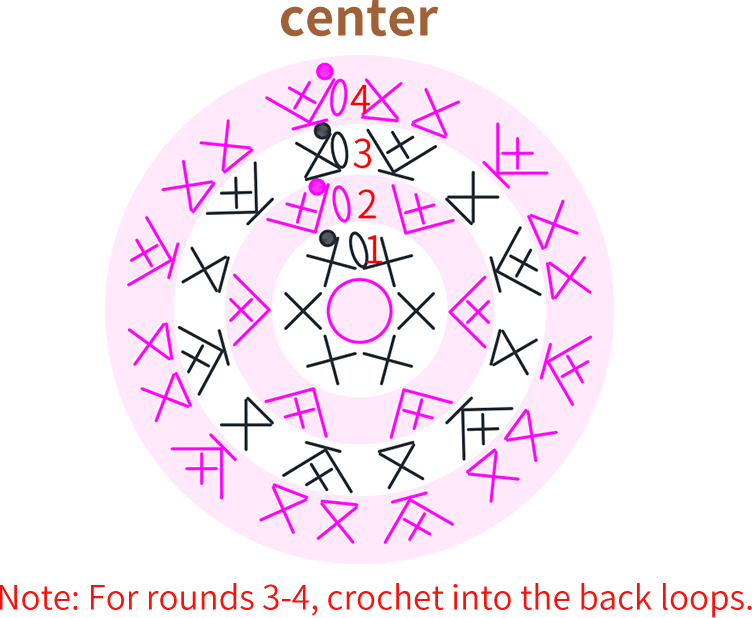
Note: This pattern is making in Chinese crochet pattern terms, and the stitch name is written using American terminology. All measurements in charts are in cm.
Chart Key













Part 1 FlowersA
There are mainly six types of flowers: Chrysanthemums, long leaves, small flowers, daisies, large flowers, and buds.
Step 1 ChrysanthemumsA1 01' 20'' (Part 1)
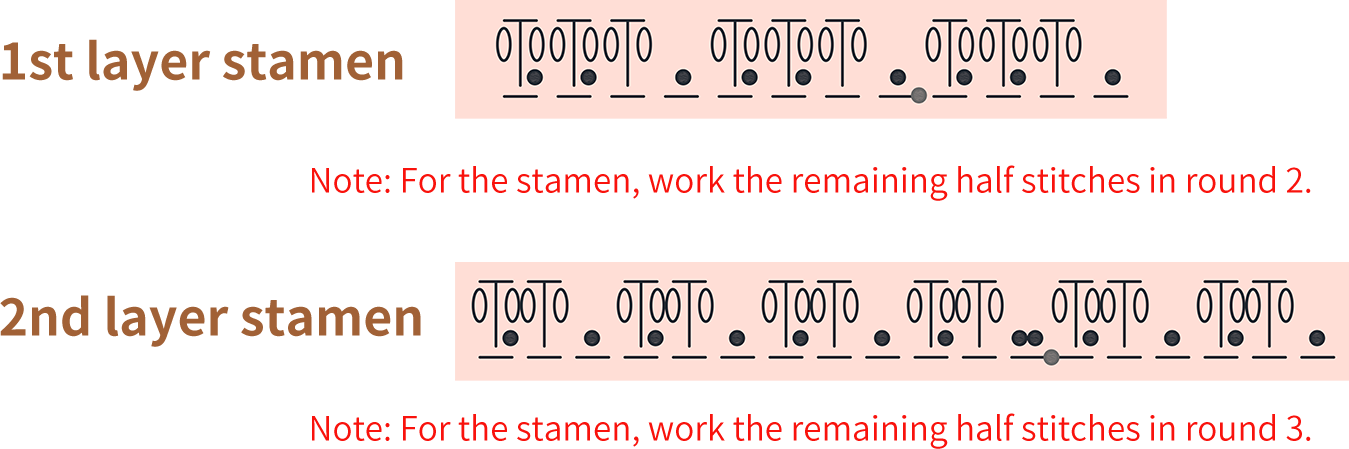
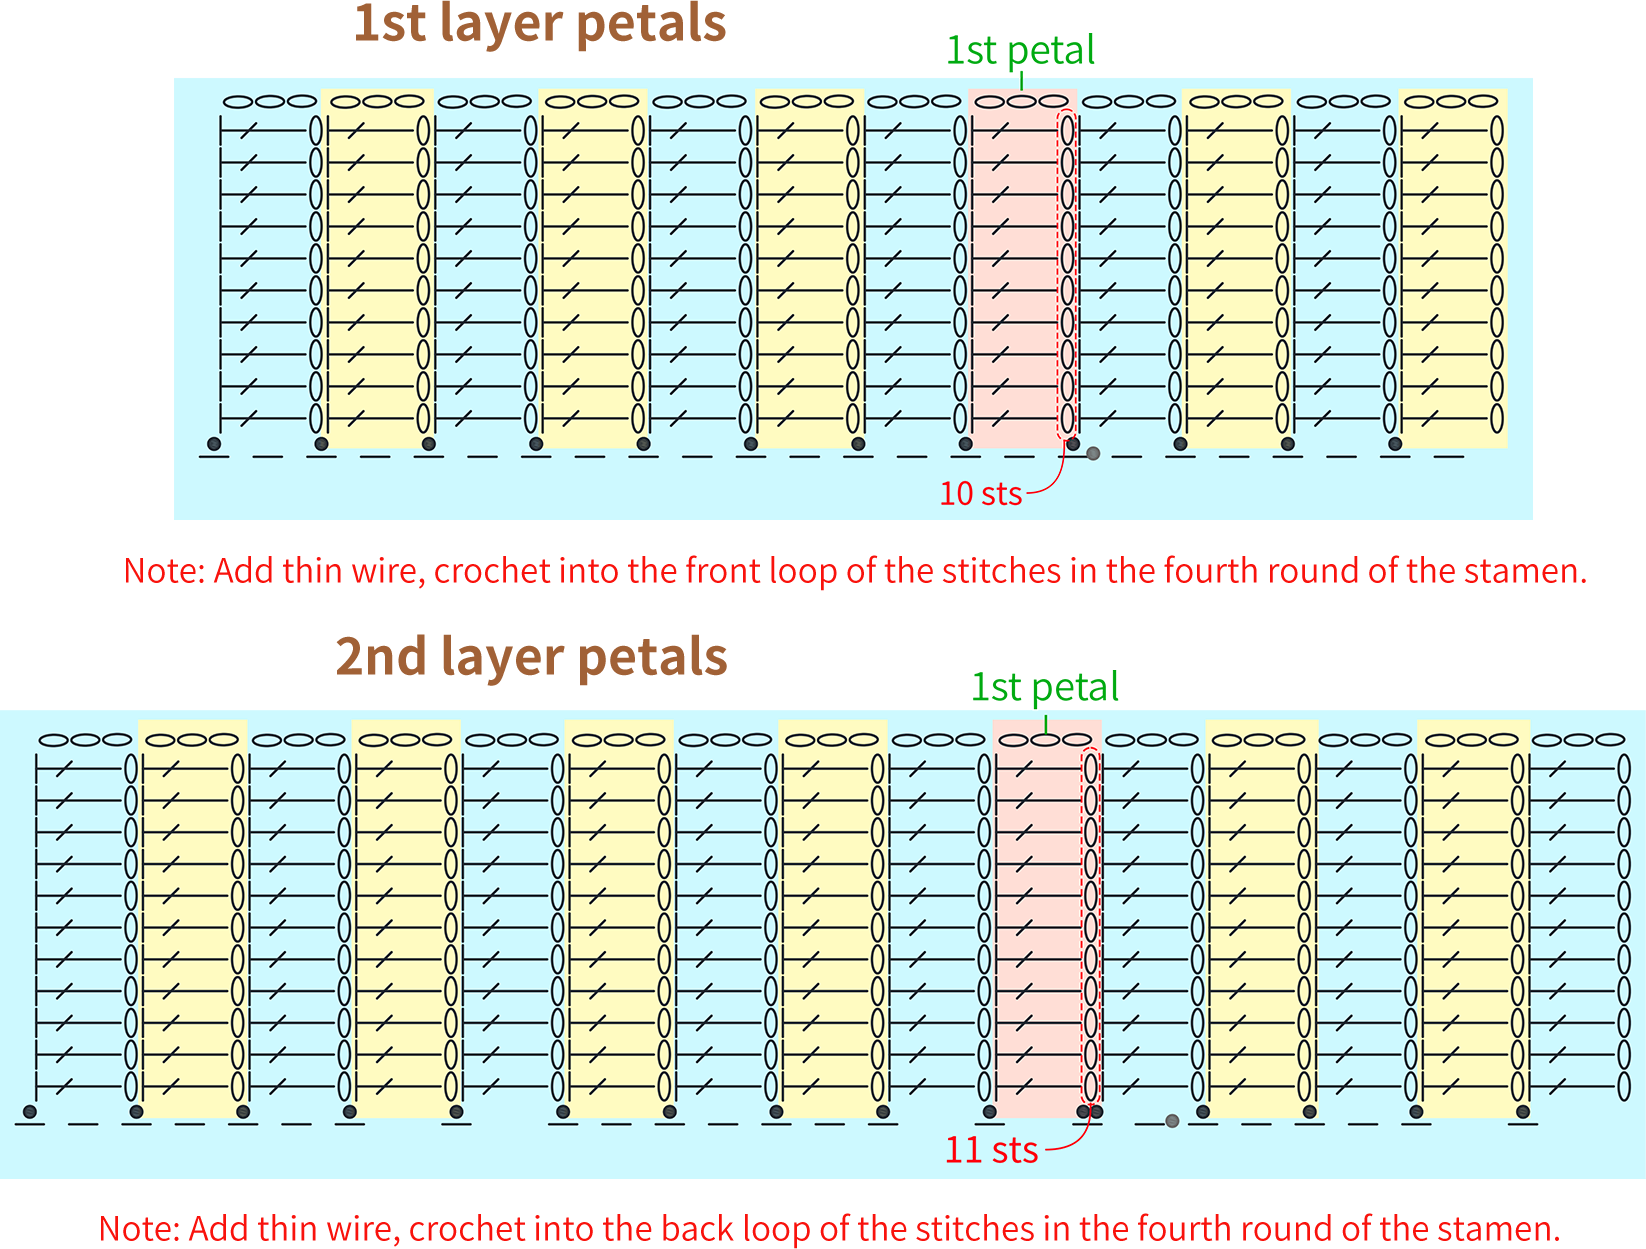
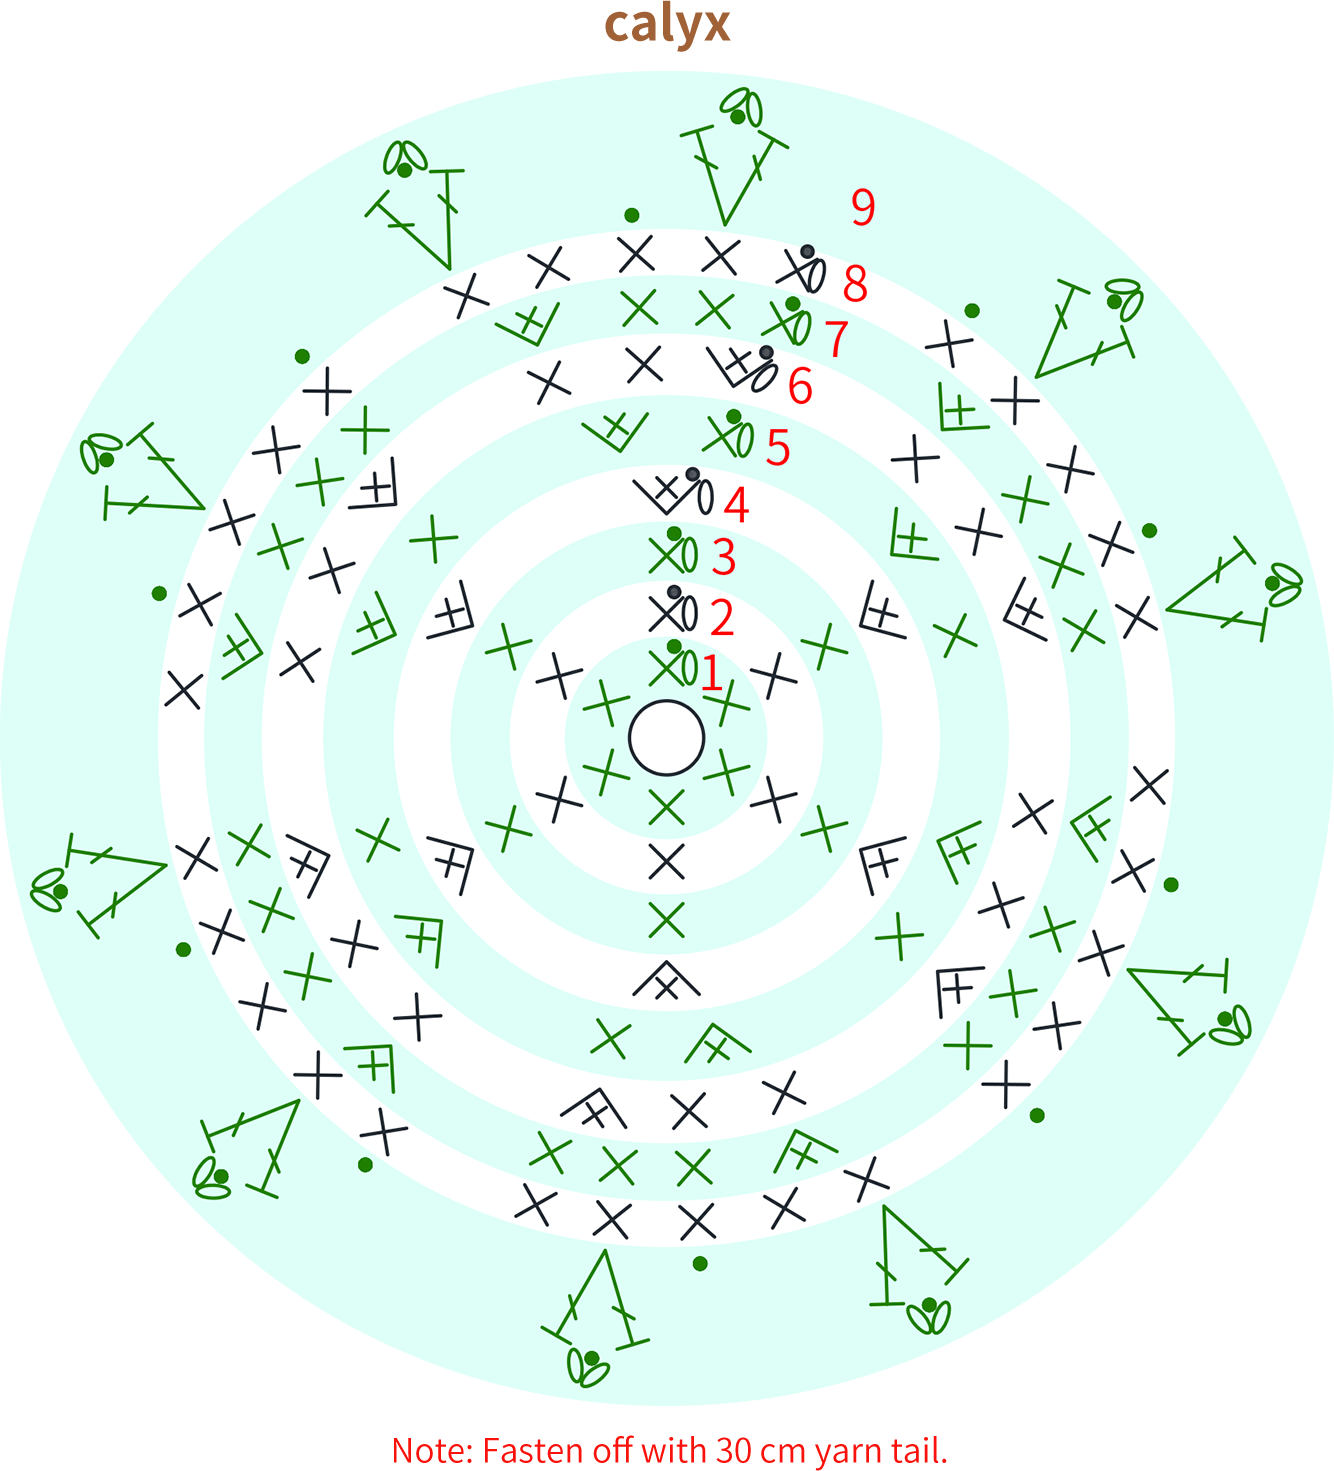
The chrysanthemum consists of the center, stamens, petals, and the calyx. For the center, we'll begin with the adjustable magic ring. Crochet in rounds counterclockwise. The stamen is crocheted in rounds on top of the center. It consists of two layers. Please refer to the video demonstration for more details.
| Chrysanthemums (make 5) | ||
| Part | Color 1×2 | Color 2×3 |
| center | 35#Fair Green | |
| stamens | 09#Pale Banana | 10#Aspen Gold |
| petals | 10#Aspen Gold | 09#Pale Banana |
| calyx | 35#Fair Green | |
Step 2 Long leavesA2 43' 56'' (Part 1)
Long leaves begin with a foundation chain for all. Then, crochet in rounds counterclockwise from the chain. And wrapthe wire around each round. Please refer to the video demonstration for more details.


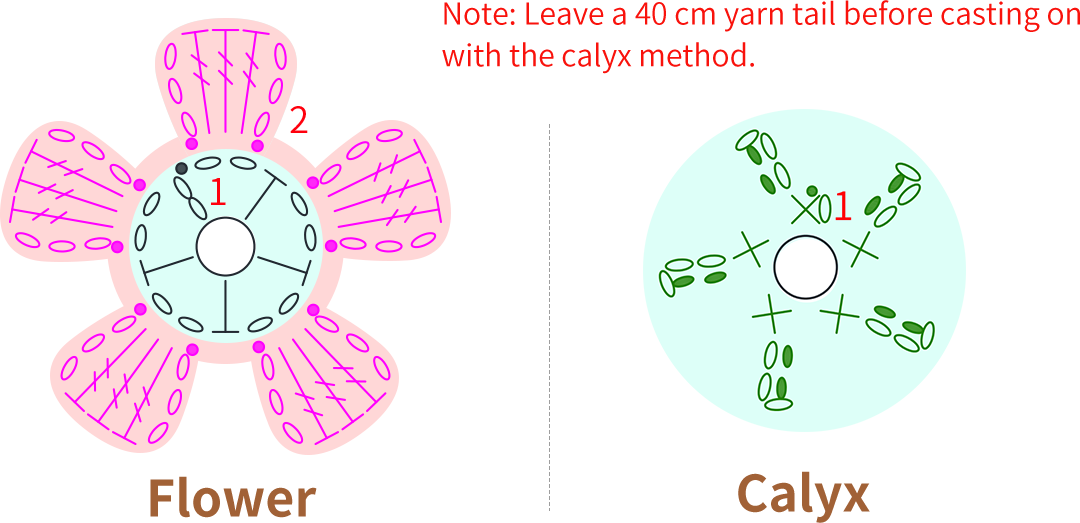
Step 3 Small flowersA3 53' 58'' (Part 1)
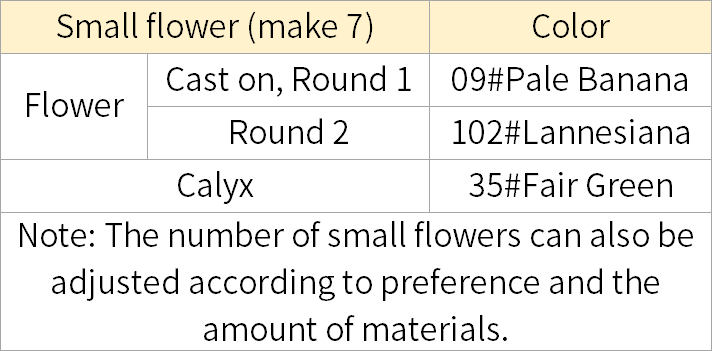
The small flowers consist of the flower petals, the calyx, and assembly. Both the petals and the calyxes start with a adjustable magic ring. And Crochet in rounds counterclockwise. When working the flowers, you'll need to switch colors. Please refer to the video demonstration for more details.
Step 4 DaisiesA4 66' 57'' (Part 1)
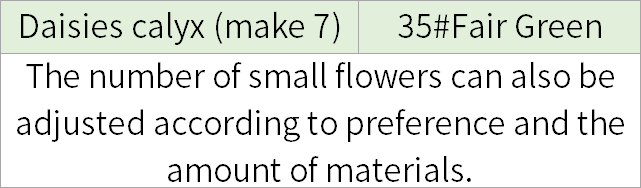
Daisies consist of the flower,the calyx, and the assembly. The flowers are pre-made. No need to work them by yourself. The crocheting method for the calyx is the same as for the small flower's calyx. Please refer to the video demonstration for more details.
Step 5 Large flowersA5 00' 11'' (Part 2)
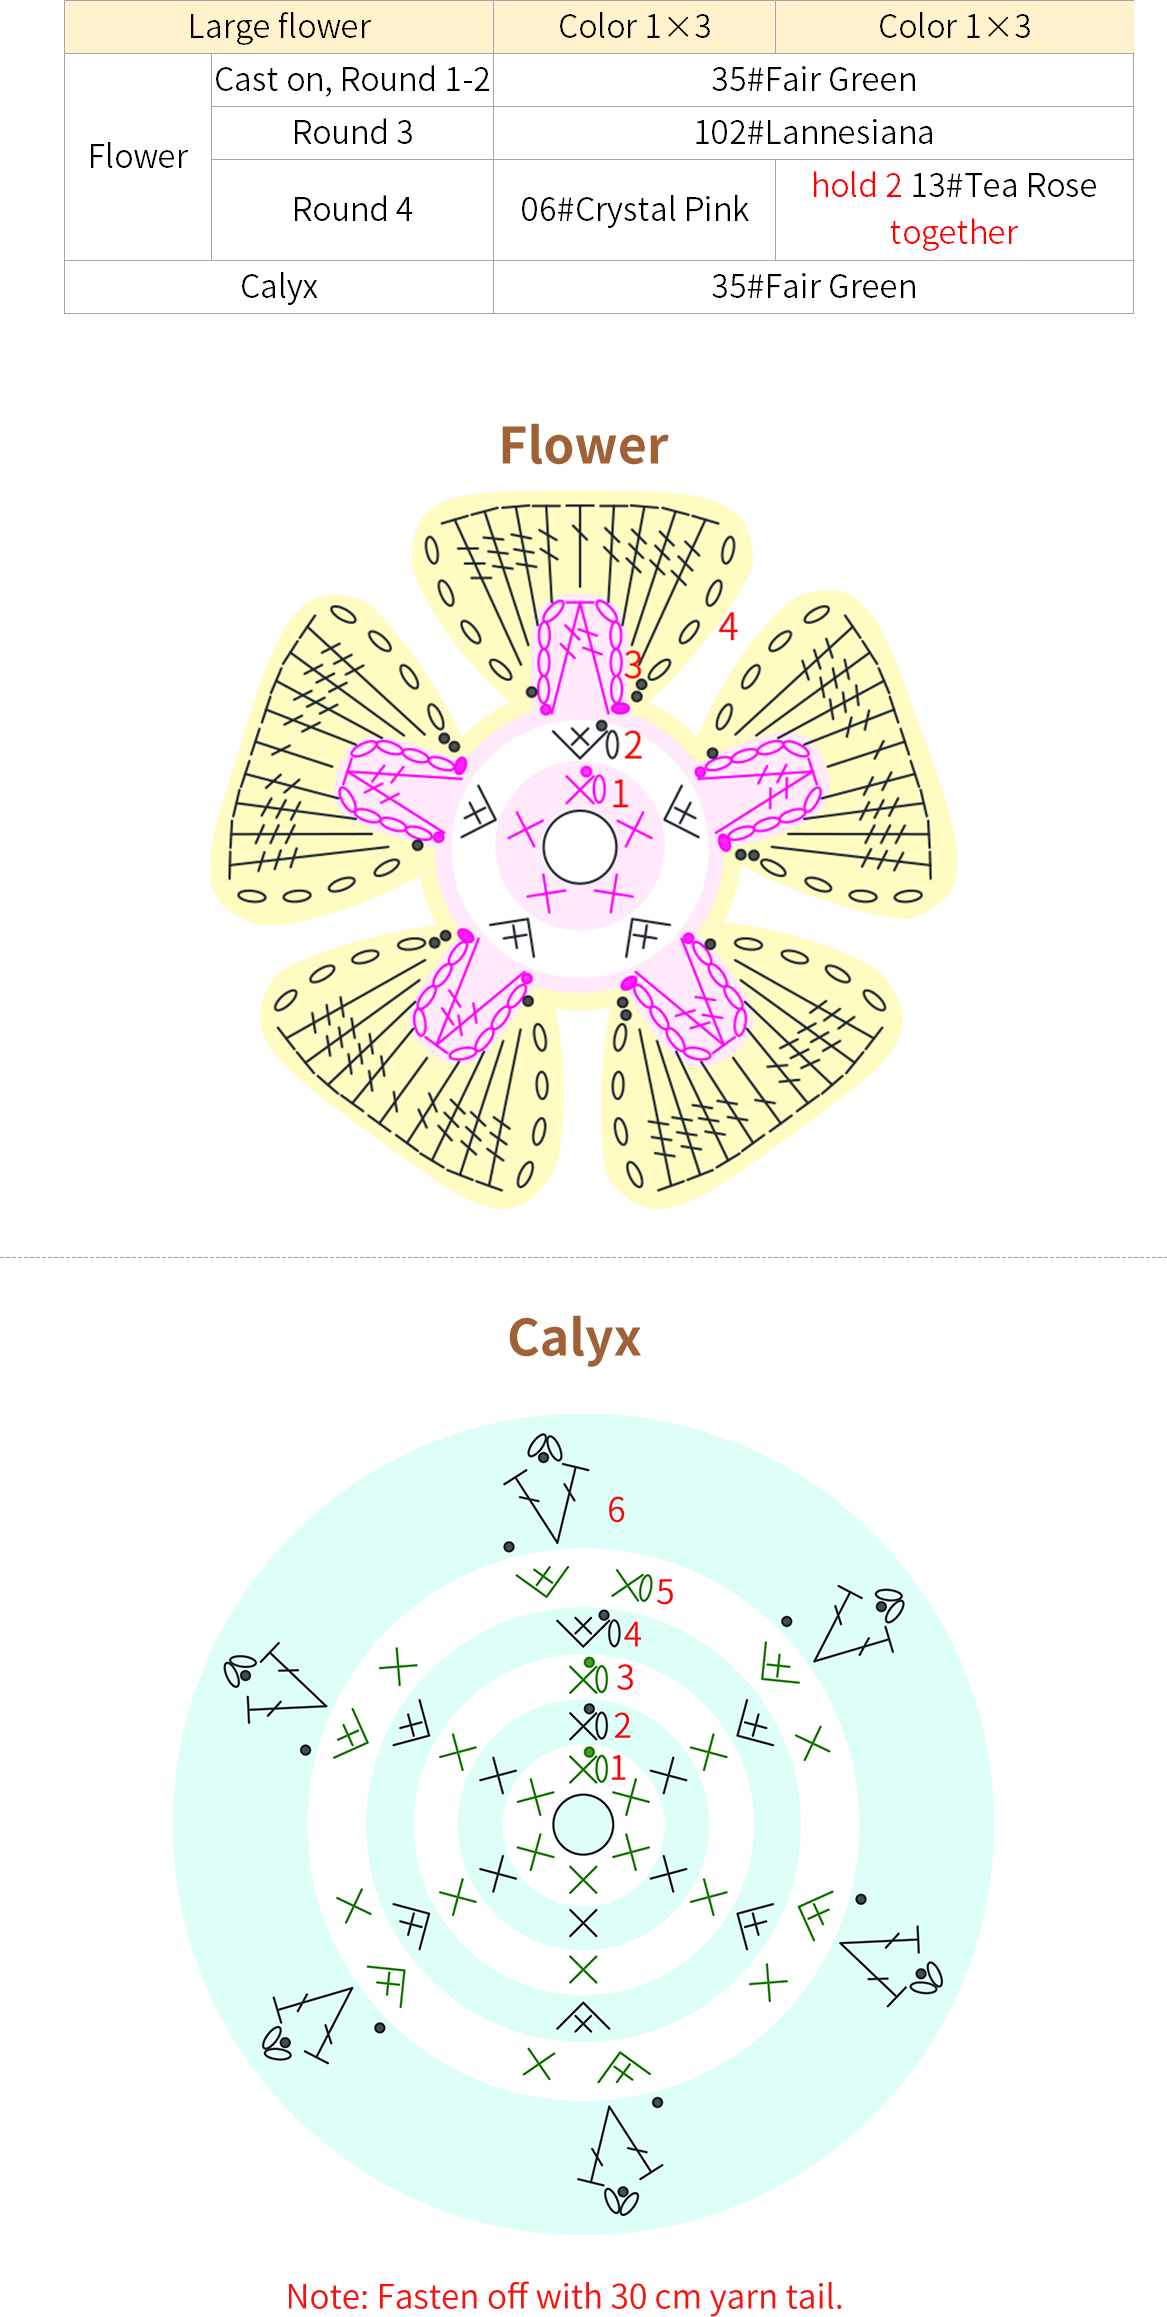
There are two color schemes for the large flowers. Each consists of a blossom and a calyx. Both start with the magic ring technique. crochet in rounds counterclockwise. While workingthe petals, we'll need to switch colors. Please refer to the video demonstration for more details.
Step 6 BudA6 14' 01'' (Part 2)
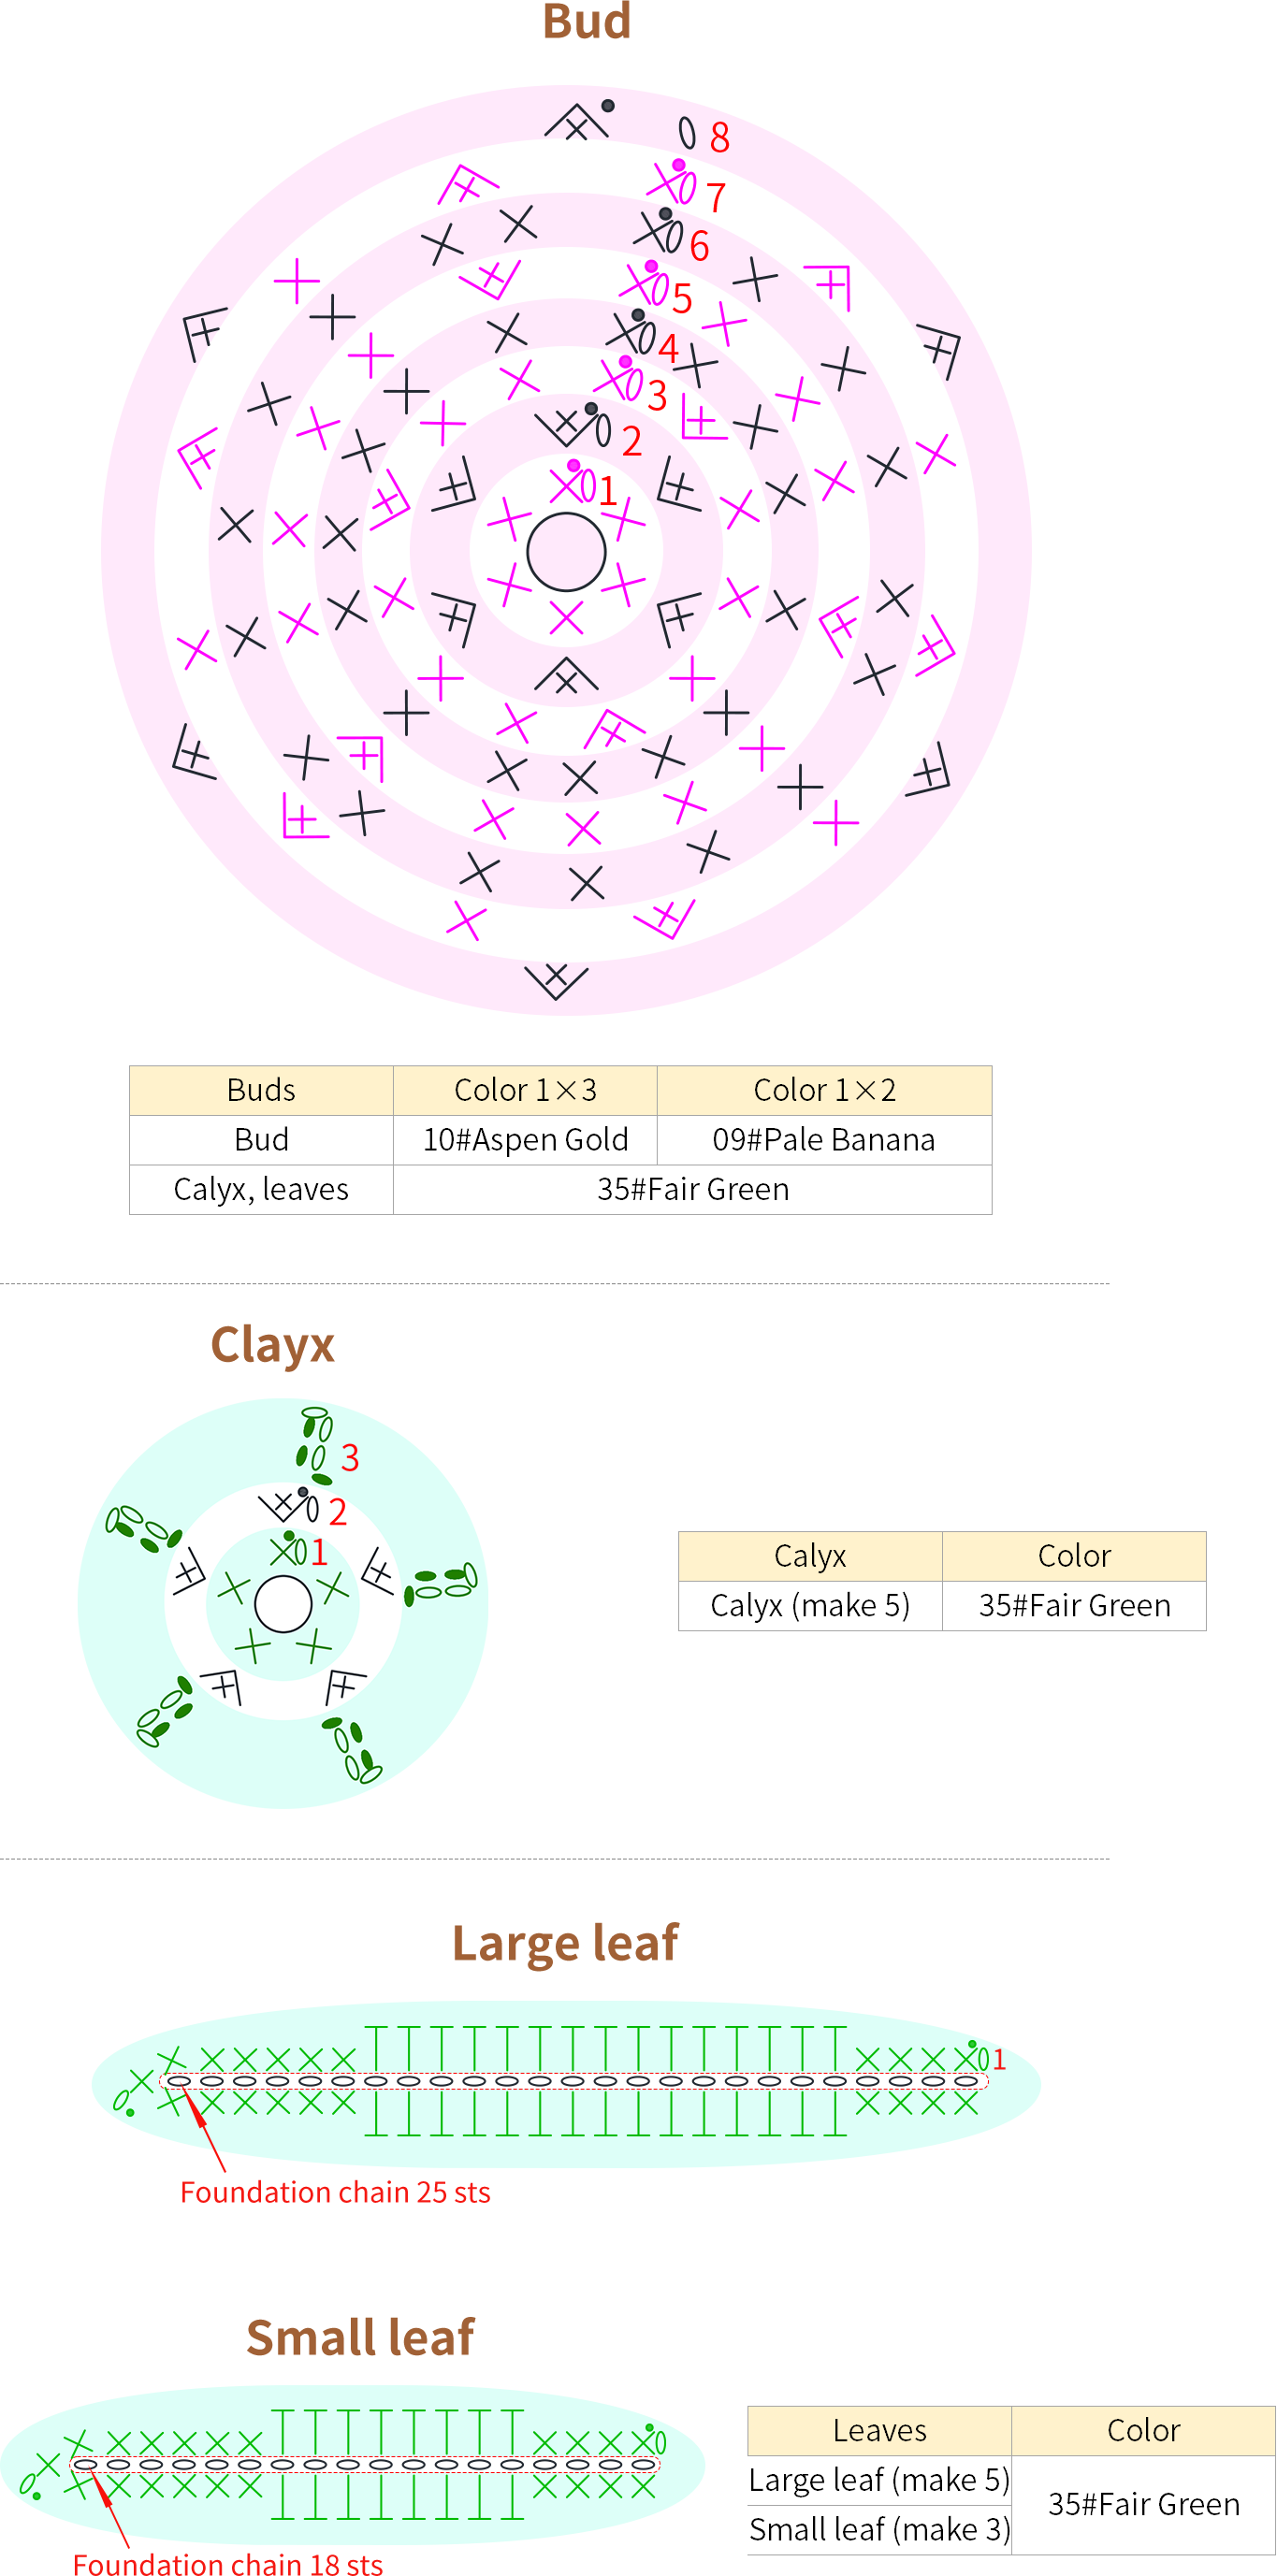
The bud consists of the bud itself, the calyx, and the leaves. Start the bud with the adjustable magic ring. Crochet in rounds counterclockwise. Please refer to the video demonstration for more details.
Part 2 AssemblyB 22' 16'' (Part 2)
Next, we'll be assembling the flowers and flower stems. The chrysanthemums, large flowers, and buds should be assembled into separate branches. The long leaves should be assembled into two branches. The small flowers and daisies can be assembled together with the chrysanthemums and large flowers. The specific distribution can be based on your preference. Please refer to the video demonstration for details.
Part 3 PackagingC 35' 03'' (Part 2)
The packaging involves arranging the flower branches, securing the wrapping paper, and adding a bow. Please refer to the video demonstration for more details.
Made by the community