Clothes
Peach Sweater Set
Project preview
See the finished project
Pattern format
Instructions
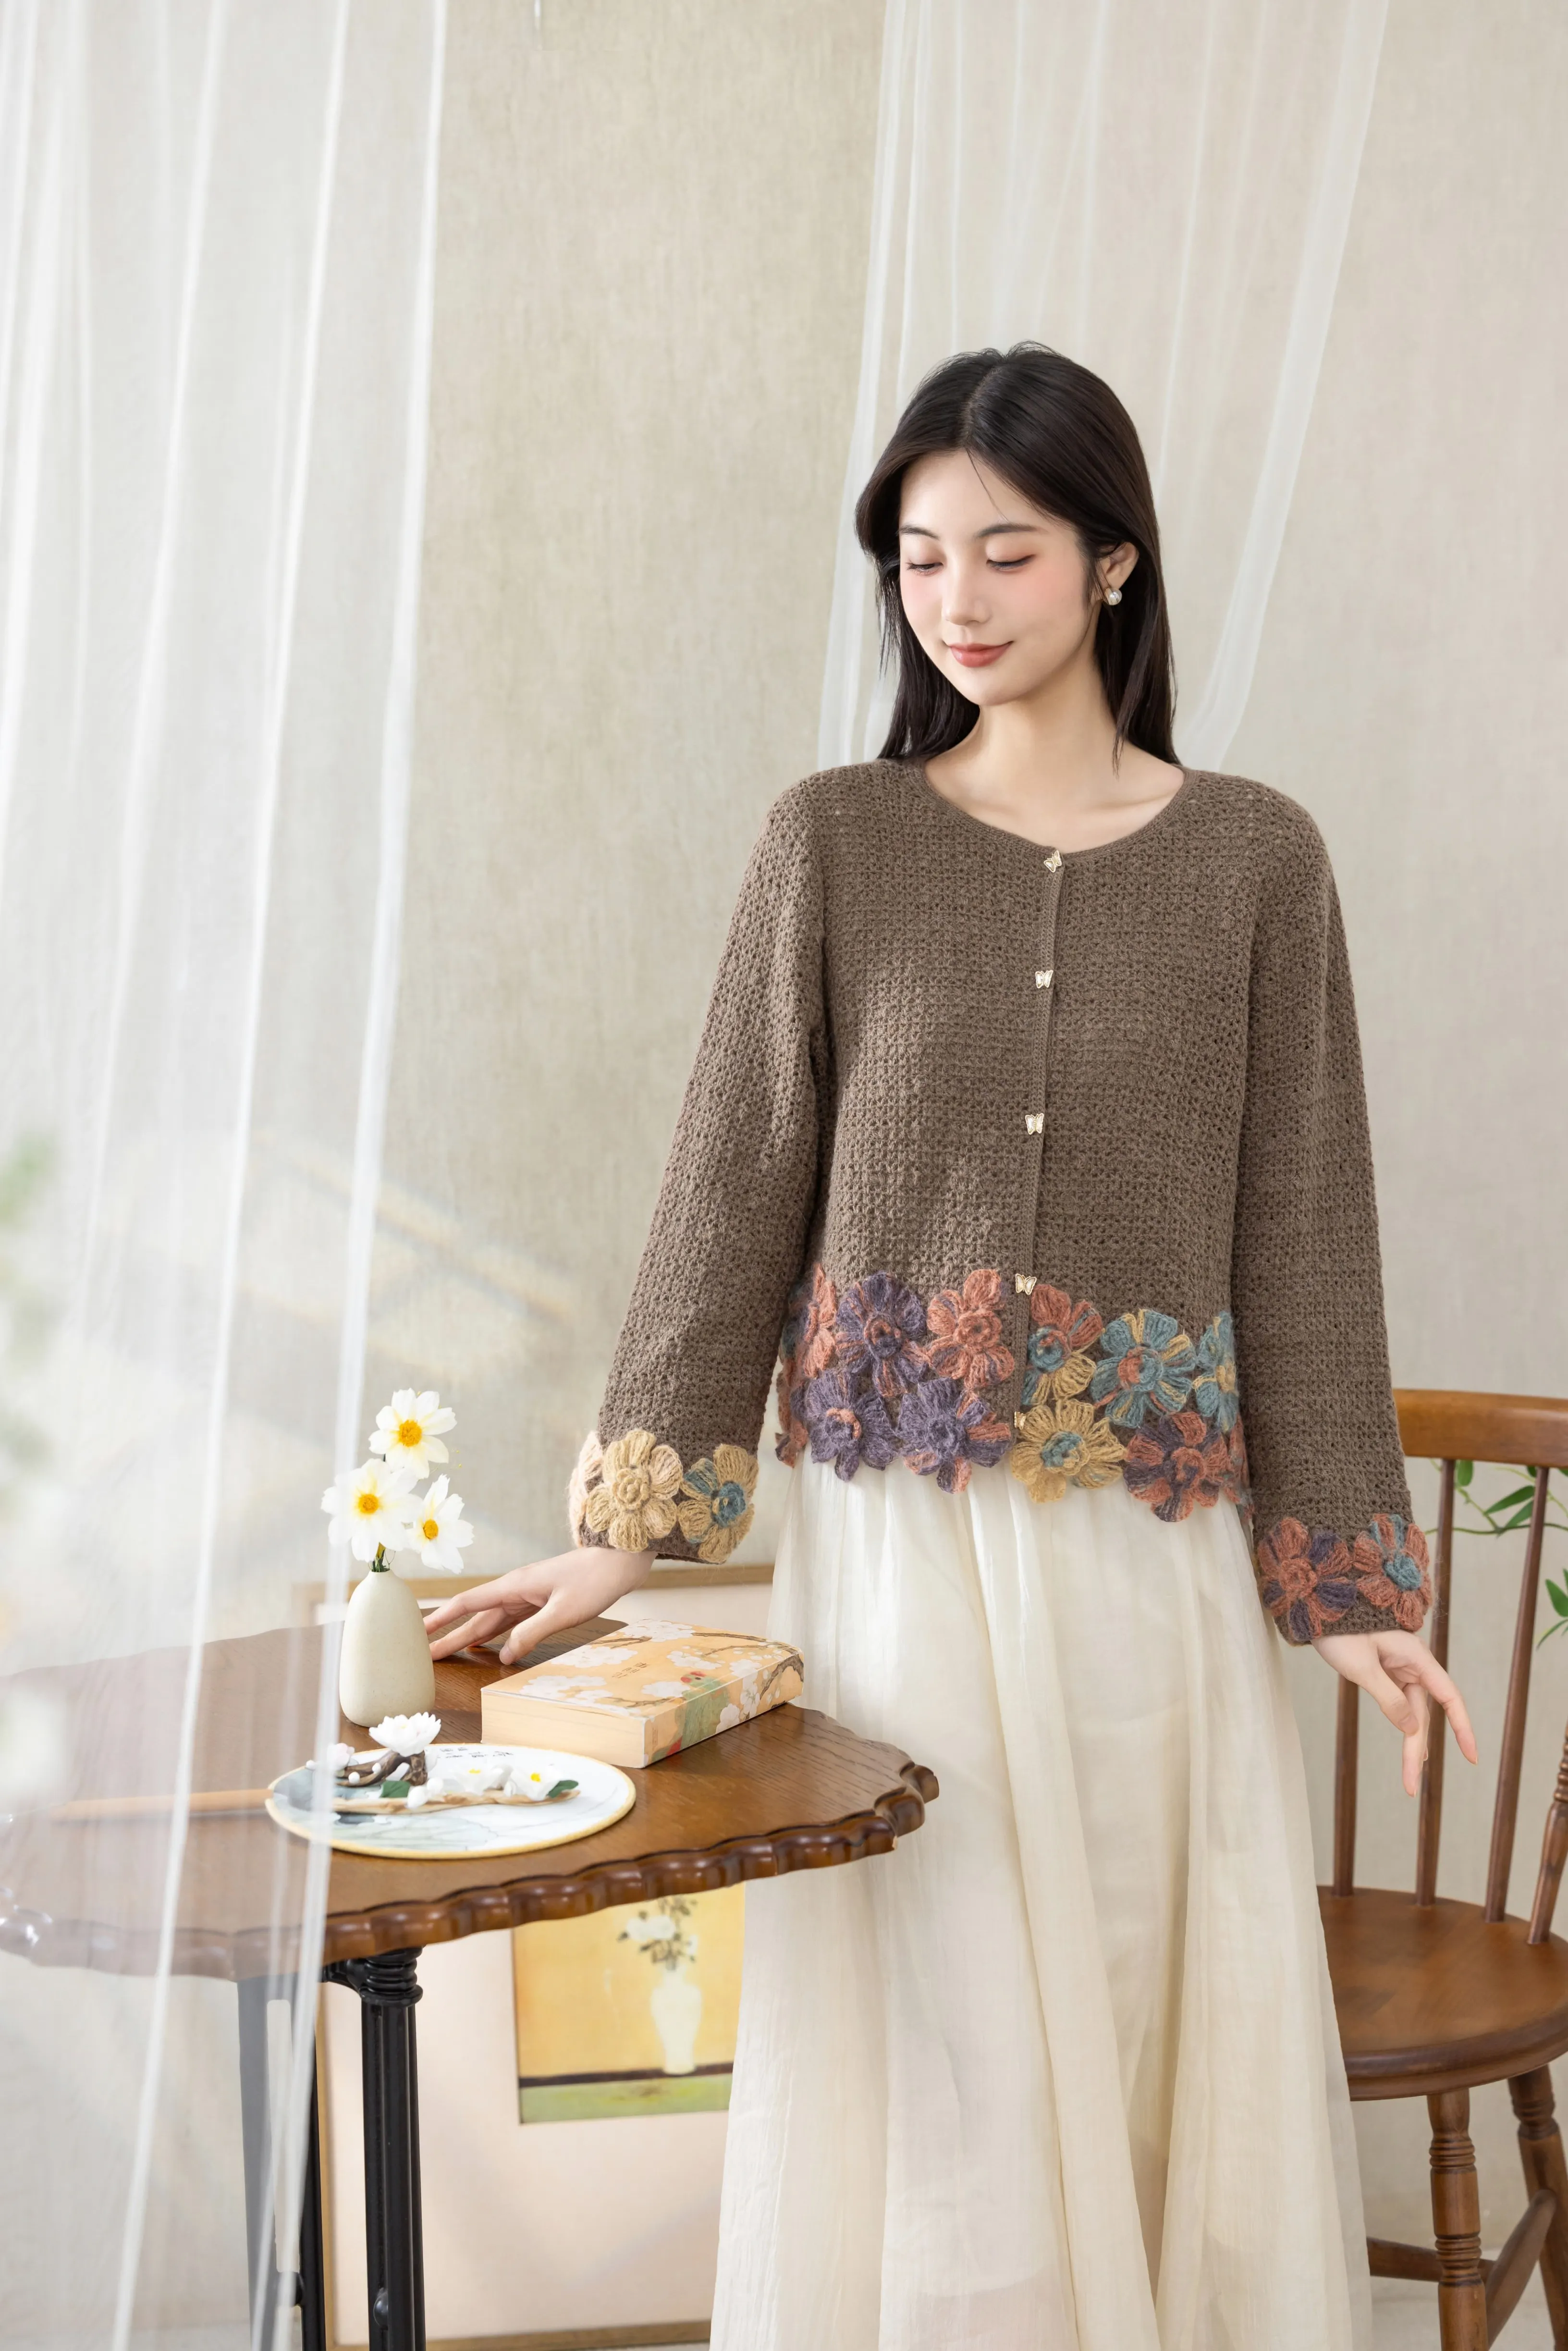
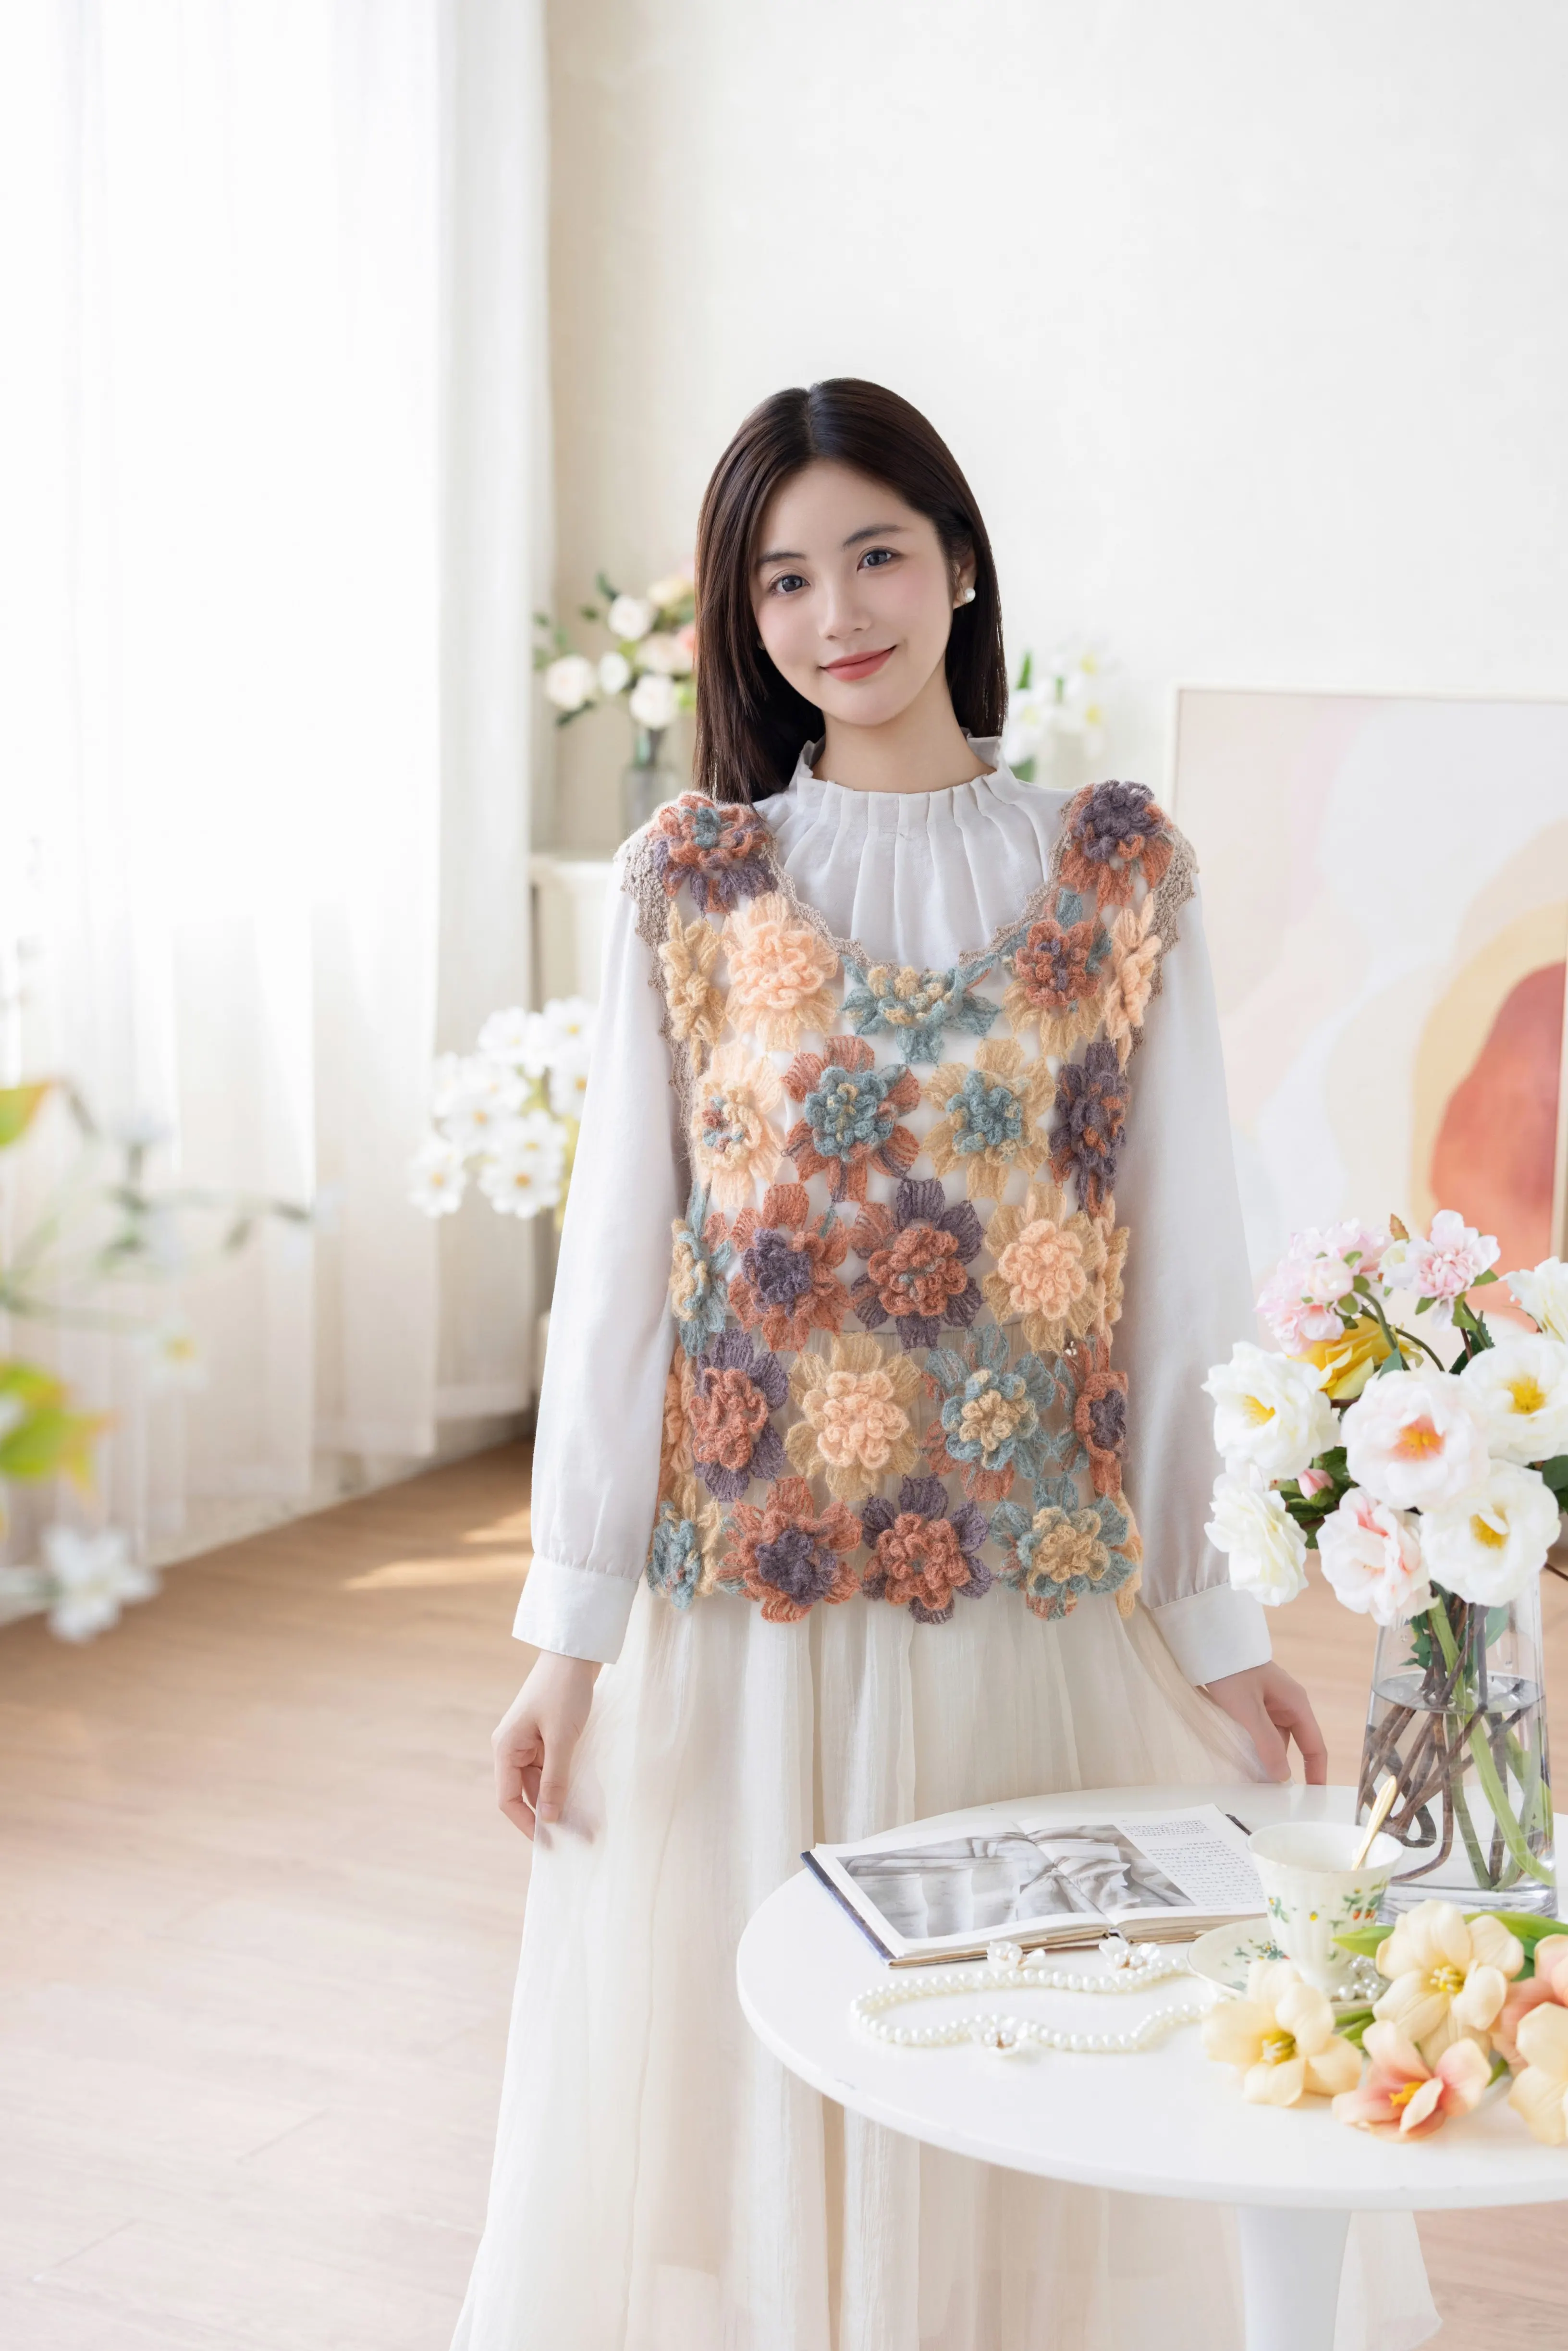
The set is divided into a vest and a cardigan. The vest divides into front pieces, back piece, and shoulder straps. The cardigan includes shoulder-parts, hems, sleeves, and front bands, where the shoulder-parts further divide into right shoulder-part, right sleeve, back shoulder-part, left sleeve, and left shoulder-part.
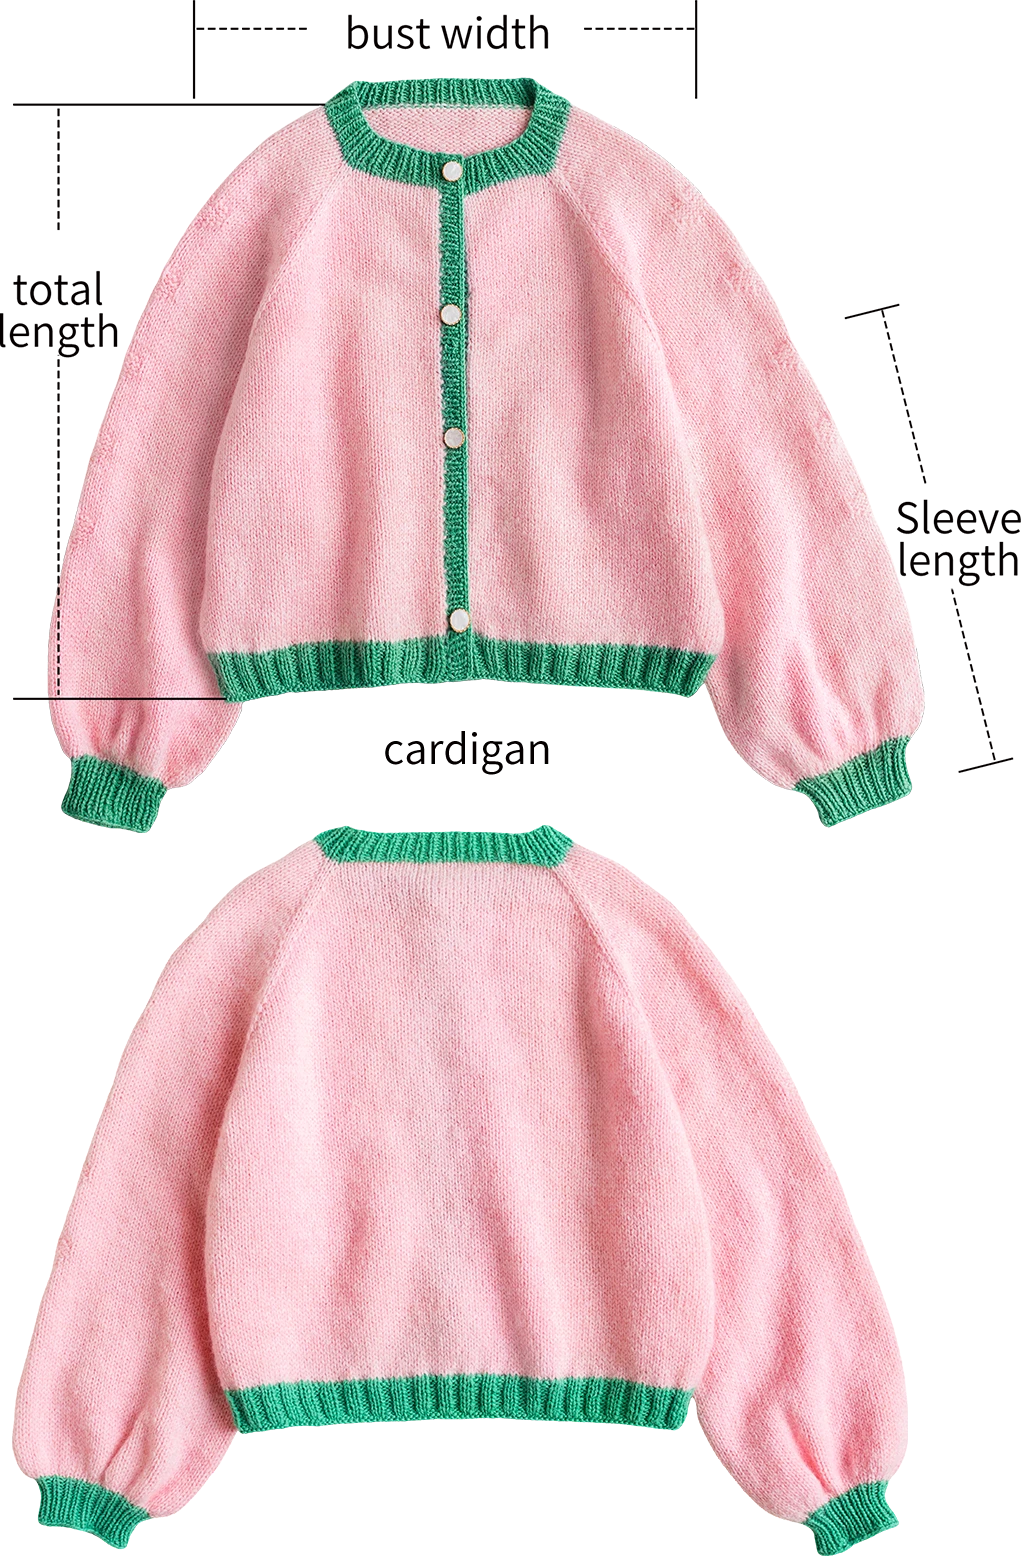
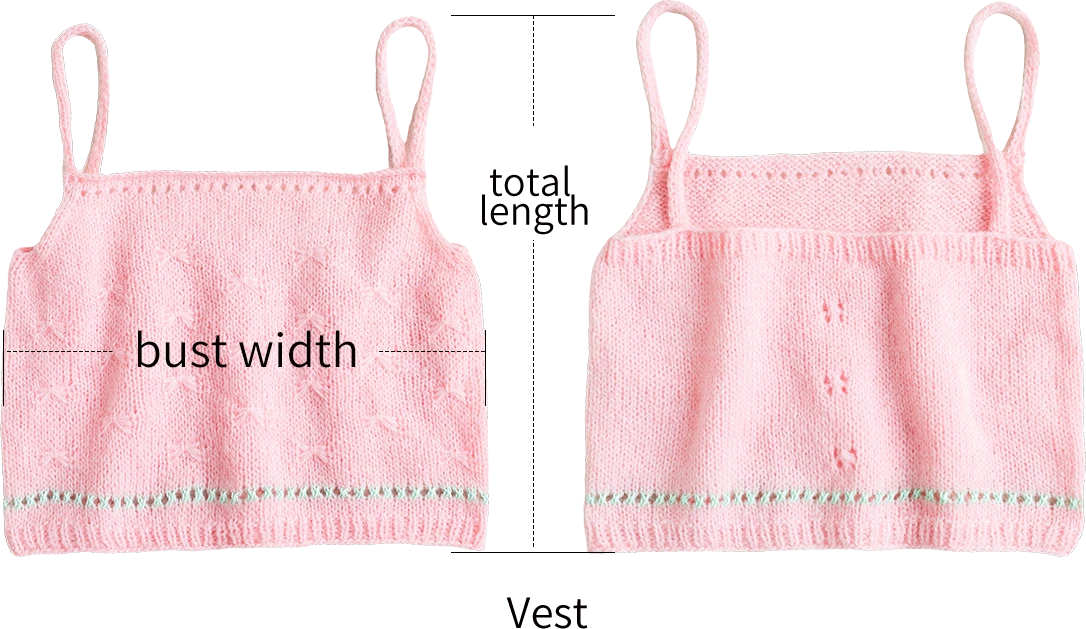
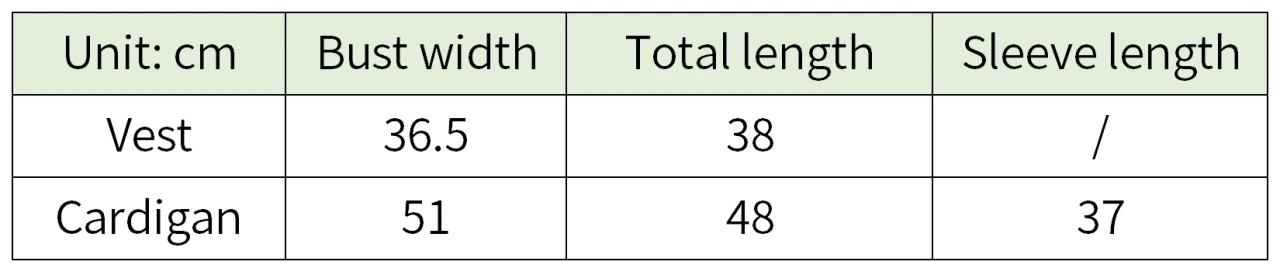
Note: Hand-measured, with an error margin of 1-2 cm.
Due to variations in individual tension, the size of the sample is for reference only.
Materials: south African Soft Mohair Mixed Hand-Knitting Yarn, Alpaca
Needle: 7# 4.5mm needle & circular needle
6# 5.0mm needle & circular needle
Chart Key



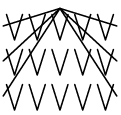
Cardigan structure diagram
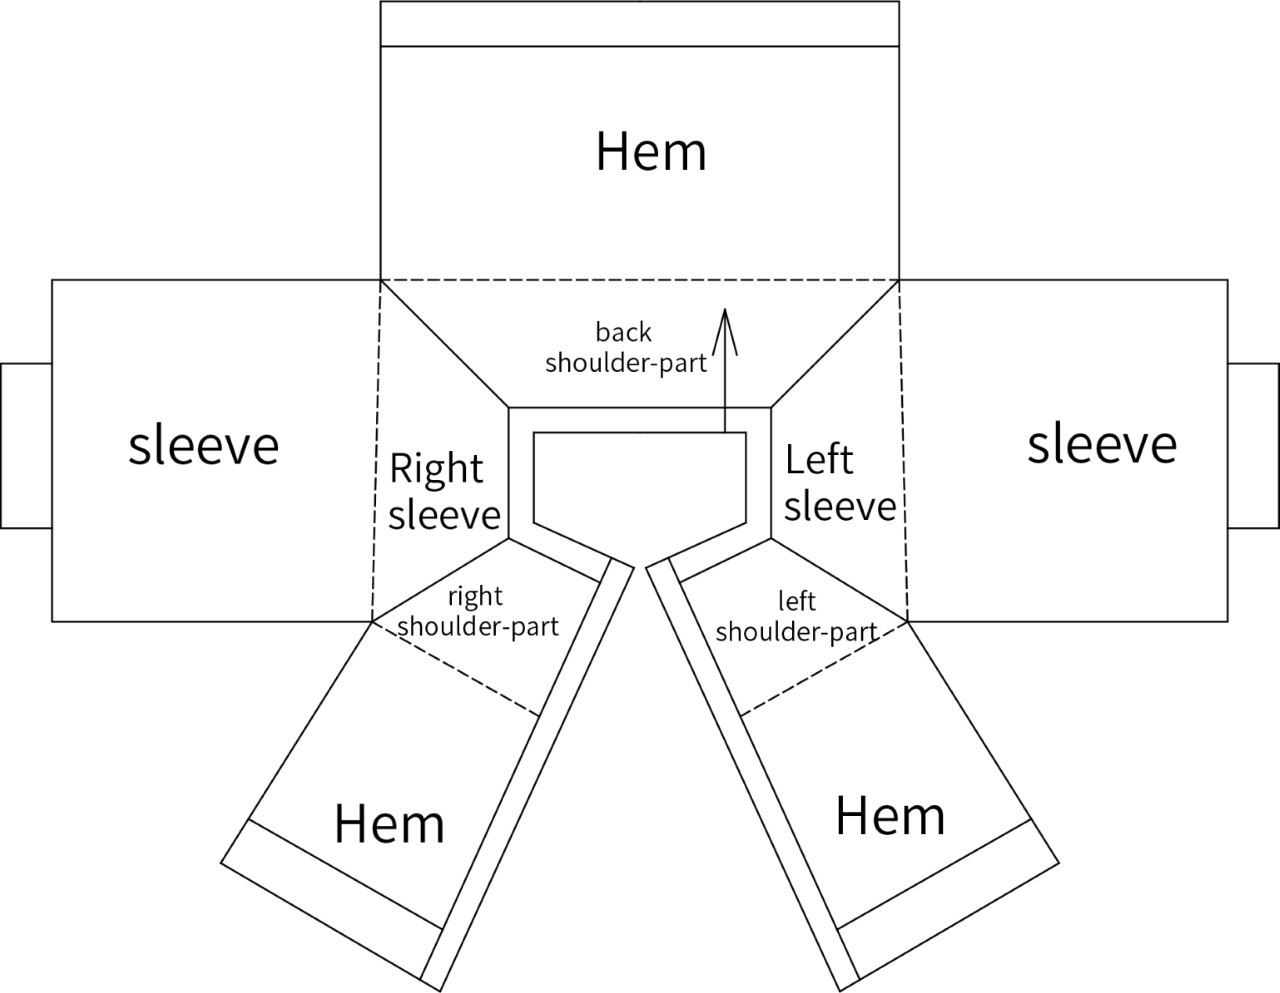

Note:
1. This pattern is making in Chinese crochet pattern terms, and the stitch name is written using American terminology. All measurements in charts are in cm.
2. The chart represent the right side of fabric, so check the key to see how to work a certain symbol on the right side and on the wrong side.
3.The left and right on the charts refer to the actual wearing position.
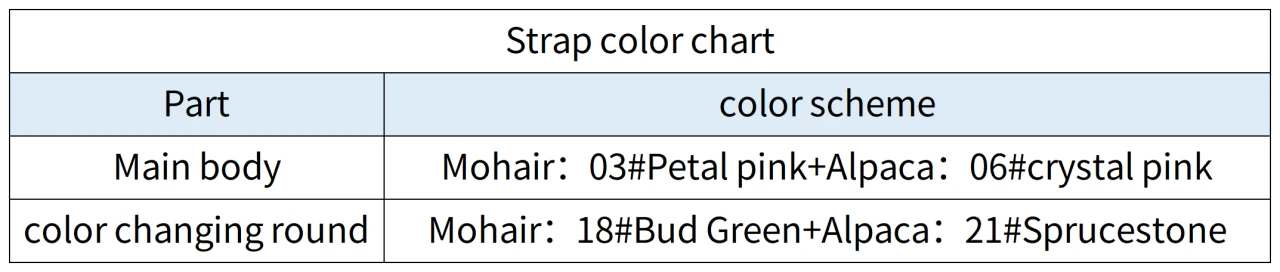
Part 1 The vest(one strand of Alpaca and one strand of Mohair, 6# needle)
The vest is divided into front and back pieces and straps. First, work in rounds to finish the back piece. Then, continue working in rows for the front piece. Finally, make two straps, leaving yarn tails at both ends of each strap to sew them onto the front and back pieces separately. The exact placement can be referenced from the actual project or determined based on real situations.
Note: 1. Determine the left and right of the fabric pieces based on the actual left and right when worn.
2. When working in rows, on the wrong side, you should work the stitches opposite to those shown in the chart.
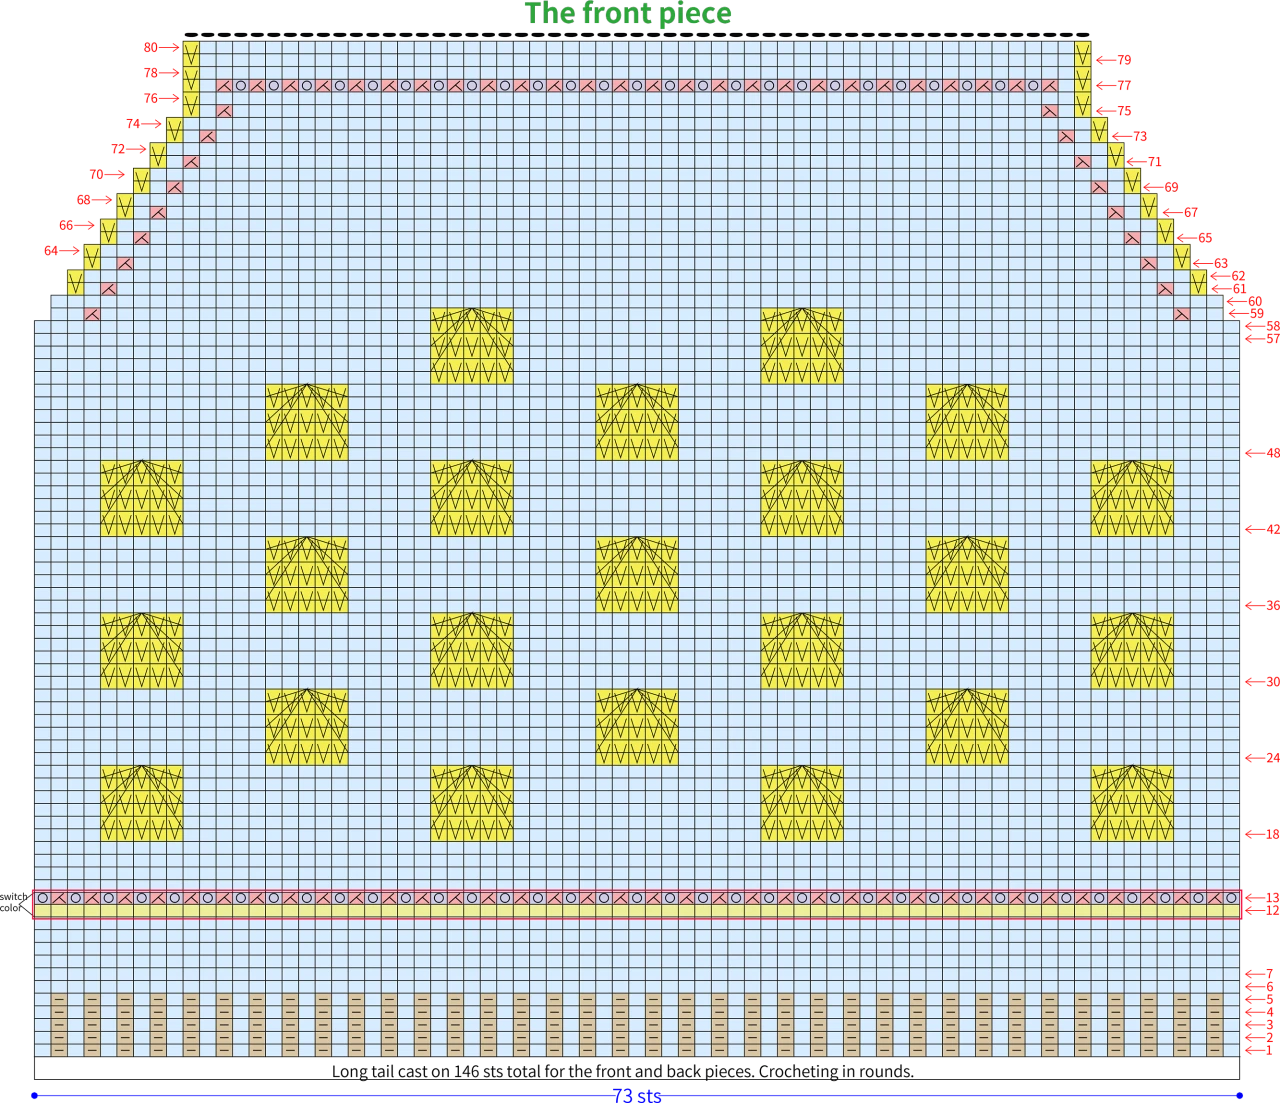
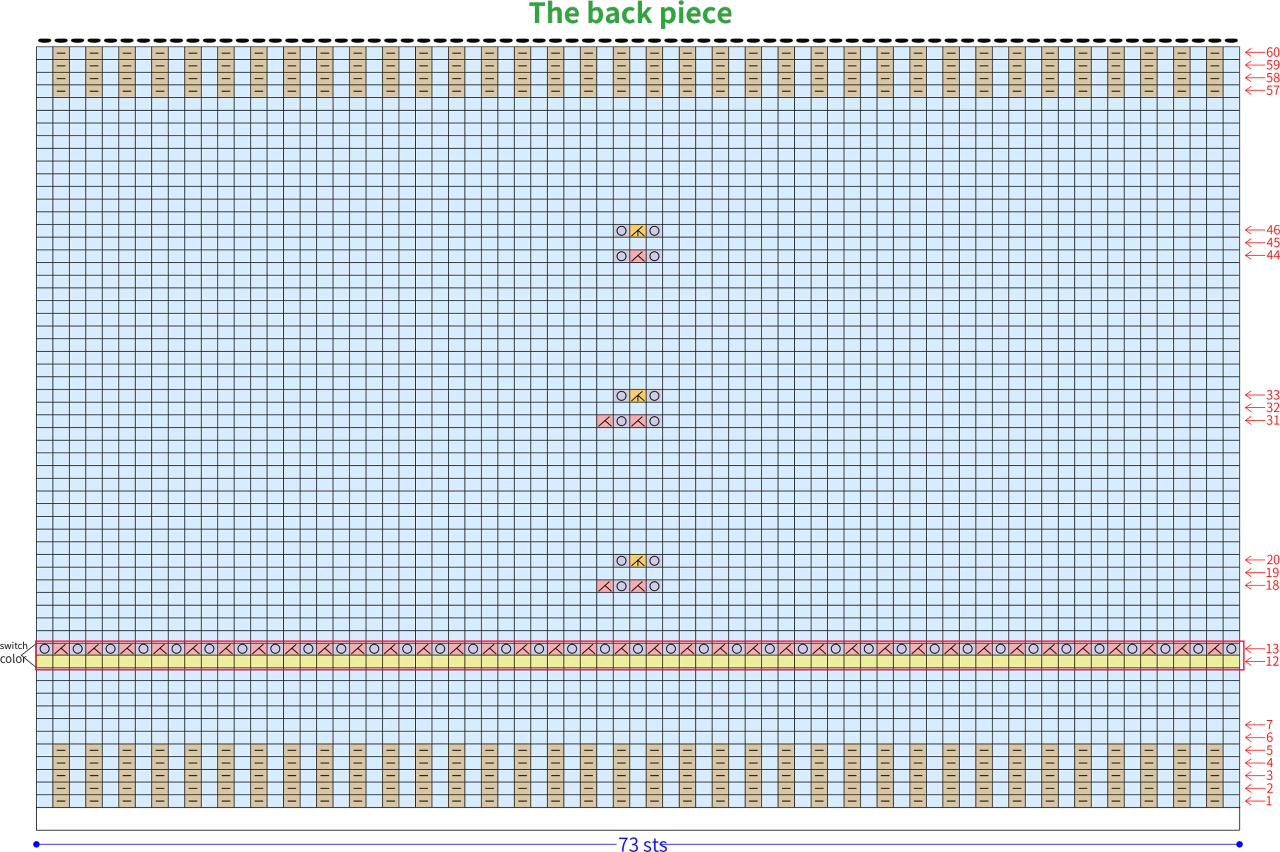
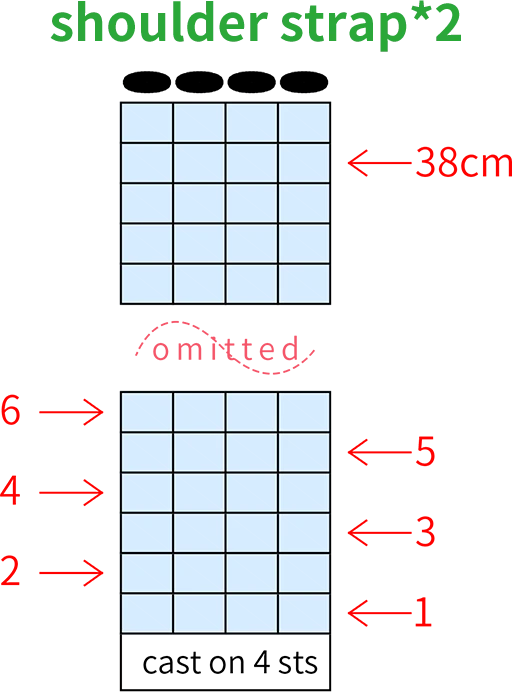
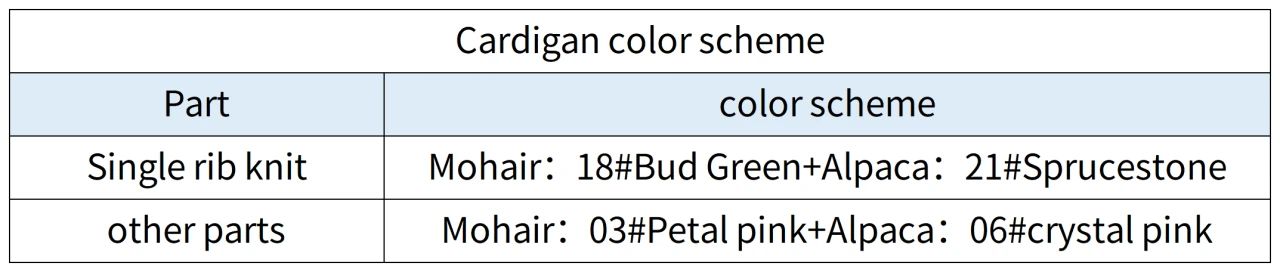
Part2 The cardigan (two strands of Alpaca + one strand of Mohair, # 7 needle knit all single rib, # 6 needle knit other parts)
Step1 The shoulder-parts
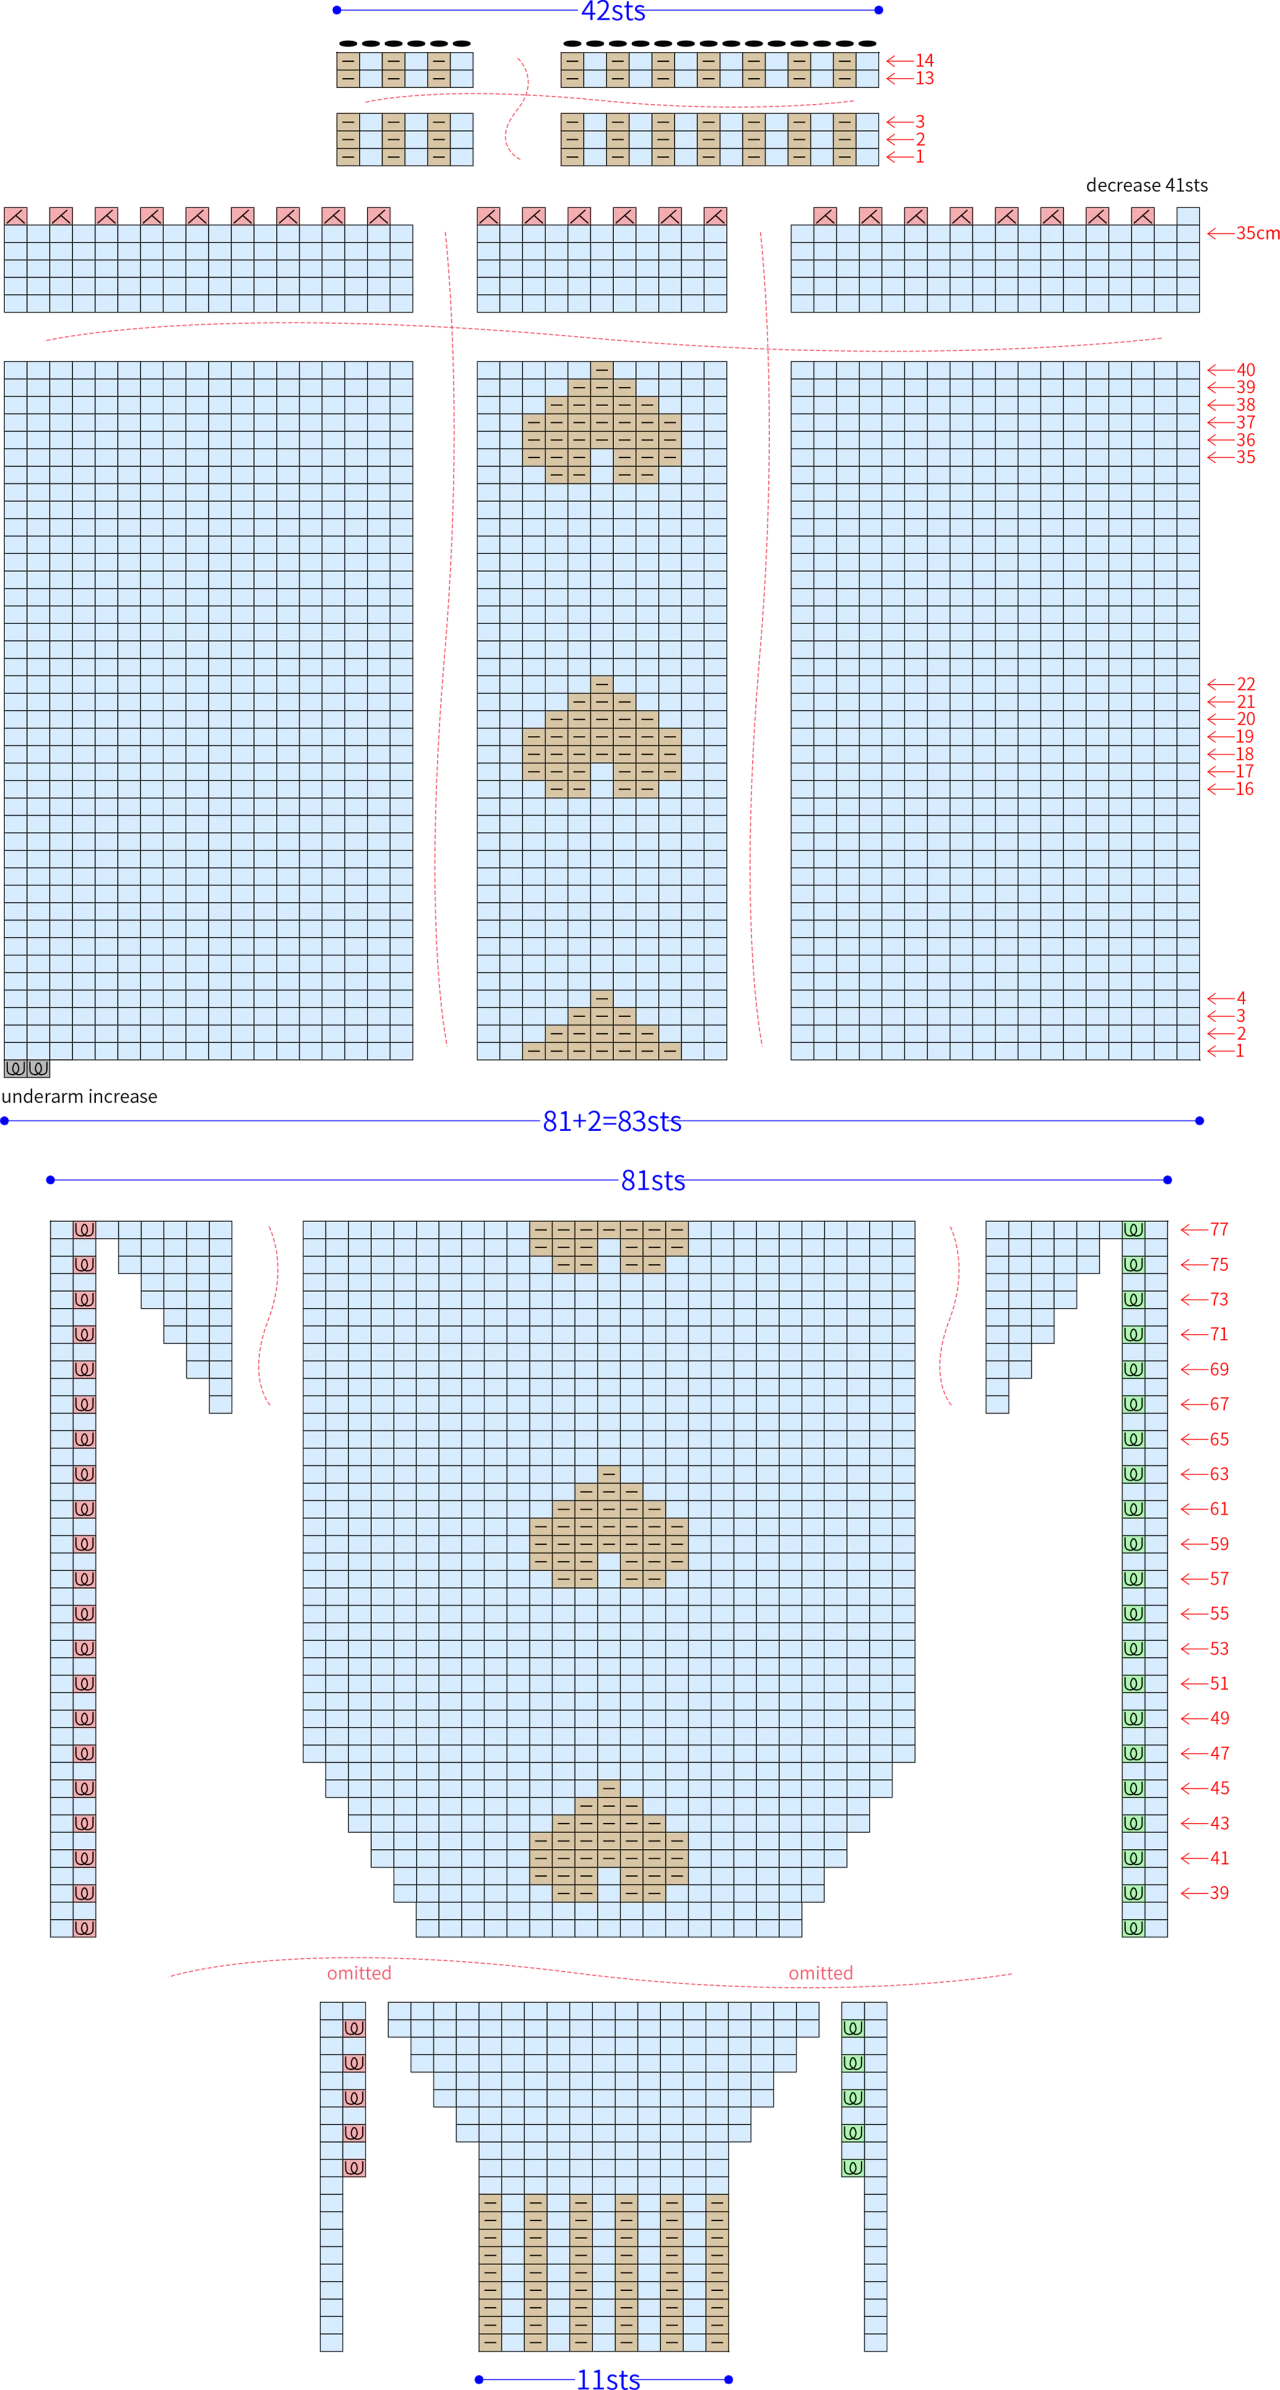
The shoulder-parts cast on with long-tail, working back and forth. Divide into five sections: right shoulder, right sleeve, back neck, left sleeve, and left shoulder. The right and left sleeves should be worked in pattern and demonstrated separately. After completing the right and left sleeves, place them on hold with waste yarn.
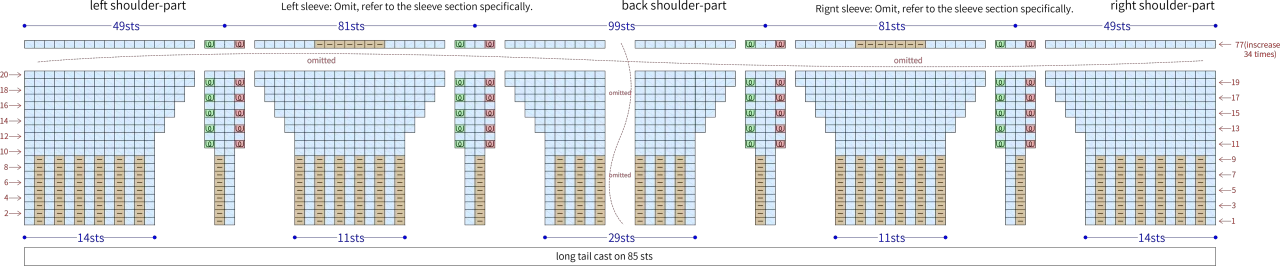
Note: Sleeves need to start knitting the pattern from row 39.
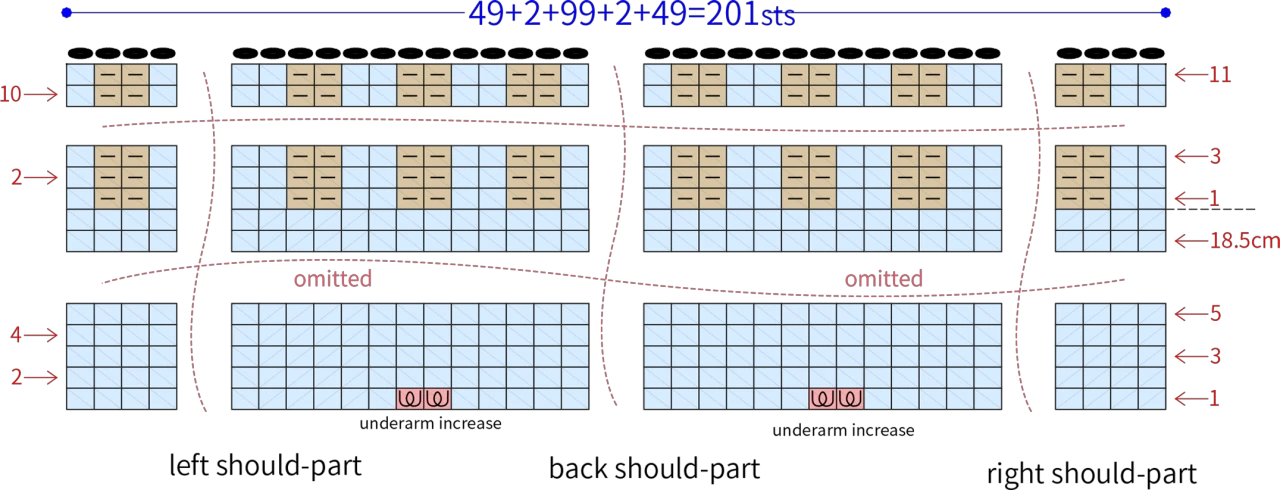
Step2 The hem
After holding the stitches for the left and right sleeves, work the hem on the remaining part of the shoulder. Pay attention to increase stitches at the underarm positions for the left and right sleeves.
Step3 The sleeves
After returning the held left and right sleeves to the straight needles, continue knitting the sleeves; the knitting method for both sleeves is identical. Pay attention to picking up stitches at the underarm increase positions.
Step4 The bands
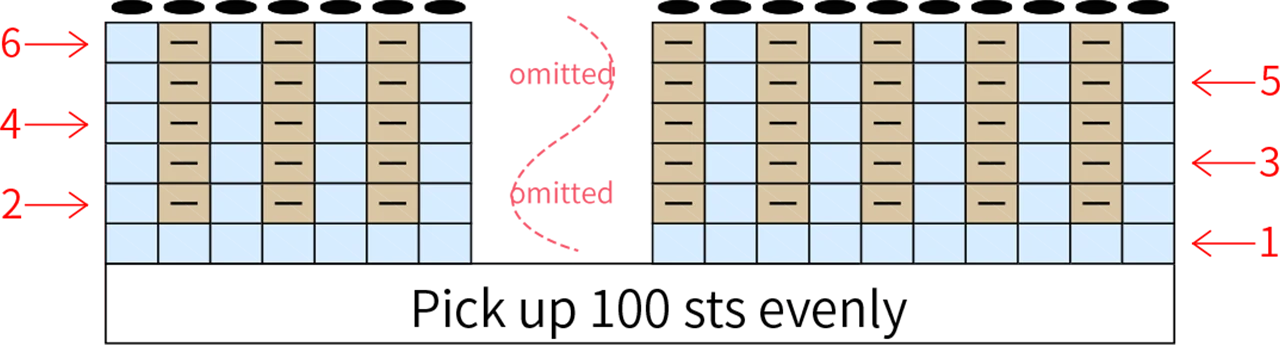
Finally, knit the front bands on both sides of the front of the garment. Sew acrylic buttons evenly on the left side front band, and then sew snap fasteners on the wrong side of the acrylic buttons and the corresponding right side front band.
Made by the community