Clothes
Pinwheel Jasmine
Project preview
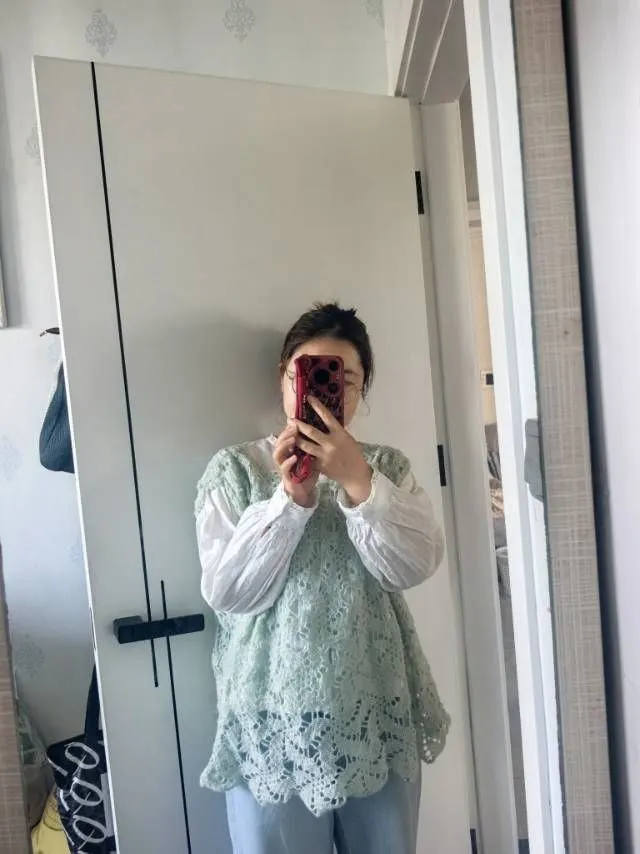
See the finished project
Pattern format
Instructions
Watch and follow
Video tutorial
| Style | Yarn | Color |
|---|---|---|
| Turquoise Blue - Small | Sequin Mahai |  21#Turquoise Blue x 3 21#Turquoise Blue x 3 |
| Turquoise Blue - Large | Sequin Mahai | 21#Turquoise Blue x 4 |
| Snow White - Small | Sequin Mahai |  03#Snow White x 3 03#Snow White x 3 |
| Snow White - Large | Sequin Mahai | 03#Snow White x 4 |
| Poinsettia Red - Small | Sequin Mahai | 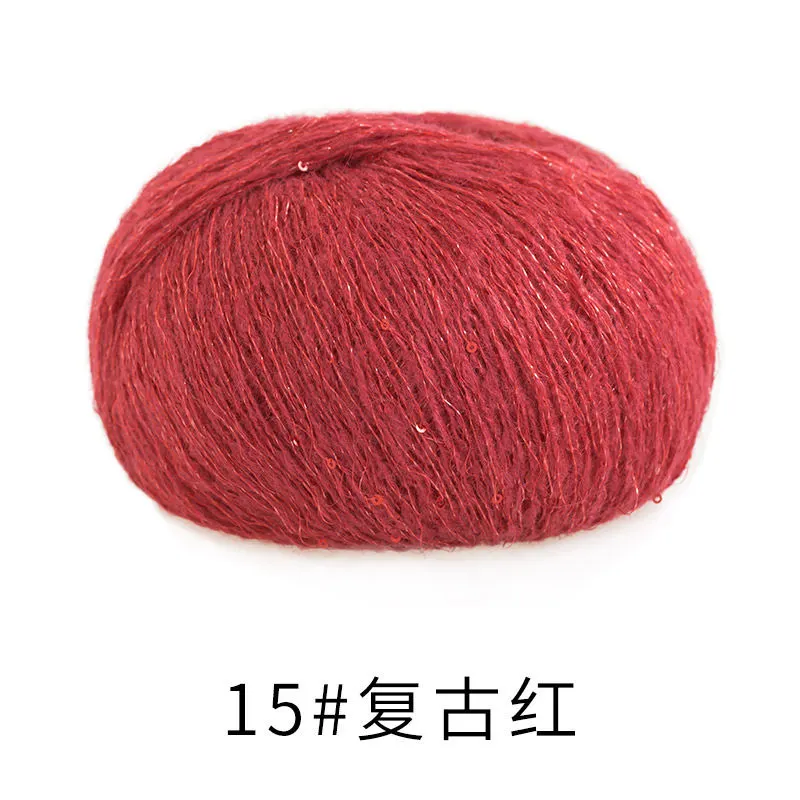 15#Poinsettia Red x 3 15#Poinsettia Red x 3 |
| Poinsettia Red - Large | Sequin Mahai | 15#Poinsettia Red x 4 |
| Black - Small | Sequin Mahai |  16#Black x 3 16#Black x 3 |
| Black - Large | Sequin Mahai | 16#Black x 4 |
Turquoise Blue - Small
Turquoise Blue - Large
Snow White - Small
Snow White - Large
Poinsettia Red - Small
Poinsettia Red - Large
Black - Small
Black - Large
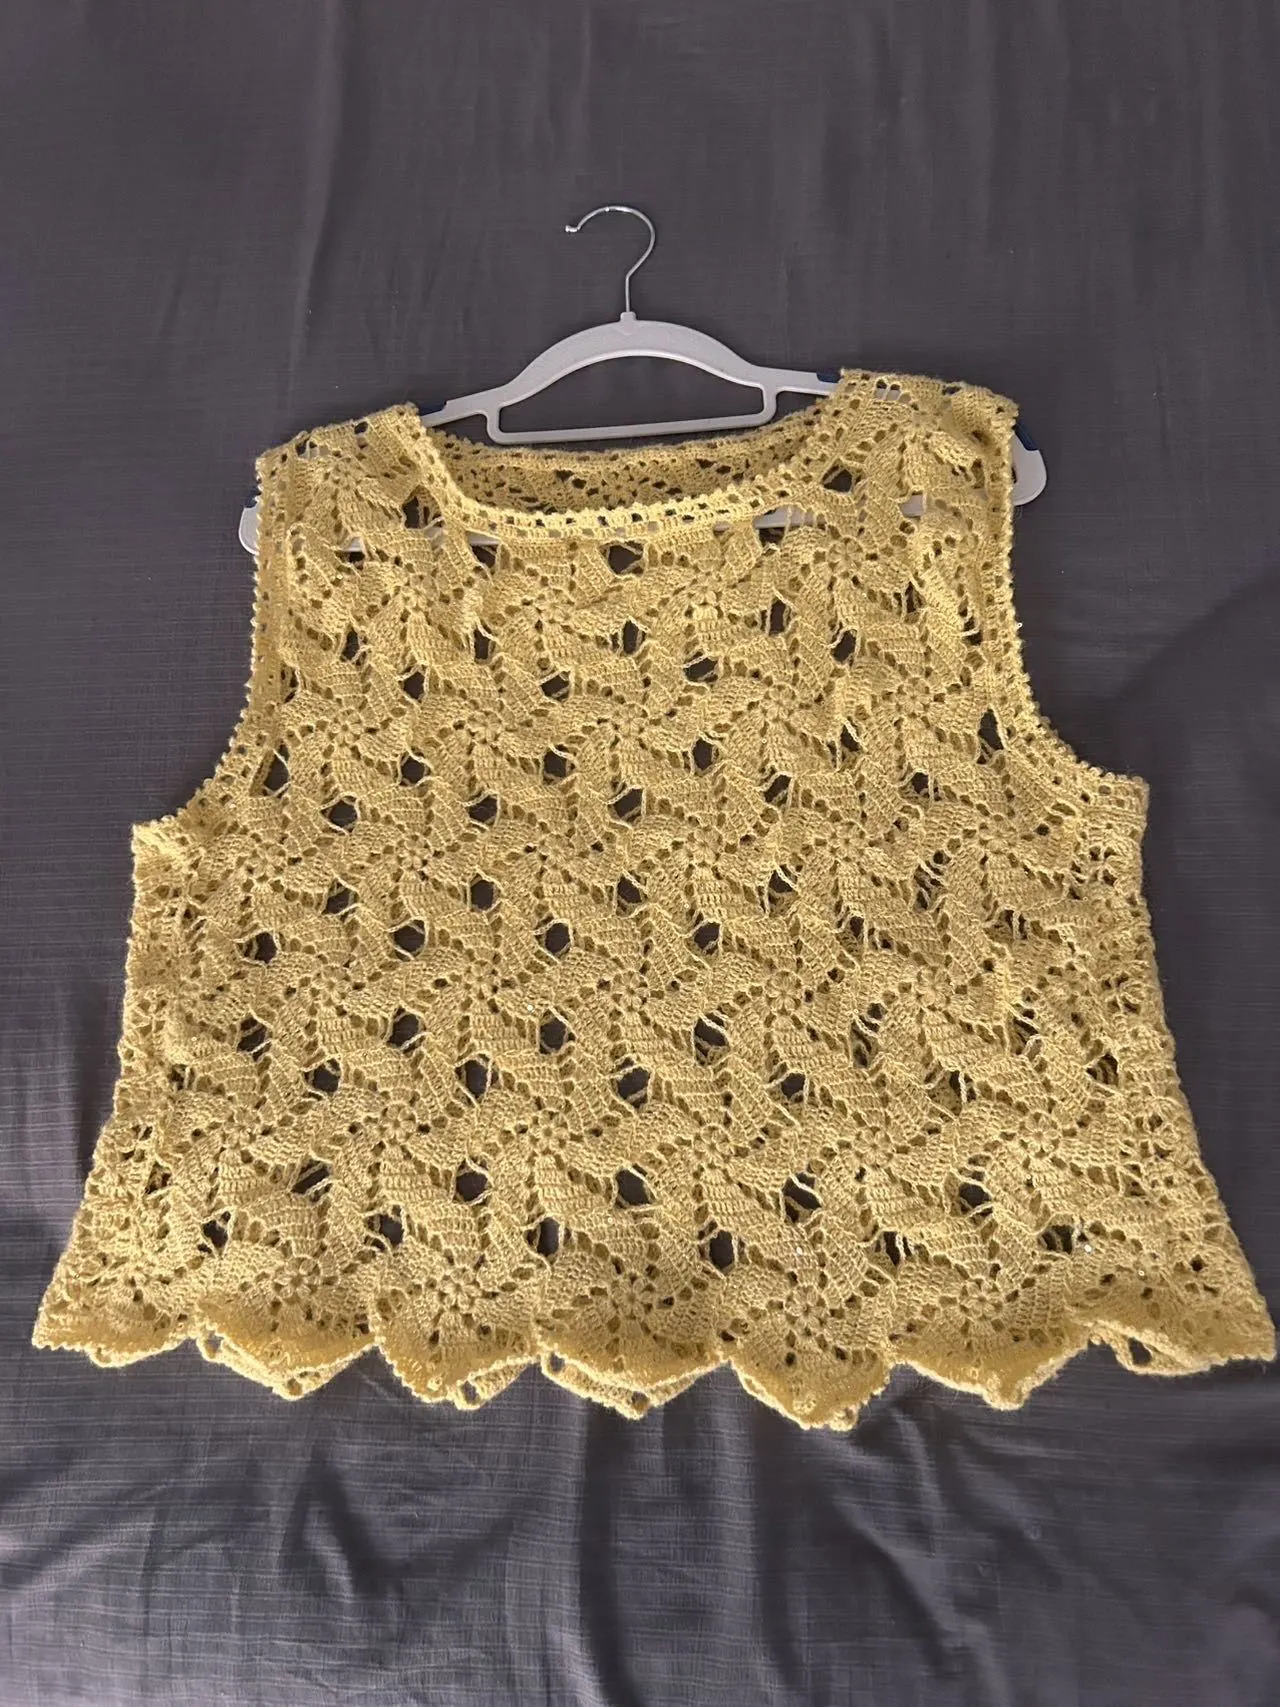
This garment is divided into several parts: the back body, front body, sides, and edging.
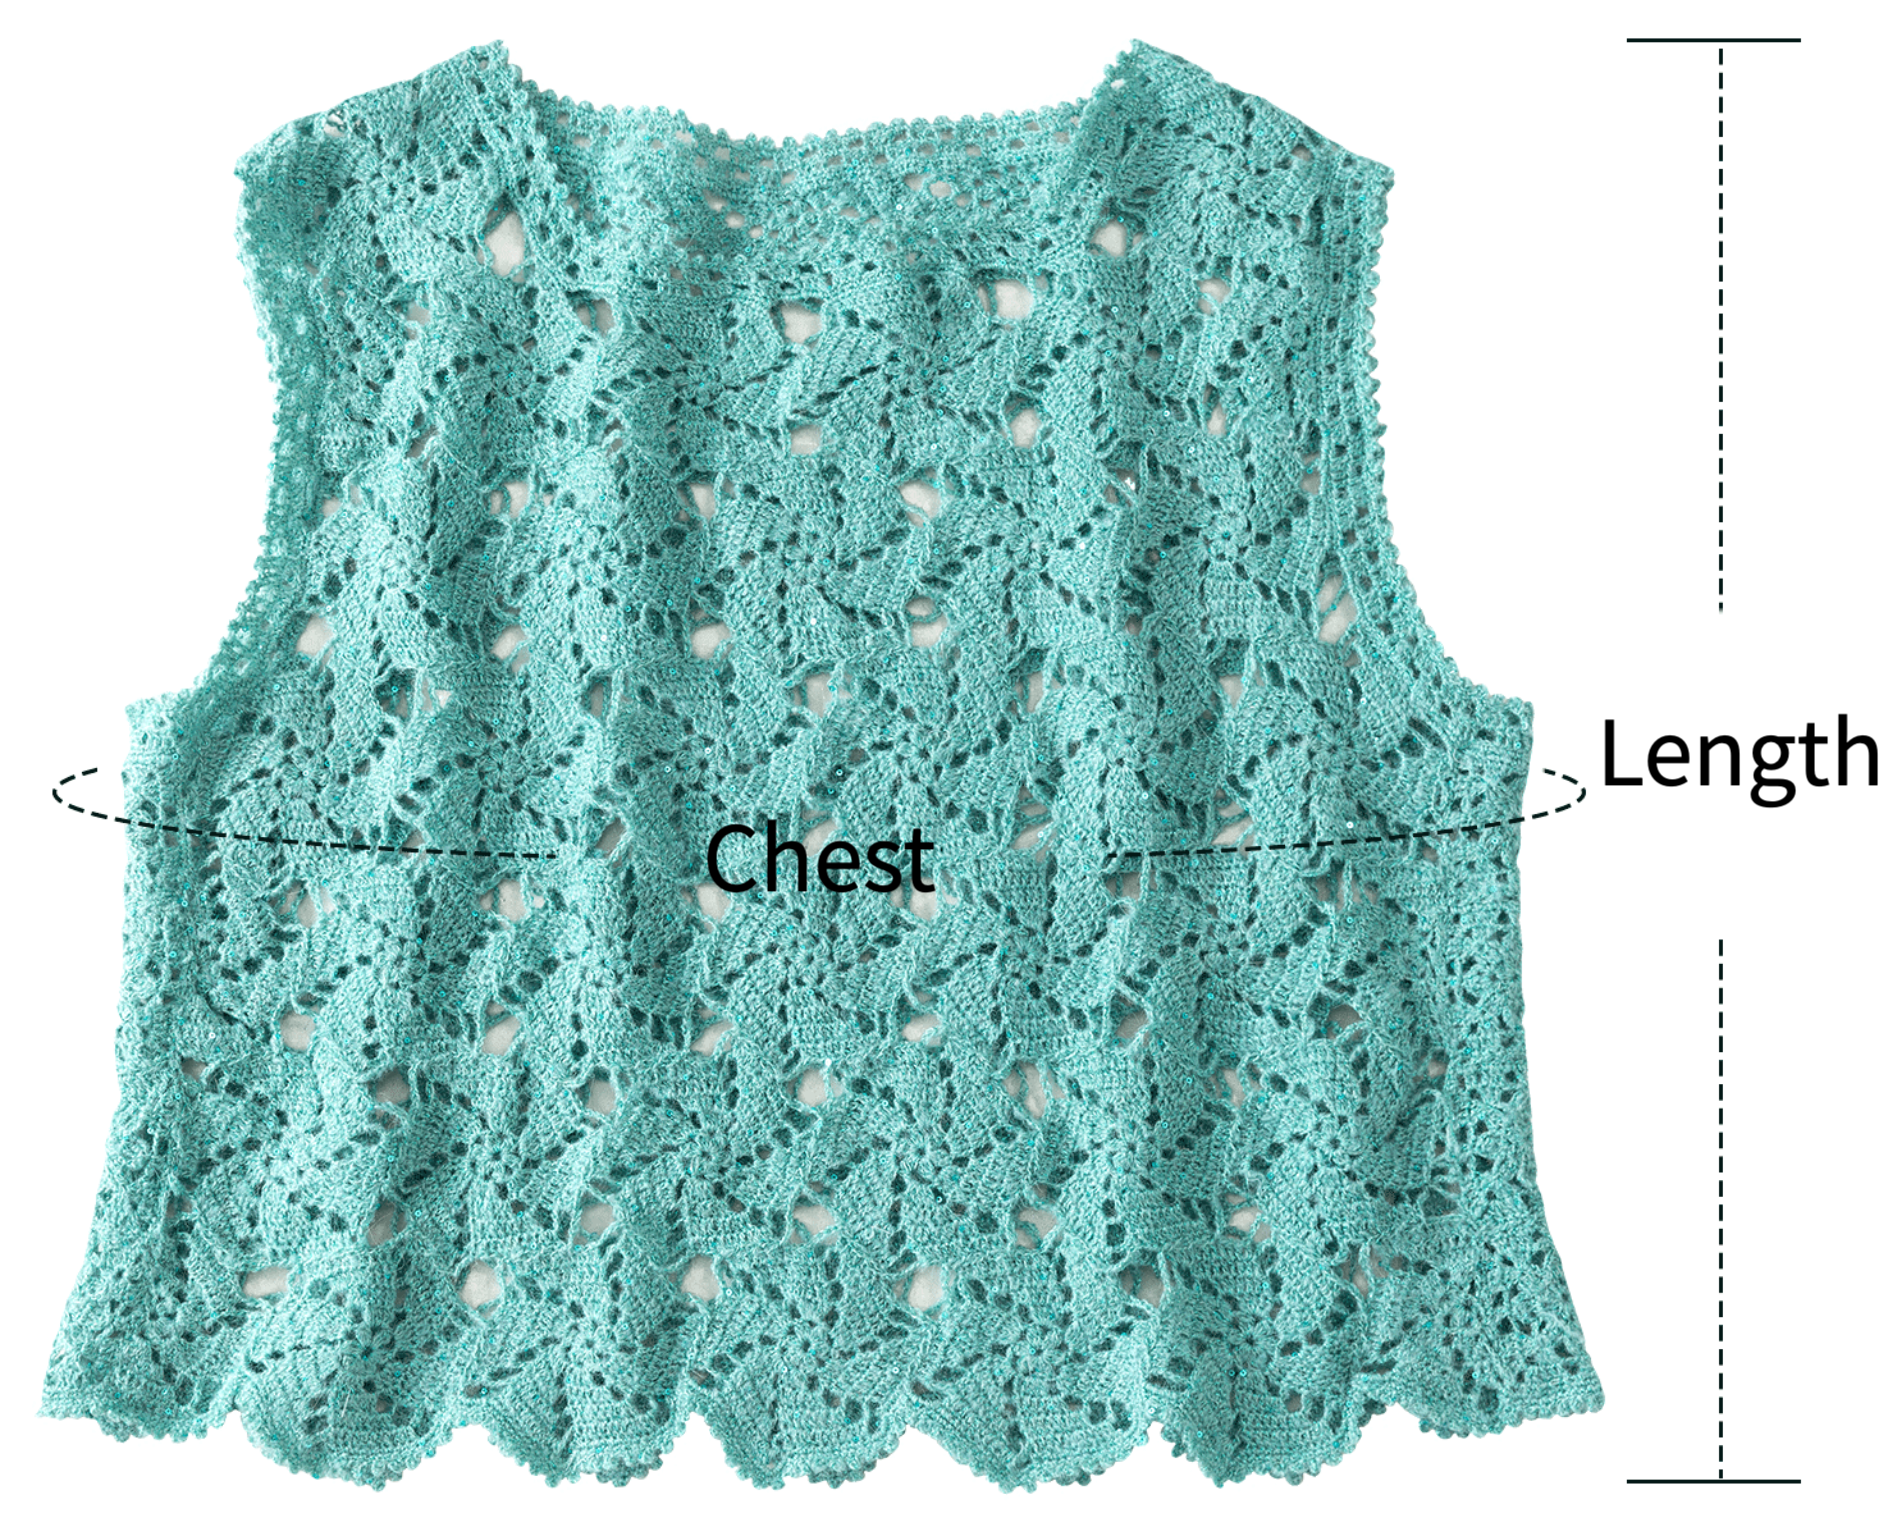
| Size: cm | Chest | Length |
| Small size | 100 | 48 |
| Large size | 110 | 52 |
Note: Hand-measured, with a tolerance of 1-2 cm. Due to differences in individual tension, the sample size is for reference only.
Yarn: Susan's Family Sequin Mohair.
Tools:
Small size - 1.80 mm Susan's crochet hook or 1.75 mm regular crochet hook.
Large size - 2.00 mm hook.

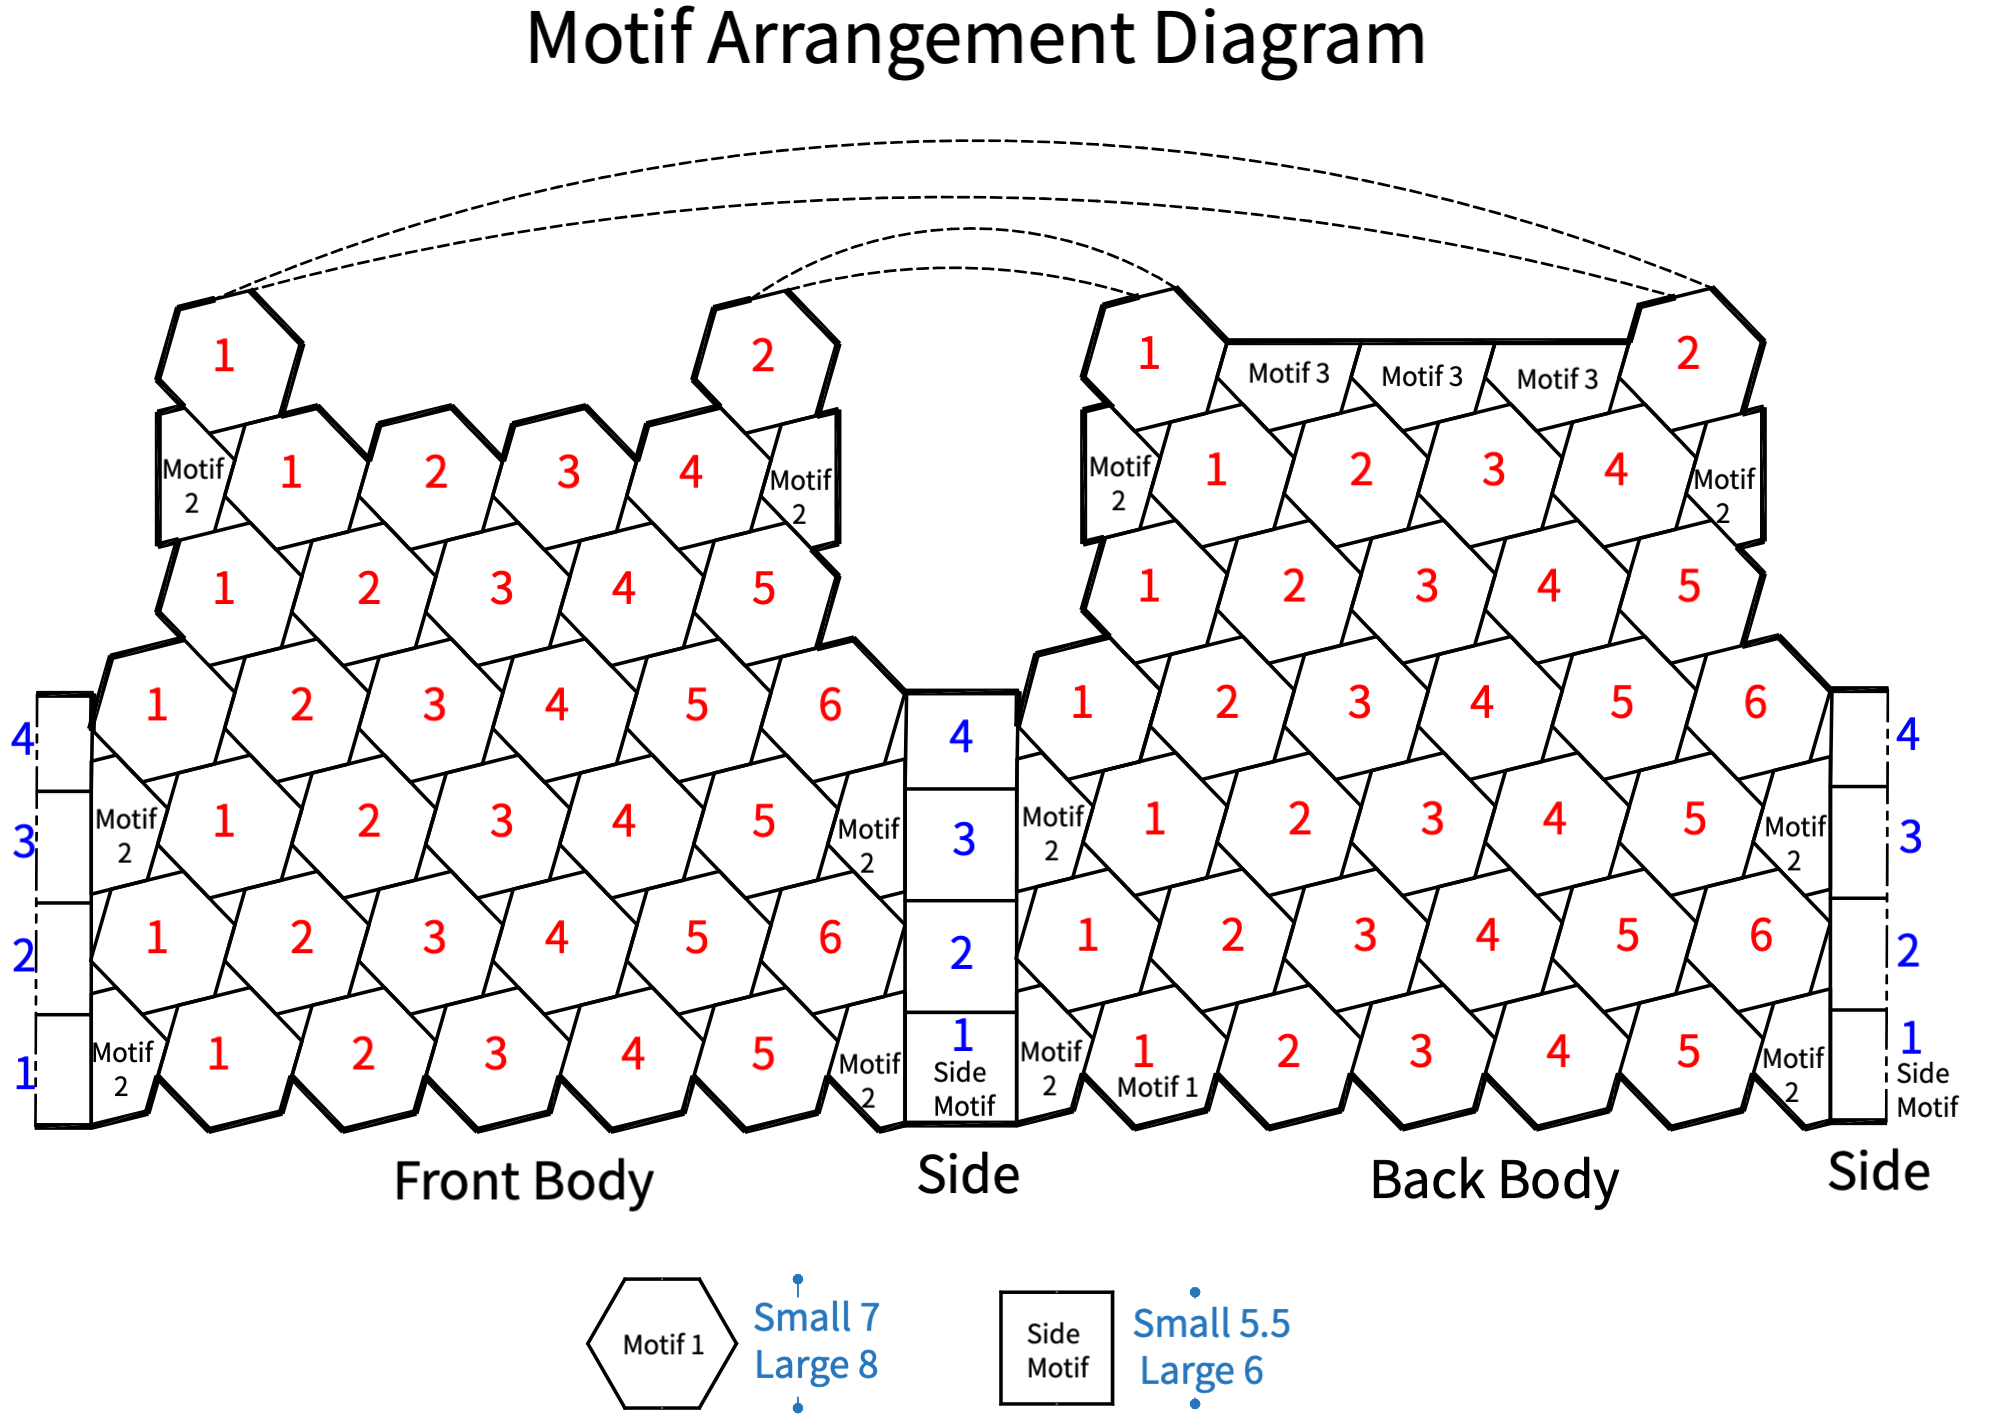
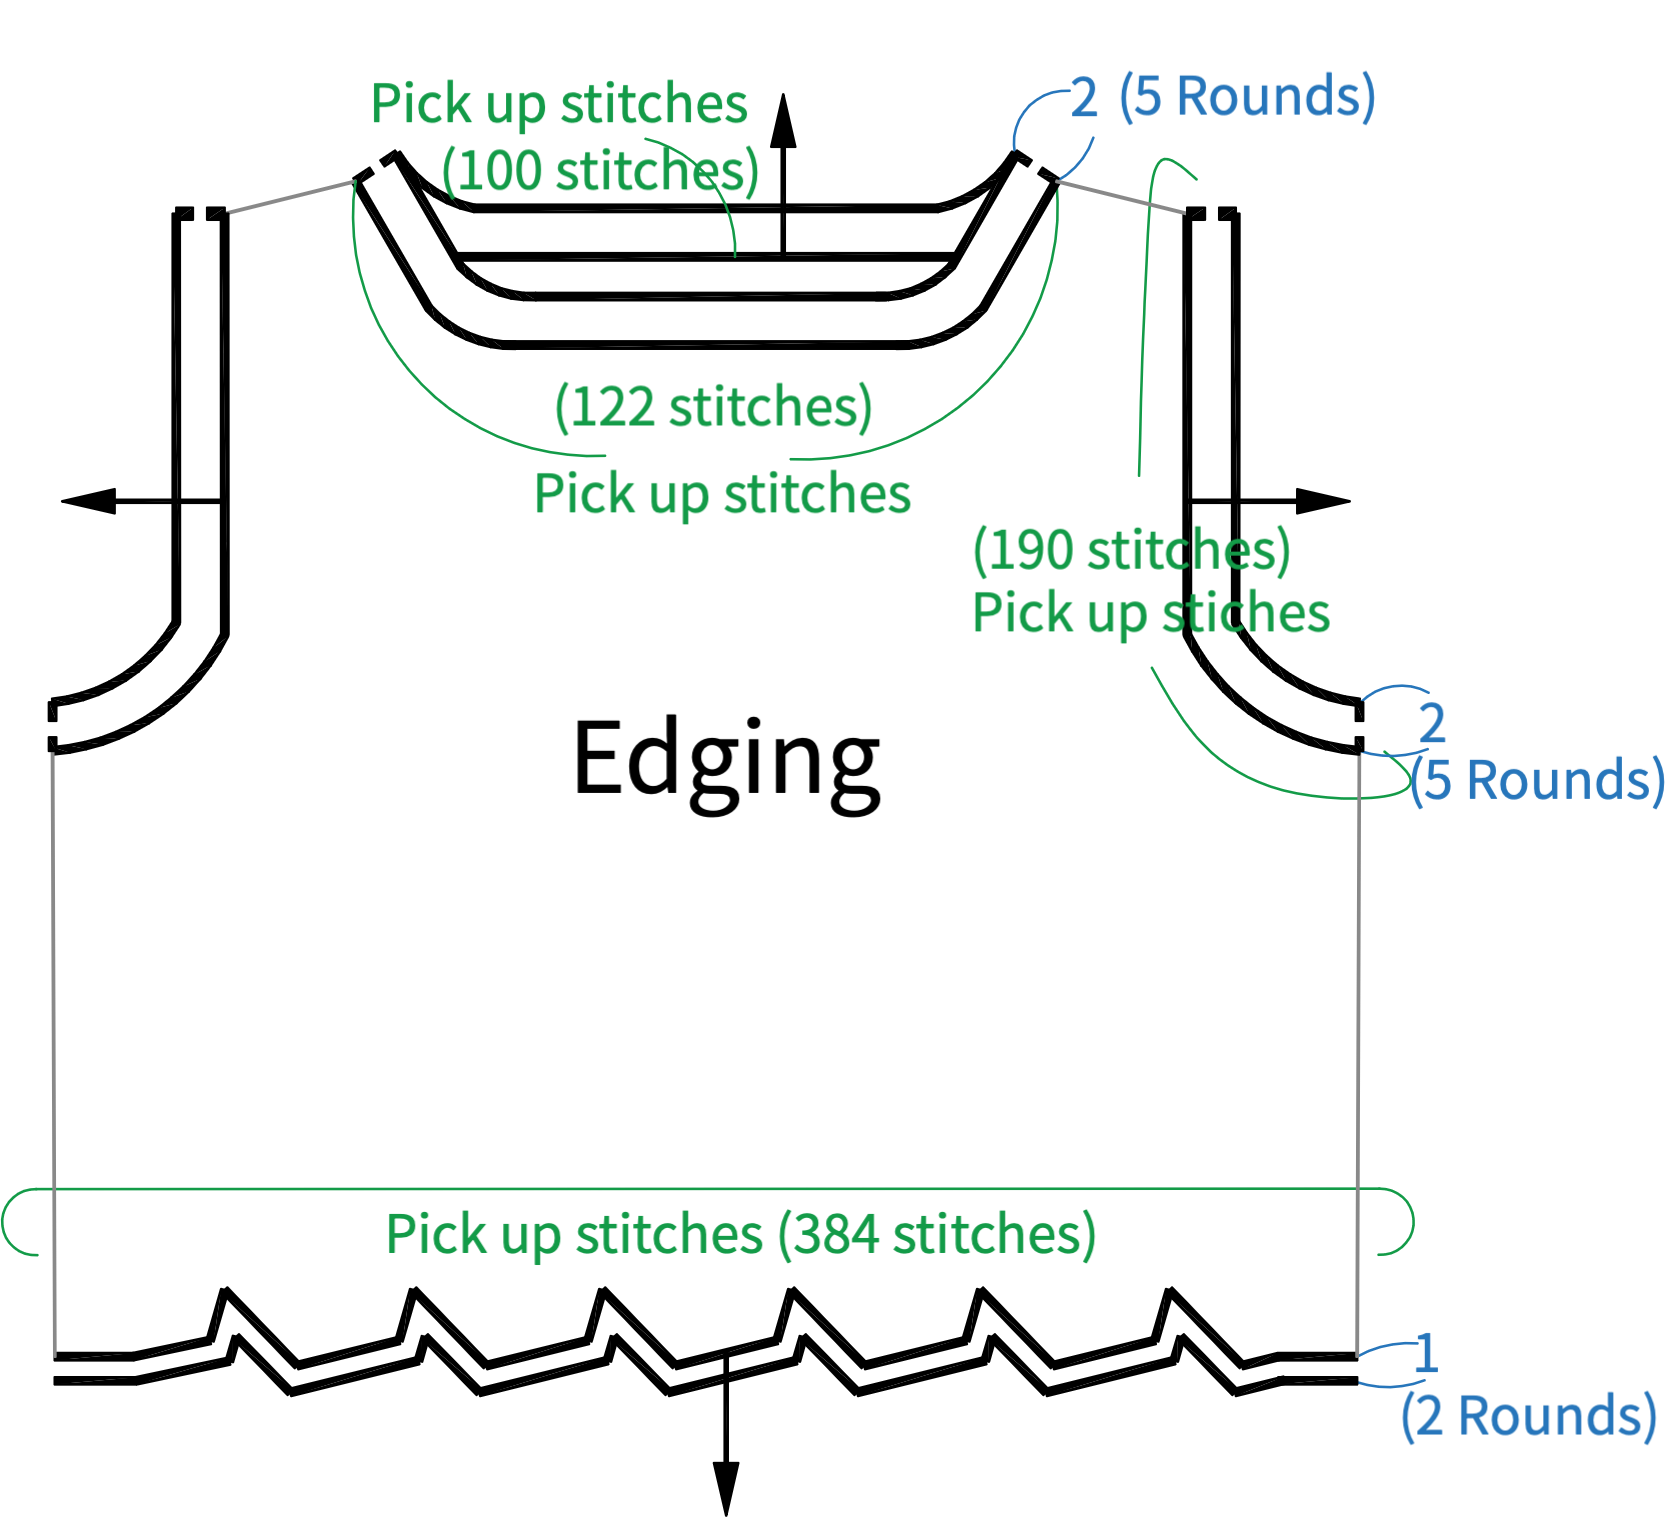
Chart Key









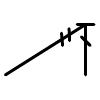
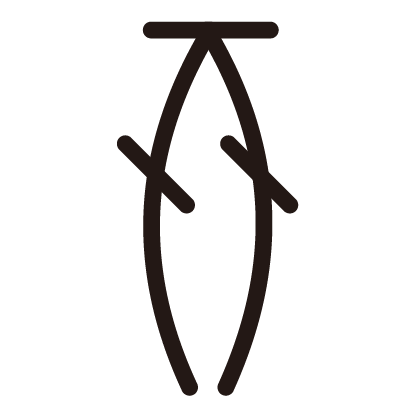
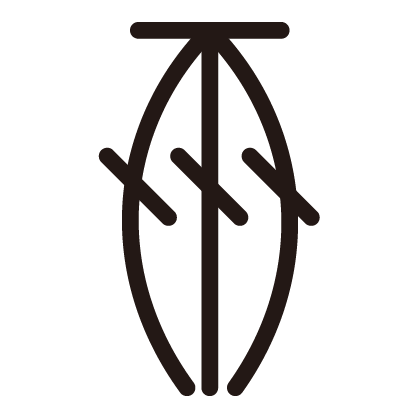



Note:
1. This pattern is making in Chinese crochet pattern terms, and the stitch name is written using American terminology. All measurements in charts are in cm.
2. This yarn is not easy to unravel, so everyone can learn first before crocheting. You'll need some patience while working.

PART1 Back BodyA 00' 47''
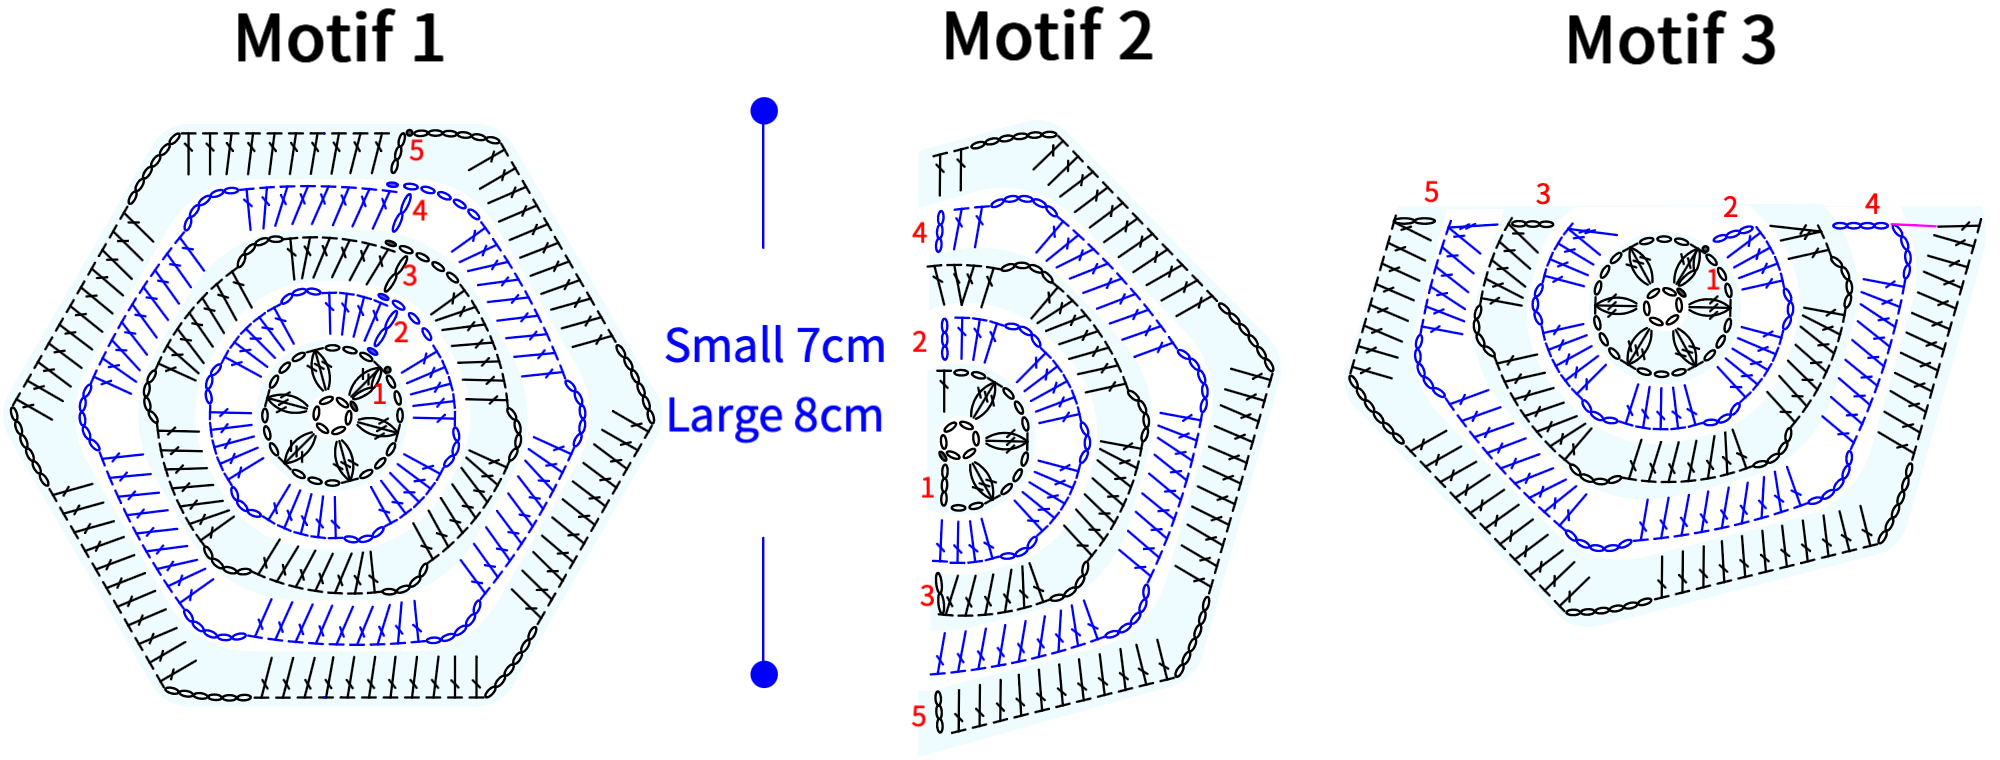
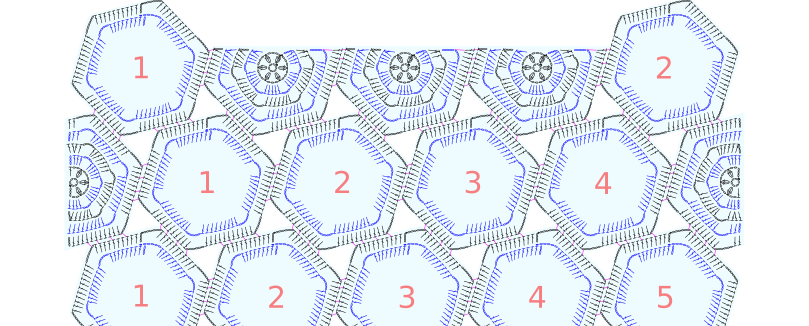
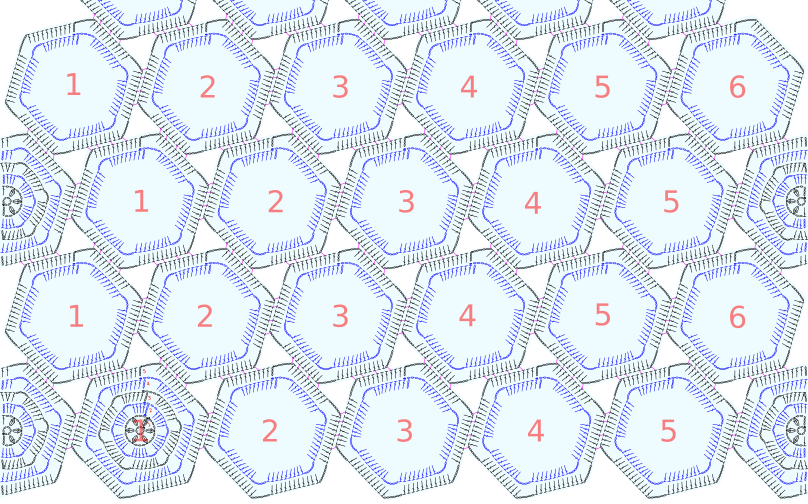
The back body is made up of individual motifs connected together, divided into Motif 1, Motif 2, and Motif 3. First, crochet and connect Motif 1, then attach Motif 2, and finally connect Motif 3. Please refer to the video demonstration for details.
Note:
1. Join motif 1 in the order from left to right and from bottom to top, then connect motif 2 and motif 3. You can also join them in your preferred order as long as the final layout matches the diagram.
2. Only the first motif 1 in the first row is a complete motif. All other motif 1s must be joined while crocheting the last round of their edging.
3. After completing the first motif 1, compare it with the size shown in the diagram. If there's a significant difference, adjust your tension and re-crochet to avoid affecting the final garment size.
PART 2 Front bodyB 39' 09''
The front body is connected using Motif 1 and Motif 2. Simply follow the connecting method used for Motif 1 and Motif 2 on the back body. Pay attention to the last row of Motif 1, which needs to be connected with the last row of the two Motif 1 pieces on the back body to complete the shoulder connection. For details, please refer to the video demonstration.
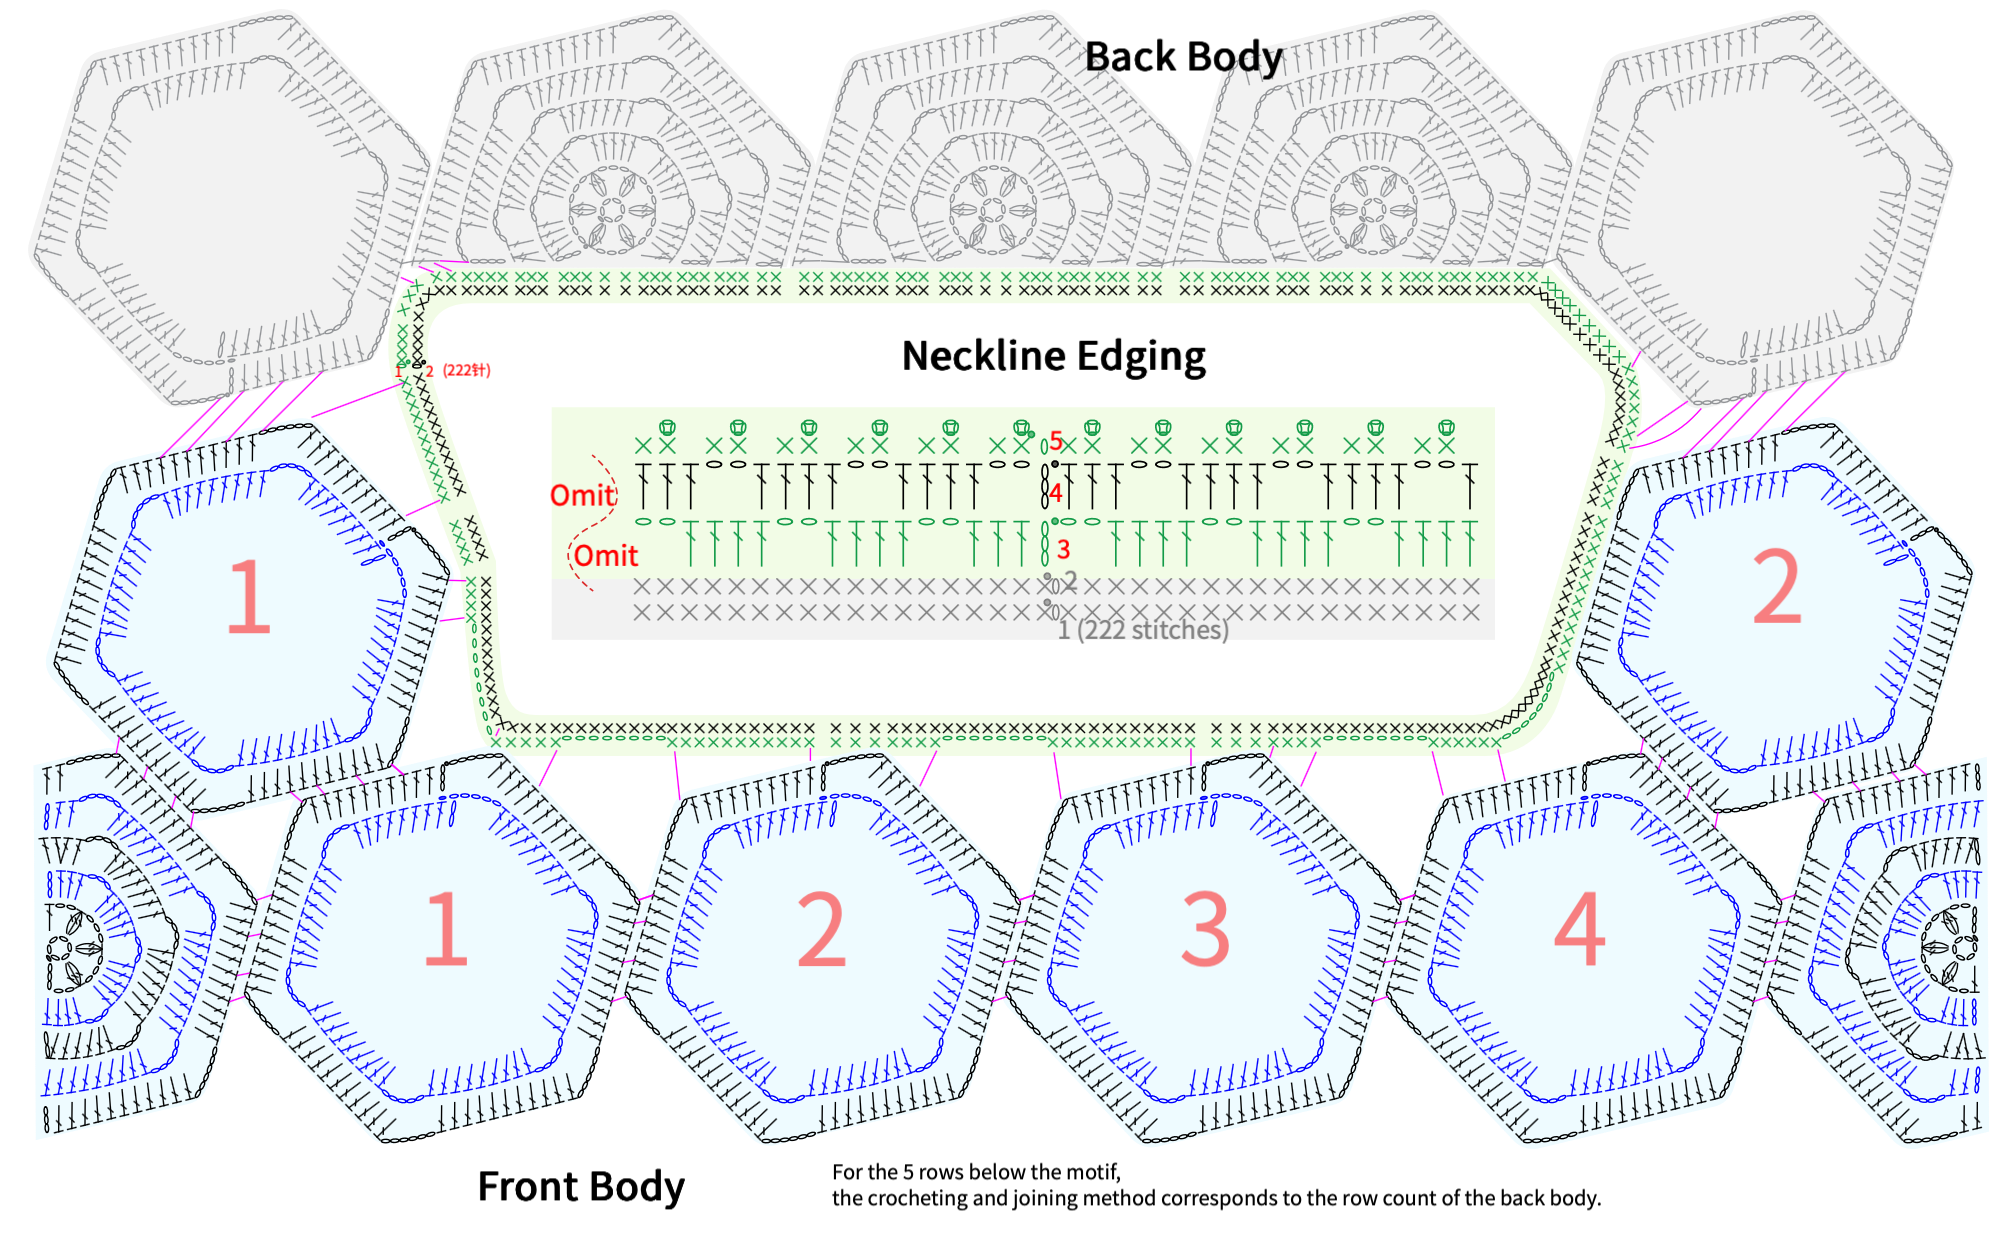
PART3 SidesC 40' 40''
There are 2 side sections in total, each made up of a side flower motif and its variation. Crochet them one by one from bottom to top, and connect them to the front and back pieces. For details, please refer to the video demonstration.
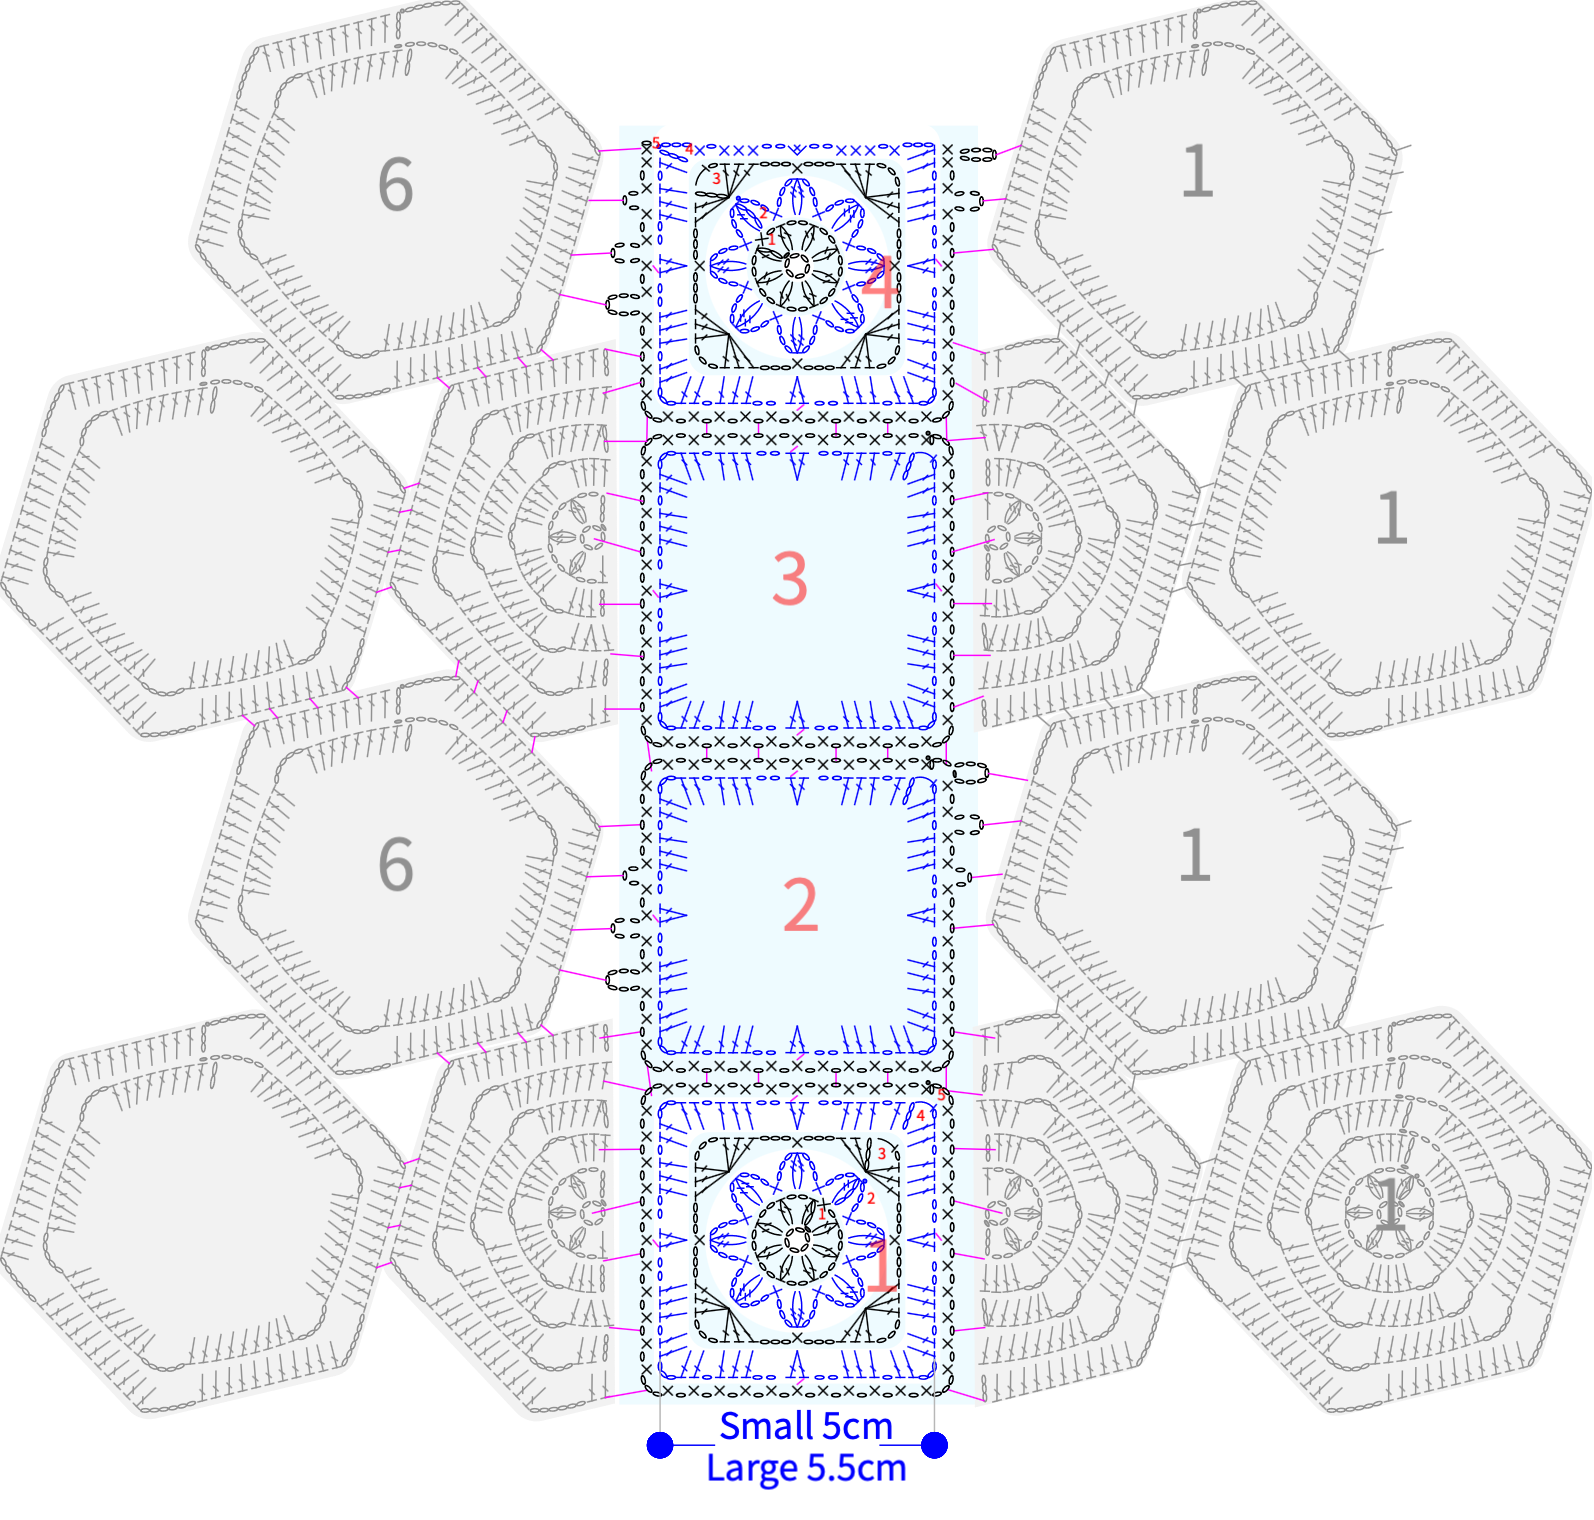
Note:
After completing the 4th round of the side flower motif, compare it with the size shown in the chart. If there's a significant difference, adjust your tension and re-crochet to avoid affecting the appearance when joining. The exact placement for connecting the side flower motif to the two side motifs can also be adjusted according to your actual situation. Just make sure the starting and ending positions align with the chart and that the pieces connect smoothly and nicely.
PART4 Crochet the edgingD 69' 37''
The edging is divided into three parts: sleeve edging, neckline edging, and bottom edging. They are crocheted separately around the cuffs, neckline, and the bottom of the front and back pieces as well as the sides. For details, please refer to the video demonstration.
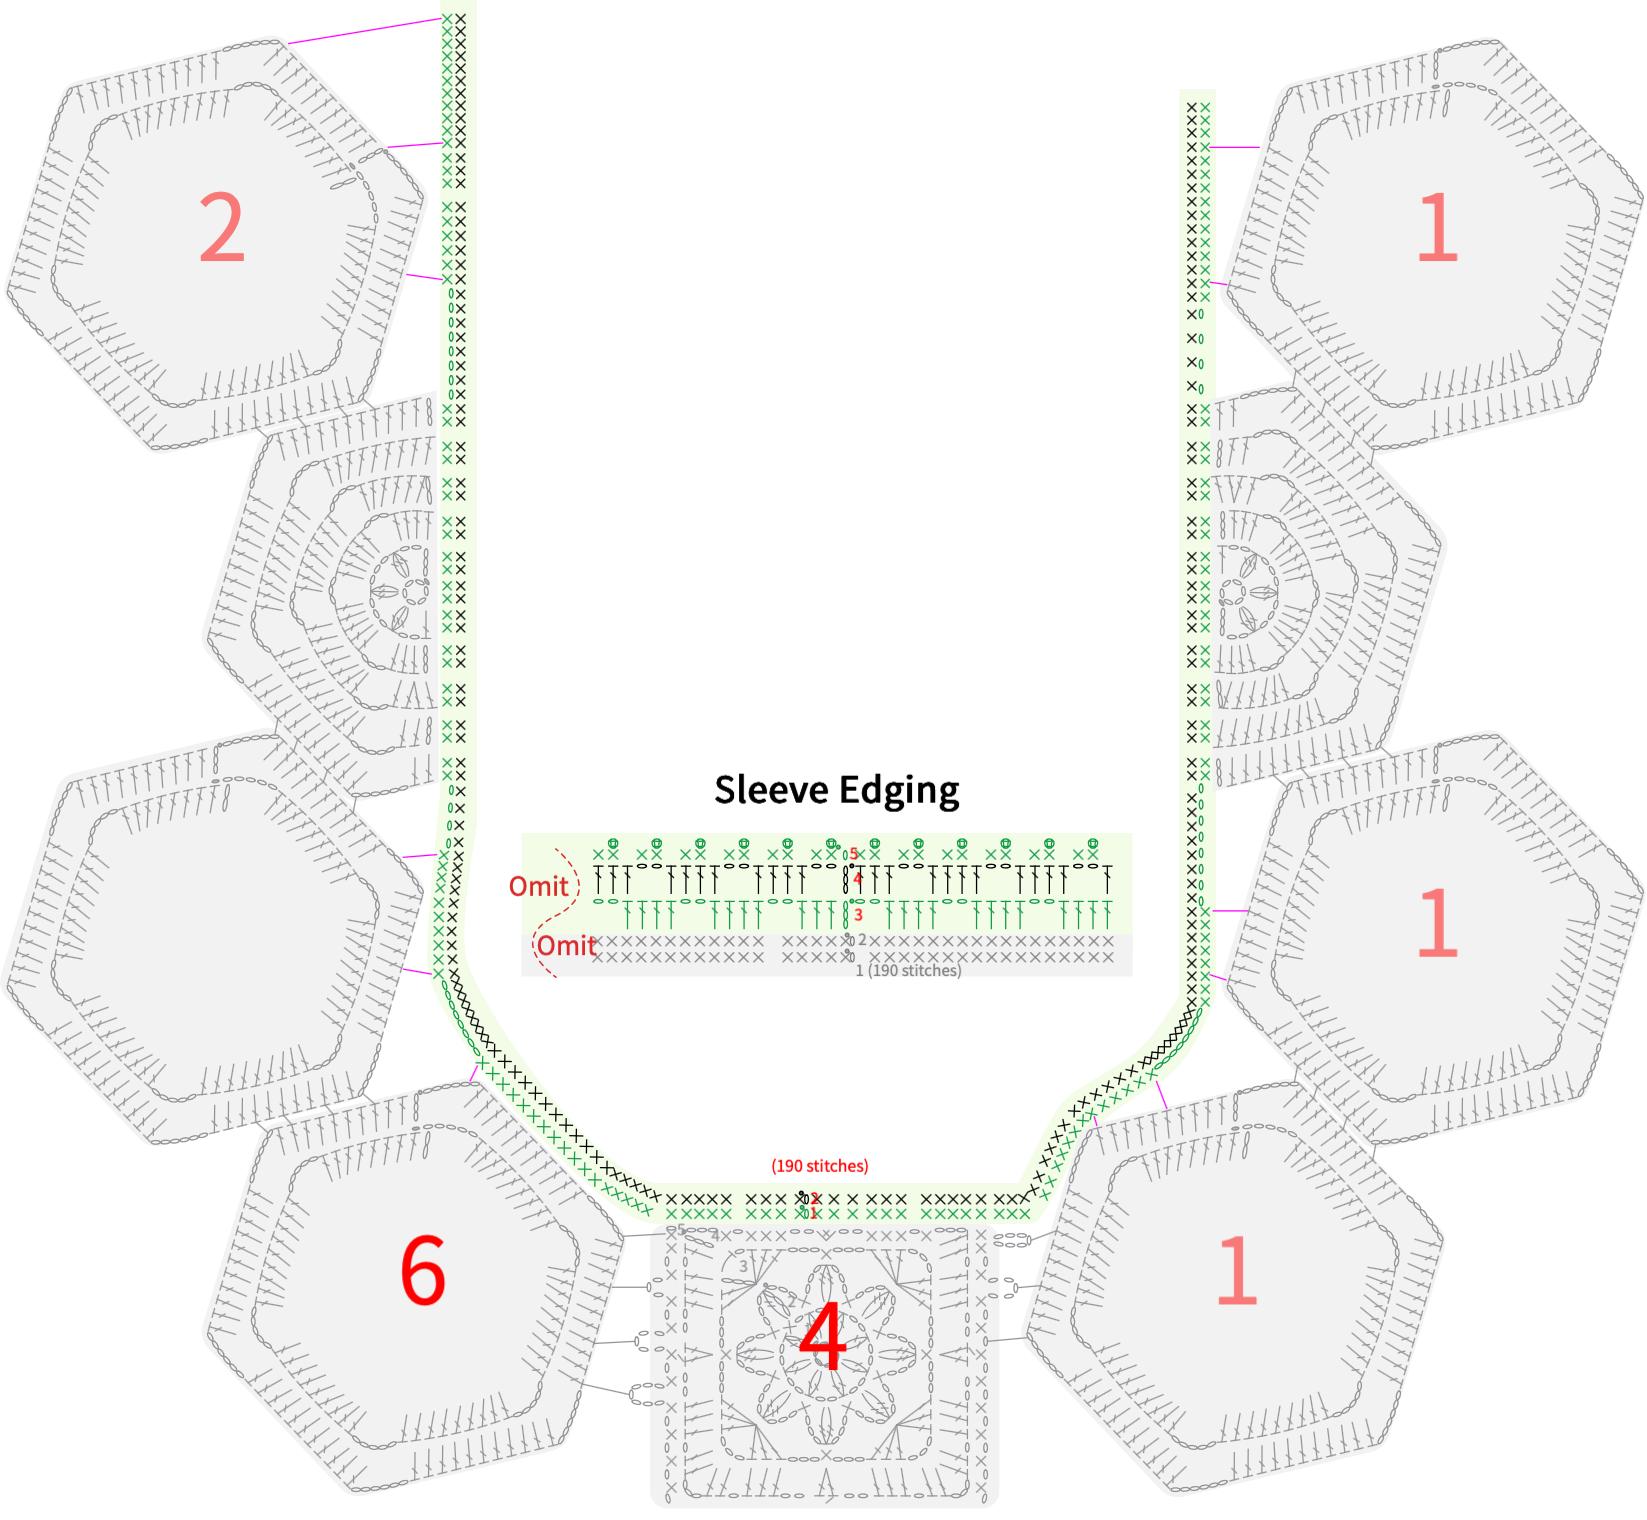

Note:
The neckline edging diagram can be found in the front body diagram. The number of single crochet stitches in the first round of the bottom edge can be adjusted according to actual needs, to ensure the fabric lies flat and looks neat. Just make sure the total number of stitches is even.
Made by the community