Clothes
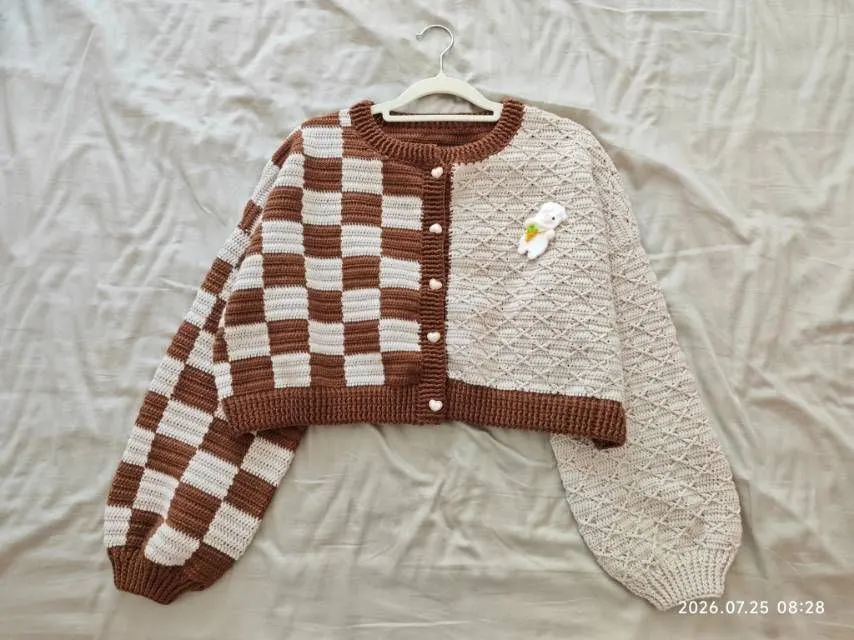
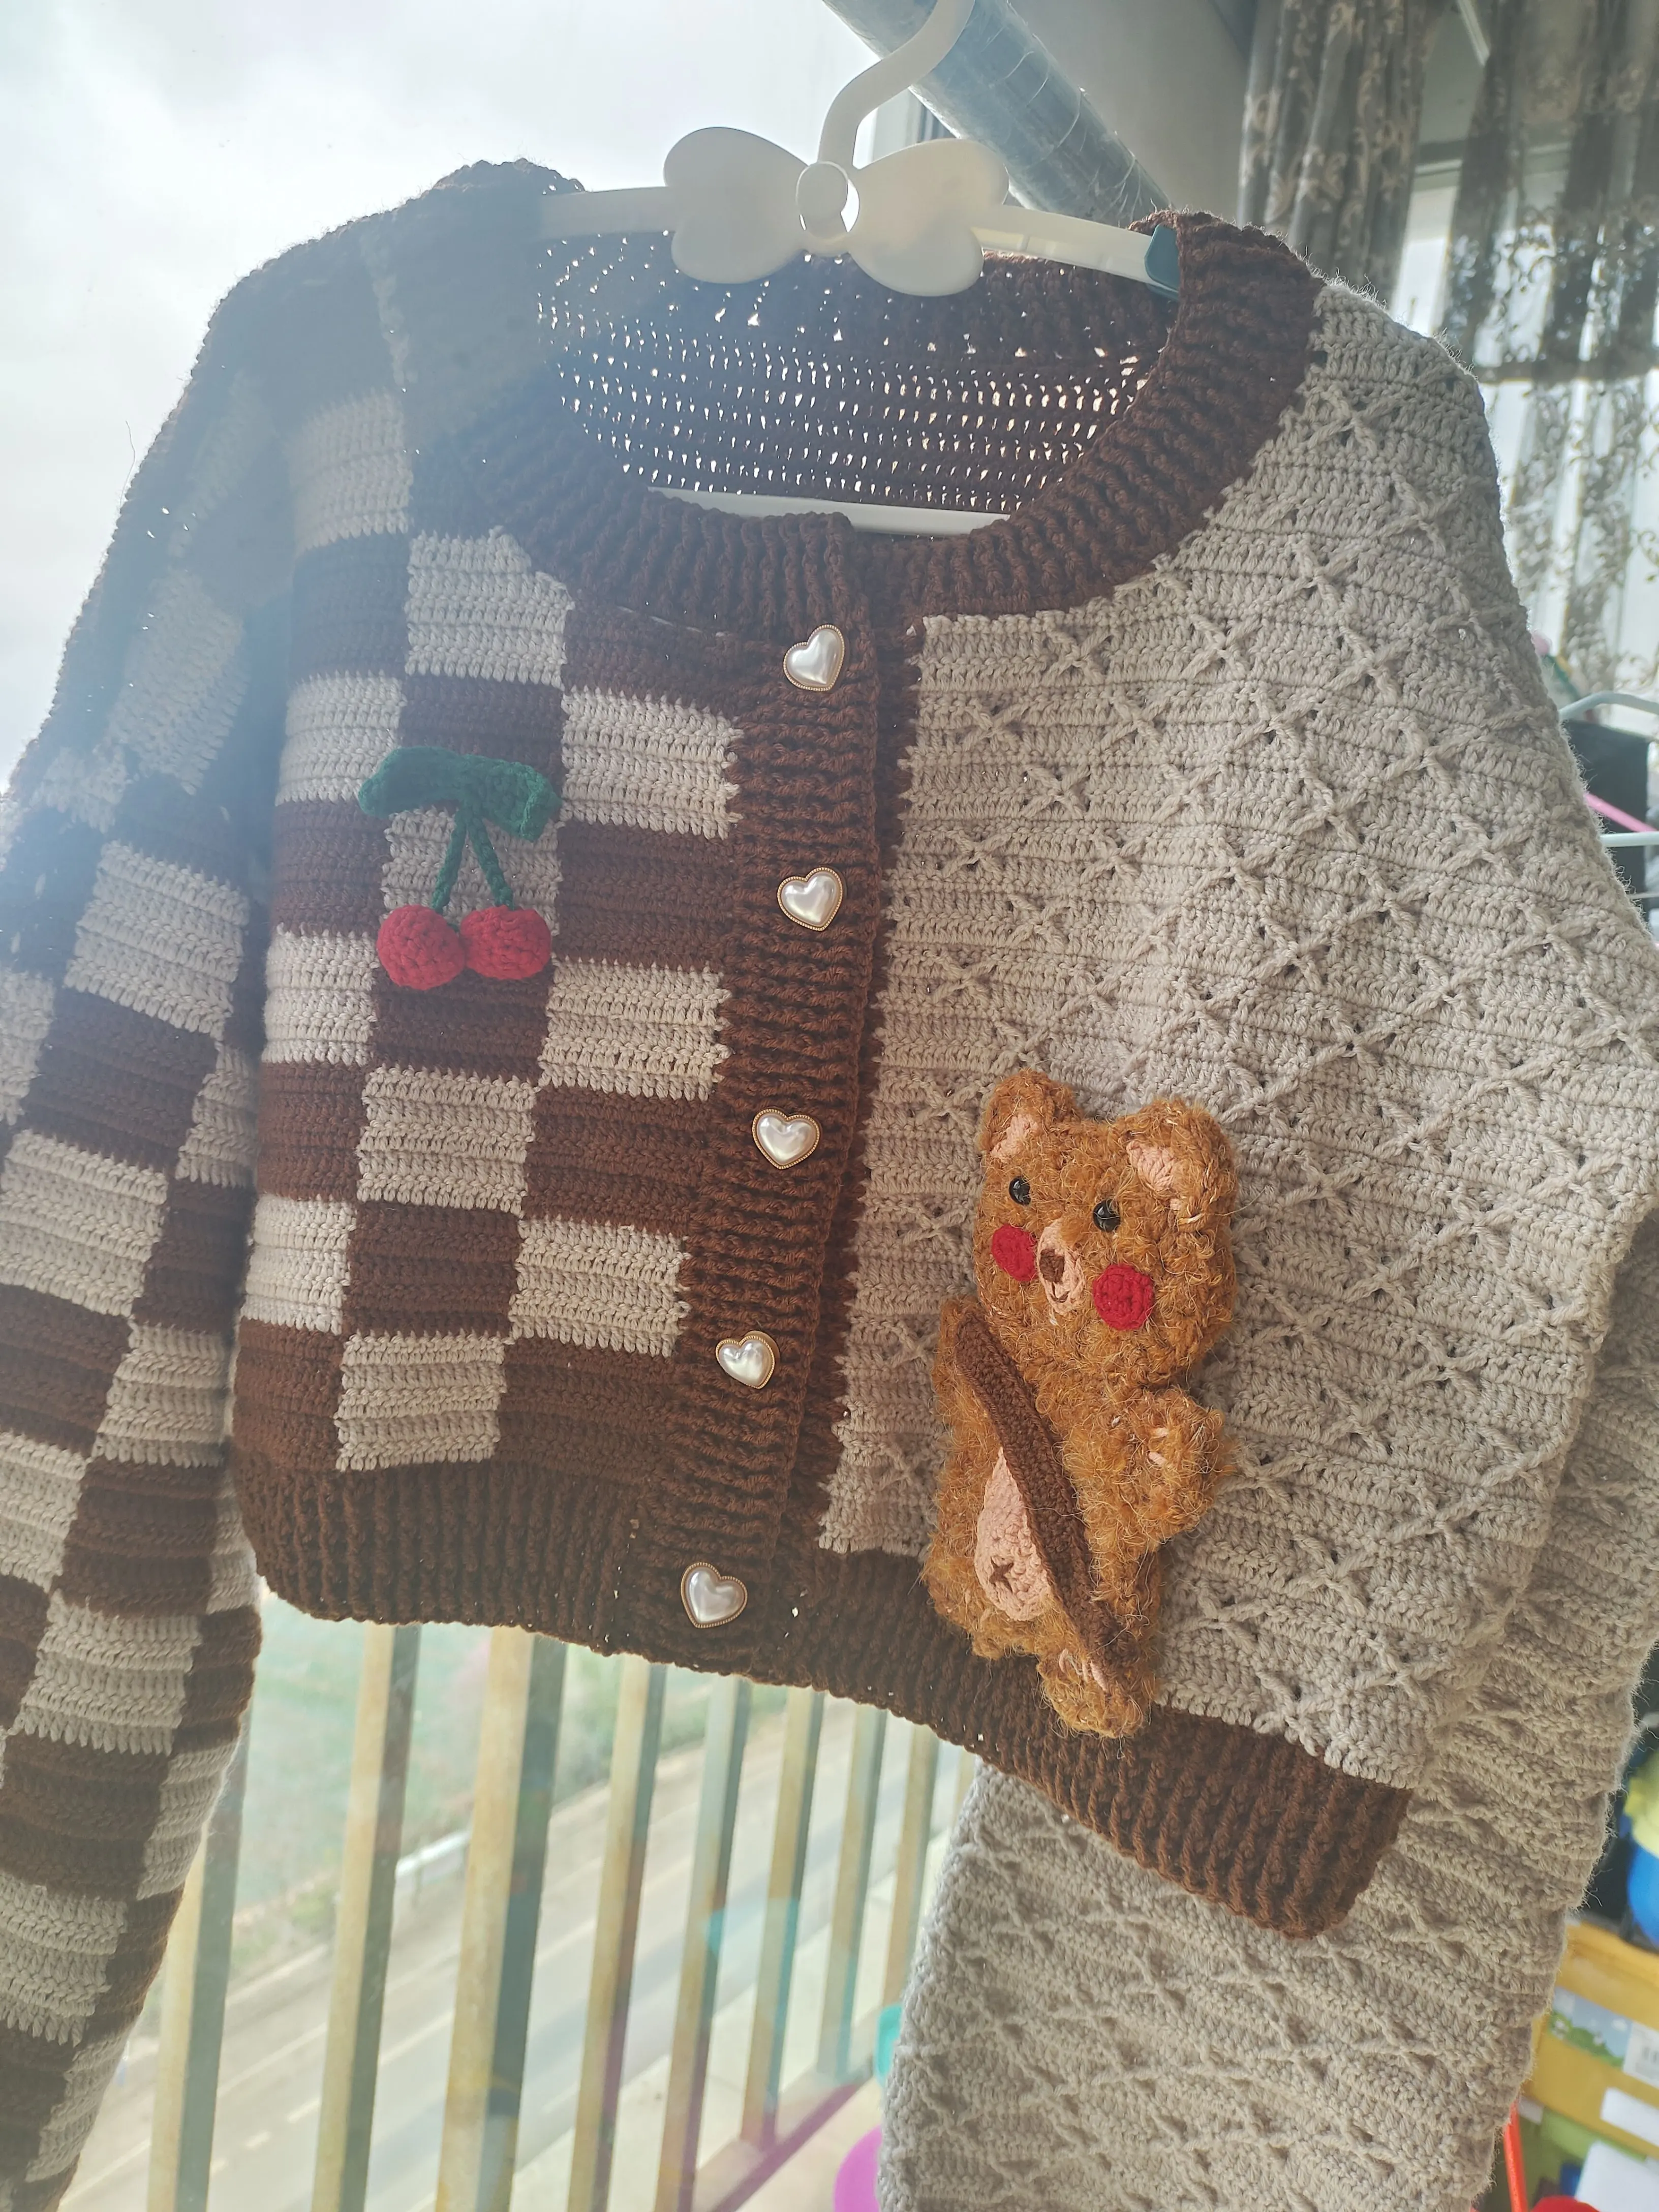
Plaid Bear Cardigan
Project preview
See the finished project
Pattern format
Instructions
Watch and follow
Video tutorial
This cardigan consists of the back piece, the right front piece, the left front piece, the sleeve pieces, the cuffs, bottom edge, front band, the buttons, the collar and the decorations. First, crochet the back piece, the left and right front pieces and the sleeve pieces separately. Then join them together. Next, crochet the cuffs, the bottom edge, the front band and the collar, also attach the buttons. Finally, crochet the decorations and attach them in place.
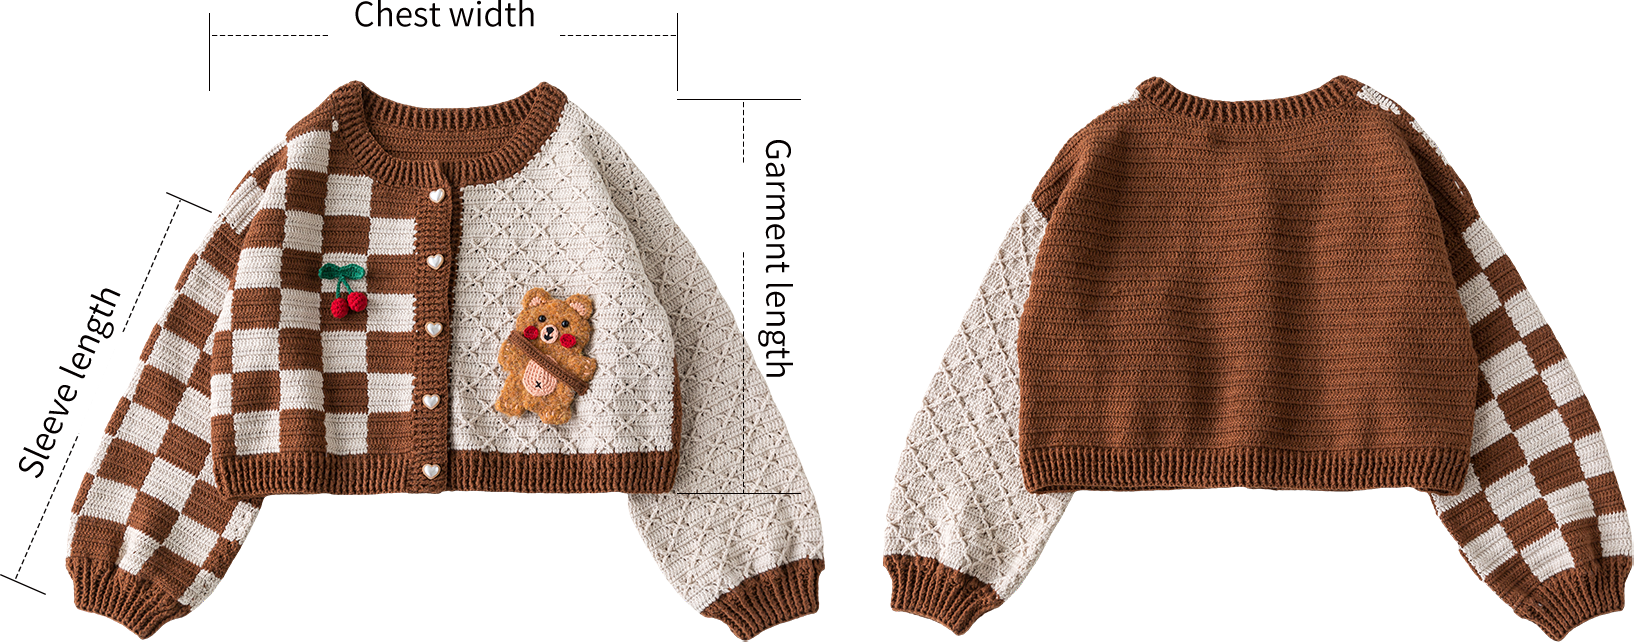
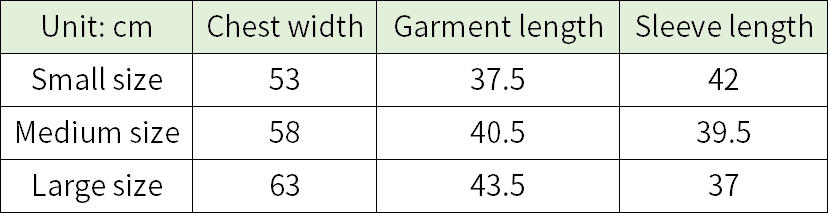
The tutorial demonstrates the Small size. Please refer to the corresponding charts for other sizes.
The handcrafted measurements may have an error of 1 to 2 cm. Due to variations in individual tension, the size of the sample is for reference only.
Materials: Susan's Family Morandi 4#, Sheep Curly, 4-Ply Combed Cotton & Acrylic Fibre Hand Knitting Yarn
Hook: 3.00 mm crochet hook

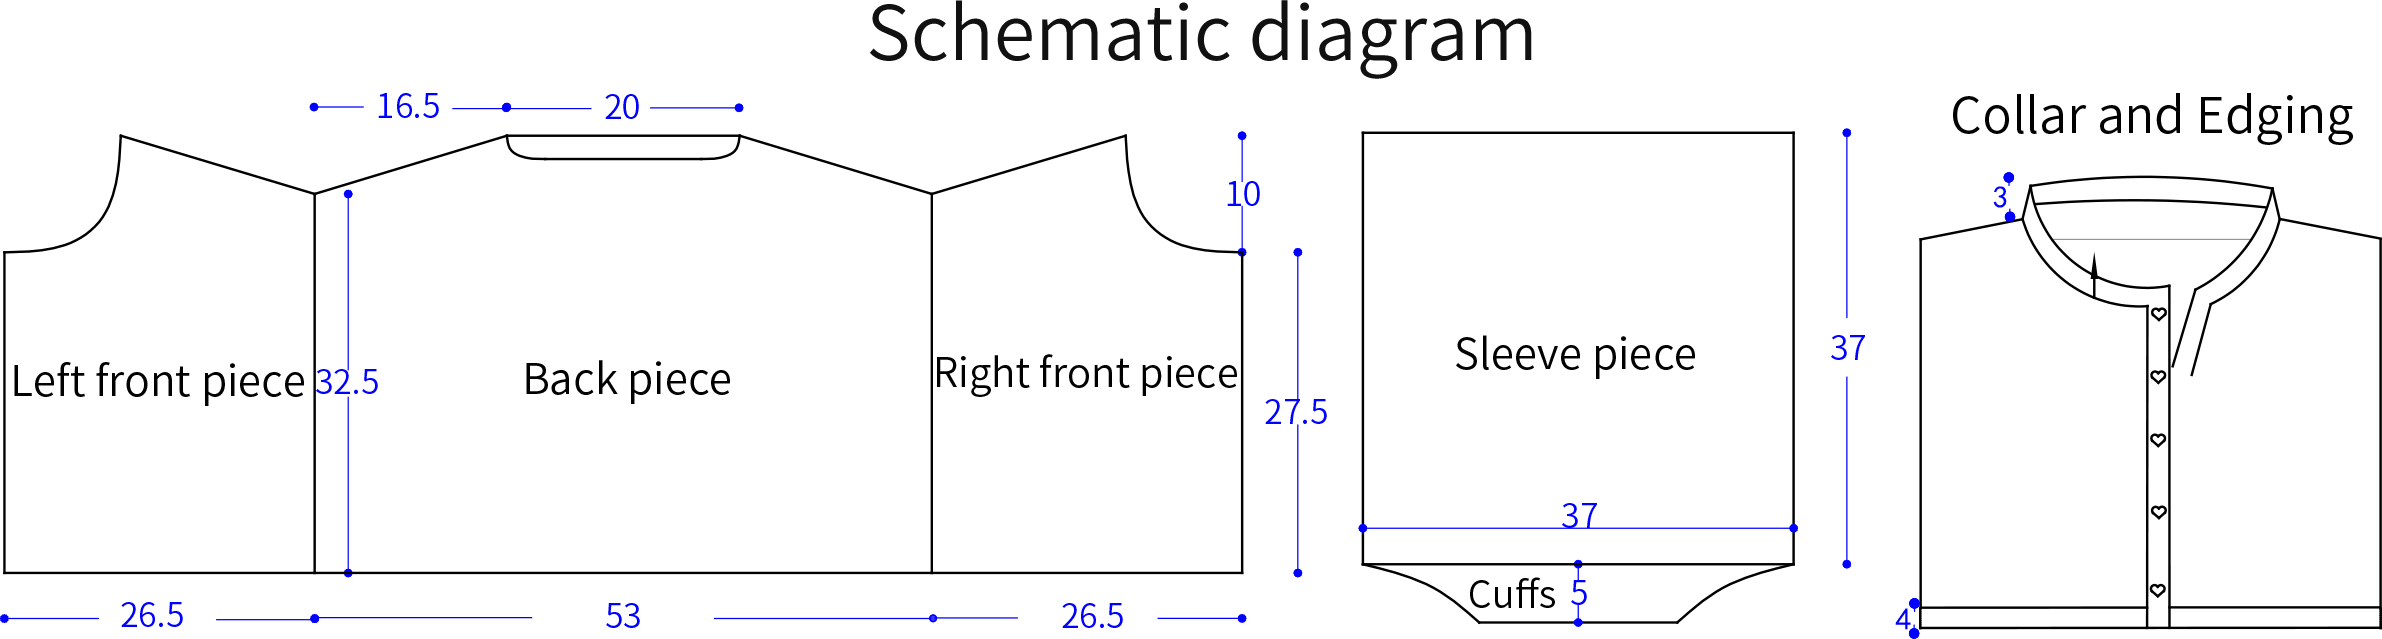
Note: Determine the left and right of the pieces based on the actual wearing orientation.
Chart Key















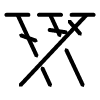
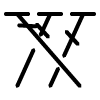
Note:
1. This pattern is making in Chinese crochet pattern terms, and the stitch name is written using American terminology. All measurements in charts are in cm. 
Part 1 Back pieceA 01' 33'' (Part 1)
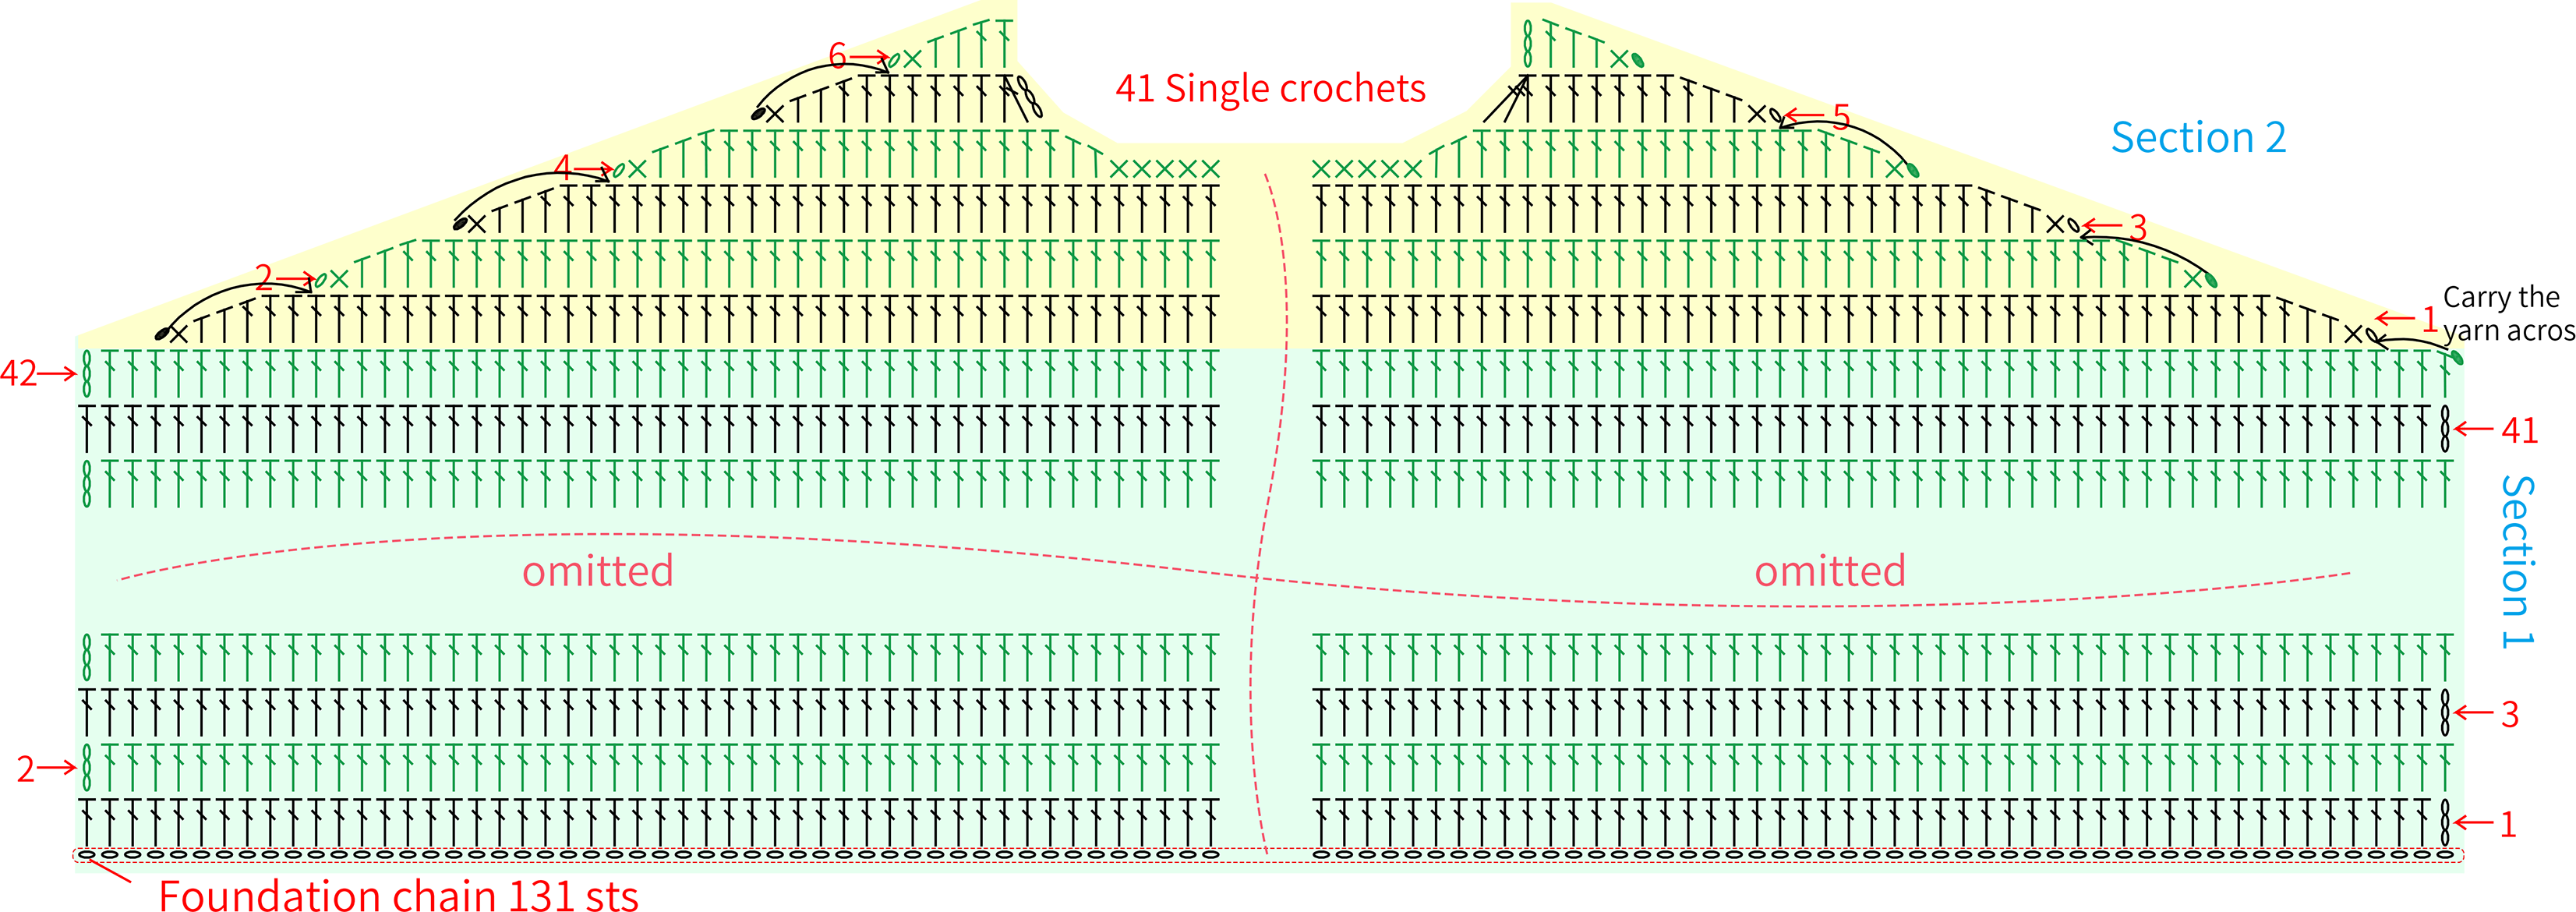
The back piece is divided into Section 1 and Section 2. Begin with the foundation chains. Work back and forth along the foundation chains.Please refer to the video demonstration for more details.

Part 2 Right front pieceB 15' 16'' (Part 1)
The right front piece is divided into Section 1 and Section 2. Begin with the foundation chains. Work back and forth along the foundation chains. Please refer to the video demonstration for more details.


Part 3 Left front pieceC 20' 47'' (Part 1)
The left front piece is divided into Section 1 and Section 2. Begin with the foundation chains. Work back and forth along the foundation chains. Please refer to the video demonstration for more details.

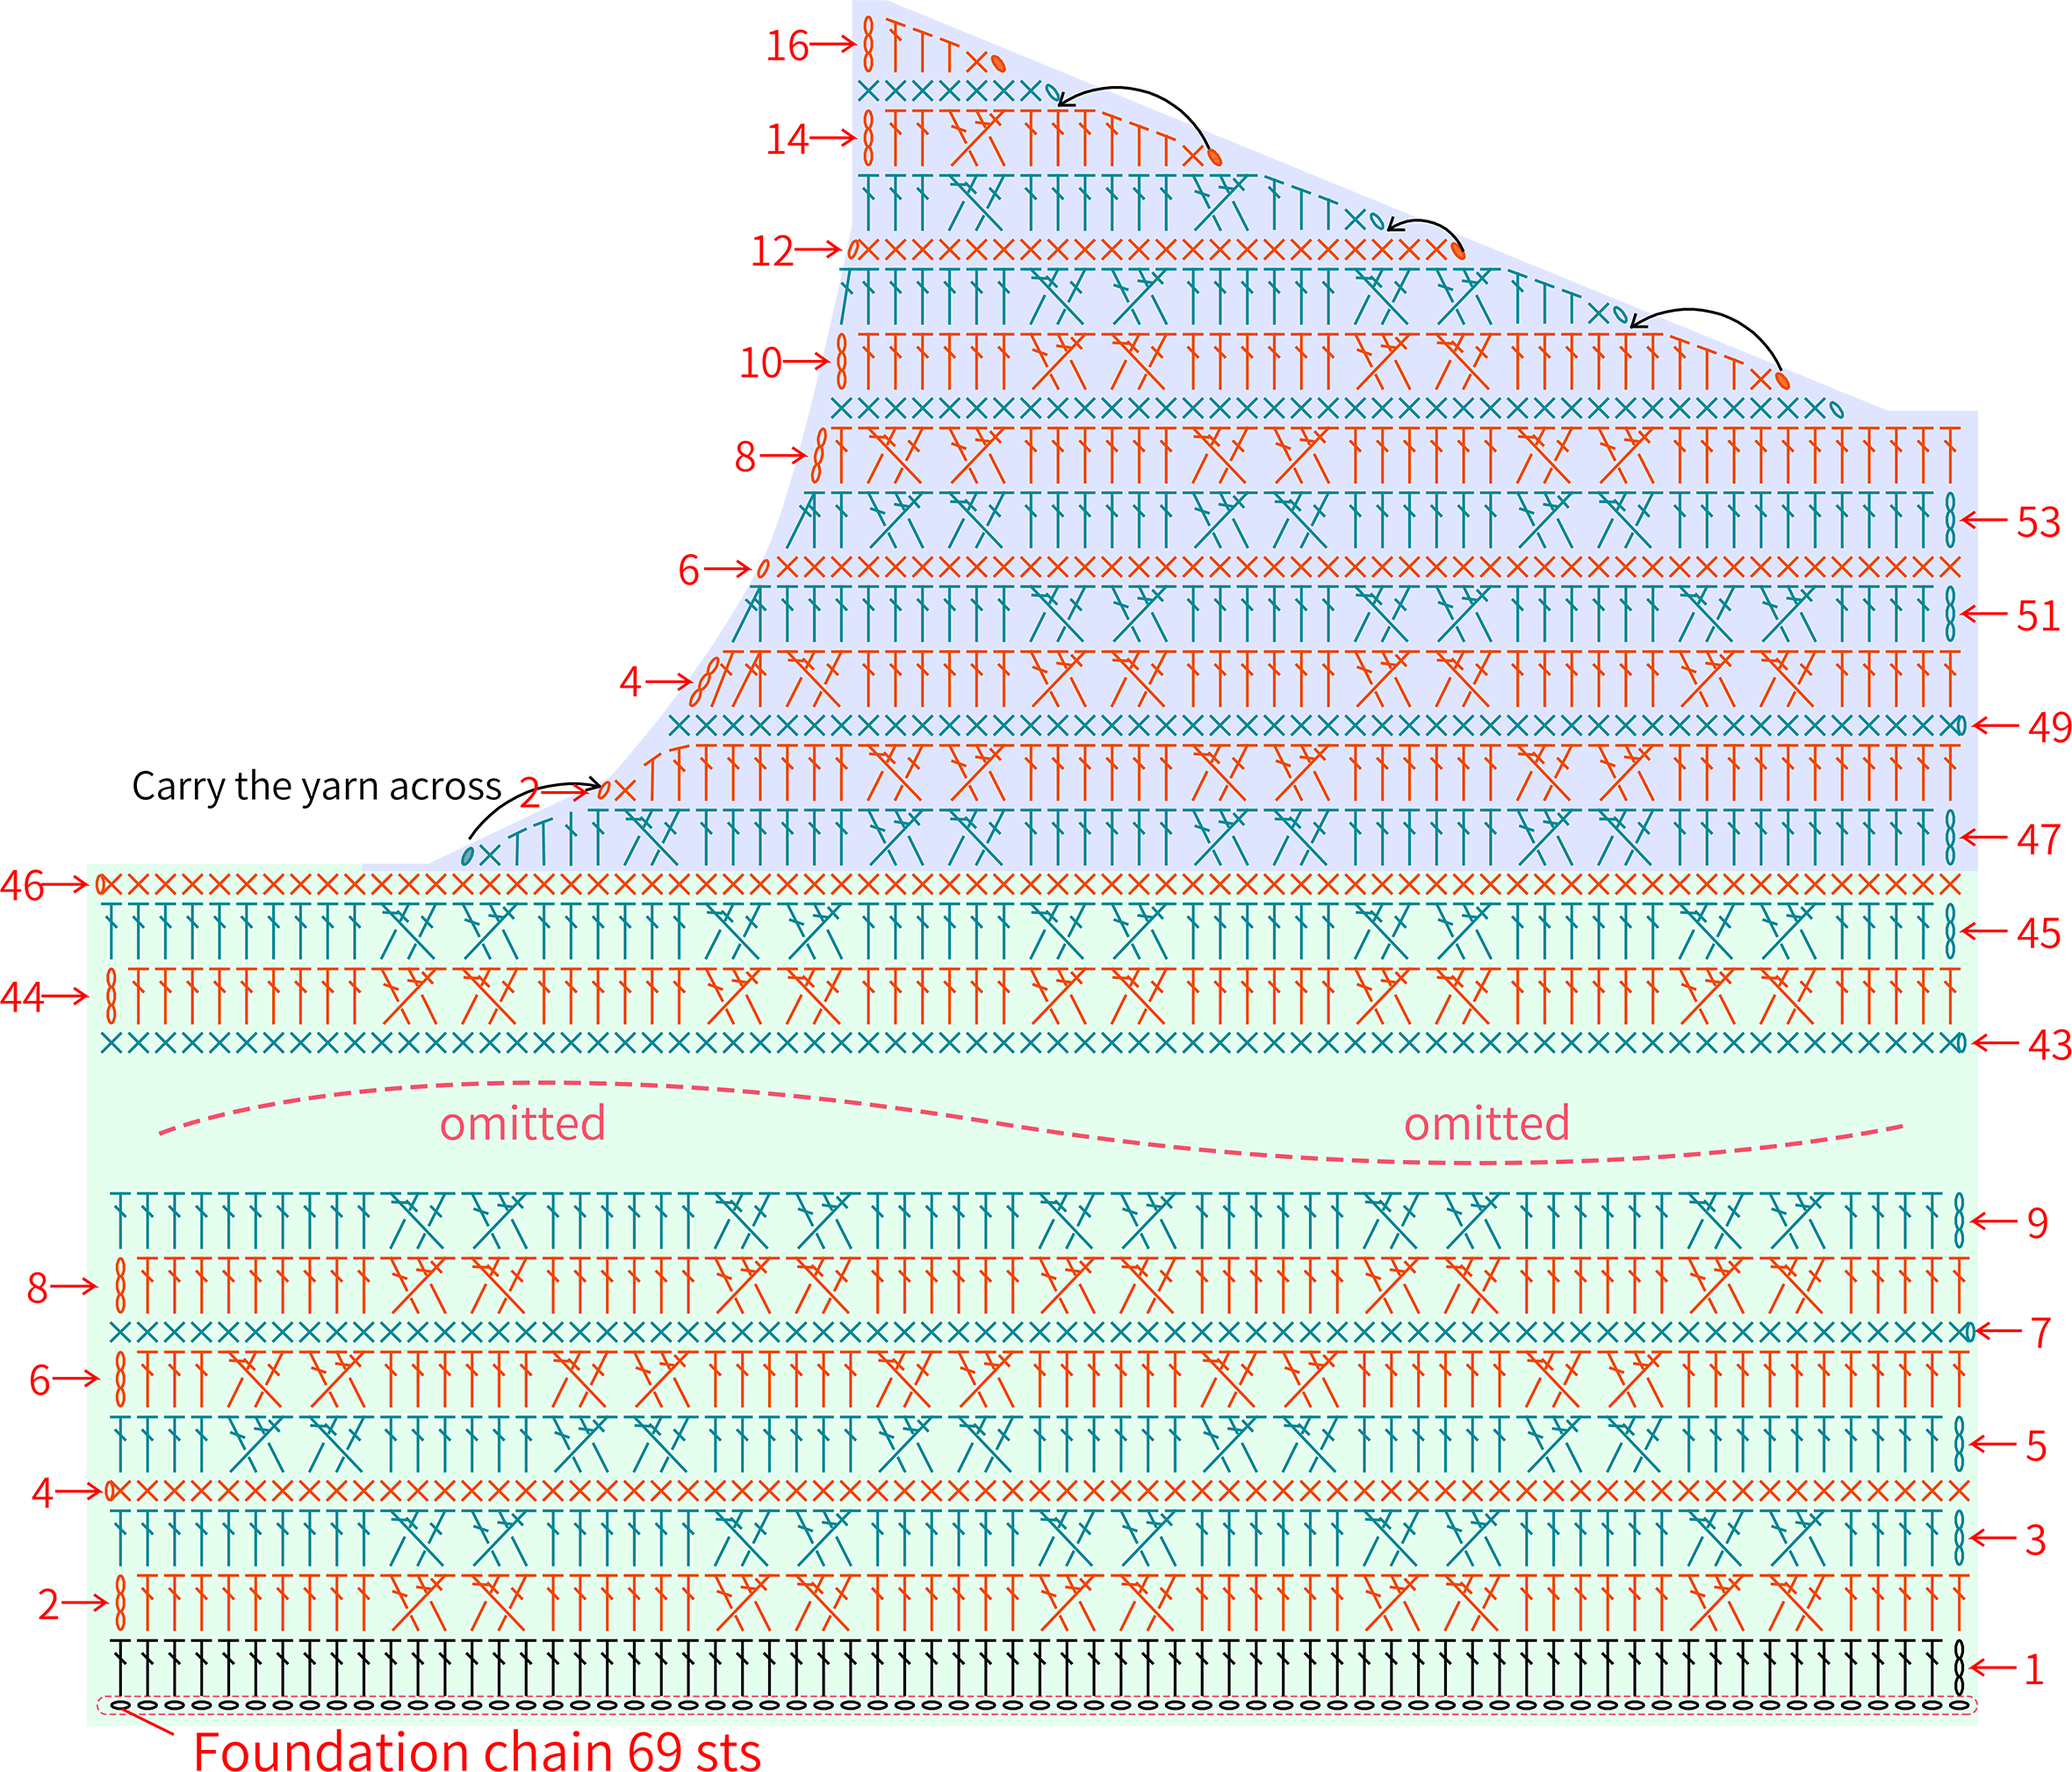
Part 4 Sleeve piecesD 31' 40'' (Part 1)
The sleeve pieces start with the chain ring. Crochet back and forth in rounds. Please refer to the video demonstration for more details.
Note: You can adjust the length of the sleeve pieces according to your own arm length.

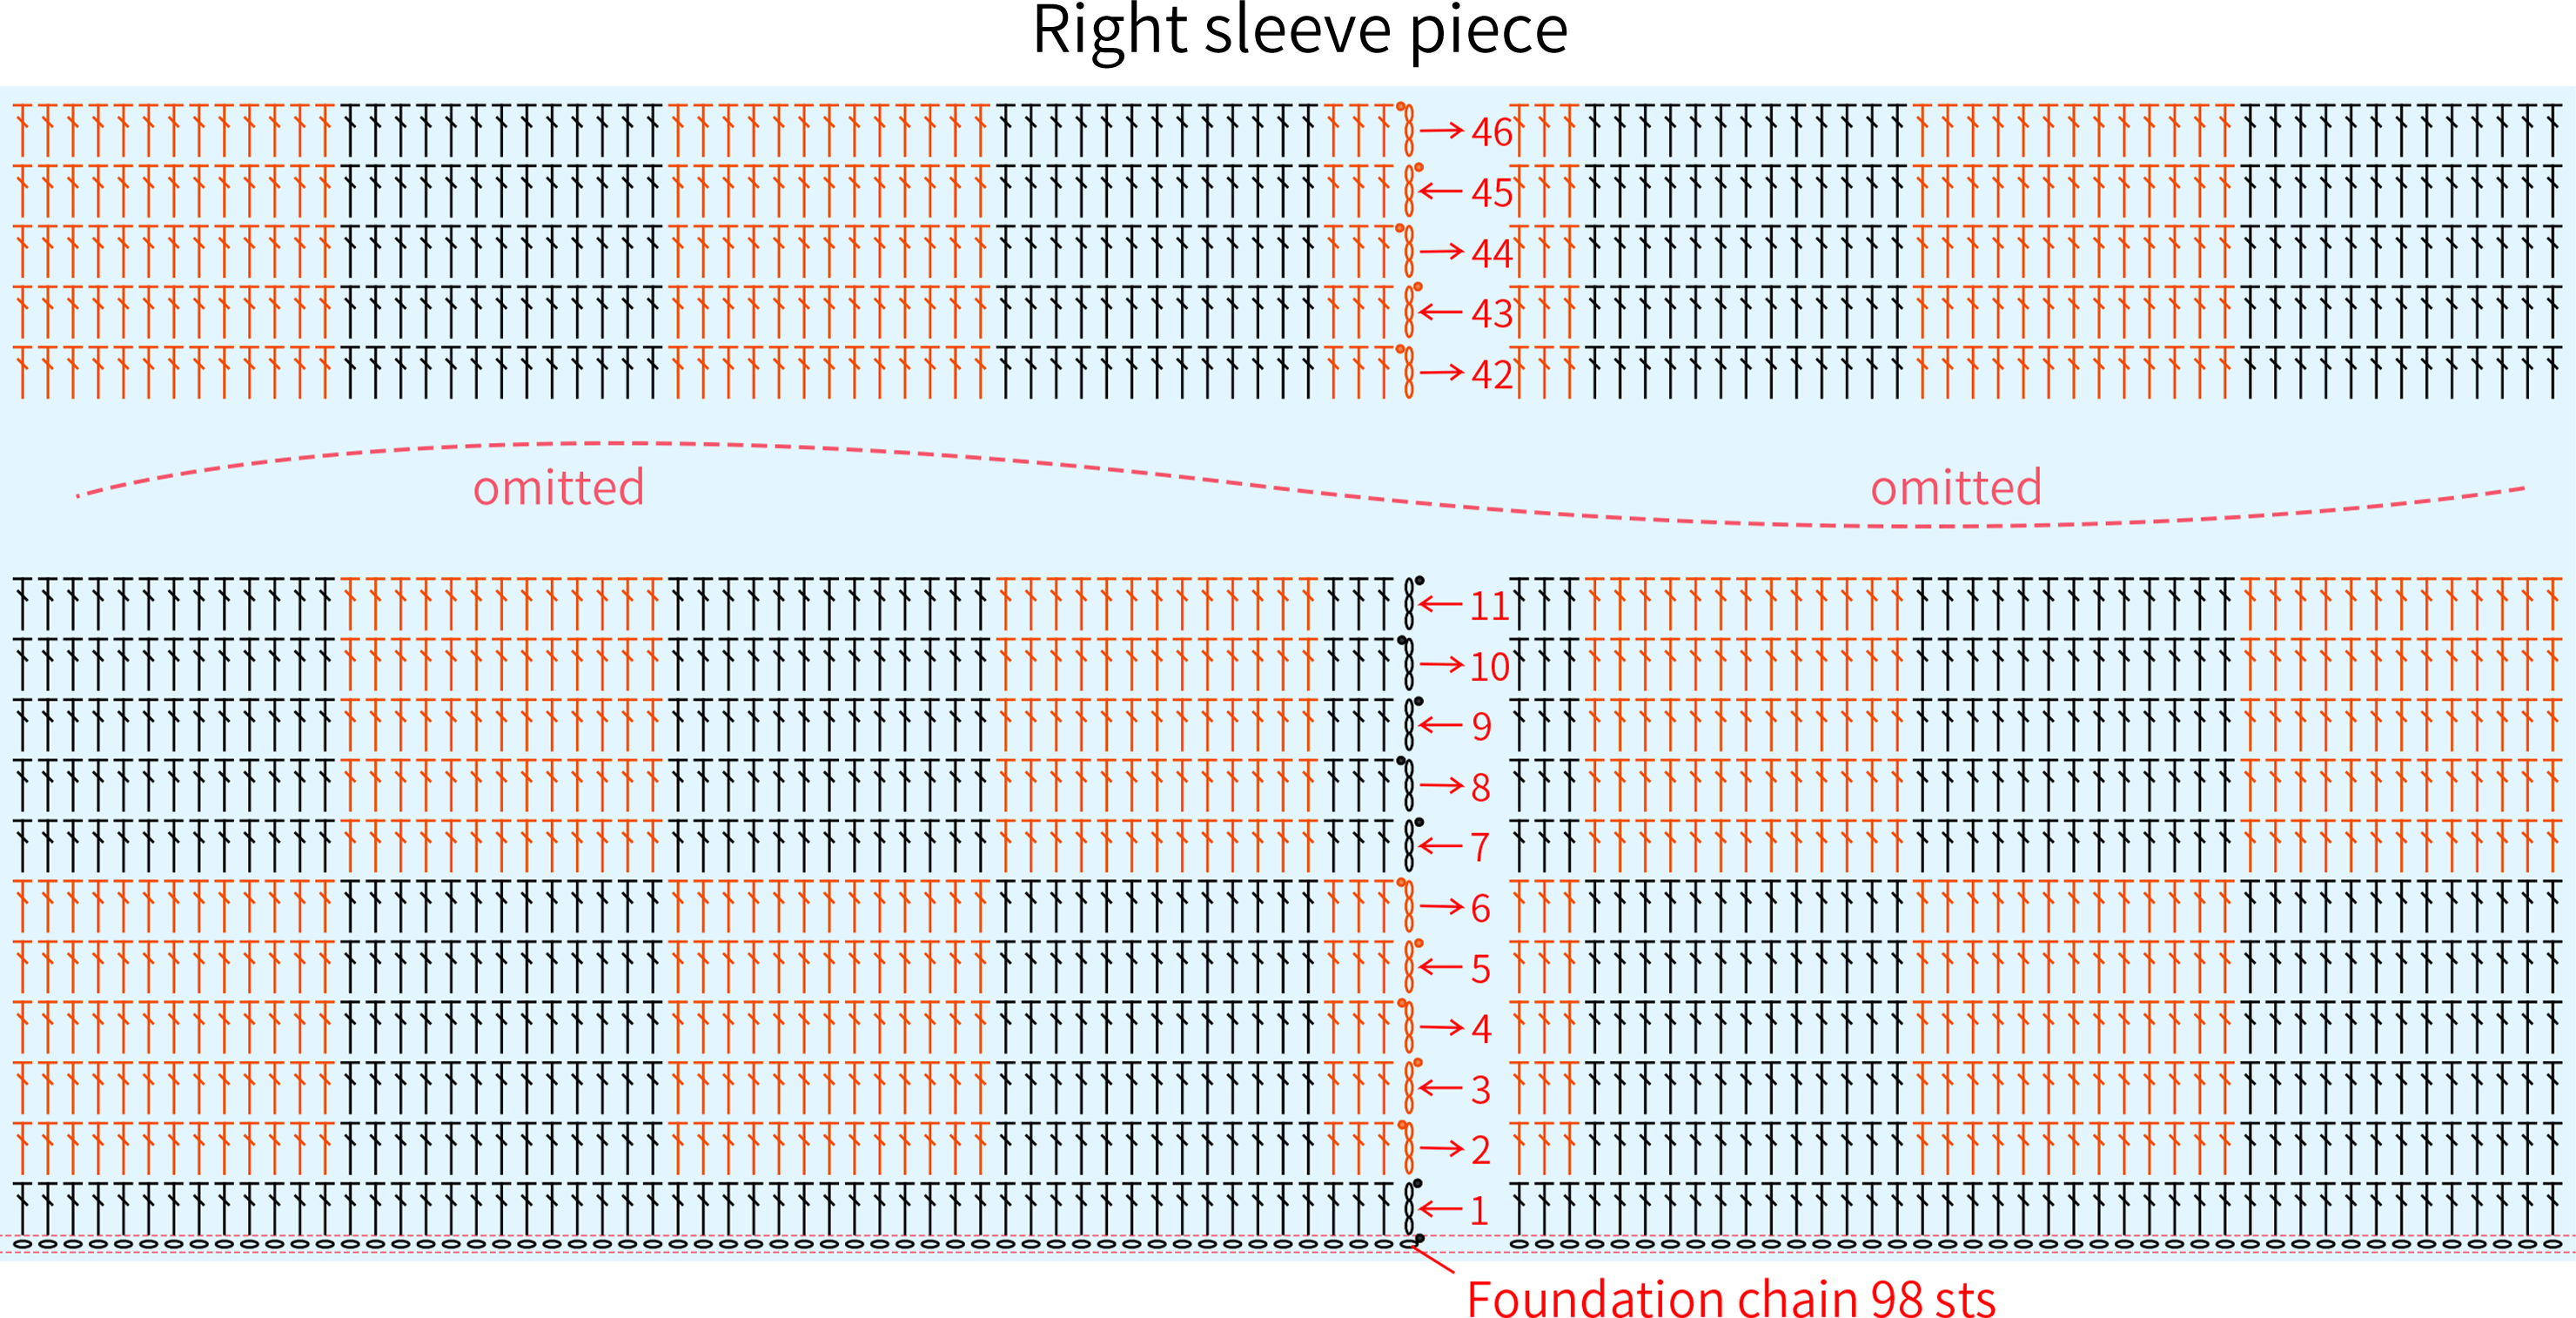

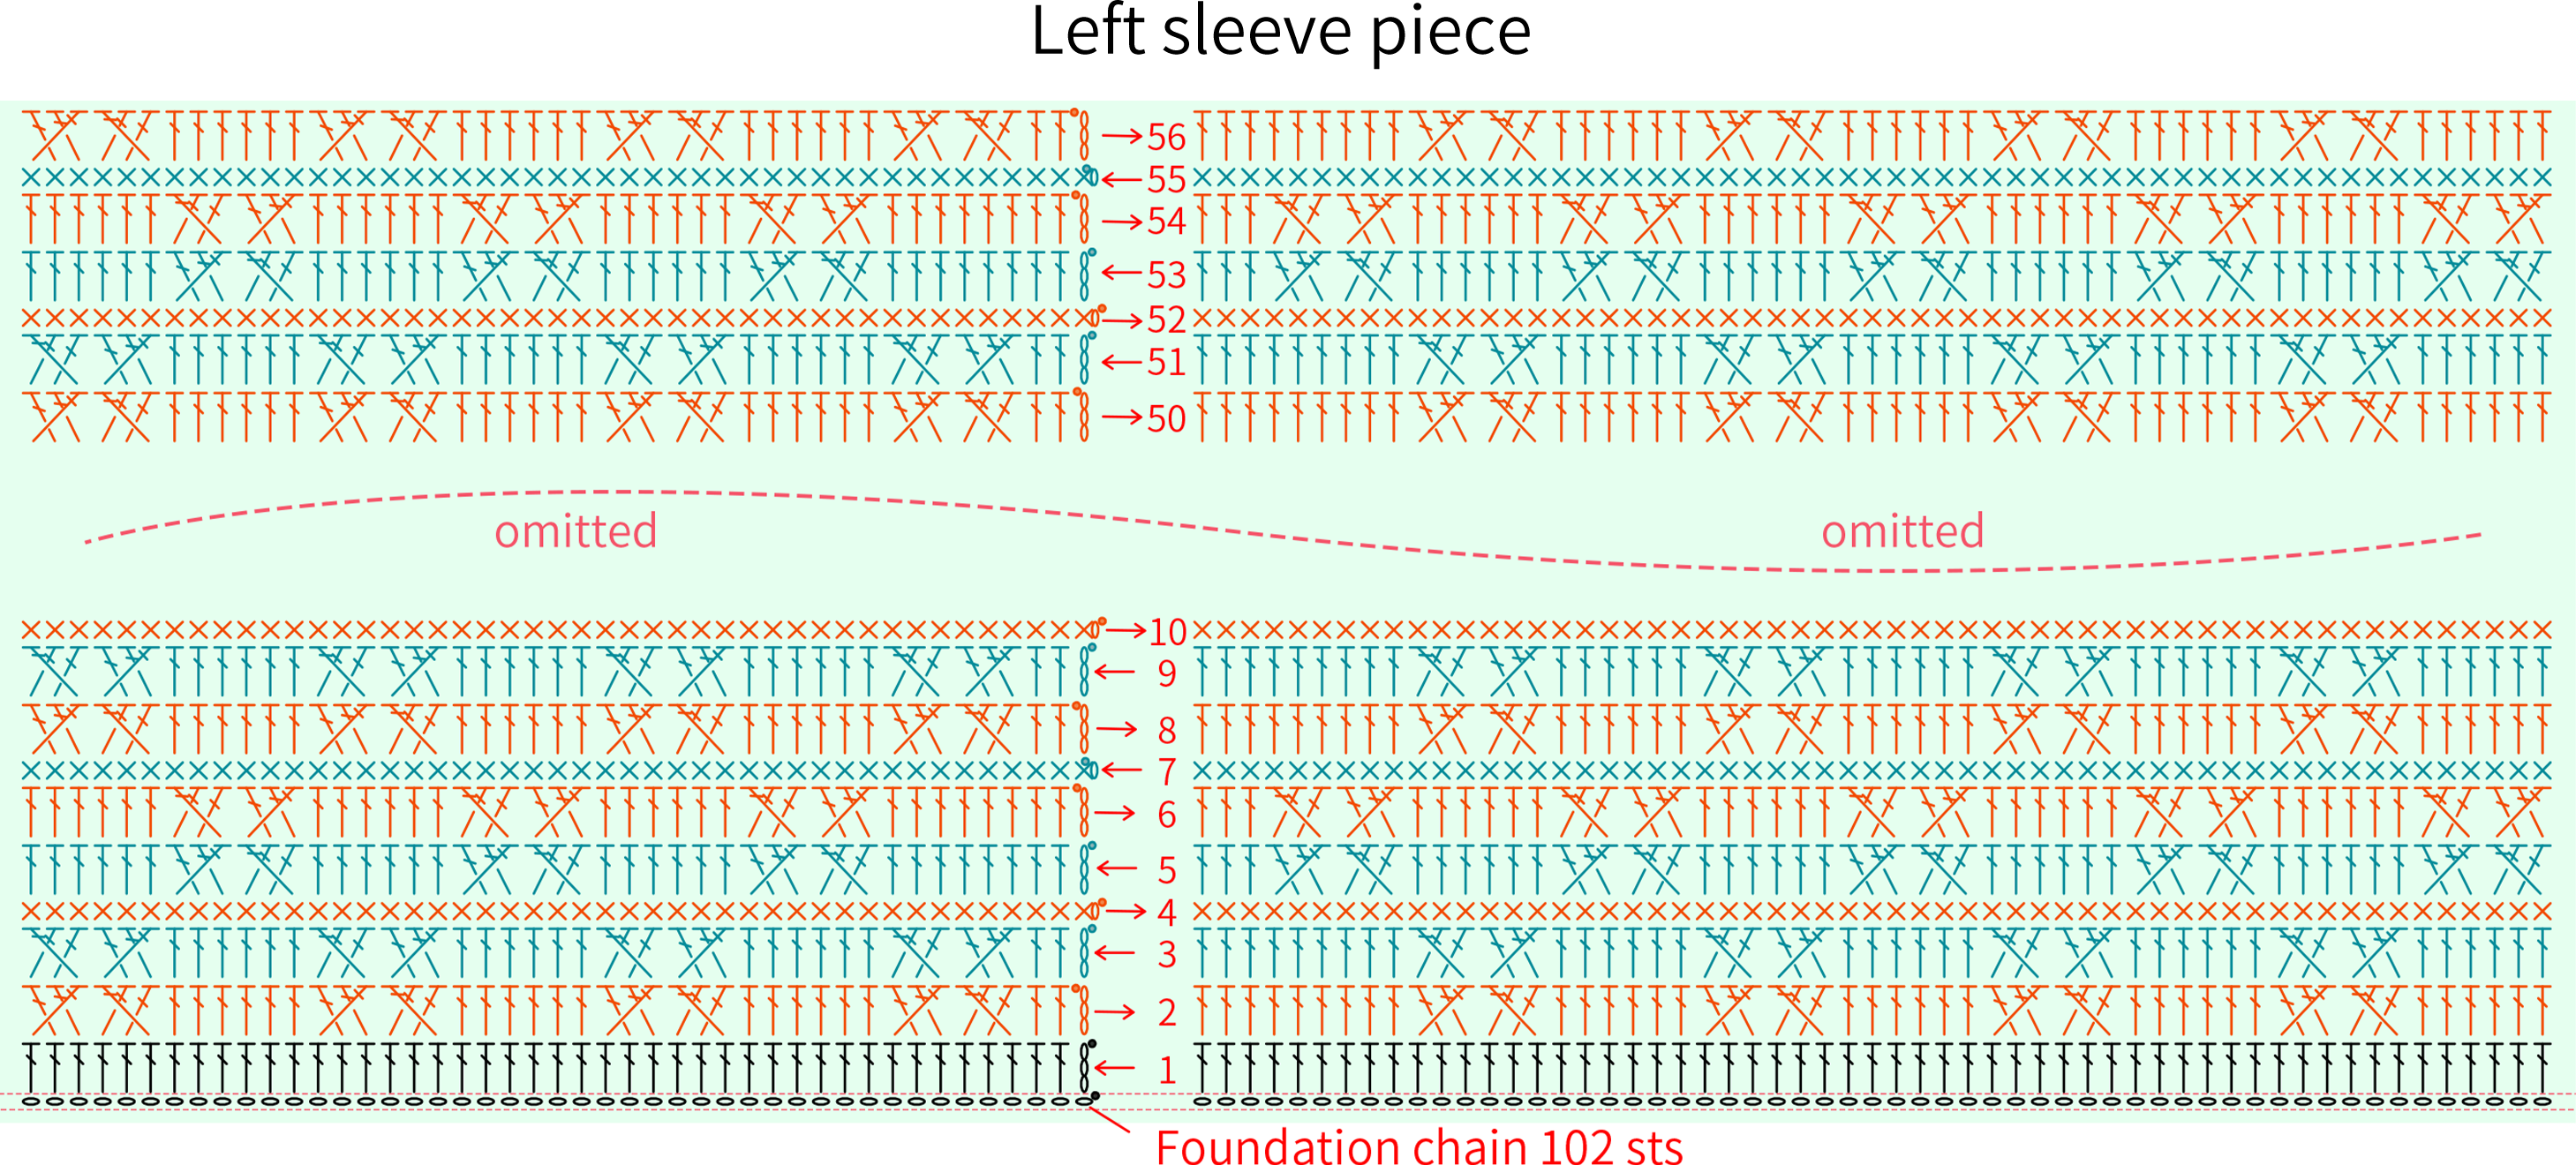
Part 5 JoinE 37' 27'' (Part 1)
Repeat the group of a single crochet followed by 2 chains to join. First, join the shoulder of the front and back pieces together. Then join the sleeves. Finally, join the side seams. Please refer to the video demonstration for more details.
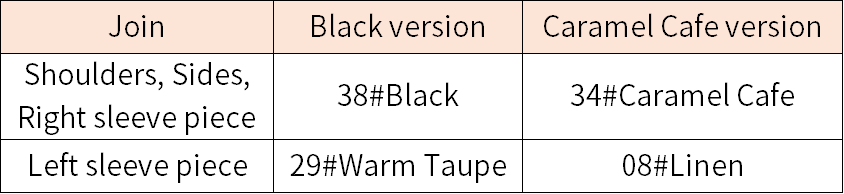
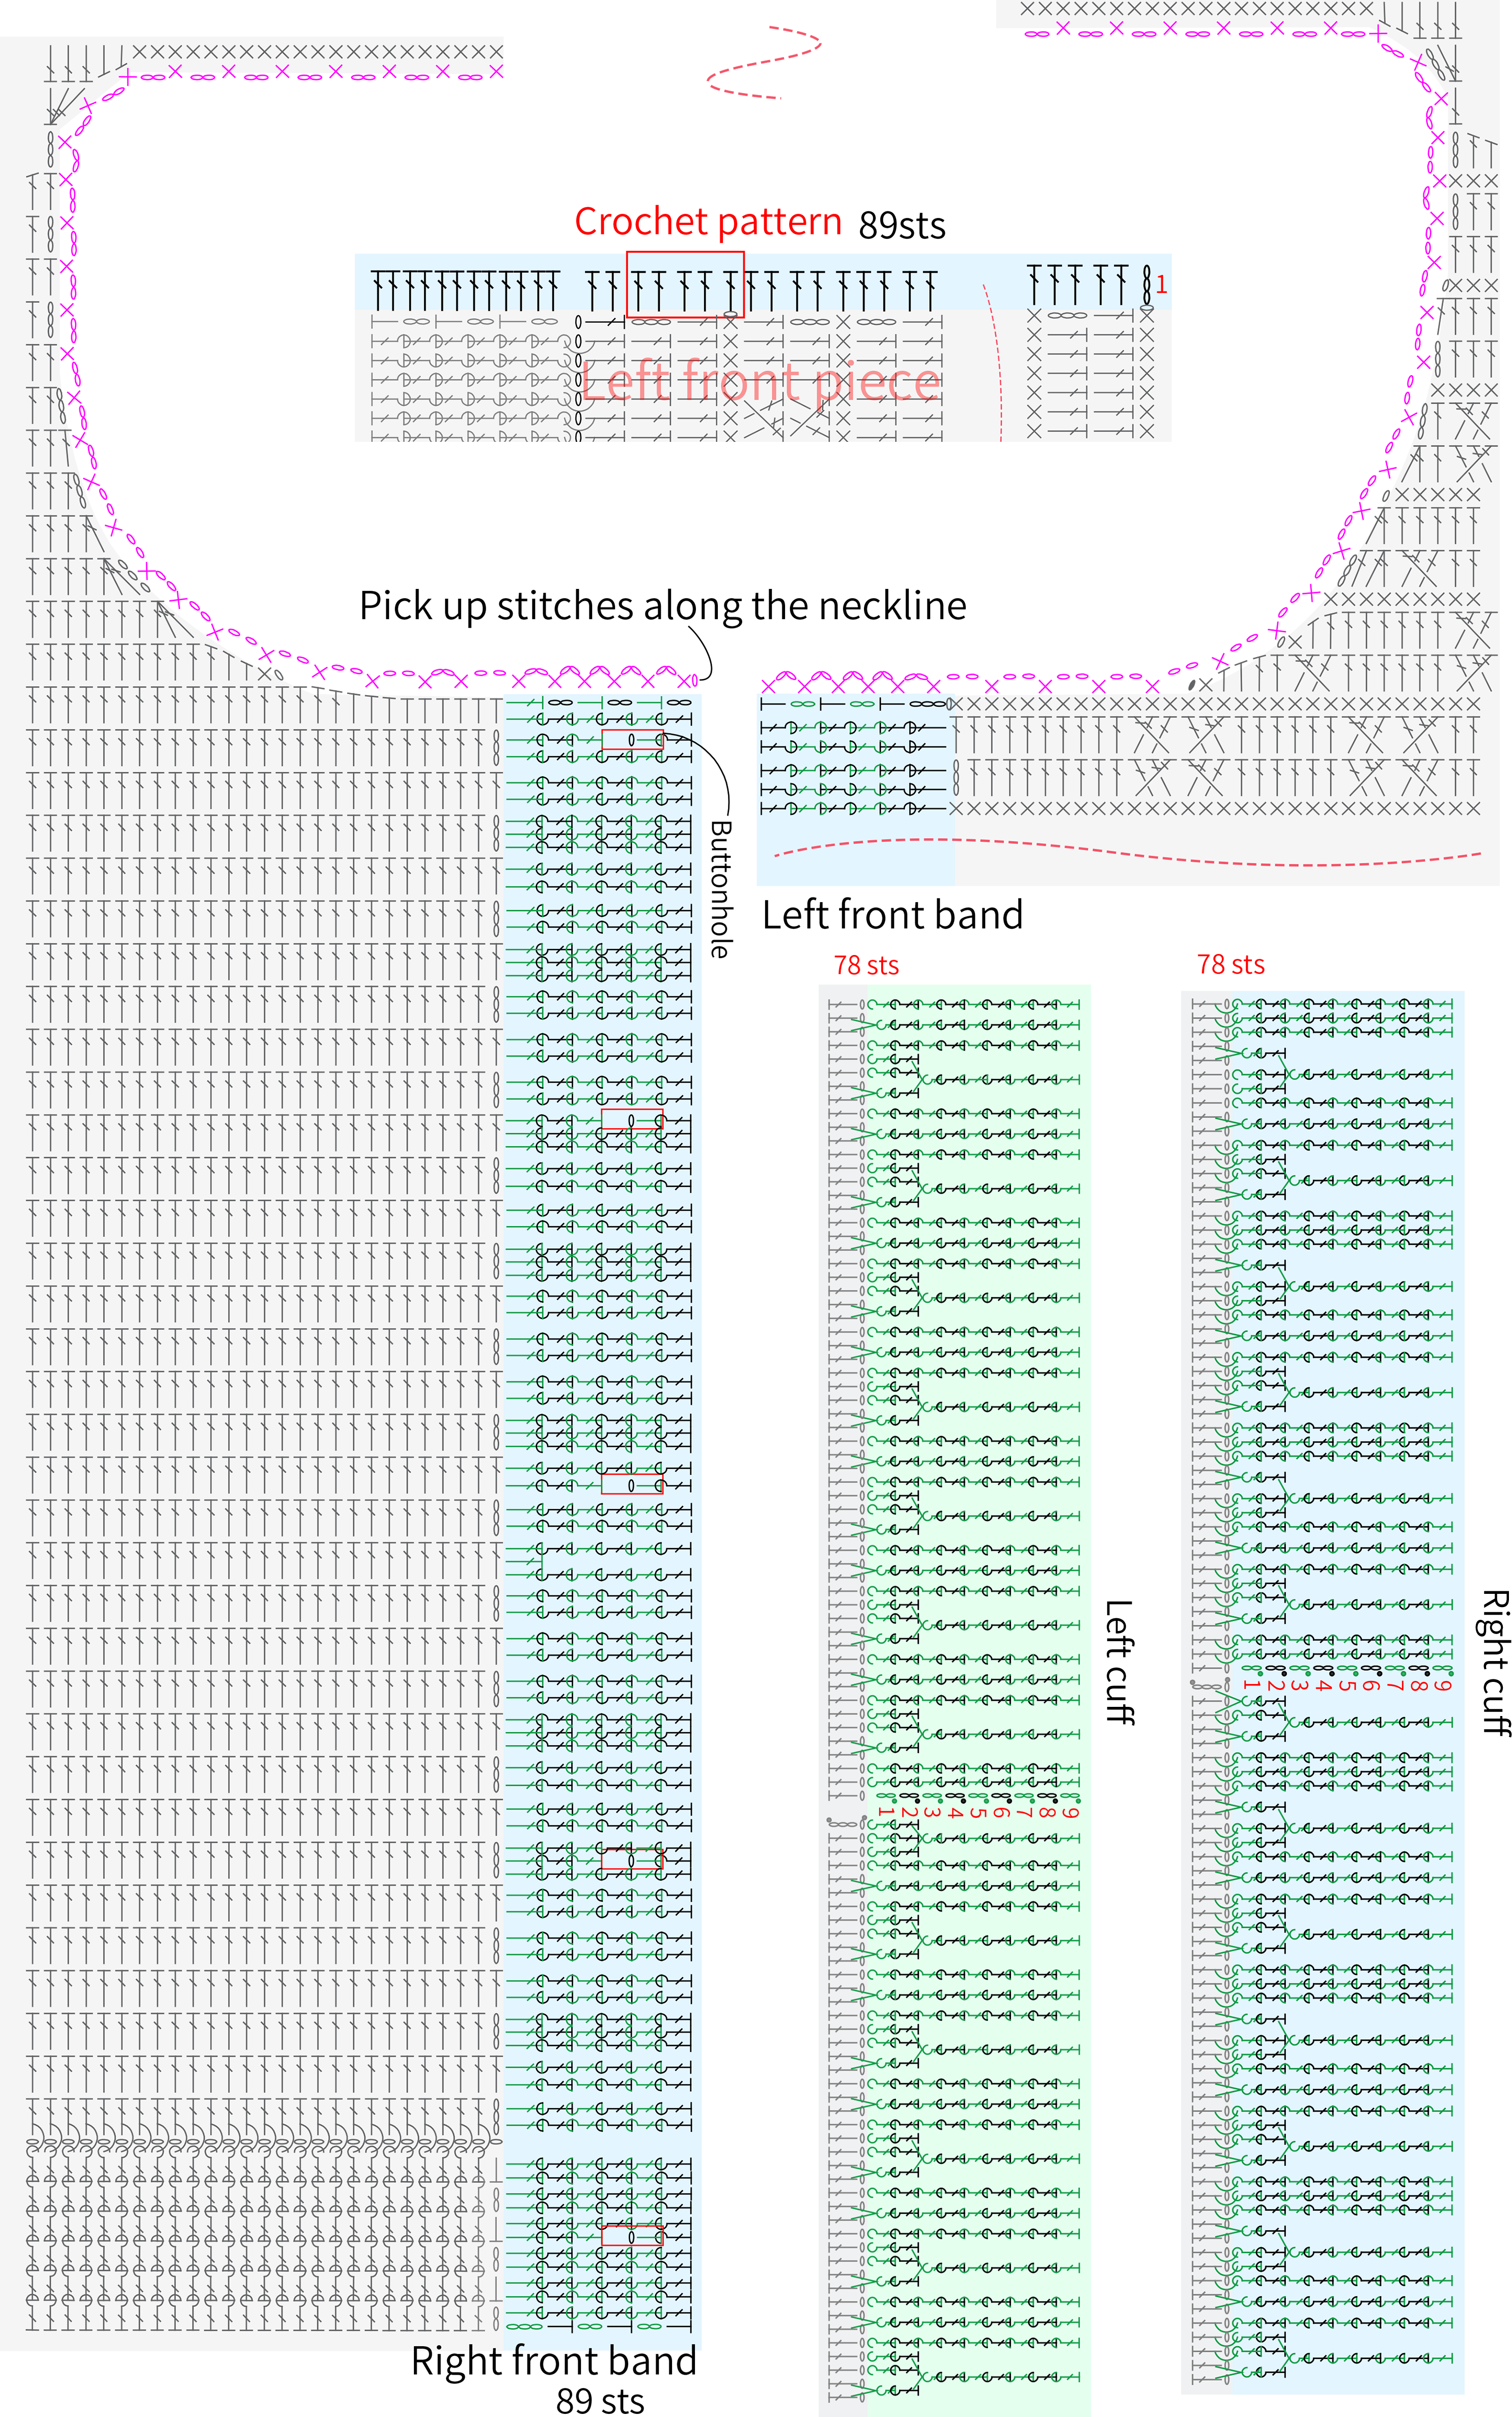
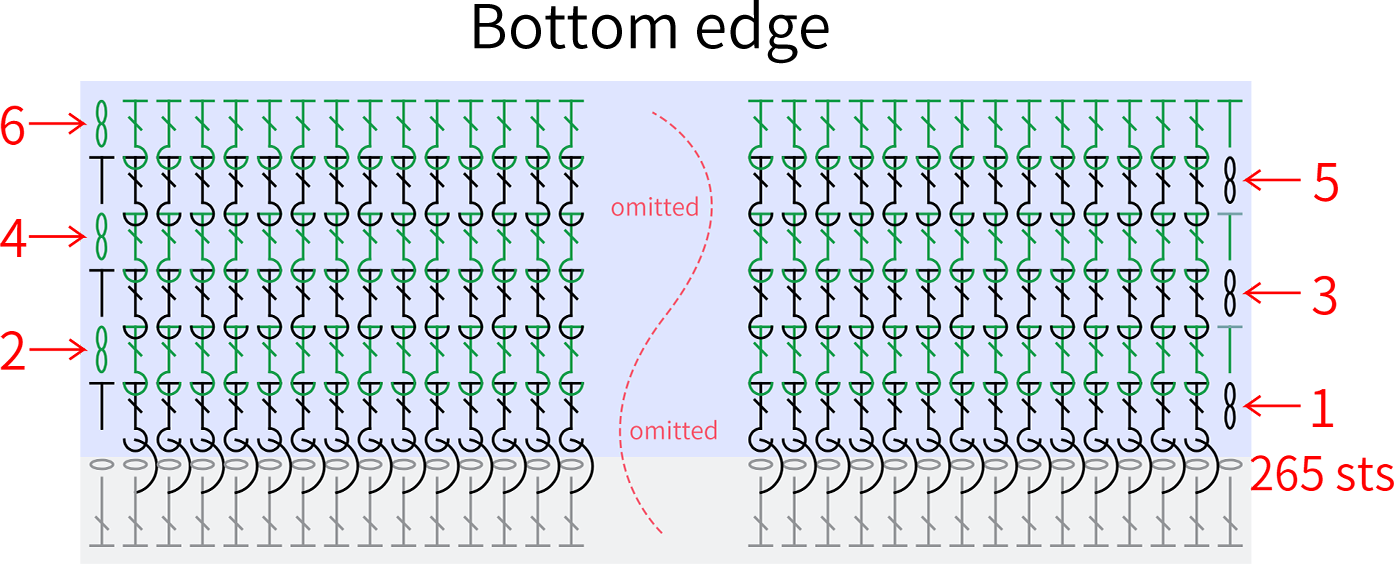
Part 6 Cuffs, Bottom edge, Front bandF 42' 22'' (Part 1)
Crochet the cuffs around the first round of the sleeve piece using double crochets, then work back and forth for the bottom edge and the front band. Start with the bottom edge, then work the front band, and finally sew on the buttons. Please refer to the video demonstration for more details.
Note: When working in rows, on the right side, work front post stitches over back post stitches, and on the wrong side, work back post stitches over front post stitches.

Part 7 CollarG 52' 13'' (Part 1)
Begin from the corner on the right front band. Work back and forth in rows. Please refer to the video demonstration for more details.


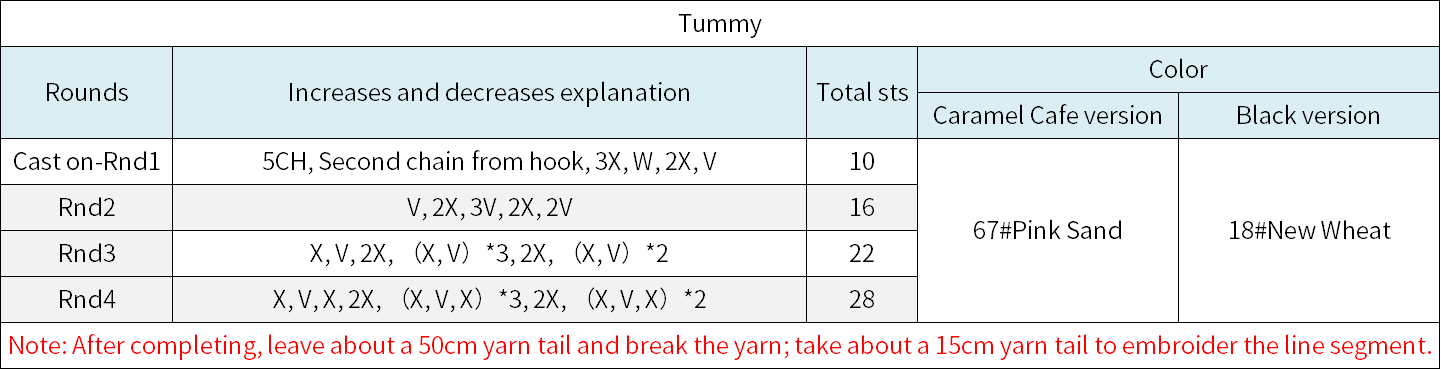
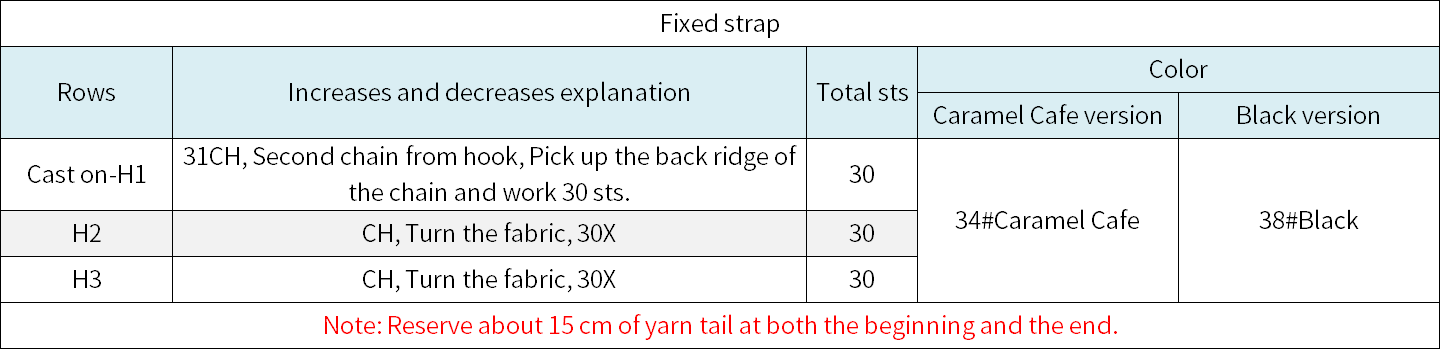
Part 8 DecorationH 00' 07'' (Part 2)
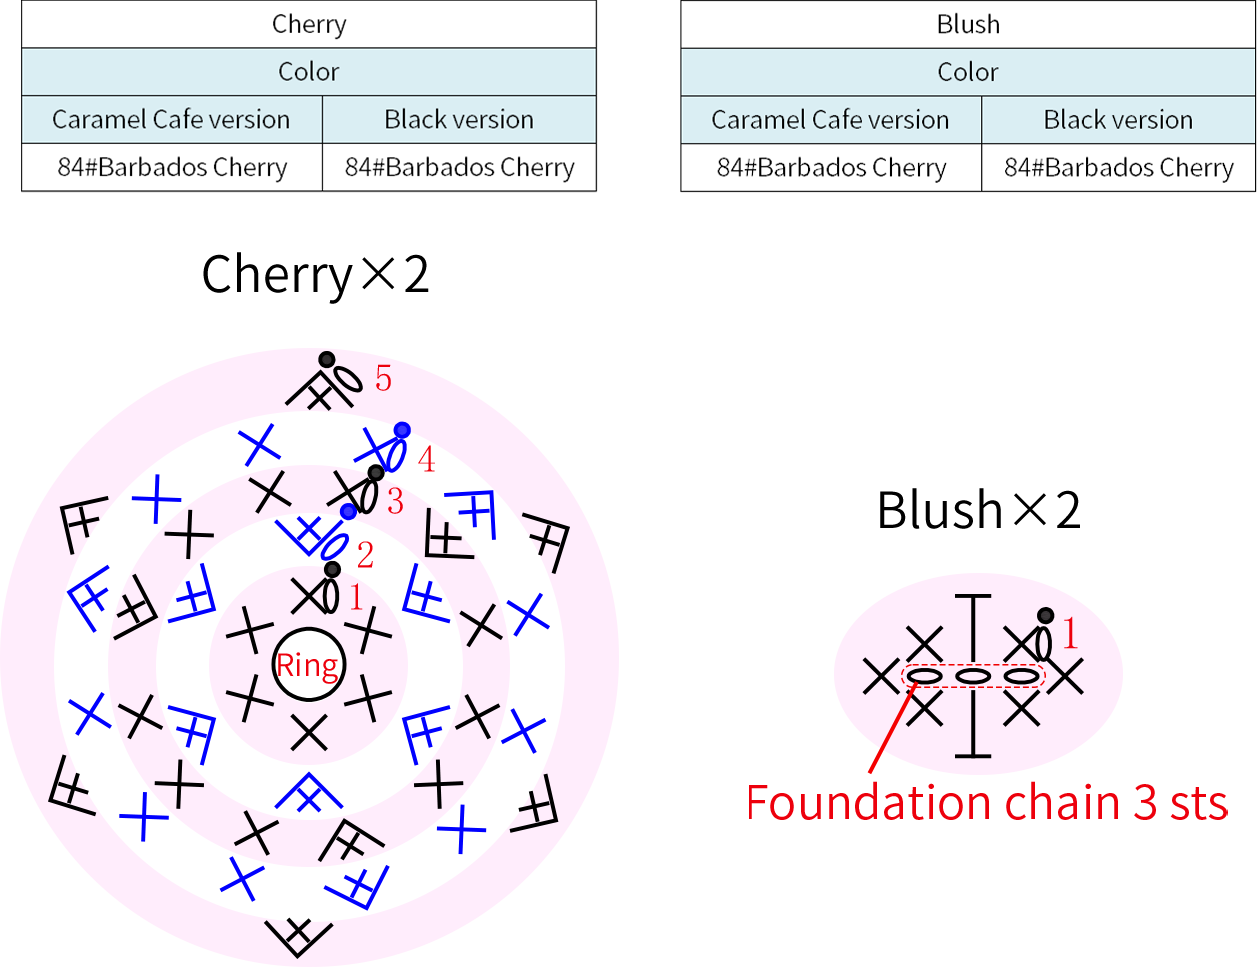
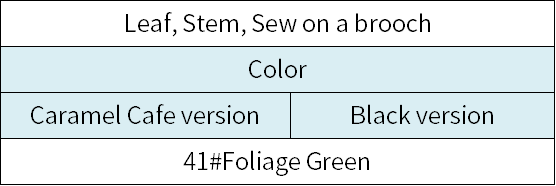
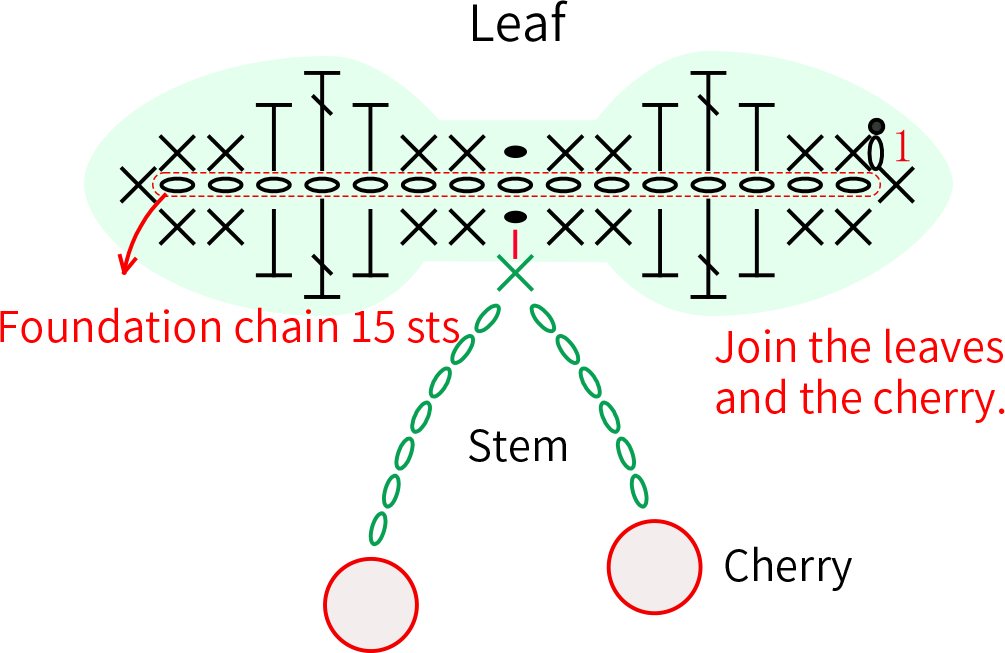
Crochet the decorations according to the chart, and after completing them, secure them onto the right and left front pieces. The placement can also be adjusted based on personal preference.


Made by the community