Home / Blanket
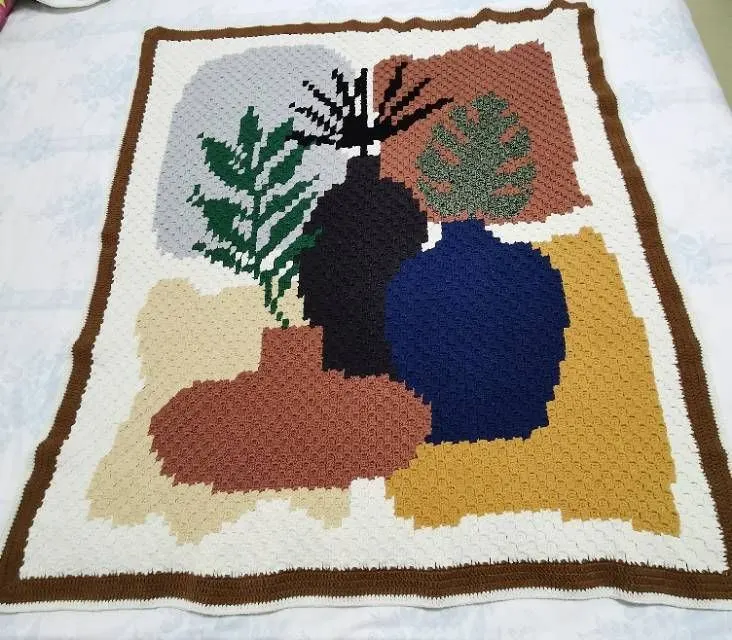
Plant Pixel Blanket
Project preview
See the finished project
Pattern format
Instructions
Watch and follow
Video tutorial
The blanket consists of the main piece and the edging. First, we’ll work on the main piece. Then crochet the edging around the main piece.
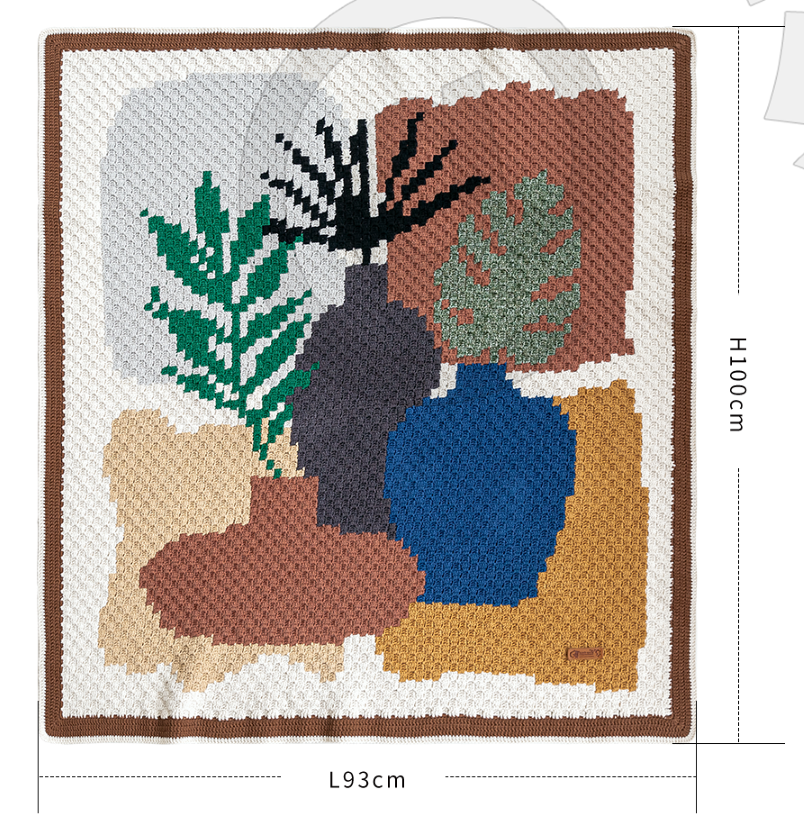
The handcrafted measurements may have an error of 1 to 2 cm. Due to variations in individual tension, the size of the sample is for reference only.
Materials: Susan's Family Ply Combed Cotton & Acrylic Fibre Hand Knitting Yarn,Impression Misty Feather and Morandi 6#
Hook: 3.00 mm crochet hook

Chart Key





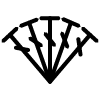
Note: This pattern is making in Chinese crochet pattern terms, and the stitch name is written using American terminology. All measurements in charts are in cm.

Part 1 Main pieceA 00' 34''
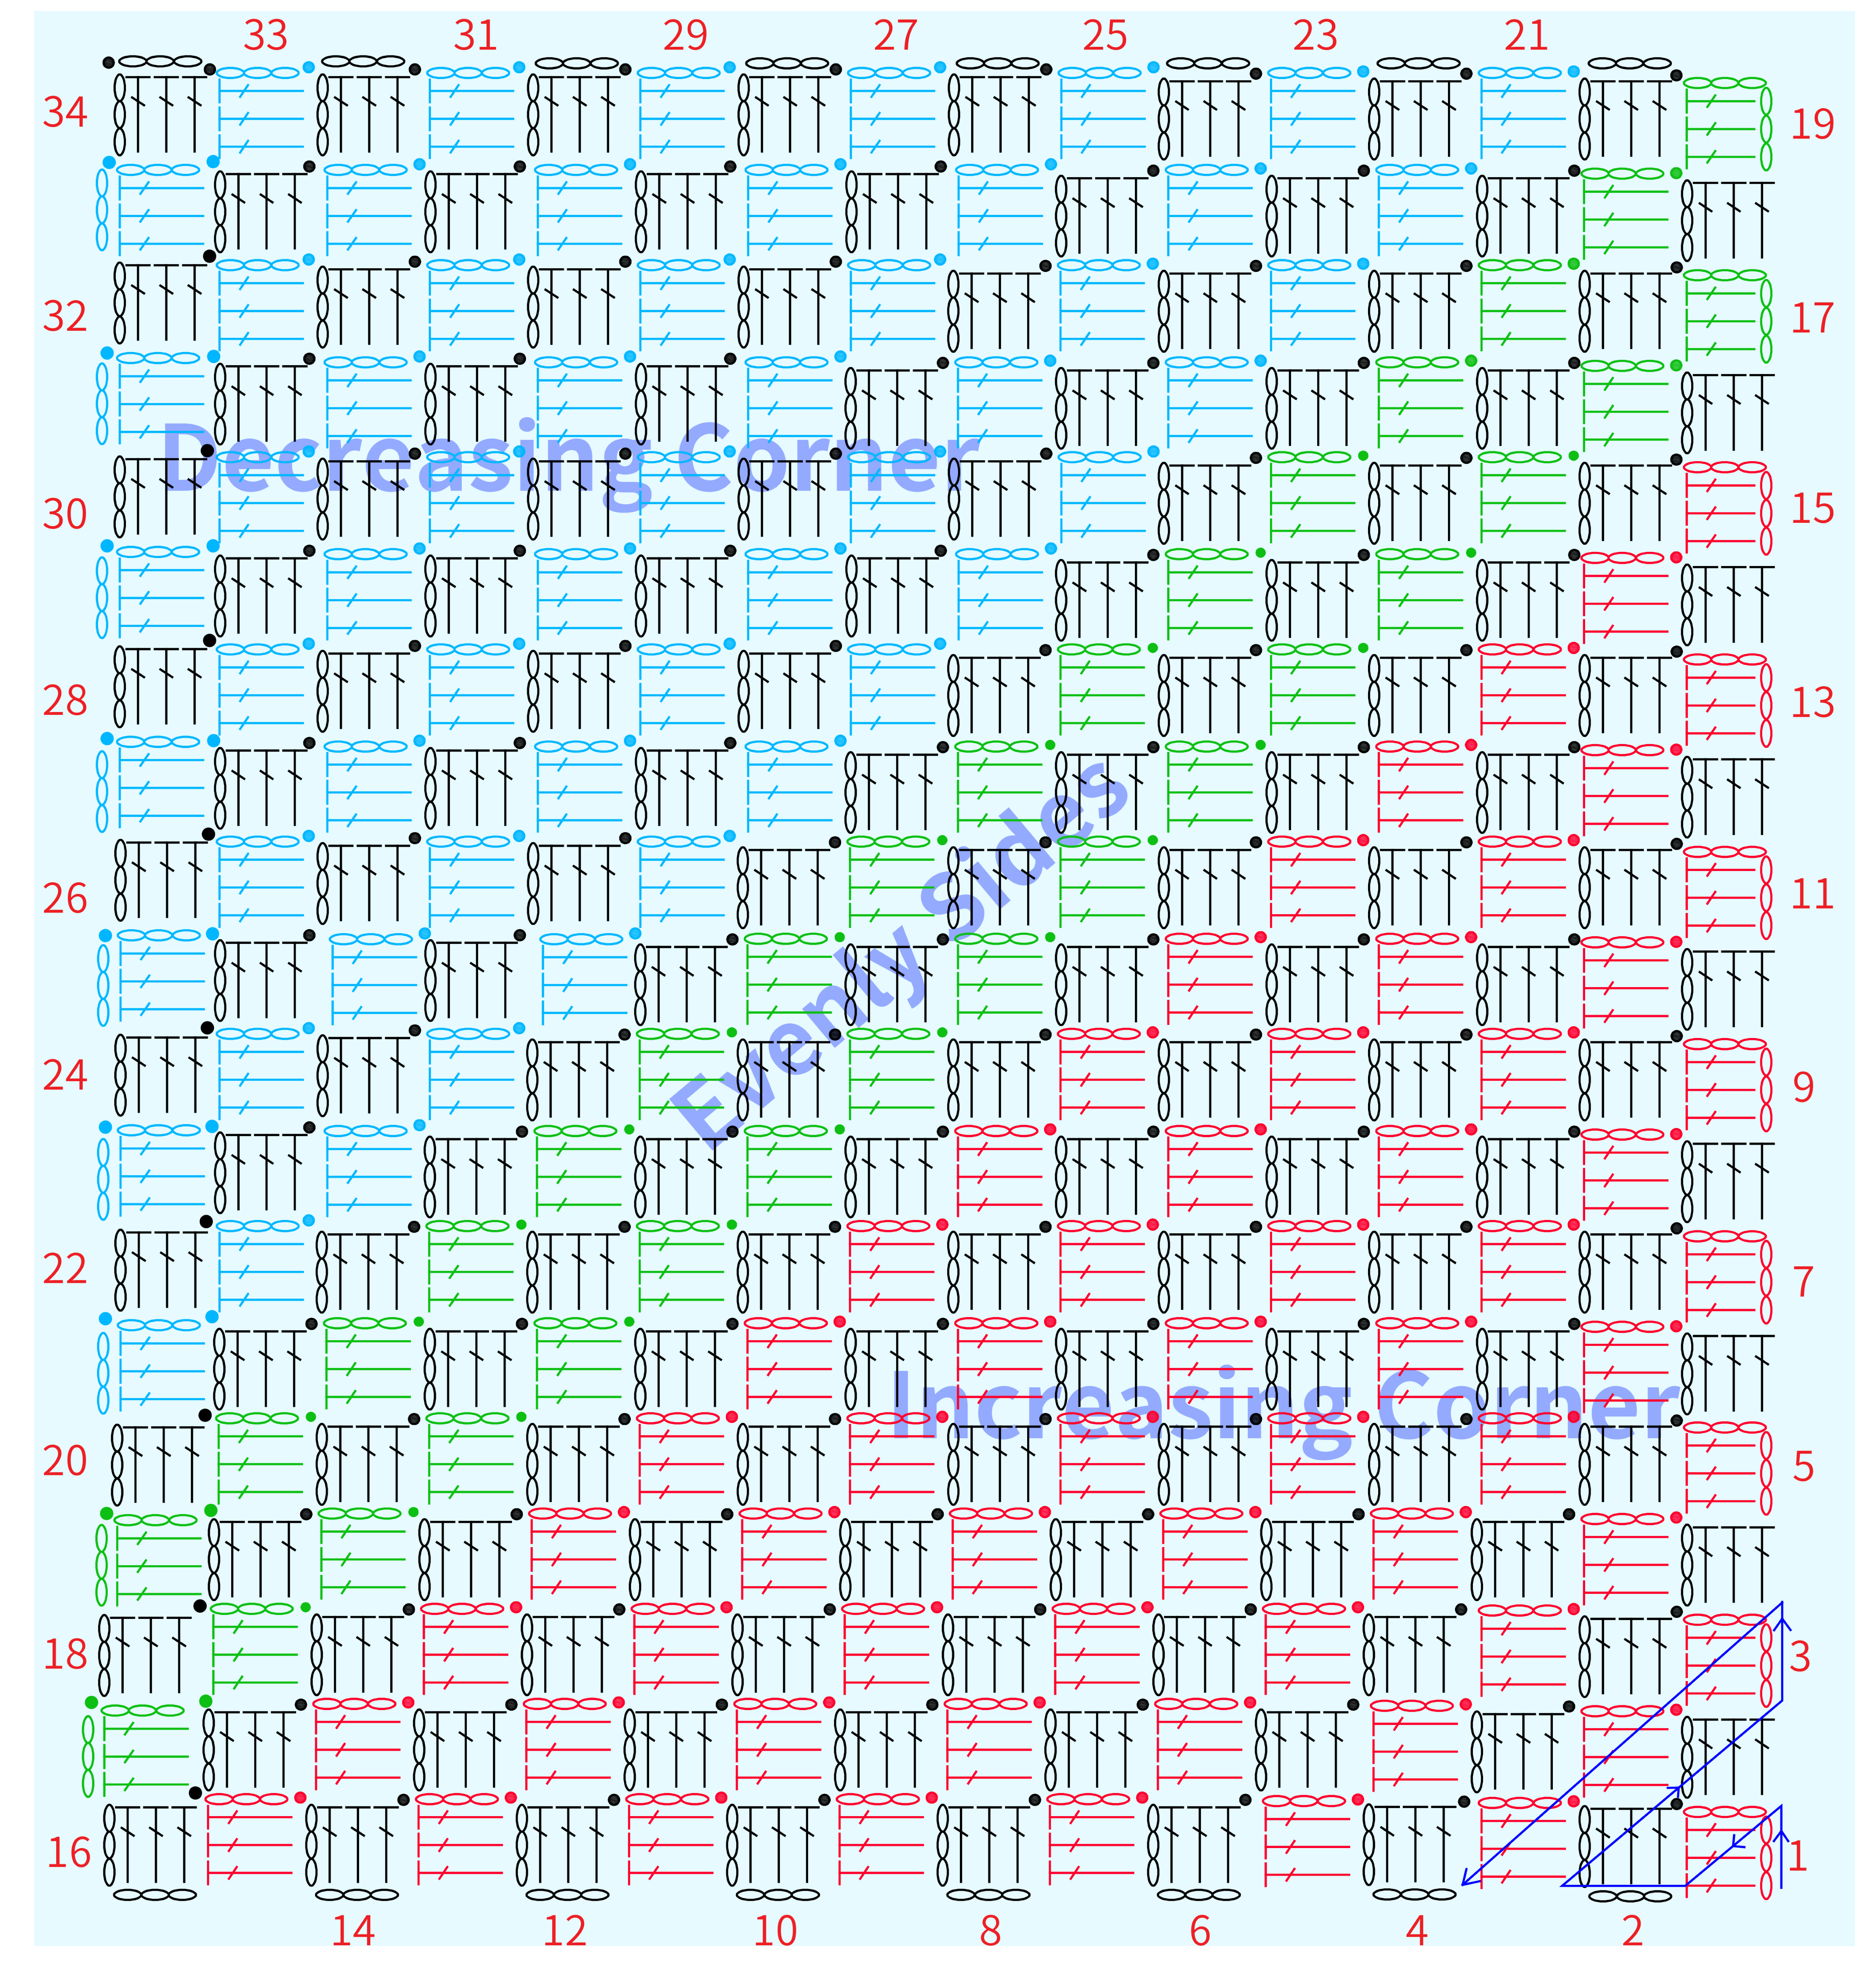
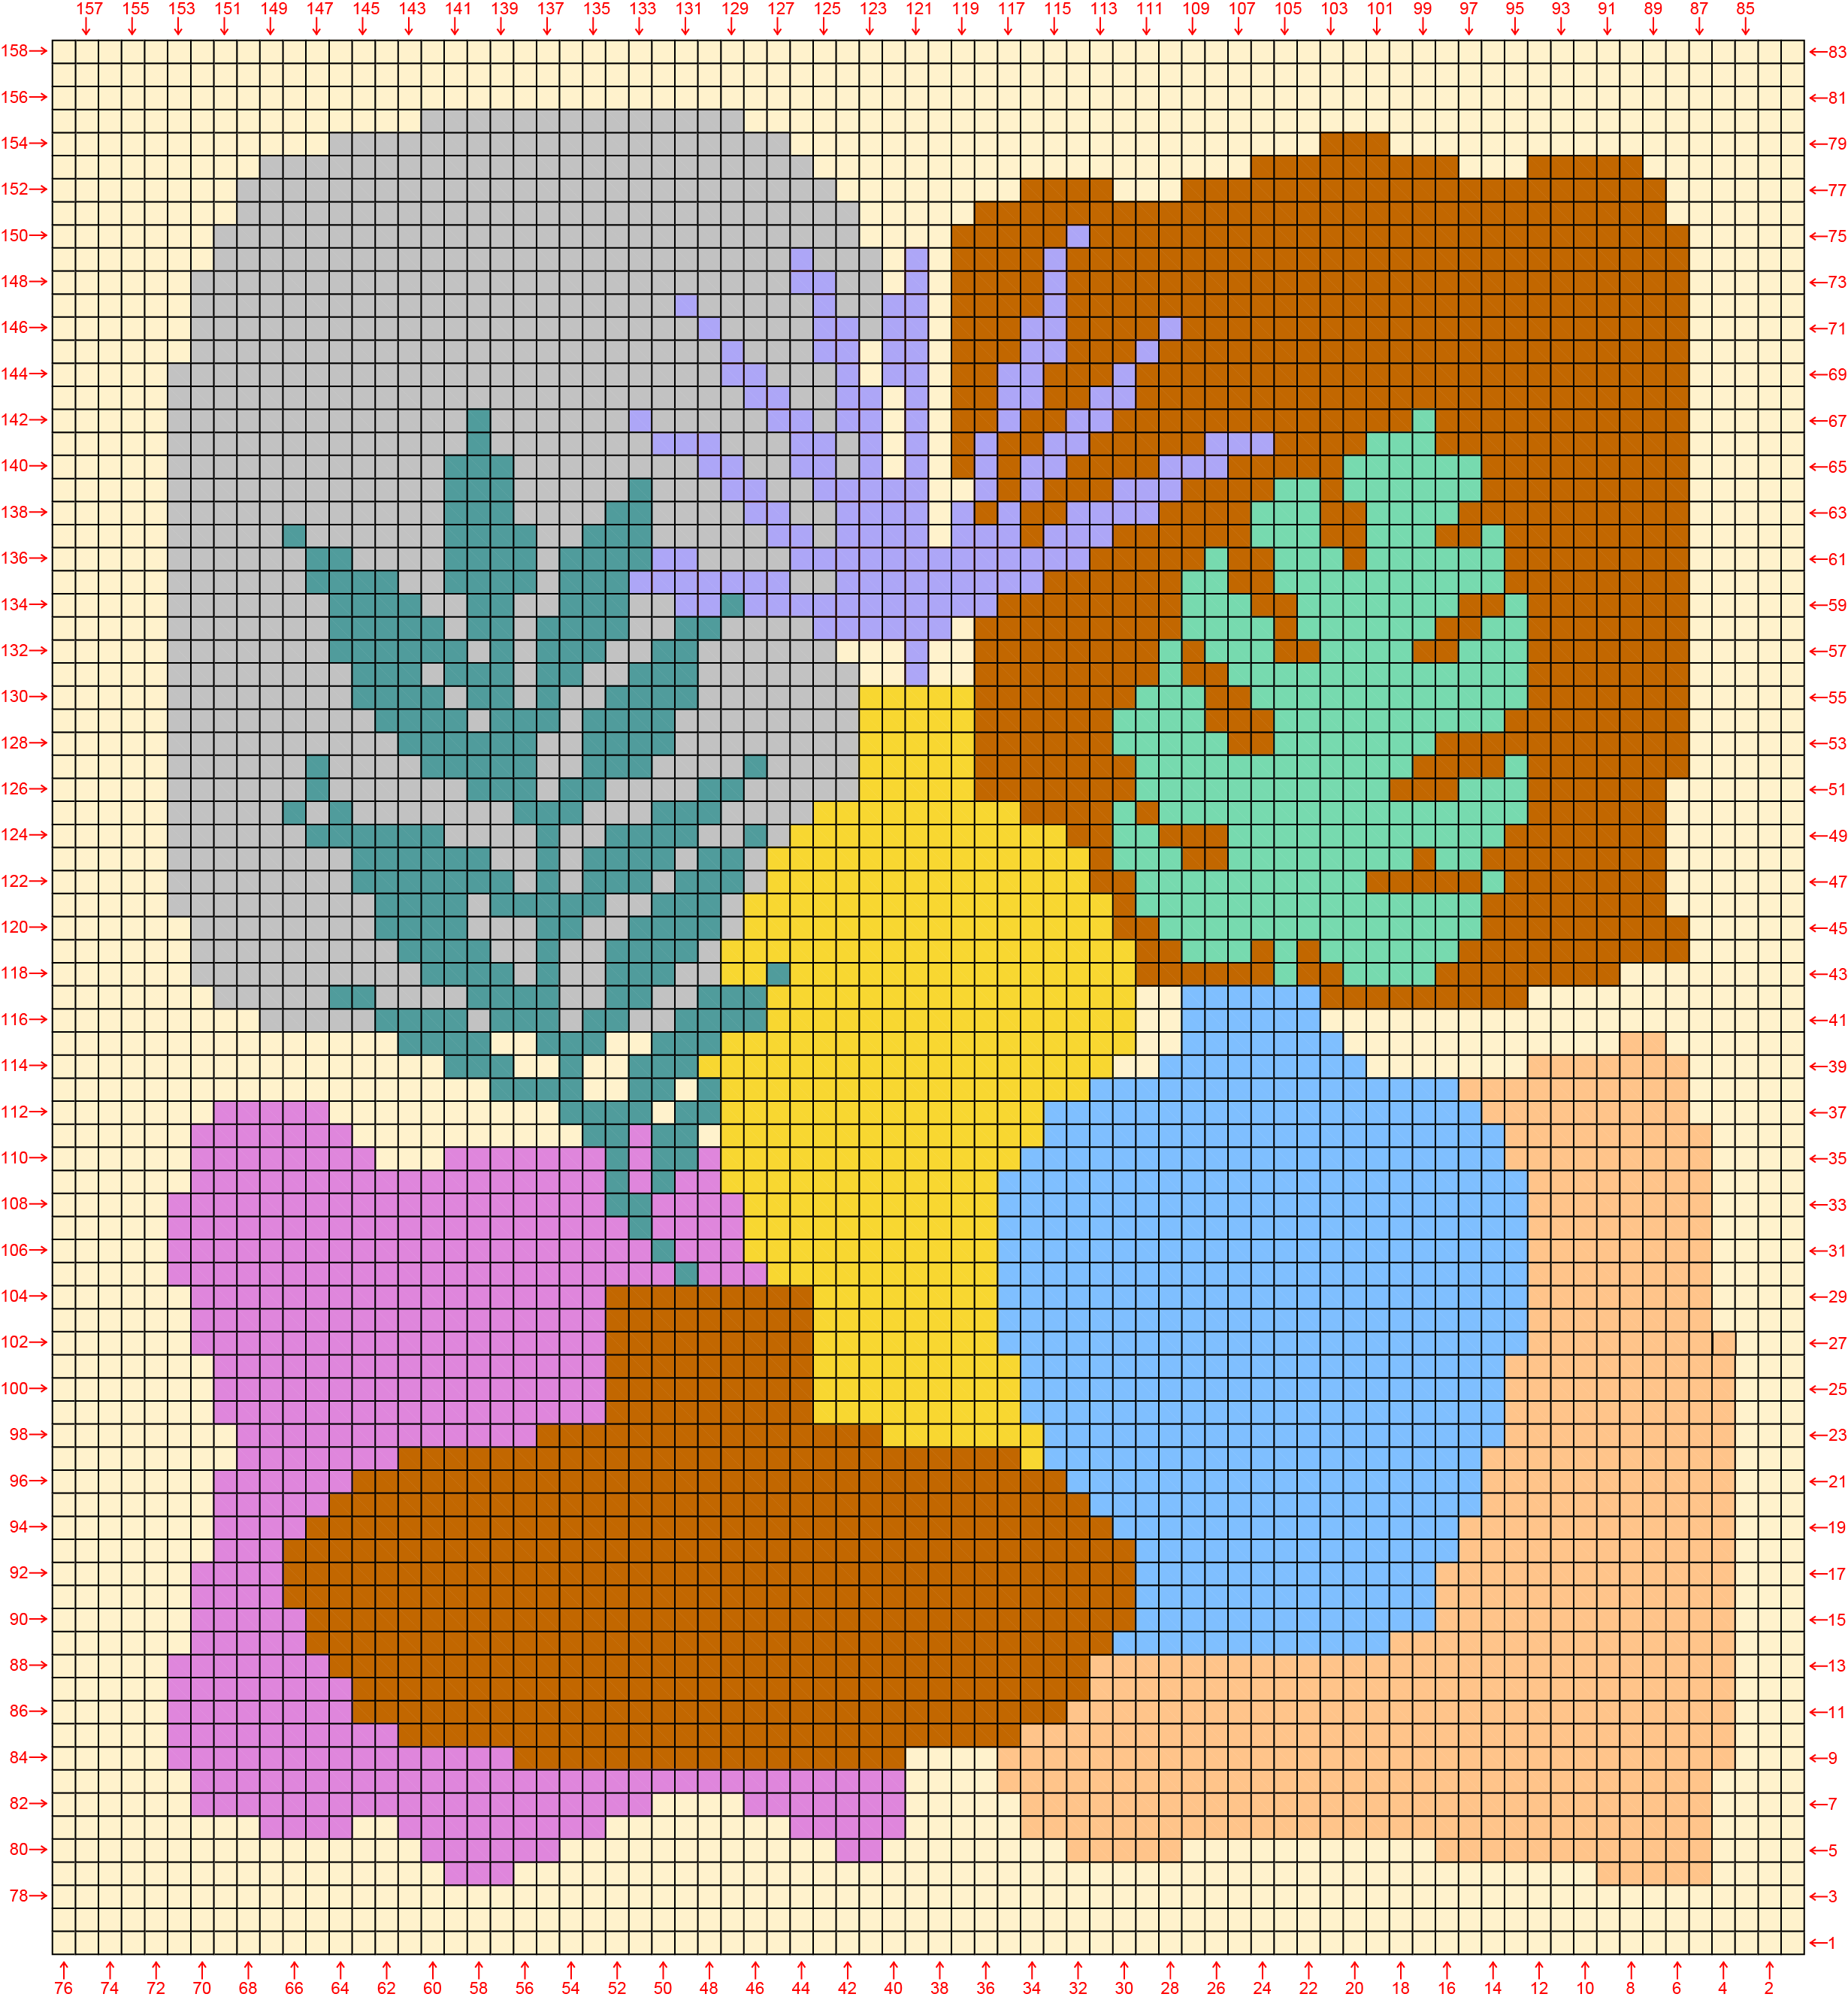
The main piece worked back and forth from corner to corner. It’s divided into an increasing corner, an evenly sides, and a decreasing corner. Throughout, we'll add new yarn and change colors, to create graphs. Please refer to the video demonstration for details.
Note: Here, a diagram of 34 rows is used as an example for demonstration. In practice, crochet according to the number of rows in the pixel grid diagram. When changing colors and the threads intertwine, promptly tidy them up to ensure smoothness. This prevents crossing and knots from affecting the crocheting process. The size of a 12-grid by 12-grid is approximately 14cm x 14cm.
The Main Piece Instructions (Color Matching Reference: Pixel Grid Diagram on Page 2)
Part2 The EdgingB 27' 22''
After completing the main piece, crochet the edging for the blanket by circling along the outer edge. Please refer to the video demonstration for details.
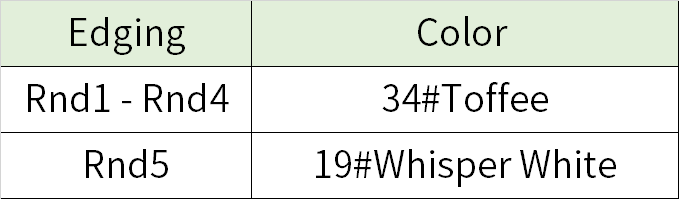
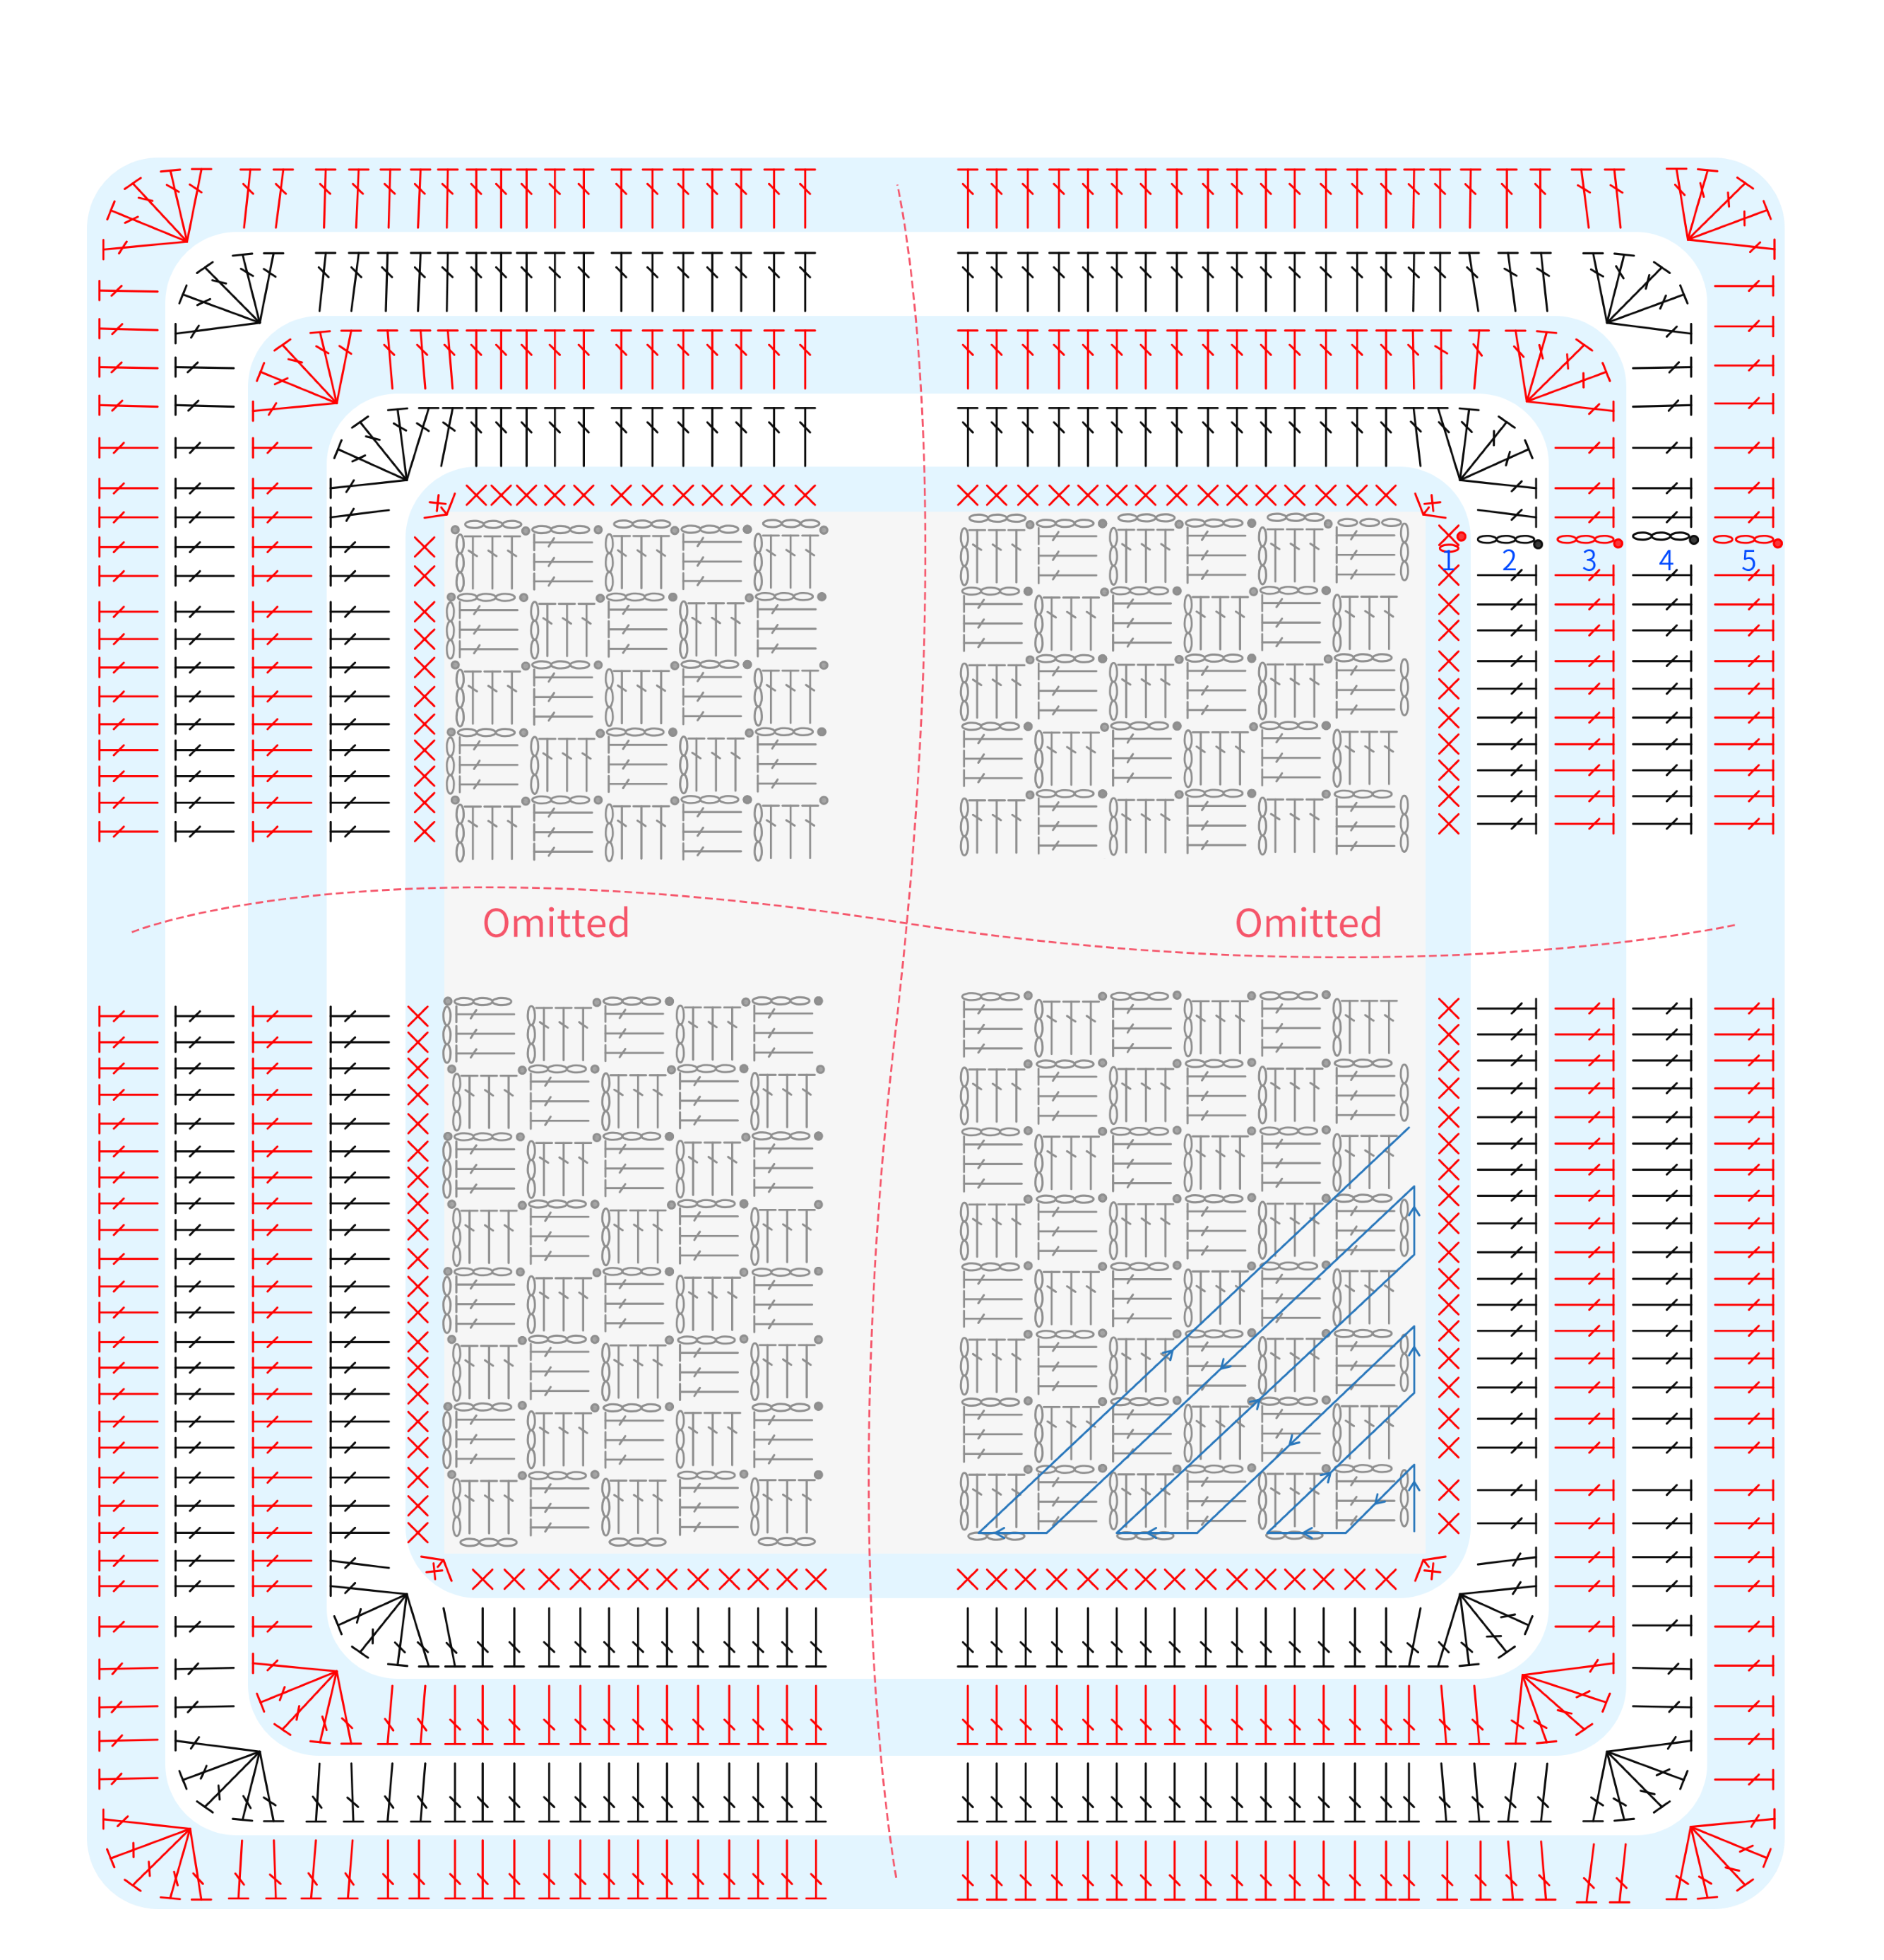
Pixel Grid Diagram
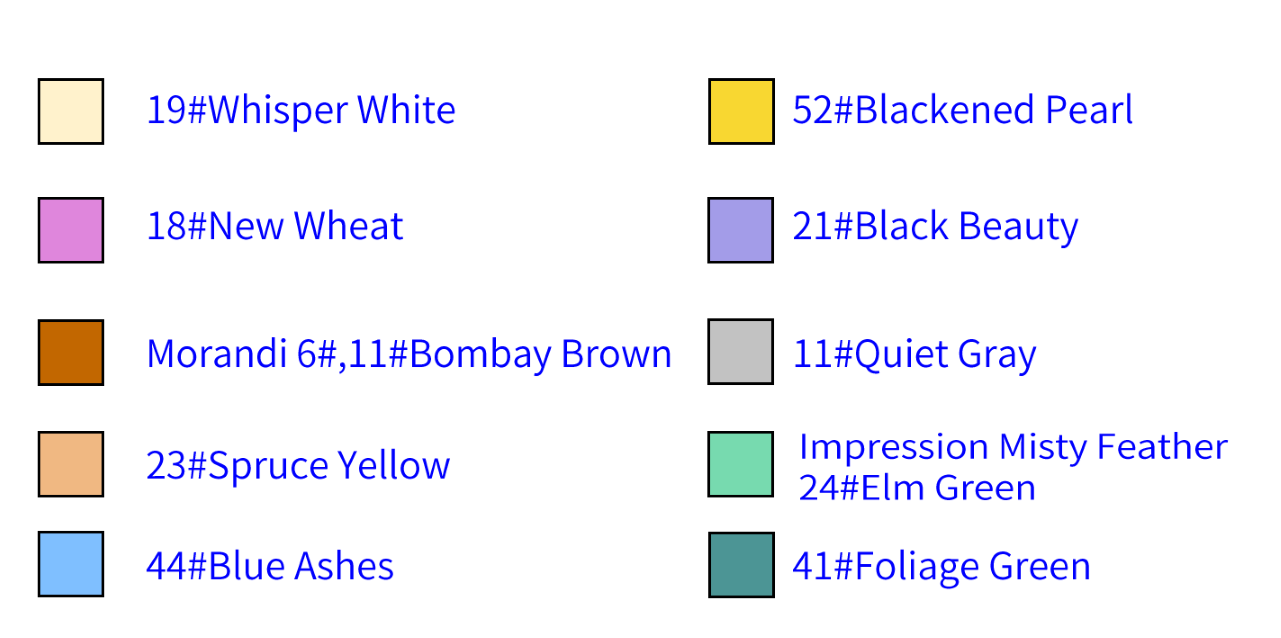
Part3 The Leather LabelC 33' 27''
When sewing the leather label, cut a 30cm long thread (34#Toffee) and use 2 strands for stitching. Please refer to the video demonstration for details.
Made by the community