Accessories / Shawl
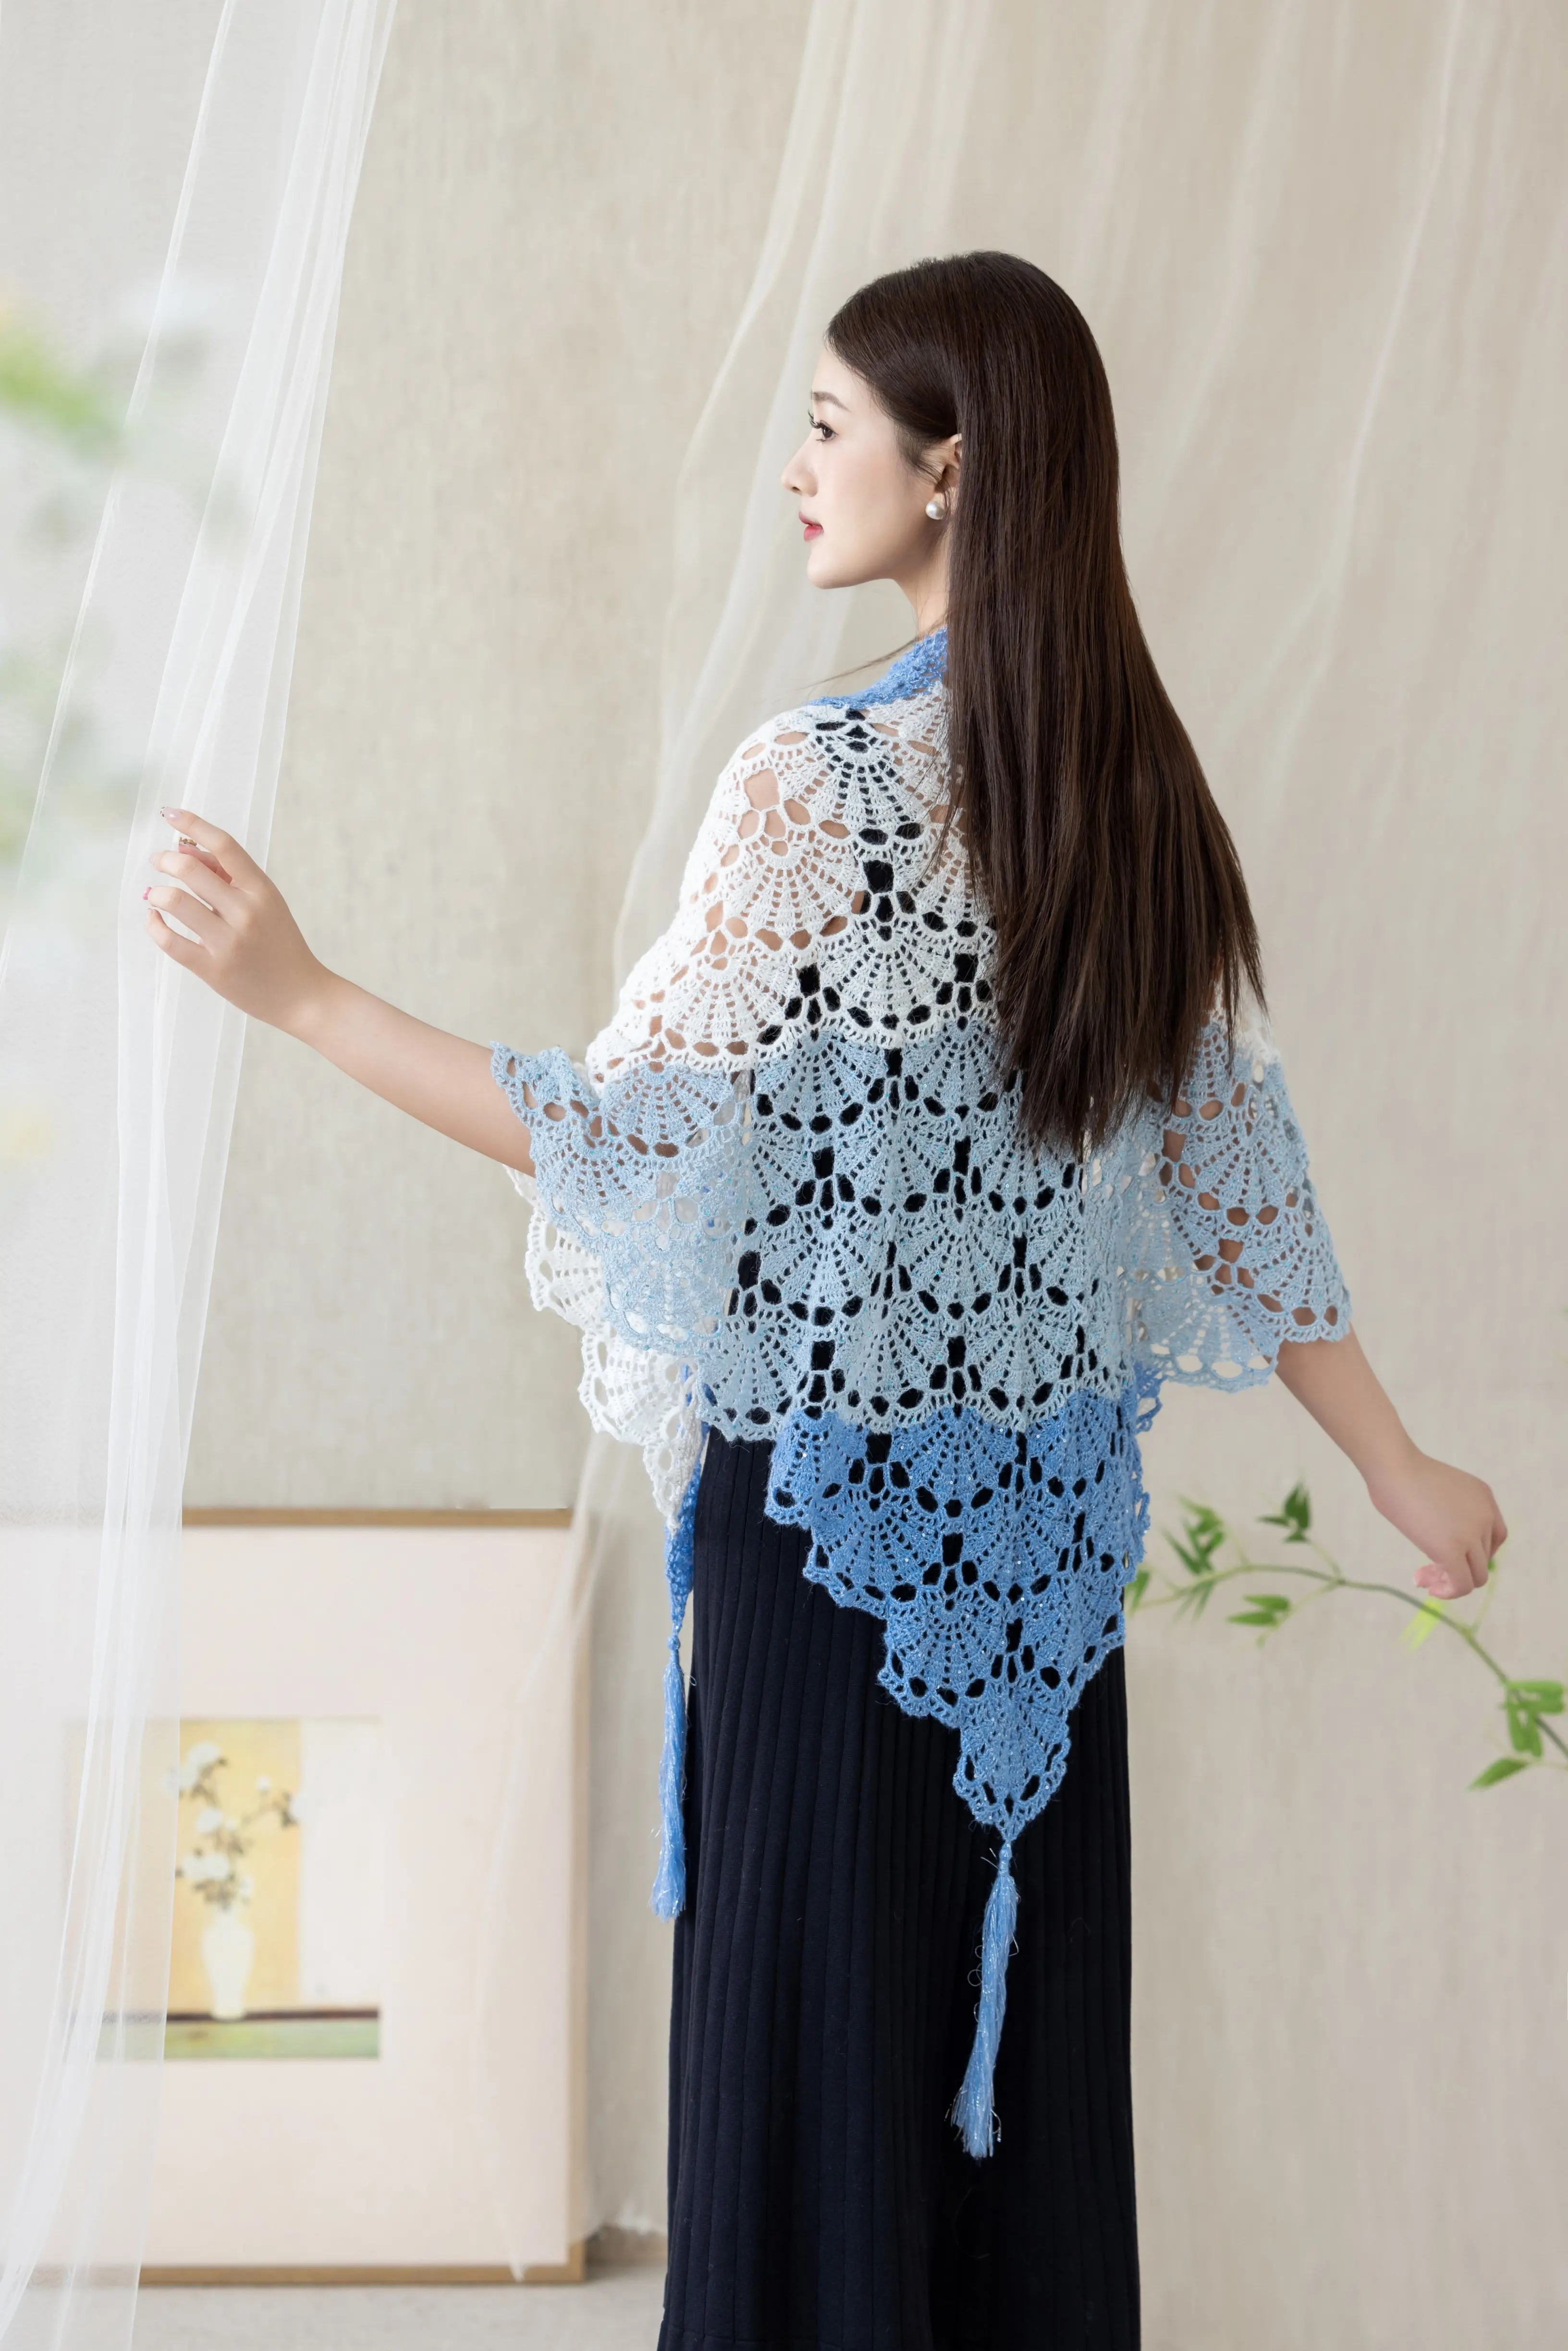
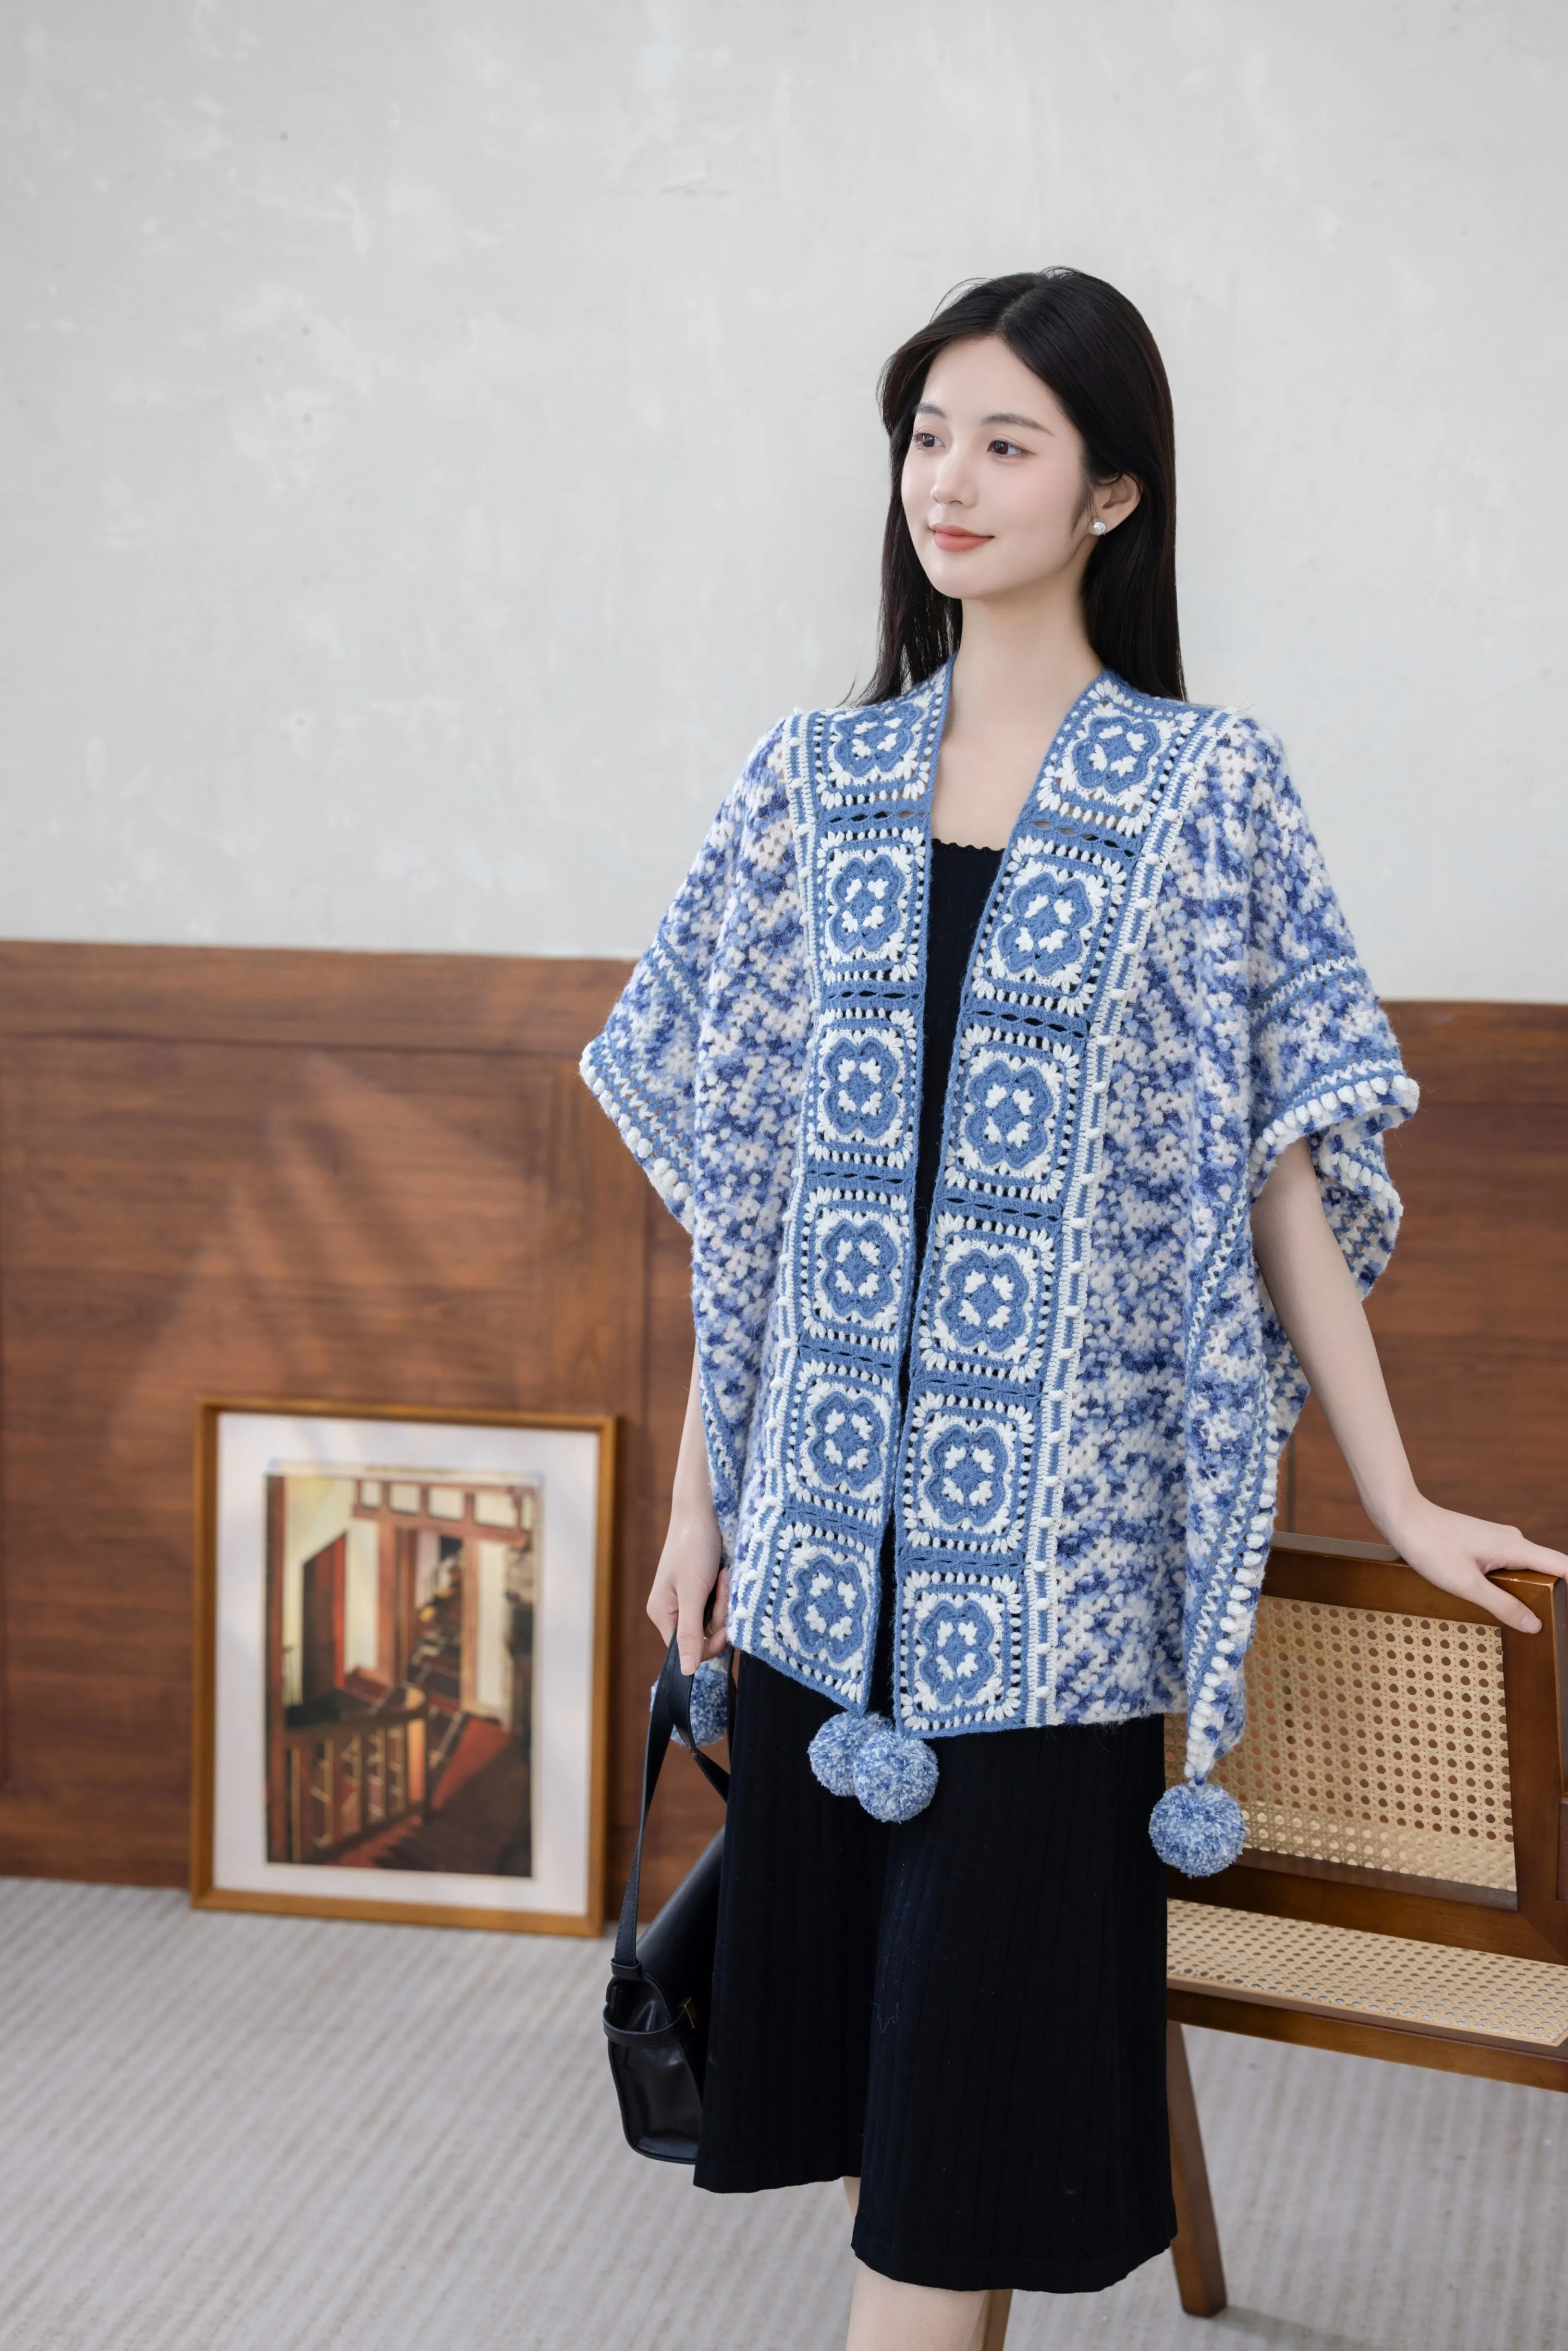
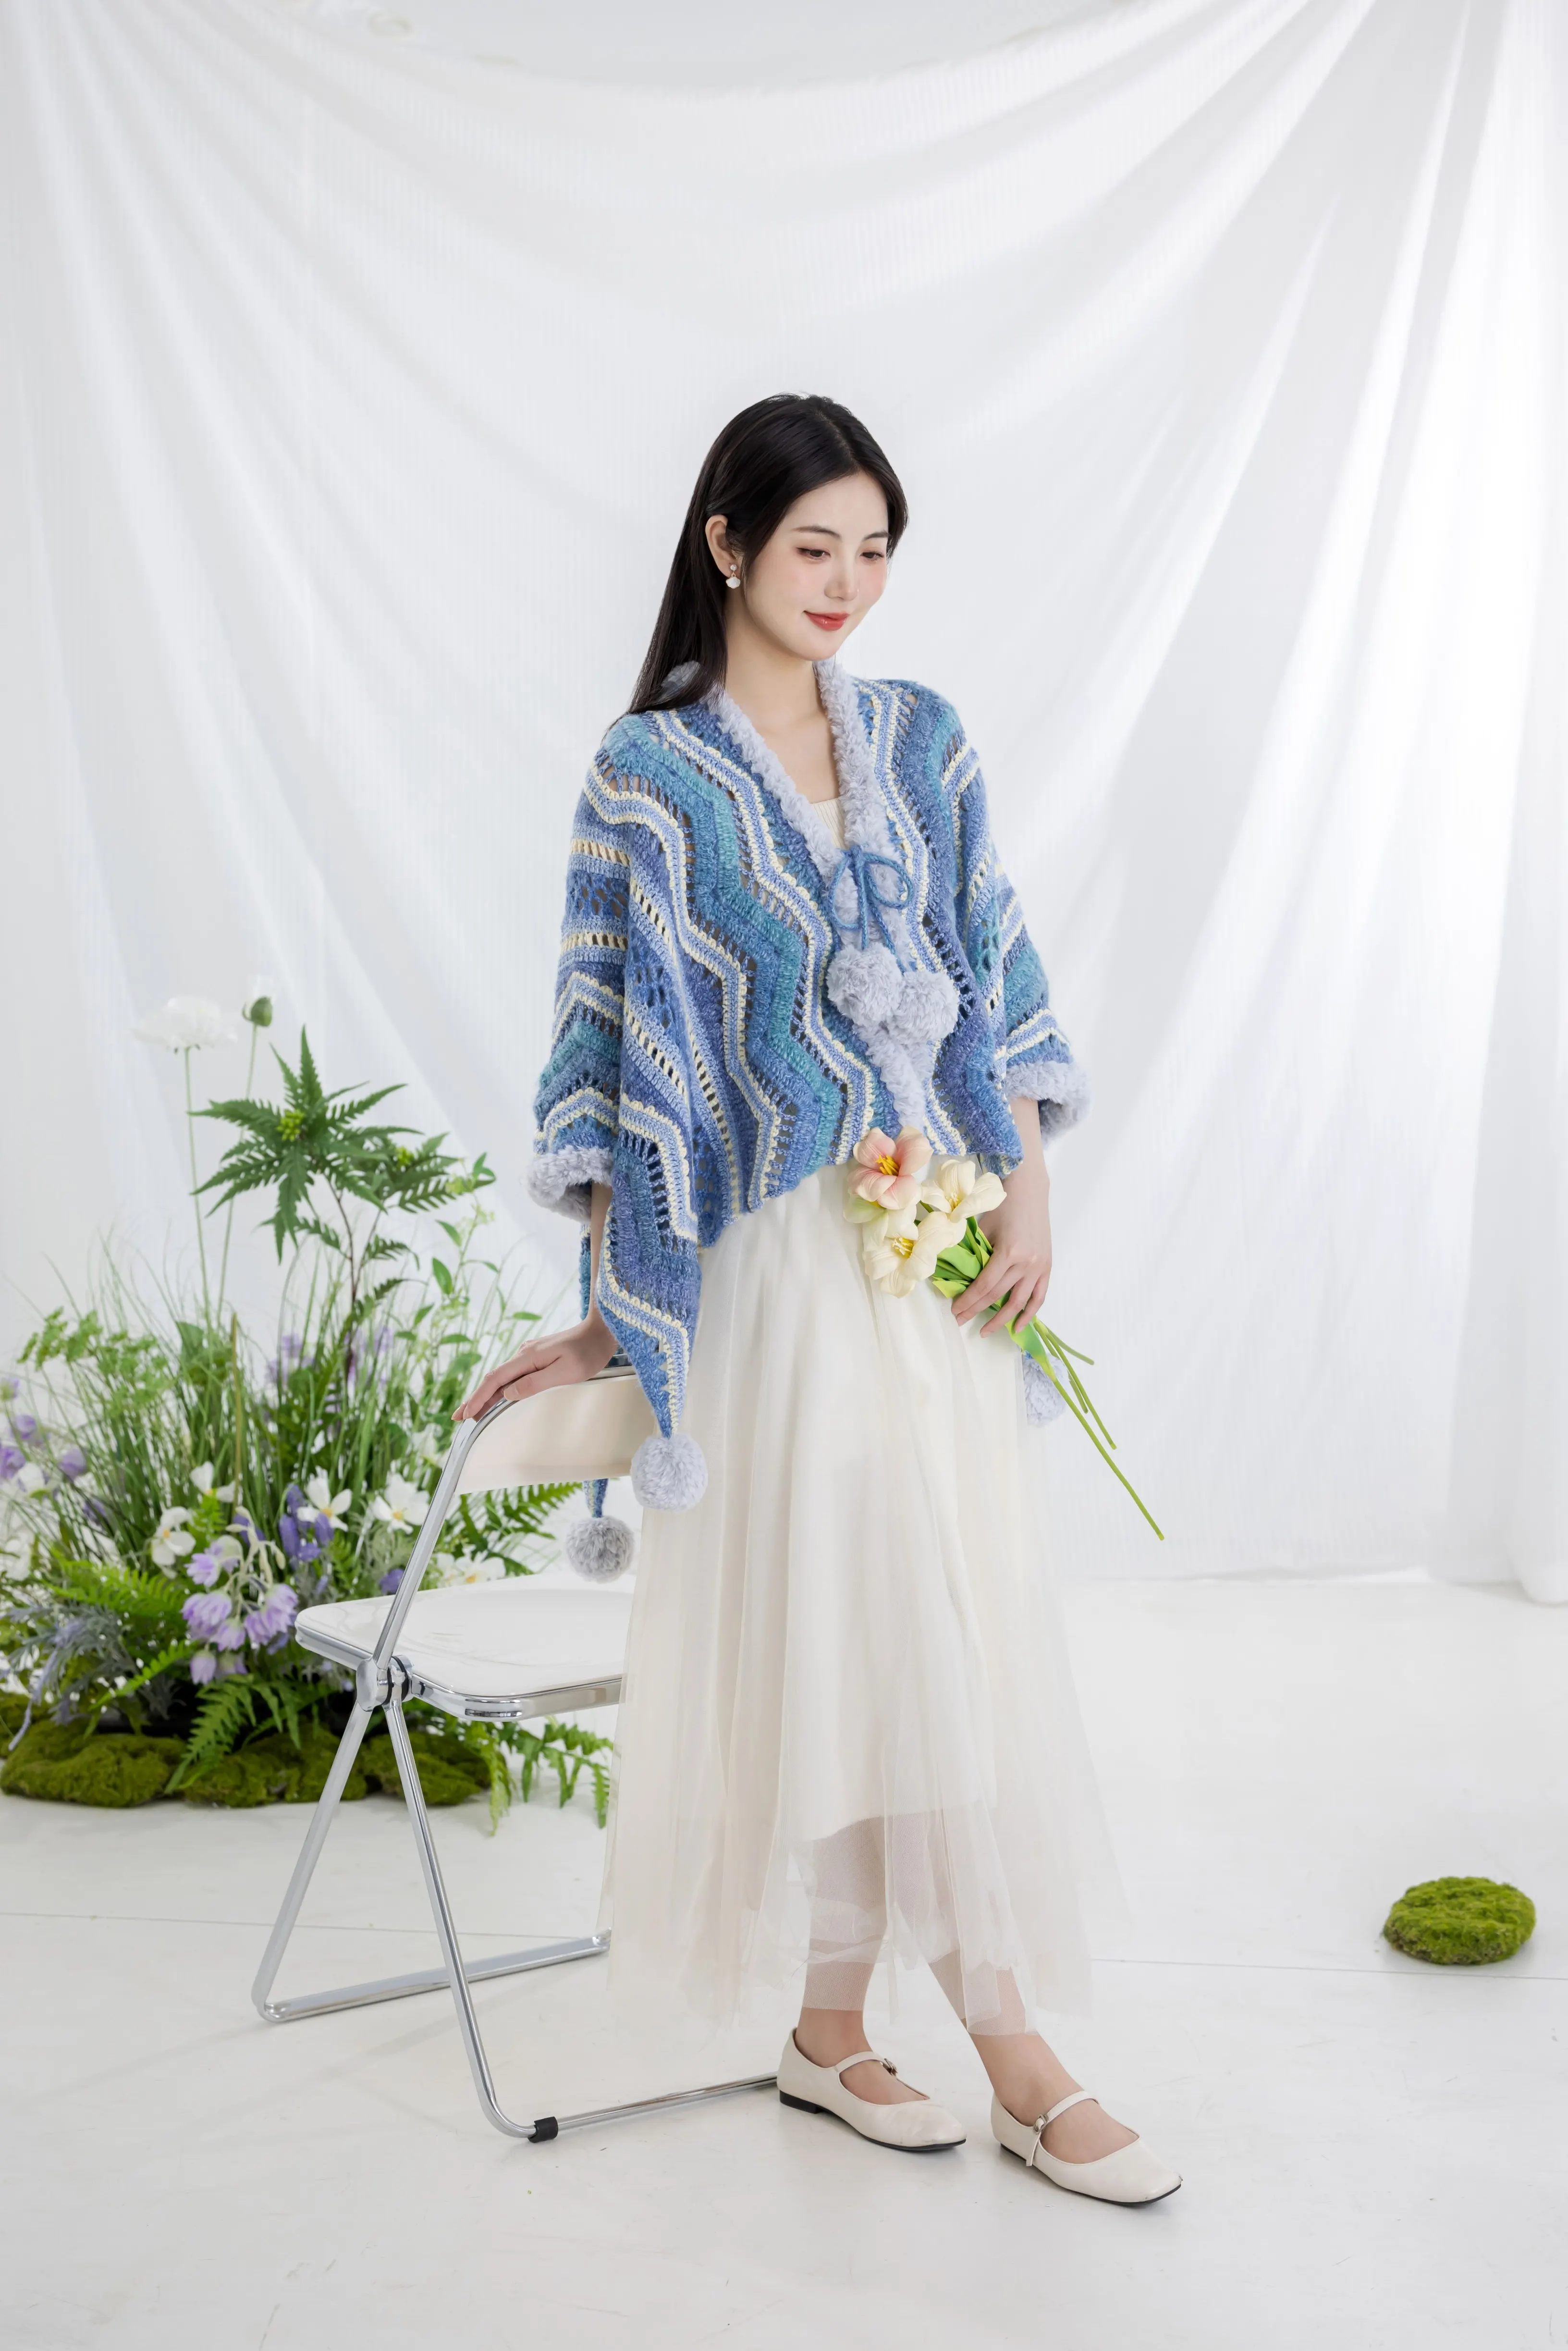
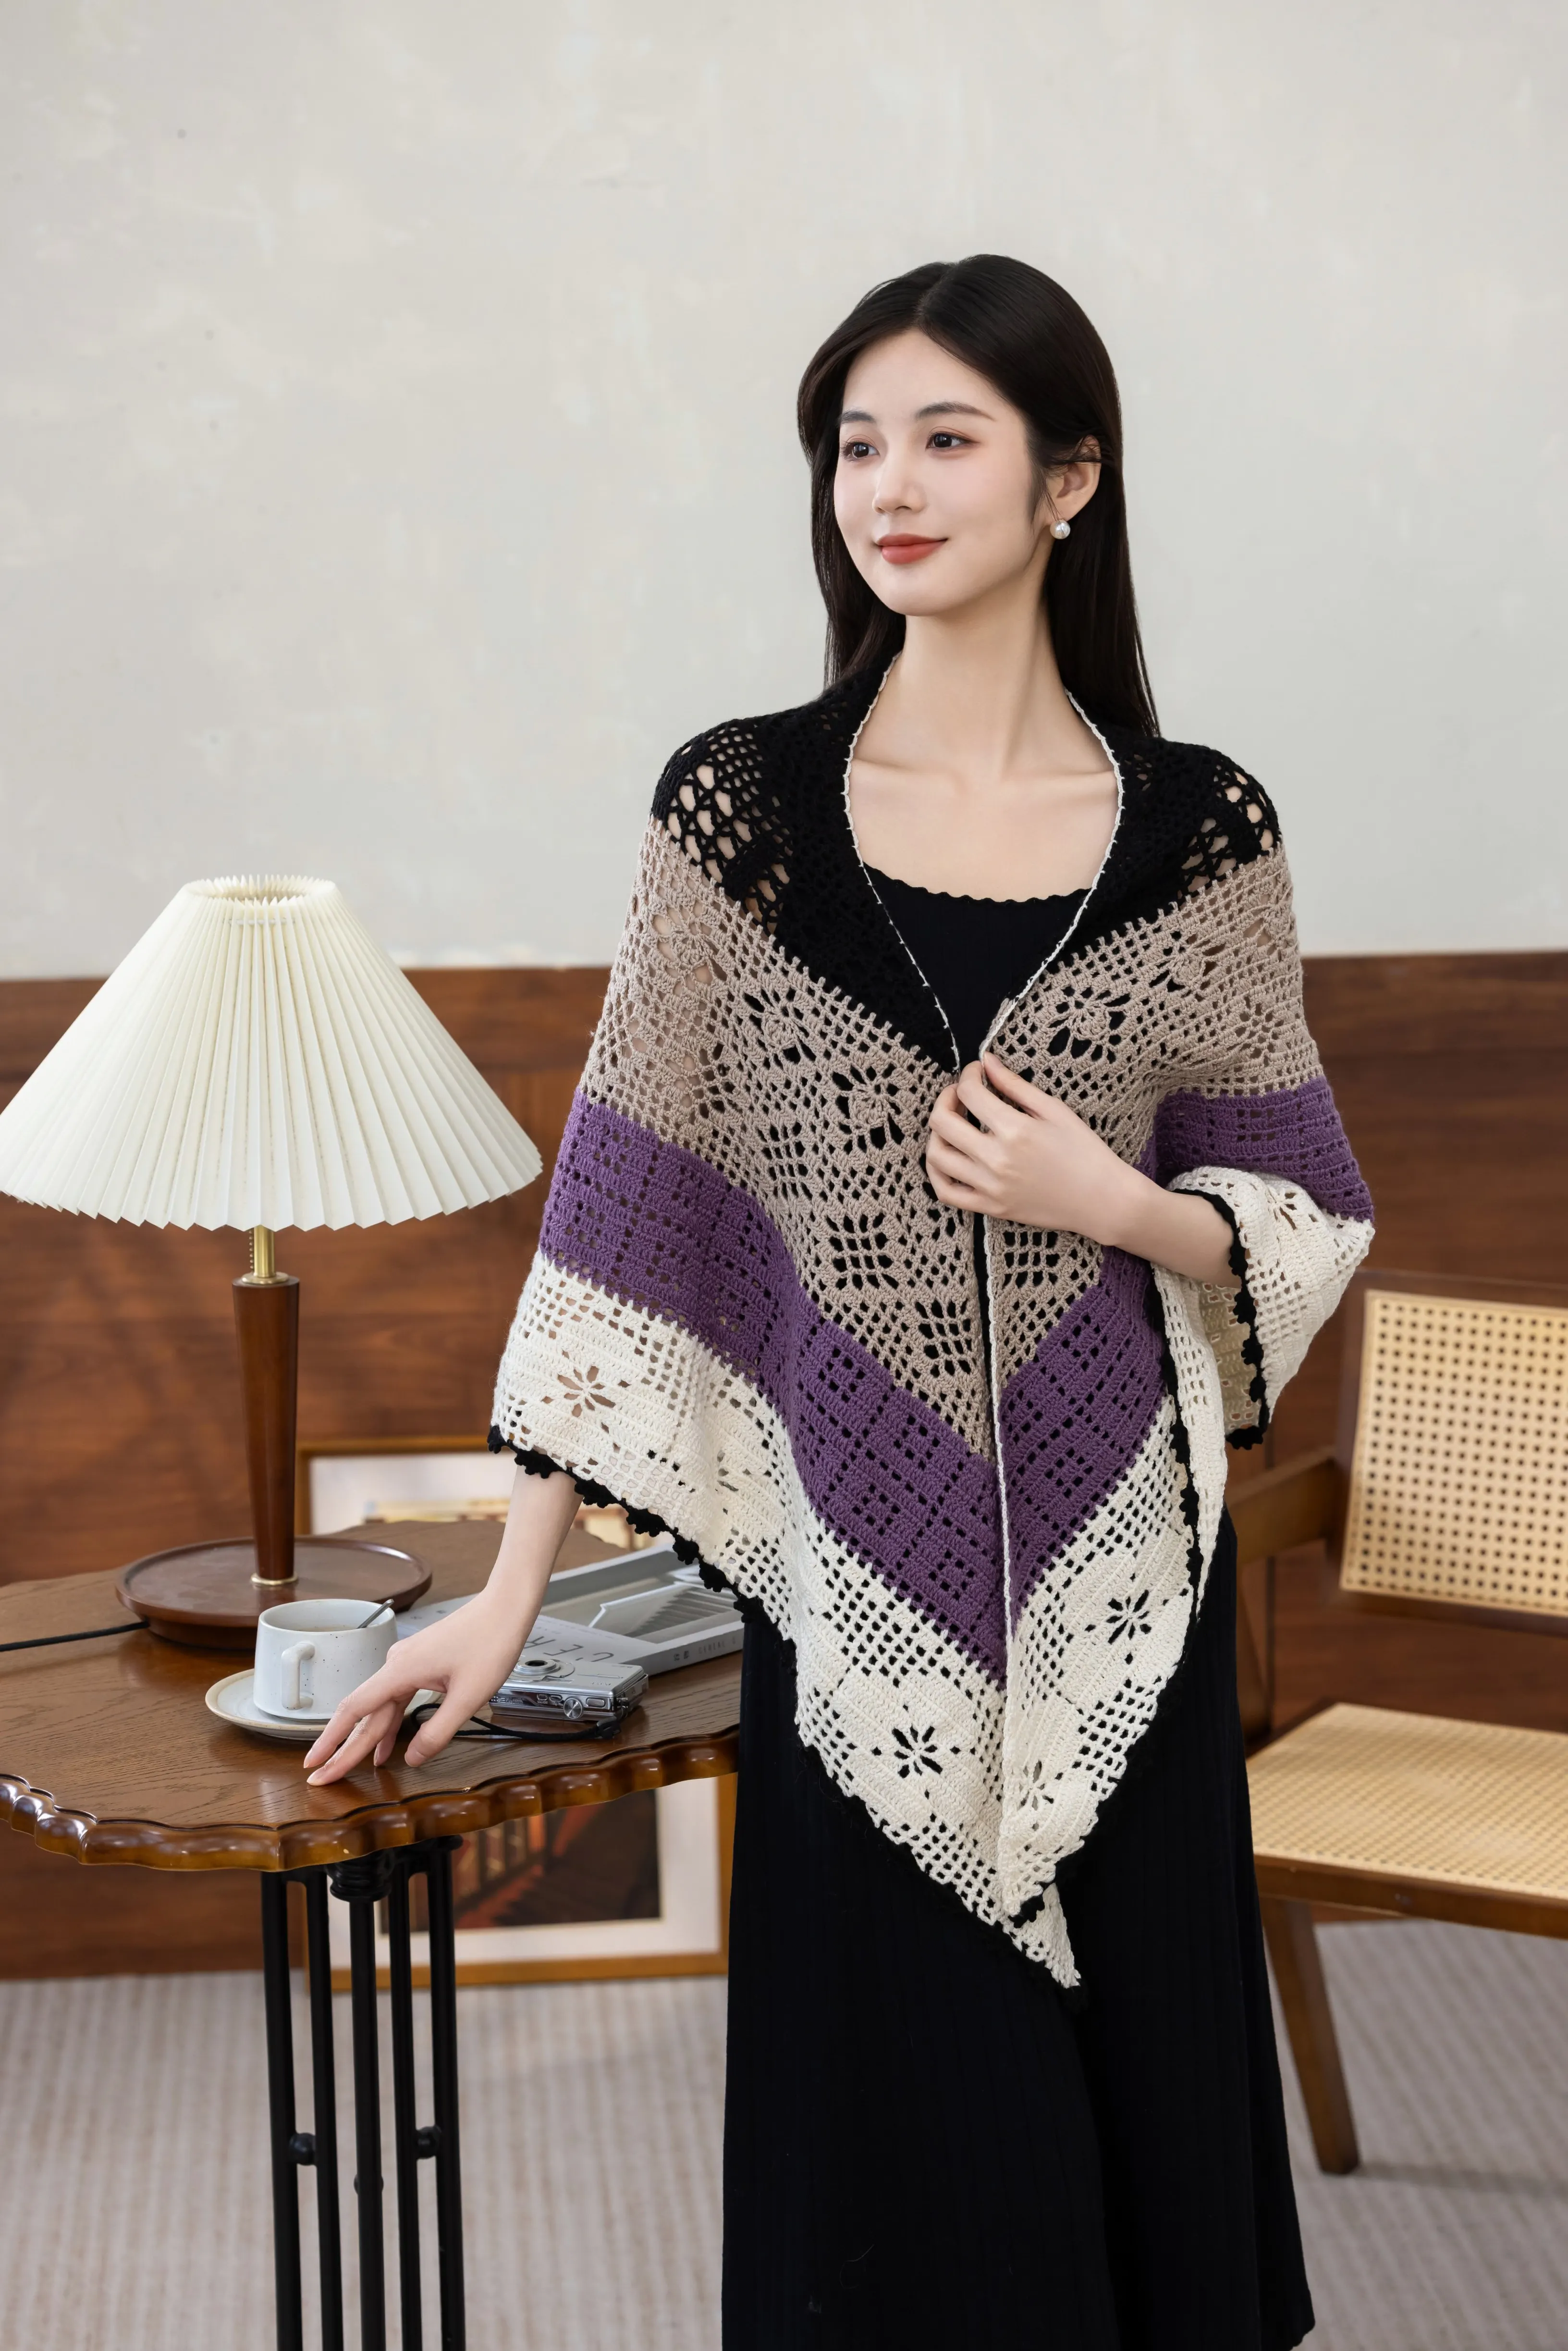
Prosperous Flower Shawl
Project preview
See the finished project
Pattern format
Instructions
Watch and follow
Video tutorial
This shawl consists of the main part, connections, edging, and decorations. First, crochet the main part, then connect it, add the edging, and finally make and attach the decorations.
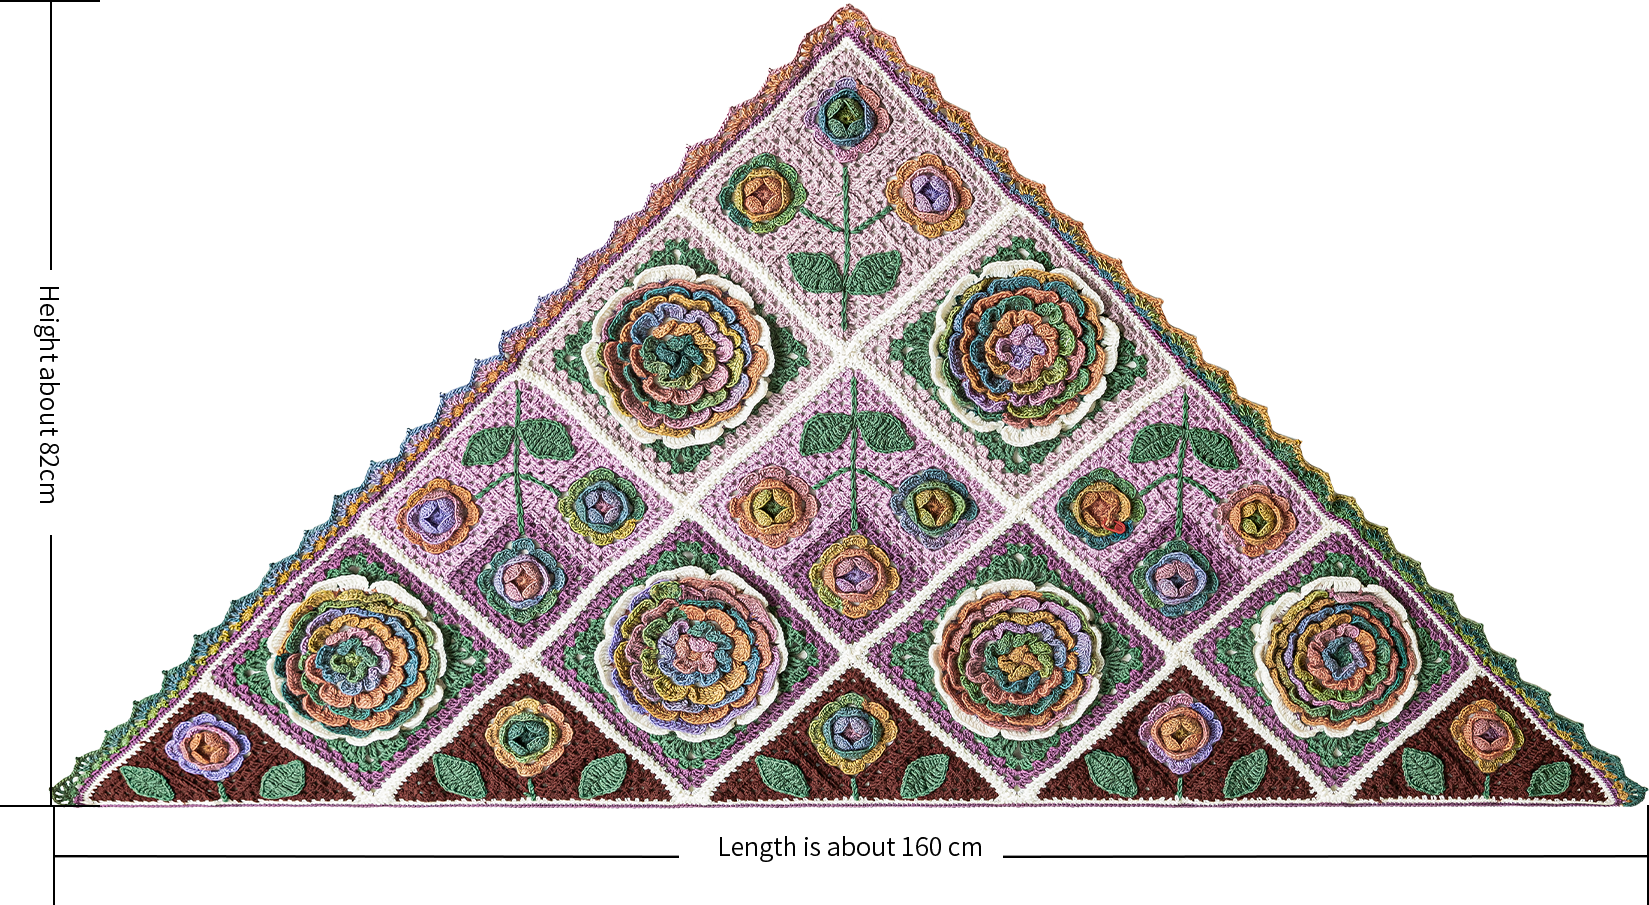
The handcrafted measurements may have an error of 1 to 2 cm. Due to variations in individual tension, the size of the sample is for reference only.
Materials: Susan's Family Morandi 4# and Monet Impression
Hook: 3.00 mm crochet hook
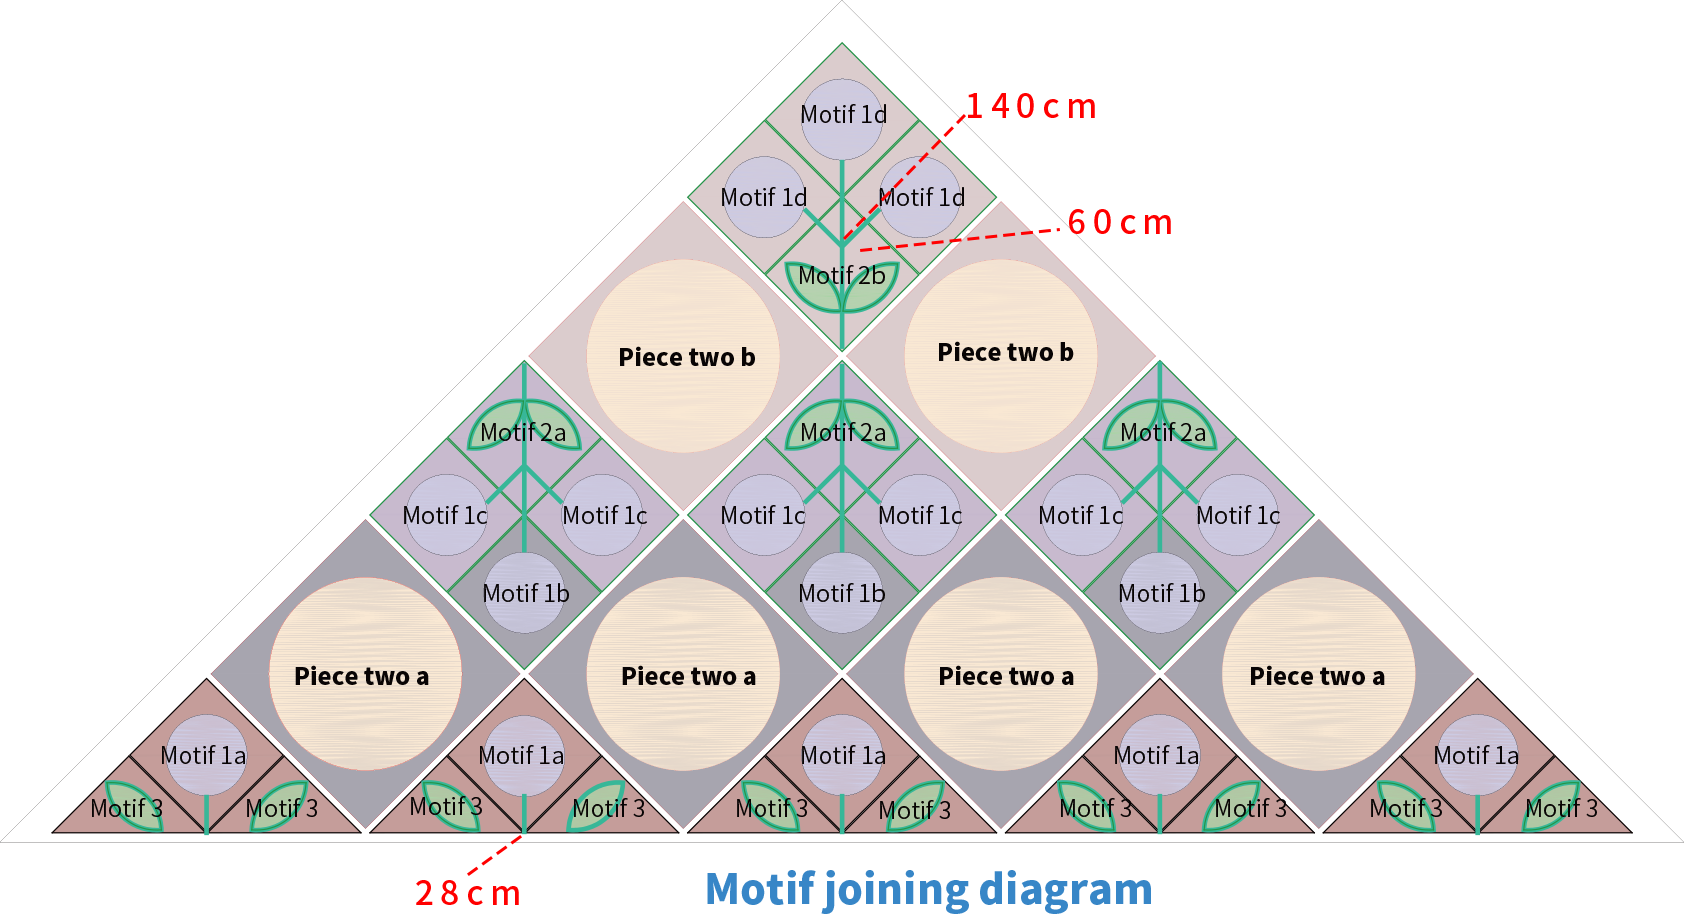
Note: Cut the branch to the marked length below, using the same color yarn as the leaves. Fold it in half to create 2 strands combined, and slip stitch at the corresponding position on the fabric. Refer to the motif joining diagram for the exact location.
For piece two, the yarn tail lengths are: long branch 140 cm, short branch 60 cm.
For piece three, the yarn tail length is 28 cm.

Chart Key











Note: This pattern is making in Chinese crochet pattern terms, and the stitch name is written using American terminology. All measurements in charts are in cm.

Part 1 Main PartA
First, complete the main part by making three types of crochet pieces. Among them, piece one and piece three consist of motifs, connecting the motifs, and crocheting the edging. Piece two is a complete motif.
Step 1 Crochet Piece OneA1 01' 18''
Each piece 1 is made by connecting 3 motifs 1 and 1 motif 2. First, crochet the motifs 1 and motifs 2 separately, then connect them and crochet the edging.

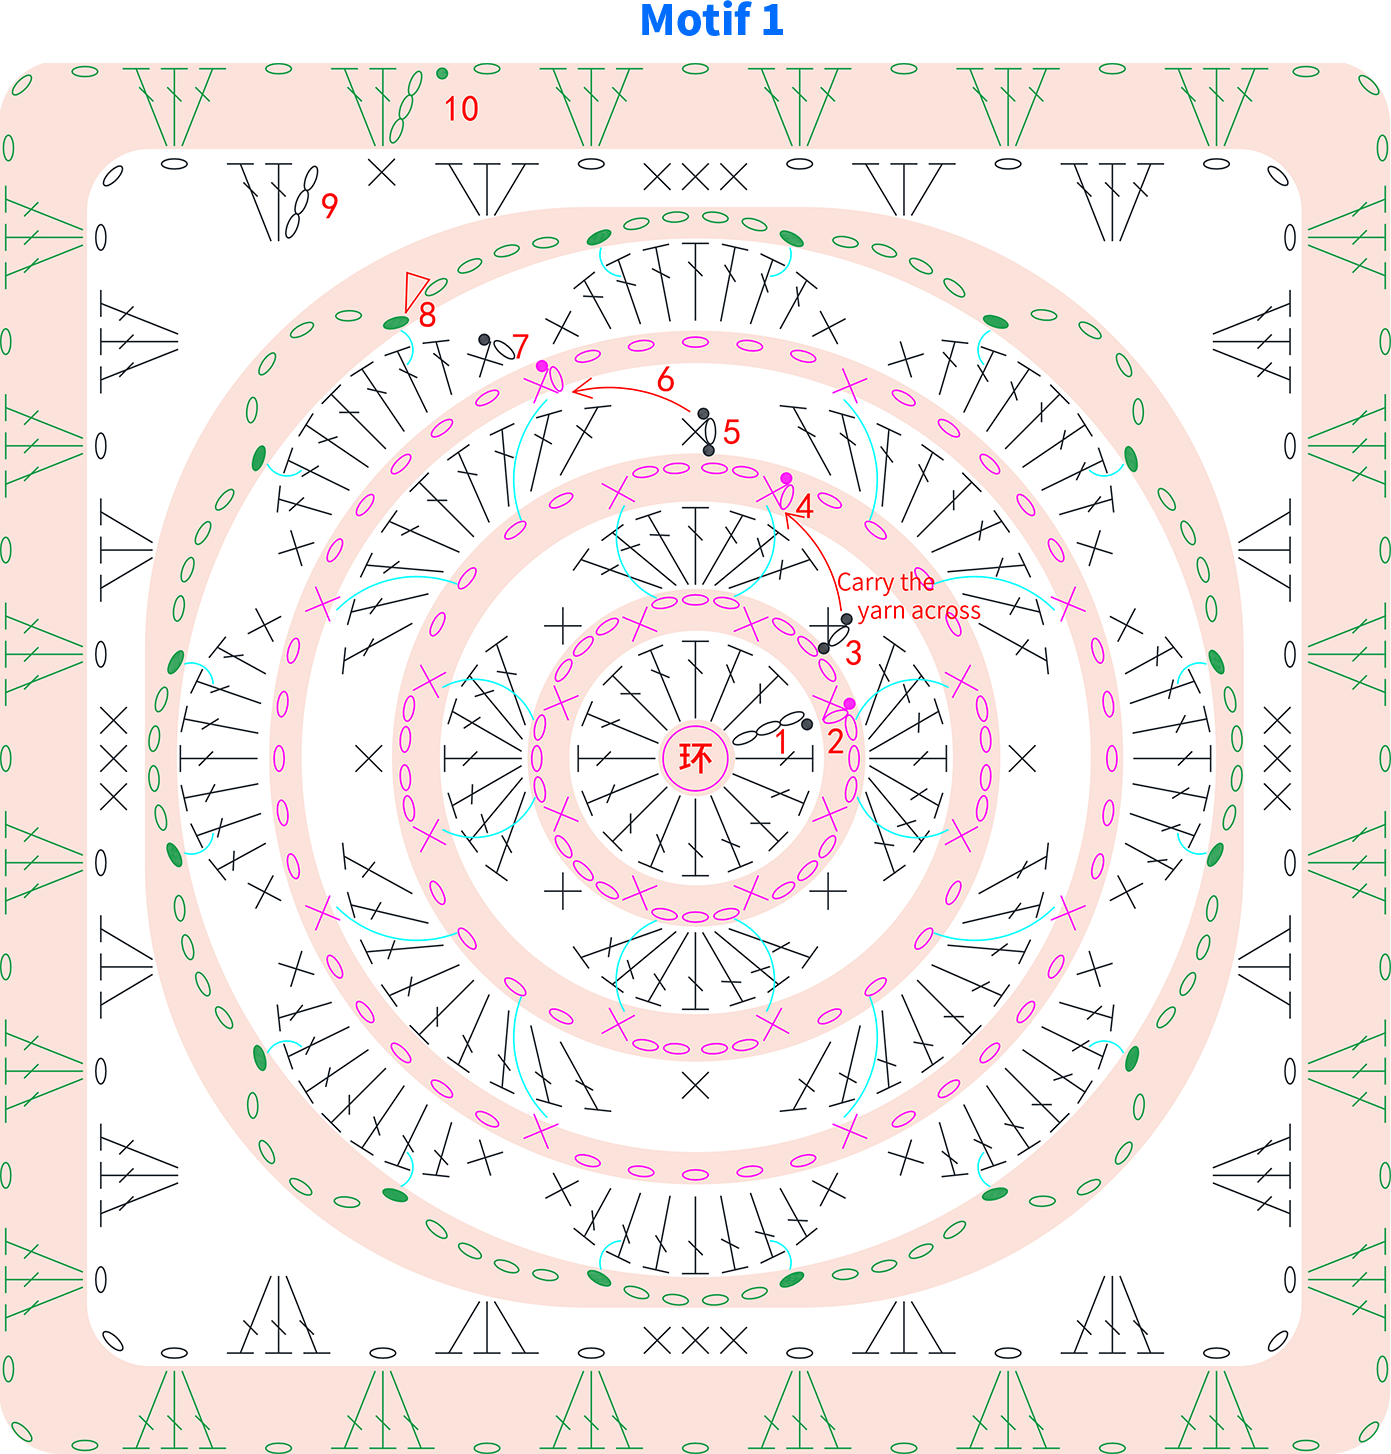

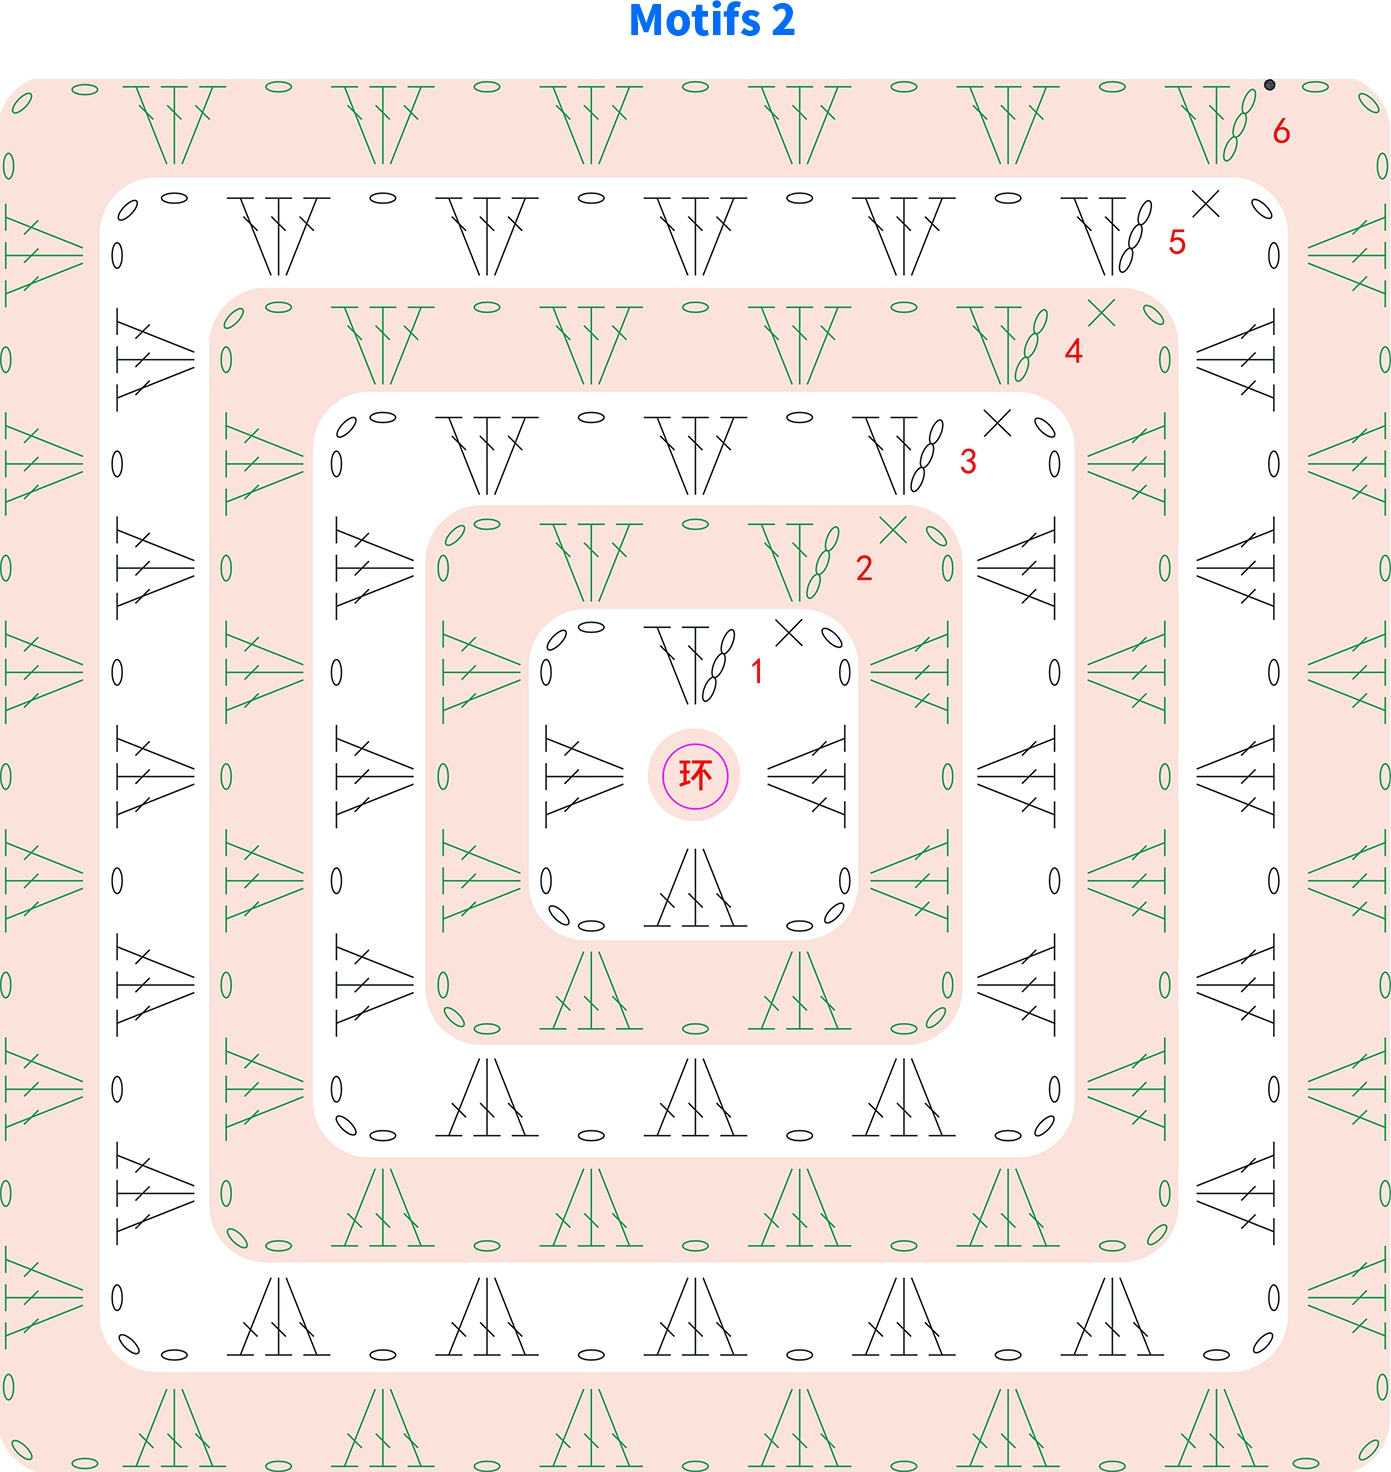
Note: 1. Variegated yarn has multiple color segments, and starting with different colors can result in different finished effects. You can refer to the finished product or choose the corresponding color segment based on your preference to start crocheting.
2. To make the color distribution of the flowers more attractive, you can first crochet the required number of variegated yarn flowers for motif 1, plan their positions, and then crochet the remaining rounds. This prevents the last round of the flowers from having a color that is too similar to the following rounds. Pay attention to crocheting and joining as you go for the last round.
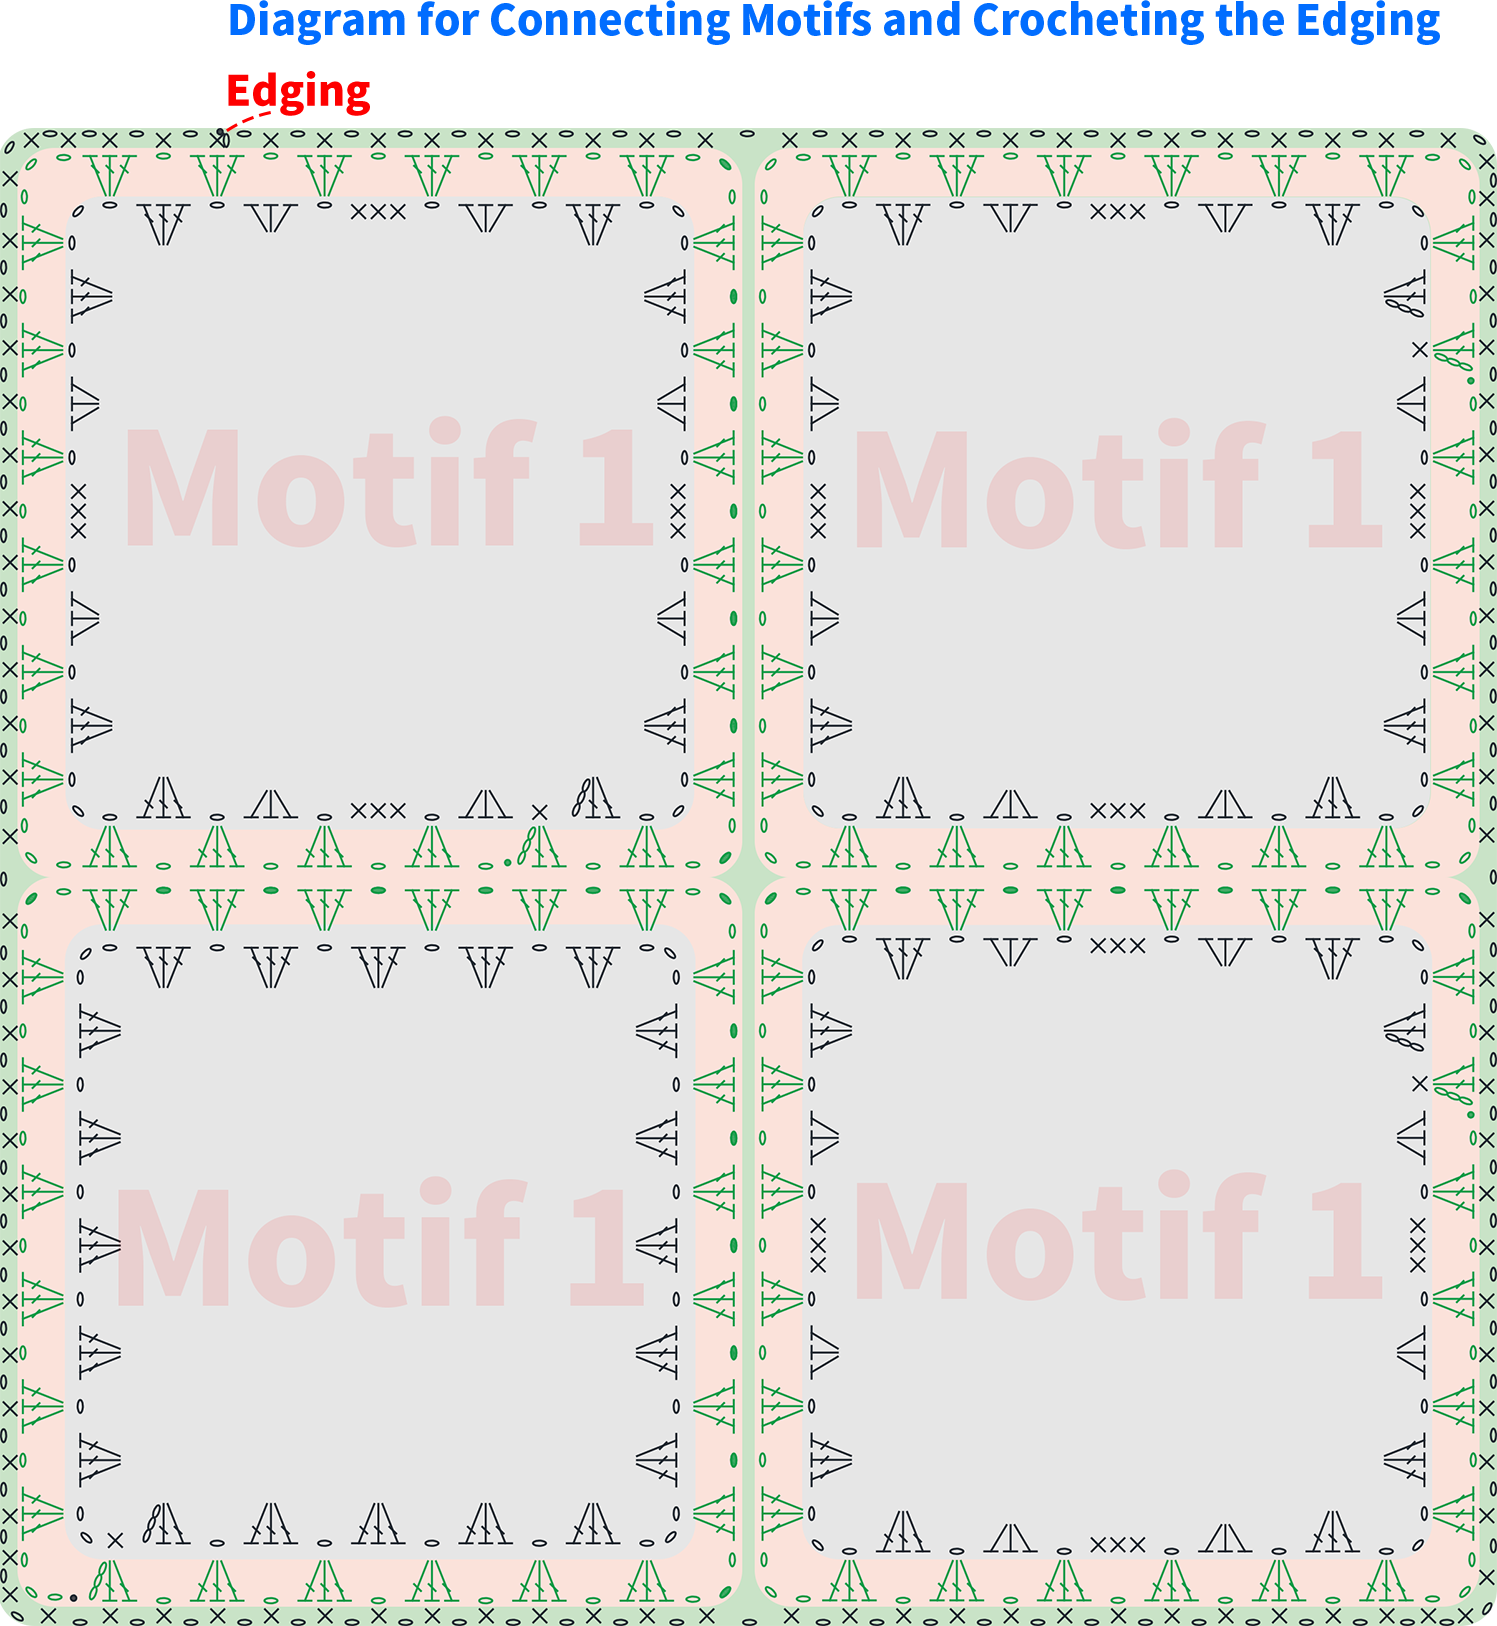
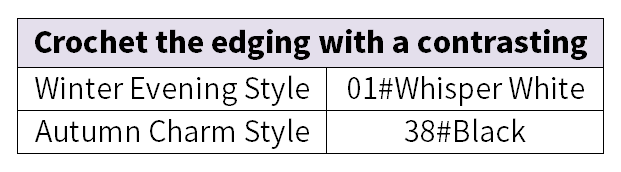
Note: When actually connecting, you can start from any motif. Except for the first motif which is crocheted separately, the other three motifs are worked and joined along the side while crocheting the last round.
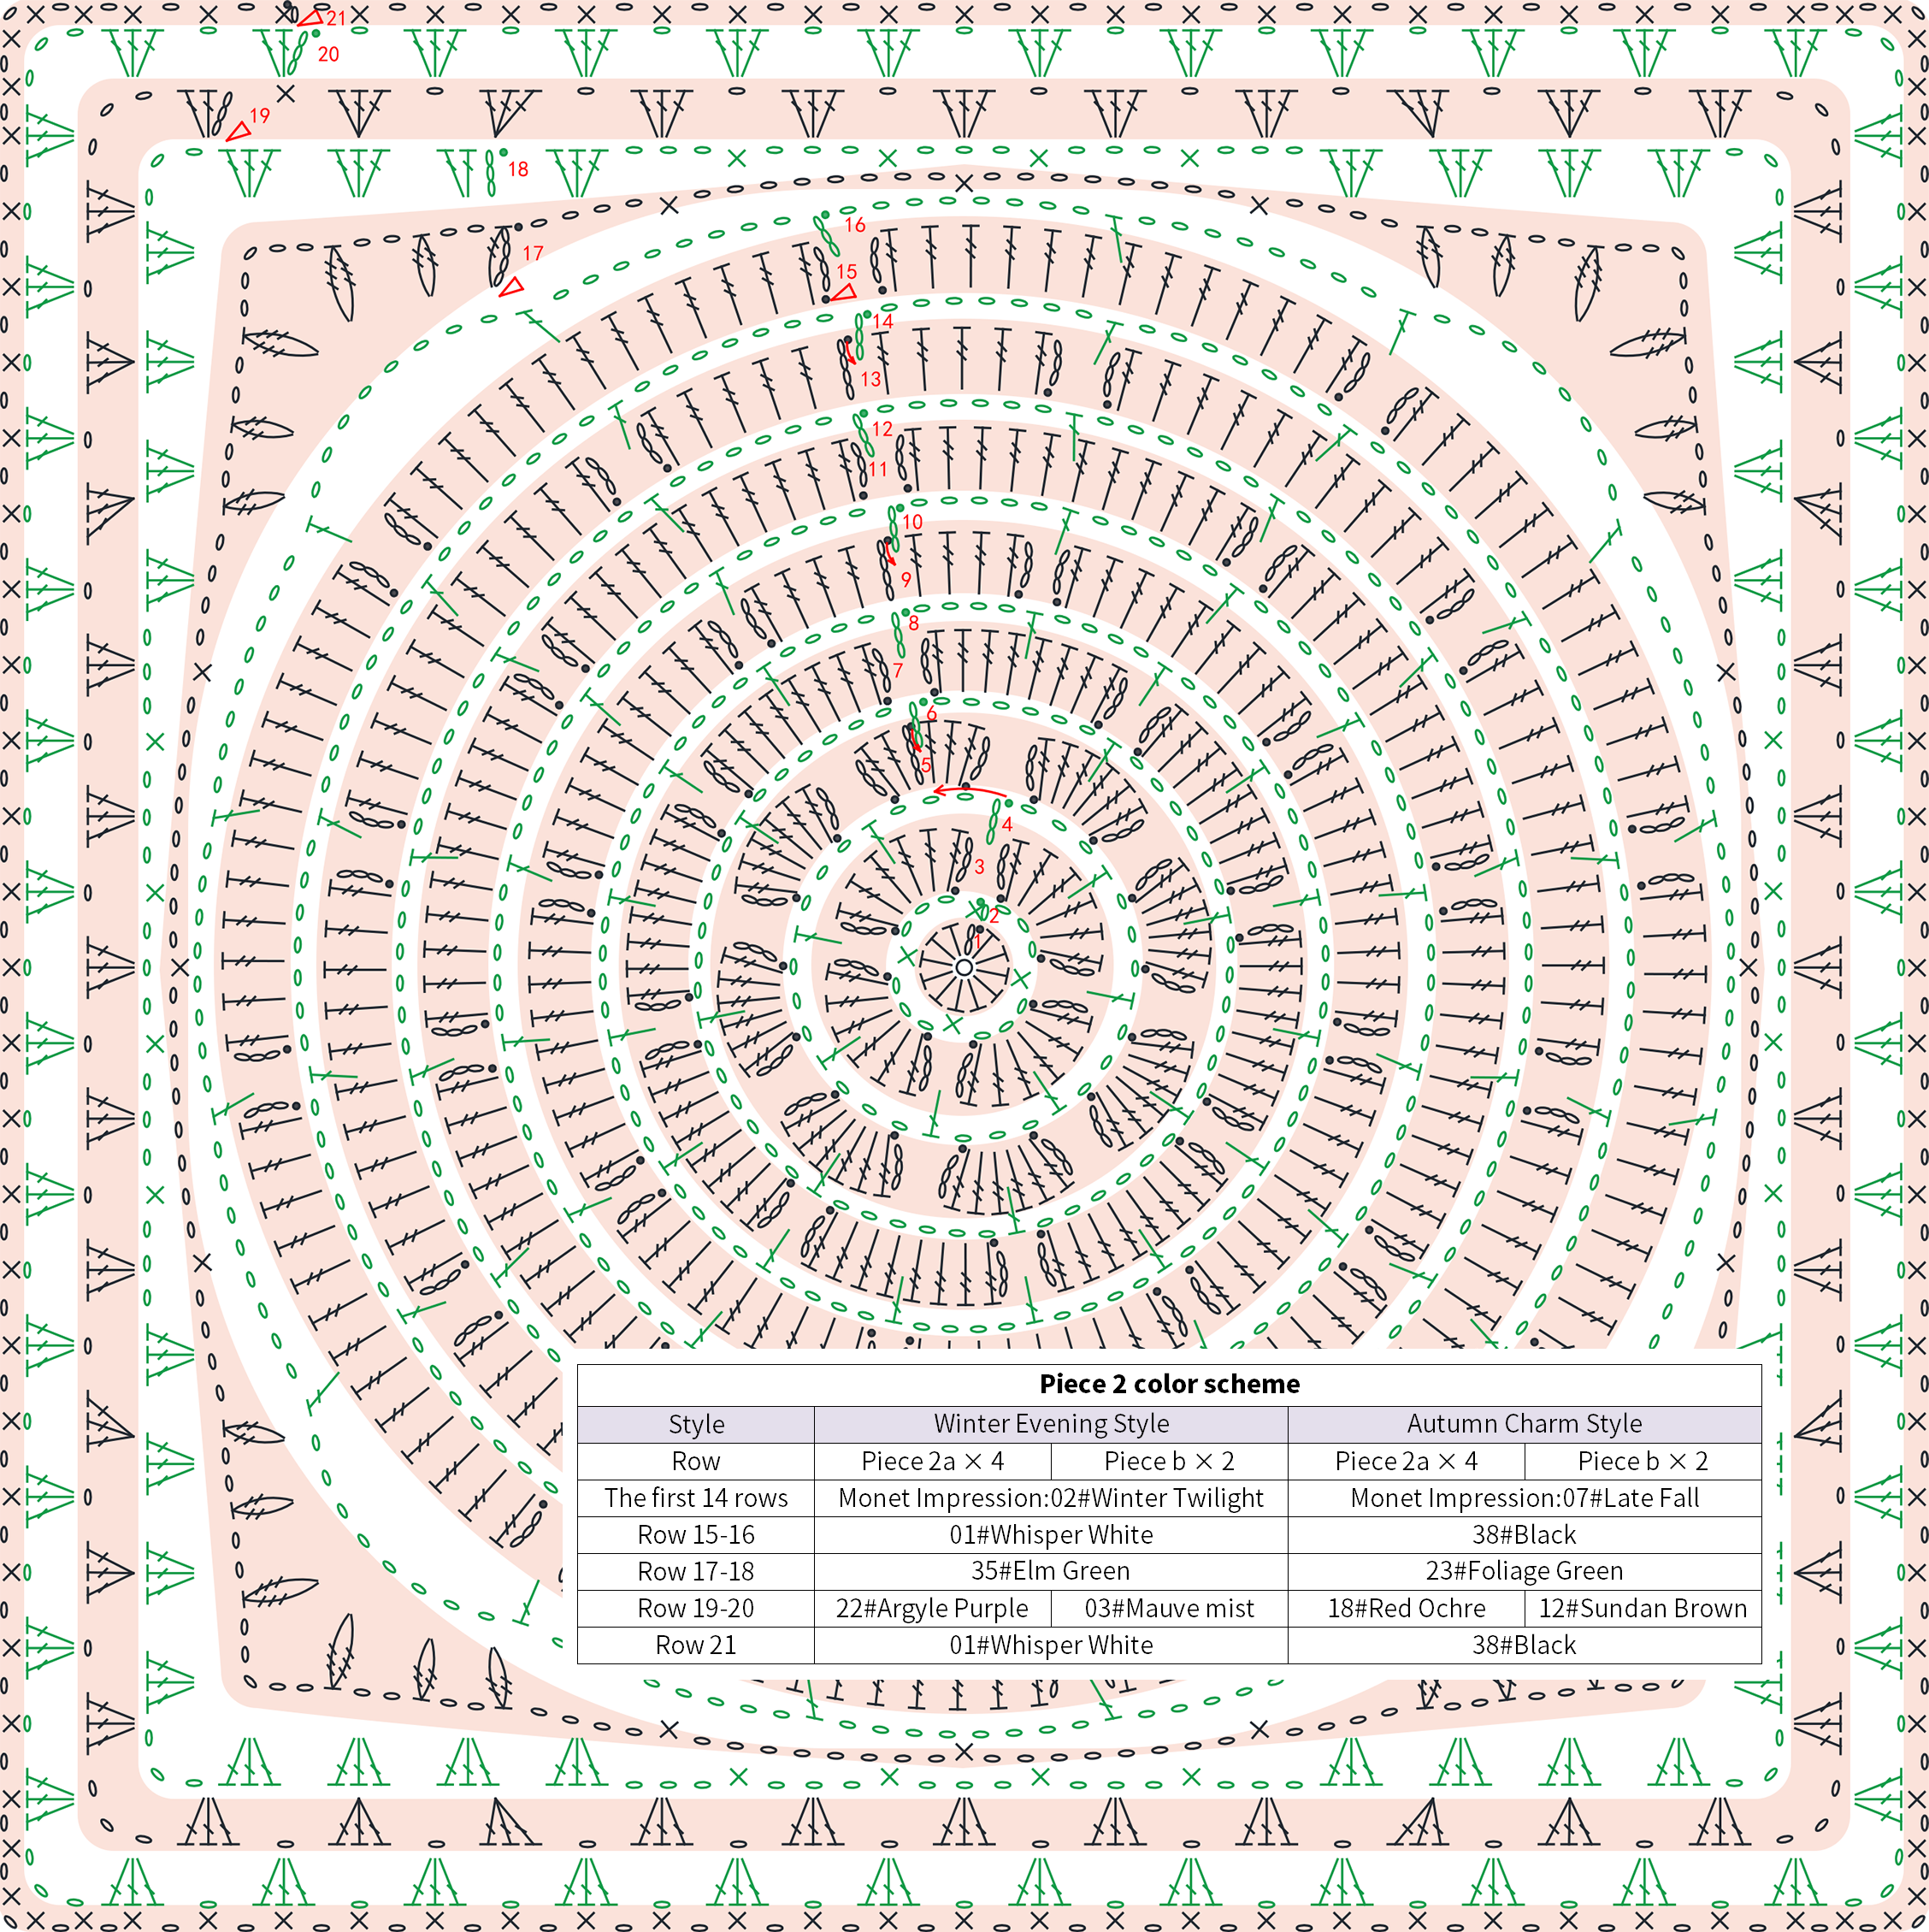
Step 2 Fabric Piece TwoA2 32' 31''
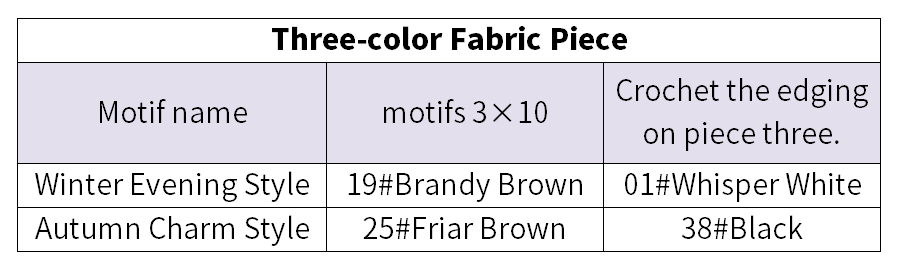
Step 3 Fabric Piece ThreeA3 45' 51''
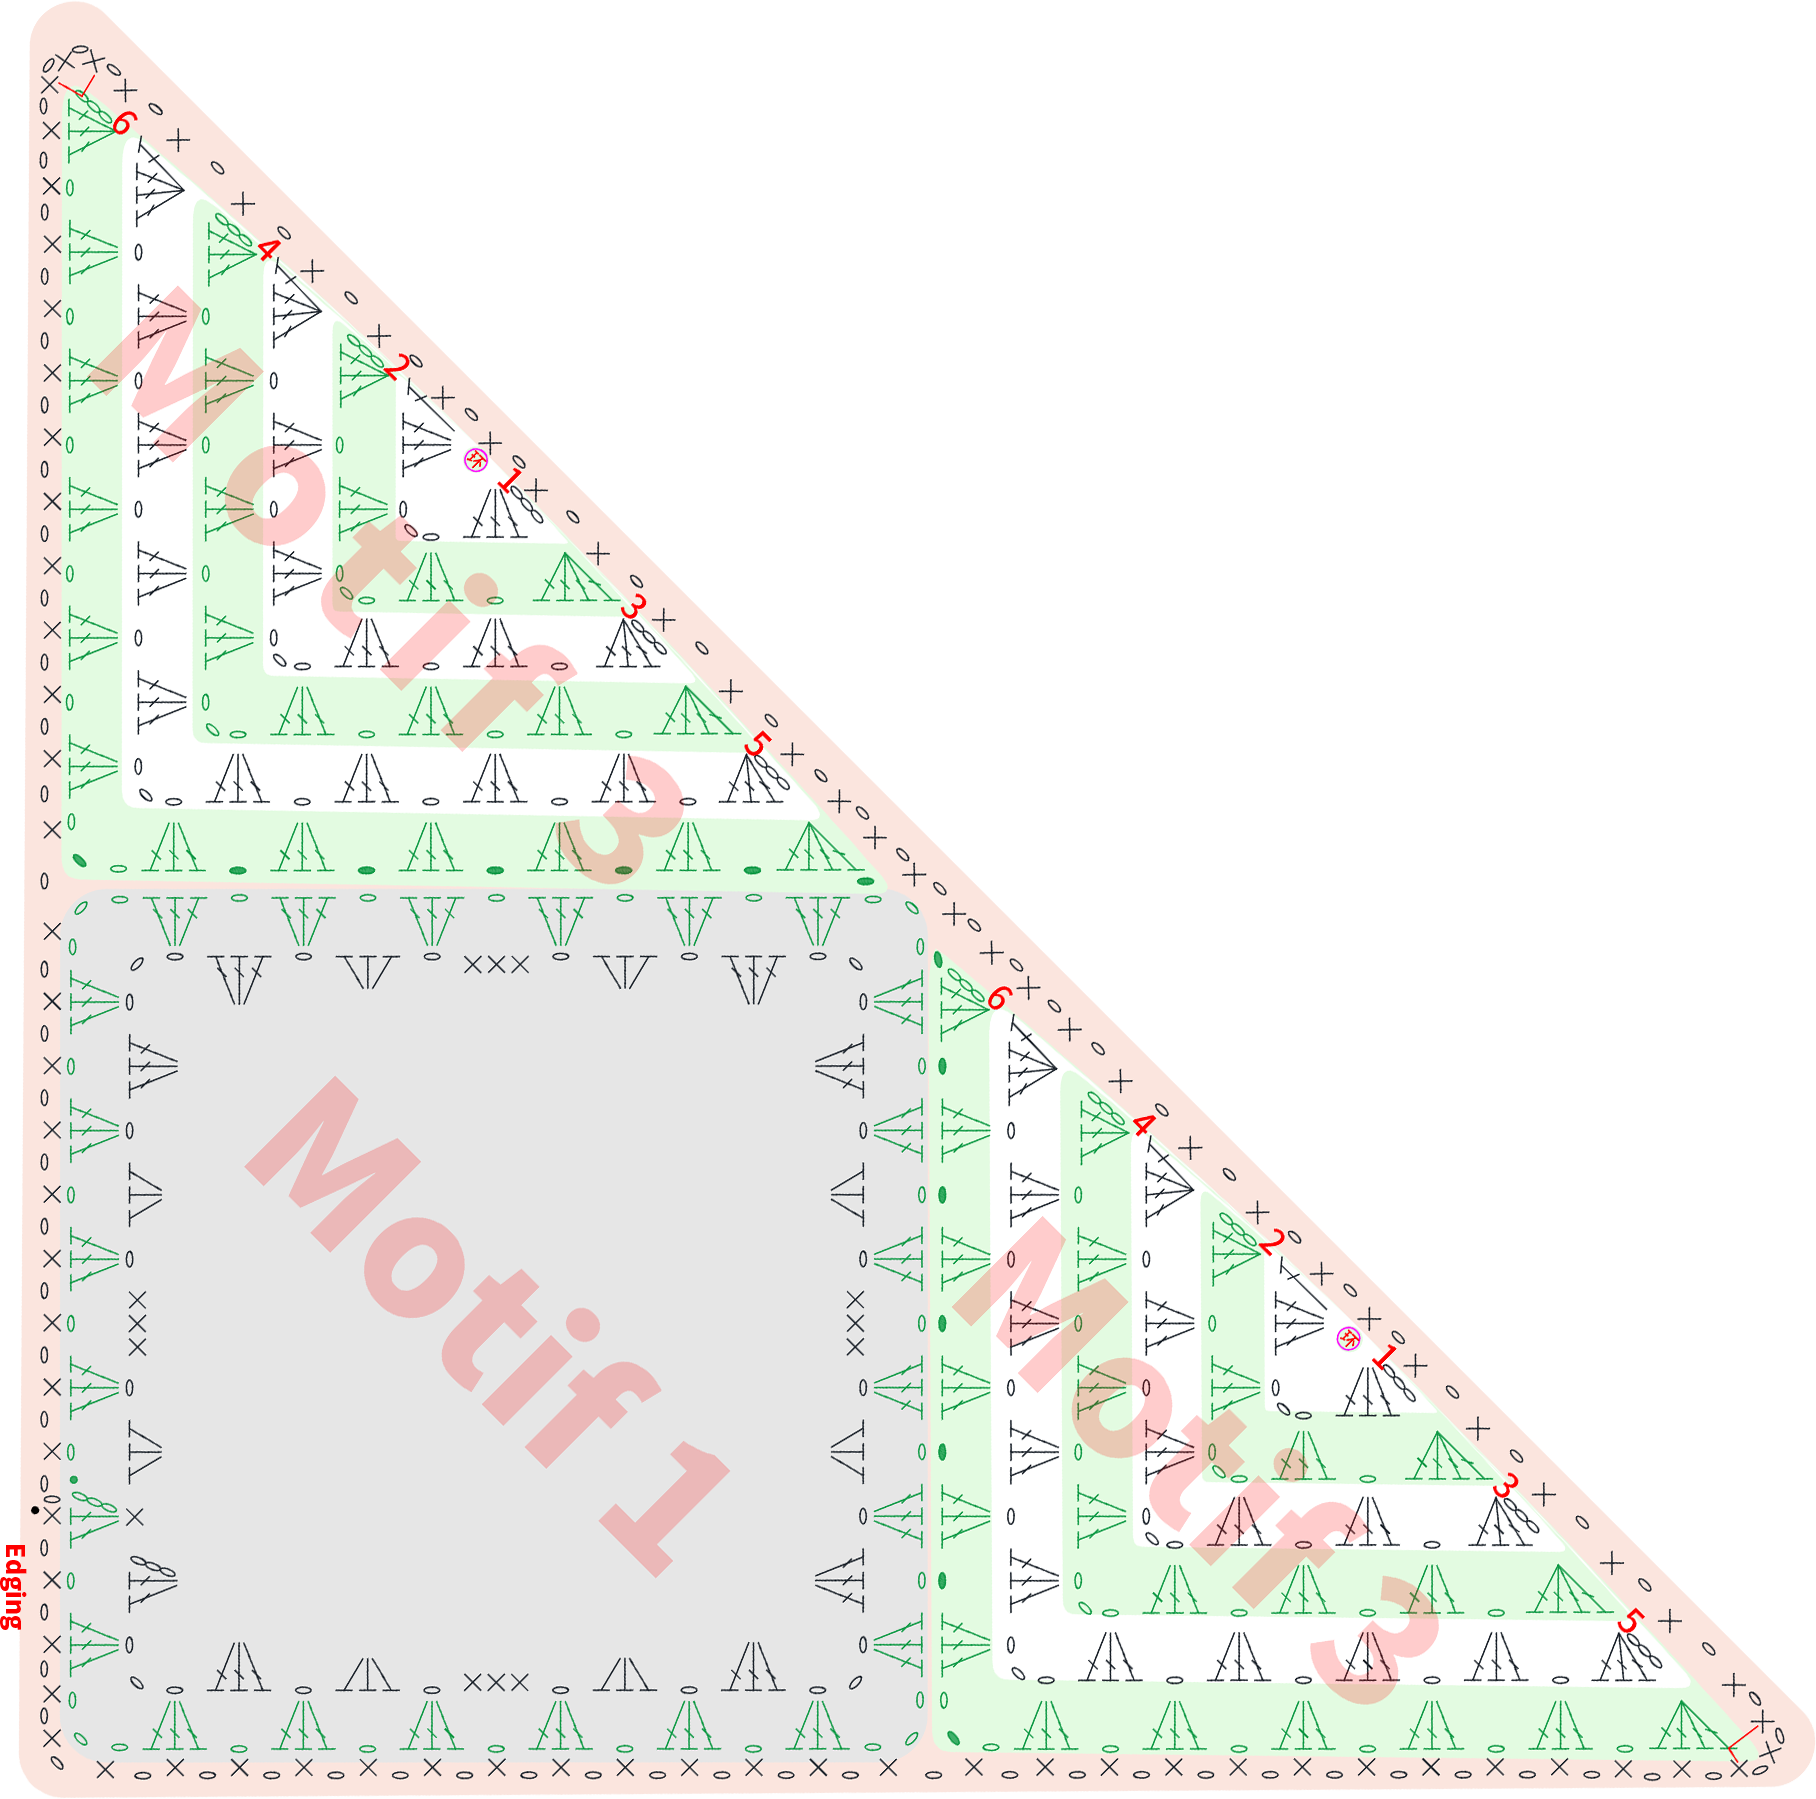
First, crochet motif 1 and motif 3 separately, then connect them and crochet the edging.
Part 2 Connecting Band Crocheting the EdgingC 50' 04''
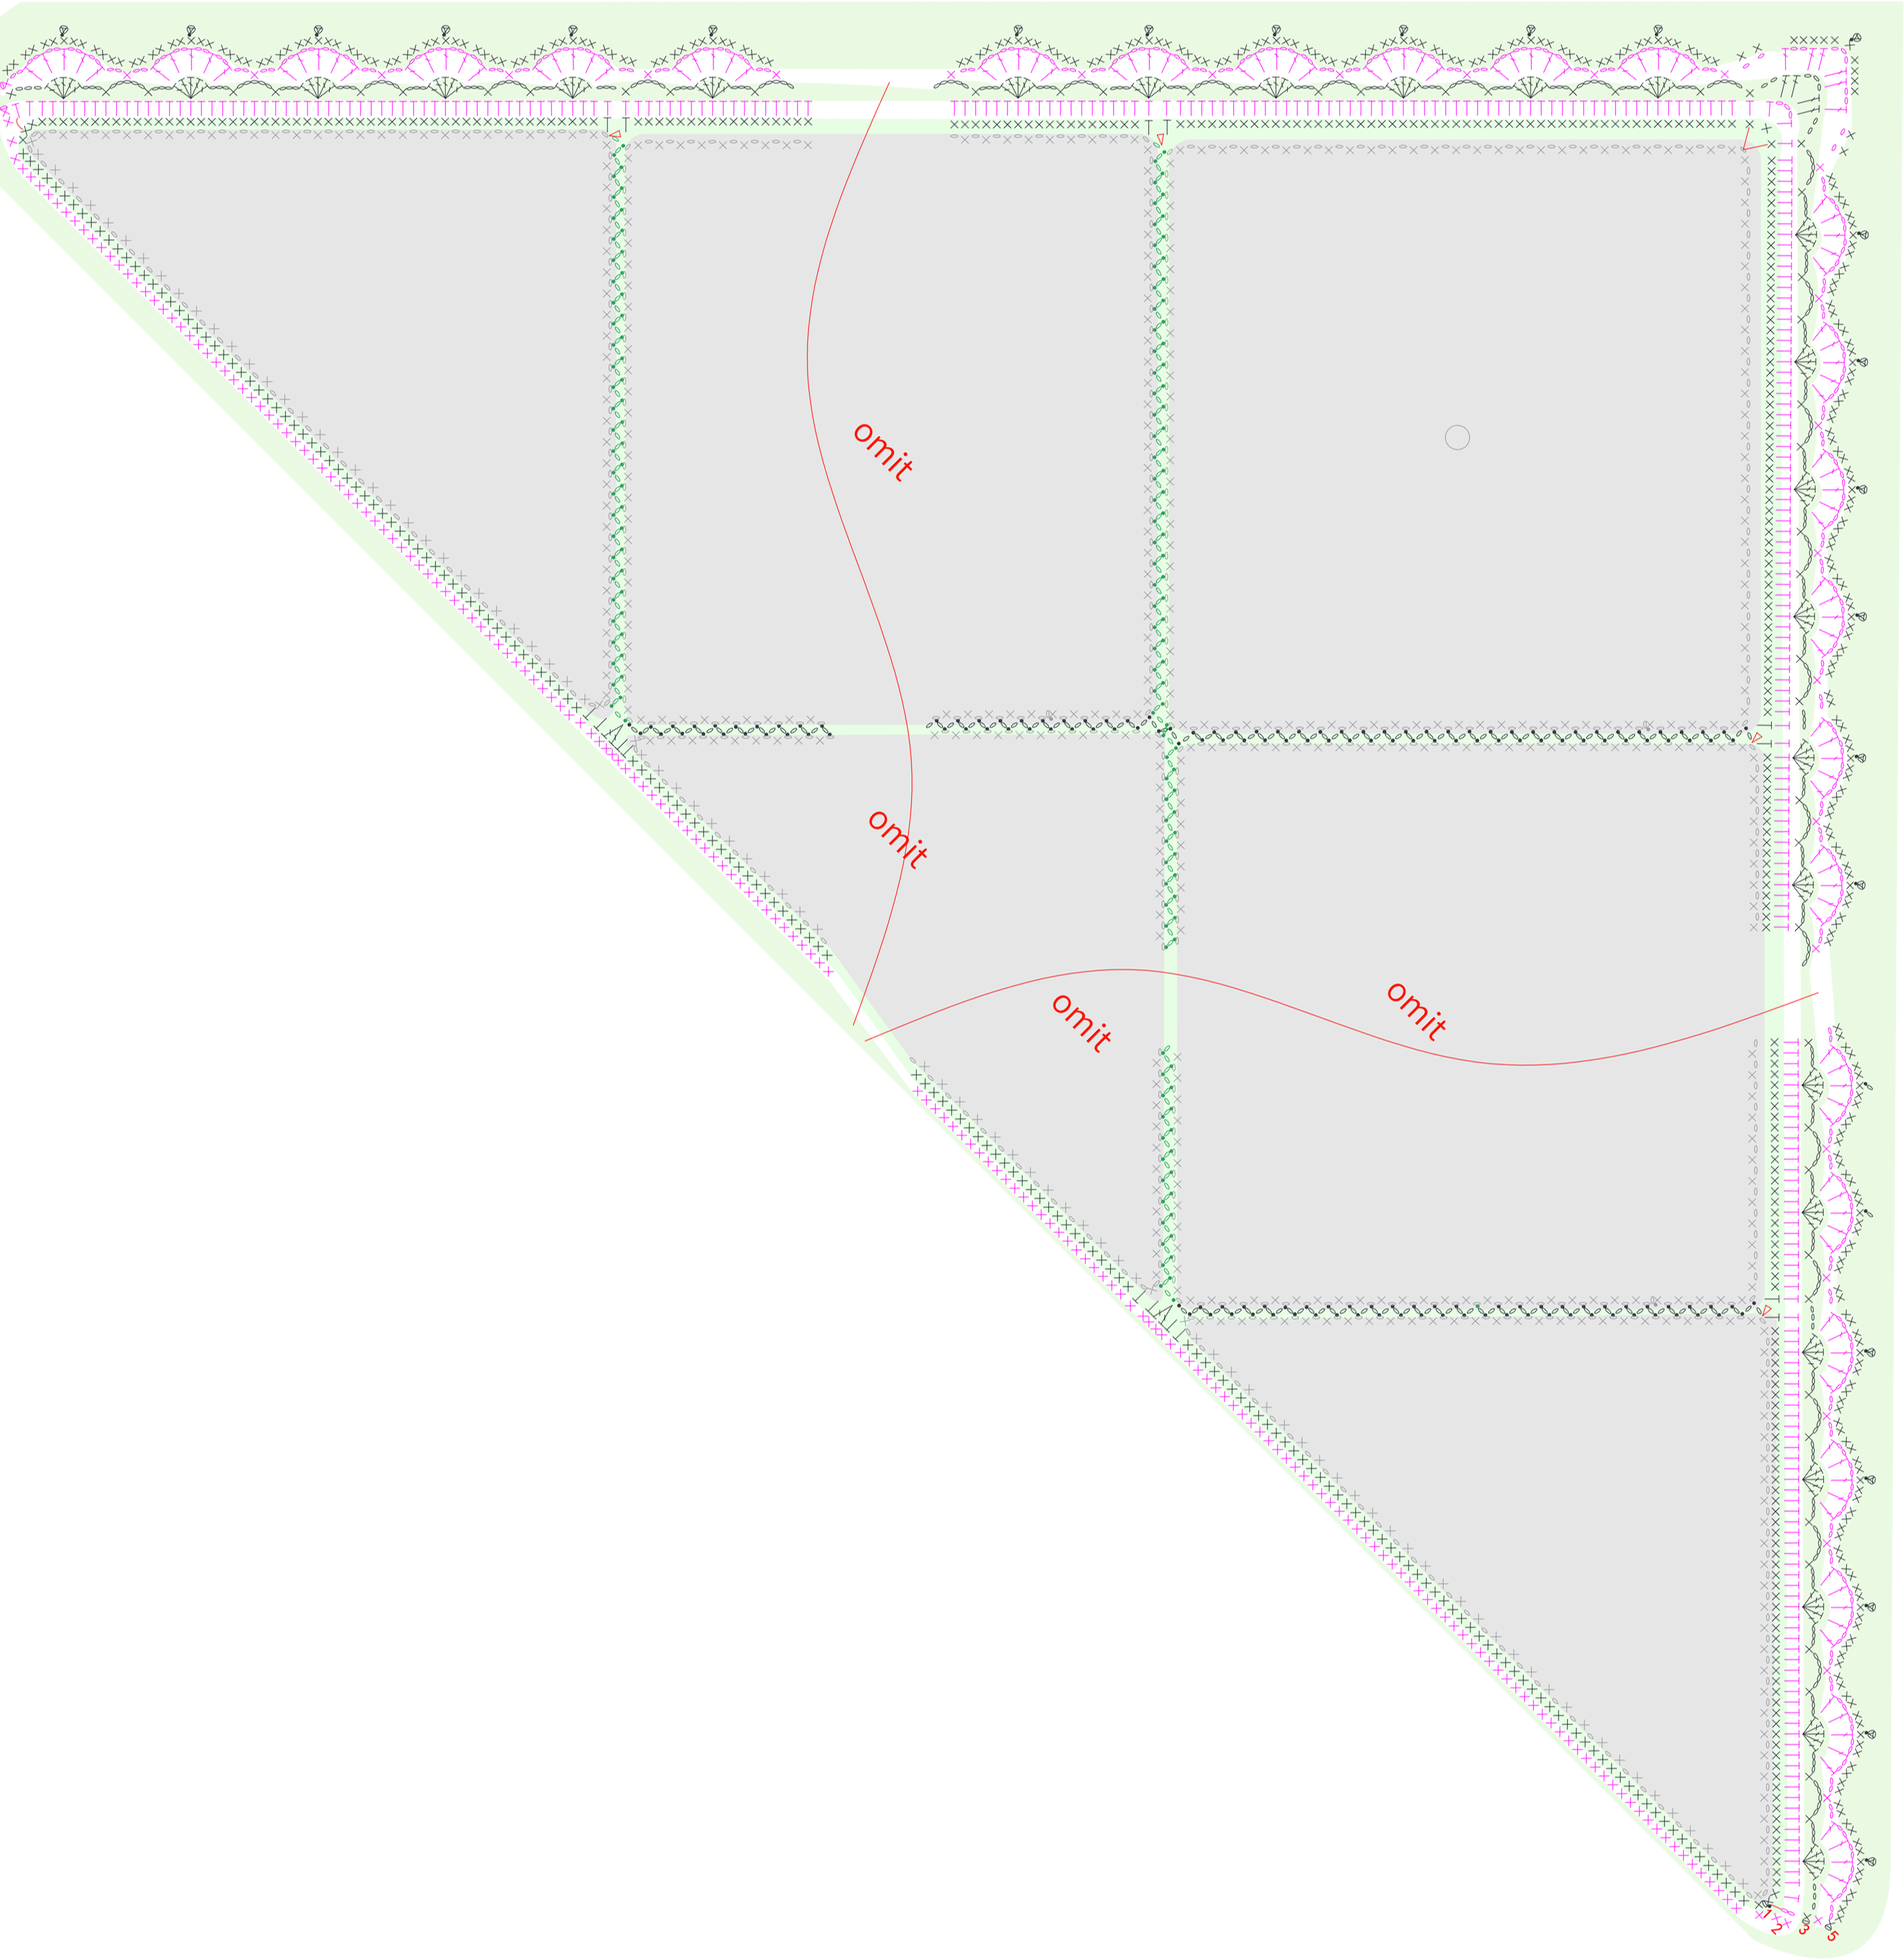
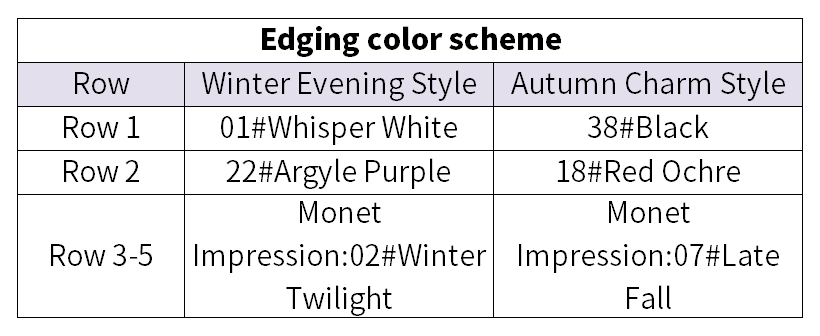
First, connect all the pieces, then crochet the edging.
Part 3 DecorationD 58' 13''
The decorations include leaves and branches. First, crochet the branches at the corresponding positions on the fabric piece, then crochet and sew on the leaves.
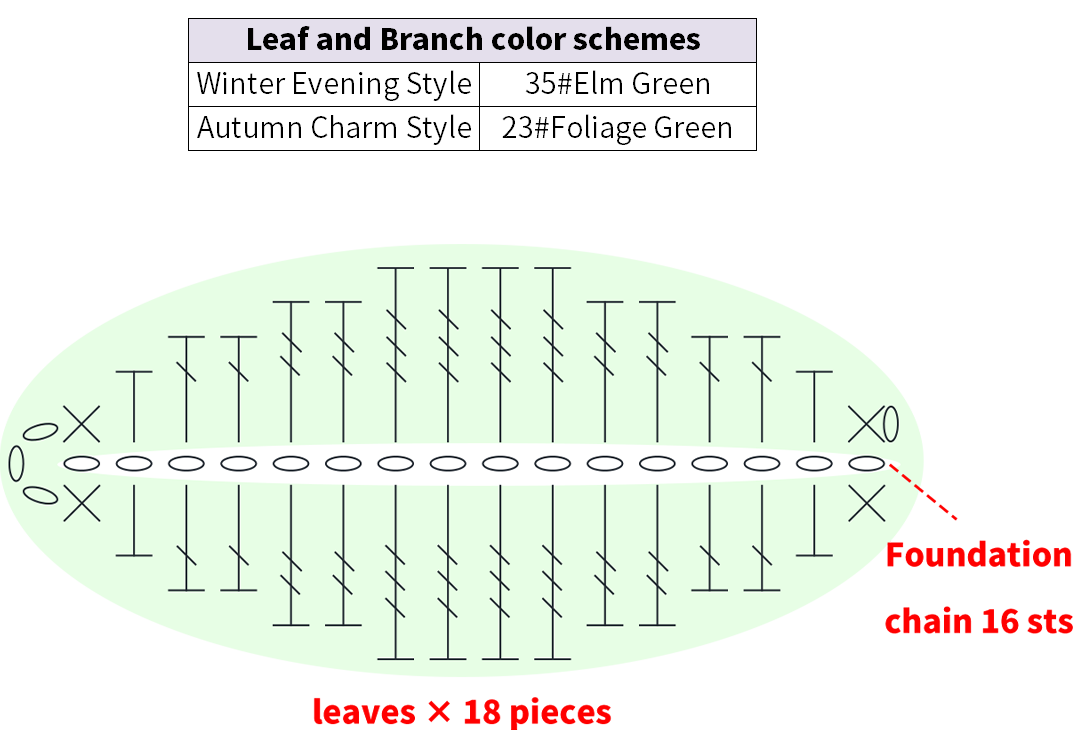
Note: After completing, leave a 30cm yarn tail for sewing.
Note: The branches are formed using two strands of the same color thread merged and worked into the corresponding position with a slip stitch. Refer to the motif joining diagram for specific locations.
Made by the community