
Clothes
Rhiannon
Project preview
See the finished project
Pattern format
Instructions
Watch and follow
Video tutorial
| Style | Yarn | Color |
|---|---|---|
| Rhiannon Bell sleeves Top - Whitecap gray Version - S | Morandi flax Lace yarn |  09#Whitecap Gray x 6 09#Whitecap Gray x 6 |
| Rhiannon Bell sleeves Top - Violet ice Version - S | Morandi flax Lace yarn |  06#Violet Ice x 6 06#Violet Ice x 6 |
| Rhiannon Bell sleeves Top - Silver pink Version - S | Morandi flax Lace yarn |  05#Silver Pink x 6 05#Silver Pink x 6 |
| Rhiannon Bell sleeves Top - Cameo blue Version - S | Morandi flax Lace yarn |  03#Cameo Blue x 6 03#Cameo Blue x 6 |
| Rhiannon Bell sleeves Top - Red clay Version - S | Morandi flax Lace yarn |  04#Red Clay x 6 04#Red Clay x 6 |
Rhiannon Bell sleeves Top - Whitecap gray Version - S
Rhiannon Bell sleeves Top - Violet ice Version - S
Rhiannon Bell sleeves Top - Silver pink Version - S
Rhiannon Bell sleeves Top - Cameo blue Version - S
Rhiannon Bell sleeves Top - Red clay Version - S
This garment is divided into front and back pieces, sleeves, collar, and bottom lace trim.
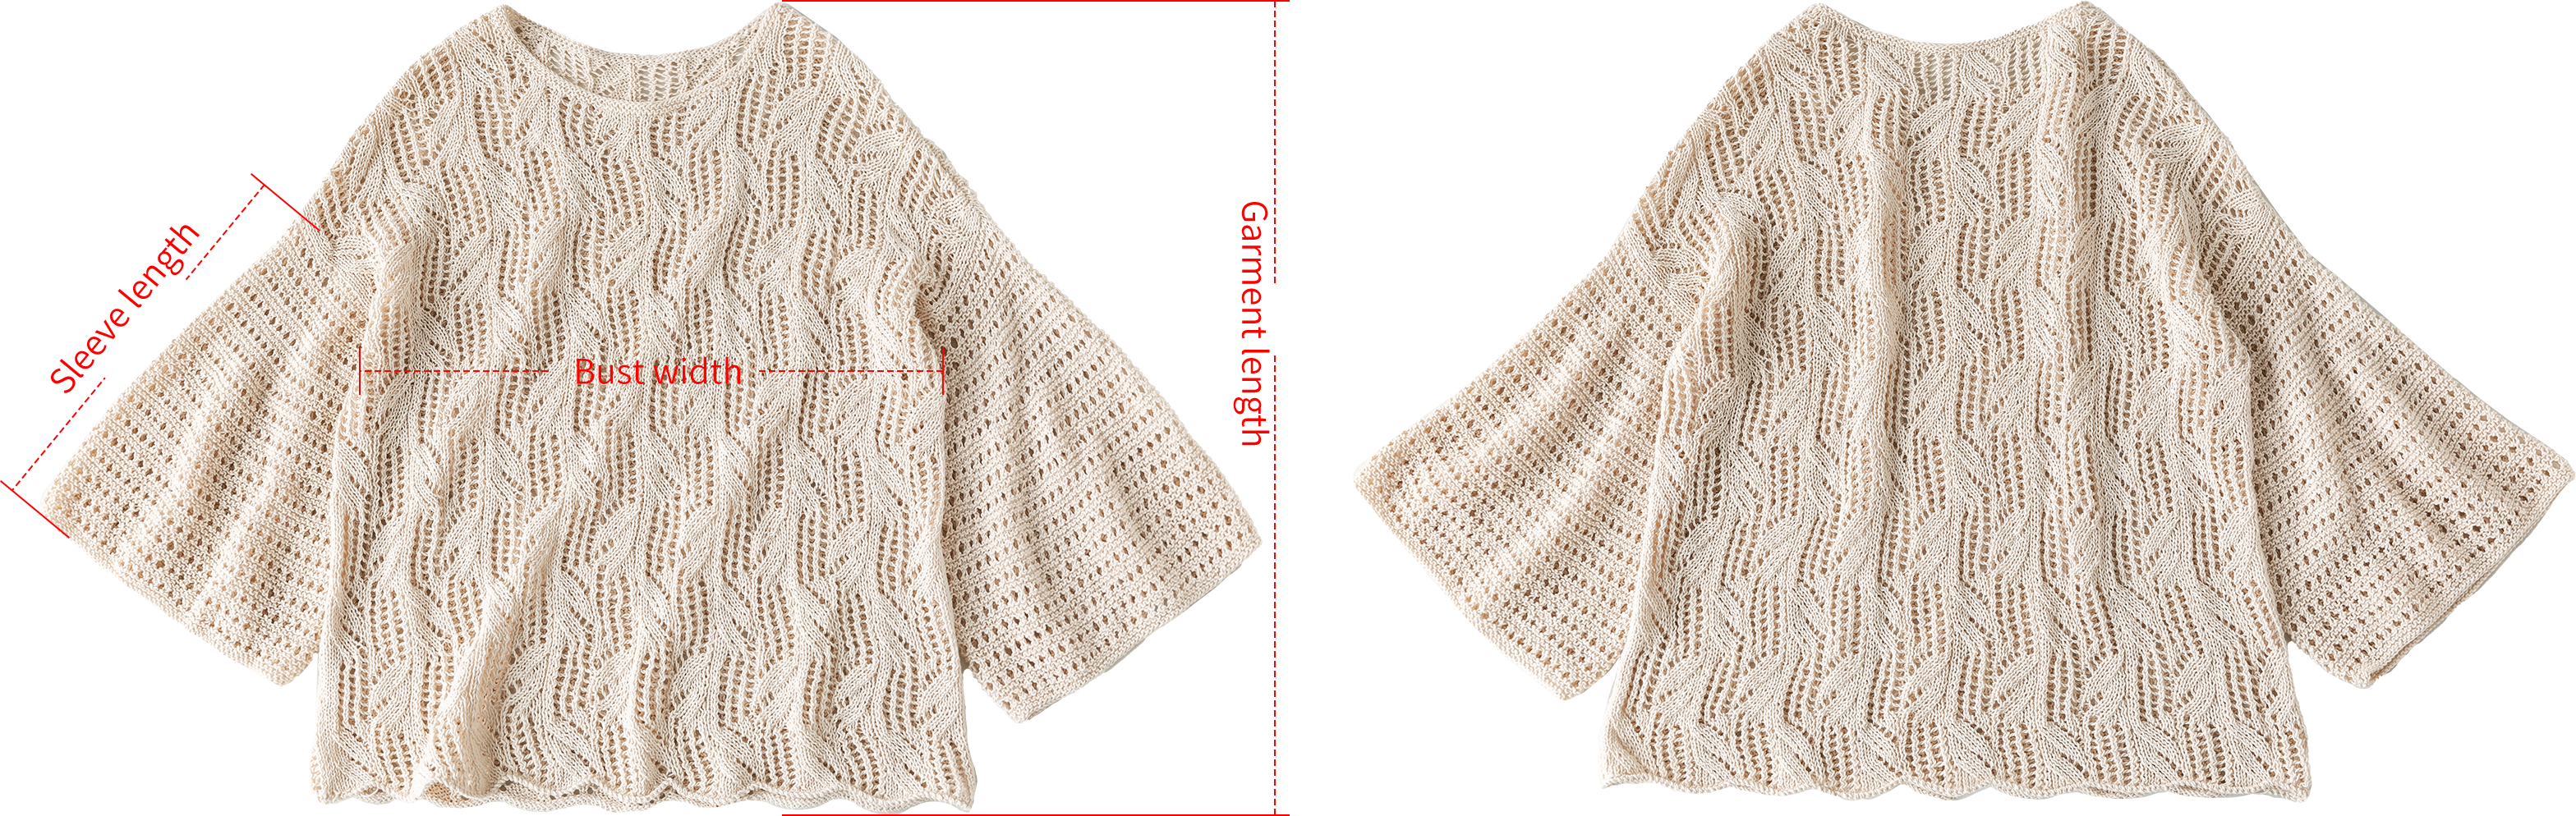
| Size | Bust width | Garment length | Sleeve length |
| Small | 49 cm | 46.5 cm | 24.5 cm |
The handcrafted measurements may have an error of 1 to 2 cm. Due to variations in individual tension, the size of the sample is for reference only.
Materials: Morandi flax Lace yarn
Needles: 3.25 mm circular needle & short straight needle
Sleeve pattern Gauge: 10 × 10 cm = 23 sts × 38 rows
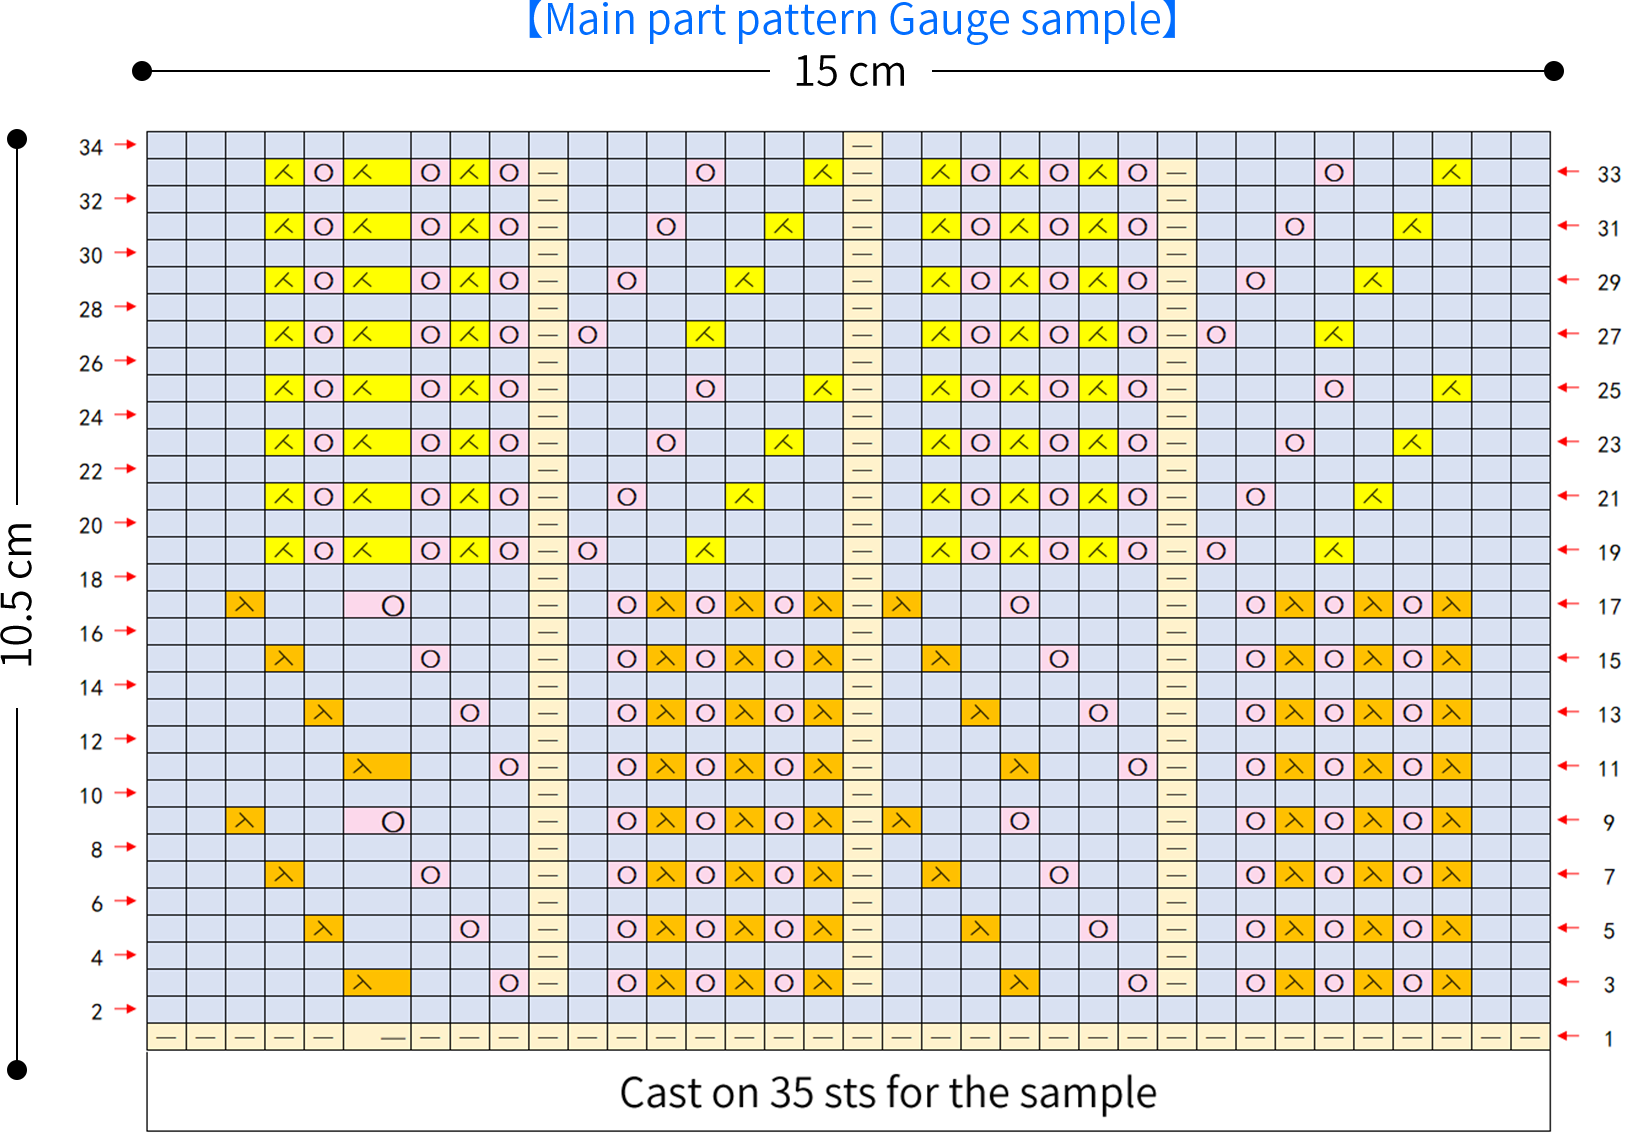
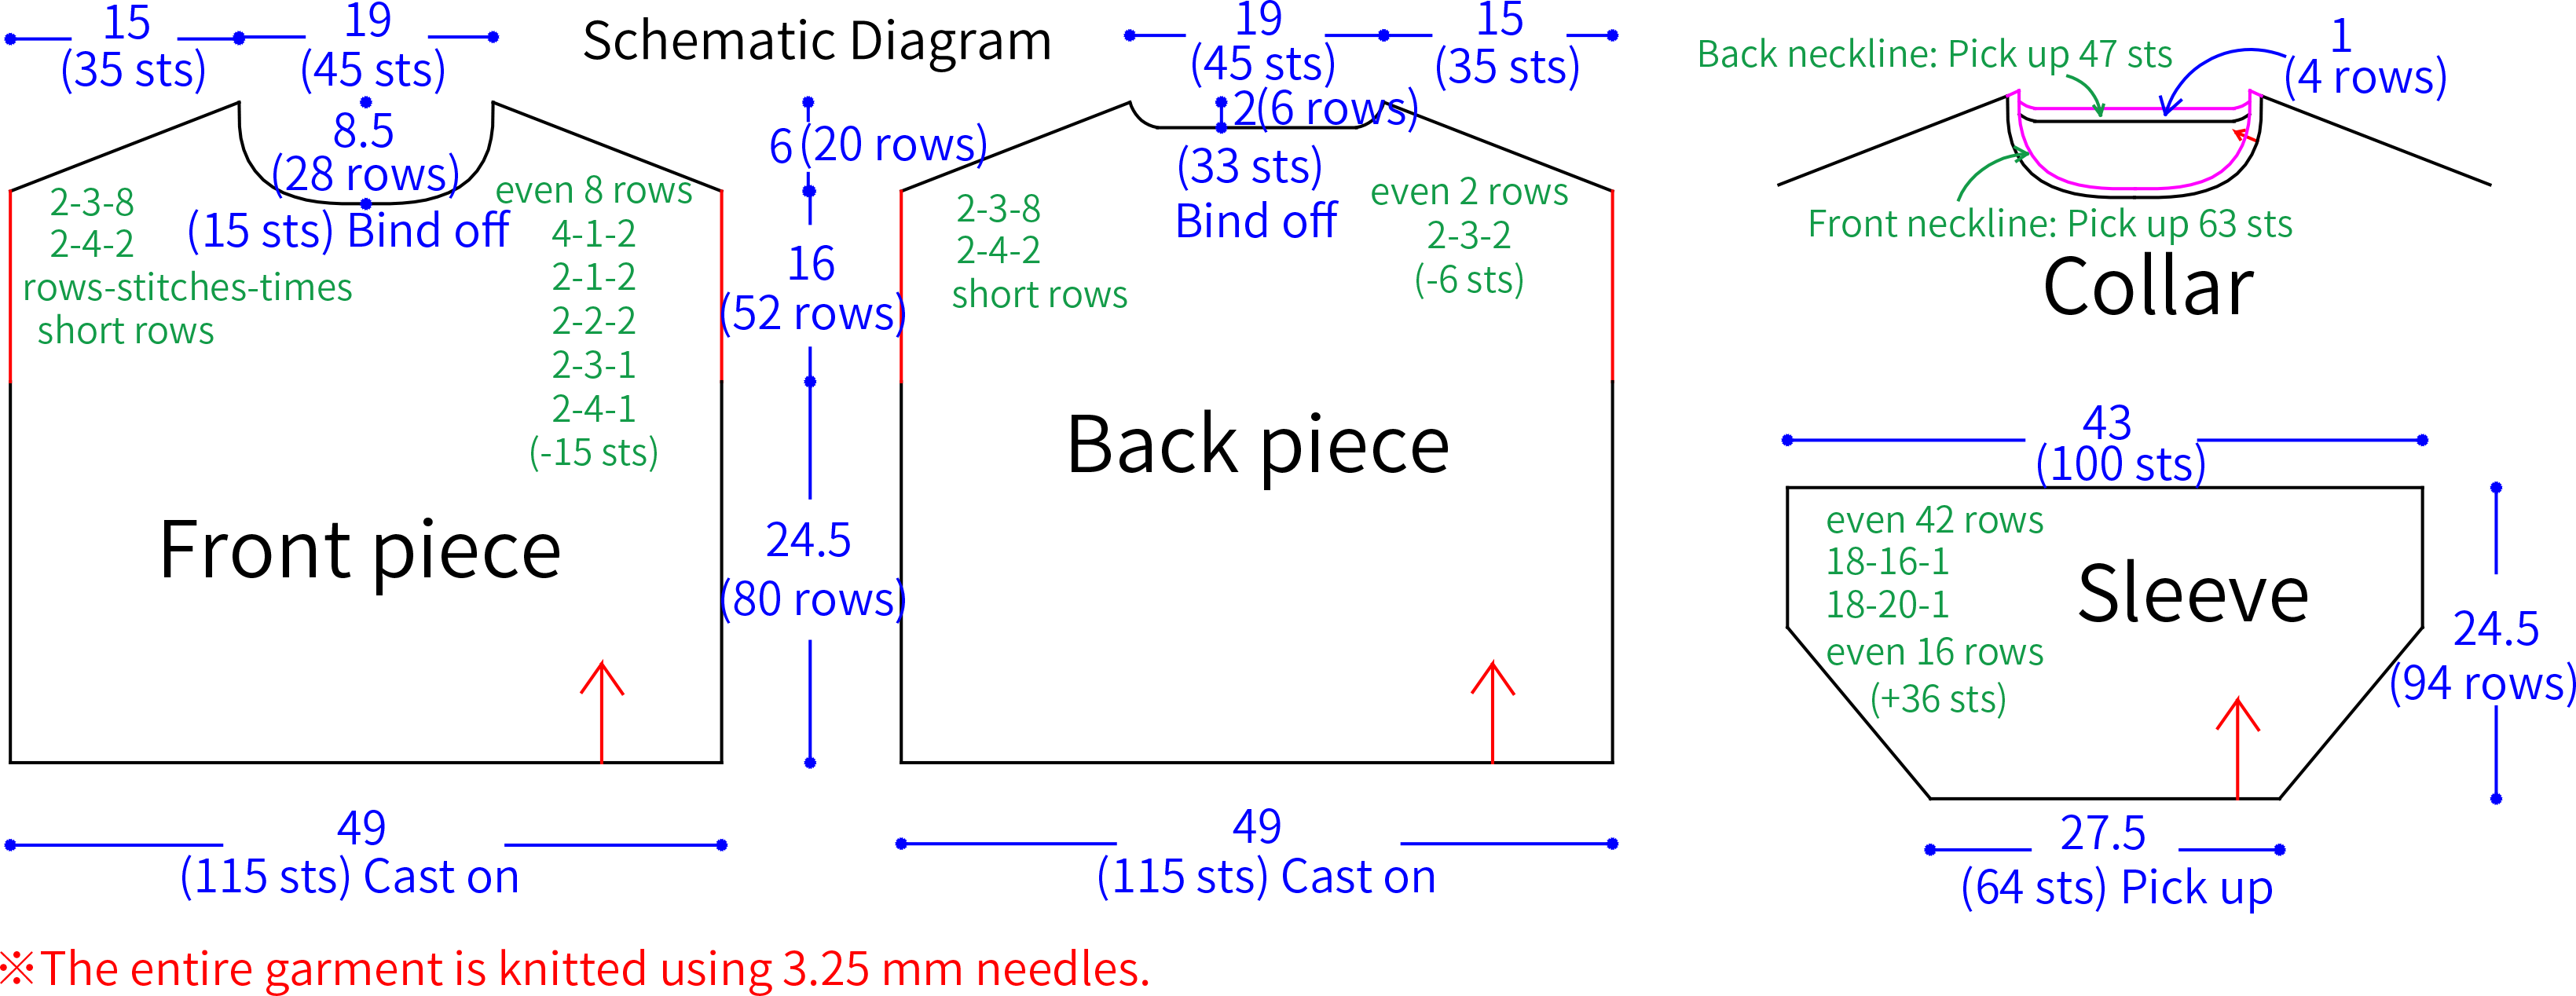
Chart Key


Note: 1. This pattern is making in Chinese crochet pattern terms, and the stitch name is written using American terminology. All measurements in charts are in cm.
2. The chart represent the right side of fabric, so check the key to see how to work a certain symbol on the right side and on the wrong side.


Part 1 Front pieceA 00' 45''
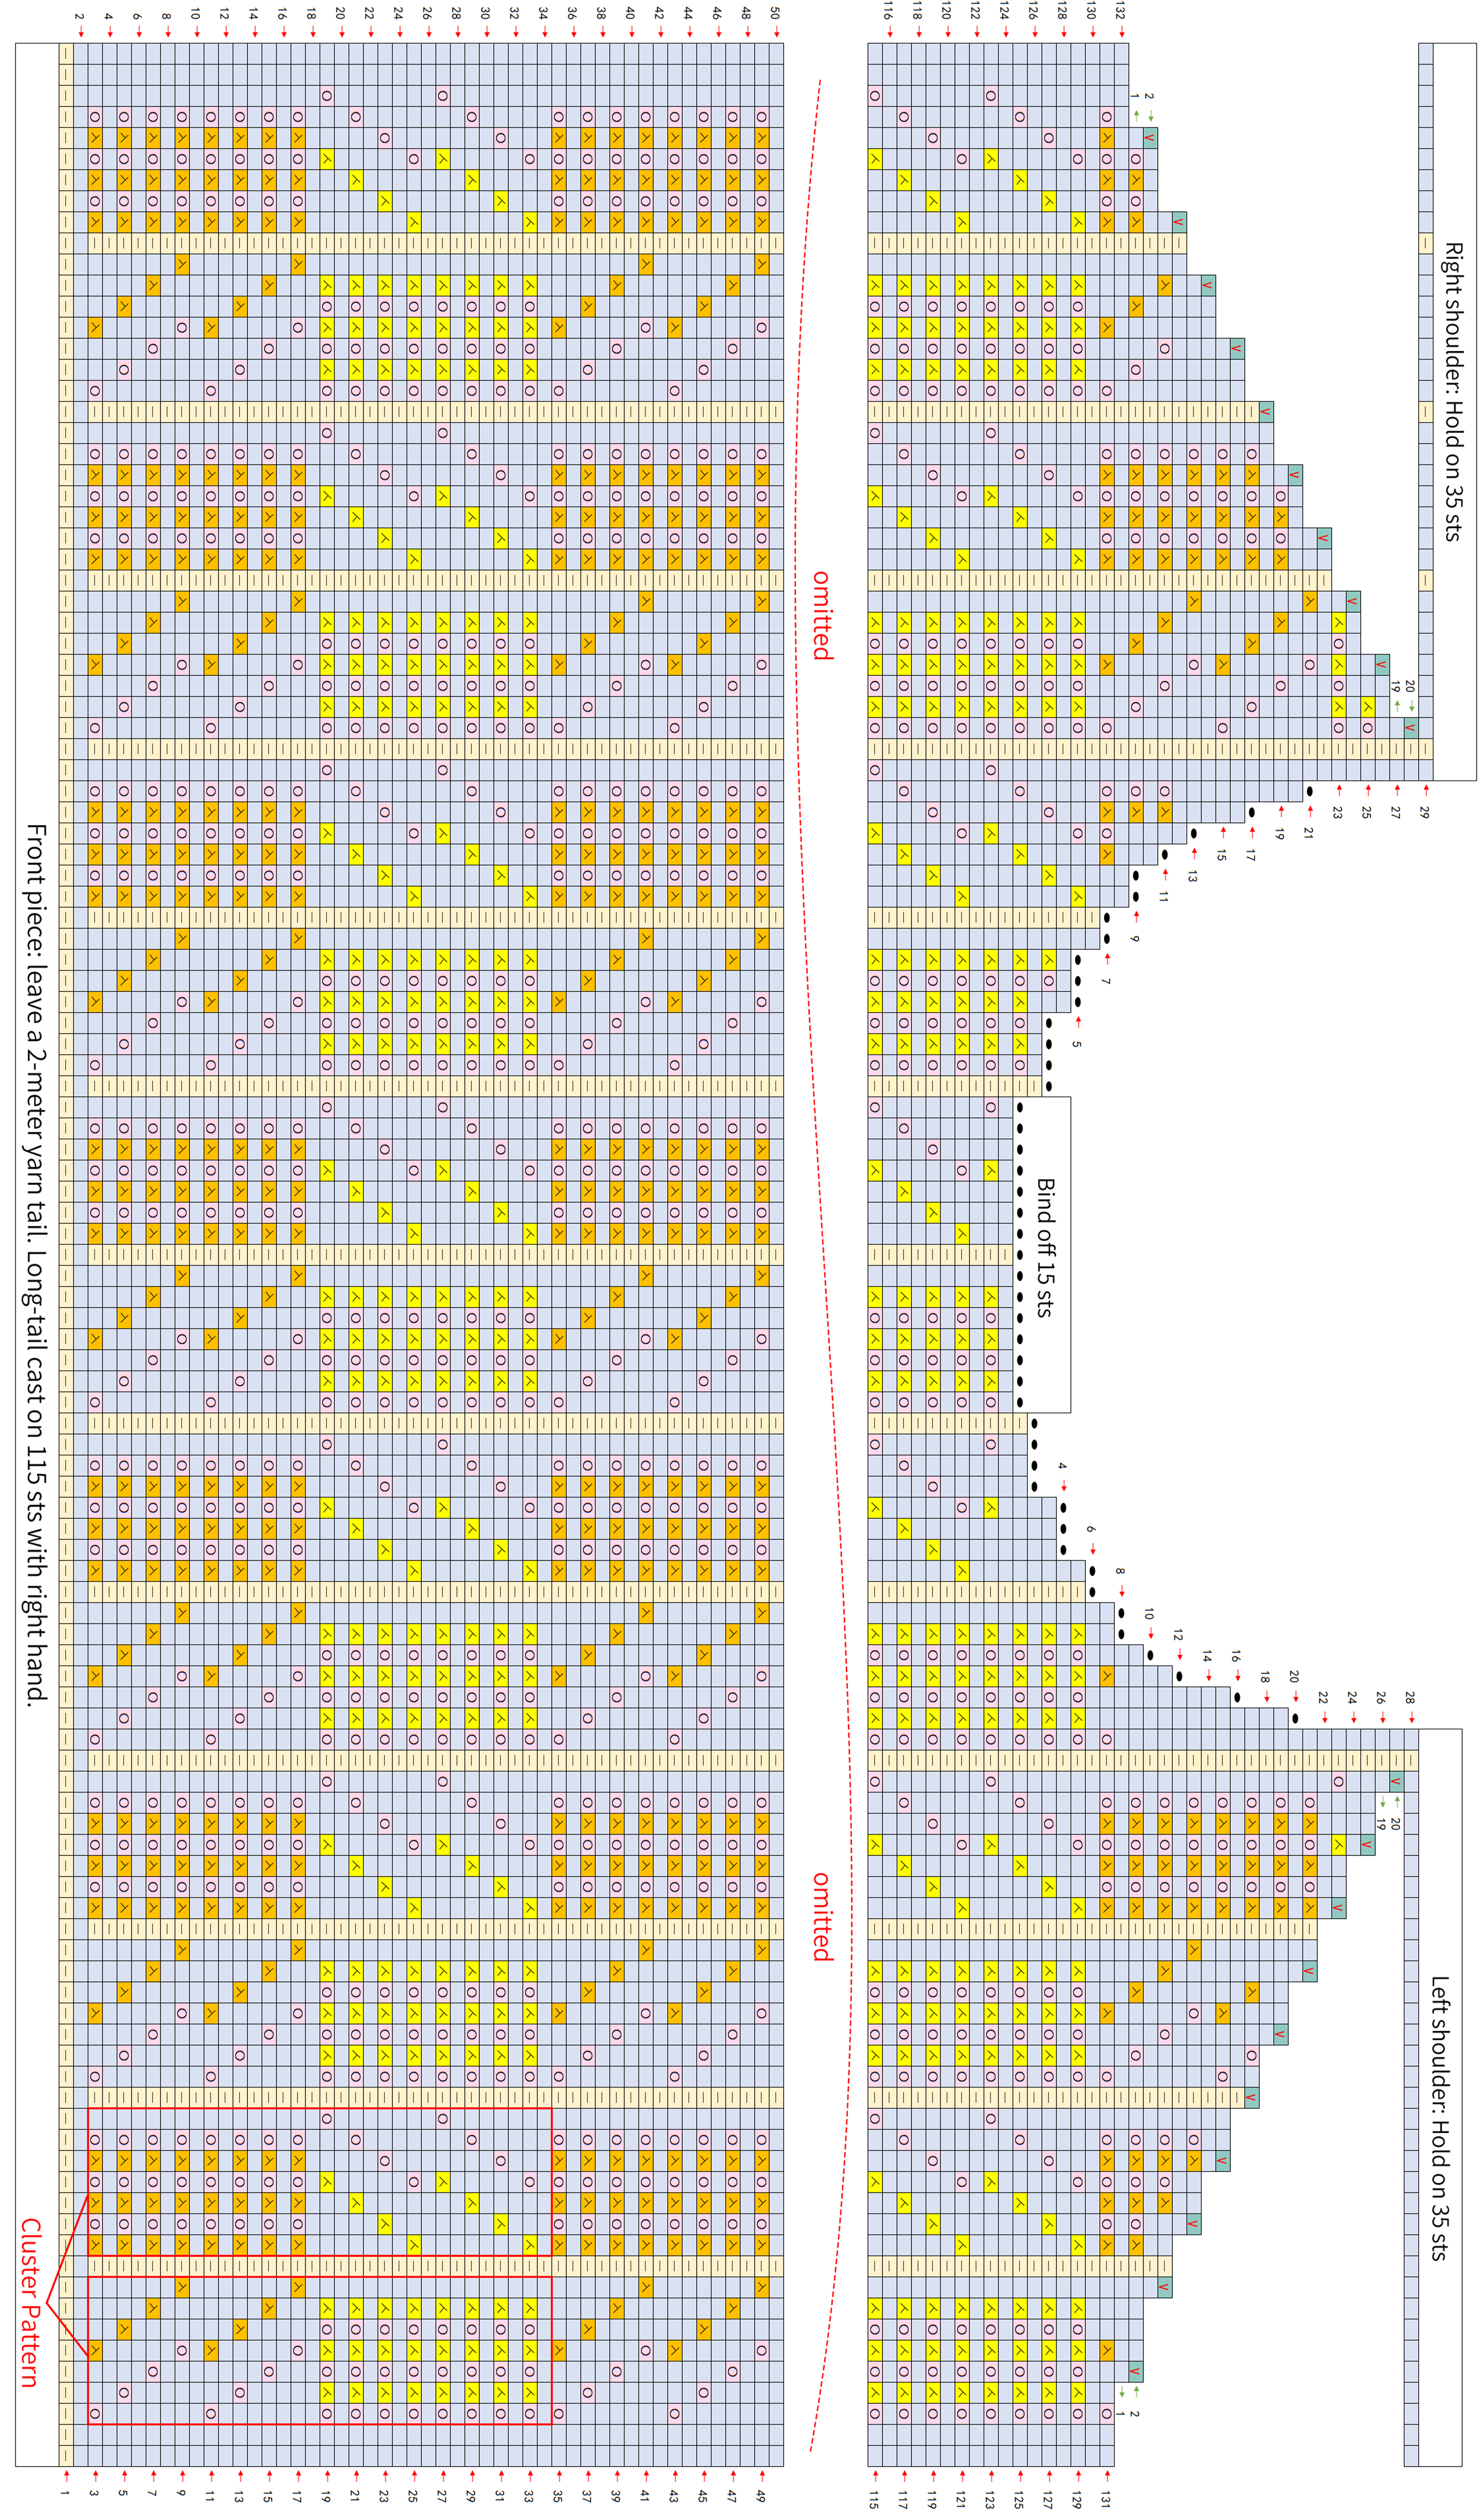
The front piece is worked using the long-tail cast on method with the right hand, knitting back and forth. The ending involves decreasing in the middle to form the neck opening, and short rows are used on both sides to create the shoulder slope. Finally, stitches are put on hold at the shoulders. Please refer to the video demonstration for more details.
Note: 1. When knitting back and forth, on the wrong side, work in a method of knitting for the purl stitches and purling for the knit stitches.
2. The left and right on the charts refer to the actual wearing position.
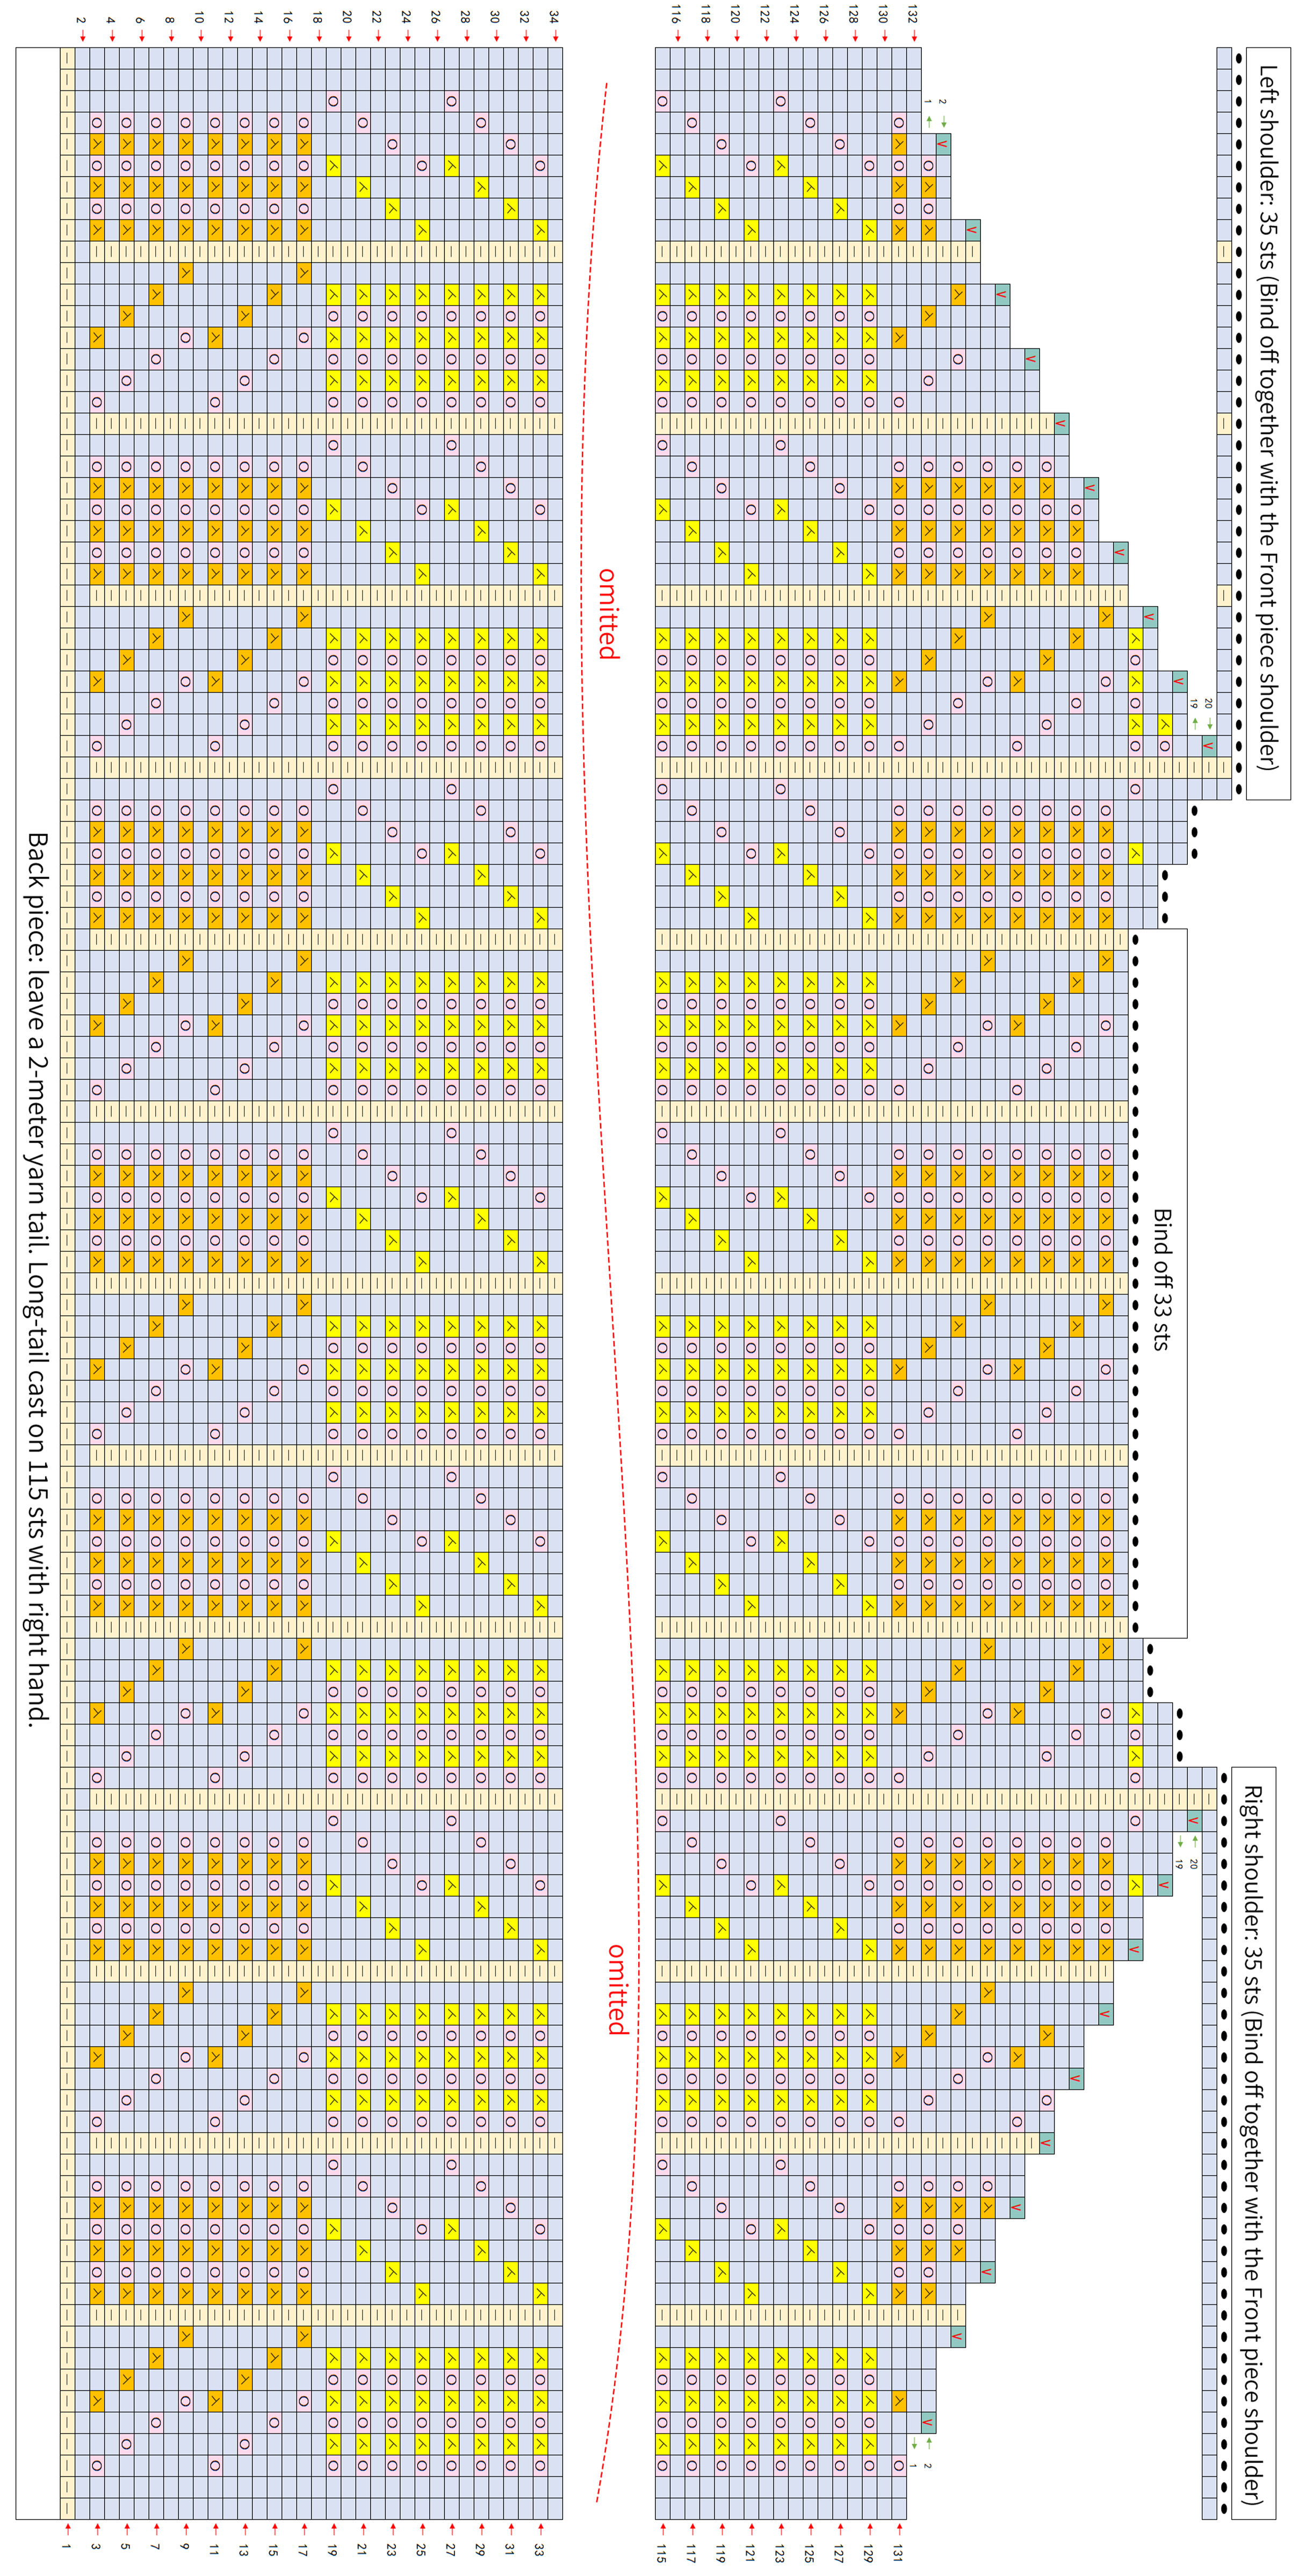
Part 2 Back pieceB 36' 38''
The method for knitting the back piece is similar to the front piece, and the ending at the shoulders should be matched up with the front piece shoulders and bind off together. Please refer to the video demonstration for more details.
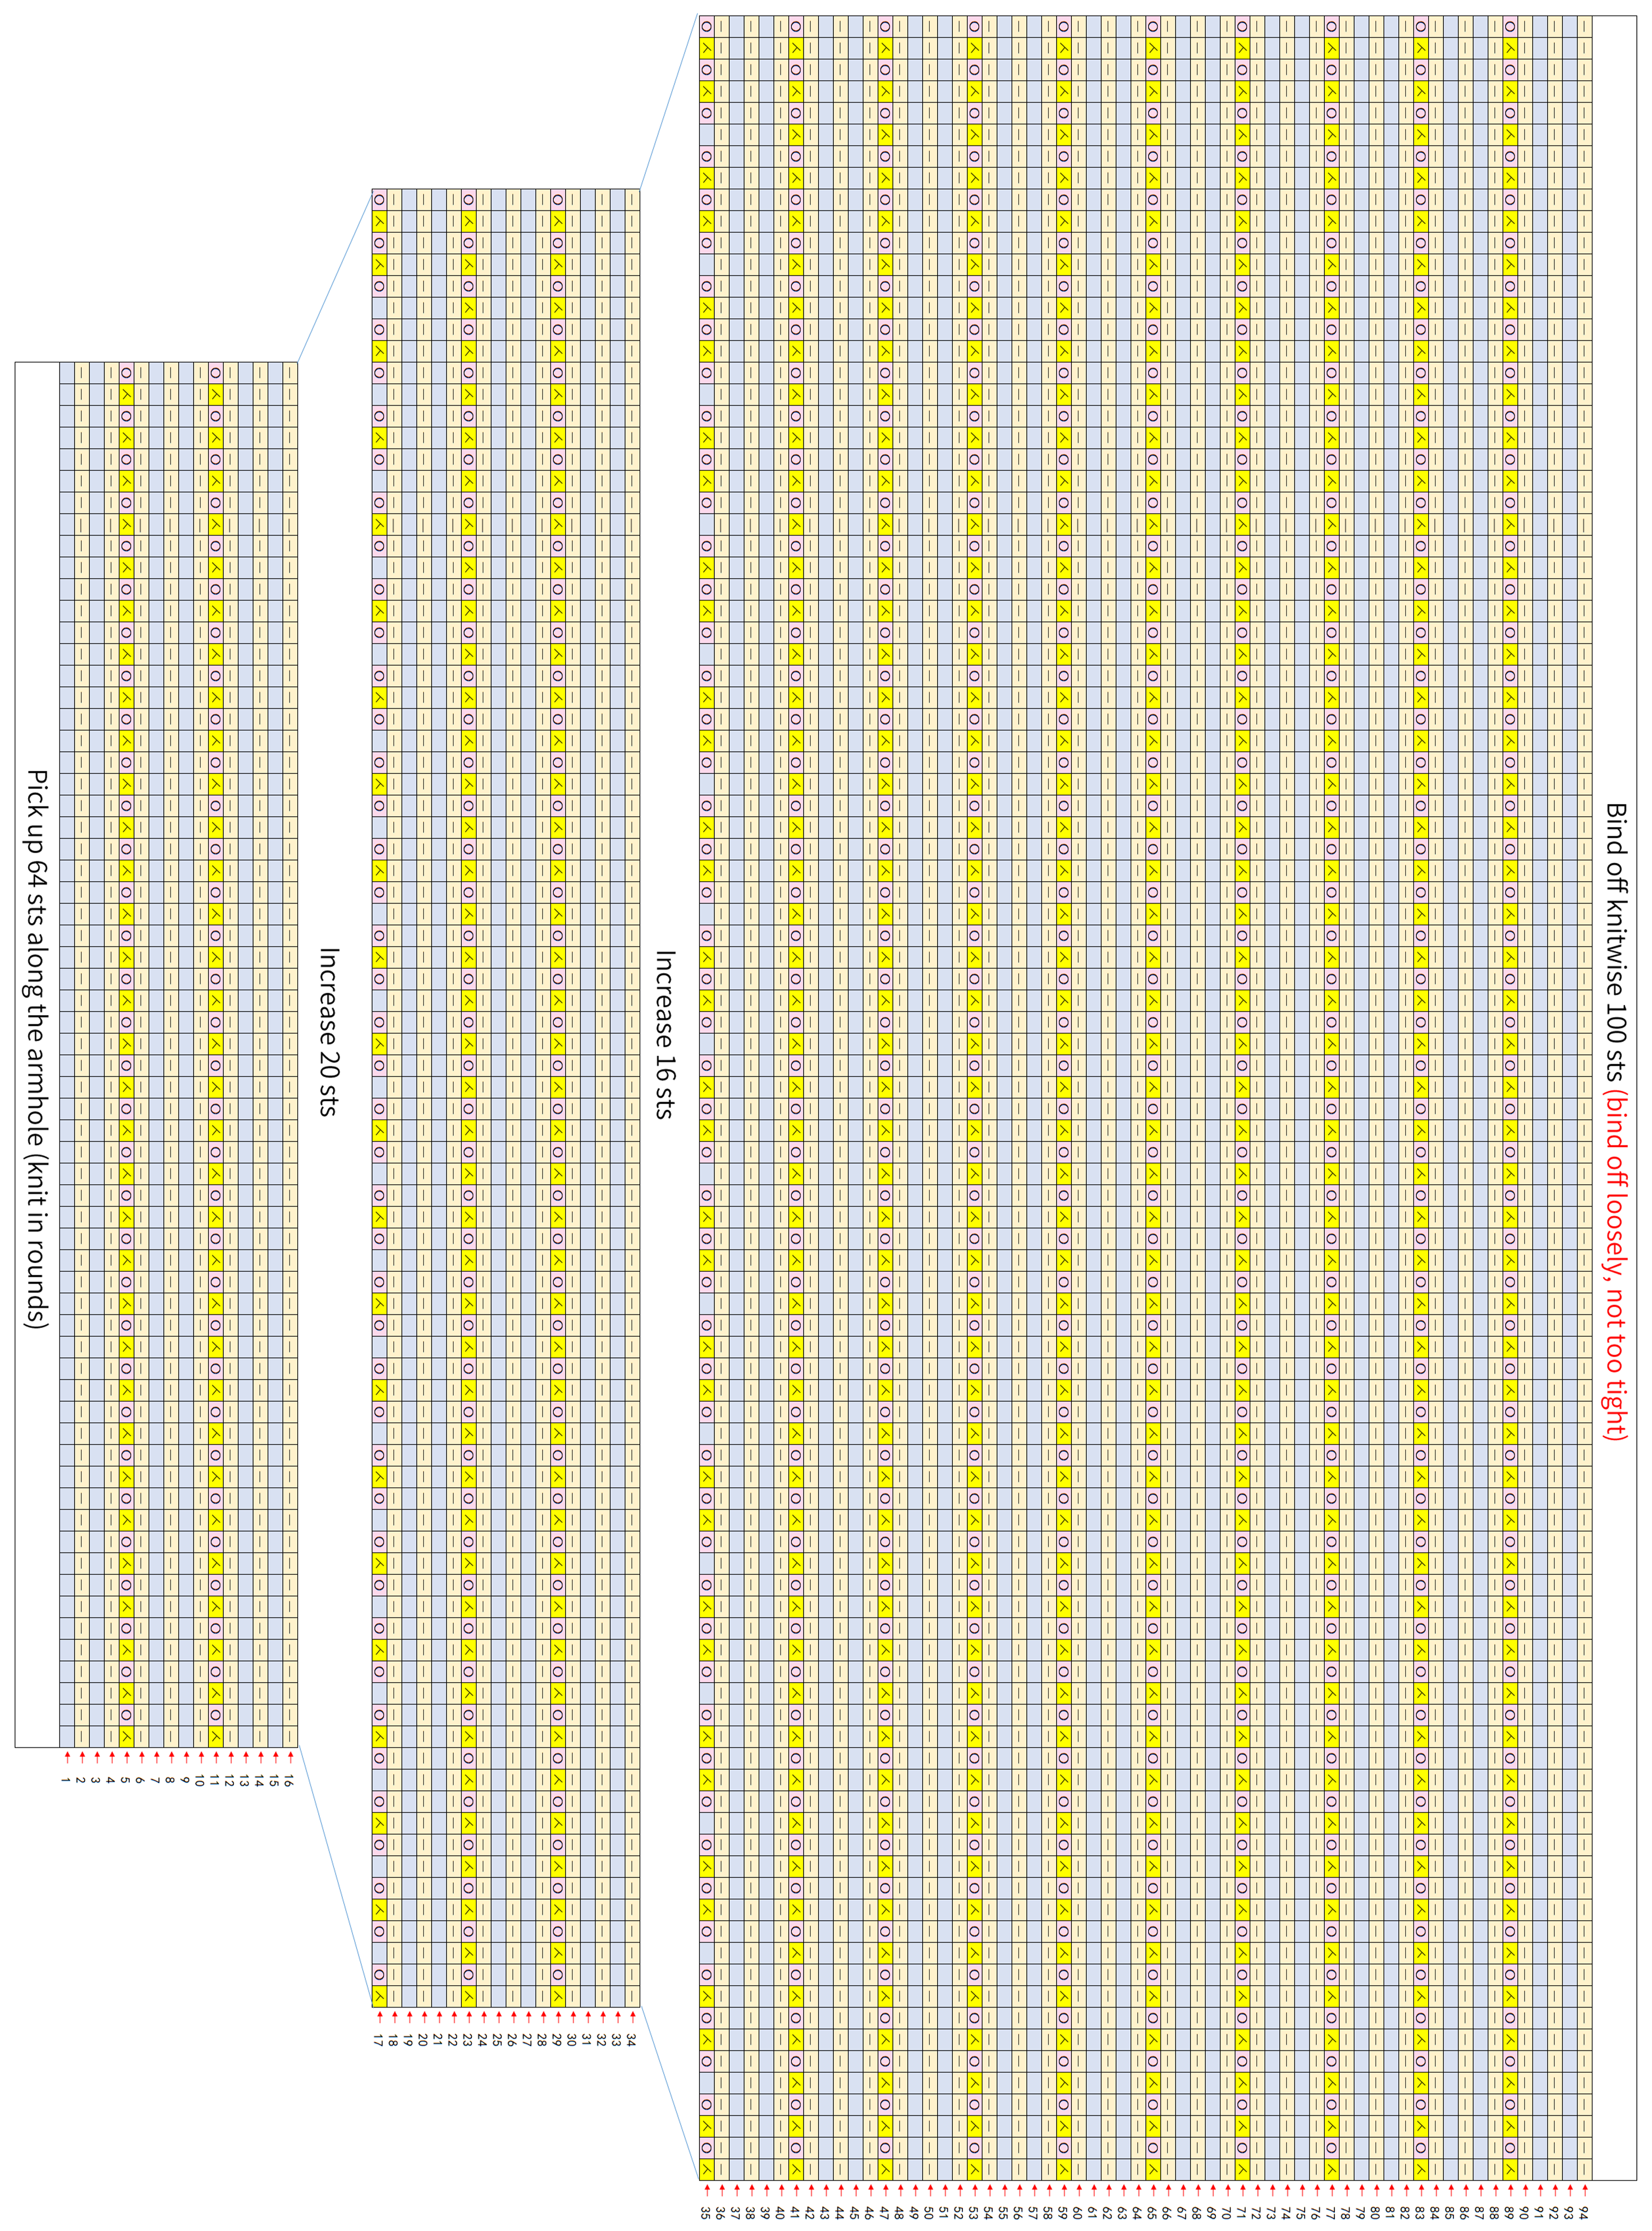
Part 3 SleevesC 42' 03''
Sew the side seams of the front and back pieces first, then pick up stitches around the armhole of the front and back pieces and work in rounds for the sleeves, finally bind off. Please refer to the video demonstration for more details.
Part 4 Collar and Bottom lace trimD 58' 38''
The collar is picked up in rounds at the neck opening positions of the front and back pieces, then knitted in rounds. Finally, the bottom lace trim is worked in rounds around the cast-on edges of the front and back pieces. Please refer to the video demonstration for more details.

Made by the community





