Clothes
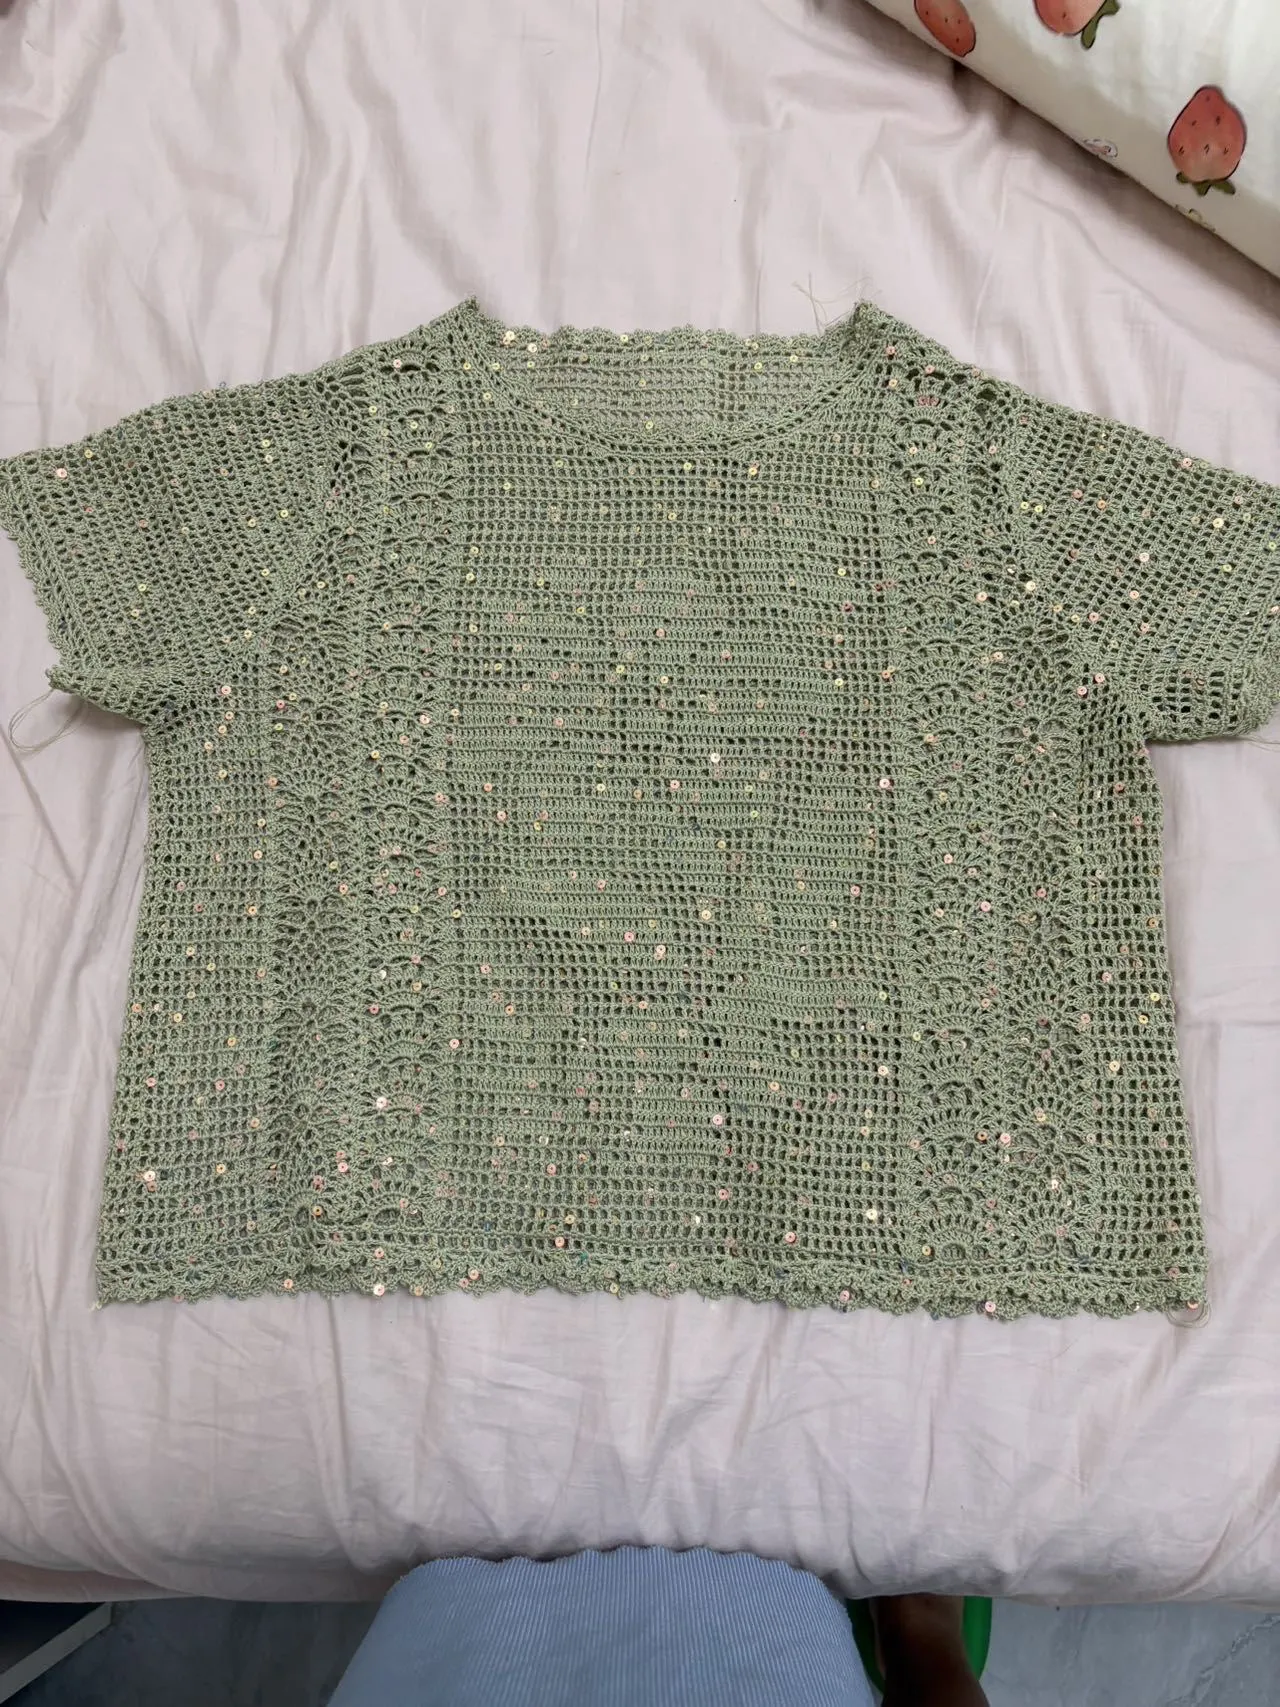
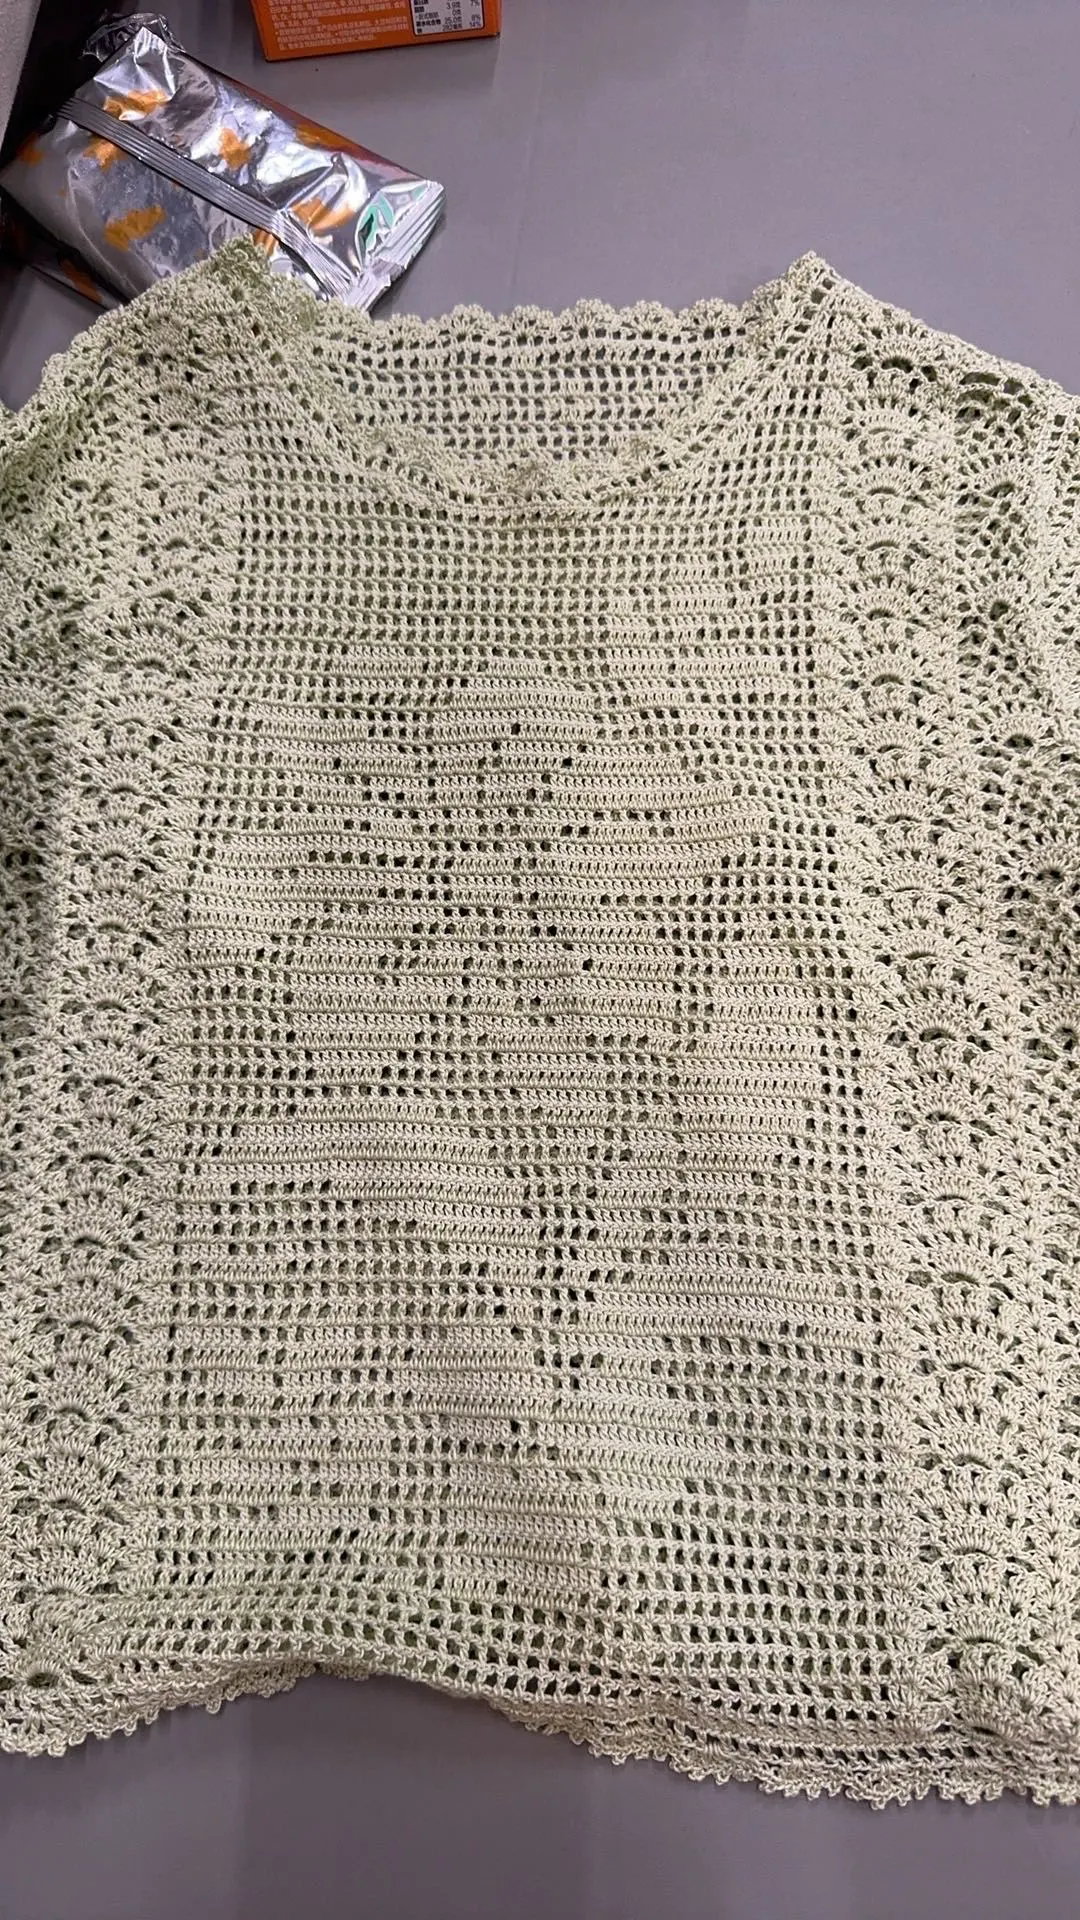
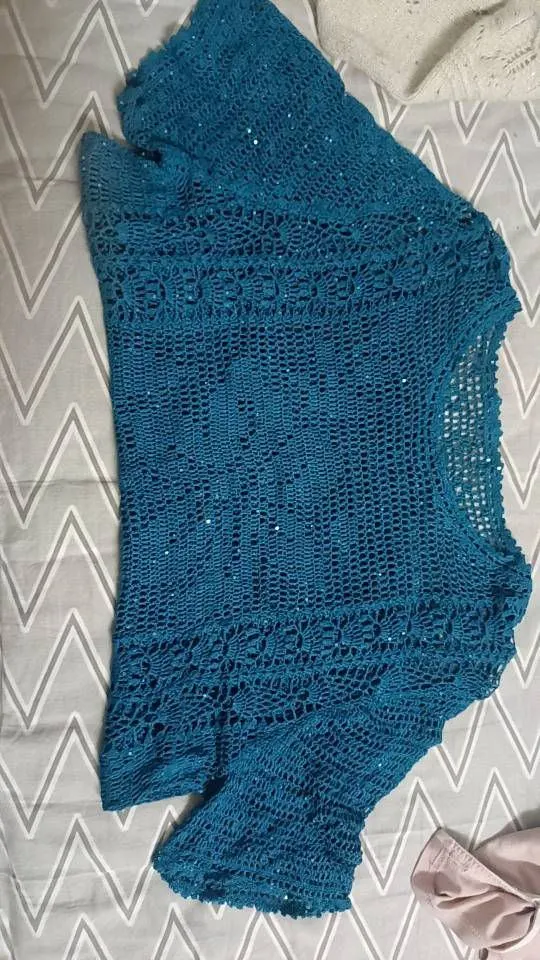
Romantic Floral Lace Top
Project preview
See the finished project
Pattern format
Instructions
Watch and follow
Video tutorial
| Style | Yarn | Color |
|---|---|---|
| Grape Shake Style | Combed 5# Lace |  08# Grape Shake 08# Grape Shake |
| 浅蓝款 | Combed 5# Lace |  09#Bleached Aqua 09#Bleached Aqua |
| Black Beauty Style | Combed 5# Lace |  15# Black Beauty 15# Black Beauty |
| Deep Green Style | Combed 5# Lace |  16# Deep Green 16# Deep Green |
| Red Clay Style | Combed 5# Lace |  22#Red Clay 22#Red Clay |
This piece of clothing is divided into several parts: the front piece, back piece, sleeves, joining together, and edging.
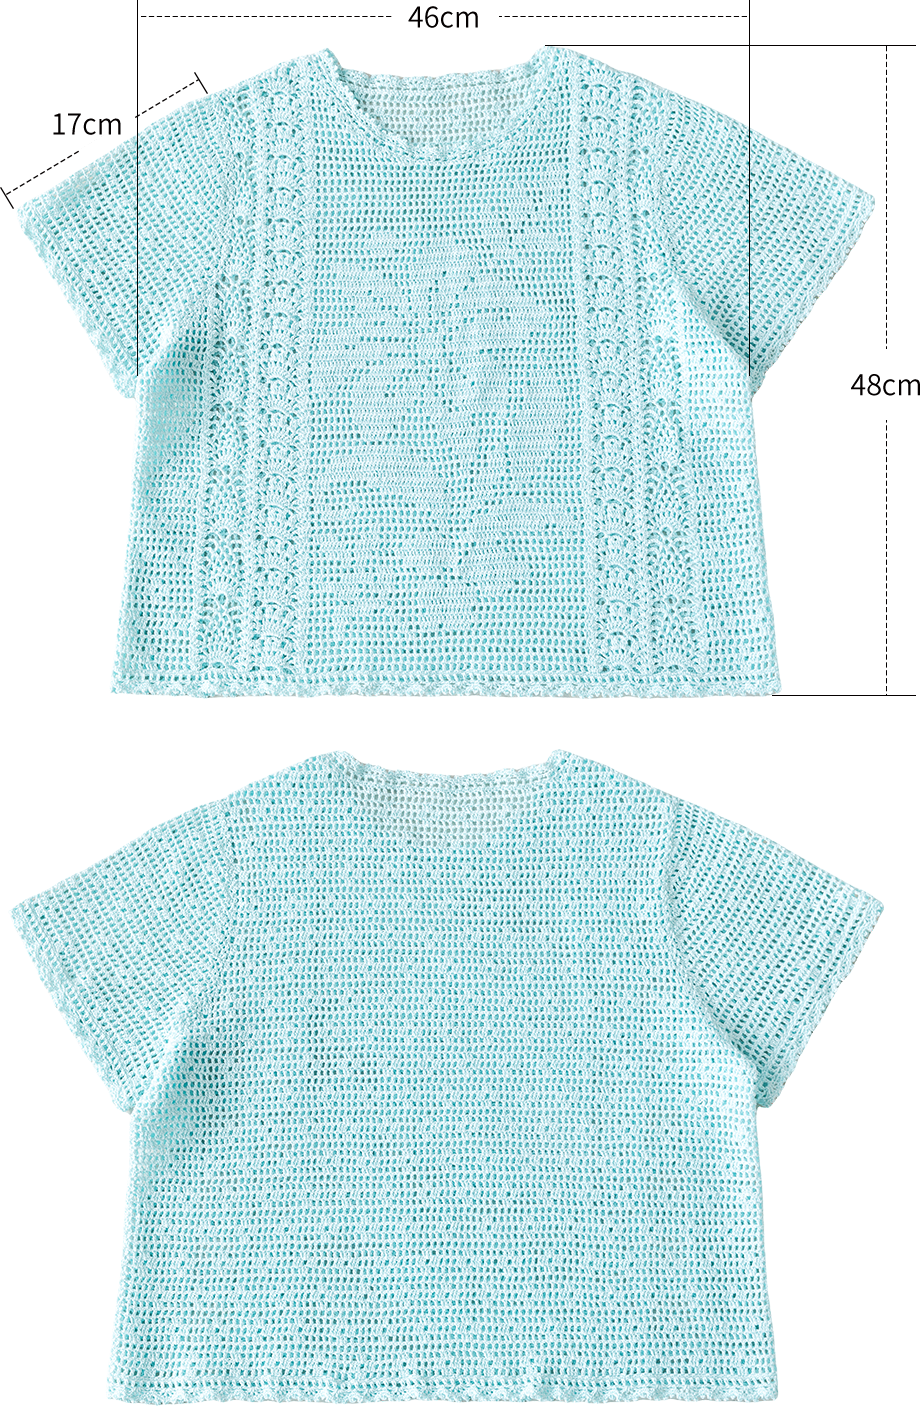
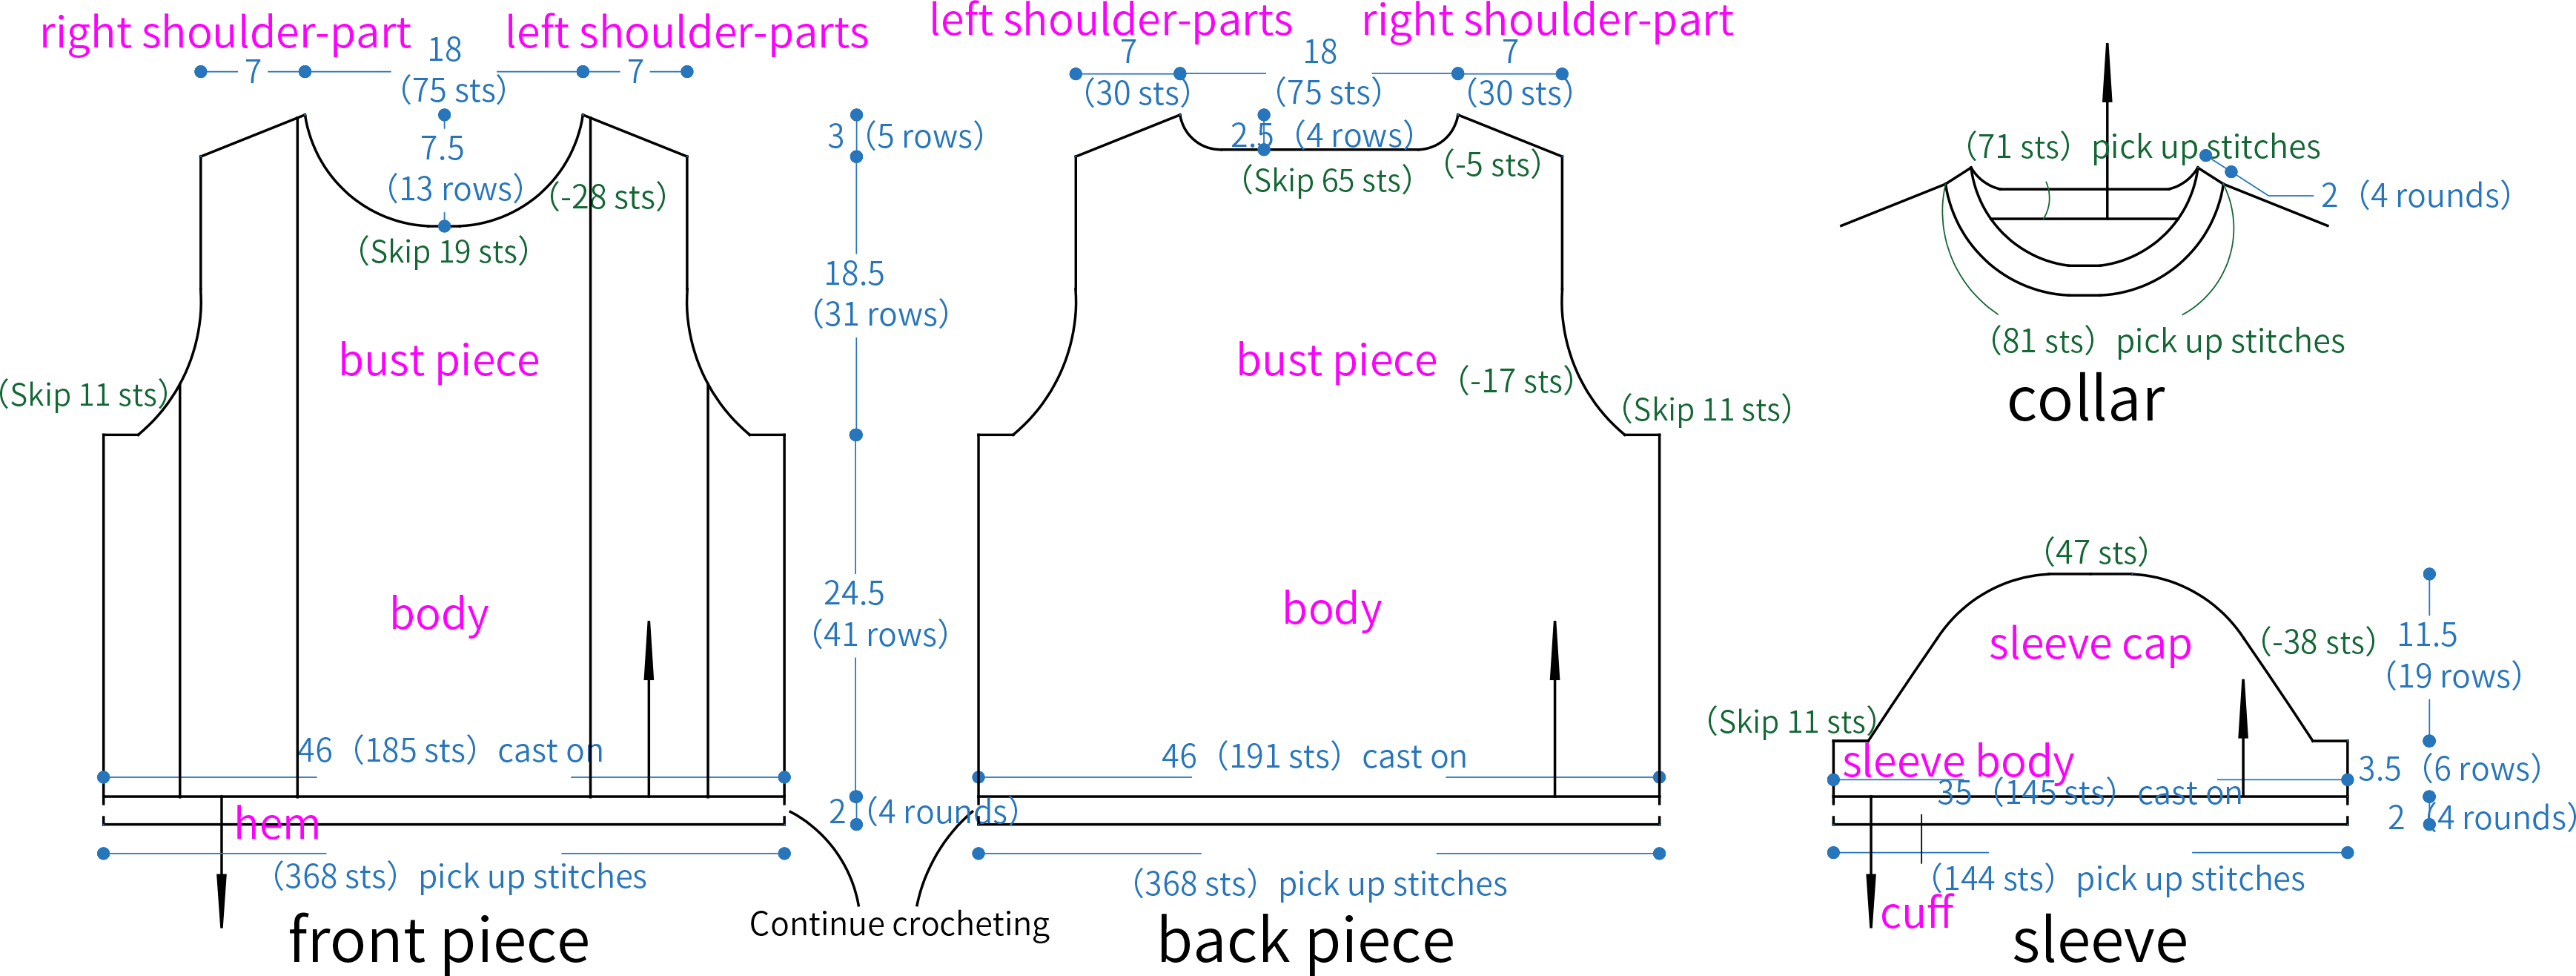
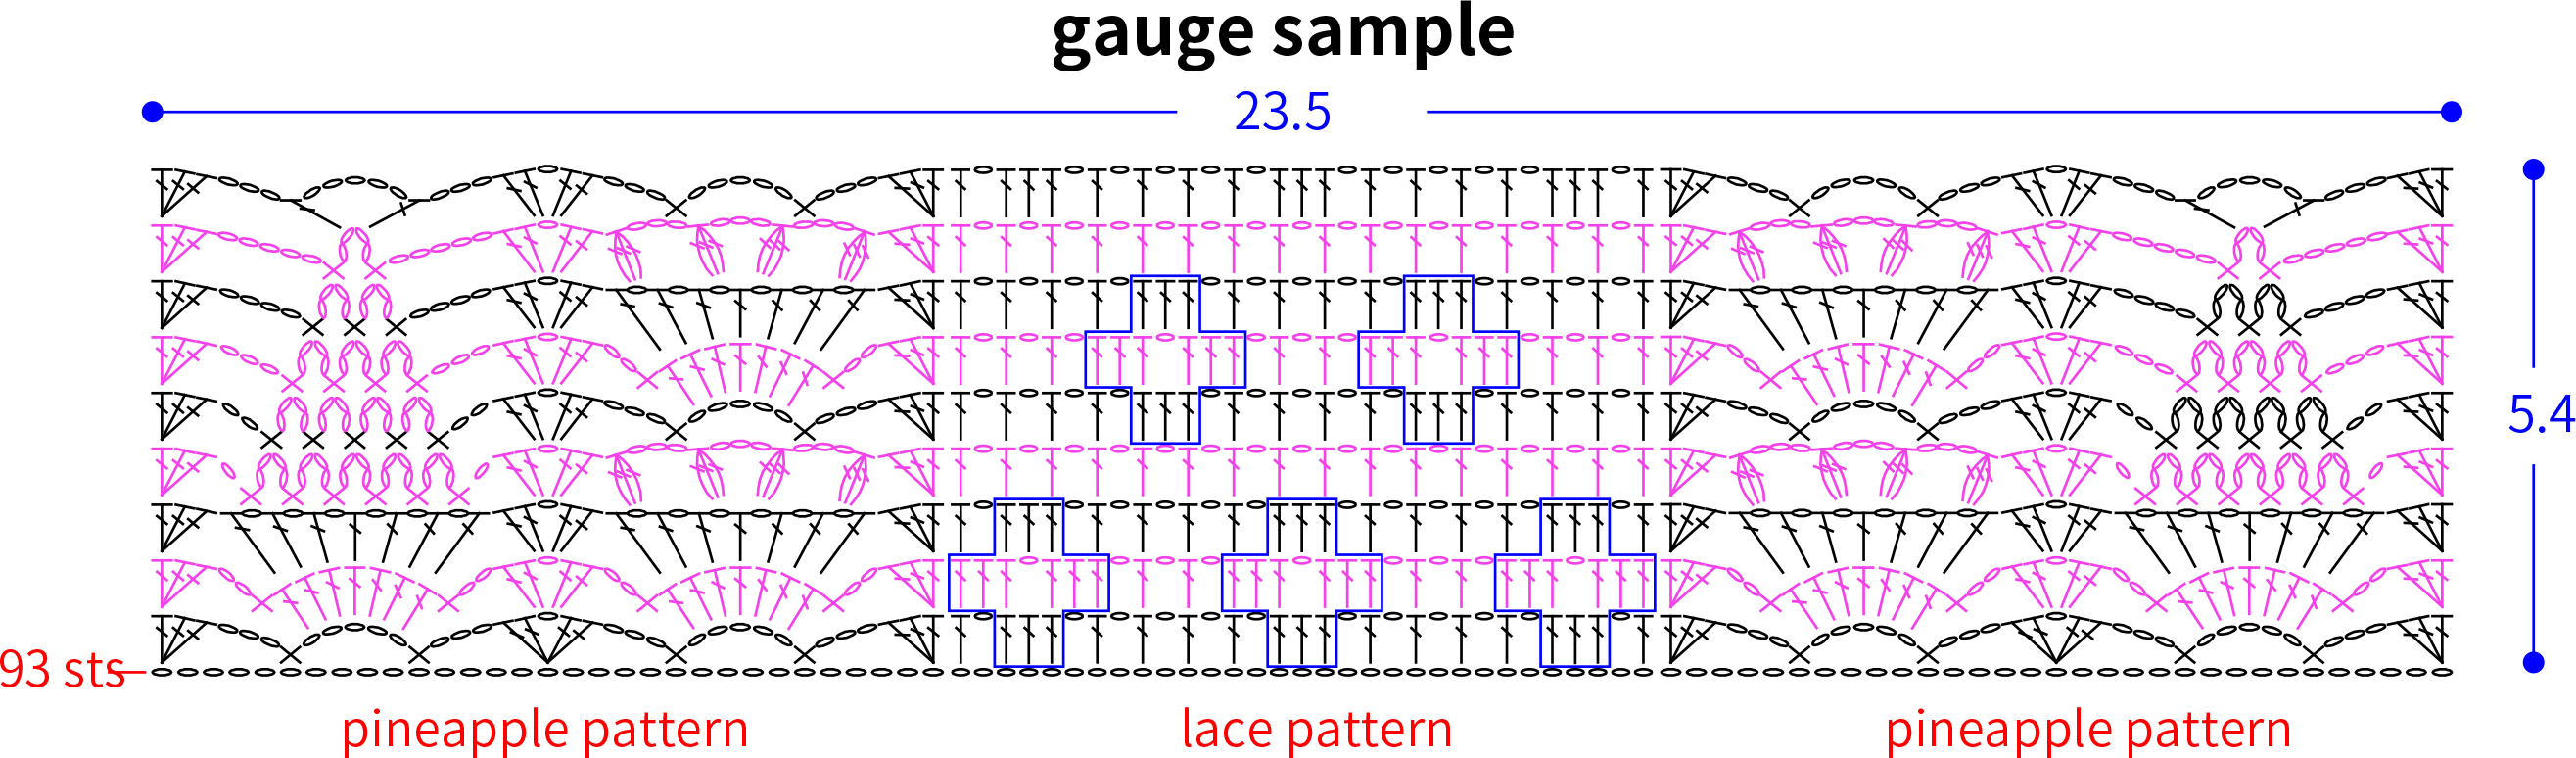
The Handcrafted measurements may have an error of 1 to 2 cm. Due to variations in individual tension, the size of the sample is for reference only.
Materials: Combed 5# Lace
Crochet Hook: 2.00mm Crochet Hook

Chart Key











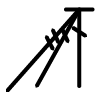


Note:
1. The left and right here are distinguished based on the actual left and right when wearing.
2. This pattern is using American terminology. All measurements in charts are in cm.

Part 1 Front pieceA 00' 28''
The front piece is worked back and forth starting with a foundation chain, dividing from bottom to top into the body, chest piece, and shoulder-parts. Please refer to the video demonstration for specifics.
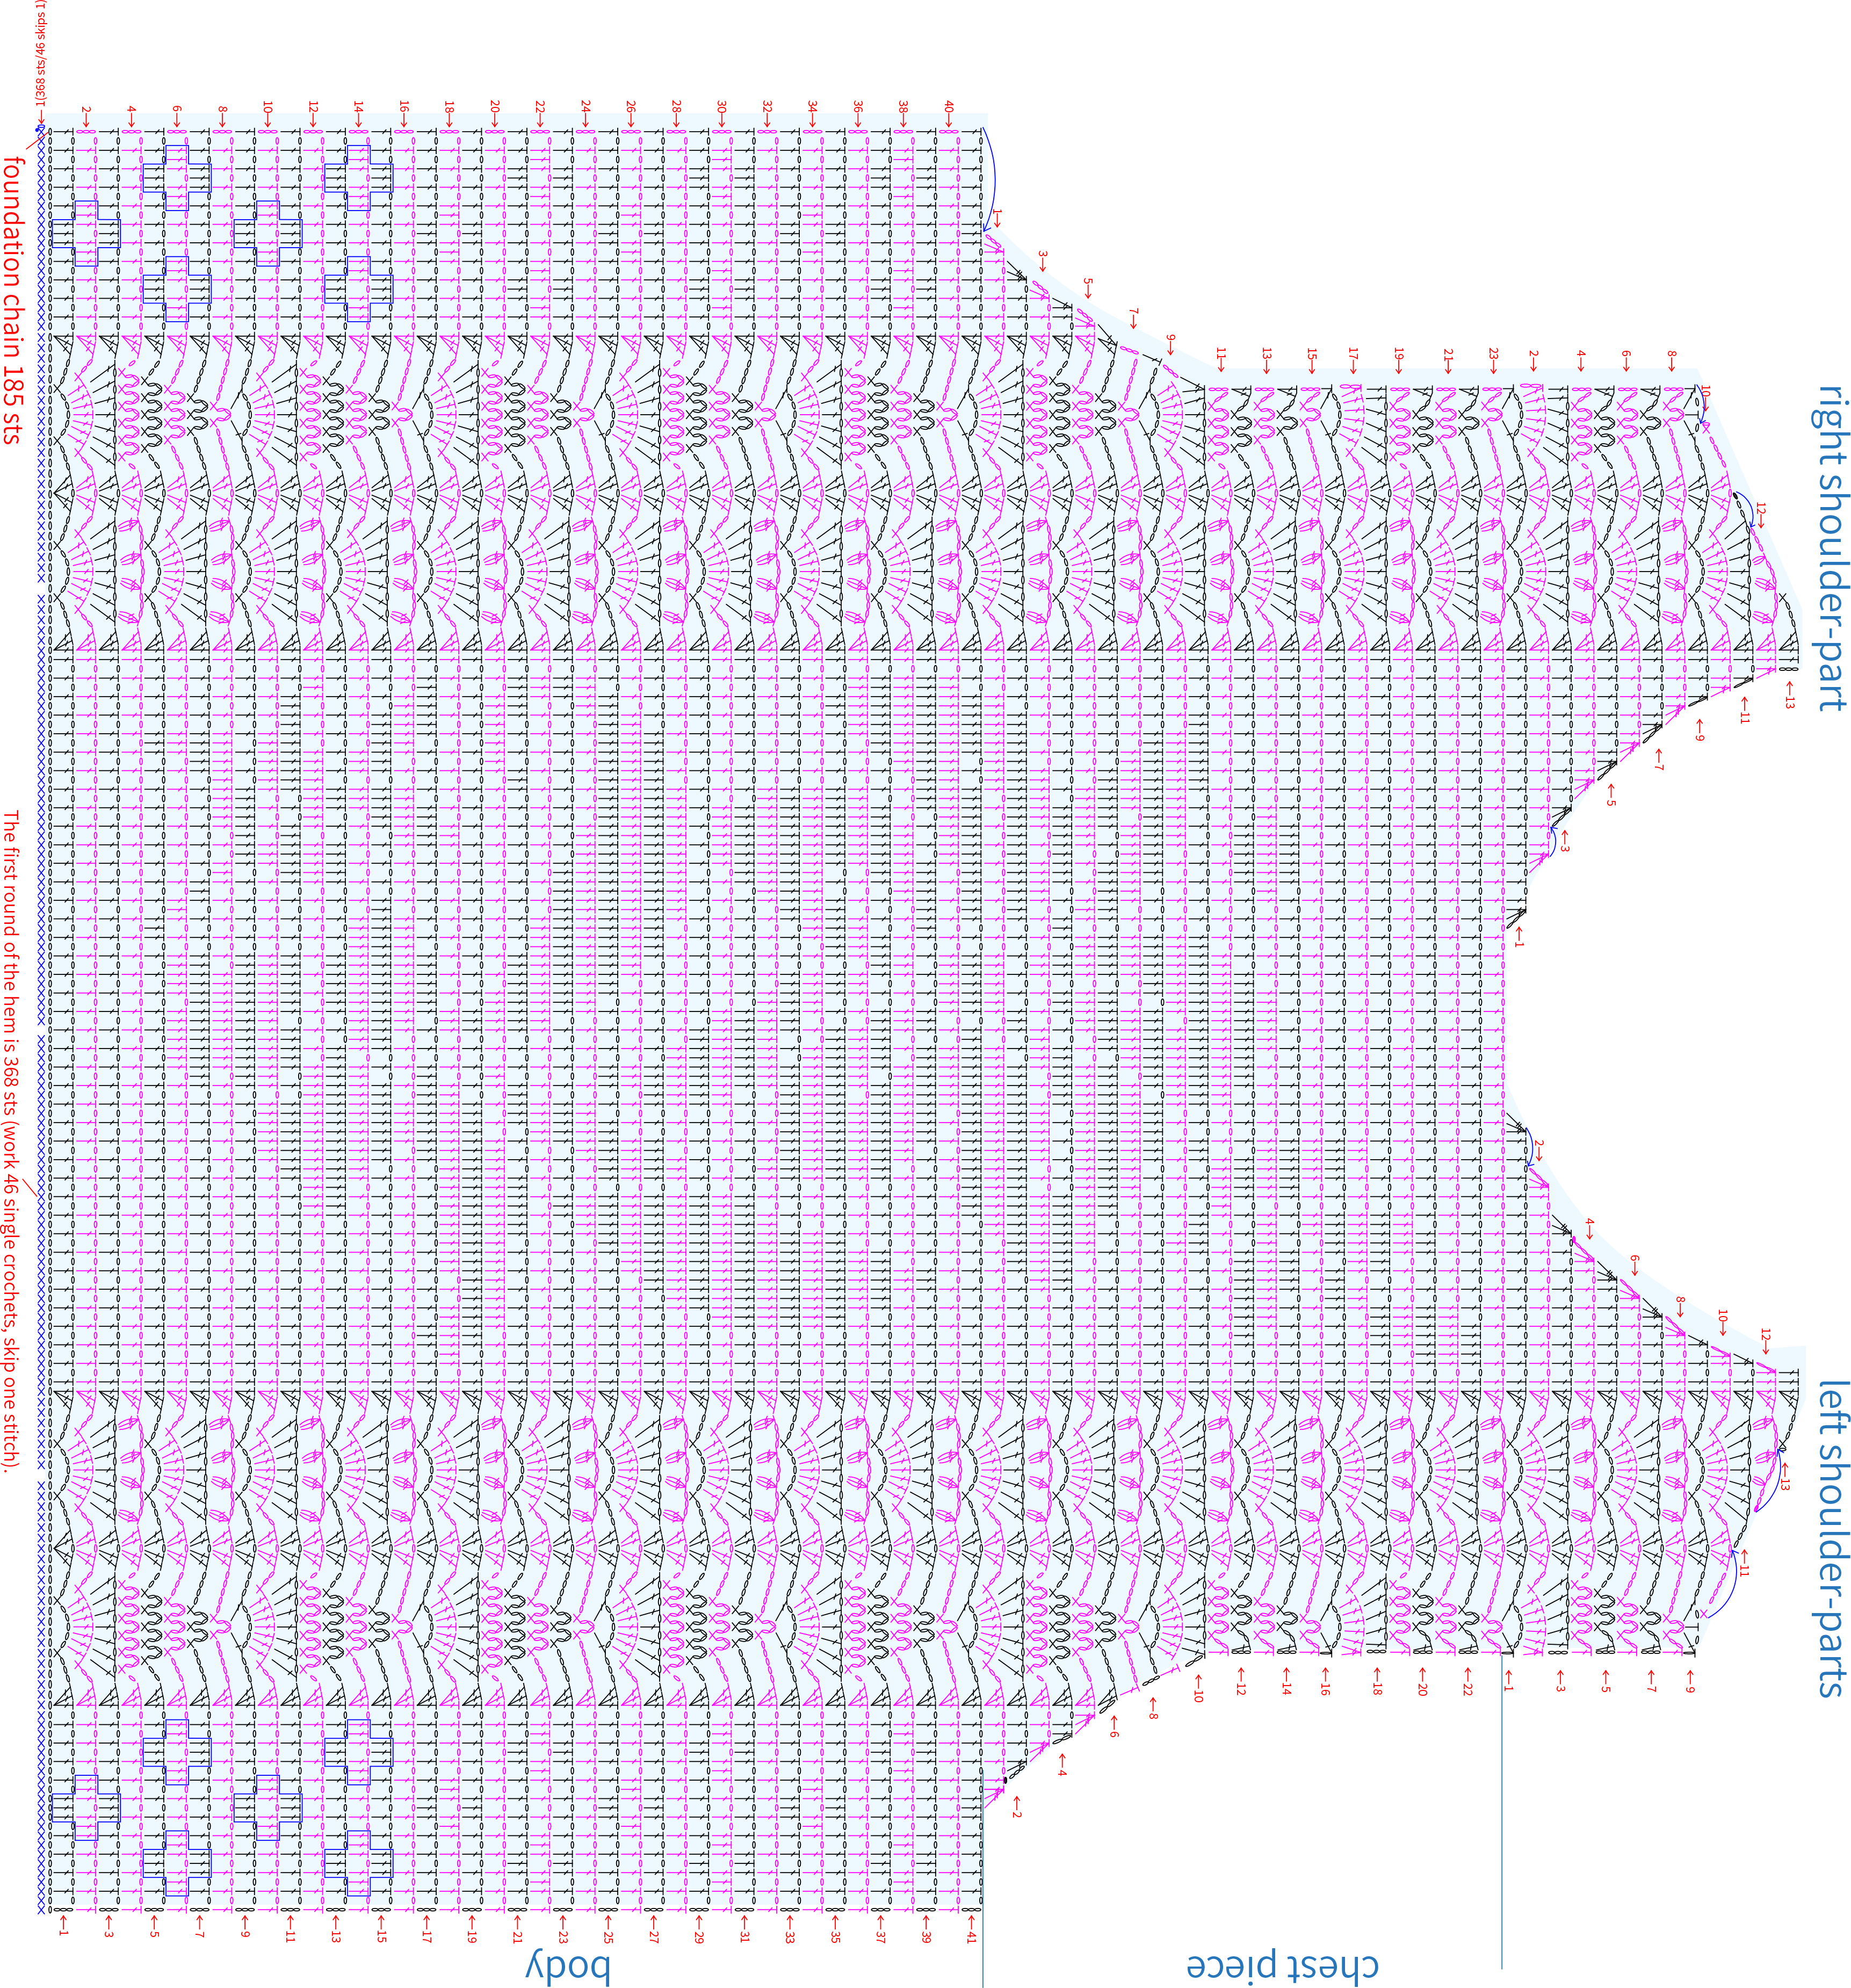
Note: After completing the 4th row of the body, check the fabric piece size (height approximately 2.5cm, width approximately the garment's bust width). If there's a significant difference, you need to adjust your tension and re-crochet to avoid affecting the finished product's dimension.
Part 2 Back pieceB 34' 11''
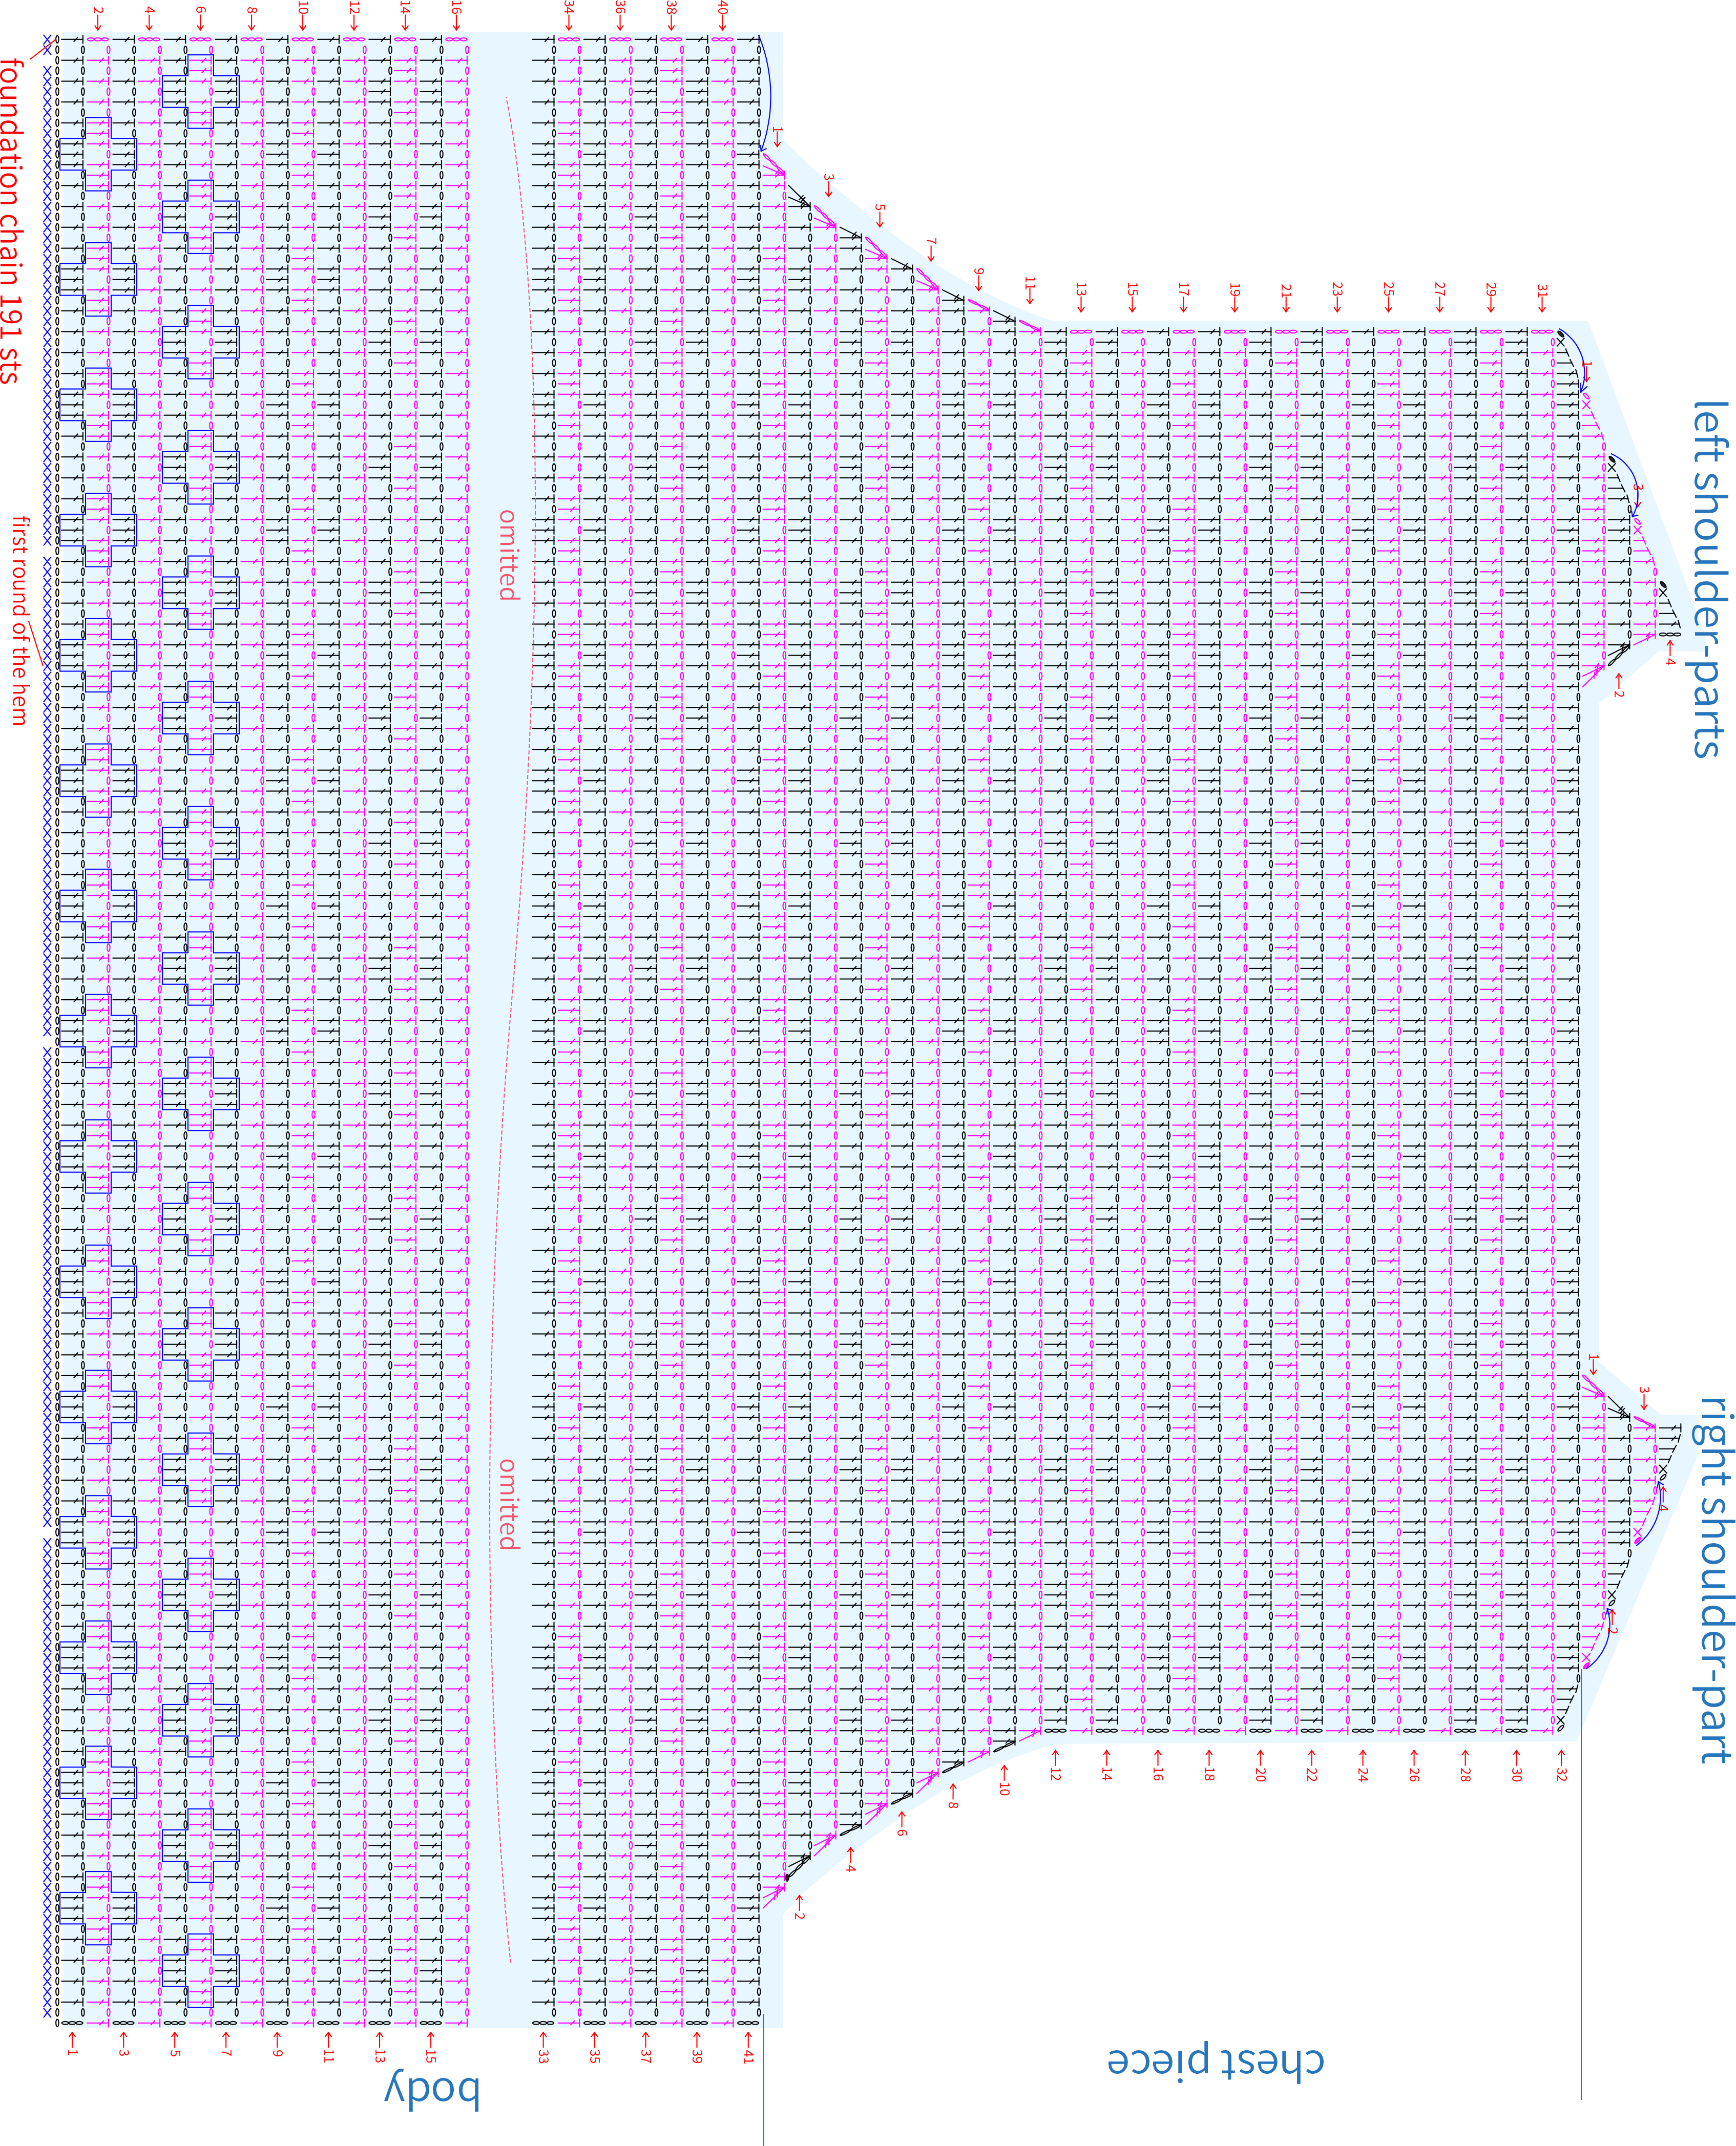
The back piece will start with a foundation chain and be crocheted back and forth, also divided into the body, chest piece, and shoulder-parts. Please refer to the video demonstration for details.
Part 3 SleevesC 35' 10''
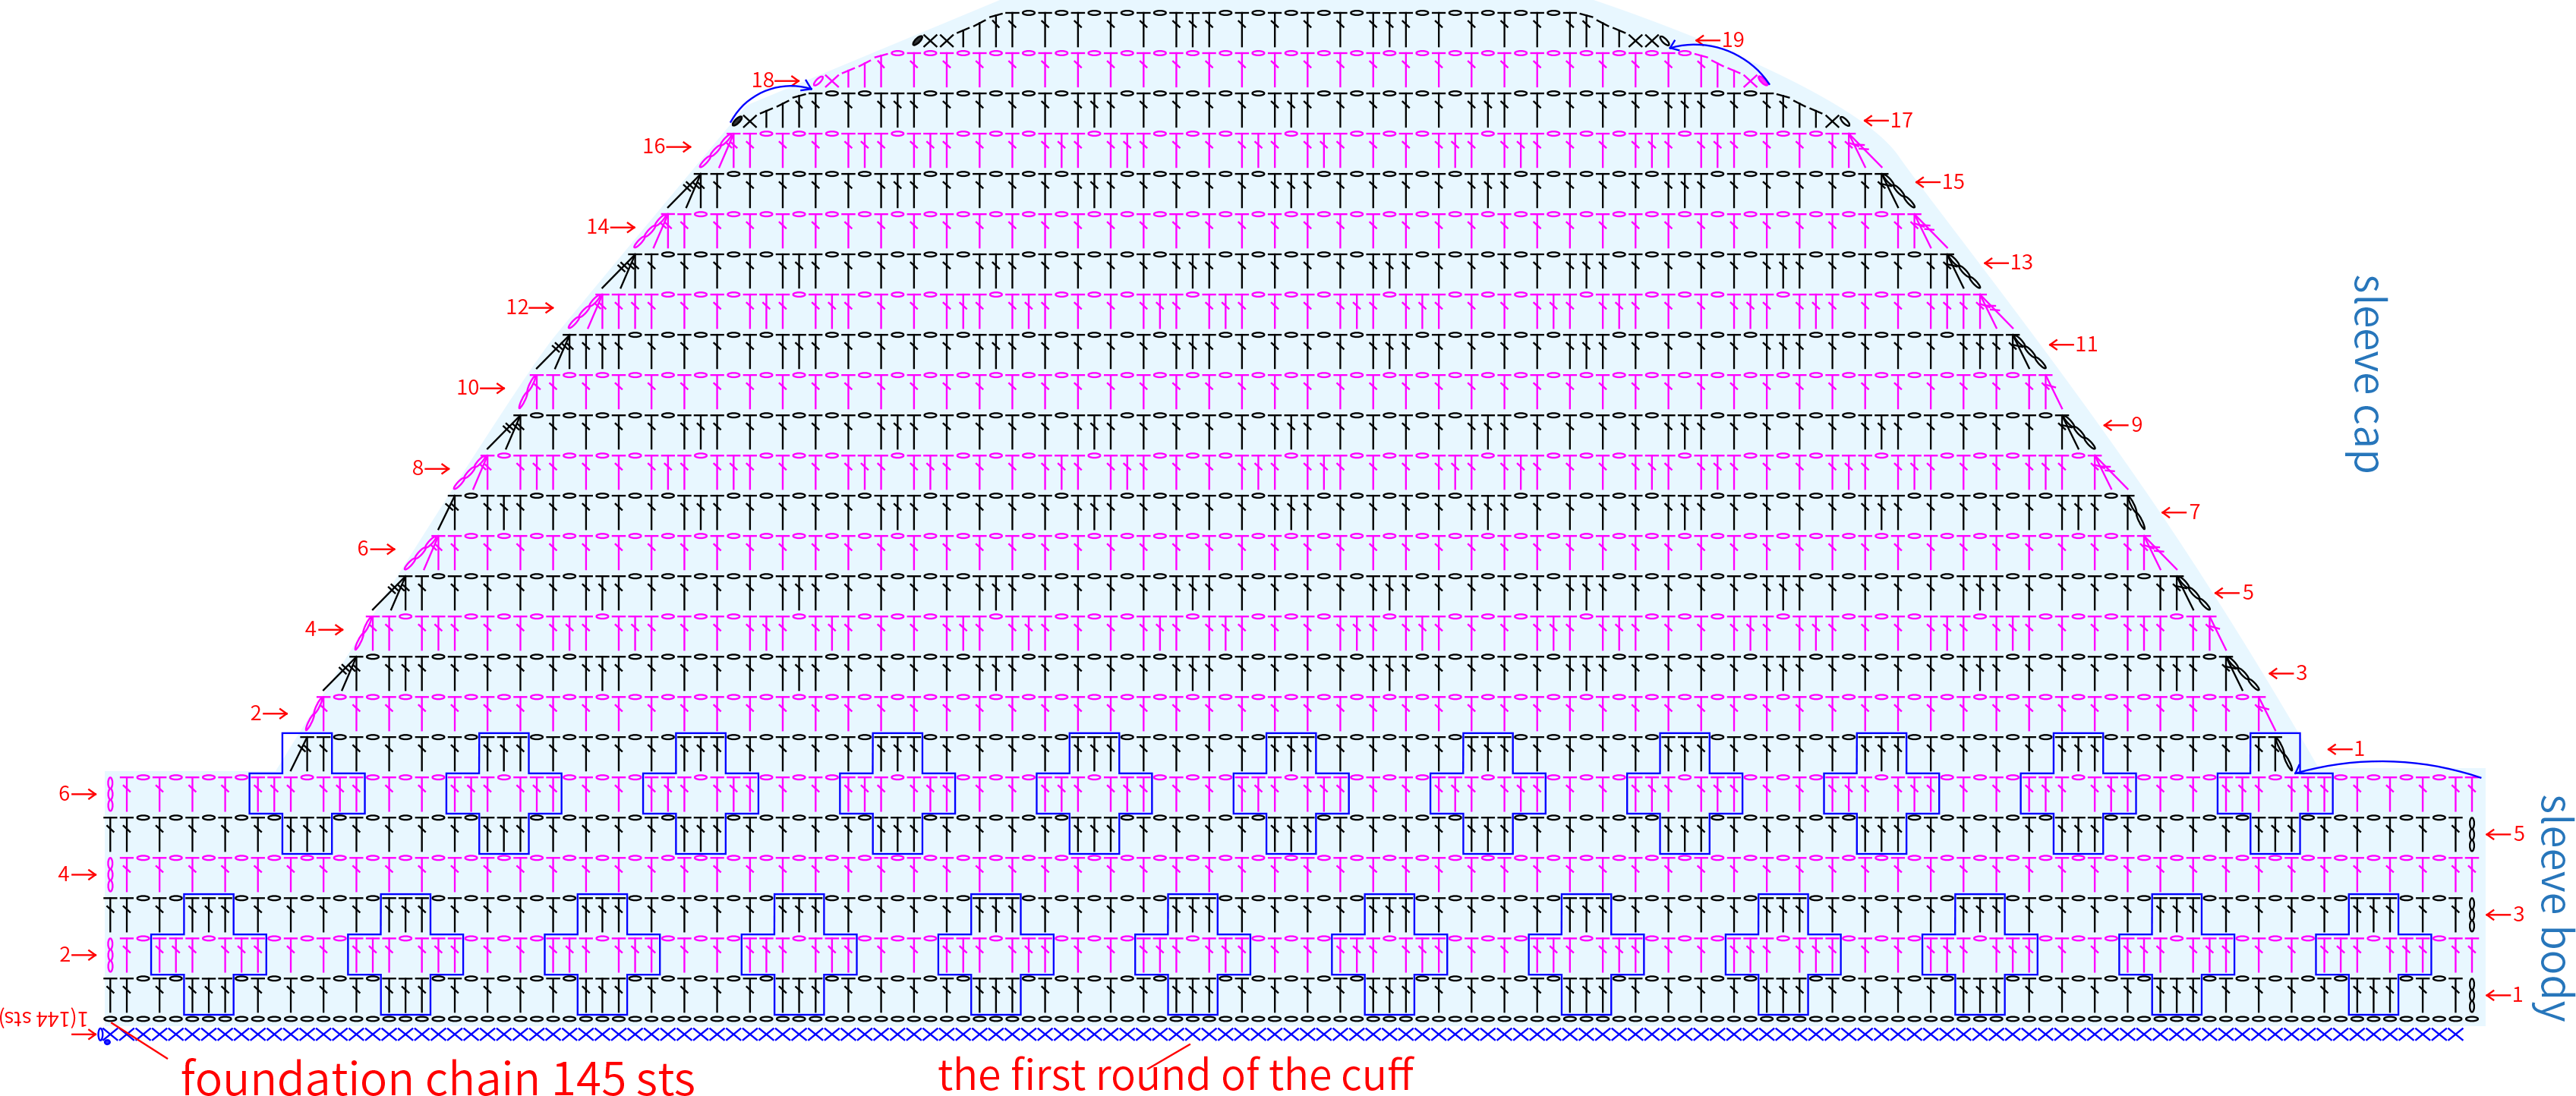
The sleeve is started with a foundation chain and worked back and forth, divided into the sleeve body and sleeve cap. Please refer to the video demonstration for specifics.
Part 4 Joining togetherD 35' 39''
After completing the front and back pieces and the sleeves, join together the shoulders and side seams of the body for the front and back pieces. For the sleeves, join the side seams of the sleeve body. Then, attach the sleeve cap to the armhole position of the front and back pieces. Please refer to the video demonstration for specifics.
Note: For the shoulder part, insert both pieces and work a single crochet on the wrong side to join them, with 1 chain stitch as a transition in between. For the other parts, separately insert the edges of the pieces and slip stitch to join them, with 1 chain stitch as a transition in between. The specific joining method can also be determined according to your preference.
Part 5 EdgingE 44' 13''
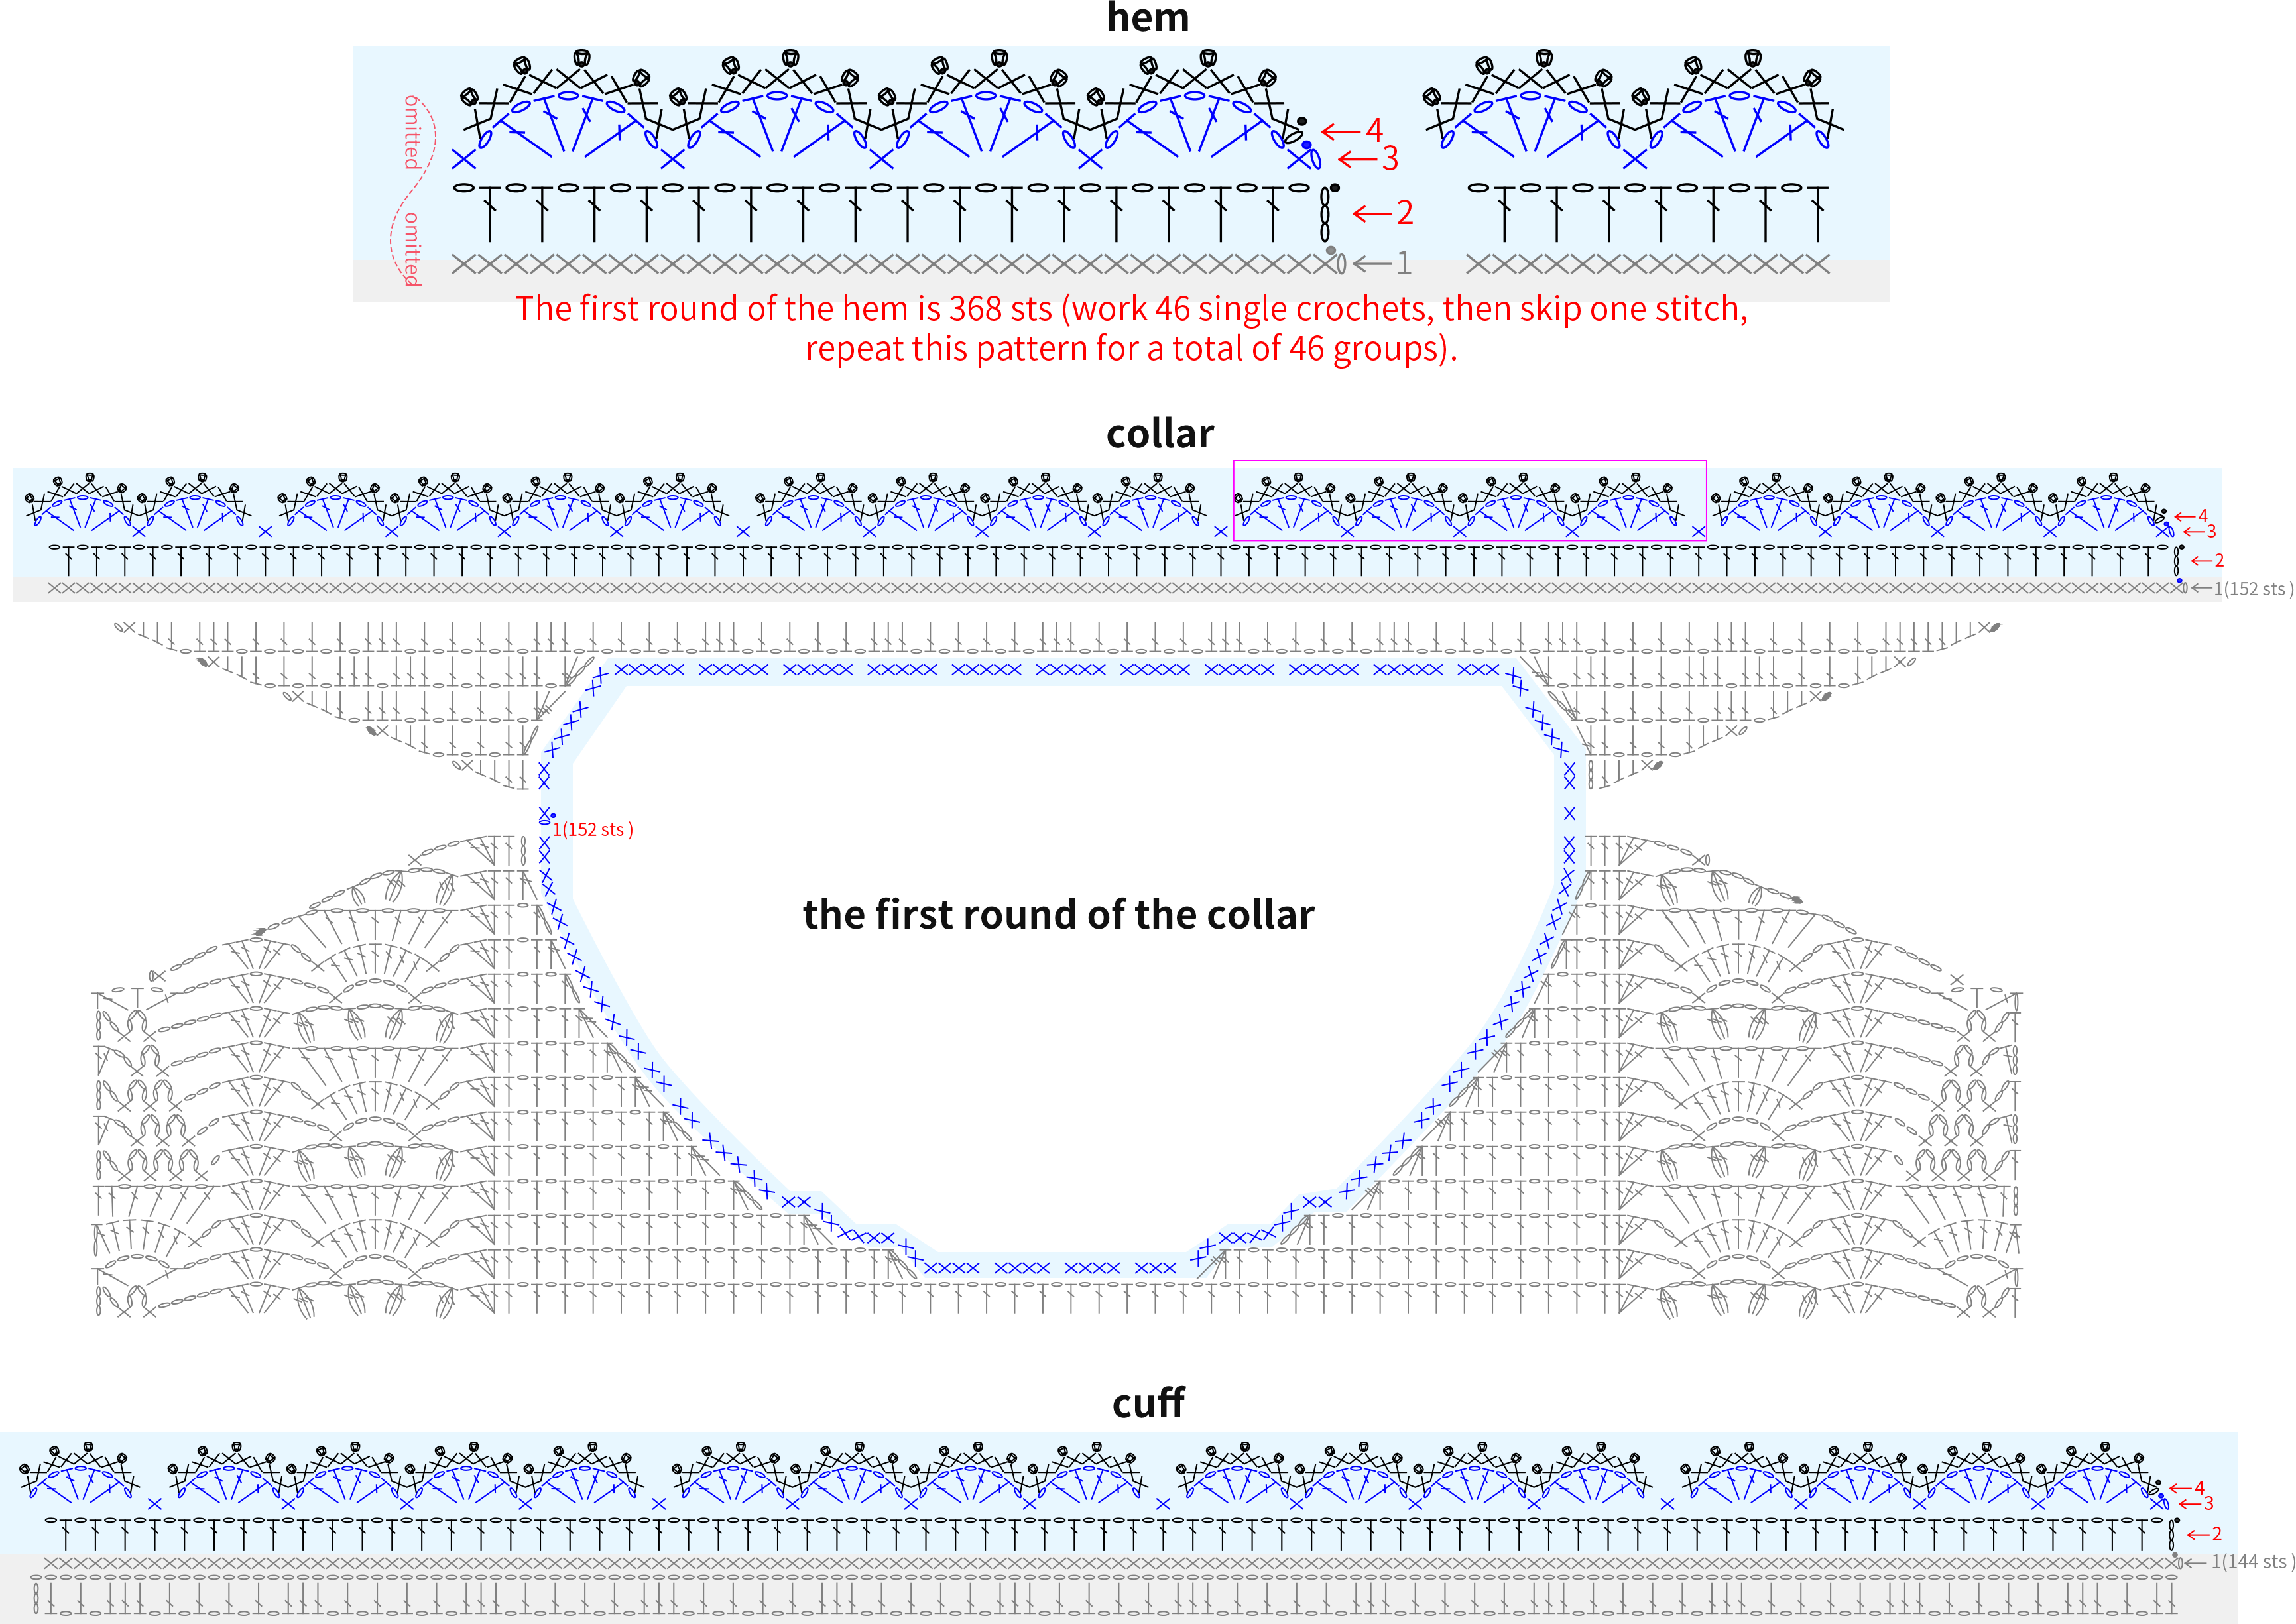
The edging is divided into three parts: the hem, the collar, and the cuffs. Work in rounds along the cast-on edges of the front and back pieces, the neckline, and the cast-on edges of the sleeves. For specific instructions, please refer to the video demonstration.
Made by the community