Home / Blanket
Ruyi Lotus Blanket
Project preview
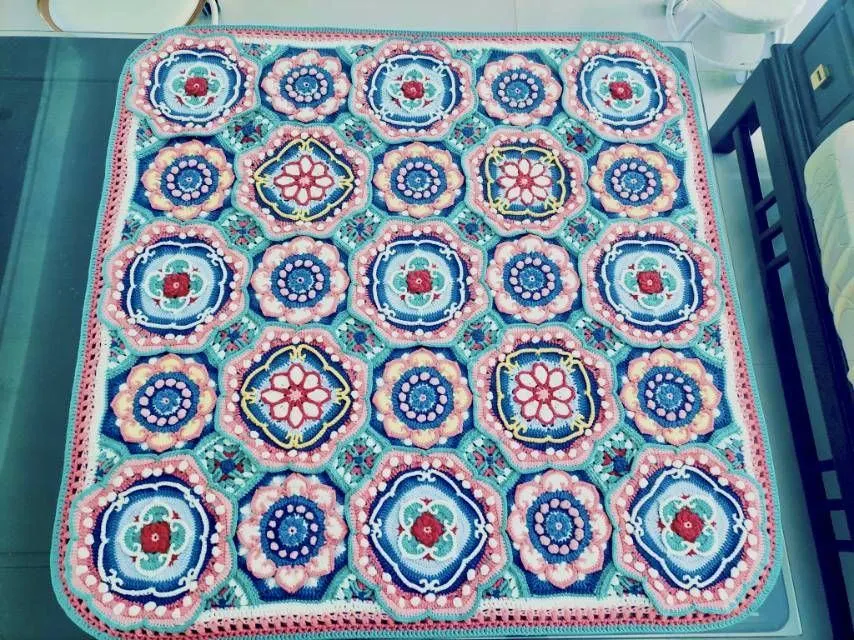
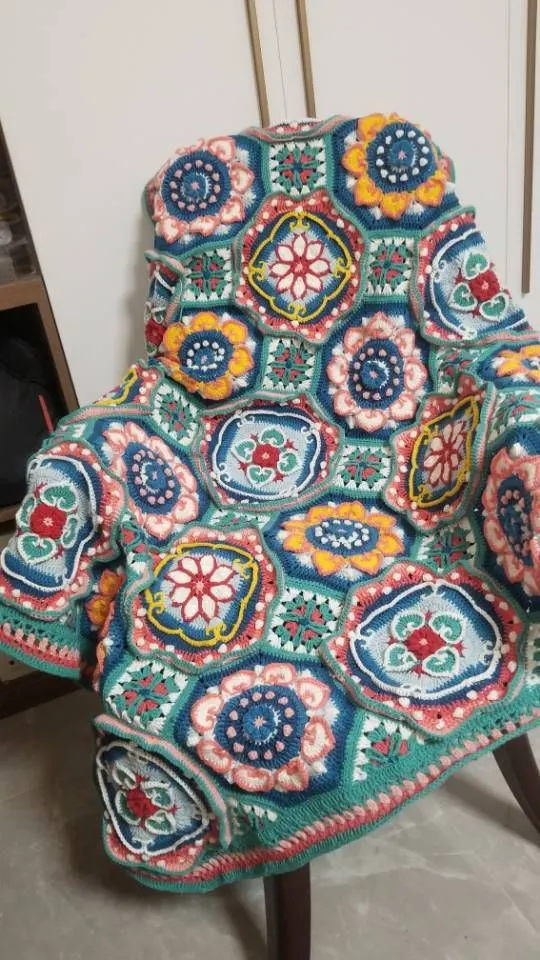
See the finished project
Pattern format
Instructions
Watch and follow
Video tutorial
This blanket includes three parts: motifs, sewing, and edging. First, crochet the motifs. Then sewing them together accordingly and edging in end.
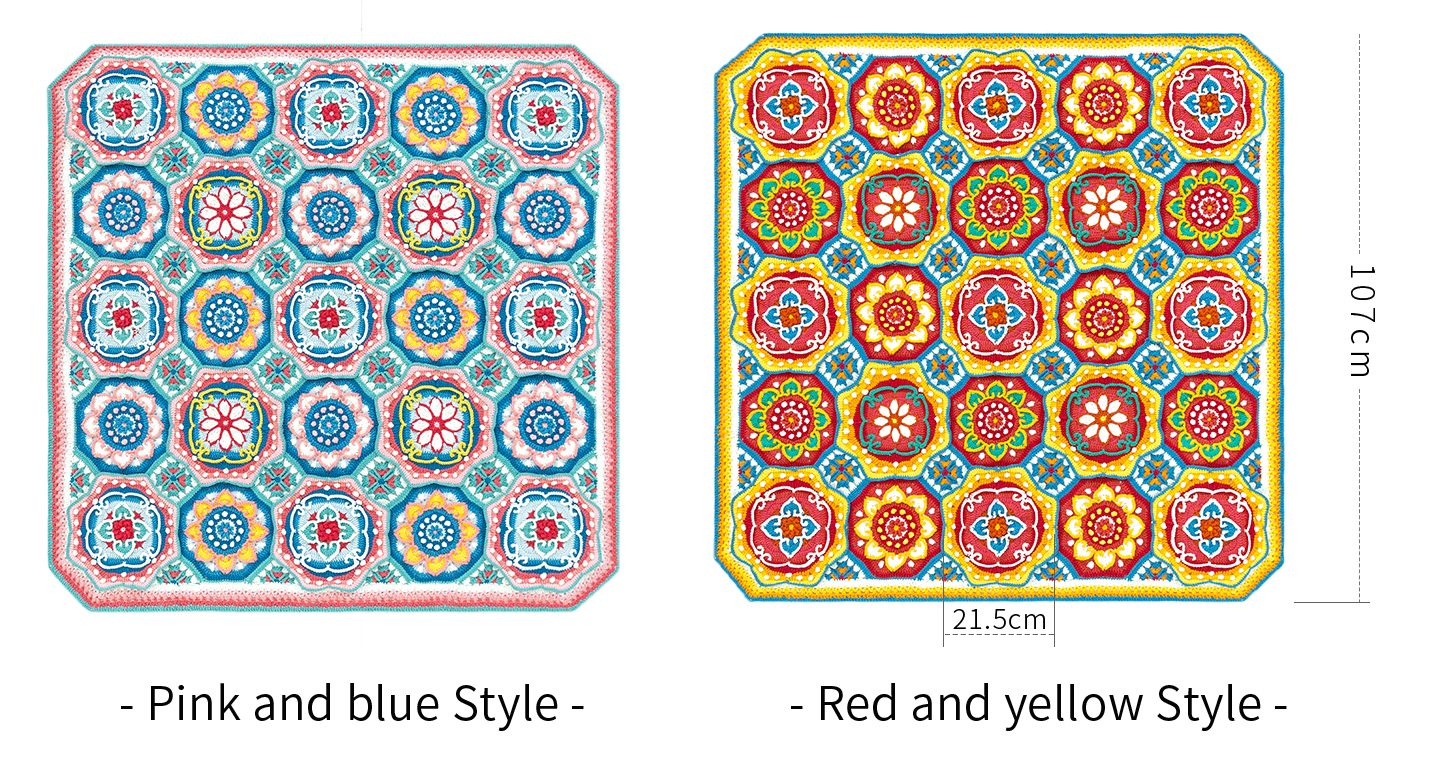
The handcrafted measurements may have an error of 1 to 2cm. Due to variations in individual tension, the size of the sample is for reference only.
Material: 4-Ply Combed Cotton & Acrylic Fibre Hand Knitting Yarn
Hook: 3.00mm crochet hook
Chart Key
















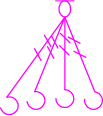



Note:
This pattern is making in Chinese crochet pattern terms, and the stitch name is written using American terminology. All measurements in charts are in cm.
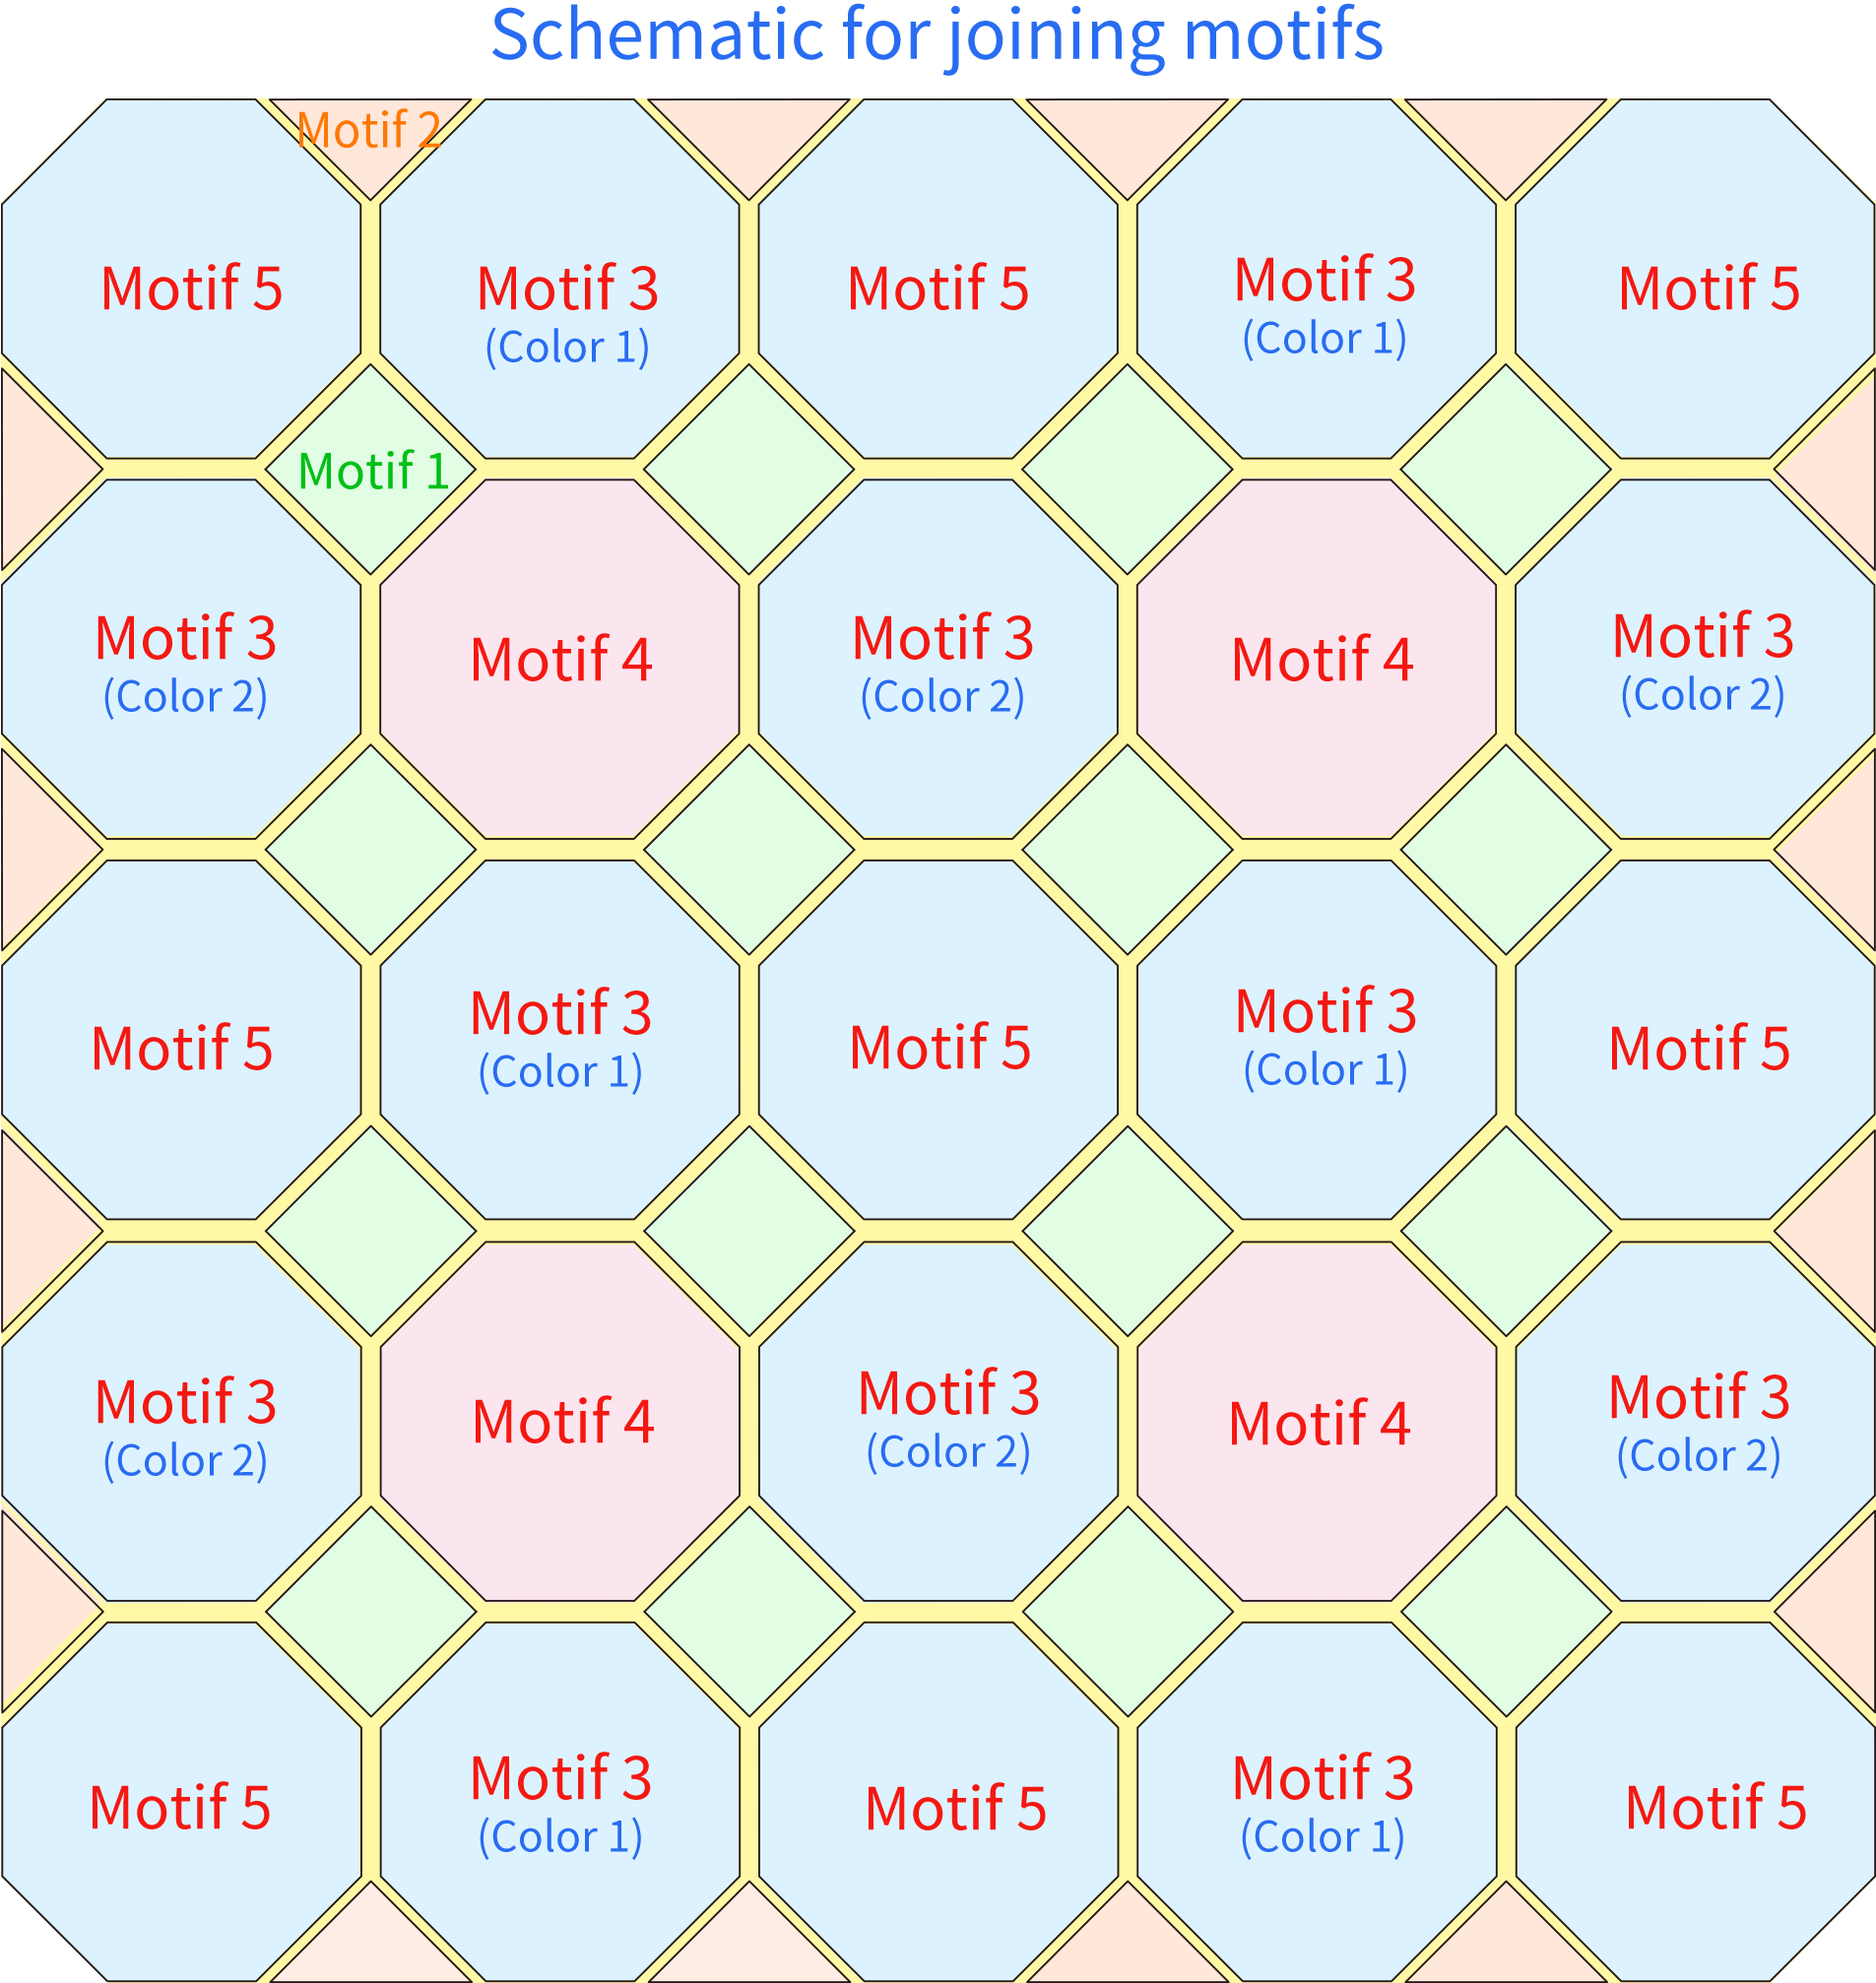
Part 1 MotifsA
There are five motifs in total: Motif 1, Motif 2, Motif 3, Motif 4 and Motif 5.
Step 1 Motif 1 (make 16)A1 01' 02'' (Part 1)
The Motif 1 starts with an adjustable magic ring and work in rounds counter-clockwise. Color changes will be required during crocheting. Please refer to the video demonstration for more details.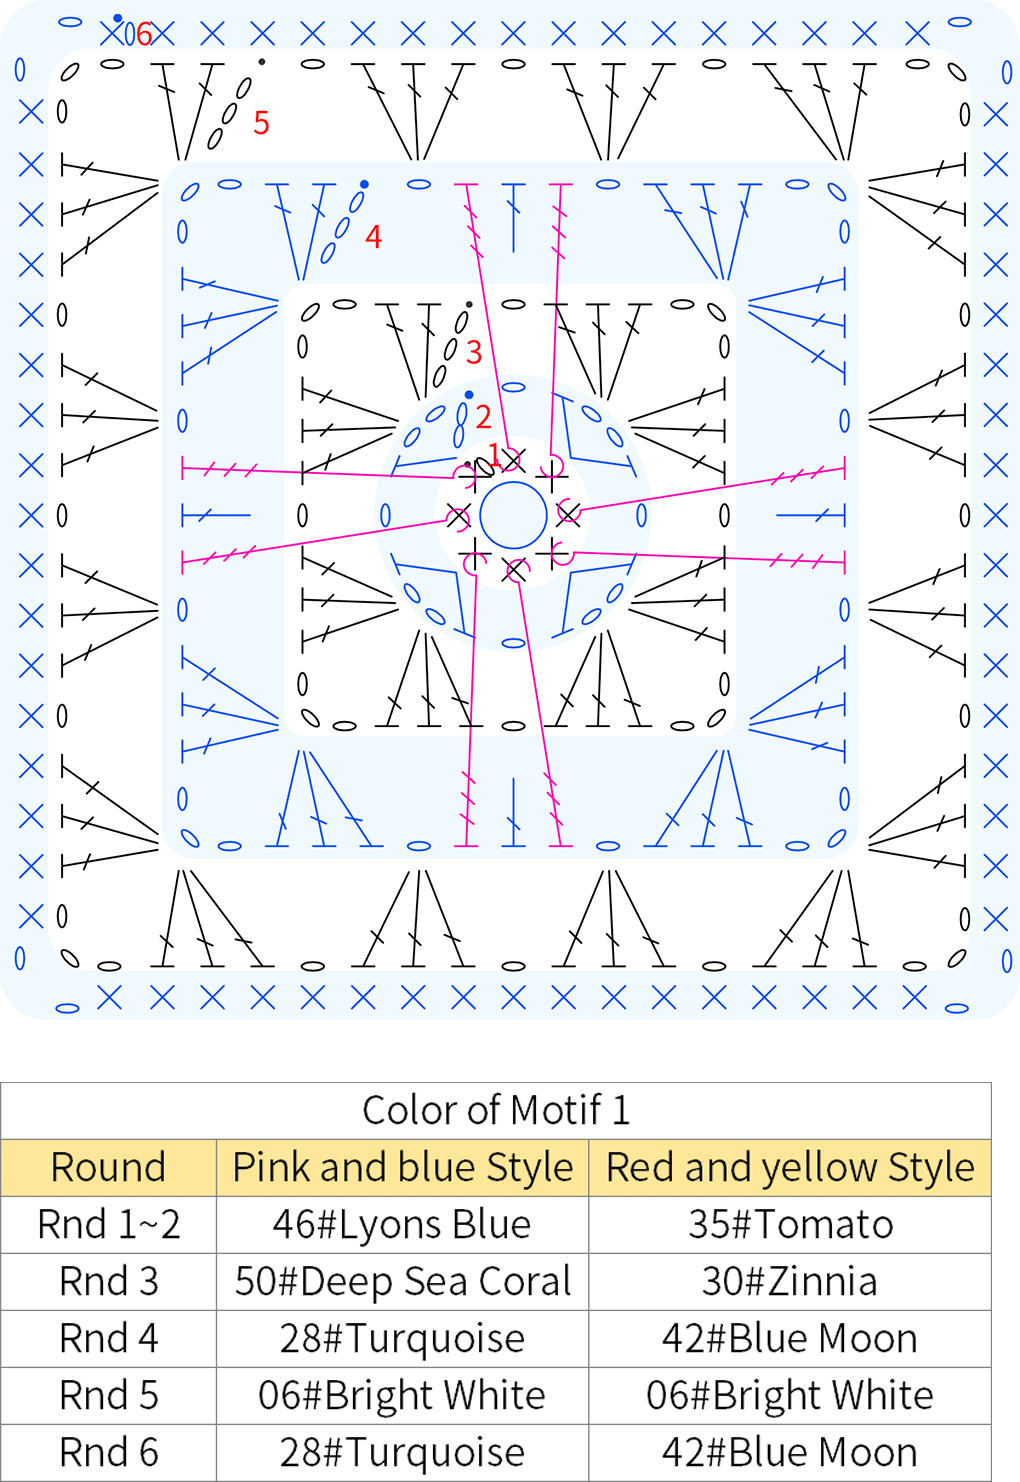
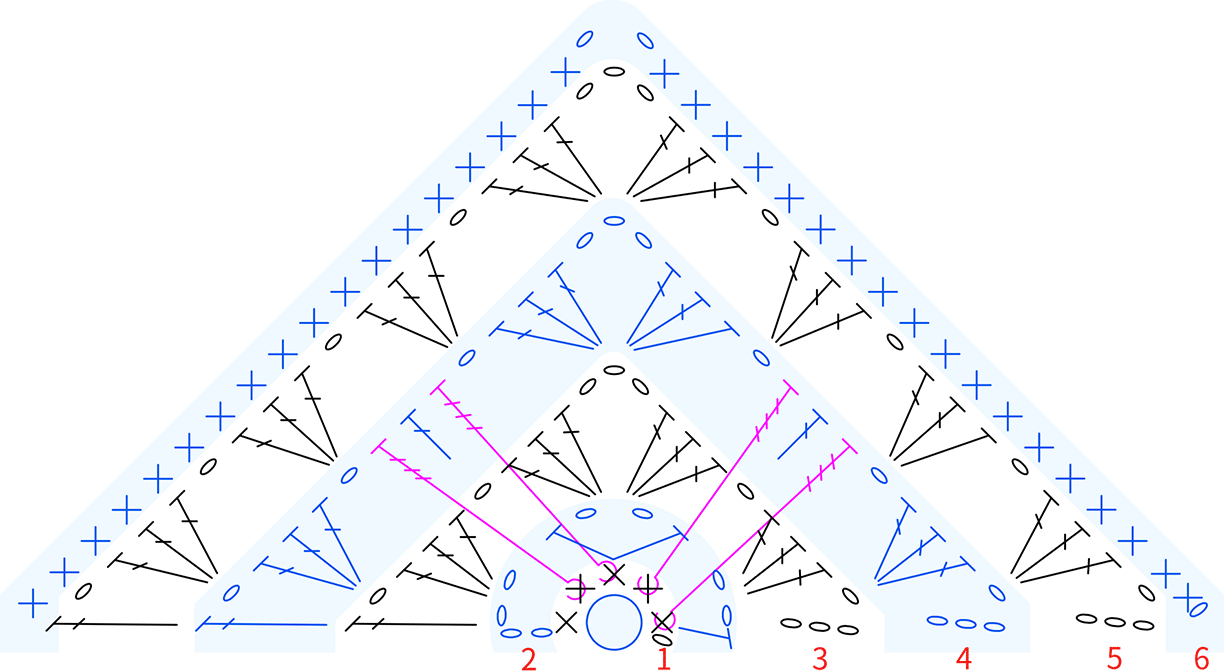
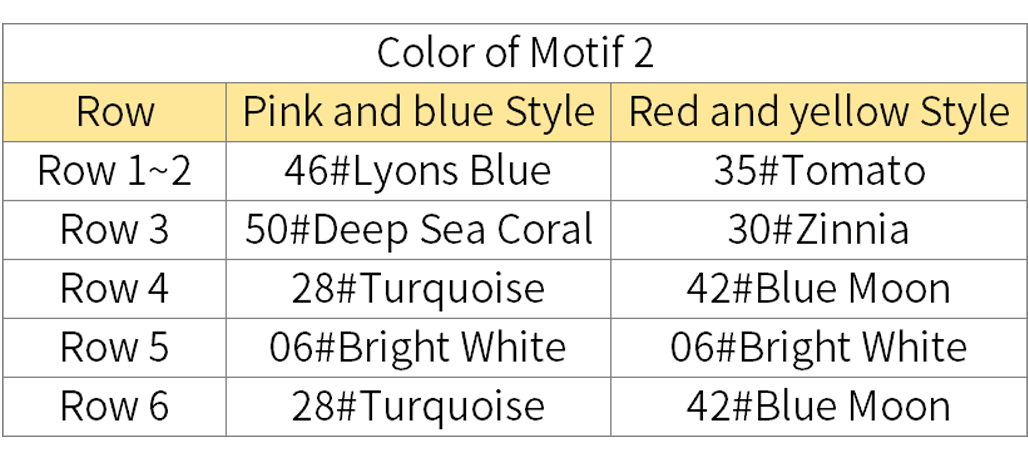
Step 2 Motif 2 (make 16)A2 30' 13'' (Part 1)
Motif 2 starts with an adjustable magic ring. work from the center outwards. Color changes will be needed during working. Please refer to the video demonstration for more details.
Step 3 Motif 3 (make 12)A3 42' 32'' (Part 1)
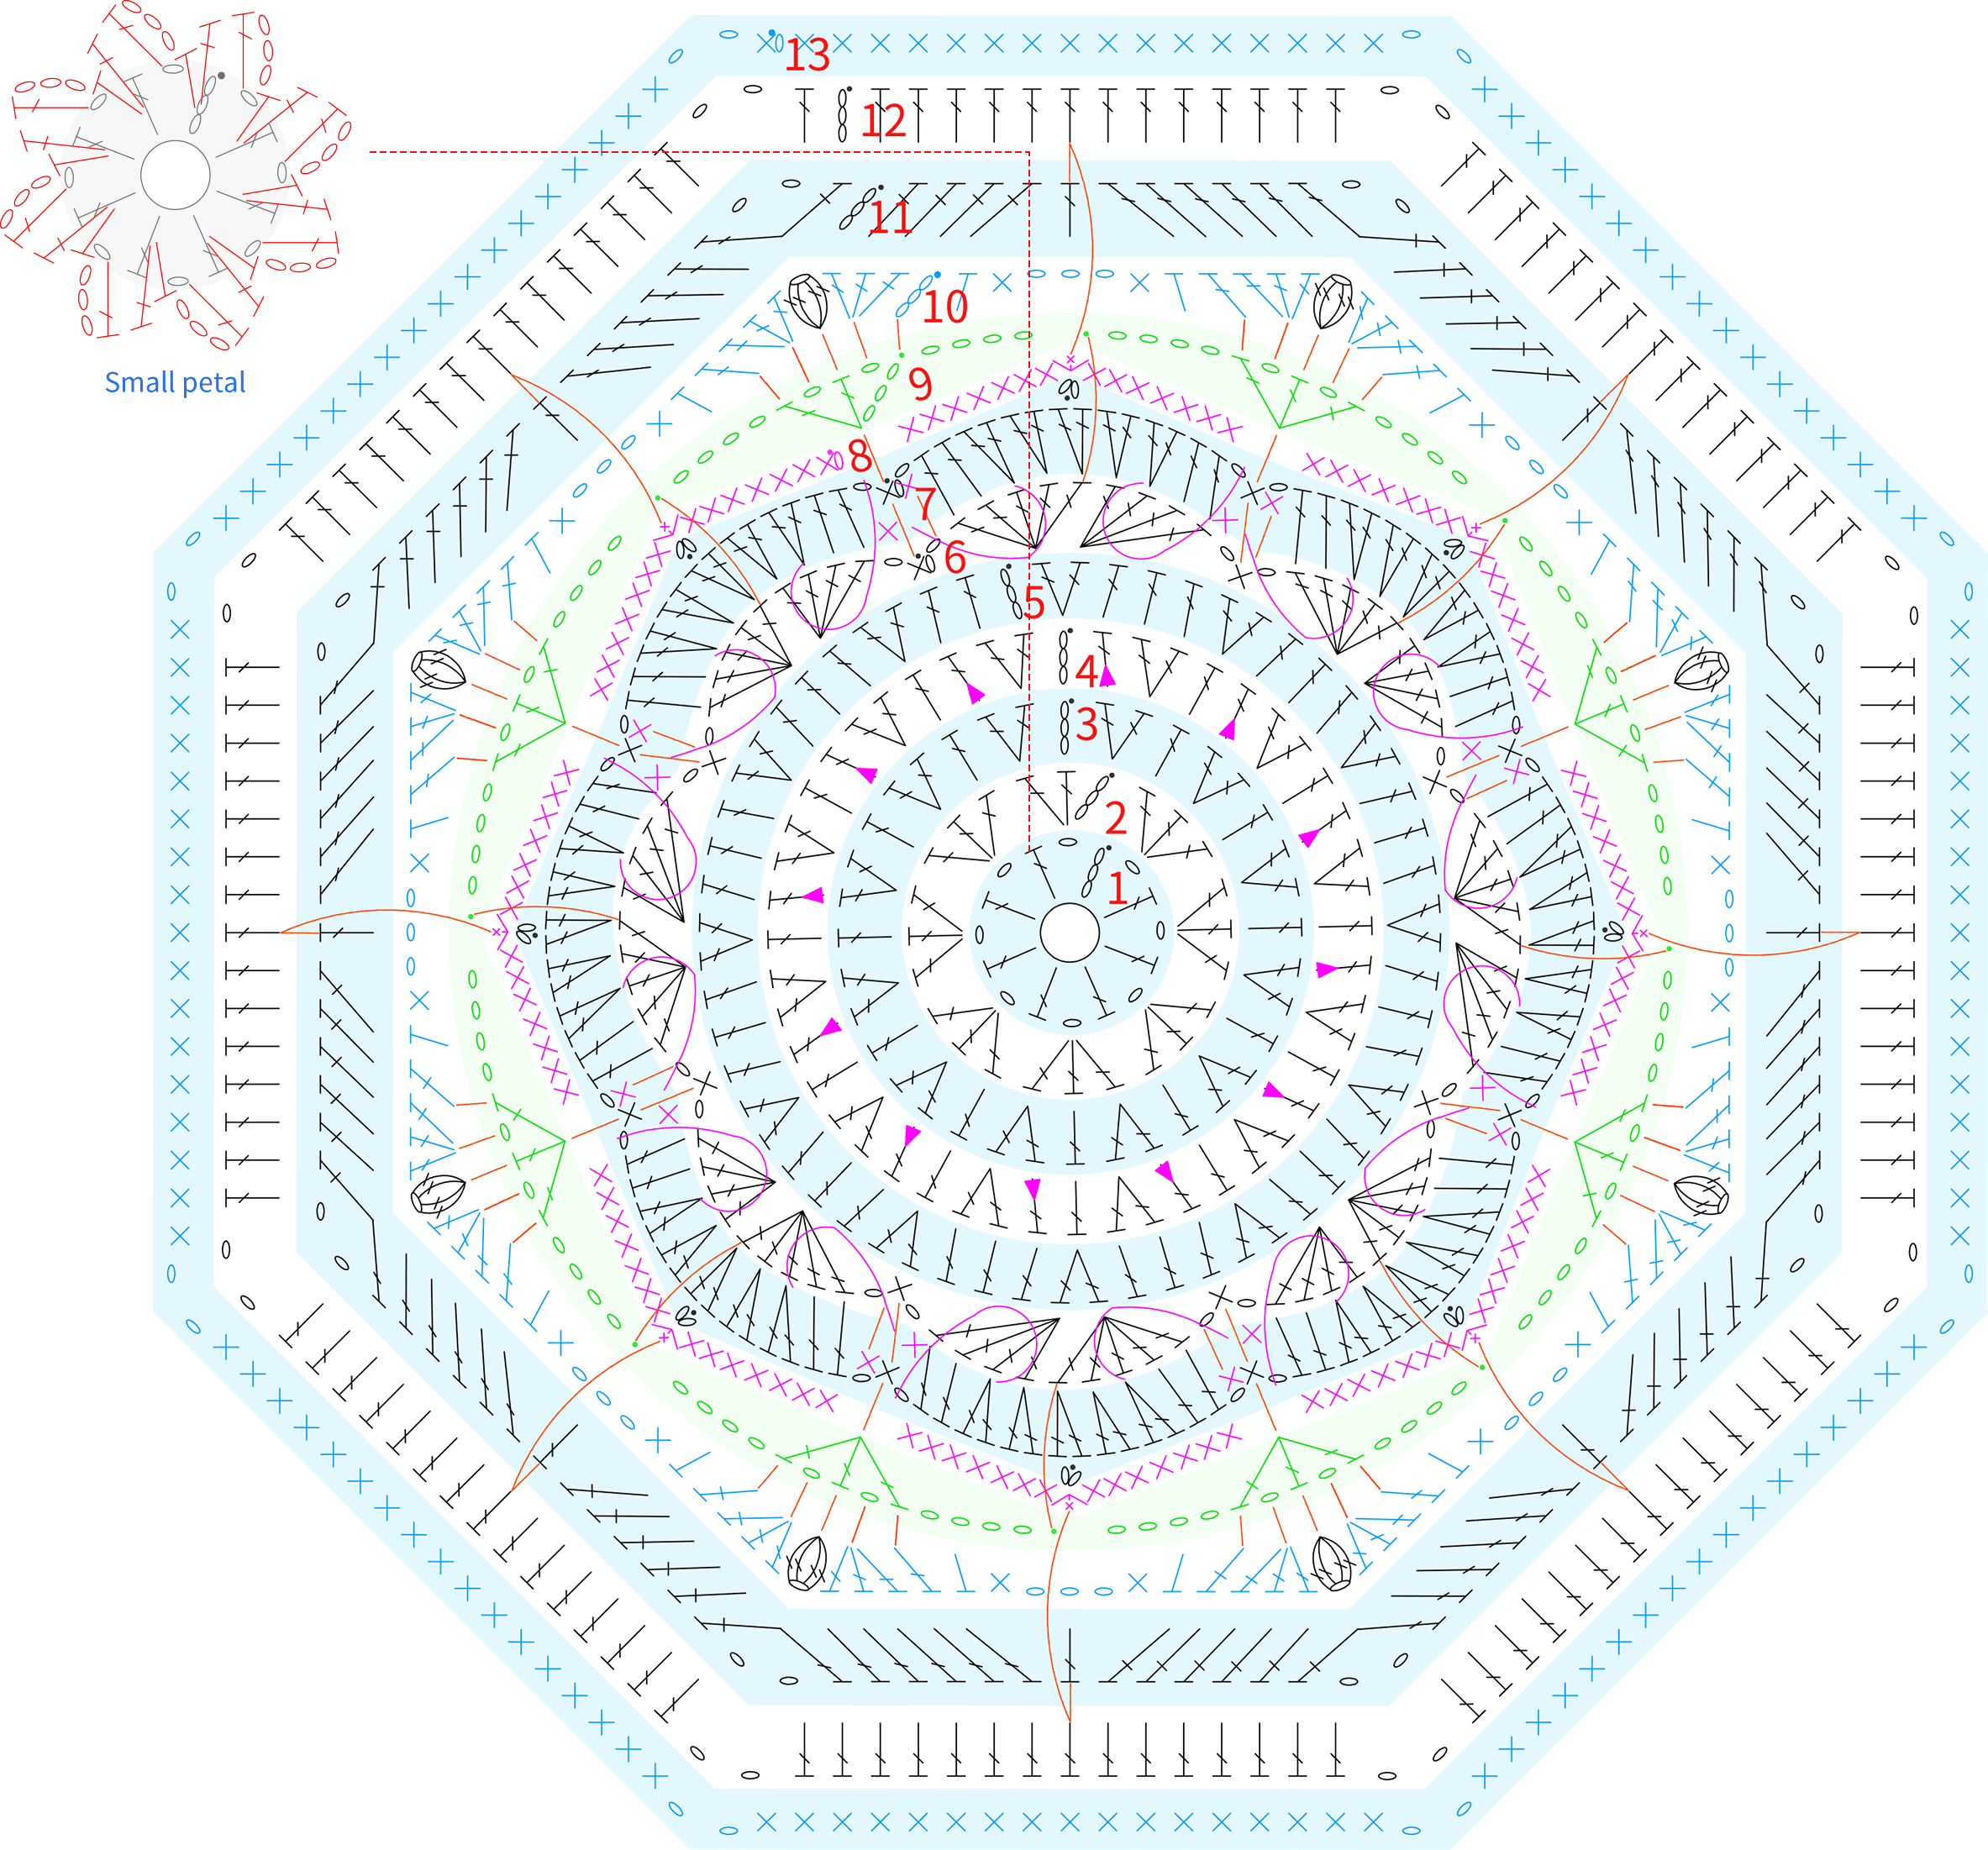
Motif 3 comes in two color combinations, the crochet method is the same. Both start with an adjustable magic ring and Crochet in round counterclockwise outward. Color changes will be needed during the process. Please refer to the video demonstration for more details.
Notes:
1. For the double crochet with a bobble, first create the bobble in the front loop, then work the double crochet in the back loop, incorporating the bobble's loop as you go.
2. When working the curved section in Round 8, pick up stitches according to their alignment, refer to the video demonstration for details.
3. For Round 9, pick up the thread behind of middle double crochet of fan stitch from Round 6 to work slip stitch.
4. When crocheting the middle double crochet in Round 12, connect it to the center stitch of the sc3-in-1 from Round 8.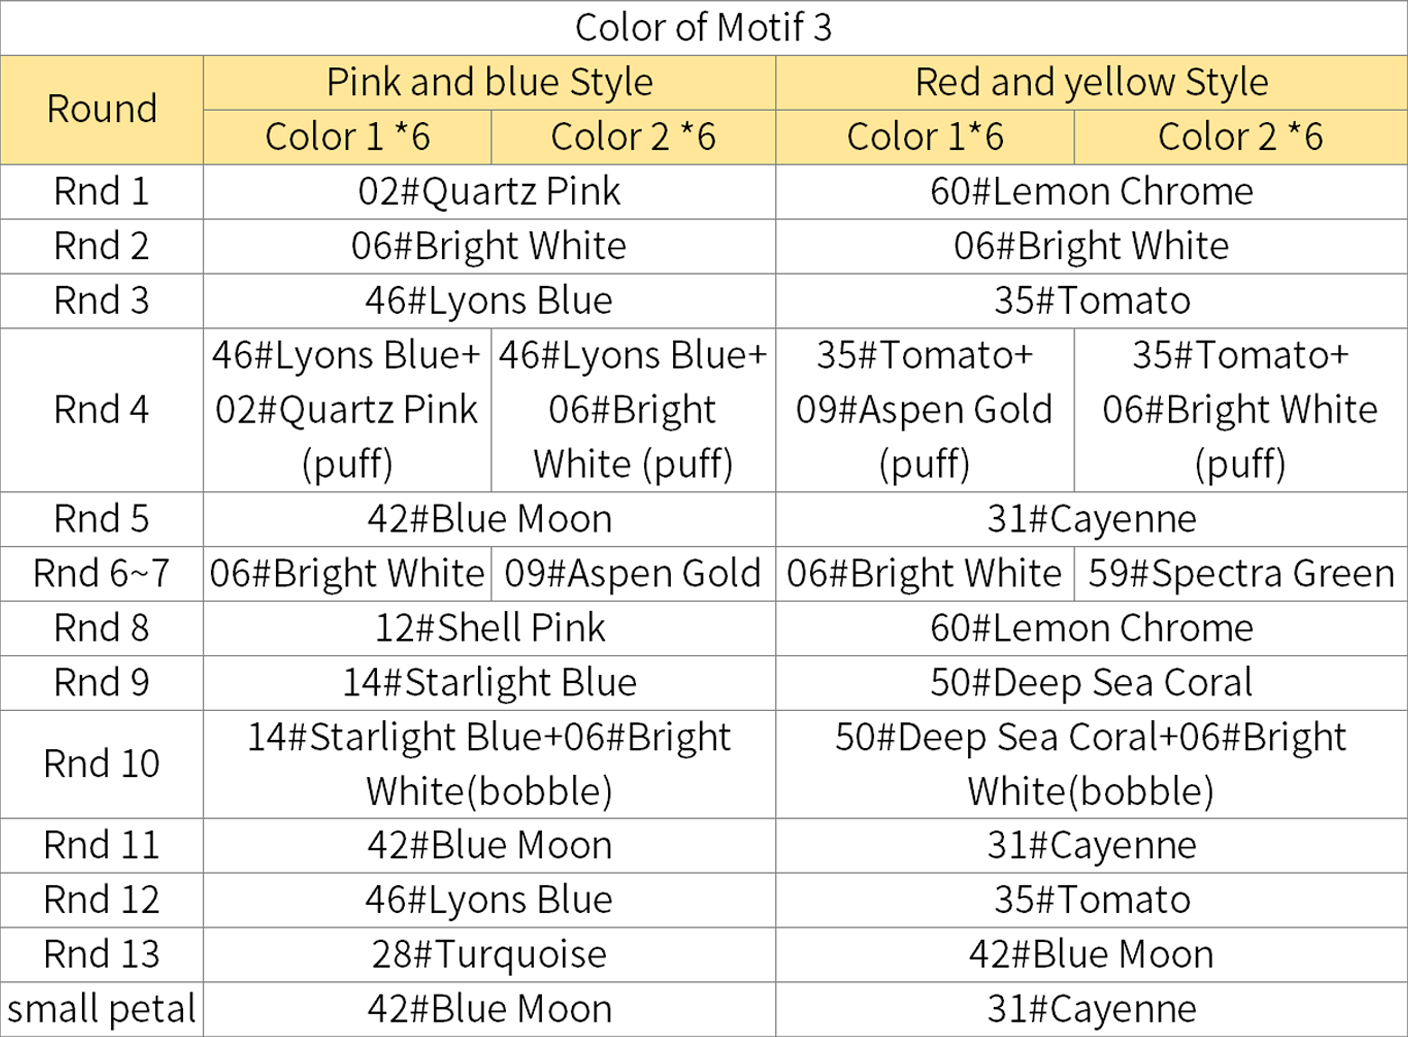
Step 4 Motif 4 (make 4)A4 00' 12'' (Part 1)
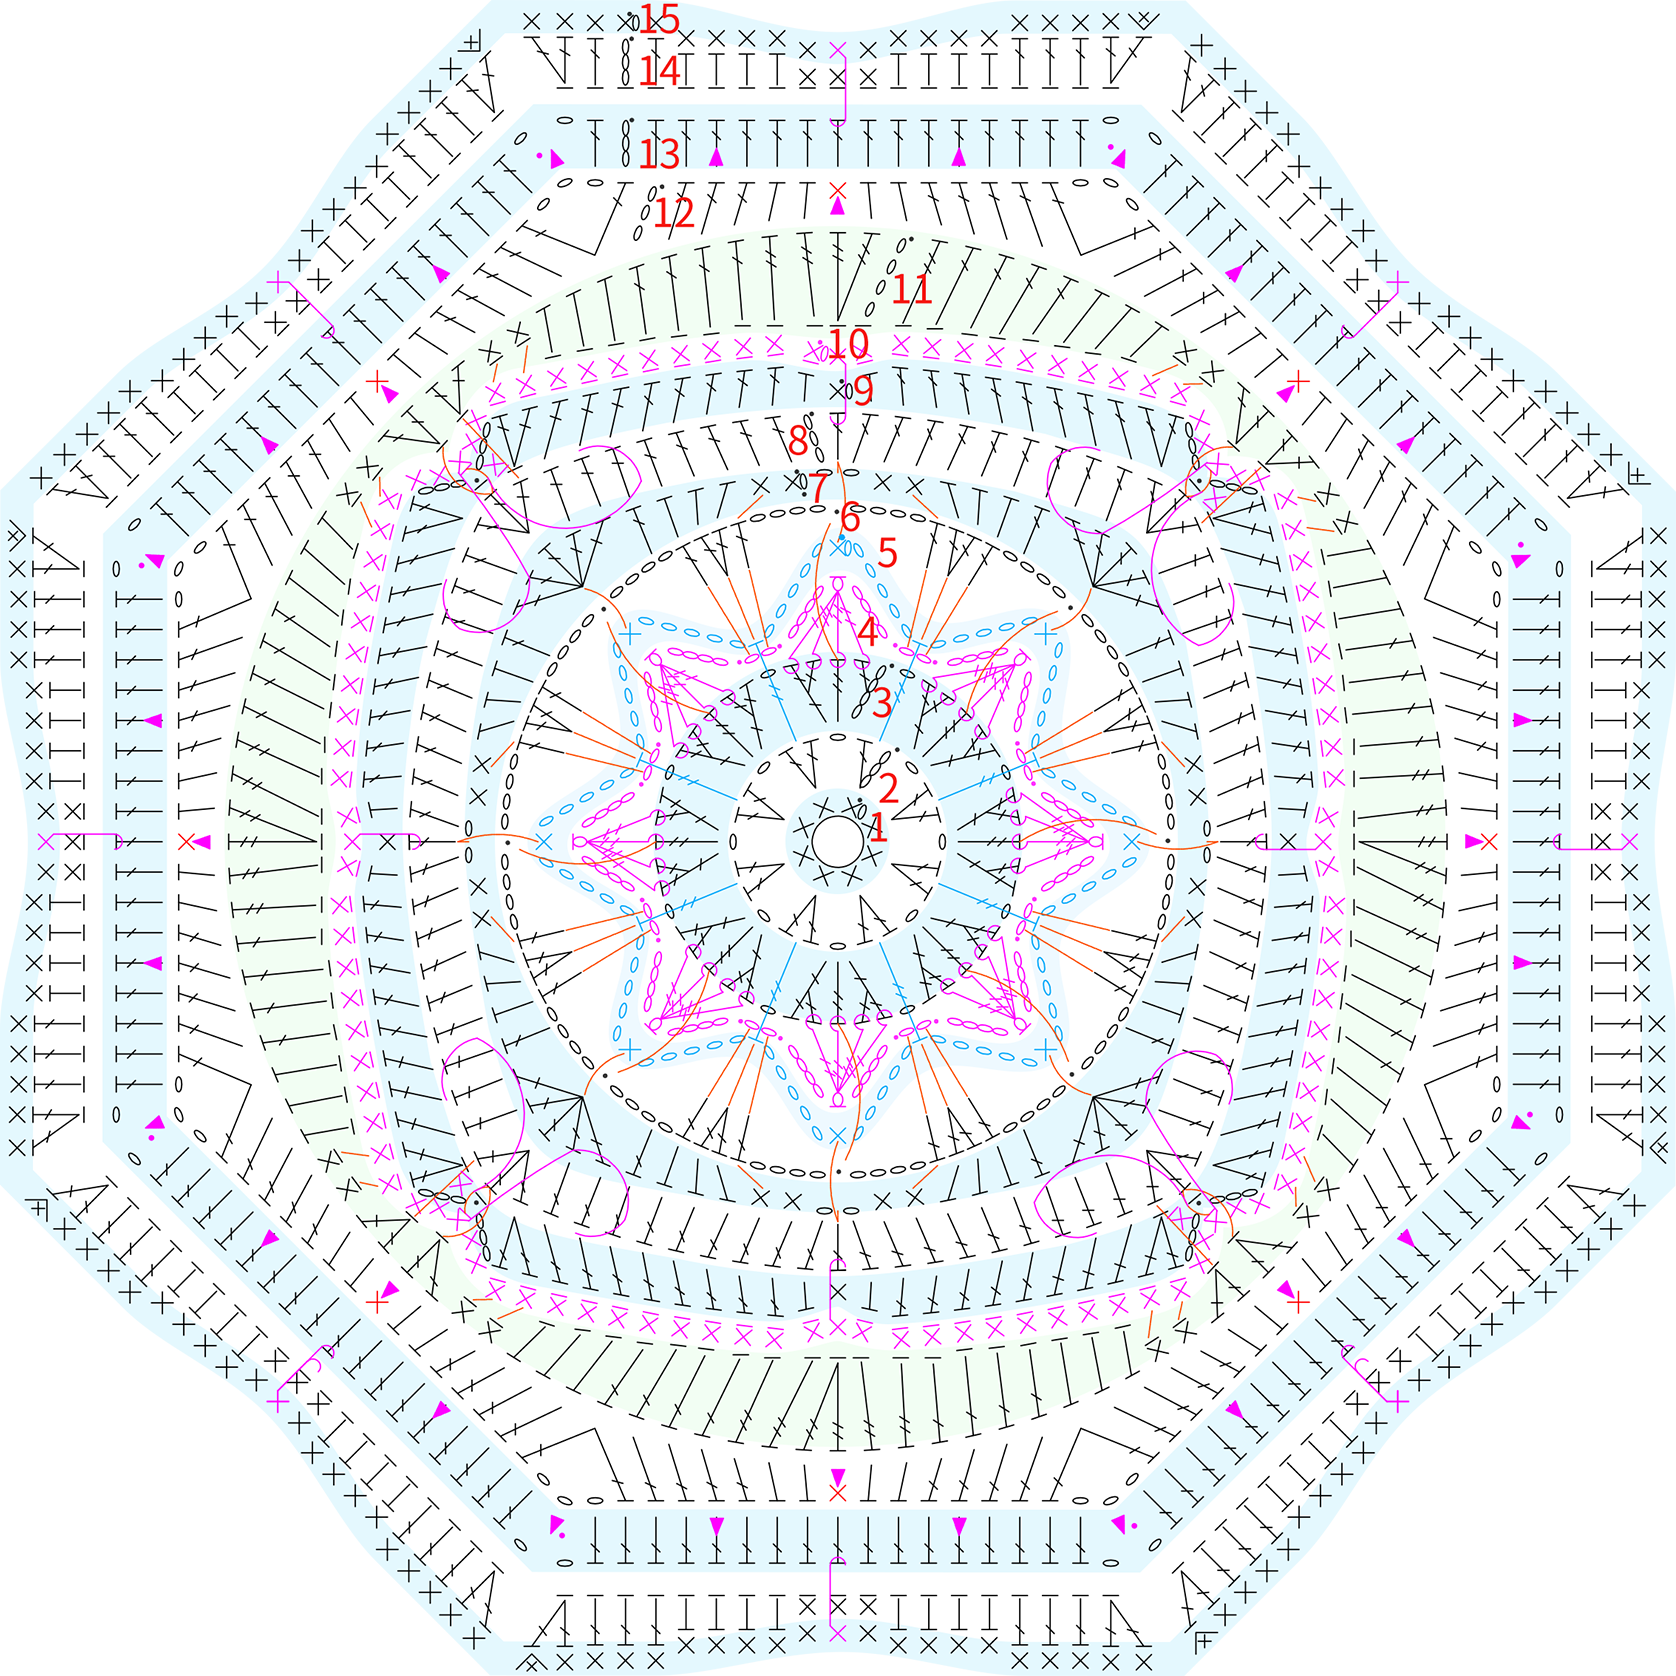
Motif 4 start with an adjustable magic ring and crochet in round counterclockwise outward. Color changes are required during the process. Please refer to the video demonstration for more details.
Note:
1. For Round 9, when work the slip stitches and dc2-in-1, crochet in the front loop of the Round 8.
2. For Round 10, crochet single crochet into the front loop of Round 9's stitches, and for the curved section, single crochet into the front loop of Round 8's stitches. Ensure you match the positions as demonstrated in the video.
3. For Round 11, work into the back loops of both Round 9 and Round 8 stitches. 4. For Round 14, work into the front loop of Round 13 stitches and the front half of the chain stitches.
5. The bean stitch pattern for Motif 4 is the same as for Motif 3, except at the corner in Round 13, make a slip stitch into the remaining 2 loops of the chain stitch. Follow the video demonstration for details.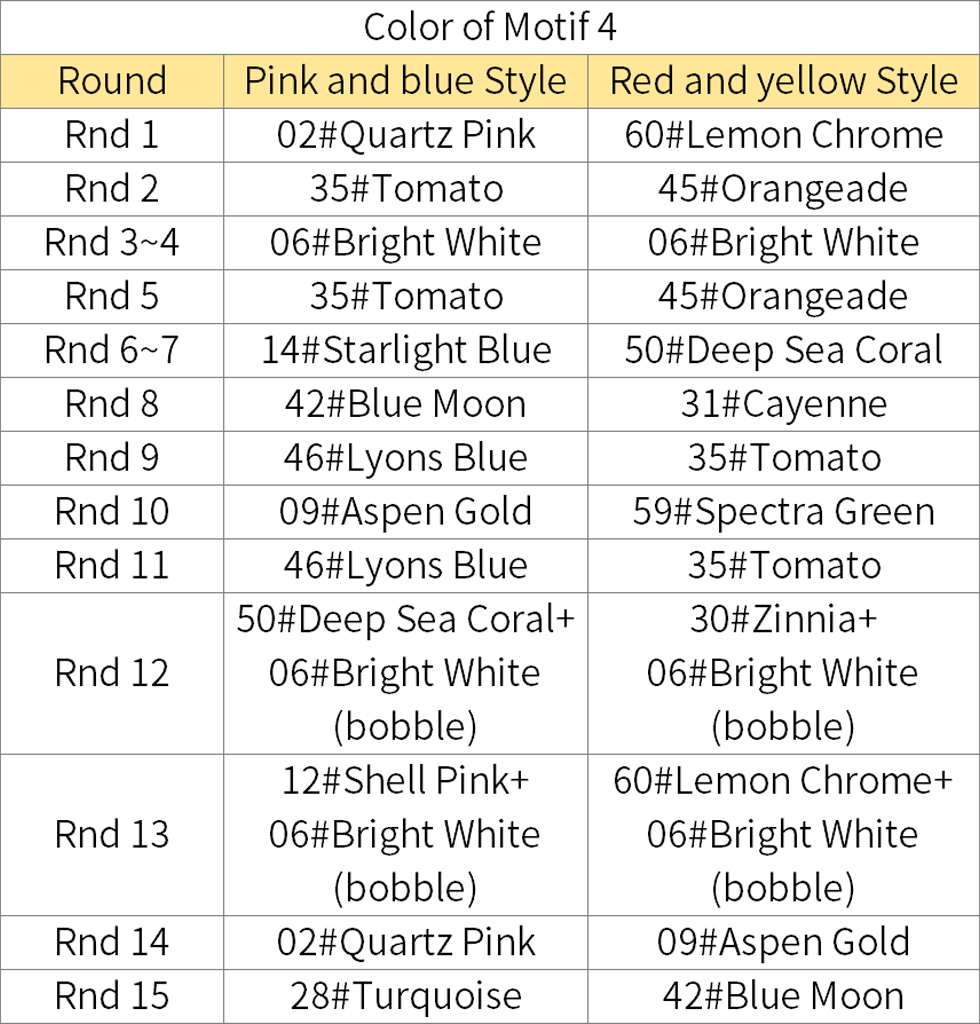
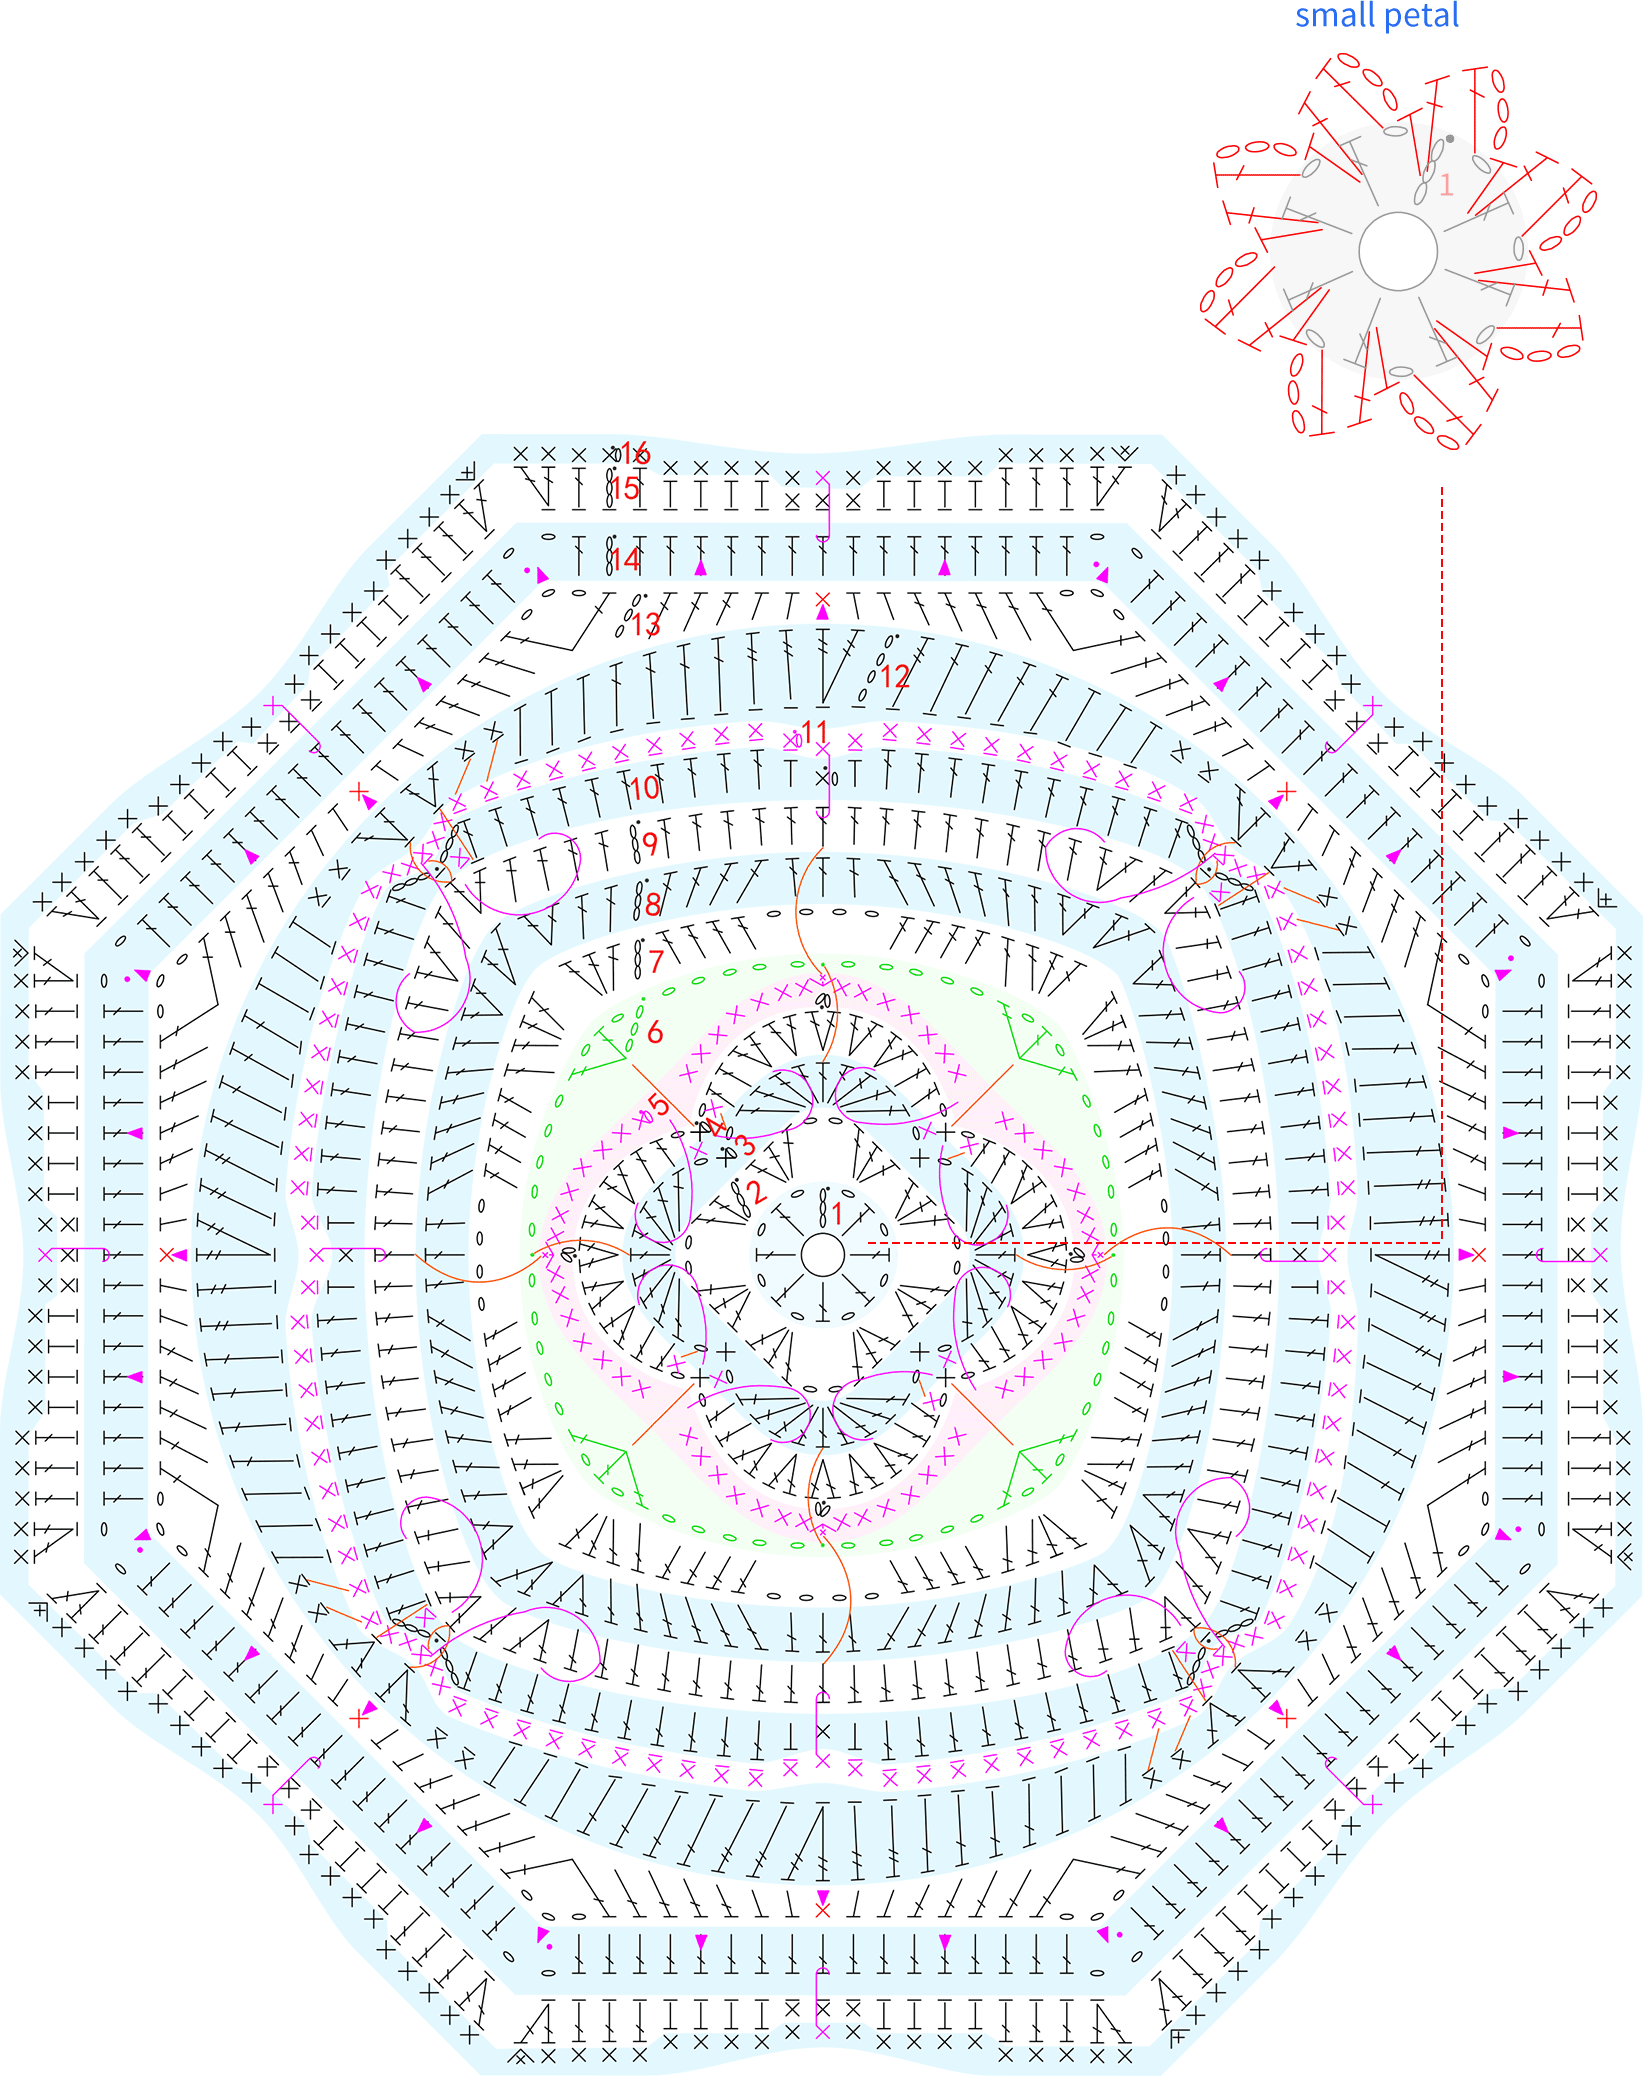
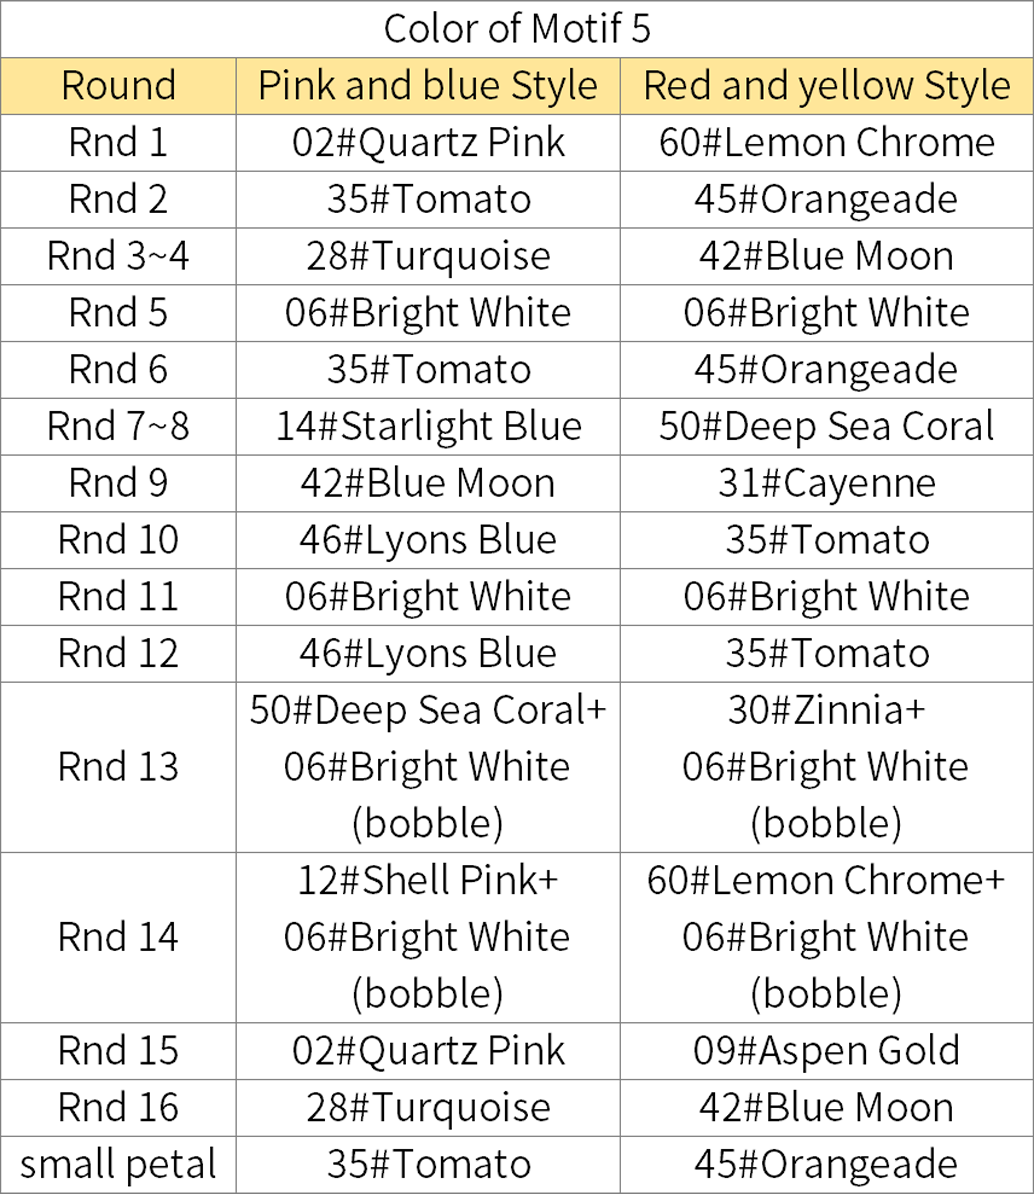
Step 5 Motif 5 (make 9)A5 00' 12'' (Part 3)
Motif 5 start with an adjustable magic ring and crochet in round counterclockwise outward. Color changes are required during the process. Please refer to the video demonstration for more details.
Note:
1. For the curves in Round 5 and 11, work into the corresponding positions as demonstrated in the video.
2. When working the slip stitch in Round 6, slip stitch into the thread before middle stitch of the fan stitch from Round 3.
3. While crocheting Round 9, join to the middle stitch of the sc3-in-1 from Round 5.
4. For Round 10, work the slip stitch and the following double crochet into the front loop of Round 9's stitches.
5. For Round 11, crochet into the front half of the stitches from Round 10, and for the single crochets on the curve's right side, work into the front loop of Round 9's stitches.
6. For Round 12, work into the back loops of the stitches from both Round 10 and 9.
7. For Round 15, crochet into the front loops of the stitches from Round 14 and the chains.
Part 2 SewingB 15' 42'' (Part 3)
First, refer to the finished product or the assembly diagram to arrange the five types of motifs in their correct positions. oin them using the overcast stitch with the color from the outermost round of each motif. Make sure to sew motif 4 and motif 5 together by picking up the horizontal lines on the wrong side of the rounds. You can start sewing from the central motif or an edge motif, just be mindful of your starting point. Please refer to the video demonstration for more details.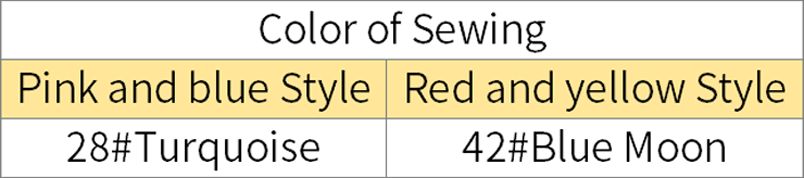
Part 3 EdgingC 29' 02'' (Part 3)
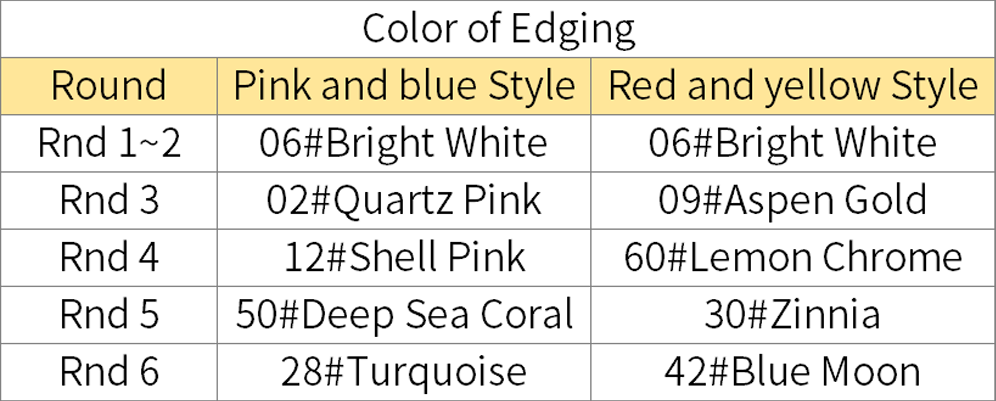
The edging is crocheted around the connected motifs with six rounds. Please refer to the video demonstration for more details.

Made by the community