Clothes
Shadow Pullover
Project preview
See the finished project
Pattern format
Instructions
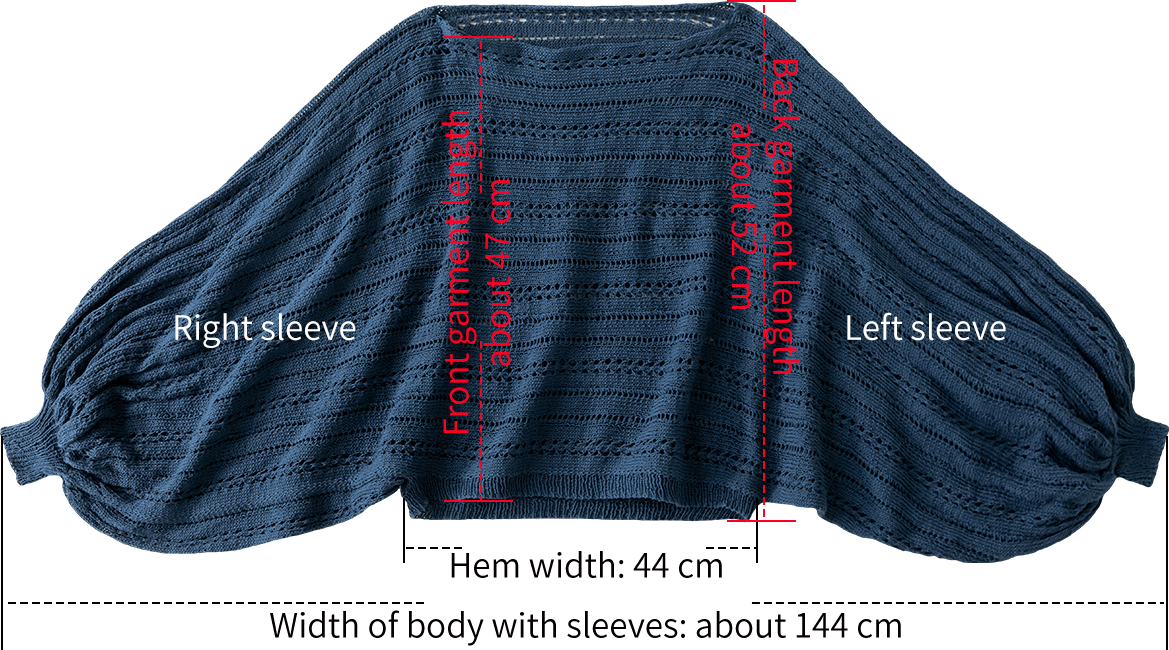
The handcrafted measurements may have an error of 1 to 2 cm. Due to variations in individual tension, the size of the sample is for reference only.
Materials: Susan's Family Combed 5# Lace
Needles: 3.25 mm & 2.75 mm circular needles
Pattern Gauge: 27 sts × 33 rows ≈ 10 cm²
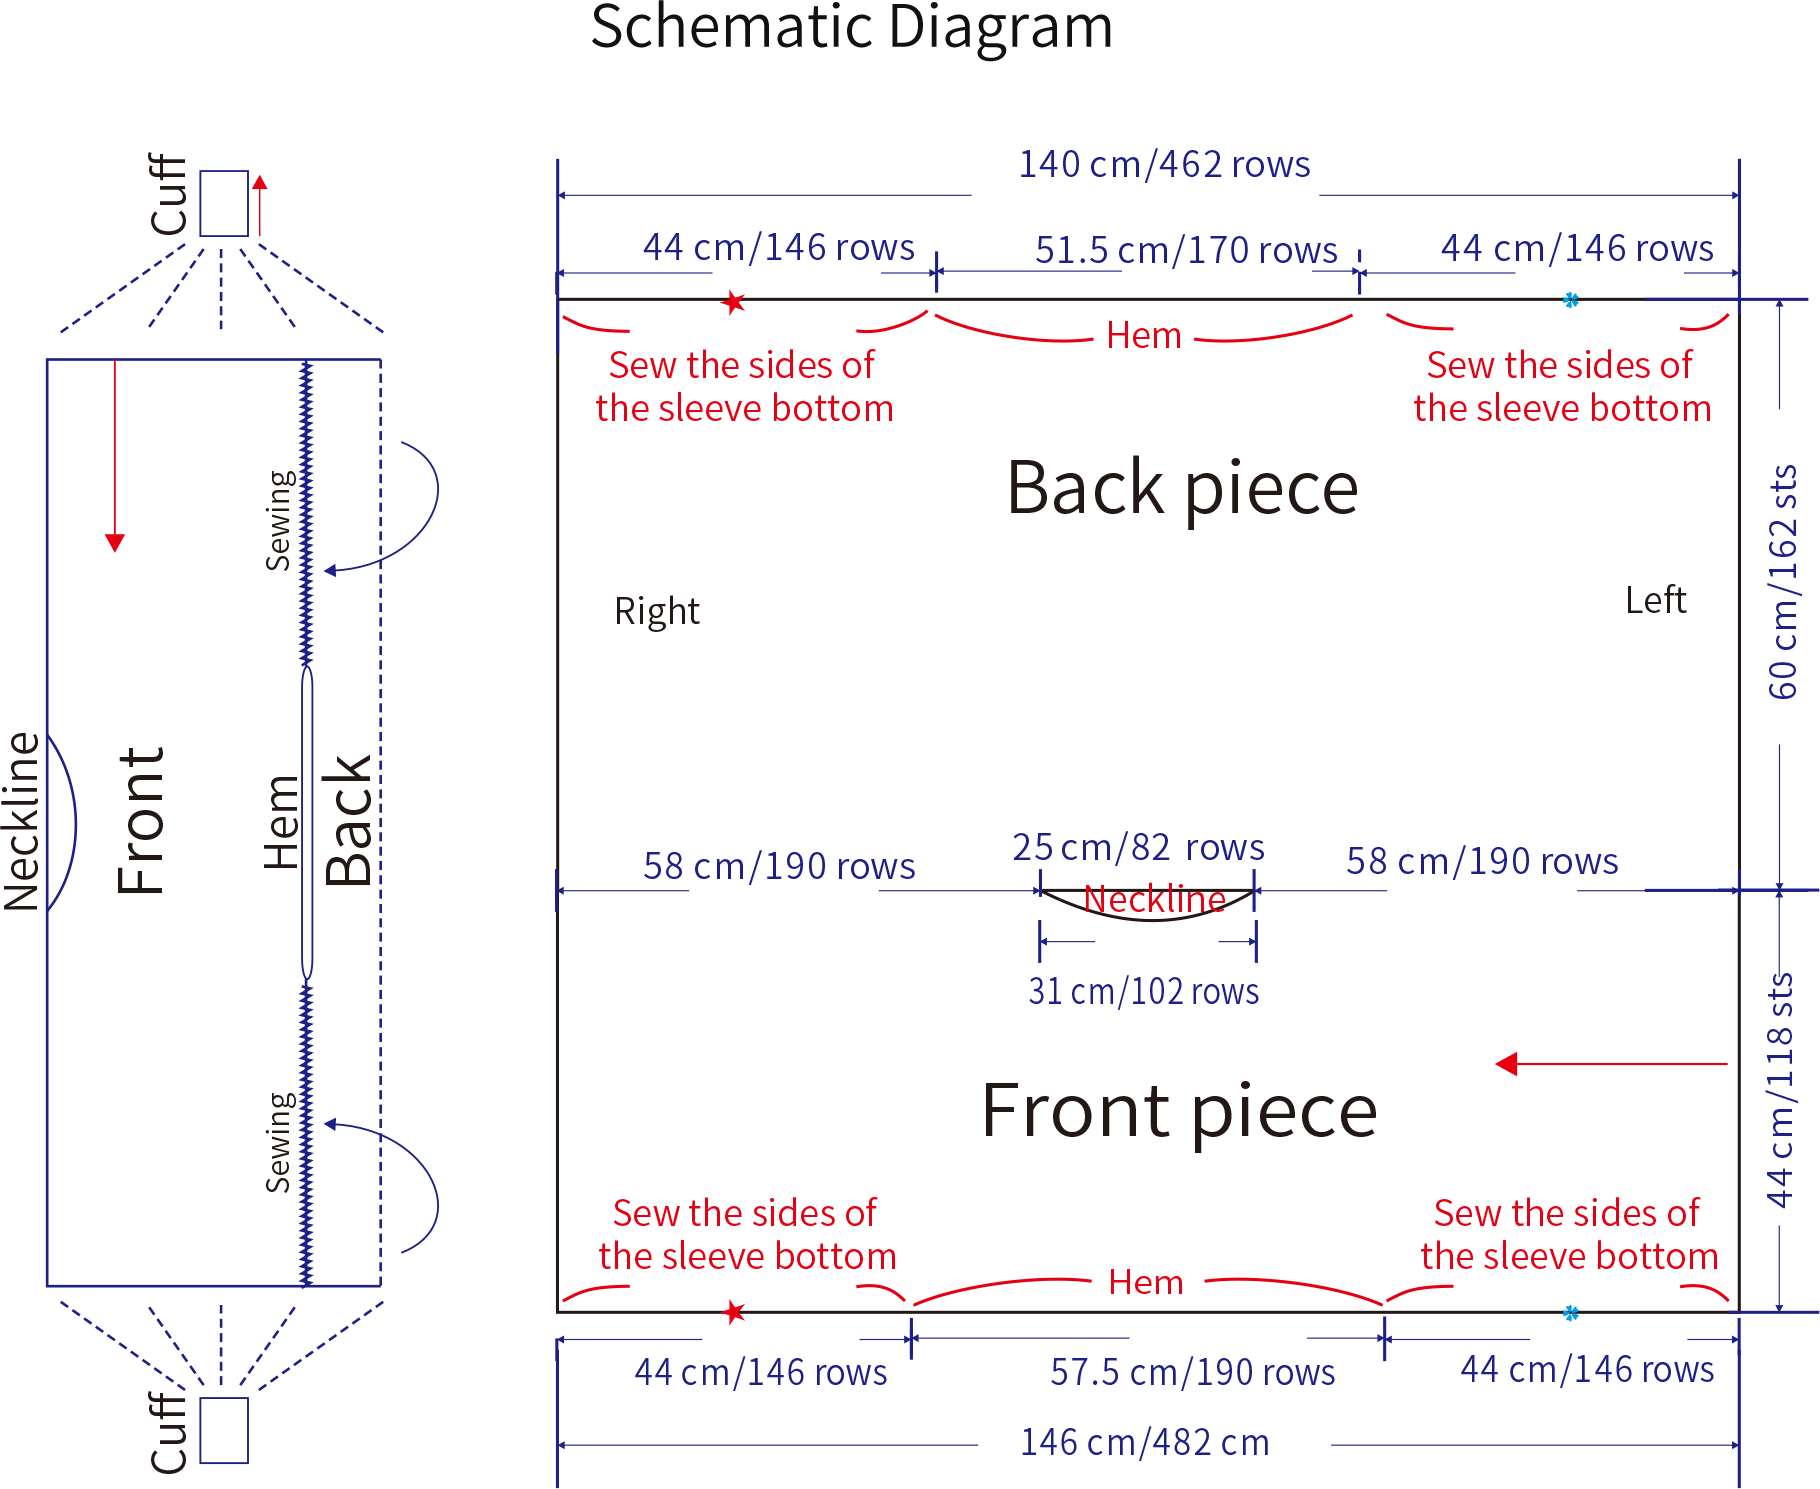
Chart Key



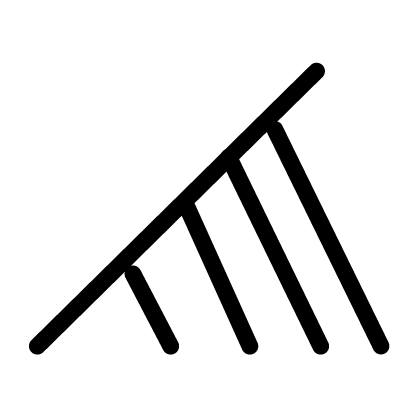
Note: 1. This pattern is making in Chinese crochet pattern terms, and the stitch name is written using American terminology. All measurements in charts are in cm.
2. The chart represent the right side of fabric, so check the key to see how to work a certain symbol on the right side and on the wrong side.
3.The left and right on the charts refer to the actual wearing position.

【Knitting Sequence and Instructions】
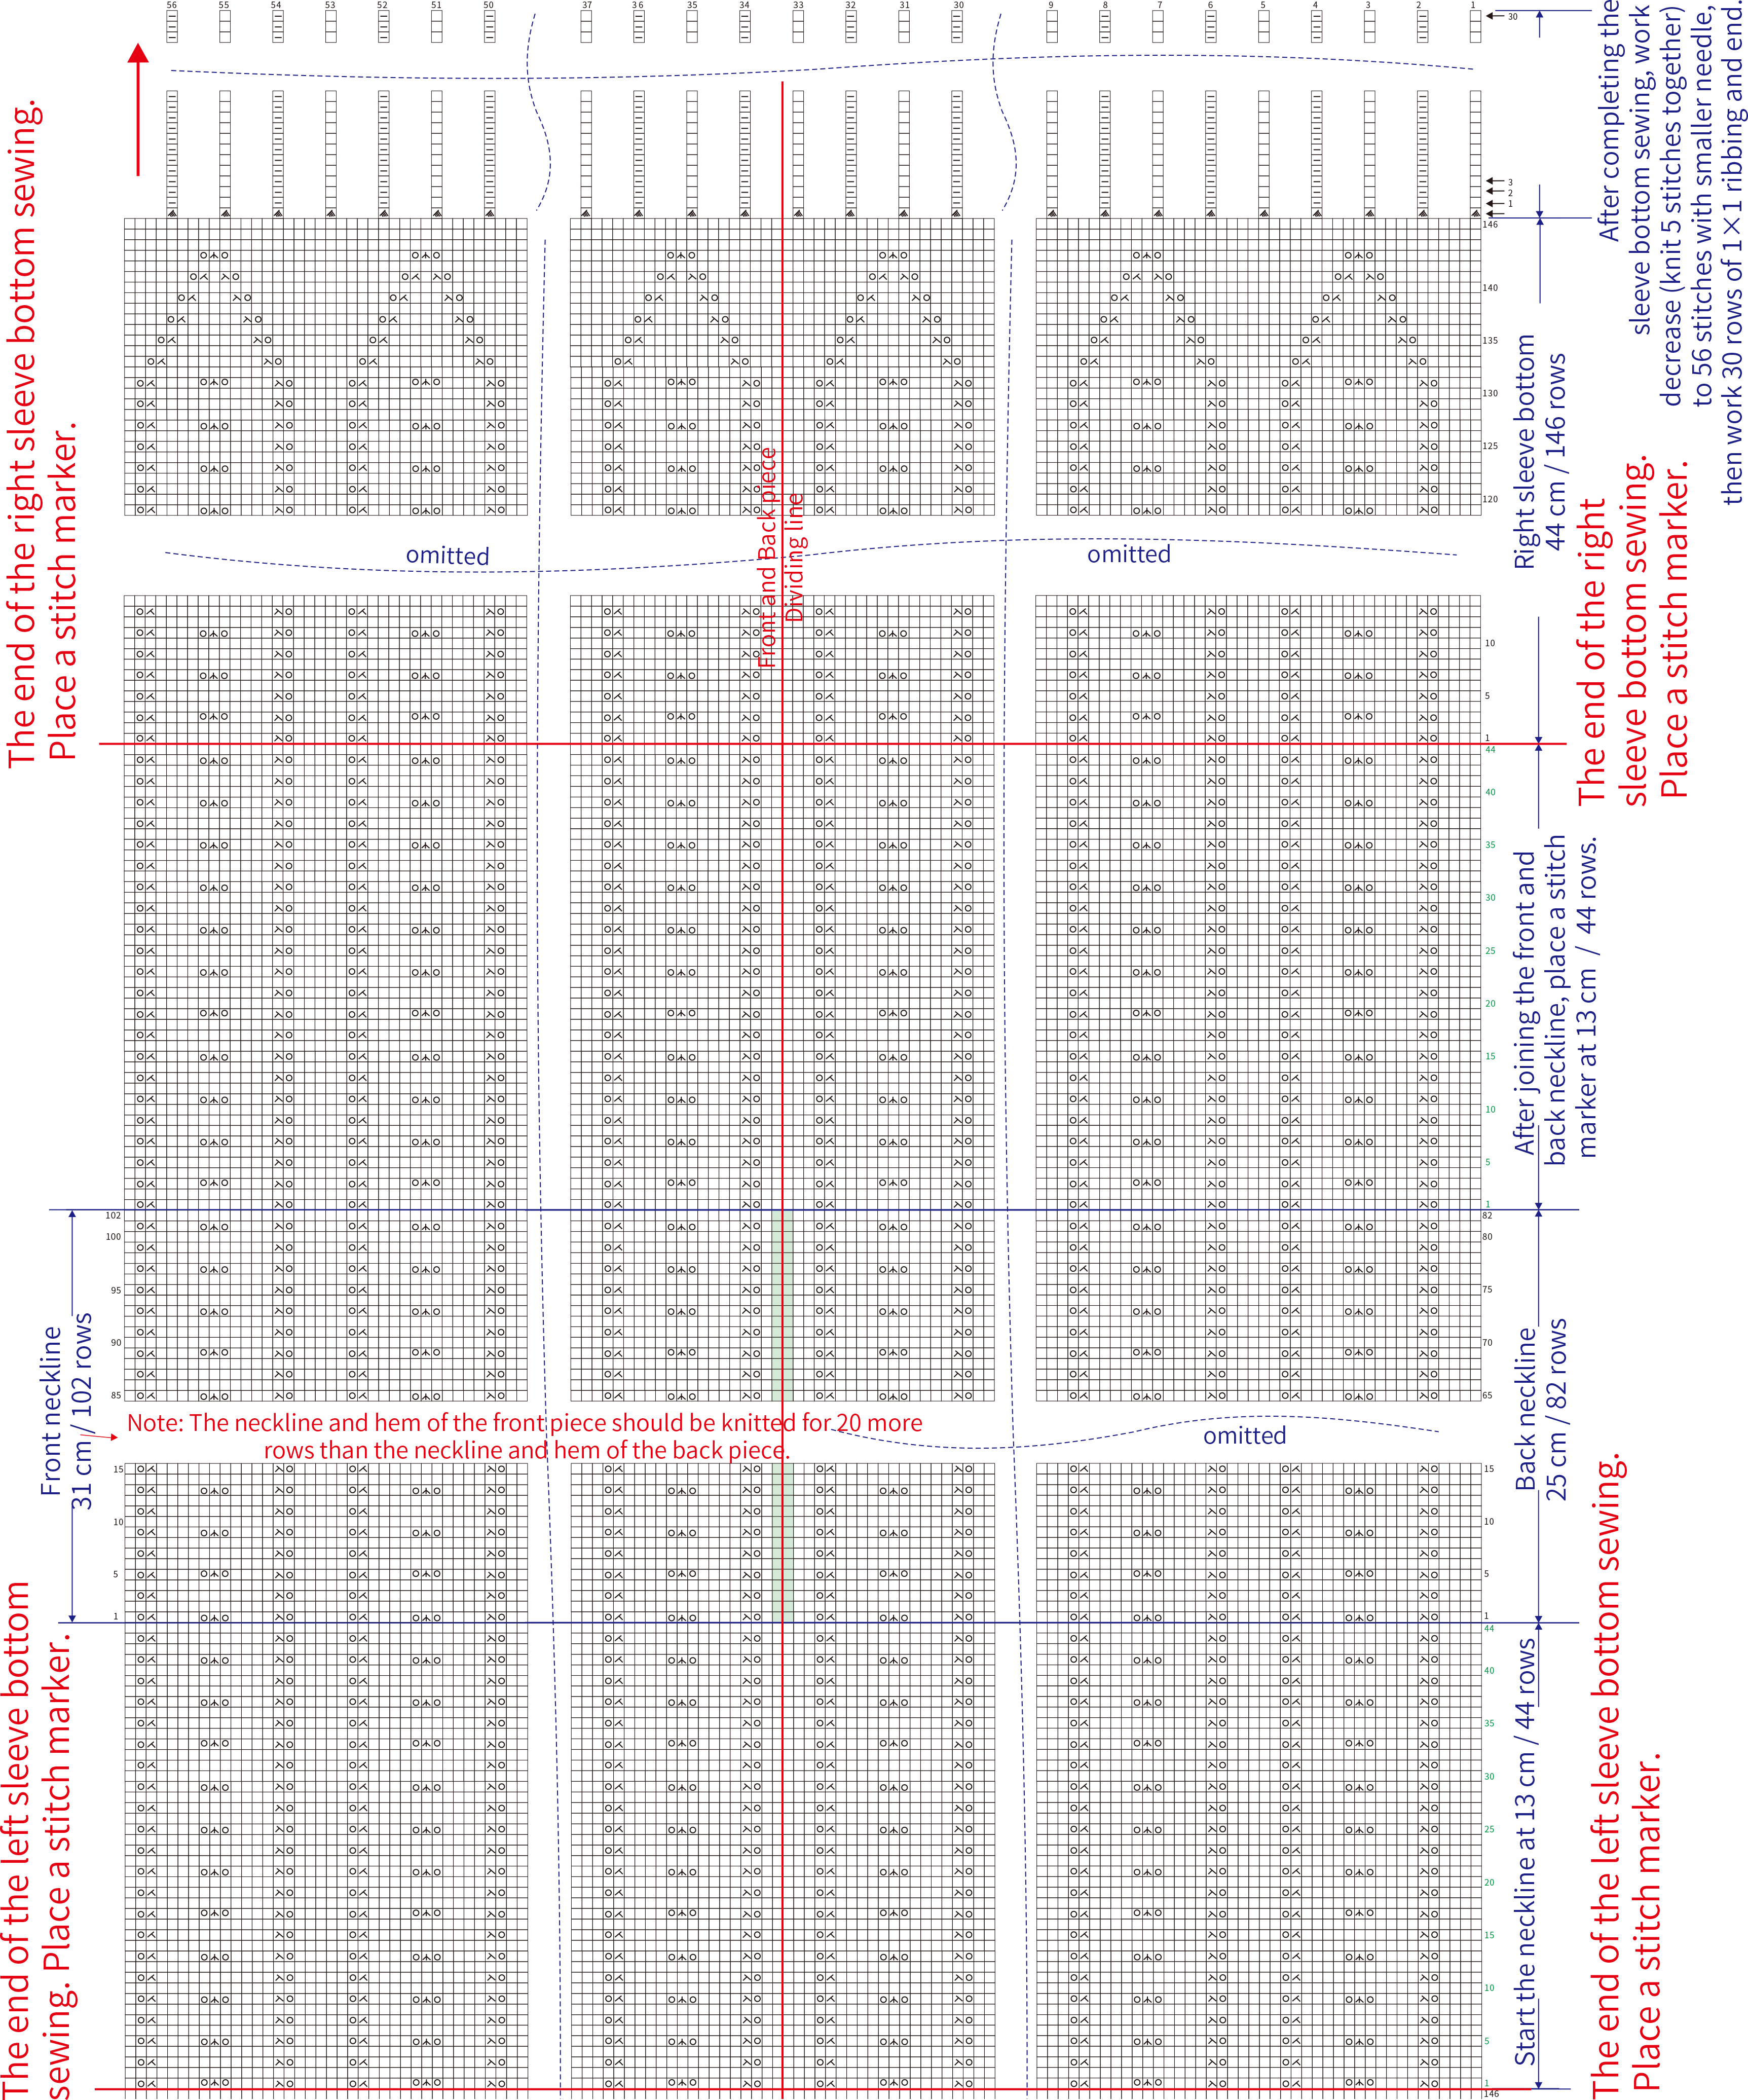
Features of this design: A straight-line slightly swinging collar, oversized blouson sleeves, and a shorter front with a longer back. The body and sleeves are knitted in one piece up to the neckline, where they are divided for separate knitting of the front and back neckline sections. After achieving the required width for both the front and back neckline, join them again to knit the other side of the body and sleeve. Upon completion, sew together the sides of the sleeve bottom, and finally, pick up stitches separately to knit the ribbing for the cuffs and hem.
1.Cast on provisionally (temporary cast on). Follow the chart to knit the left body and sleeve and work up to the neckline. then place the front piece stitches on hold and work the back piece separately until you reach the required neckline width with no break yarn. Join new yarn and work the front piece separately until you reach the required front neckline width (the front neckline is 6 cm wider than the back neckline to create a slightly swinging neckline effect, which makes it more comfortable to wear). Then, pick up from the held stitches of the back piece, finish knitting the back piece, and continue to join and work the front piece together down to complete the right body piece.
2. After everything is completed, fold it in half along the neckline, sew the sides of the sleeve bottom, leaving the middle open for the hem (the width of the hem can be adjusted according to your own situation, tighter looks better).
3. After completing the sewing, thread a large needle through the live stitches at the cast-on area, remove the waste yarn, switch to a smaller steel needle to start the decrease (knit 5 stitches together) bind-off, and knit the 1×1 ribbing for the cuff. For the right cuff, you can directly use the smaller steel needle to bind off and knit the 1×1 ribbing.
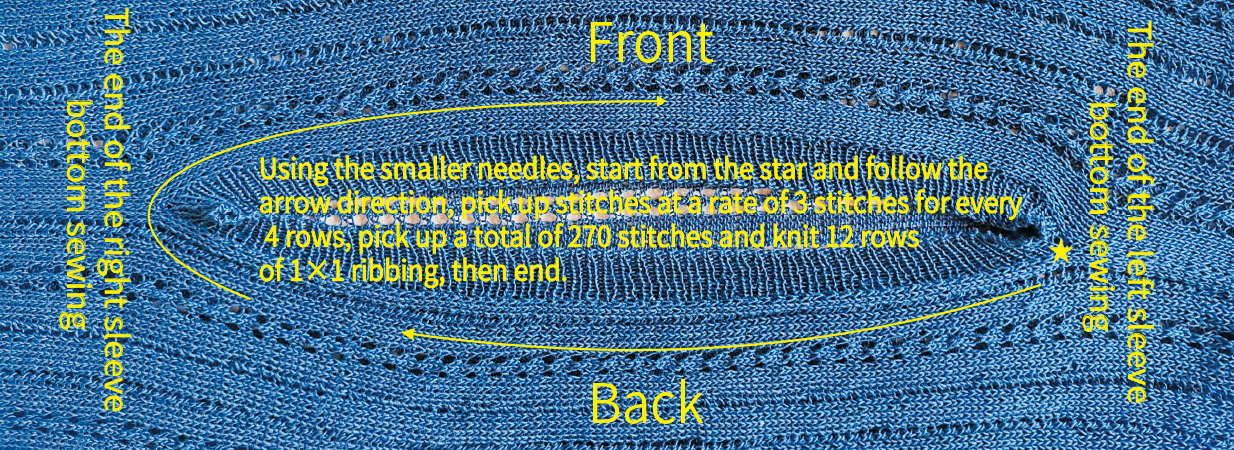
4. Using smaller circular needle, pick up stitches along the hem edge at a rate of 3 stitches for every 4 rows, then work the 1×1 ribbing for the hem position, finish.
Part 1 Main part
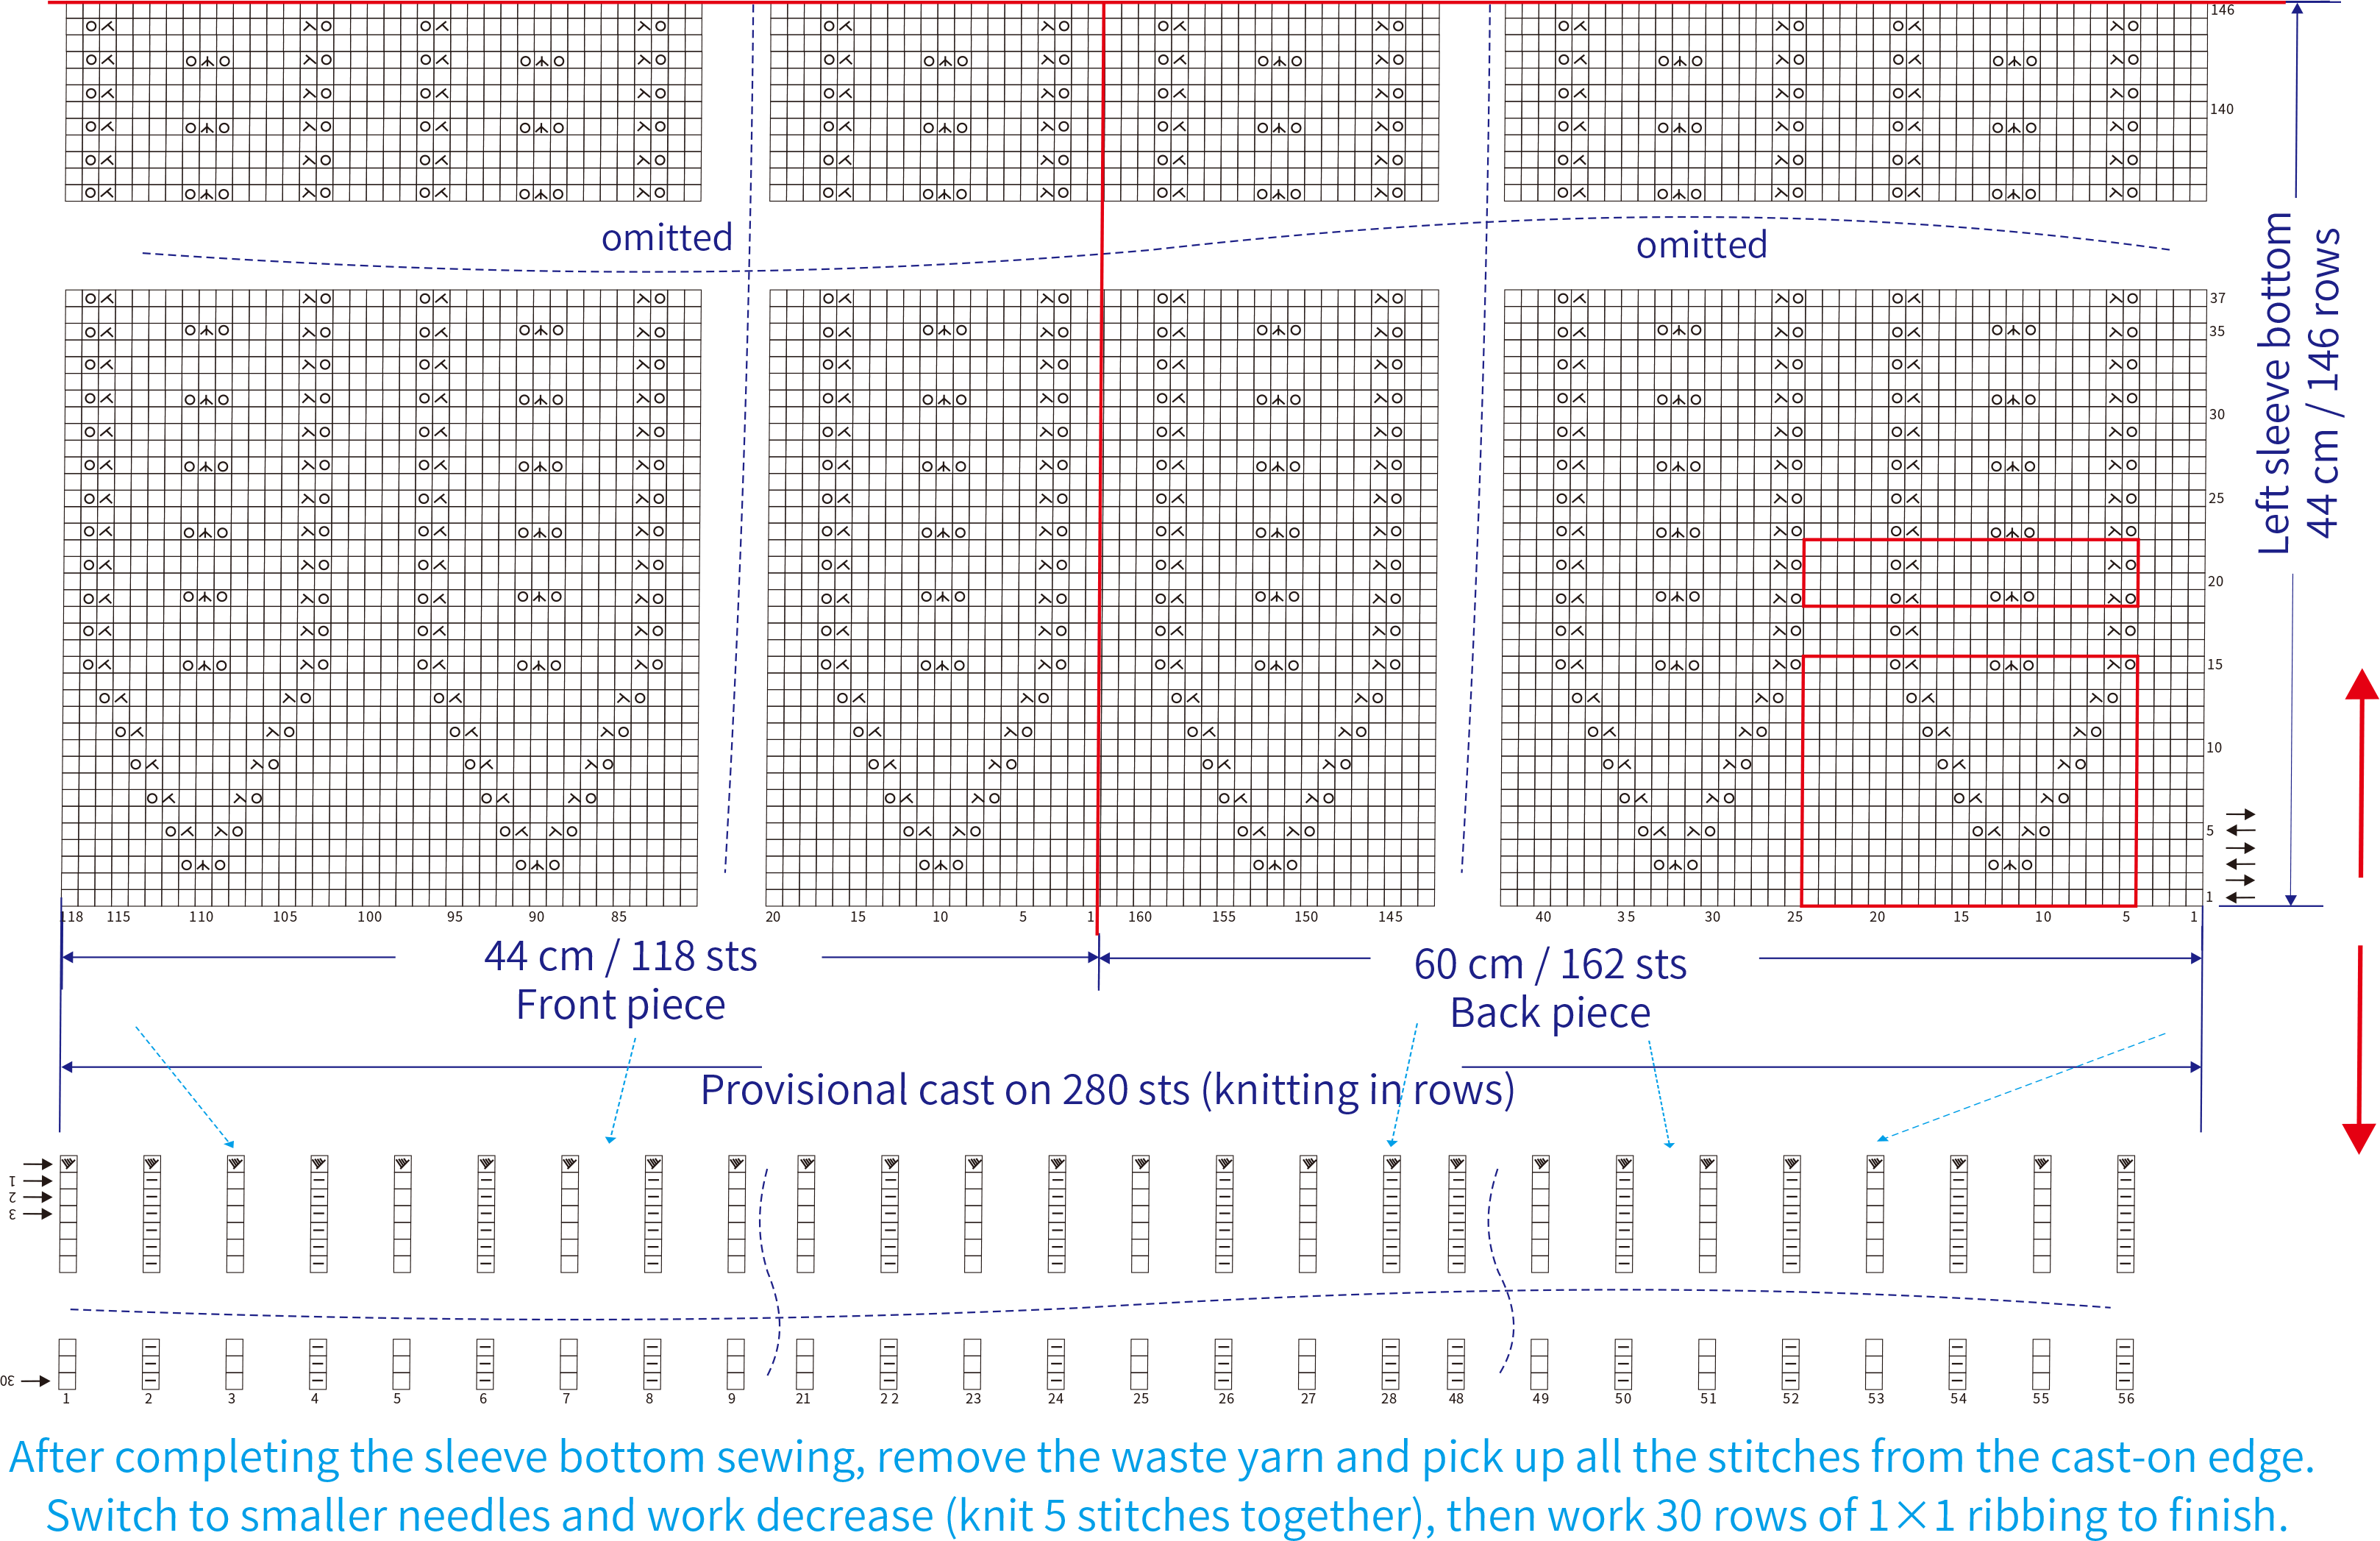
Part 2 Hem chart

Made by the community