Clothes
Shian
Project preview
See the finished project
Pattern format
Instructions
Watch and follow
Video tutorial
| Style | Yarn | Color |
|---|---|---|
| Parisian Blue Version | Alpaca | 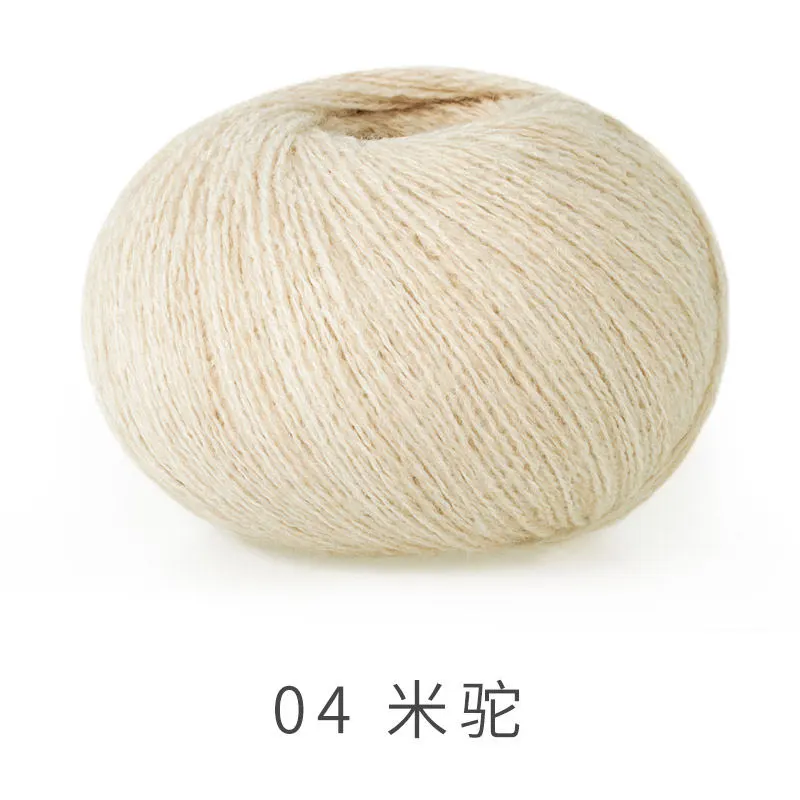 04#Sandshell x 4 04#Sandshell x 4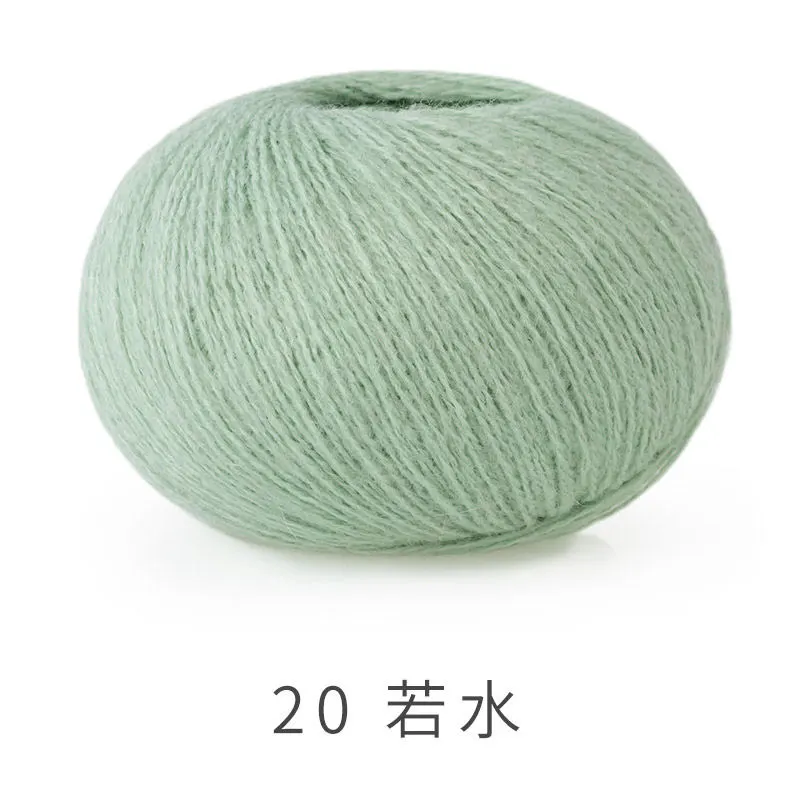 20#Subtle Green x 1 20#Subtle Green x 1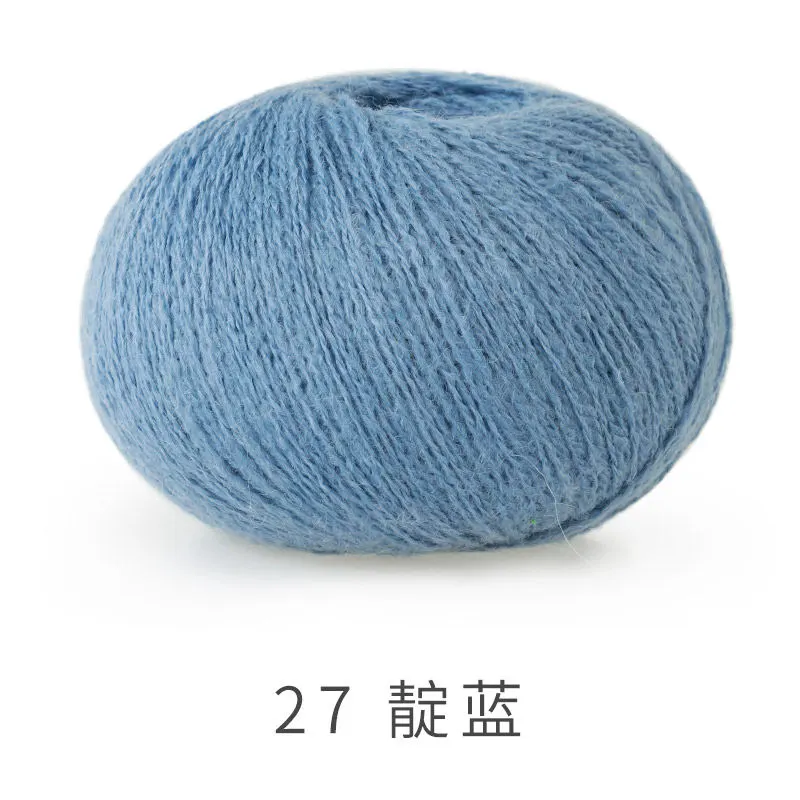 27#Parisian Blue x 2 27#Parisian Blue x 2 |
| Sheer Pink Version | Alpaca |  03#Sheer Pink x 3 03#Sheer Pink x 3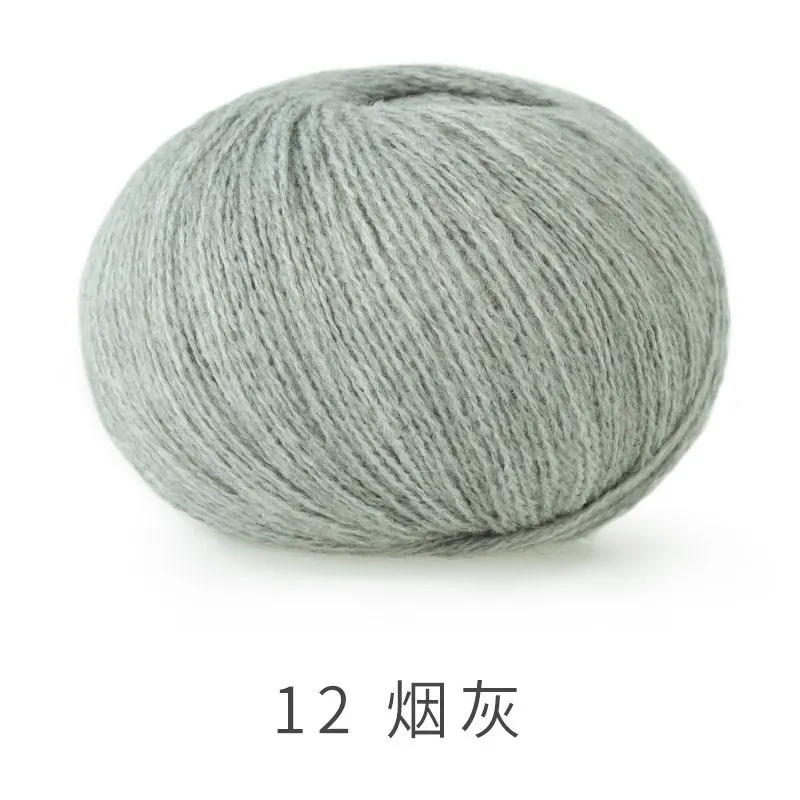 12#Drizzle Gray x 8 12#Drizzle Gray x 8 |
| Burnt Coral Version | Alpaca | 04#Sandshell x 3 10#Burnt Coral x 9 10#Burnt Coral x 9 |
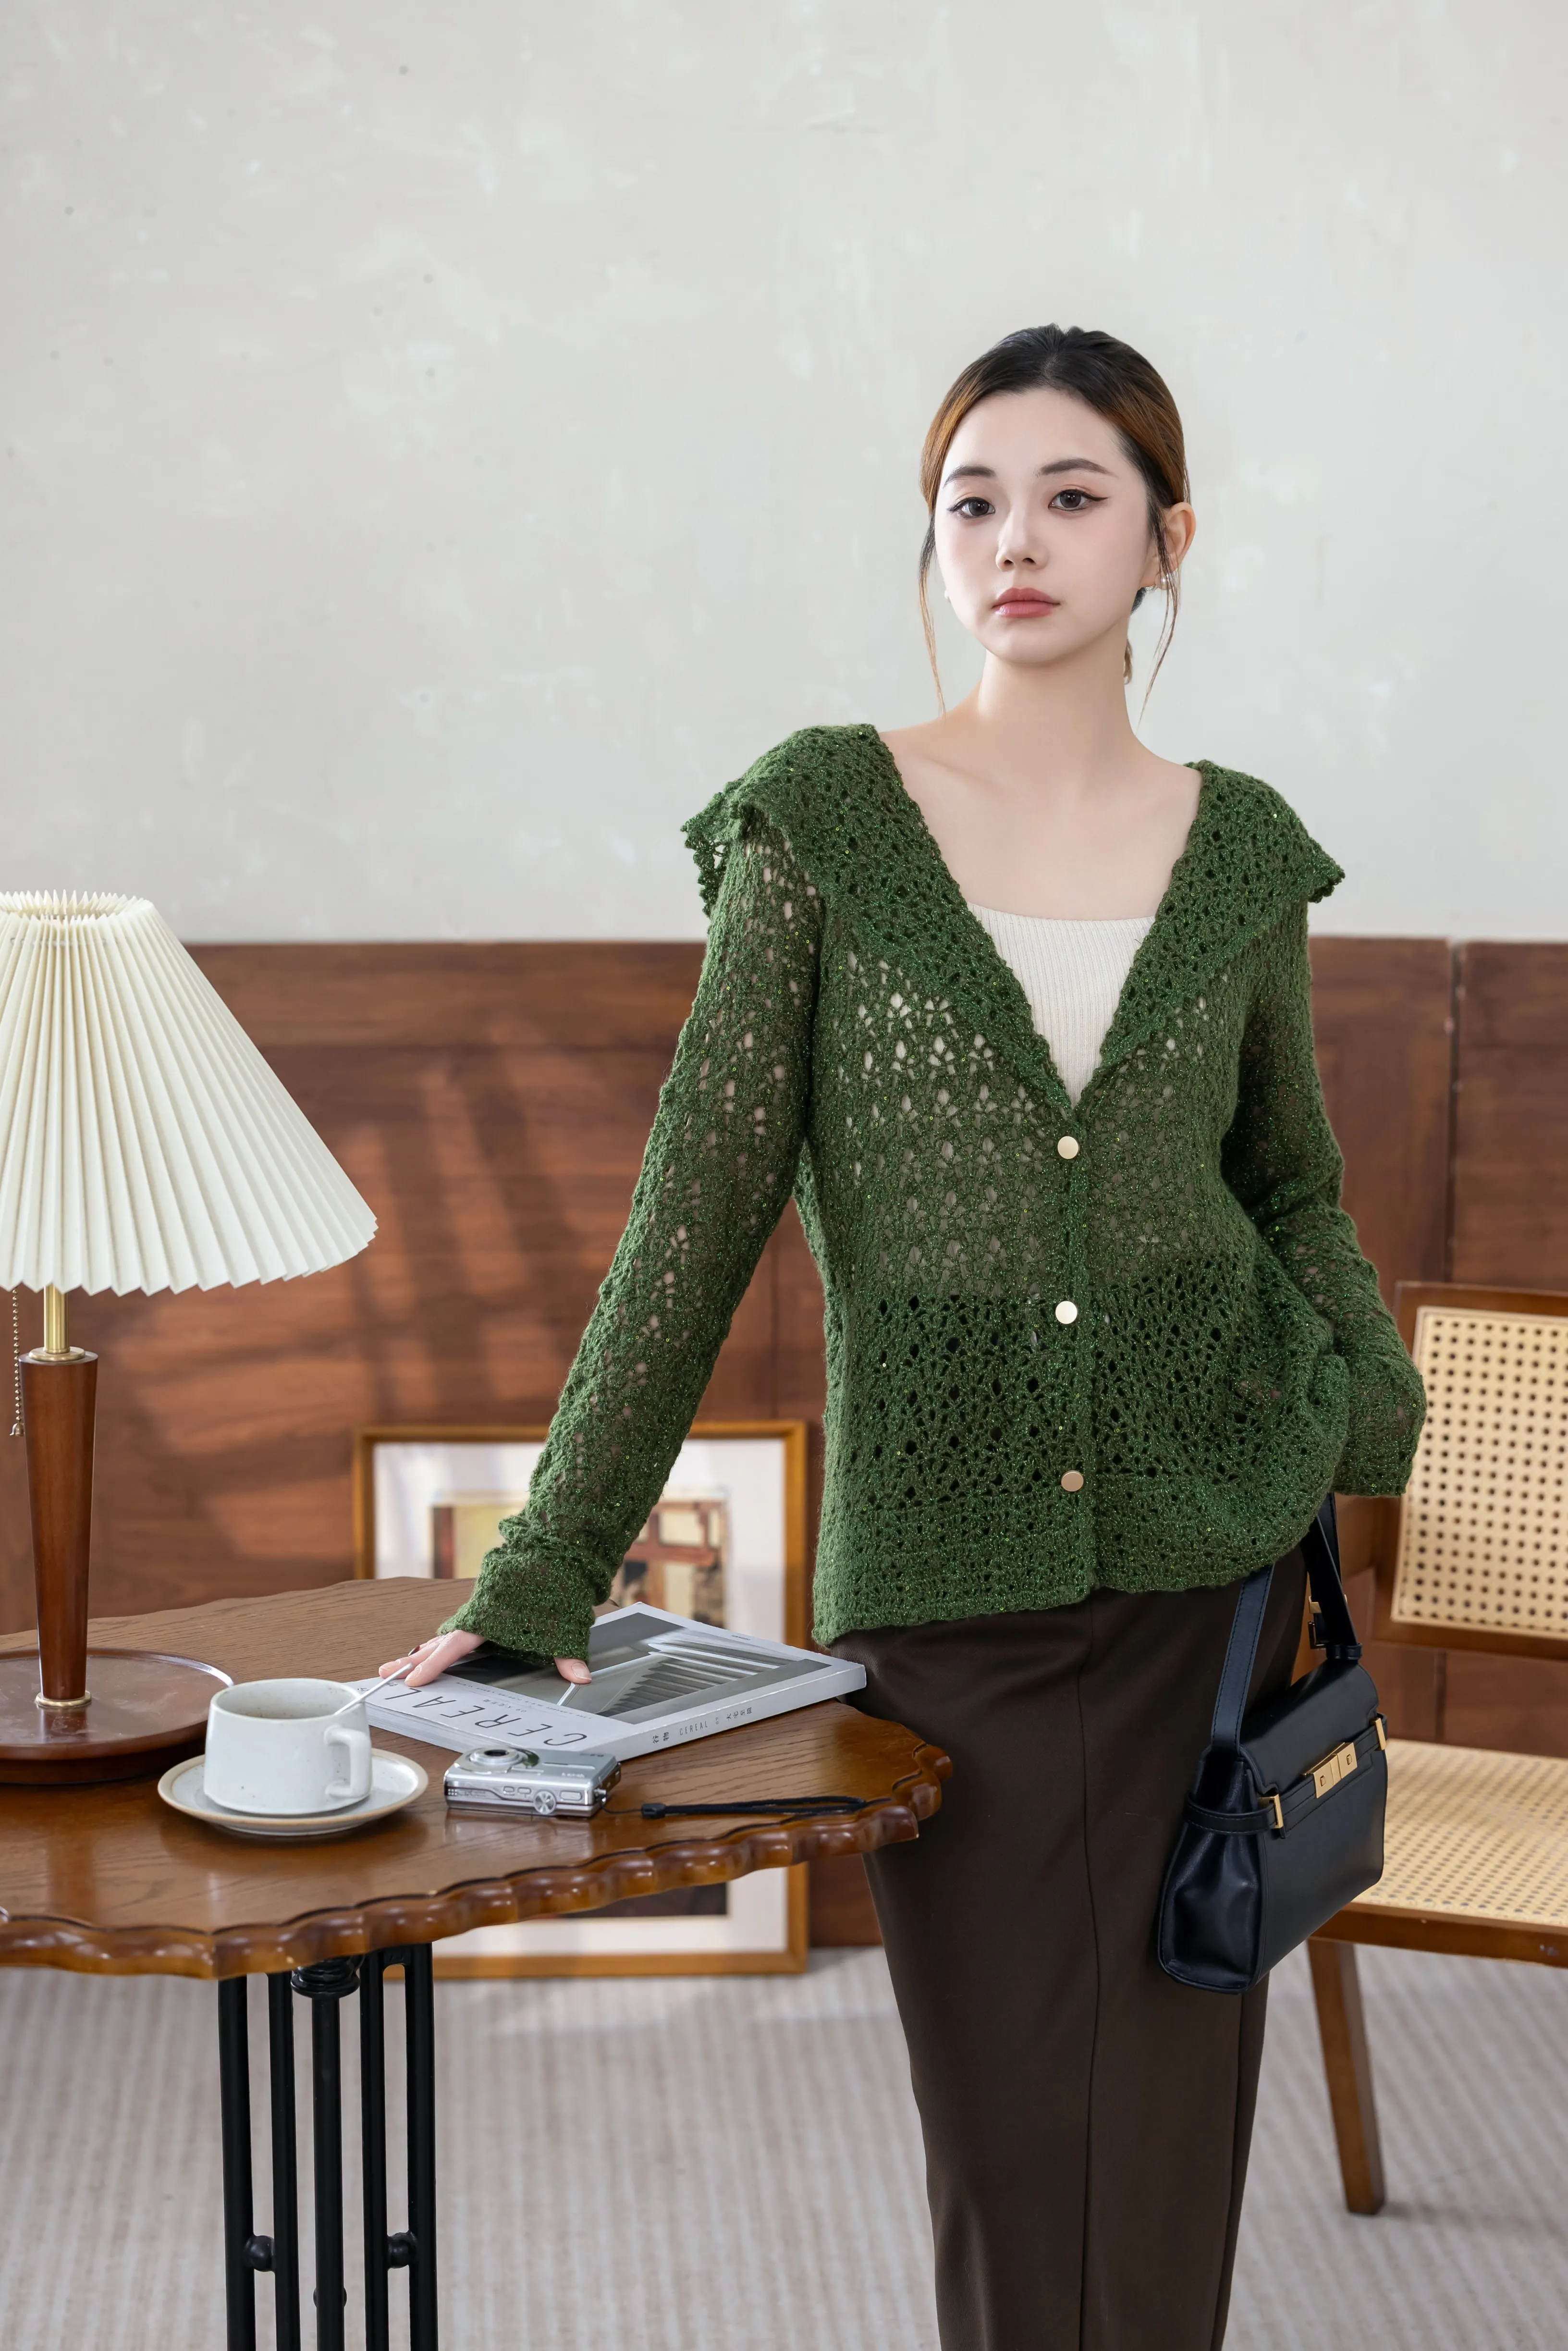
This garment is divided into the back body, front body (left and right), sleeves, front band, collar, buttons, and tassels.
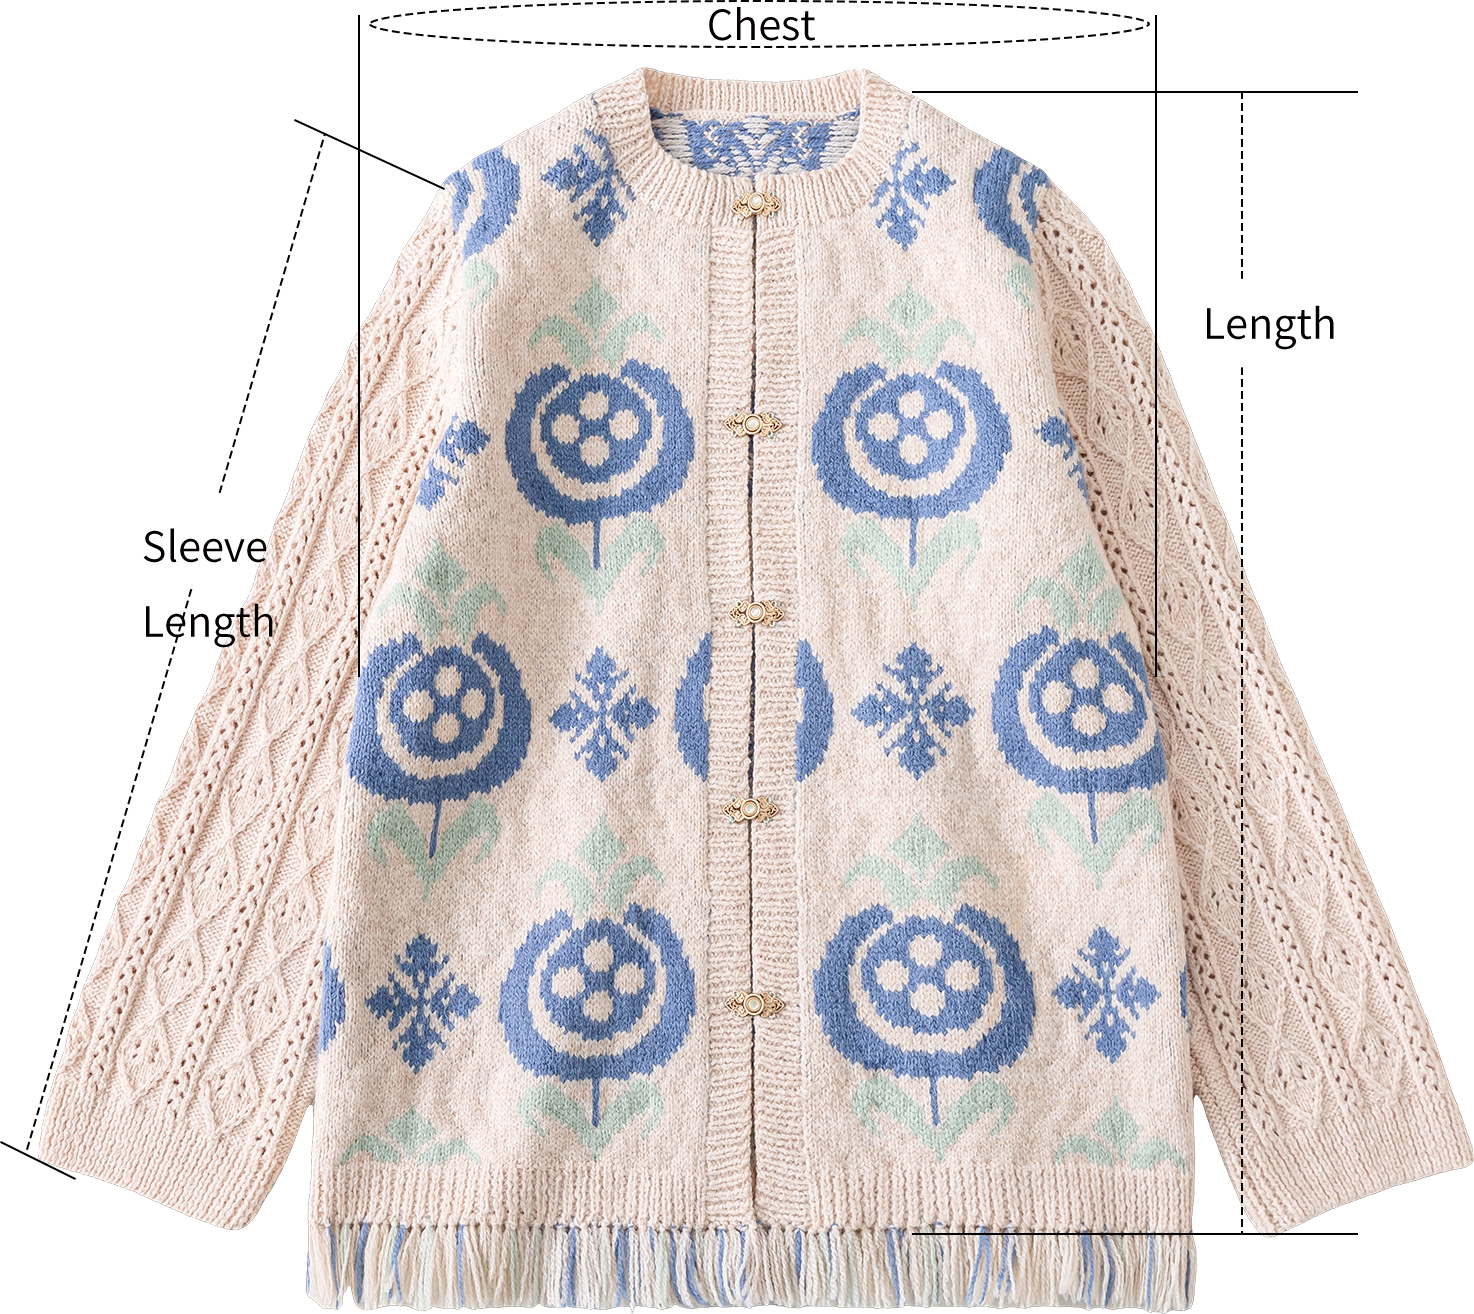
| Chest | Length | Sleeve Length |
| 102 cm | 64.5 cm | 54 cm |
The handcrafted measurements may have an error of 1 to 2 cm. Due to variations in individual tension, the size of the sample is for reference only.
Note: 1. The left and right in the chart refer to the actual left and right when worn.
2. On the wrong side, work the opposite stitch as shown in the chart.
Materials : Alpaca (working with two strands: 2 strands held together as one)
Needle & Hook : 9#-3.75 mm Circular Needle & 2.00 mm Crochet Hook
Gauge Sample
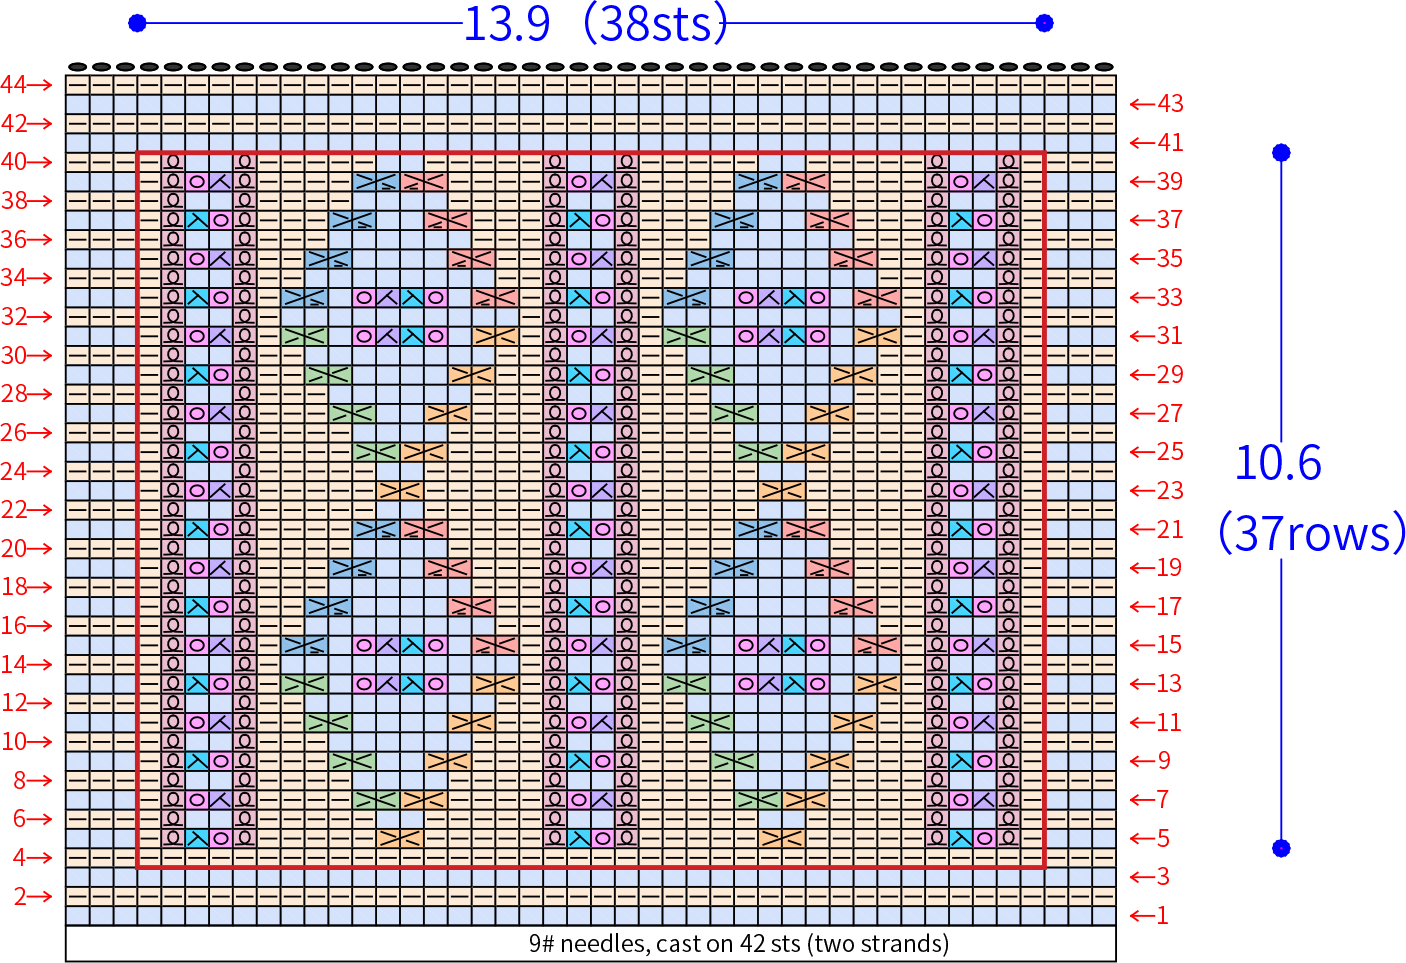
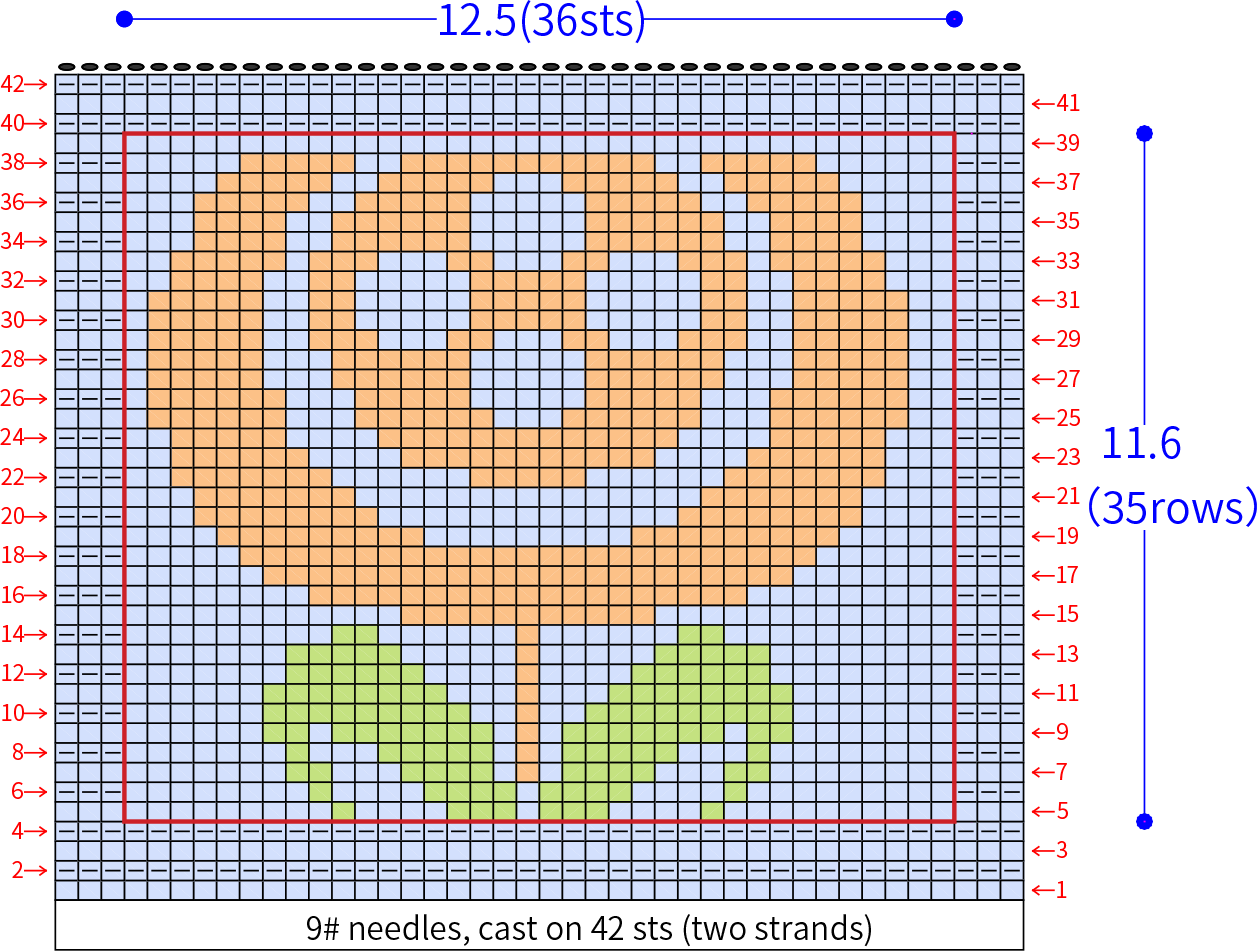
Schematic Diagram
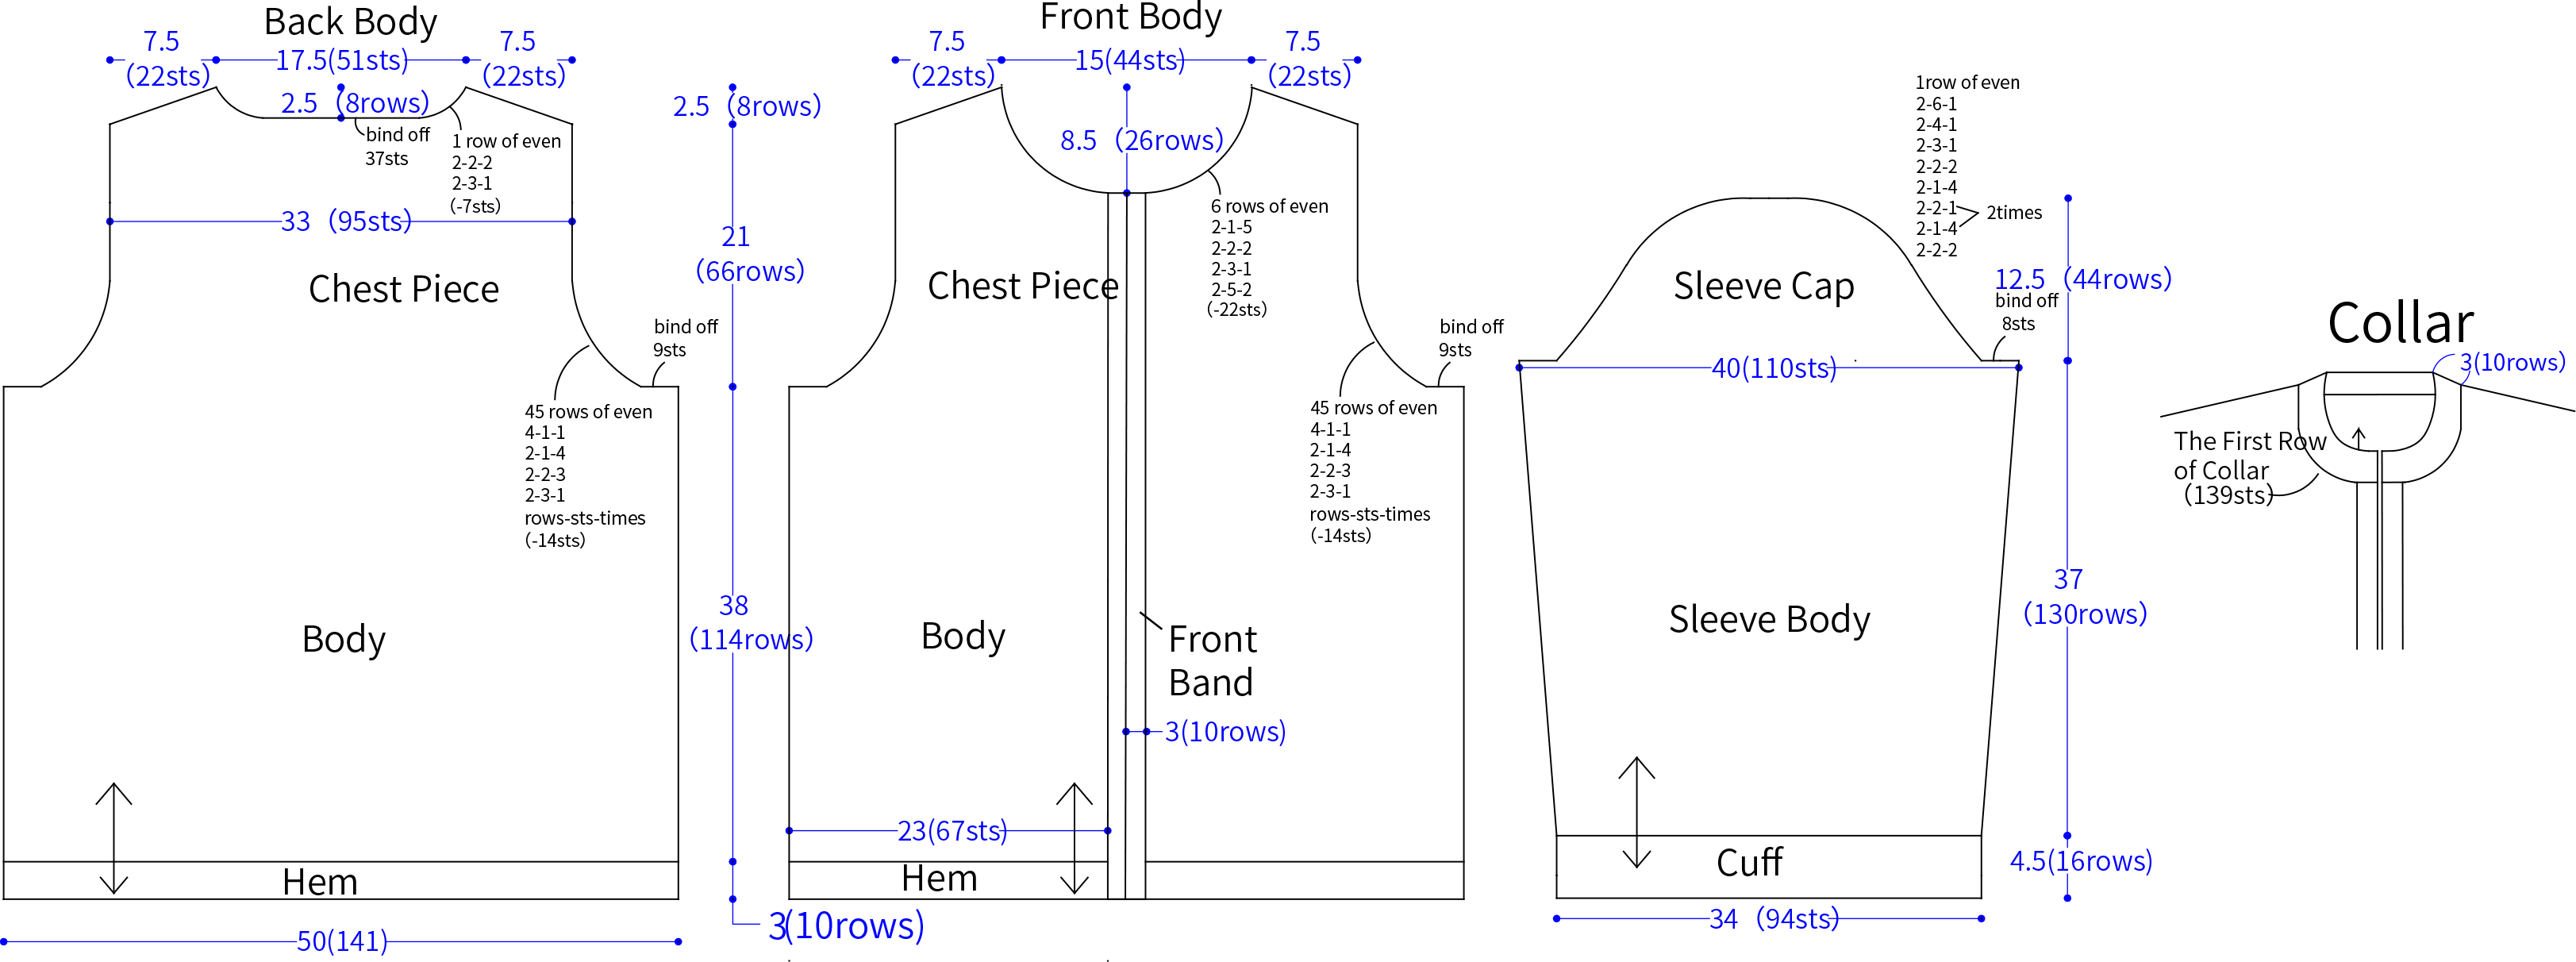

Chart Key



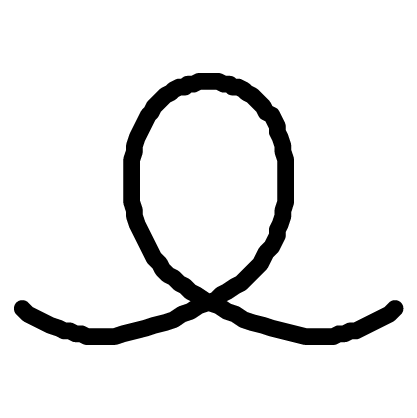




Note:
1. This pattern is making in Chinese crochet pattern terms, and the stitch name is written using American terminology. All measurements in charts are in cm.
2. The chart represent the right side of fabric, so check the key to see how to work a certain symbol on the right side and on the wrong side.

Part 1 Back Body A 01' 35'' (Part 1)
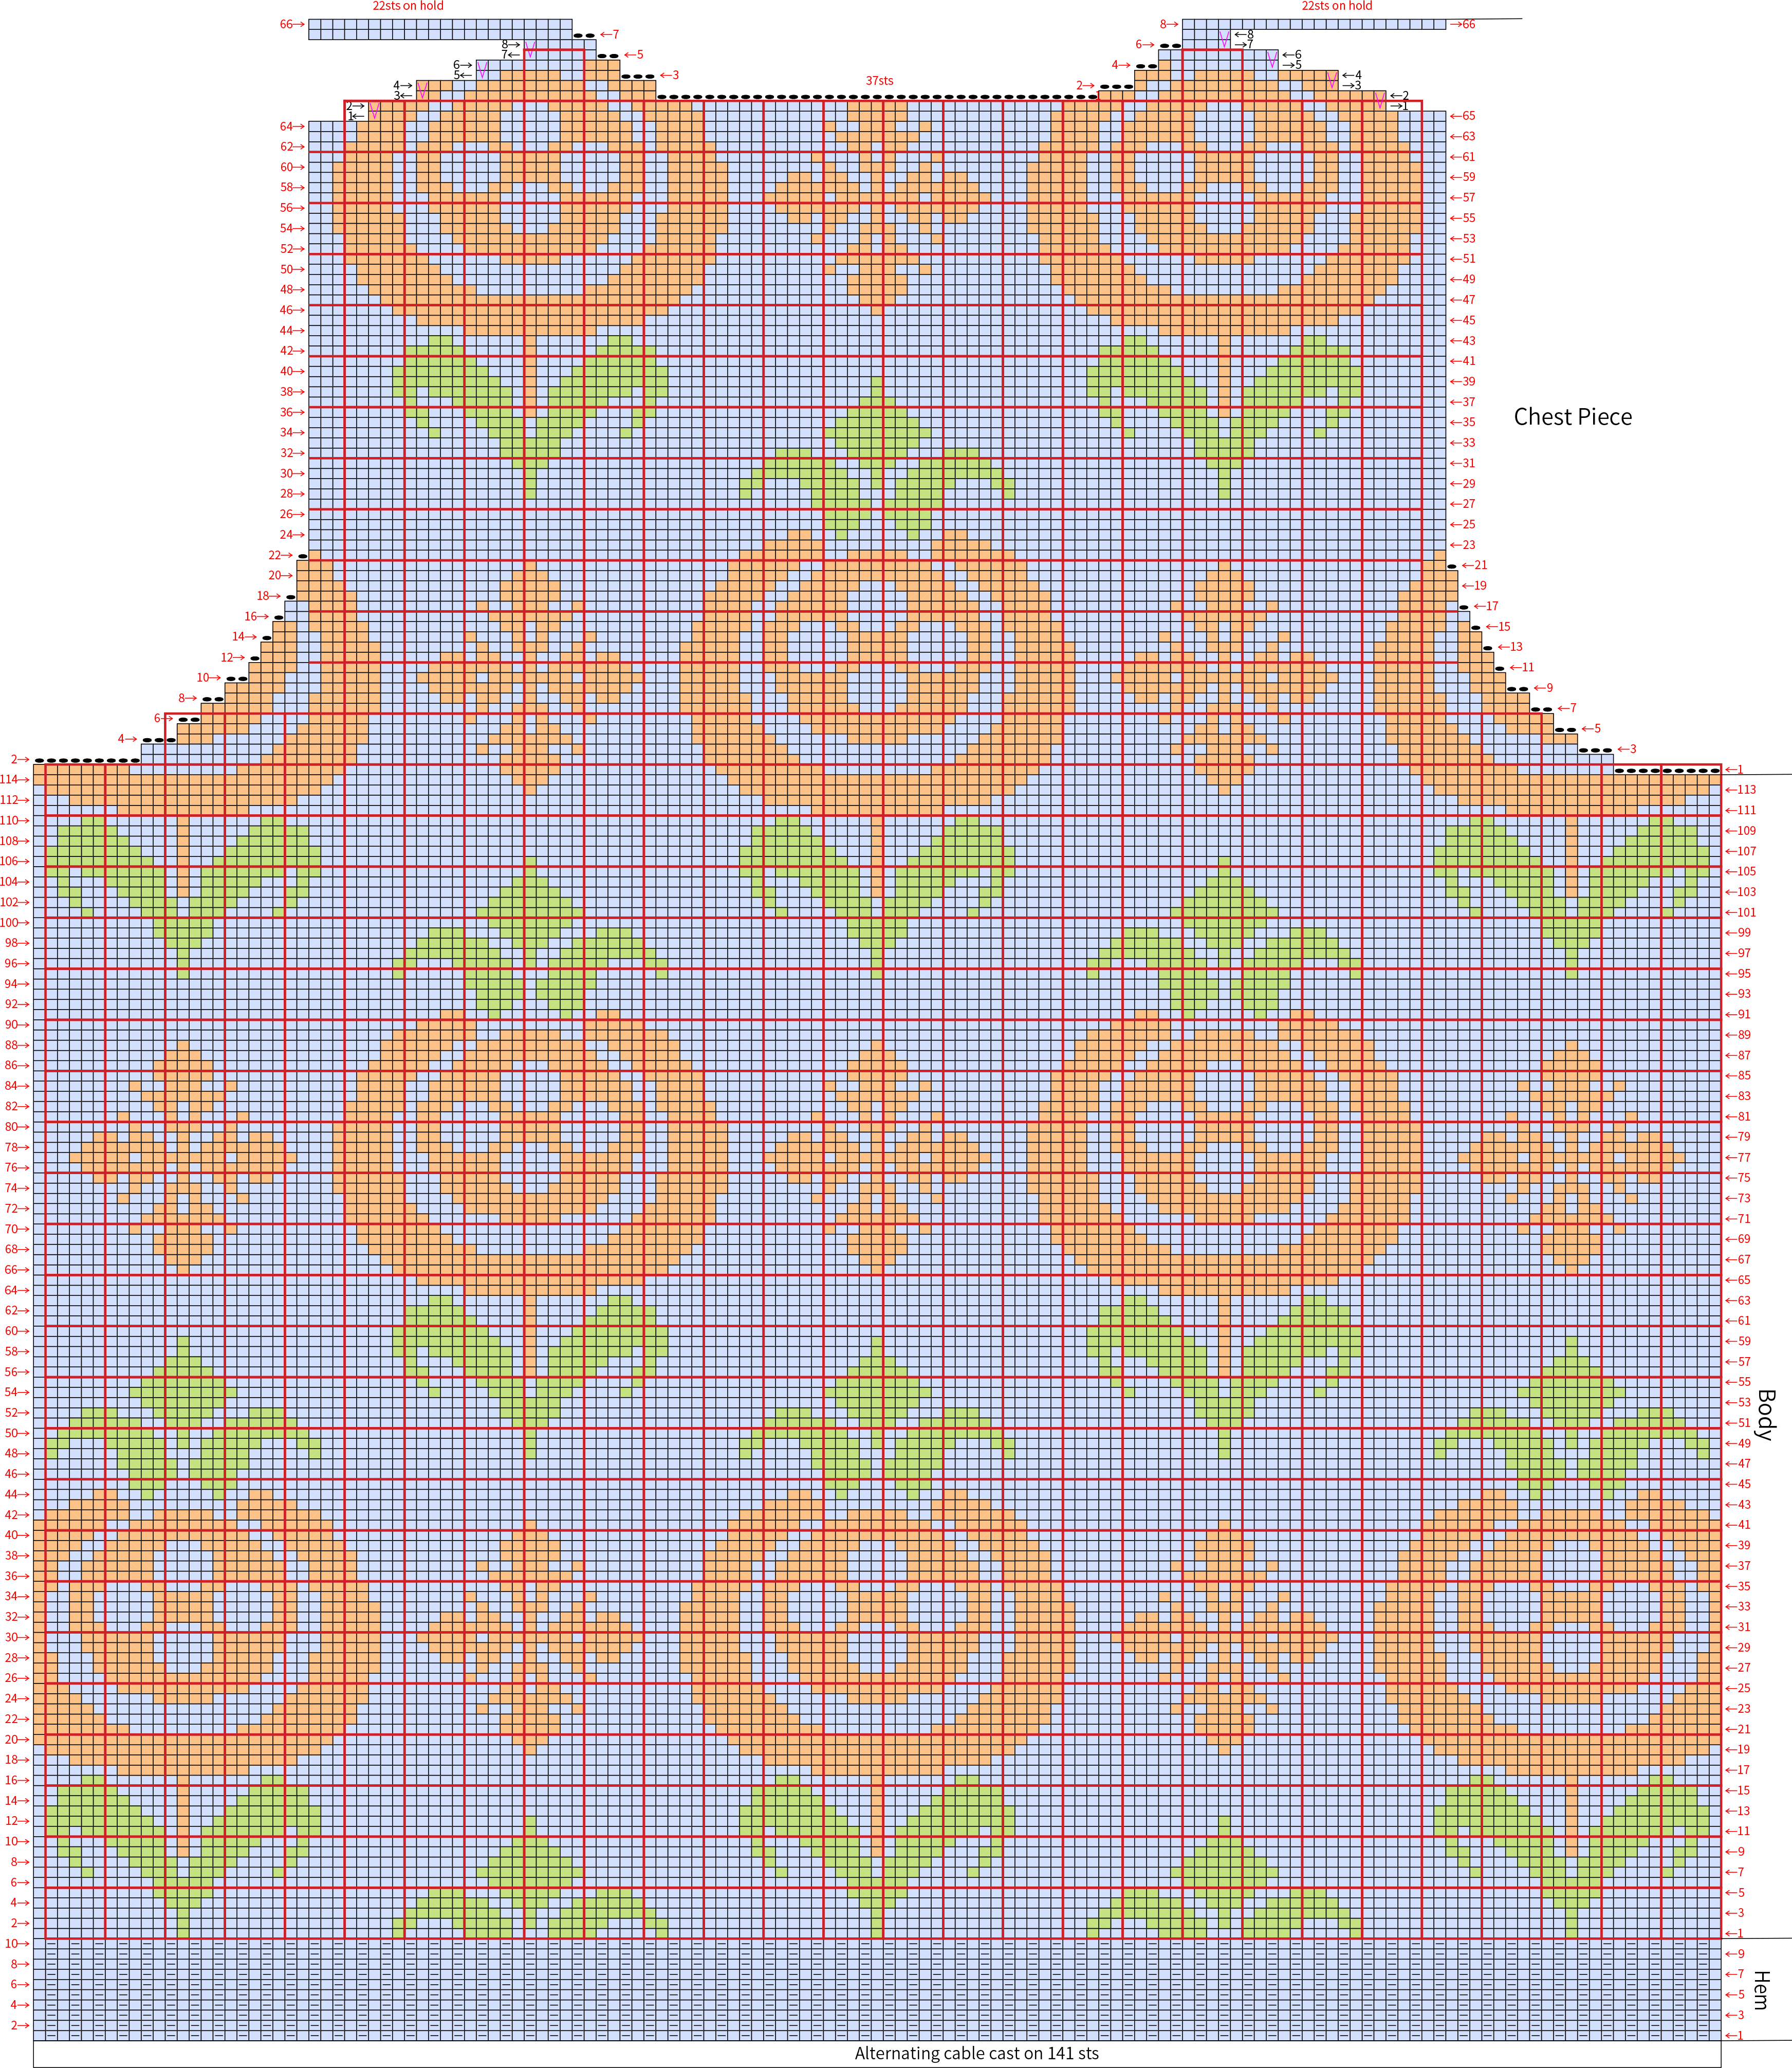
Divide into hem, body, and chest piece. First crochet the hem, then continue crocheting the body and chest piece from the hem. Use alternating cable cast on for the hem, knitting in rows to form this single rib. Please refer to the video demonstration for details.
Part 2 Front Body B 00' 08'' (Part 2)
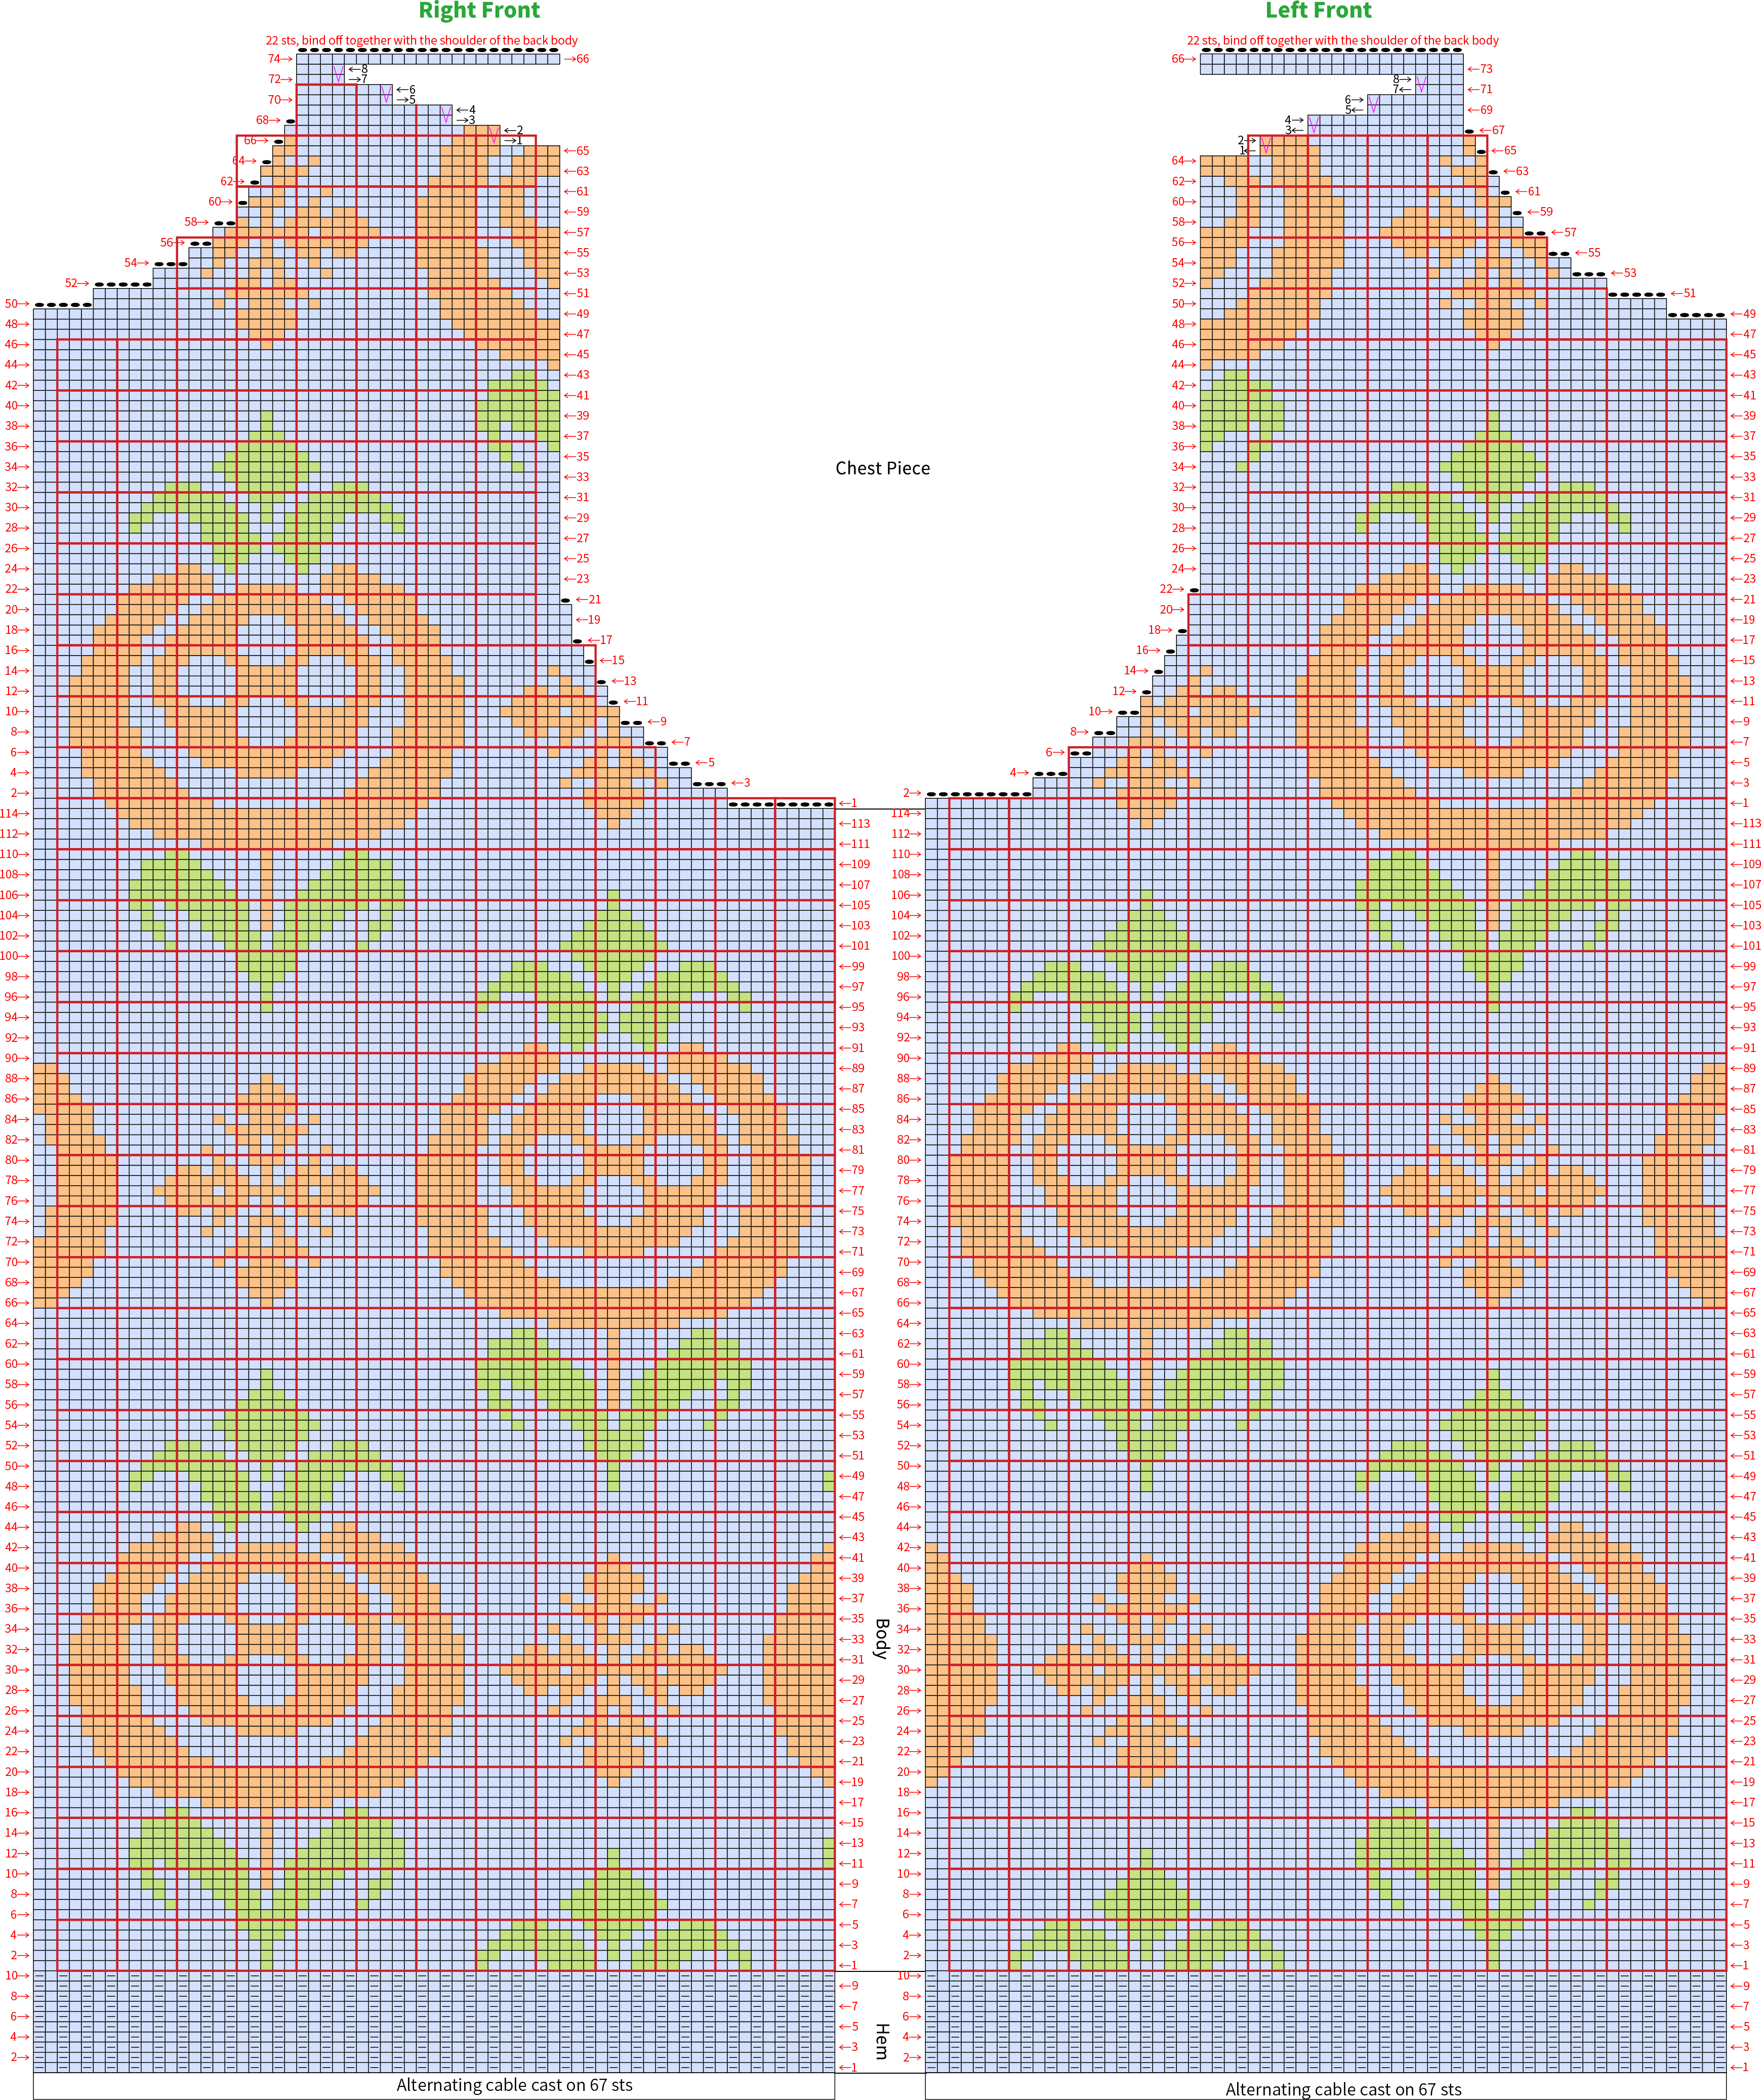
Divide into left front and right front, both divided into hem, body, and chest piece. Please refer to the video demonstration for details.
Part 3 Sleeves C 13' 29'' (Part 2)
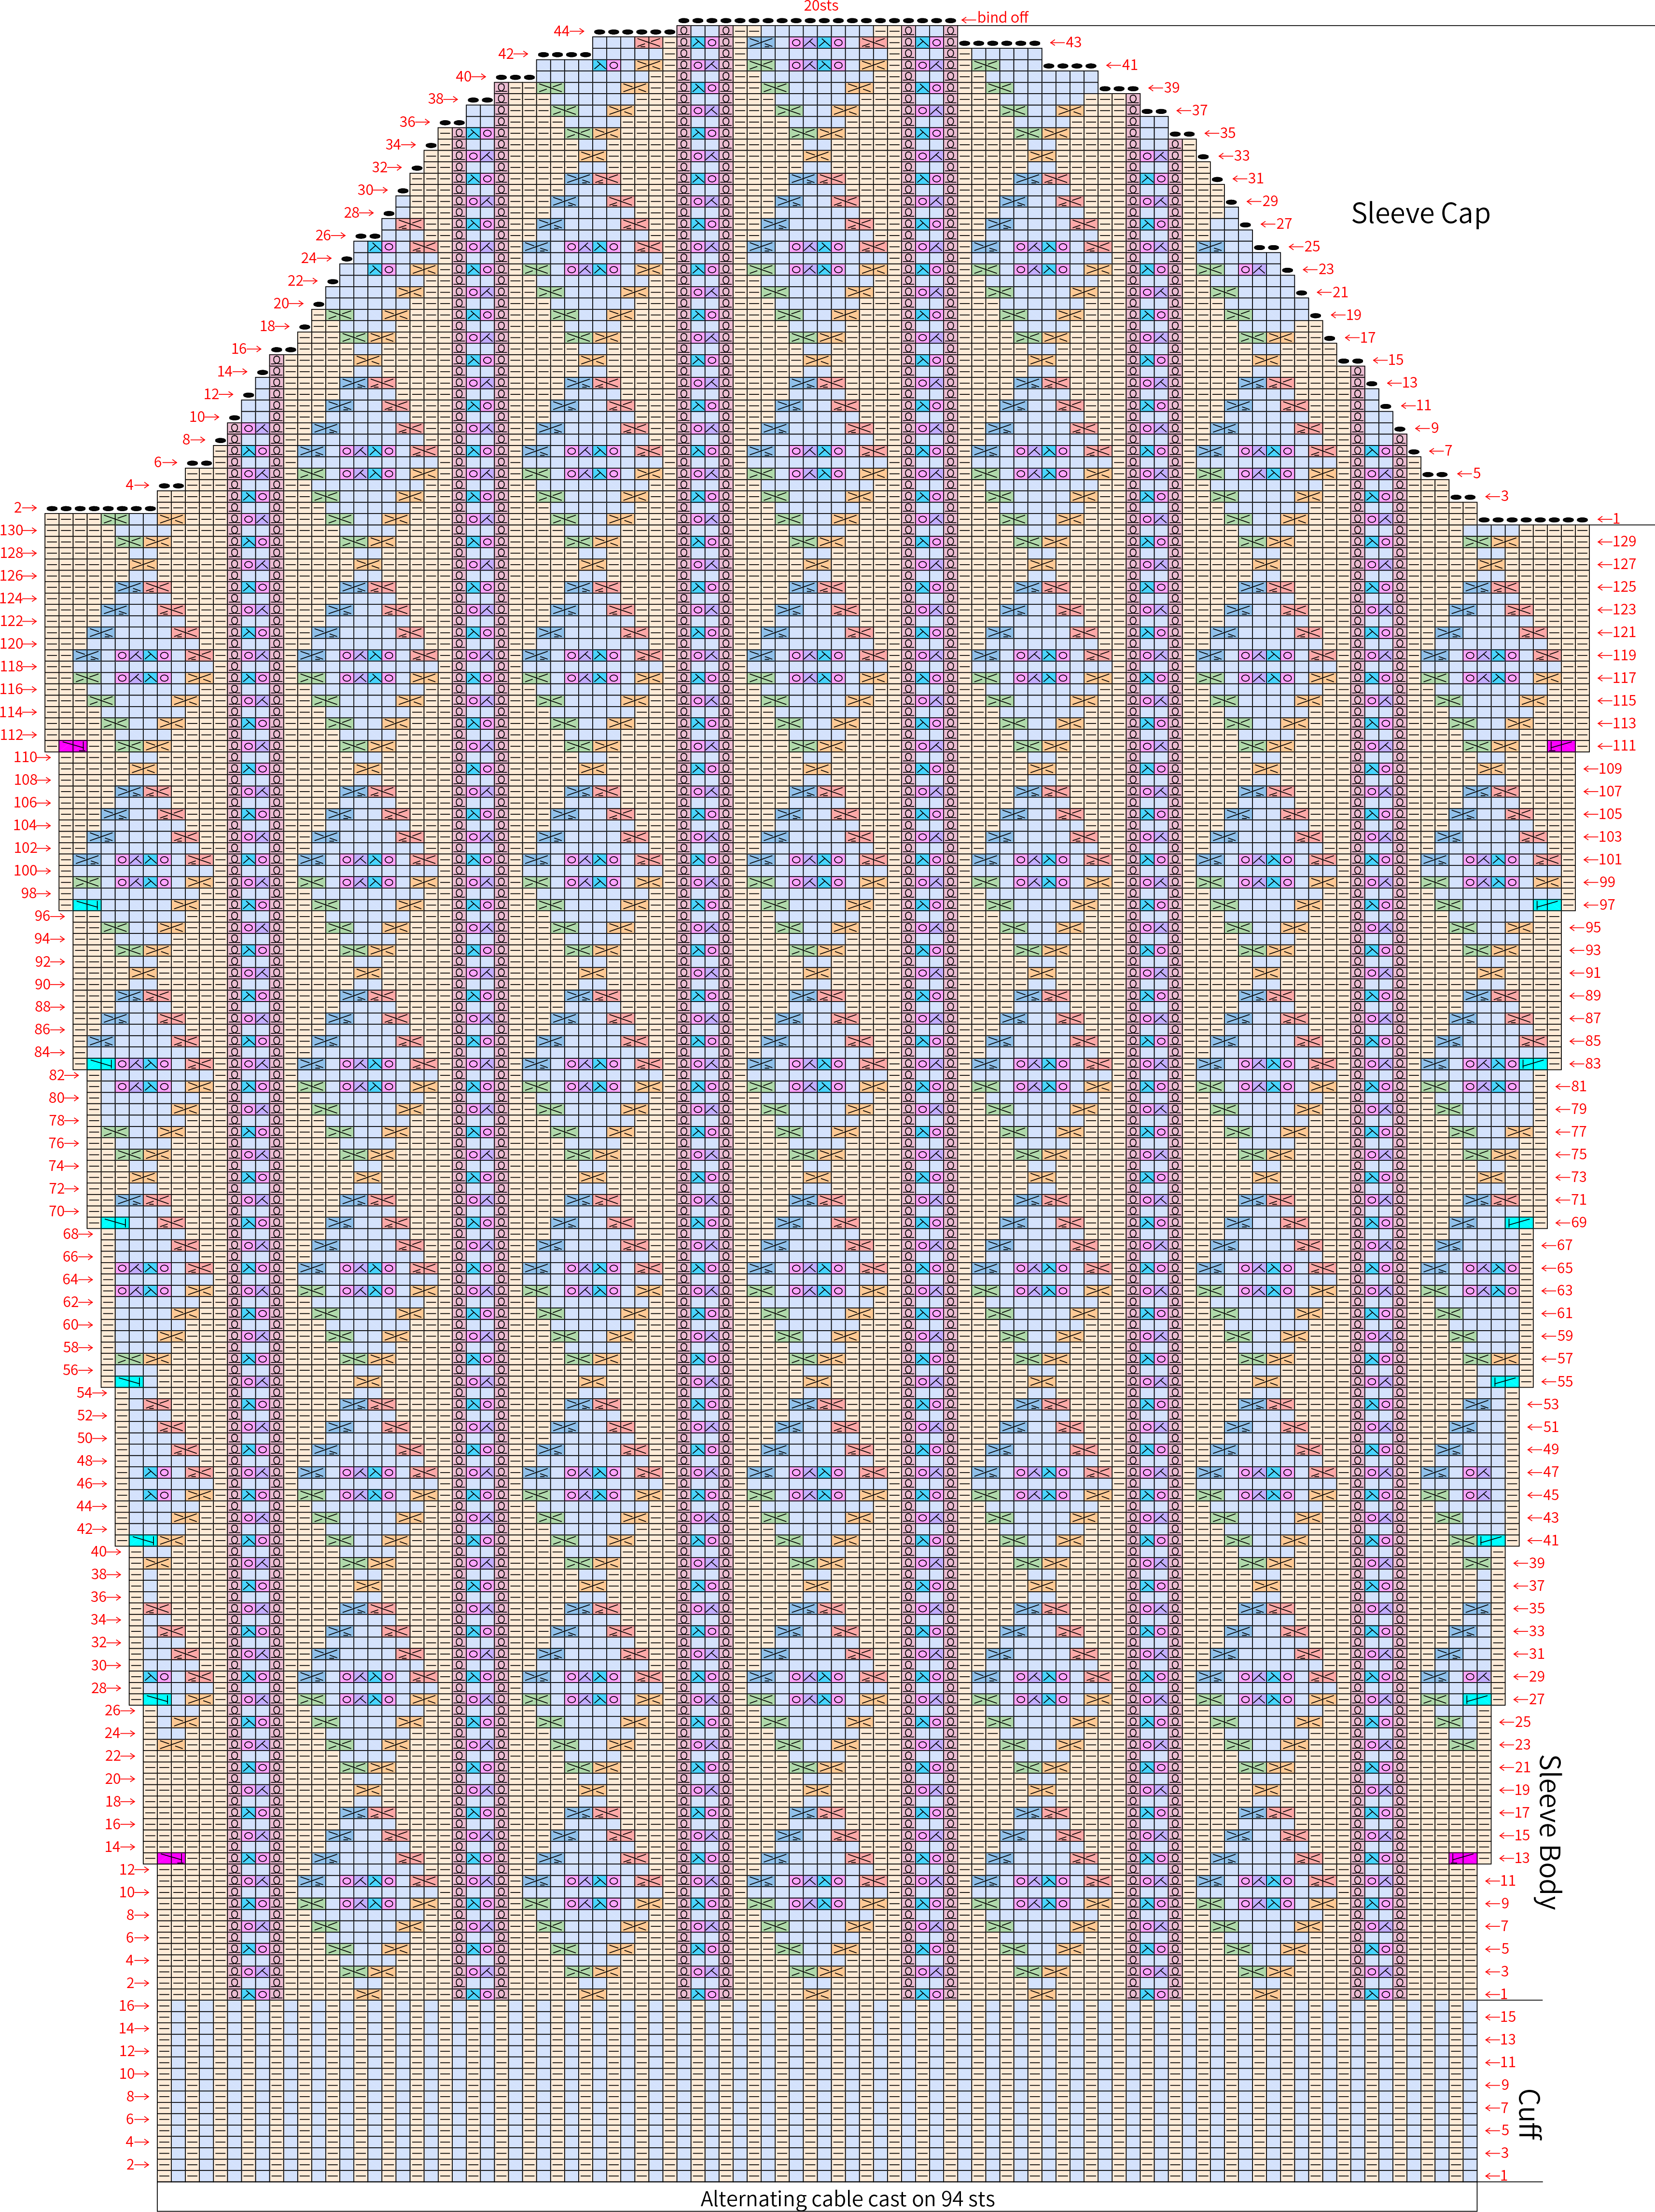
There are two identical pieces, each divided into the cuff, sleeve body, and sleeve cap. First, knit them separately, then sew together and attach. Please refer to the video demonstration for more details.
Part 4 Front Band D 29' 47'' (Part 2) and Collar E 35' 54''
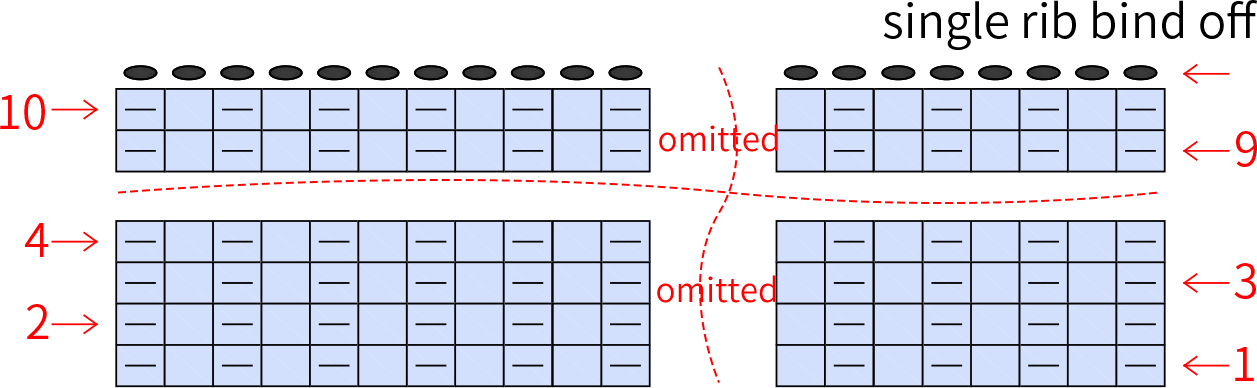
Pick up stitches for the front band along the lower edge of the front body, body, and part of the chest section. After completing the picking up, work in single rib stitch. For the collar, pick up stitches around the neckline of both front and back bodies as well as the front band. Refer to the chart for specific stitch counts, or adjust as needed—make sure the total number of stitches picked up is odd. Please refer to the video demonstration for more details.
Front band 139 sts: roughly pick up 4 sts every 5 rows
Collar 127 sts: pick up 8 sts on each front band edge + 29 sts on each front body edge + pick up 8 sts on each side of the back body+37 sts in the middle of the back body
Part 5 Buttons F 39' 29'' (Part 2)
Tassels G 41' 35'' (Part 2)
Sew 5 pairs of buttons evenly on the front band, and make tassels with the remaining yarn along the front band and hems. Please refer to the video demonstration for more details.
Note: Cut about 10 cm yarn tails for tassels using a crochet hook, or decide based on your preference.
| Version | Parisian Blue Version | Sheer Pink Version | Burnt Coral Version |
| ■ | 04#Sandshell | 12#Drizzle Gray | 04#Sandshell |
| ■ | 27#Parisian Blue | 03#Sheer Pink | 10#Burnt Coral |
| ■ | 20#Subtle Green | ||
| Work with 2 strands held together as one. | |||