Home / Pillow
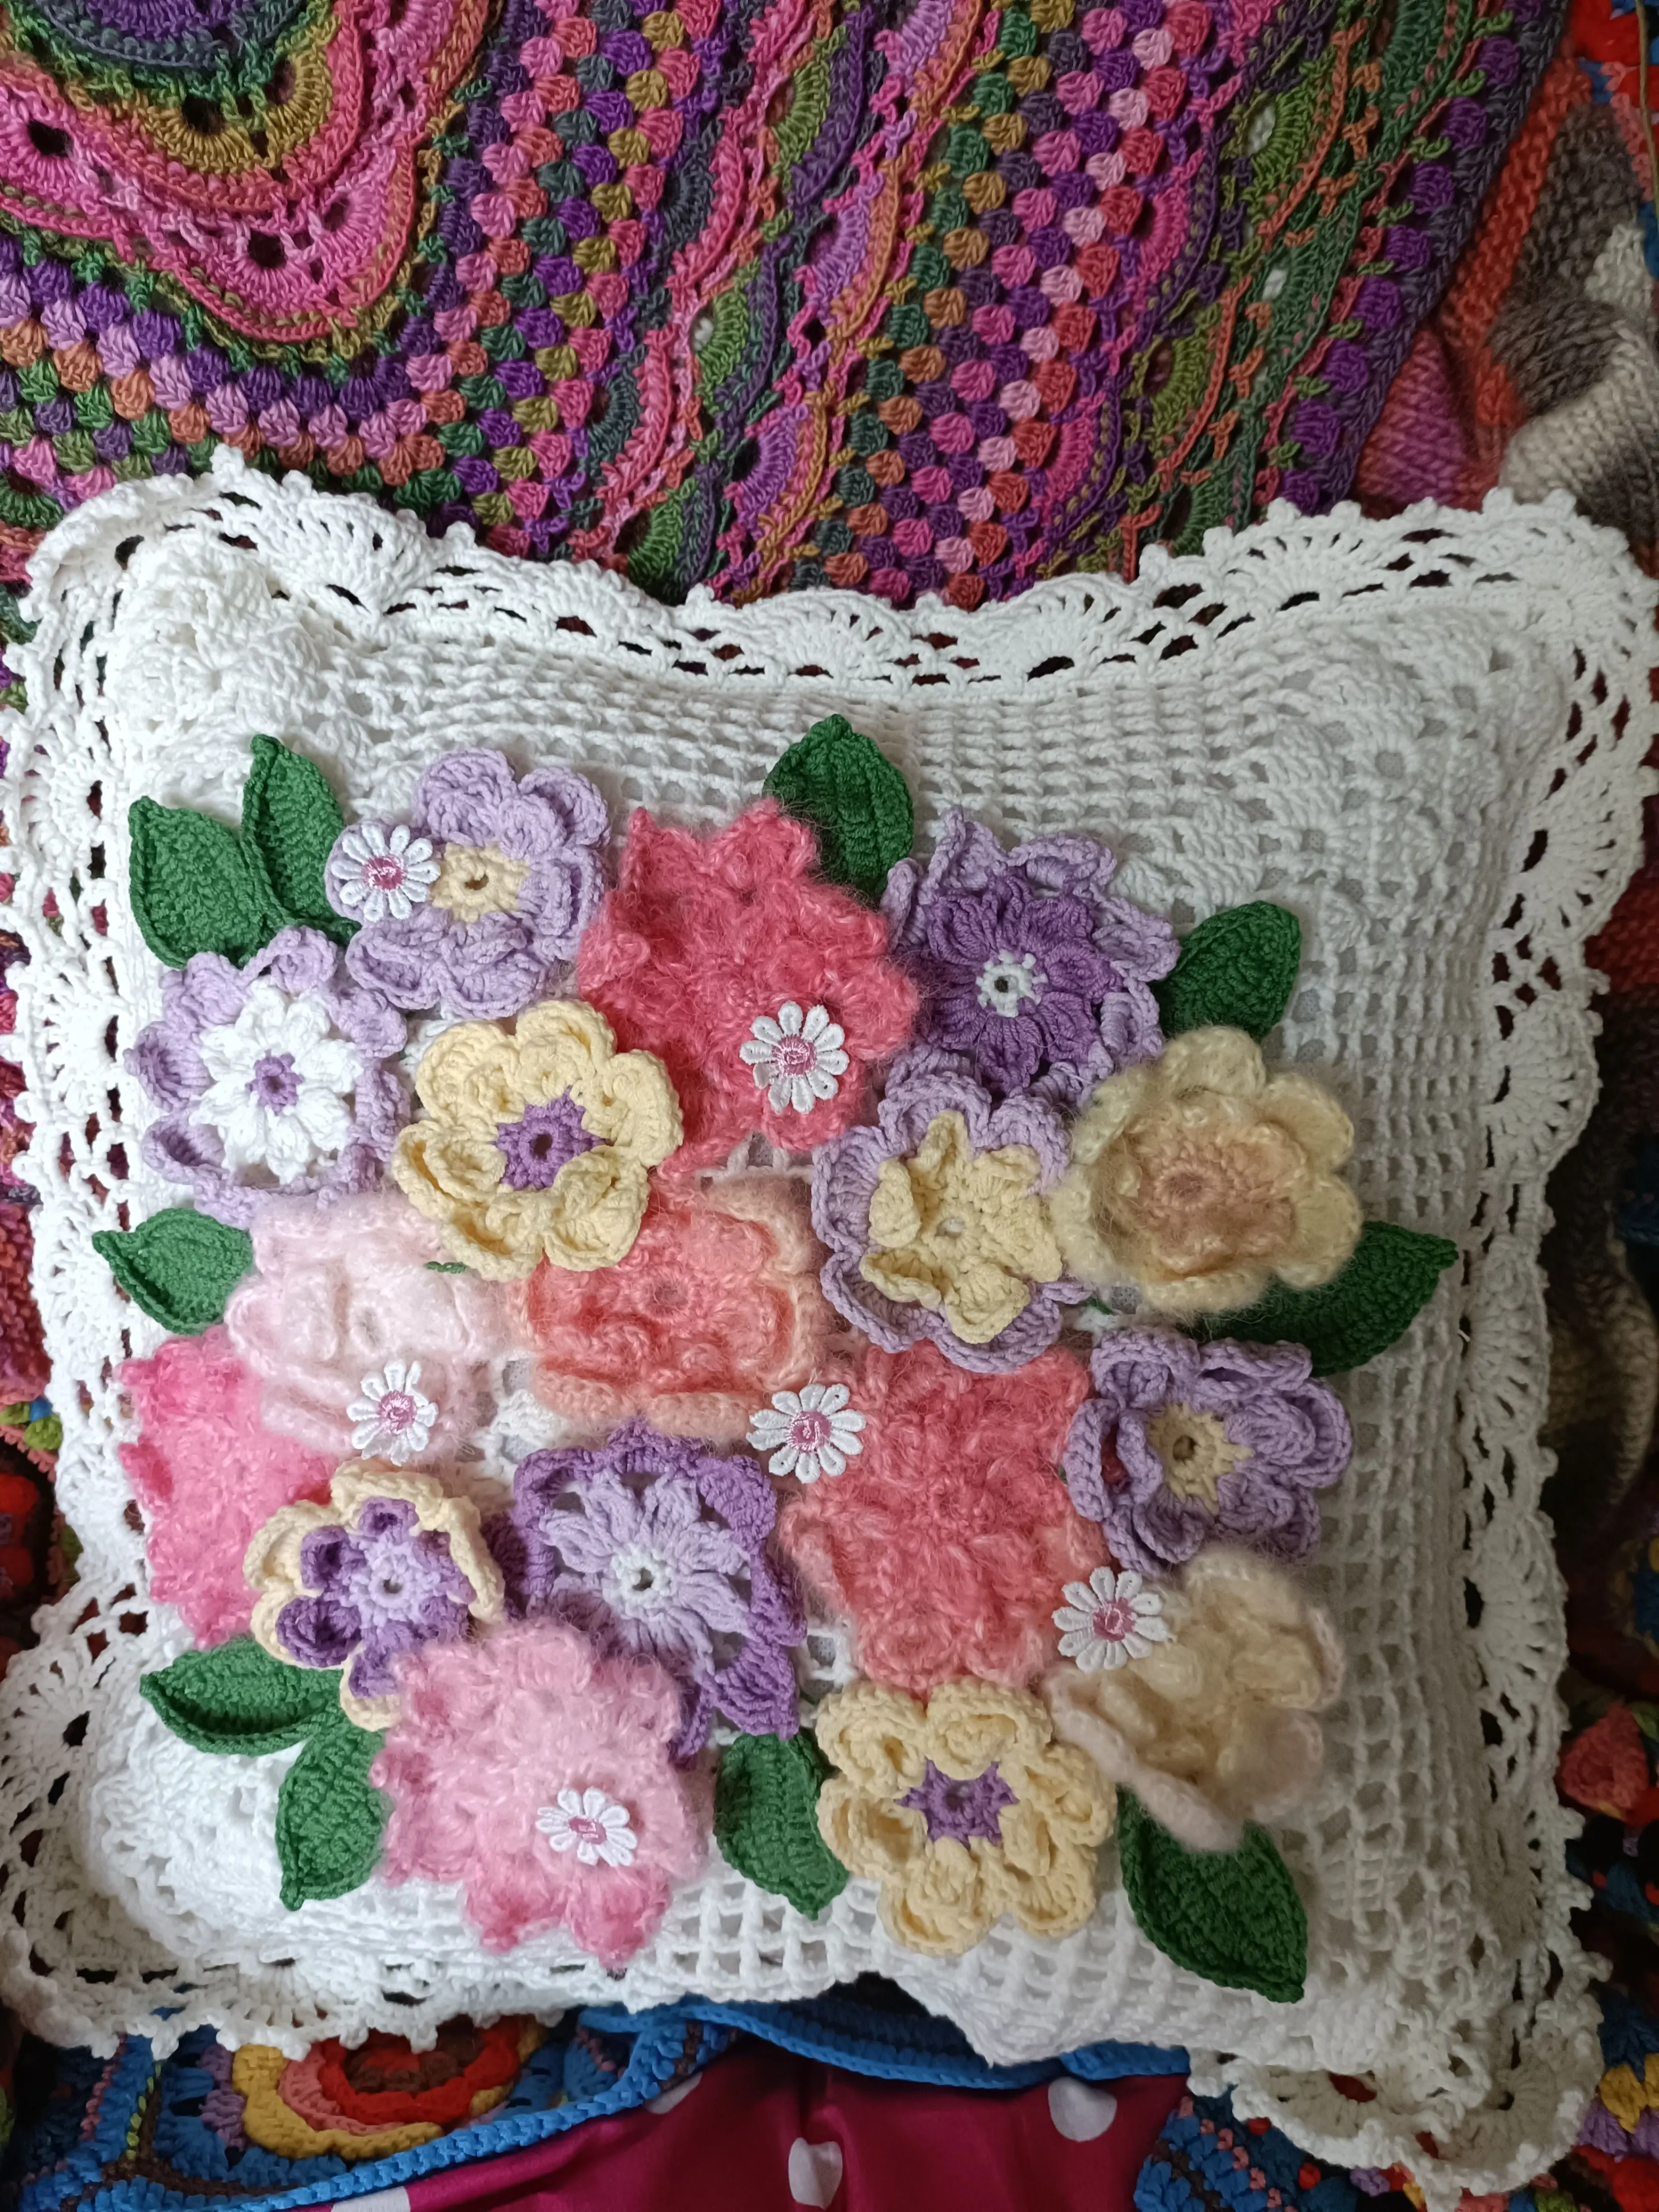
Springtime Pillowcase
Project preview
See the finished project
Pattern format
Instructions
Watch and follow
Video tutorial
The pillowcase includes the main part and decorations. First, make the main part and the decorations, then assemble them.
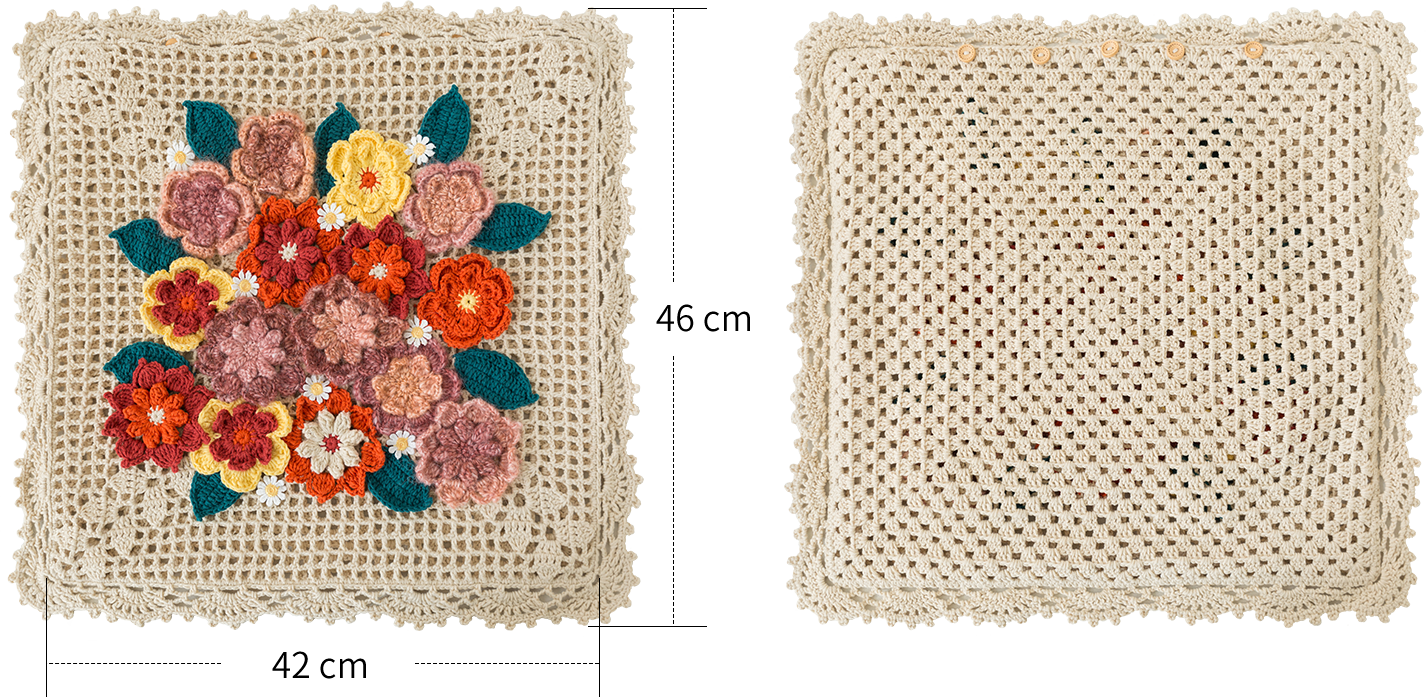
The handcrafted measurements may have an error of 1 to 2 cm. Due to variations in individual tension, the size of the sample is for reference only.
Materials: 4-Ply Combed Cotton & Acrylic Fibre Hand Knitting Yarn,
Susan's Family Dawn Impression
Hook: 3.00 mm crochet hook
Chart Key















Note: This pattern is making in Chinese crochet pattern terms, and the stitch name is written using American terminology. All measurements in charts are in cm. 
Part 1 Main part A 00' 34''
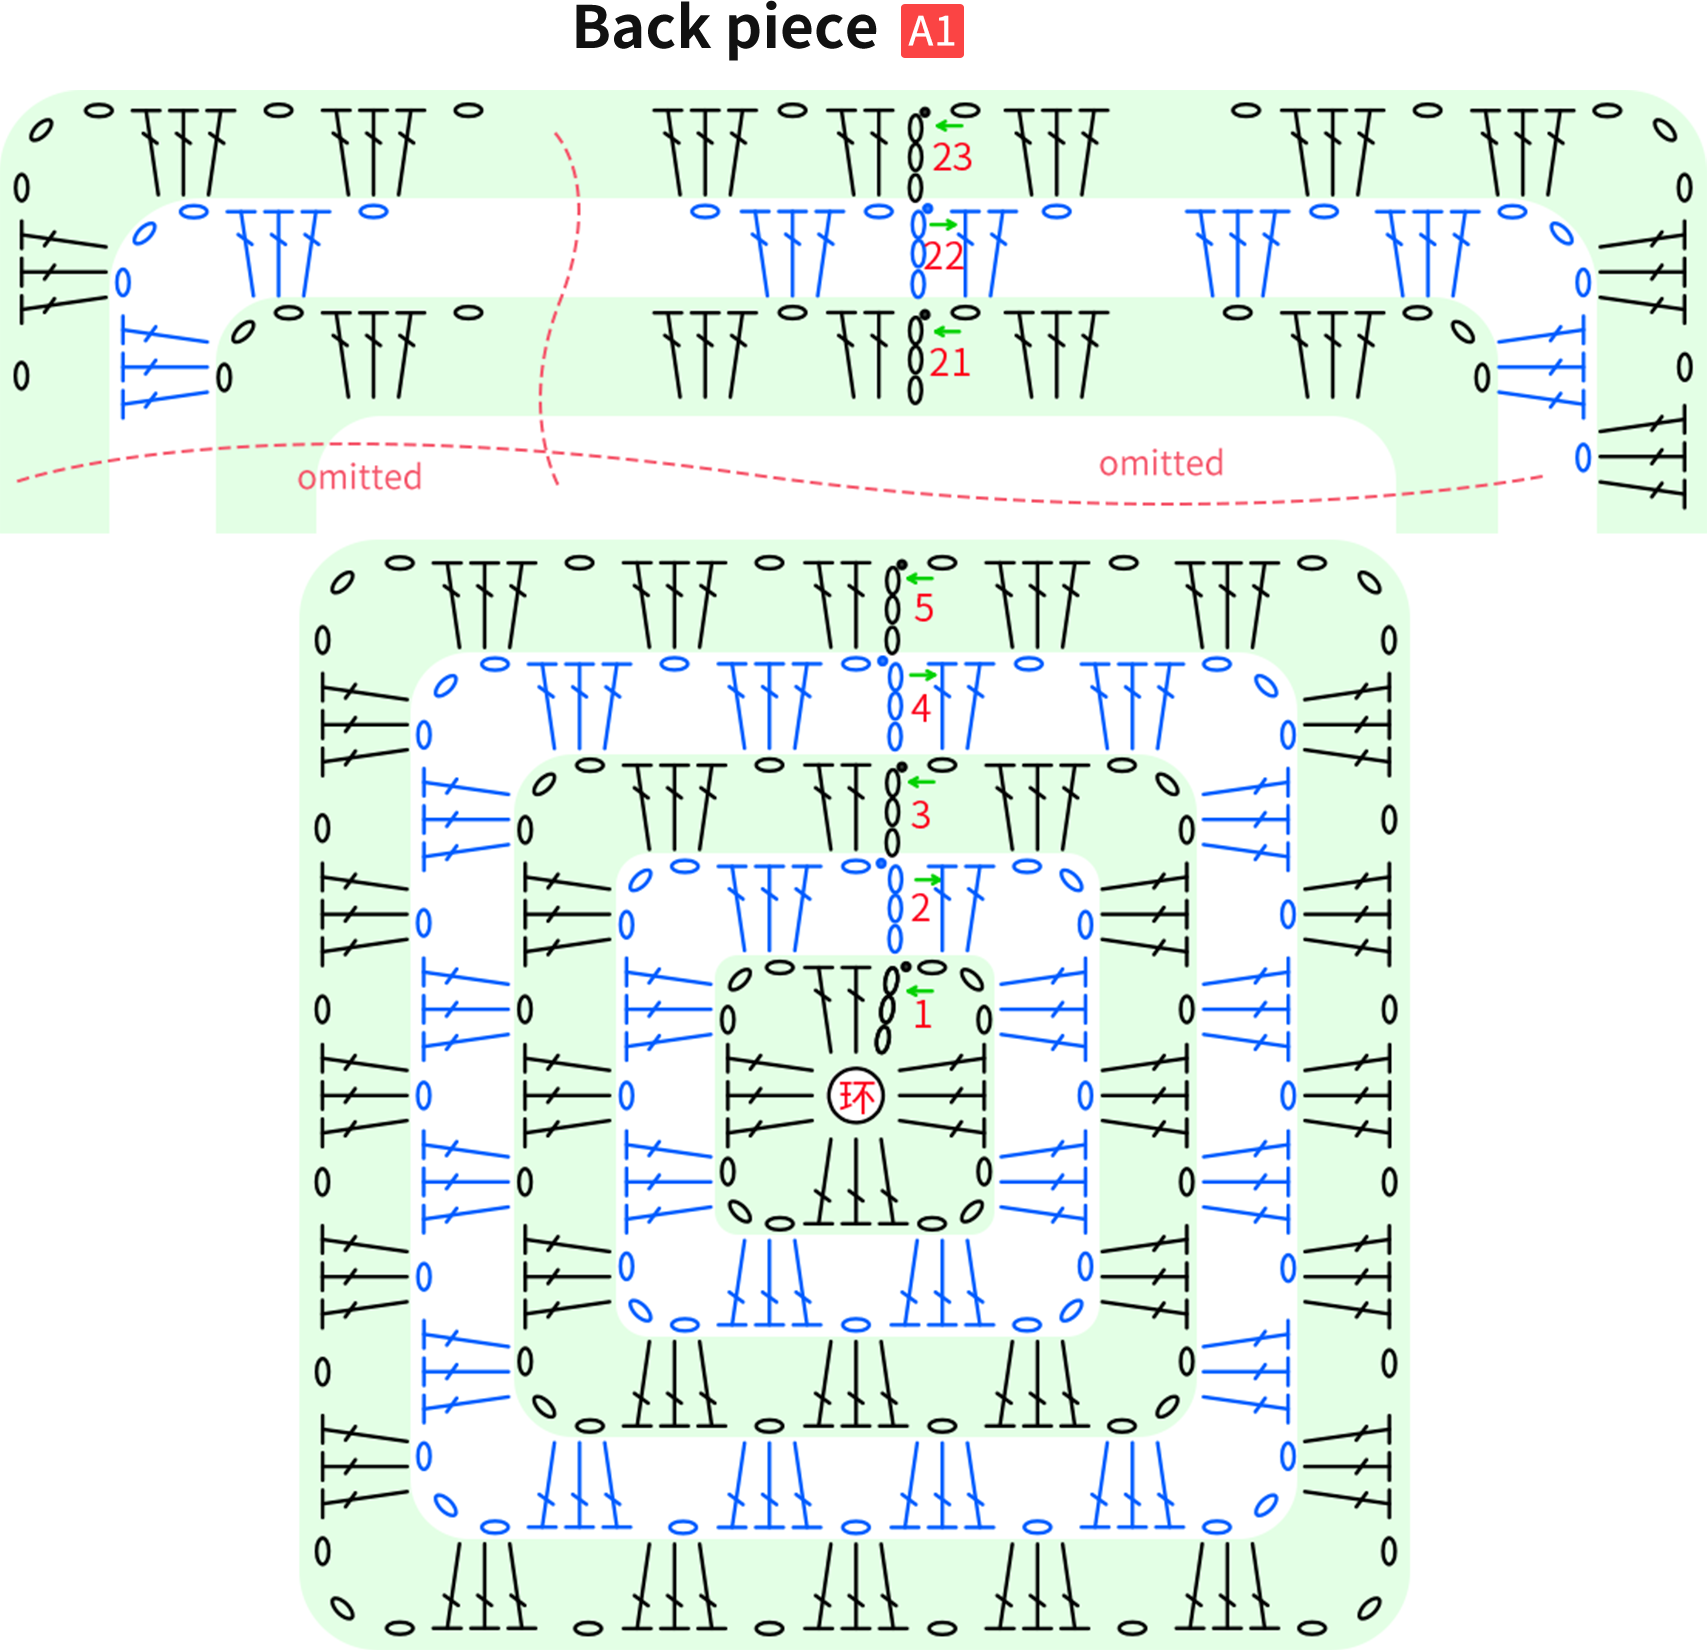
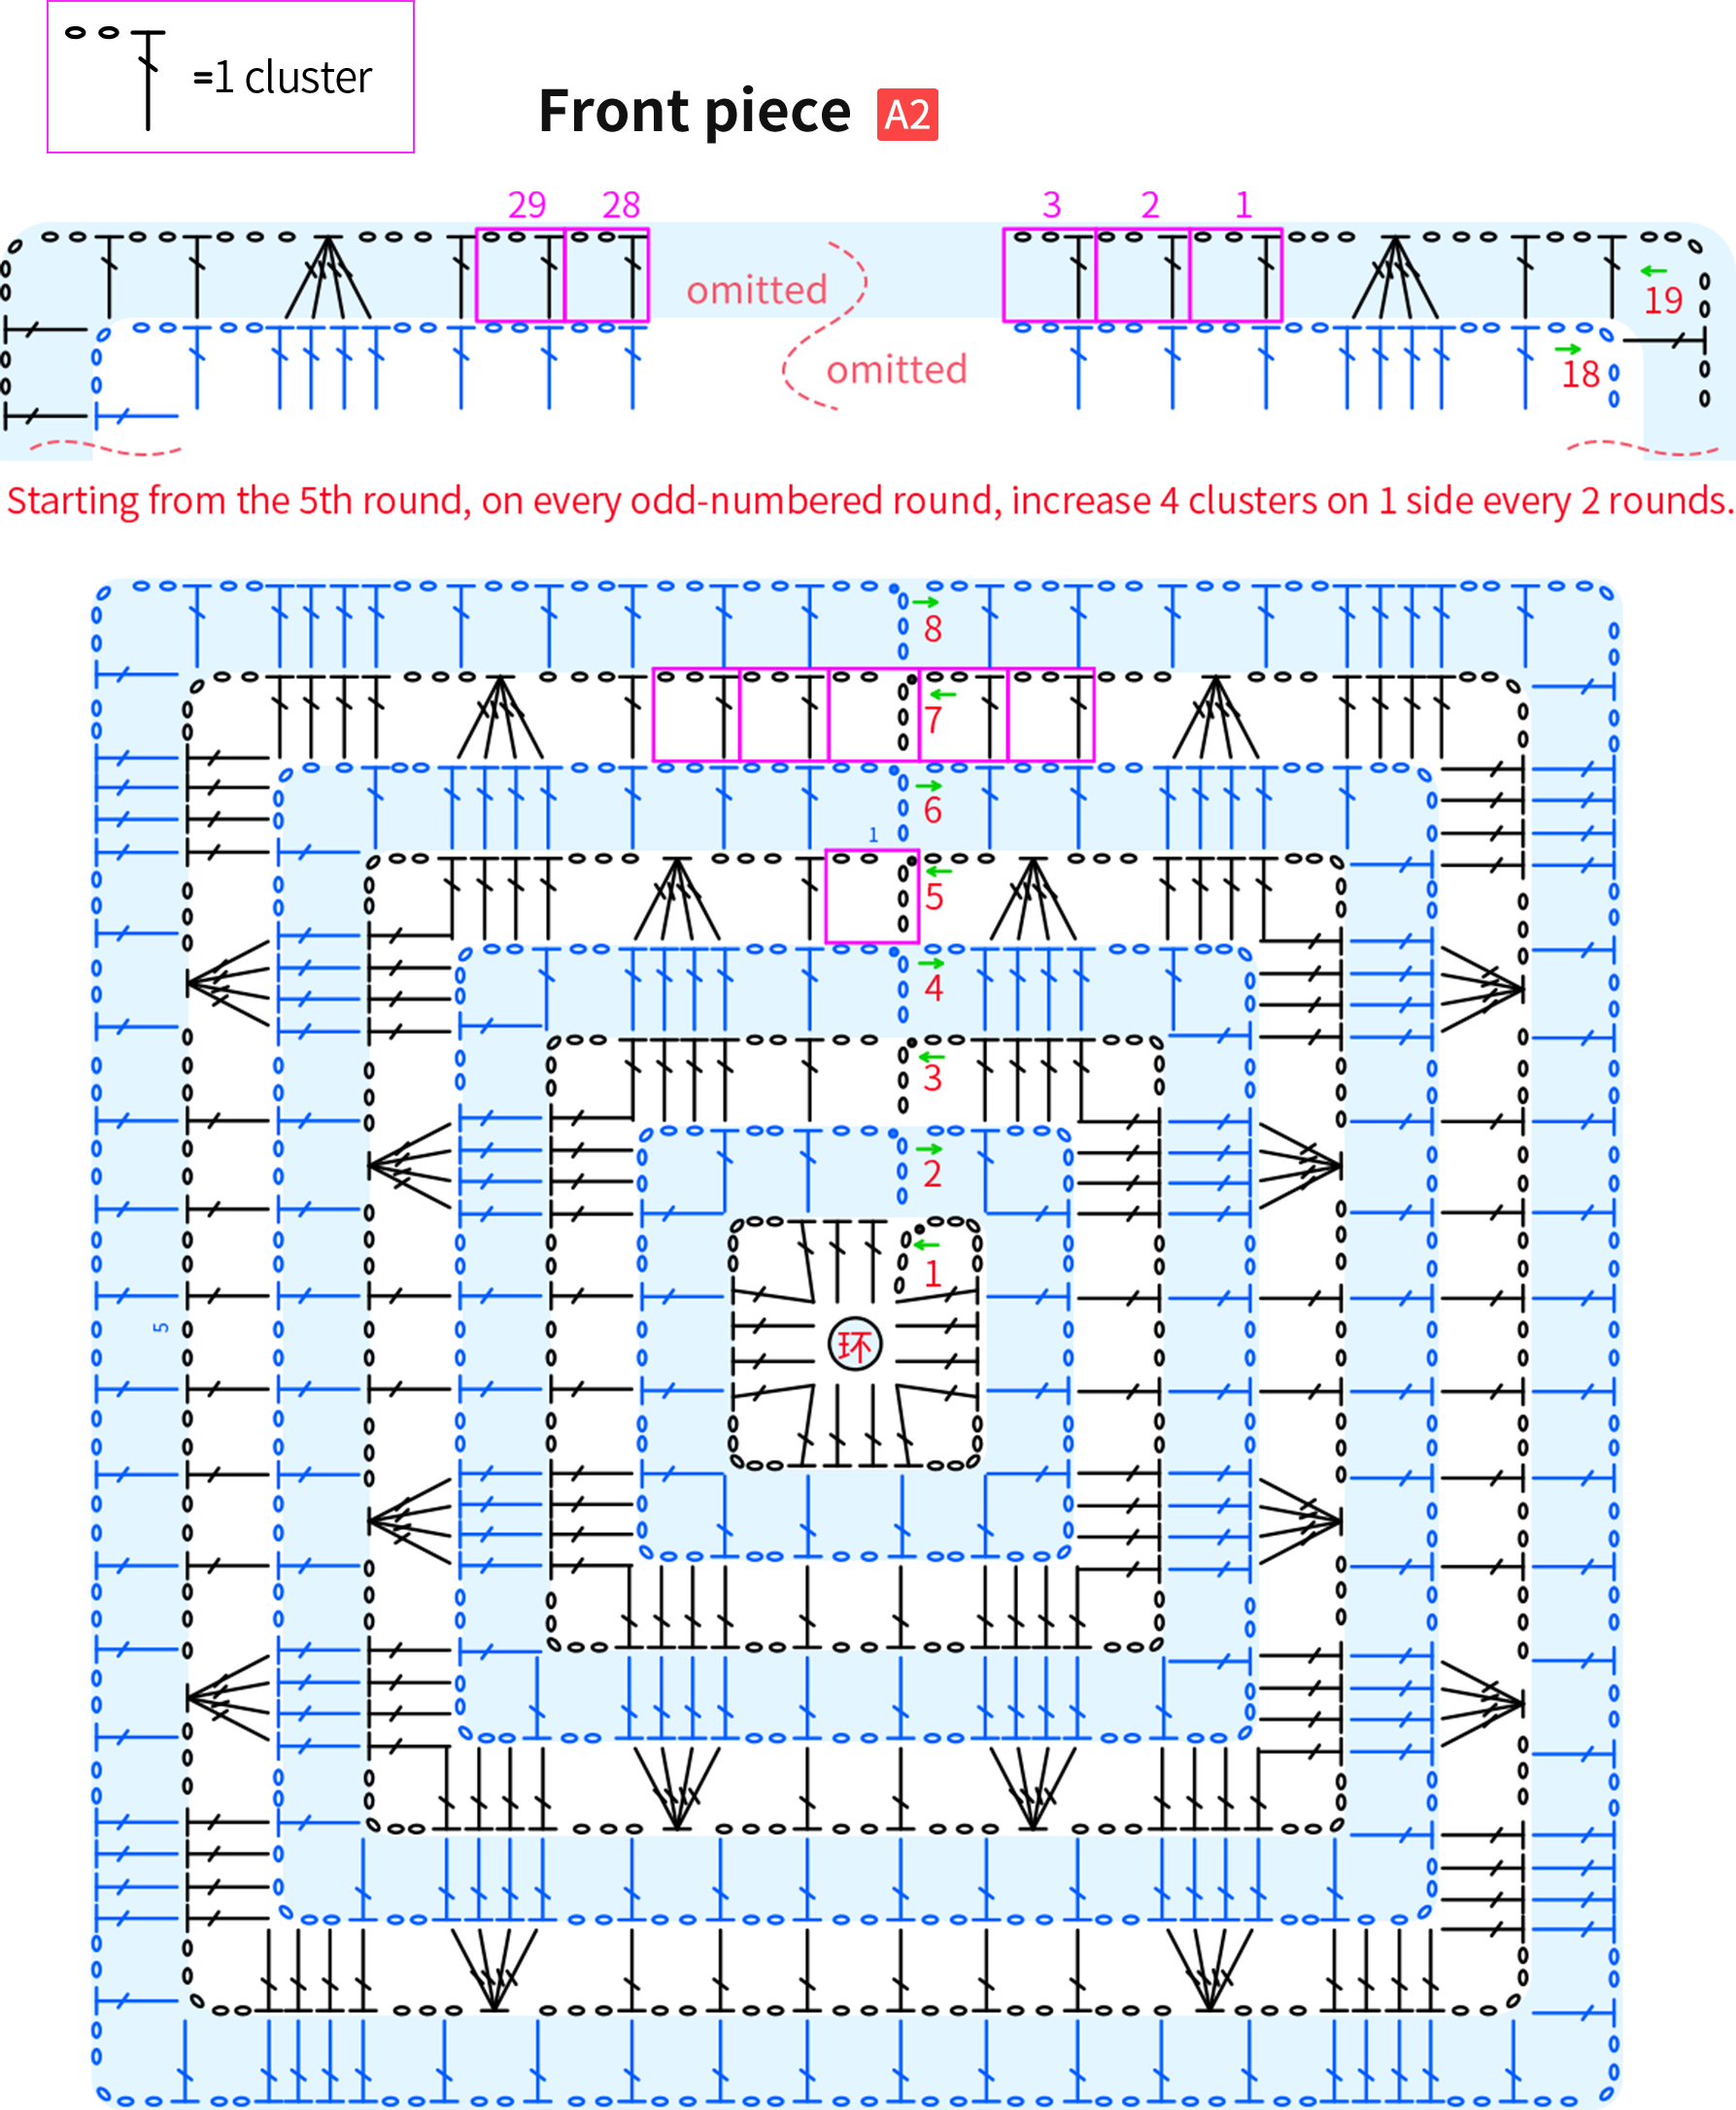
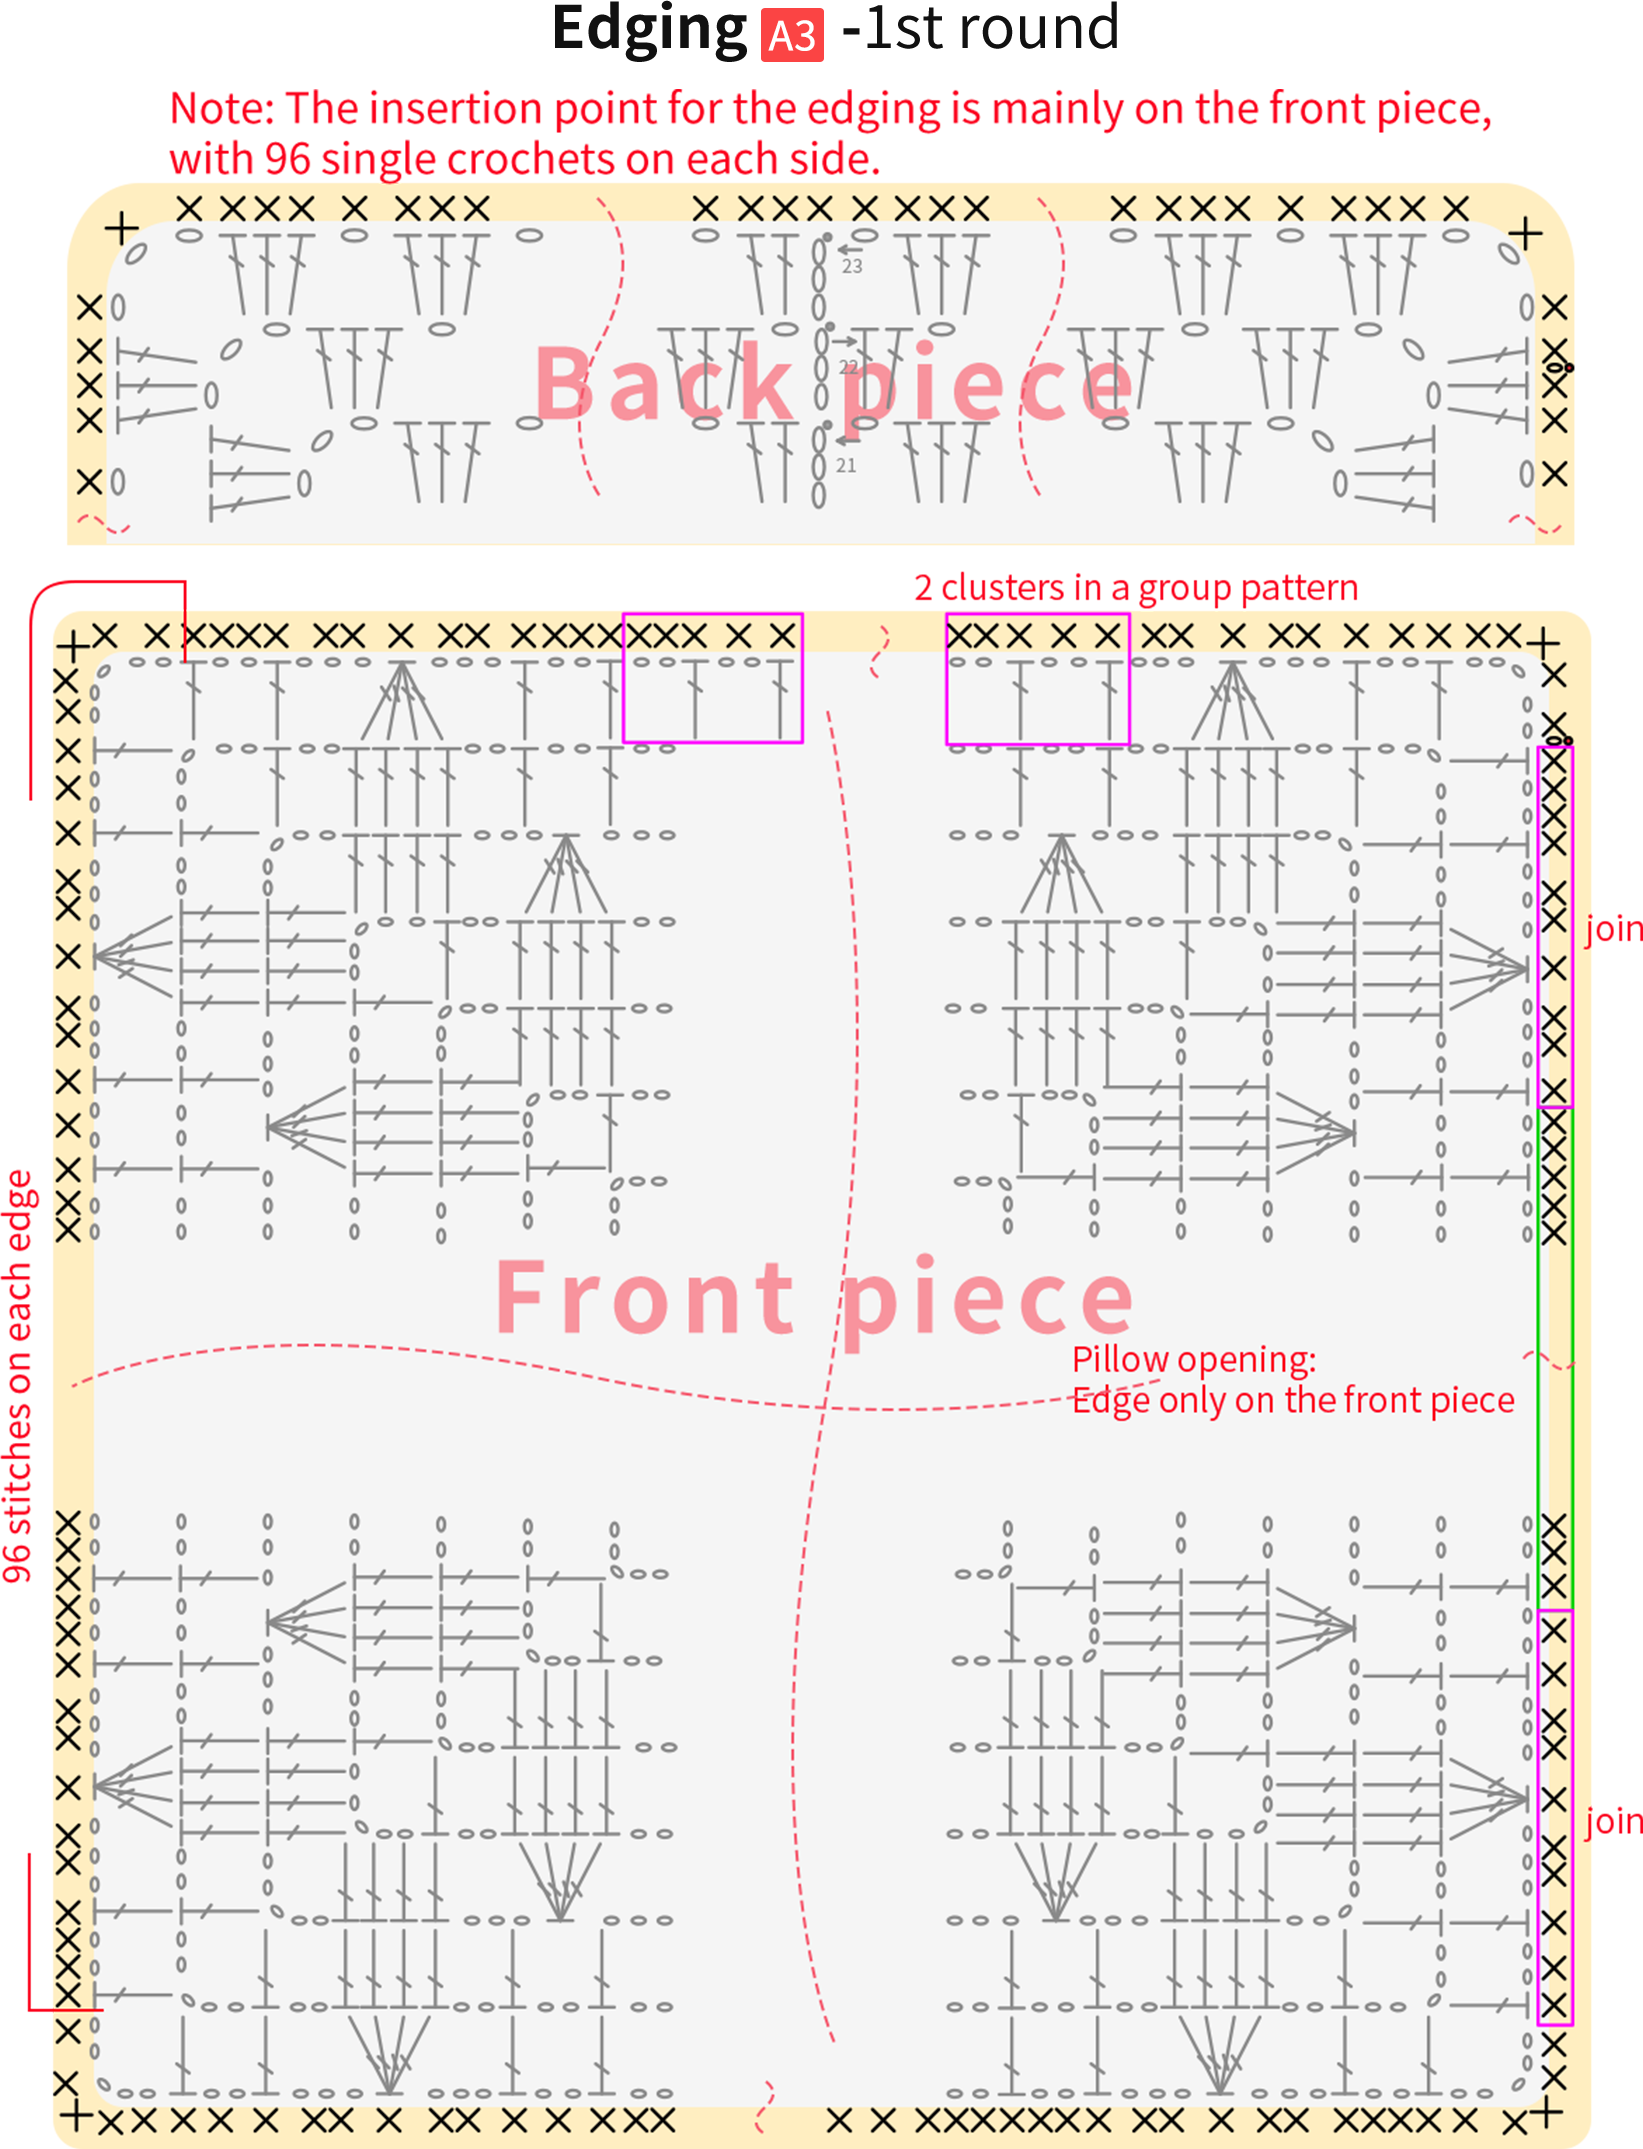
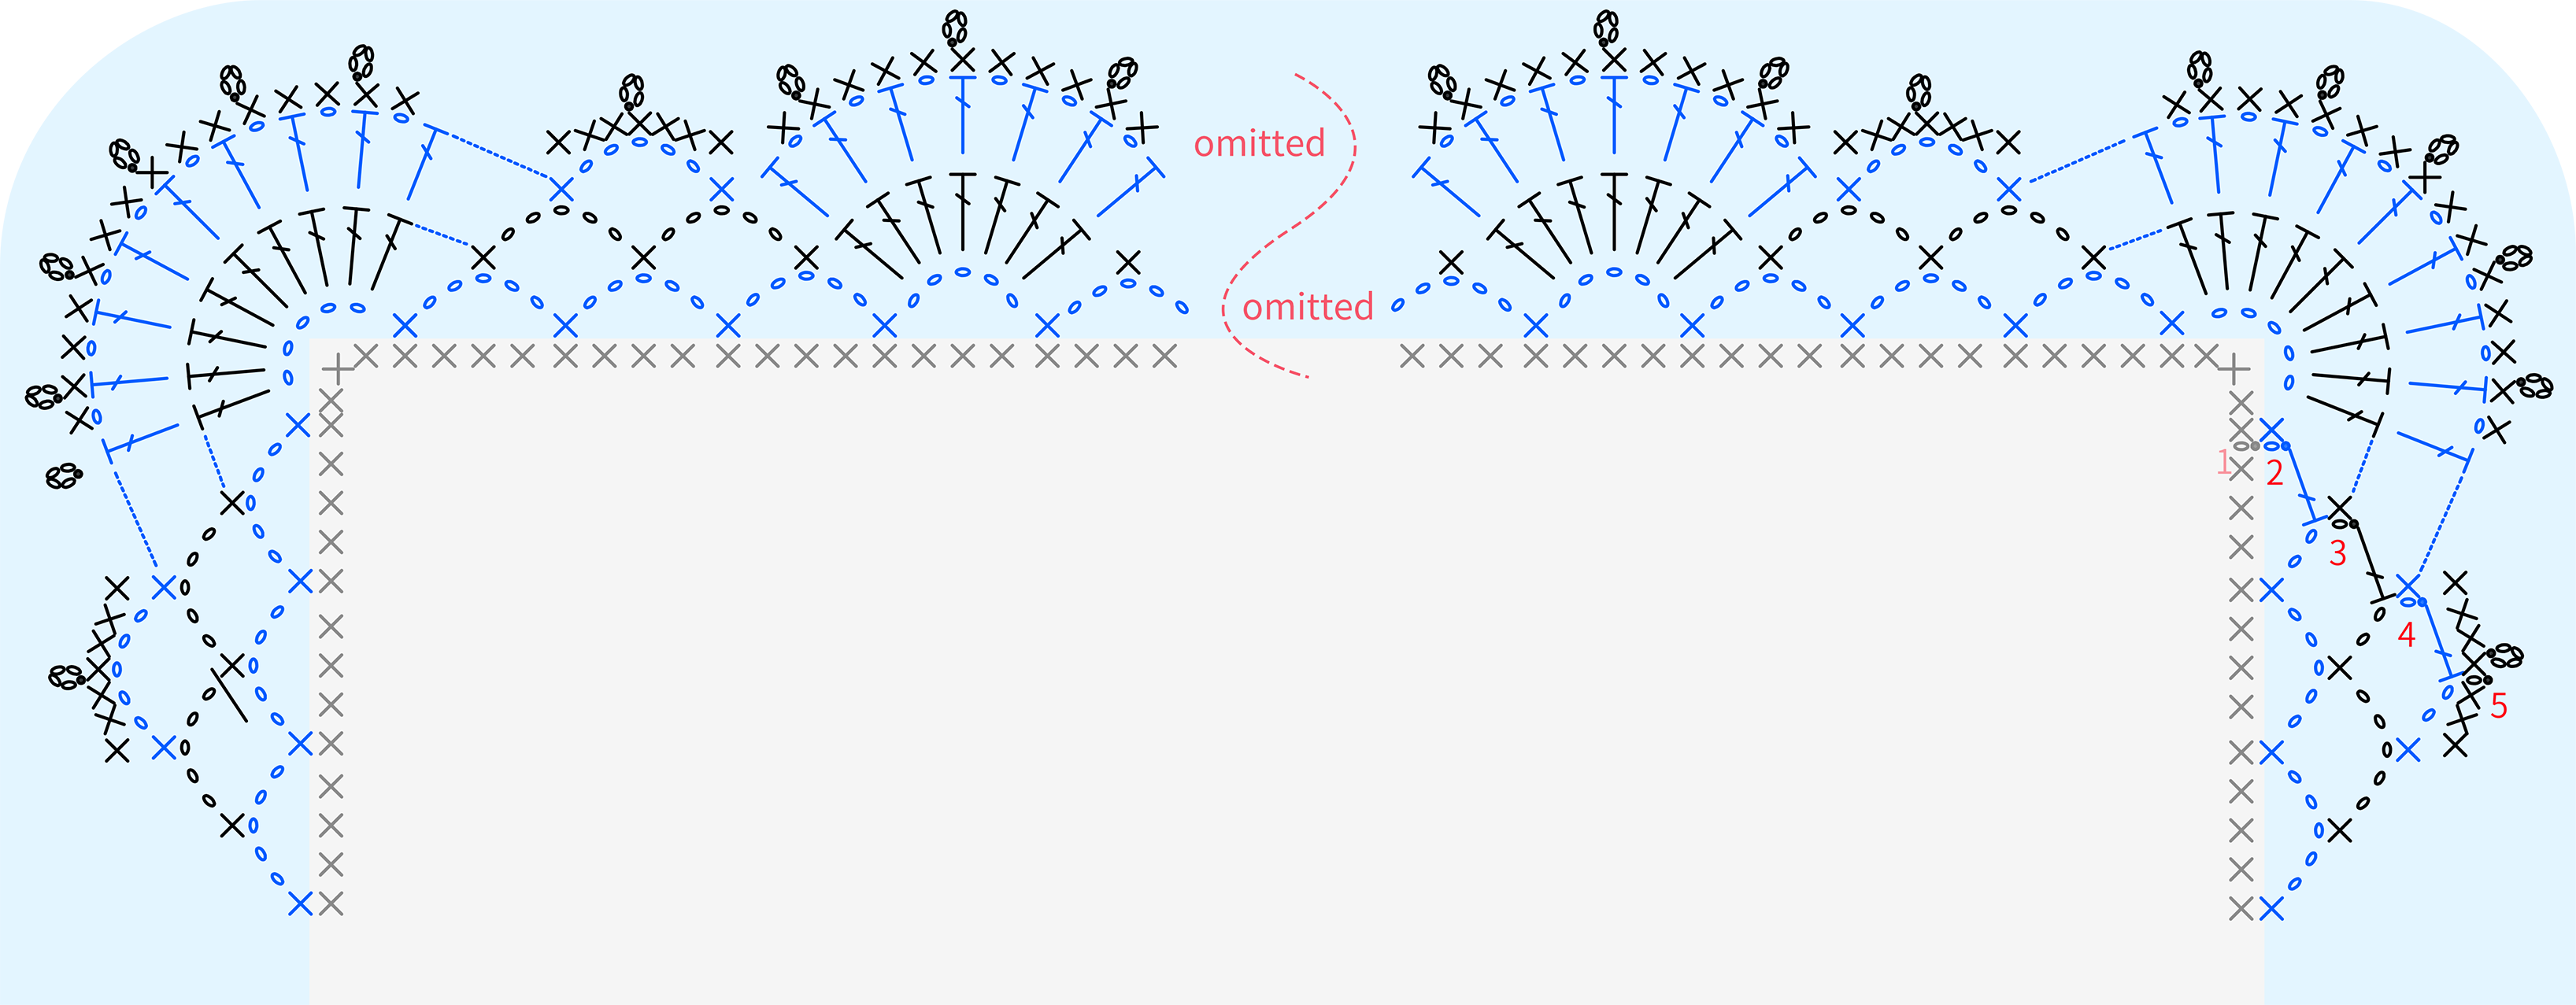
The main part consists of the back piece, the front piece, and the edge. Then, place the two pieces with their wrong sides facing each other. Proceed to edging around, Please refer to the video demonstration for details.
Part 2 DecorationsB 22' 31''
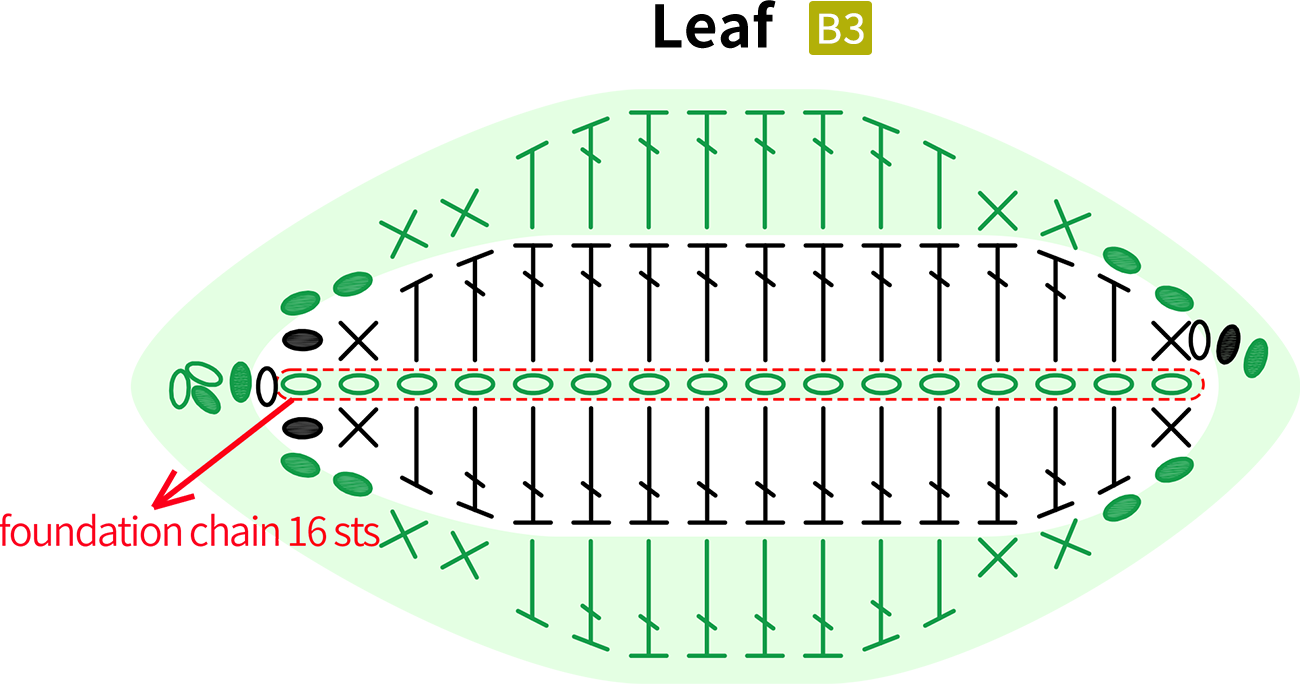
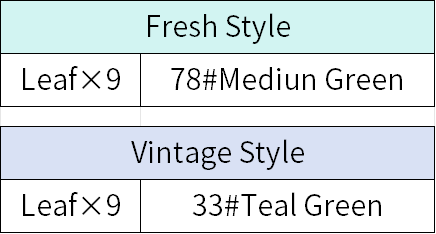
The decorations include Motif 1, Motif 2, and leaves. After completing each decoration, be sure to leave a long yarn tail for sewing. Motif 1 and Motif 2 are crocheted with two different yarns. For the gradient sections, separate the yarn by color when wrapping it. Change colors as you crochet with each one. Please refer to the video demonstration for specifics.
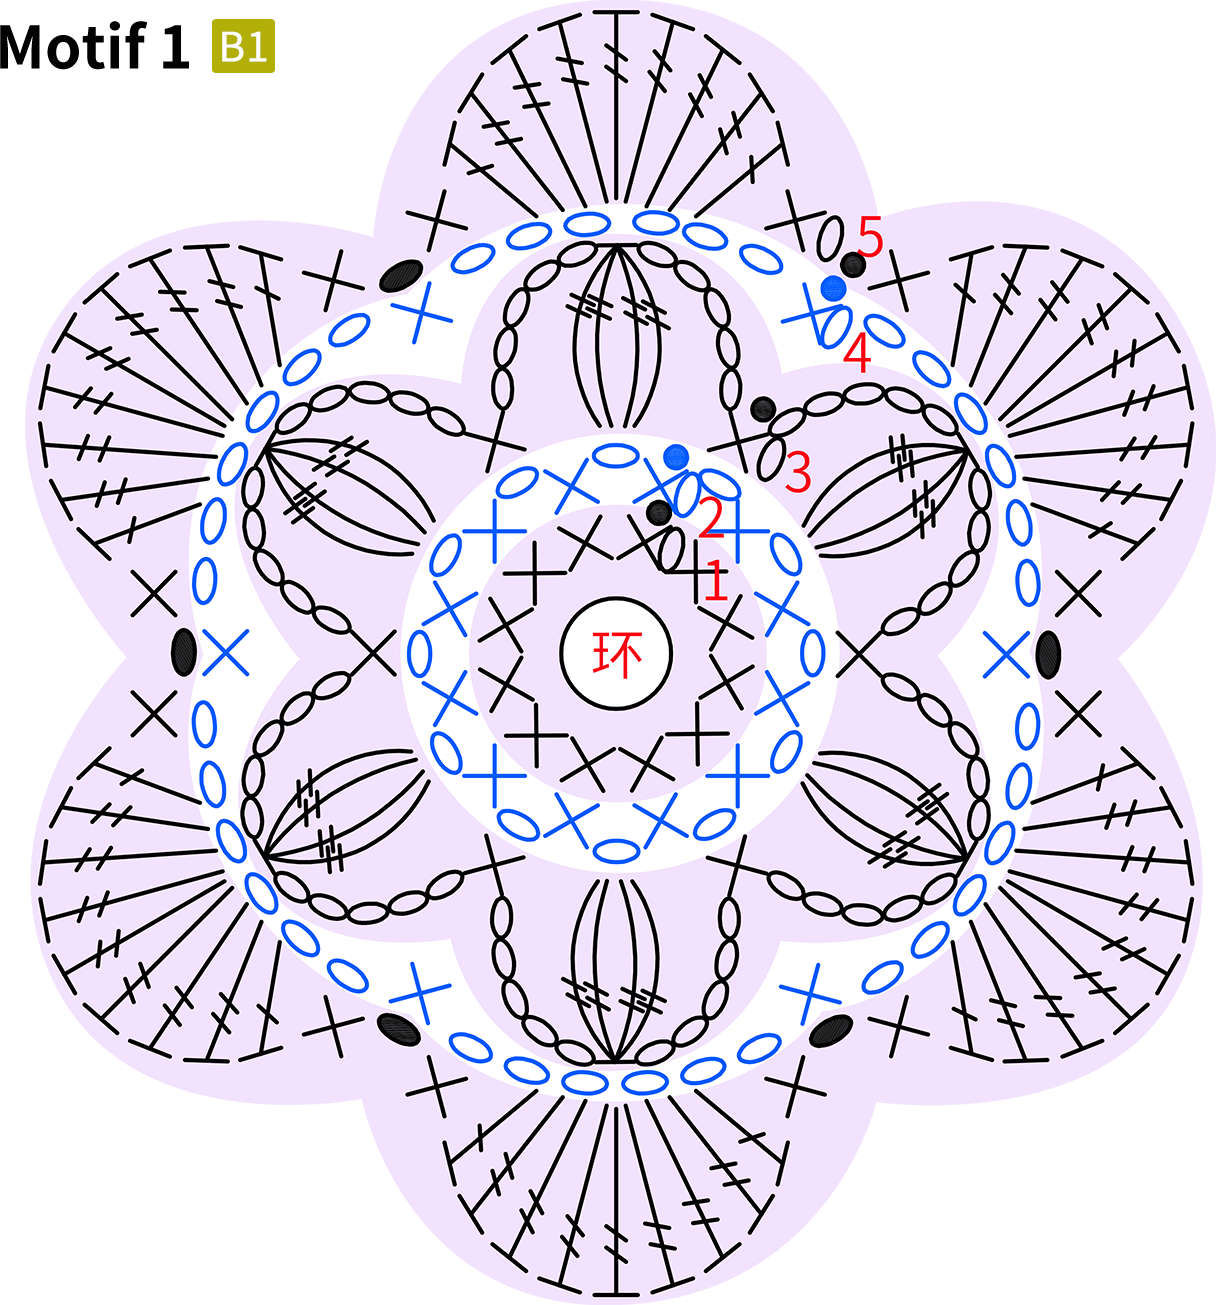
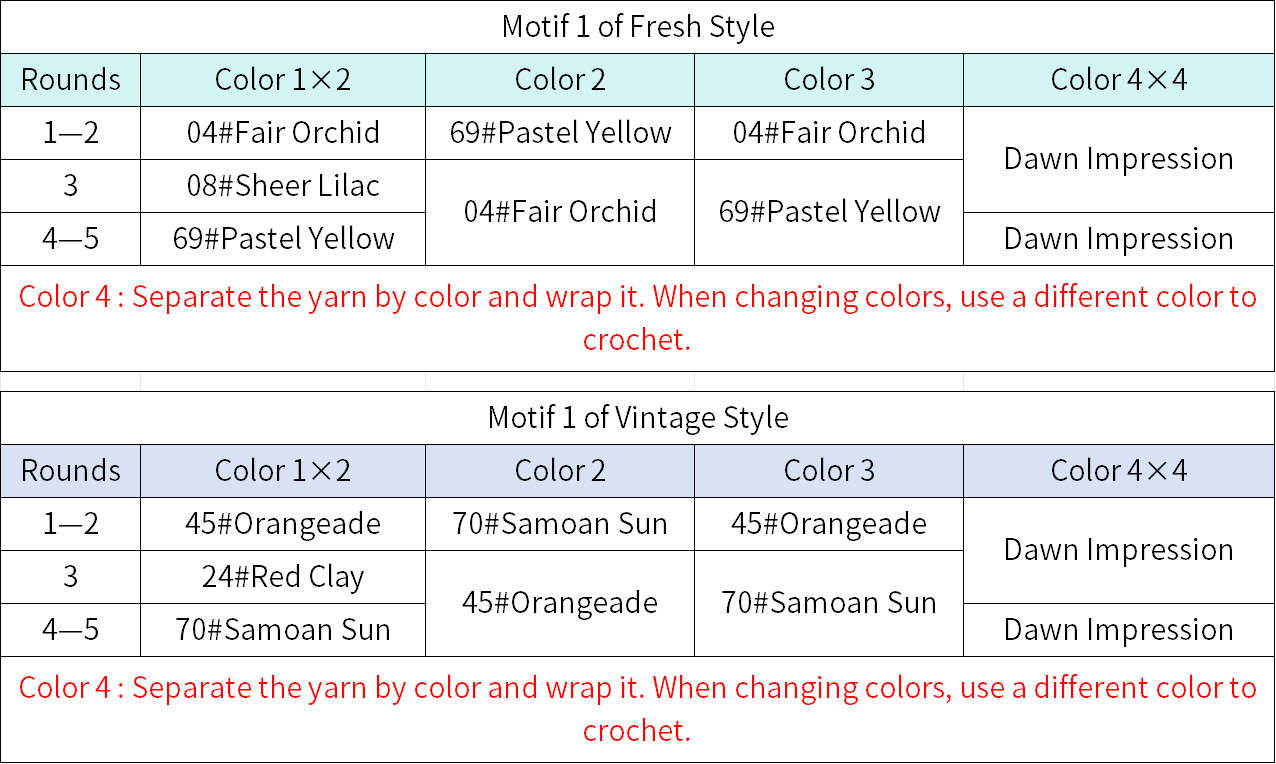
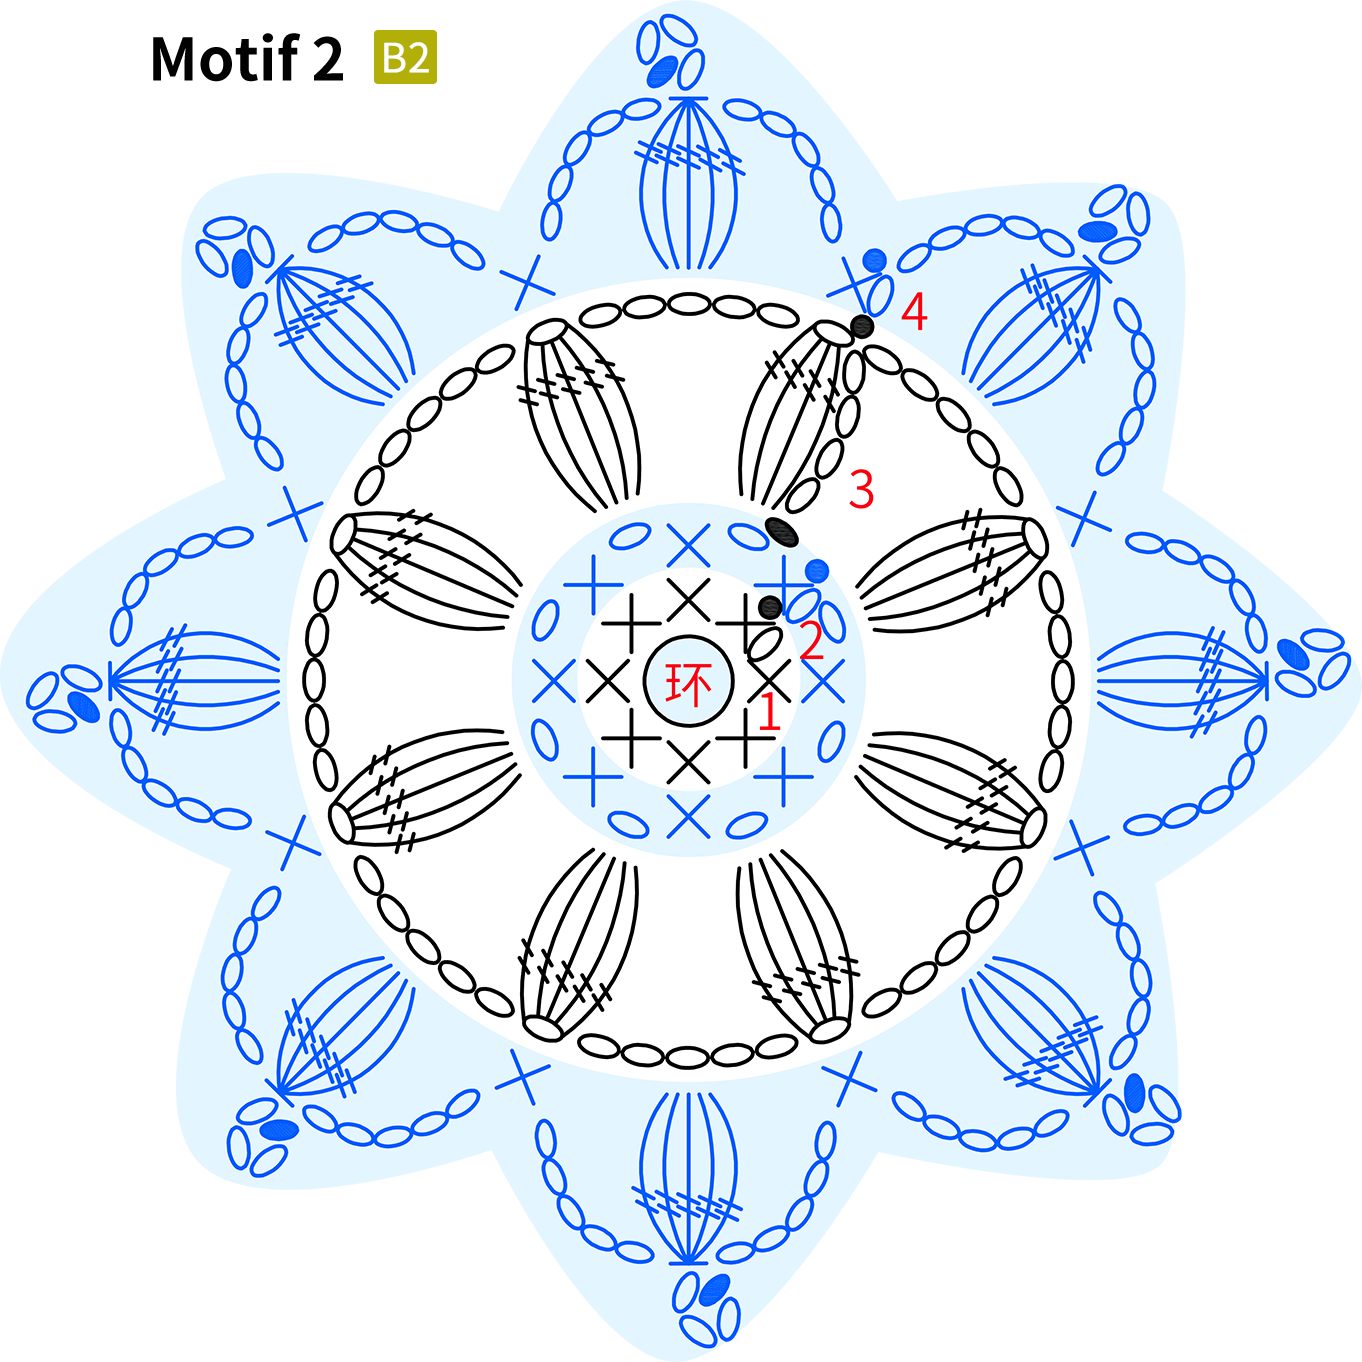
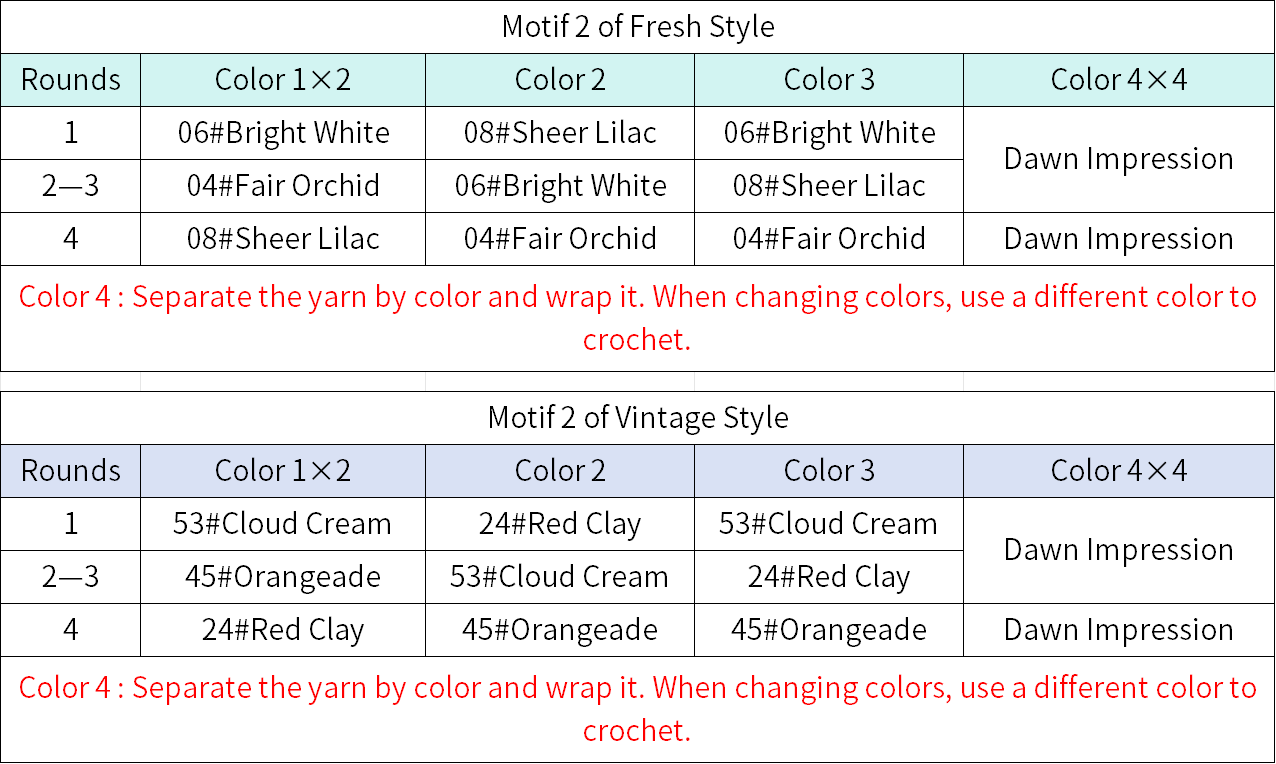
Part 3 AssemblyC 36' 06''
Assembly includes attaching decorations, small blossoms and buttons. Please refer to the video demonstration for specifics.
Made by the community