Home / Blanket
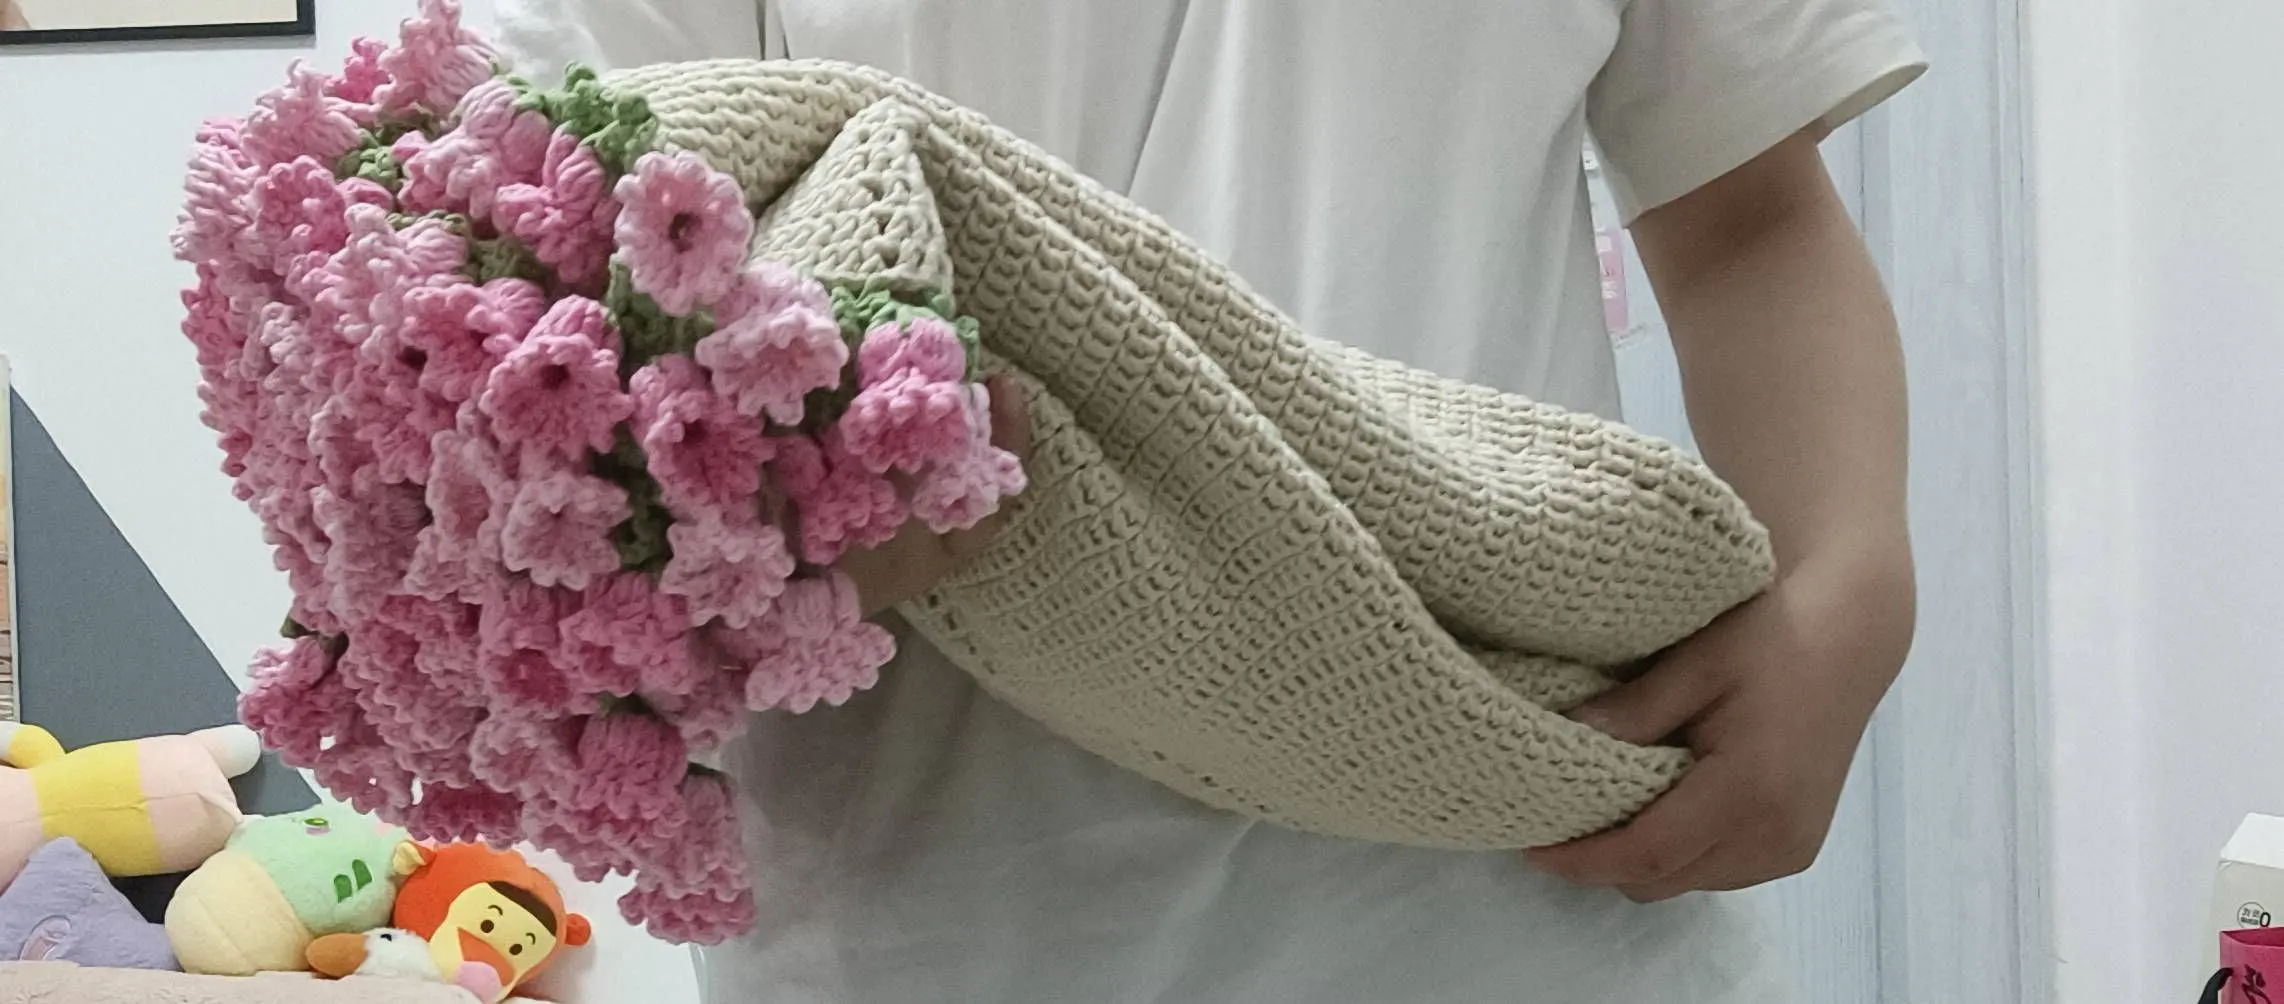
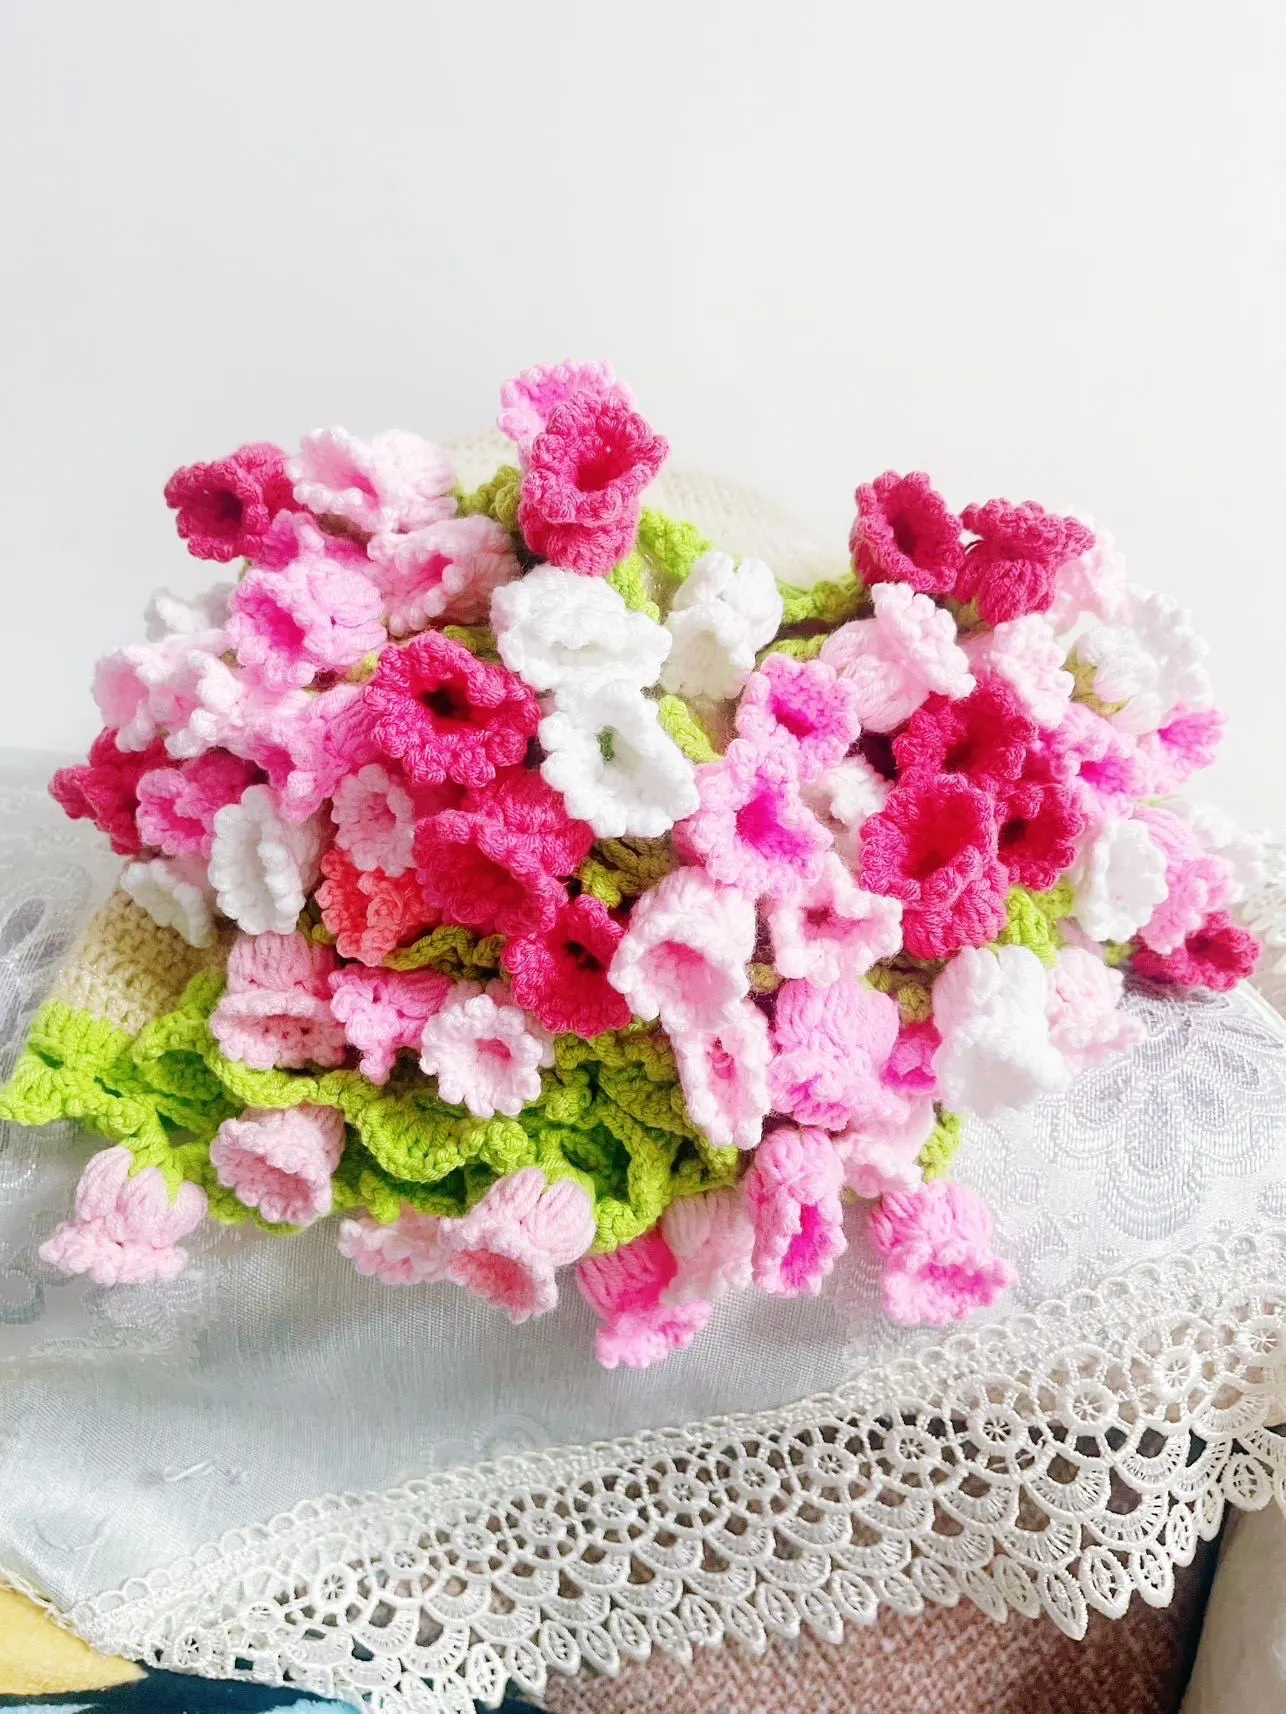
Starlight Bouquet Blanket
Project preview
See the finished project
Pattern format
Instructions
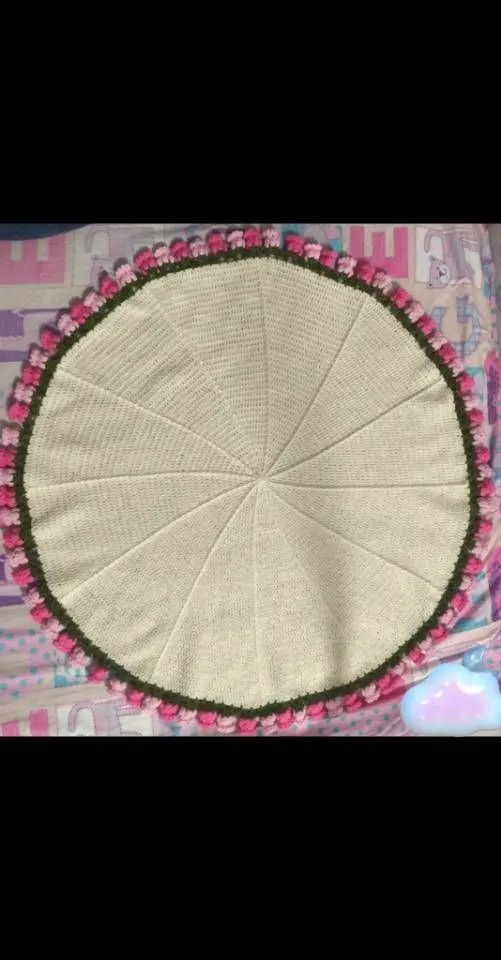
This blanket is divided into the main part, edging, and stars. Crochet the main part first, then the edging, followed by crocheting the stars, and finally sew the stars onto the edging.
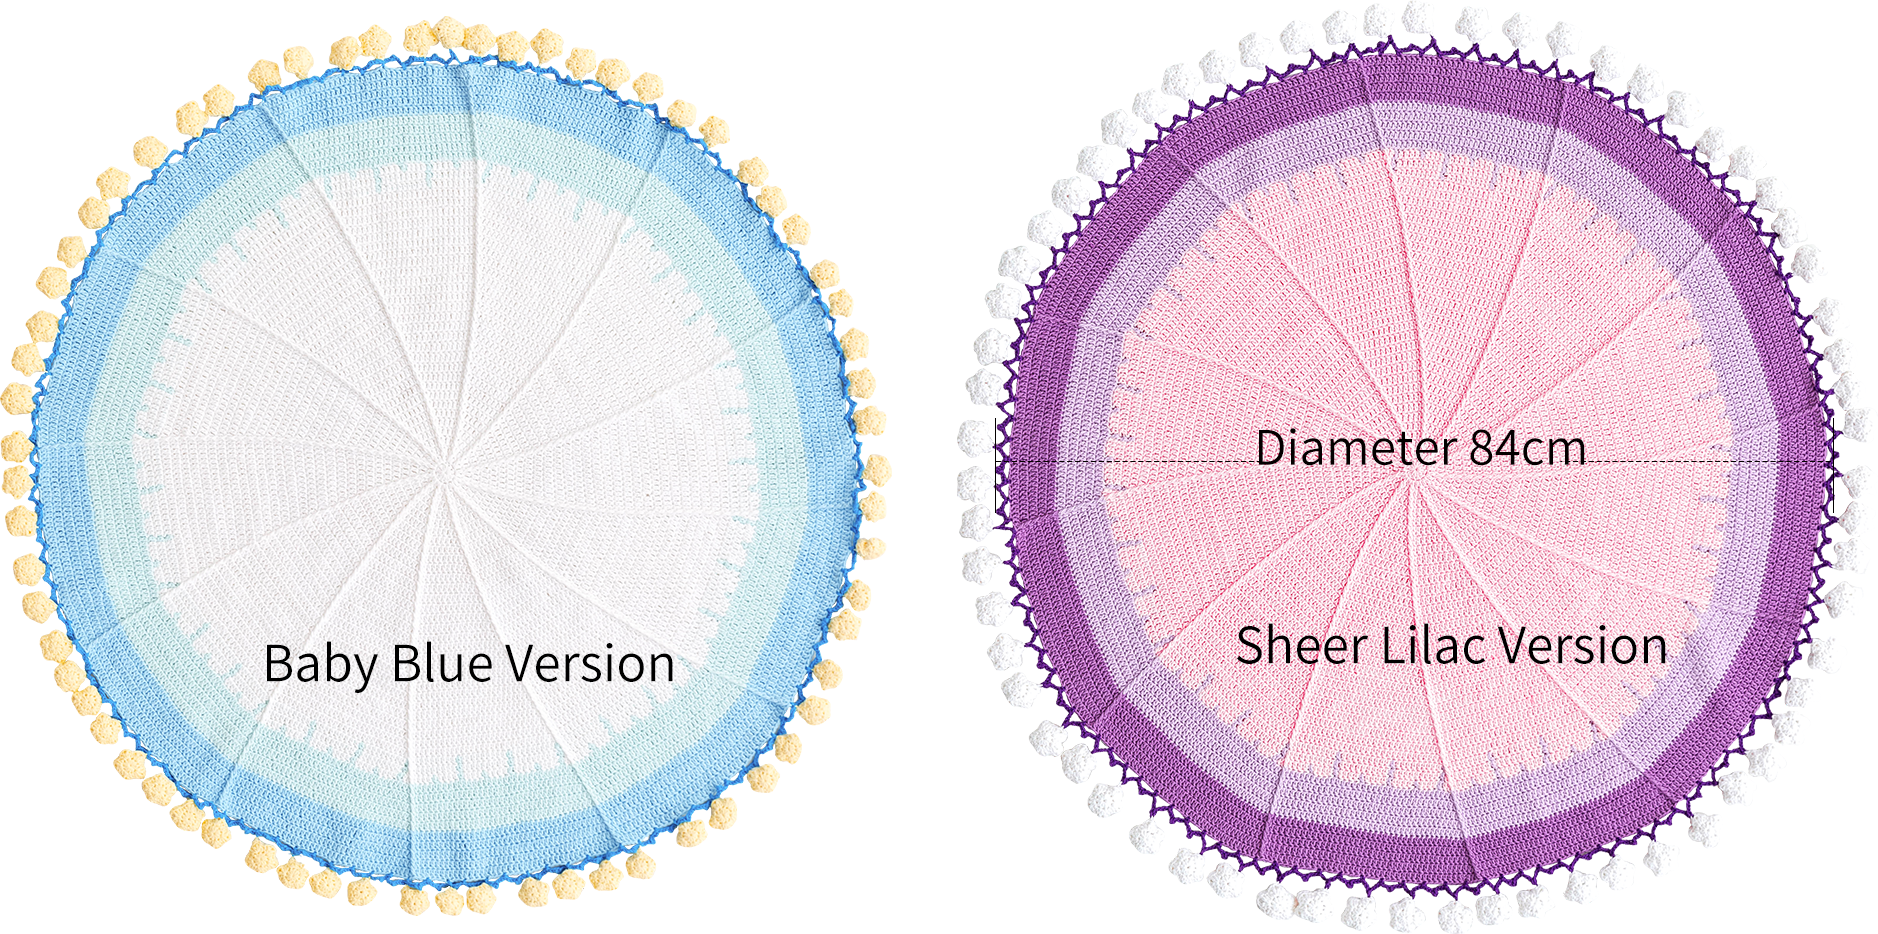
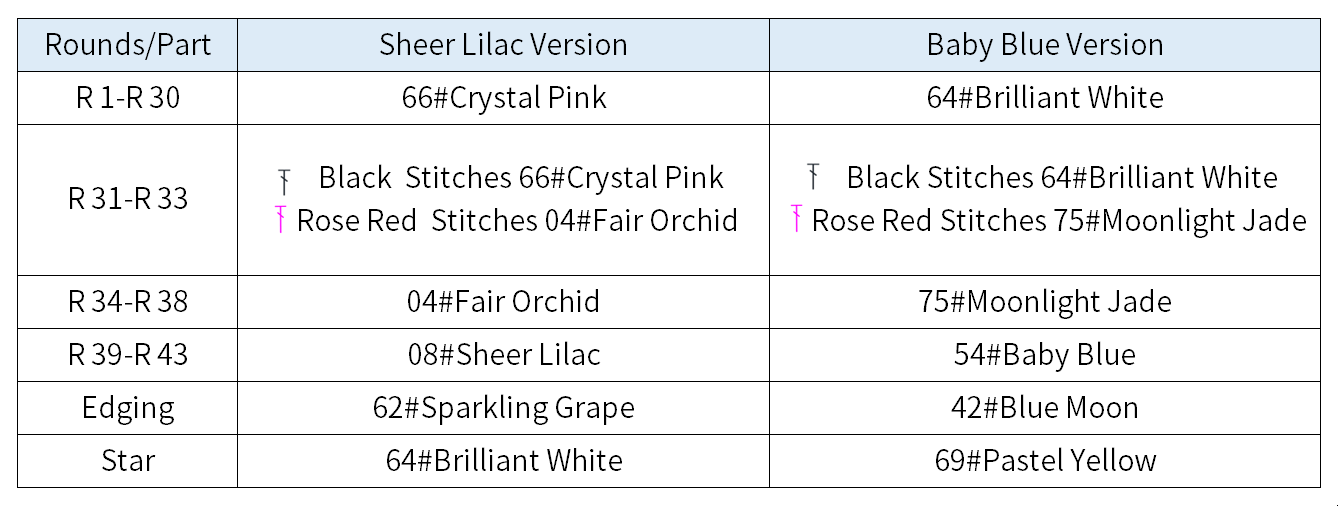
The Handcrafted measurements may have an error of 1 to 2 cm. Due to variations in individual tension, the size of the sample is for reference only.
Materials: 4-Ply Combed Cotton & Acrylic Fibre Hand Knitting Yarn
Crochet Hook: 2.50 mm Crochet Hook

Chart Key








Note:
This pattern is making in Chinese crochet pattern terms, and the stitch name is written using American terminology. All measurements in charts are in cm.
Part 1 The Main Part
The main part uses the magic ring technique, and is crocheted in rounds counterclockwise. Starting from round 2, you need to increase stitches in each round. For the specific increase pattern, please refer to the table.
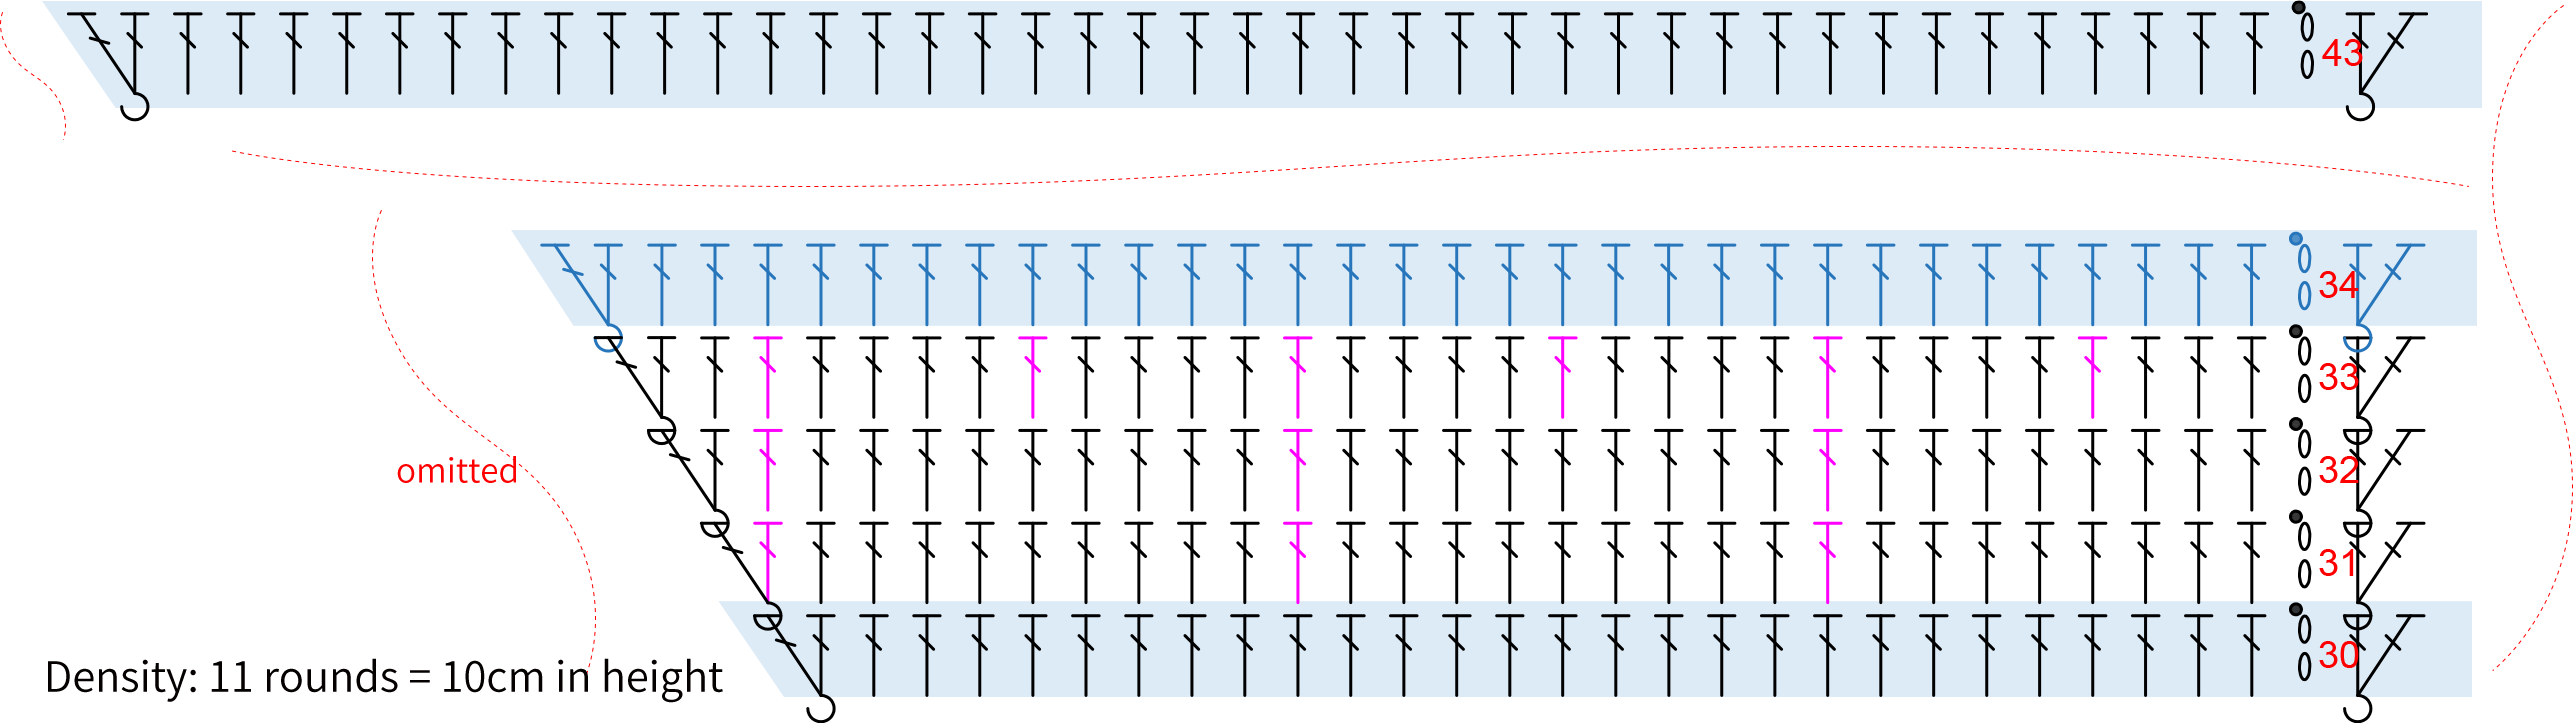
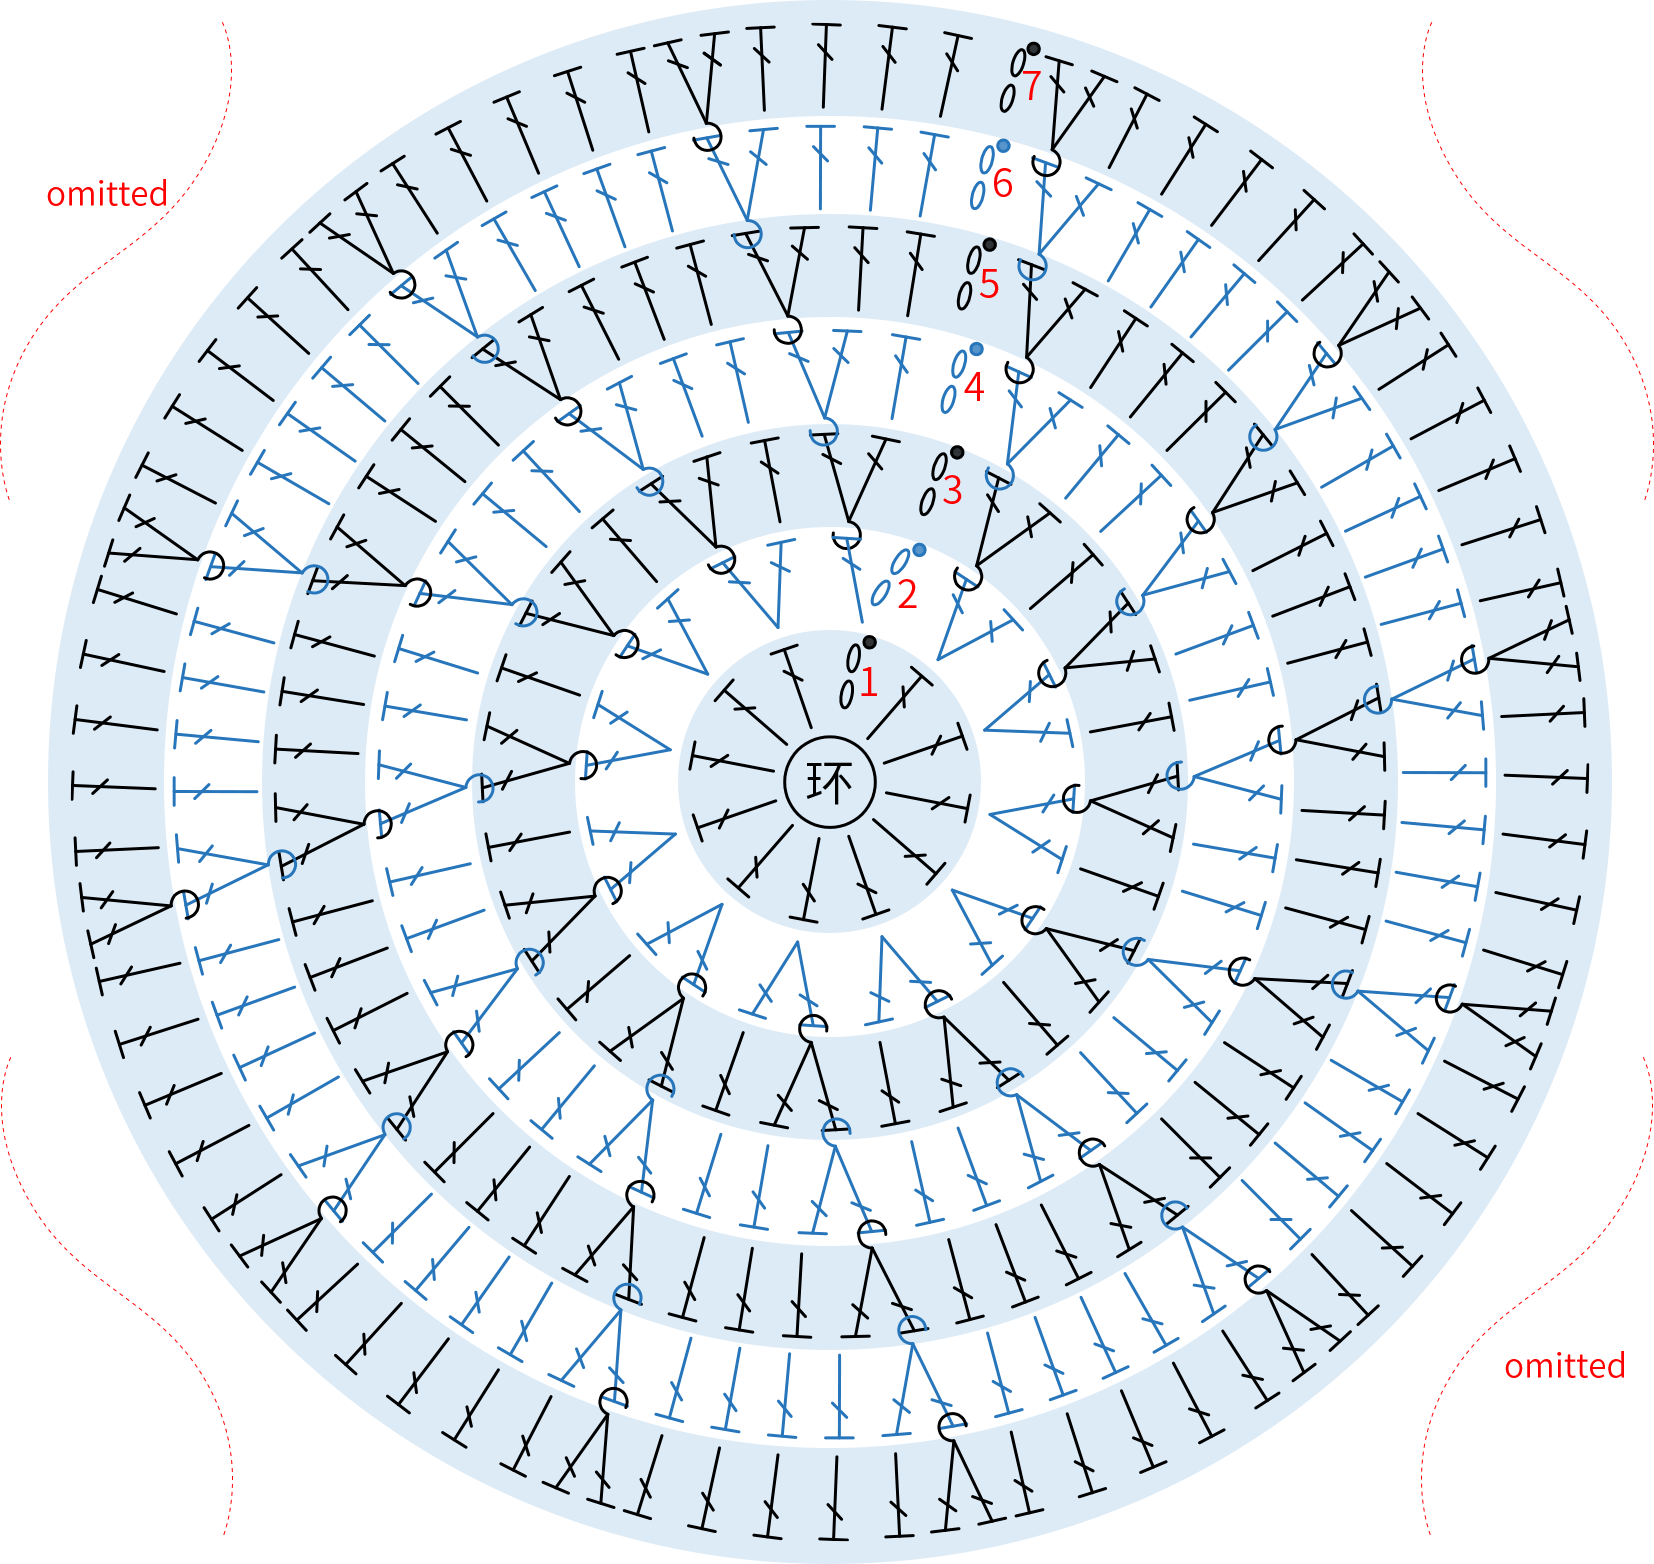
| Rounds | Increase the number of stitches | Stitch Instruction | Total Stitches |
| R 1 | MR | 12 | |
| R 2 | 12 | Crochet 2 stitches into each stitch | 24 |
| R 3 | 12 | increase 1 stitch every 1 | 36 |
| R 4 | 12 | increase 1 stitch every 2 | 48 |
| R 5 | 12 | increase 1 stitch every 3 | 60 |
| R 6 | 12 | increase 1 stitch every 4 | 72 |
| R 7 | 12 | increase 1 stitch every 5 | 84 |
| R 8 | 12 | increase 1 stitch every 6 | 96 |
| R 9 | 12 | increase 1 stitch every 7 | 108 |
| R 10 | 12 | increase 1 stitch every 8 | 120 |
| R 11 | 12 | increase 1 stitch every 9 | 132 |
| R 12 | 12 | increase 1 stitch every 10 | 144 |
| R 13 | 12 | increase 1 stitch every 11 | 156 |
| R 14 | 12 | increase 1 stitch every 12 | 168 |
| R 15 | 12 | increase 1 stitch every 13 | 180 |
| R 16 | 12 | increase 1 stitch every 14 | 192 |
| R 17 | 12 | increase 1 stitch every 15 | 204 |
| R 18 | 12 | increase 1 stitch every 16 | 216 |
| R 19 | 12 | increase 1 stitch every 17 | 228 |
| R 20 | 12 | increase 1 stitch every 18 | 240 |
| R 21 | 12 | increase 1 stitch every 19 | 252 |
| R 22 | 12 | increase 1 stitch every 20 | 264 |
| R 23 | 12 | increase 1 stitch every 21 | 276 |
| R 24 | 12 | increase 1 stitch every 22 | 288 |
| R 25 | 12 | increase 1 stitch every 23 | 300 |
| R 26 | 12 | increase 1 stitch every 24 | 312 |
| R 27 | 12 | increase 1 stitch every 25 | 324 |
| R 28 | 12 | increase 1 stitch every 26 | 336 |
| R 29 | 12 | increase 1 stitch every 27 | 348 |
| R 30 | 12 | increase 1 stitch every 28 | 360 |
| R 31 | 12 | increase 1 stitch every 29 | 372 |
| R 32 | 12 | increase 1 stitch every 30 | 384 |
| R 33 | 12 | increase 1 stitch every 31 | 396 |
| R 34 | 12 | increase 1 stitch every 32 | 408 |
| R 35 | 12 | increase 1 stitch every 33 | 420 |
| R 36 | 12 | increase 1 stitch every 34 | 432 |
| R 37 | 12 | increase 1 stitch every 35 | 444 |
| R 38 | 12 | increase 1 stitch every 36 | 456 |
| R 39 | 12 | increase 1 stitch every 37 | 468 |
| R 40 | 12 | increase 1 stitch every 38 | 480 |
| R 41 | 12 | increase 1 stitch every 39 | 492 |
| R 42 | 12 | increase 1 stitch every 40 | 504 |
| R 43 | 12 | increase 1 stitch every 41 | 516 |
Part 2 Edging
Crochet the border around the edge of the completed main part, crocheting in rounds counterclockwise.

Part 3 Stars
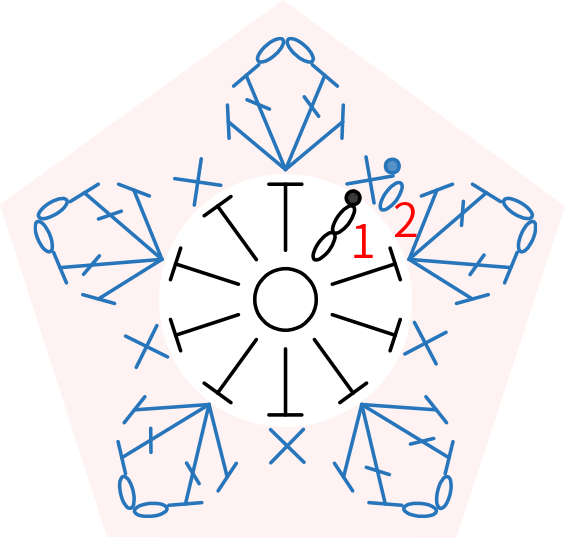
The stars are worked with a magic ring, crocheting in rounds counterclockwise. Each star is divided into 2 pieces, which are sewn together at the last round. Then stuff it and sew onto the single crochets of the edging. There are 64 stars in total. Place 1 single crochet between every 2 stars. You can adjust the quantity and placement of the stars according to your preference.
Made by the community