Clothes
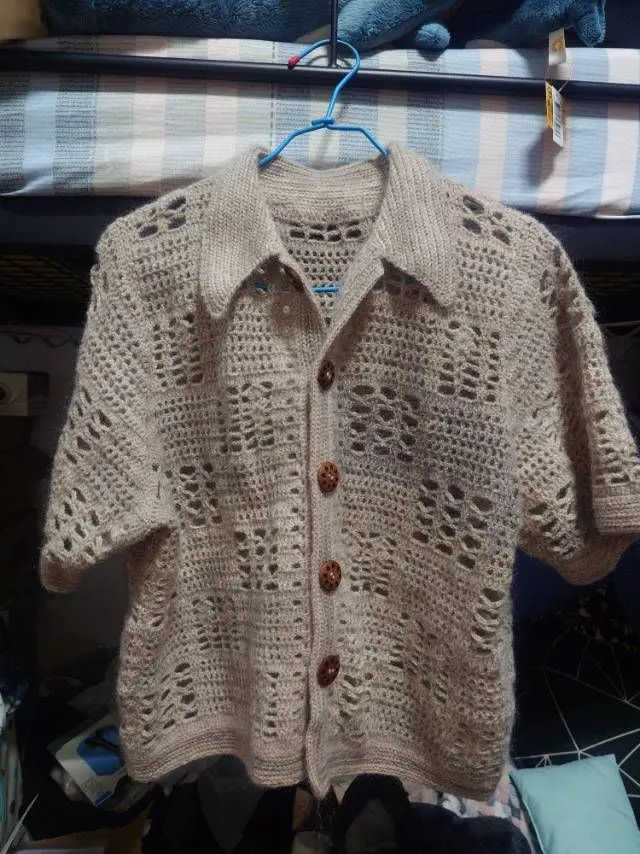
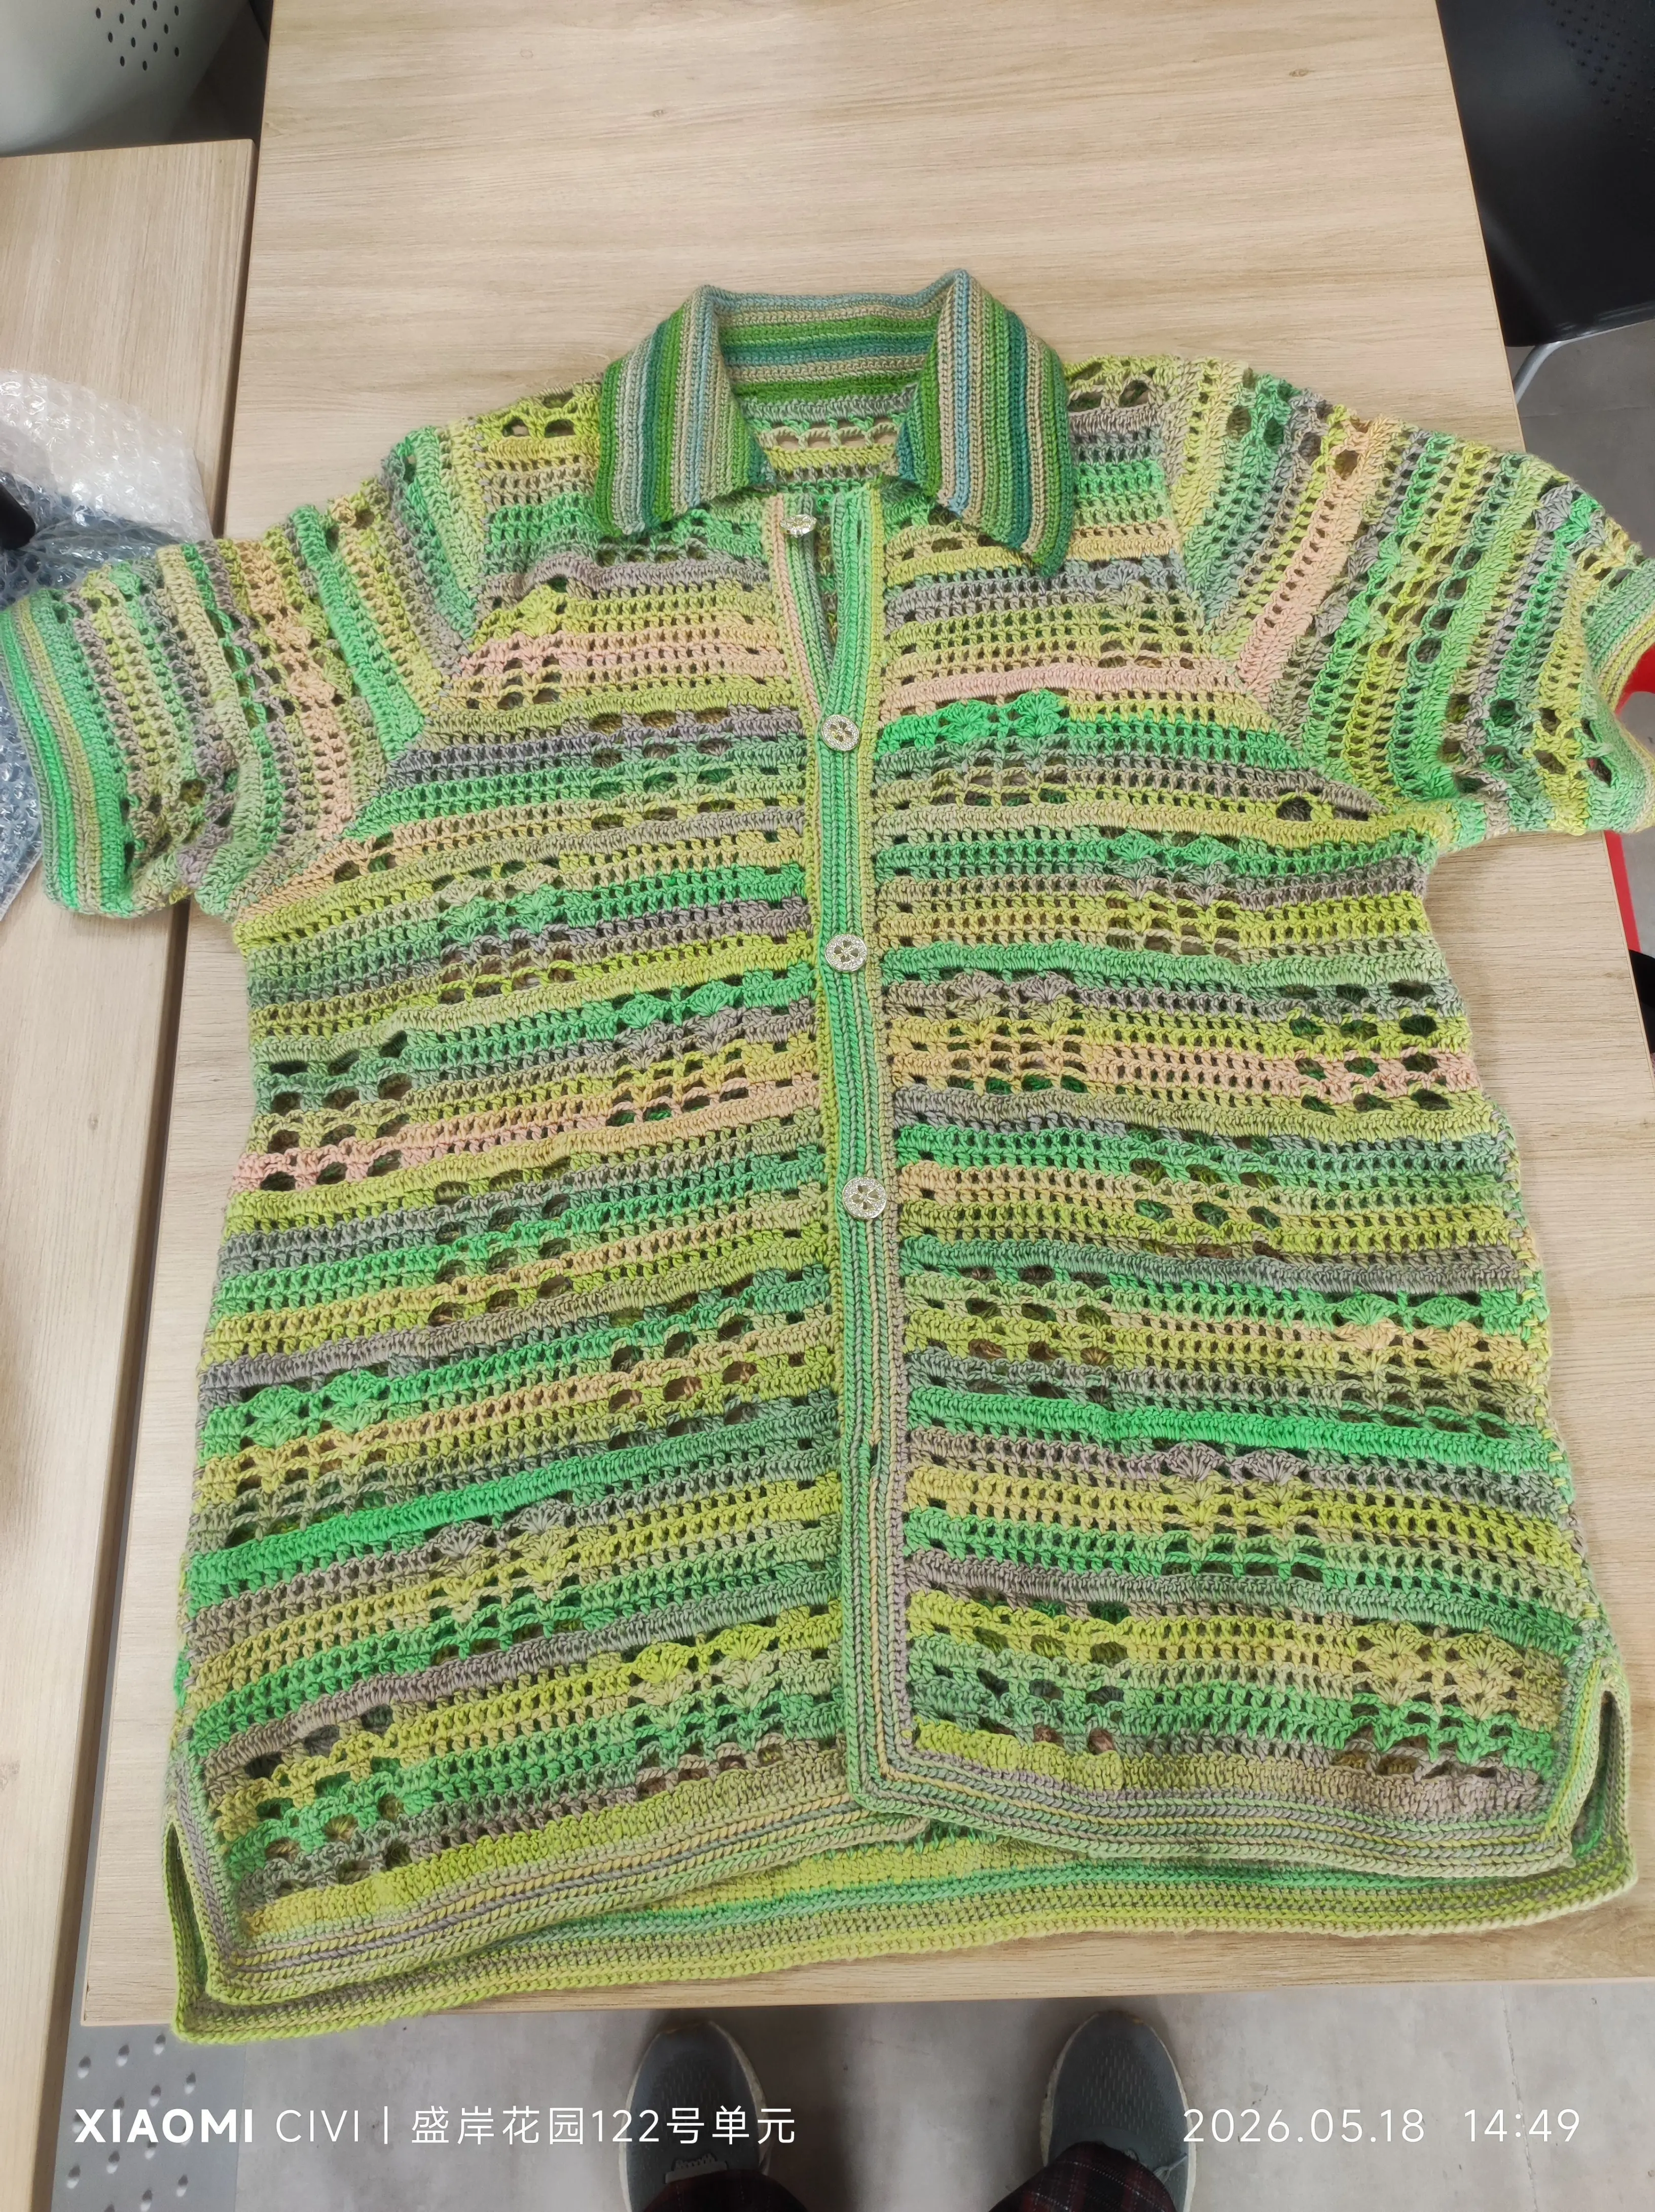
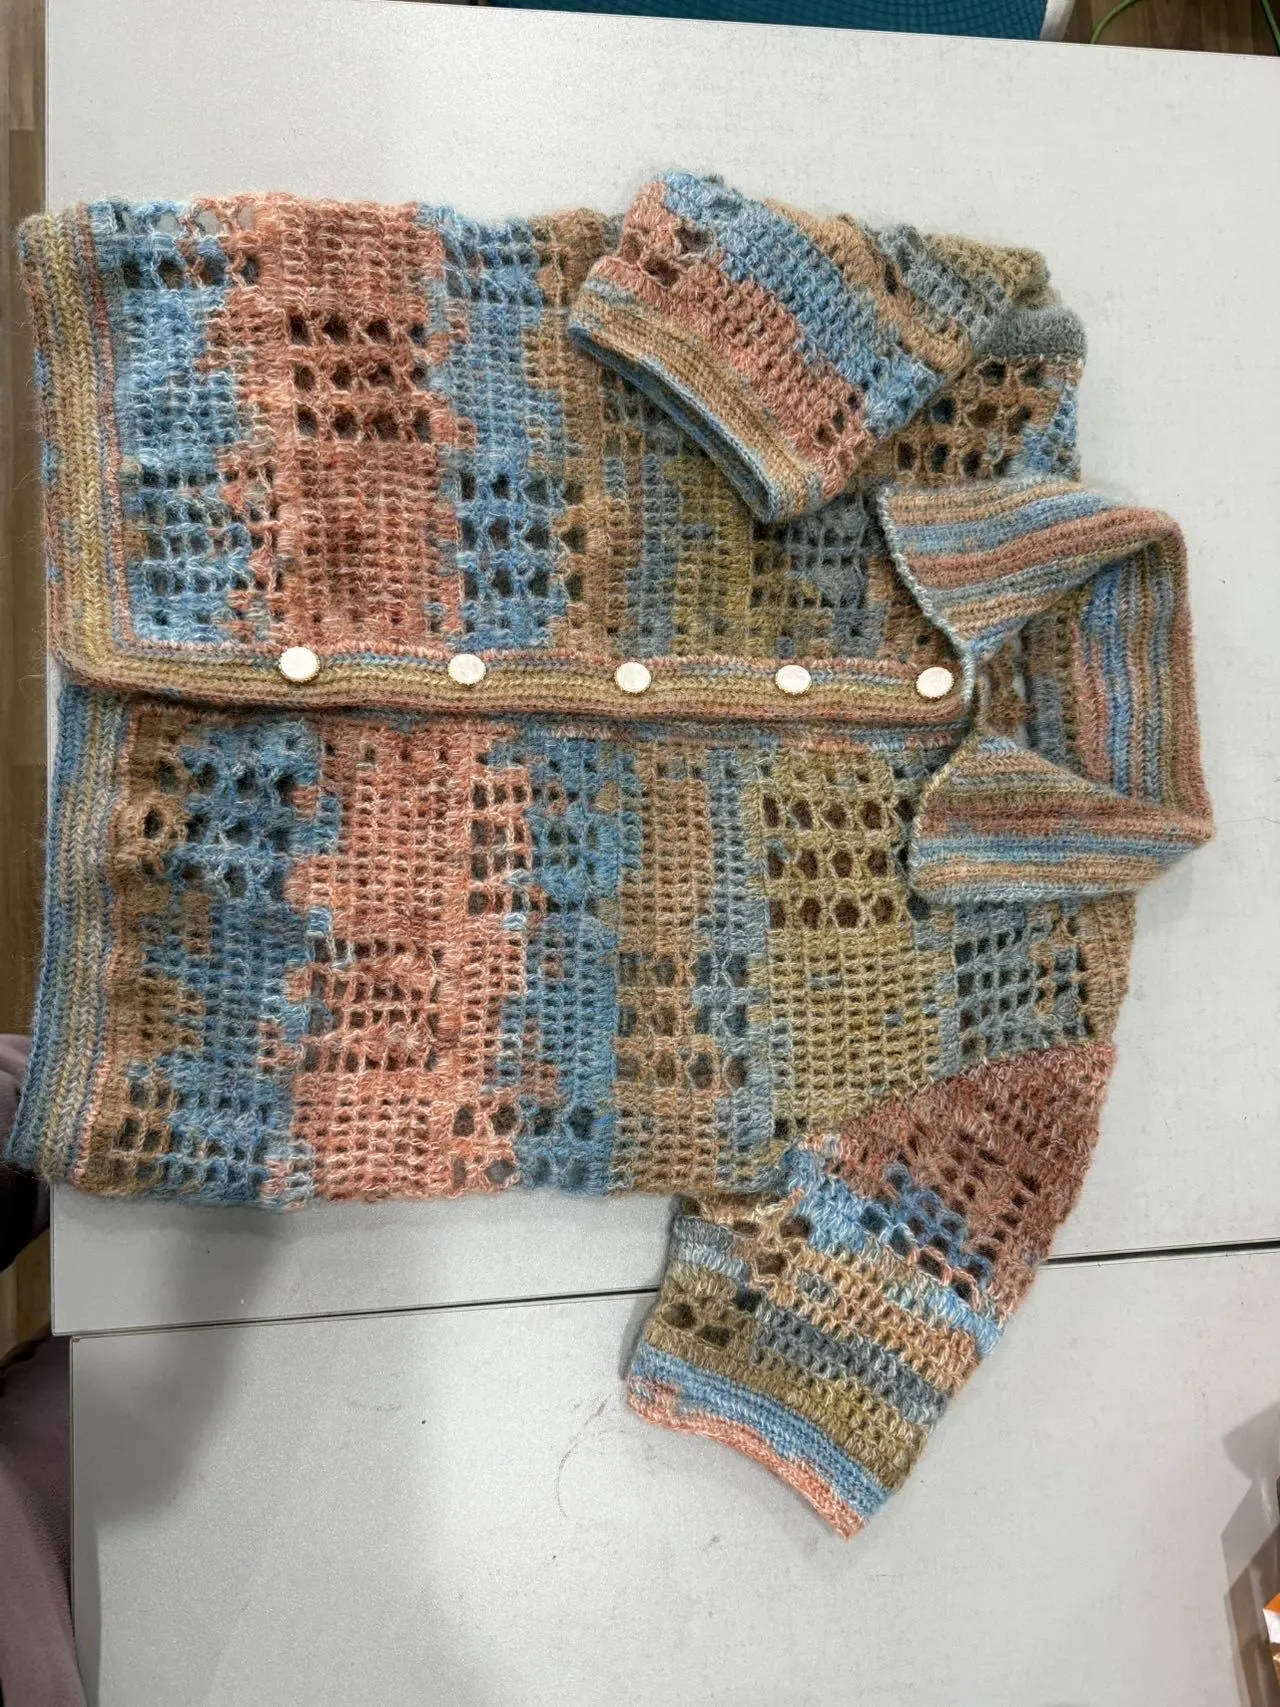
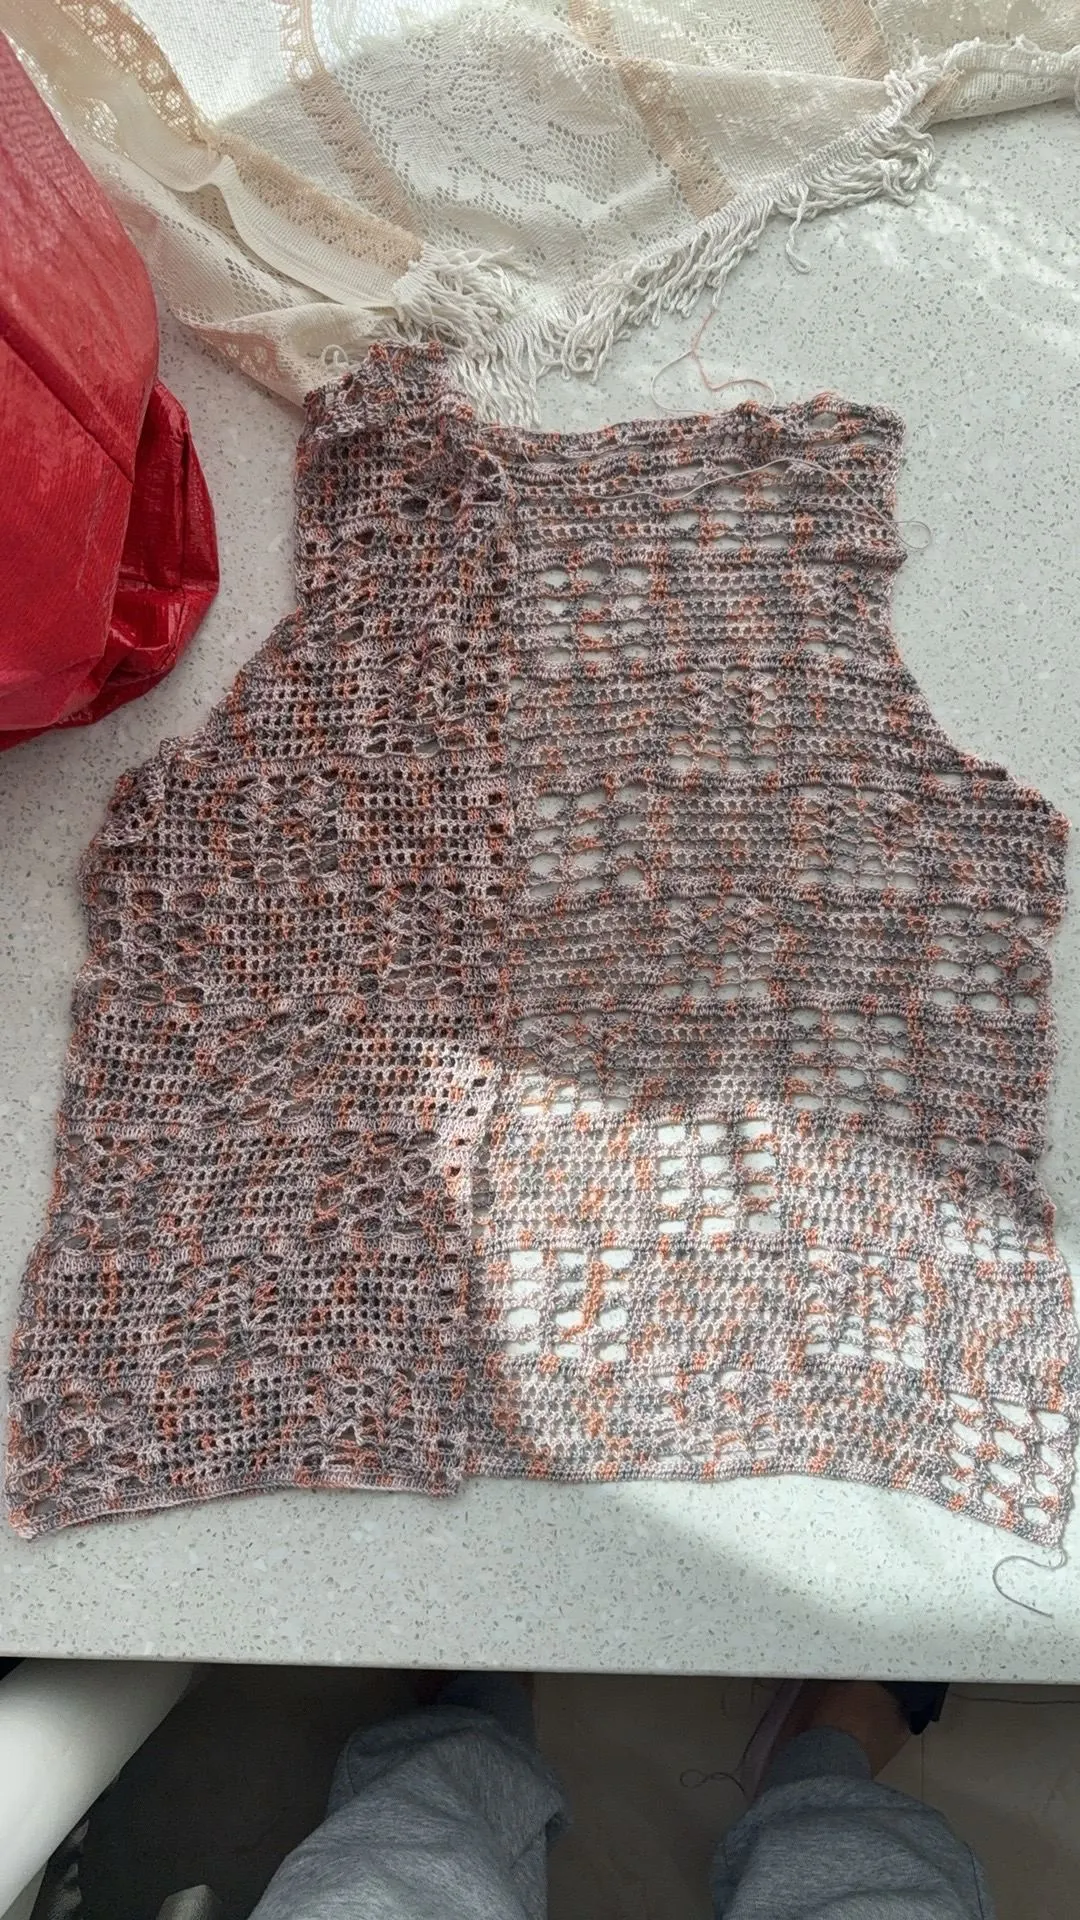
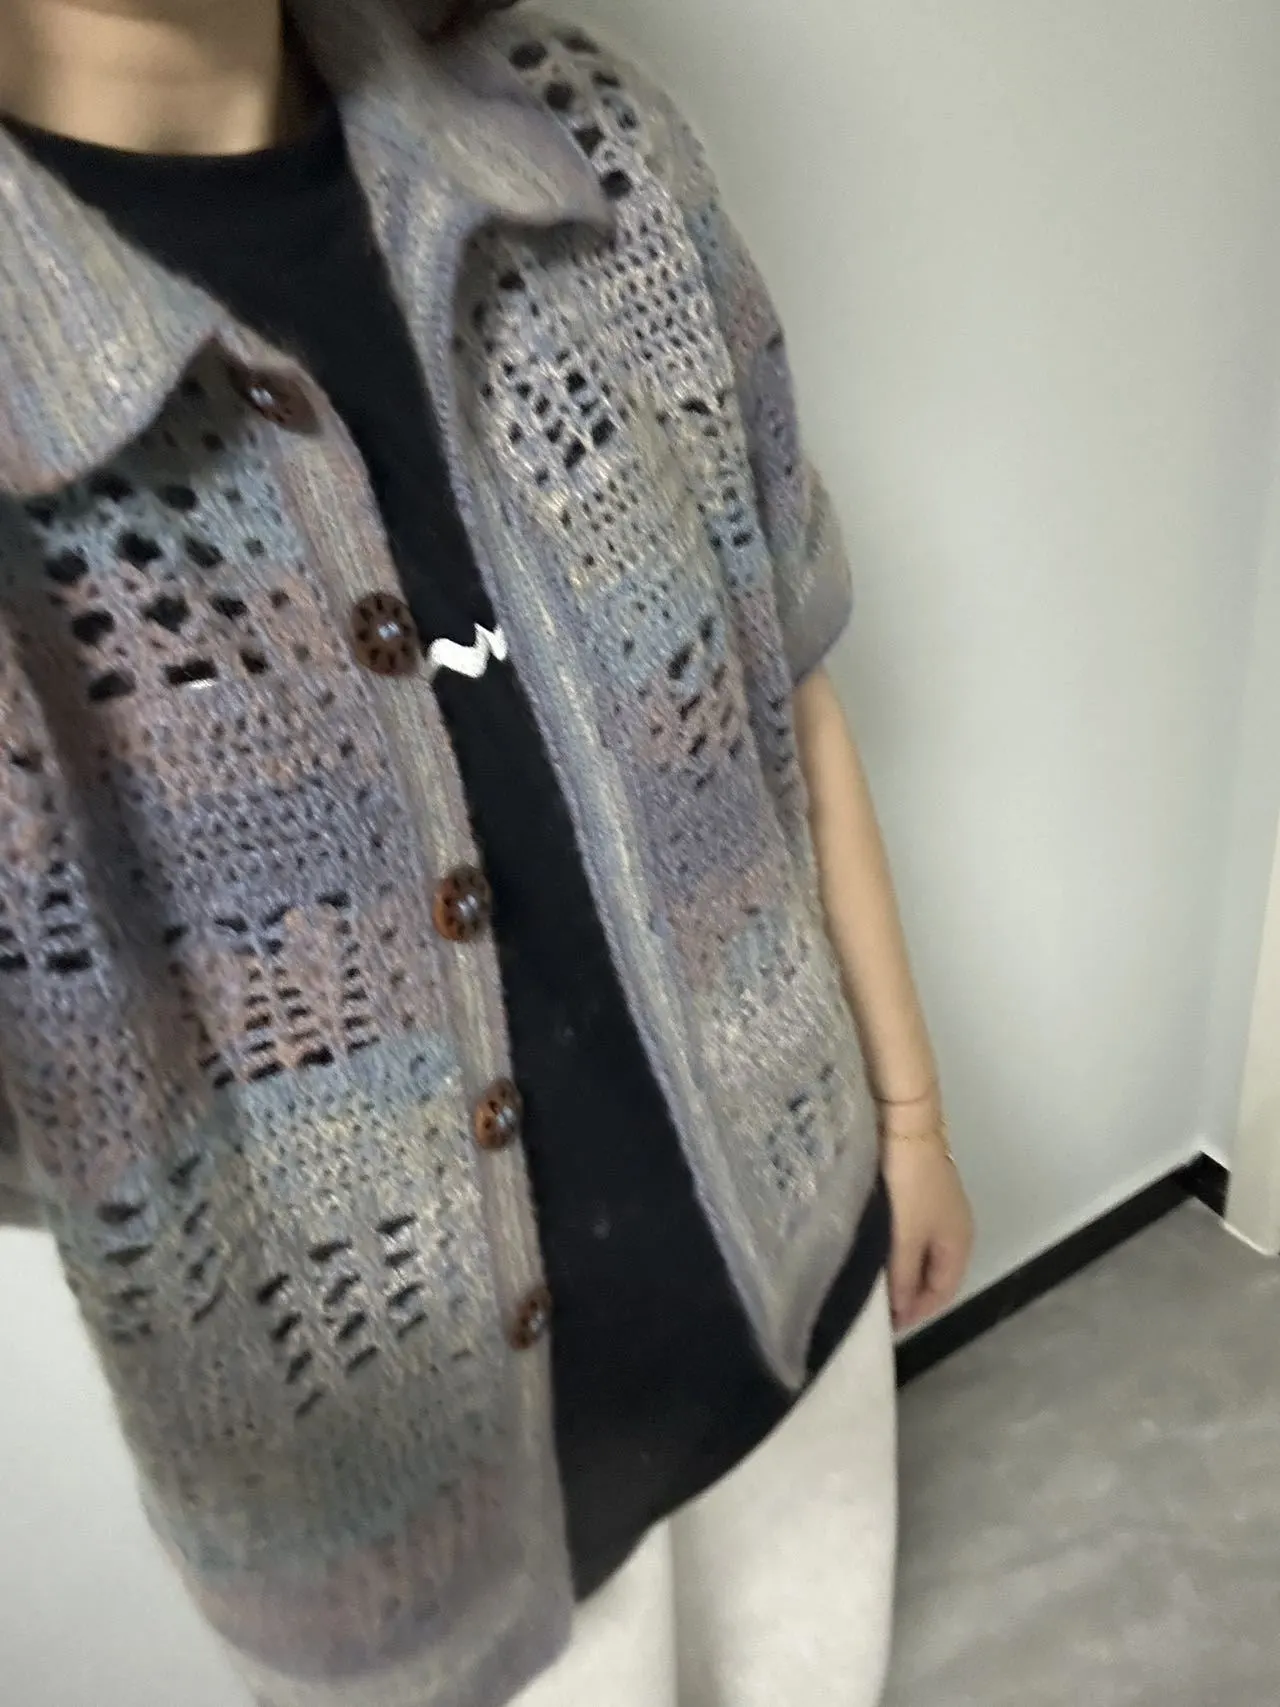
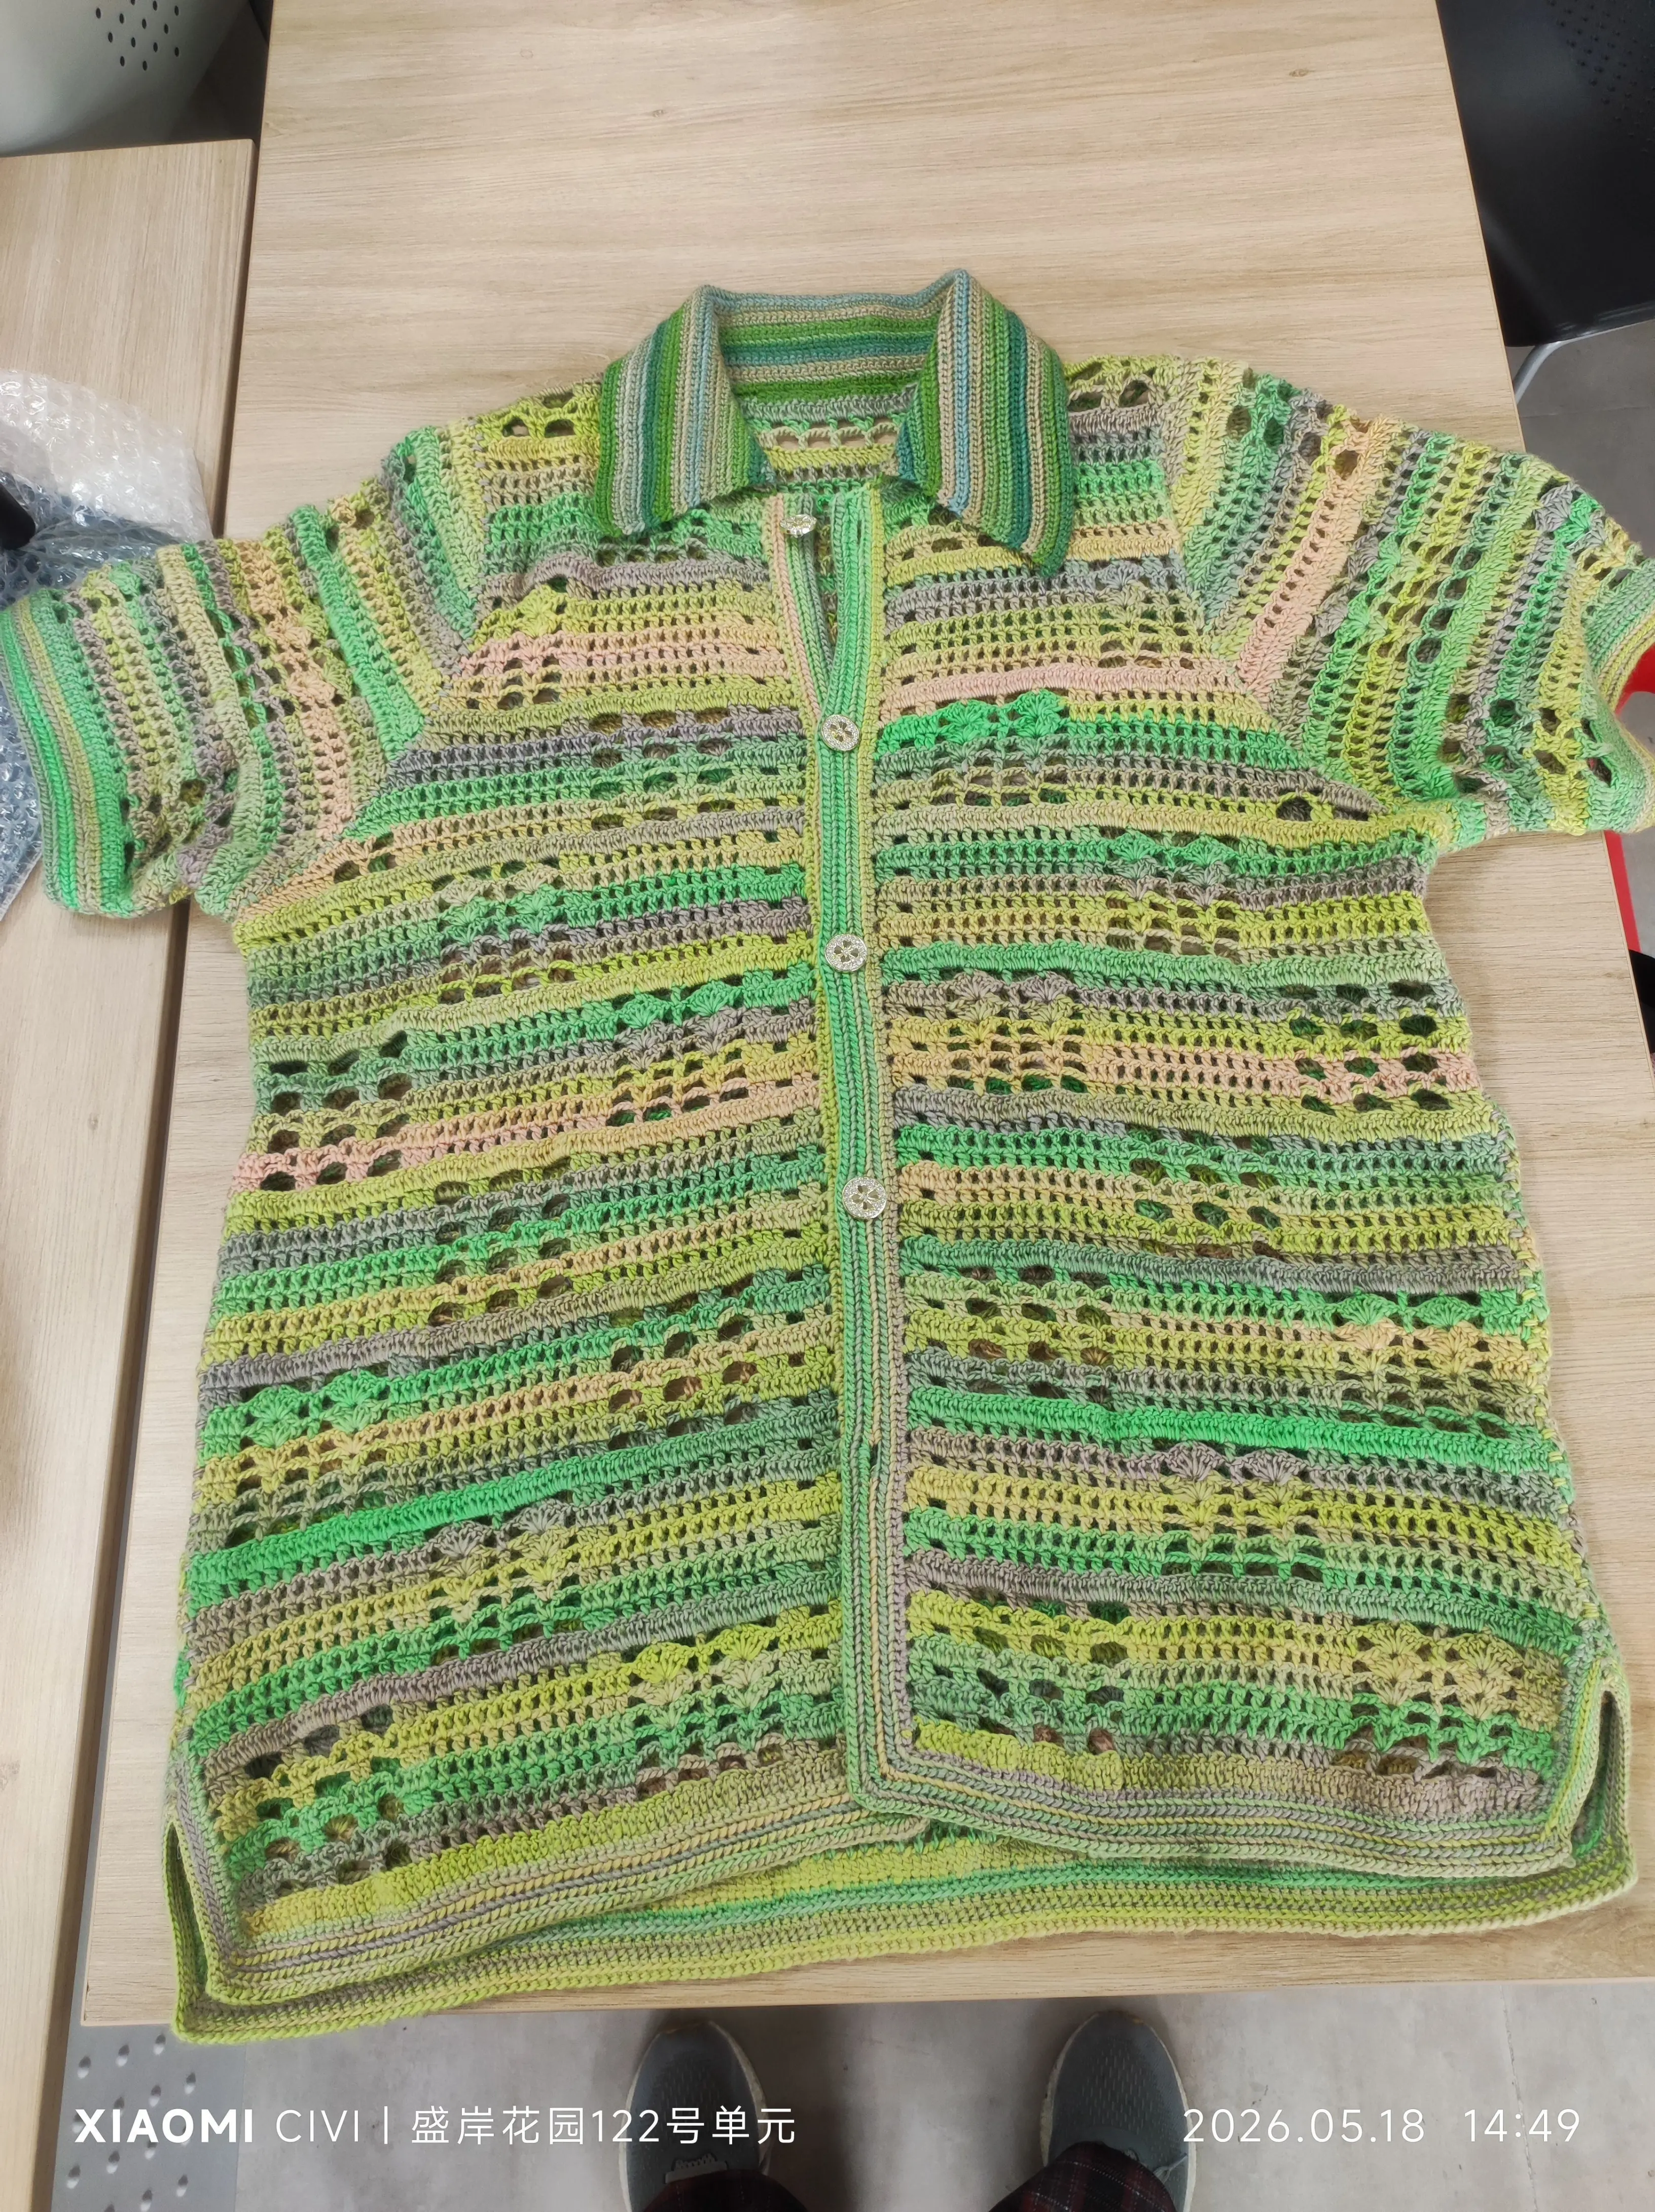
Starlight Couple Cardigan
Project preview
See the finished project
Pattern format
Instructions
Watch and follow
Video tutorial
| Style | Yarn | Color |
|---|---|---|
| Alpaca Ink Shadow Style | Alpaca | 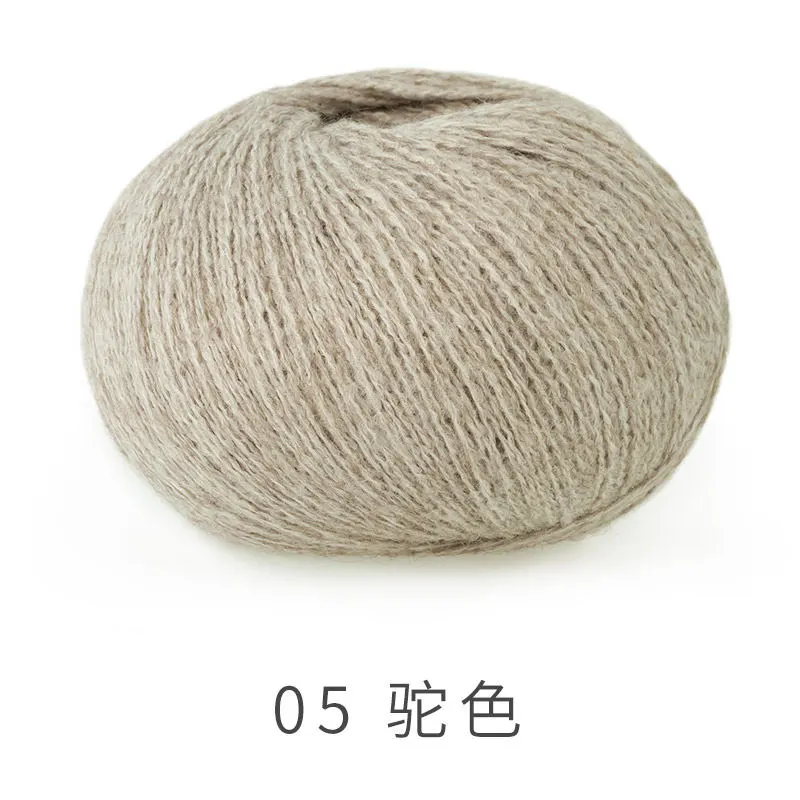 05#Simply Taupe x 4 05#Simply Taupe x 4 |
| South African Soft Mohair Mixed Hand-Knitting Yarn |  02#Ink Shadow x 4 02#Ink Shadow x 4 | |
| Alpaca Tang Night Banquet Style | Alpaca | 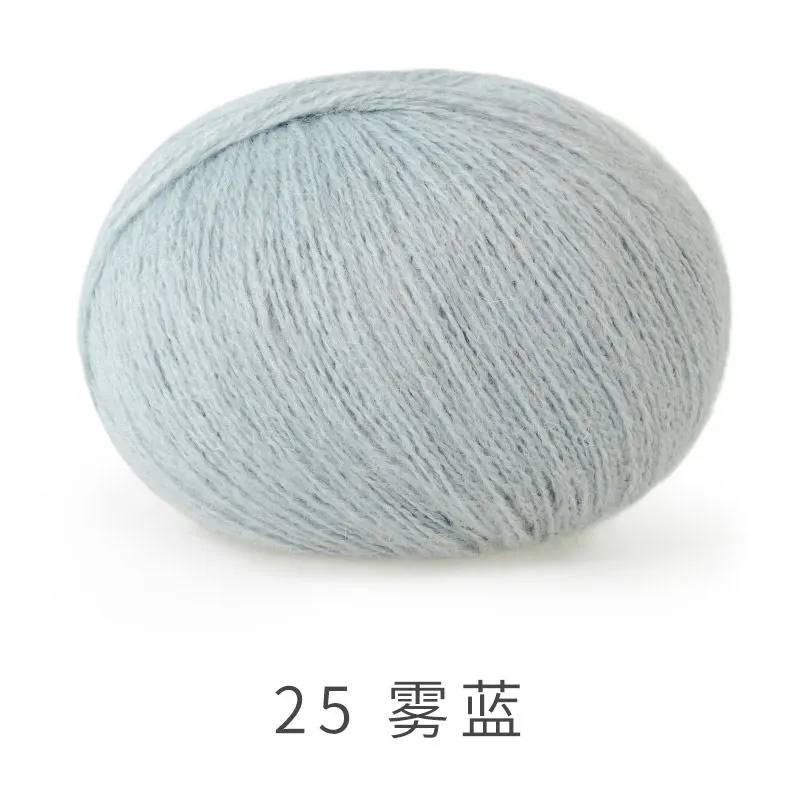 25#Winter Sky x 4 25#Winter Sky x 4 |
| South African Soft Mohair Mixed Hand-Knitting Yarn |  06#Tang Night Banquet x 4 06#Tang Night Banquet x 4 | |
| Alpaca Wild Blossoms Style | Alpaca | 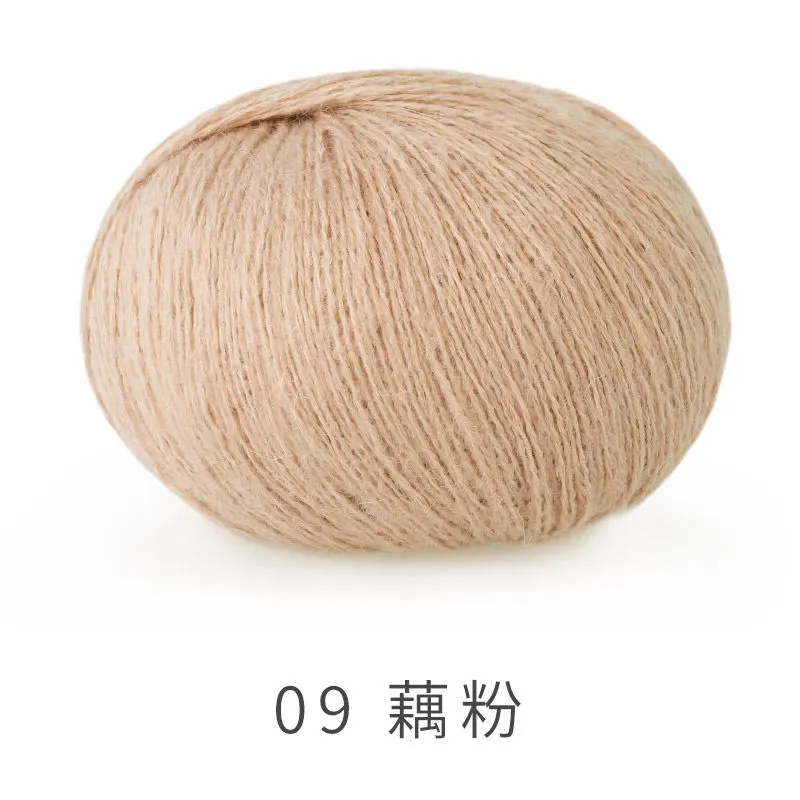 09#Mellow Rose x 4 09#Mellow Rose x 4 |
| South African Soft Mohair Mixed Hand-Knitting Yarn |  04#Wild Blossoms x 4 04#Wild Blossoms x 4 | |
| Alpaca Autumn Woods Style | South African Soft Mohair Mixed Hand-Knitting Yarn Space-dyed |  05#Autumn Woods x 4 05#Autumn Woods x 4 |
| Alpaca | 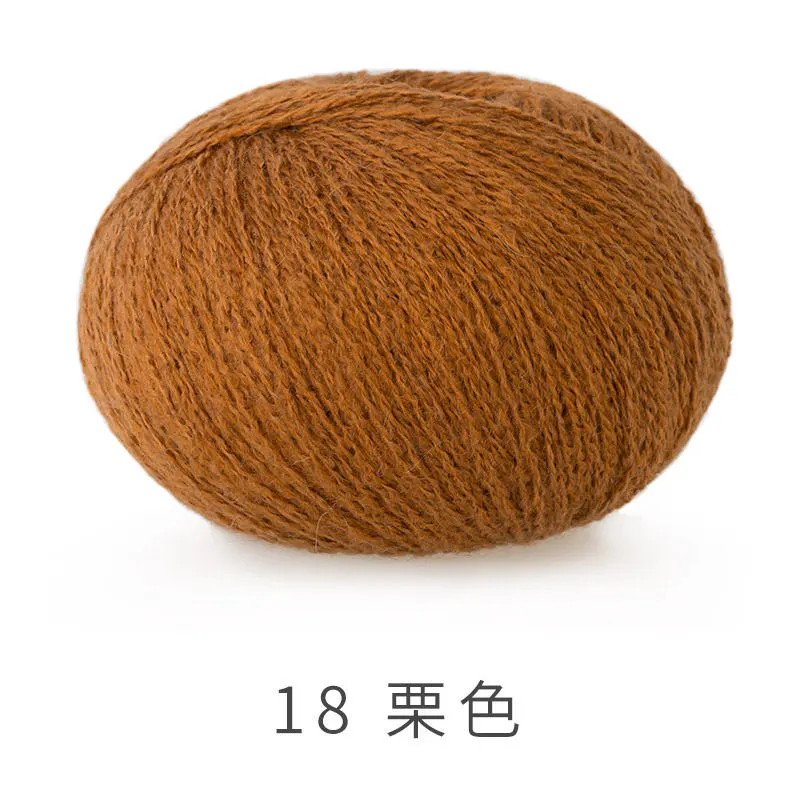 18#Glazed Ginger x 4 18#Glazed Ginger x 4 | |
| Lamb wool Autumn Wood Style | South African Soft Mohair Mixed Hand-Knitting Yarn Space-dyed | 05#Autumn Woods x 4 |
| Lamb Wool |  35#Butterum x 4 35#Butterum x 4 | |
| Lamb wool Tang Night Banquet Style | Lamb Wool |  15#Dusk Blue x 4 15#Dusk Blue x 4 |
| South African Soft Mohair Mixed Hand-Knitting Yarn | 06#Tang Night Banquet x 4 |
Alpaca Ink Shadow Style
Alpaca Tang Night Banquet Style
Alpaca Wild Blossoms Style
Alpaca Autumn Woods Style
Lamb wool Autumn Wood Style
35#Butterum x 4Lamb wool Tang Night Banquet Style
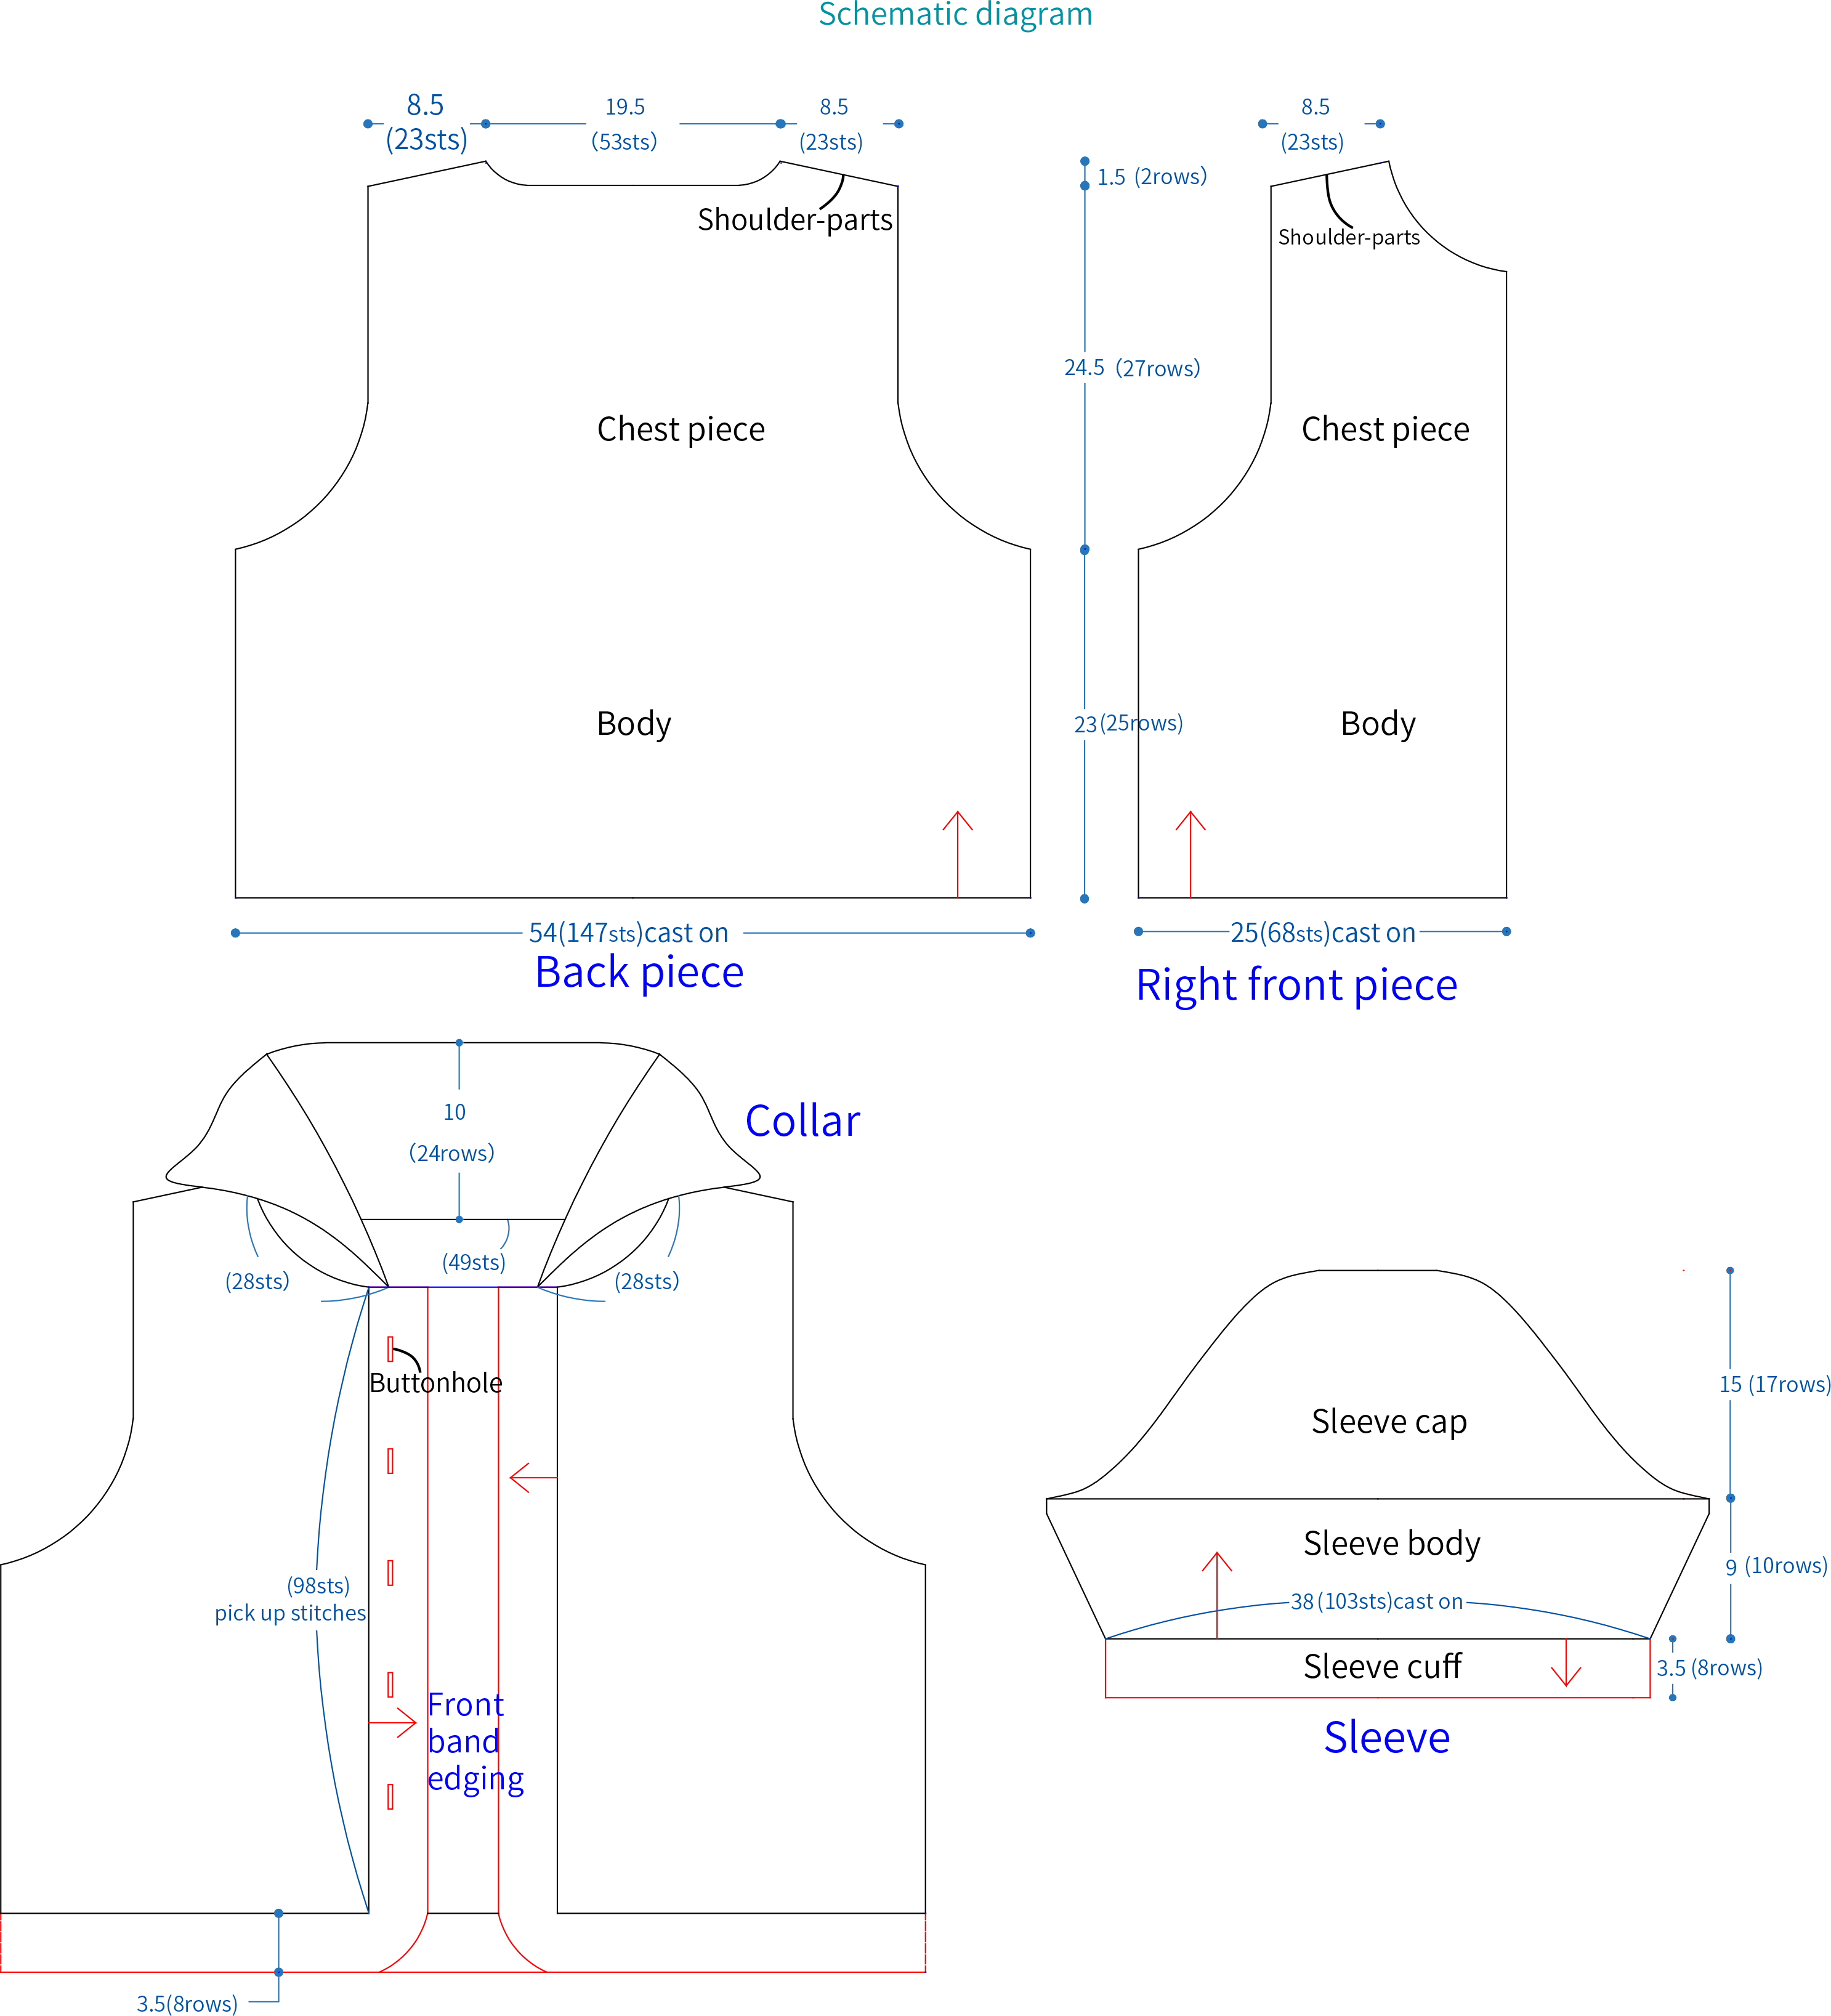
15#Dusk Blue x 4This cardigan consists of the back piece, left and right front pieces, sleeves, front band edging, and collar. First, crochet the front and back pieces and the sleeves separately, then join them together, and finally crochet the front band edging and collar in the corresponding areas separately.
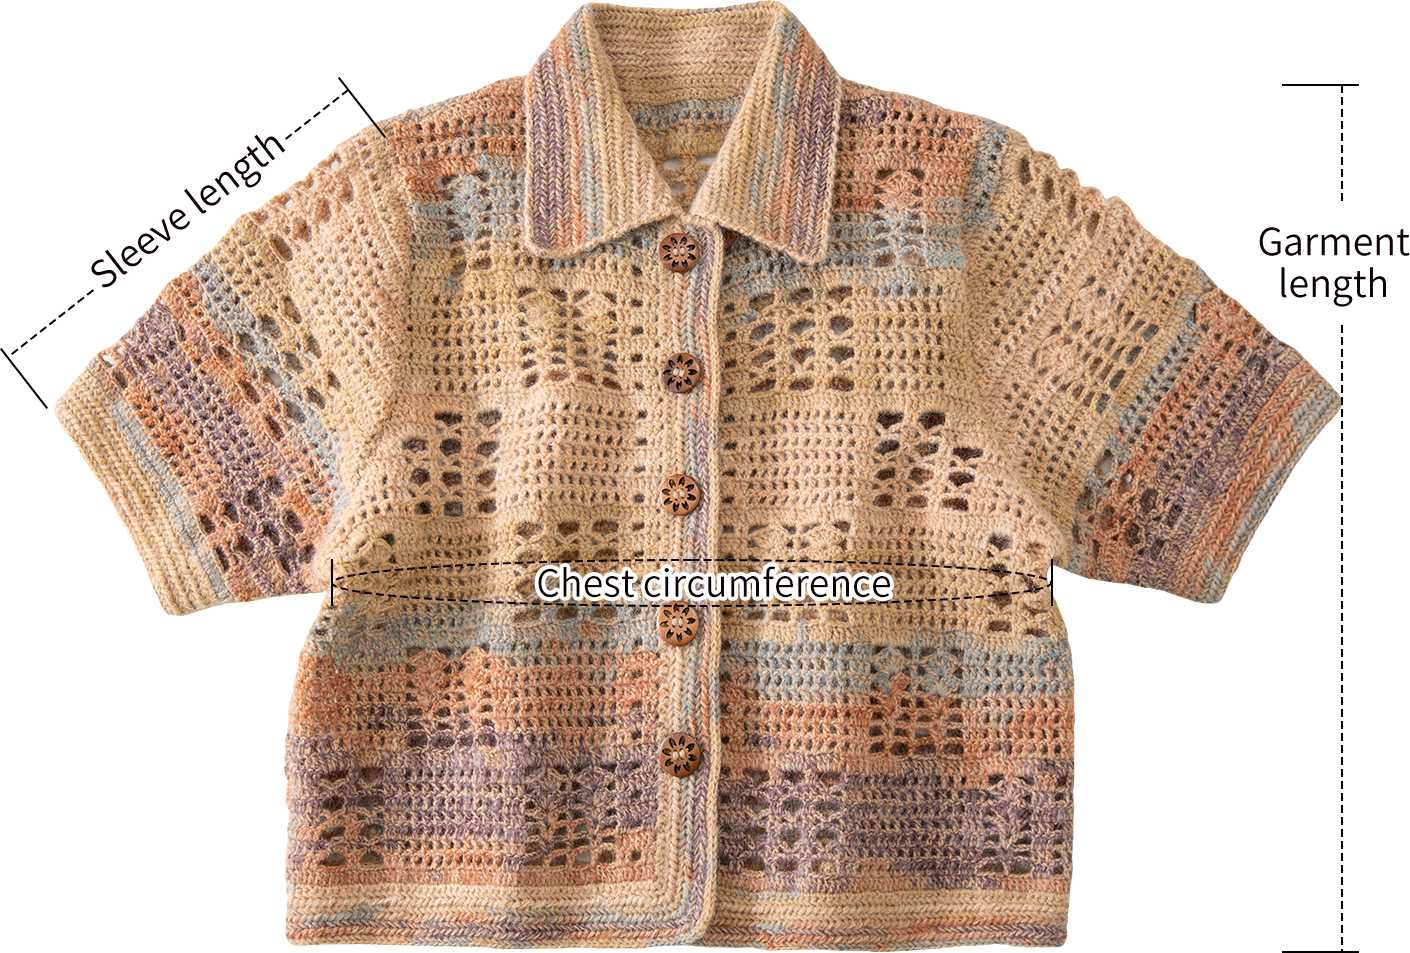
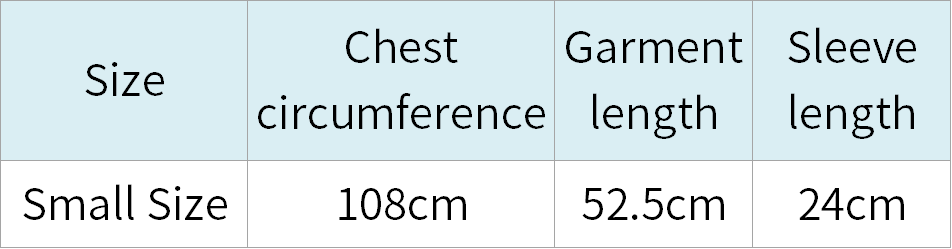
Note: Hand-measured, with an error margin of 1-2 cm.
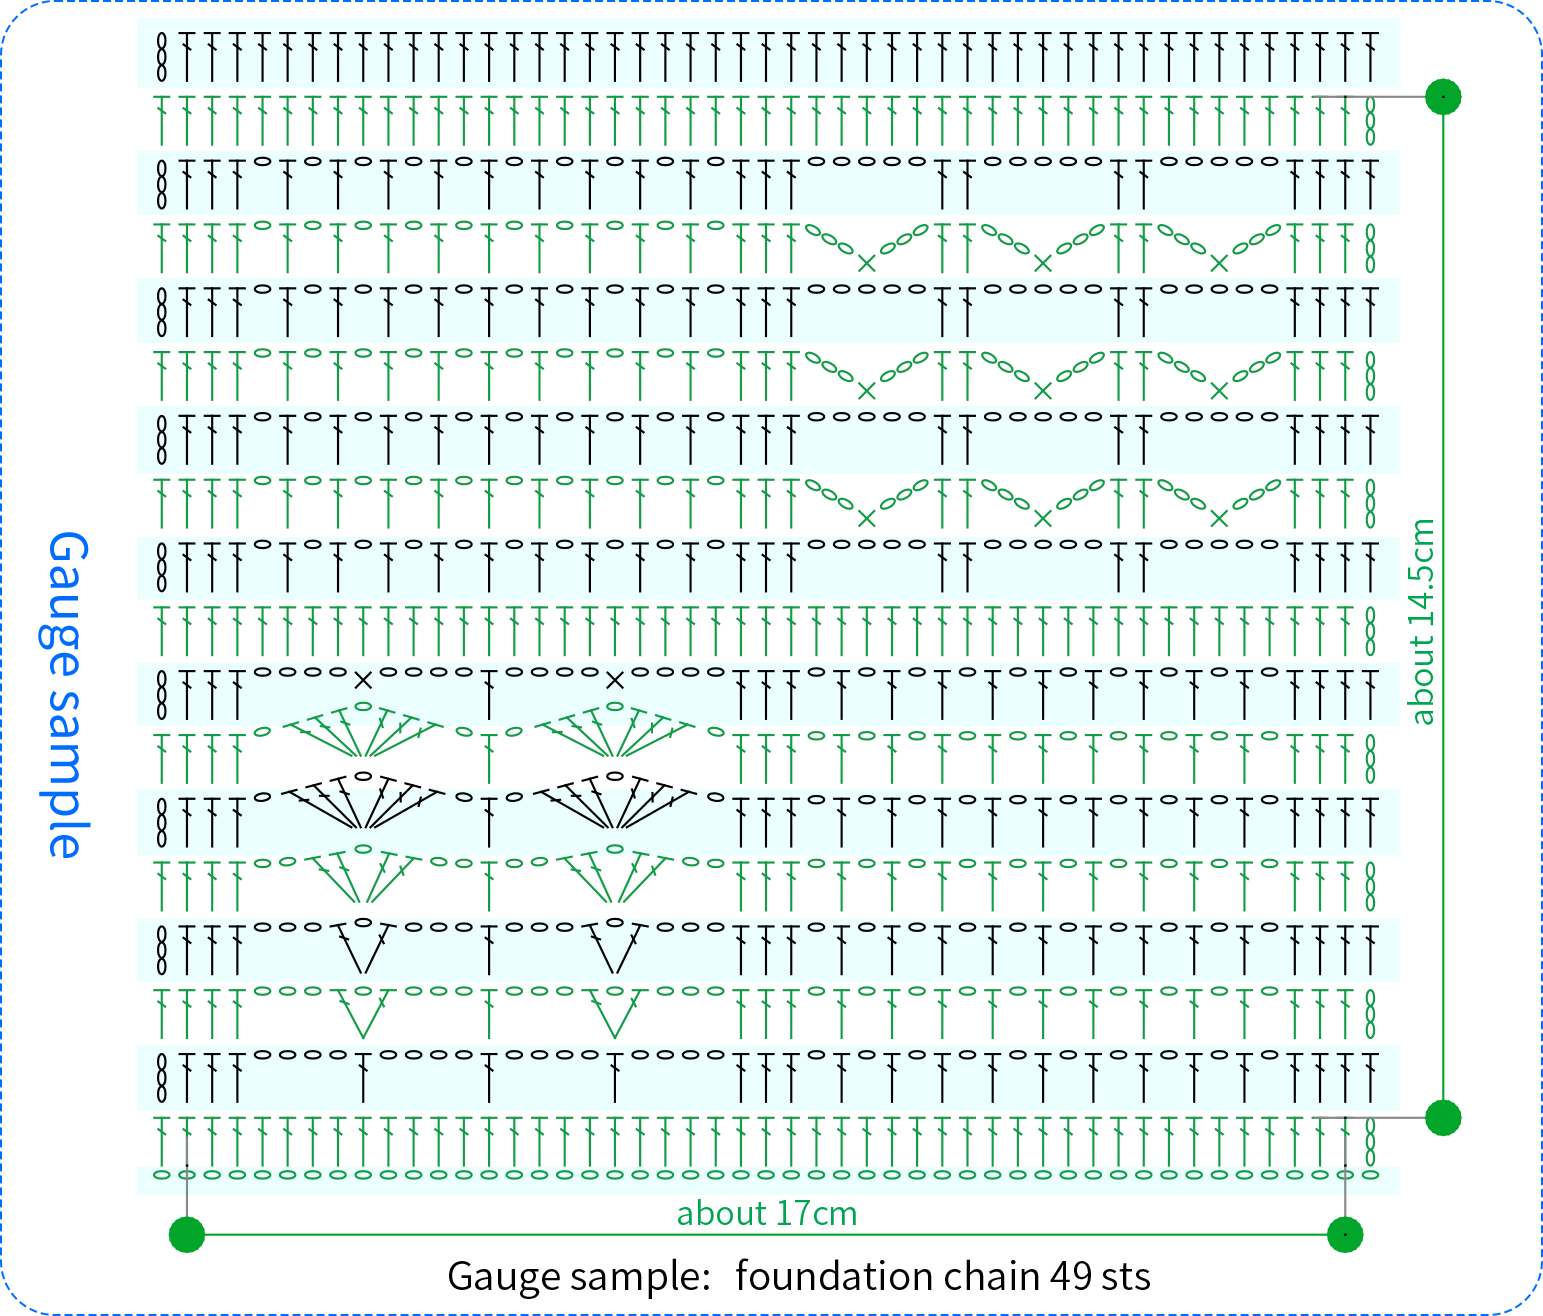
Due to variations in individual tension, the size of the sample is for reference only.
Materials: Susan's Family South African Soft Mohair Mixed Hand-Knitting Yarn + Alpaca
or
Susan's Family South African Soft Mohair Mixed Hand-Knitting Yarn + Lamb Wool
(Work with two yarns held together as one strand.)
Hook: 2.50 mm crochet hook

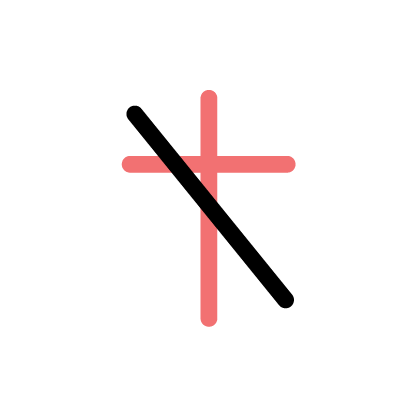
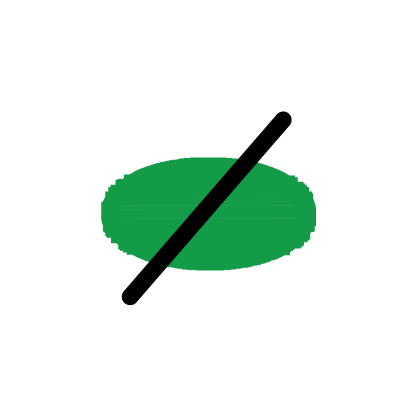
Chart Key










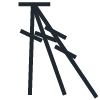
Note:
1. This pattern is making in Chinese crochet pattern terms, and the stitch name is written using American terminology. All measurements in charts are in cm.
2. When crocheting with hand-painted yarn, the different colors at the starting position can result in different effects in the finished product. This yarn is special and not easy to undo. It's suggested to first learn the crocheting method using scrap yarn from home. After getting familiar with it, then crochet with the original yarn.

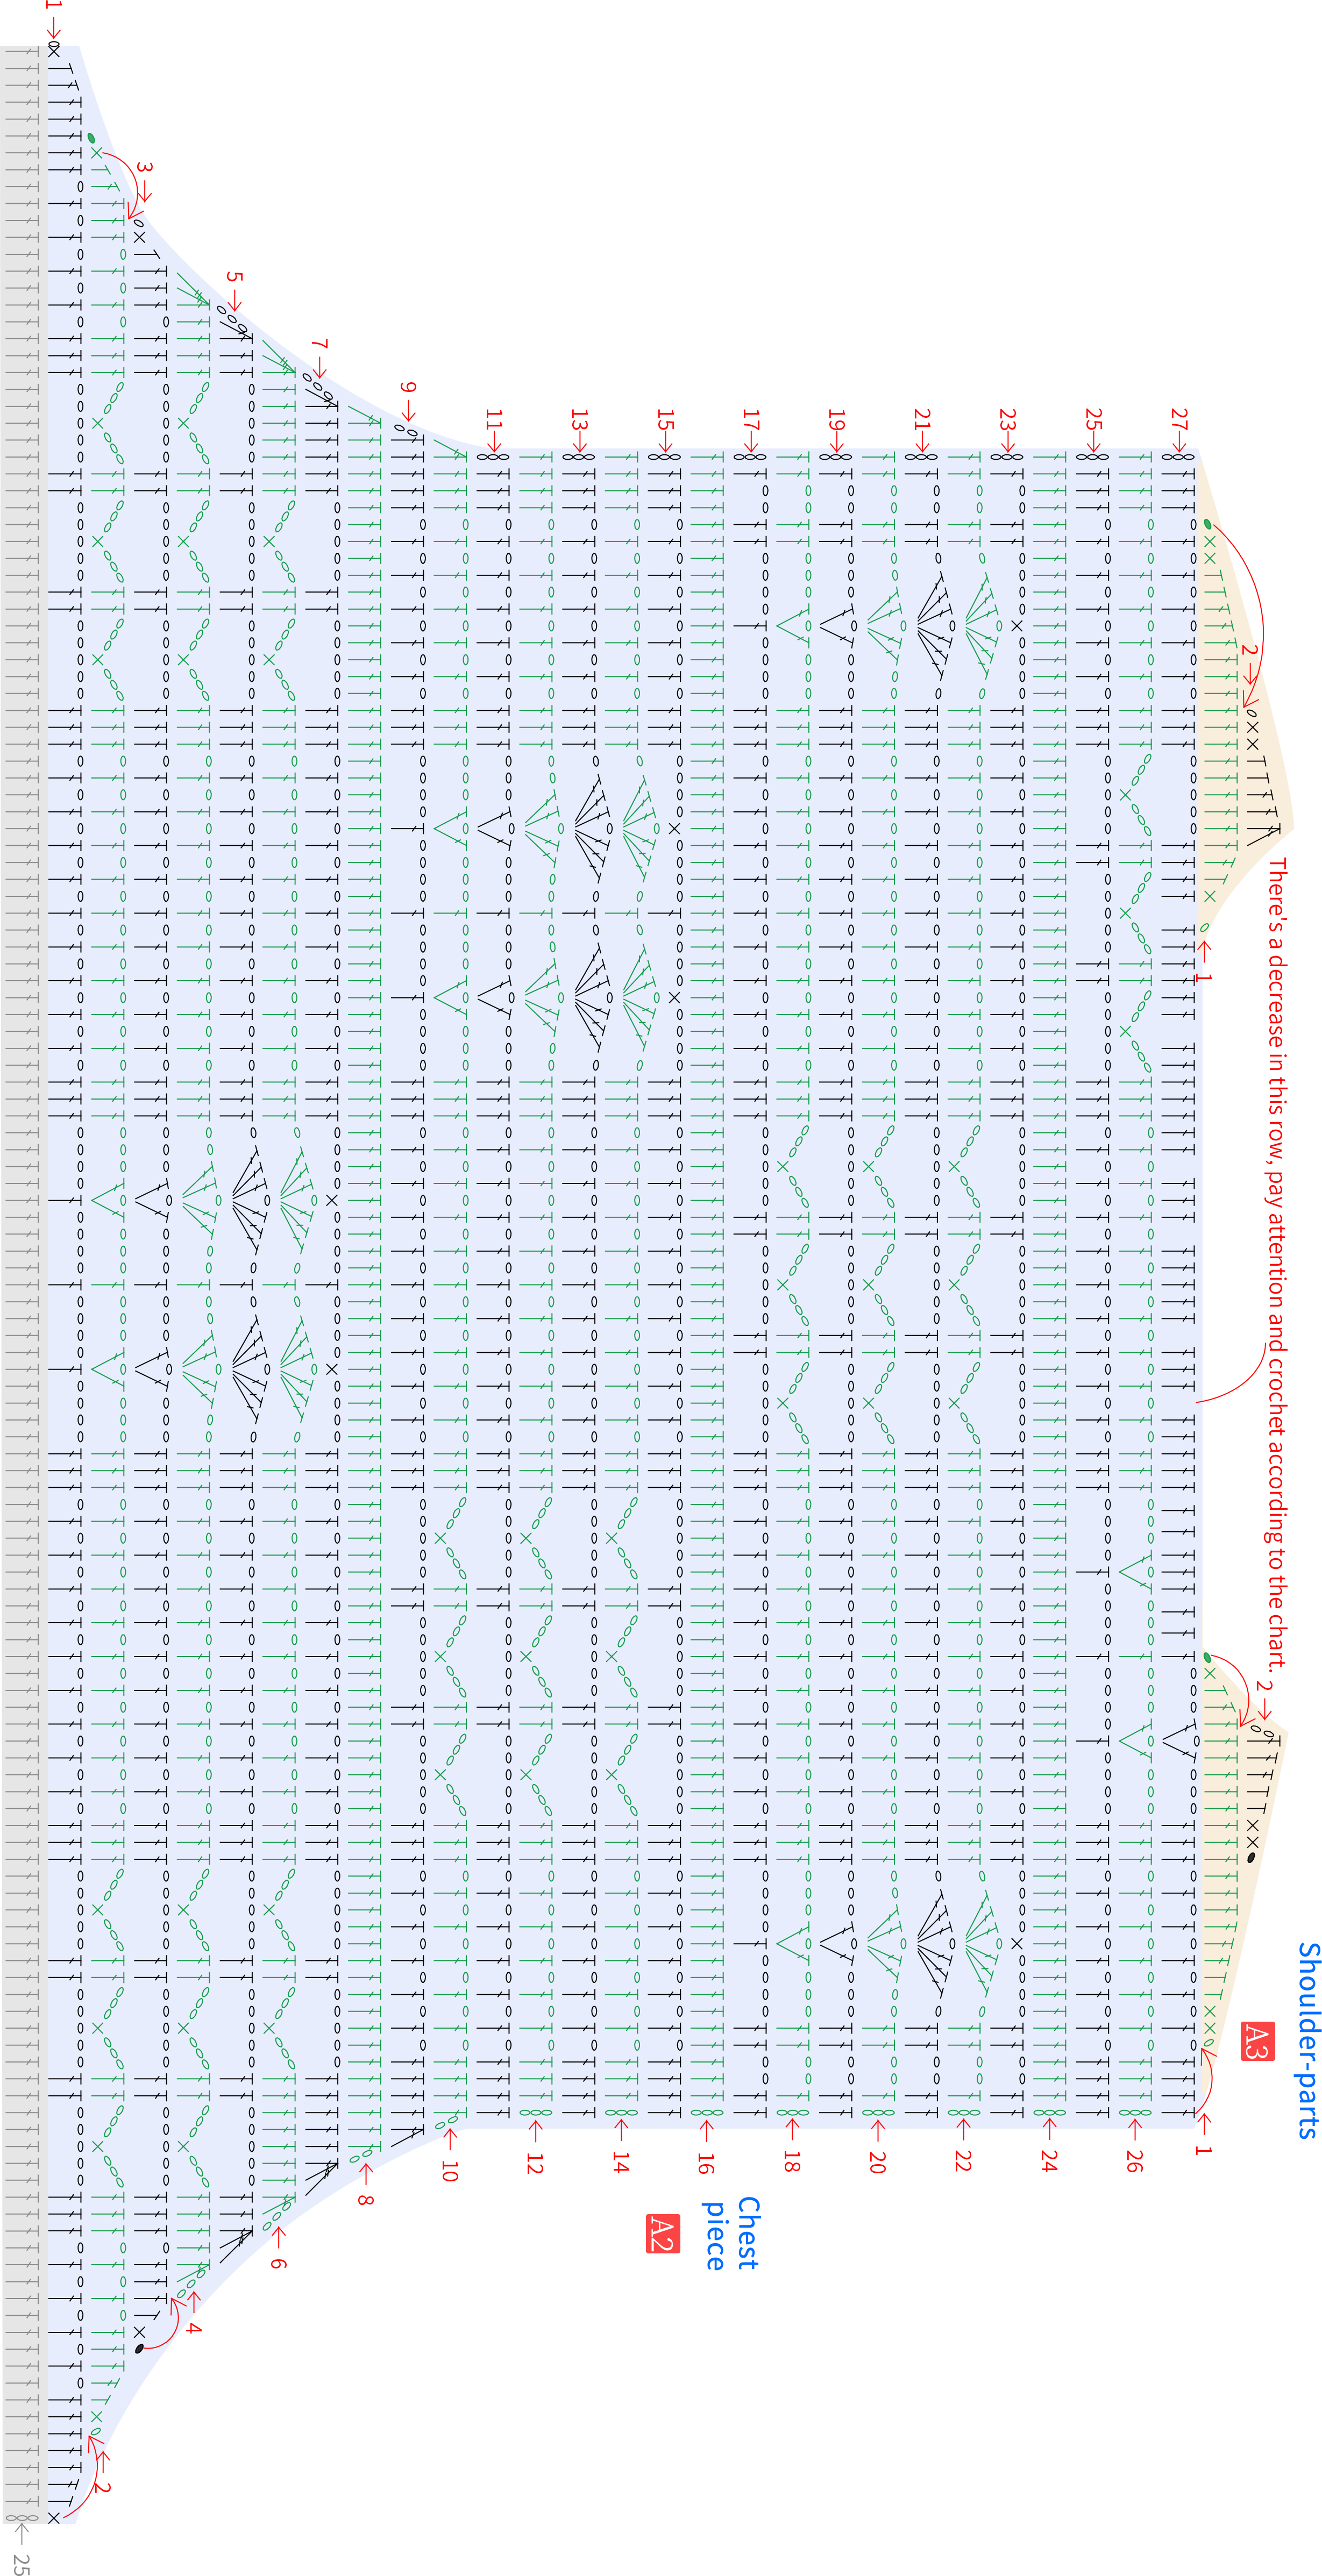
Part 1 Back pieceA 01' 01''
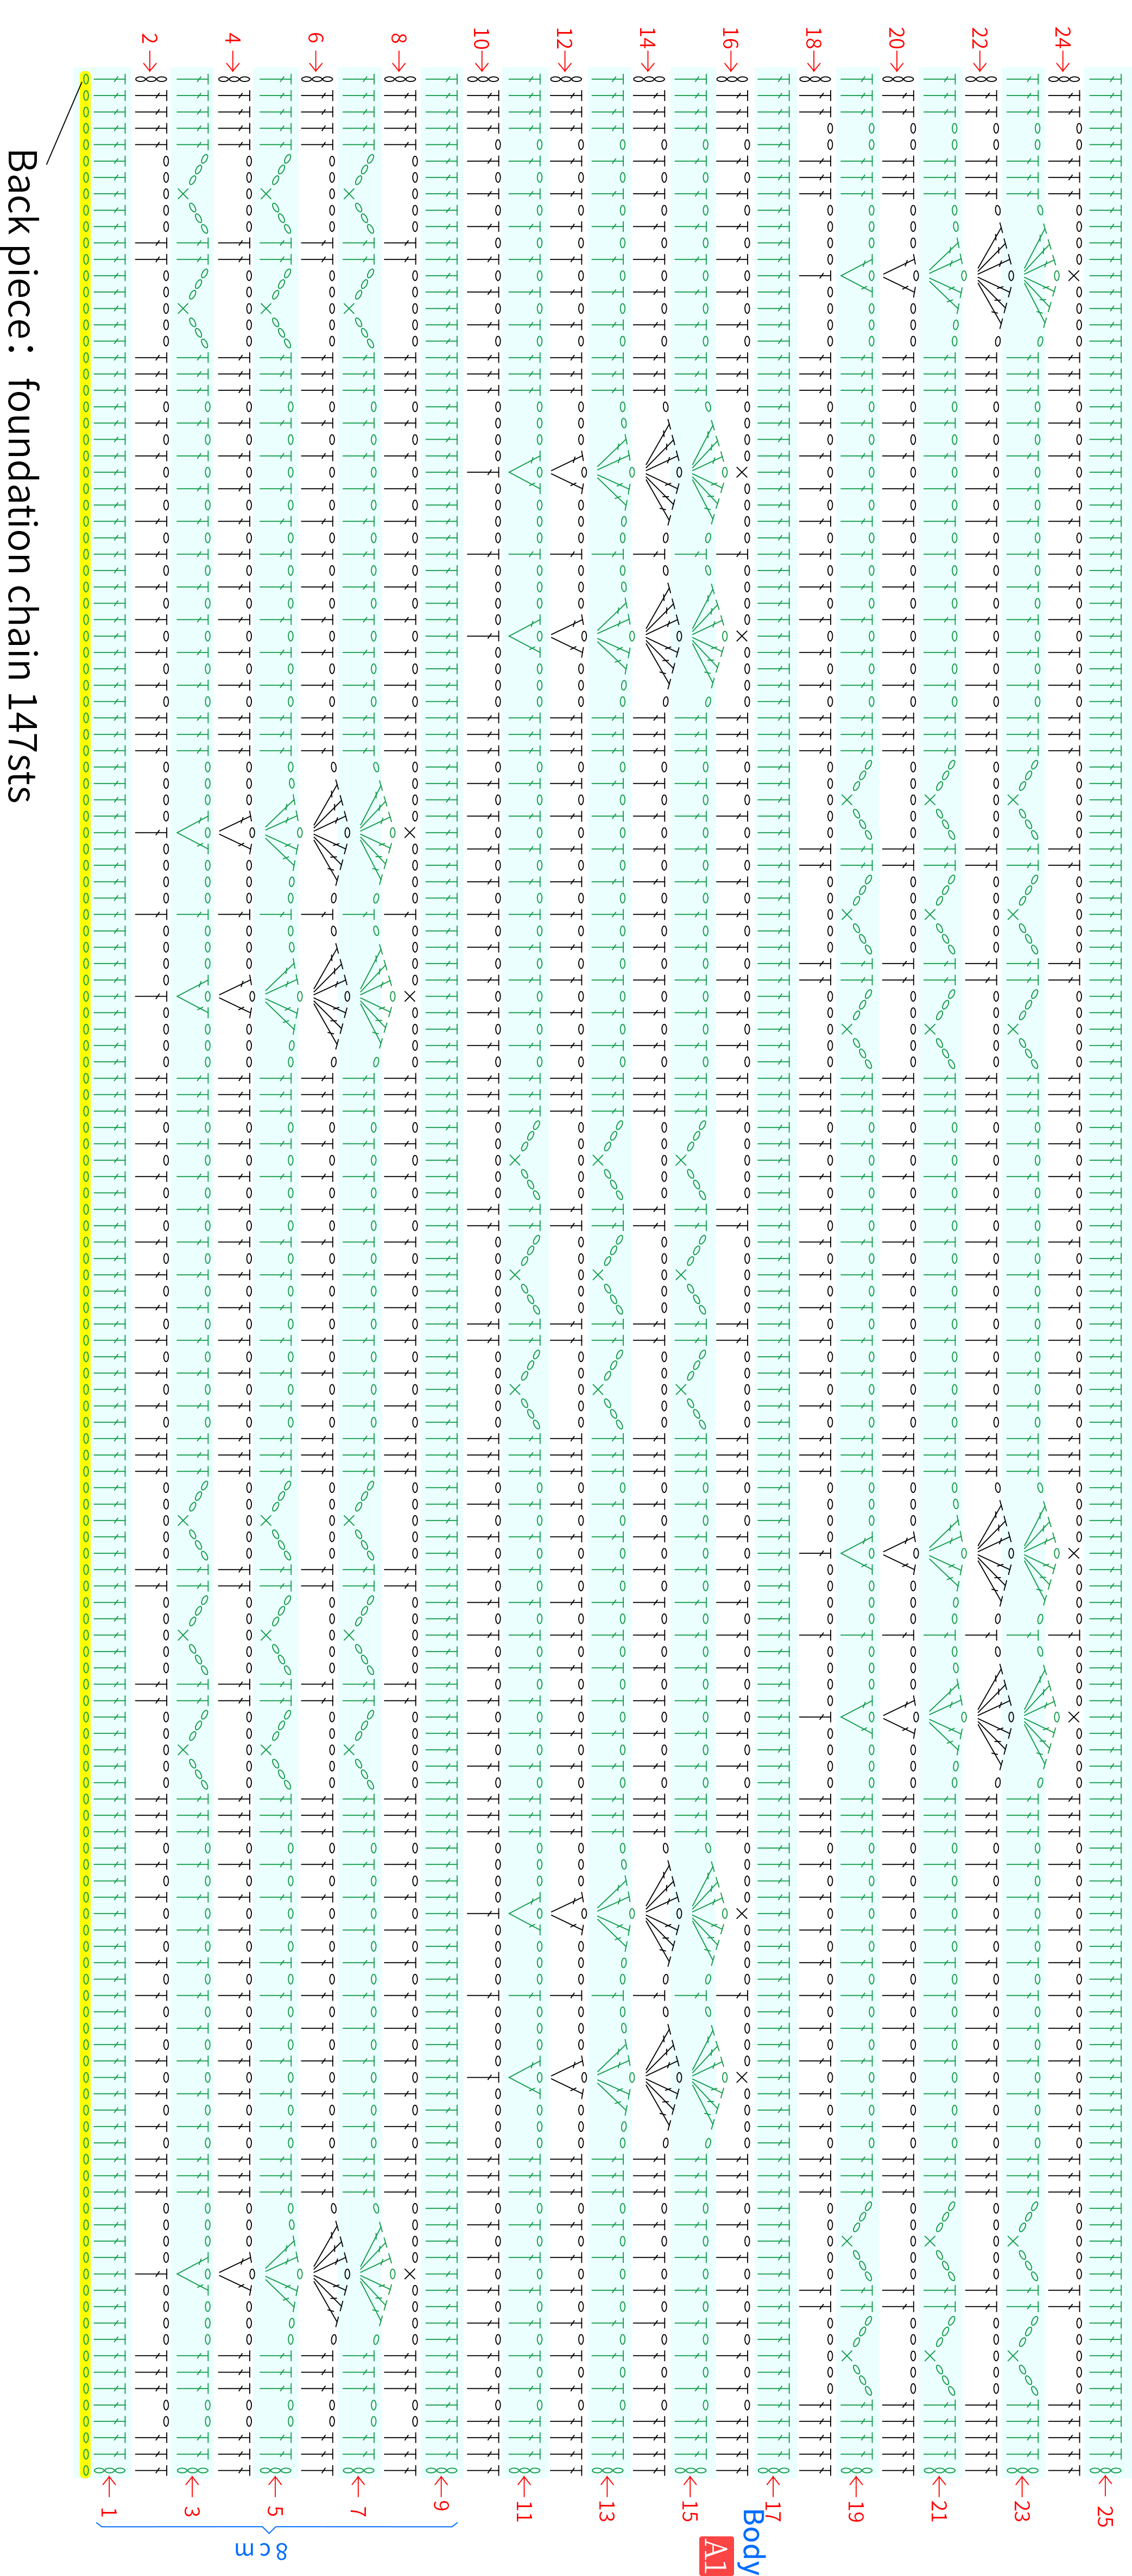
It's divided into three parts: the body, the chest piece, and the shoulder-parts. We will start from foundation chain, and work back and forth along the starting chain. Please refer to the video demonstration for more details.
Note: After completing row 9, you can measure the height (8cm) and width (54cm). If there's too much difference from the dimensions marked on the chart, it's recommended to adjust your tension and re-crochet.
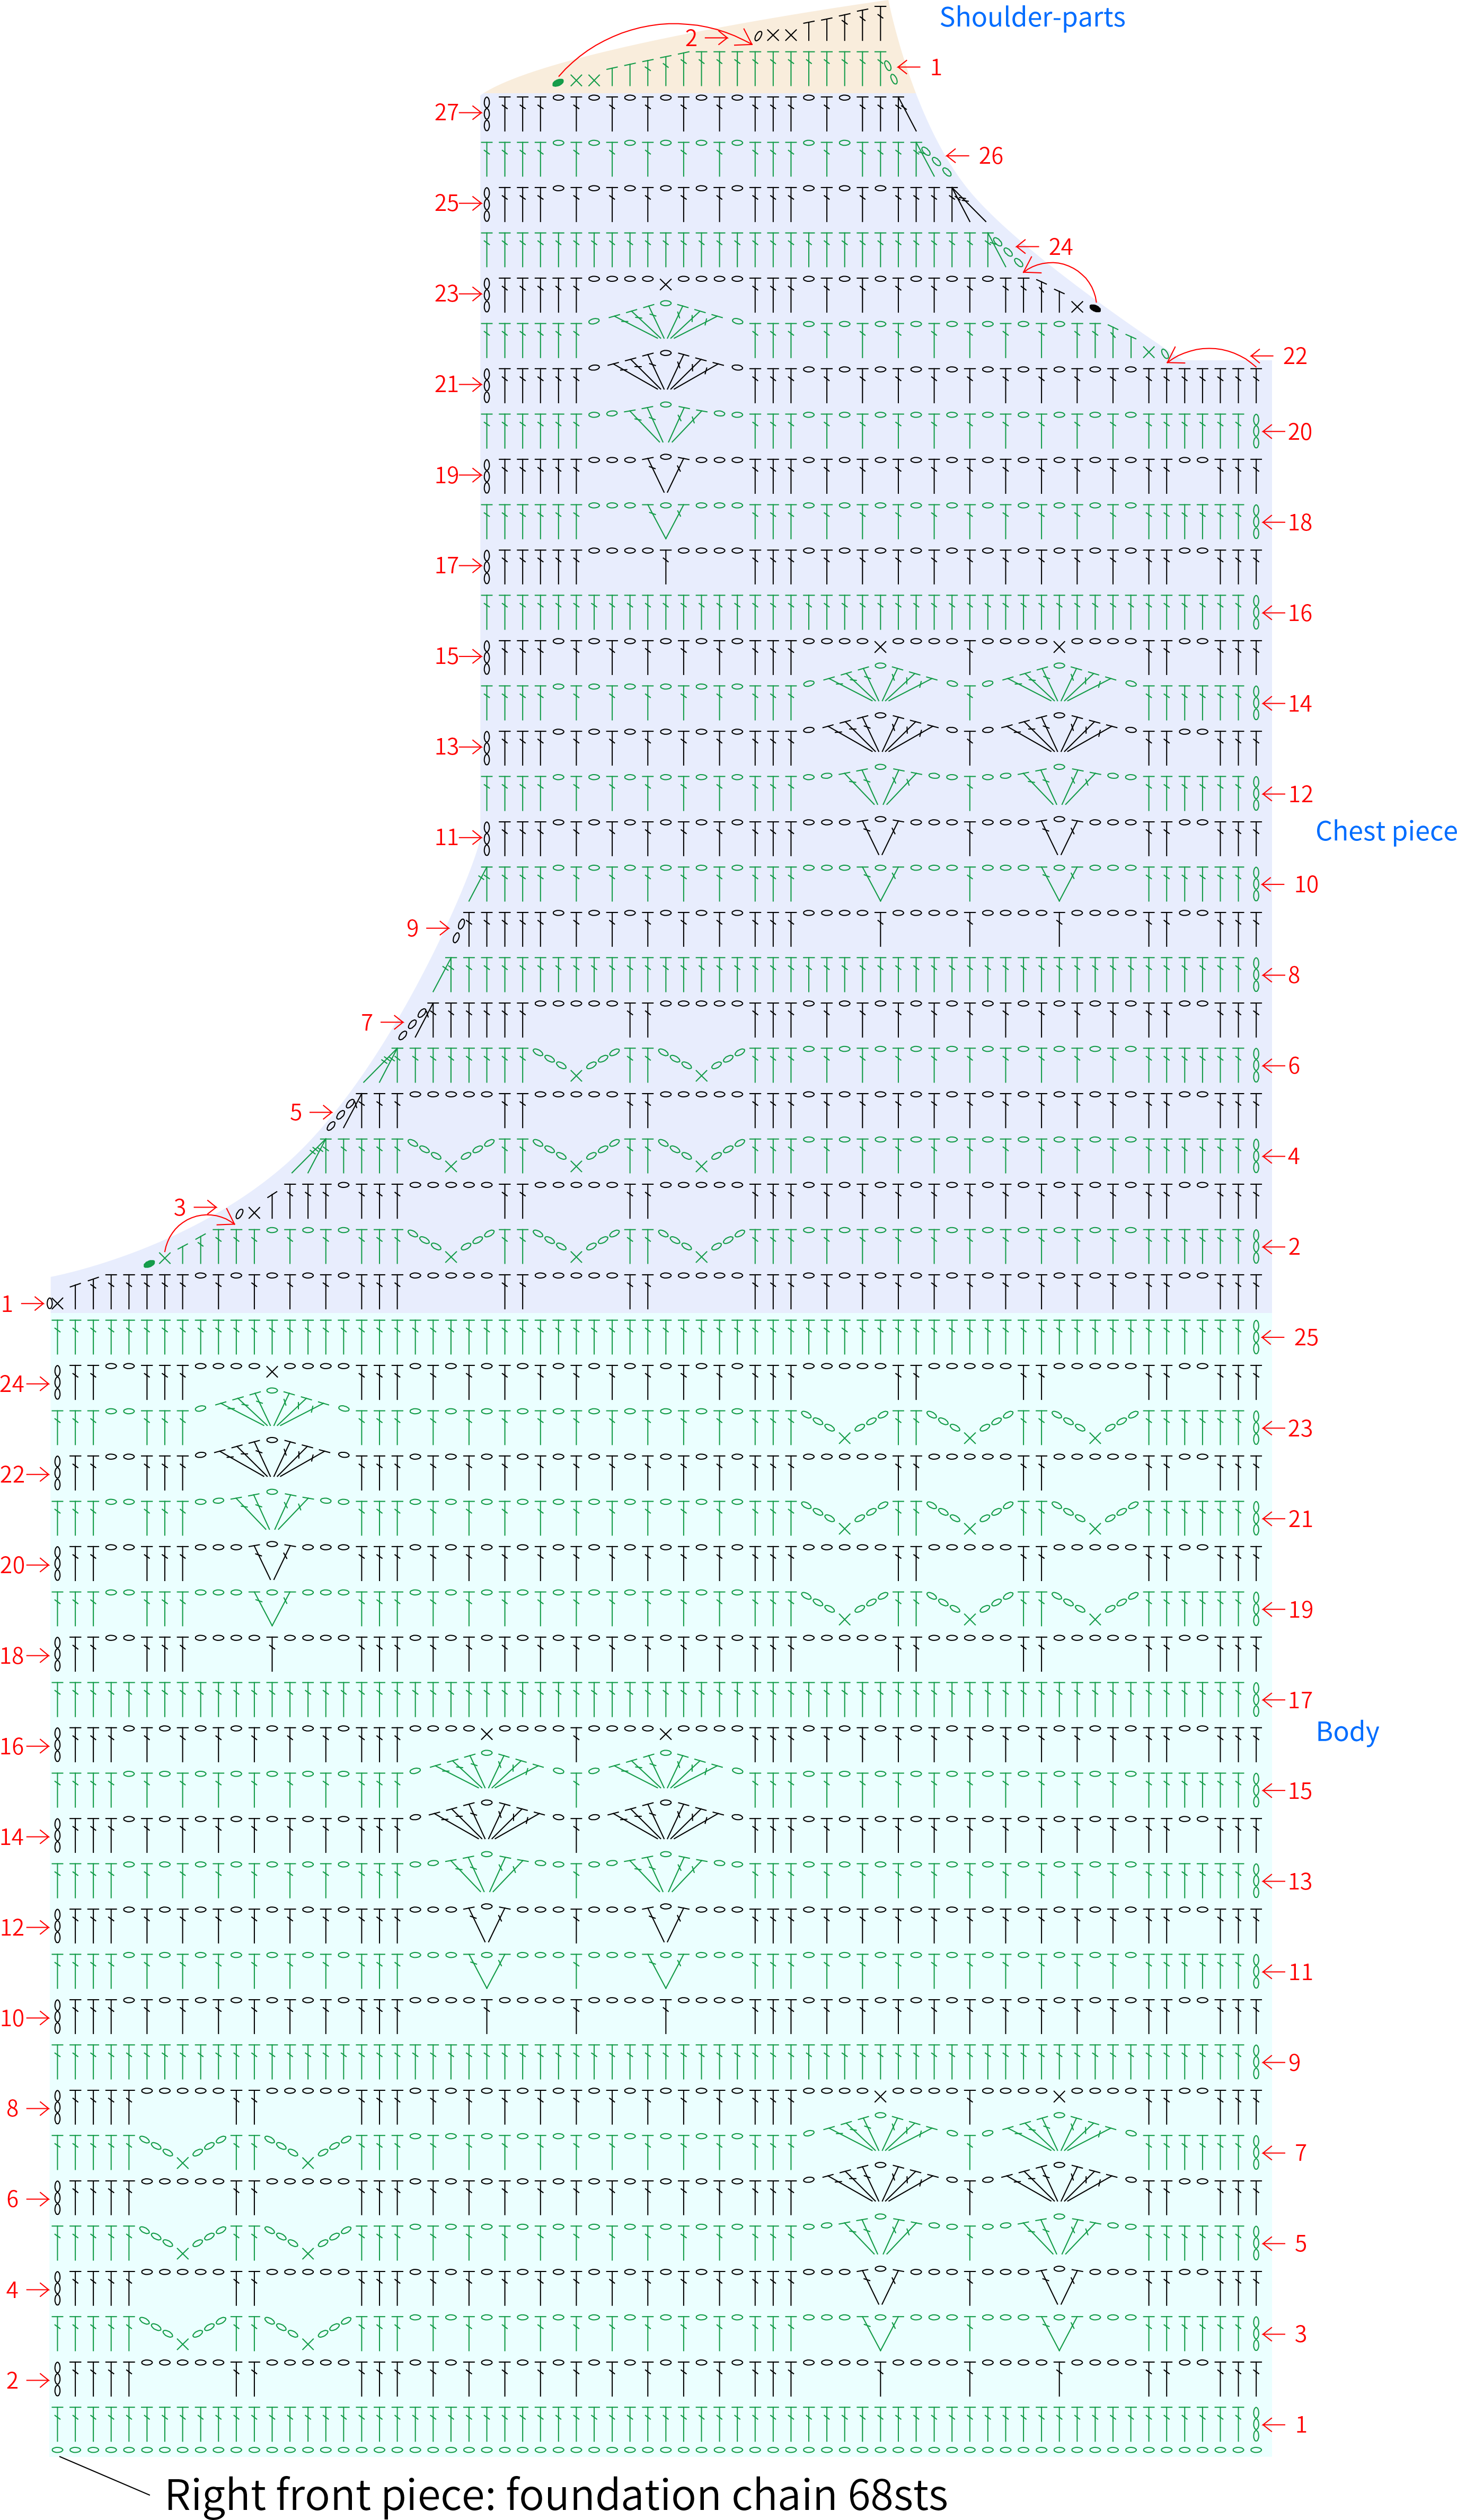
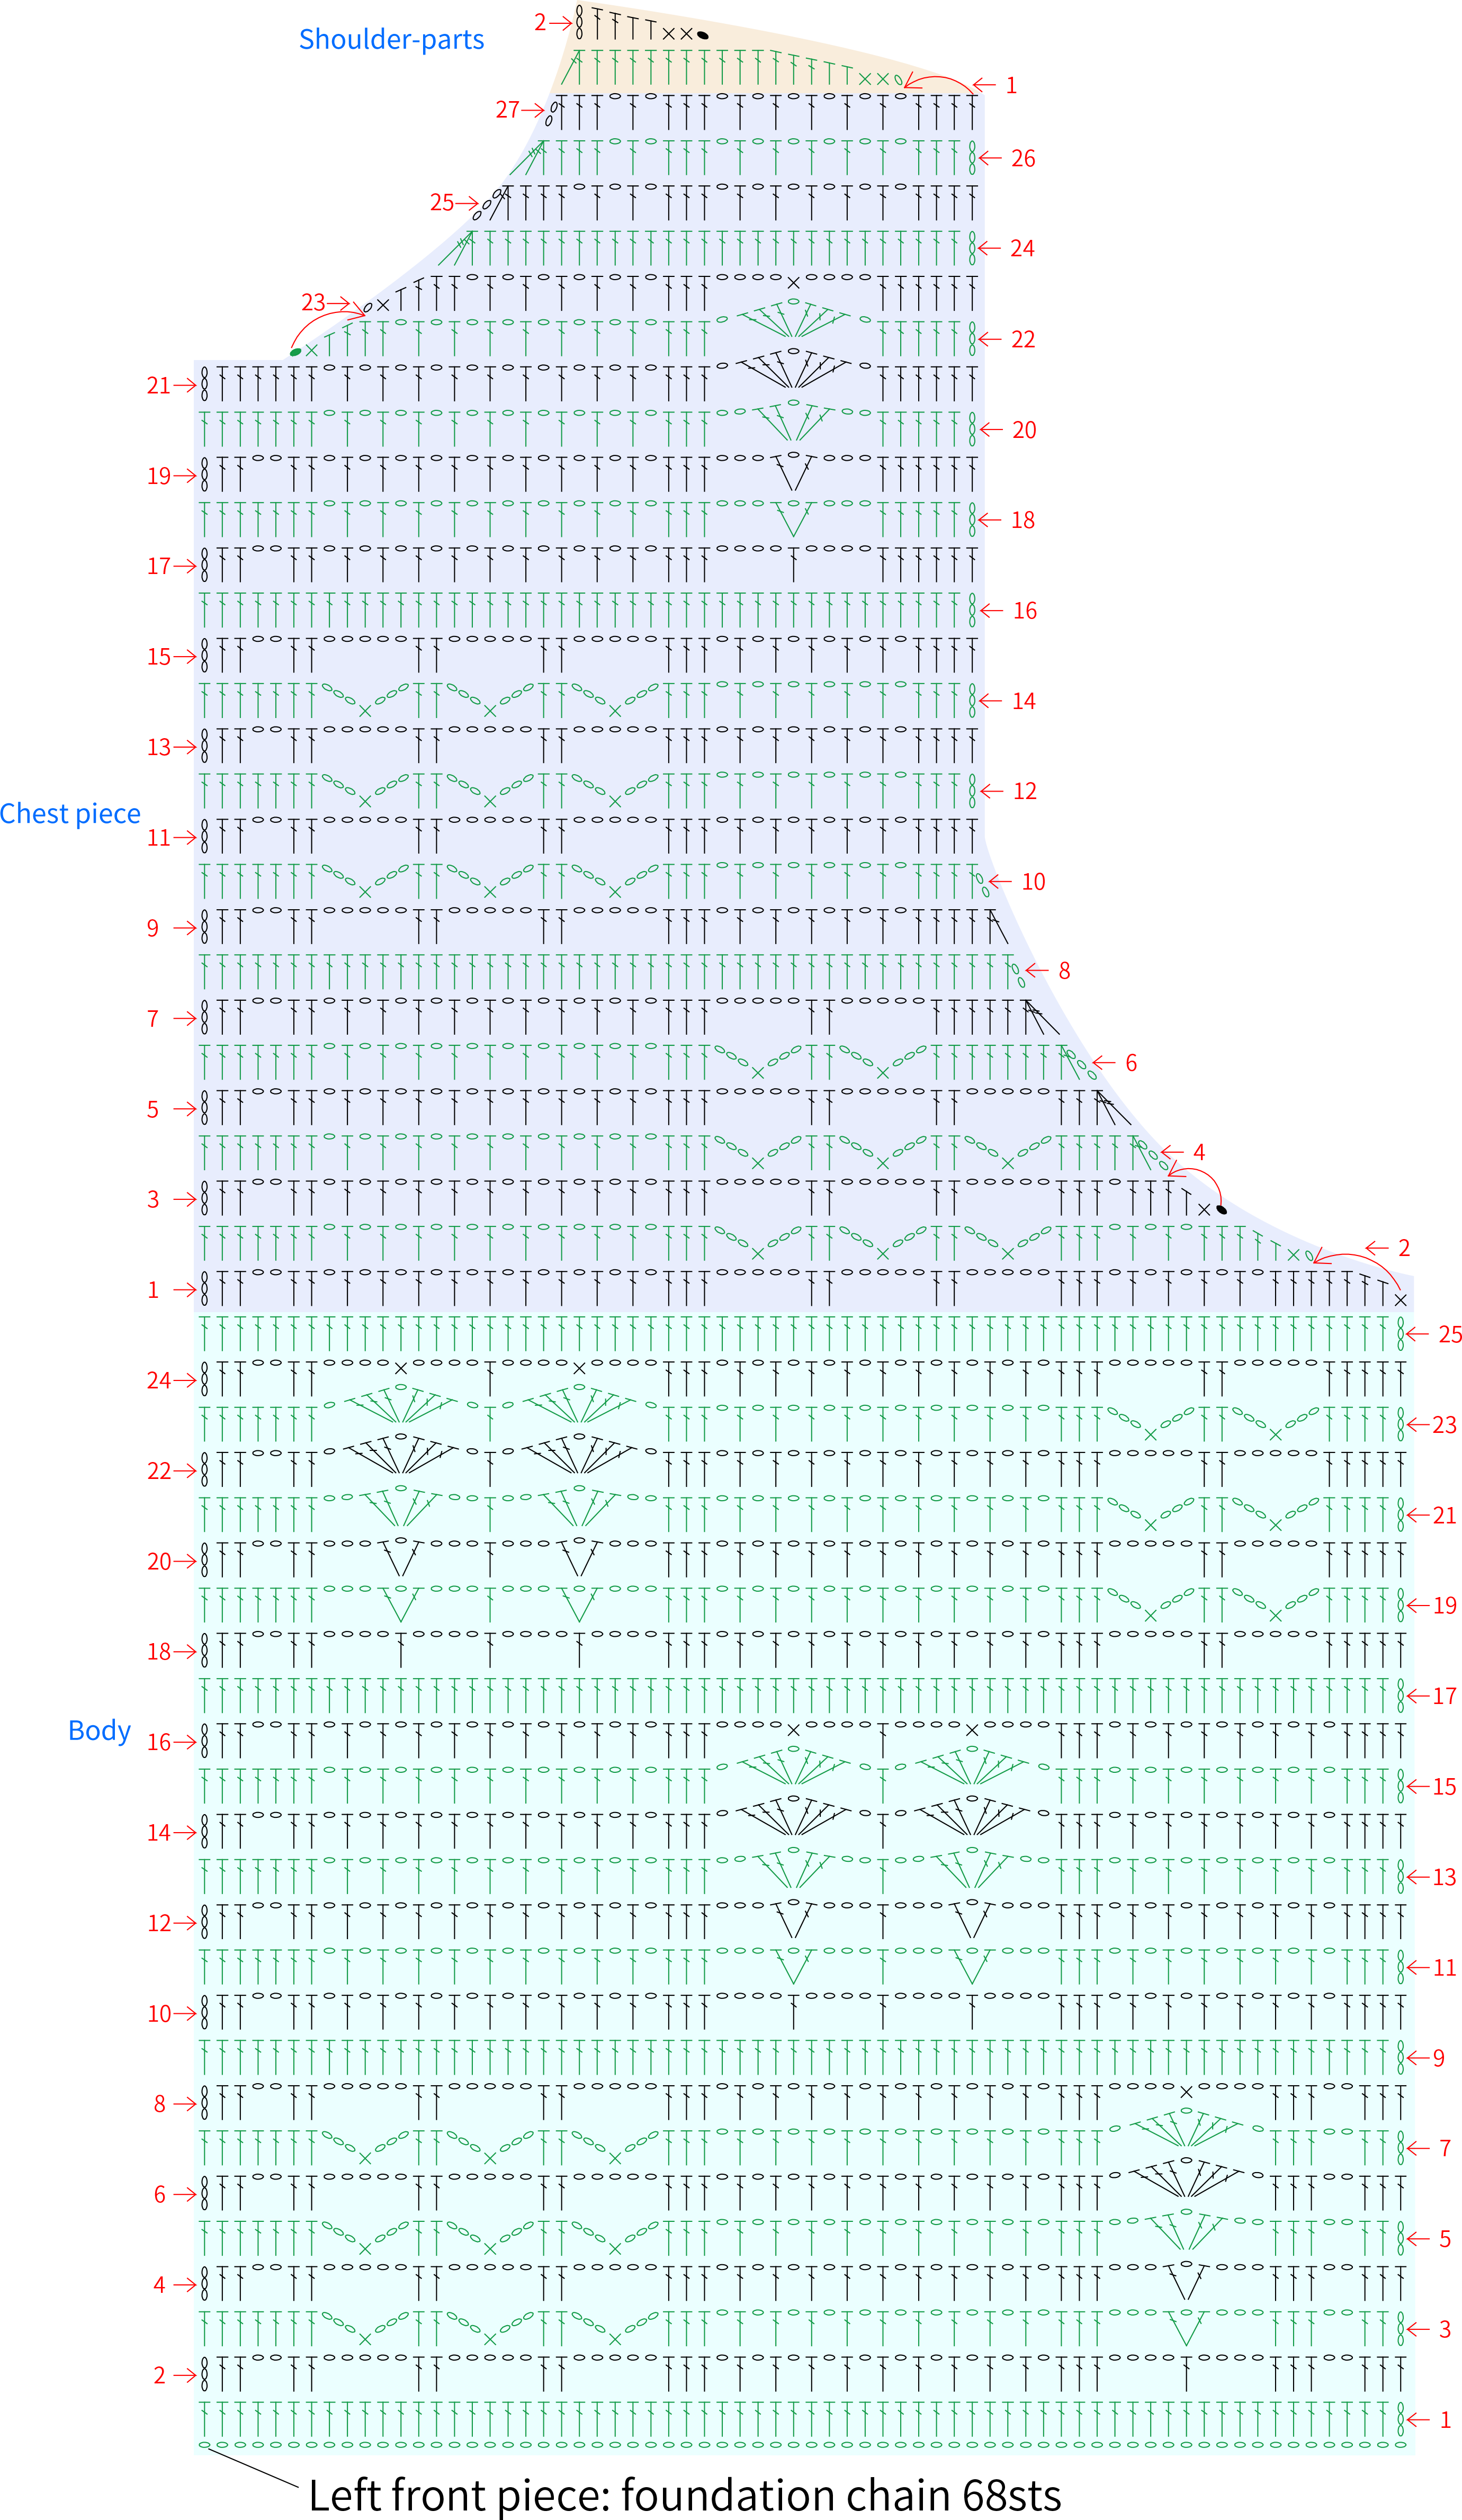
Part 2 Left and right front piecesB 37' 24''
Divide into three parts: the body, front piece, and shoulder-parts. The method is similar to that of the back piece, starting with a foundation chain and working back and forth in rows. Please refer to the video demonstration for more details.
Note: Here, left and right refer to the left and right when the garment is worn.
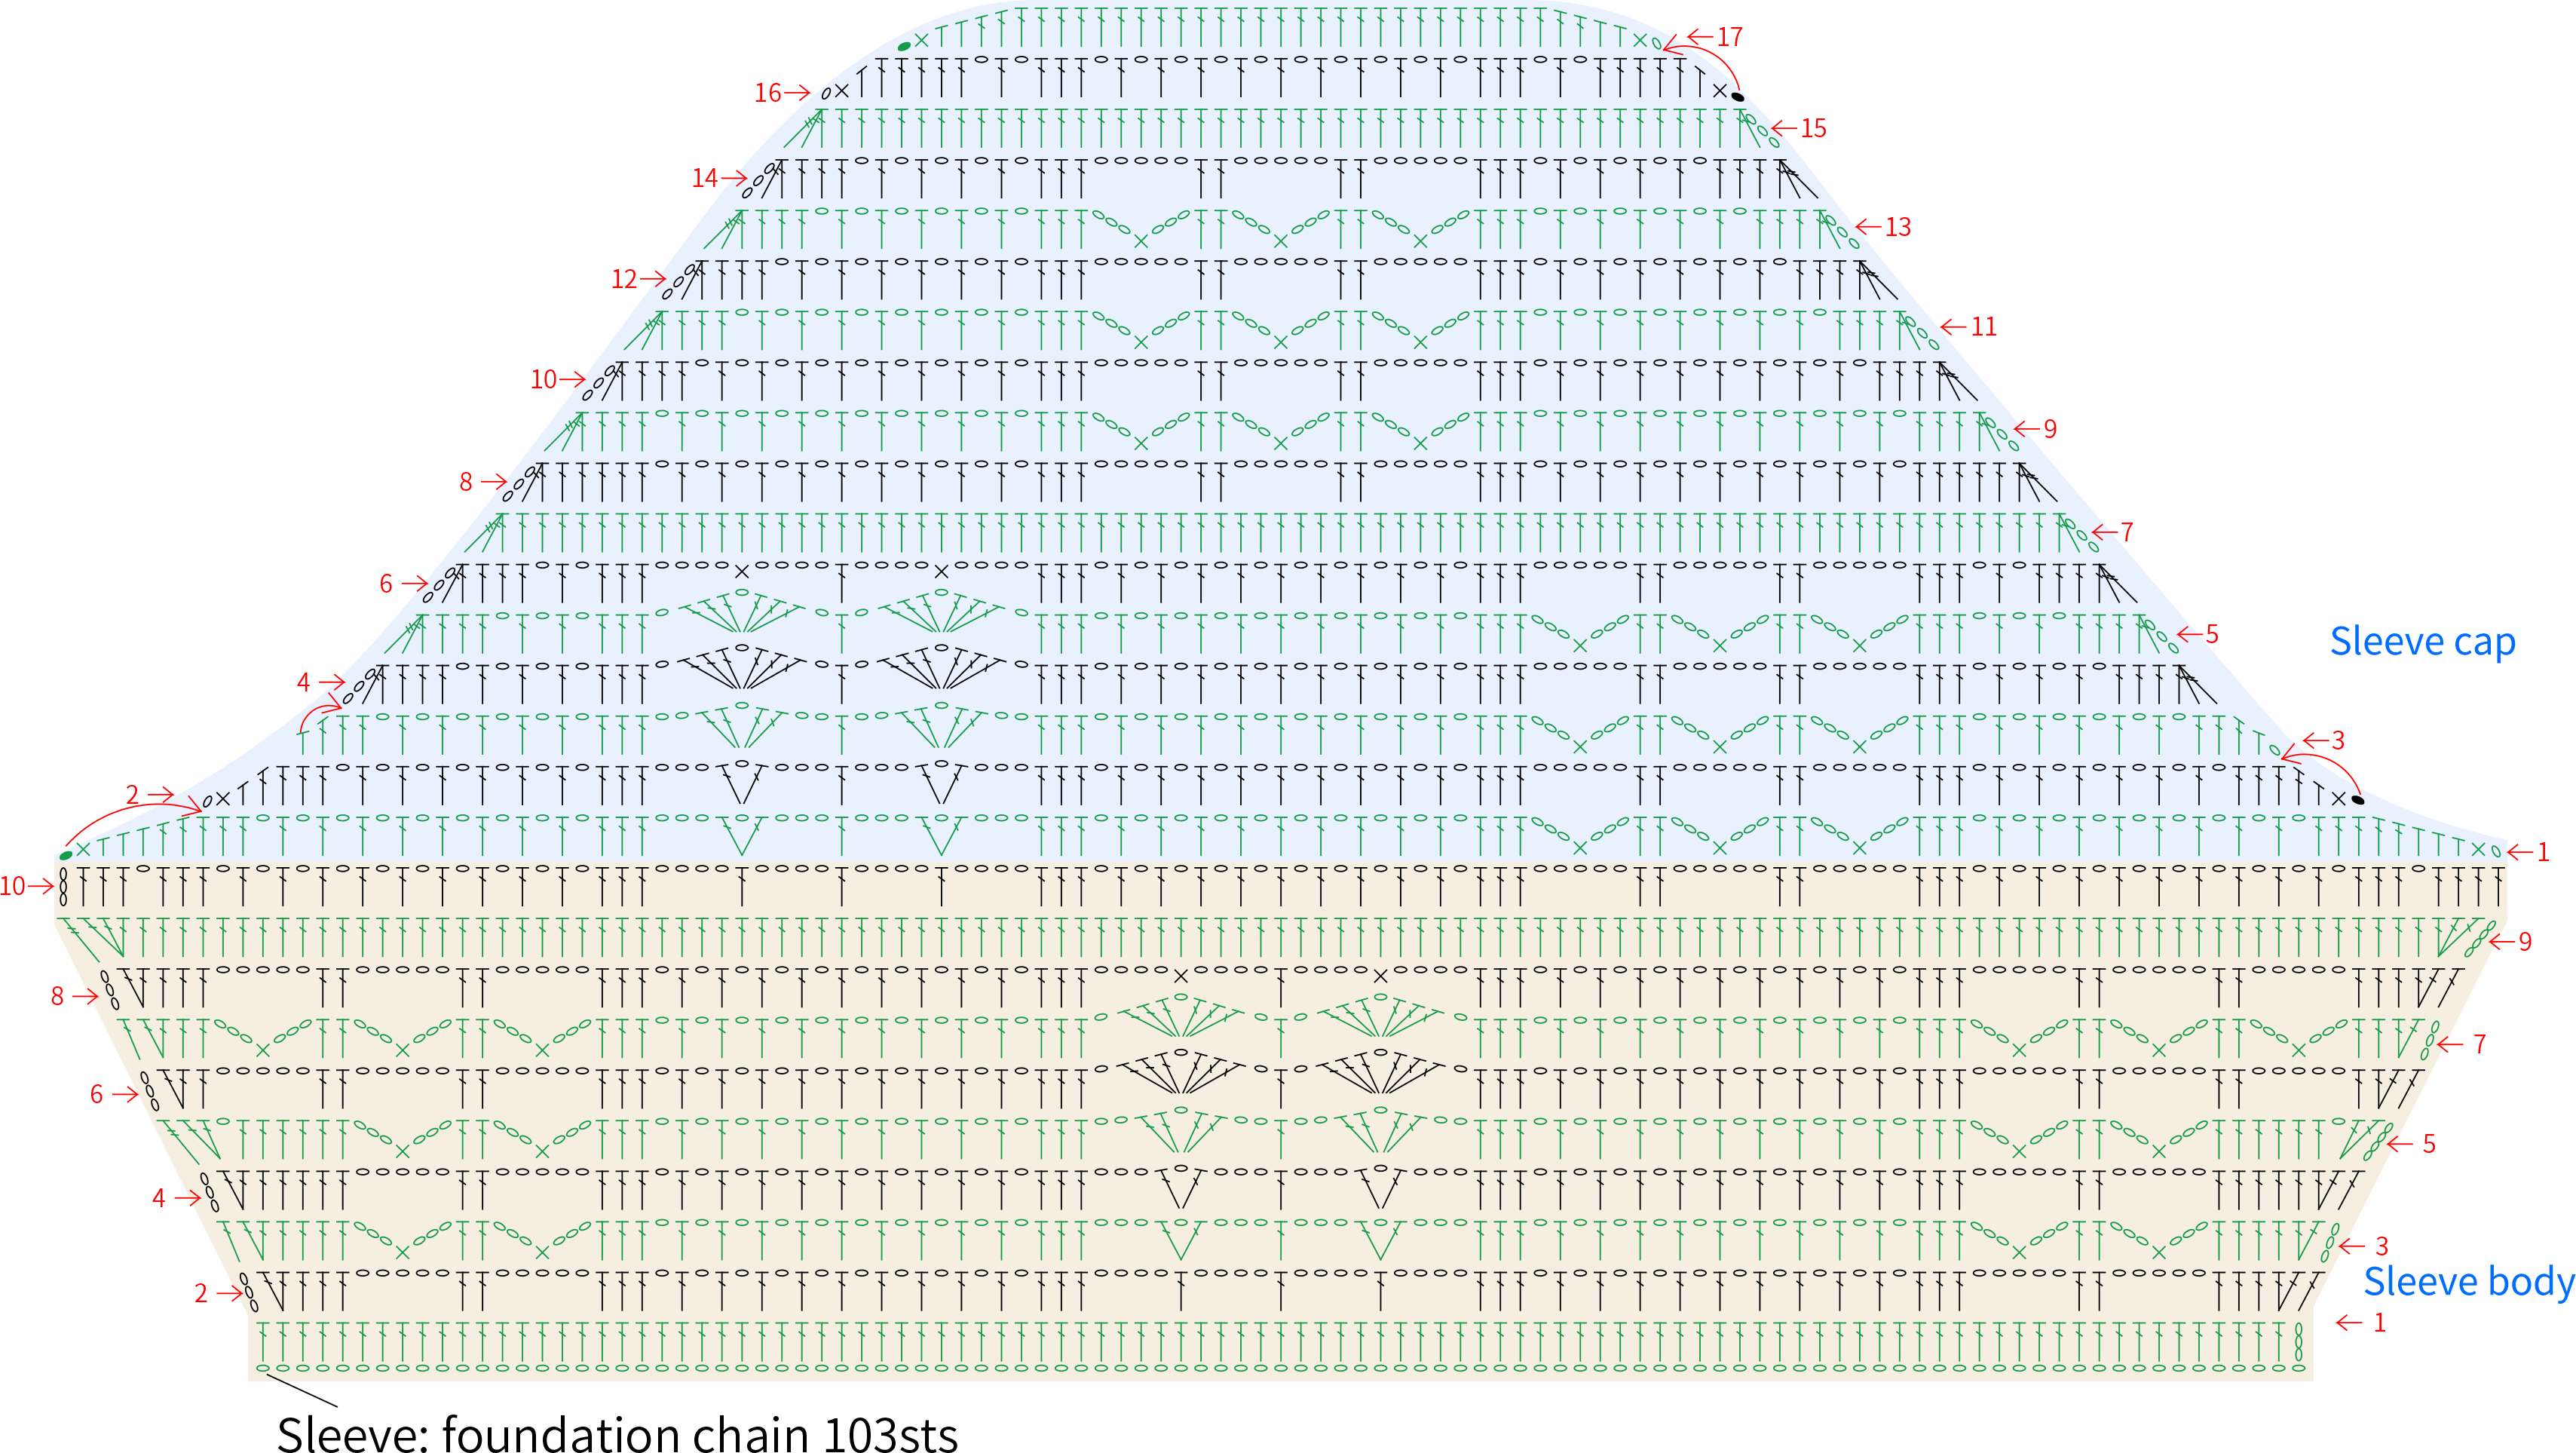
Part 3 Sleeve × 2 piecesC 38' 36''
The crocheting method for both sleeves is identical, divided into the sleeve body, sleeve cap, and sleeve cuff. For the sleeve body, we will start with a foundation chain and work back and forth in rows. Please refer to the video demonstration for more details.
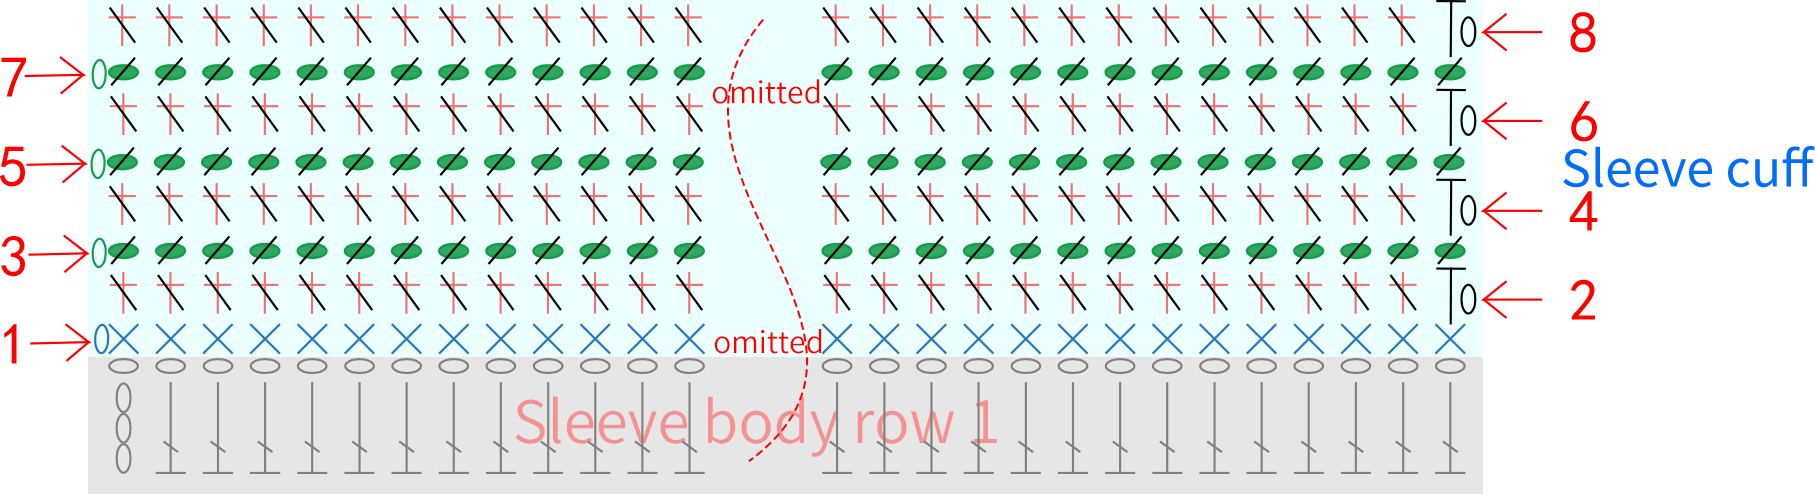
Part 4 JoinD 54' 40''
The attachment of the front and back pieces, as well as the sleeves, is done using single crochets with an interval of two chain stitches between the single crochets. The number of chain stitches can also be adjusted according to actual conditions. Just keep the fabric piece looking neat and flat when attaching. Please refer to the video demonstration for more details.
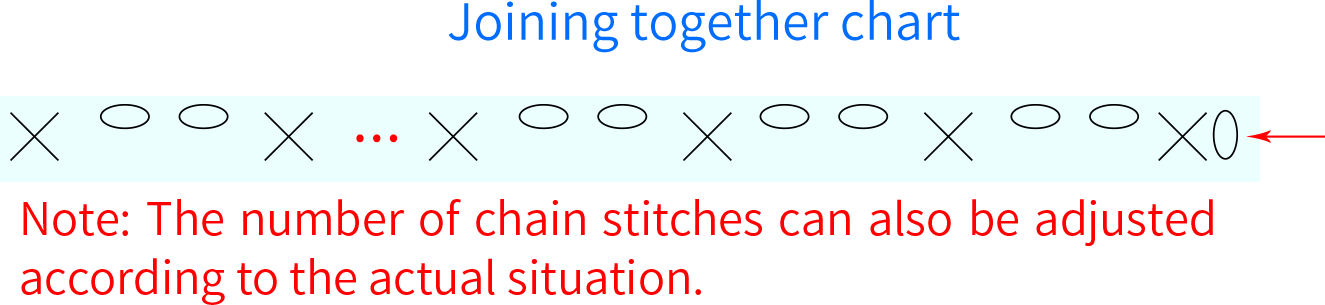
Part 5 Front band edgingE 60' 35''
Work back and forth along the side seams of the completed front pieces and the hems of the front and back pieces, using a similar method to the cuffs. When crocheting, make sure to leave space for buttonholes. Please refer to the video demonstration for more details.
Note: For men, the buttonholes are placed on the left front band; for women, they are on the right front band. This can be adjusted based on personal preference. Despite different positions, the crocheting method is identical.
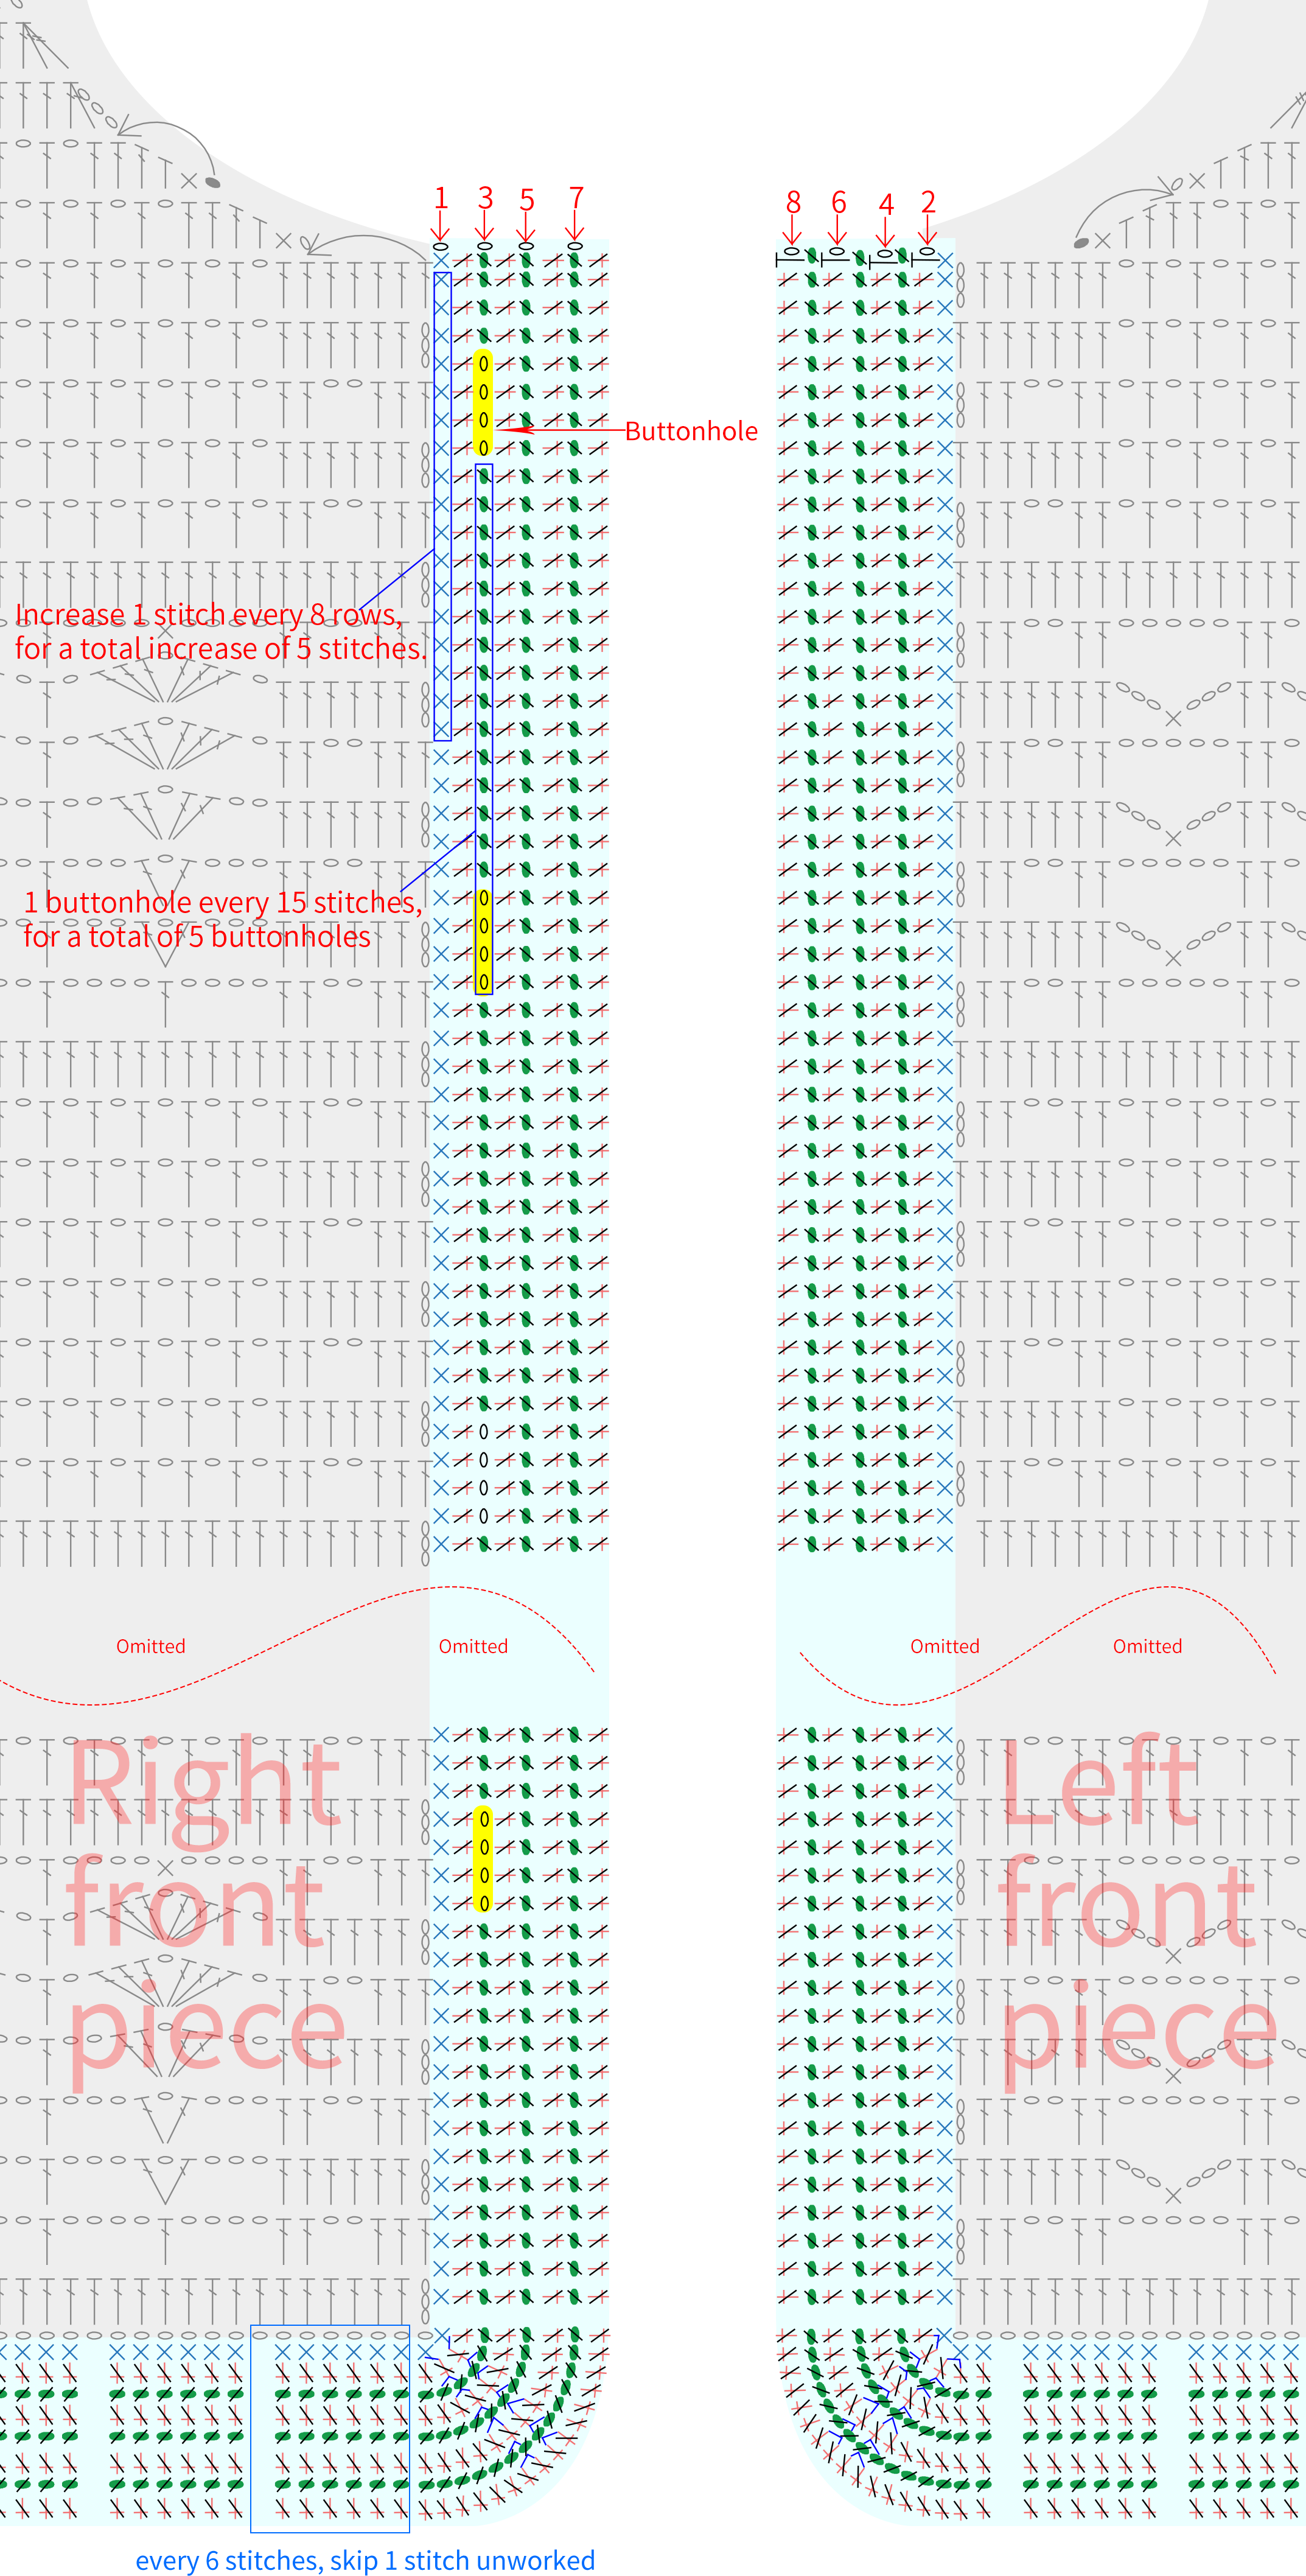
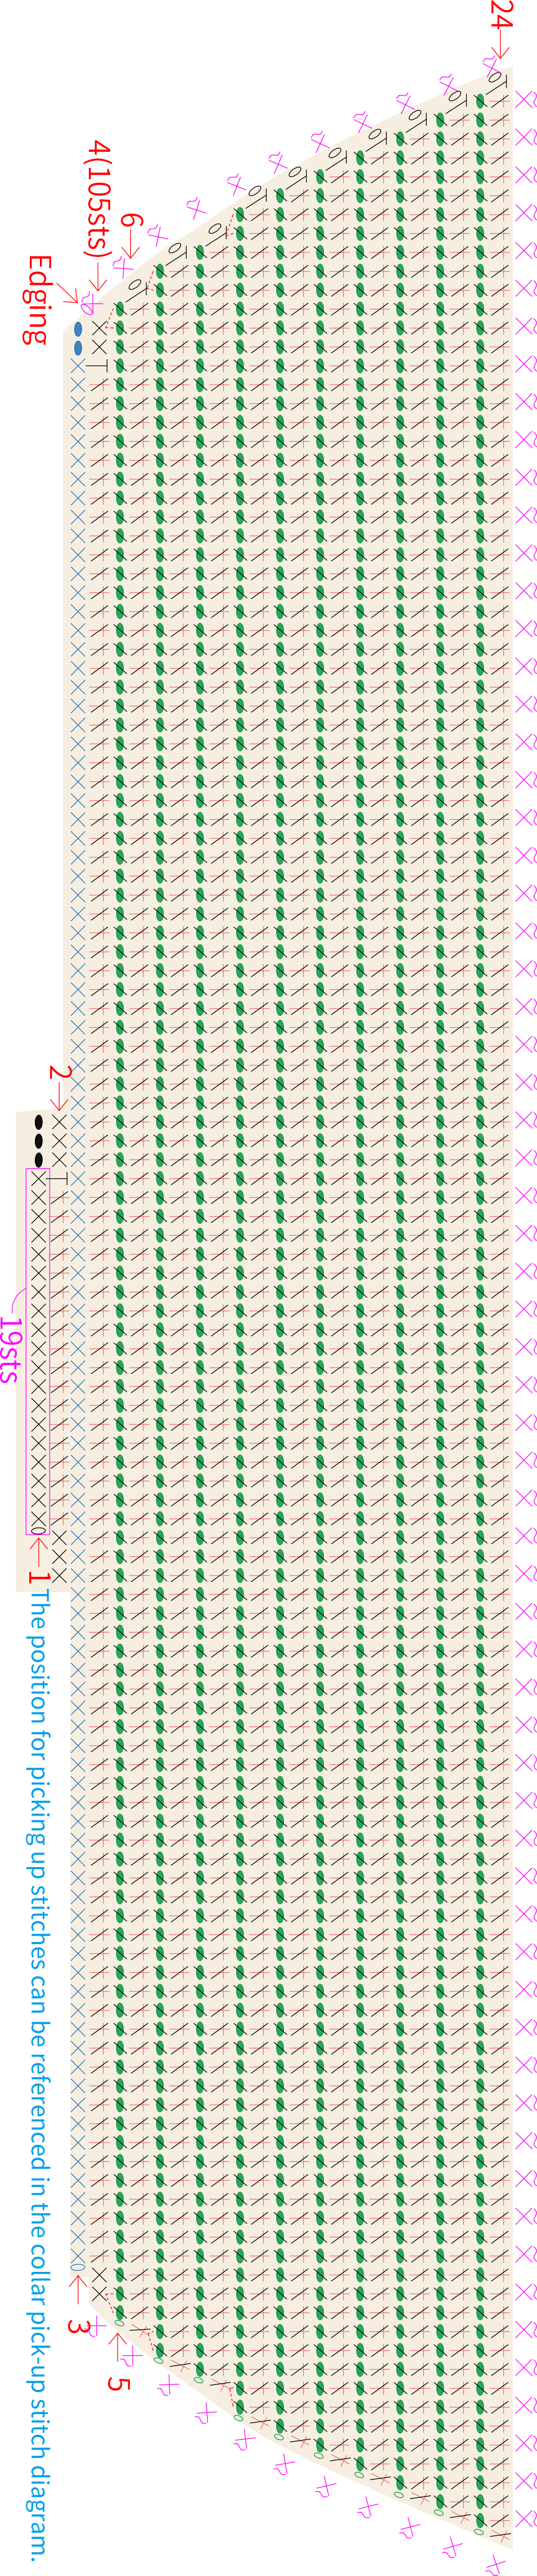
Part 6 CollarF 77' 18''
Divide into the main part and the edging. First, work the main part of the collar back and forth at the neck opening. After completing the crocheting, crochet a round of edging along the main part. Please refer to the video demonstration for more details.
Note: Leave about 30 centimeters of yarn tail at the beginning and end of the edging for sewing. The number of stitches can also be adjusted according to the actual situation, just crochet evenly.
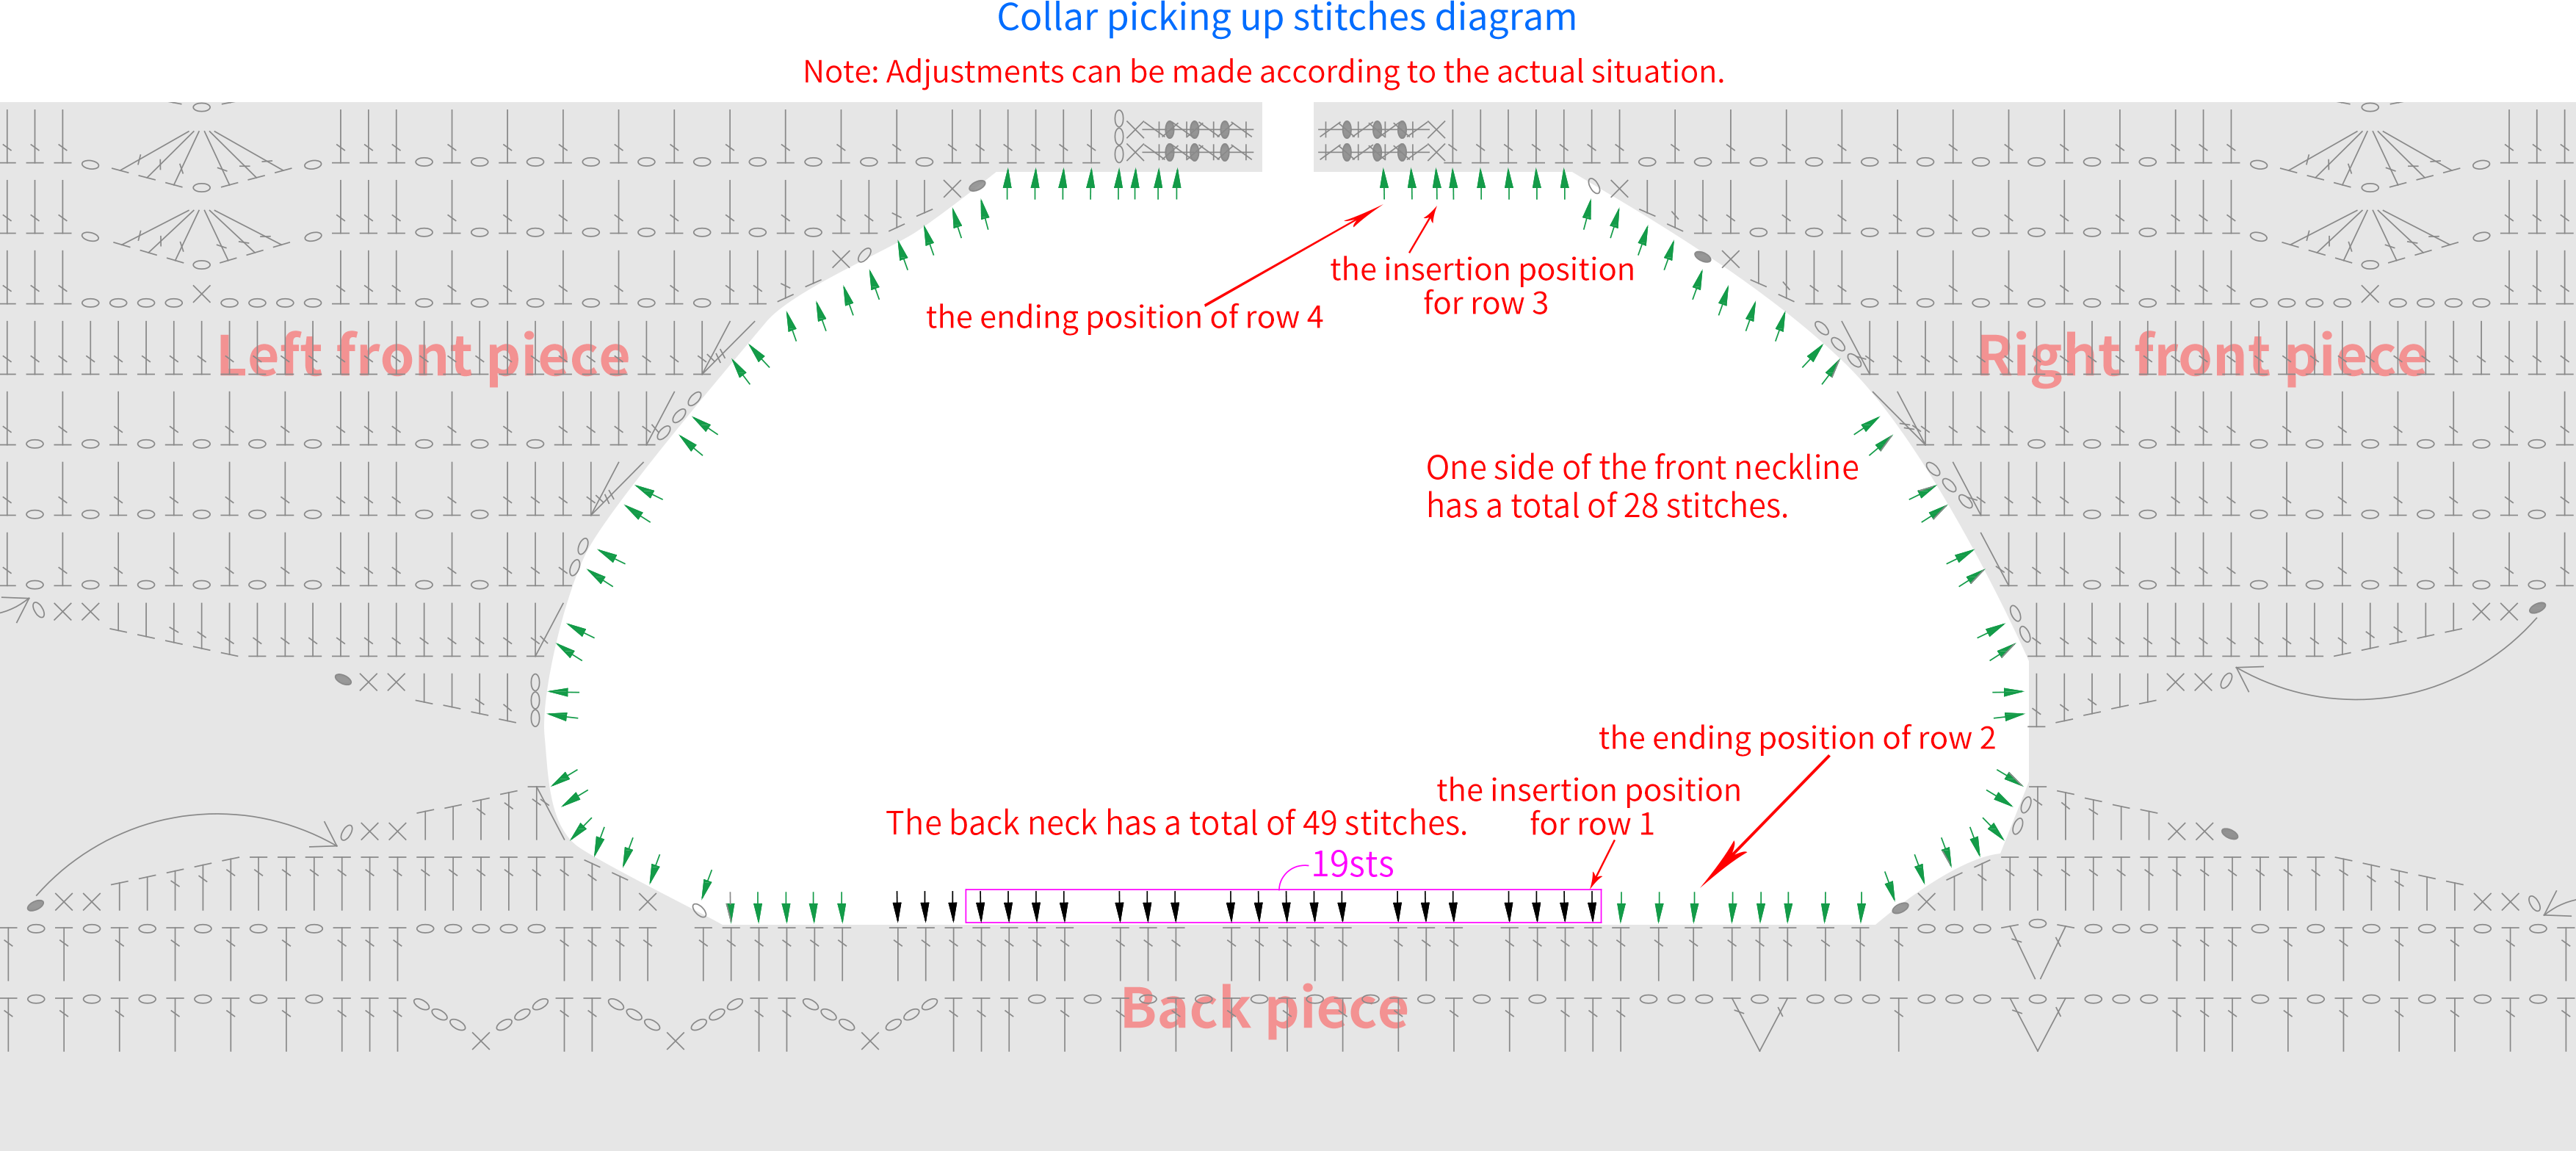
Made by the community