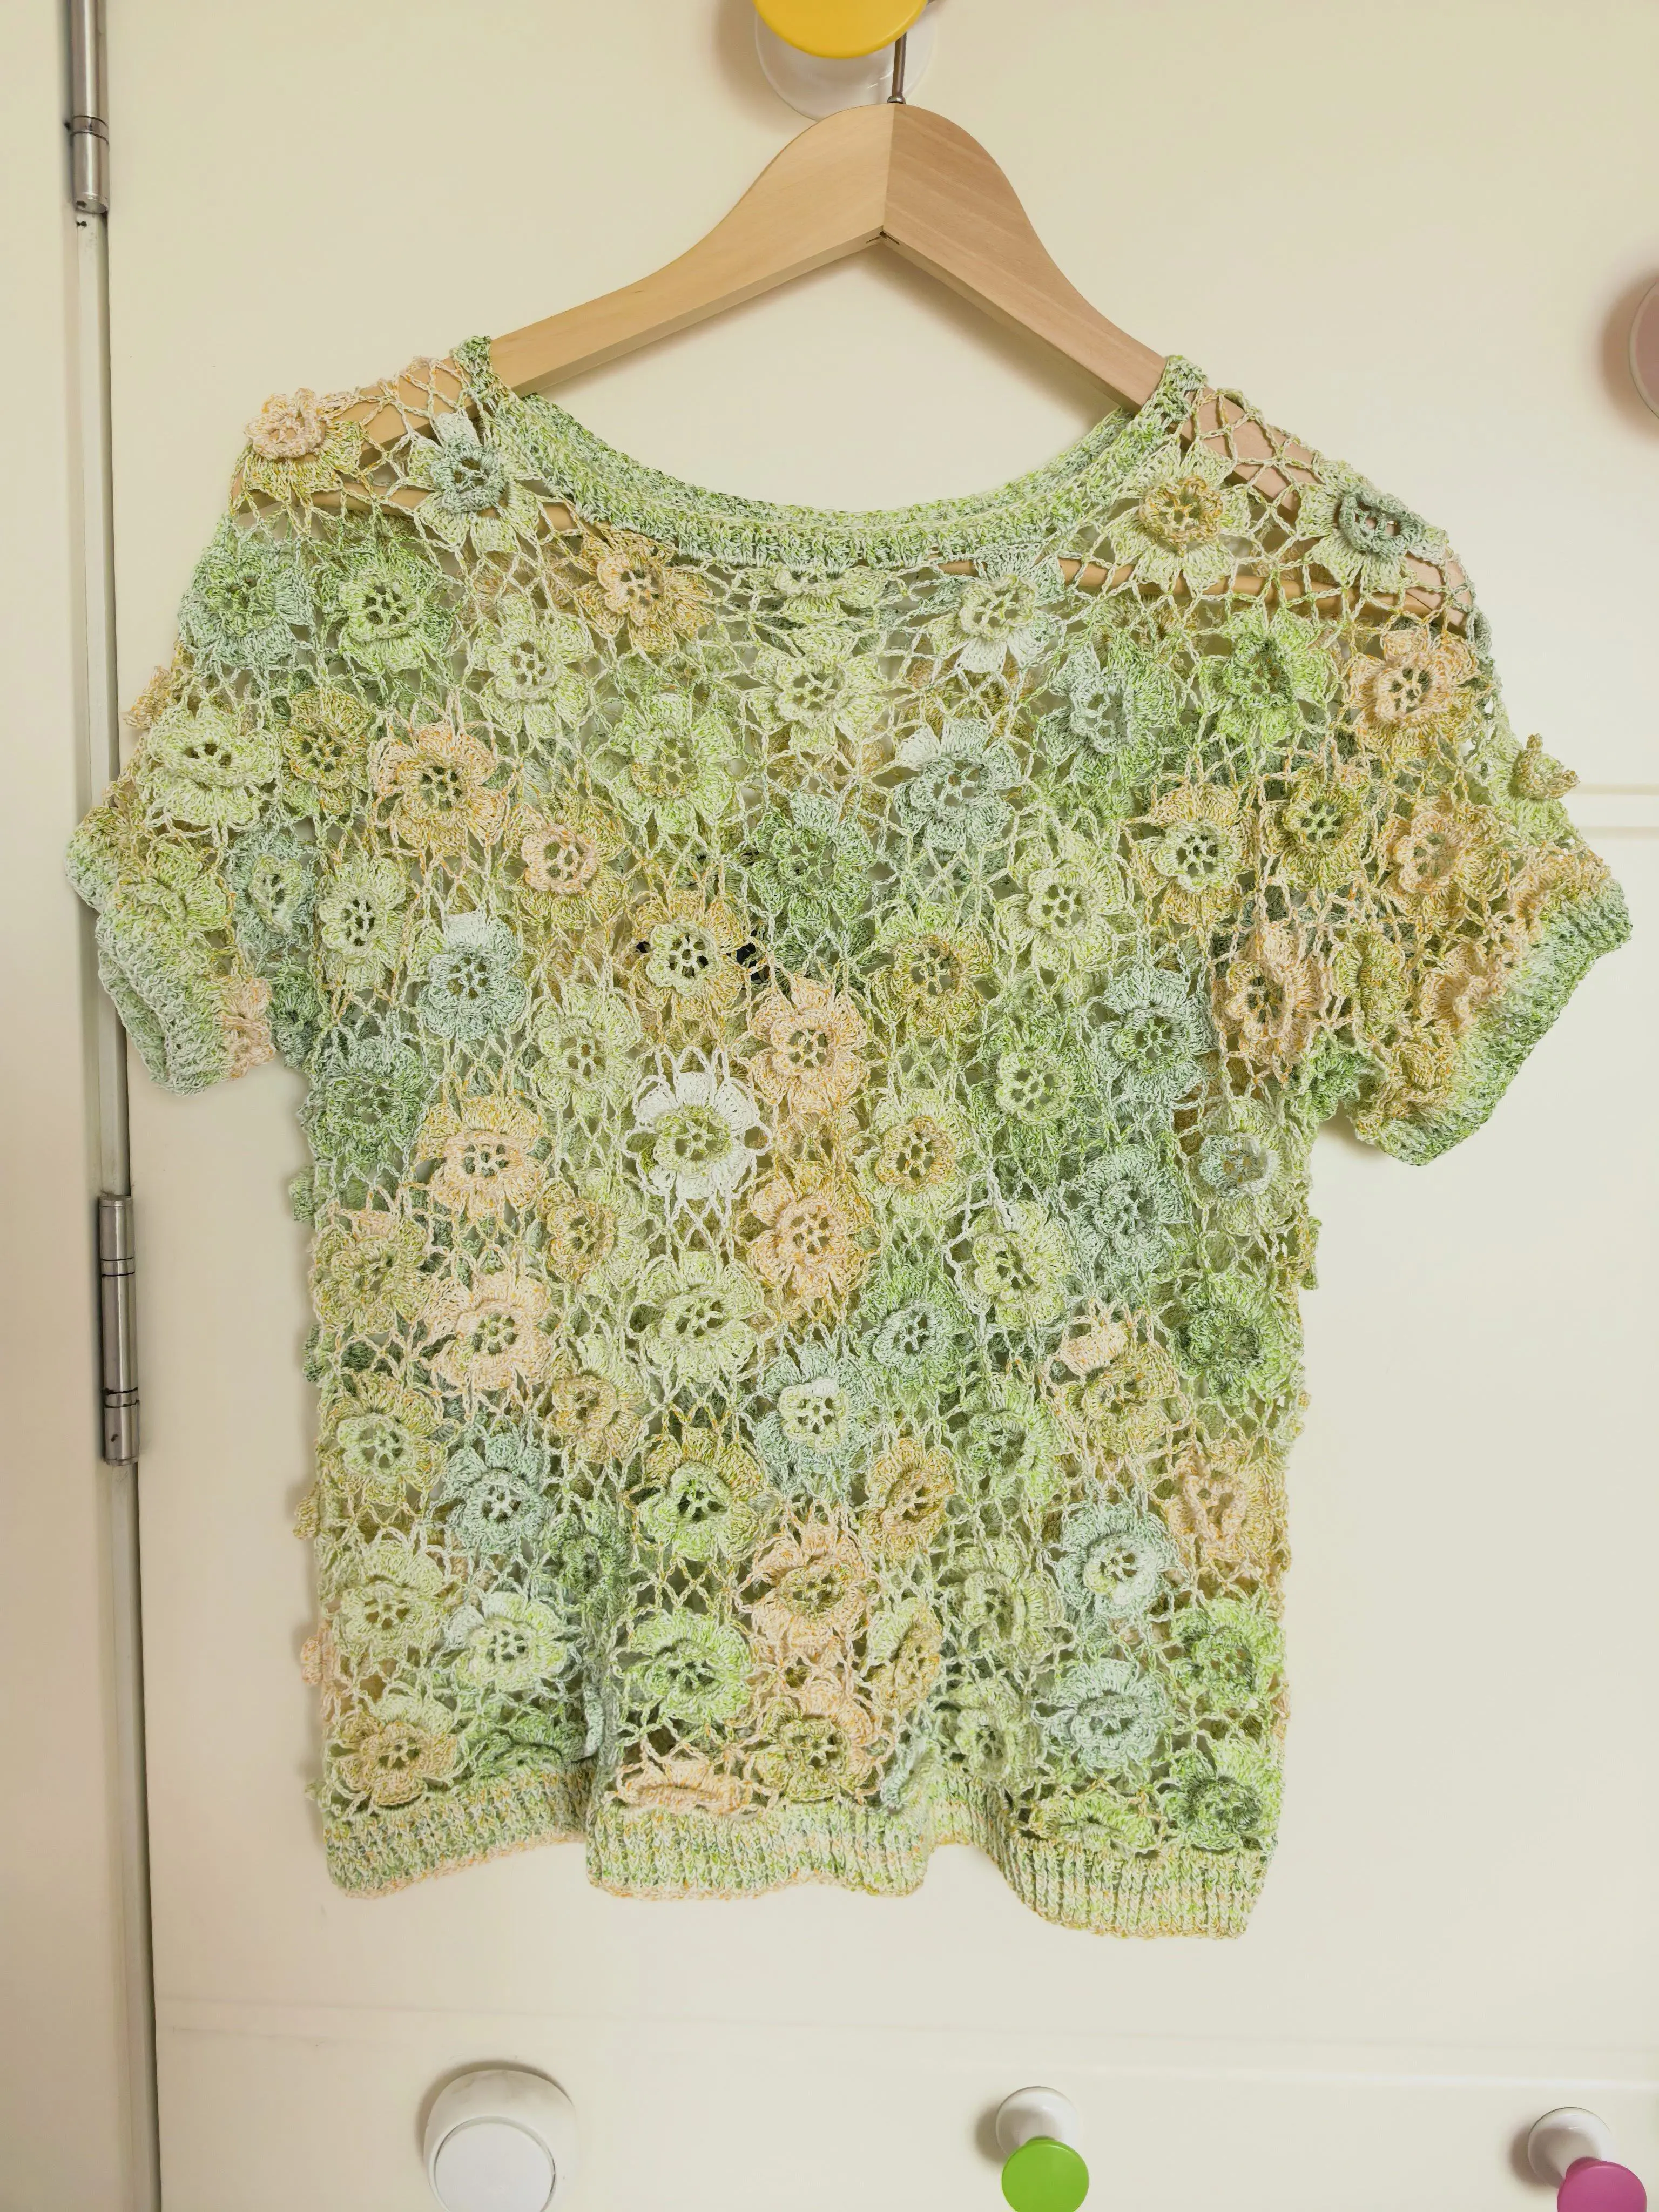
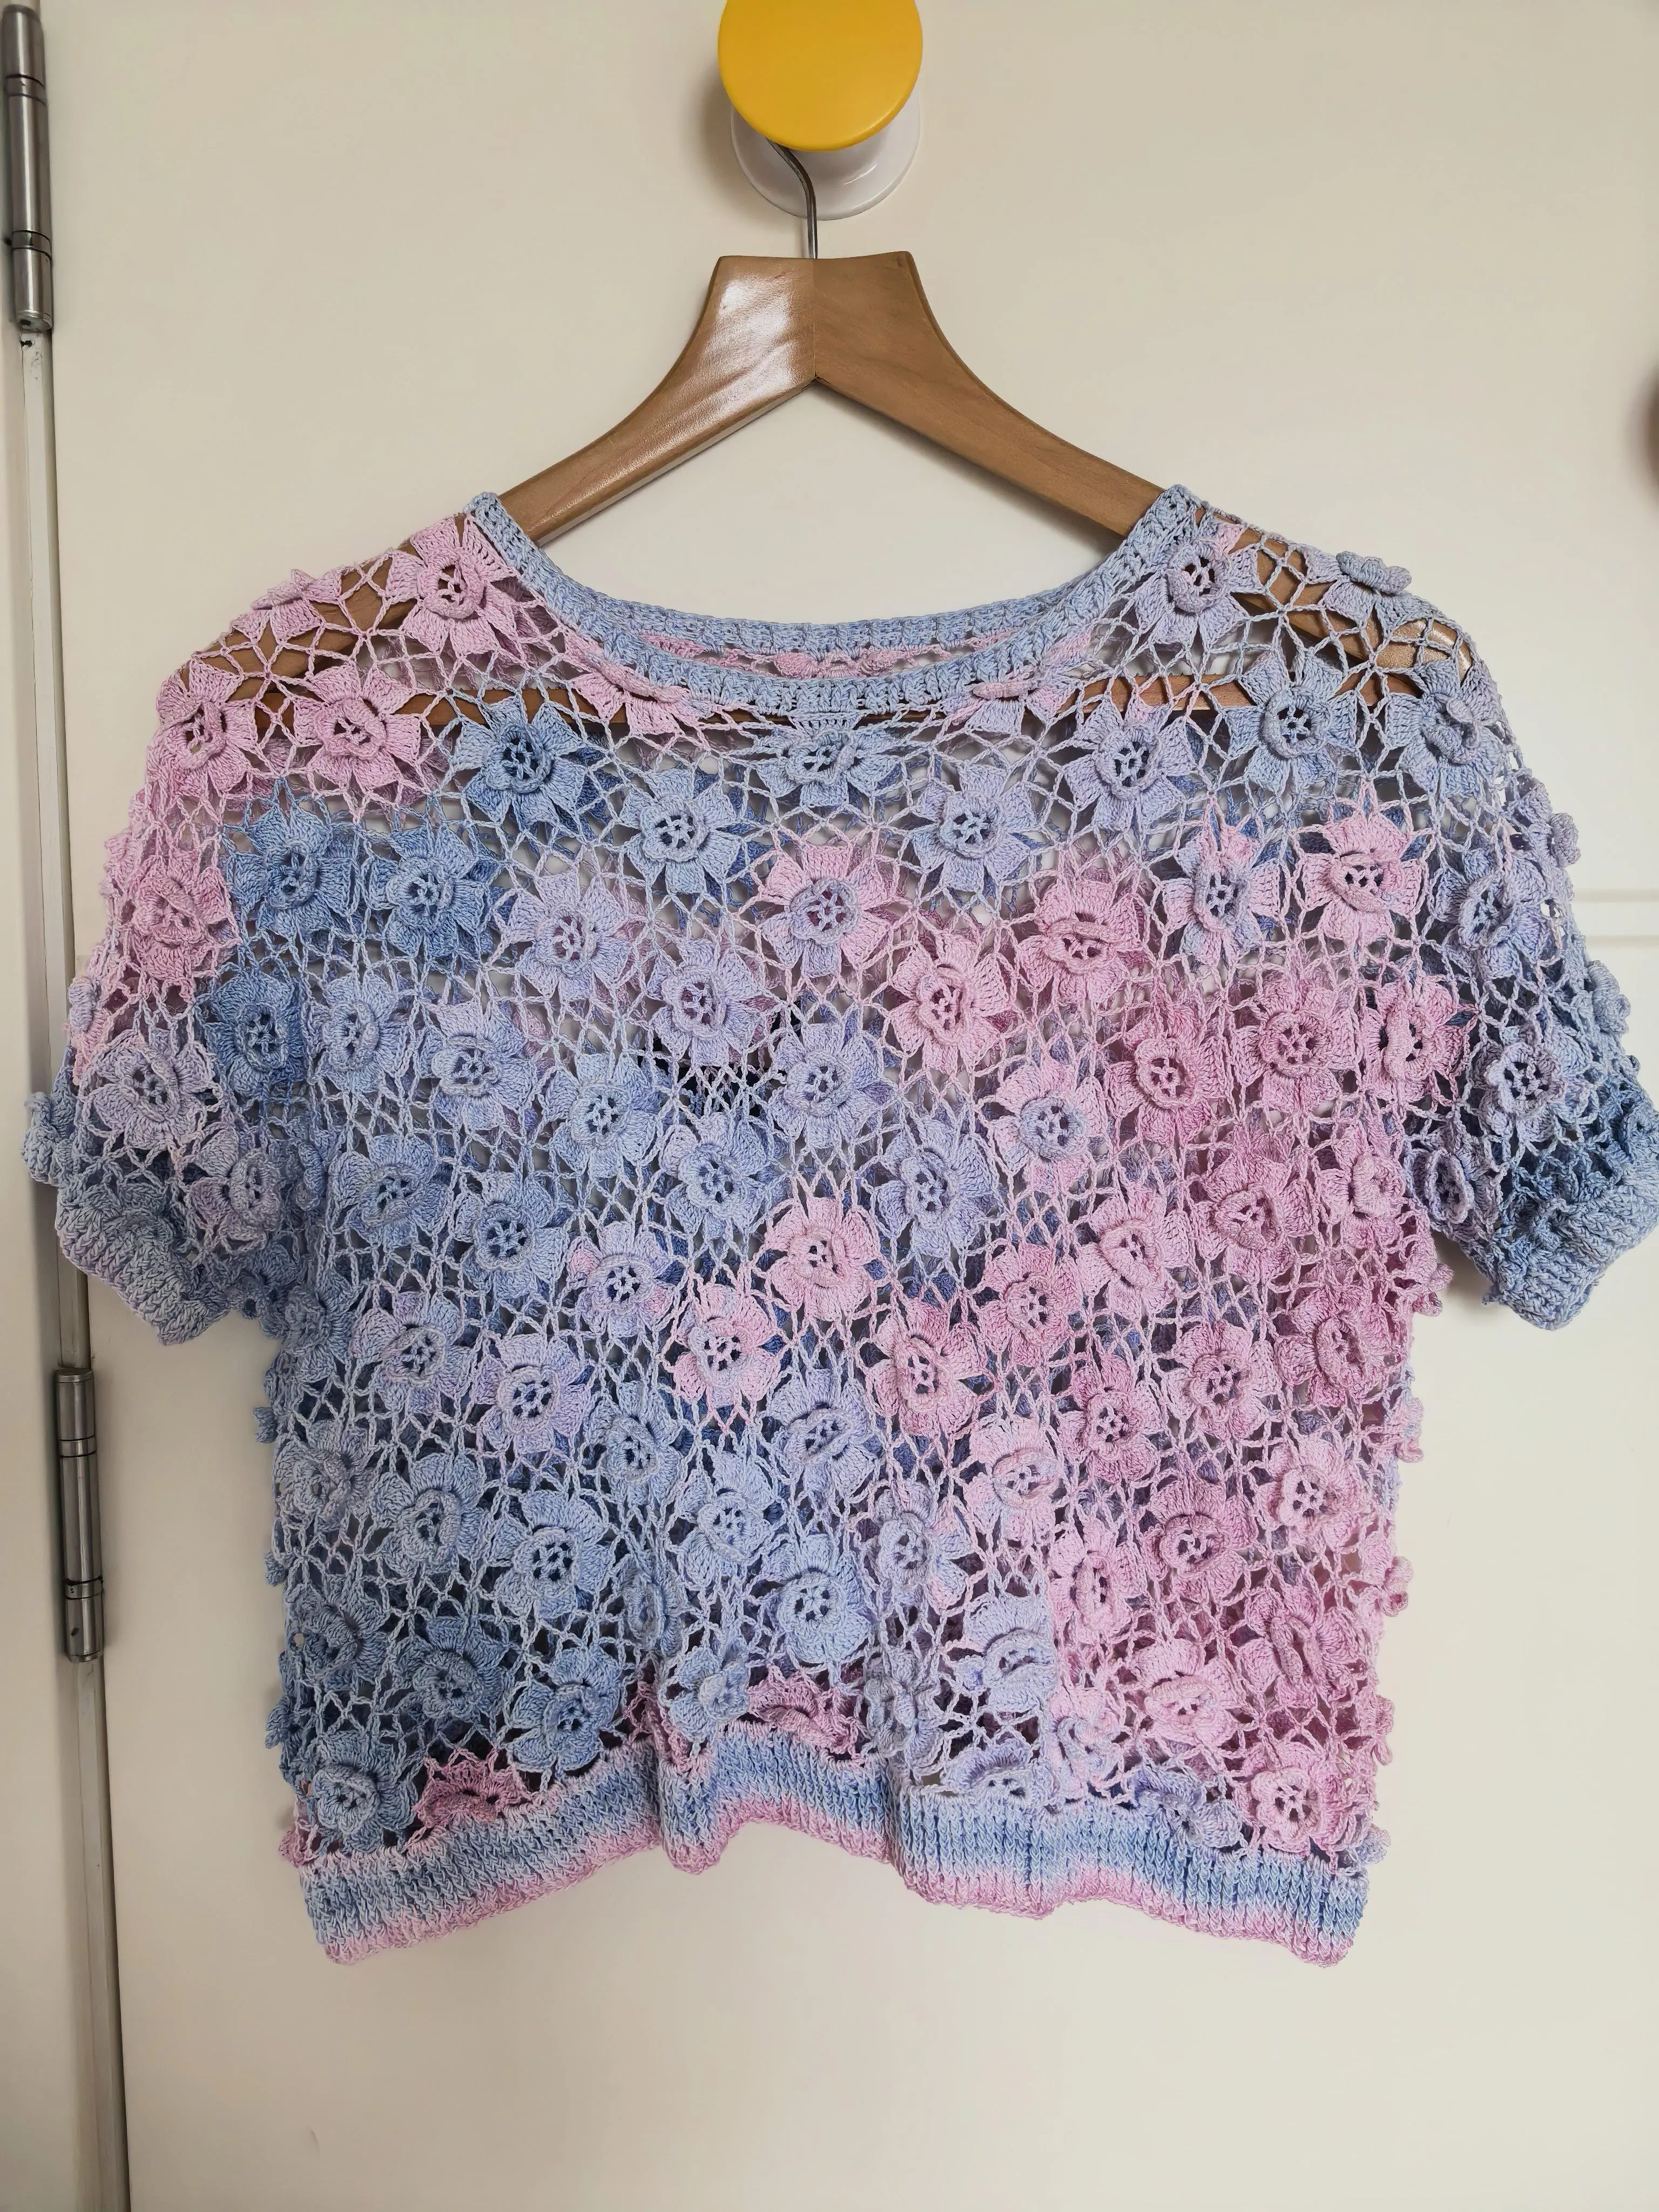
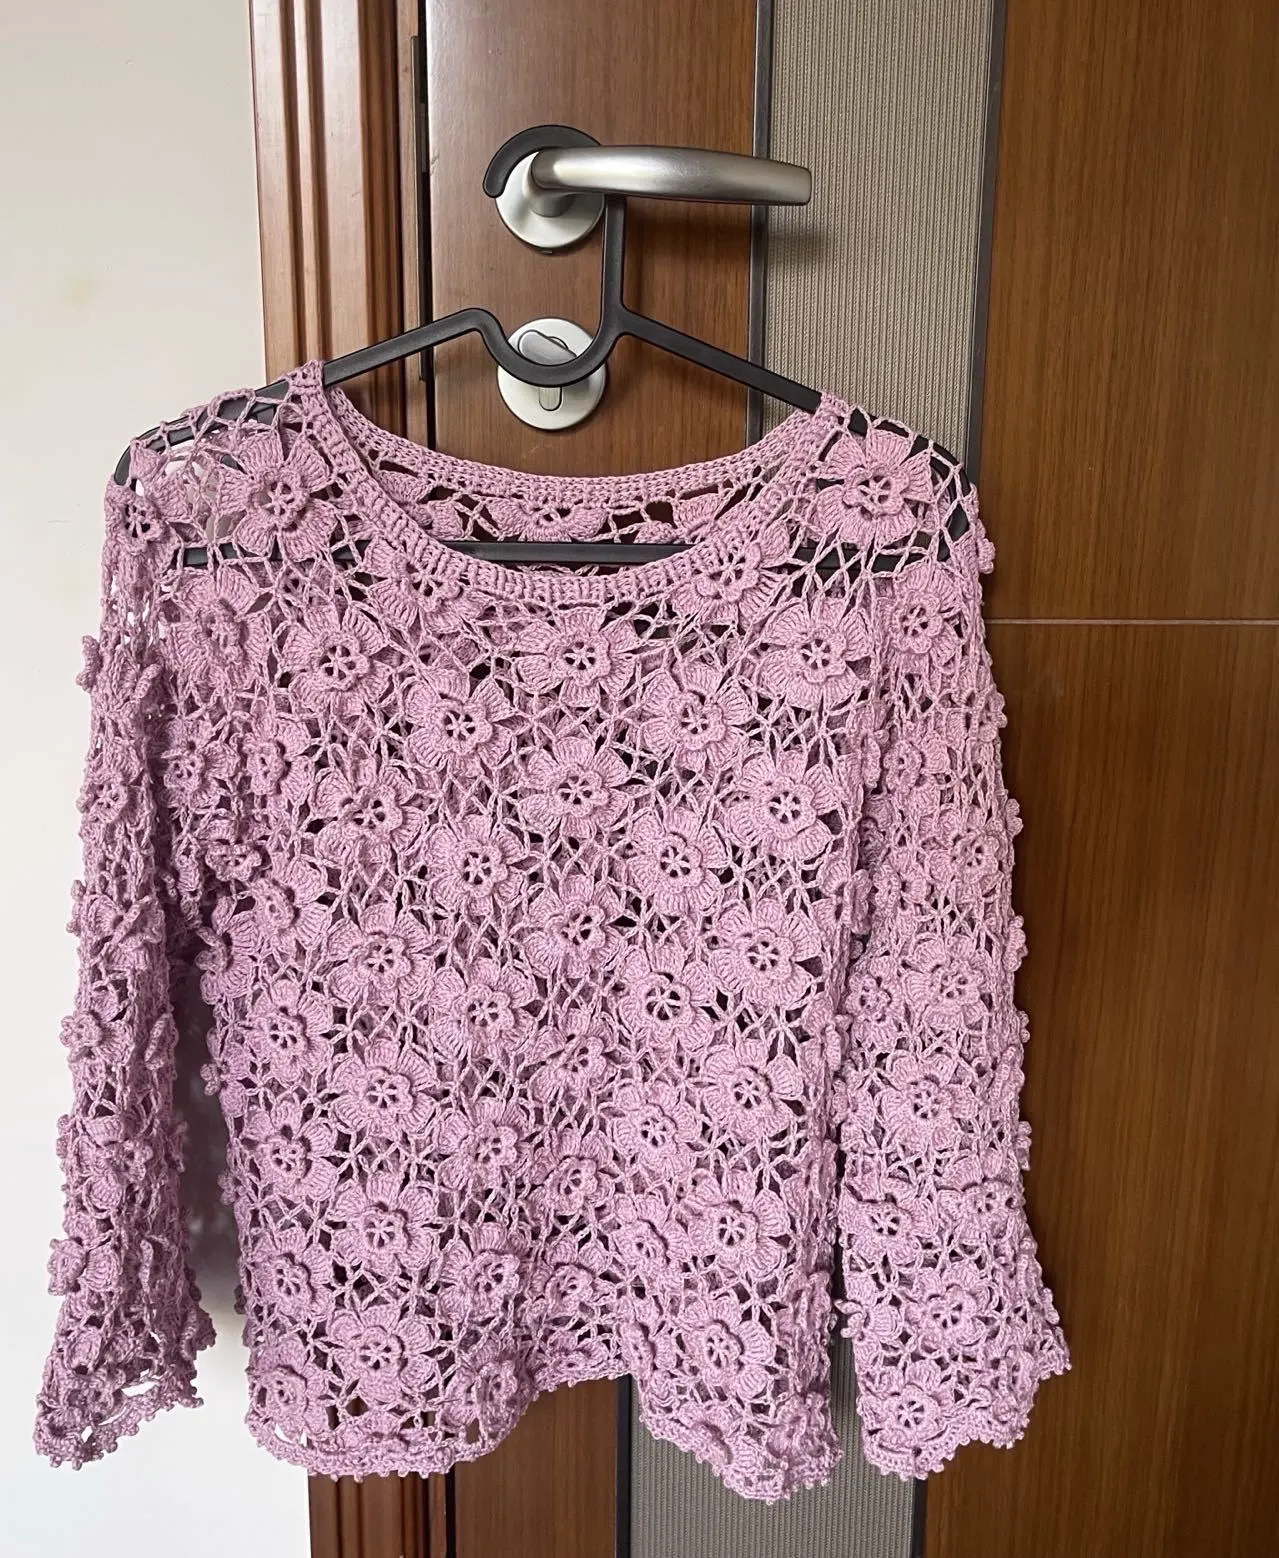
Clothes
Summer Blossom
Project preview
See the finished project
Pattern format
Instructions
Watch and follow
Video tutorial
| Style | Yarn | Color |
|---|---|---|
| Mint Lime-Long Sleeve Small Size | Combed 5# Lace |  504#Mint Lime x 7 504#Mint Lime x 7 |
| Mint Lime-Short Sleeve Small Size | Combed 5# Lace | 504#Mint Lime x 5 |
| Stream Moon-Long Sleeve Small Size | Combed 5# Lace |  07# Lilac Snow x 1 07# Lilac Snow x 1 508#Stream Moon x 7 508#Stream Moon x 7 |
| Stream Moon-Short Sleeve Small Size | Combed 5# Lace | 07# Lilac Snow x 1508#Stream Moon x 5 |
It consists of the body, sleeves, and edging. The difference between short and long sleeves lies in the number of rounds used for the sleeve motifs.
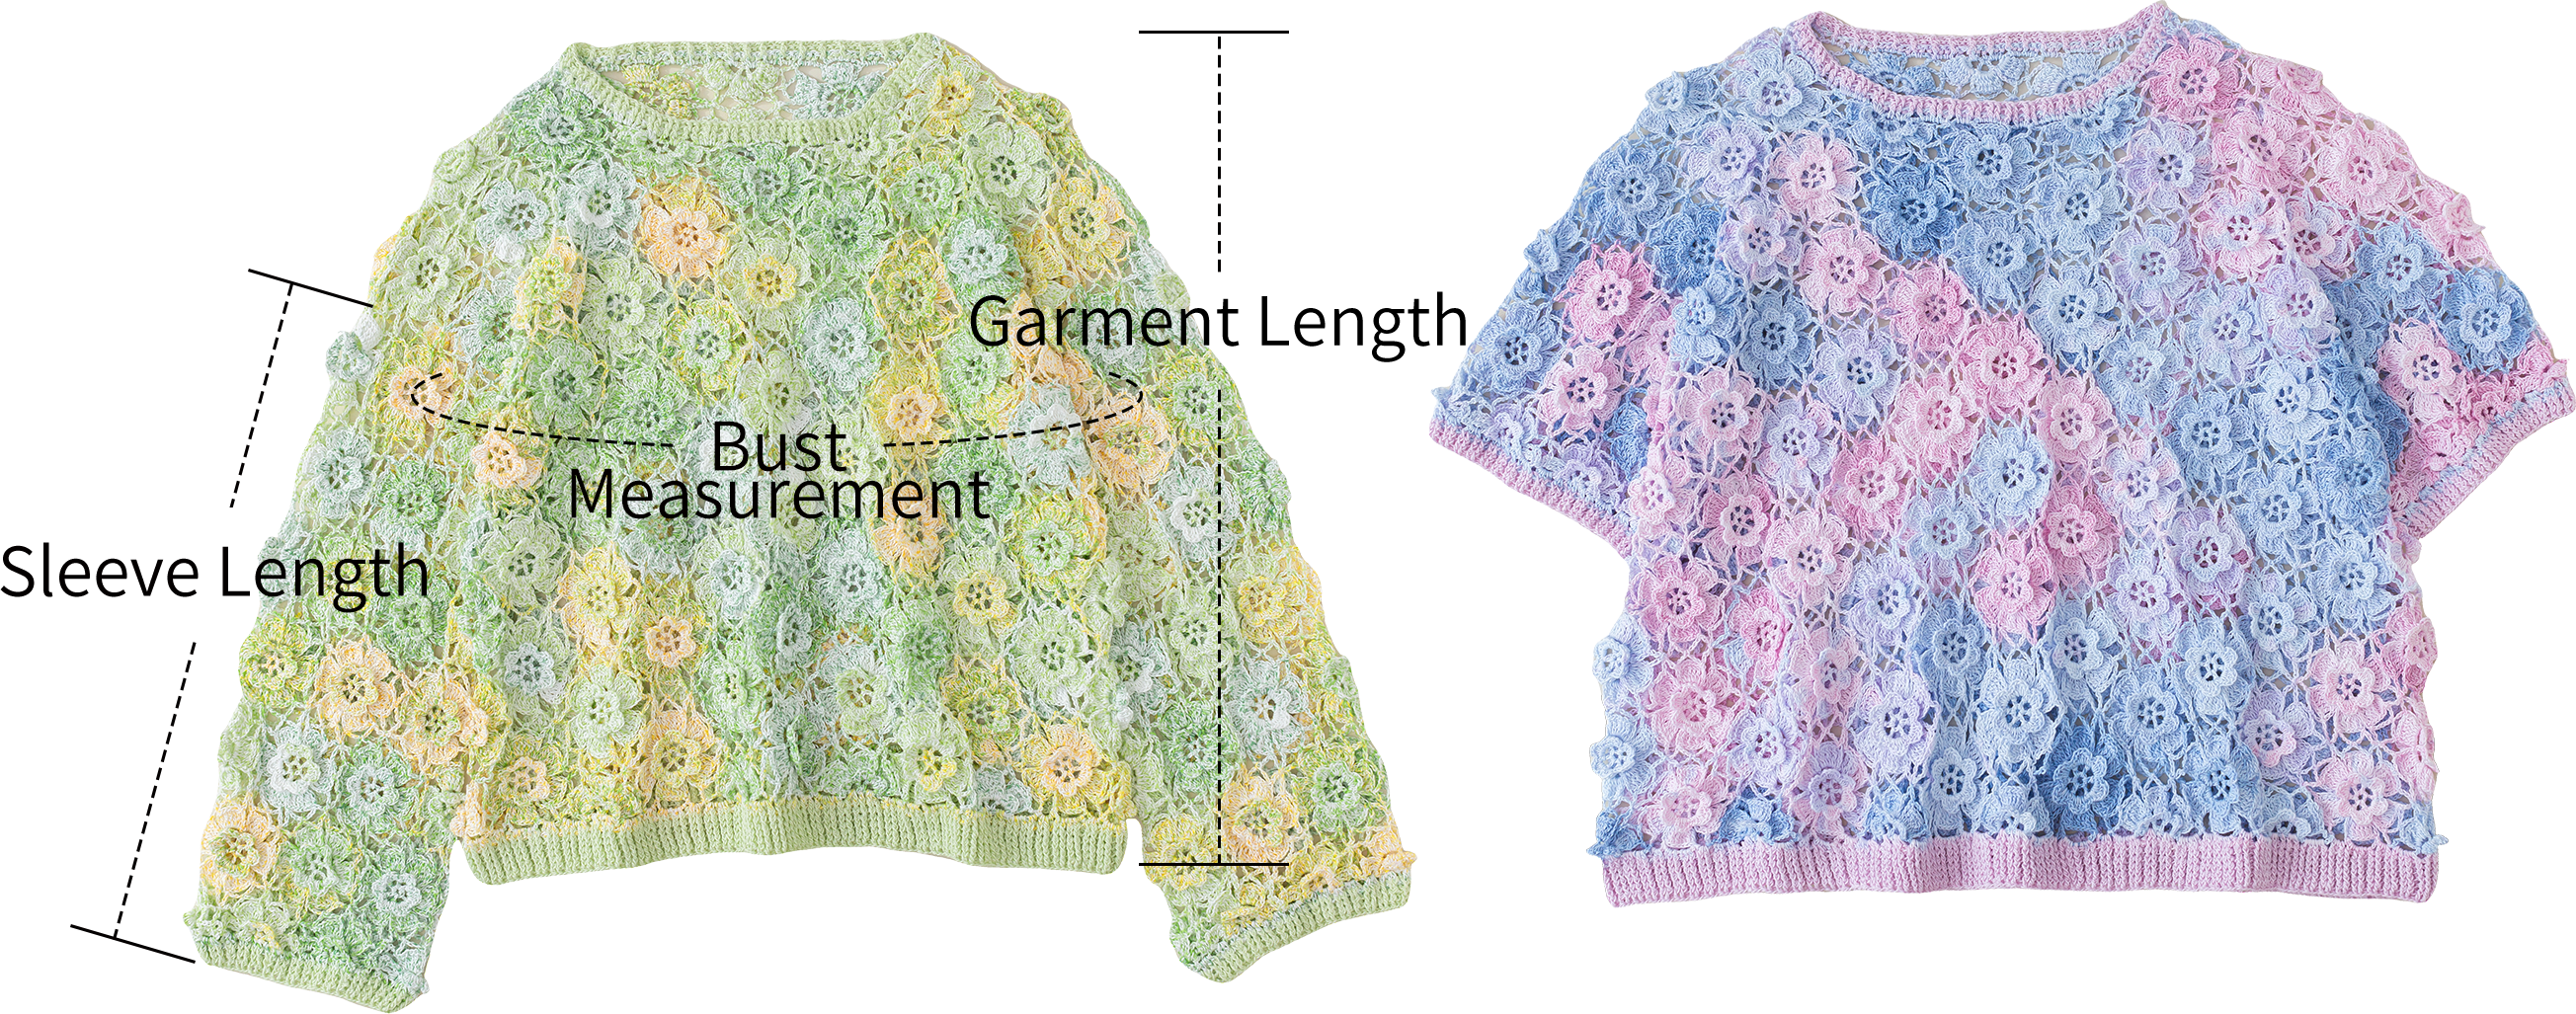
| Unit: cm | bust | length of the garment | sleeve length |
| Small size | 102 | 44 | 33 |
Note: Hand-measured, with a tolerance of 1-2 cm.
Due to differences in individual tension, the sample size is for reference only.
Yarn: Combed 5# Lace
Tools: 2.00 mm crochet hook

The tutorial is demonstrated in the smallest size. Please refer to the corresponding diagrams for other sizes.
Structure diagram
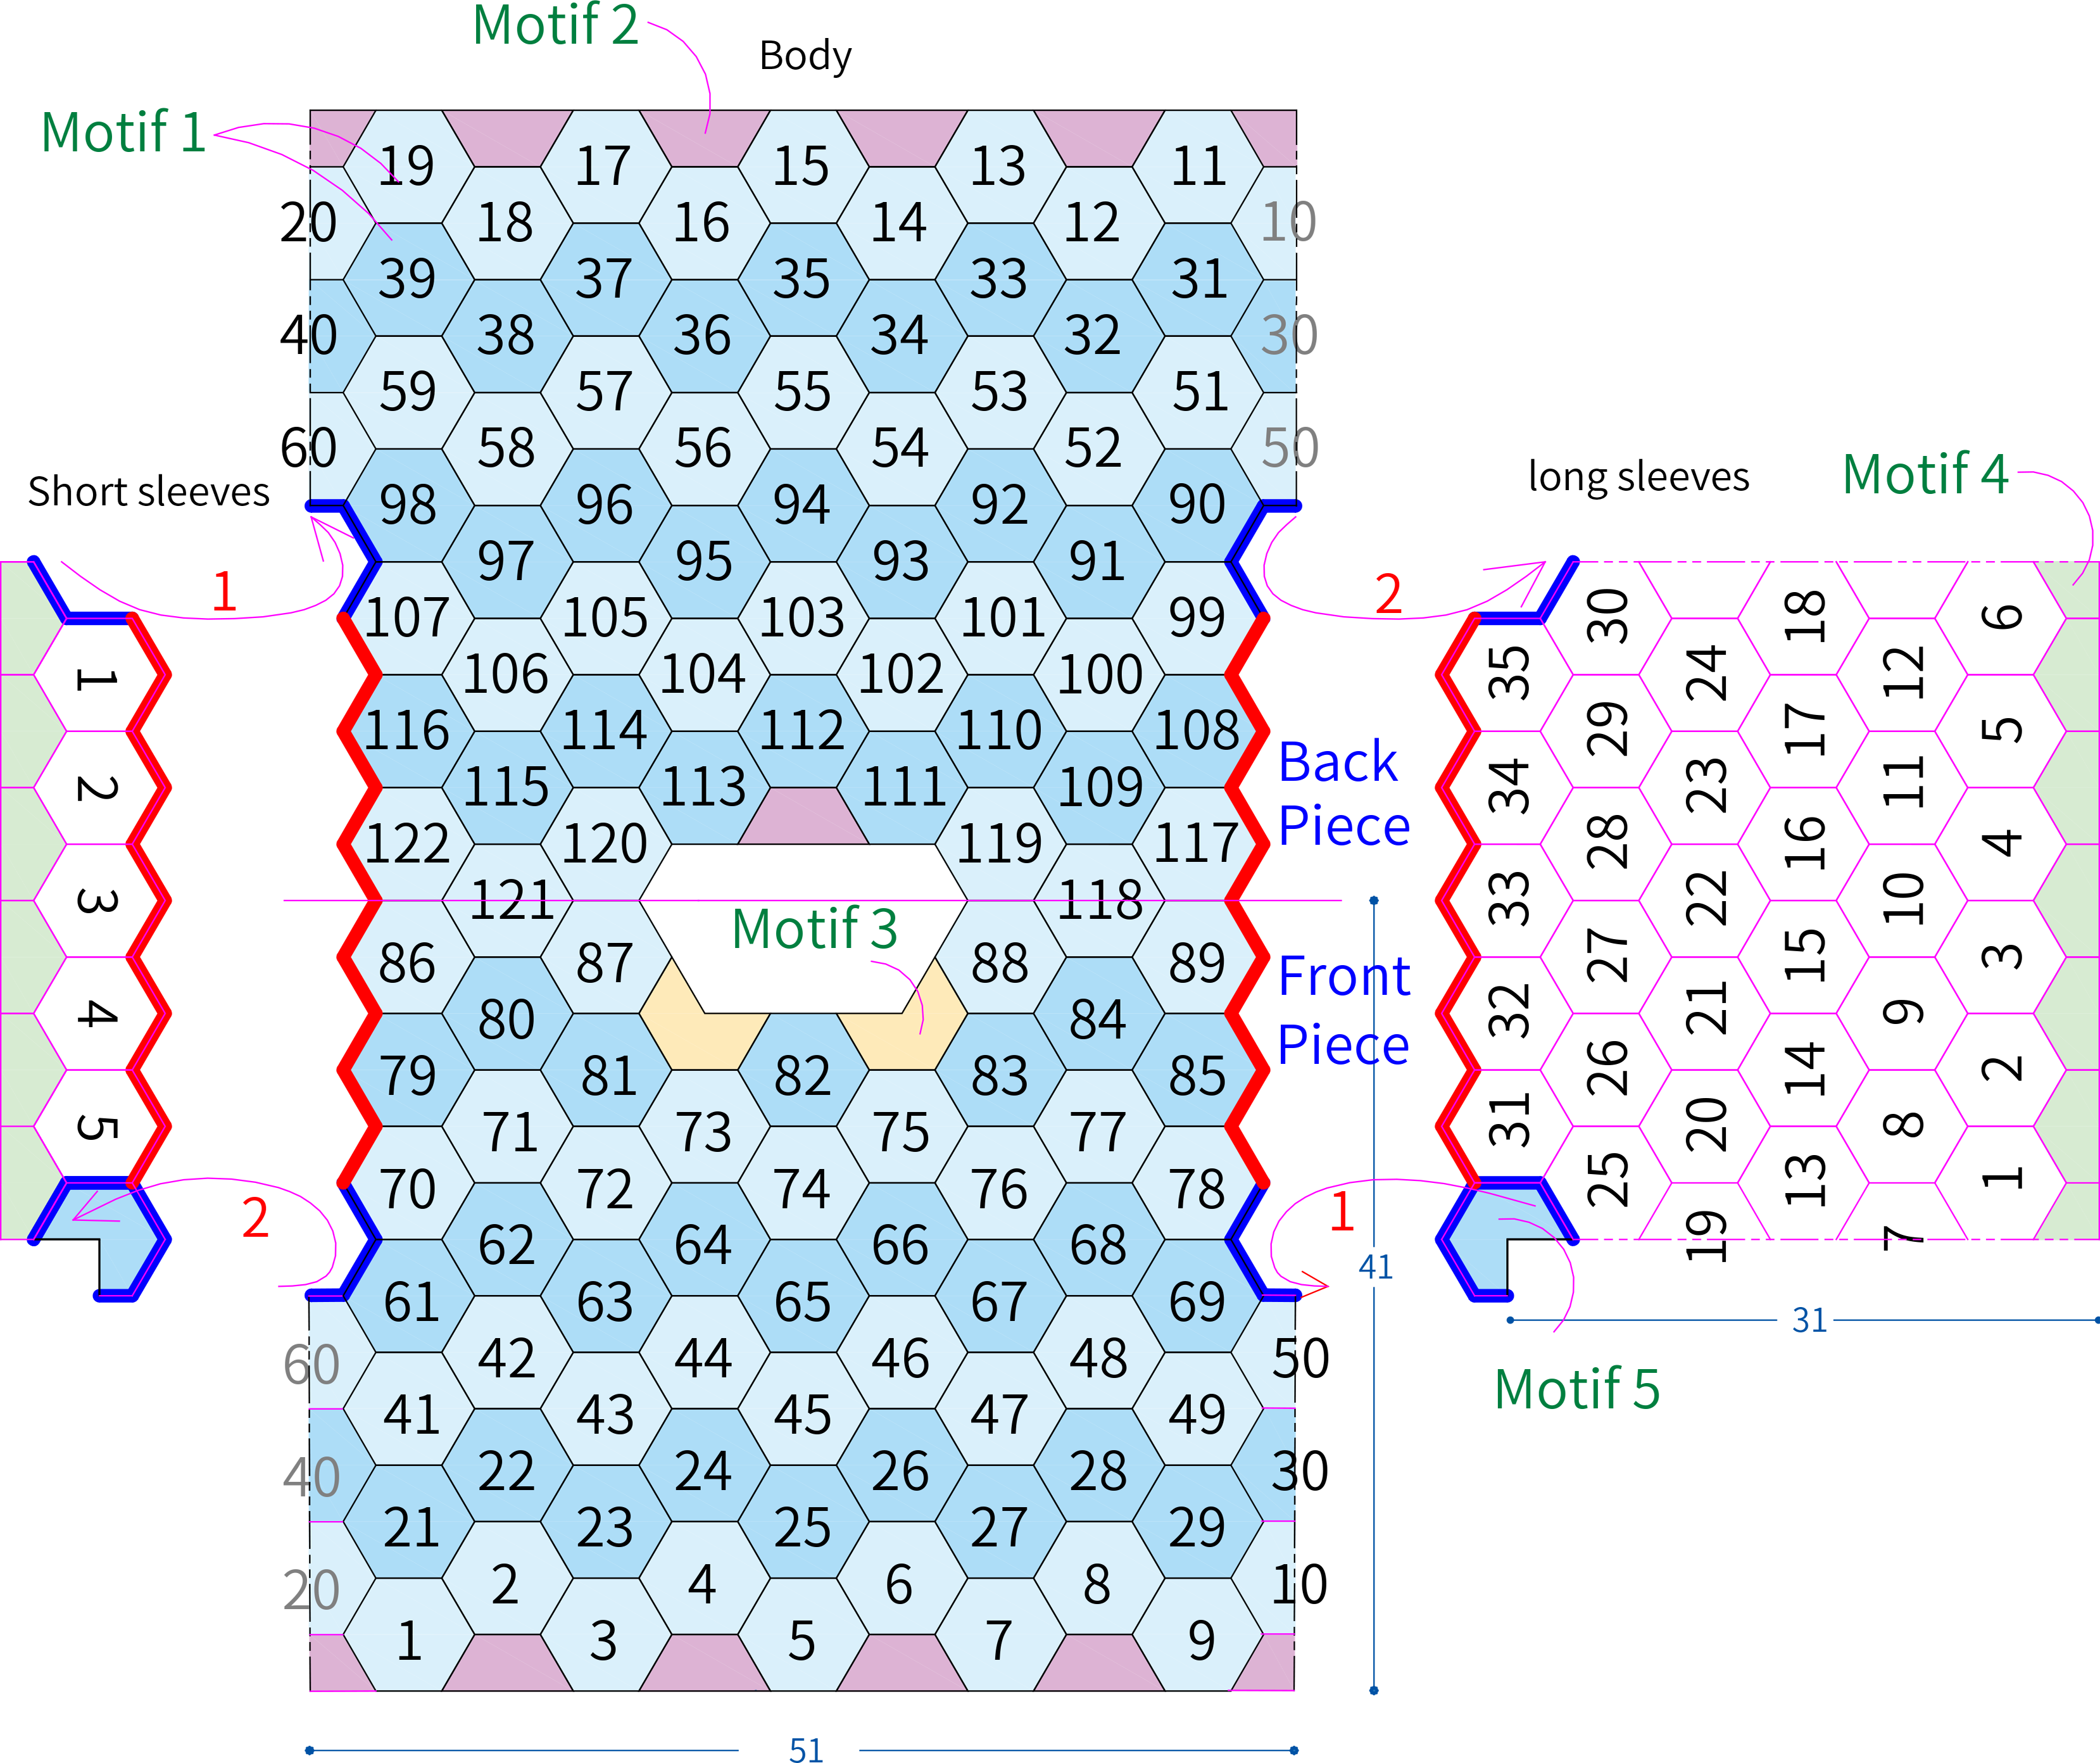
Note:
1. For the body, first sew all of motif one together, then attach motif two and three; for the sleeves, first sew motif four, then attach the remaining motifs.
2. When crocheting slip stitches on the wrong side, you need to crochet the opposite stitches as shown in the chart.
3. The sleeves for both long and short versions are shown in the same diagram. When crocheting, pay attention to making both sides of the sleeves symmetrical.

Note: 1. This pattern is making in Chinese crochet pattern terms, and the stitch name is written using American terminology. All measurements in charts are in cm.
Chart Key








| Overall Yarn Chart | ||
| Part | rounds | color combination |
| motif | Variegated lace | |
| neckline edging | Rnd 1 | Variegated lace |
| Rounds 2–3 | Pearl lace | |
| crochet the edging | Rnd 1 | Variegated lace |
| Rounds 2–7 | Pearl lace | |
| crochet the edging for the sleeve cuff | Rnd 1 | Variegated lace |
| Rounds 2–4 | Pearl lace | |
PART1 BodyA 00' 47''
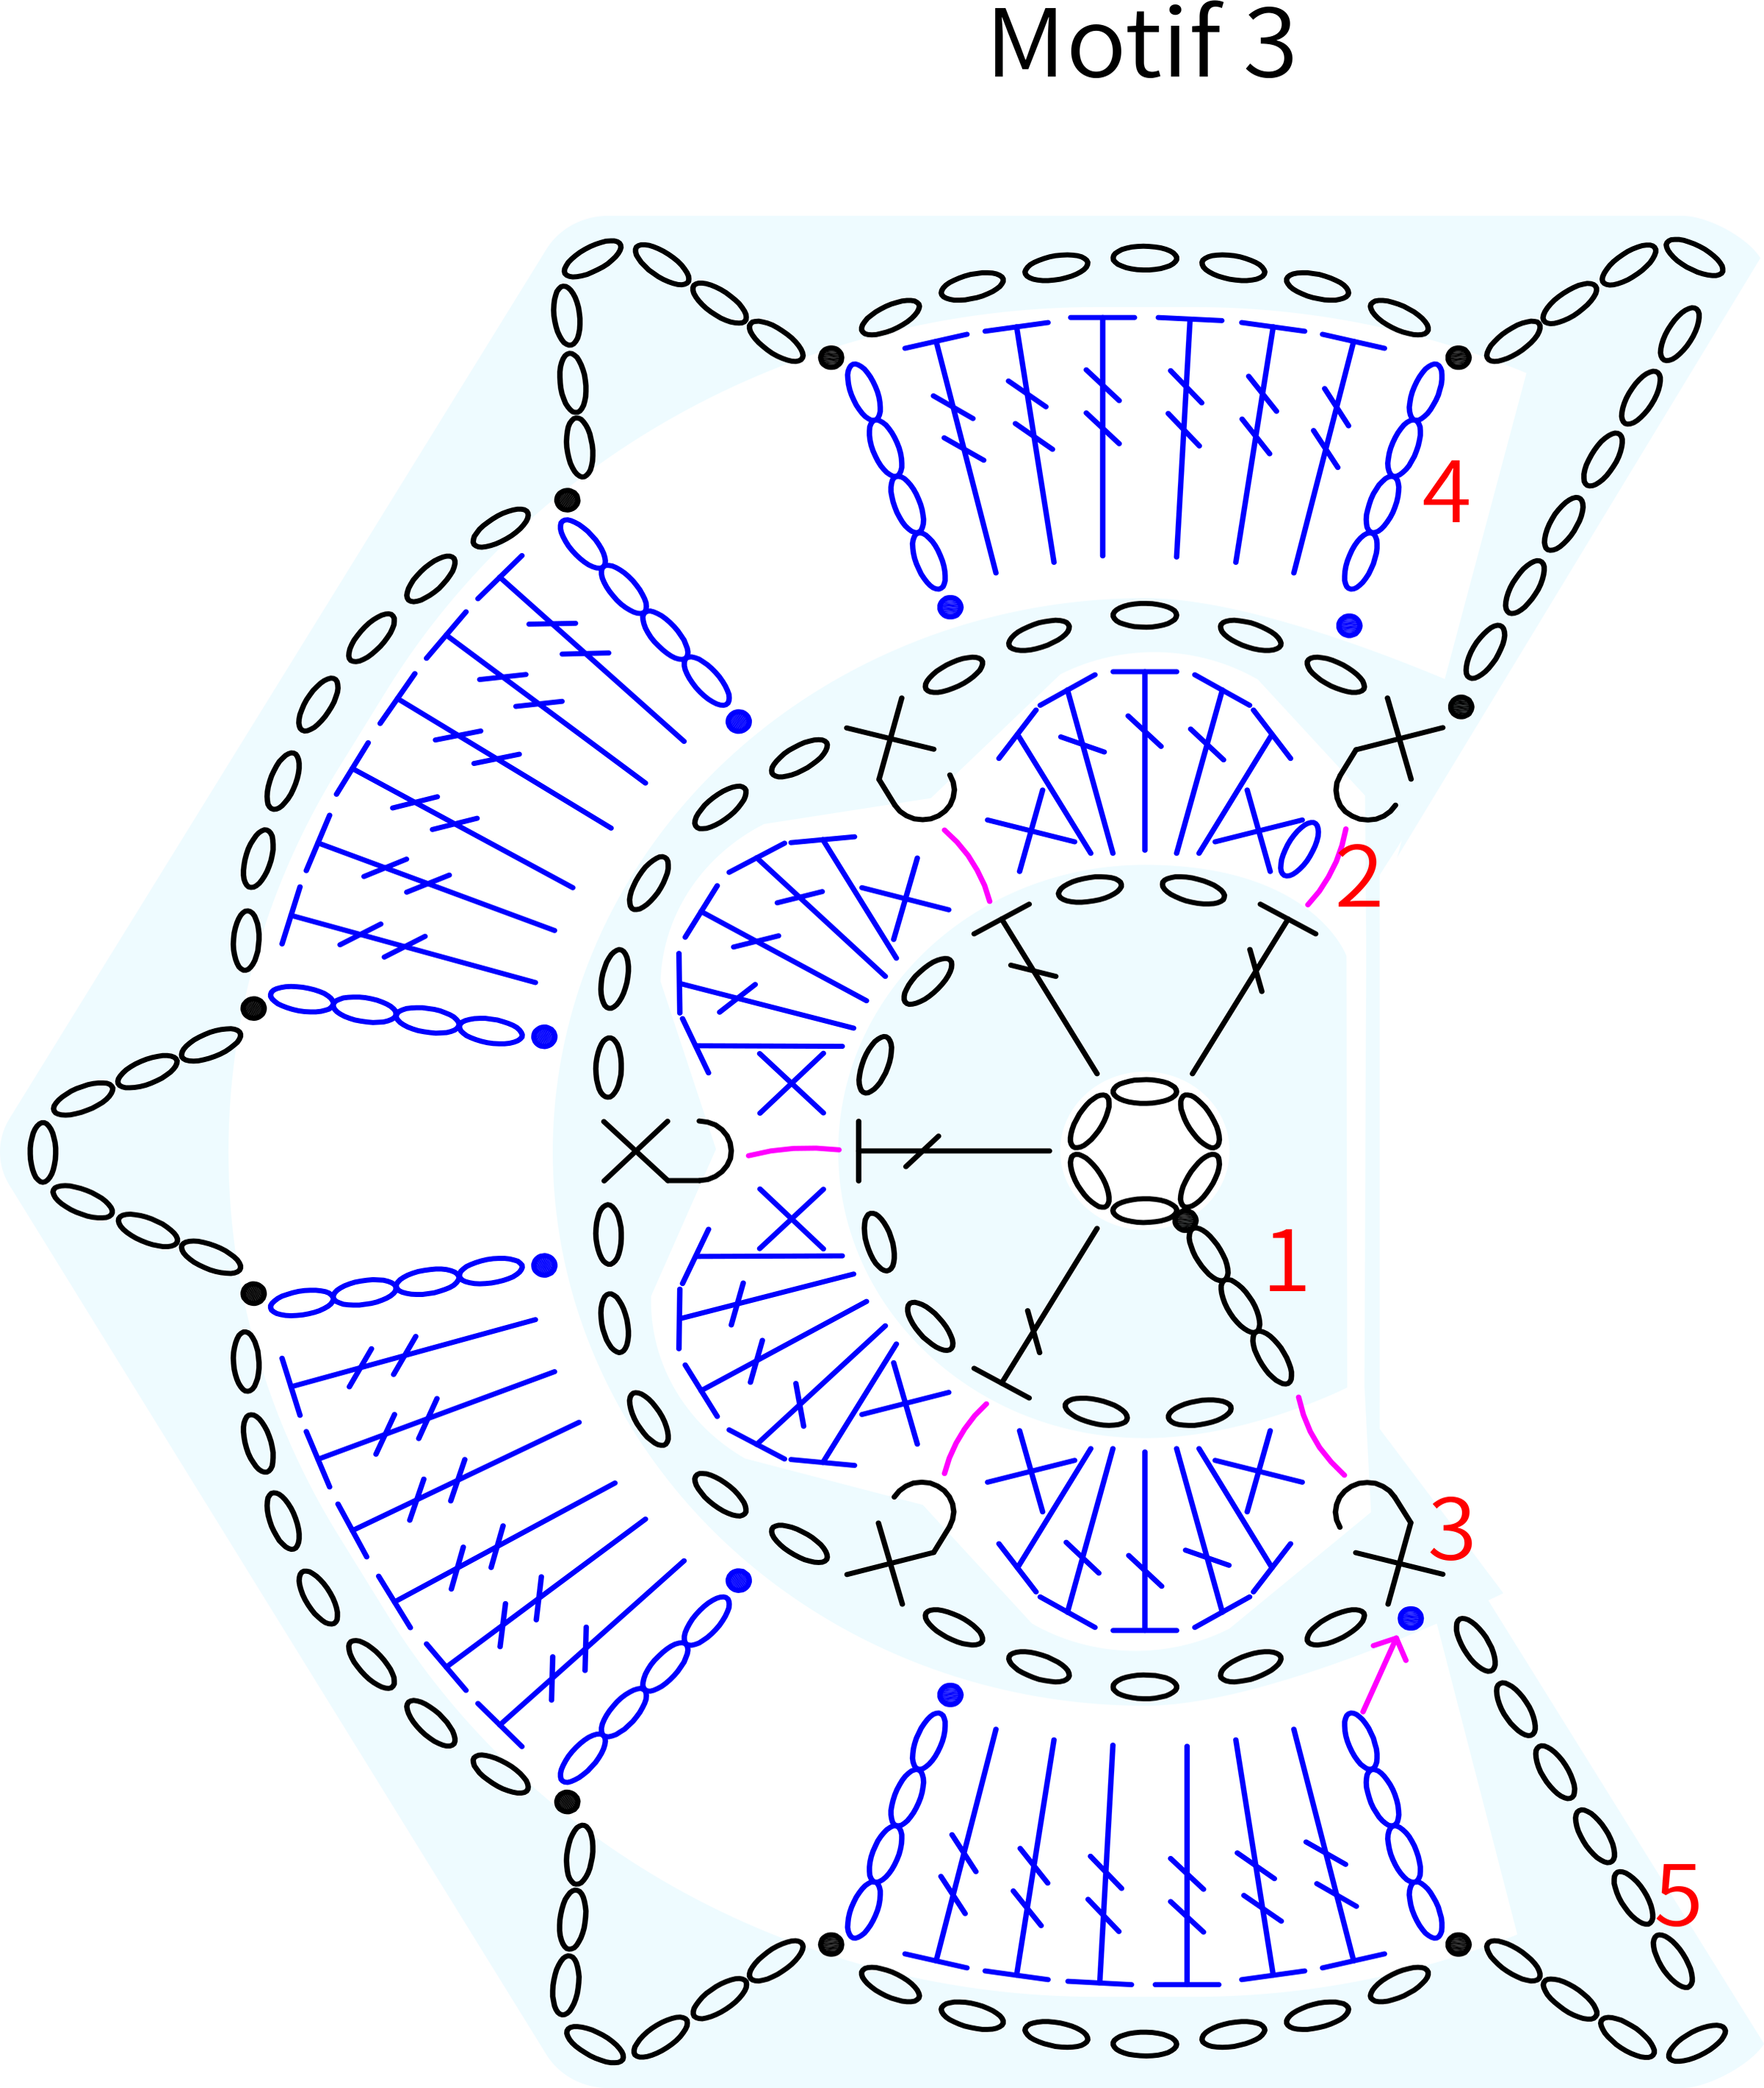
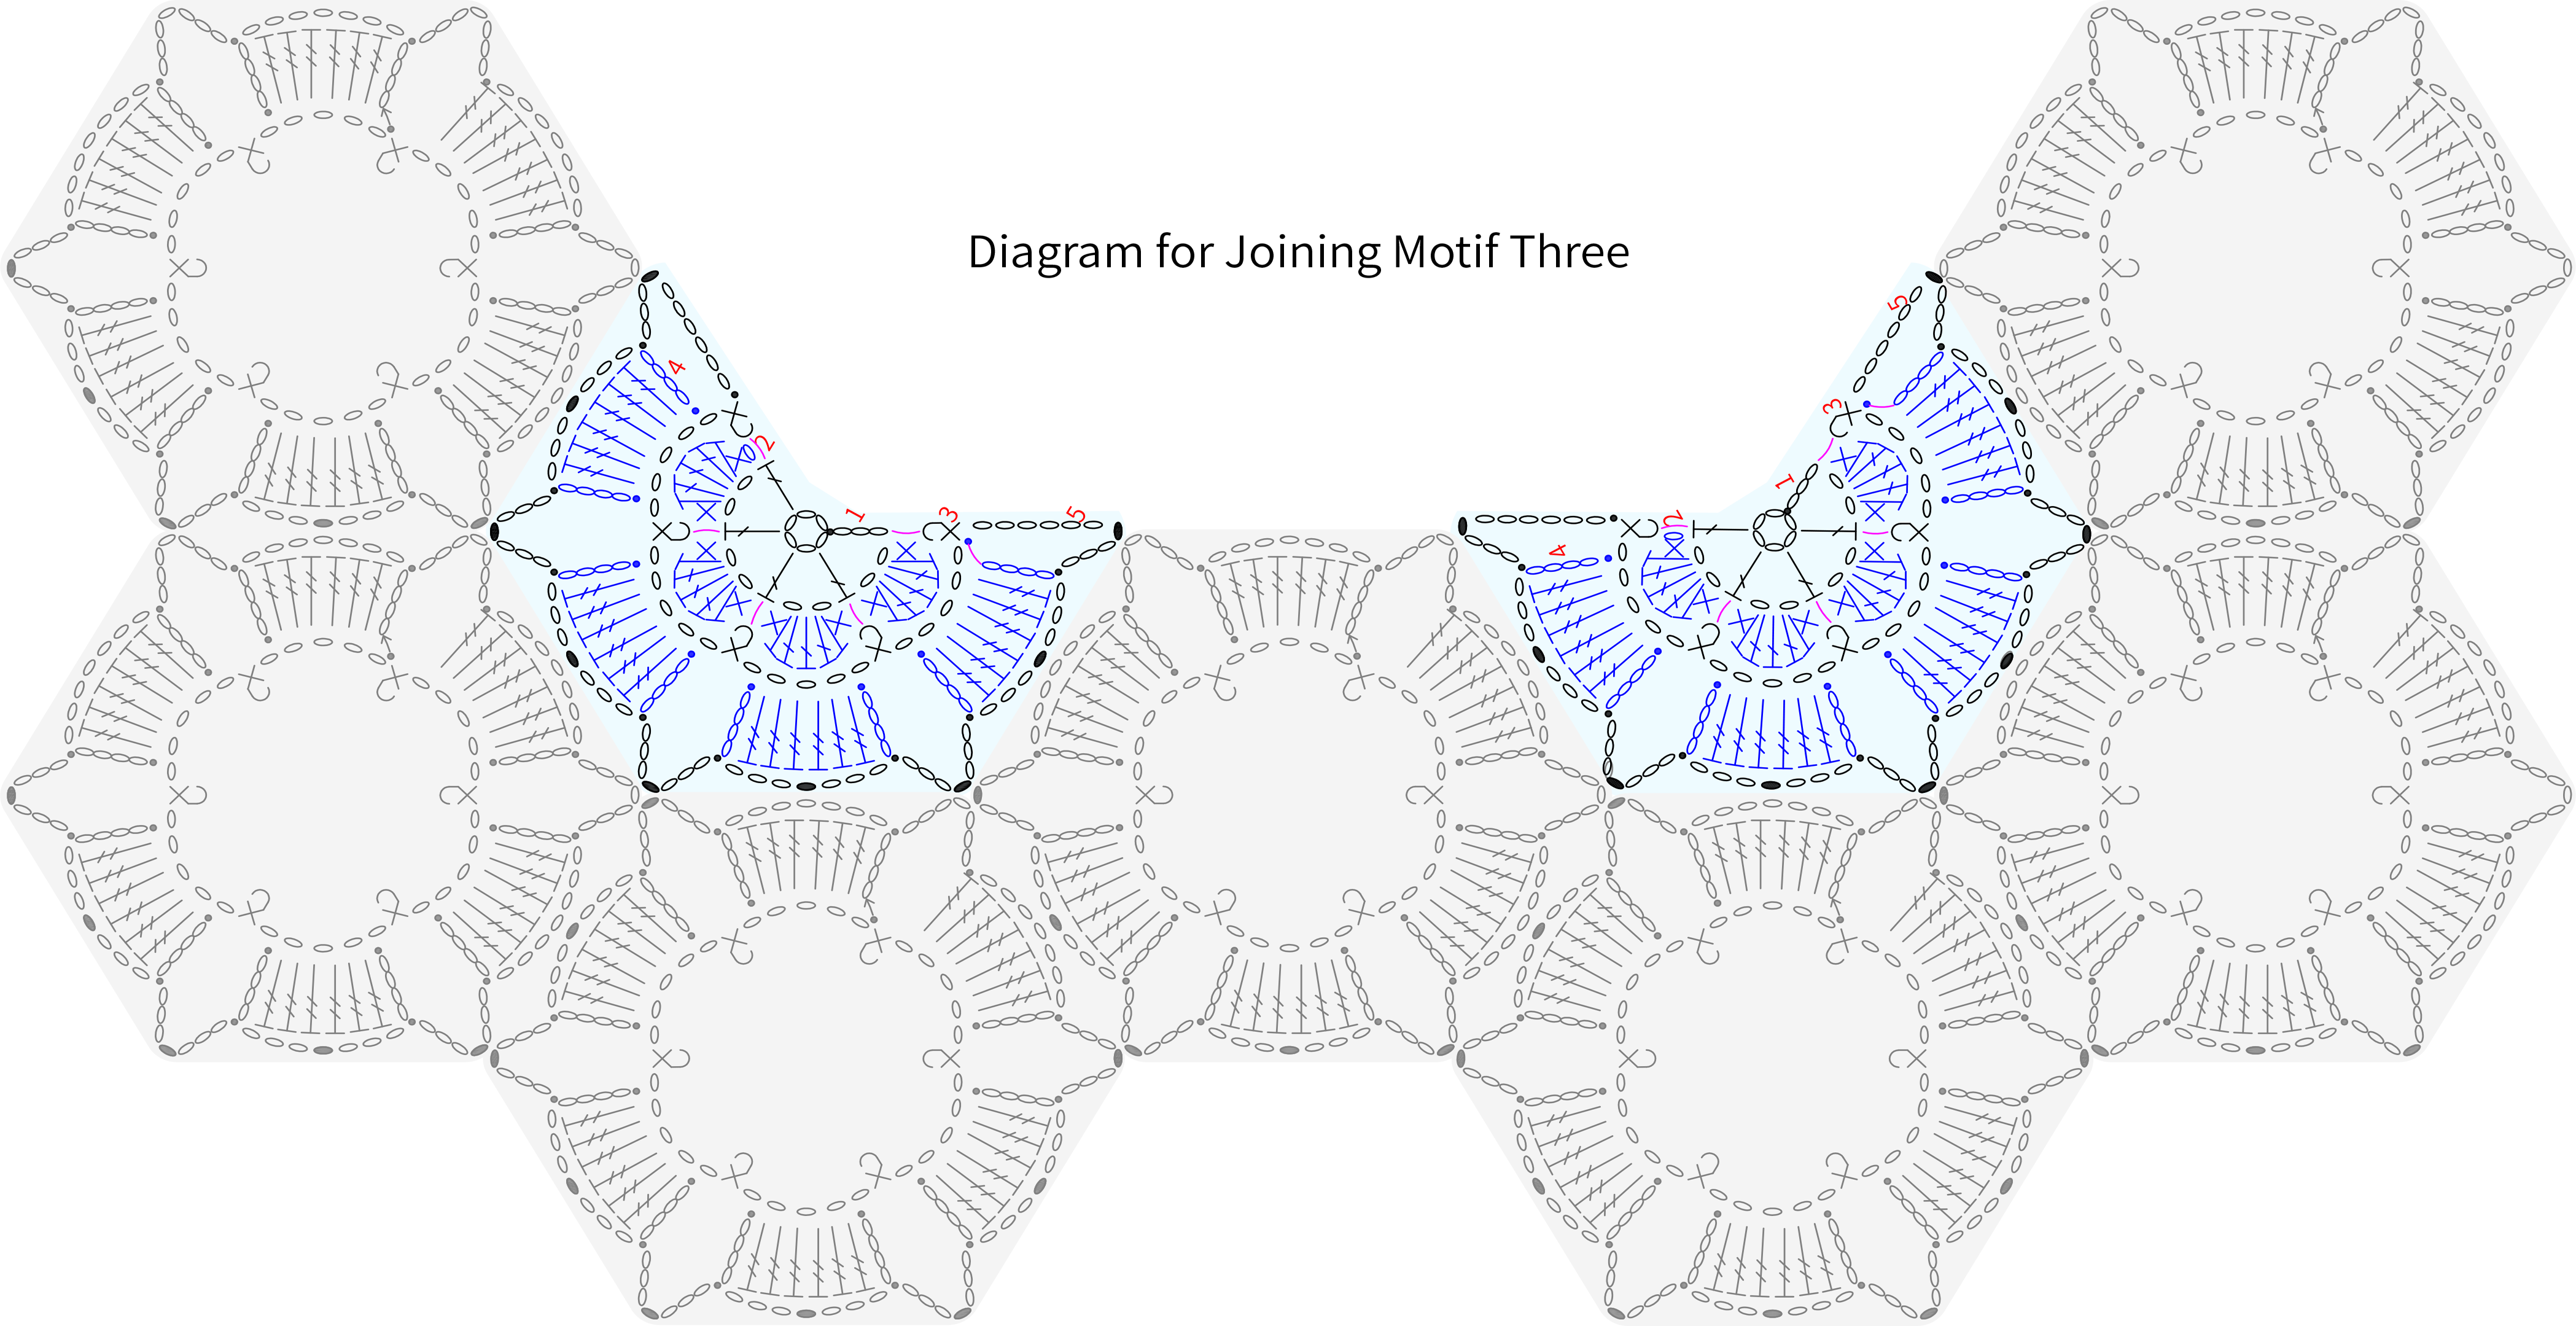
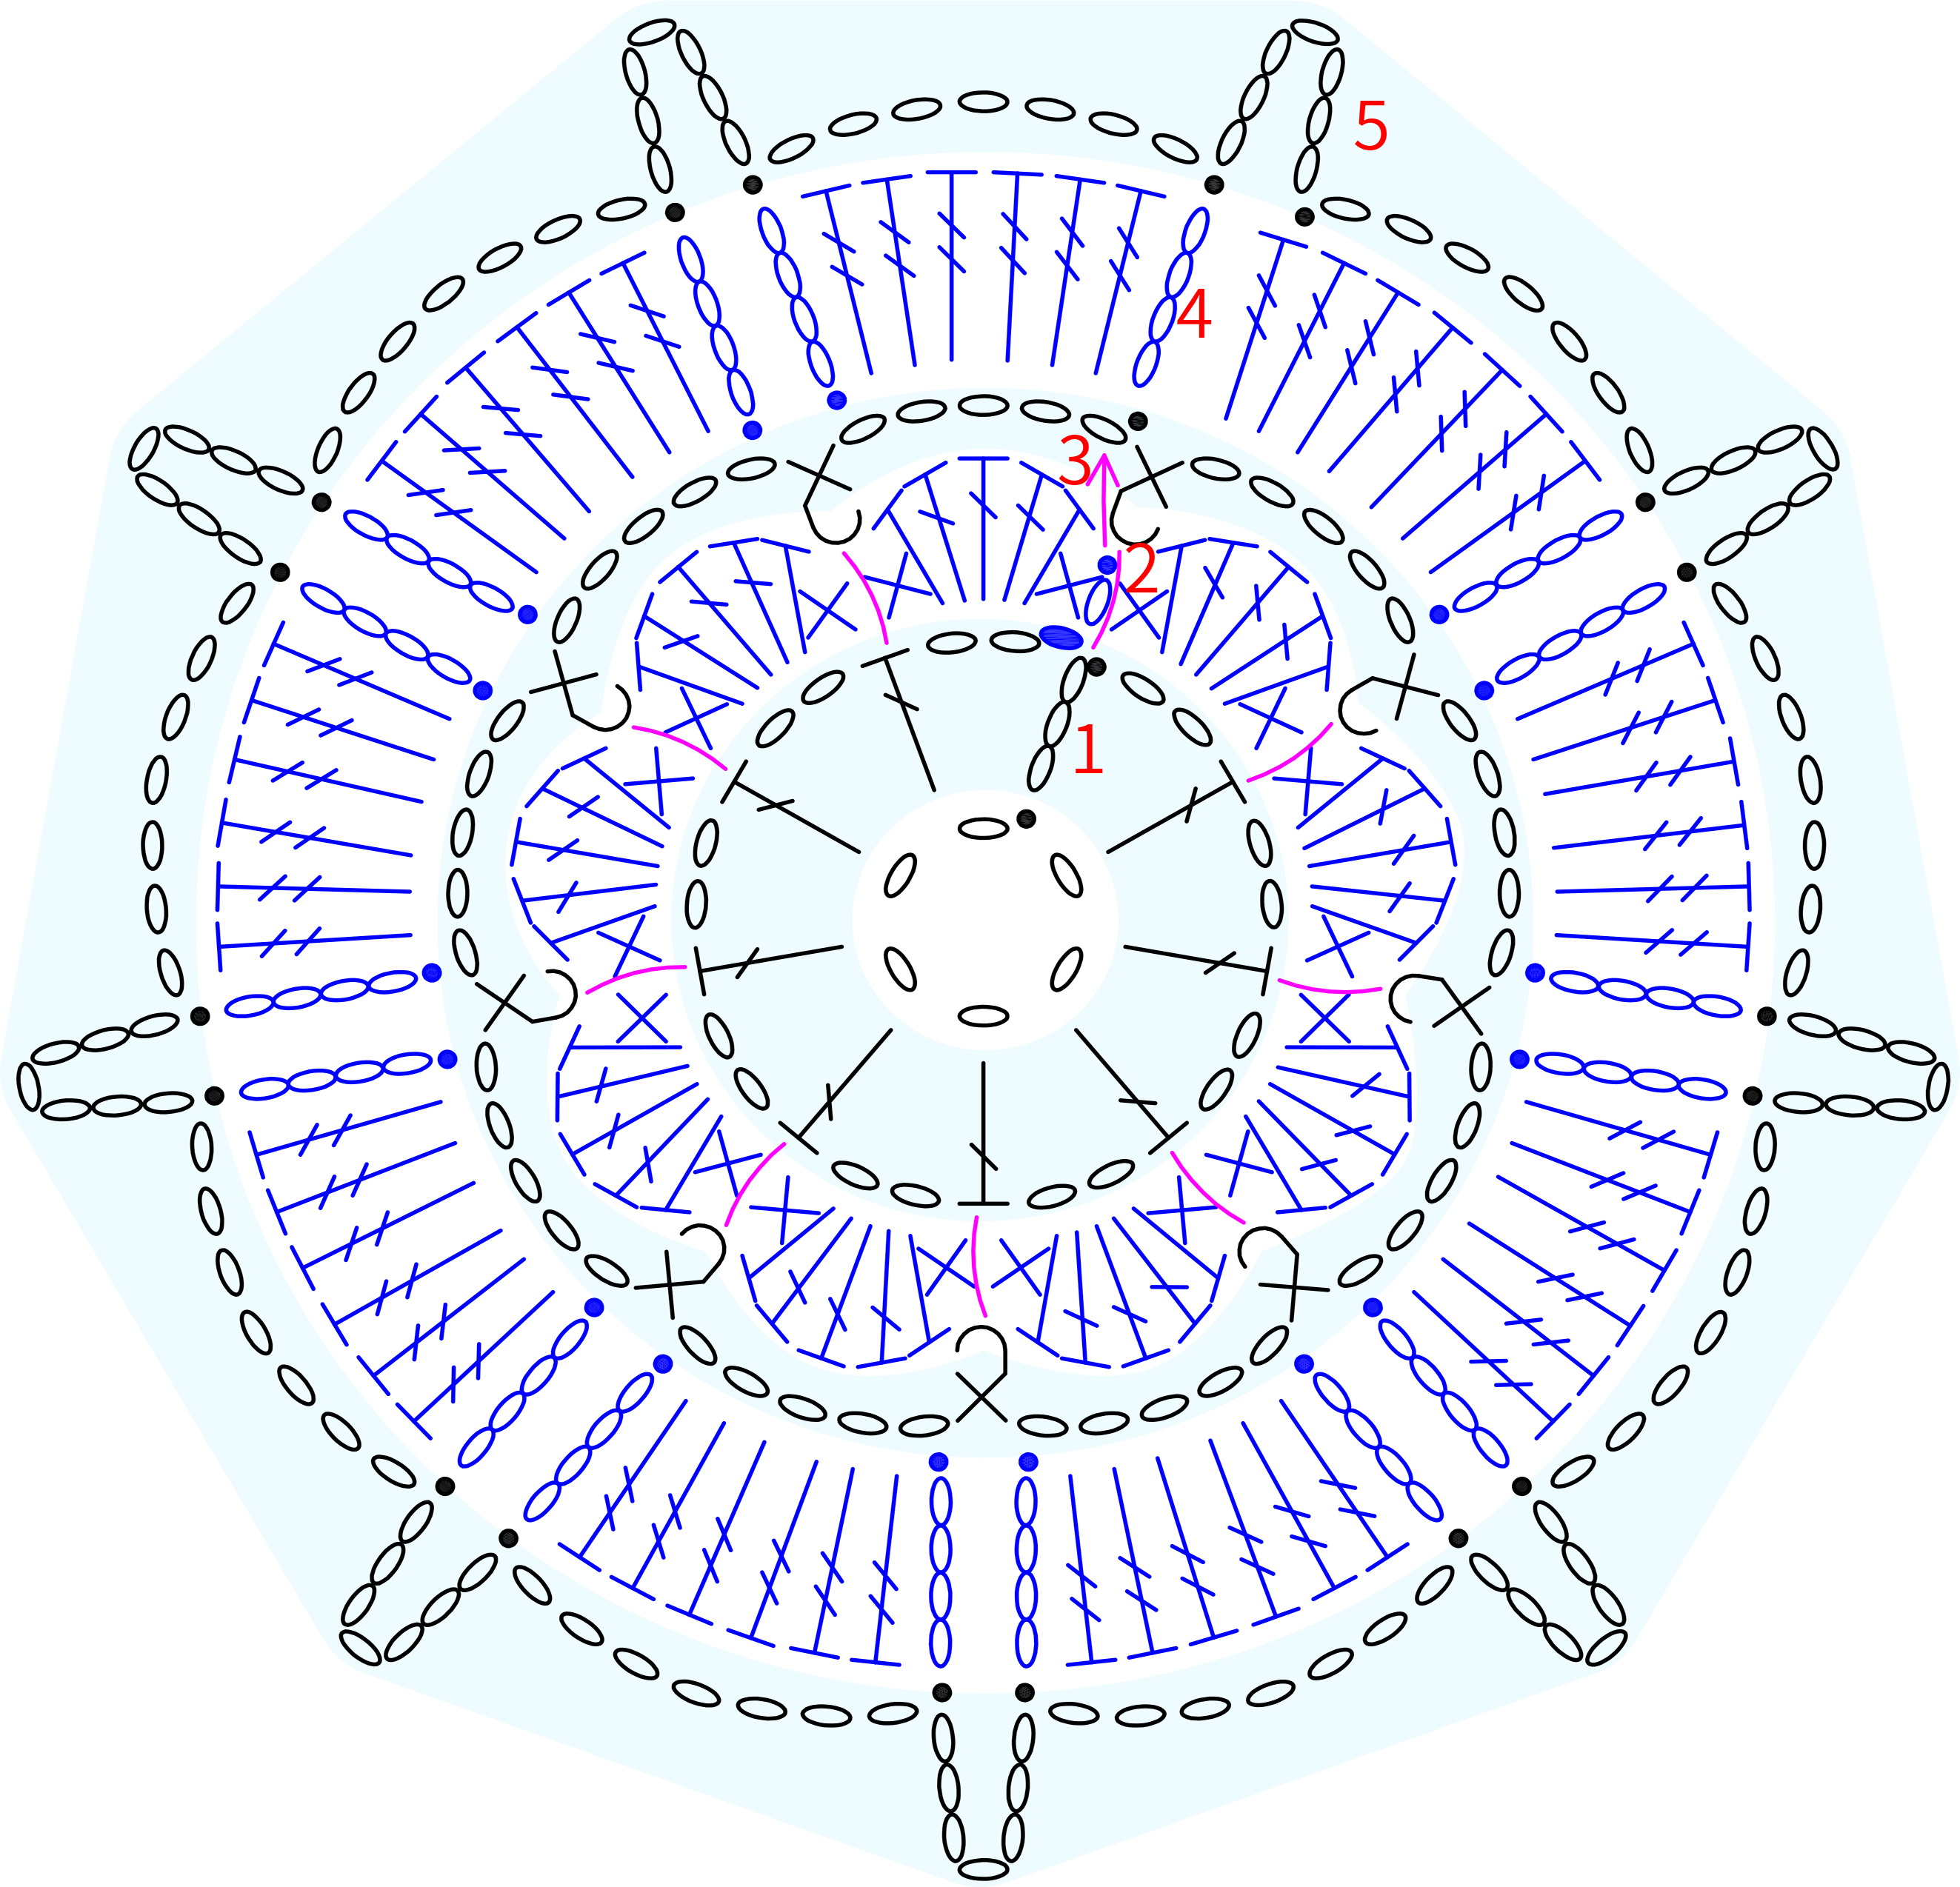
The body is divided into front and back panels, which are made by crocheting motifs together as you go. Please note that the sides and shoulders of both the front and back panels need to be connected. The design is divided into Motif 1, Motif 2, and Motif 3. When crocheting, complete all of Motif 1 first, then crochet Motif 2 and Motif 3 in their corresponding positions. Please refer to the video demonstration for more details.
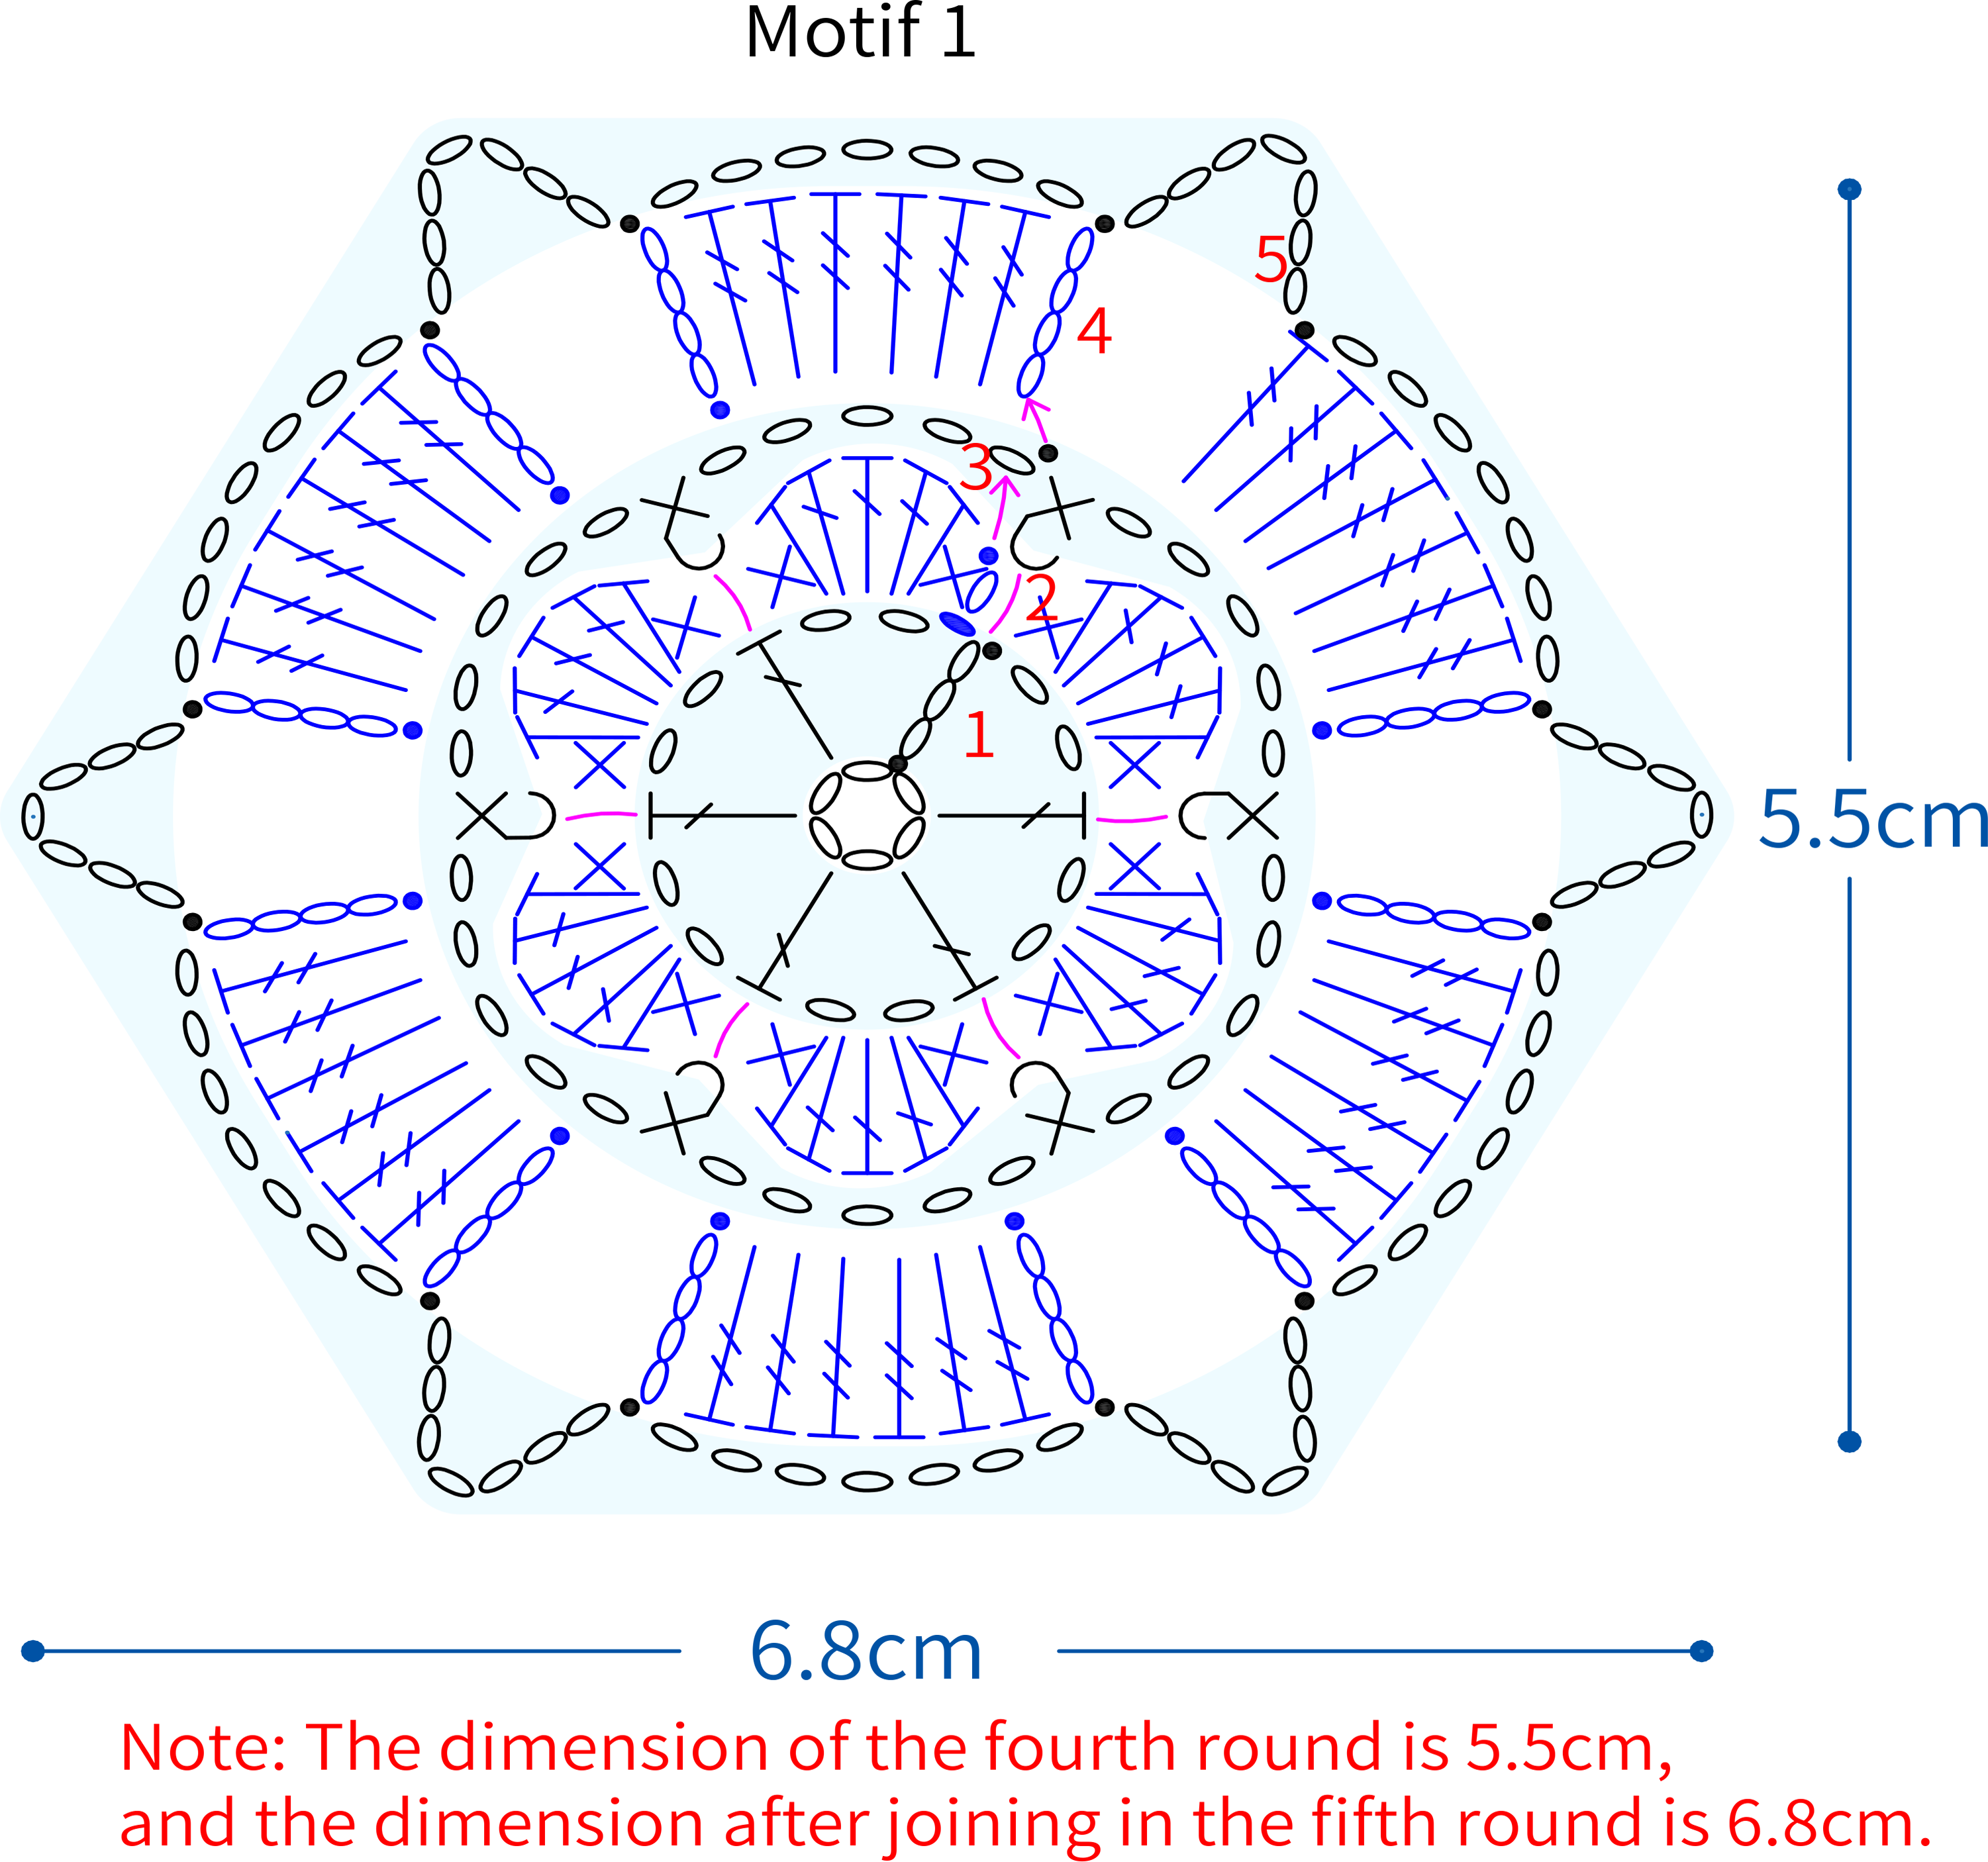
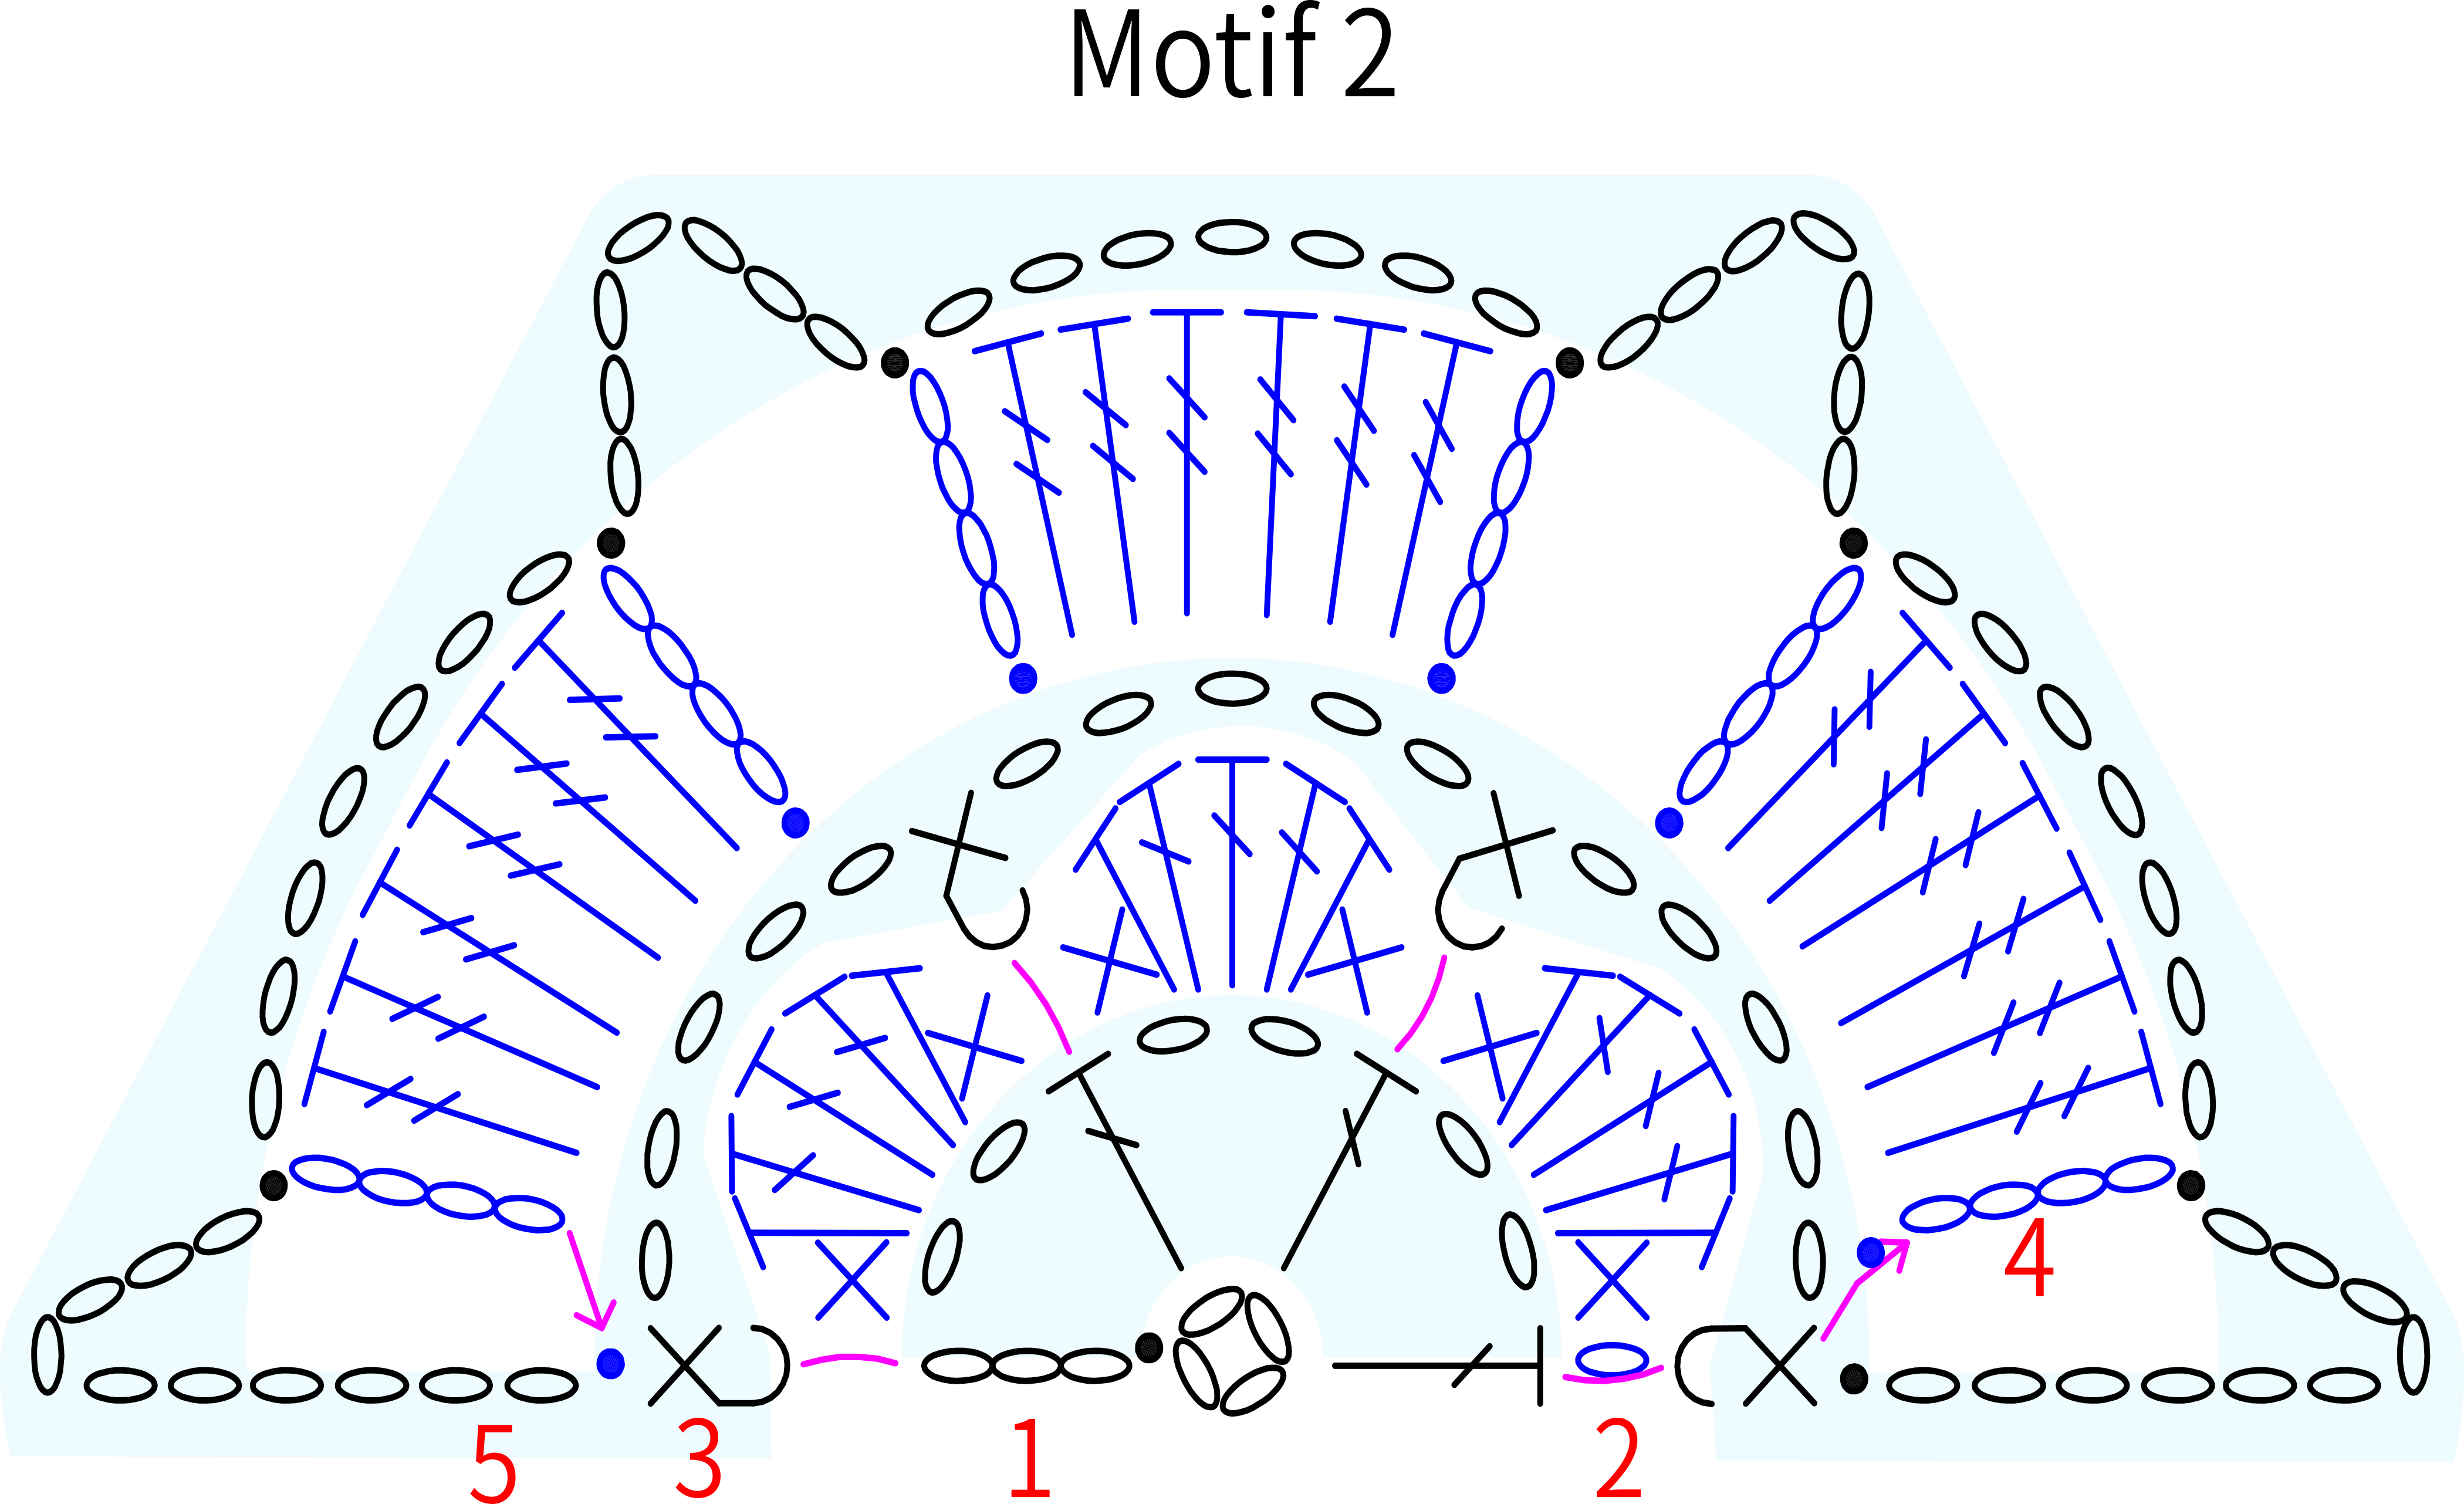
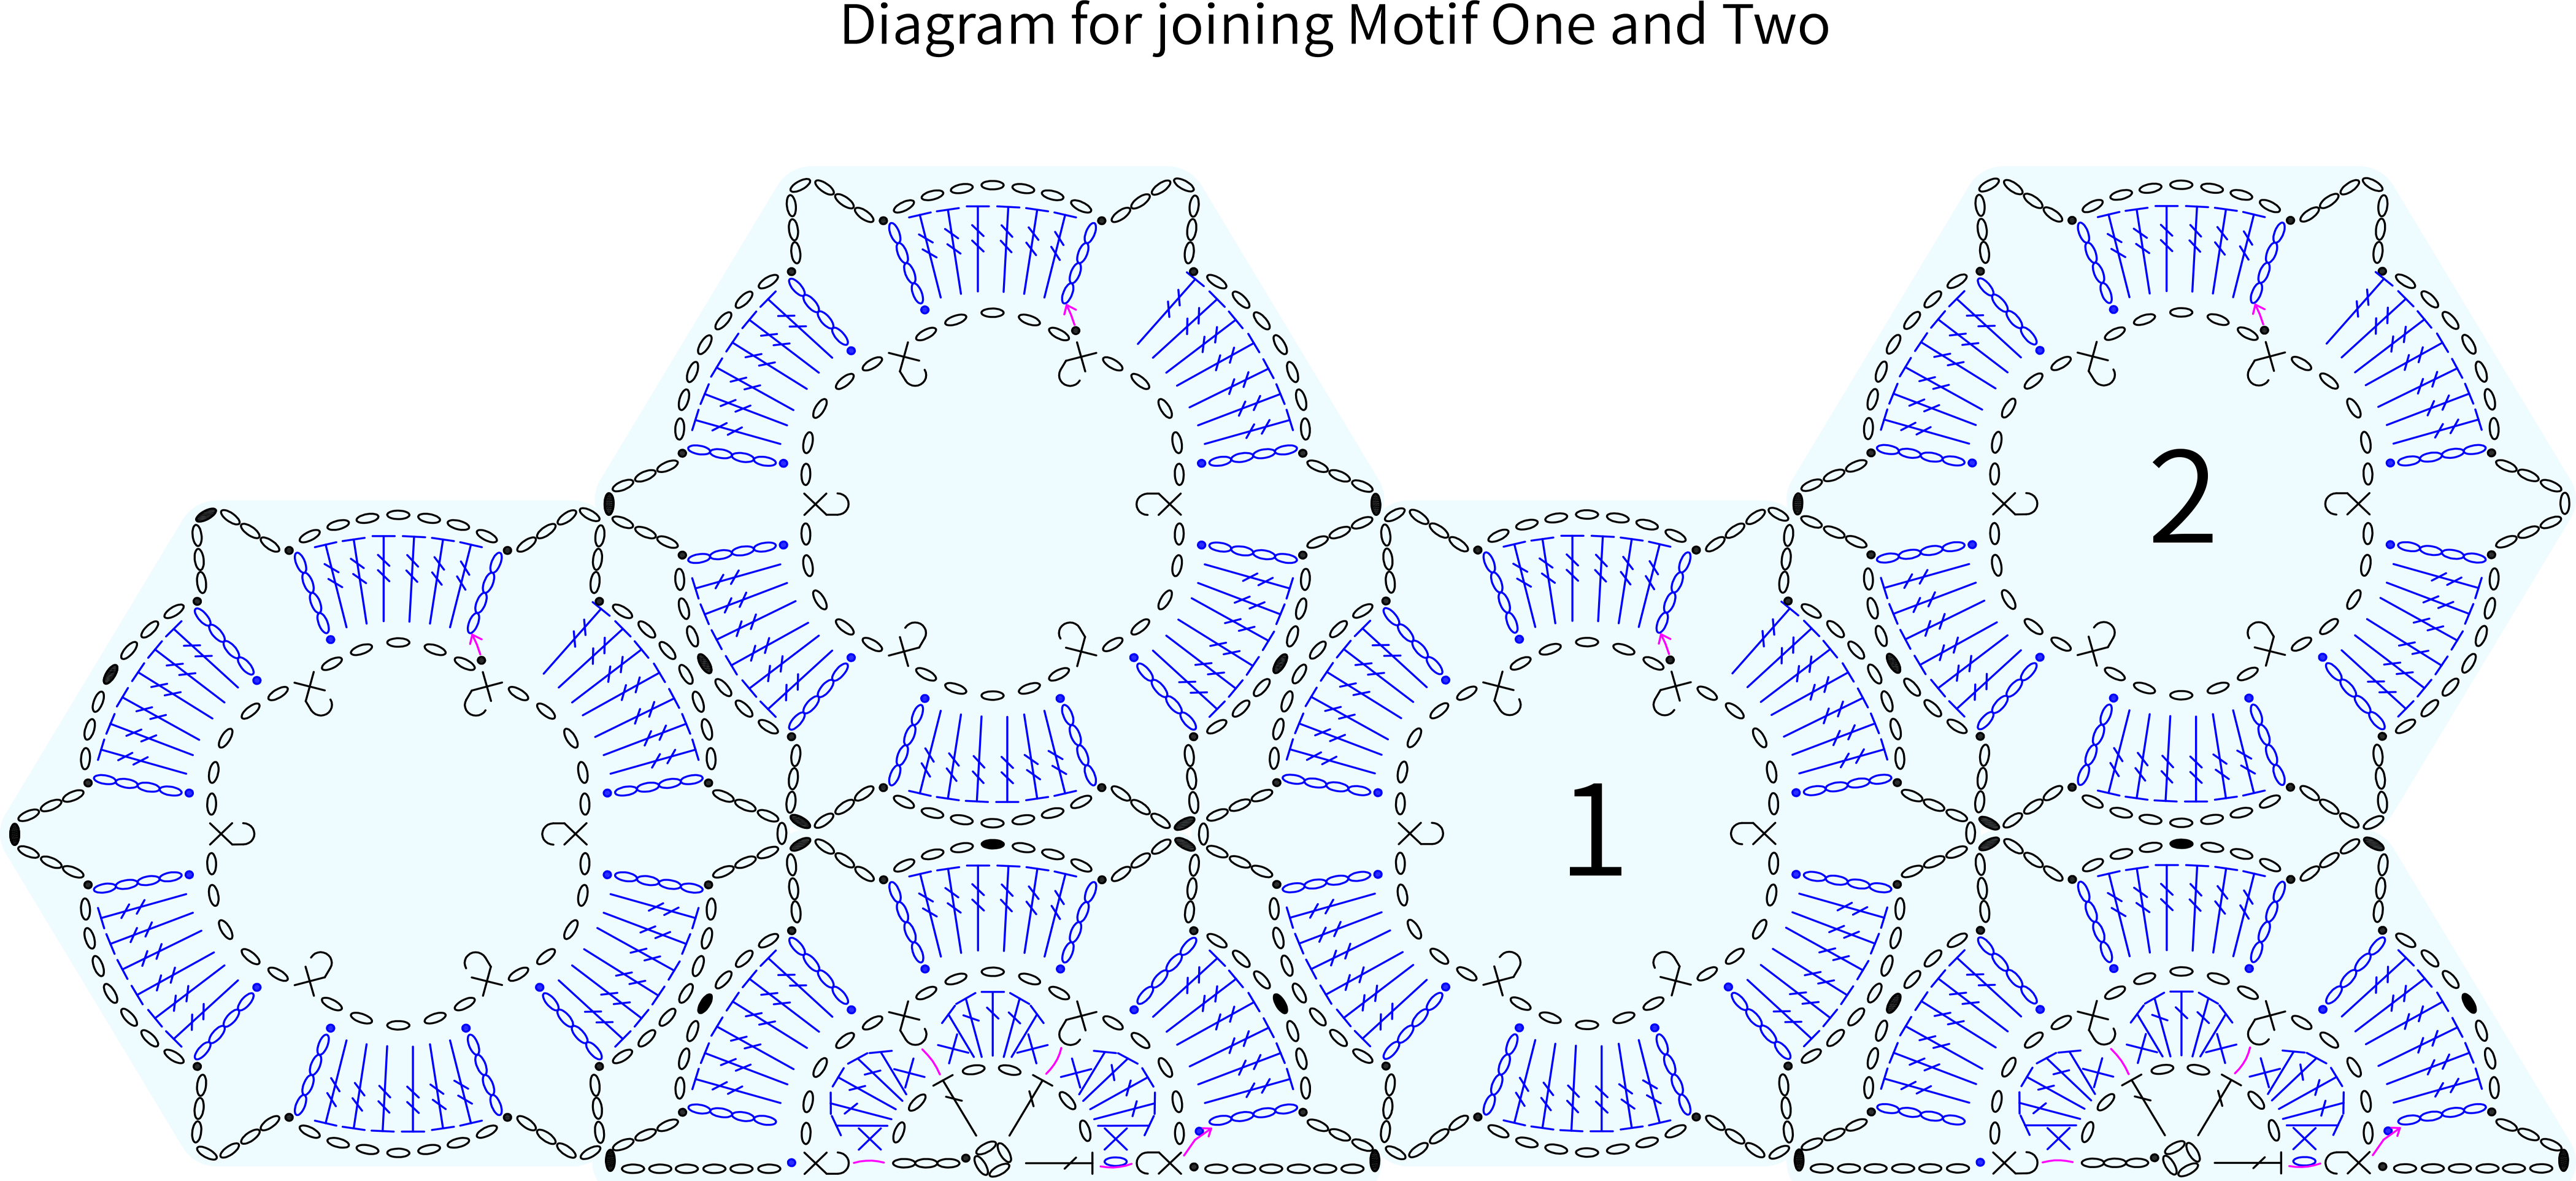
Note: Motif A is roughly a hexagon. When joining, pick up chain stitches at the corners and slip stitch them, and pick up chain loops along the edges and slip stitch those.
PART2 SleevesB 26' 10''
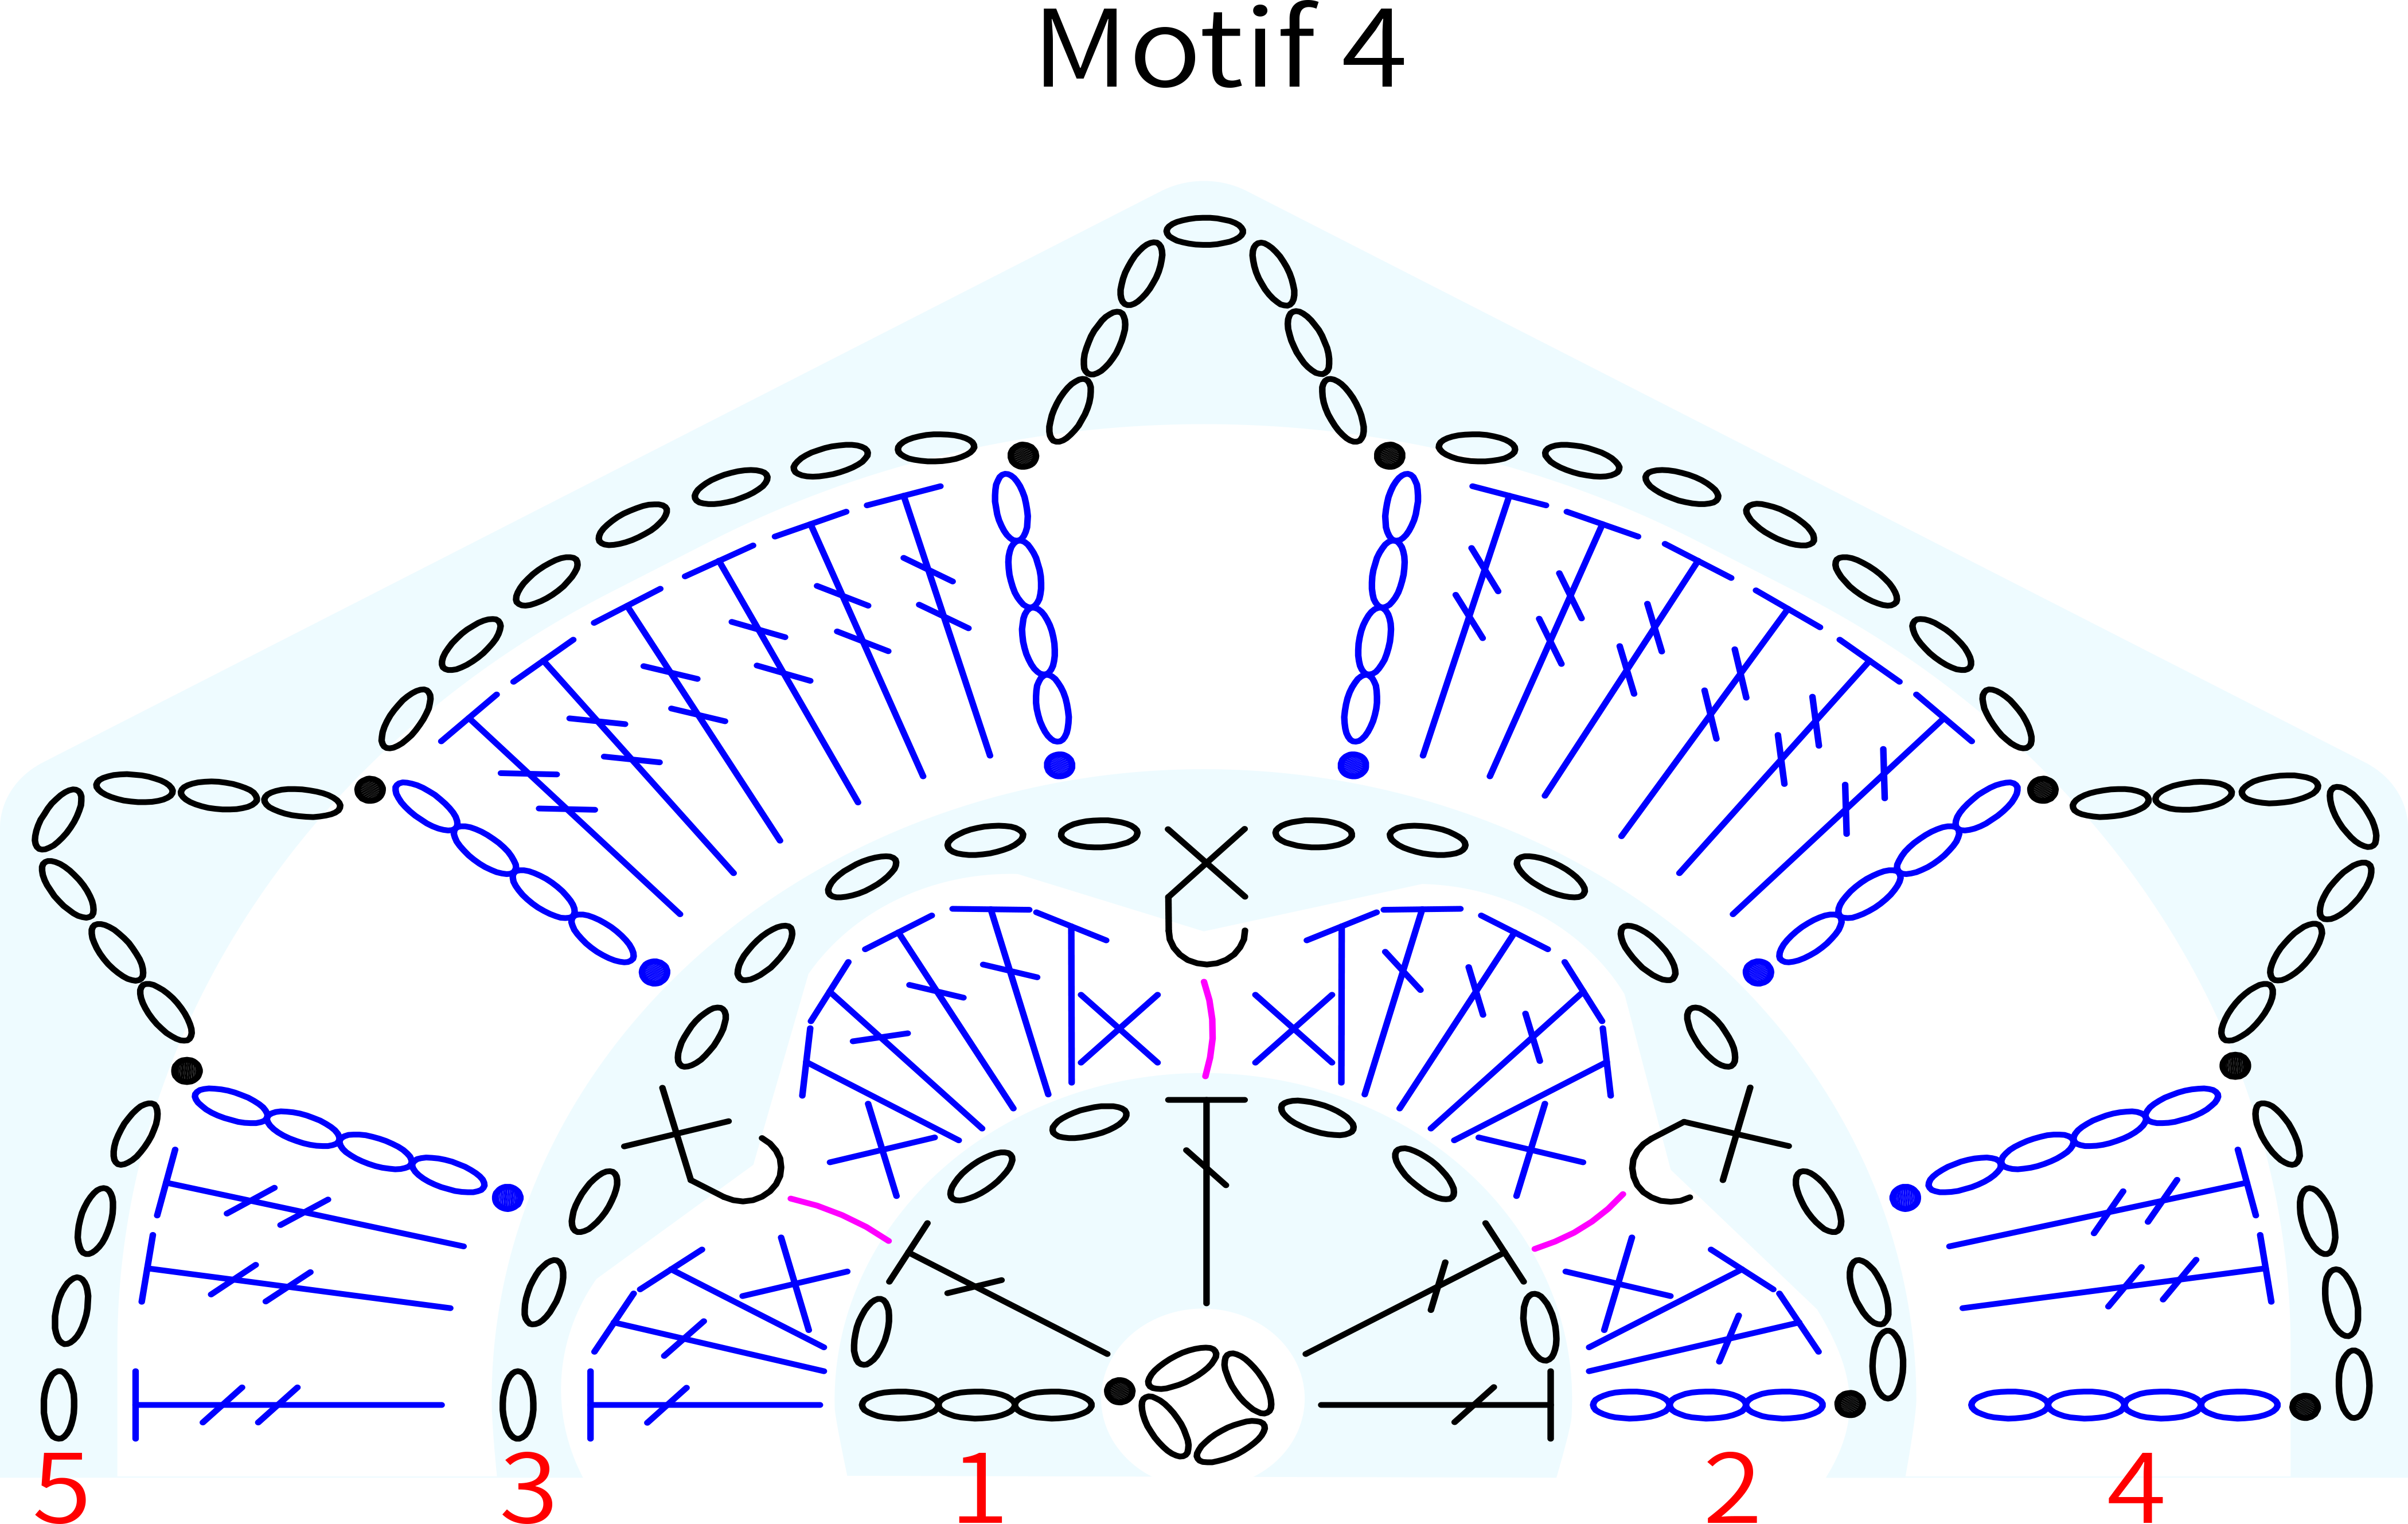
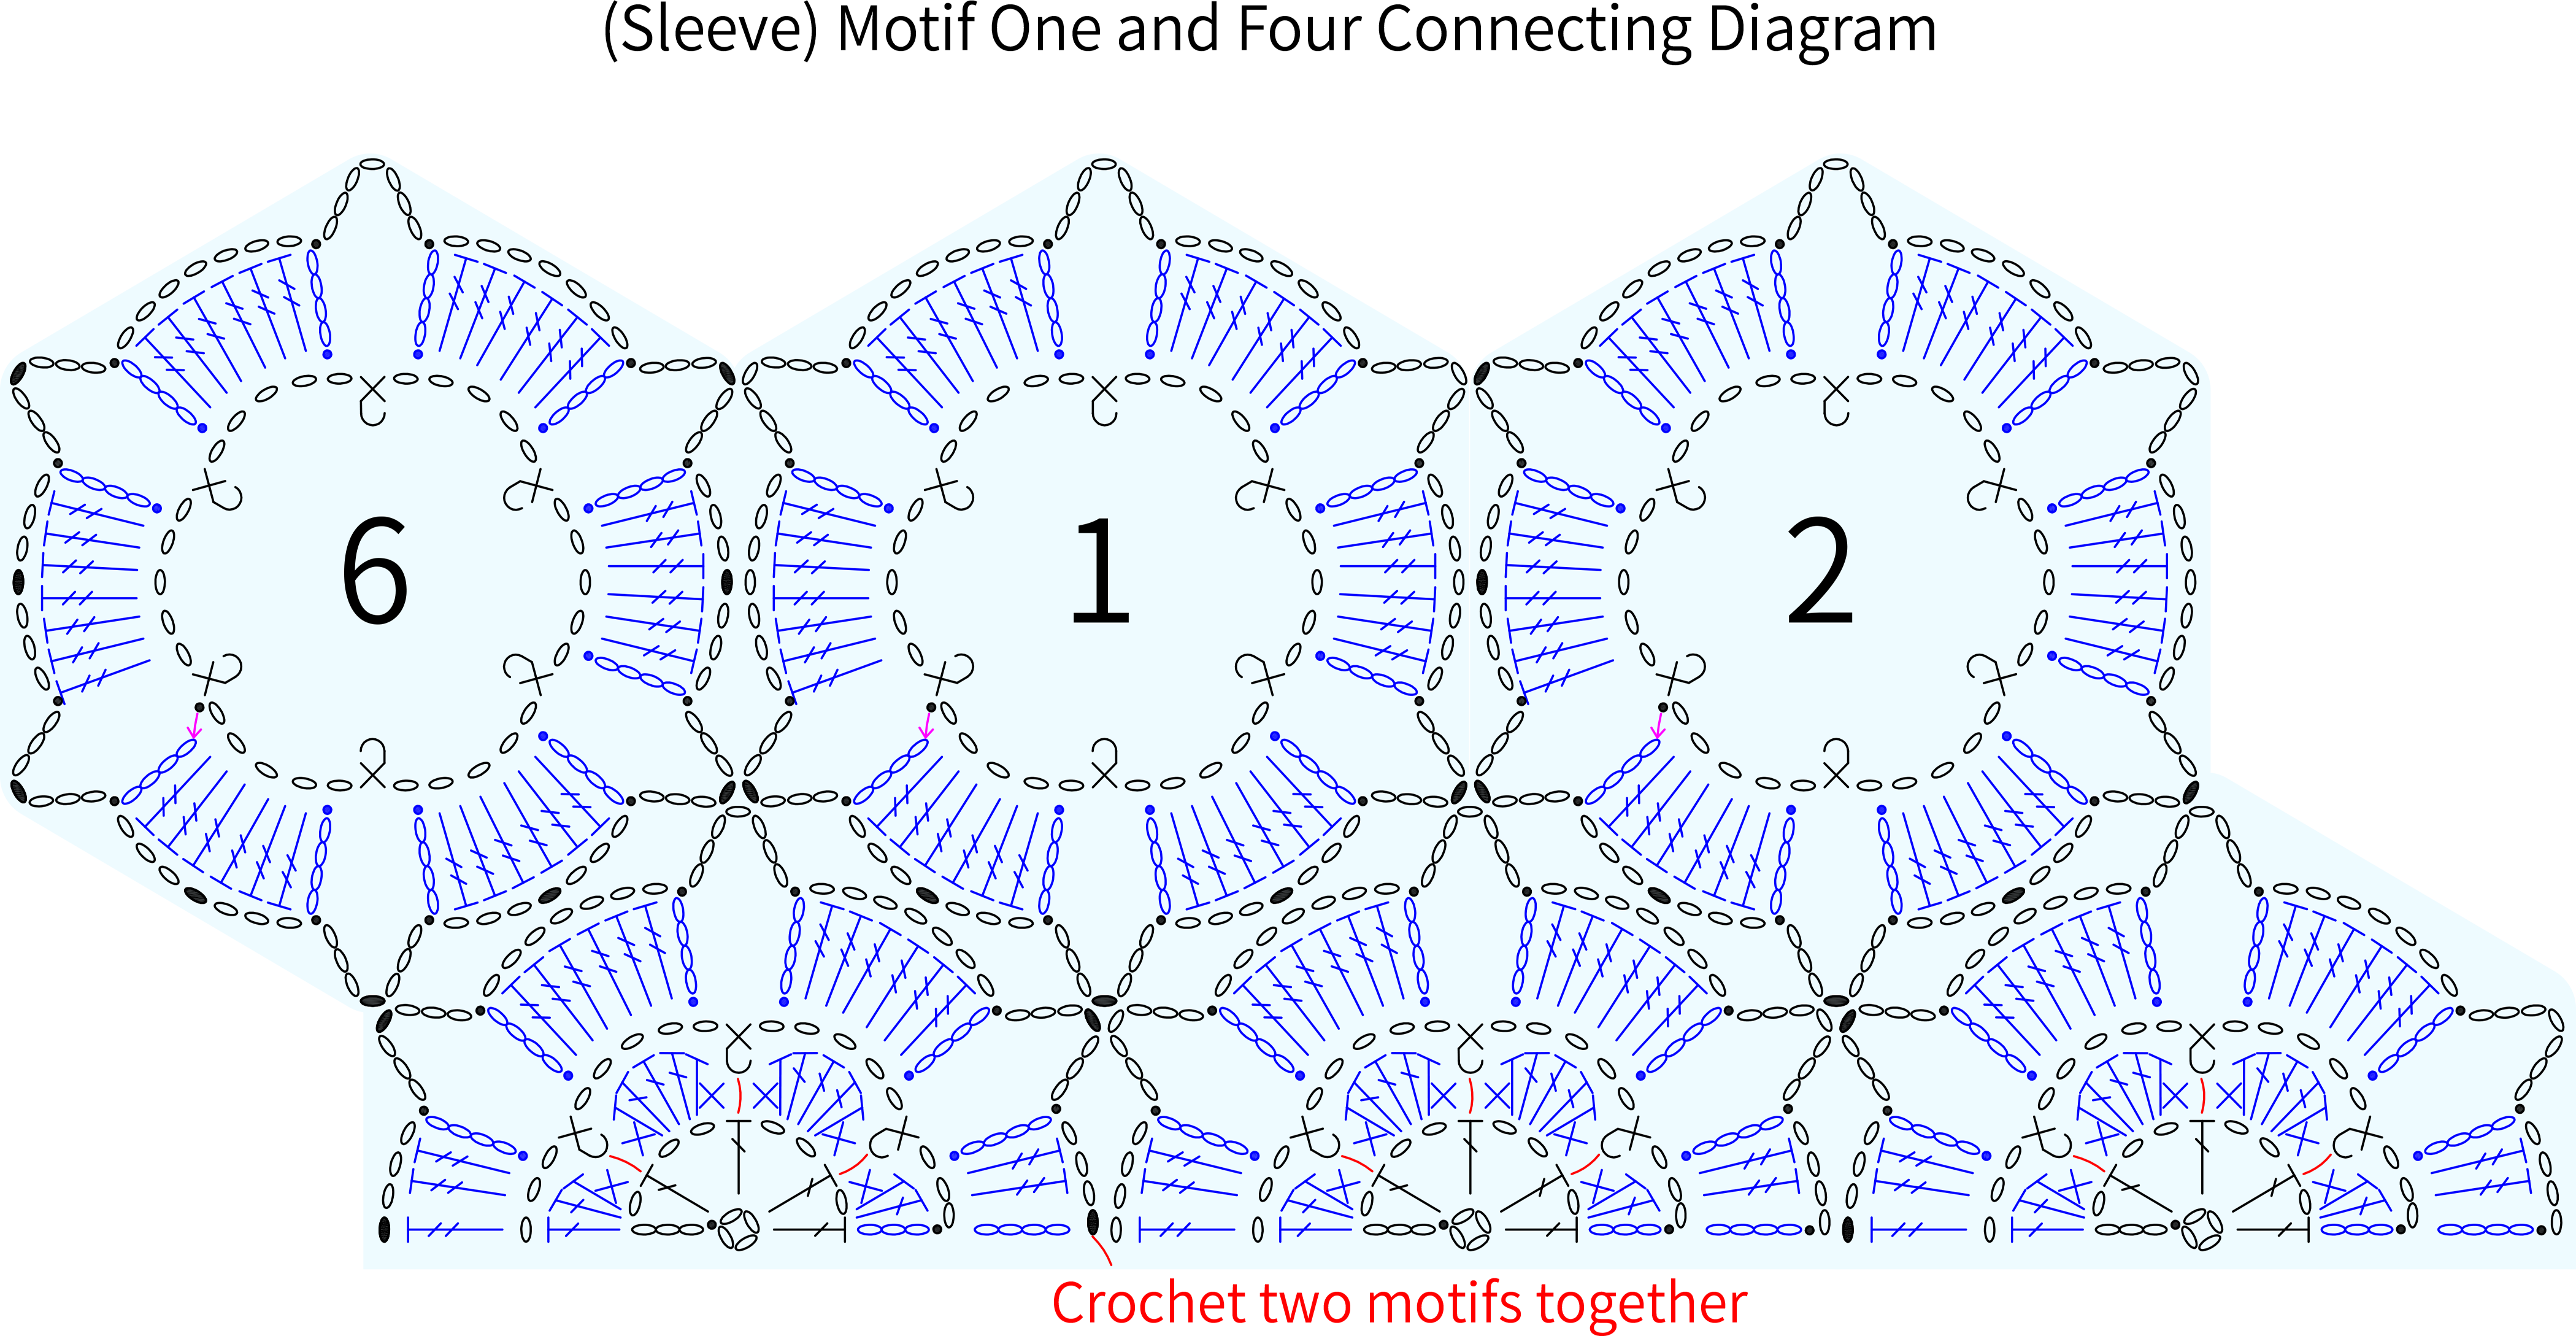
The sleeves are crocheted in this order: first crochet and assemble motif 4, then crochet the remaining motifs on top. The diagram shows both short and long sleeves together—when crocheting, pay attention to keeping both sides of the sleeves symmetrical. Please refer to the video demonstration for more details.
Motif 5
PART3 EdgingC 35' 26''
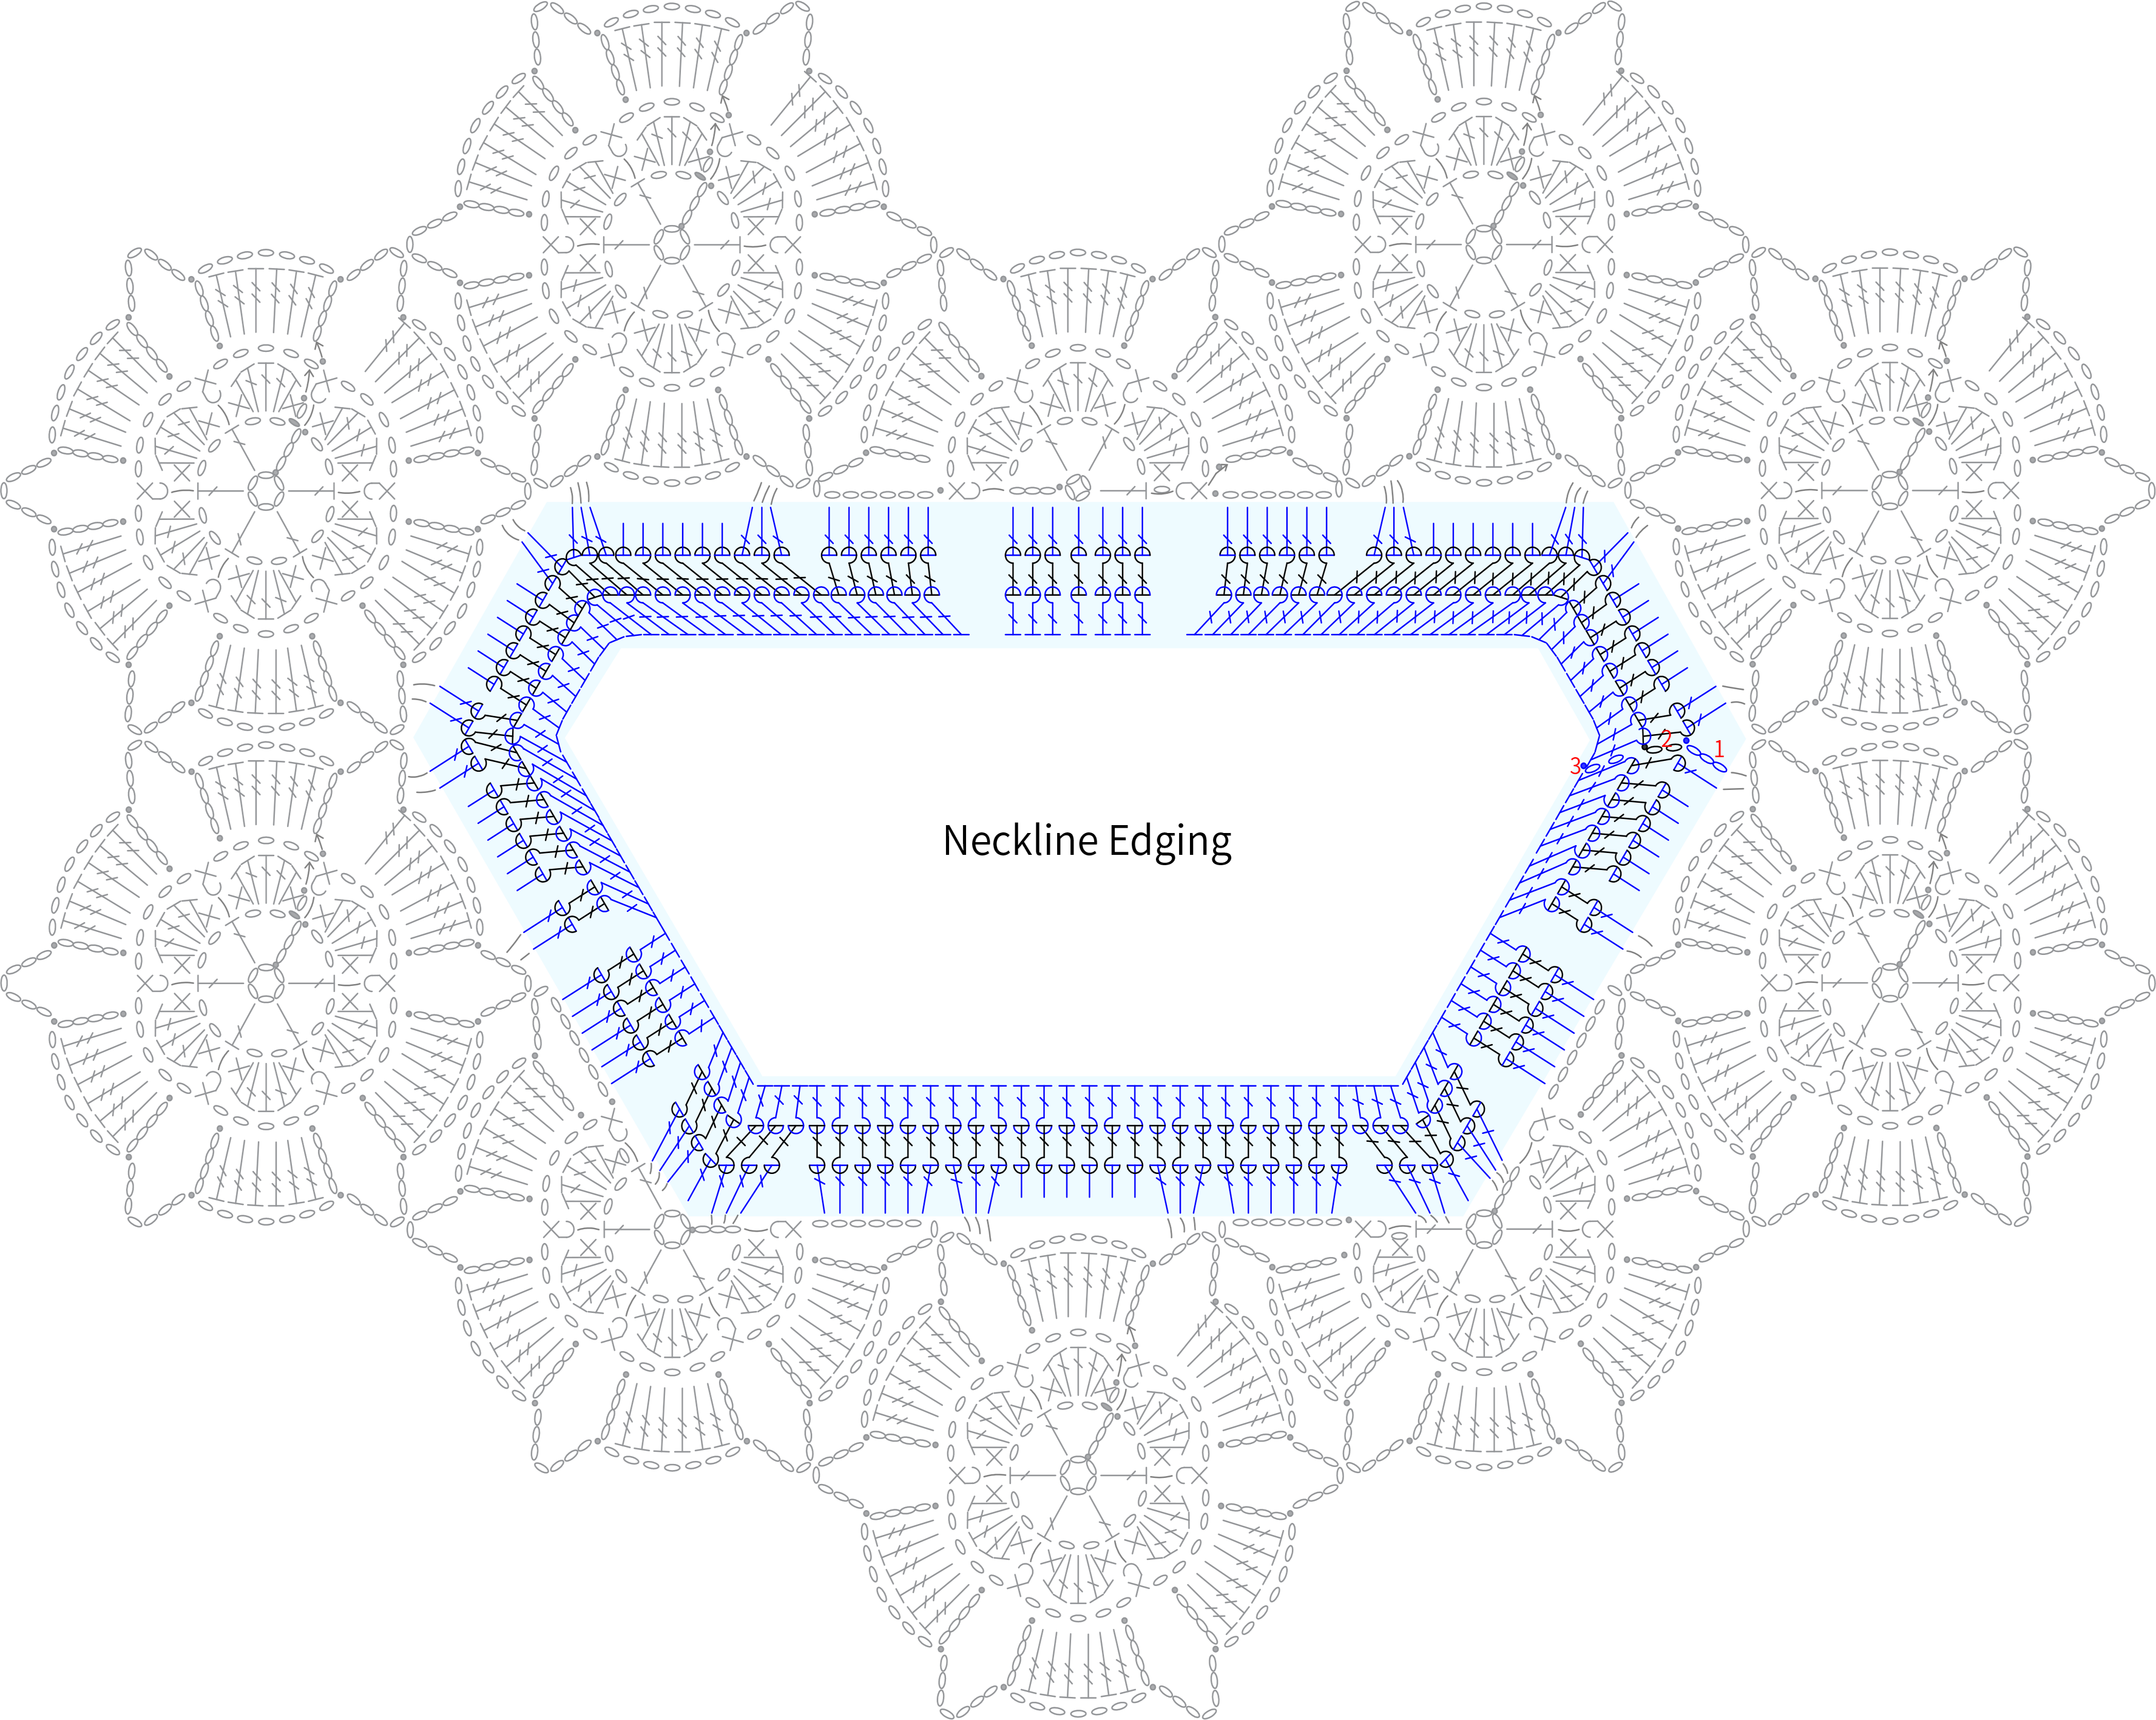
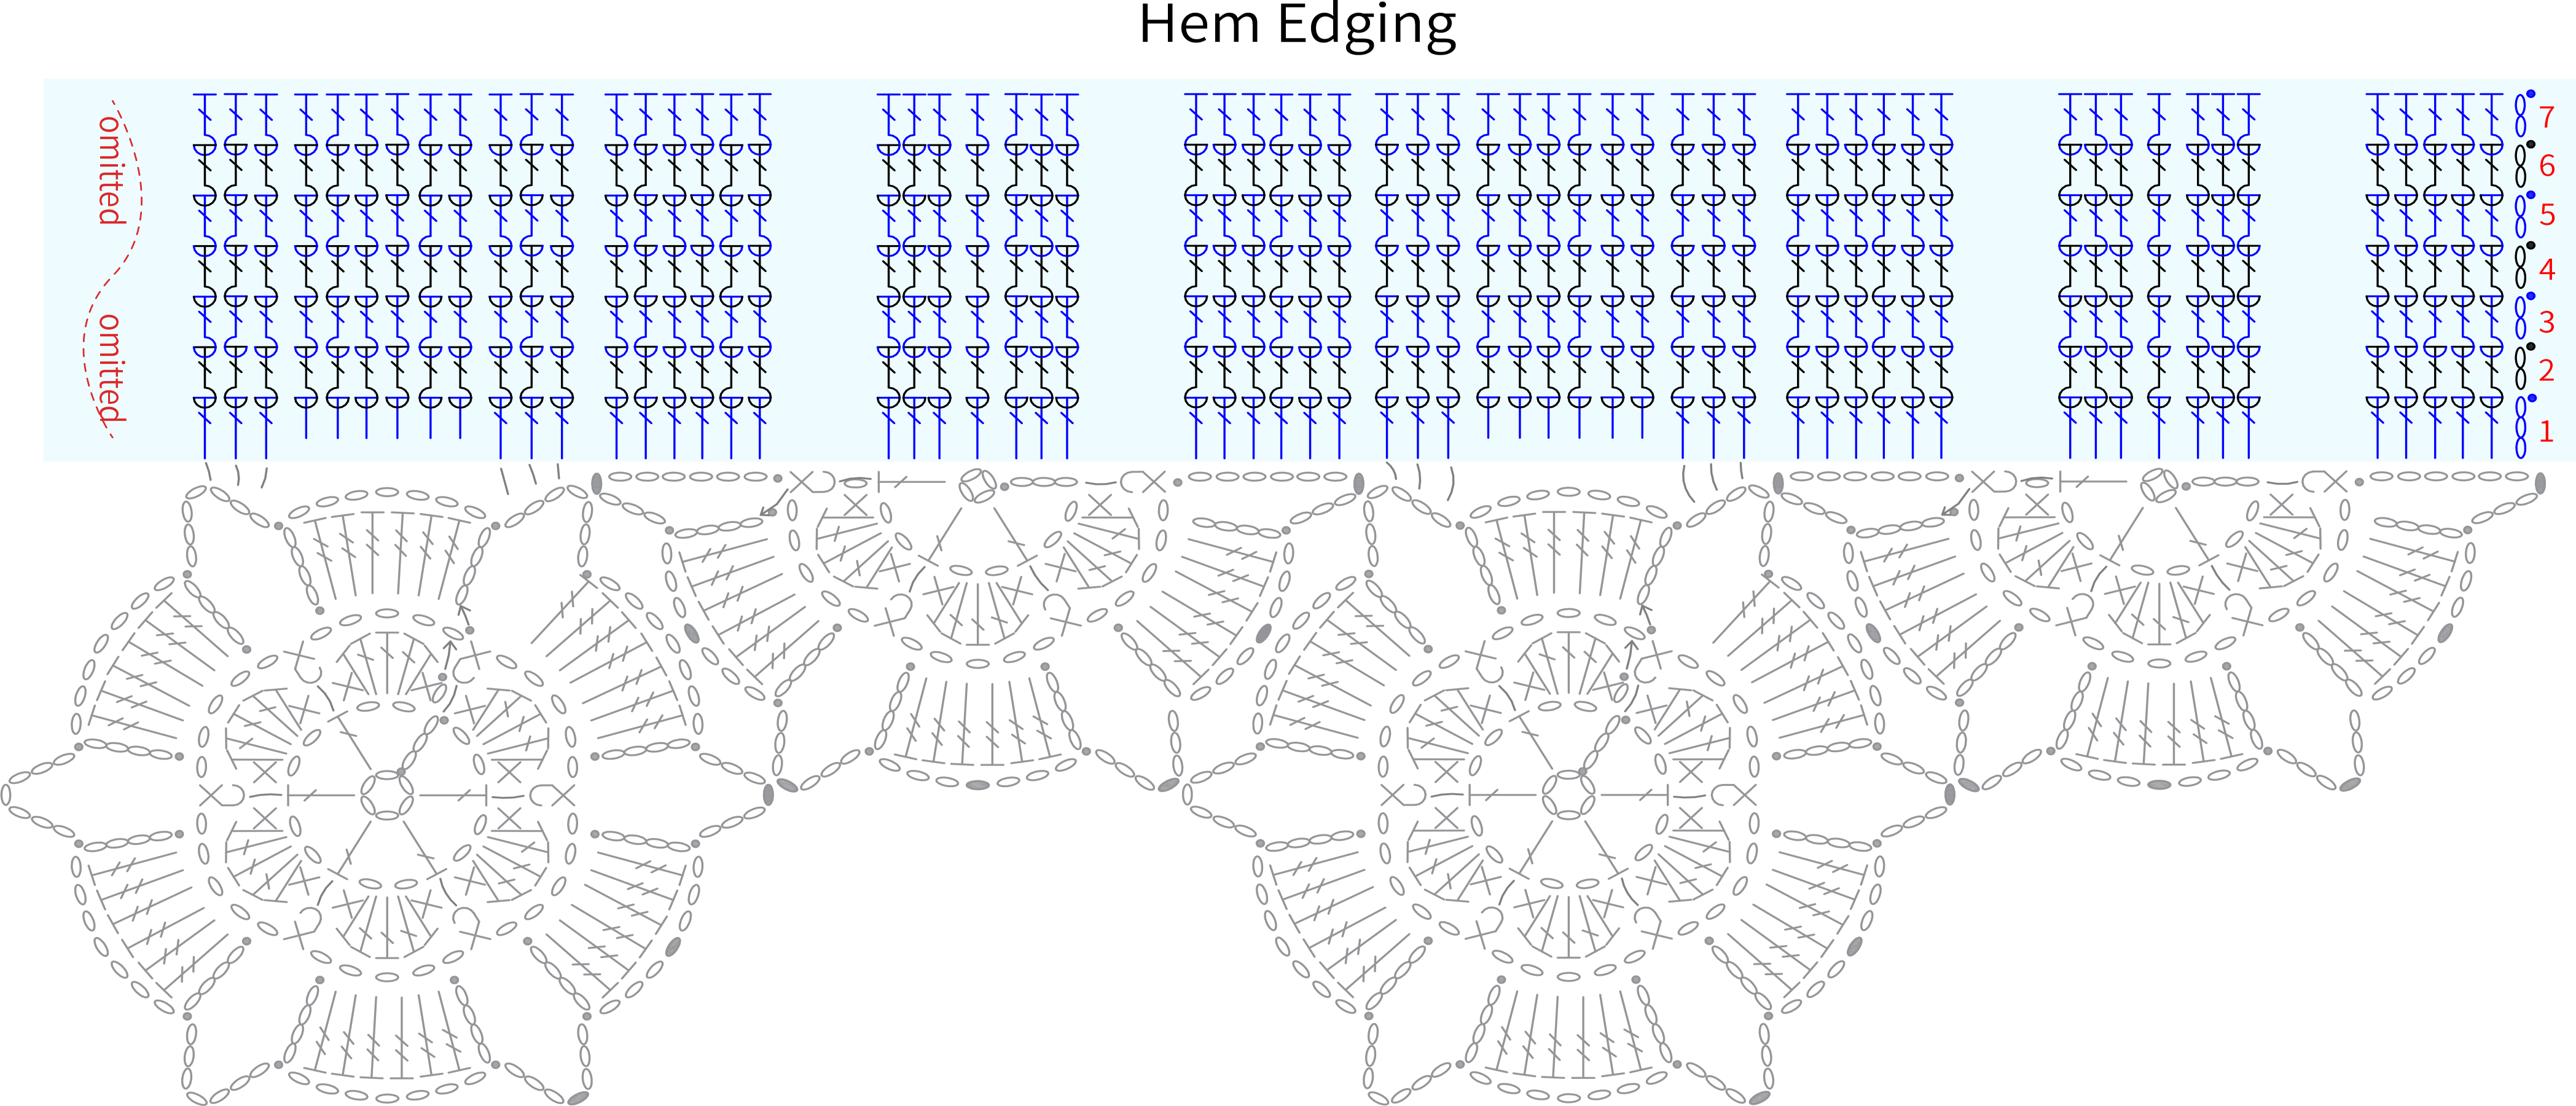
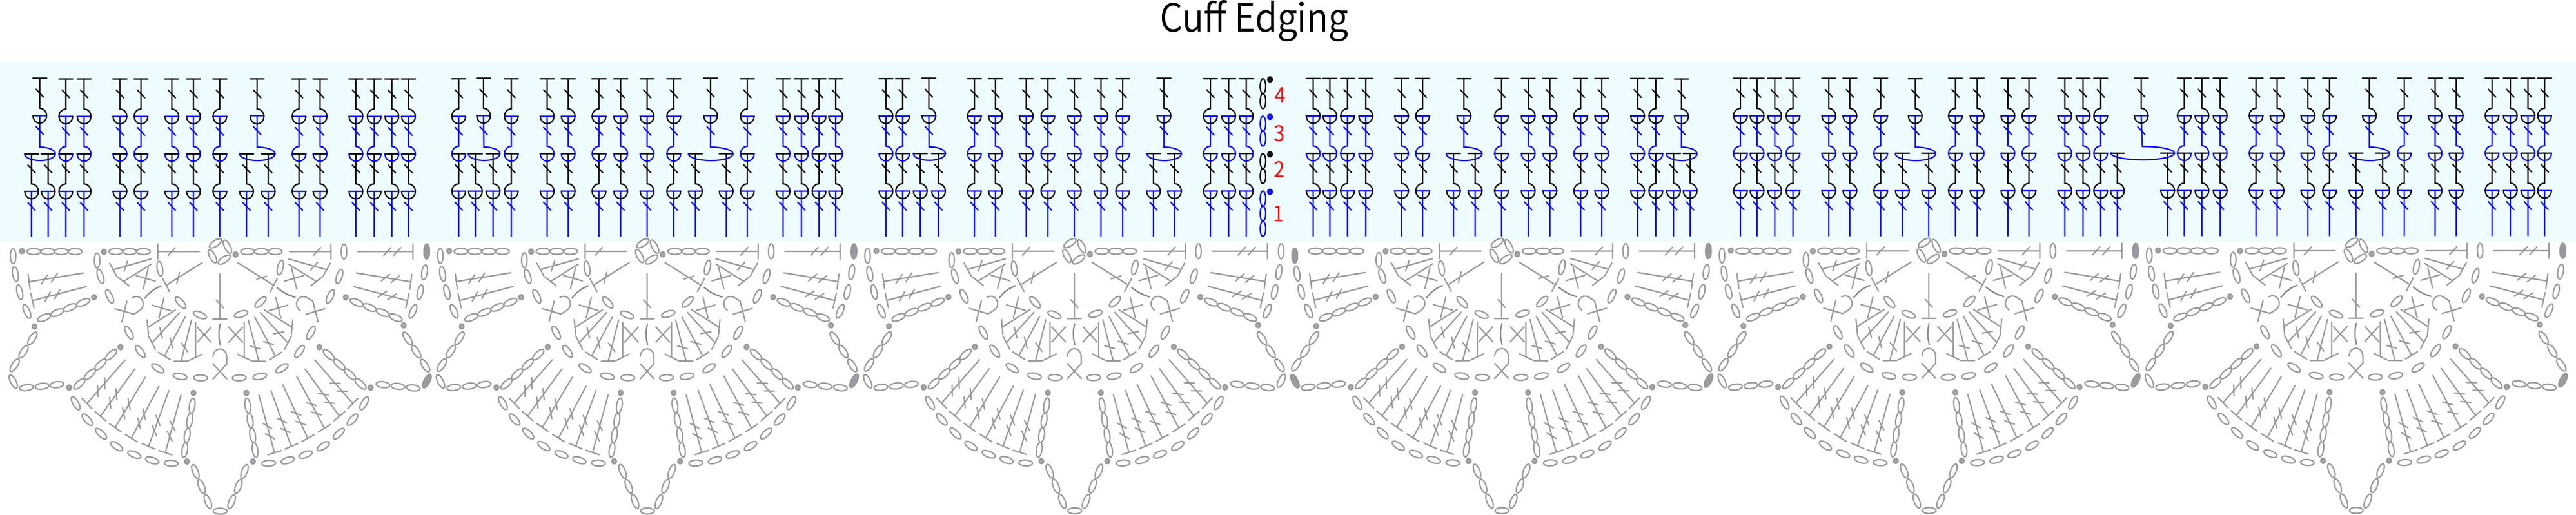
The edging is divided into neckline edging, hem edging, and sleeve edging. Start by picking up stitches along the neckline and work the edging there. Then crochet the edging at the hem, and finally pick up stitches at the sleeve openings for the sleeve edging. Please refer to the video demonstration for more details.
Made by the community