Clothes
Summer Lace Pullover
Project preview
See the finished project
Pattern format
Instructions
Watch and follow
Video tutorial
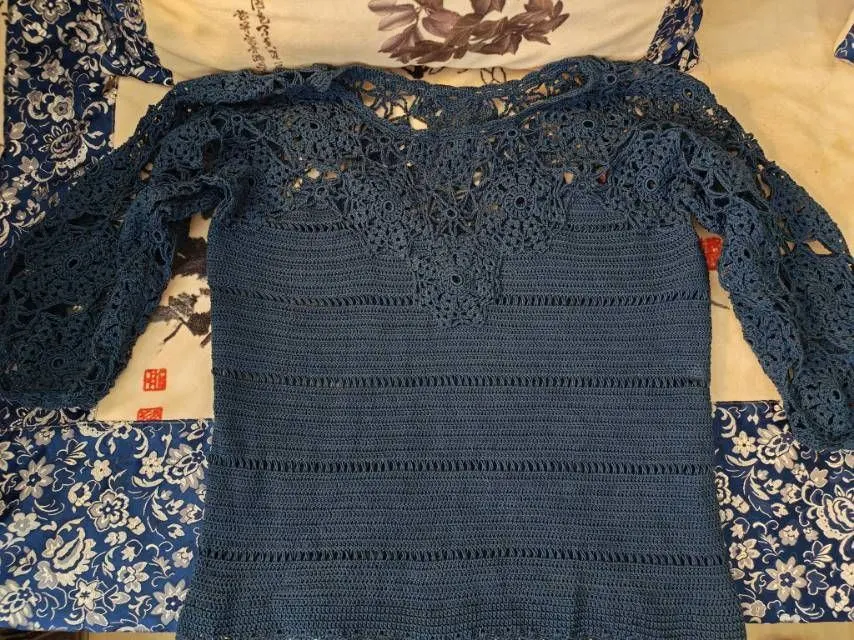
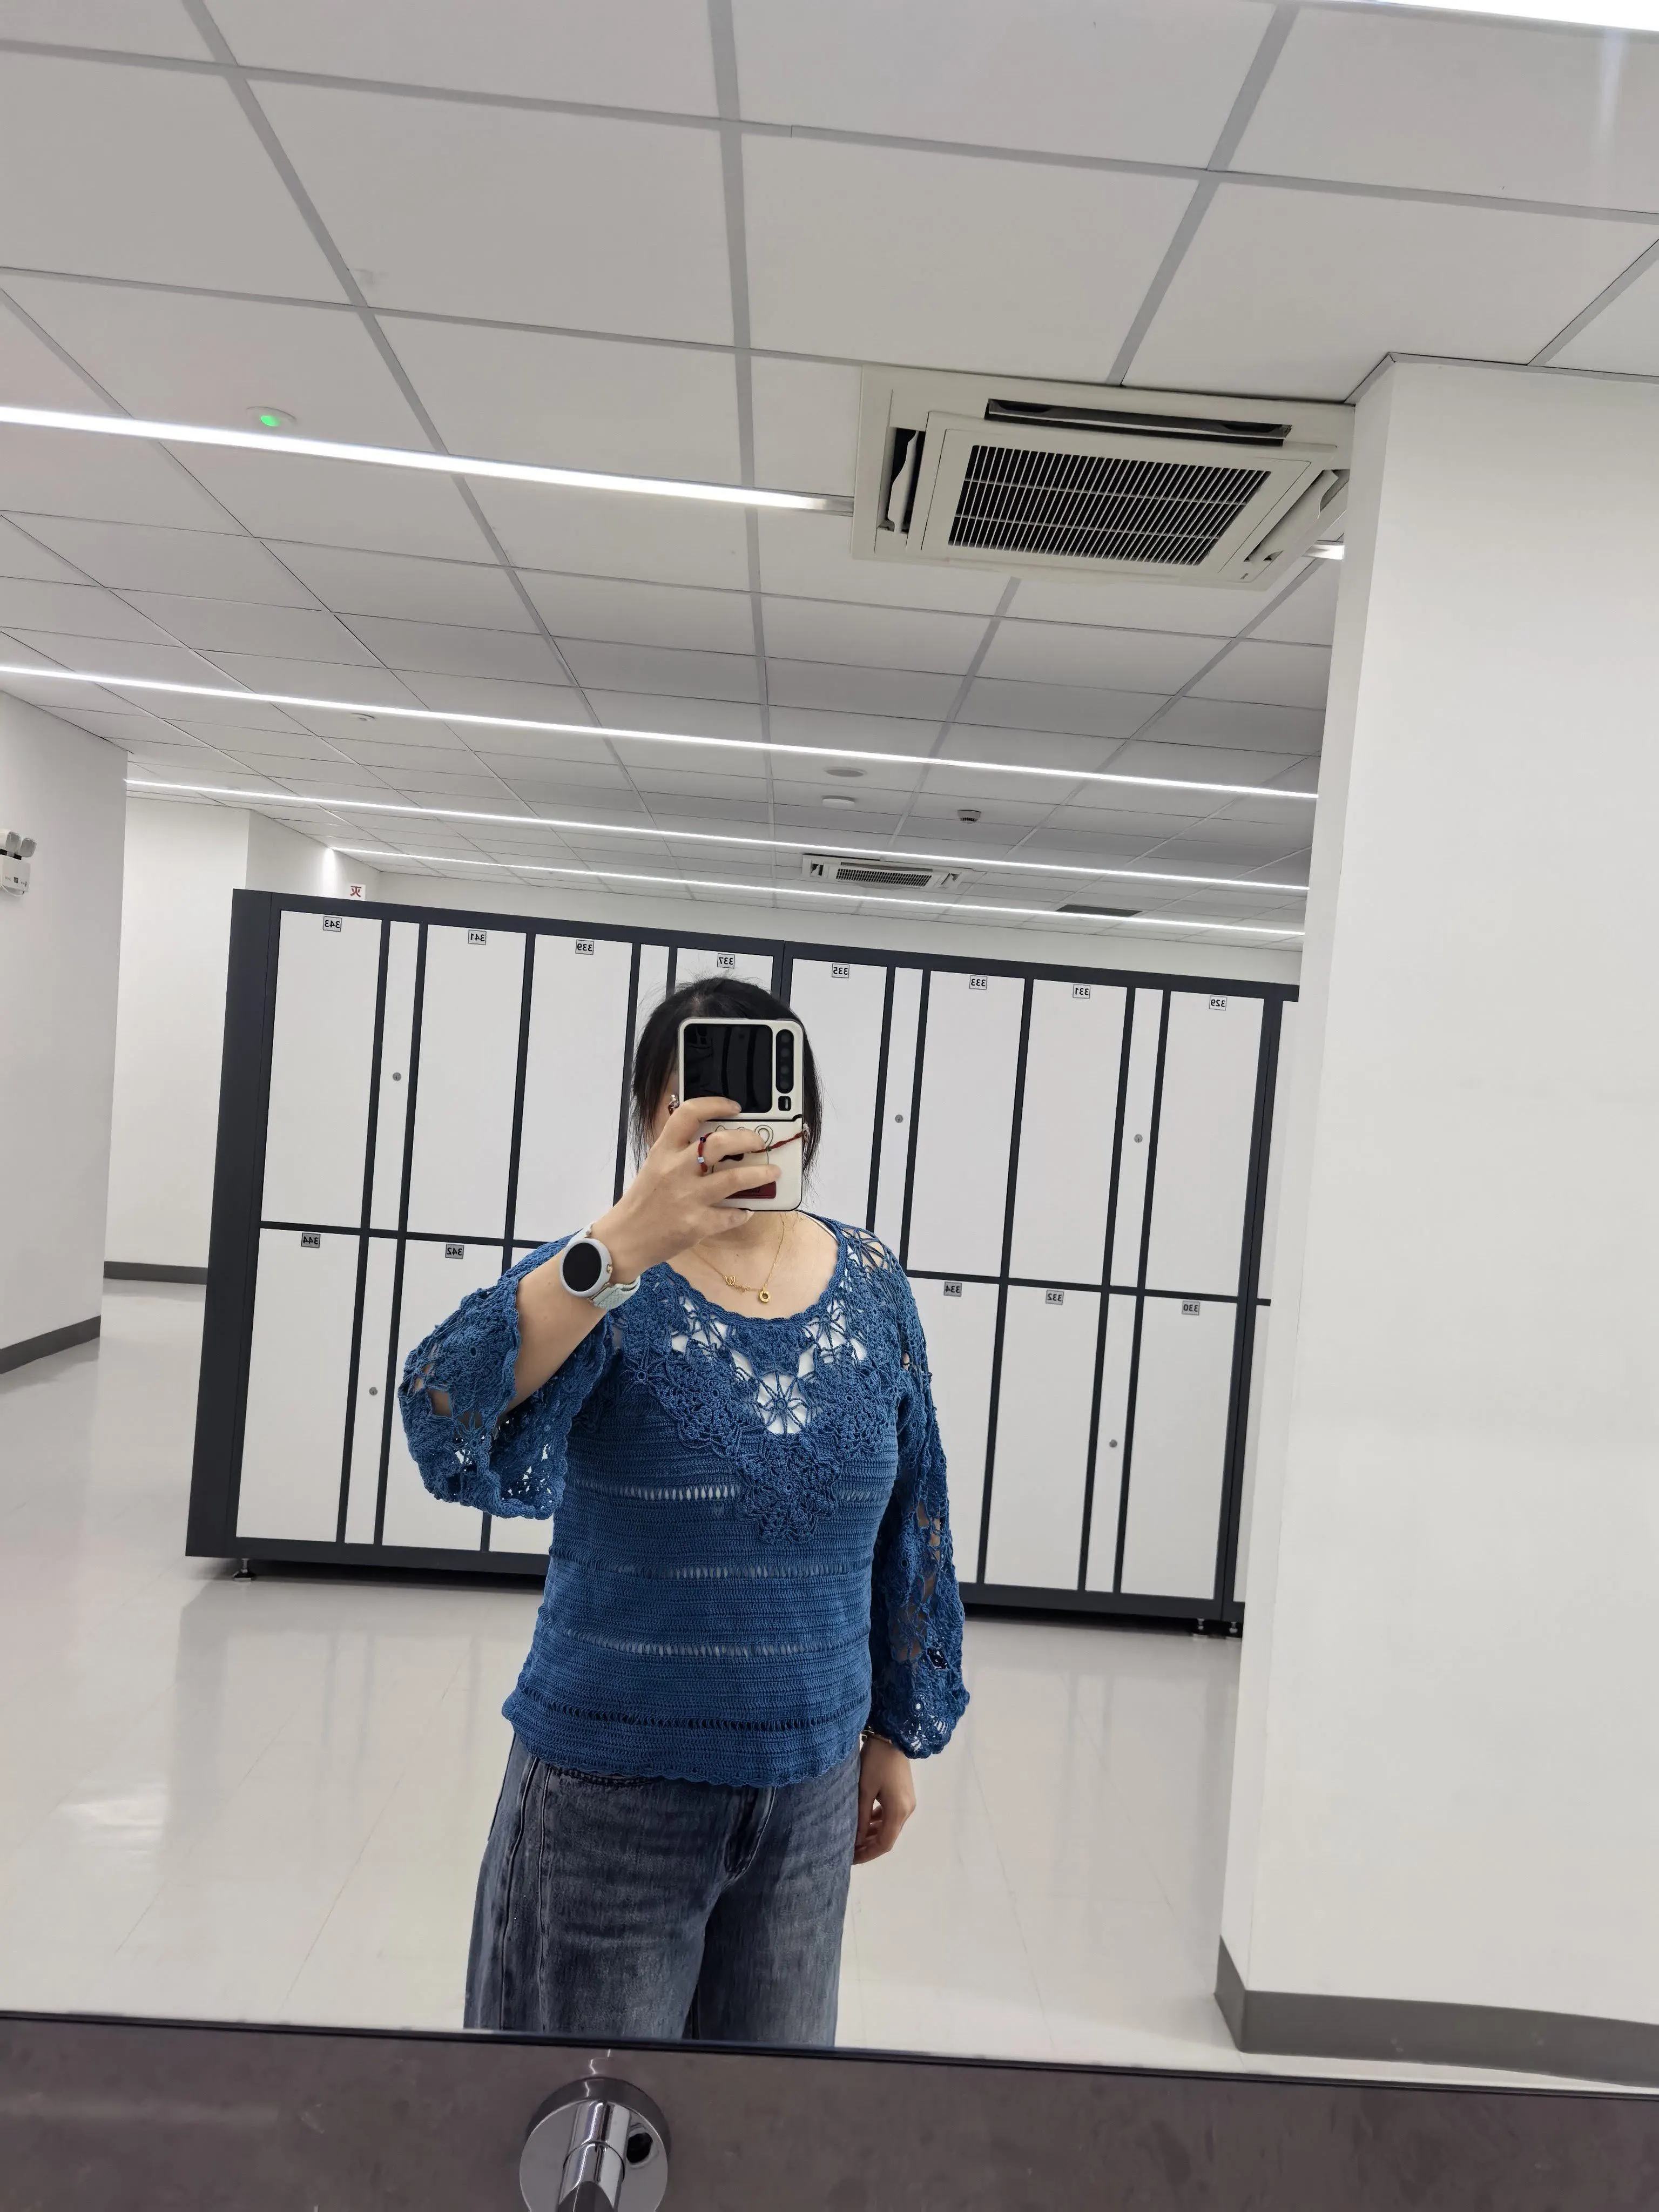
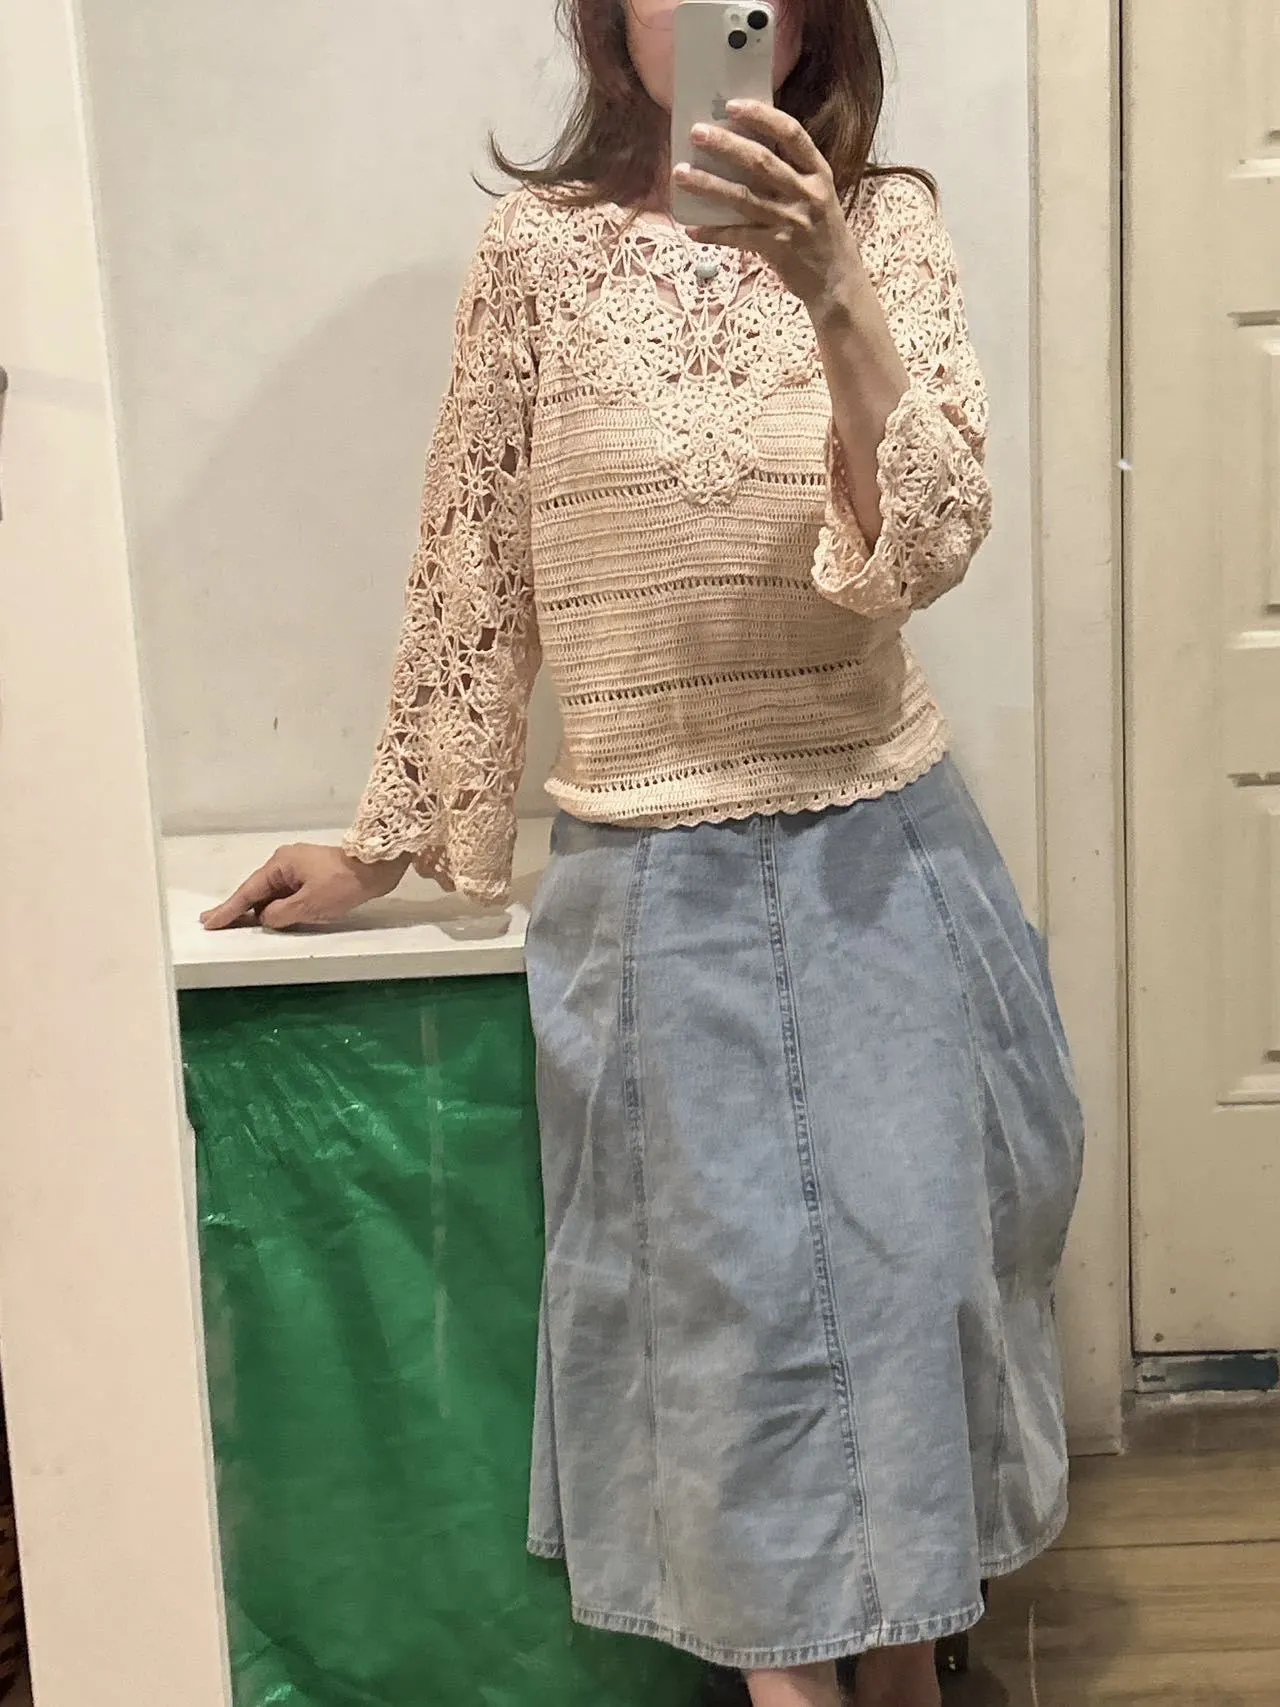
This garment comes in long-sleeved and mid-sleeved versions. All in same crochet method, just with different numbers of stitches. All include the front piece, the back piece, the neck and shoulder, and sleeves. First, work the front and back pieces, then work the neck and shoulders and the sleeves, After that, work the joining and edging.
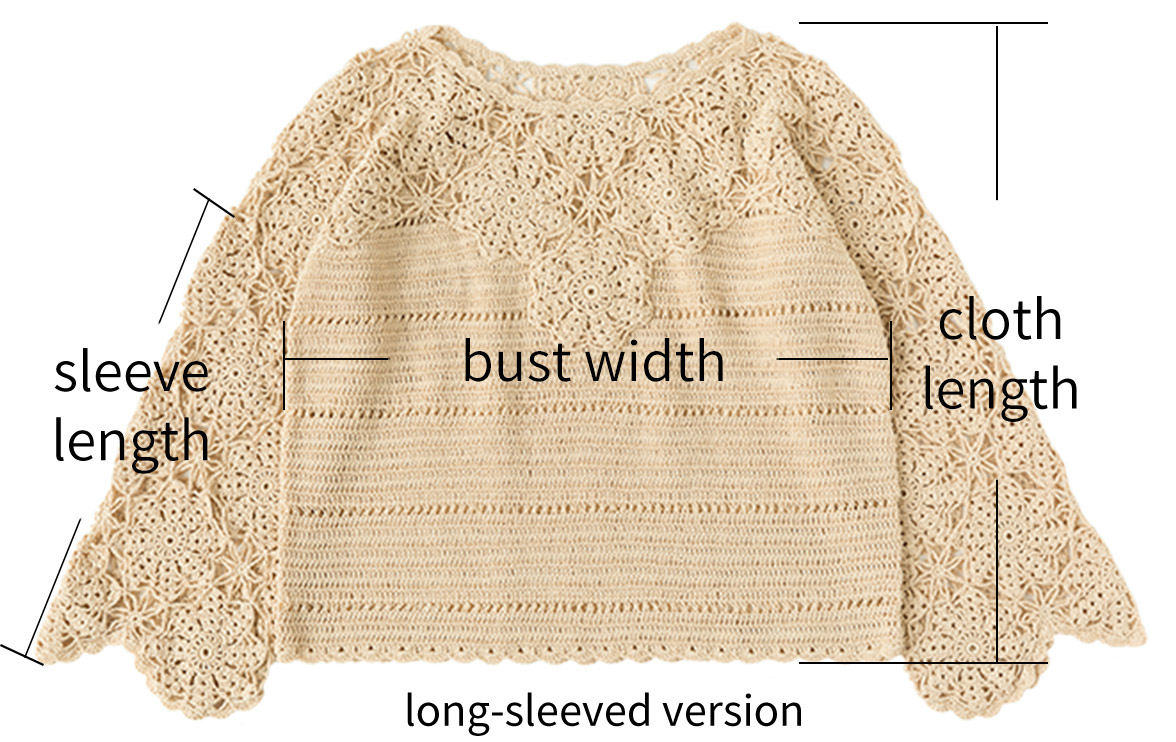

The handcrafted measurements may have an error of 1 to 2 cm. Due to variations in individual tension, the size of the sample is for reference only.
Materials: Susan's Family Combed 5# Lace
Hook: 1.75 mm crochet hook

Note: This pattern is making in Chinese crochet pattern terms, and the stitch name is written using American terminology. All measurements in charts are in cm.
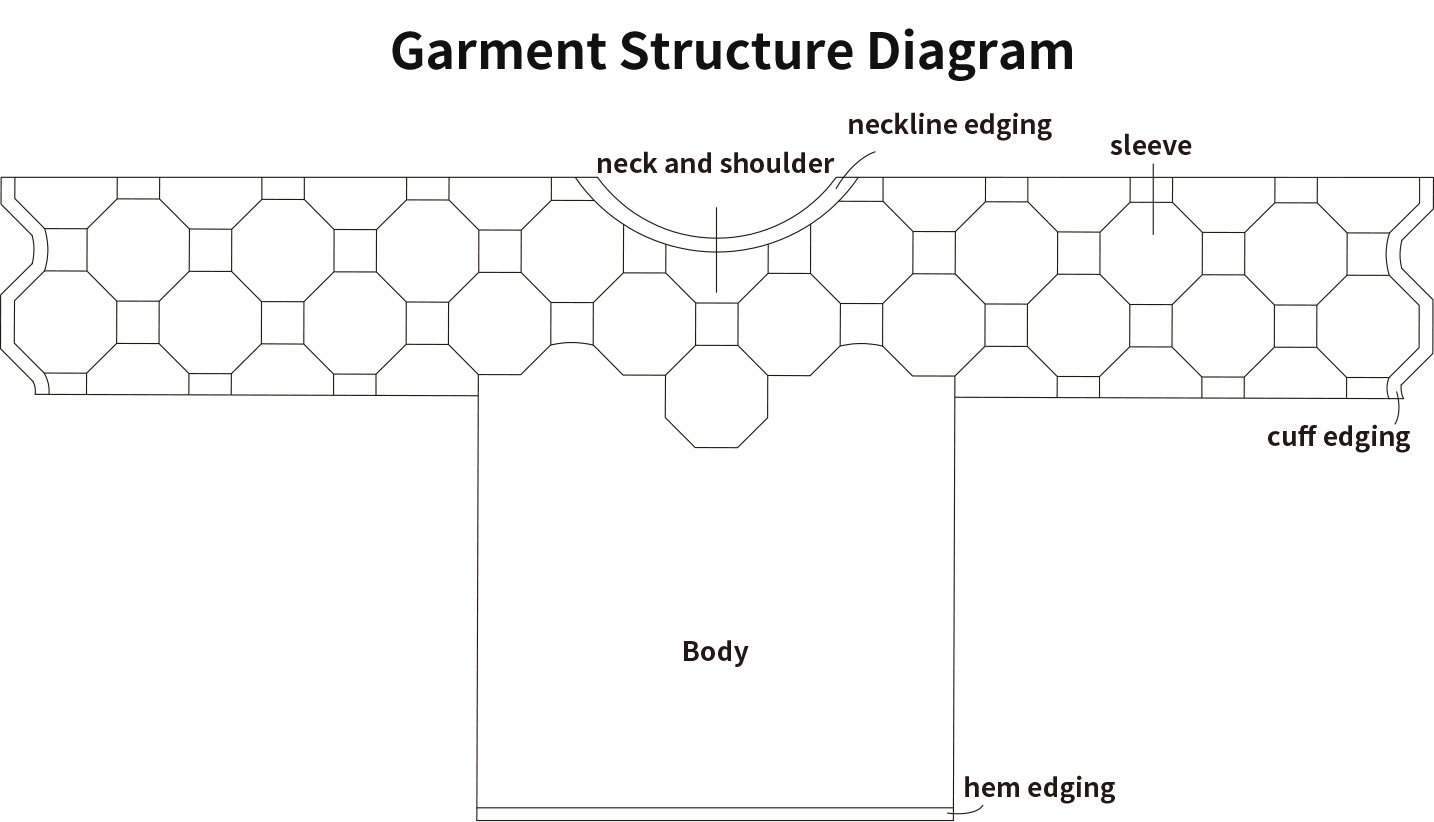
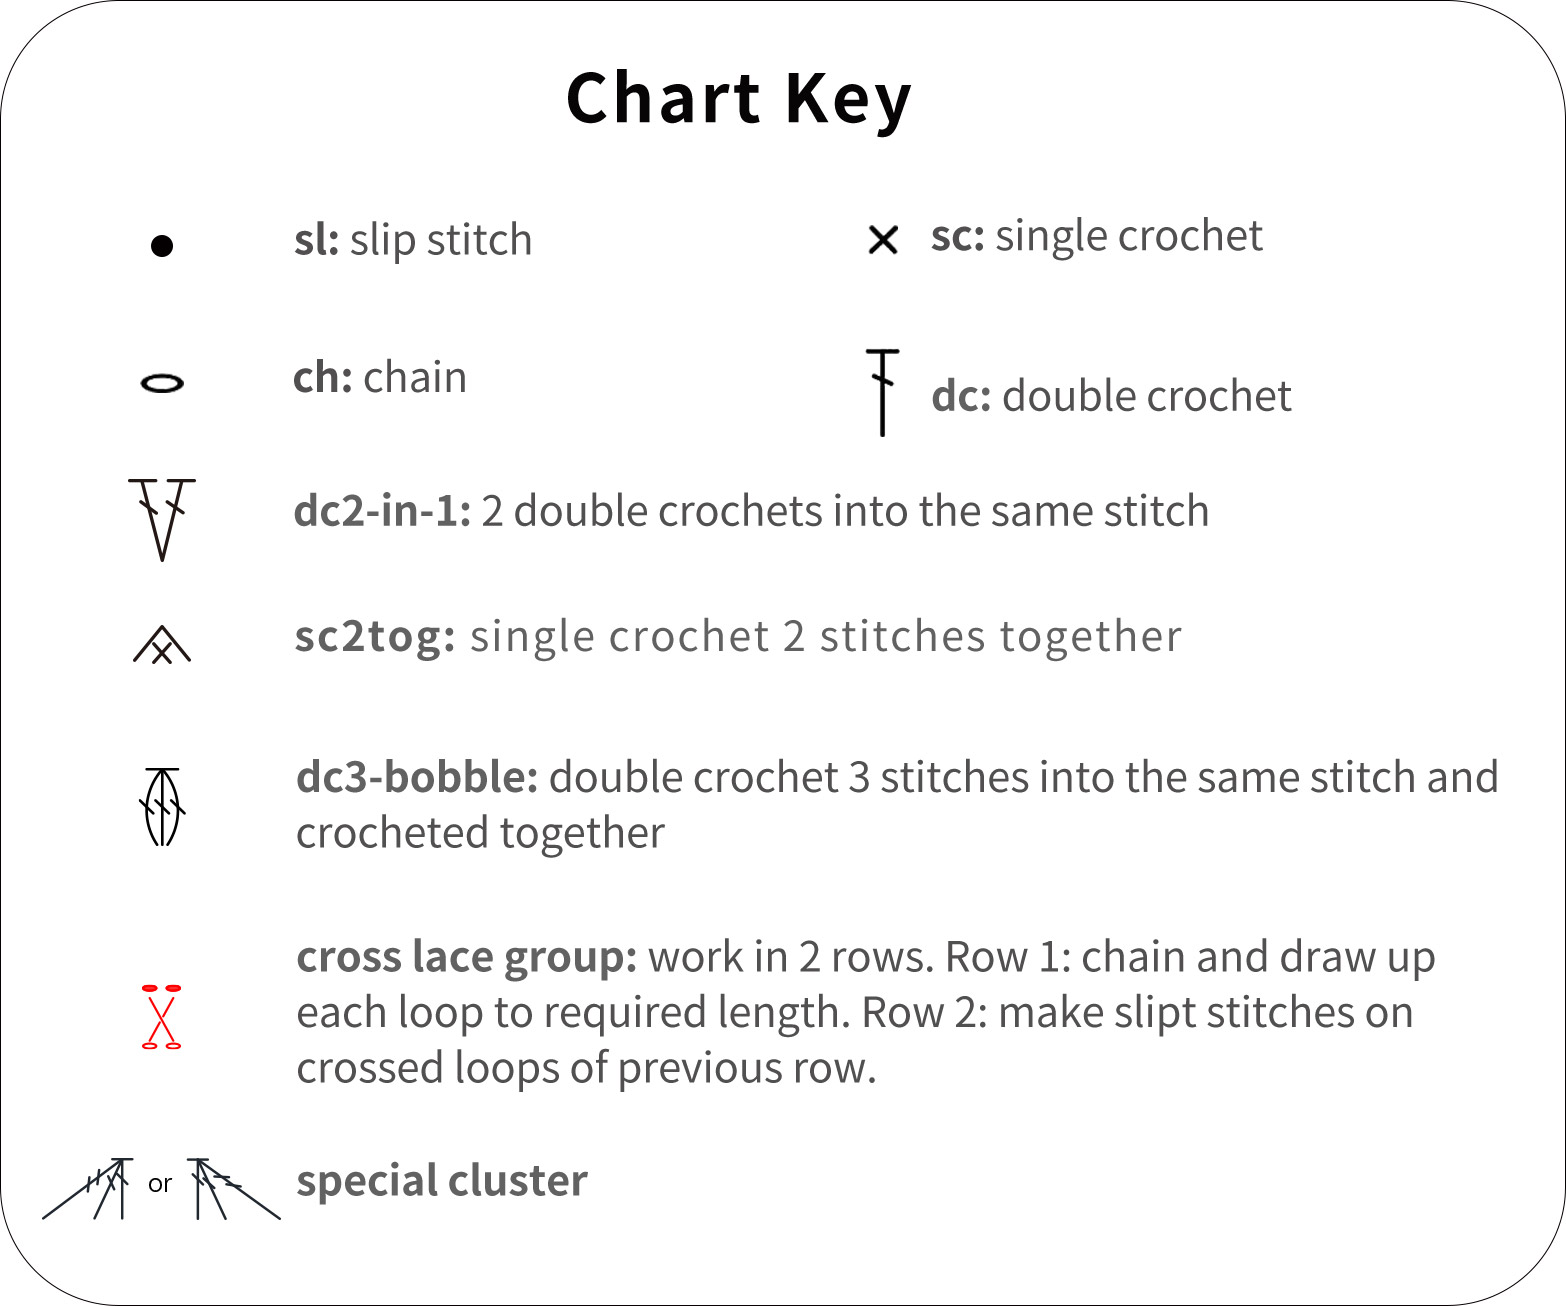

Part 1 Front pieceA
The front piece consists of the body, left and right chest pieces.
Step 1 BodyA1 00' 59''
The body is divided into Area 1 and Area 2, start with a foundation chain. Work back and forth in rows to crochet upwards. Please refer to the video demonstration for more details.
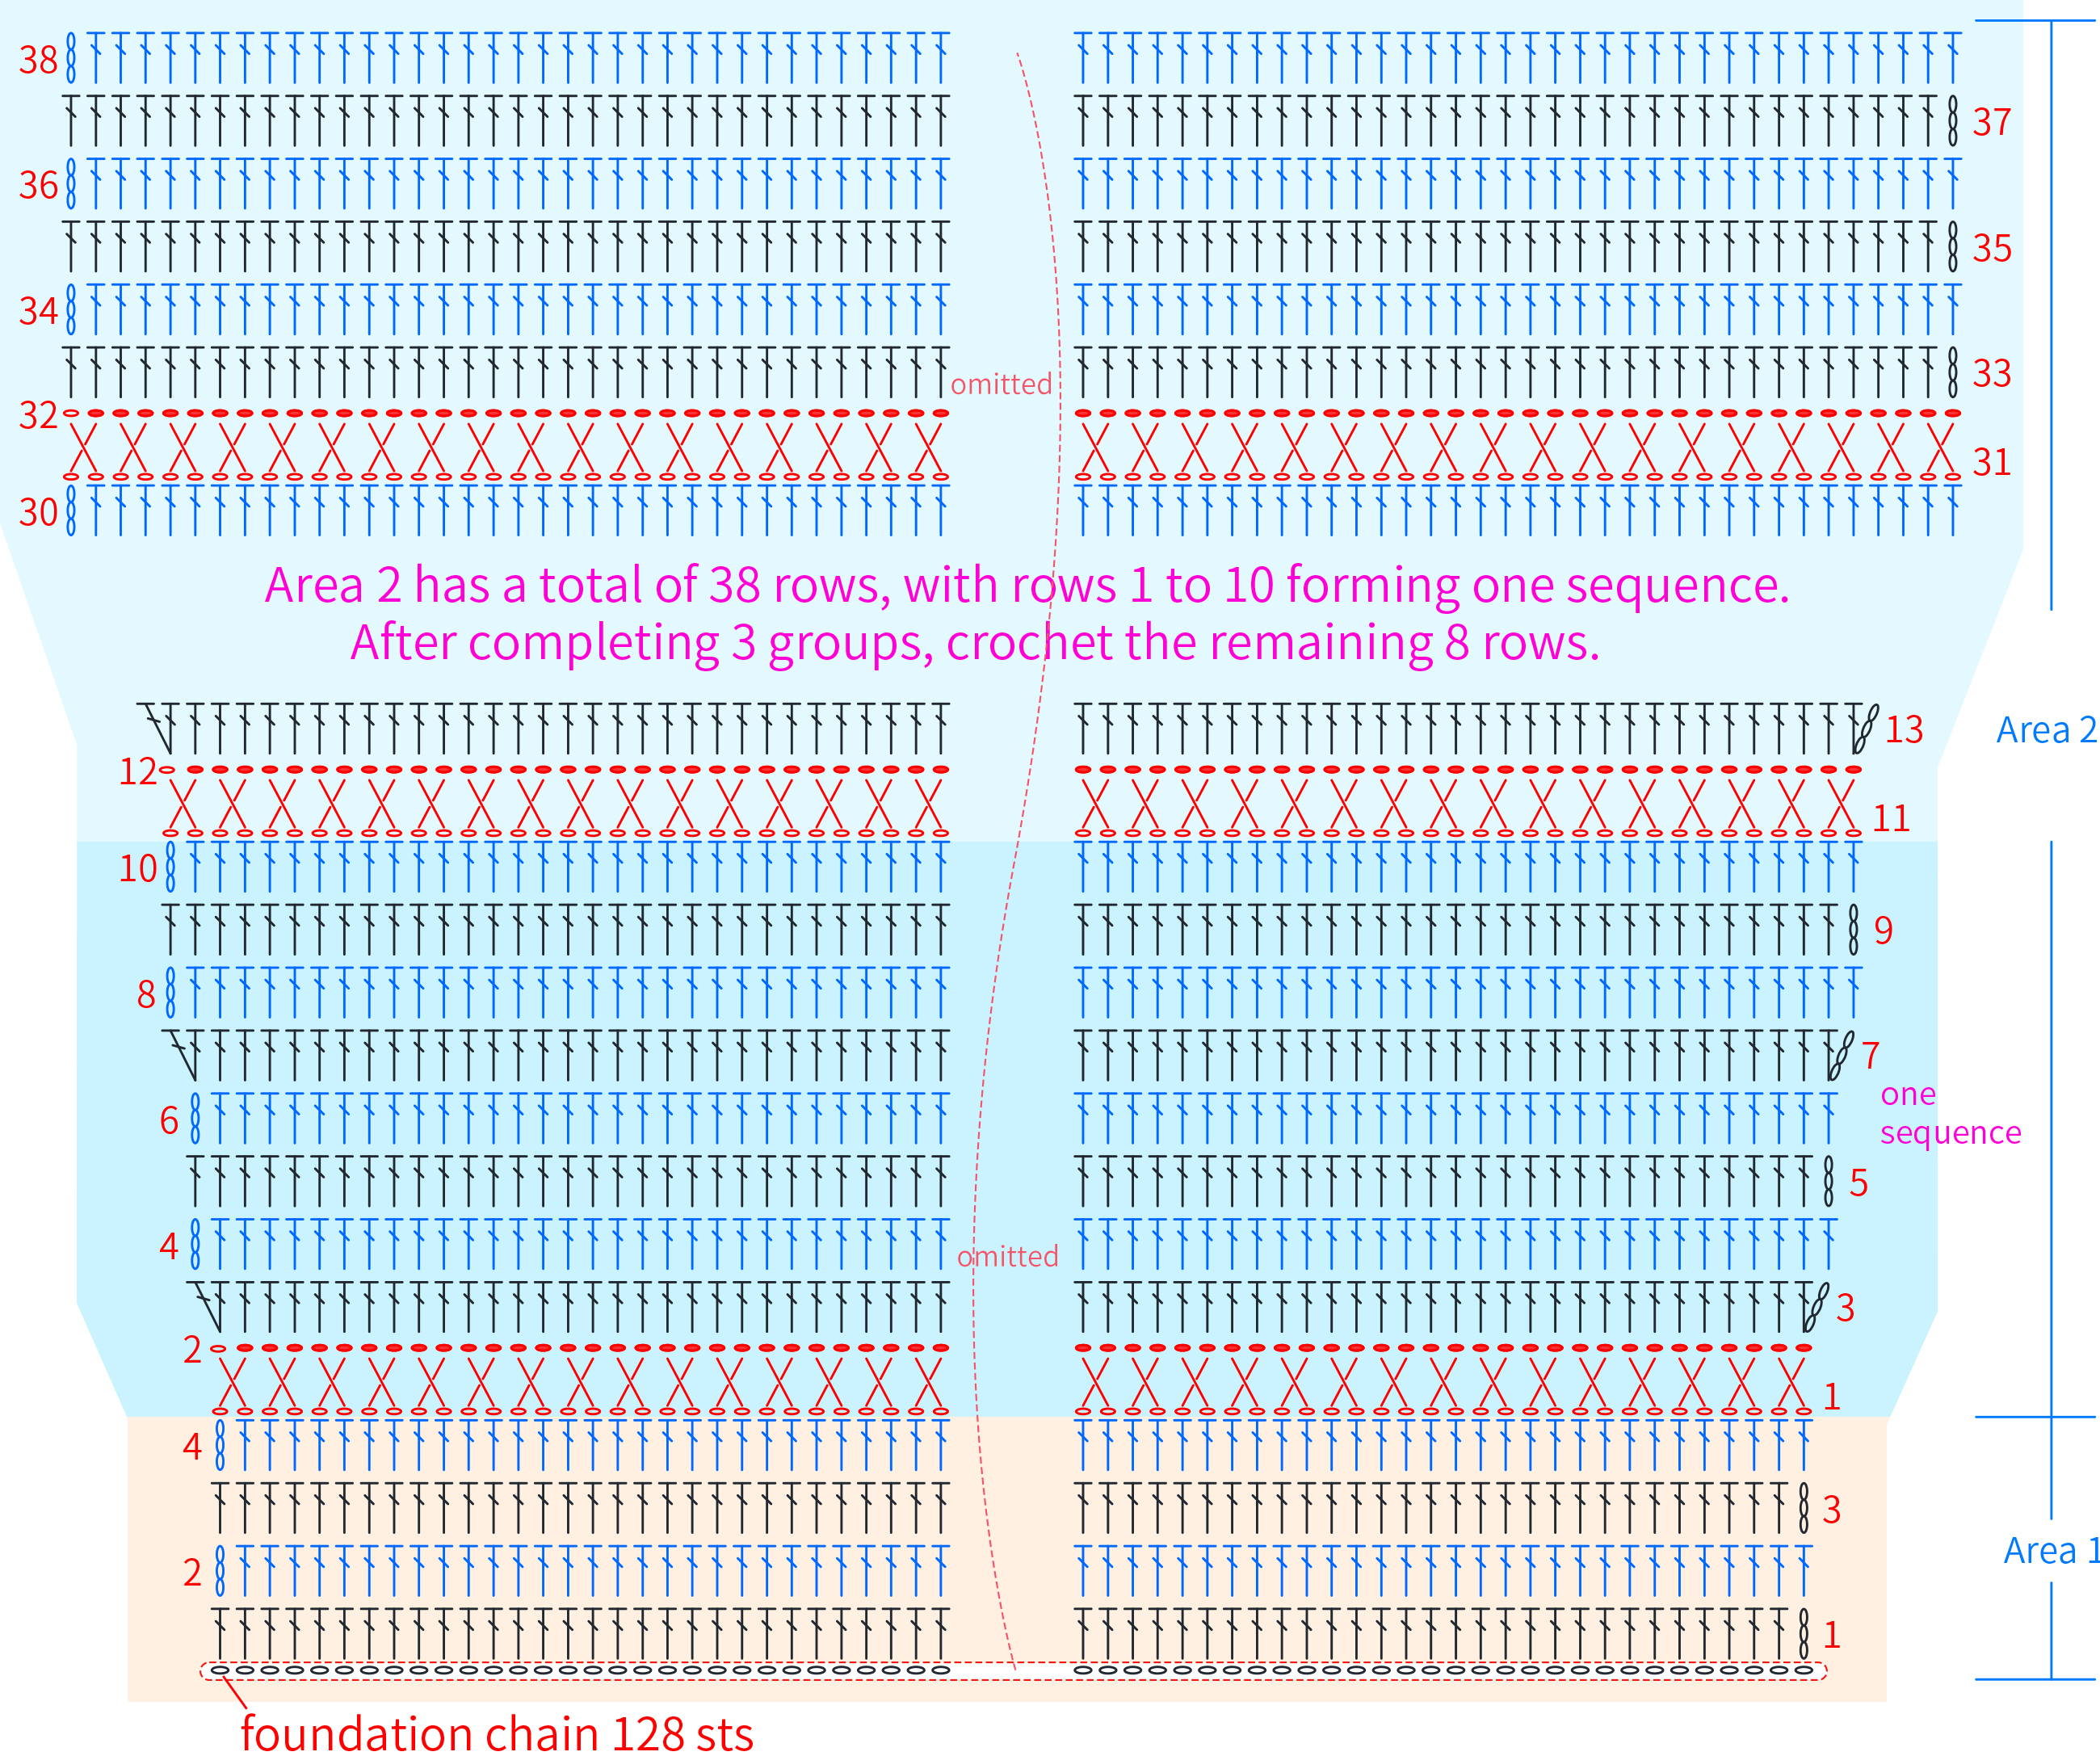
Note: After completing Area 1, the width should be about 44 cm and the height about 3 cm. If the dimensions differ too much, you need to adjust your tension or switch to a different hook size and crochet again.
Step 2 Left A2 and right A3 chest pieces. 17' 52''
The left and right chest pieces are worked back and forth in rows separately on the basis of body. Please refer to the video demonstration for more details.
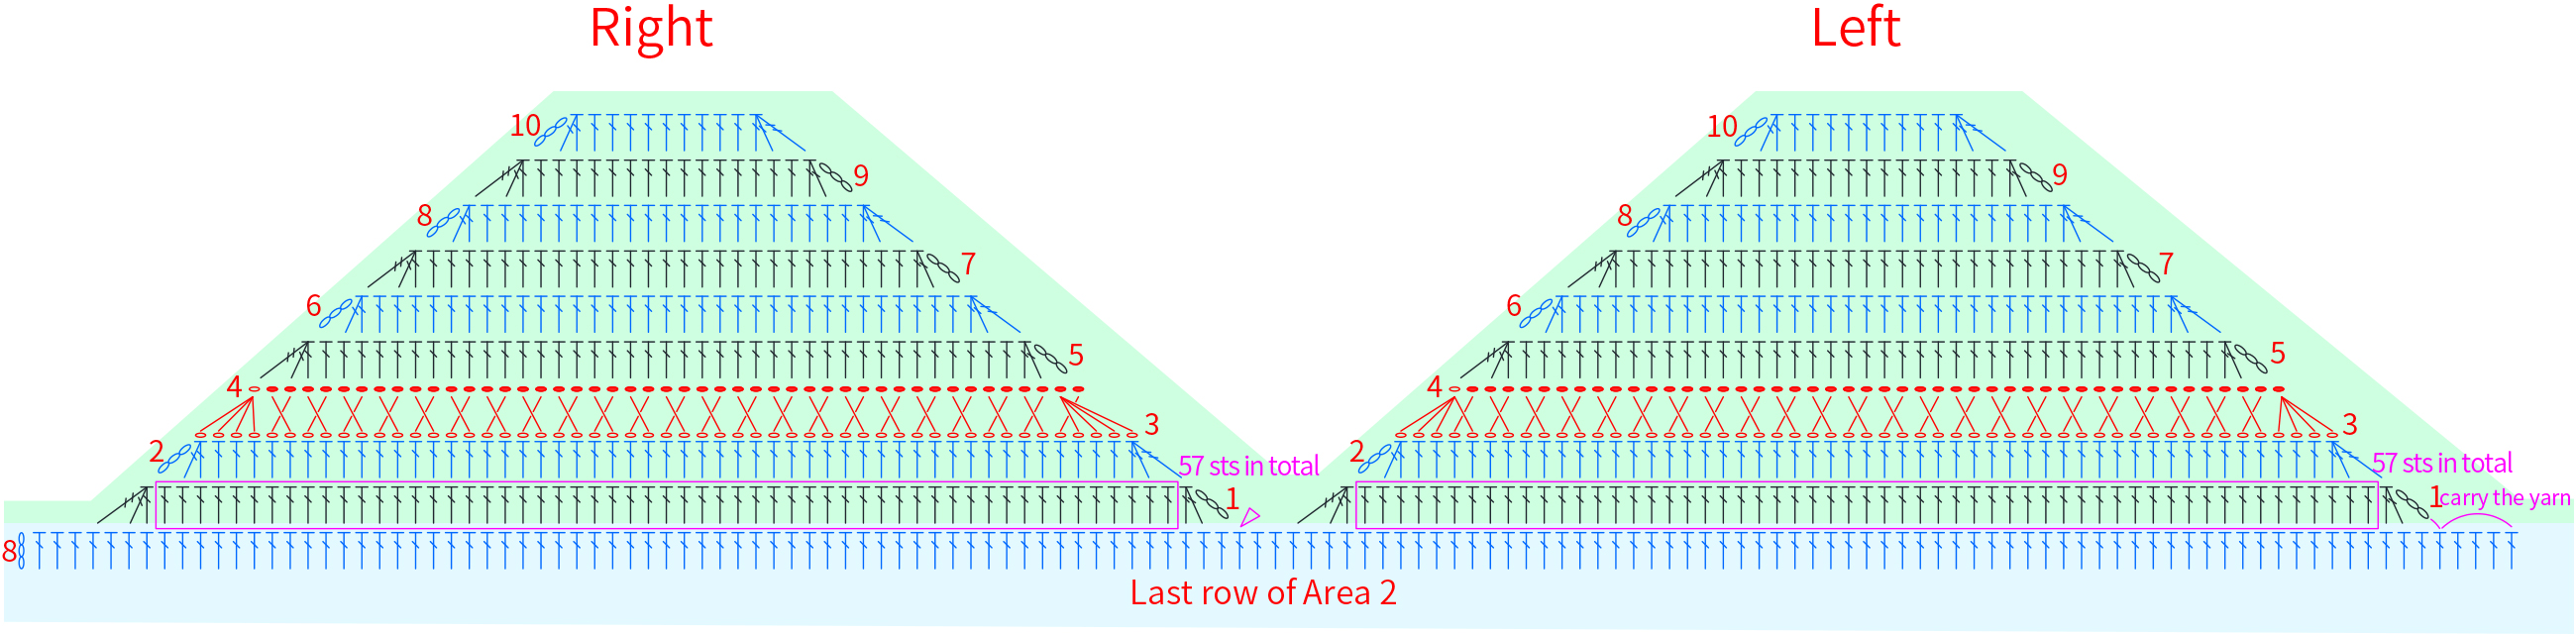
Part 2 Back pieceB 32' 38''
The back piece consists of three areas. Area 1 and 2 are same as the body part of the front piece. Area 3 is similar to the left chest of the front piece. Please refer to the video demonstration for more details.

Note: Area 1 and 2 of the back piece are identical to Area 1 and 2 of the front piece. Maintain the same crochet tension as the front piece, and edge dimensions should fit well with the front piece.
Part 3 Neck, shoulders and sleevesC
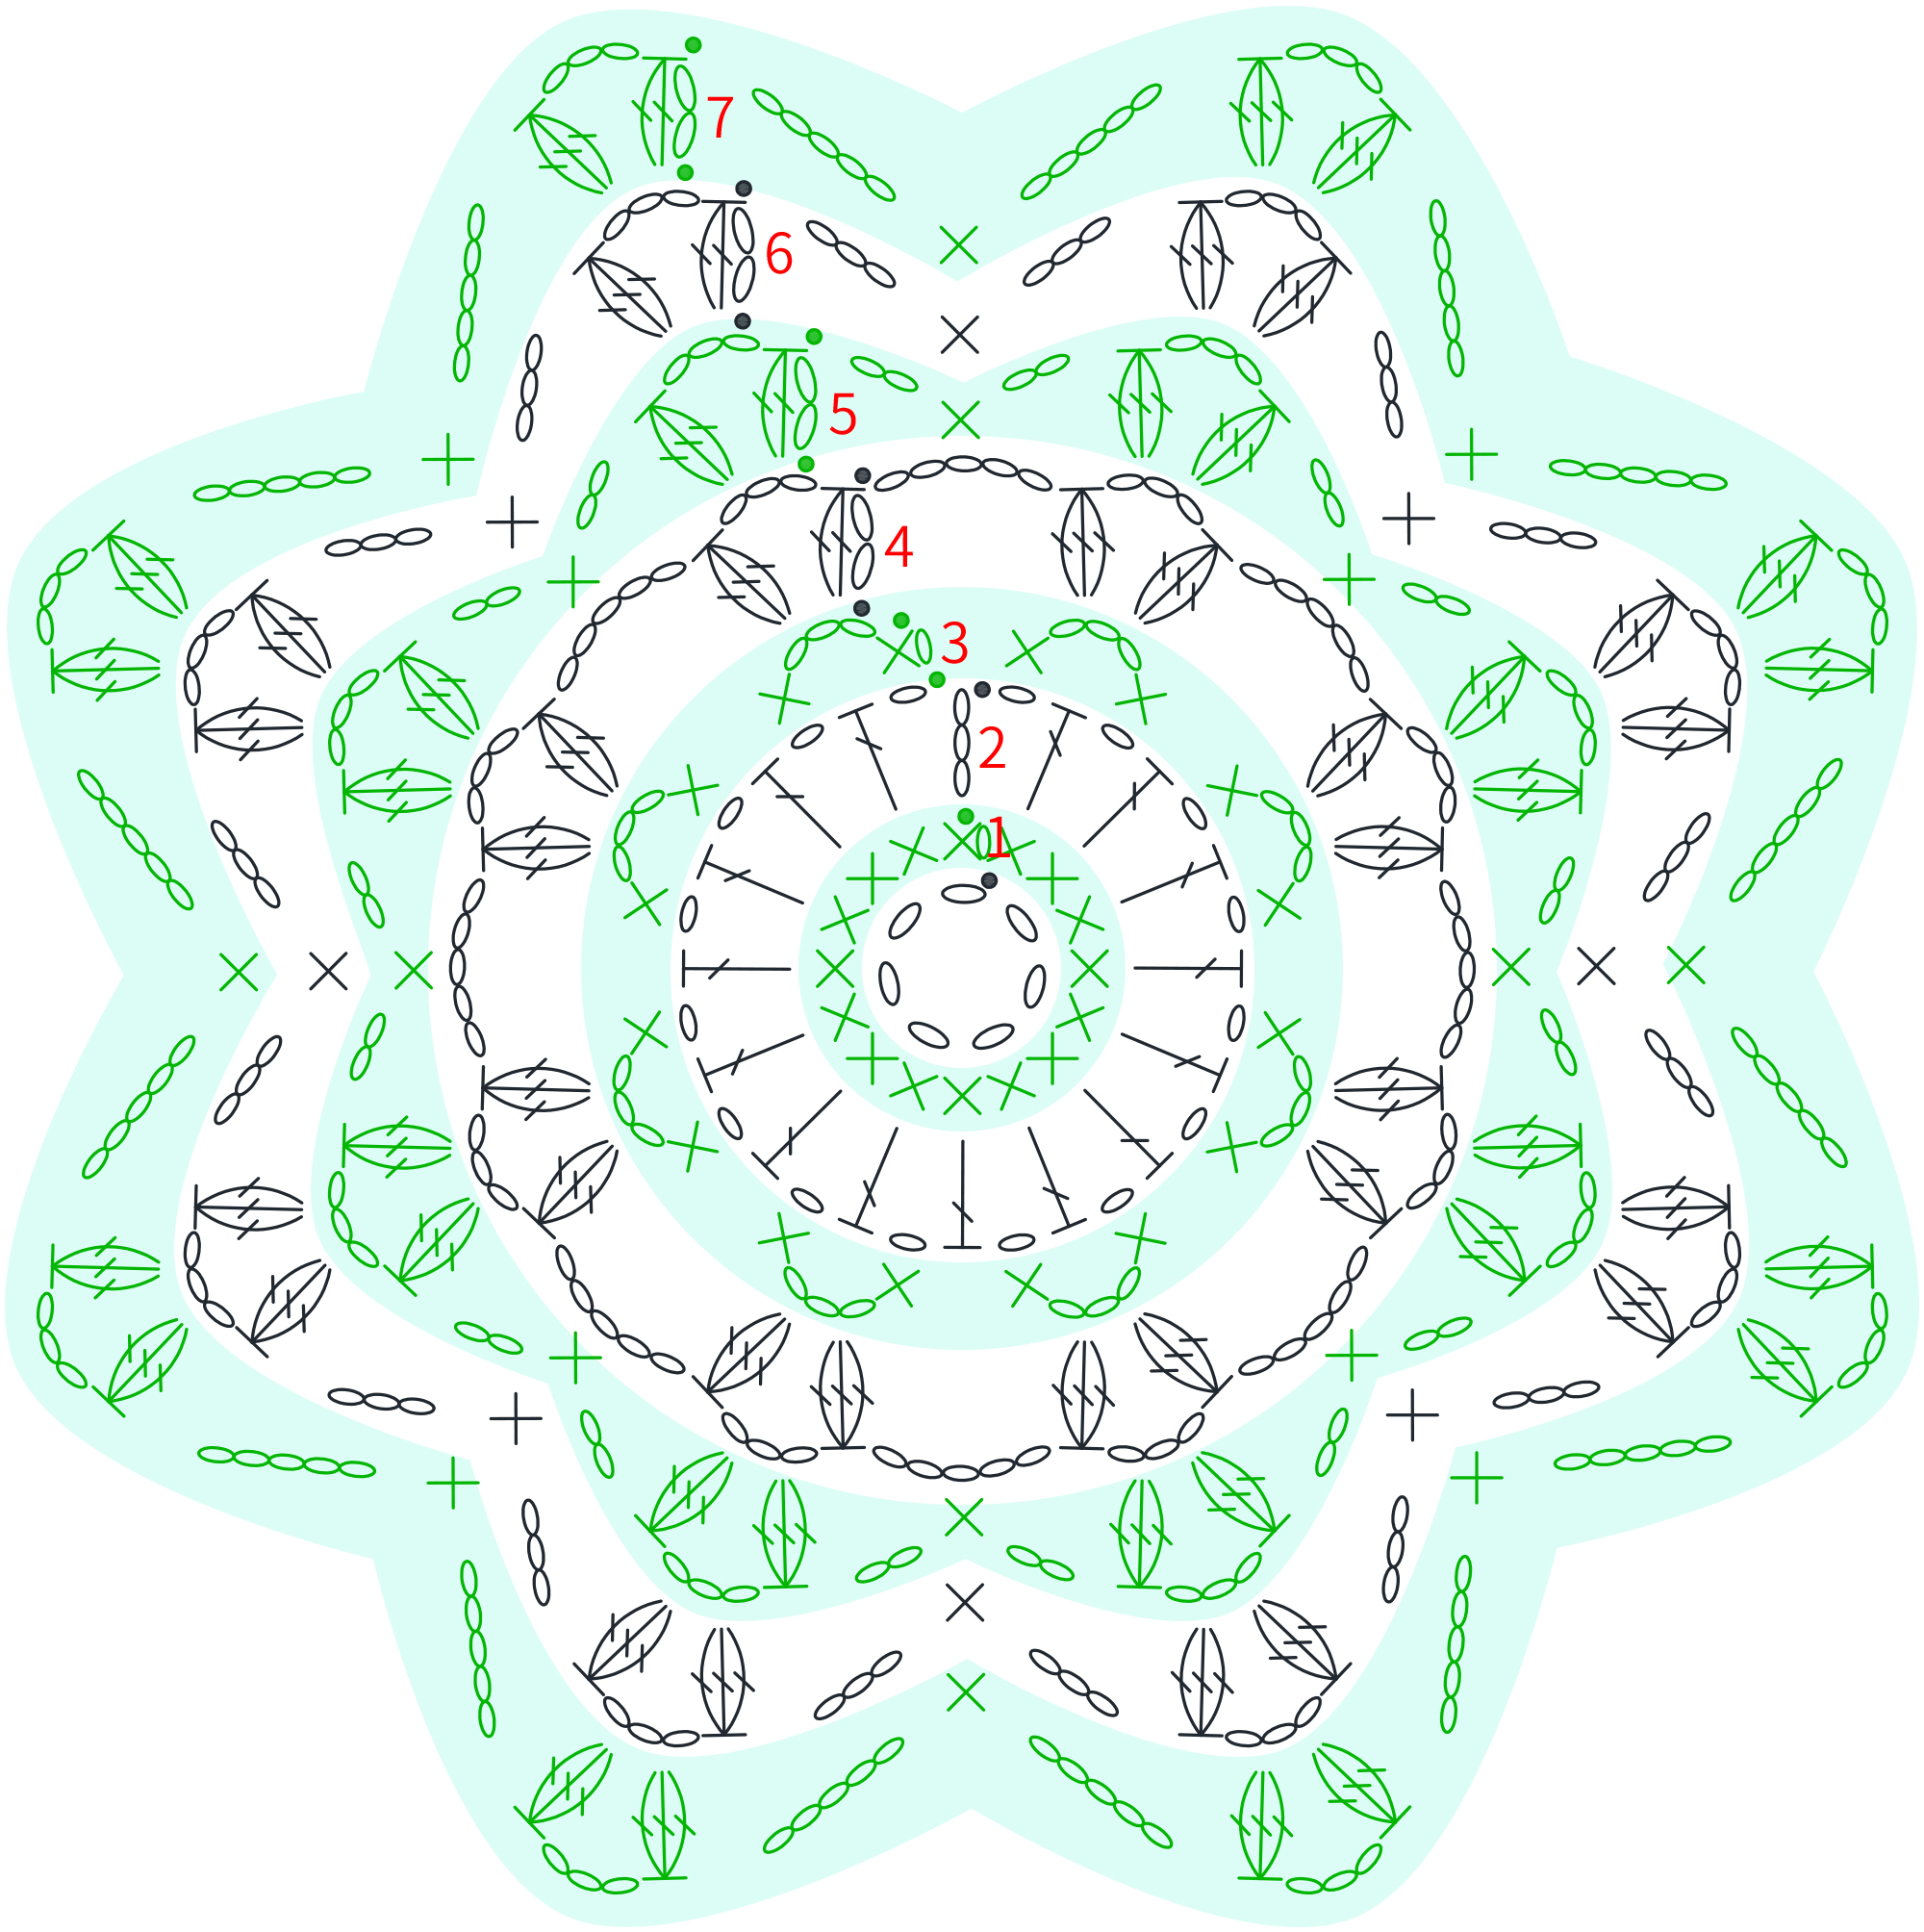
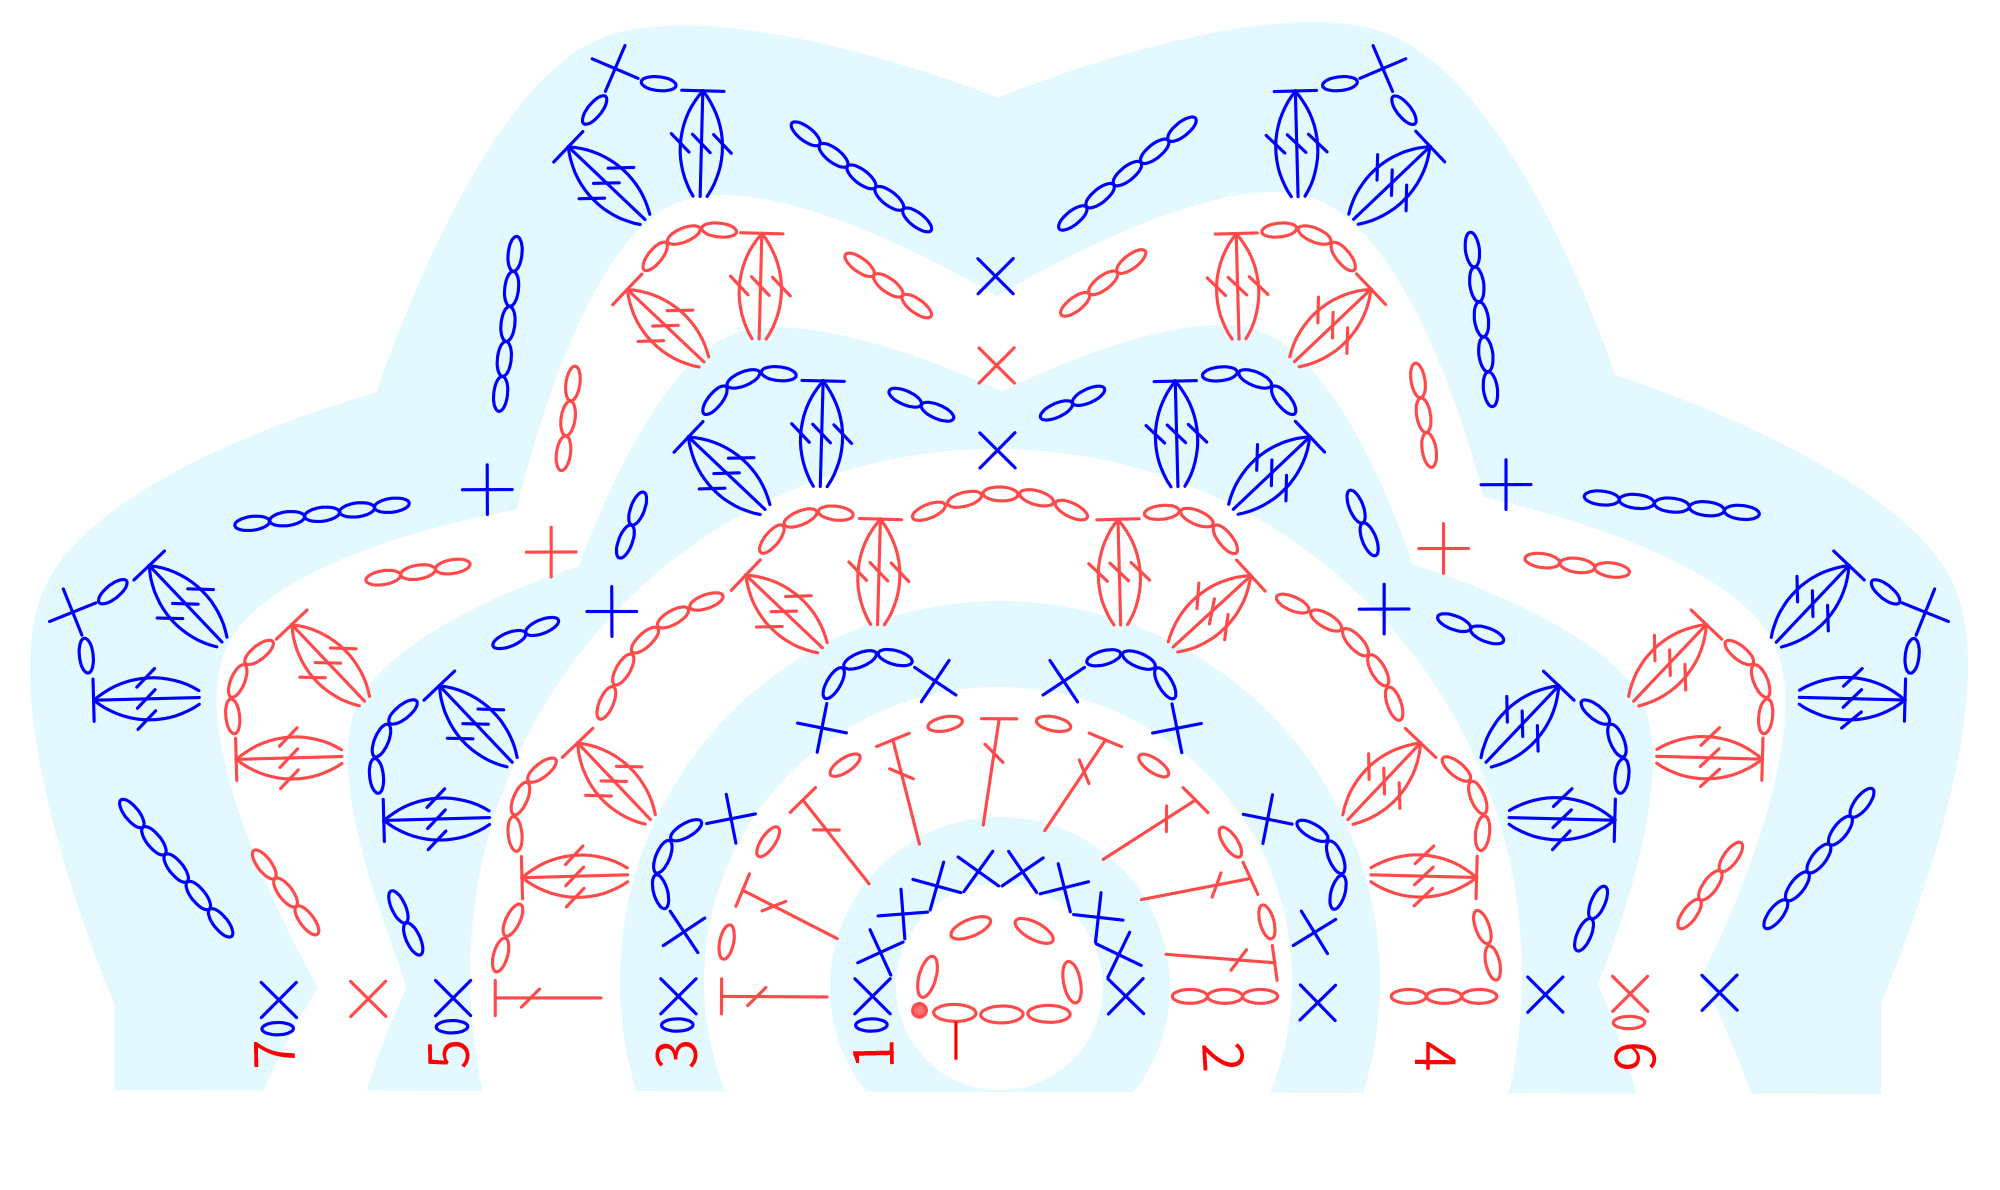
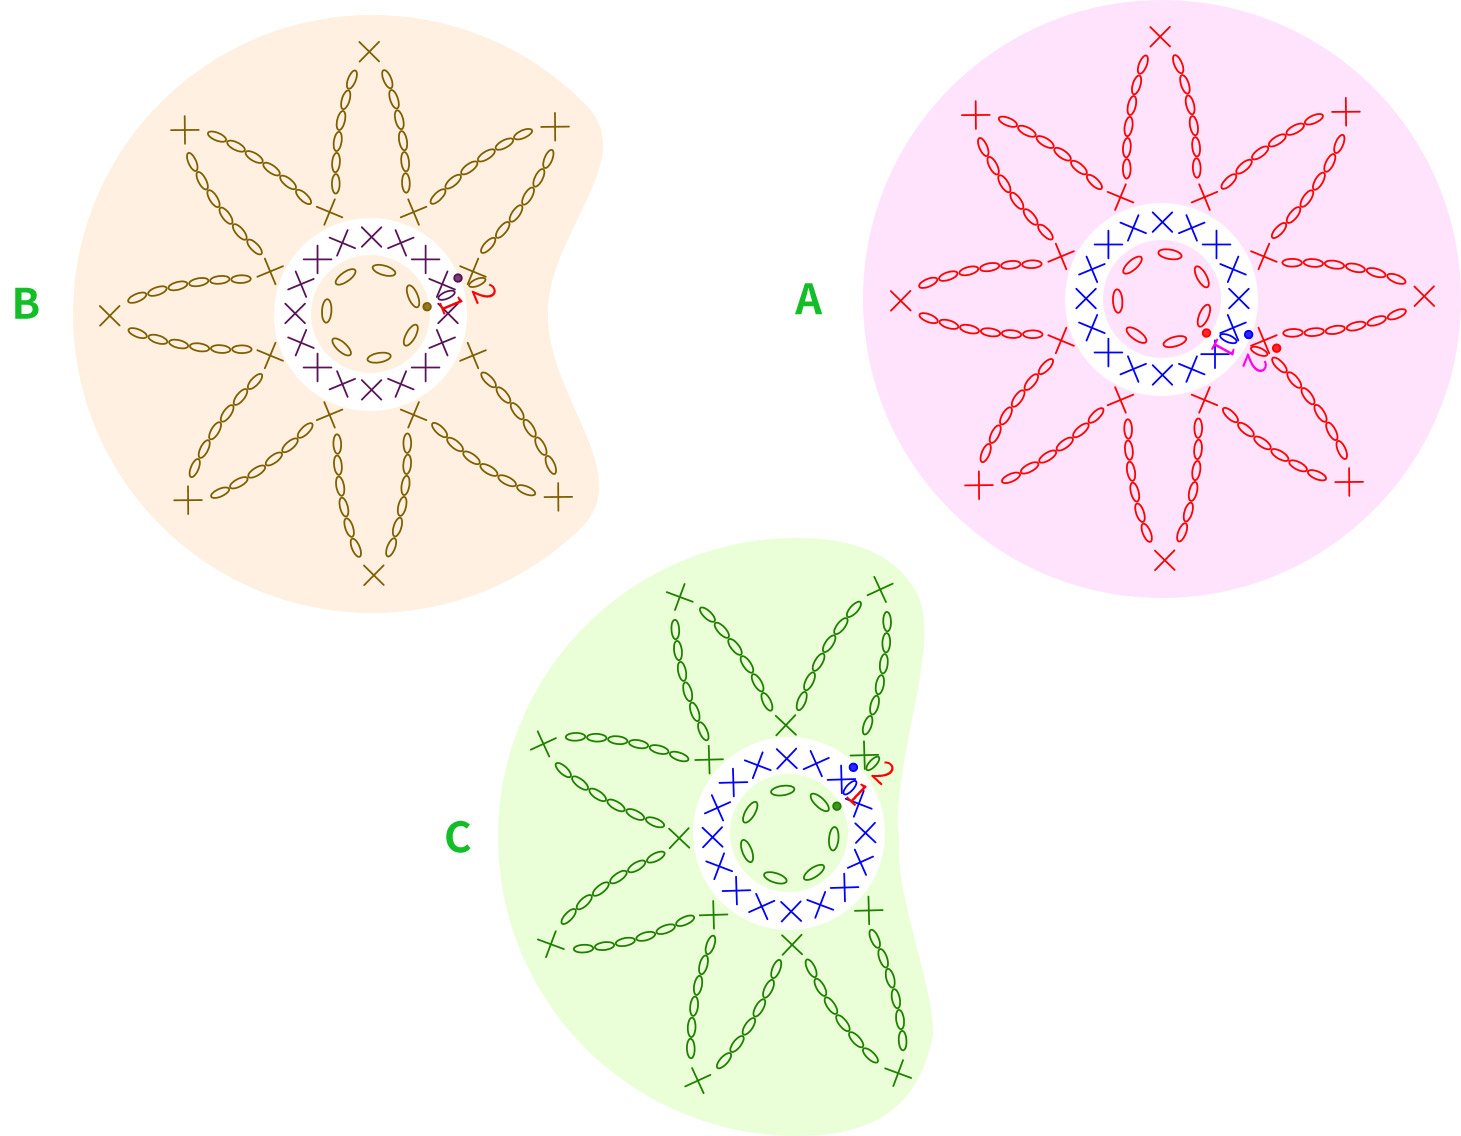
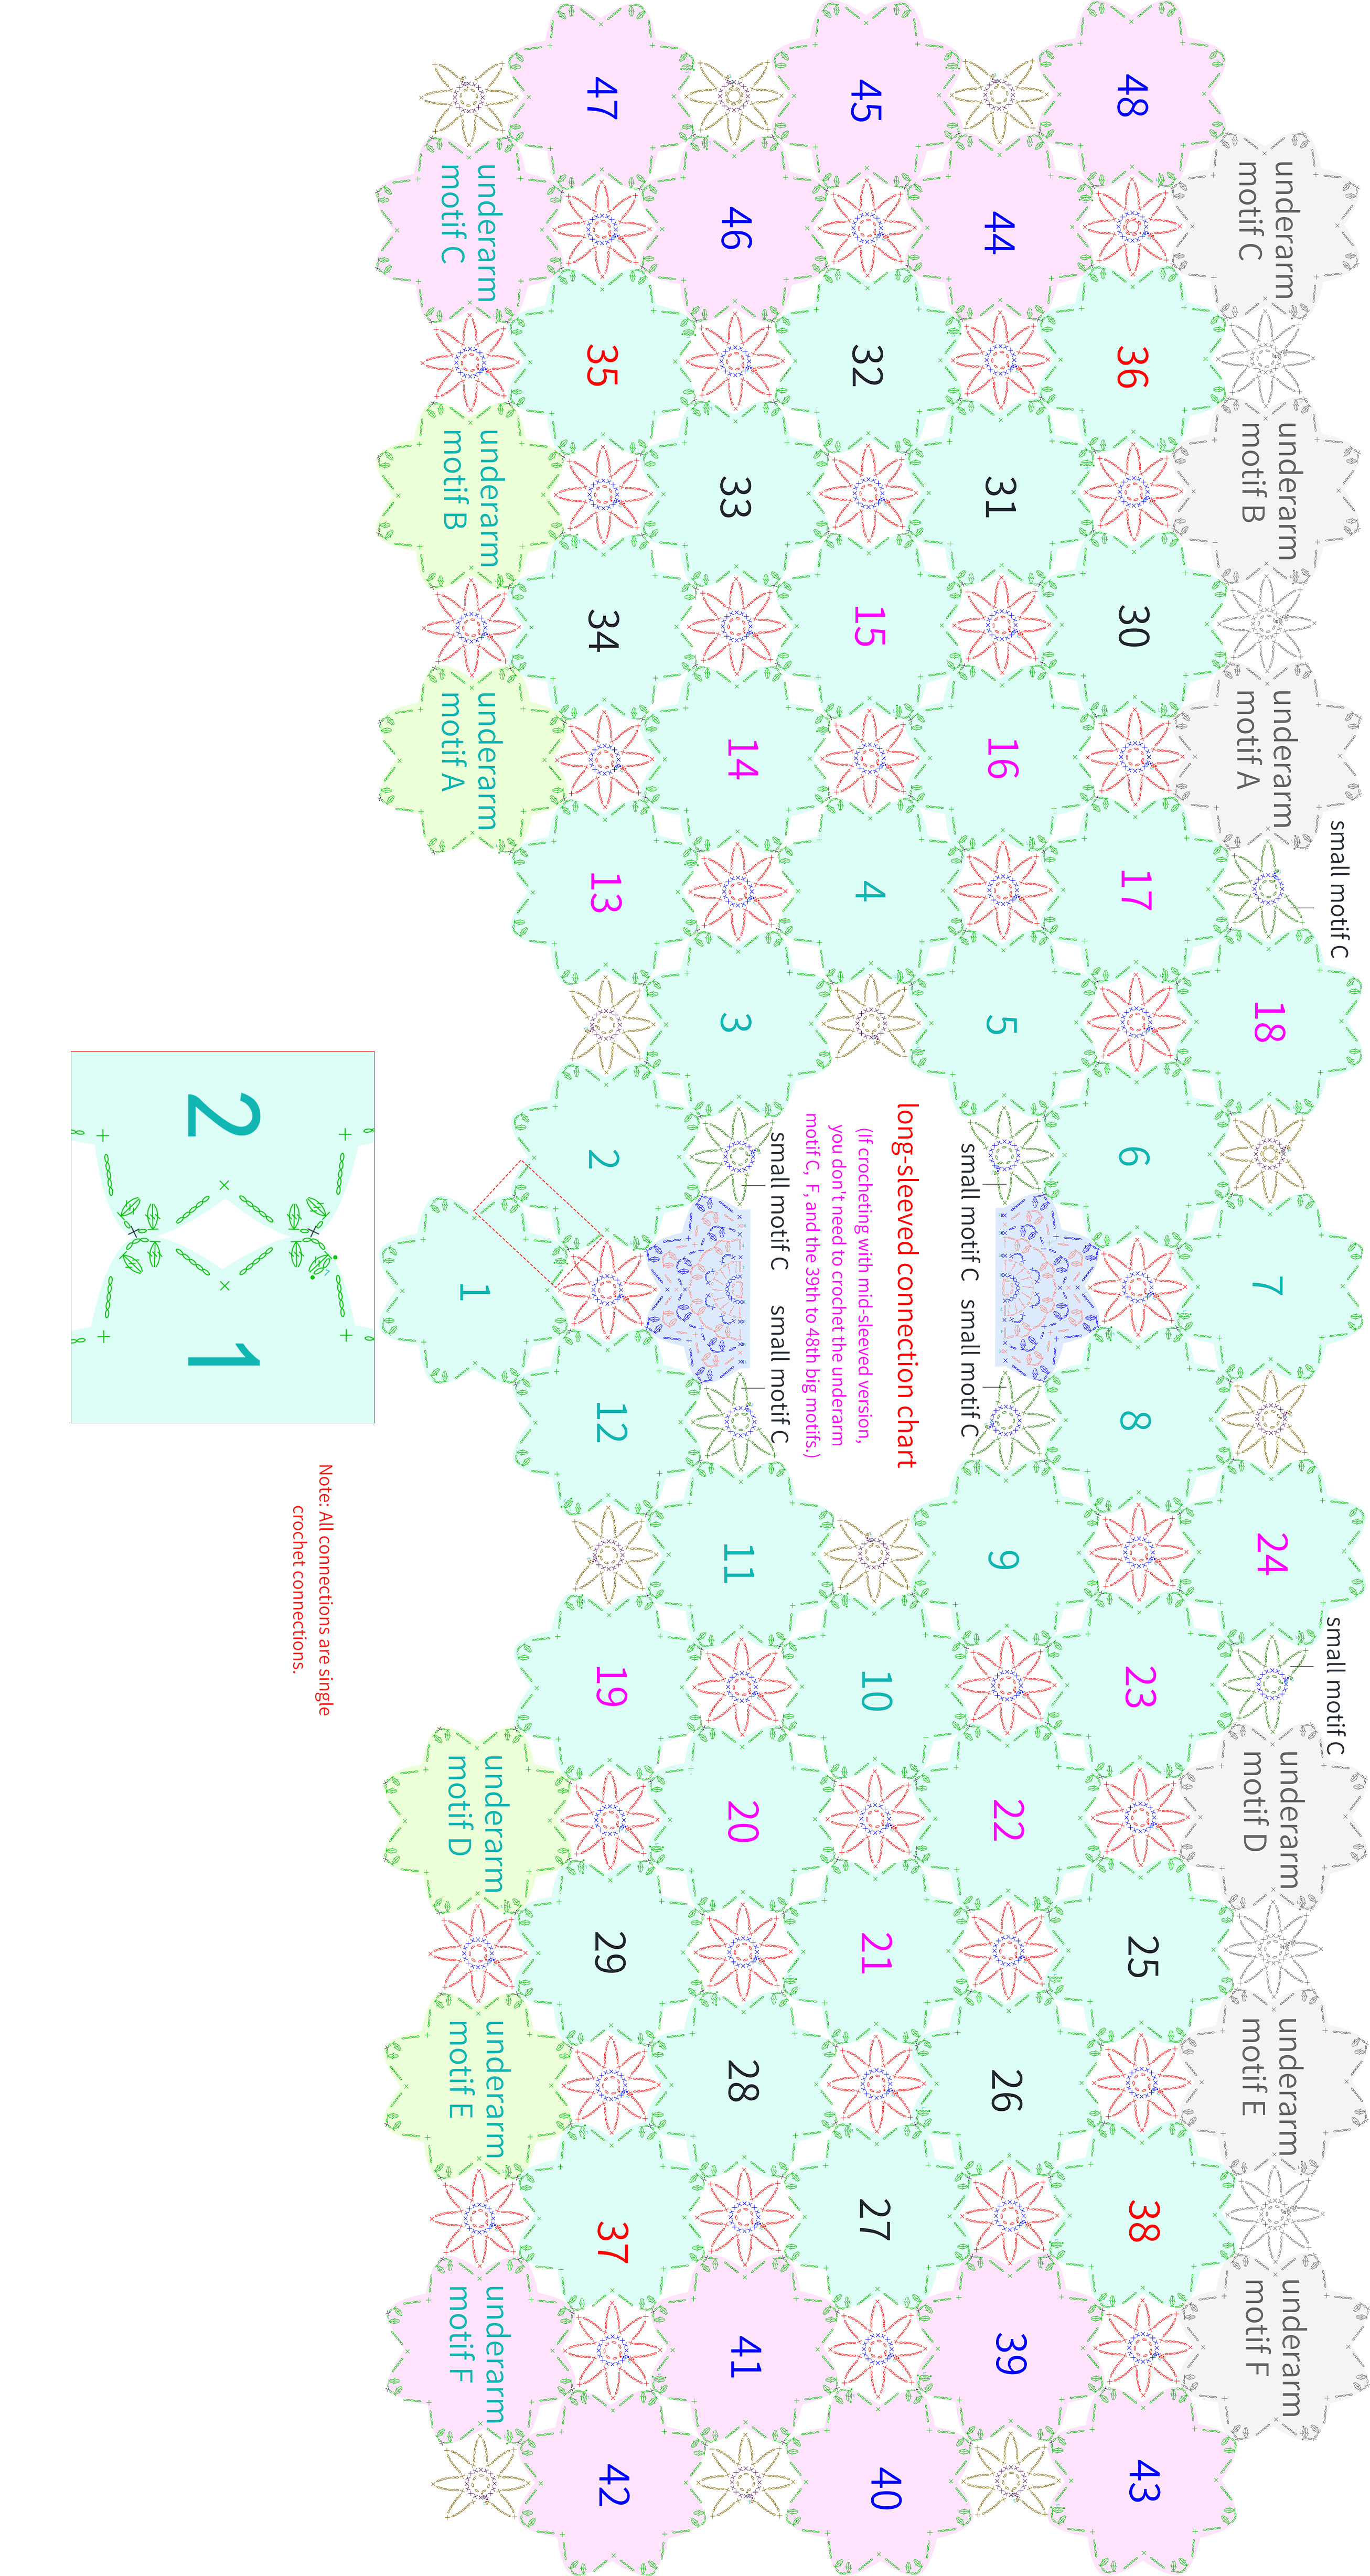
The neck, shoulders and sleeves crochet and join as you go, finish the 2 parts together. These involve three different motifs, the big motif, the semicircle motif and the small motif.
Step 1 Big motifC1 33' 25''
The big motif begin with a chain ring. Crochet in rounds counterclockwise along the ring. The first one is worked individually and when crocheting the final round on remaining motifs, refer to the connection chart and join to matching motifs. Please refer to the video demonstration for more details.
Step 2 Semicircle motifC2 58' 19''
The semicircle motifs begin with a chain ring, work back and forth in rows along the ring. Please refer to the video demonstration for more details.
Step 3 Small motifC3 62' 16''
The small motifs includes Small Motif A, Small Motif B, and Small Motif C. All is start with a chain ring, work in rounds counterclockwise along the ring. Please refer to the video demonstration for more details.
Part 4 JoiningD 68' 21''
The joining includes the joining of the front and back pieces and the joining of the neck and shoulder. We'll start by joining the front and back pieces. Once done, sew the neck and shoulders together (2 strands). Please refer to the video demonstration for more details.

Part 5 EdgingE
The edging includes the hem edging, the cuff and neckline edging.
Step 1 Hem edgingE1 79' 25''
Join the yarn at the back piece, crochet a round counterclockwise. Please refer to the video demonstration for more details.

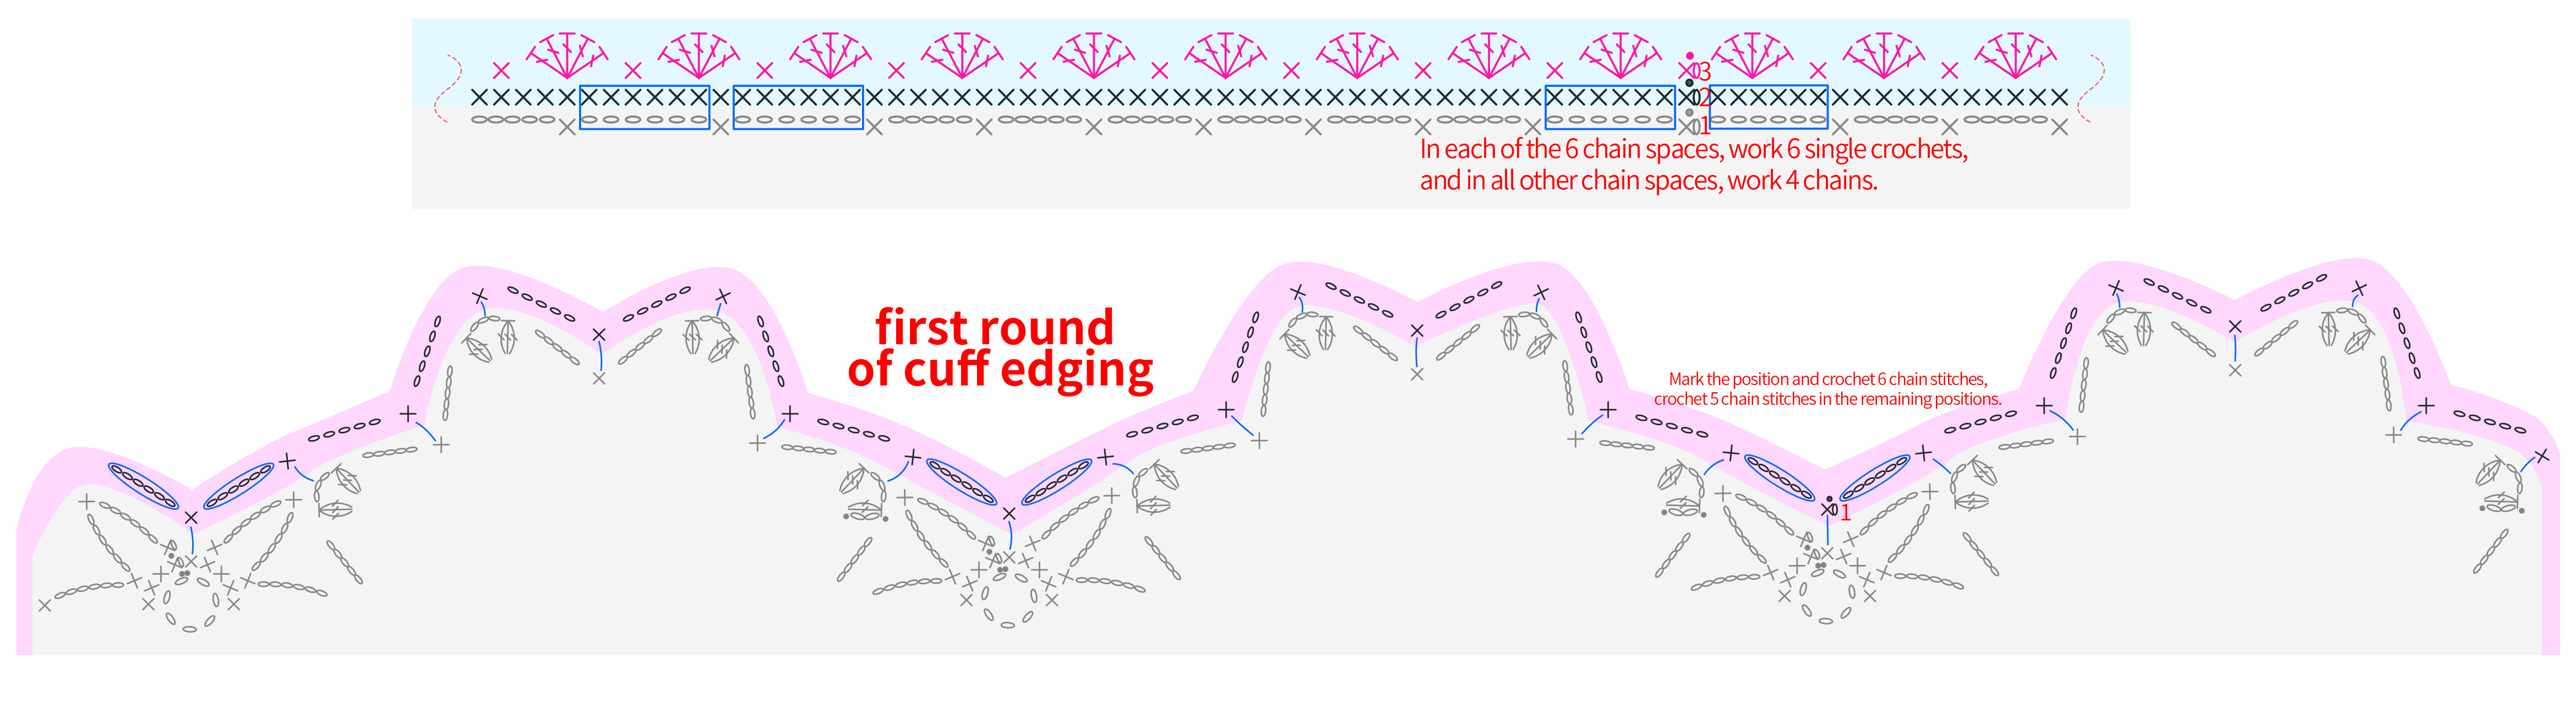
Step 2 Cuff edgingE2 82' 21''
Crochet around the sleeve edge counterclockwise. The method is identical for both sides. Please refer to the video demonstration for more details.
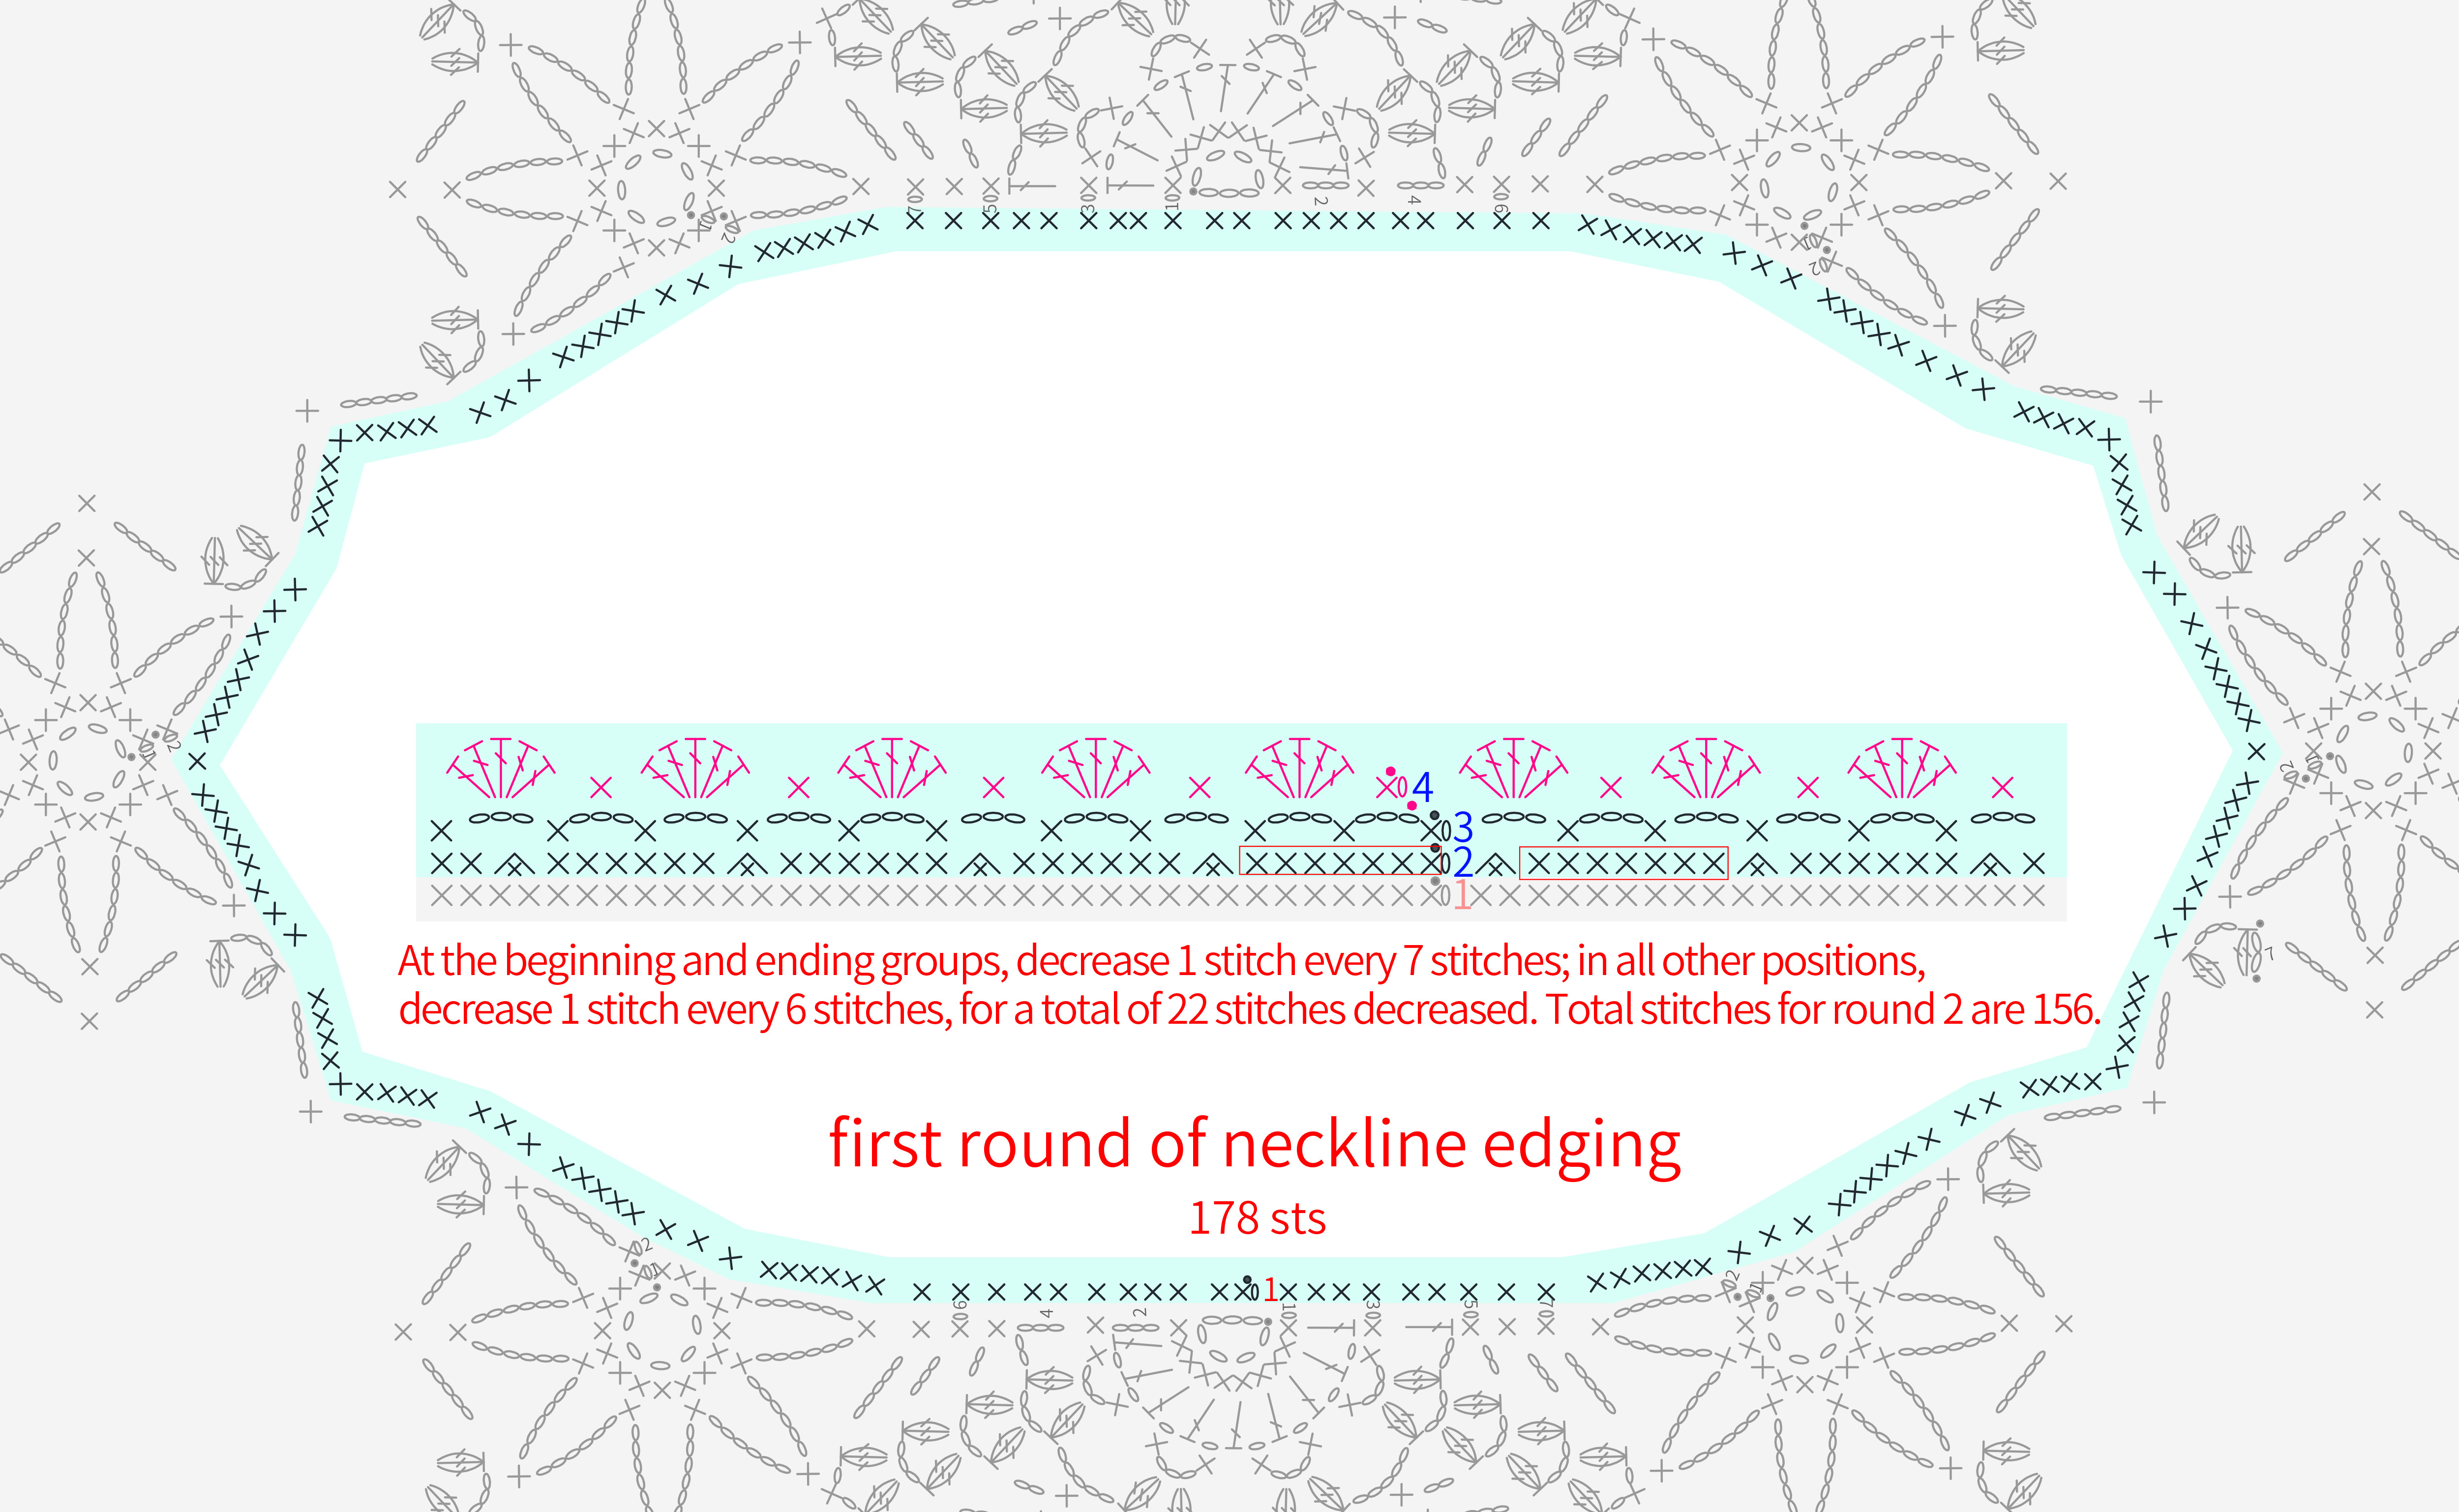
Step 3 Neckline edgingE3 86' 14''
Work in rounds counterclockwise along the neckline. Please refer to the video demonstration for more details.
Made by the community