Home / Pillow
Sunflower pillow cover
Project preview
See the finished project
Pattern format
Instructions
Watch and follow
Video tutorial
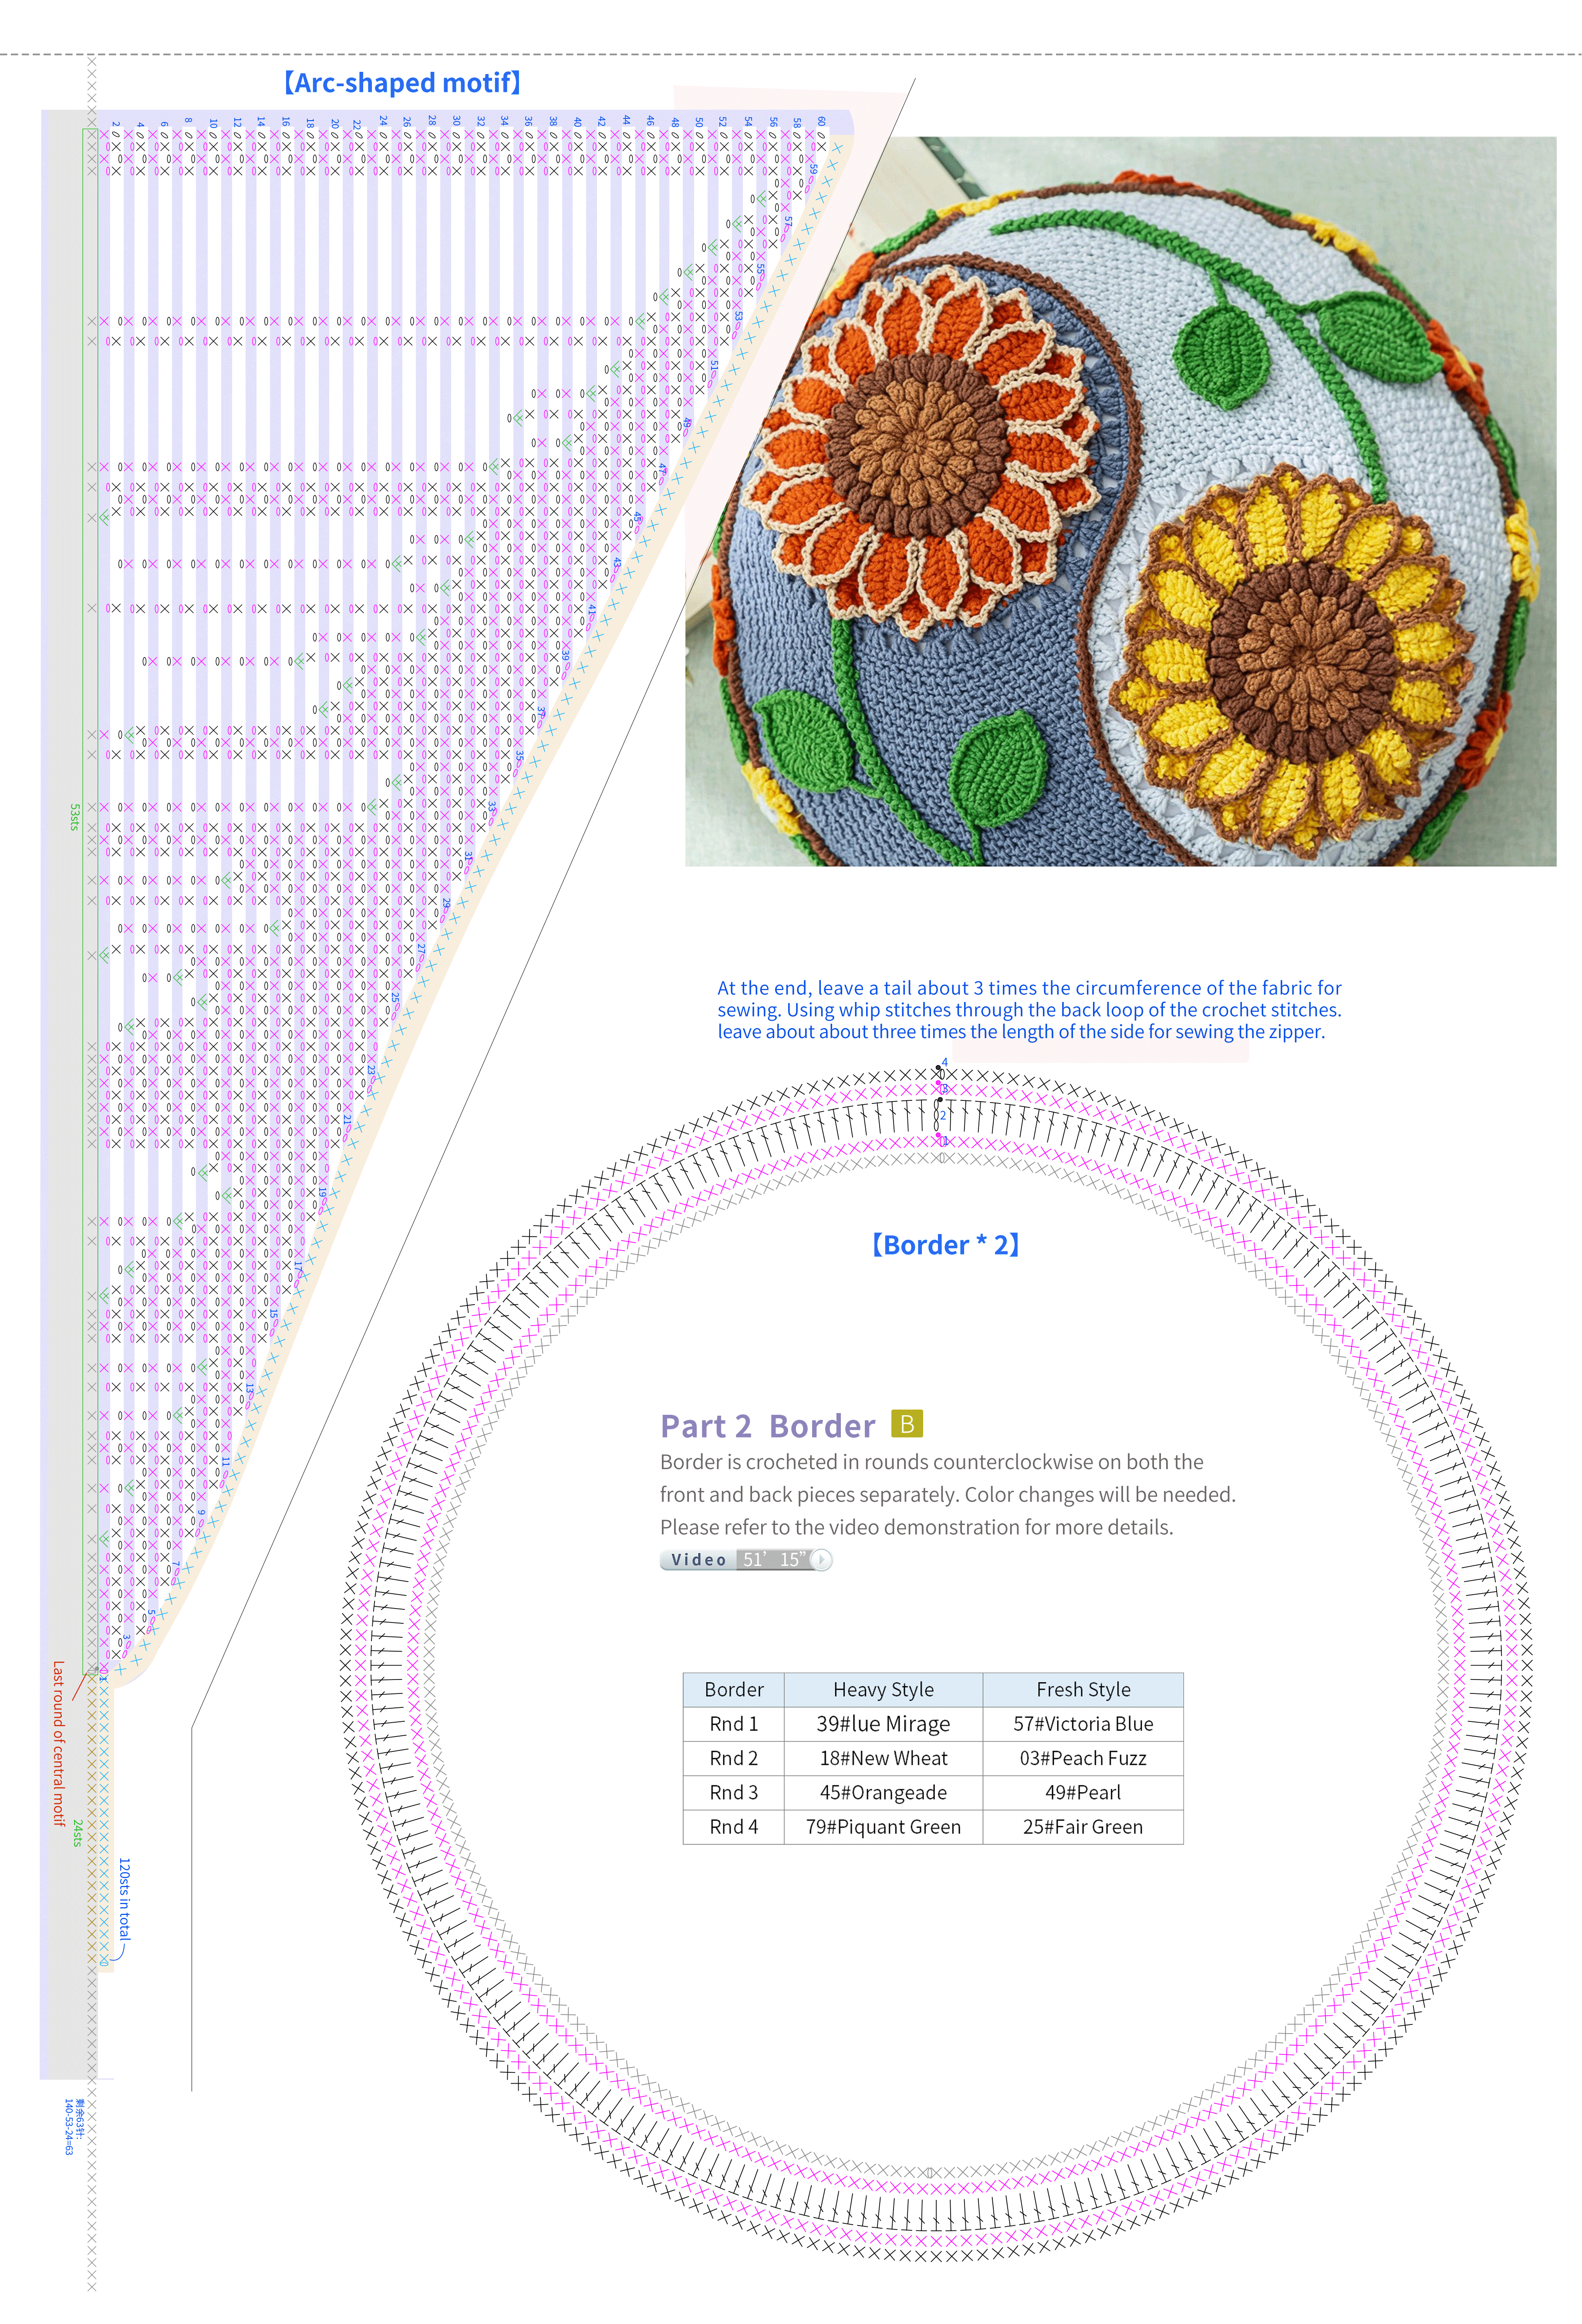
This pillow cover is divided into the front and back pieces, the borders, and the decorations.
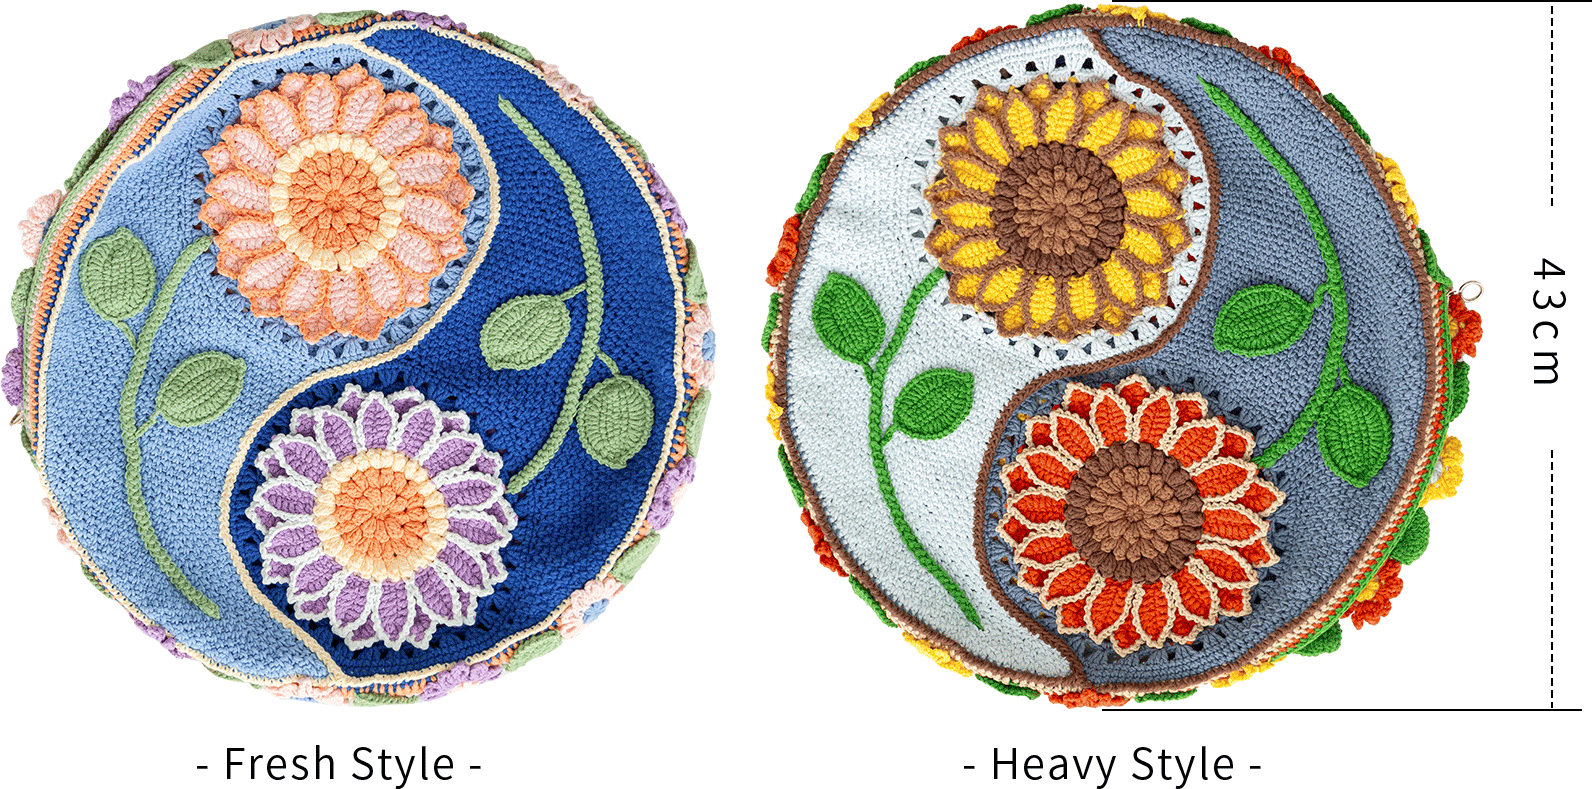
The handcrafted measurements may have an error of 1 to 2cm. Due to variations in individual tension, the size of the sample is for reference only.
Material: 4-Ply Combed Cotton & Acrylic Fibre Hand Knitting Yarn
Hook: 3.00mm crochet hook
Note:
This pattern is making in Chinese crochet pattern terms, and the stitch name is written using American terminology. All measurements in charts are in cm.
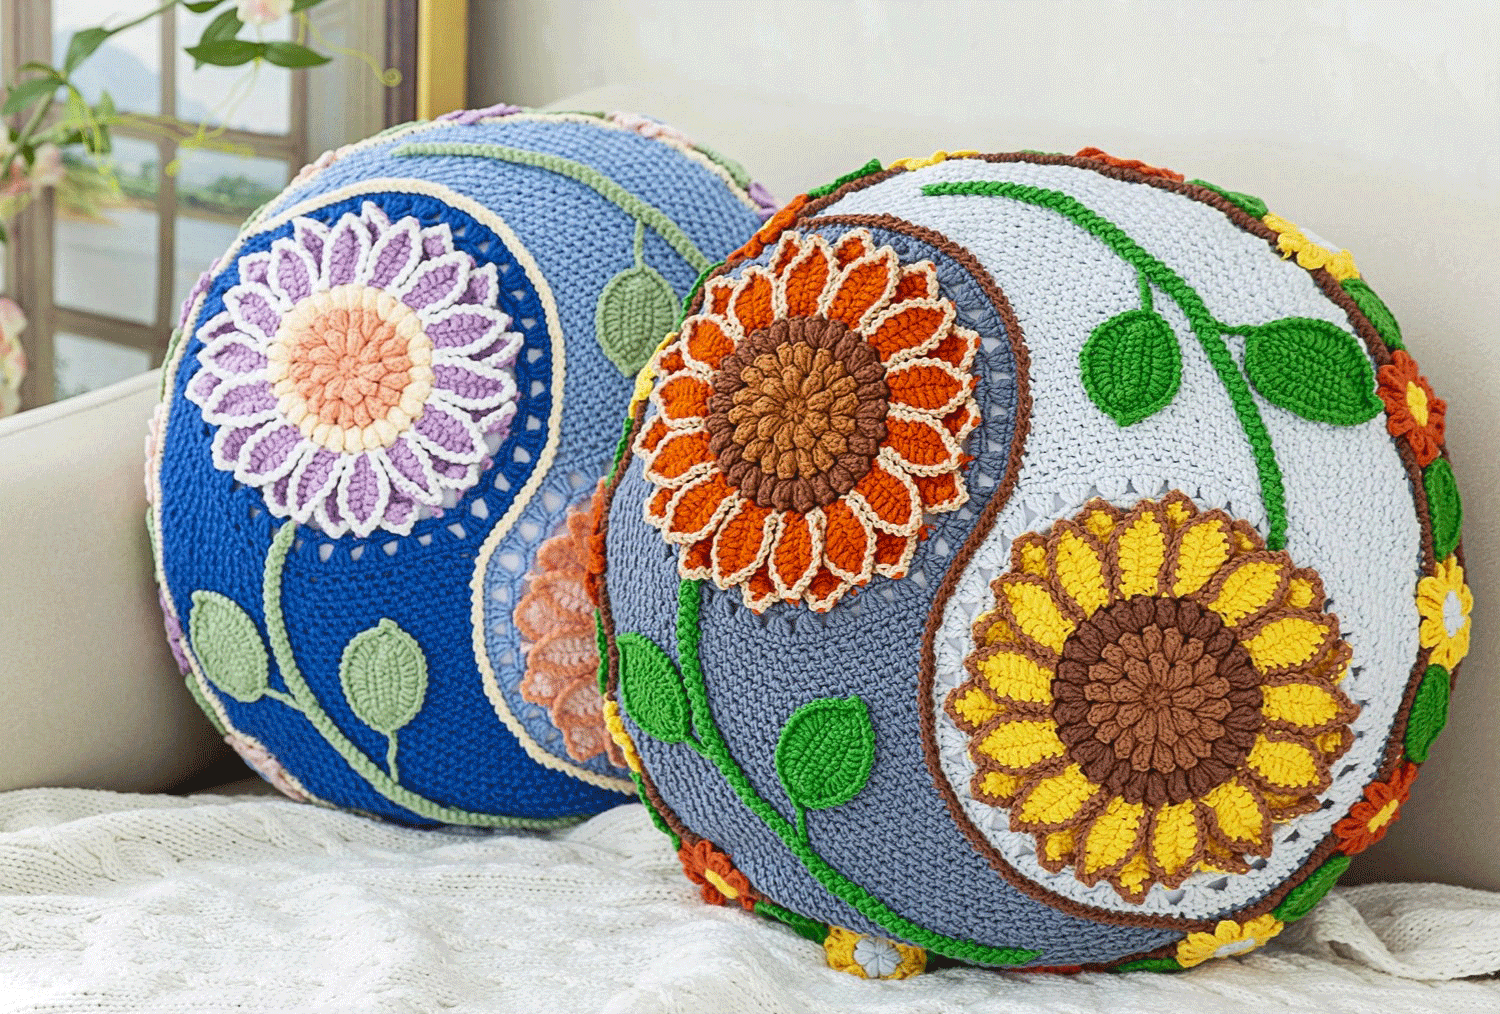
Chart Key














Part 1 Front and back piecesA 00' 34''
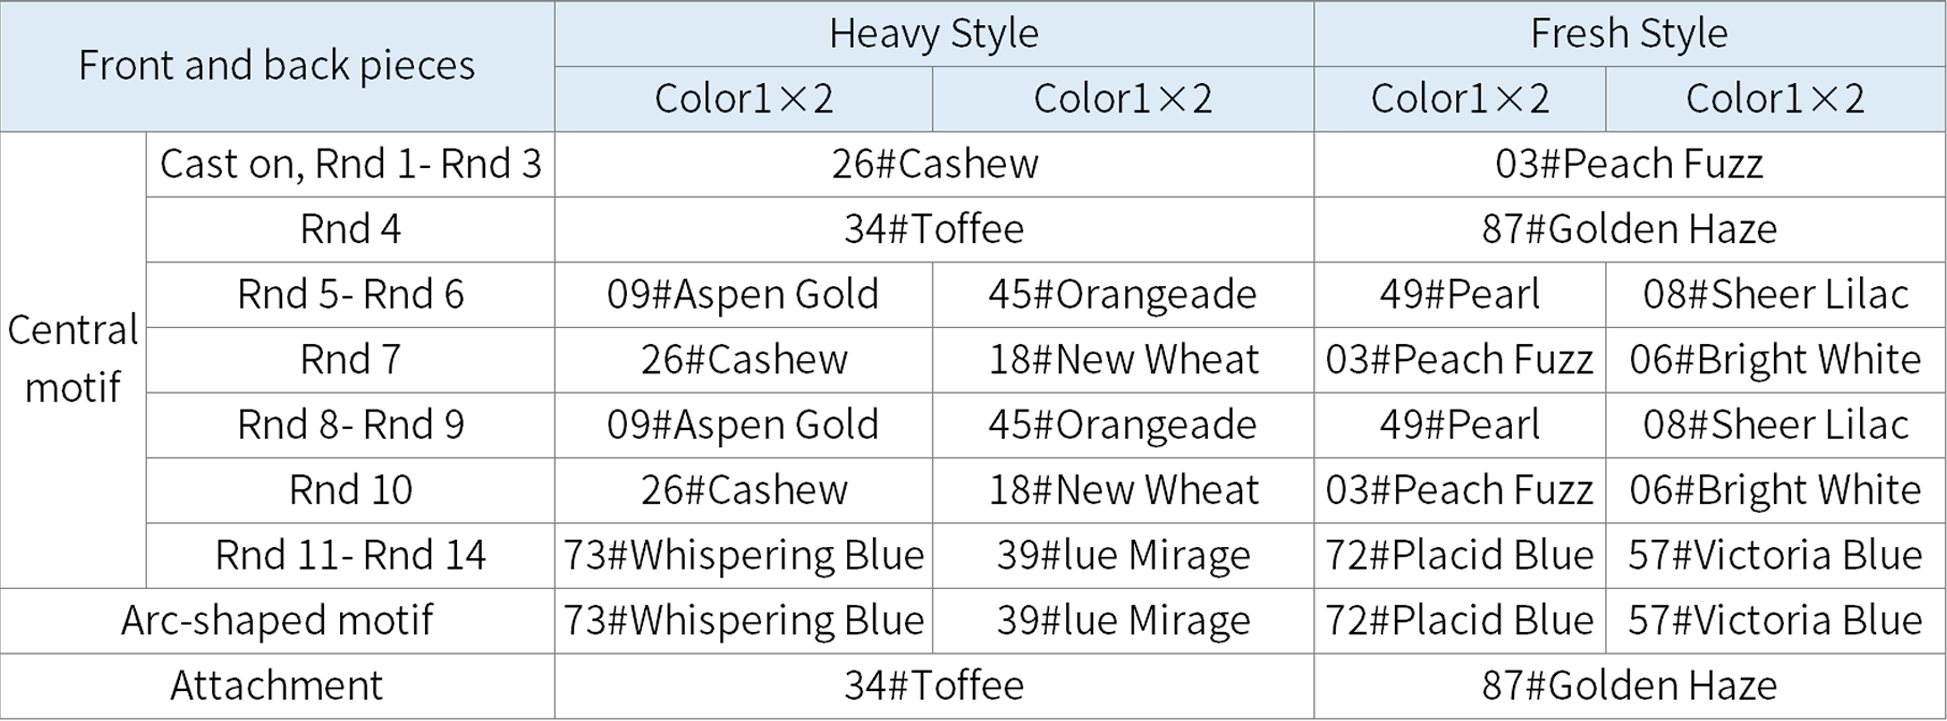
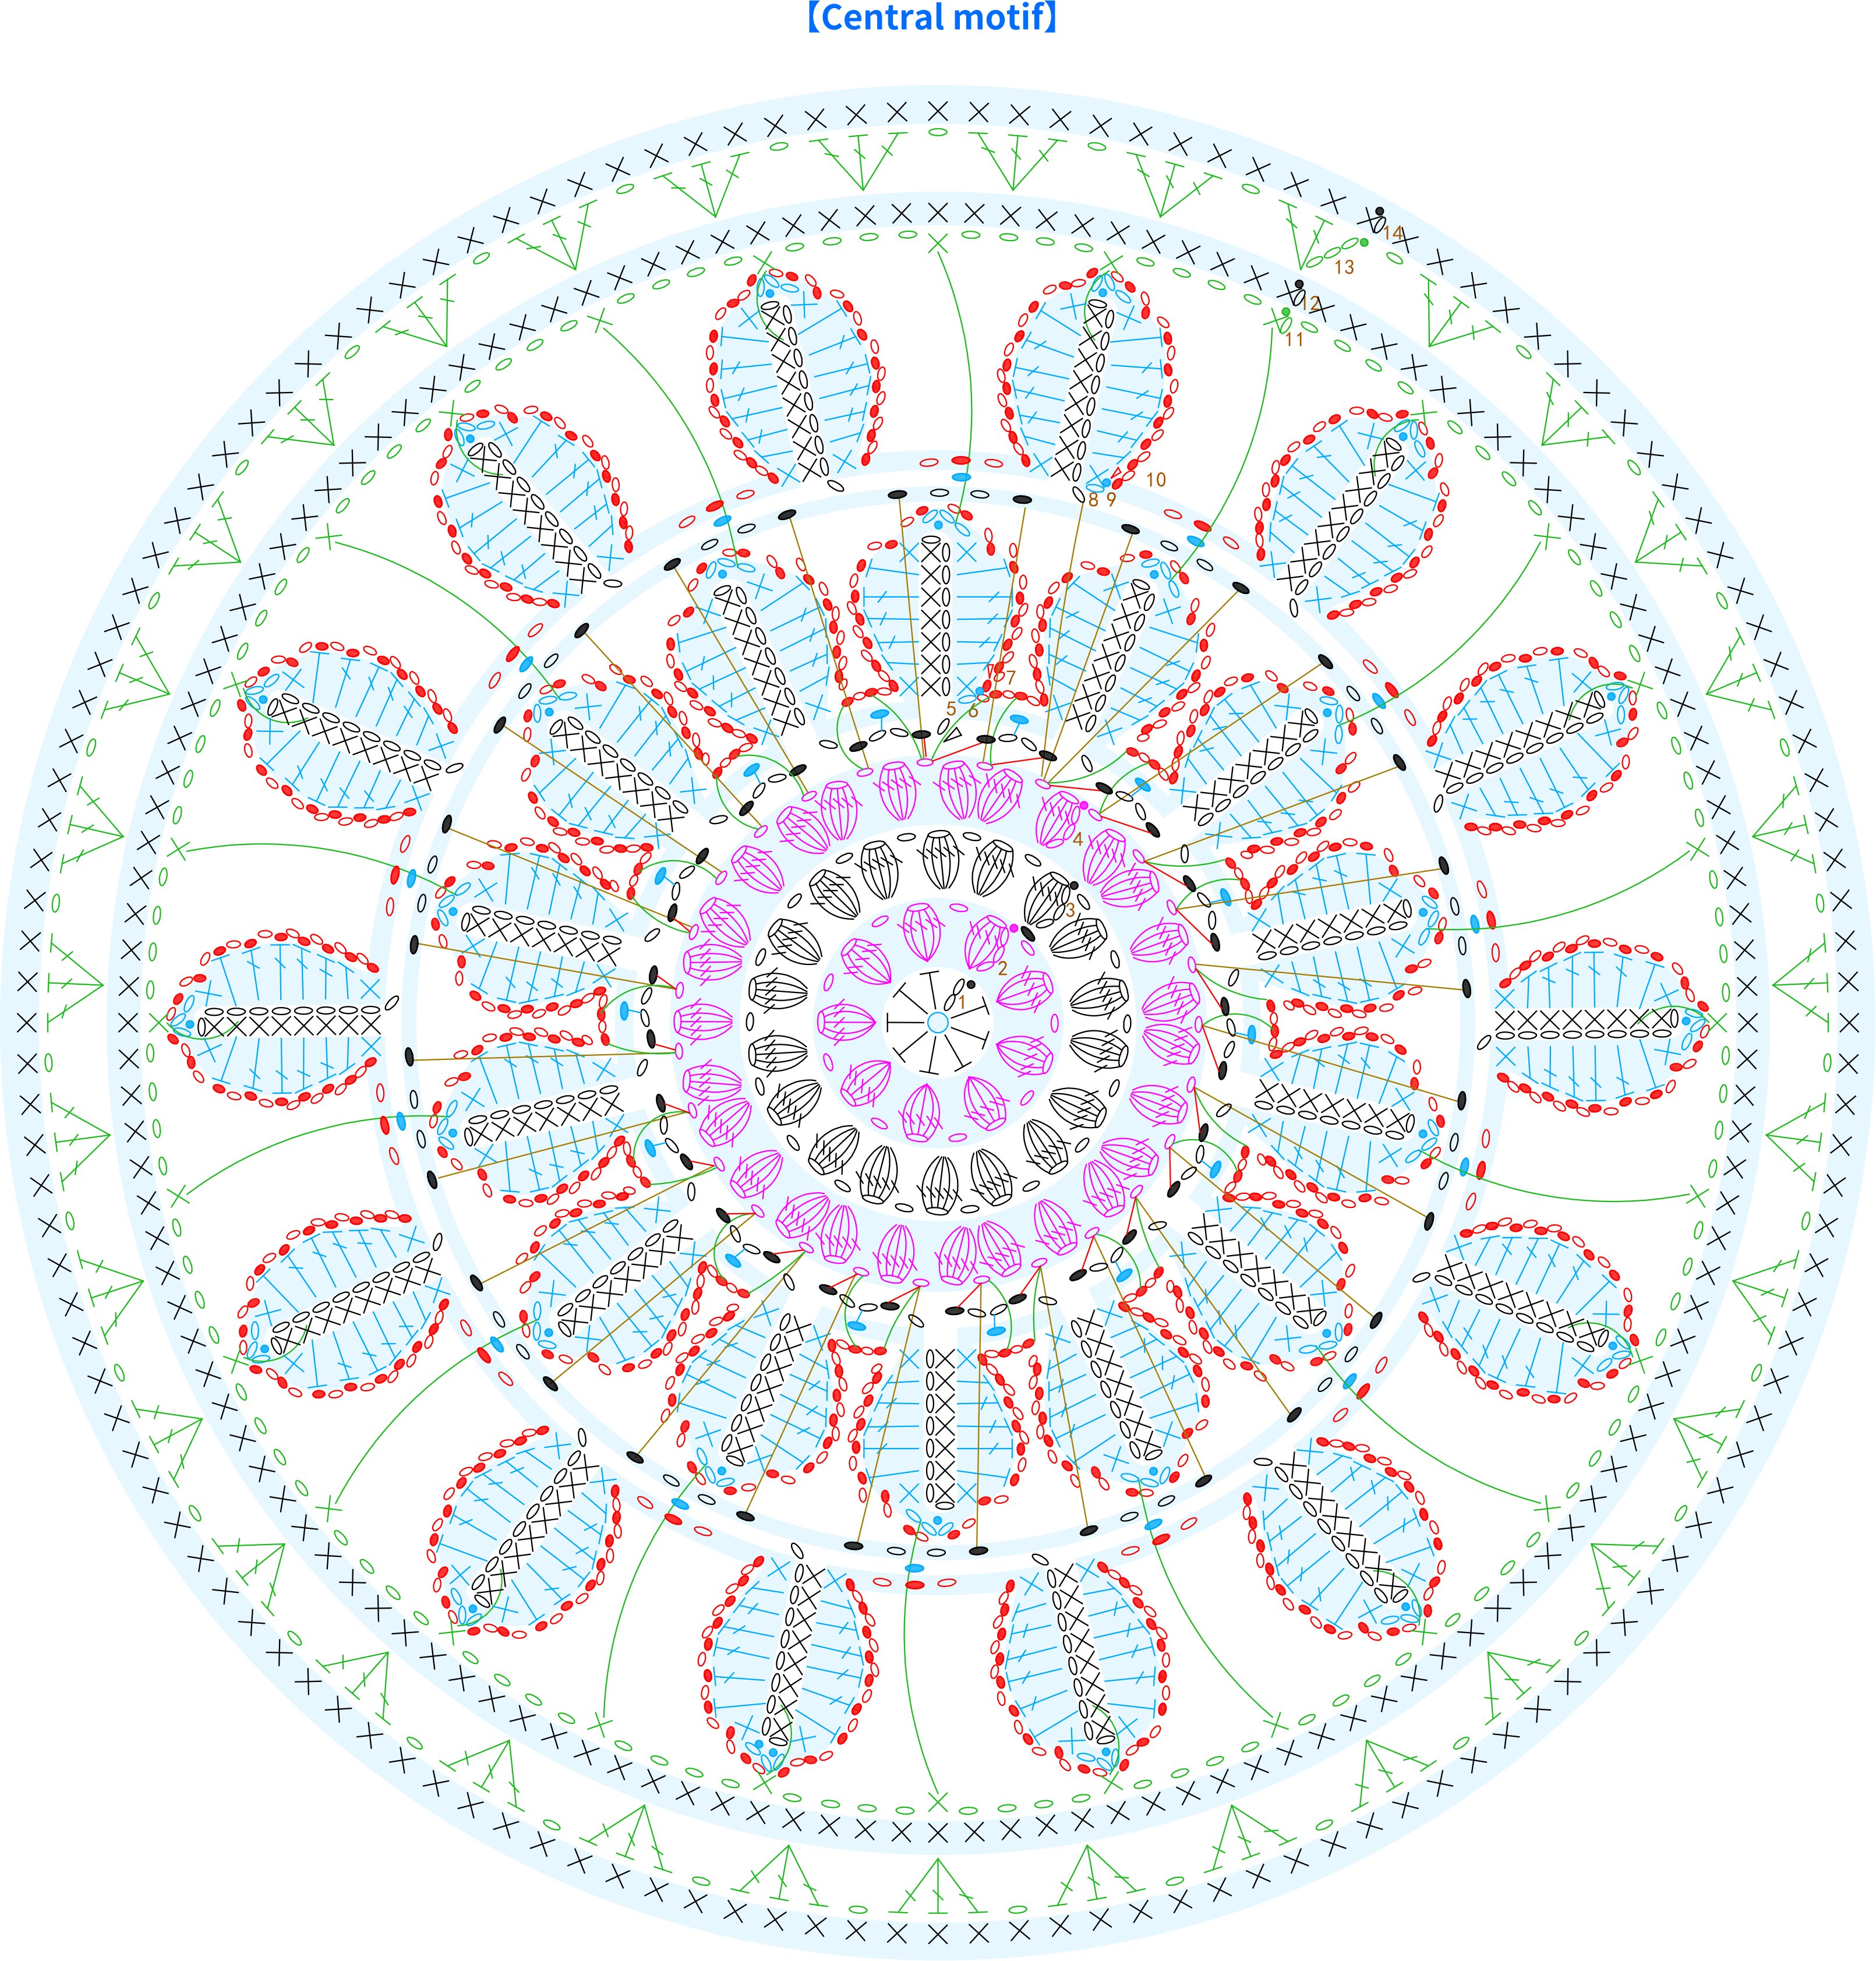
Front and back pieces are crocheted in the same way, both pieces consist of 3 sections: a central motif, an arc-shaped motif and the attachment. First, start with the central motif, then work on an arc-shaped motif back and forth in a specific area of the central motif. Once done, add an attachment. Please refer to the video demonstration for more details.
Note:
When you finished the central motif, measure the diameter of it. If there's a big difference to 19 cm, you may redo the work, adjusting the tension of motif by tighten or loosen the stitches as needed. And maintain that tension for the following crocheting to ensures a proper size.
Part 3 DecorationsC 53' 22''
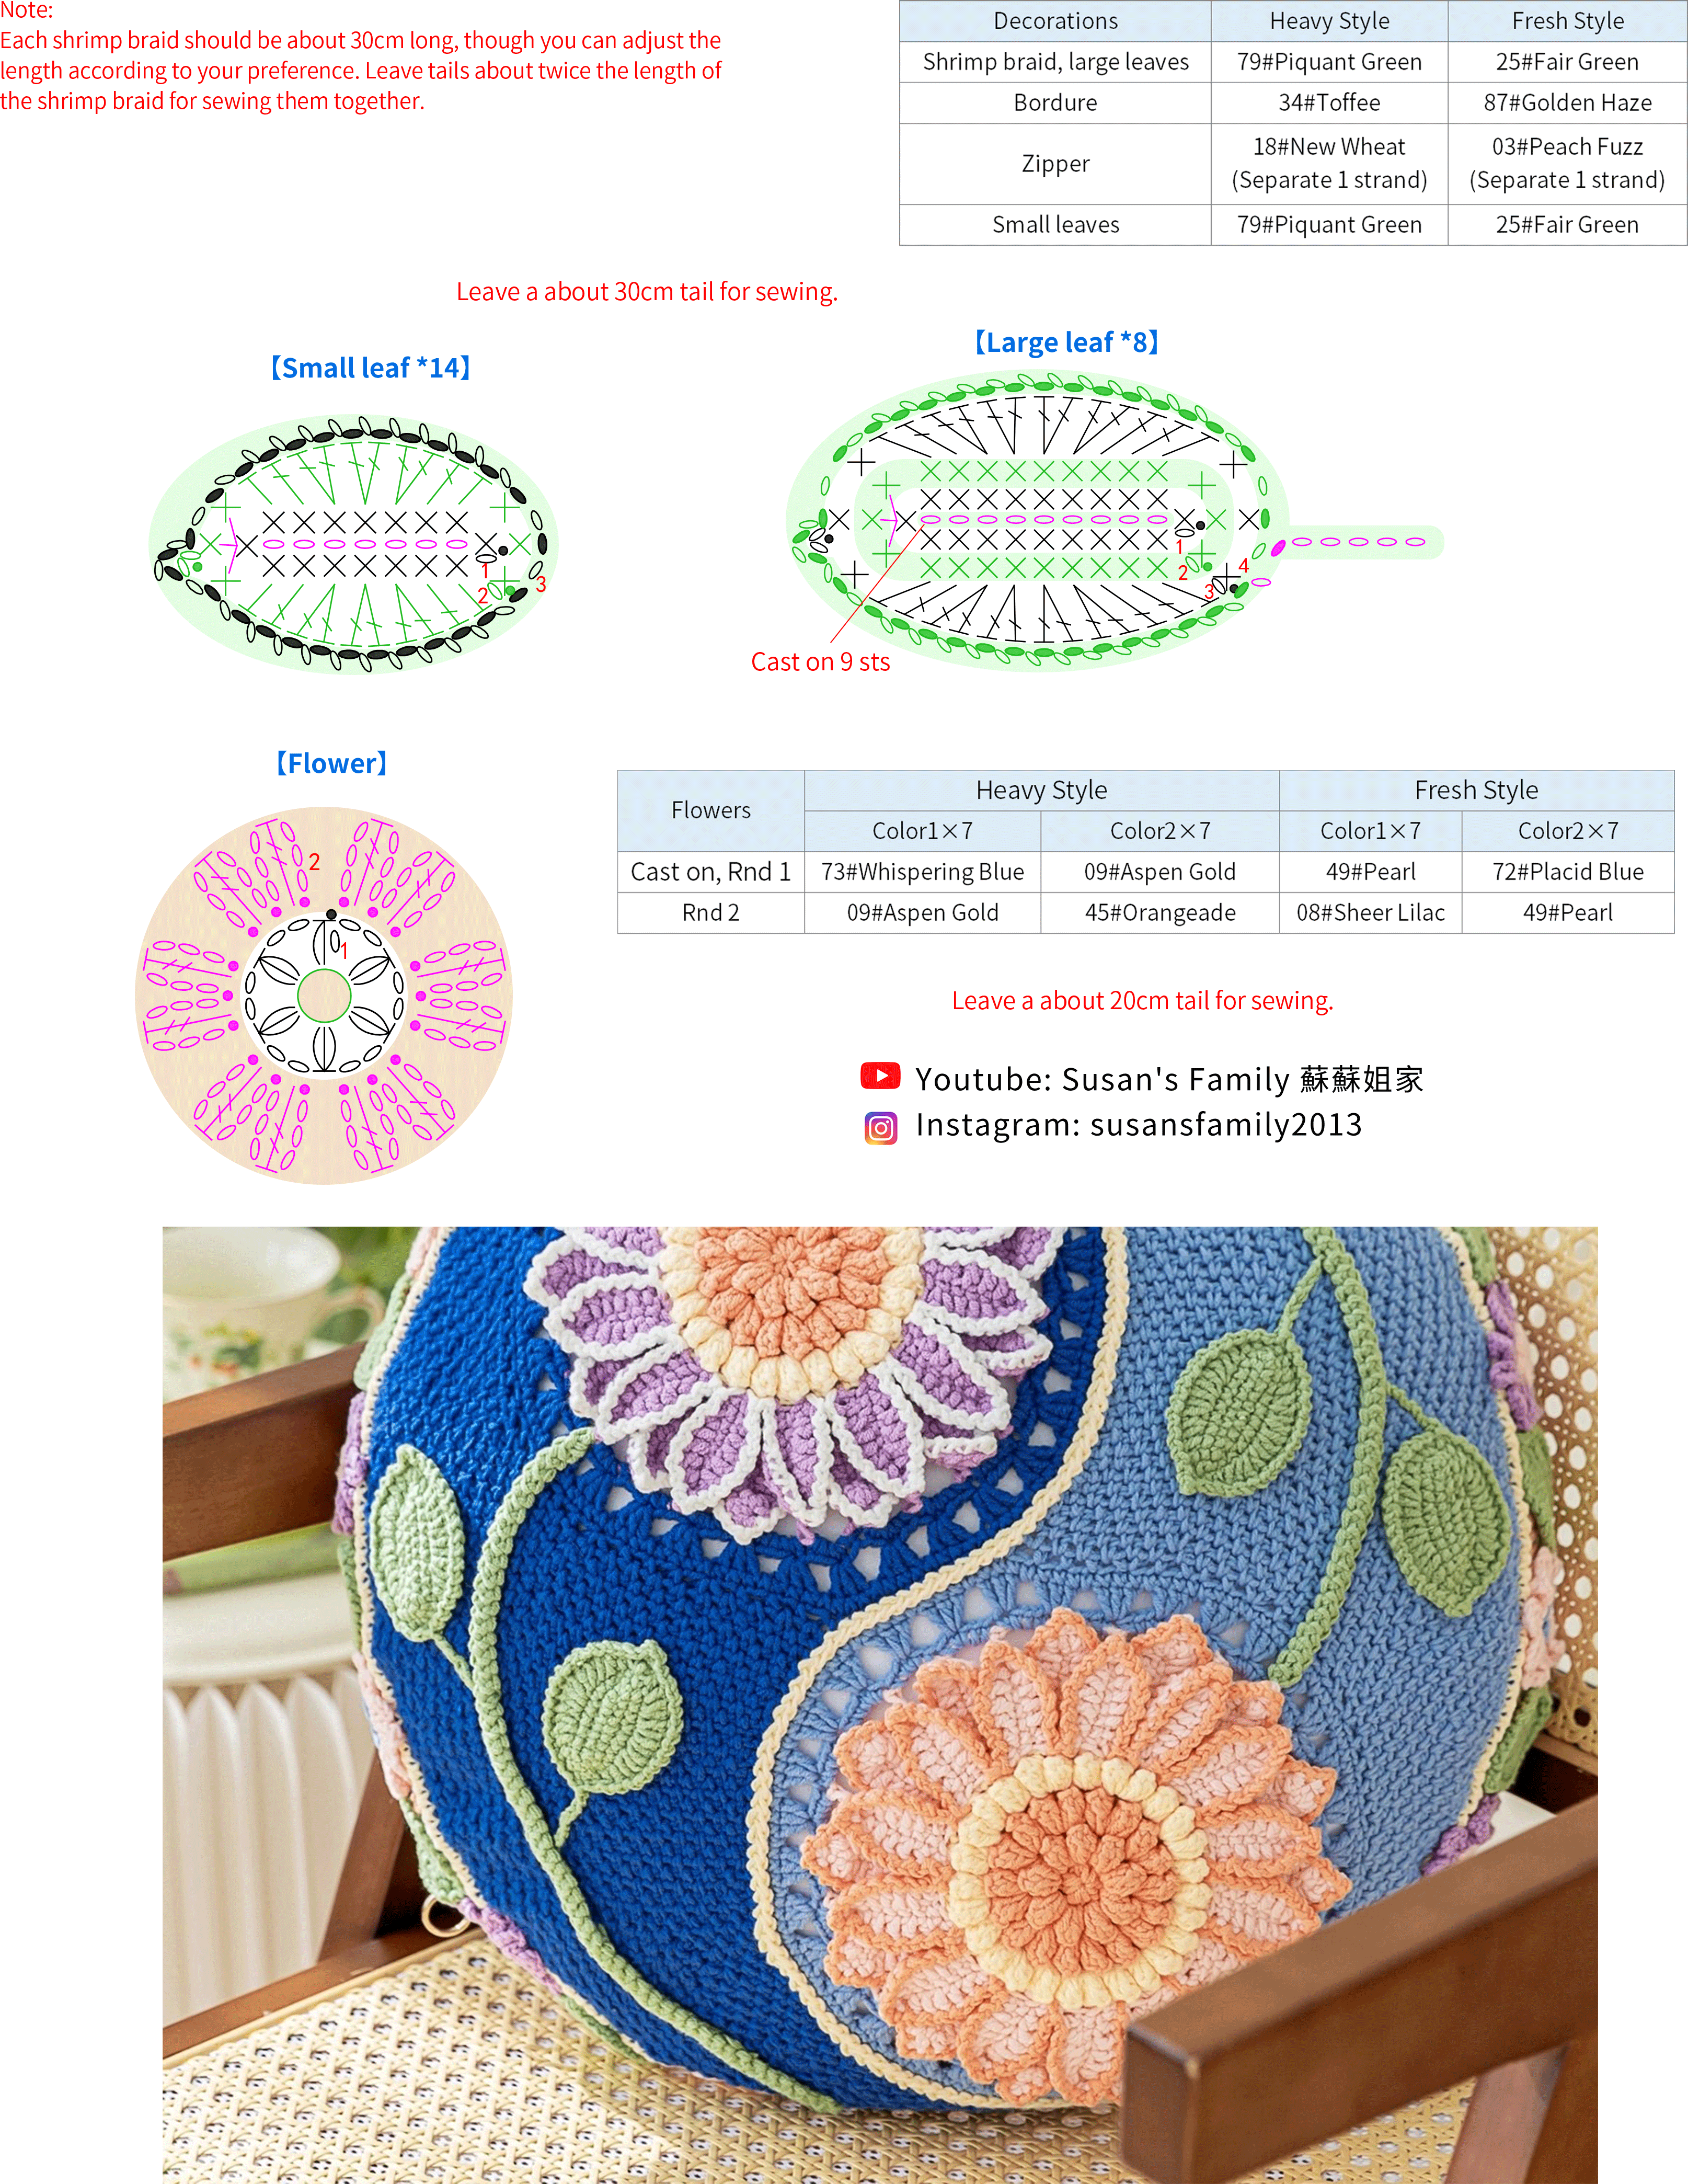
Decoration consist of the shrimp braid, the large leaves, sewing up front and back pieces, the bordure, zipper, small leaves and flowers. First, make the shrimp braid and large leaves. Once they're secure, sew the front and back pieces up. Then, work the bordure and sew the zipper. Finally, make the small leaves and flowers and sew them together. Please refer to the video demonstration for more details.
Made by the community