Home / Blanket
The Blanket of Sunk Panel Pattern
Project preview
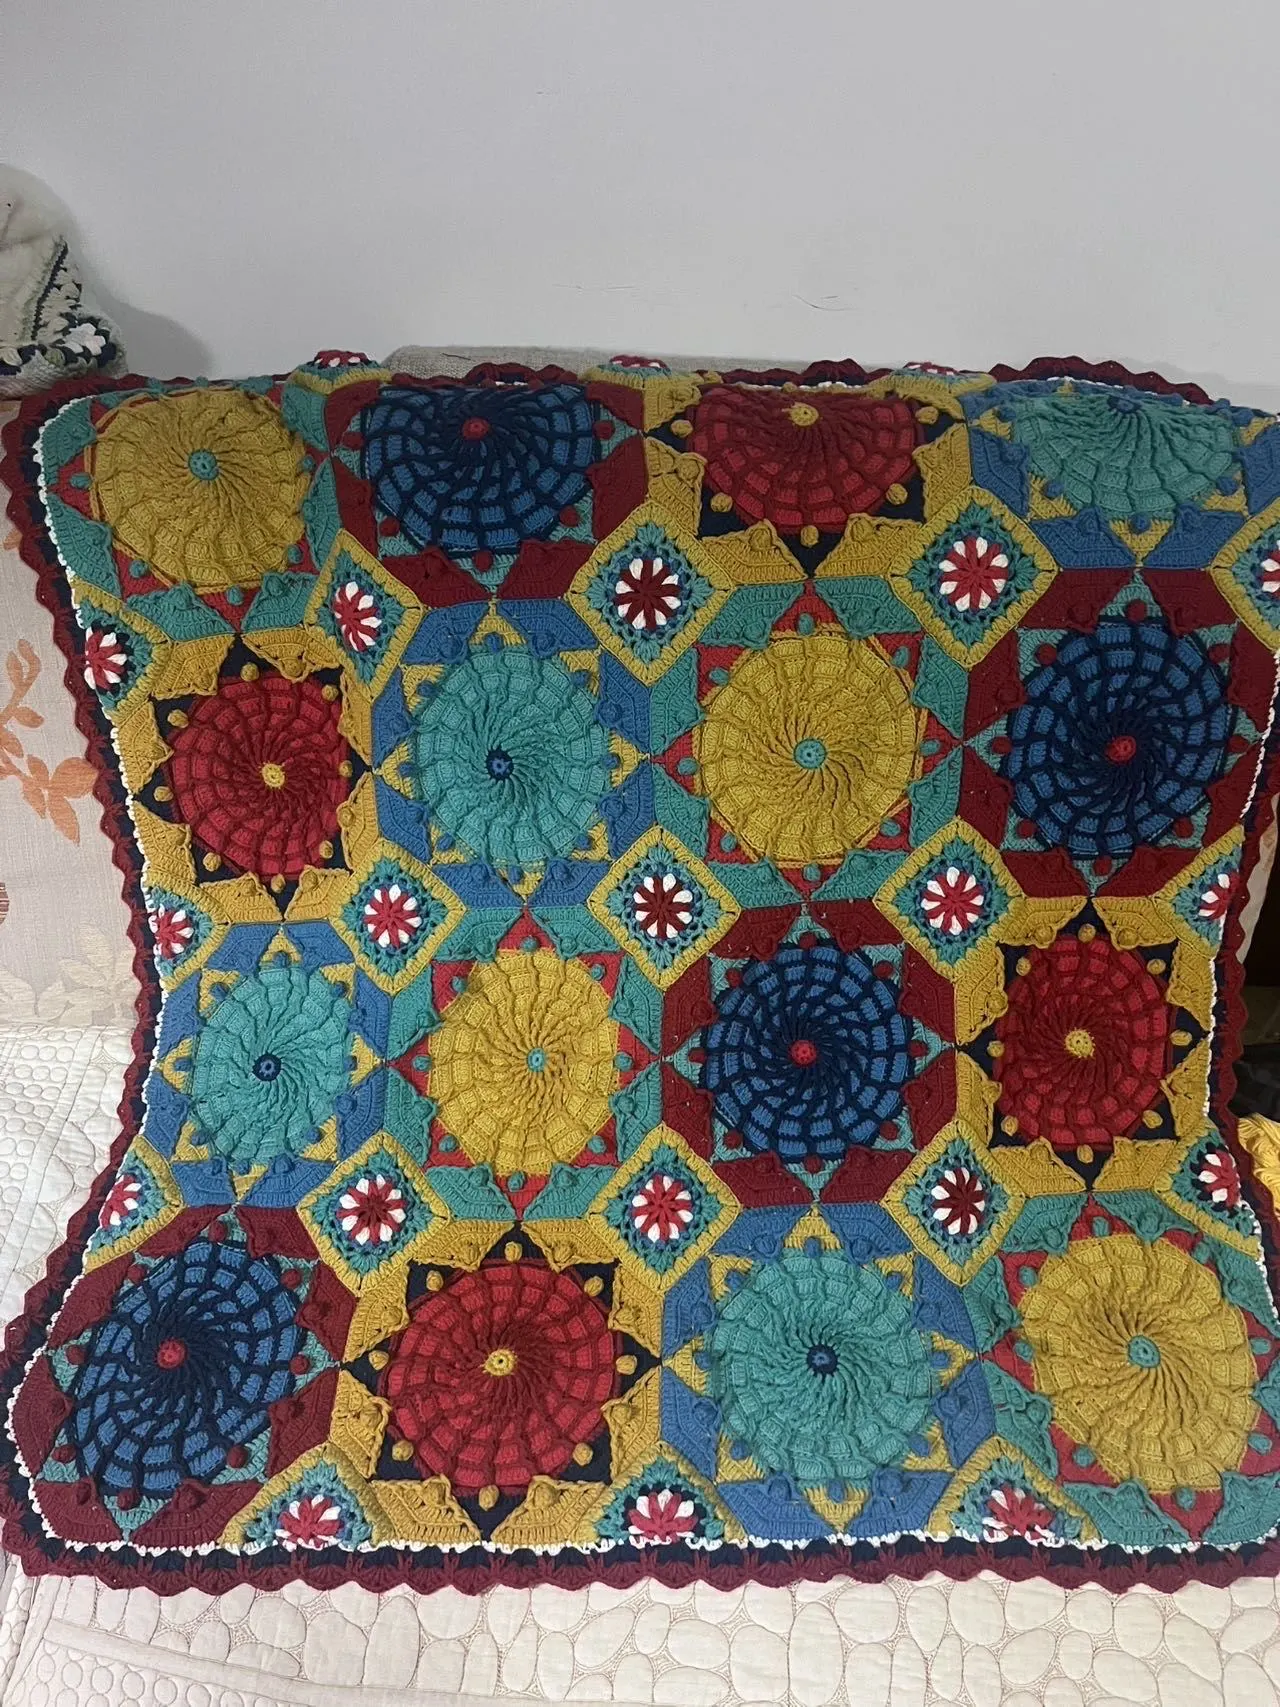
See the finished project
Pattern format
Instructions
Watch and follow
Video tutorial
Materials:4-Ply Combed Cotton & Acrylic Fibre Hand Knitting Yarn
Hook:3.0mm crochet hook Finished measurement:95×95cm
Motif size:
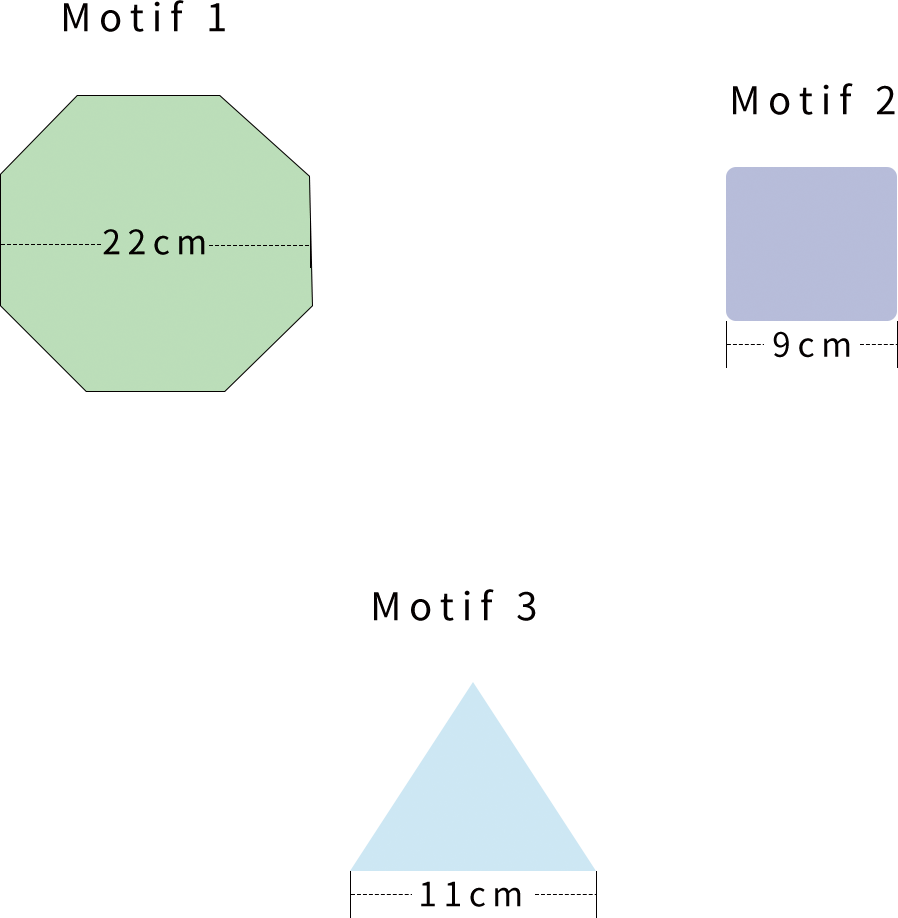
The handcrafted measurements may have an error of 1 to 2cm. Due to variations in individual tension, the size of the sample is for reference only.
Chart Key


















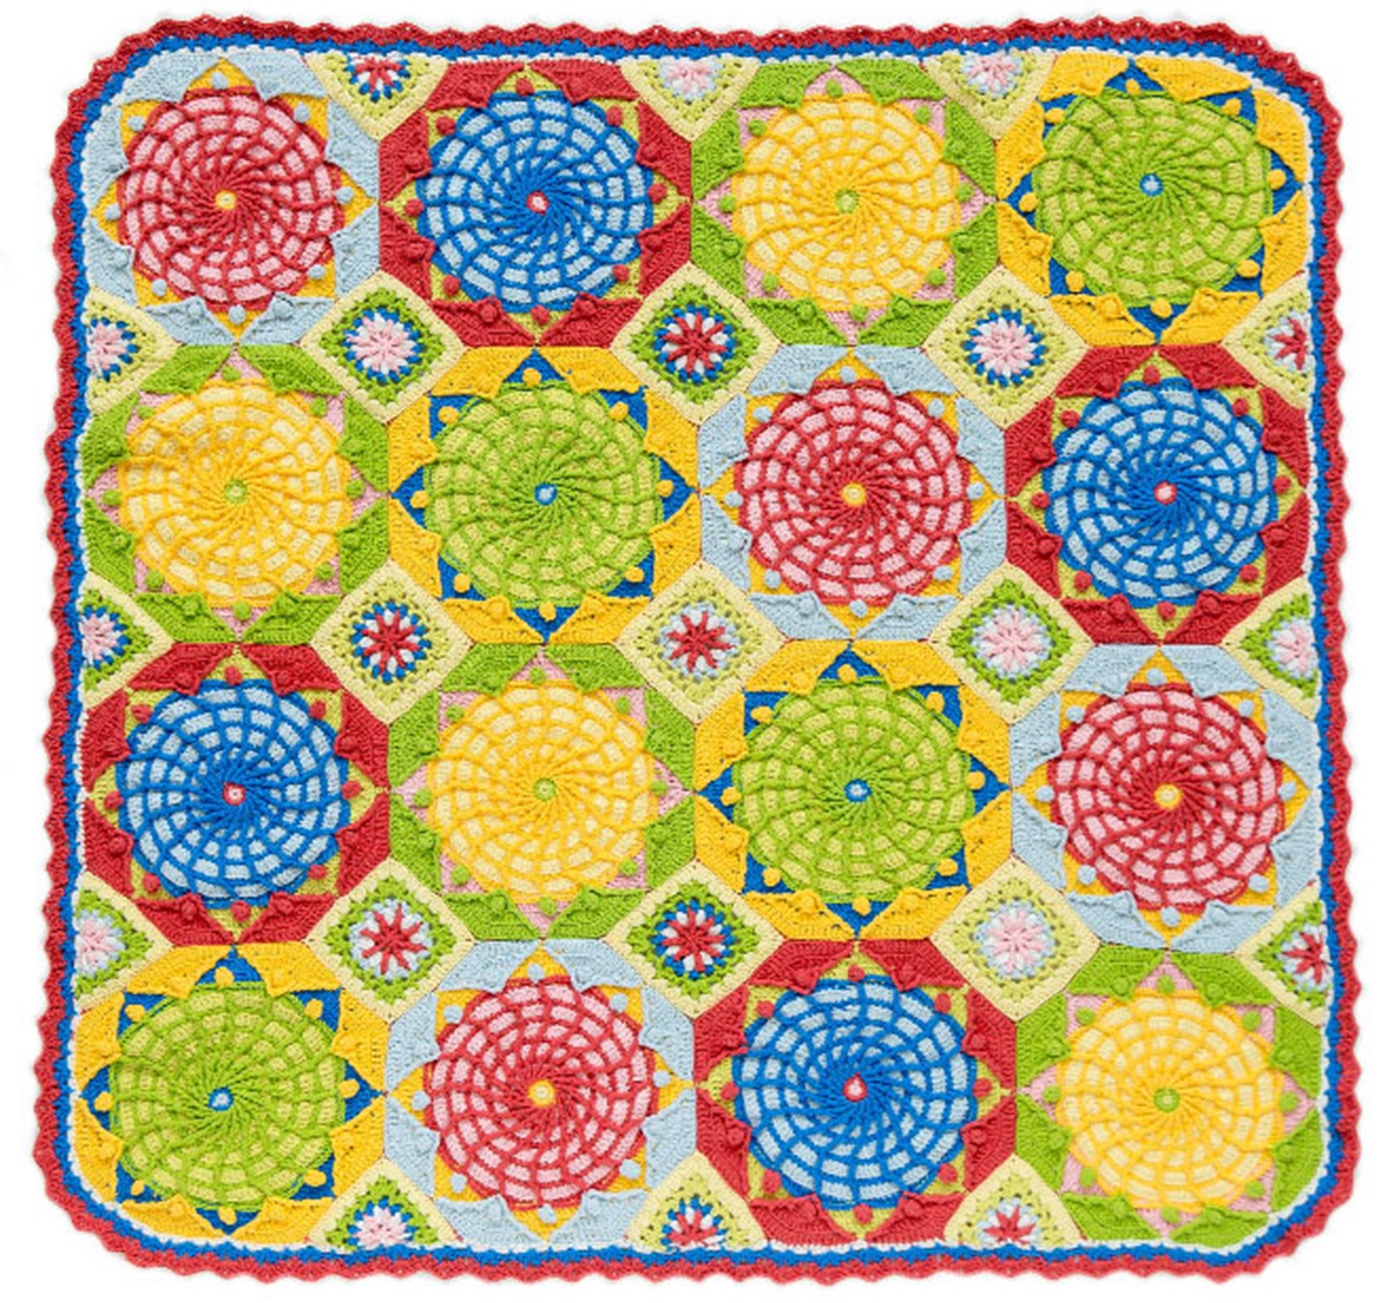
Fresh Style
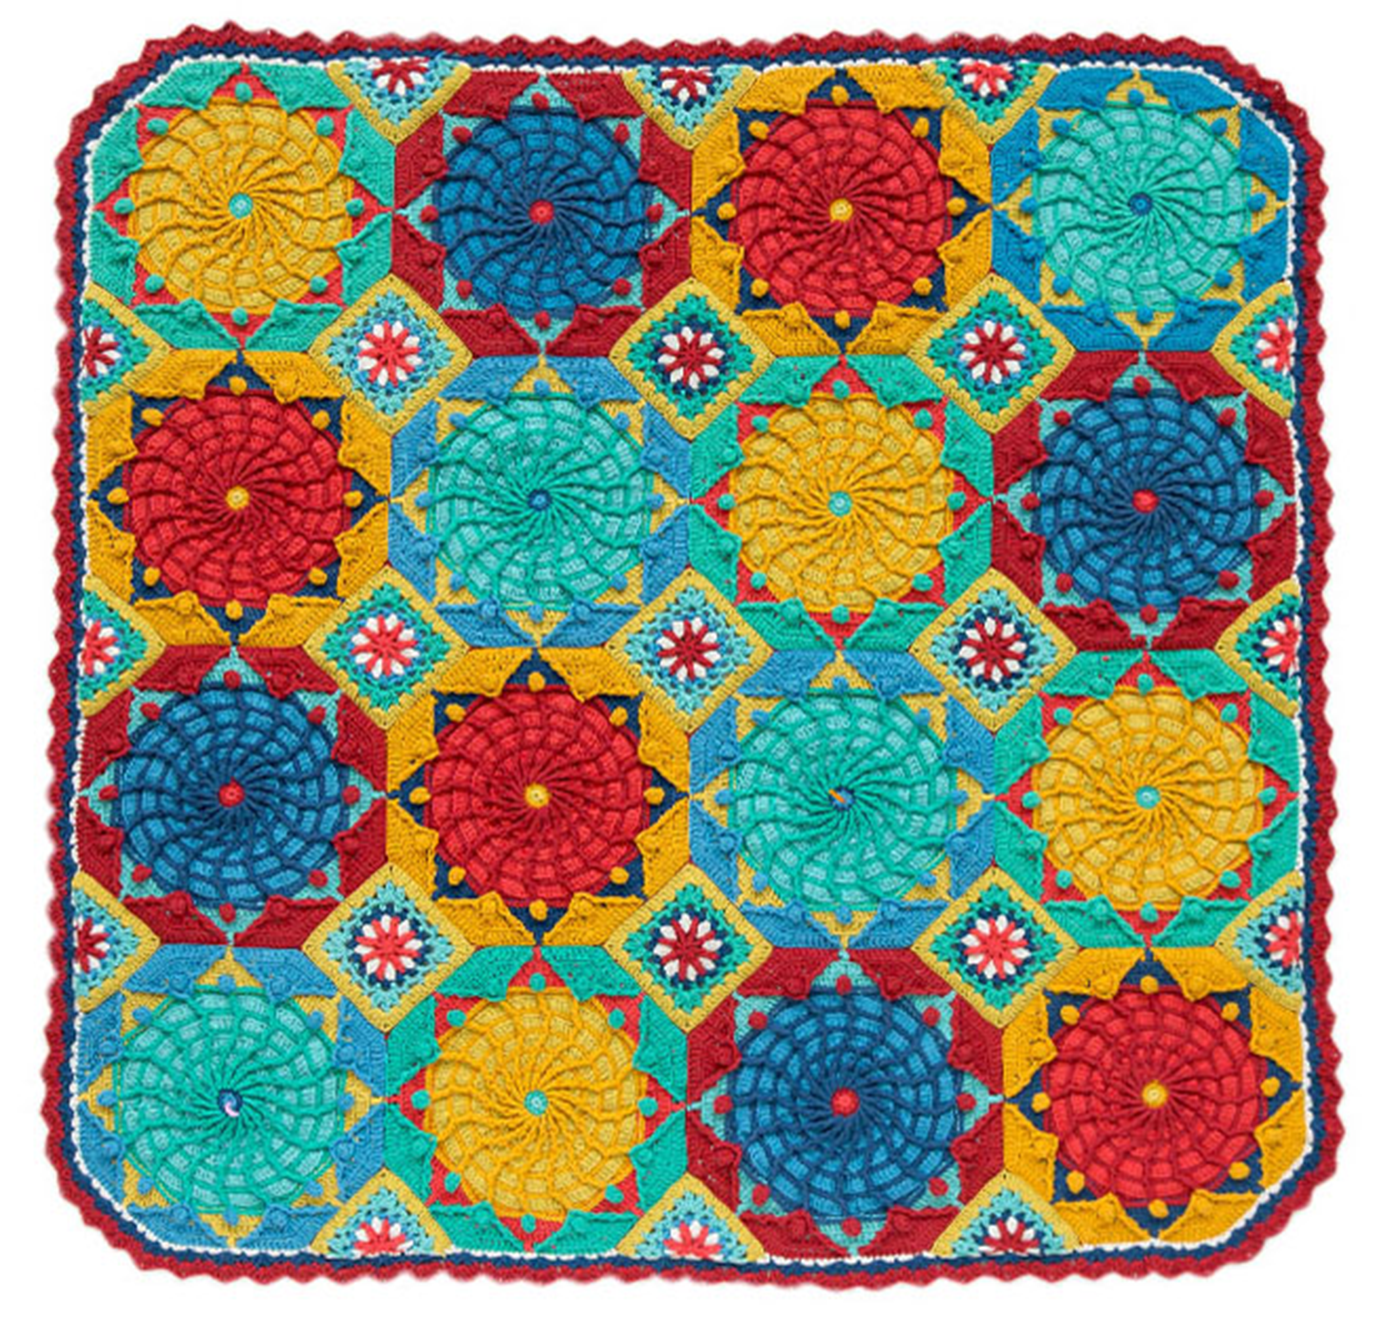
Vintage Style
Crochet Tips :
This blanket is made up of motifs, joining, and edging. There are three types of motifs: motif 1 in octagon shape, motif 2 in square shape, and motif 3 in triangle shape. First, crochet the corresponding number of motifs, then join them together, and finally crochet edging around the joined motifs.
Note:
This pattern is written using American terminology and is worked in continuous round unless otherwise stated. All measurements in charts are in cm.
STEP1 Motif 1*16 01' 22'' (Part 1)
Begin the motif with the double magic ring,and then work in rounds,following the chart.The motif has four different colors: A, B, C, and D, and color changes are required during the crocheting process. Please refer to the video demonstration for details.
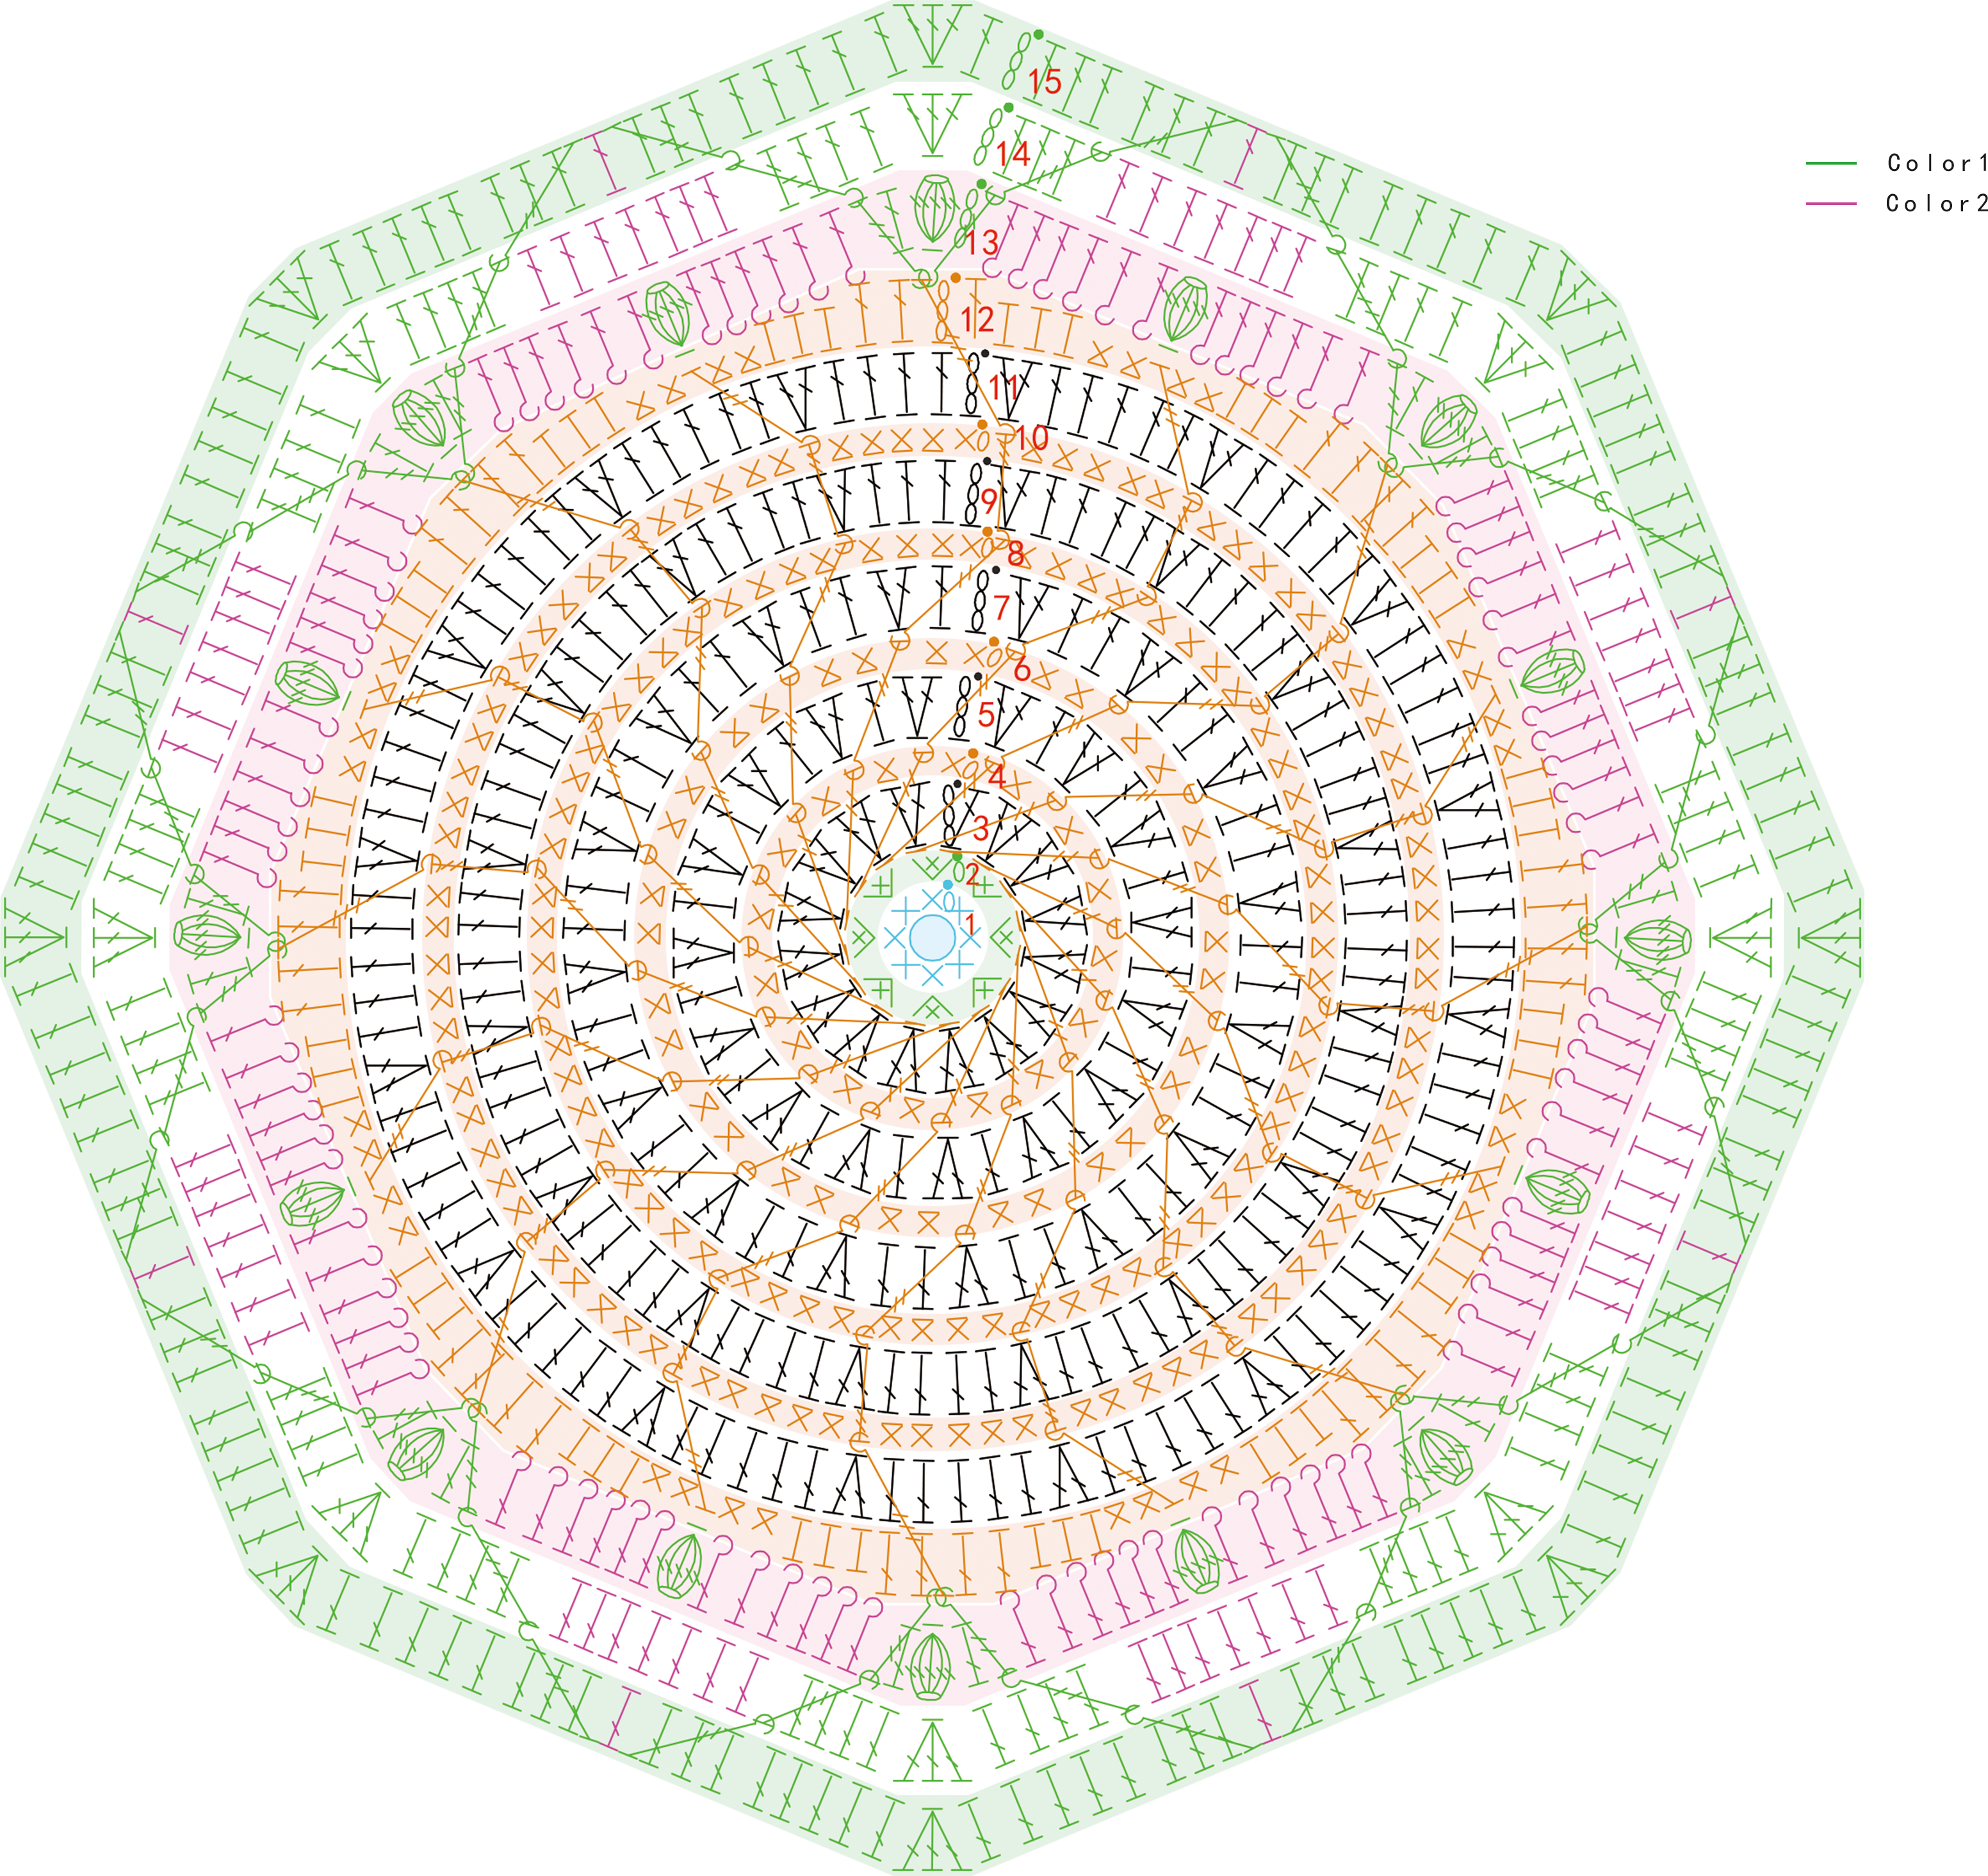
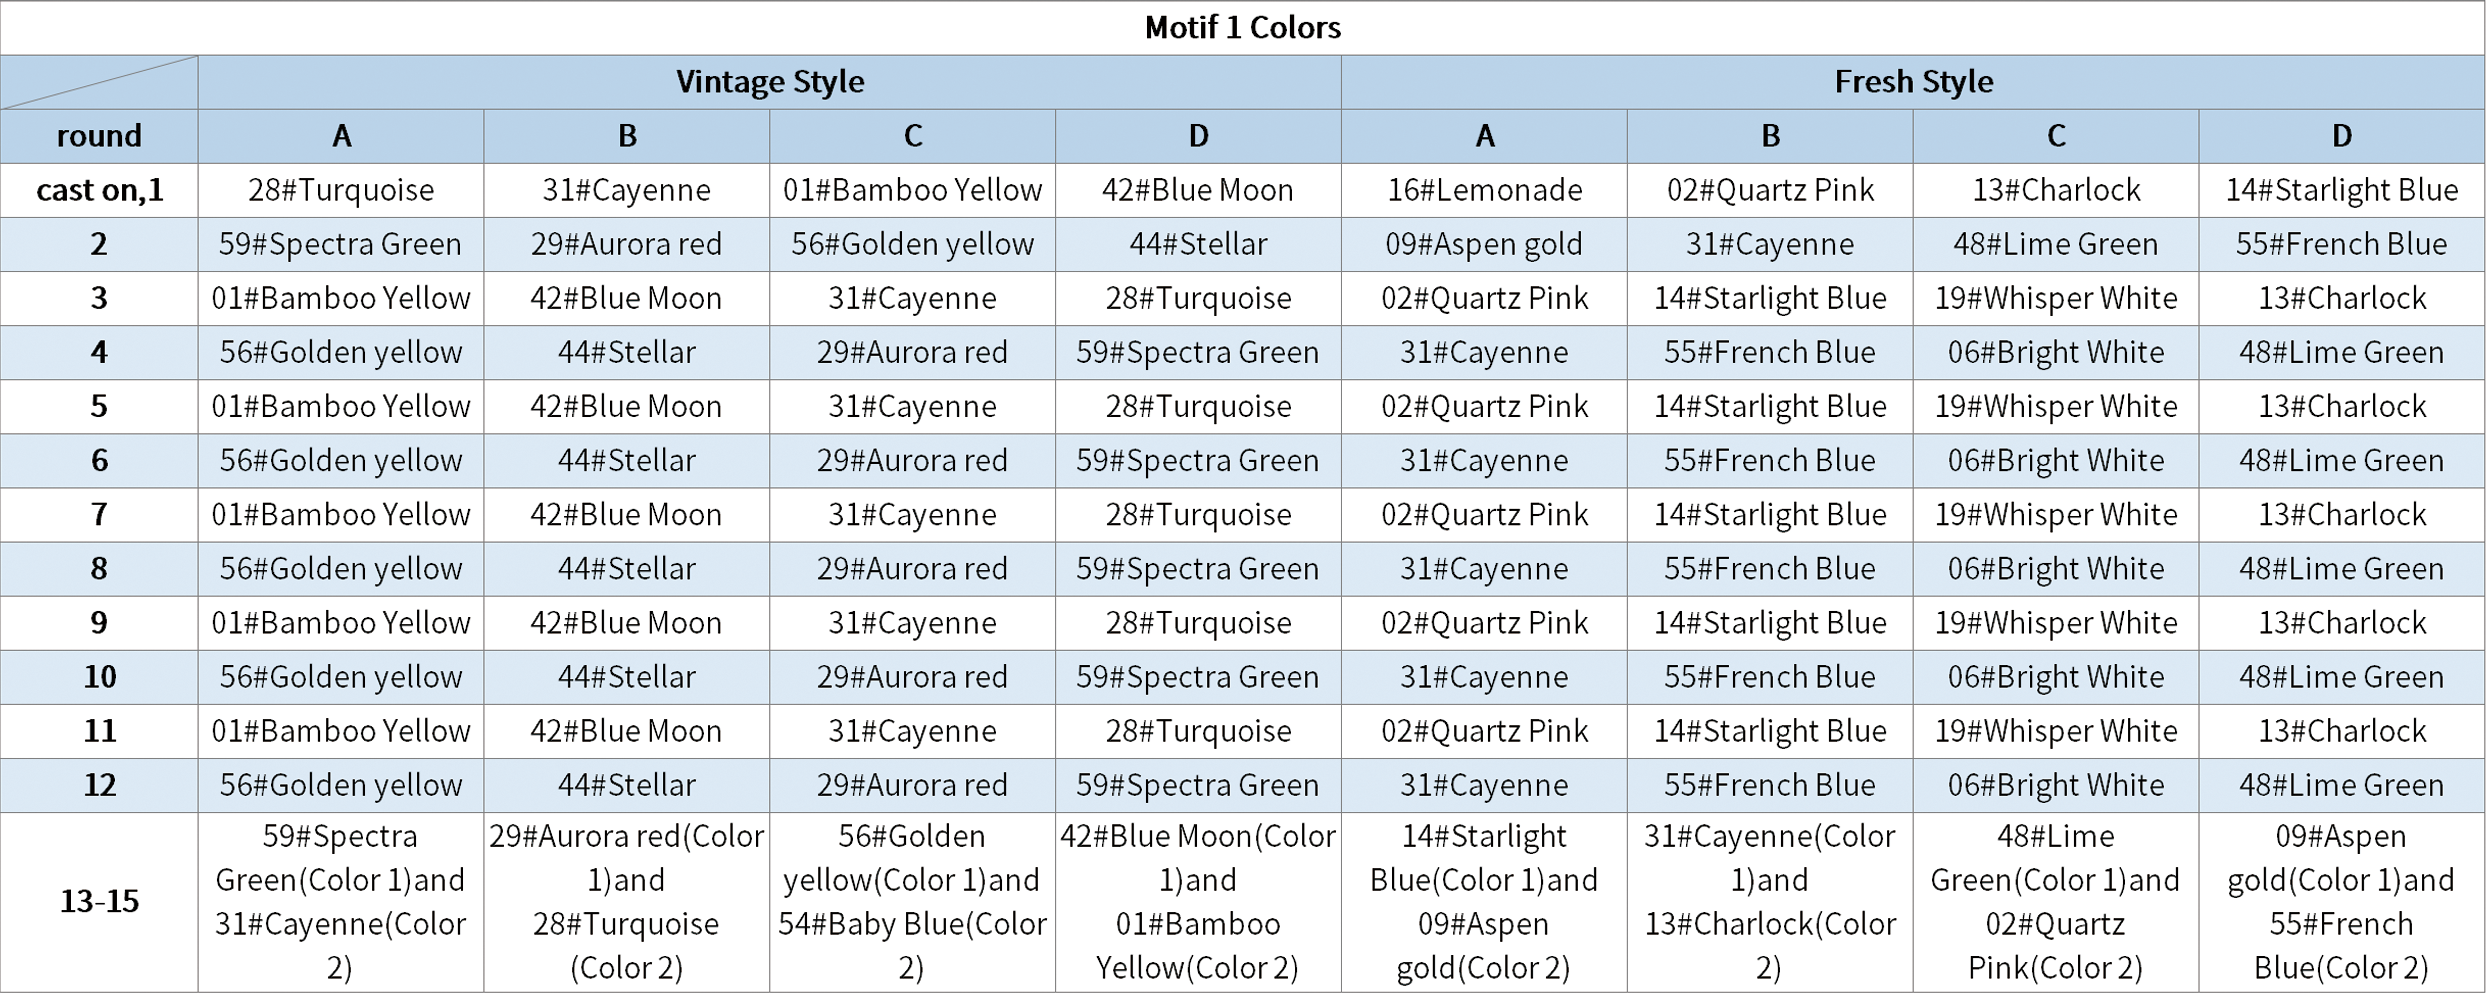
Note1:
The horizontal line below the stitch in the chart key indicates that the stitch should be crocheted in the back loop only. For the 4th round of treble double crochet, the chain space is on the front half of the remaining stitches from the 2nd round; for other stitches, the placement is on the back loop of the stitches from the previous round.
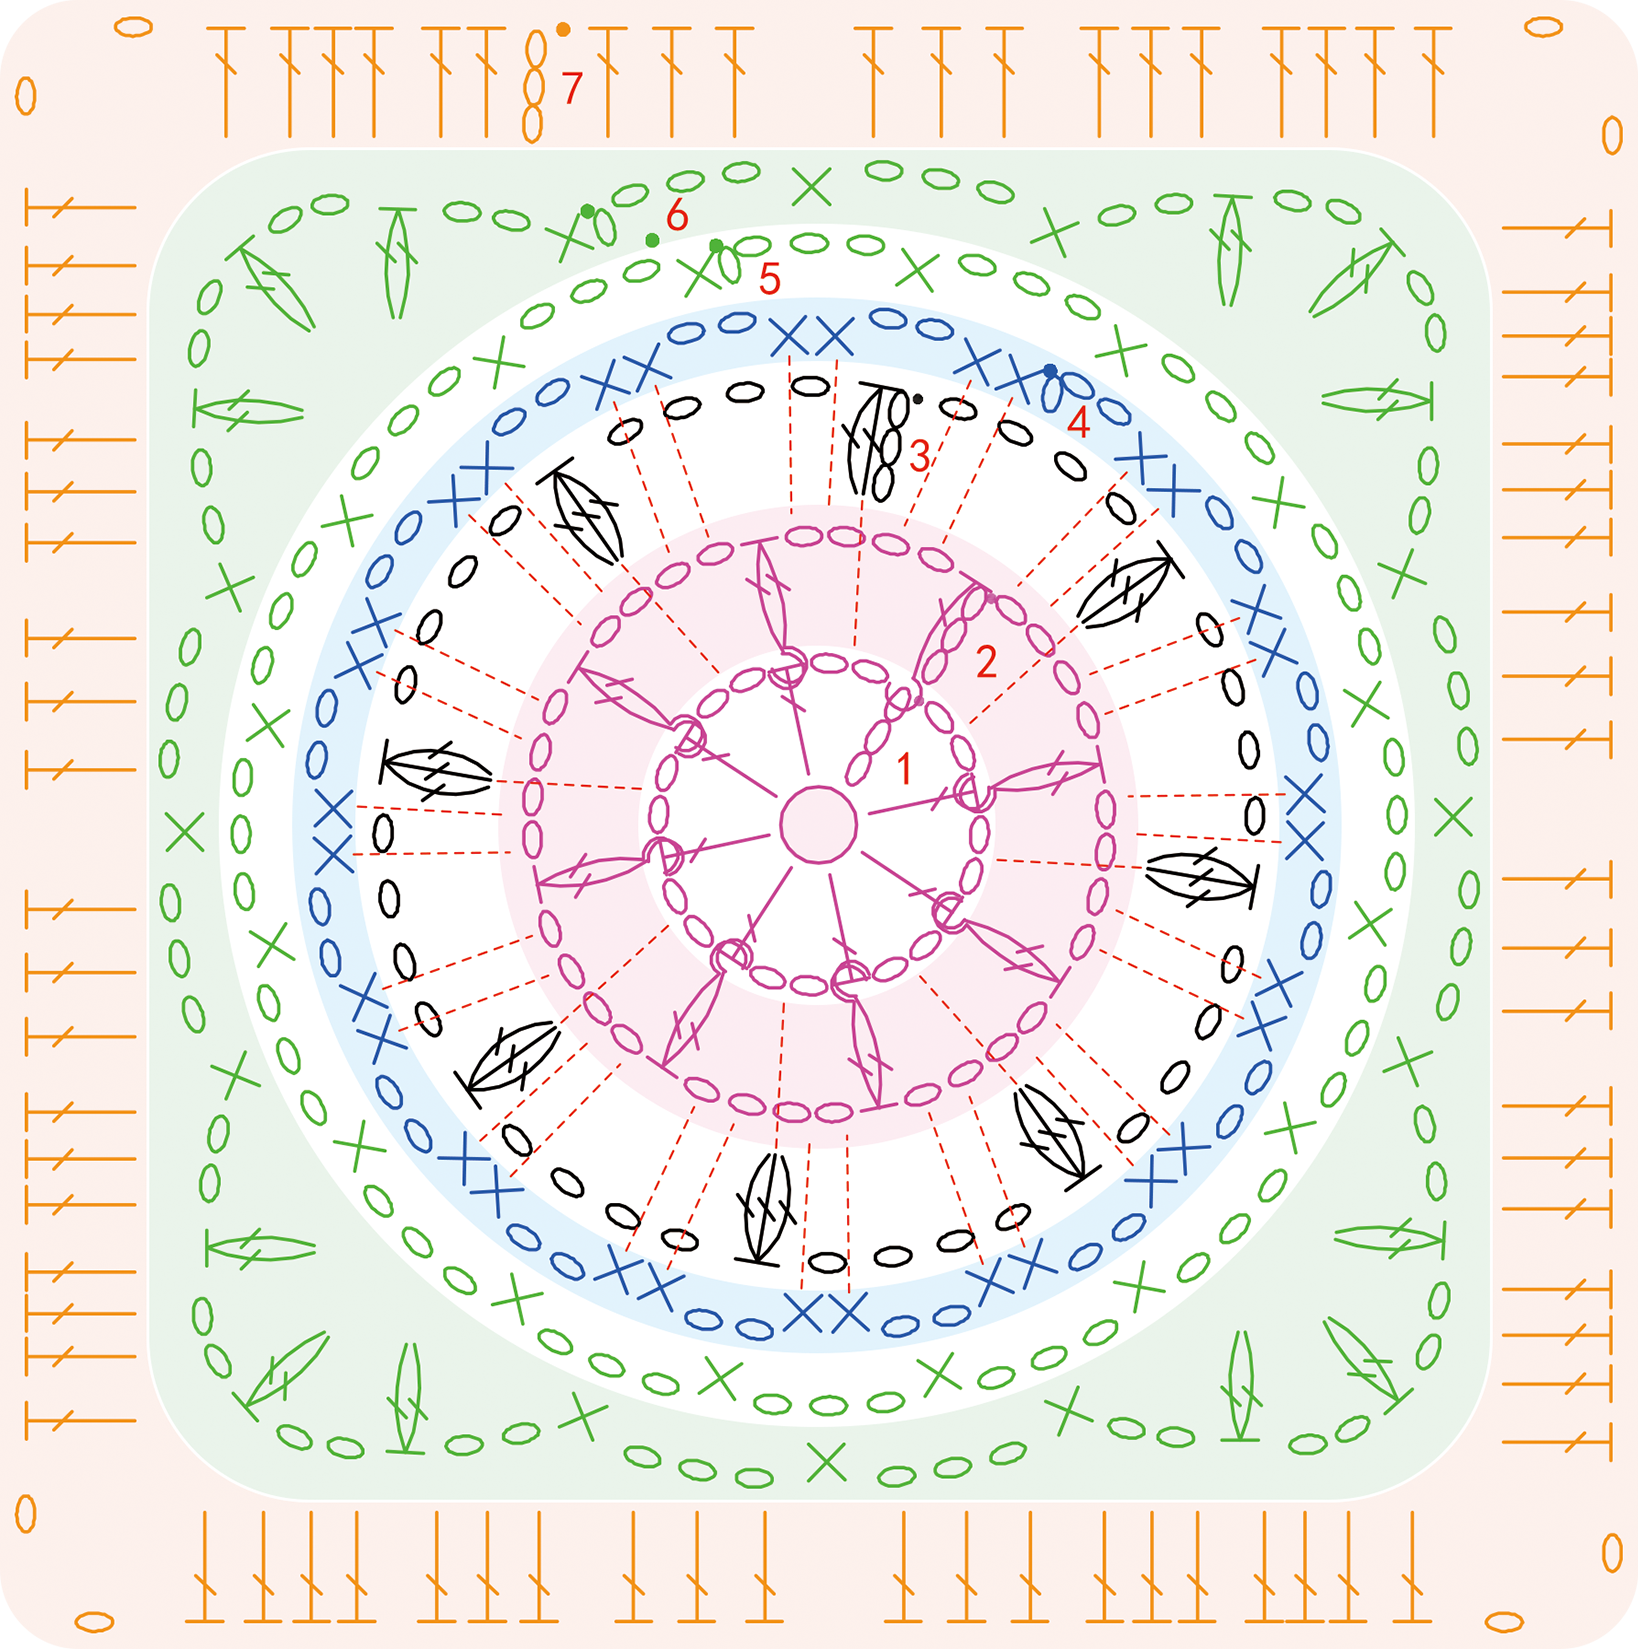
STEP2 Motif 2*9 00' 04'' (Part 2)
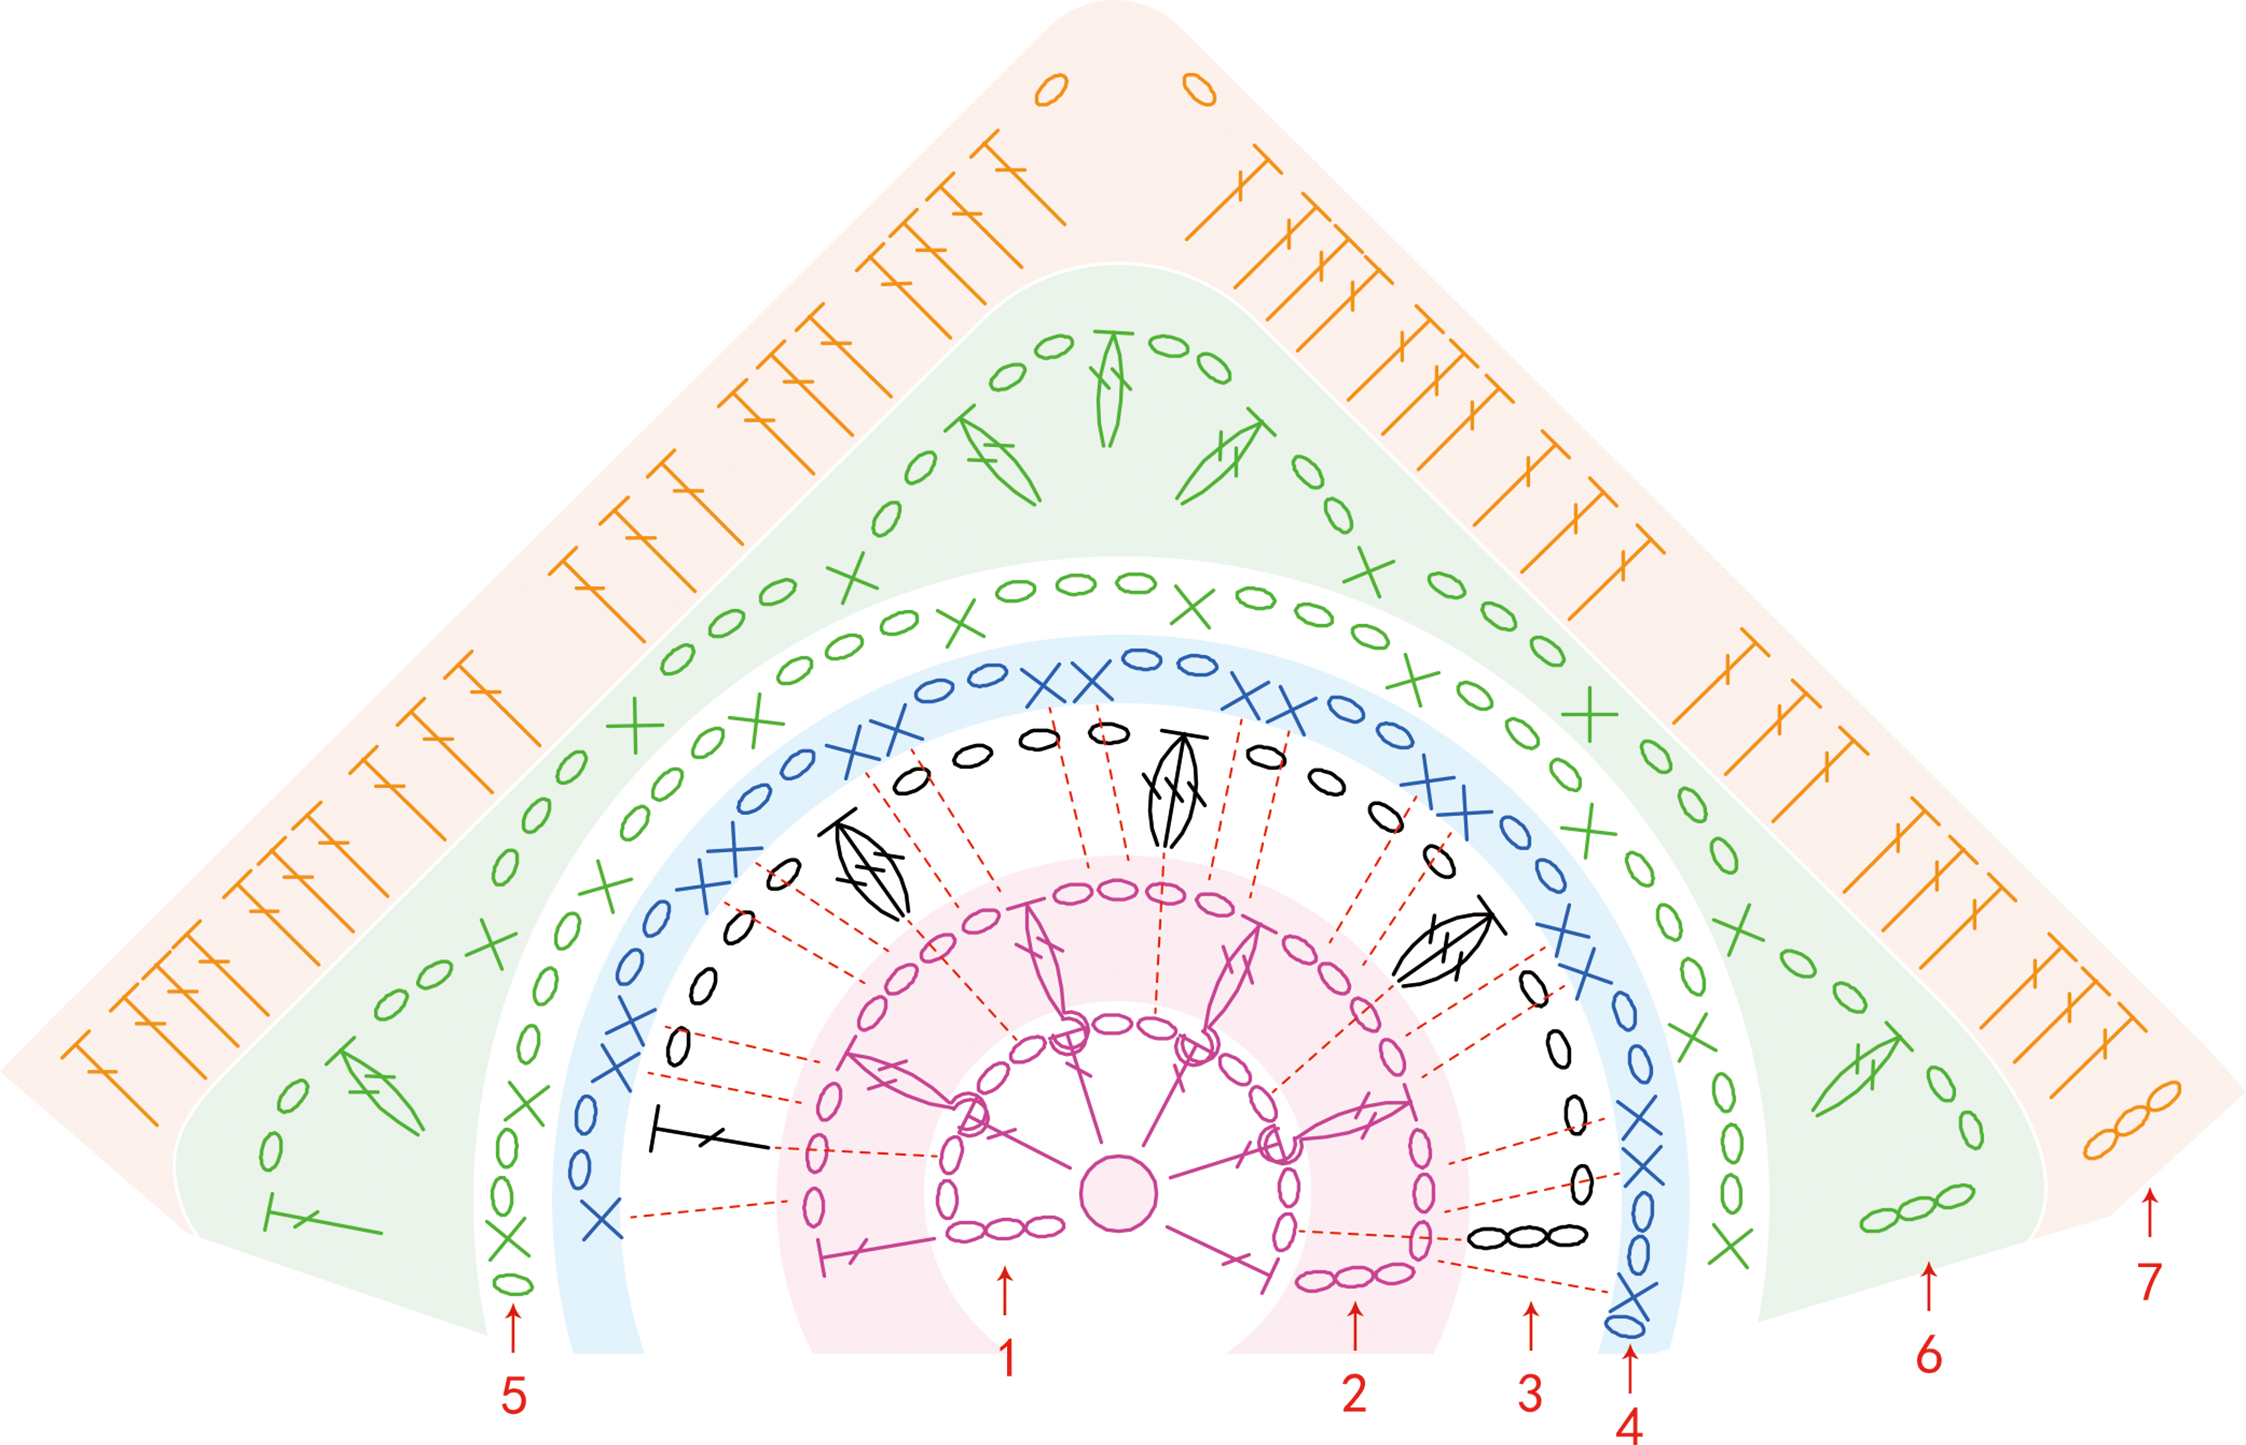
Begin the motif with the double magic ring,and then work in rounds,following the chart, color changing were requested.Please refer to the video demonstration for details.
Note2:
In the 3rd round, the dc3tog-in-1 are placed in the 1st round chain space; while in the 4th round, the sc are worked into the chain space in the 2nd round. Please refer to the video for details.
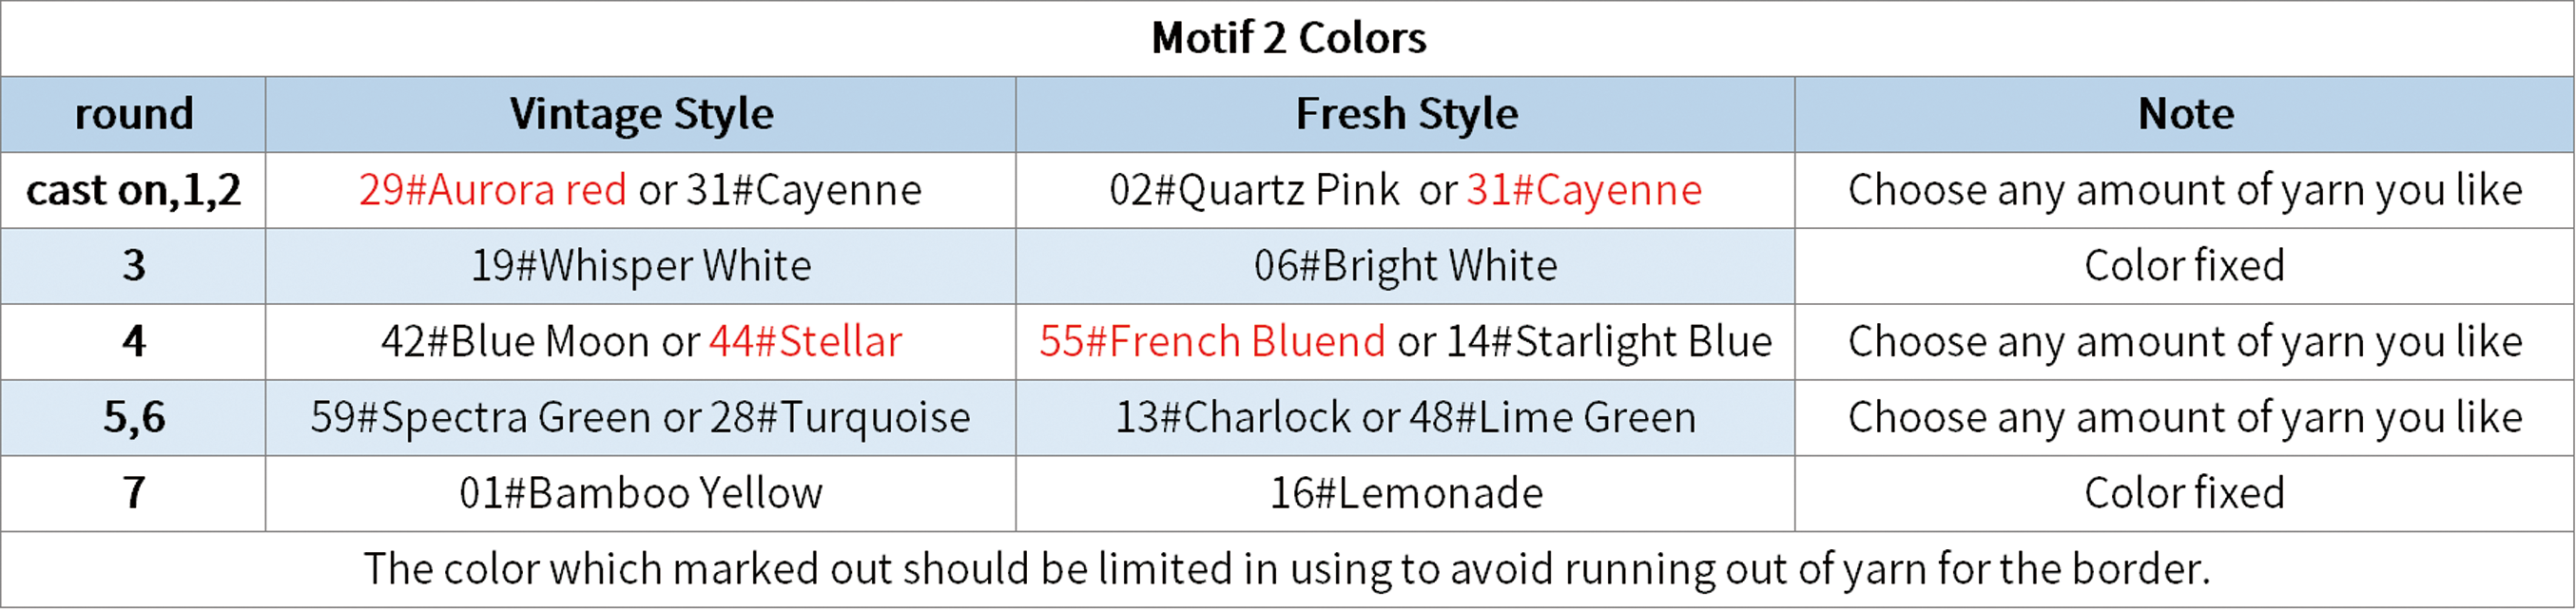
STEP3 Motif 3*12 30' 45'' (Part 2)
Begin the motif with the double magic ring,and then work in rows,following the chart, Refer to the Motif2 colors changing color.Please refer to the video demonstration for details.
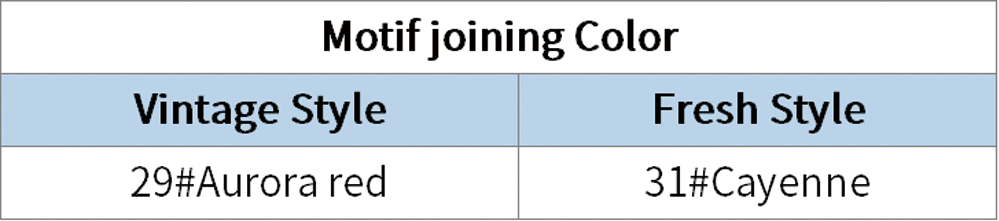
STEP4 Motif joining method 40' 28'' (Part 2)
After completing the motifs, place them right side facing each other, and use slip stitch to join them together. The color placement for motifs 1 should follow the color layout, but you can adjust it according to your preference as long as each row and each column have motifs of the same color staggered. The color distribution for motifs 2 and 3 can be random. Please refer to the video demonstration for details.
Color layout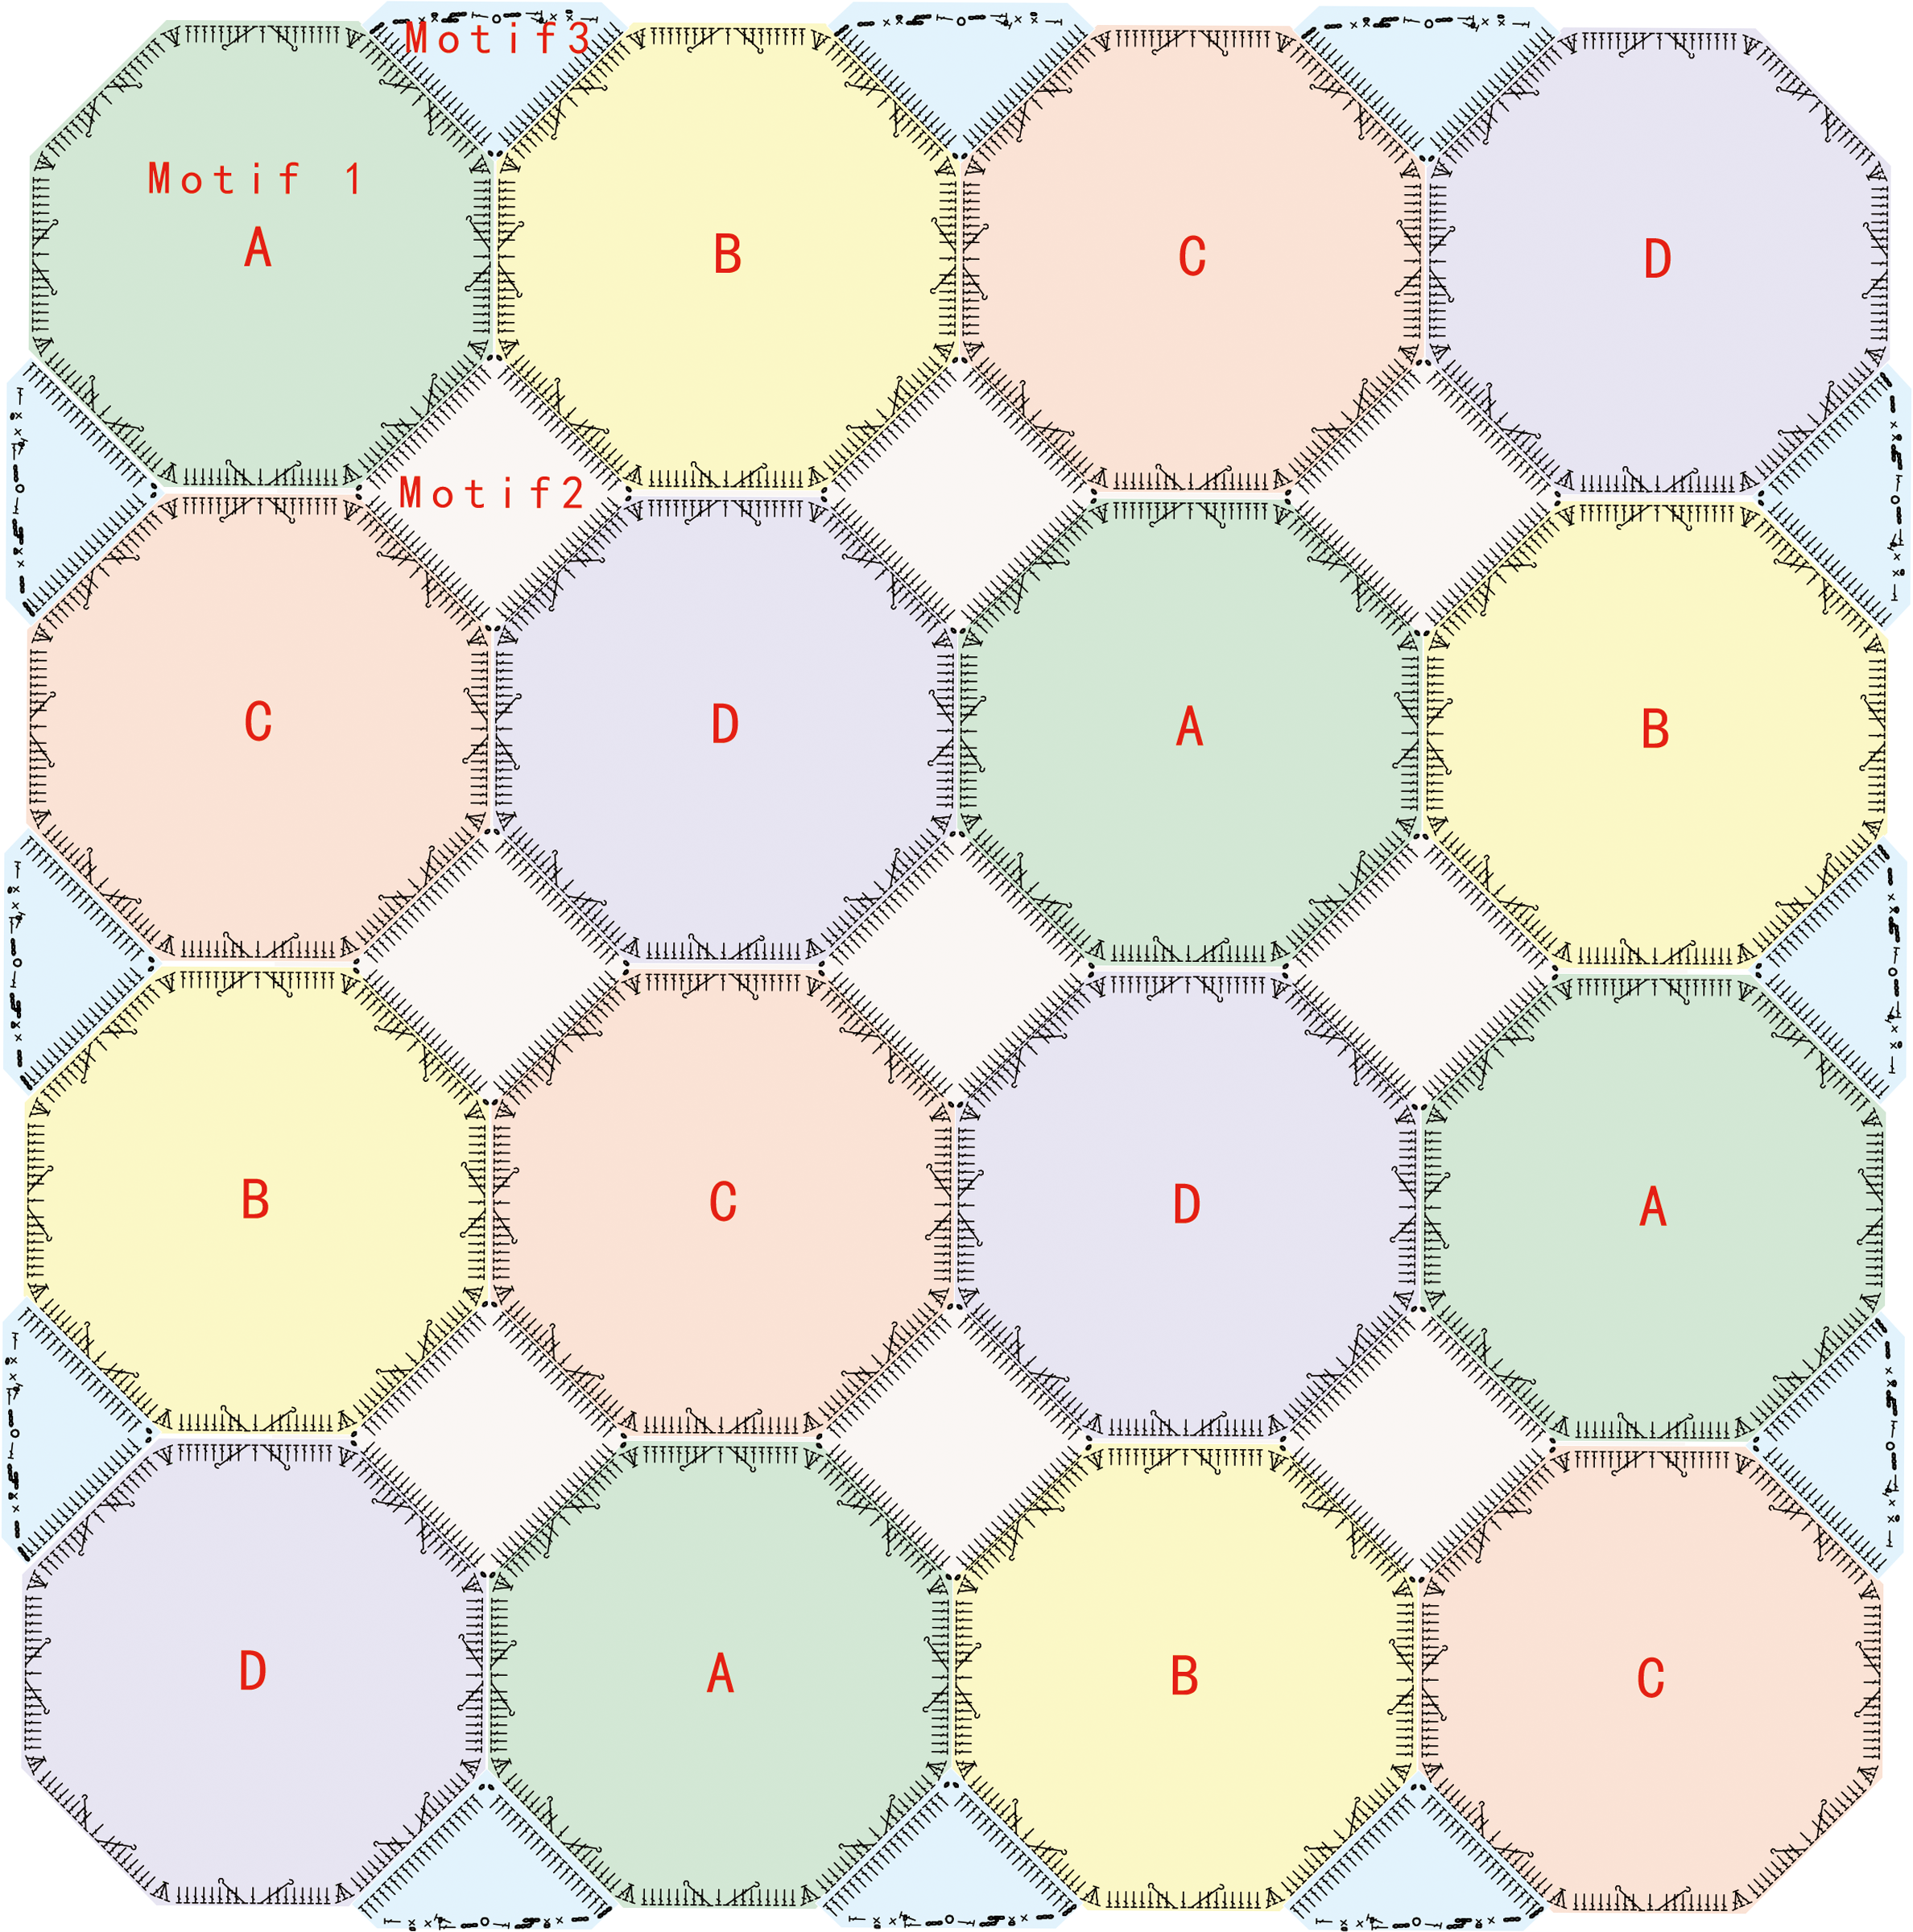
STEP5 Edging 51' 34'' (Part 2)
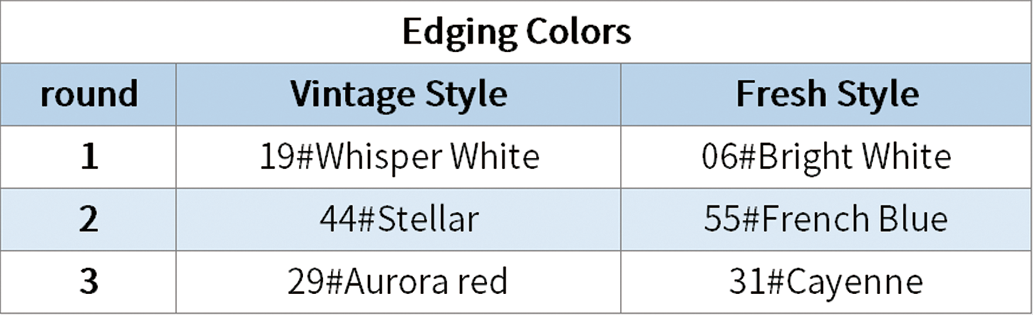
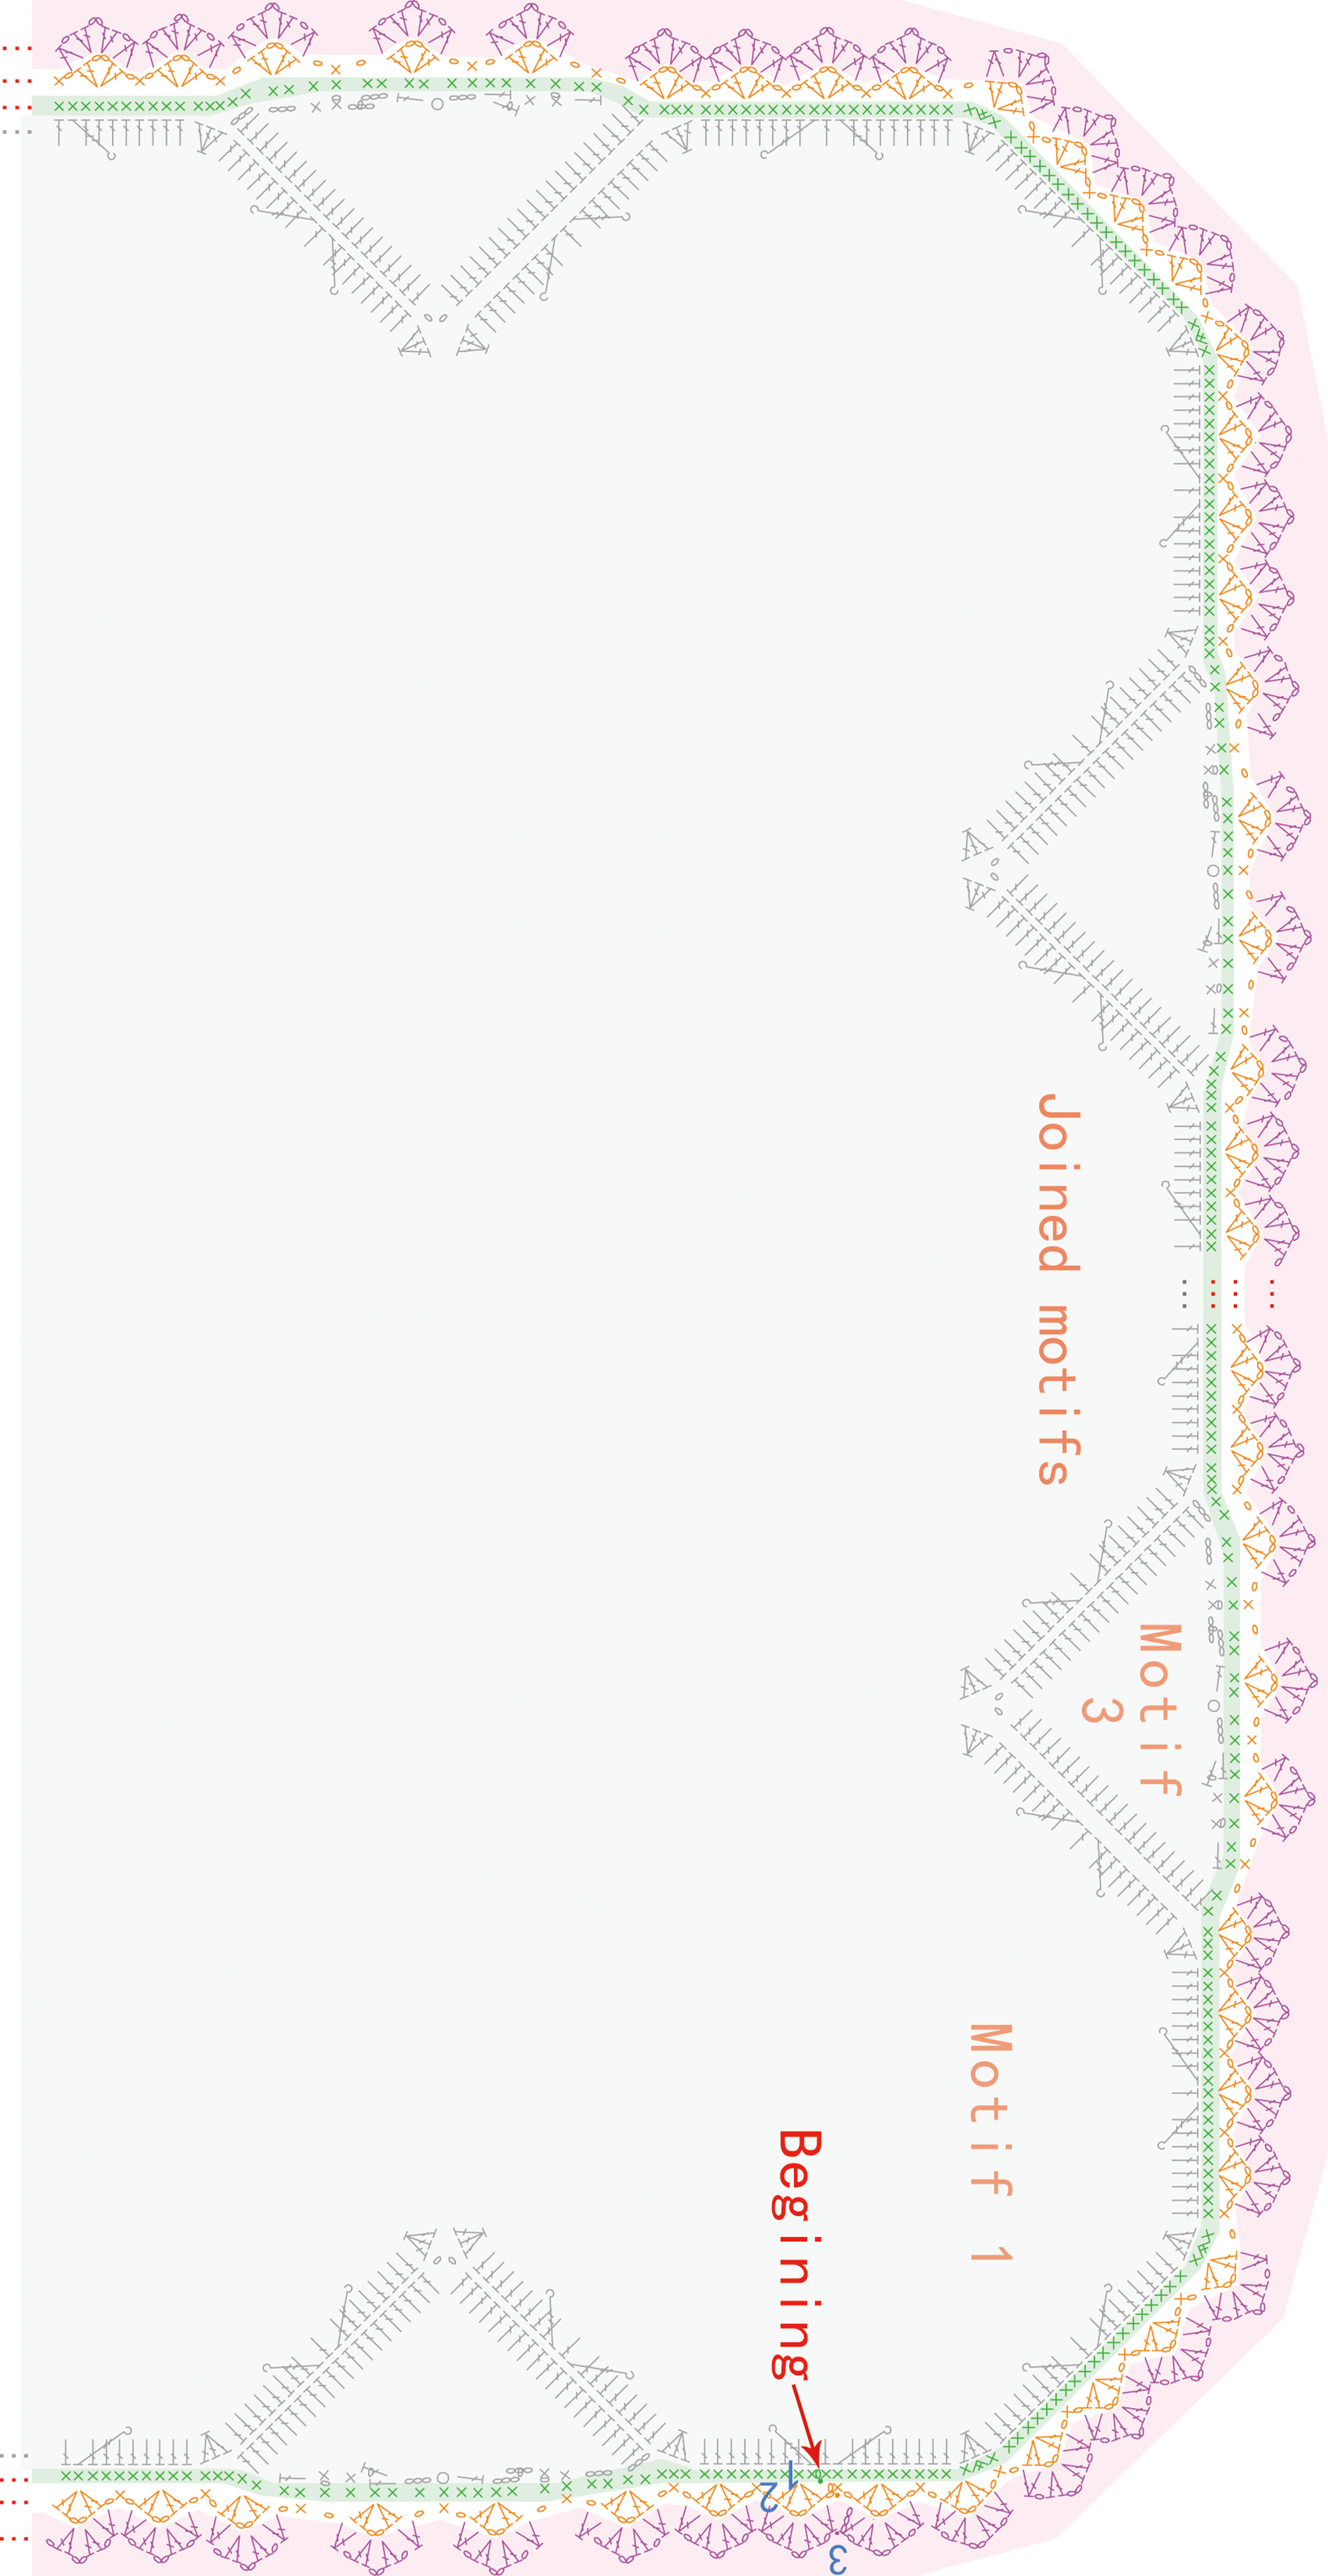
Edging for 3 rounds, changing colors for each round. Joining yarn to the blanket body and work around it counterclockwise. Due to the large size of the complete diagram, only a partial view is shown in the image. Please refer to the video demonstration for details.

Made by the community