Home / Blanket
Tuanhua Dome Blanket
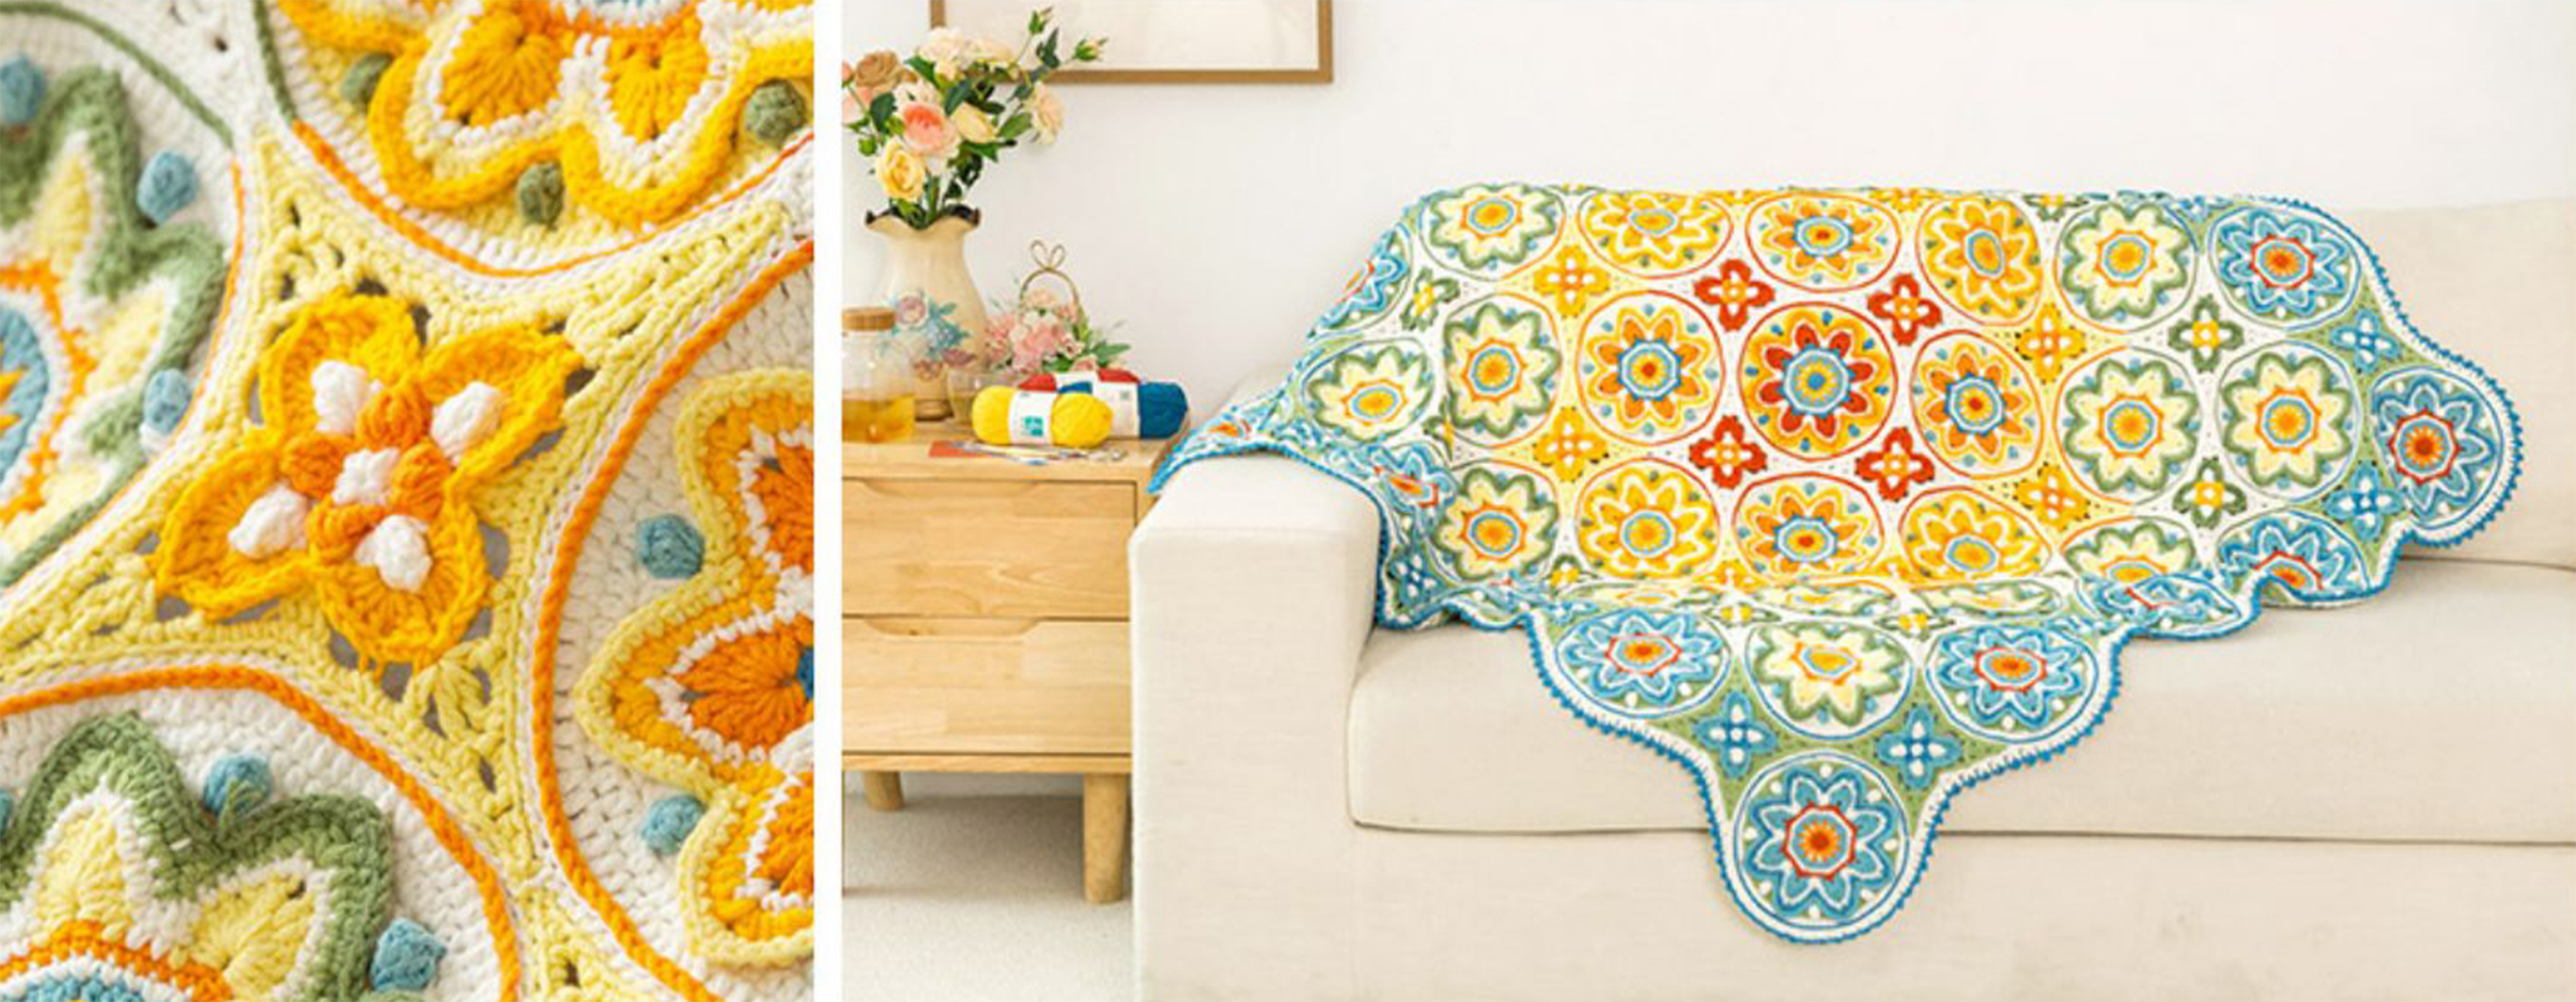
Project preview
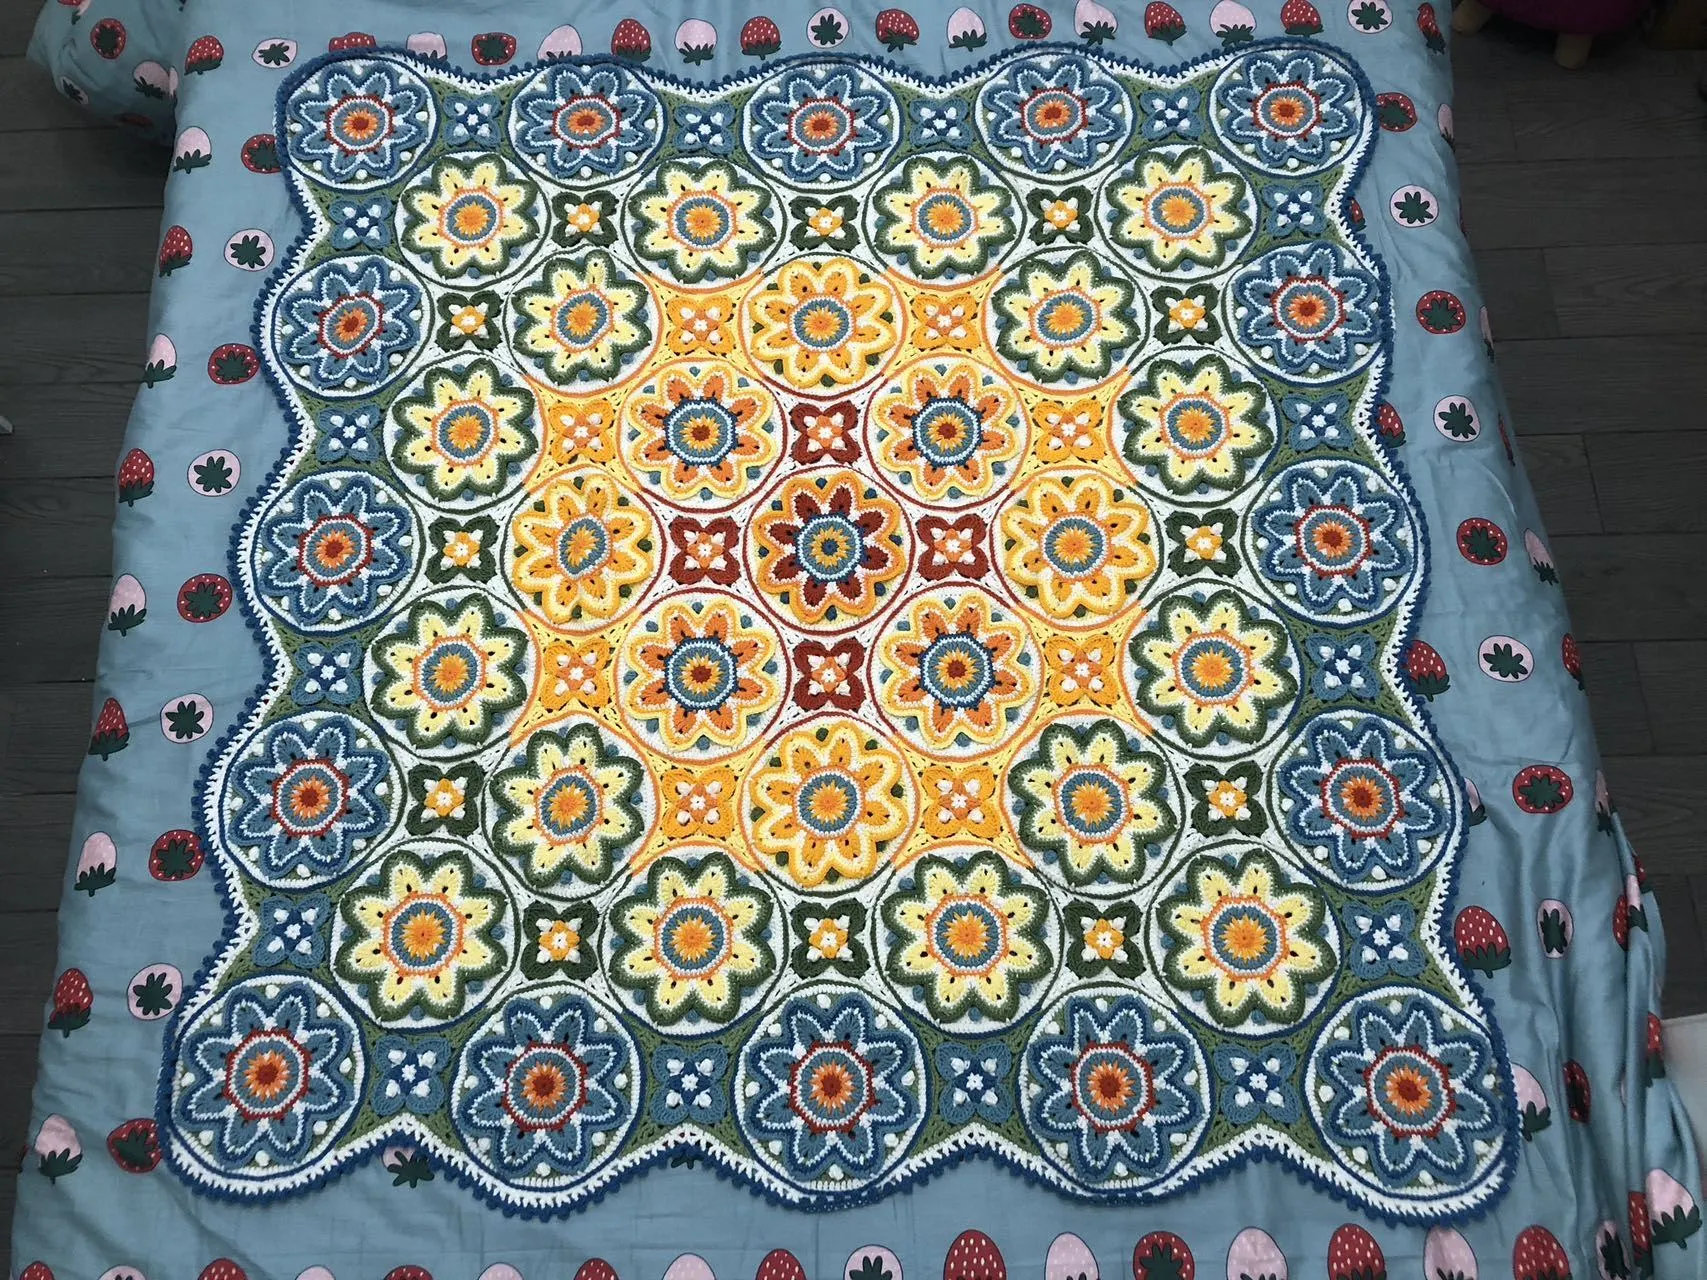
See the finished project
Pattern format
Instructions
Watch and follow
Video tutorial
This blanket is made up of motifs, sewing, slip stitches as decoration and edging. First, we will made the motifs. Then, we'll seam the motifs accordingly. Next, we'll use the slip stitch as decoration. Finally, we'll crochet the edging.
- Red Blue Style -
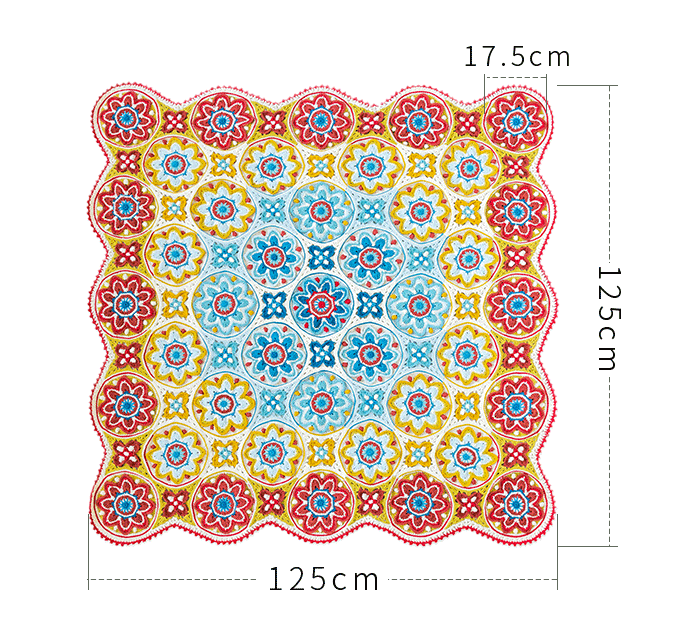
- Yellow Green Style -
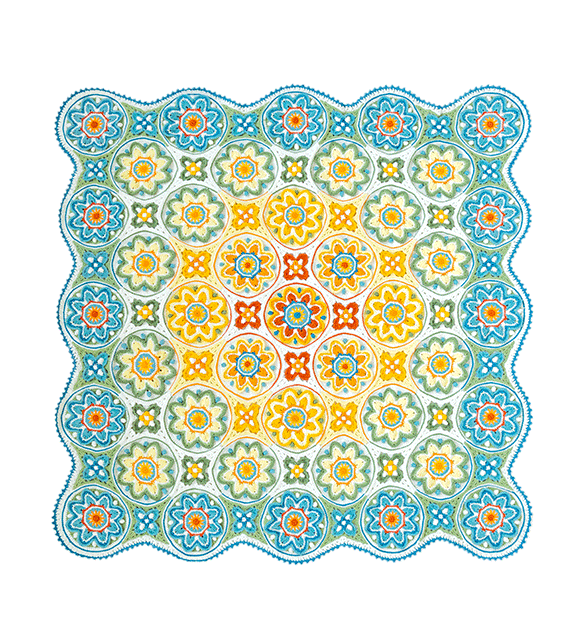
The handcrafted measurements may have an error of 1 to 2cm. Due to variations in individual tension, the size of the sample is for reference only.
Material: 4-Ply Combed Cotton & Acrylic Fibre Hand Knitting Yarn
Hook: 3.00mm crochet hook
Note:
This pattern is making in Chinese crochet pattern terms, and the stitch name is written using American terminology. All measurements in charts are in cm.
Chart Key



















Part 1 MotifsA
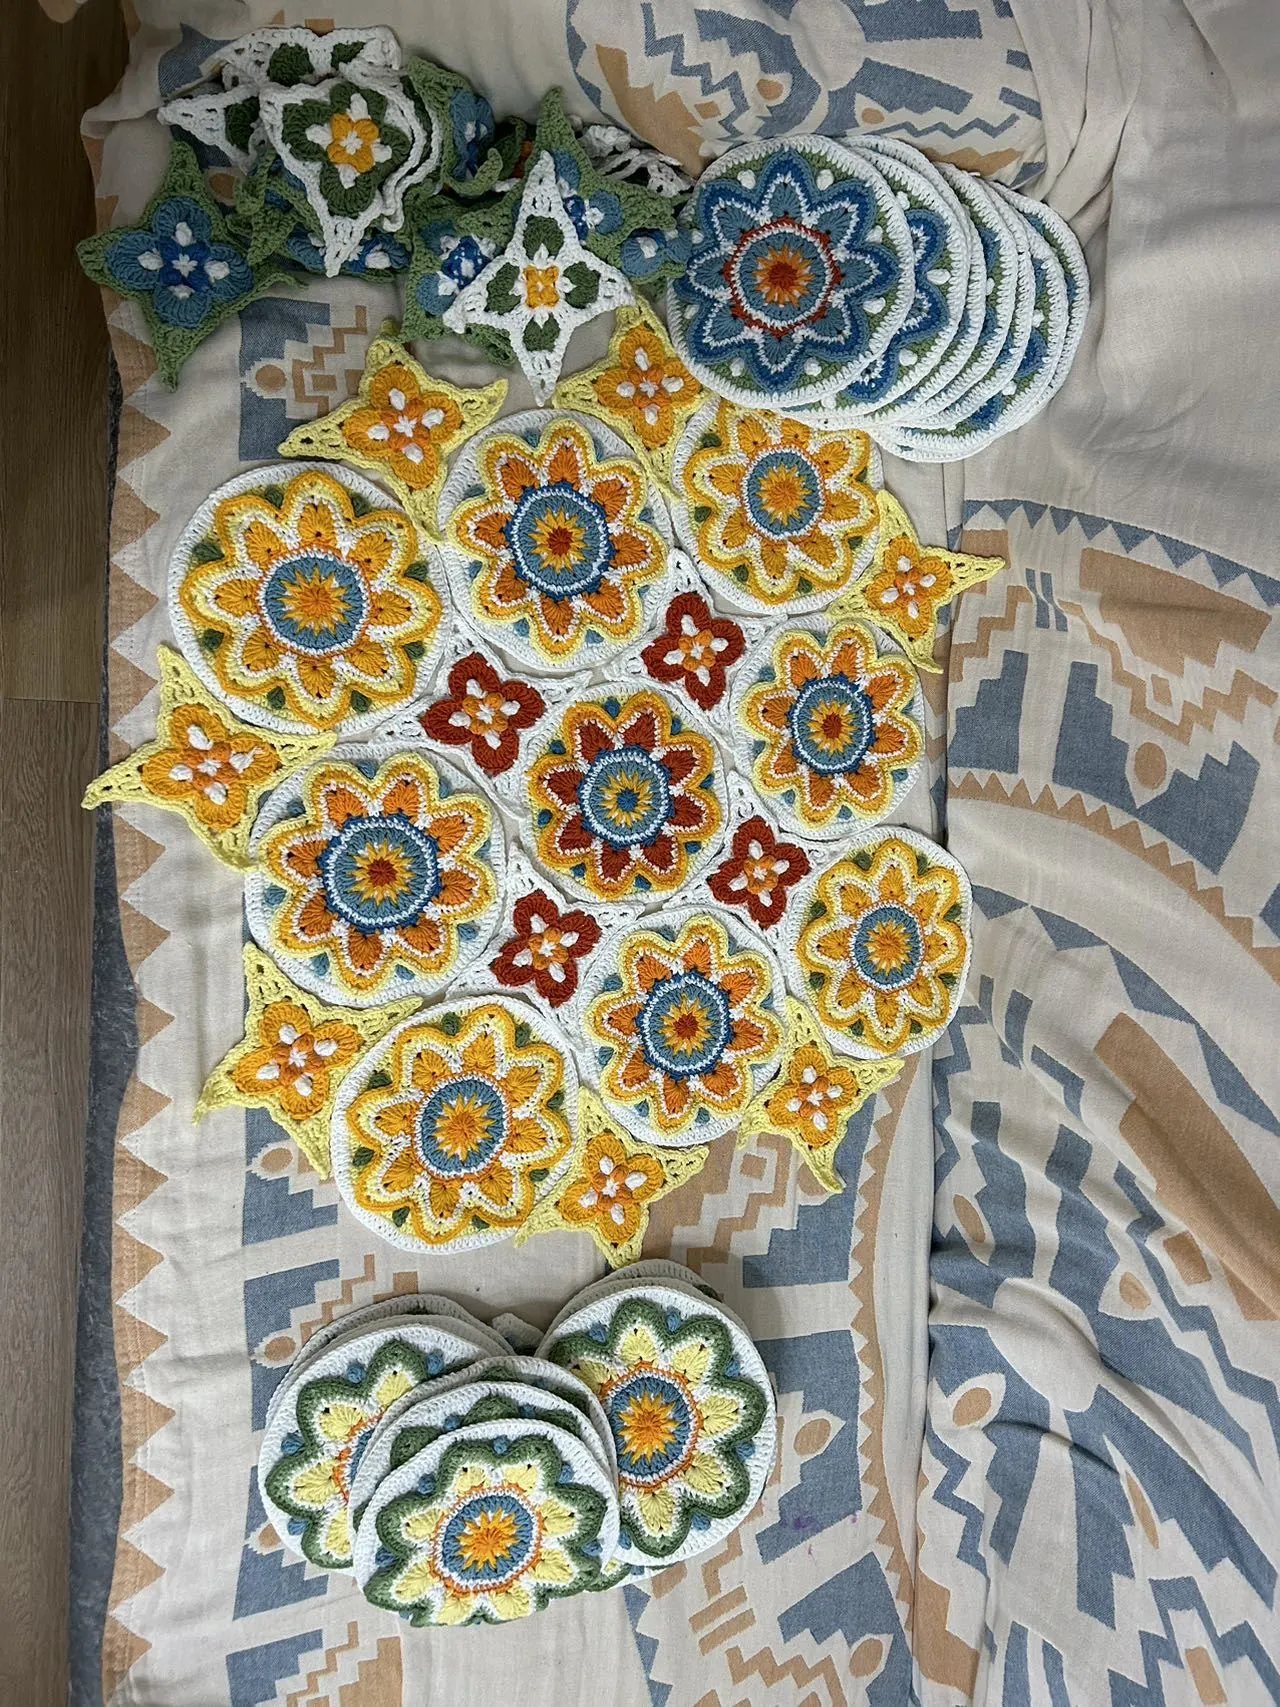
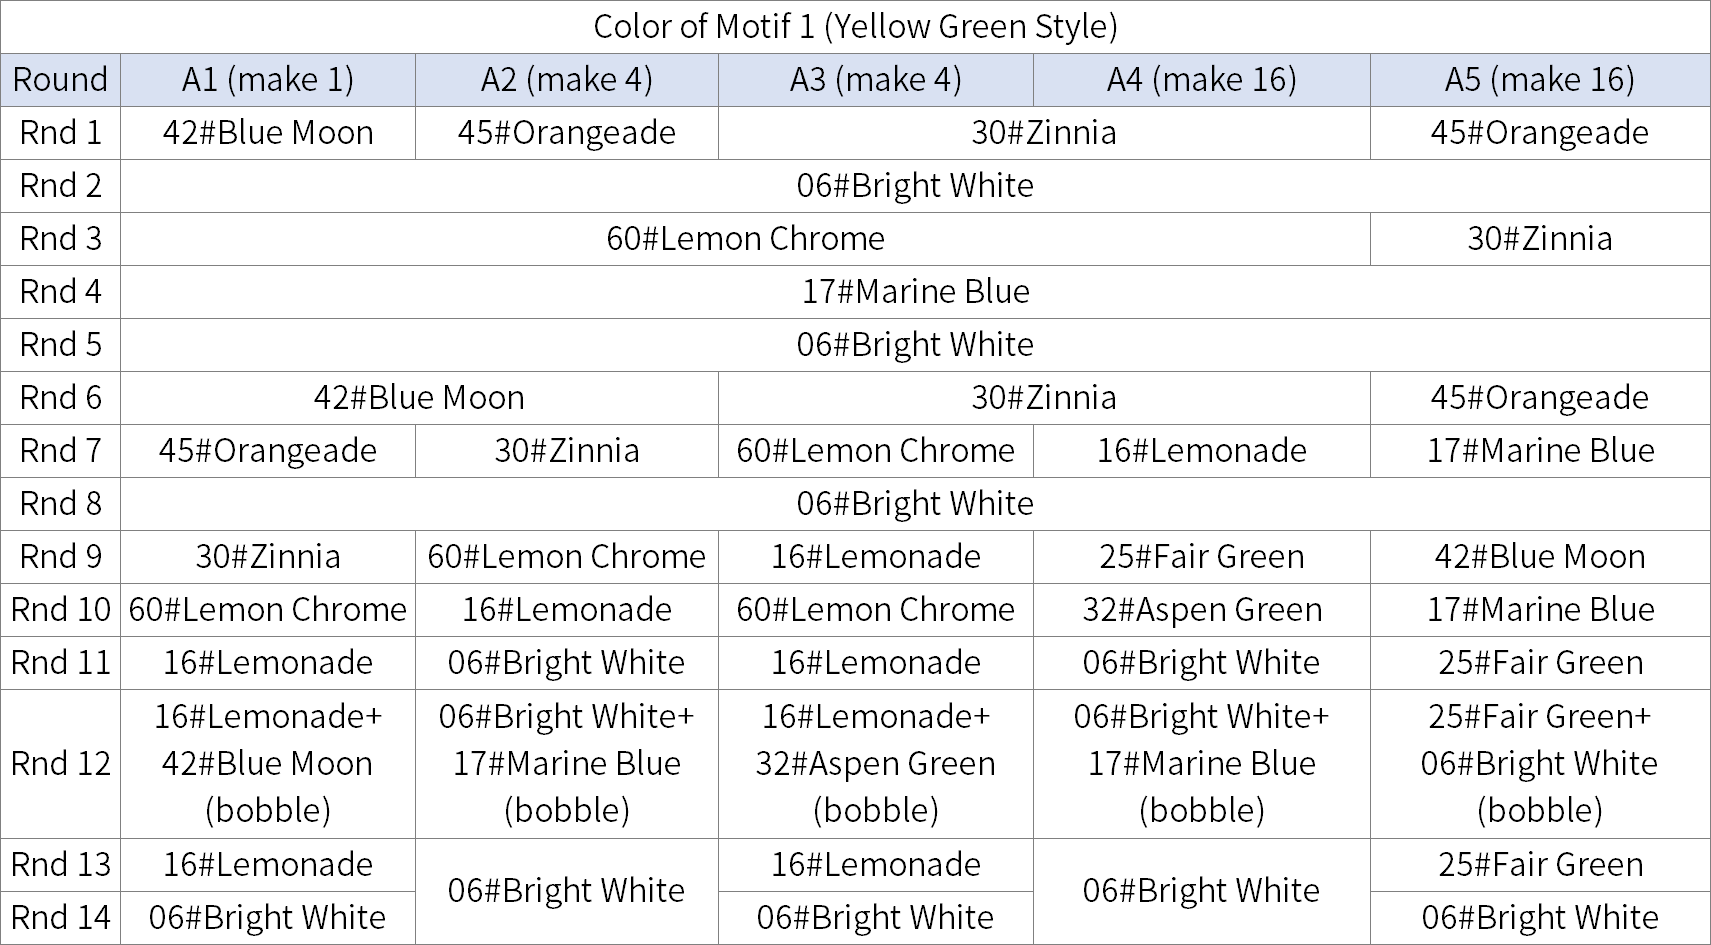
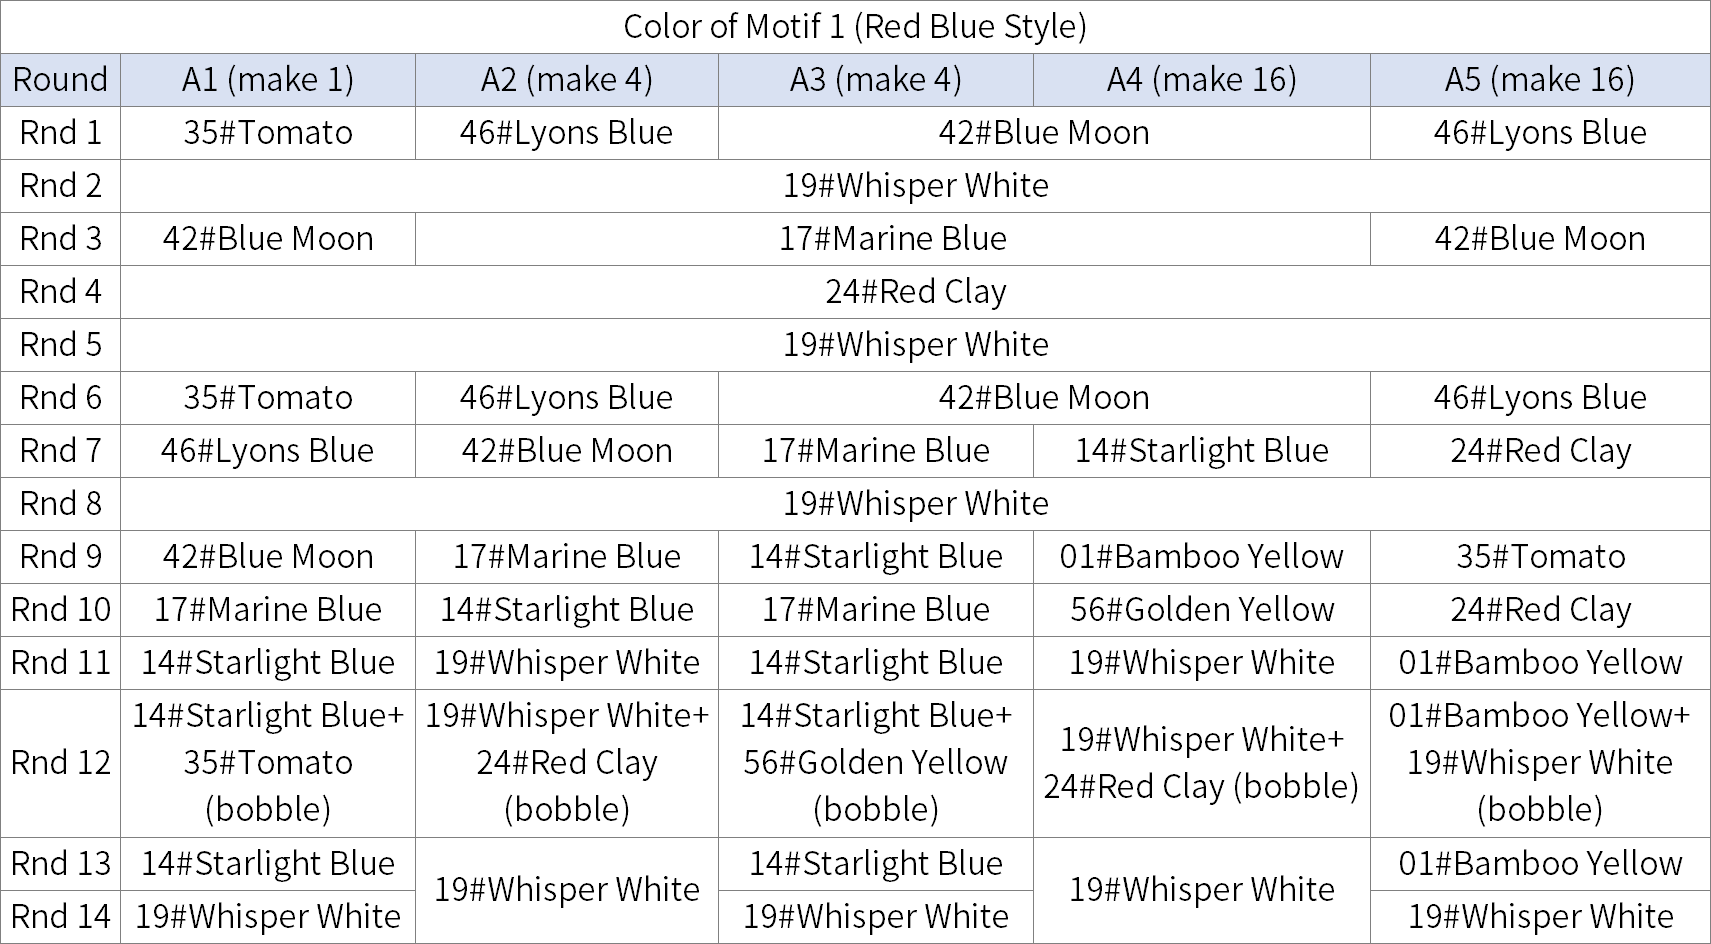
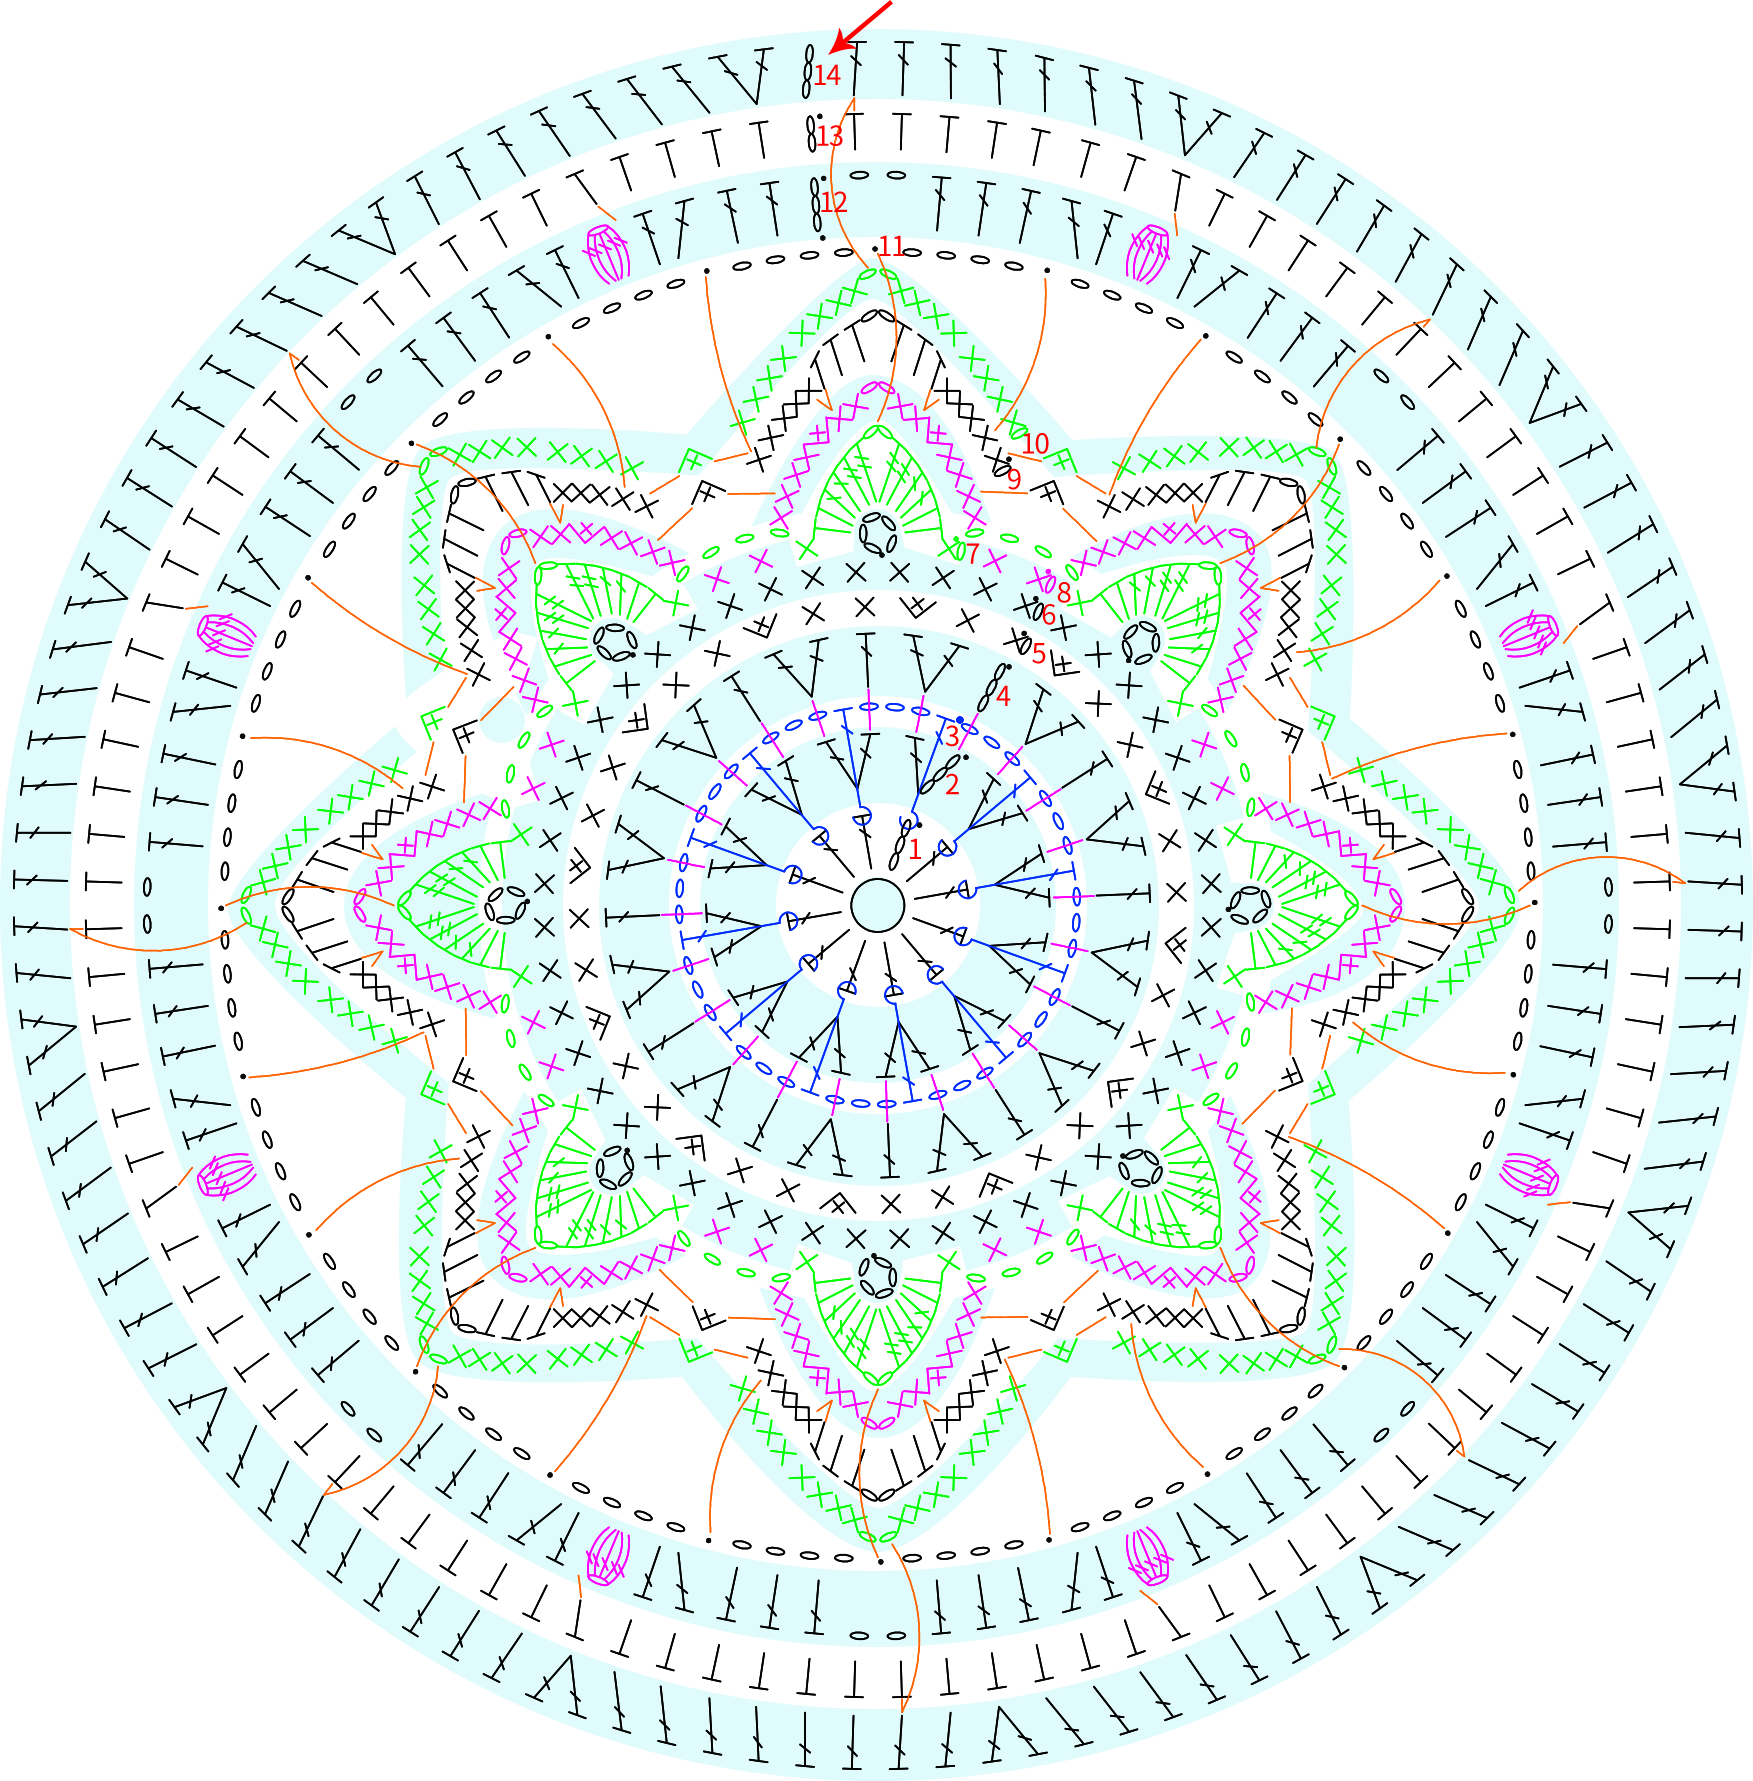
Step 1 Motif 1 (make 41)A1 00' 57'' (Part 1)
The Motif 1 has various color matching. All motifs use double magic ring to begin, Wrap the yarn in counter clockwise and in round shape. You are required to use and change other yarns during the process. Please refer to the video demonstration for more details.
Note:
① At the end of Round 10 and Round 14, do not work a slip stitch, simply bind off.
② When working Round 14, join to the corresponding position in Round 10.
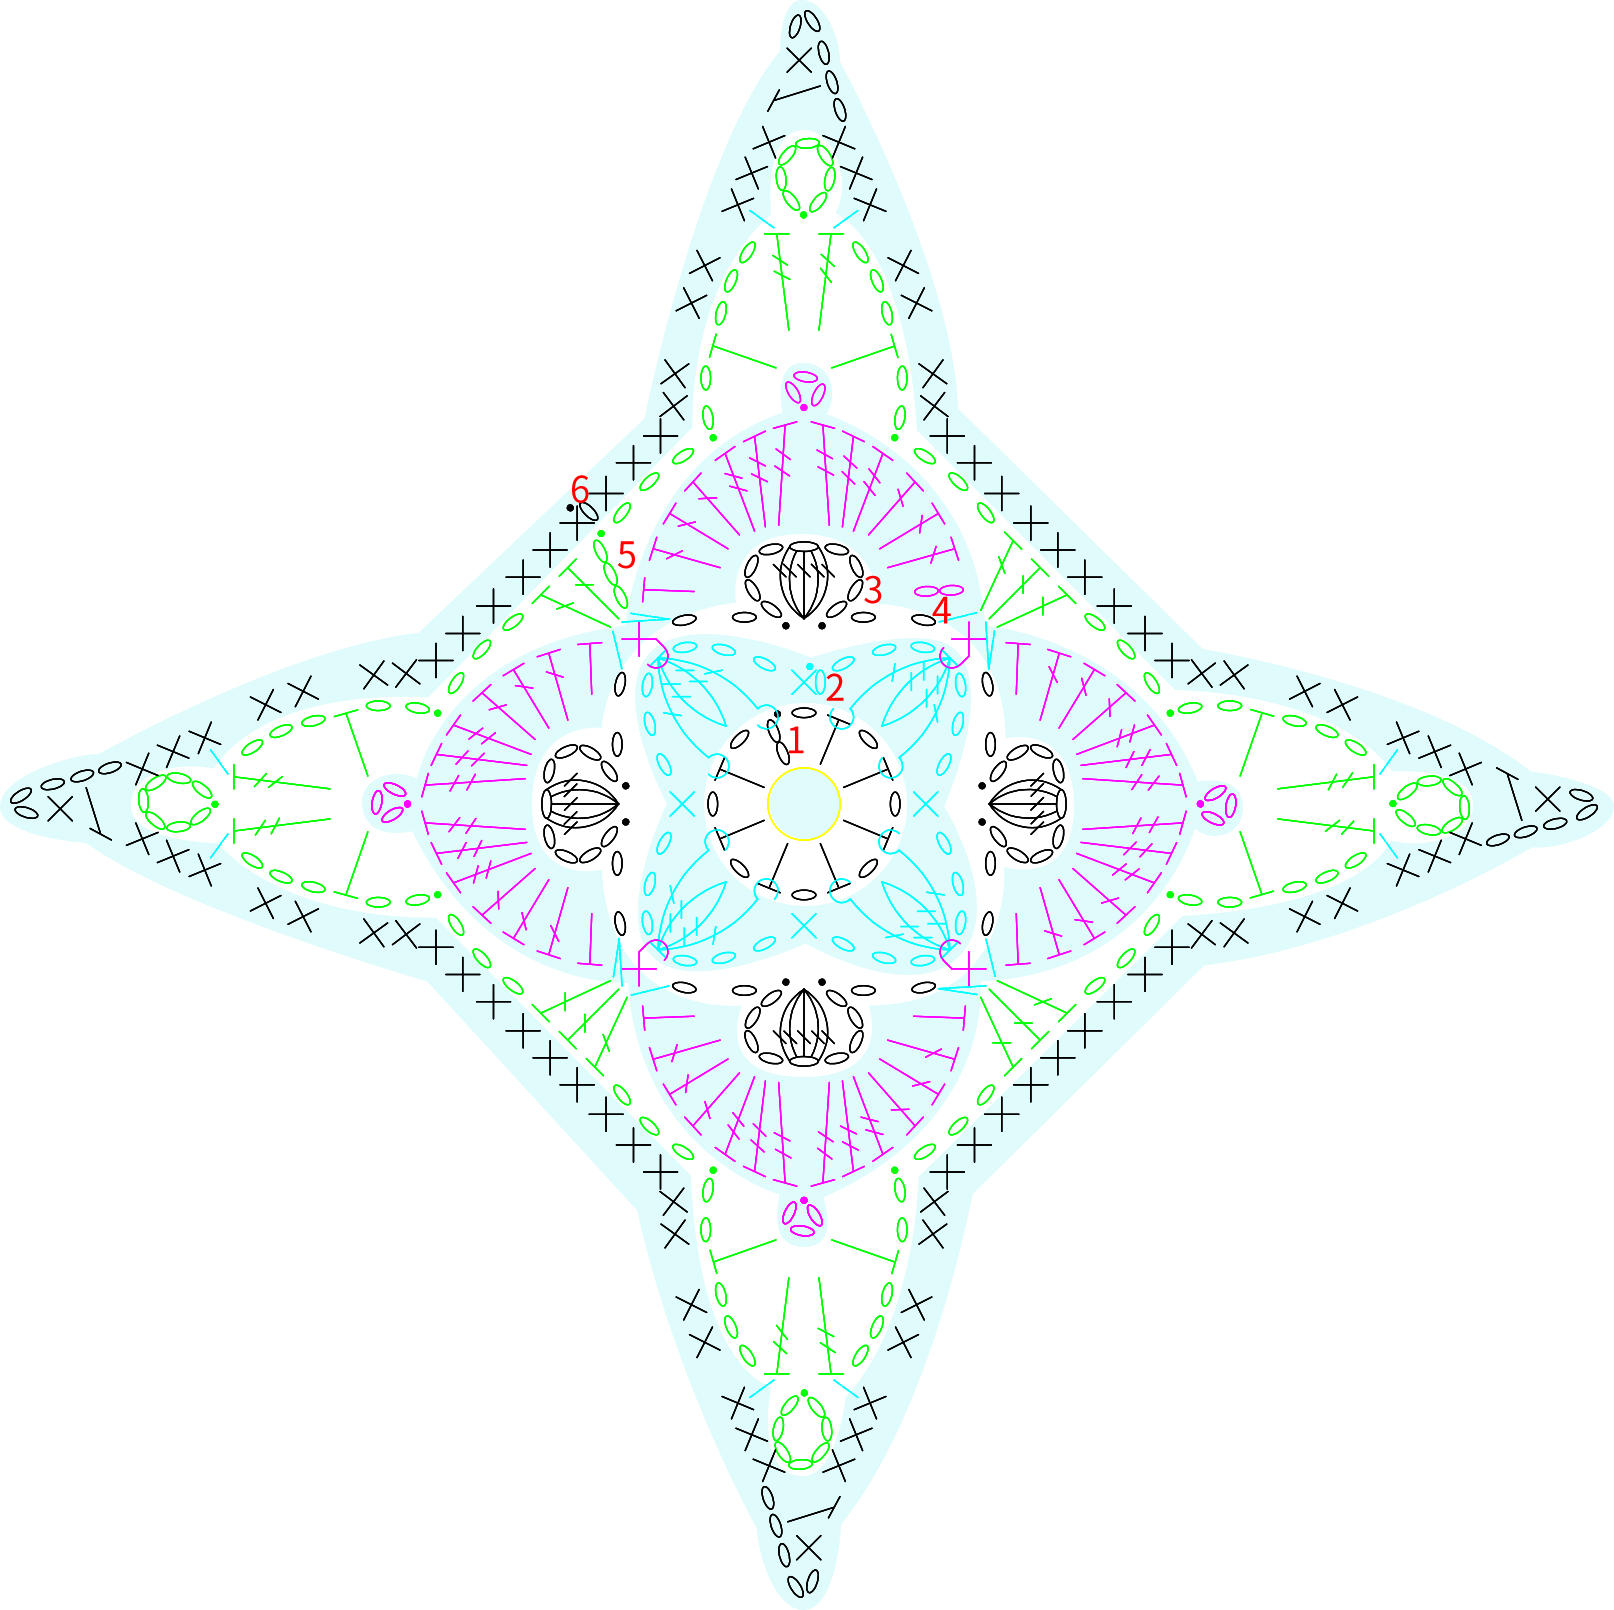
Step 2 Motif 2 (make 40)A2 00' 12'' (Part 2)
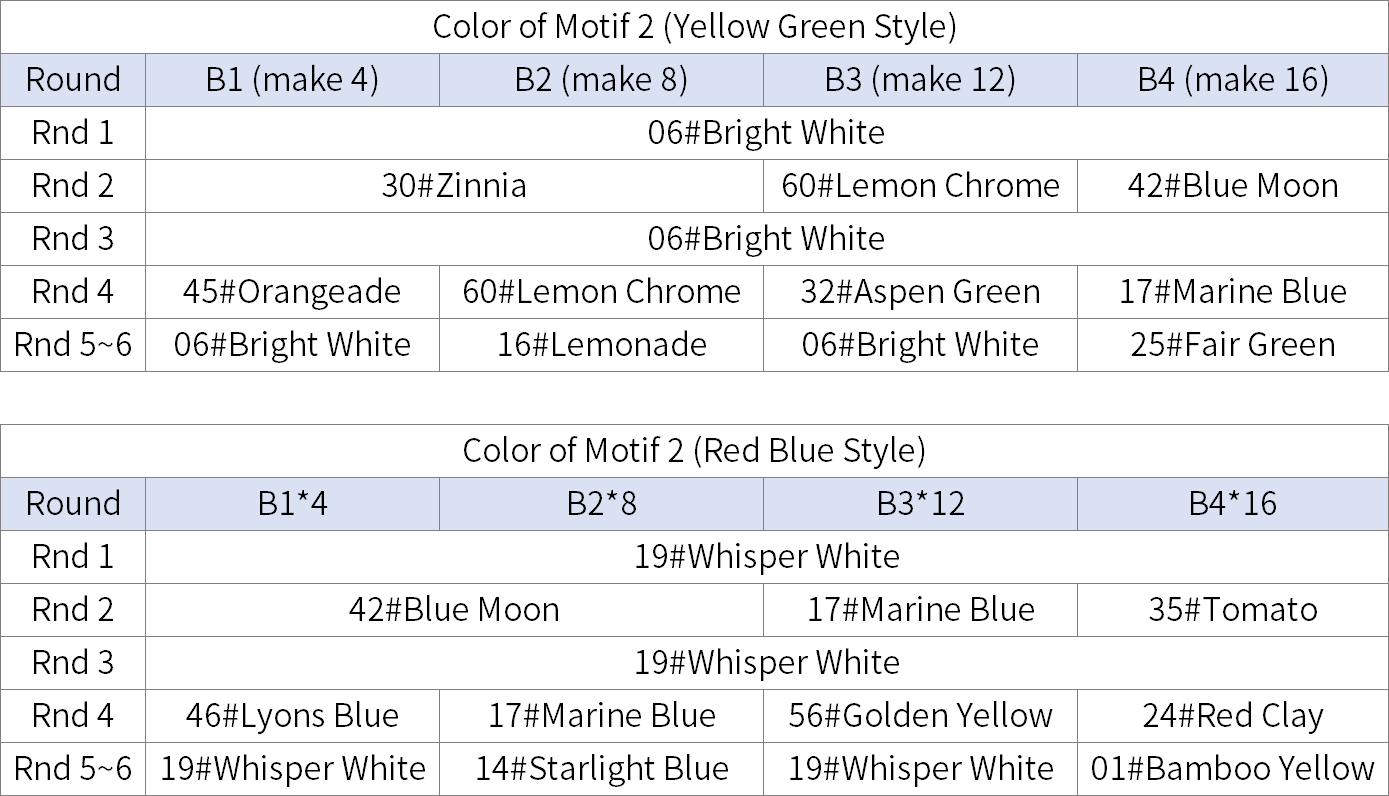
The Motif 2 has various color matching. All motifs use double magic ring to begin, Wrap the yarn in counter clockwise and in round shape. You are required to use and change other yarns during the process. Please refer to the video demonstration for more details.
Note:
① At the end of Round 4, do not work a slip stitch, simply bind off.
② For Round 5, insert your hook behind the treble crochet and into the yarn of the previous row, then work 3 double crochets into each of the 4 chain spaces from Round 3.
③ In the chain spaces of Round 6, crochet the single crochets loosely.
Part 2 Sewing B and slip stitch
as decorationC 29' 30'' (Part 2)
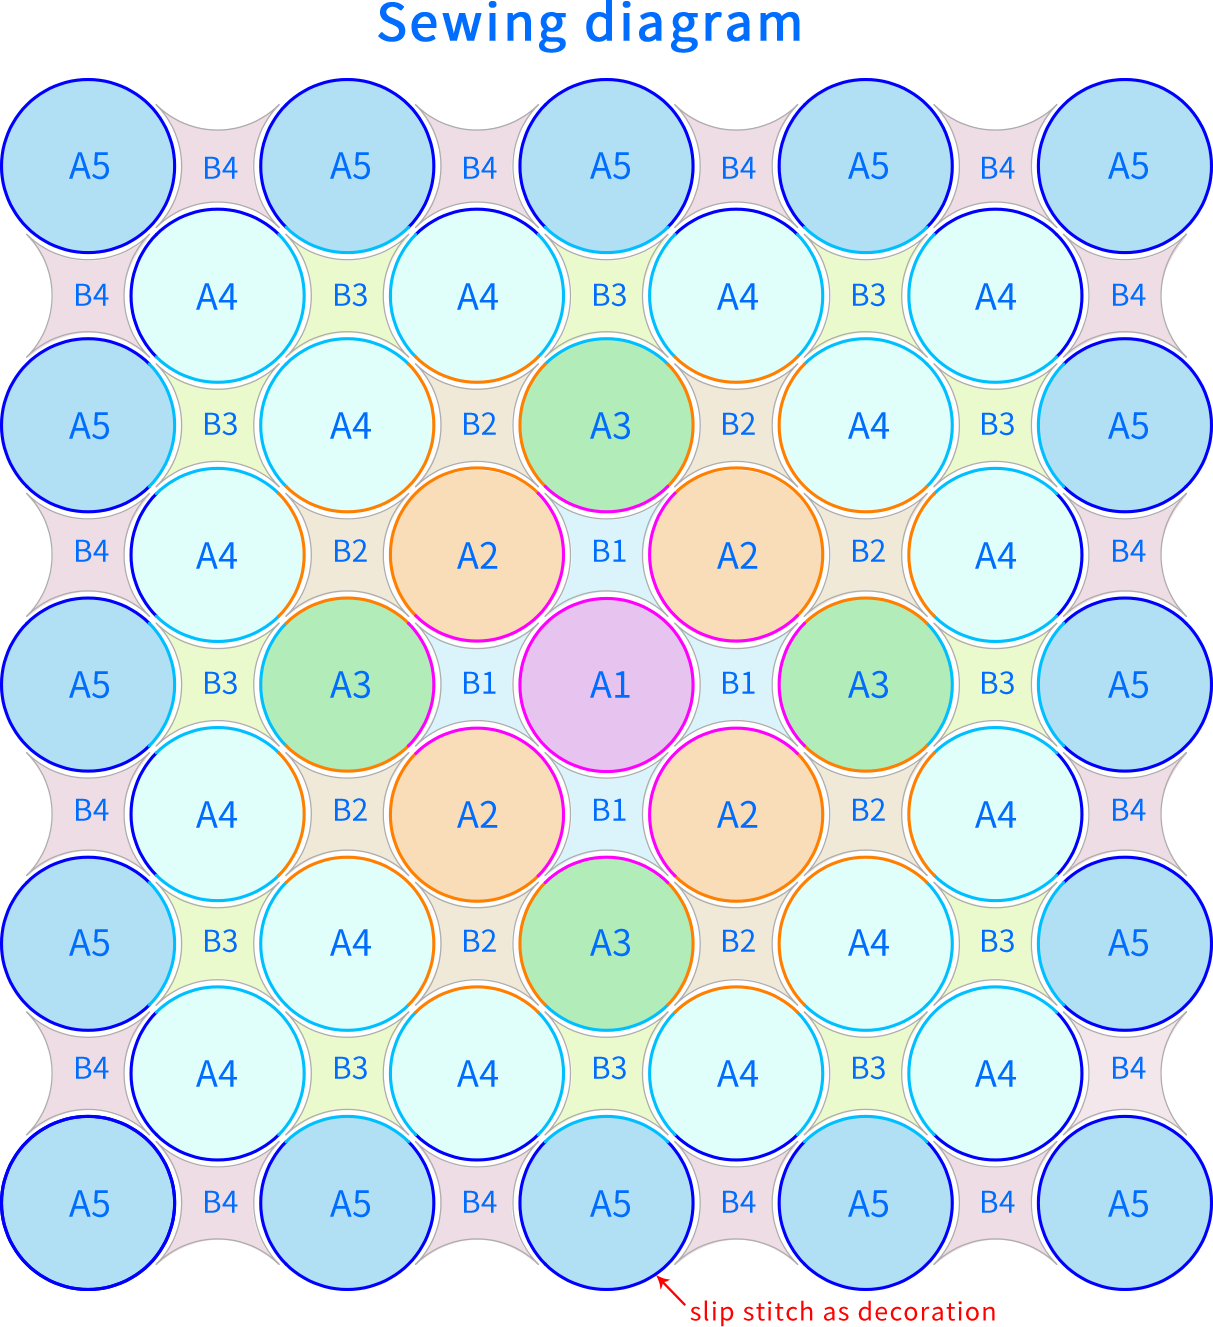
After finishing all motifs, refer to the end product, or the seaming instruction on the sewing diagram. use the same color yarn as the outermost of motif 1 to proceed seaming. Next, use slip stitch as edging. Please refer to the video demonstration for more details.
Note:
① For an aesthetically pleasing texture, when sewing motifs together, align the bobberstitches of Motif 1 with the pointed corners of Motif 2, ensuring consistency across the entire blanket.
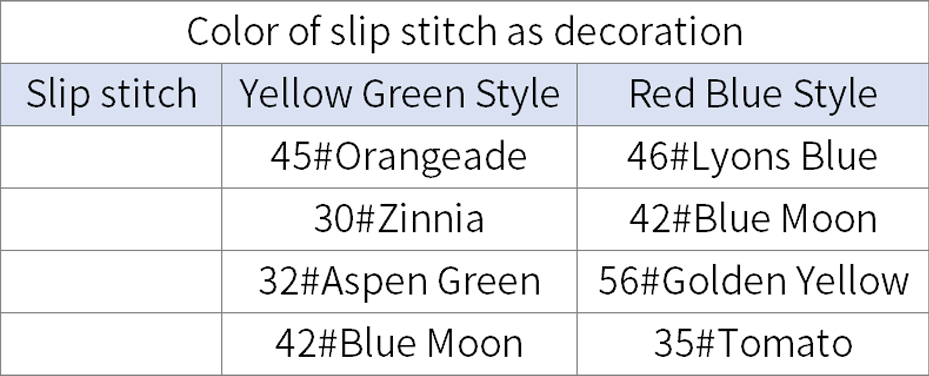
② After sewing, work a round of slip stitches as a decorative border on the last round of Motif 1. Use multiple color segments in this slip stitch round, refer to the corresponding table for the specific colors to use.
Part 3 EdgingC 47' 29'' (Part 2)
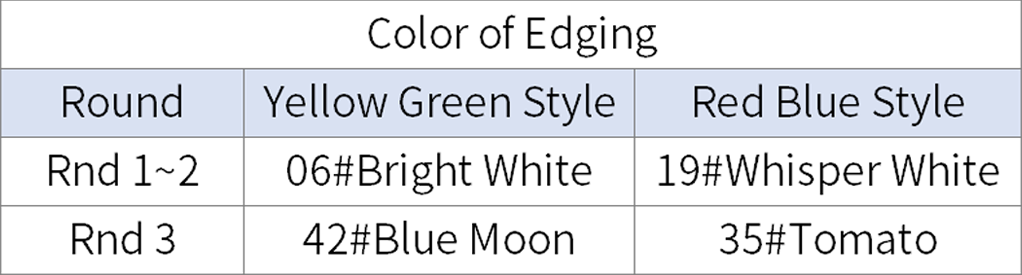
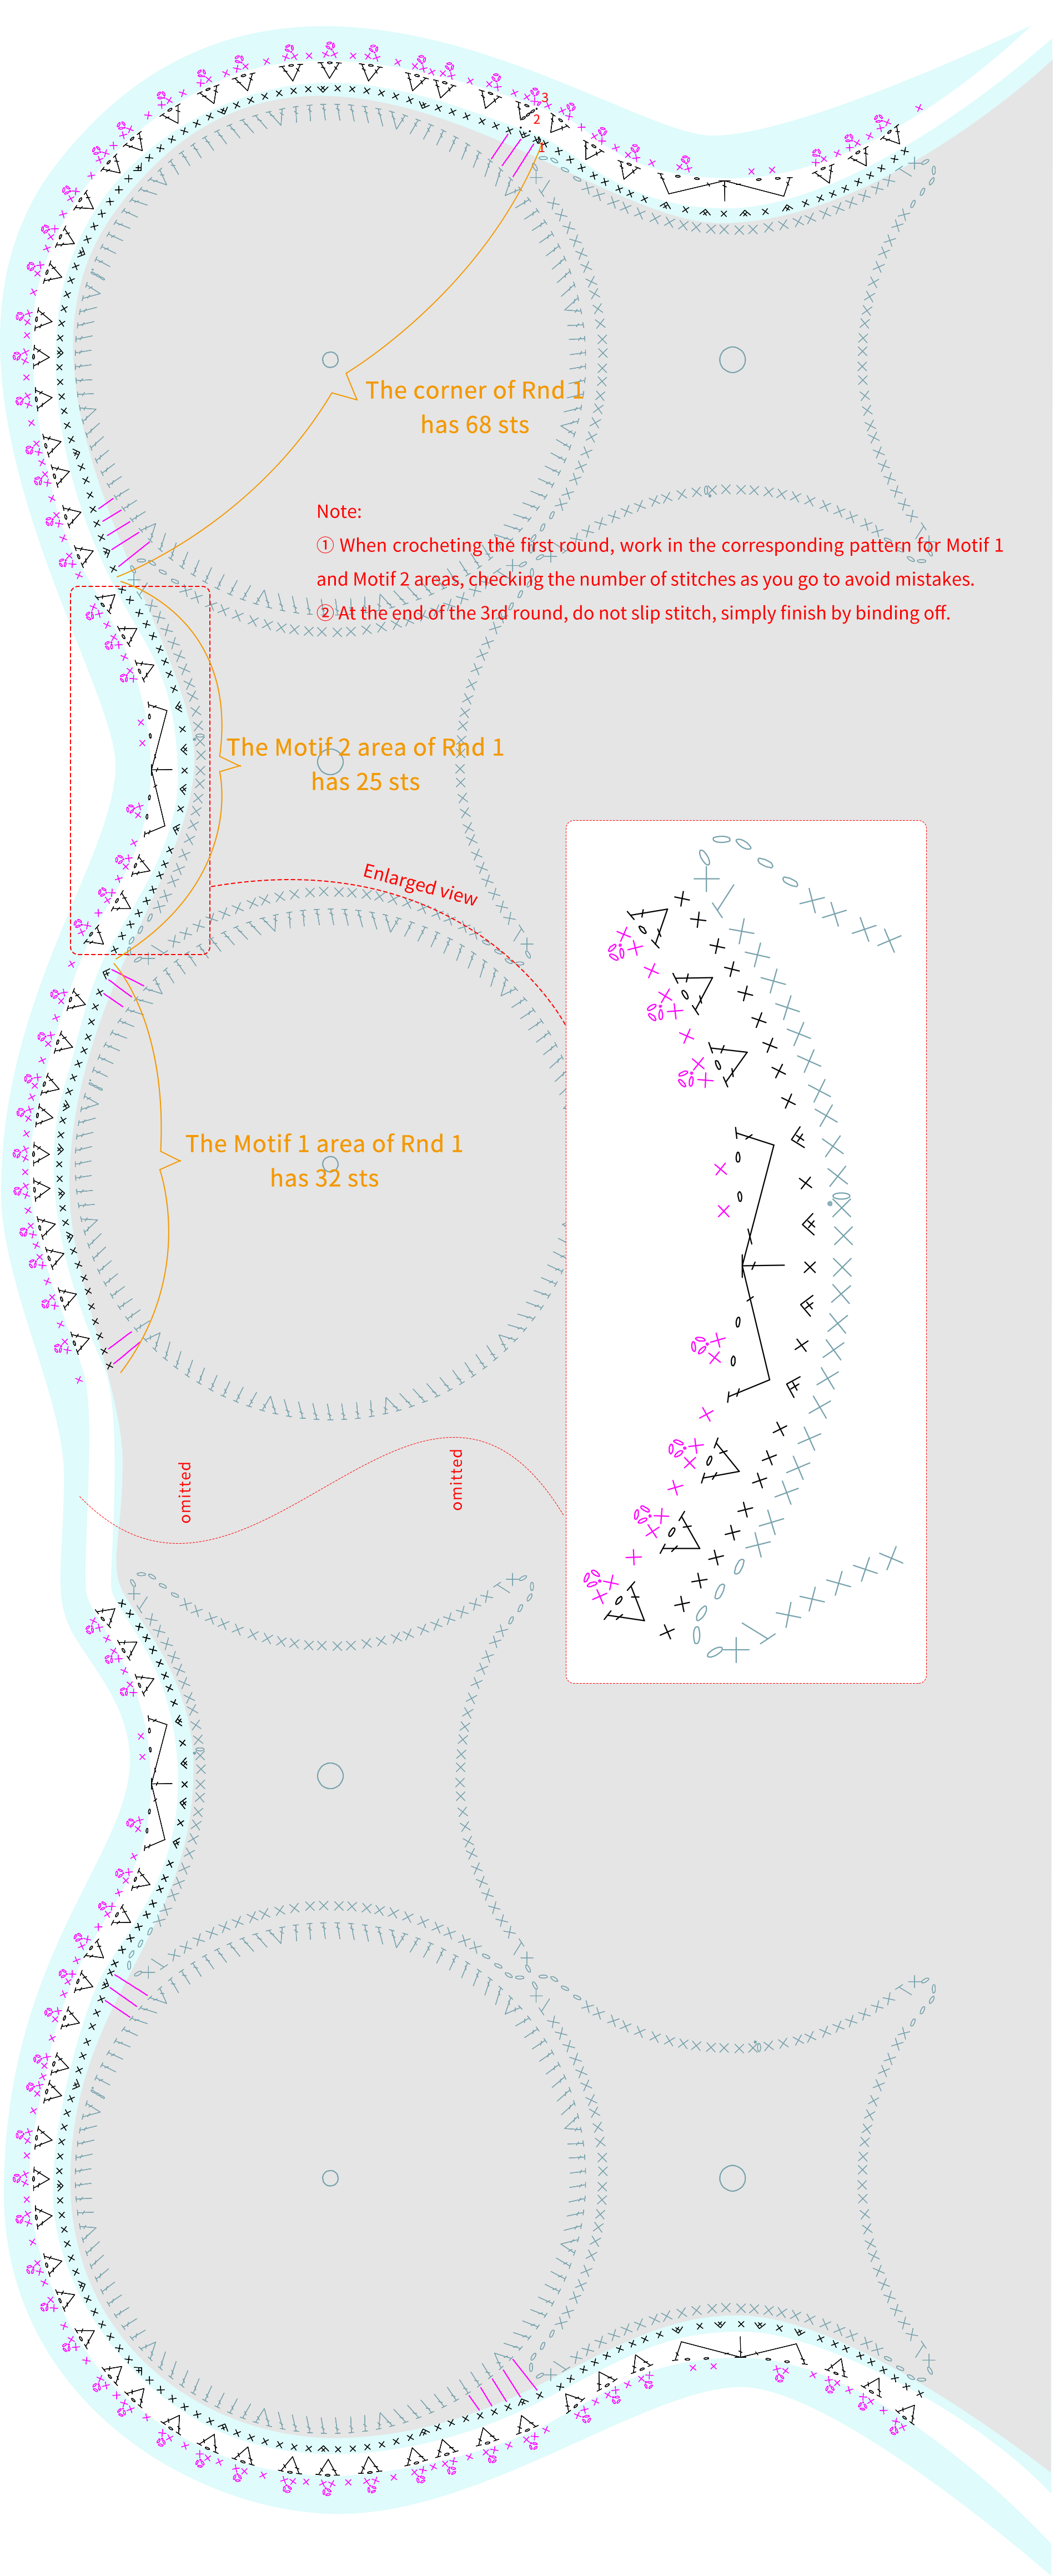
The edging is making along the spliced motifs. You are required to use and change other yarns during the process. Please refer to the video demonstration for more details.

Made by the community