Home / Blanket
Tudor Rose Blanket
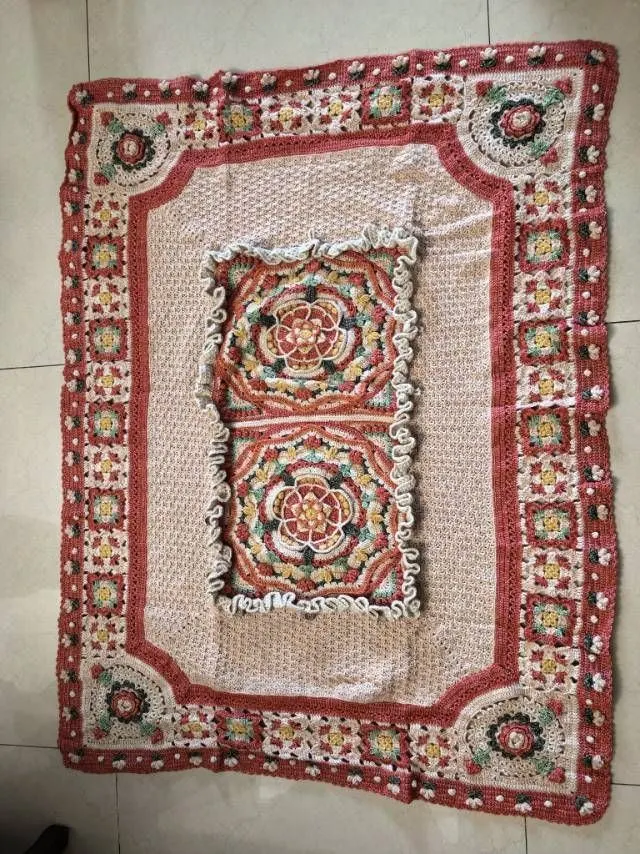
Project preview
See the finished project
Pattern format
Instructions
Watch and follow
Video tutorial
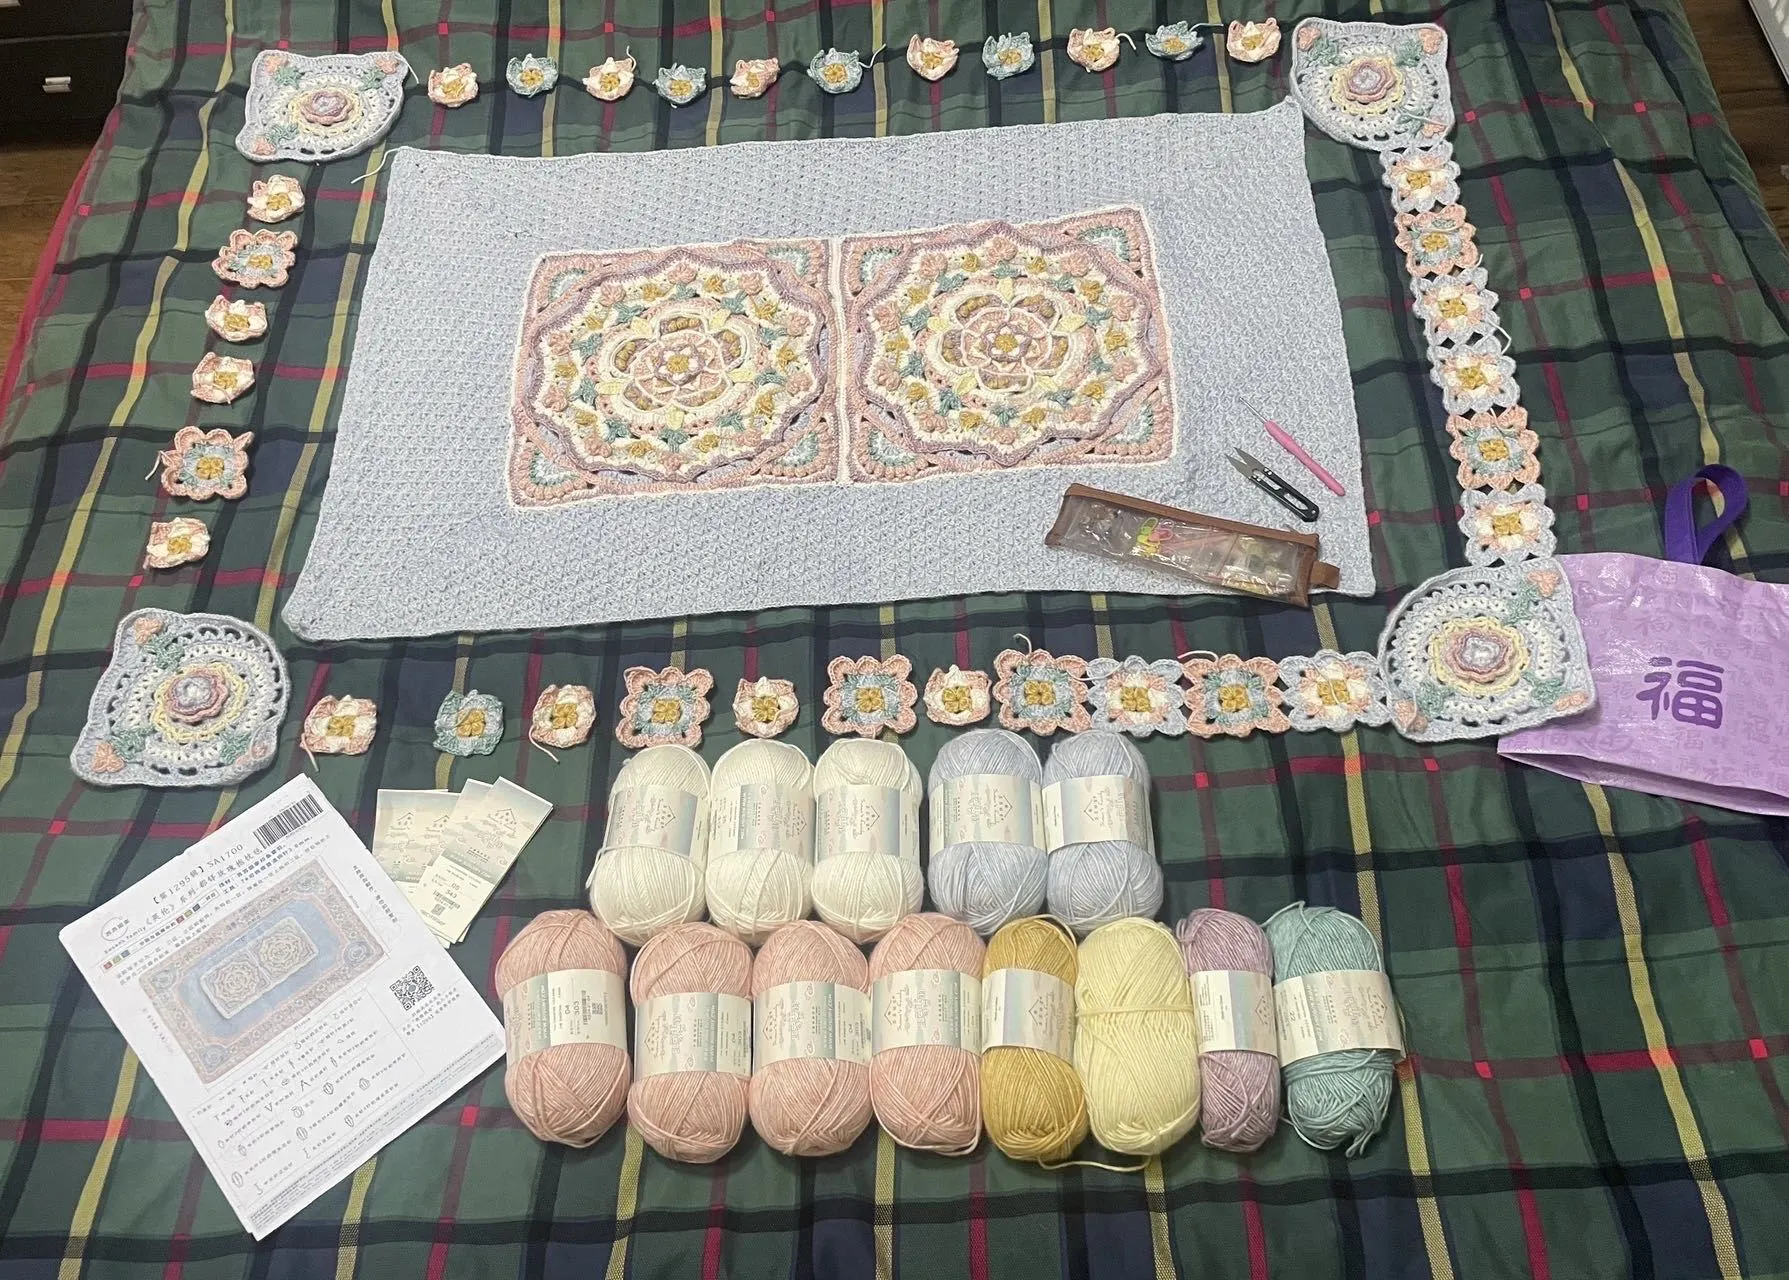
This blanket is divided into Section 1, Section 2, Section 3, and accessories. Start by crocheting Section 1, then crochet Section 2 onto Section 1, next crochet Section 3 and sew it together with Section 2, and finally add the accessories.
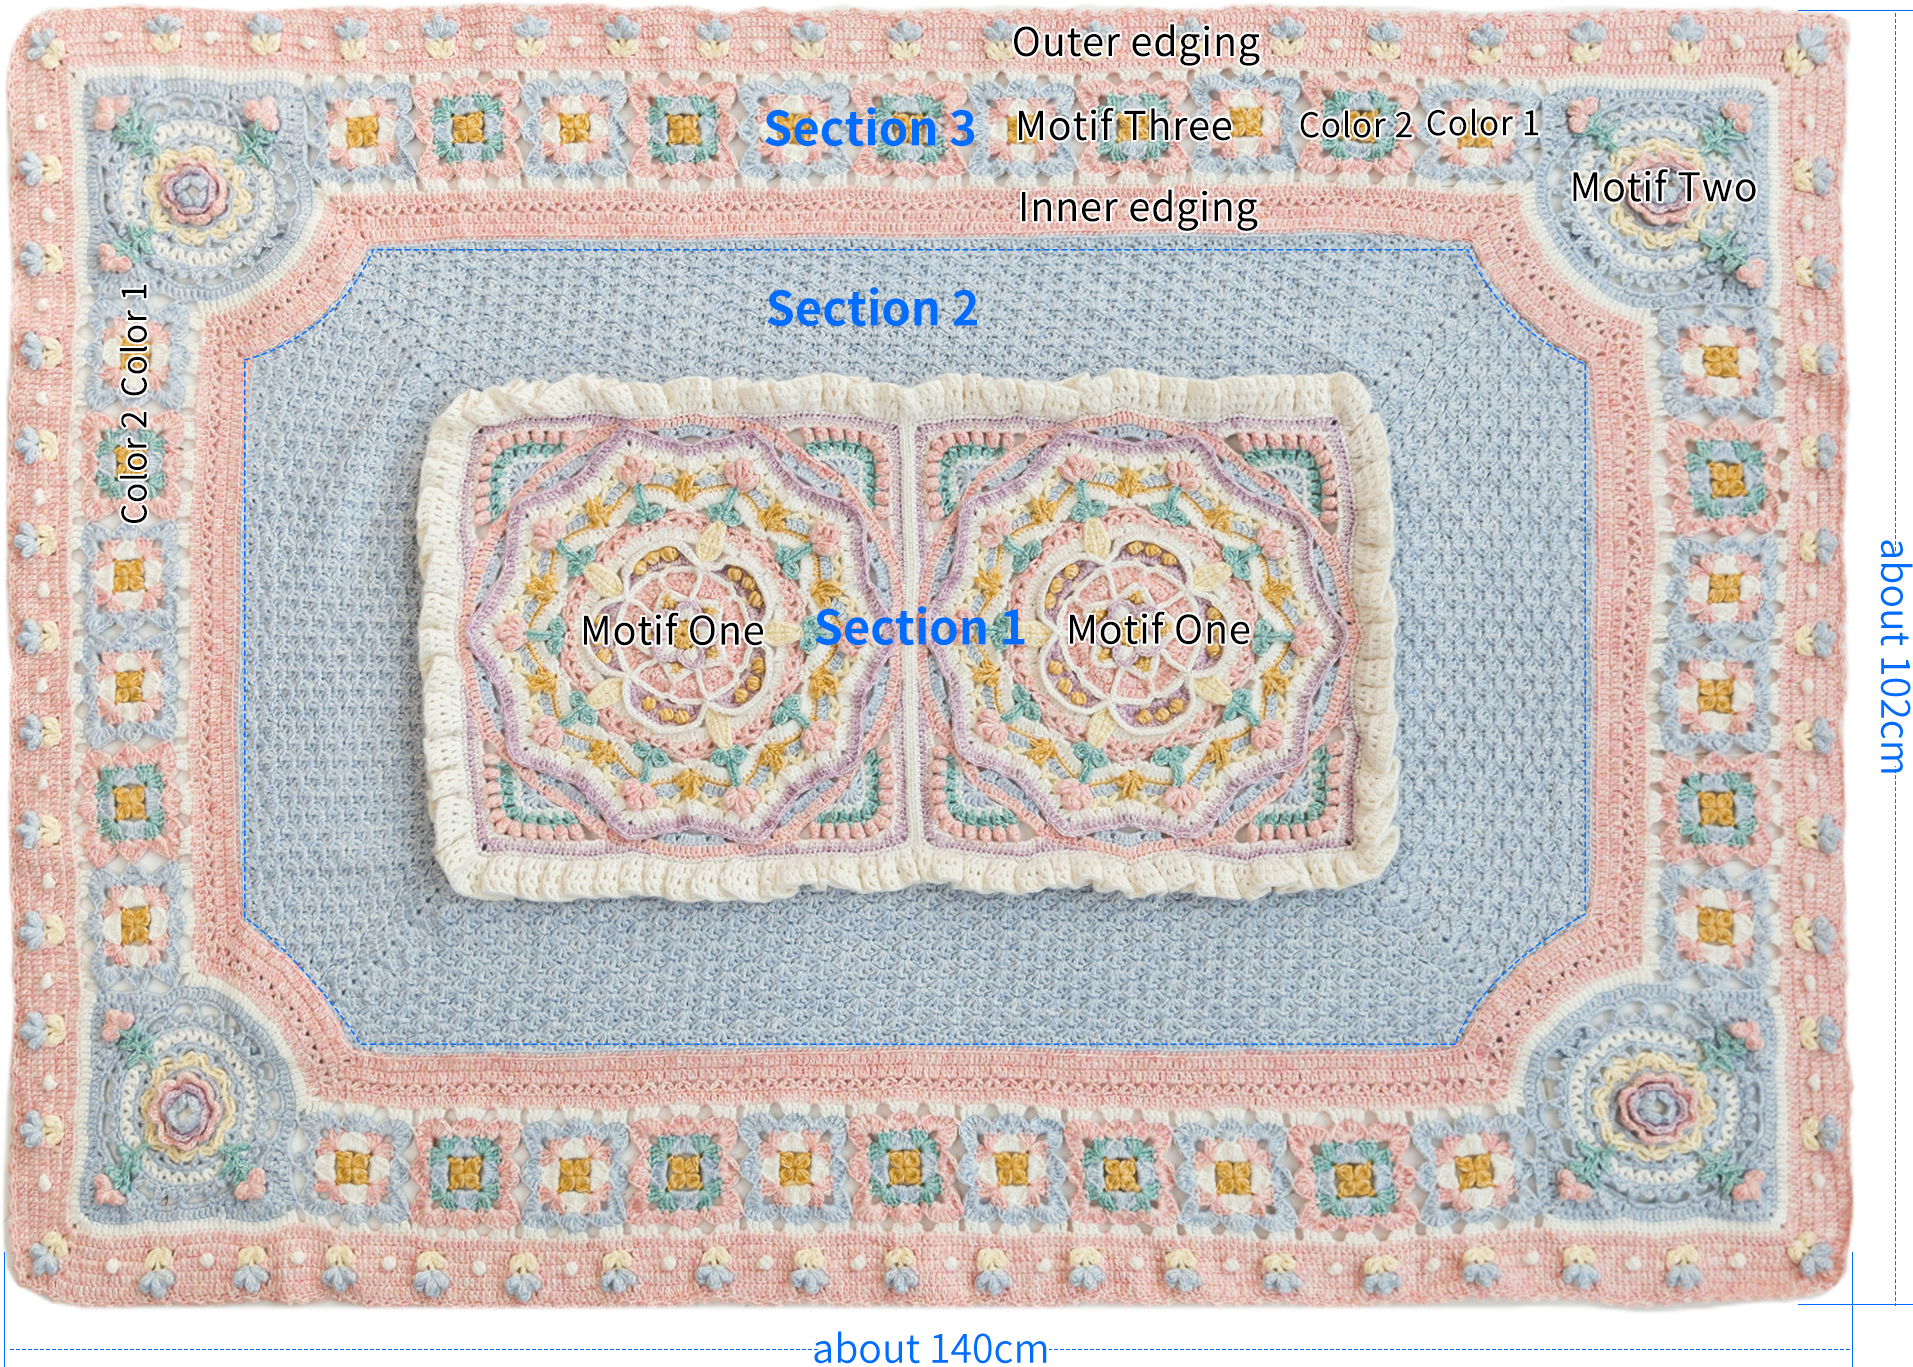
Note: Hand-measured, with an error margin of 1-2 cm.
Due to variations in individual tension, the size of the sample is for reference only.
Materials: Susan's Family Impression Misty Feather
Hook: 3.00 mm crochet hook
Chart Key




























Note: This pattern is making in Chinese crochet pattern terms, and the stitch name is written using American terminology. All measurements in charts are in cm.

Part 1 Section 1A 00' 58'' (Part 1)
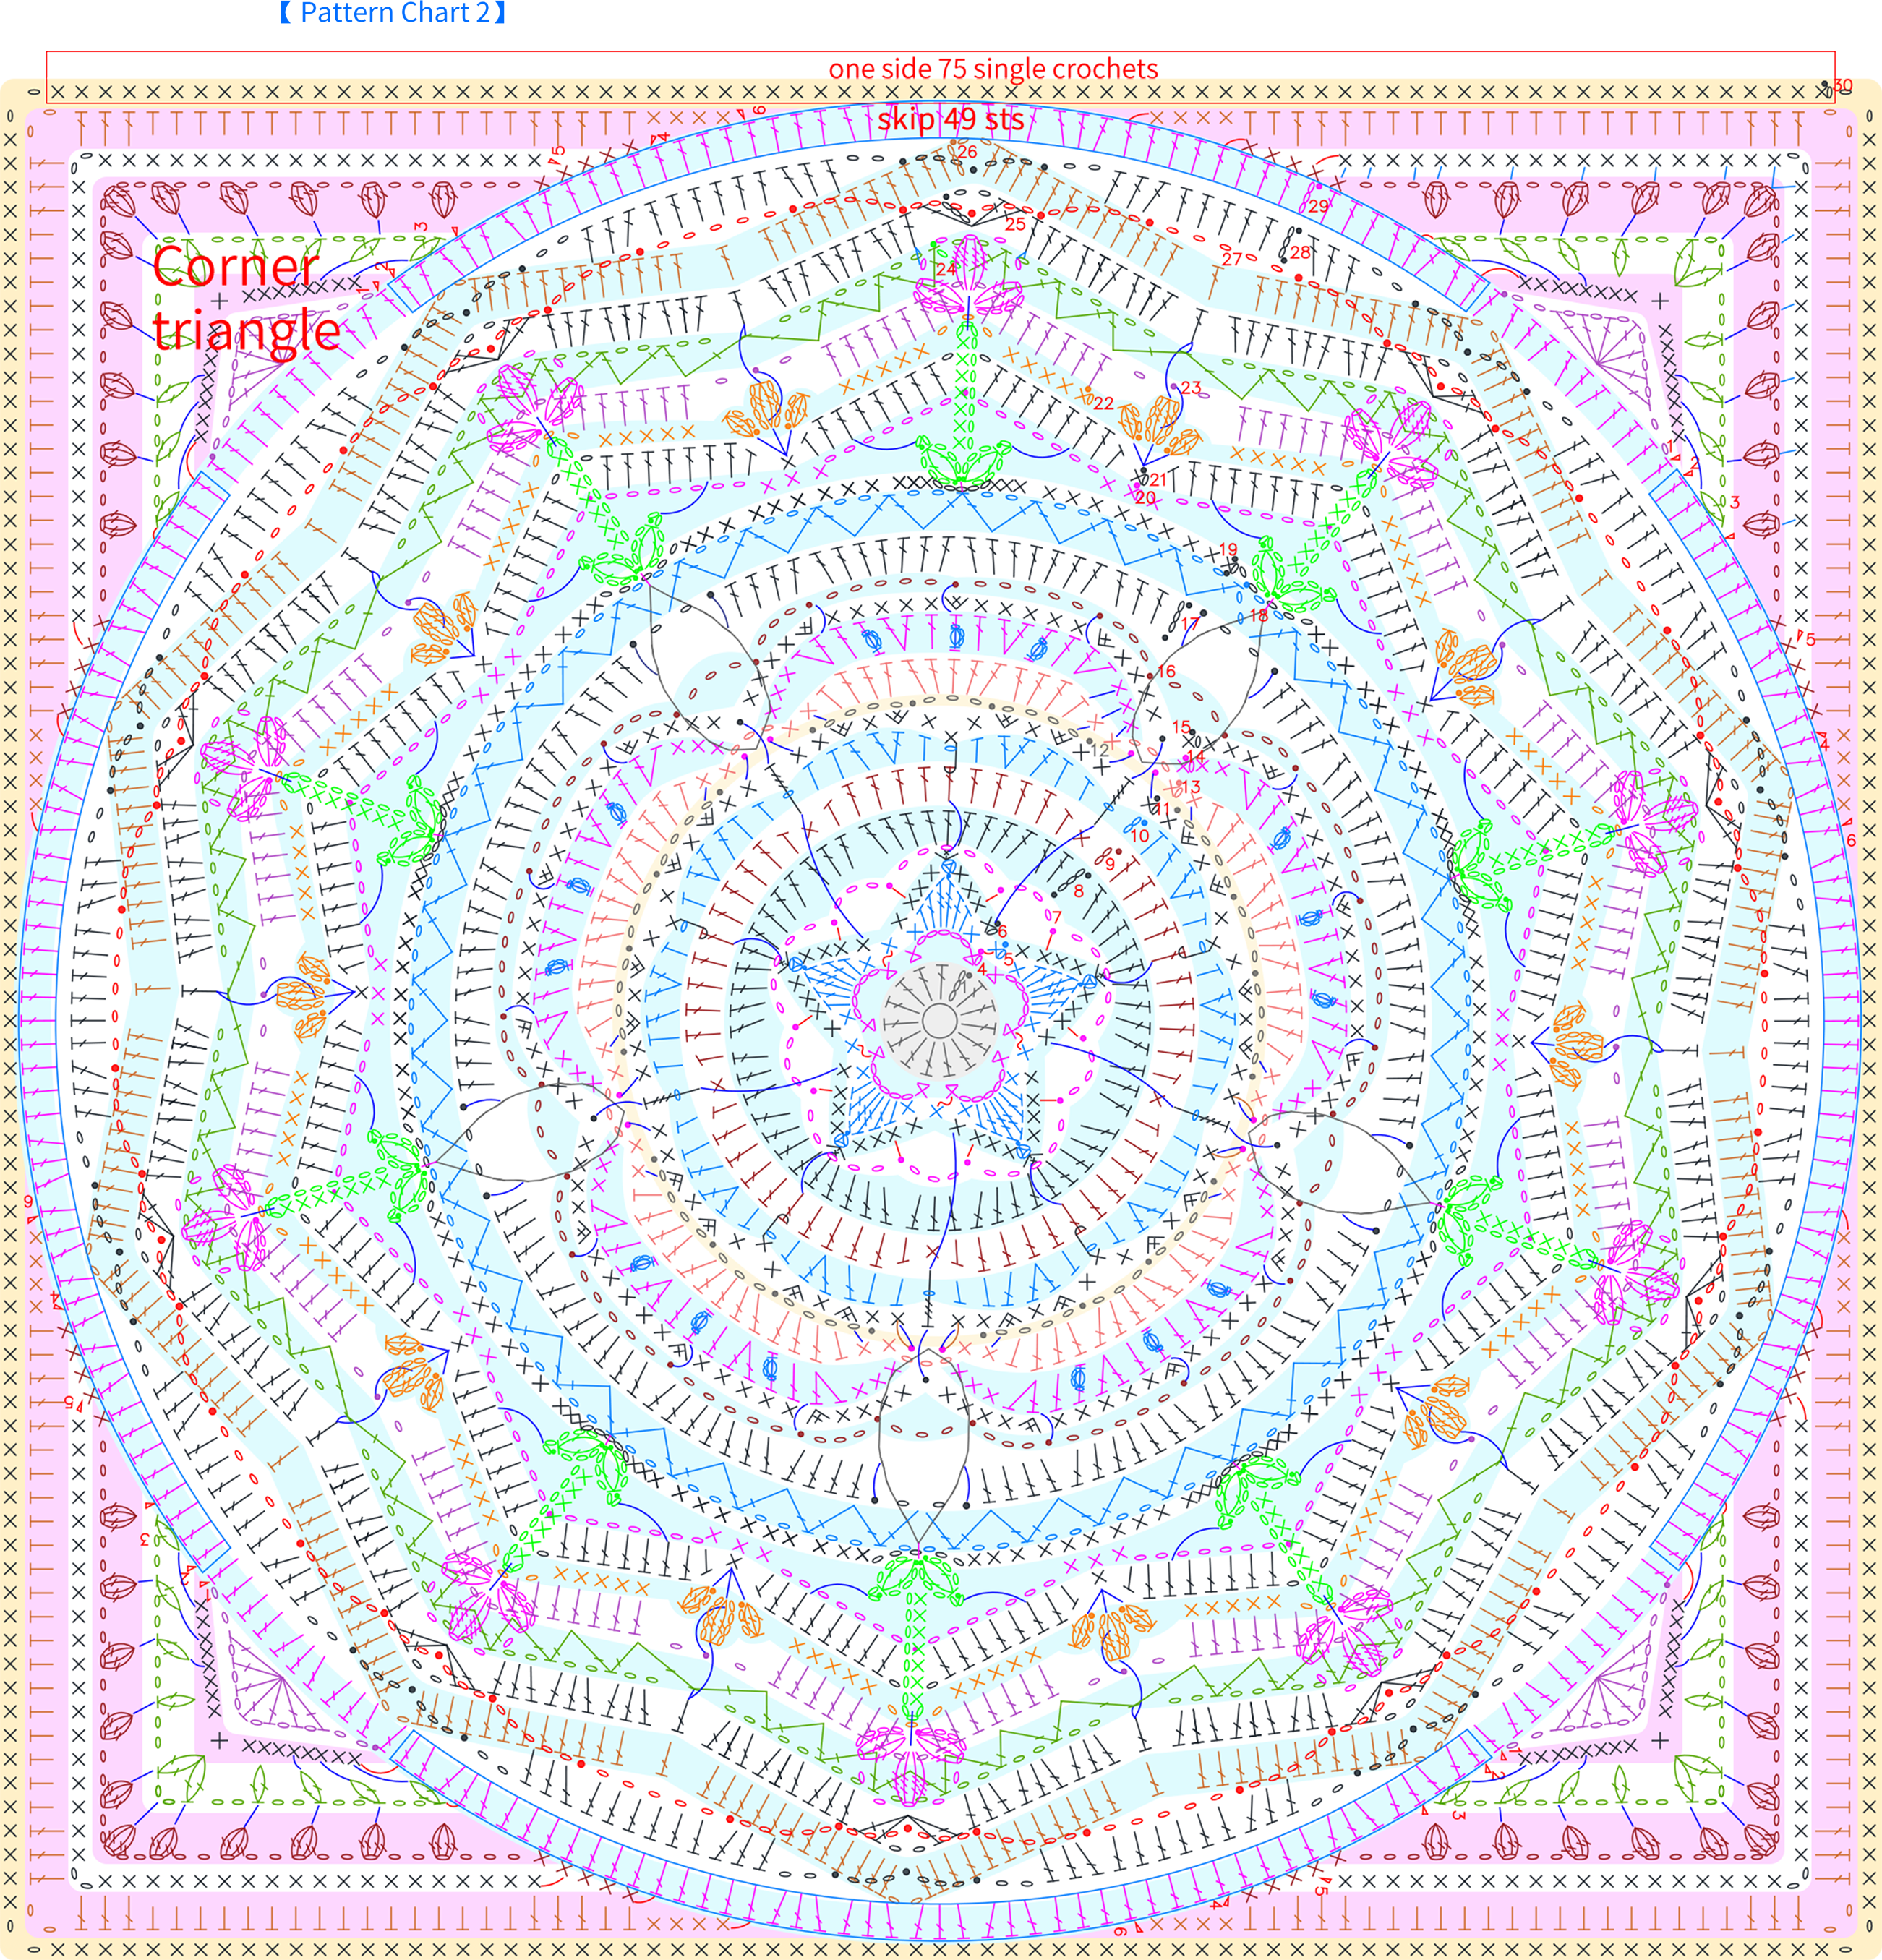
Section 1 consists of 2 identical Motif One, crocheted separately, then sewn together. Motif One begins with a magic ring, crocheting in rounds counterclockwise, working a corner triangle during the crocheting process, and also involves switching colors. Please refer to the video demonstration for more details.
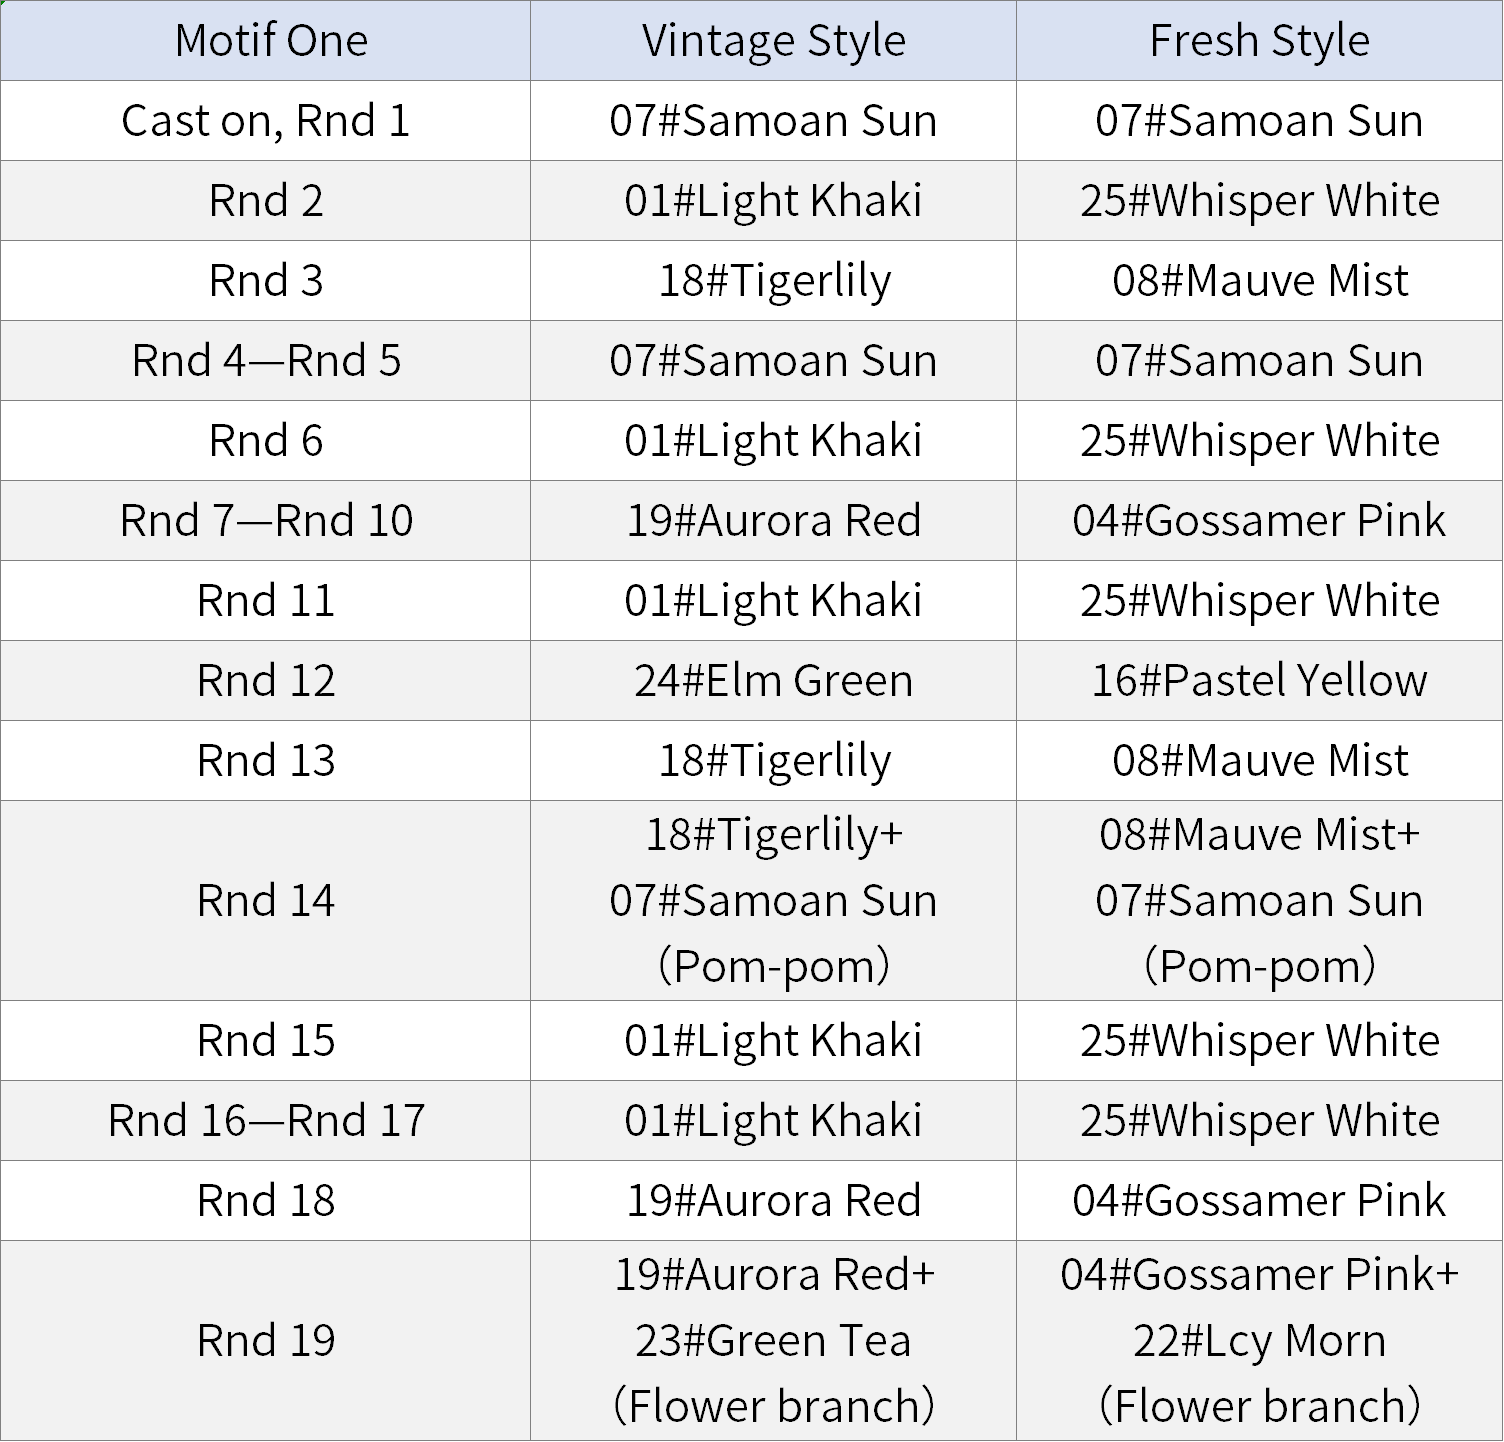
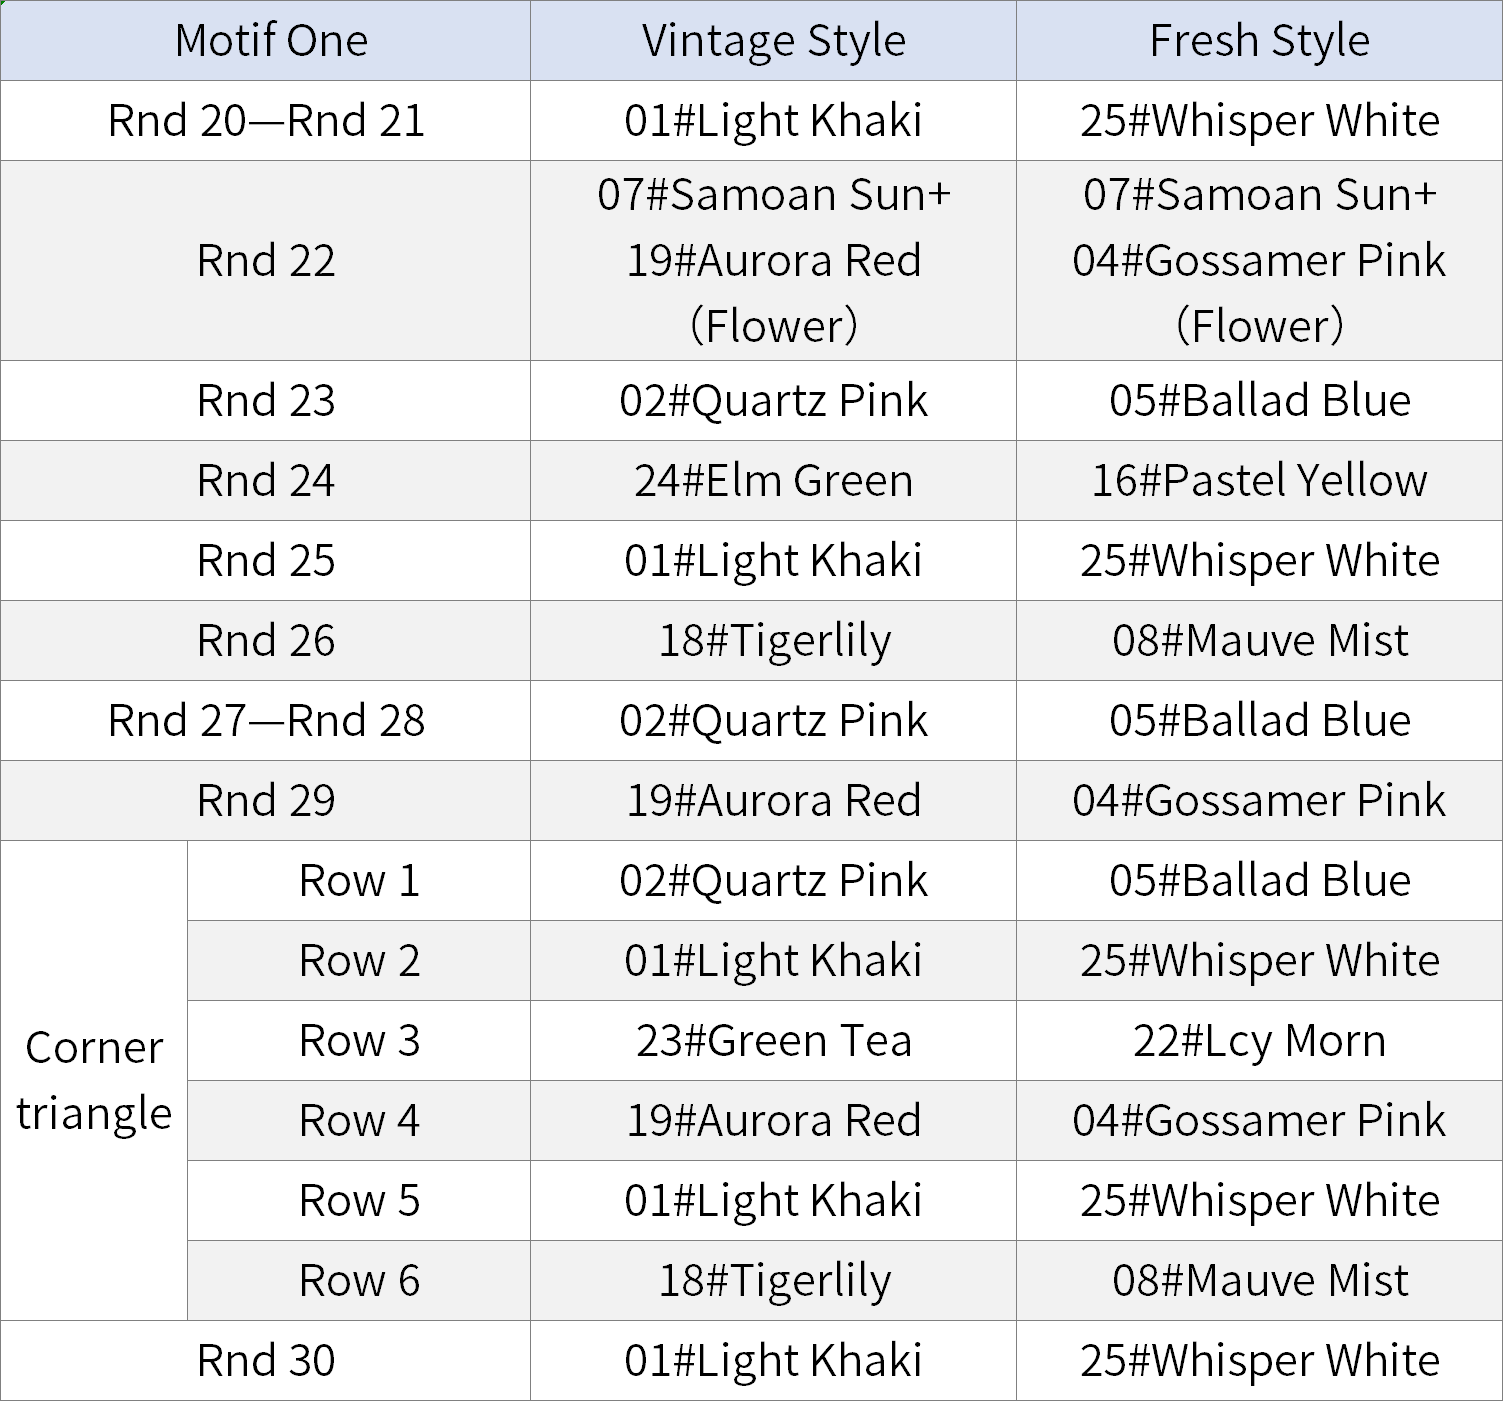
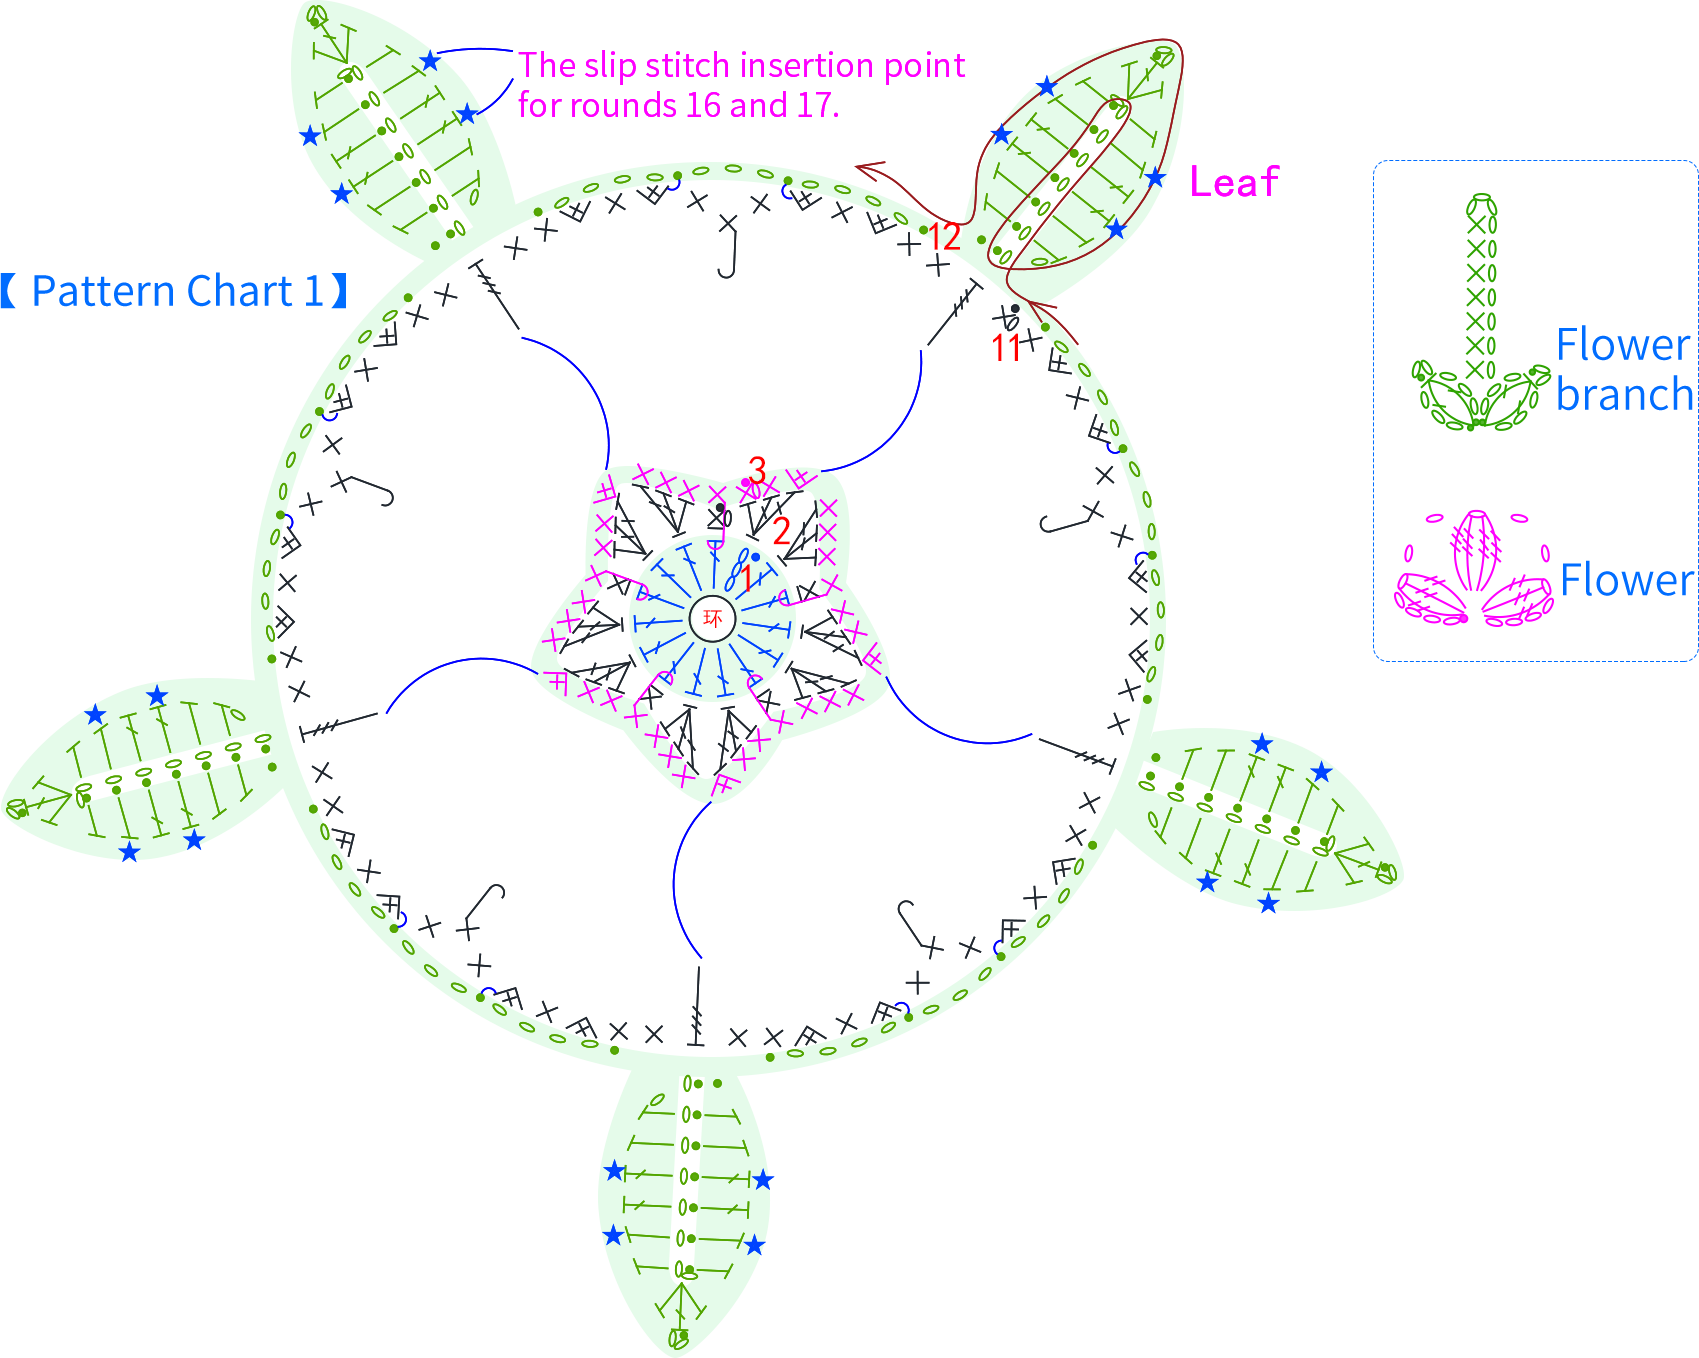
Note:
① For round 2, crochet through the front loop of the first round;
② For round 4, crochet through the back loop of the first round;
③ For the 11th round, work 3 treble crochets together on the corresponding positions of the 3rd and 6th rounds as shown in the chart; please refer to the video demonstration for more details;
④ For the 12th round, follow Pattern Chart 1 and crochet behind the stitches of the 11th round; the stitch placement for the 13th round is special, please refer to the video demonstration for more details;
⑤ When crocheting the 19th round, crochet together with the flower branches;
⑥ When crocheting the 22nd round, crochet together with the flowers.
Part 2 Section 2 64' 48'' (Part 2)
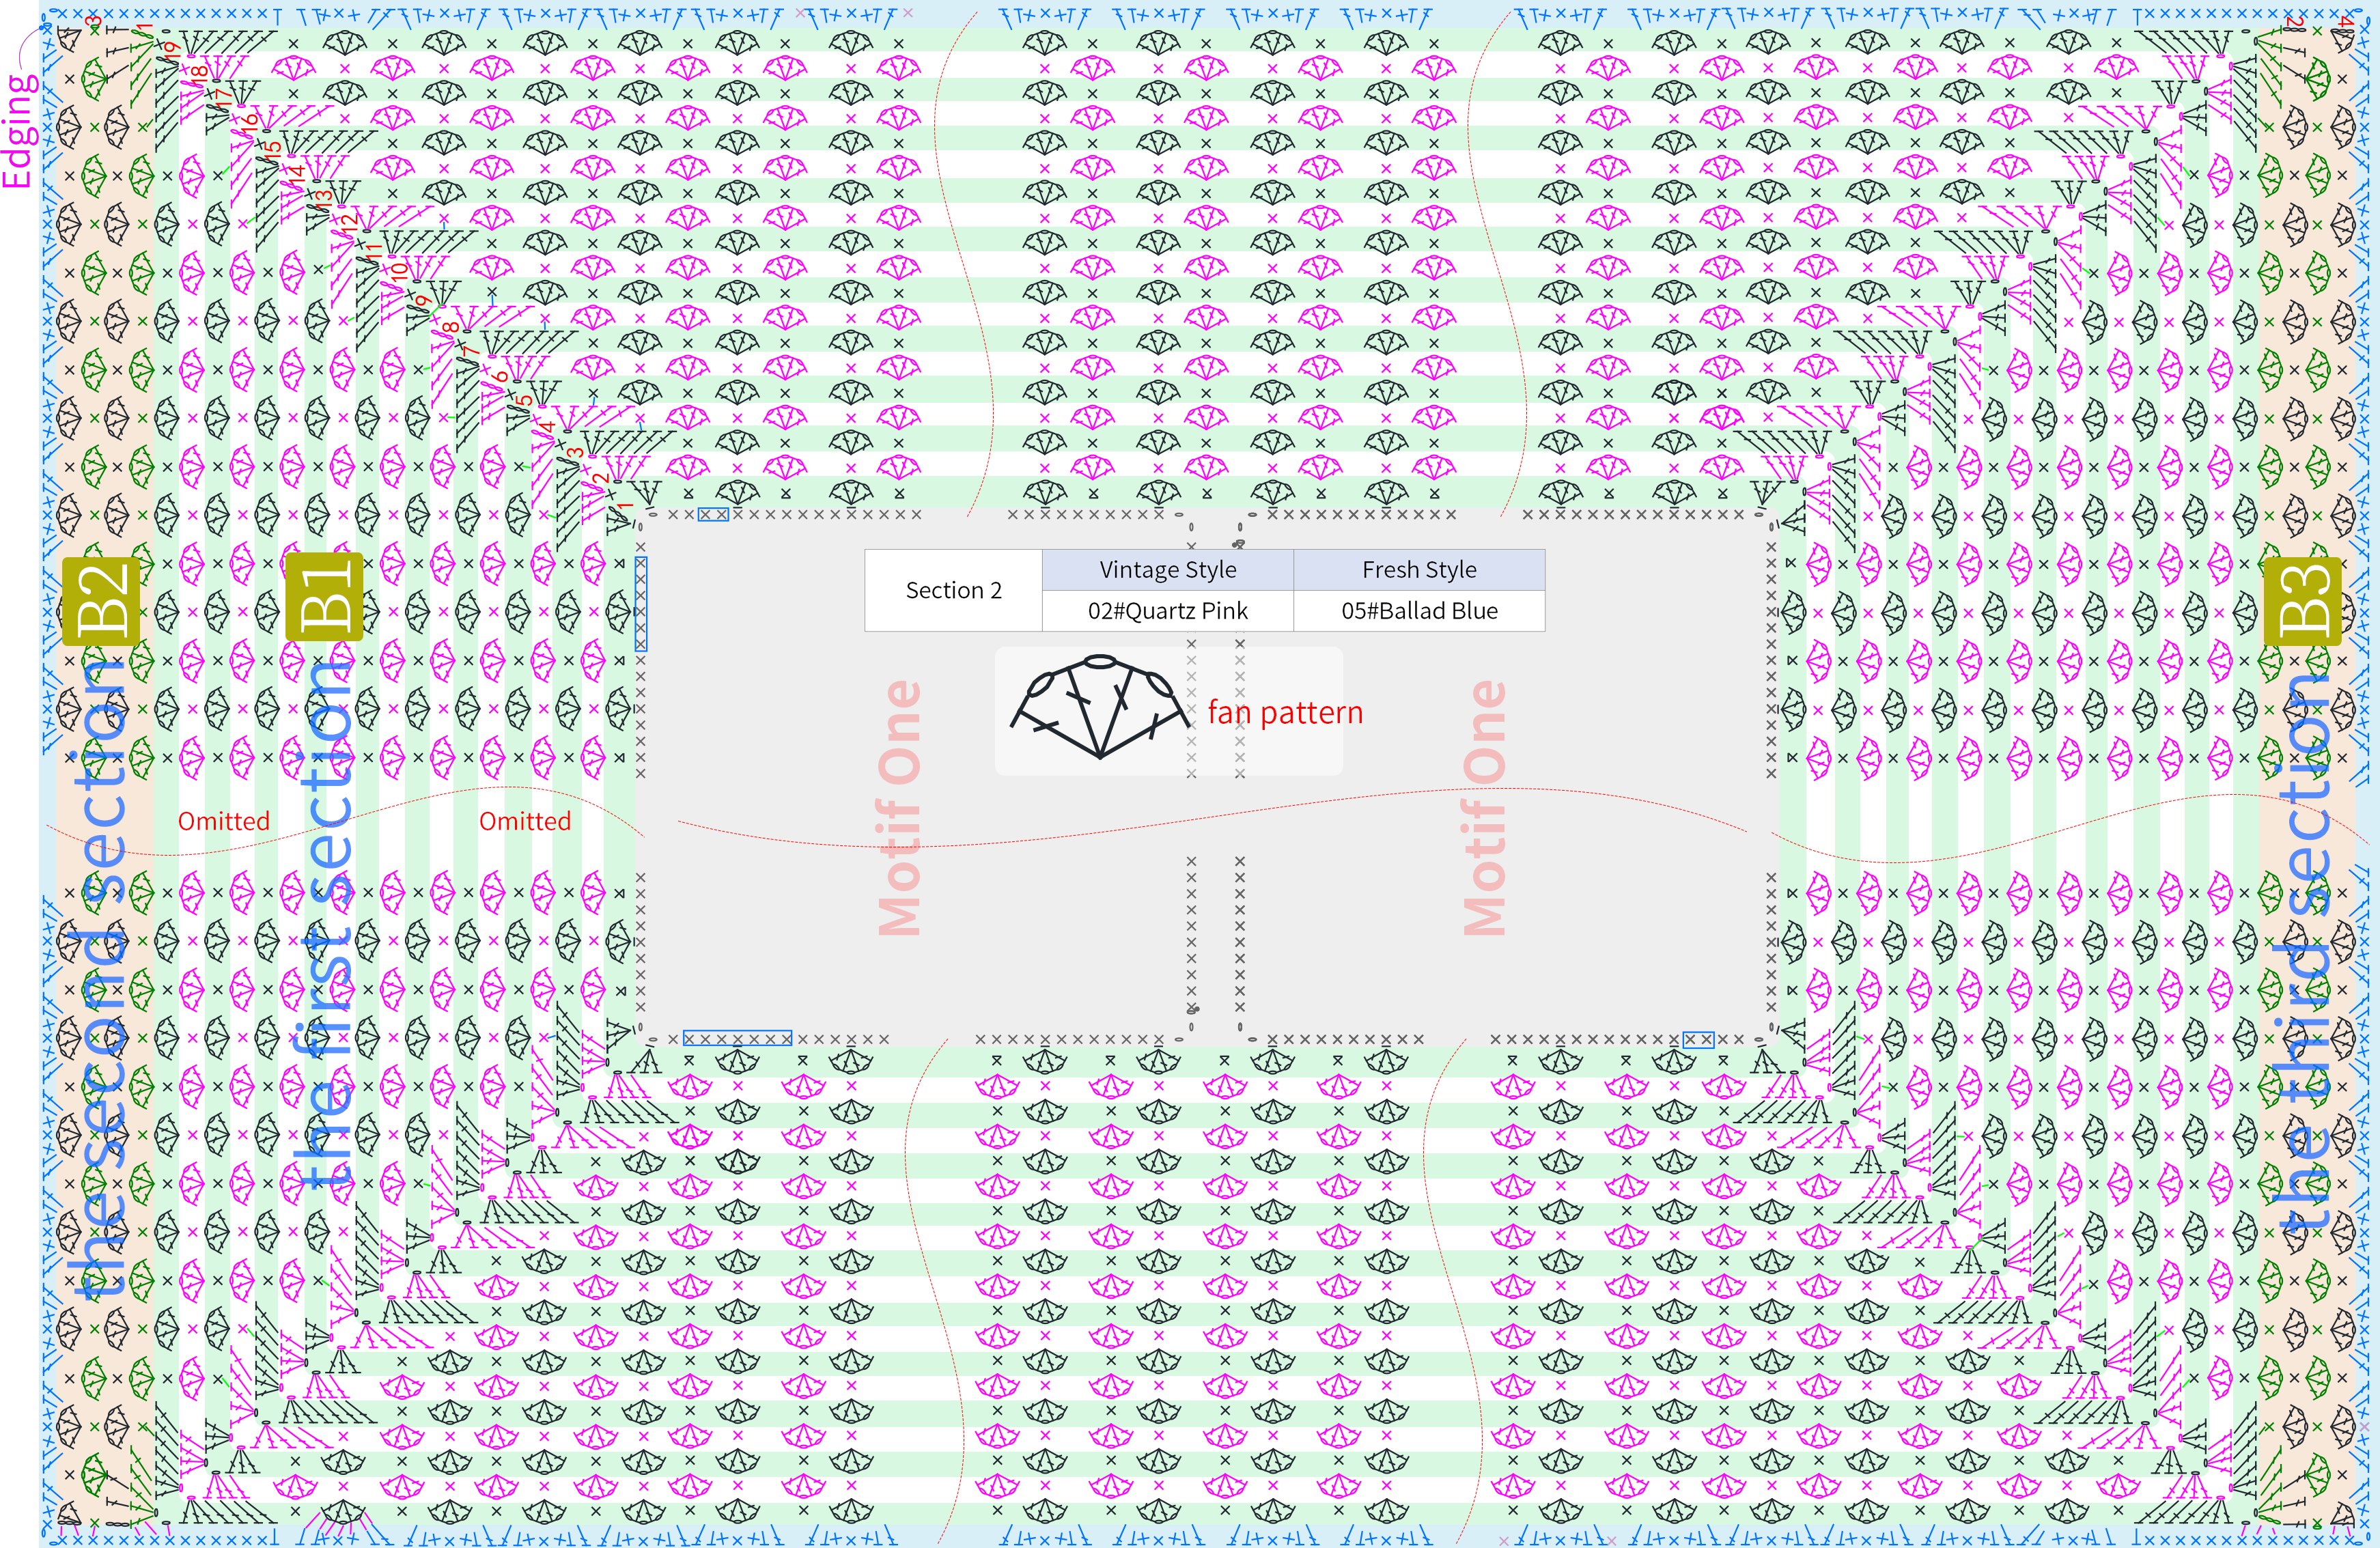
Section 2 is crocheted on Section 1. First, crochet the first part counterclockwise in rounds, then crochet the second and third sections separately at both ends, and finally add the edging. Please refer to the video demonstration for more details.
Part 3 Section 3
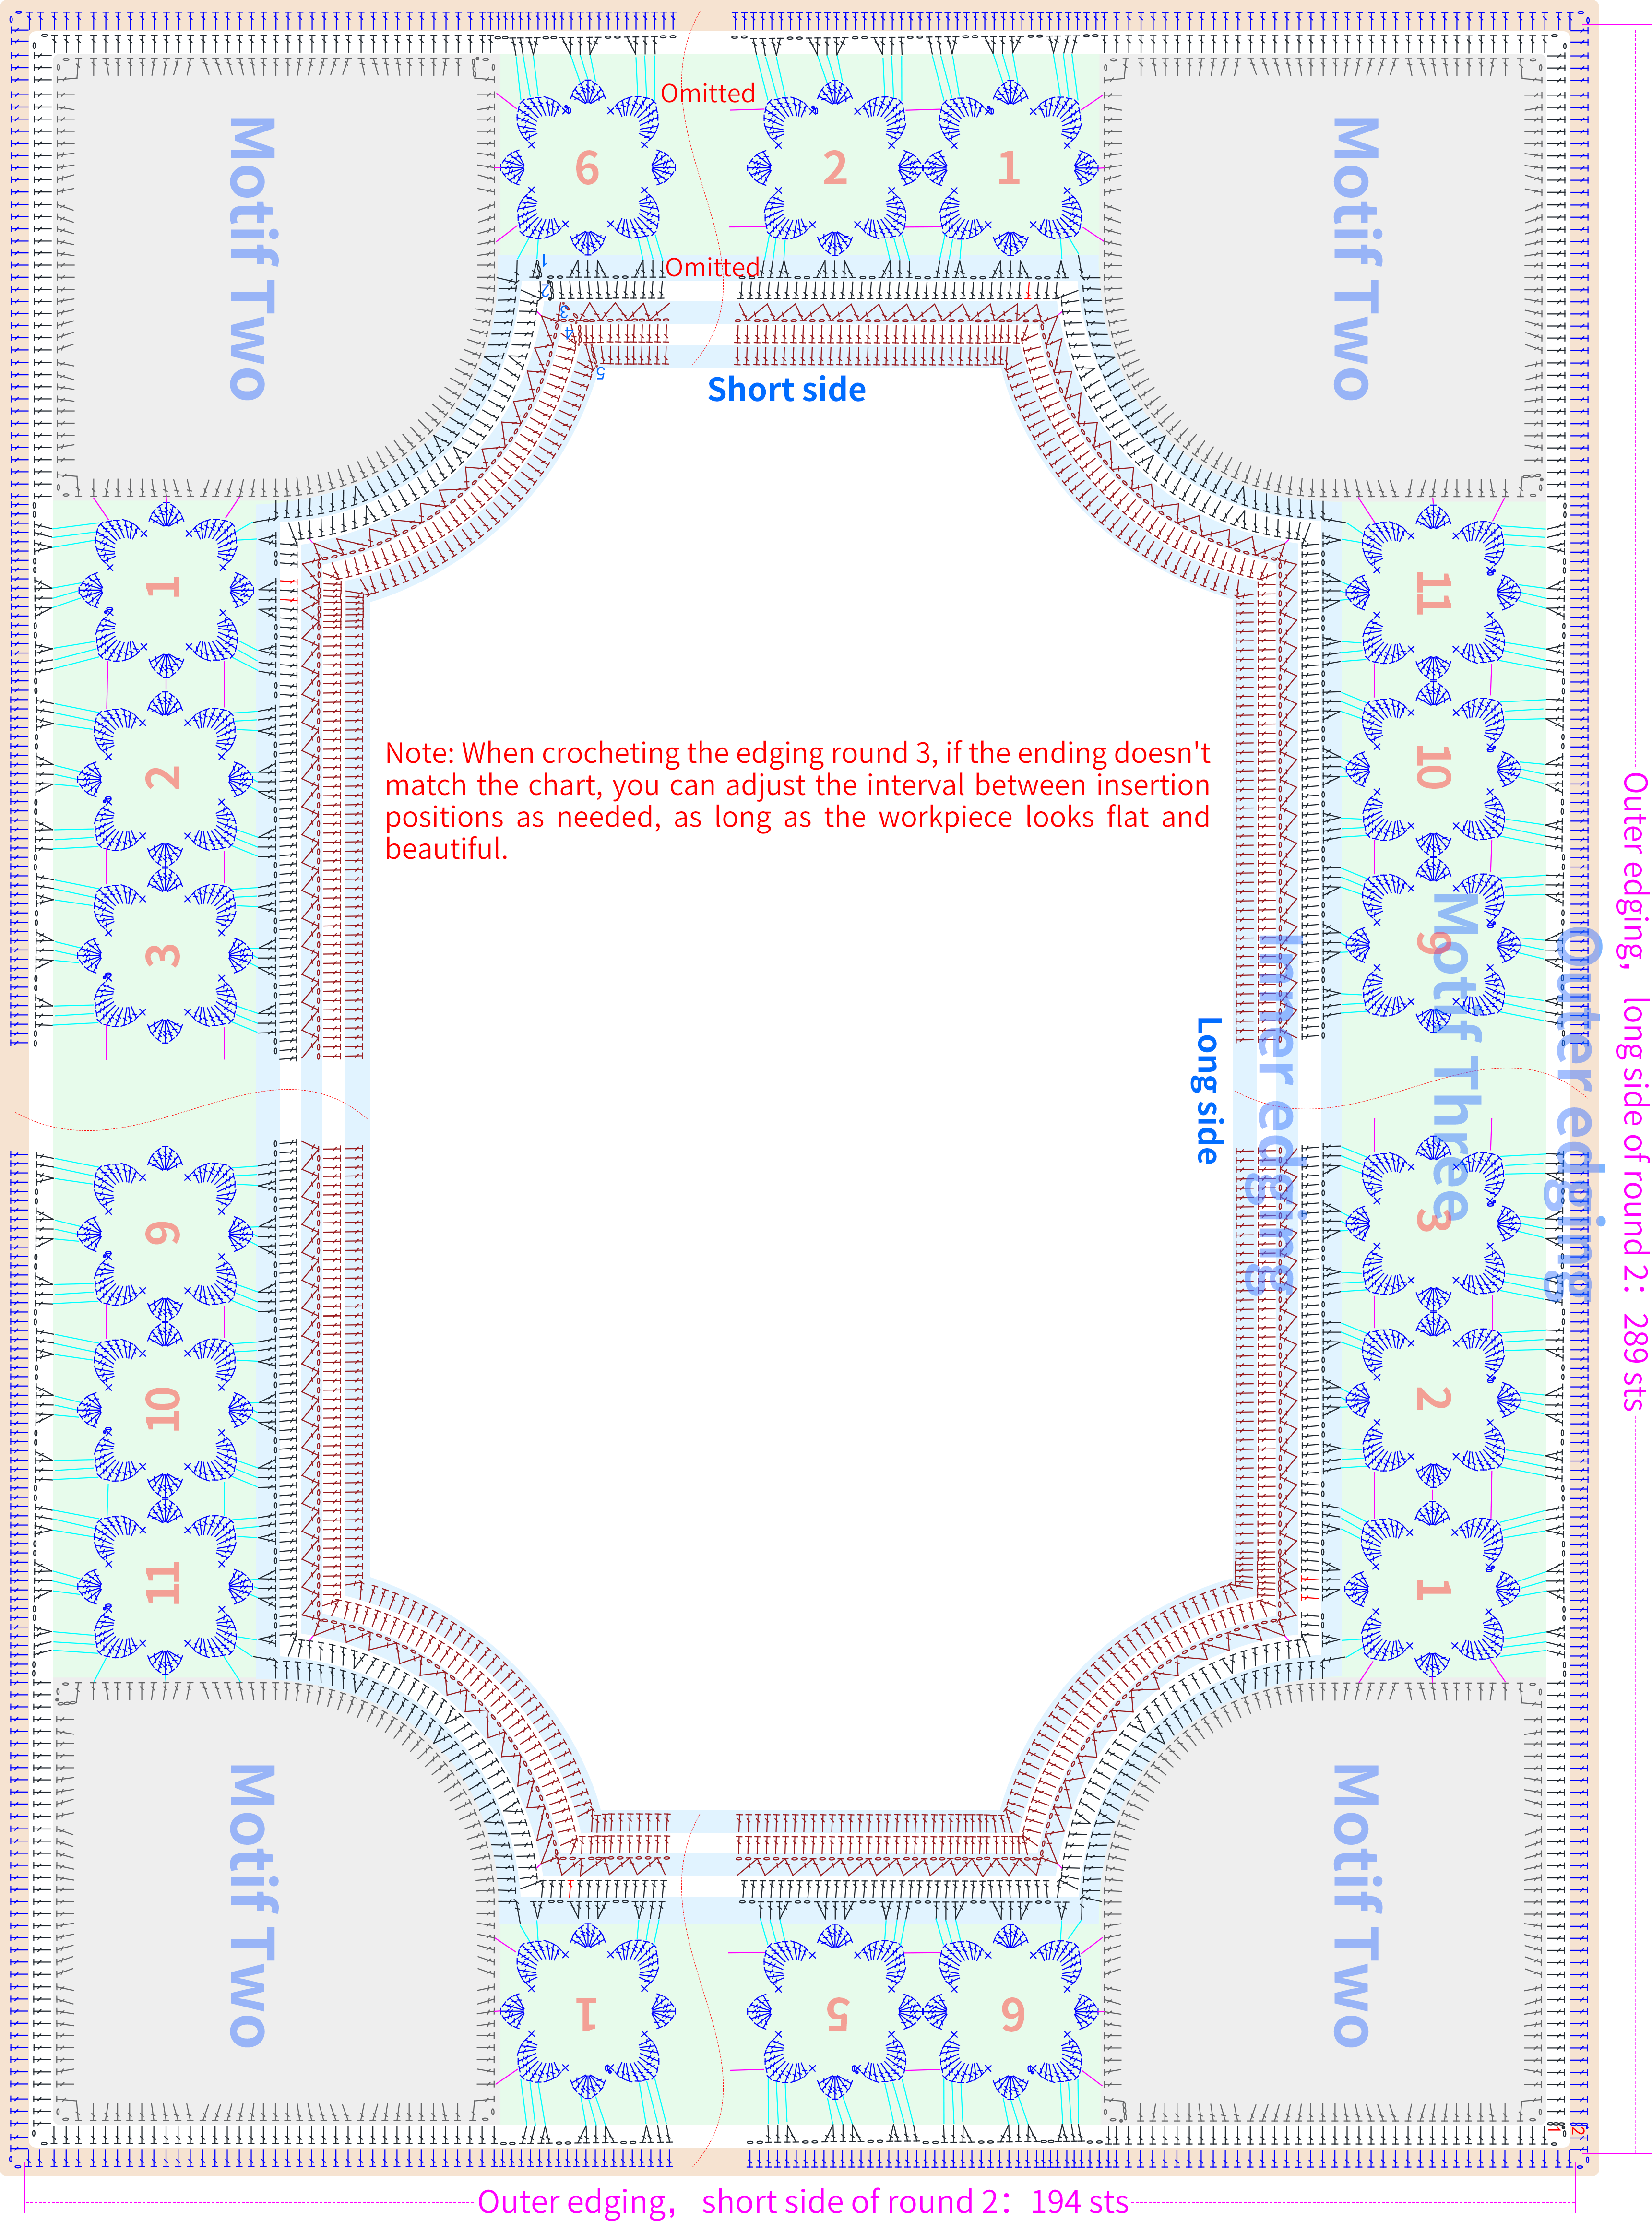
Section 3 divides into motif two, motif three, inner edging, sewing, and outer edging. First, crochet motif two, then move on to motif three and join it with motif two. After that, crochet the inner edging, and once completed, sew it together with Section 2. Finally, crochet the outer edging.
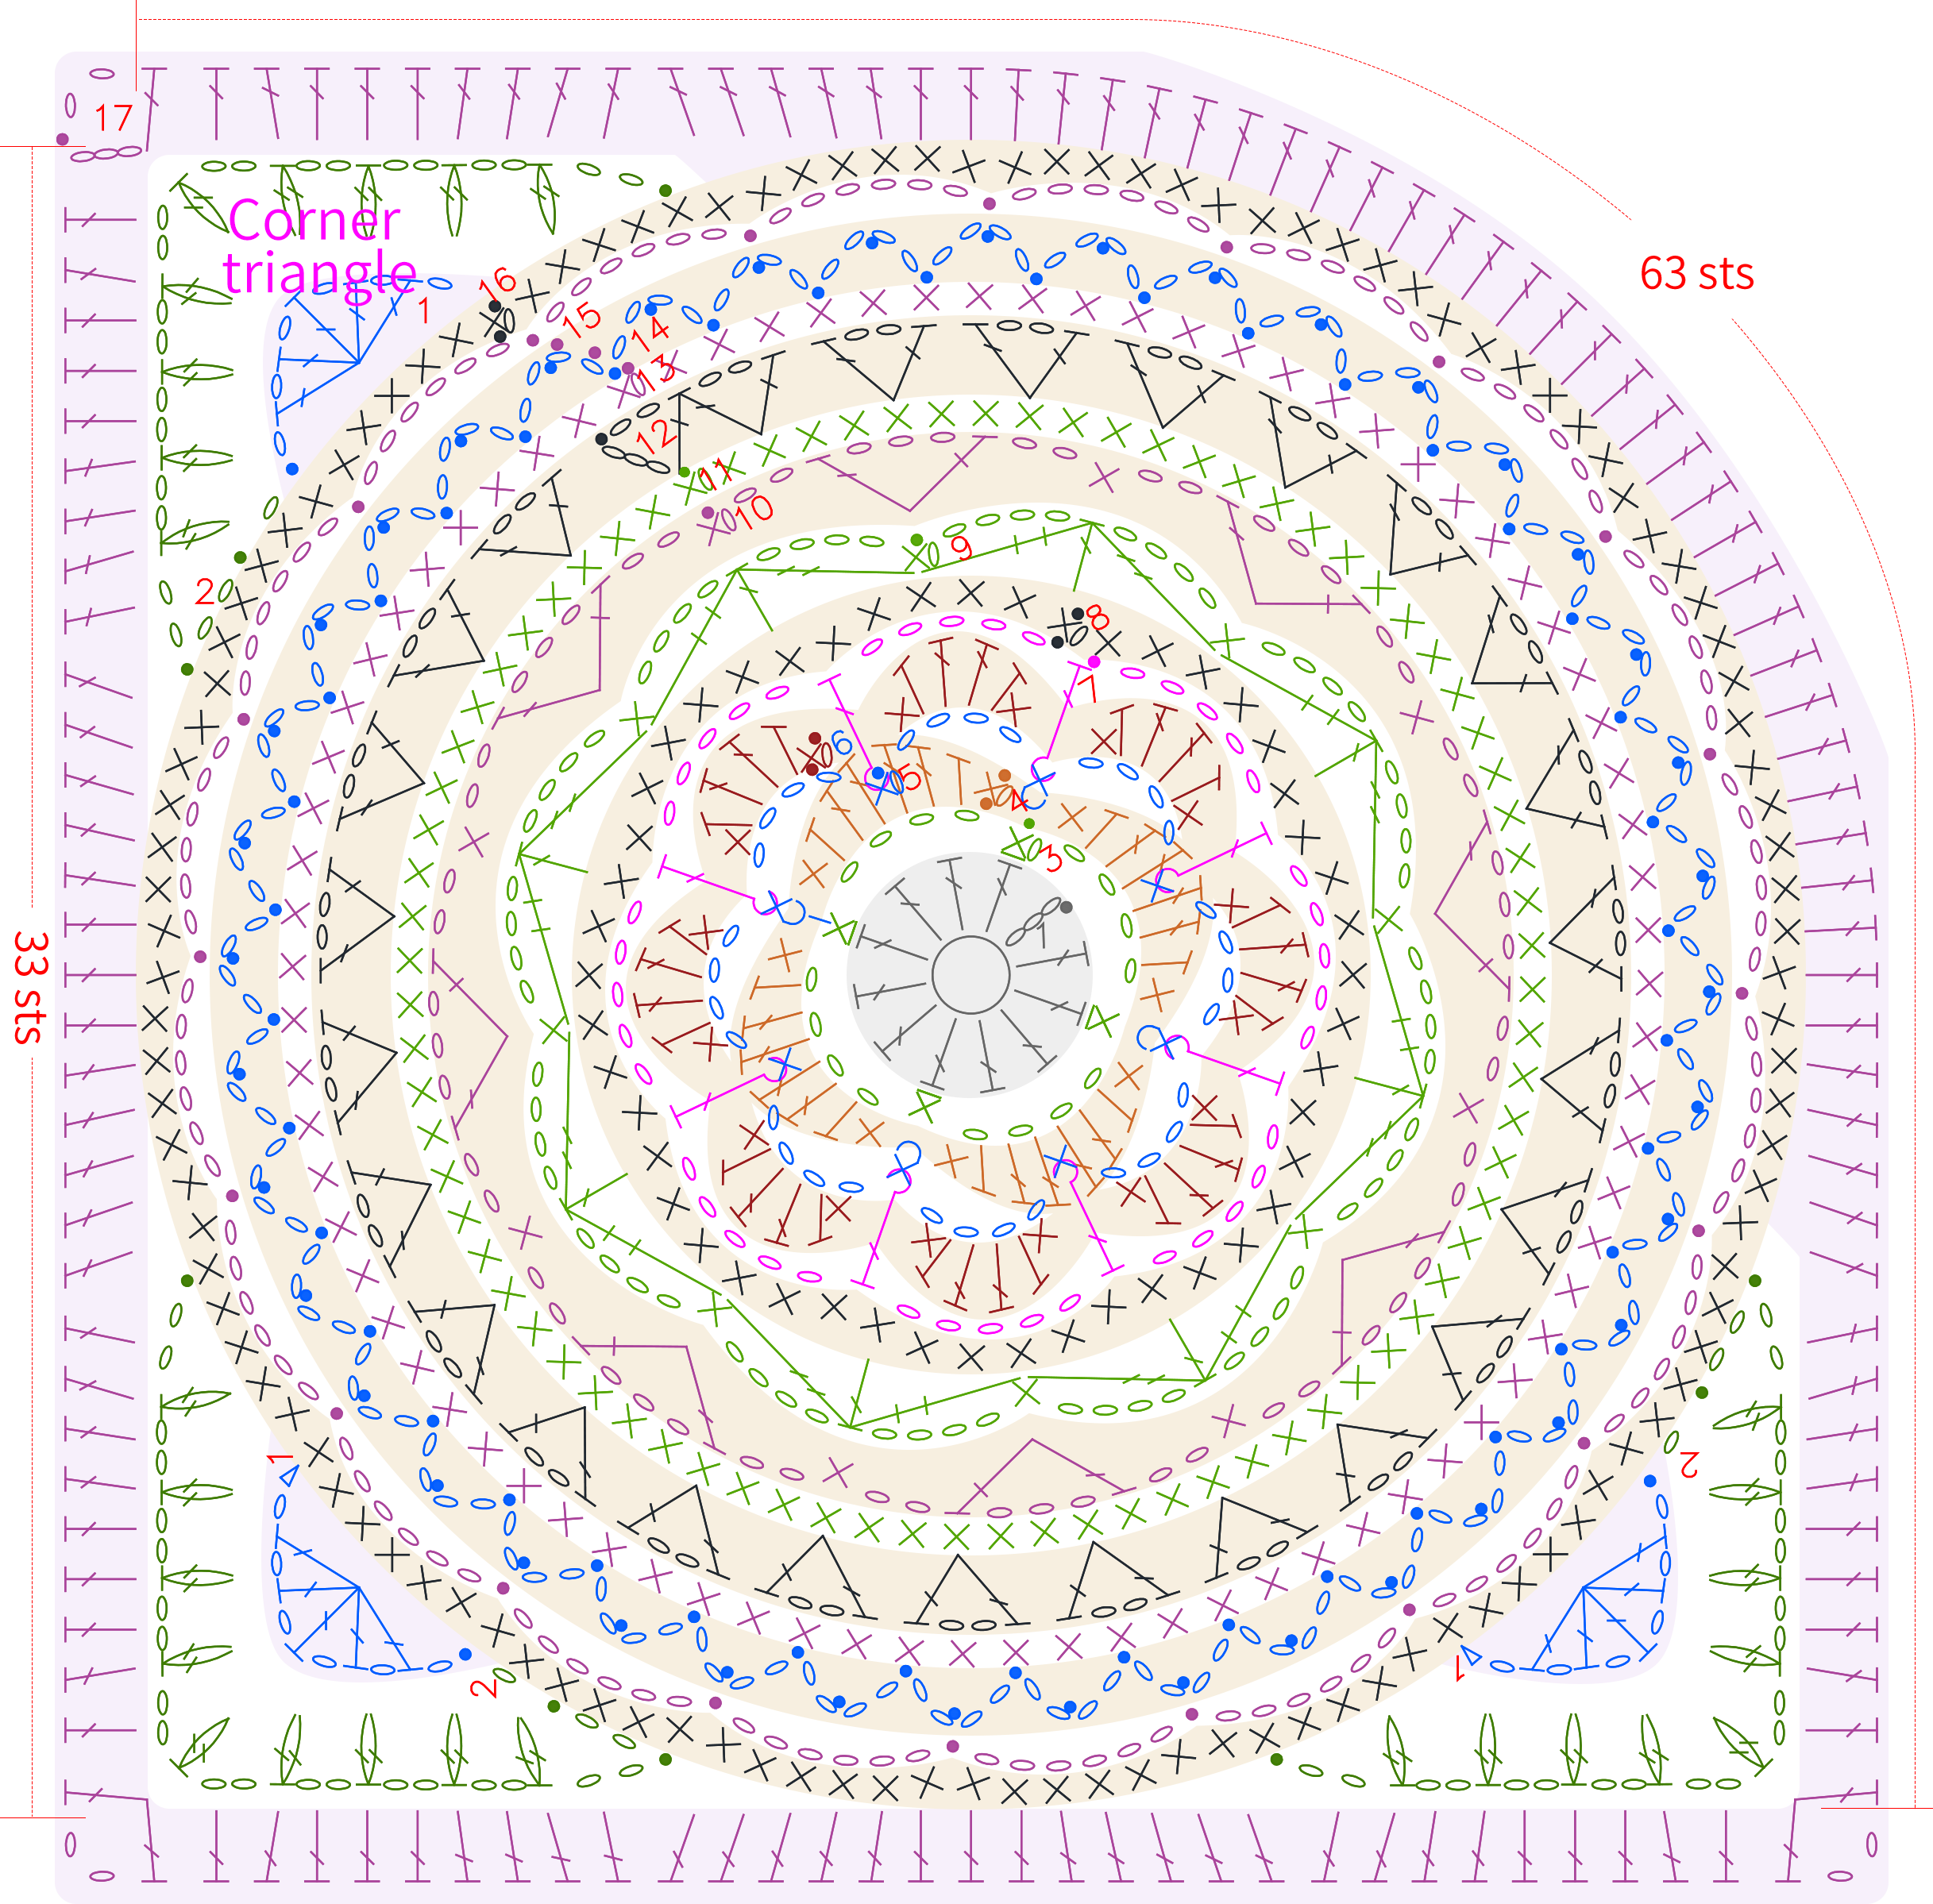
Step 1 Motif Two * 4 piecesC1 00' 47'' (Part 3)
Motif Two, start with an adjustable magic ring, crochet in rounds counterclockwise, while crocheting, you need to crochet 3 corner triangles, and finally add decorations. Please refer to the video demonstration for more details.
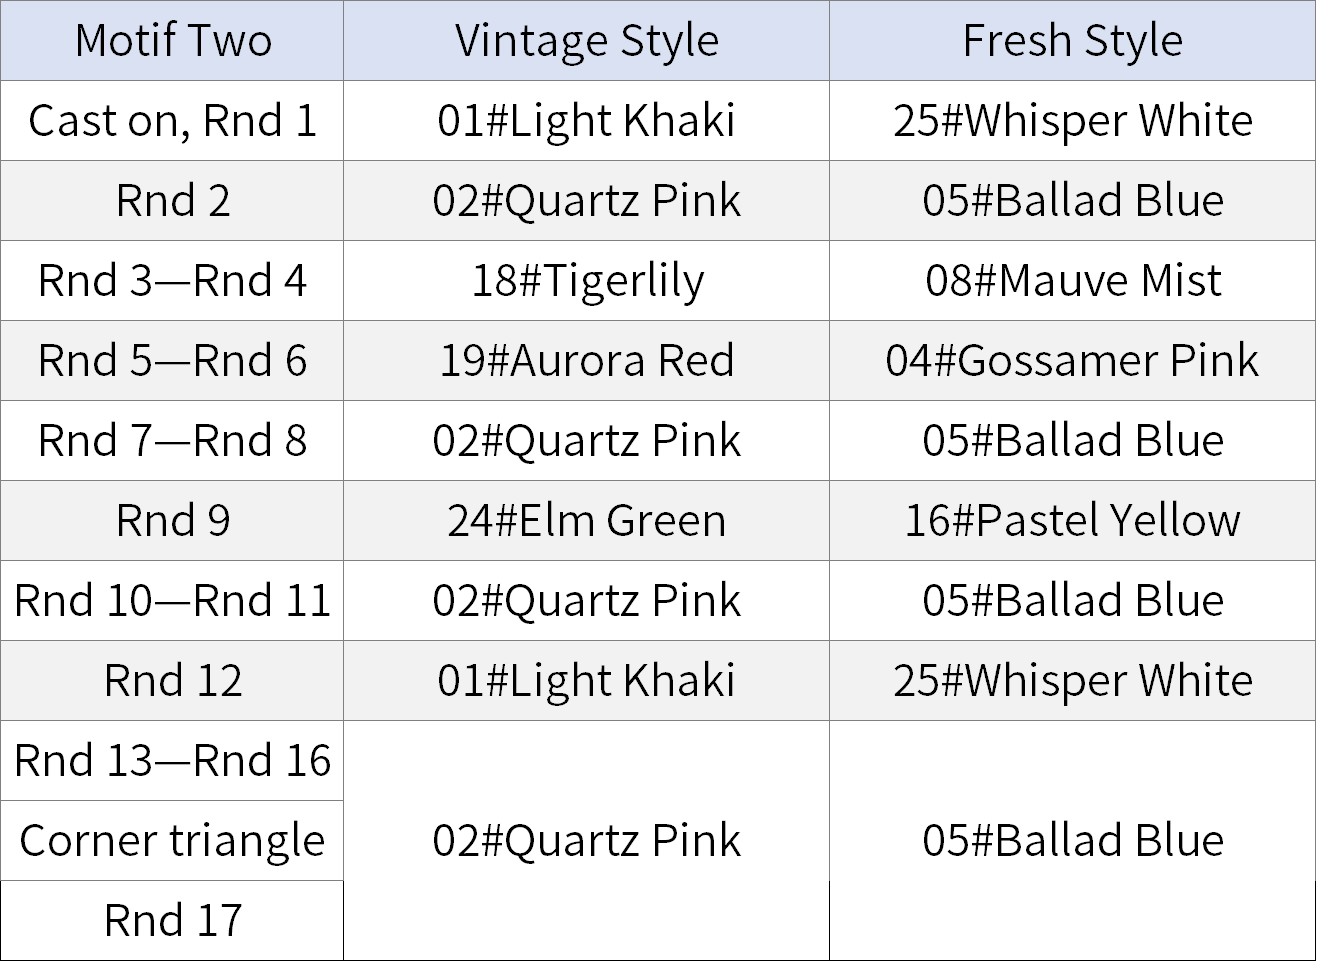
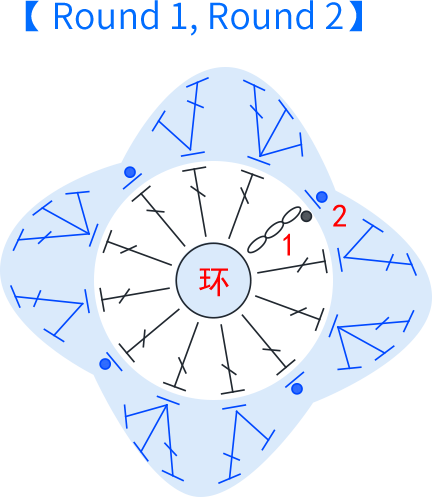
Note: For the second round, crochet into the front loop of the first round; for the third round, crochet into the back loop of the first round.

Step 2 Motif ThreeC2, Inner edgingC3, and Sewing C4 53' 07'' (Part 3)
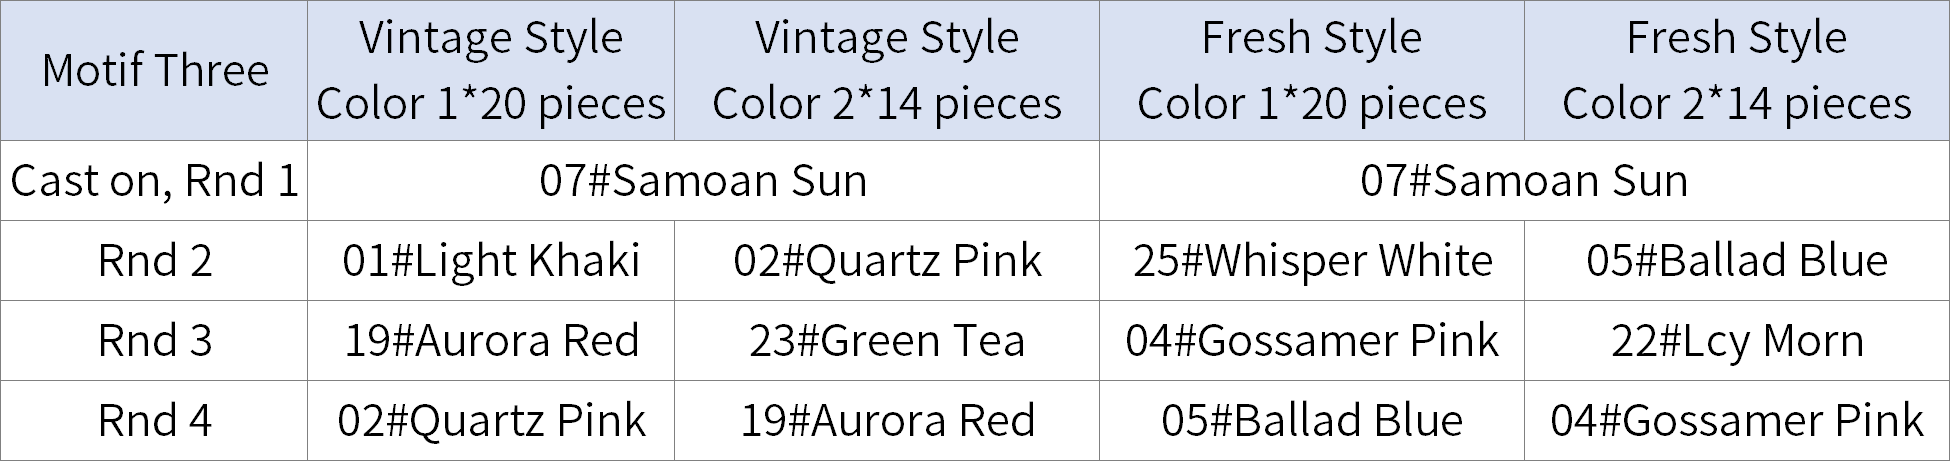
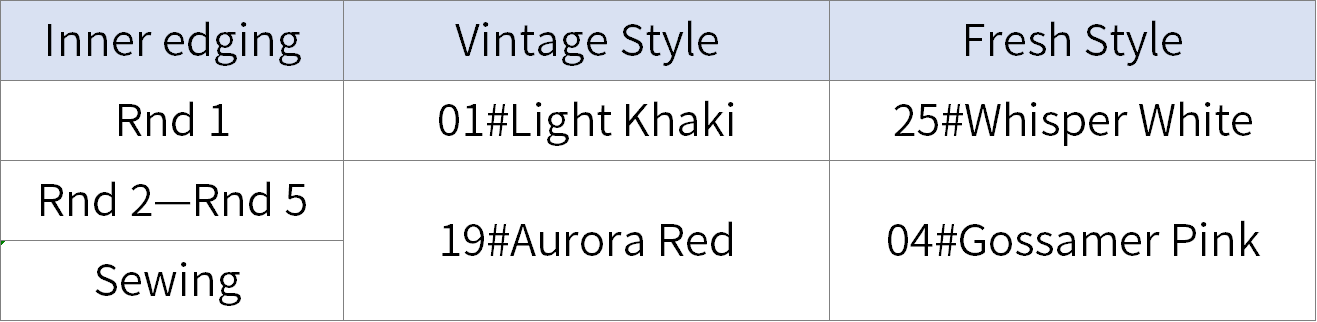
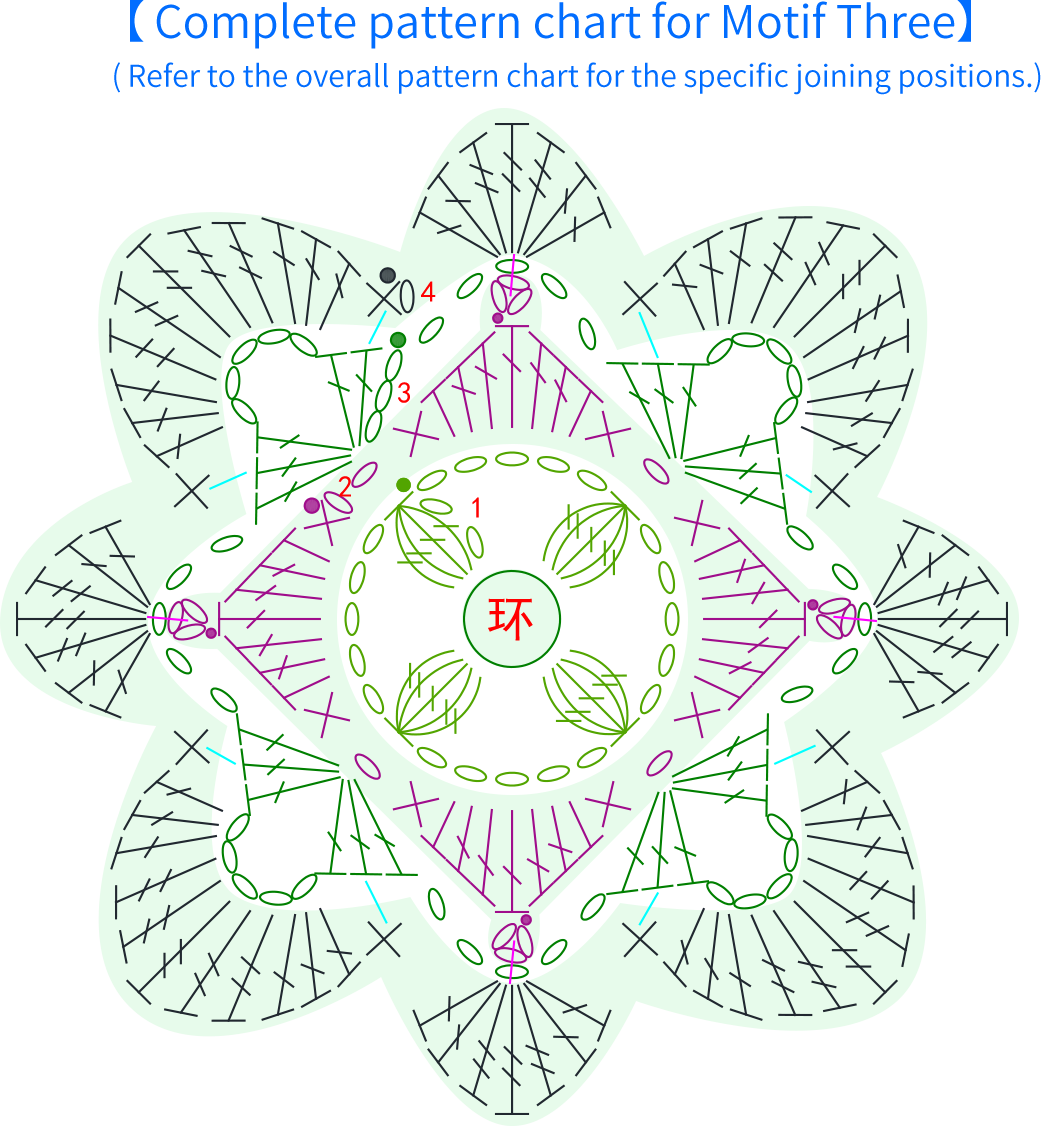
Motif Three begins with a magic ring and is crocheted in rounds counterclockwise. During the crocheting process, you need to switch colors. First, crochet the first three rounds, and on the last round, join as you crochet to form a frame, ensuring symmetrical distribution of the two color schemes while joining. After completion, crochet an inner edging inside the joined Motif Two and Motif Three. Once done, sew it together with Section 2. Please refer to the video demonstration for more details.
Step 3 Outer edgingC5 24' 45'' (Part 4)
The edging is crocheted counterclockwise around the outside of the joined motifs, and you need to switch colors while crocheting. Please refer to the video demonstration for more details.
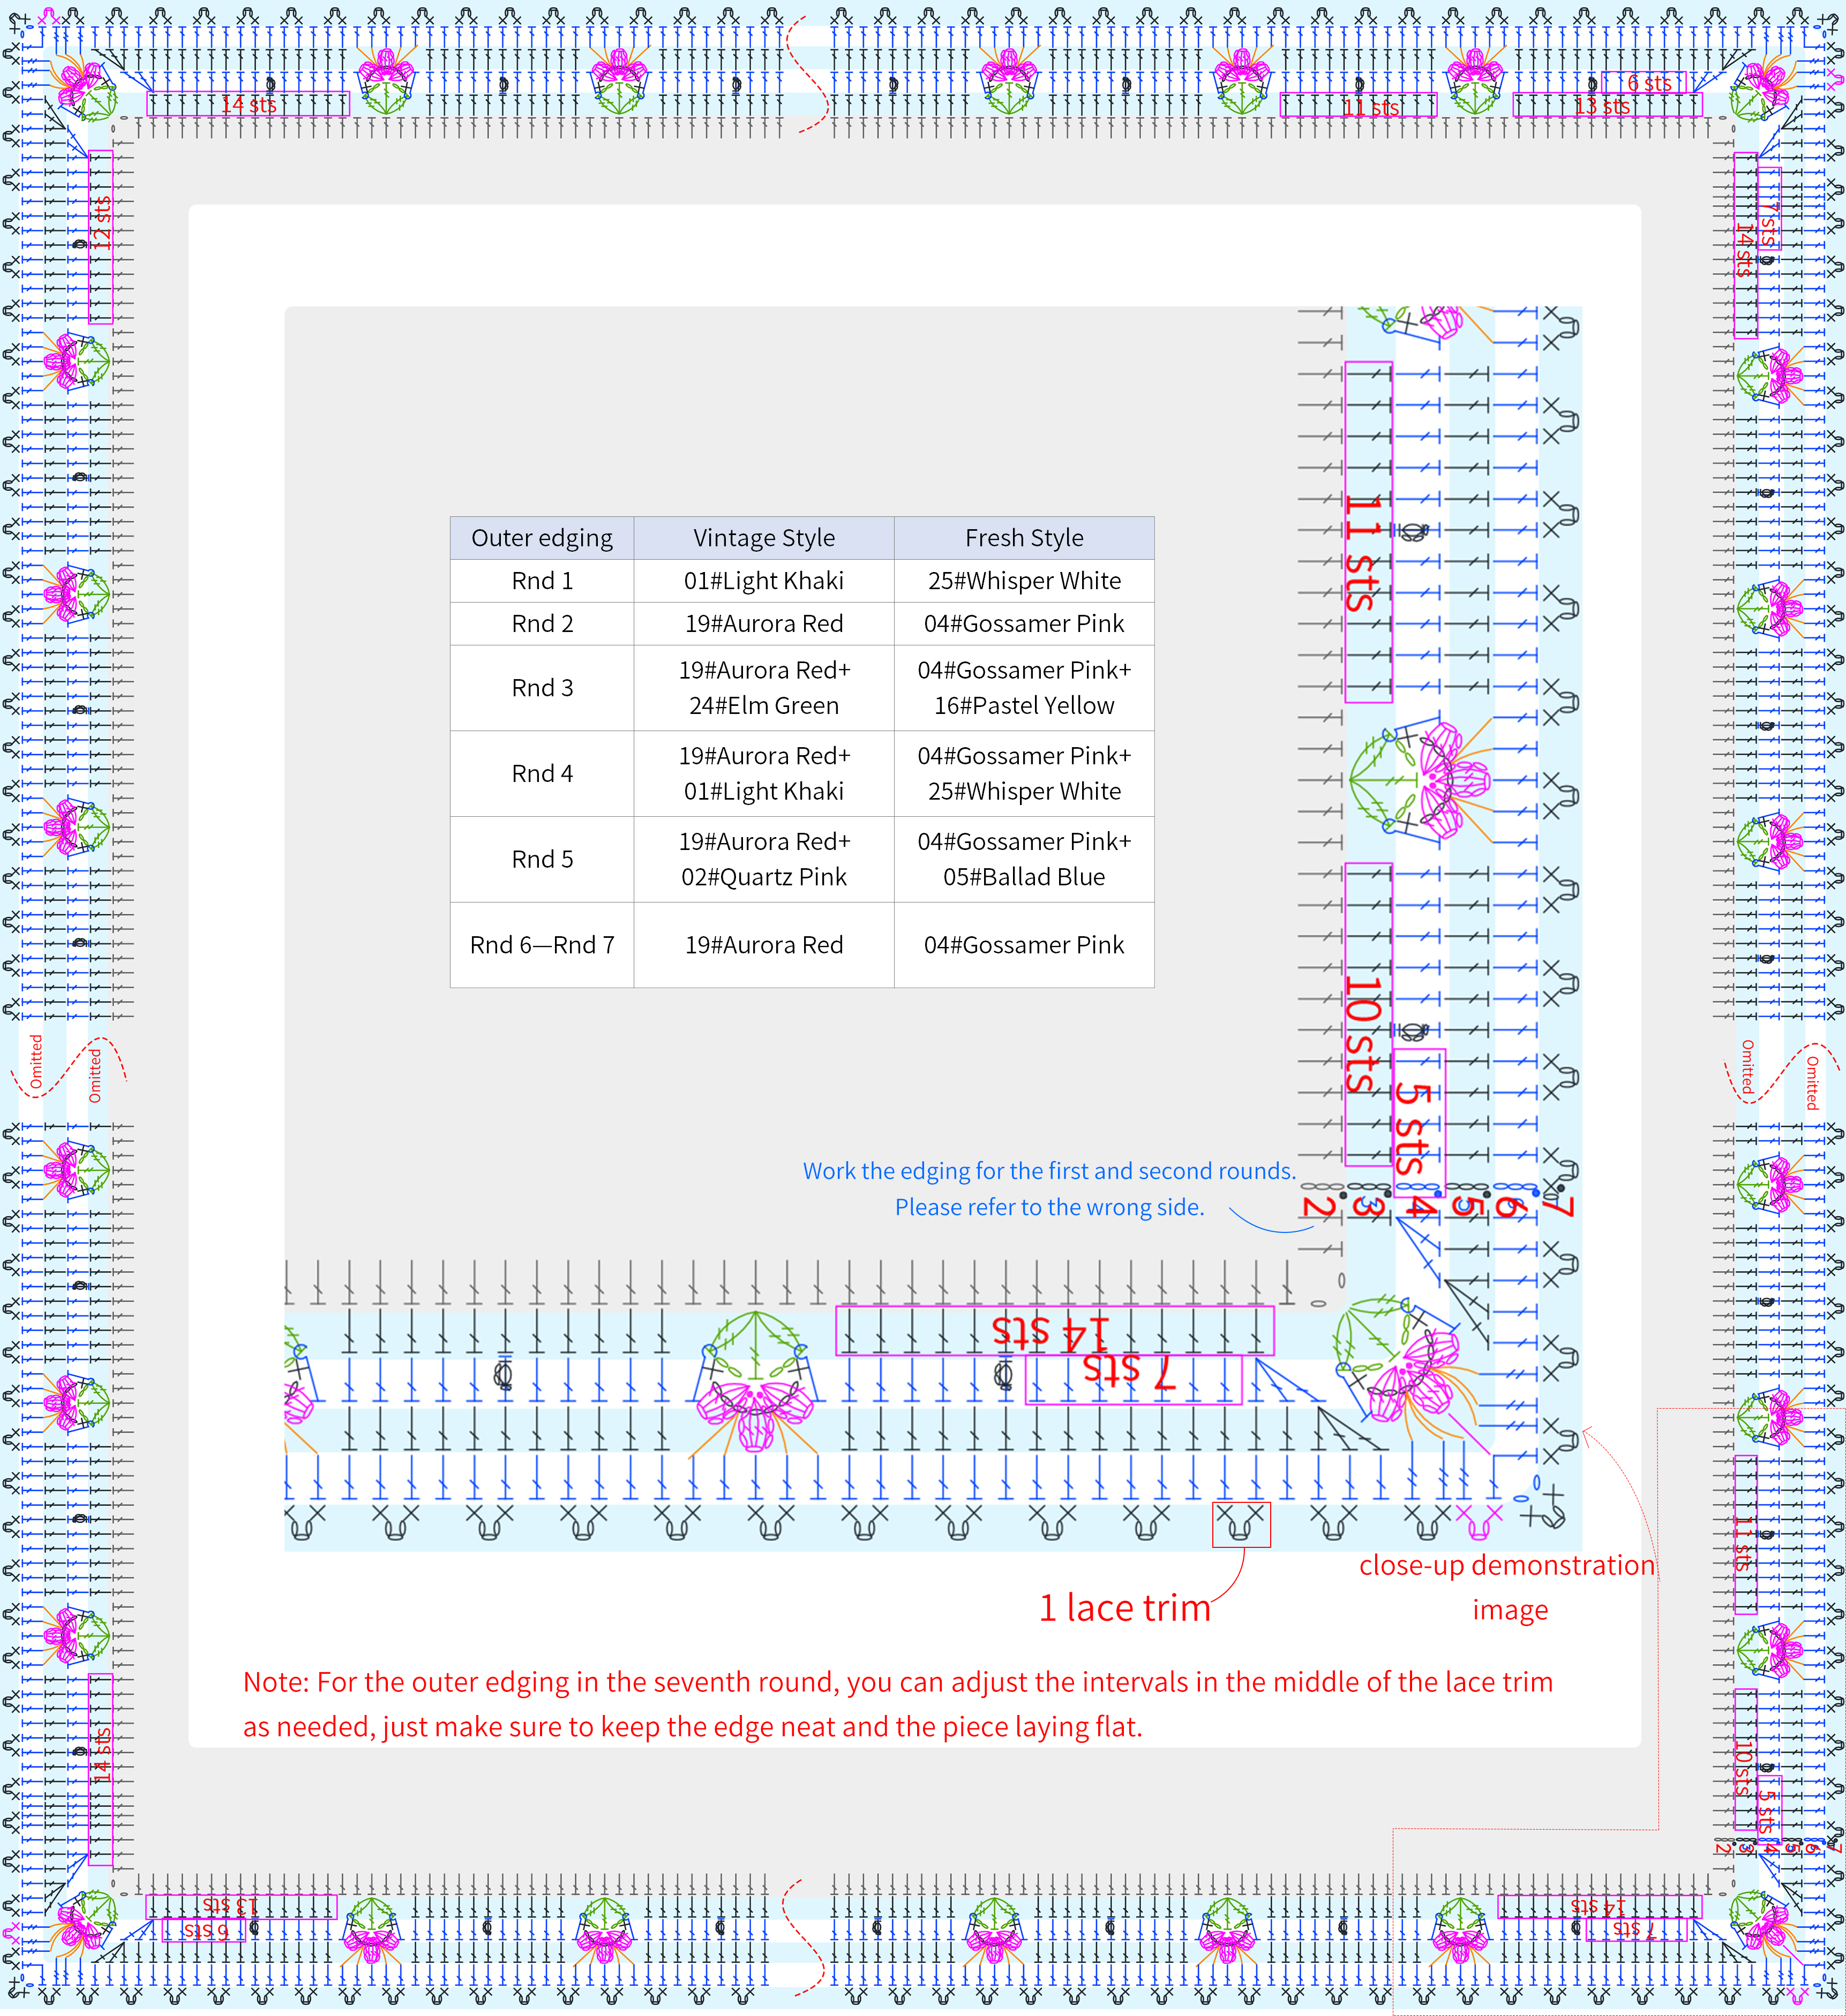
Part 4 Accessories 67' 43'' (Part 4)
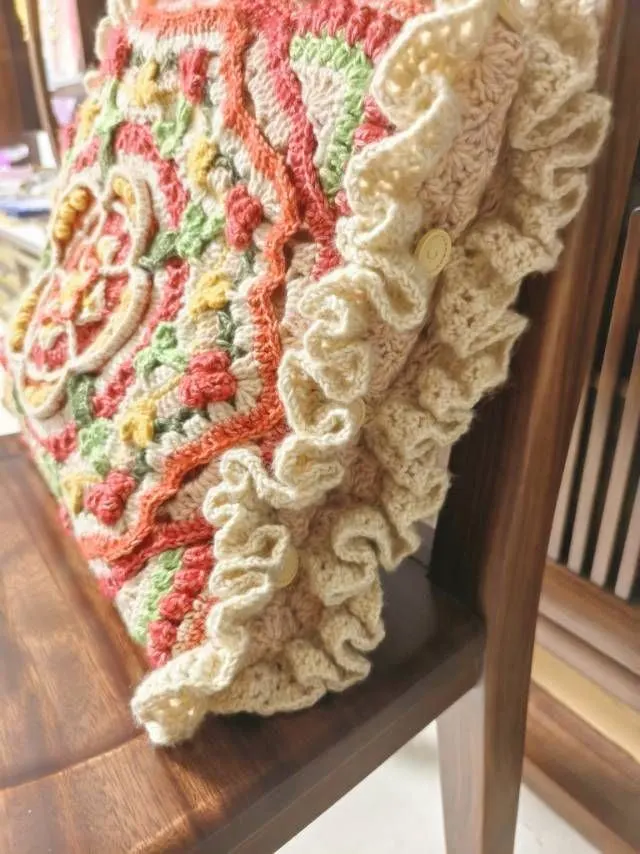
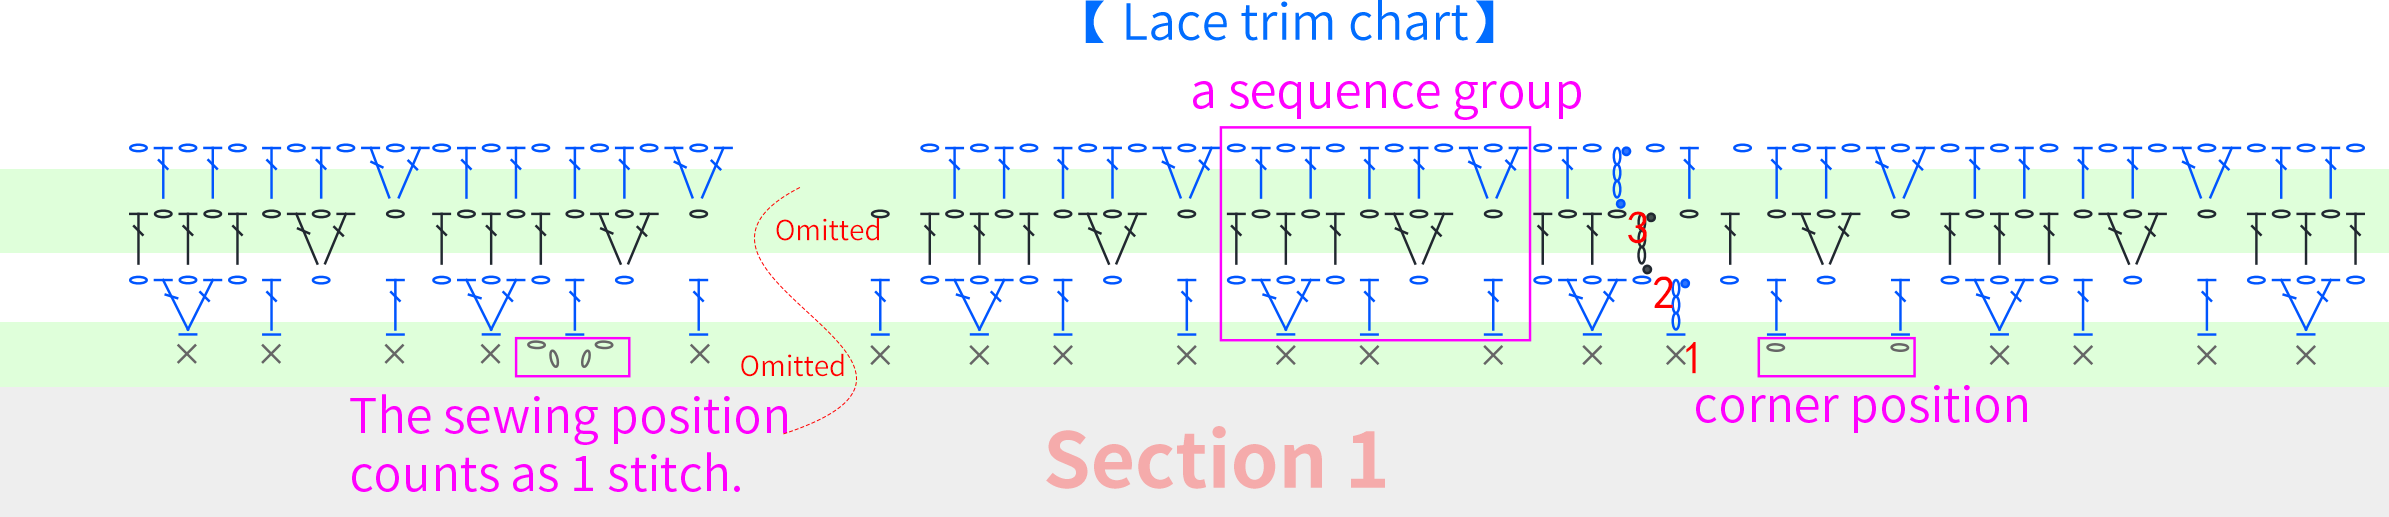
The accessories include lace trimD1, buttons, and buttonholesD2. The lace trim is crocheted around the edge of Section 1 counterclockwise. The buttons and buttonholes are distributed separately on the 3 sides of Motif One in Section 1 that are not sewn together. Please refer to the video demonstration for more details.
Note:
1. Lace trim, buttons sewing, and buttonholes
Vintage Style: 01#Light Khaki; Fresh Style: 25#Whisper White
2. The stitch technique at the ending is for reference only. When crocheting the lace trim, you can adjust the increase placement according to the actual situation, just ensure that the fabric curls naturally and the texture is beautiful.
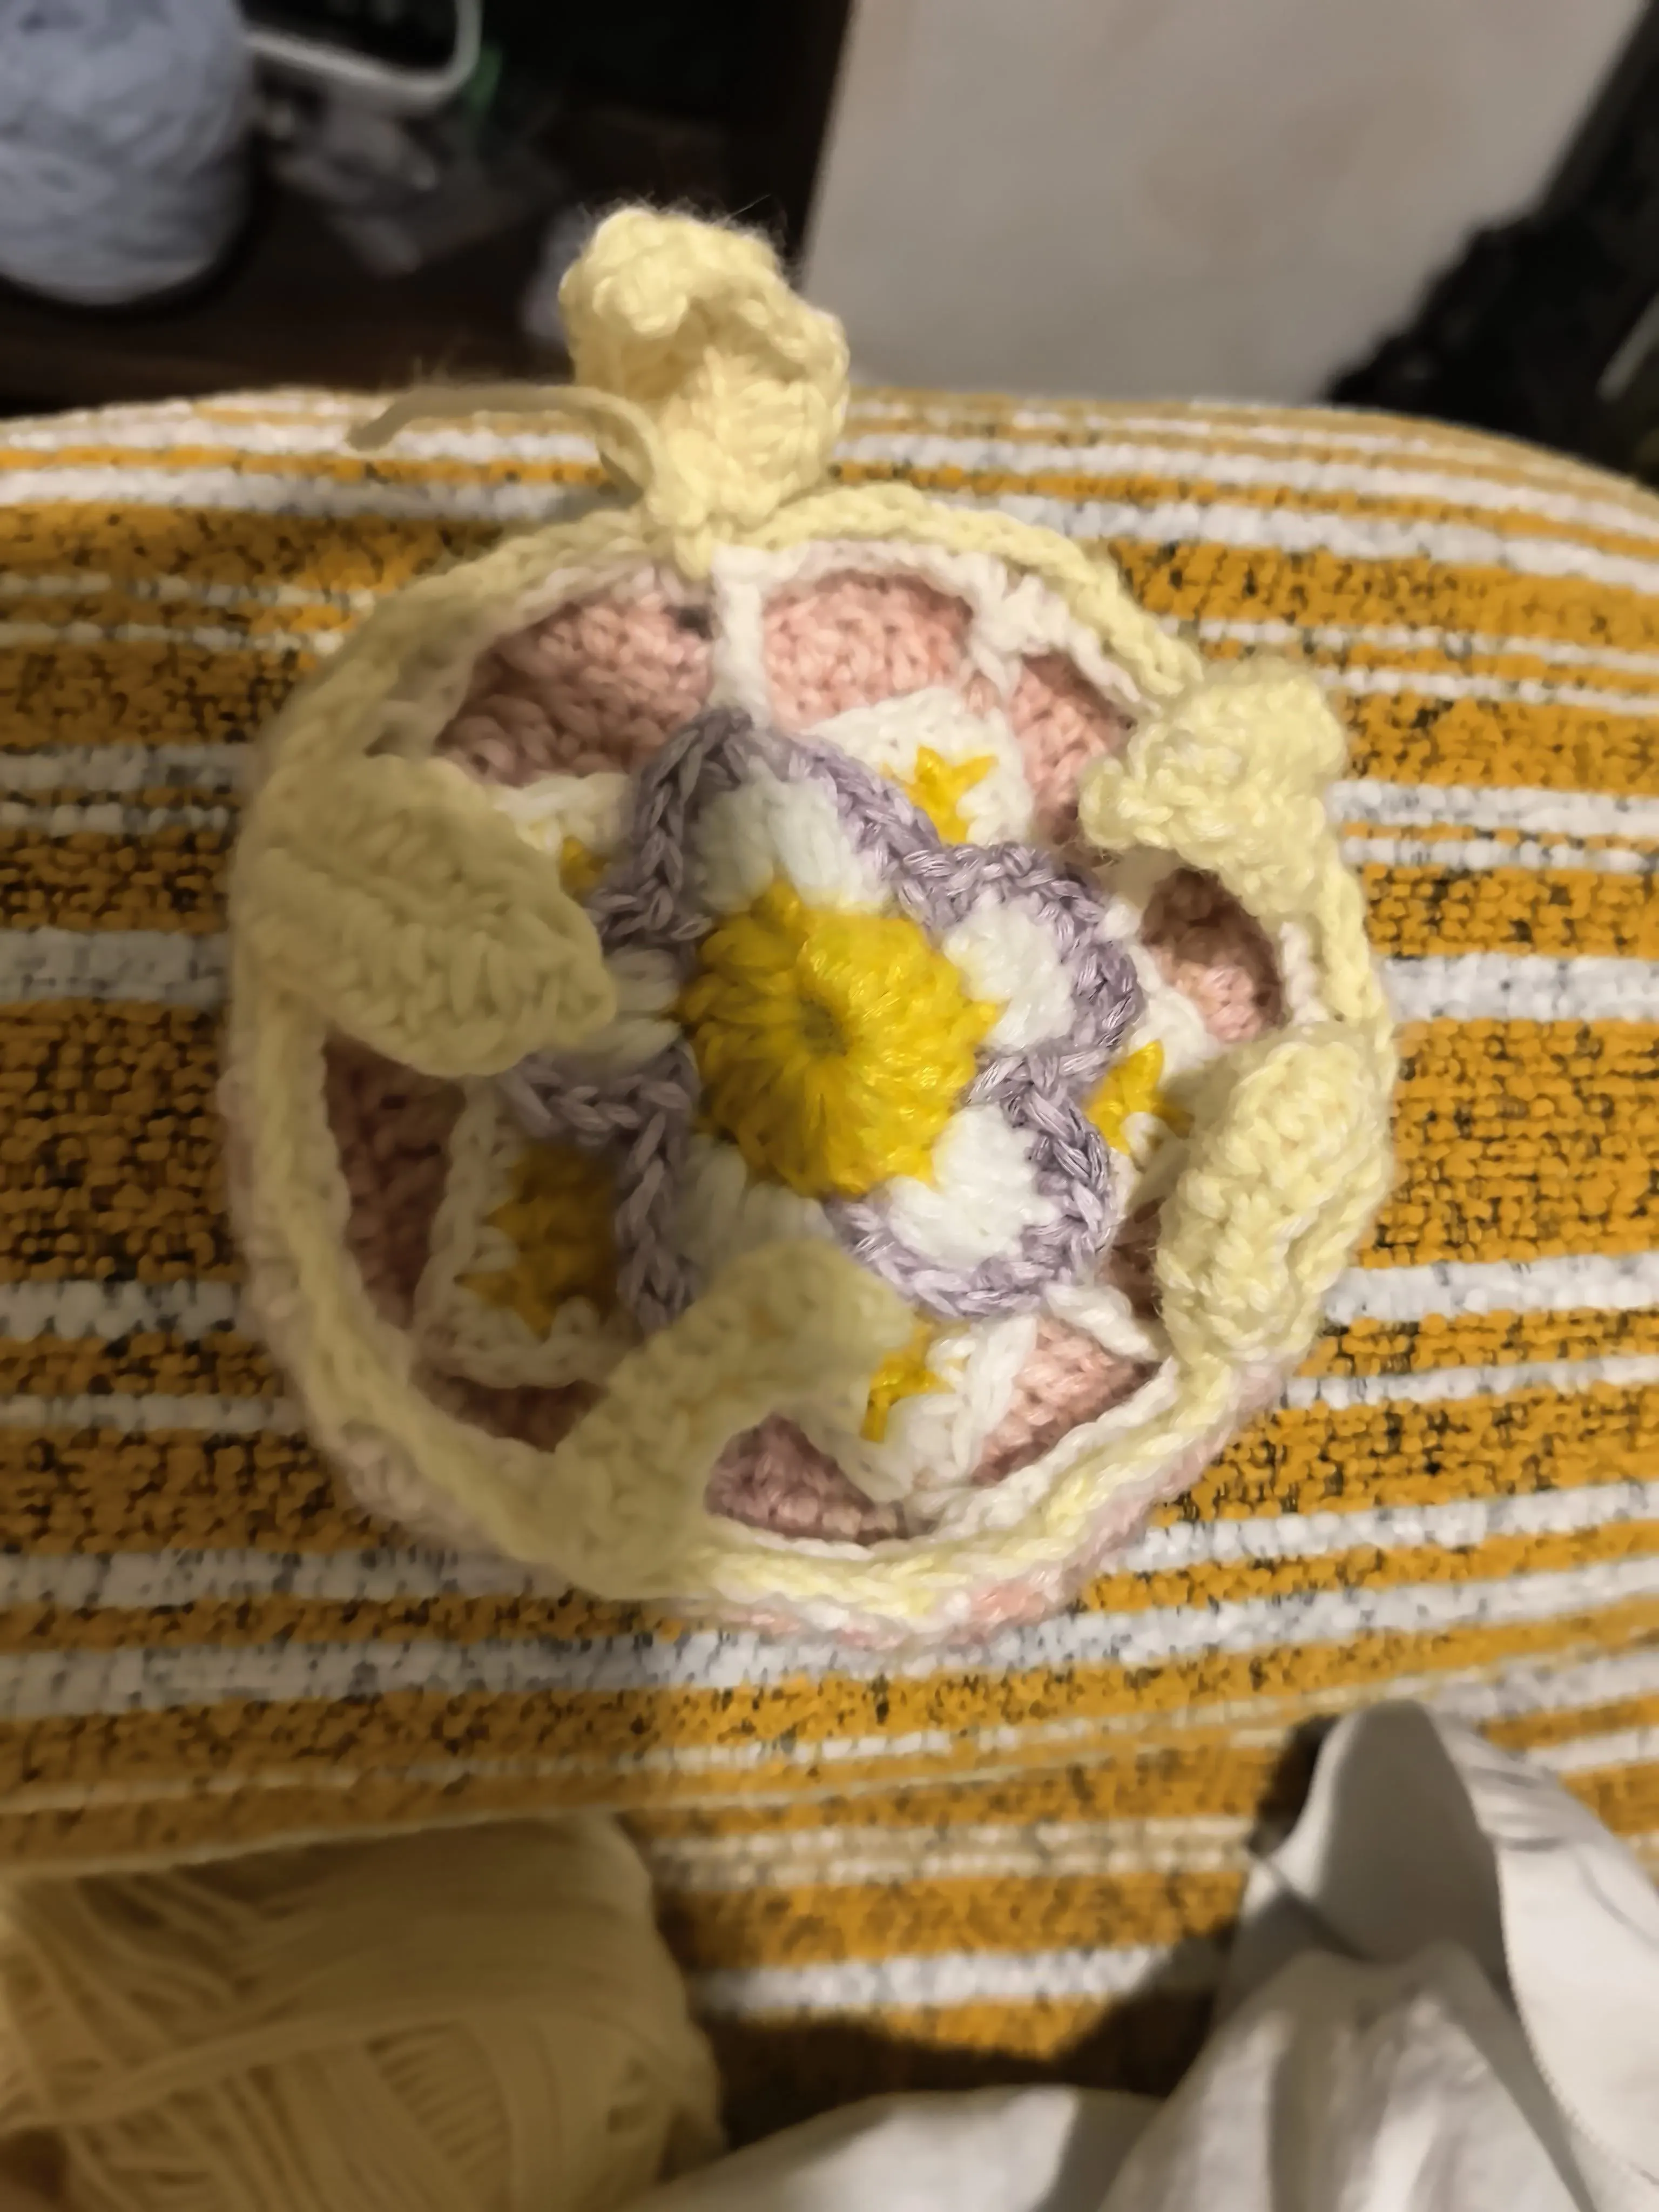
Made by the community