
Clothes
Warm Aroma Jacket
Project preview
See the finished project
Pattern format
Instructions
Watch and follow
Video tutorial
This garment divides into the back piece, left and right front pieces, joining together, edging, and accessories.
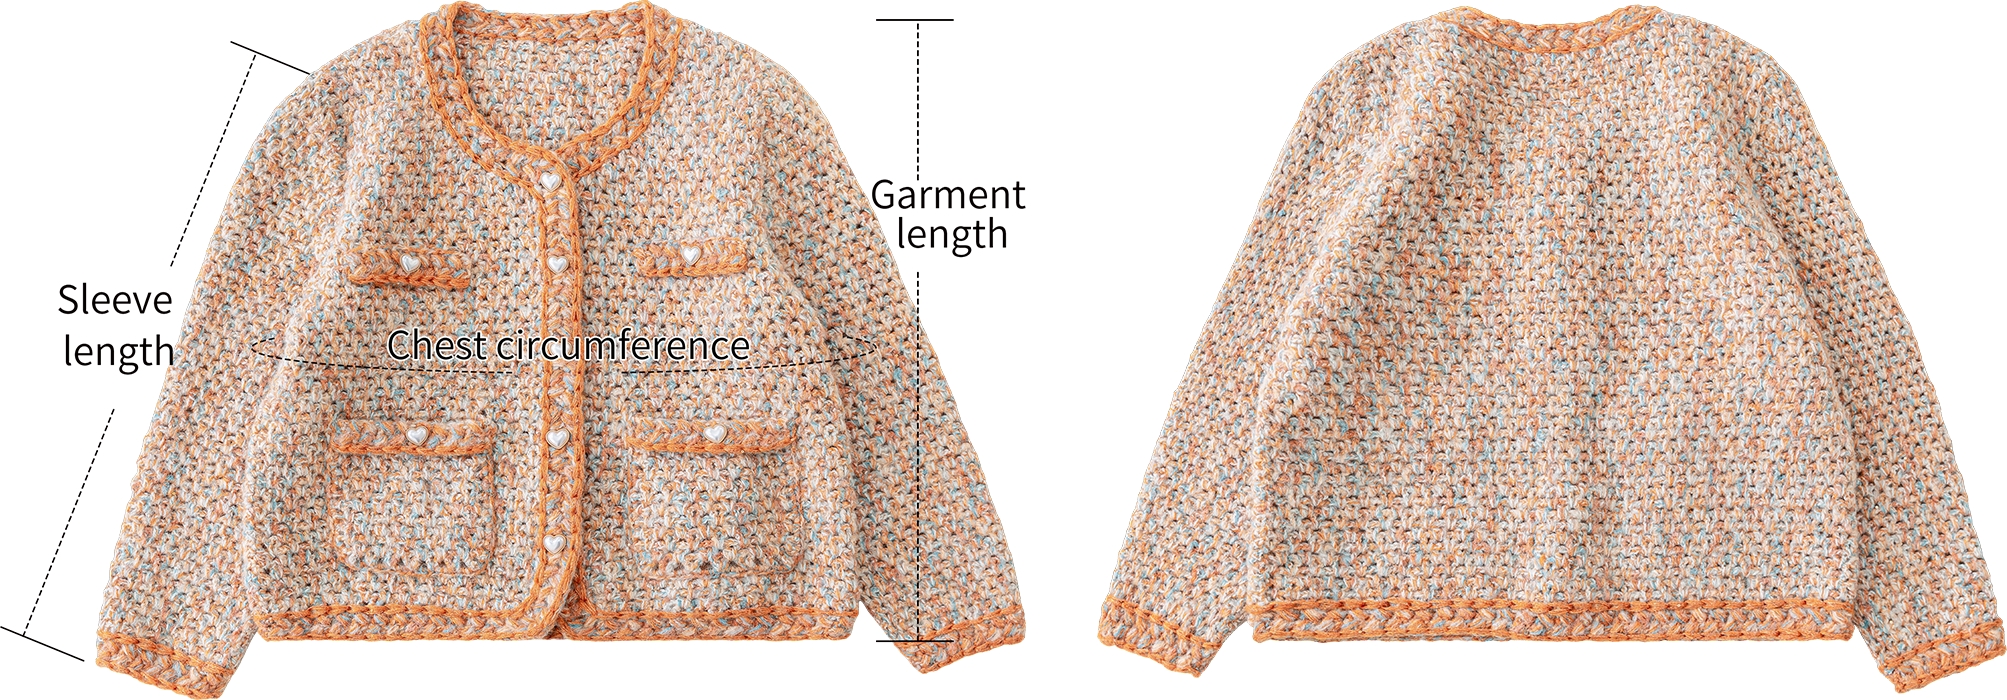
| Unit: cm | Chest circumference | Garment length | Sleeve length |
| Small Size | 100 | 52 | 50.5 |
Due to variations in individual tension, the size of the sample is for reference only.
Materials: Field Impression, Alpaca, Sequin Mohair
Crochet Hook: 4.00mm Crochet Hook

Chart Key









Note: This pattern is making in Chinese crochet pattern terms, and the stitch name is written using American terminology. All measurements in charts are in cm.
| Color Chart | ||
| Part | Yarn | |
| Back piece, Left and right front pieces, Sleeve, Joining together |
Field Impression 1 single strand + Alpaca 1 single strand + Sequin Mohair 1 single strand |
|
| Front band edging |
Front band lace trim | Field Impression 1 single strand + Sequin Mohair 2 single strands |
| Slip stitch decoration | Sequin Mohair 4 single strands | |
| Cuff edging | Cuffs lace trim | Field Impression 1 single strand + Sequin Mohair 2 single strands |
| Slip stitch decoration | Sequin Mohair 4 single strands | |
| Pockets | Main part cast on - Row 13 | Field Impression 1 single strand + Alpaca 1 single strand + Sequin Mohair 1 single strand |
| Main part cast on - Row 15 | Field Impression 1 single strand + Sequin Mohair 2 single strands |
|
| Slip stitch decoration | Sequin Mohair 4 single strands | |
| Edging | Field Impression 1 single strand + Sequin Mohair 2 single strands |
|
| Sew together | Field Impression 1 single strand | |
| Chest decorative edges |
Main part | Field Impression 1 single strand + Sequin Mohair 2 single strands |
| Slip stitch decoration | Sequin Mohair 4 single strands | |
| Sew together | Field Impression 1 single strand | |
| Sewing on buttons | Field Impression 1 single strand | |
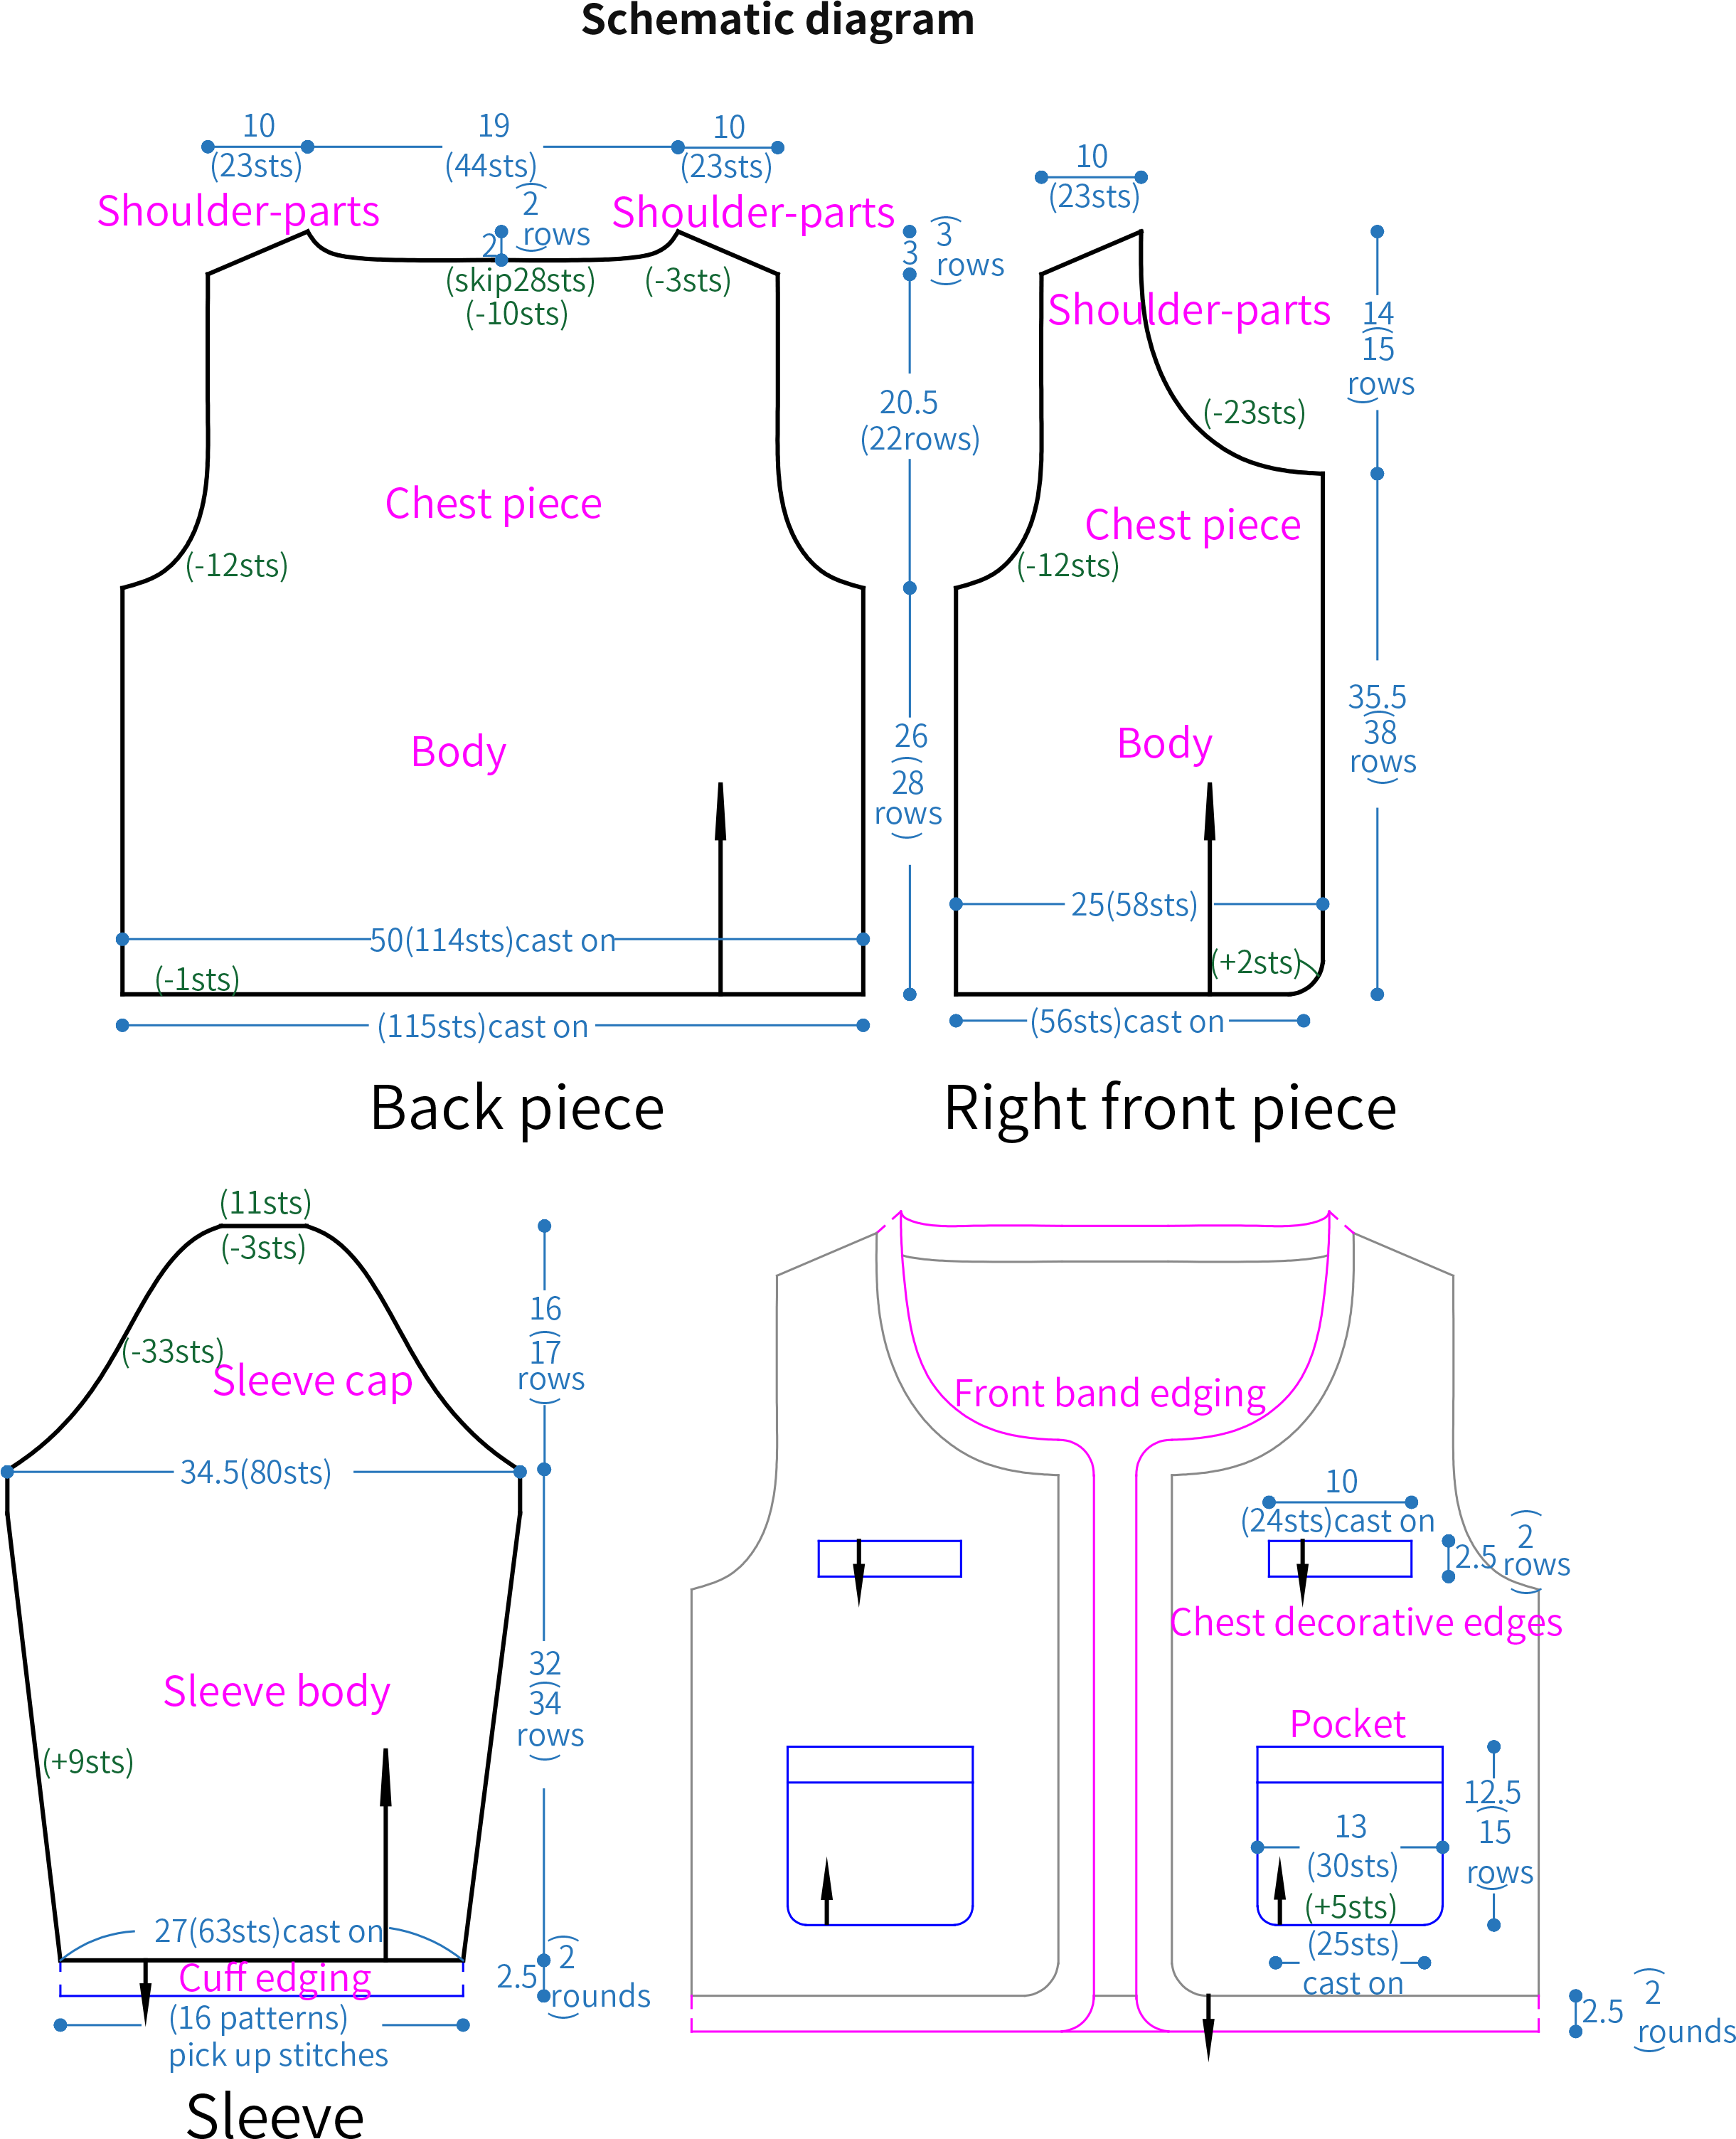

Part 1 Back pieceA 00' 39''
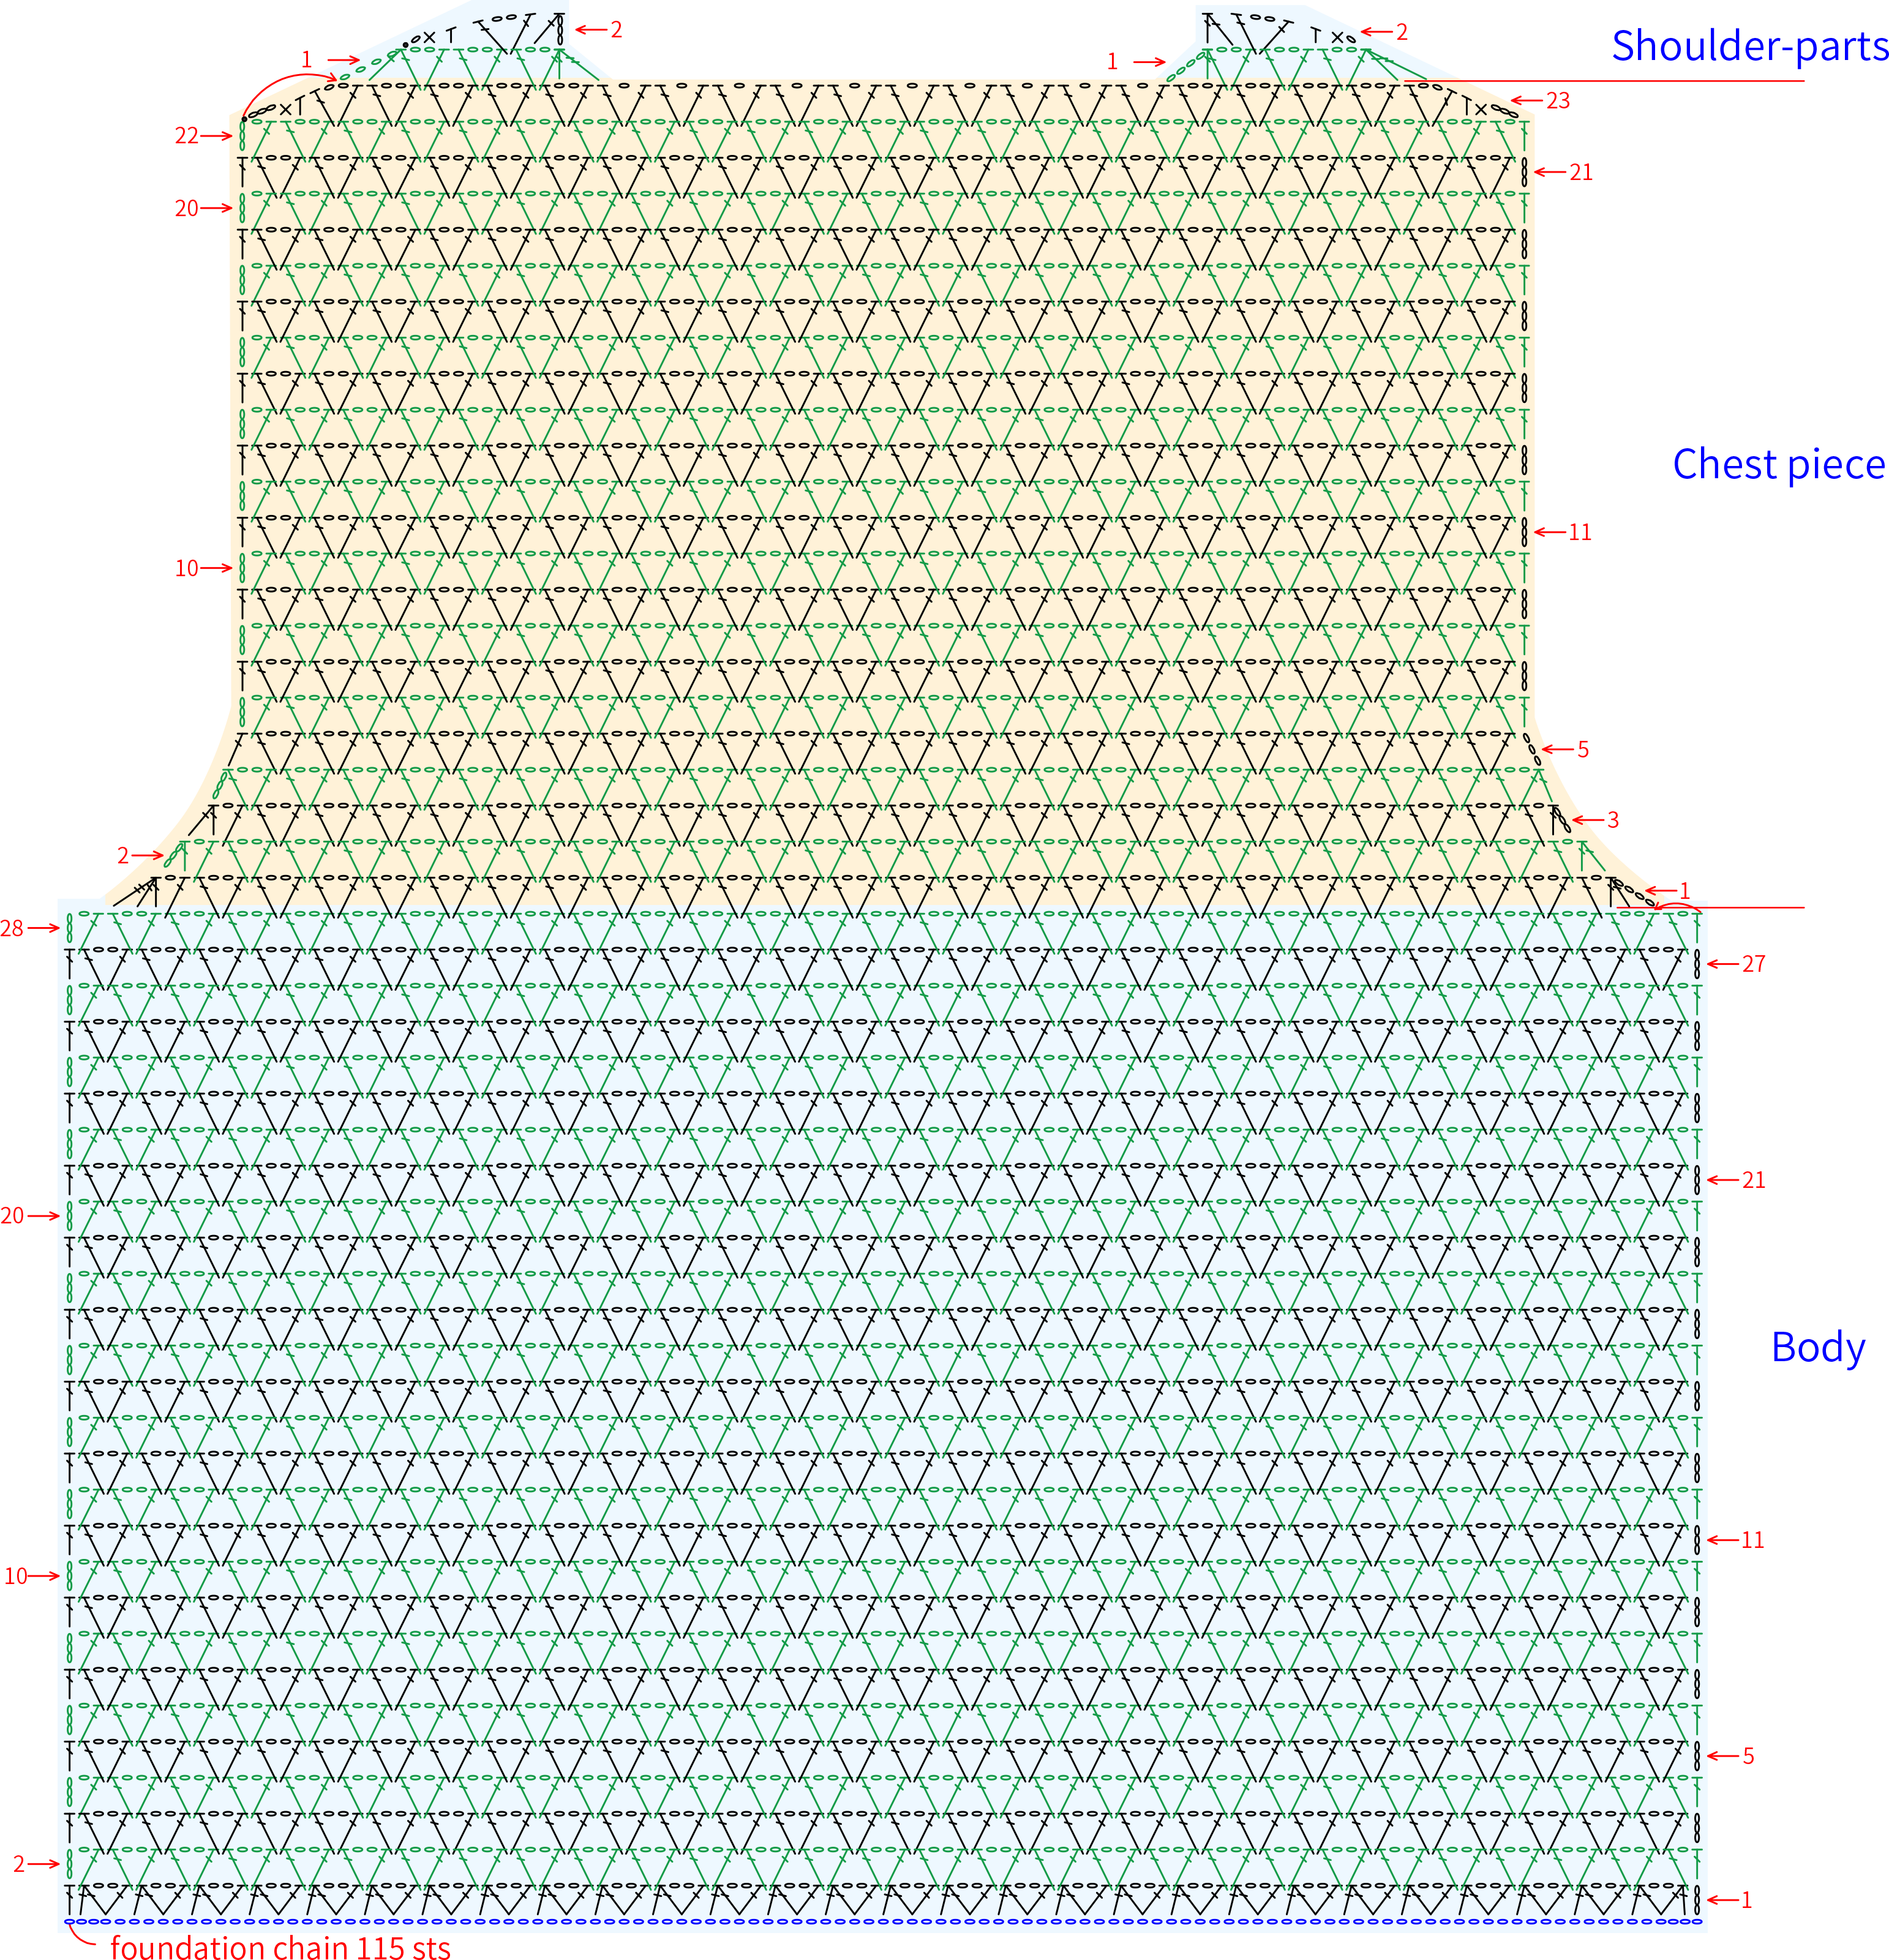
The back piece starts with a foundation chain, and then works back and forth along the foundation chain, dividing into the body, chest piece, and shoulder-parts. Please refer to the video demonstration for specifics.
Note:
1. After completing the 4th row of the body, the height should be approximately 4 cm, and the width should match the size marked for casting on in the structure diagram. If there is a significant difference, you need to adjust your tension and crochet again to avoid affecting the finished measurement.
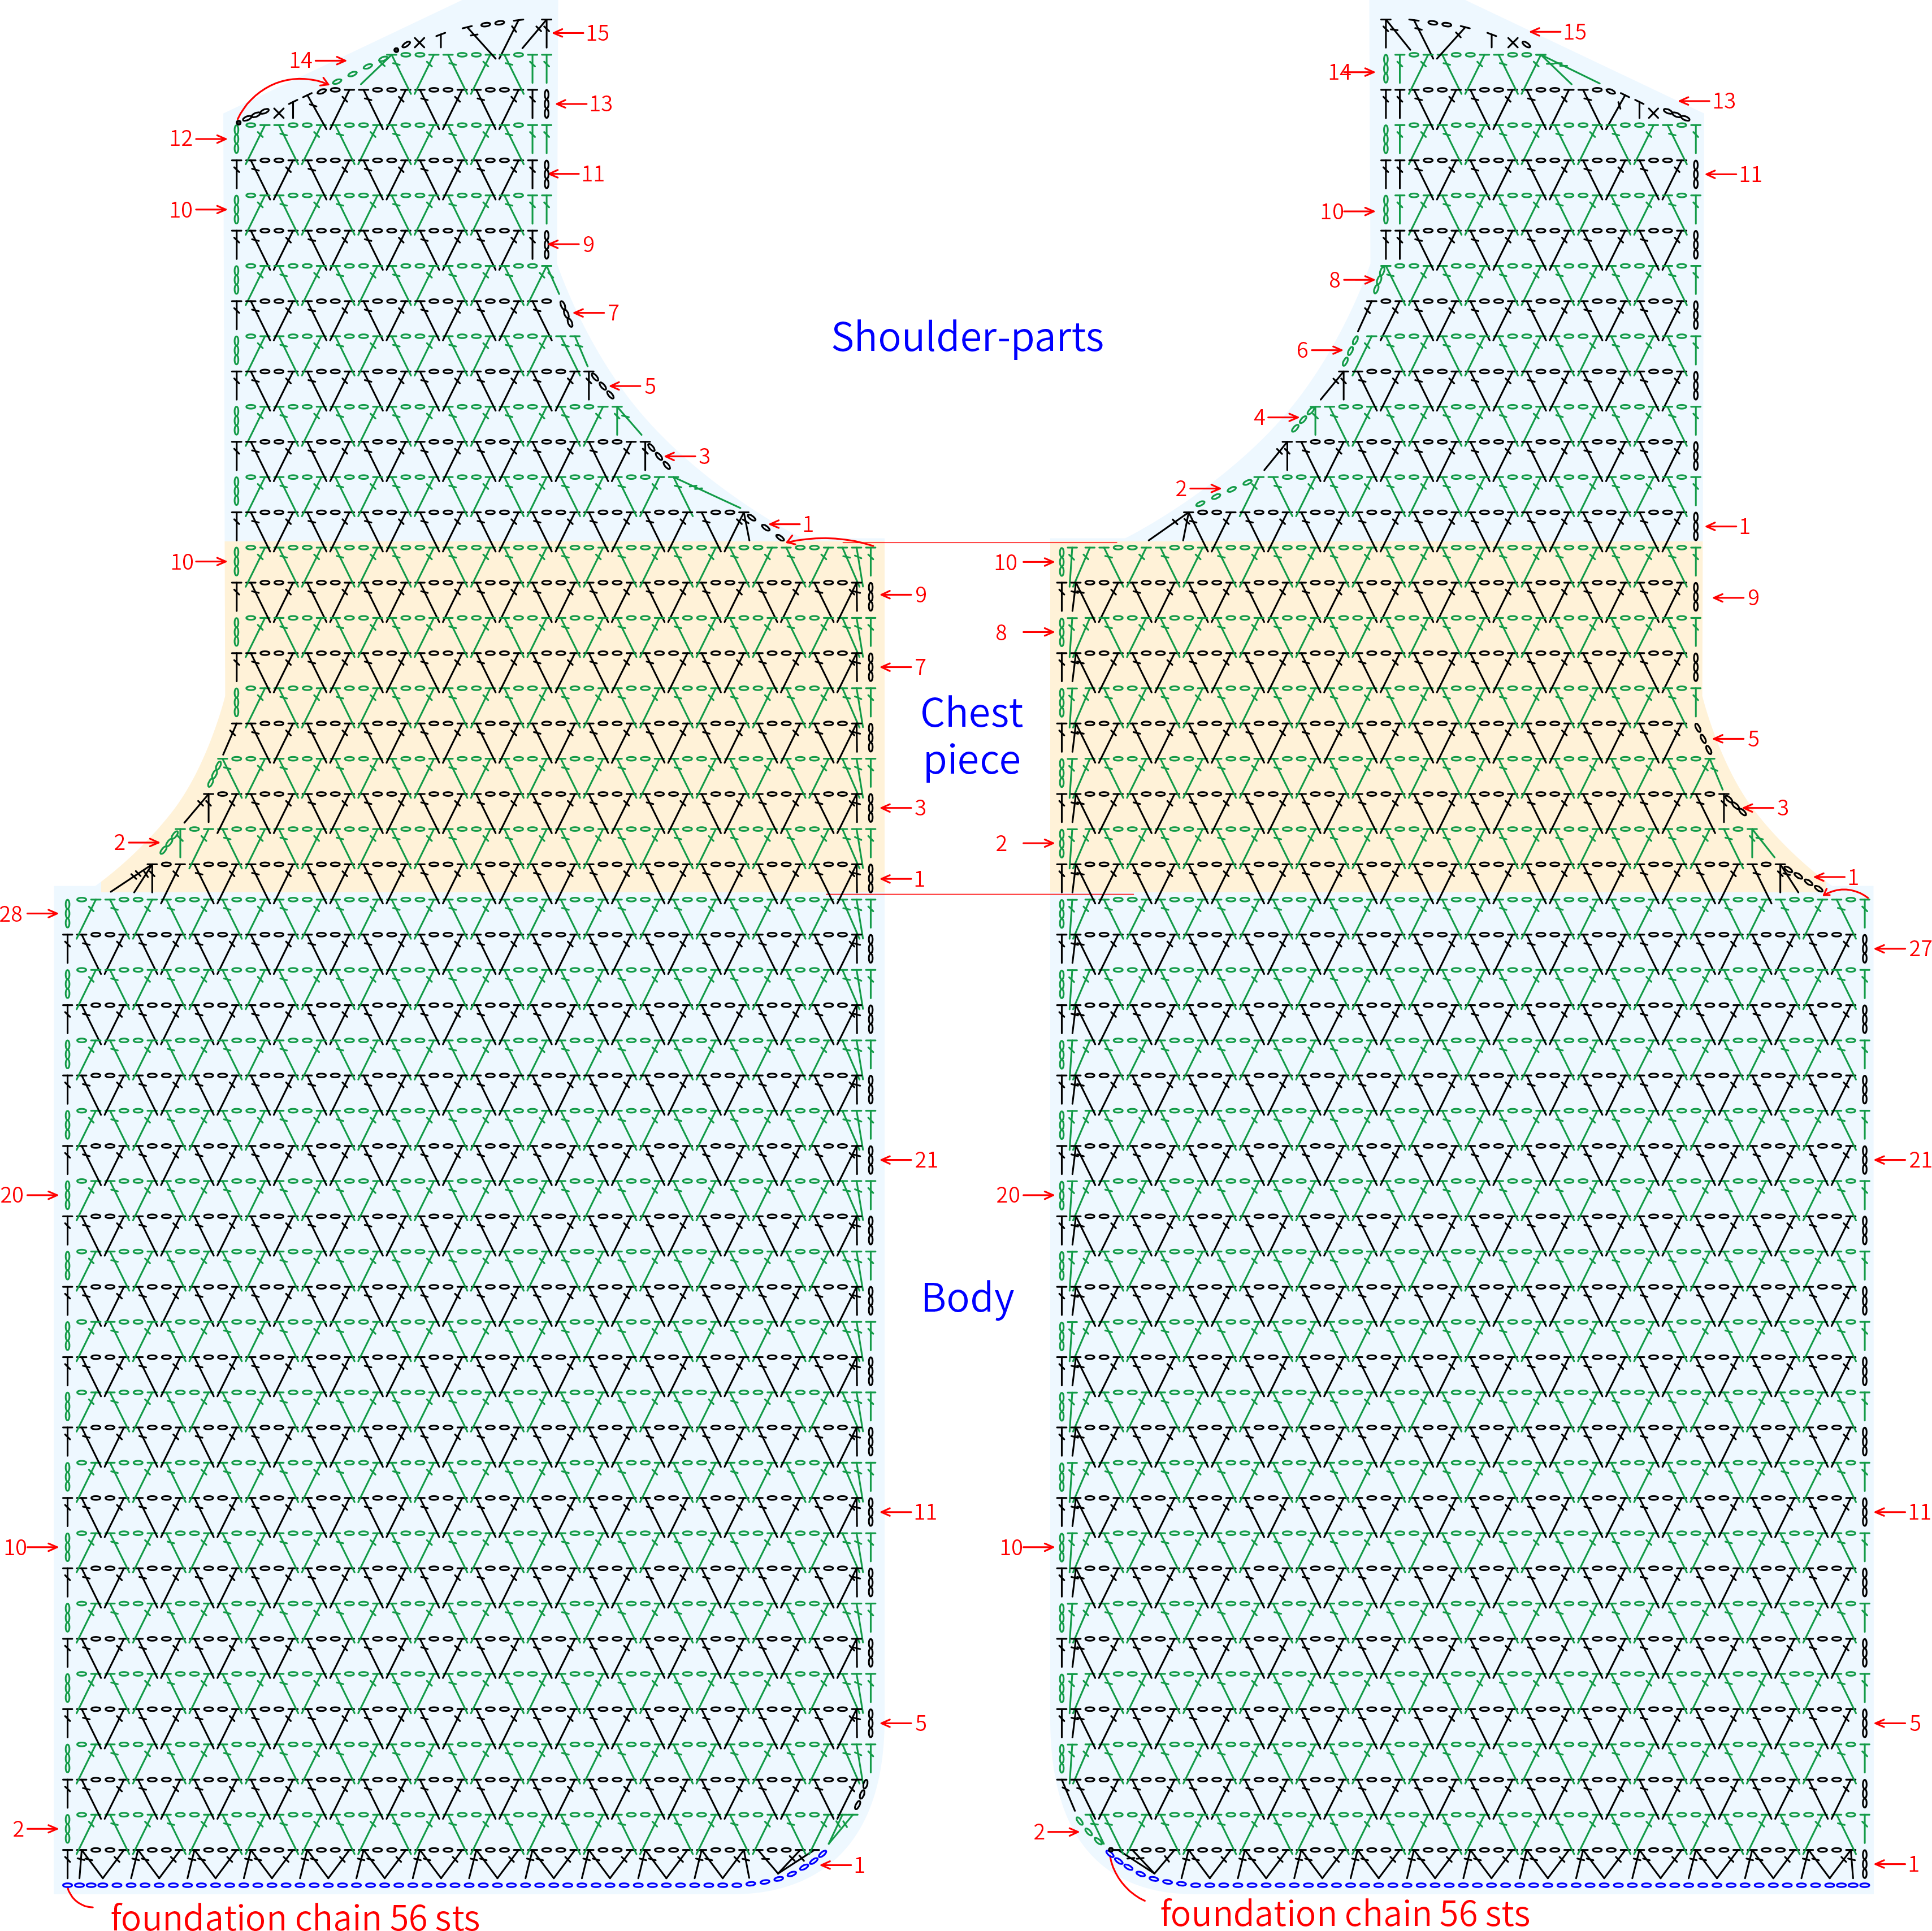
2. The left and right mentioned here refer to the left and right when the garment is being worn.
Part 2 Left and right front piecesB 23' 46''
Both the left and right front pieces start with a foundation chain and are worked back and forth. They are also divided into the body, chest pieces, and shoulder-parts. Please refer to the video demonstration for specifics.
Part 3 SleeveC 32' 59''
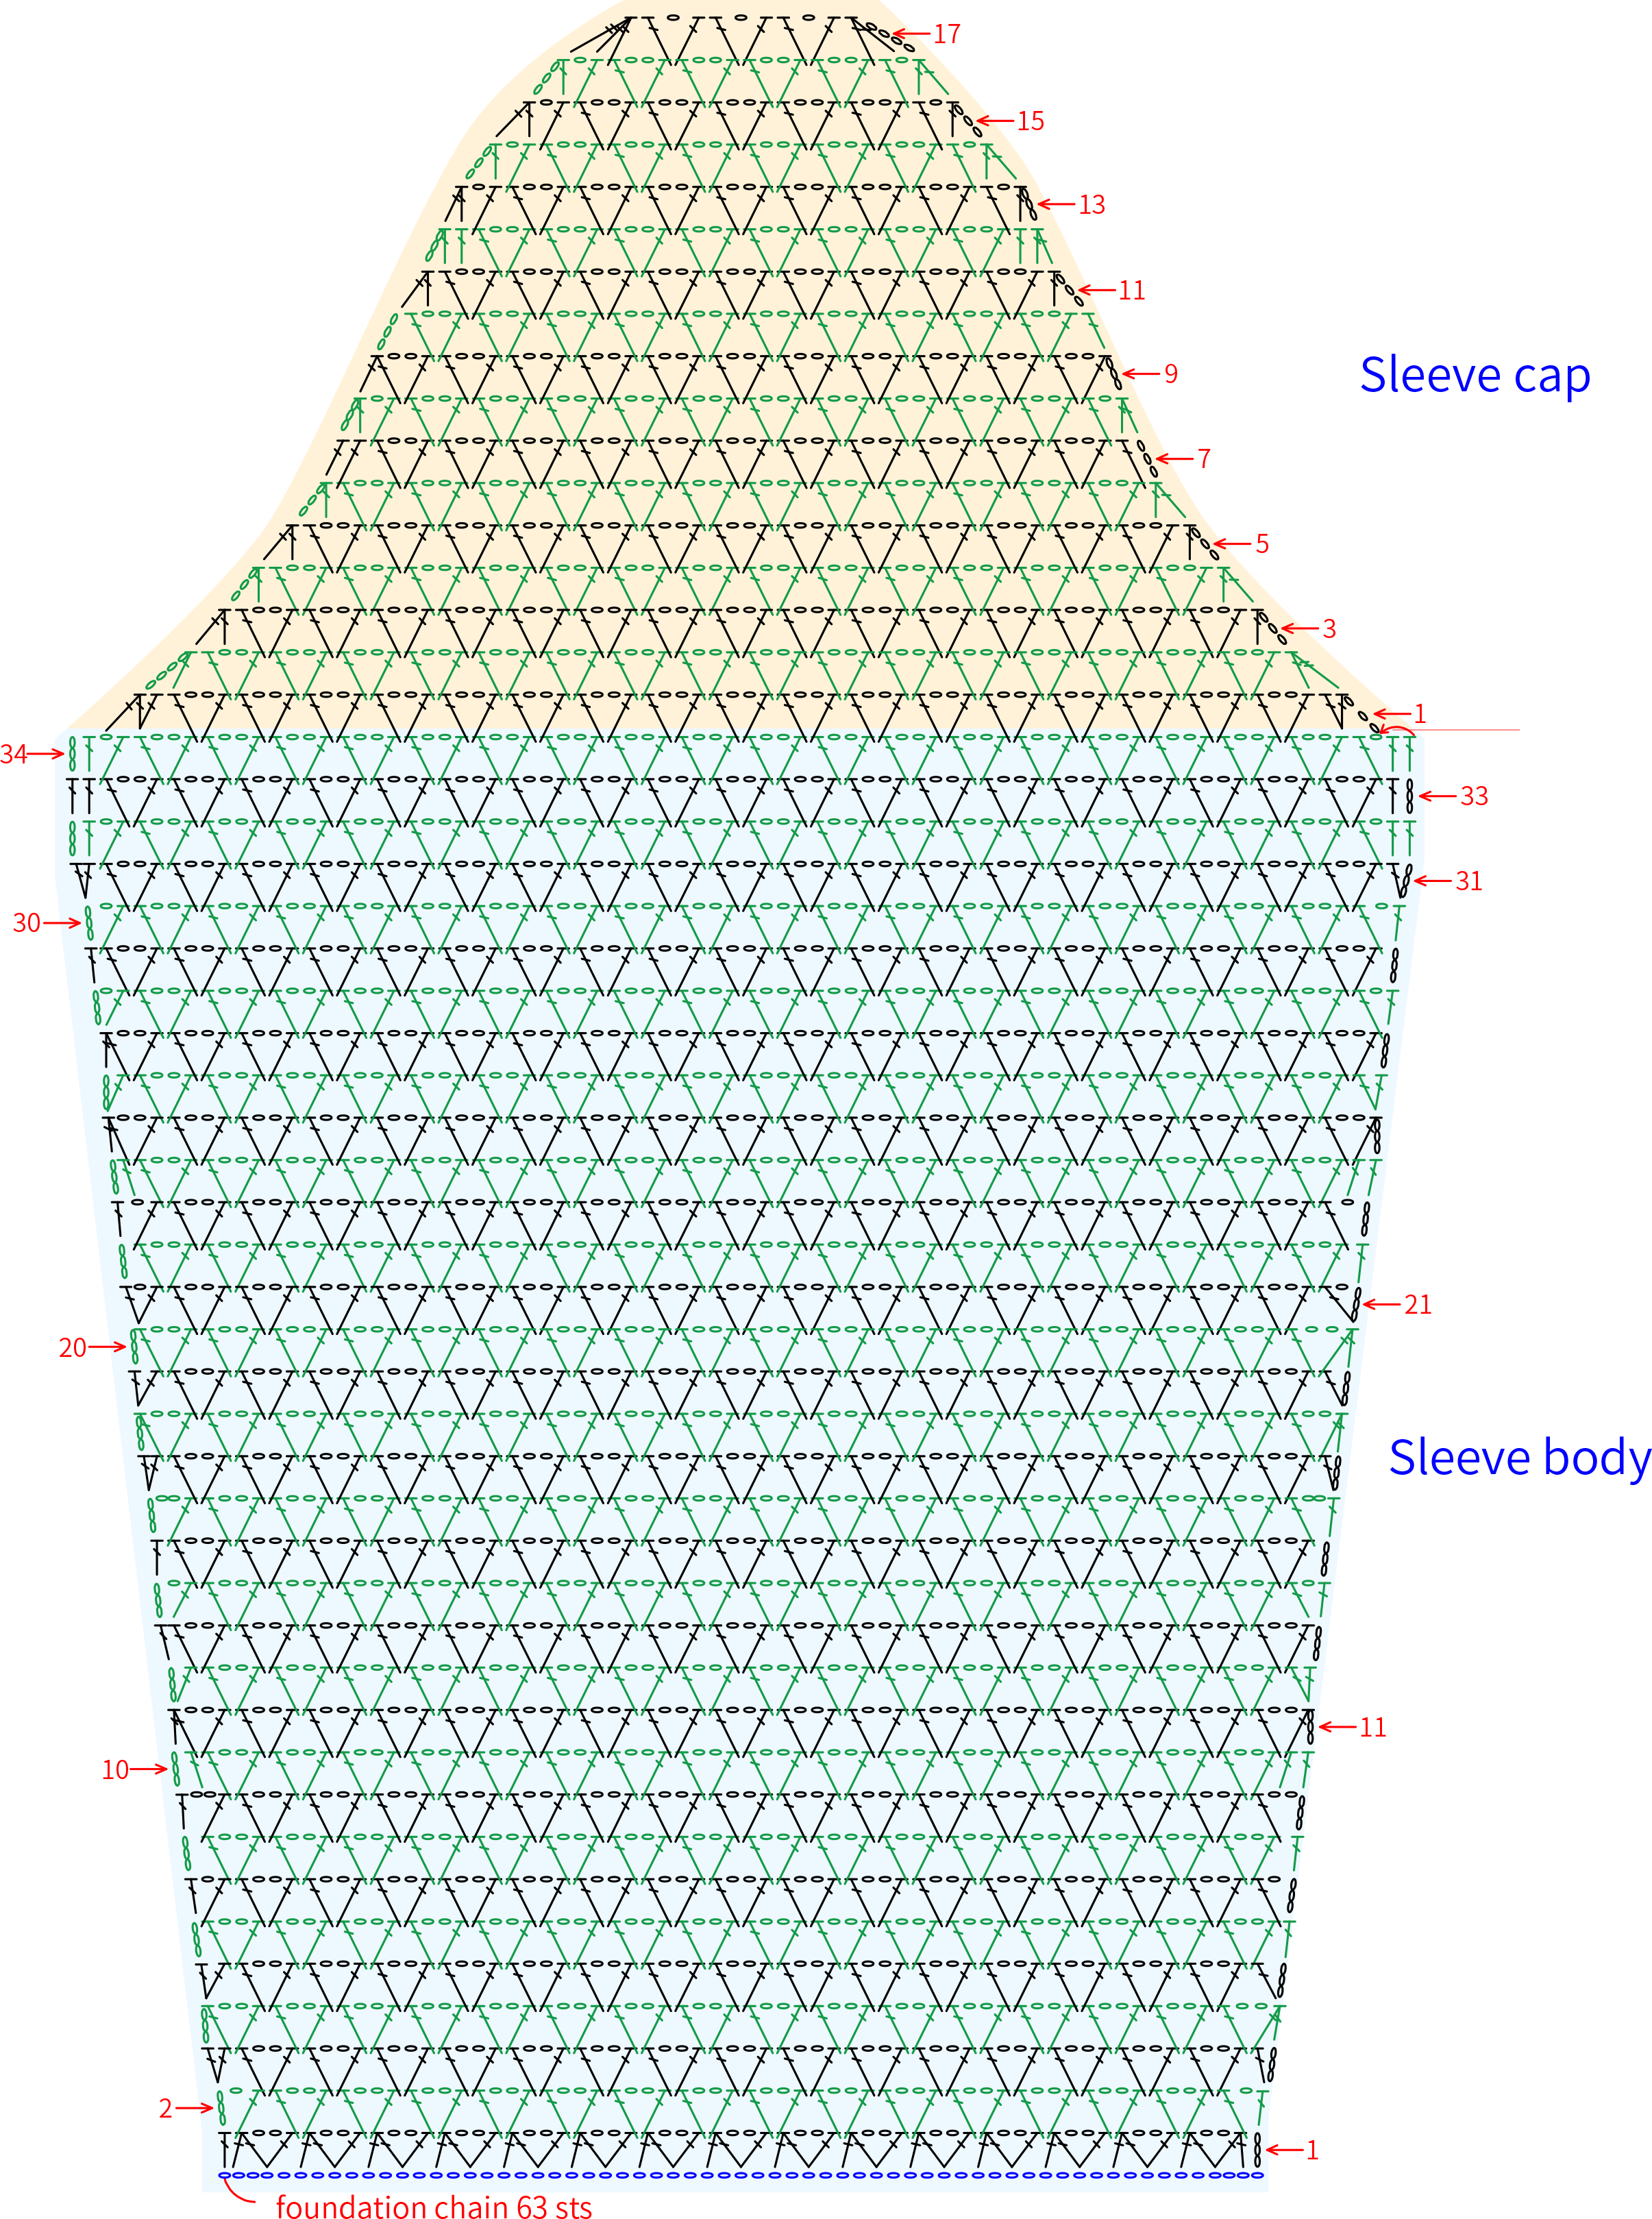
The sleeve starts with a foundation chain and is crocheted back and forth, divided into the sleeve body and sleeve cap. Please refer to the video demonstration for specifics.
Part 4 Joining togetherD 33' 55''
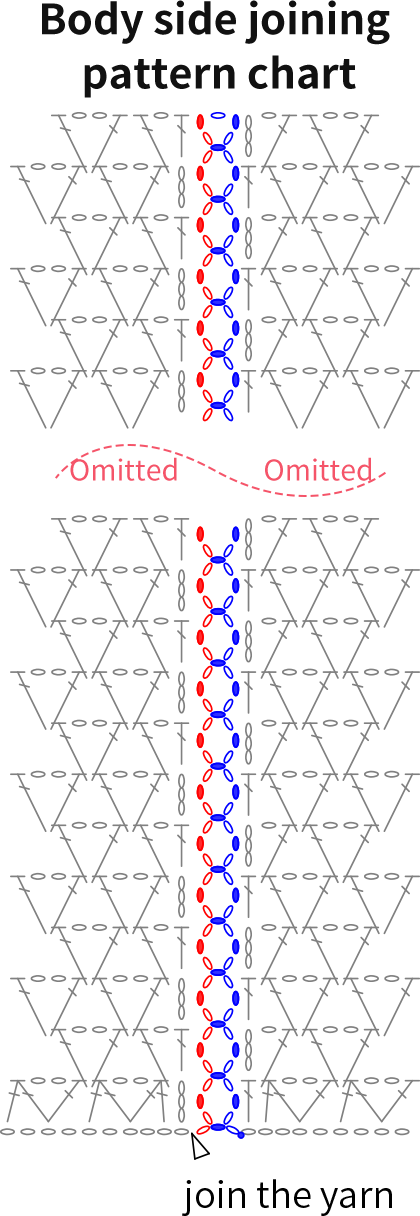
After completing the front and back pieces and the sleeves, join the shoulders and side seams of the body. Once that's done, attach the sleeves. Please refer to the video demonstration for specifics.
Note: For the attachment of the shoulders and sleeves, work single crochets on the wrong side with two chain stitches as a transition. The specific joining method can also be adjusted according to preference.
Part 5 EdgingE 45' 47''
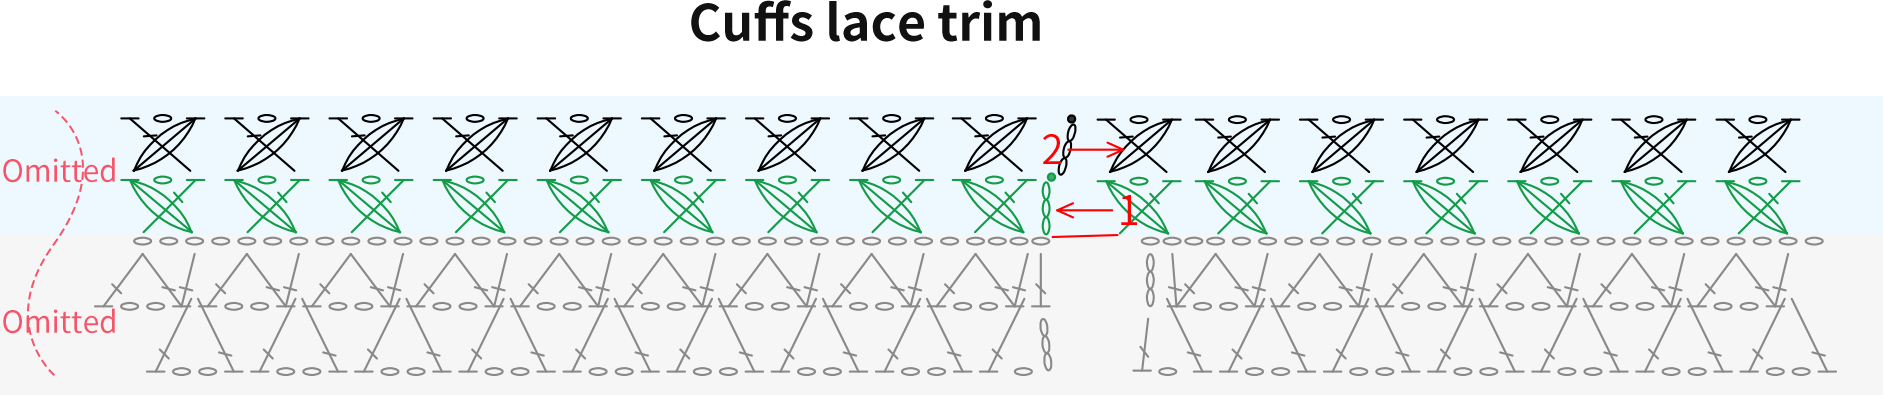
The edging is divided into two parts: the cuff edging and the front band edging. Both parts include lace trim and slip stitch decorations. Please refer to the video demonstration for specifics.
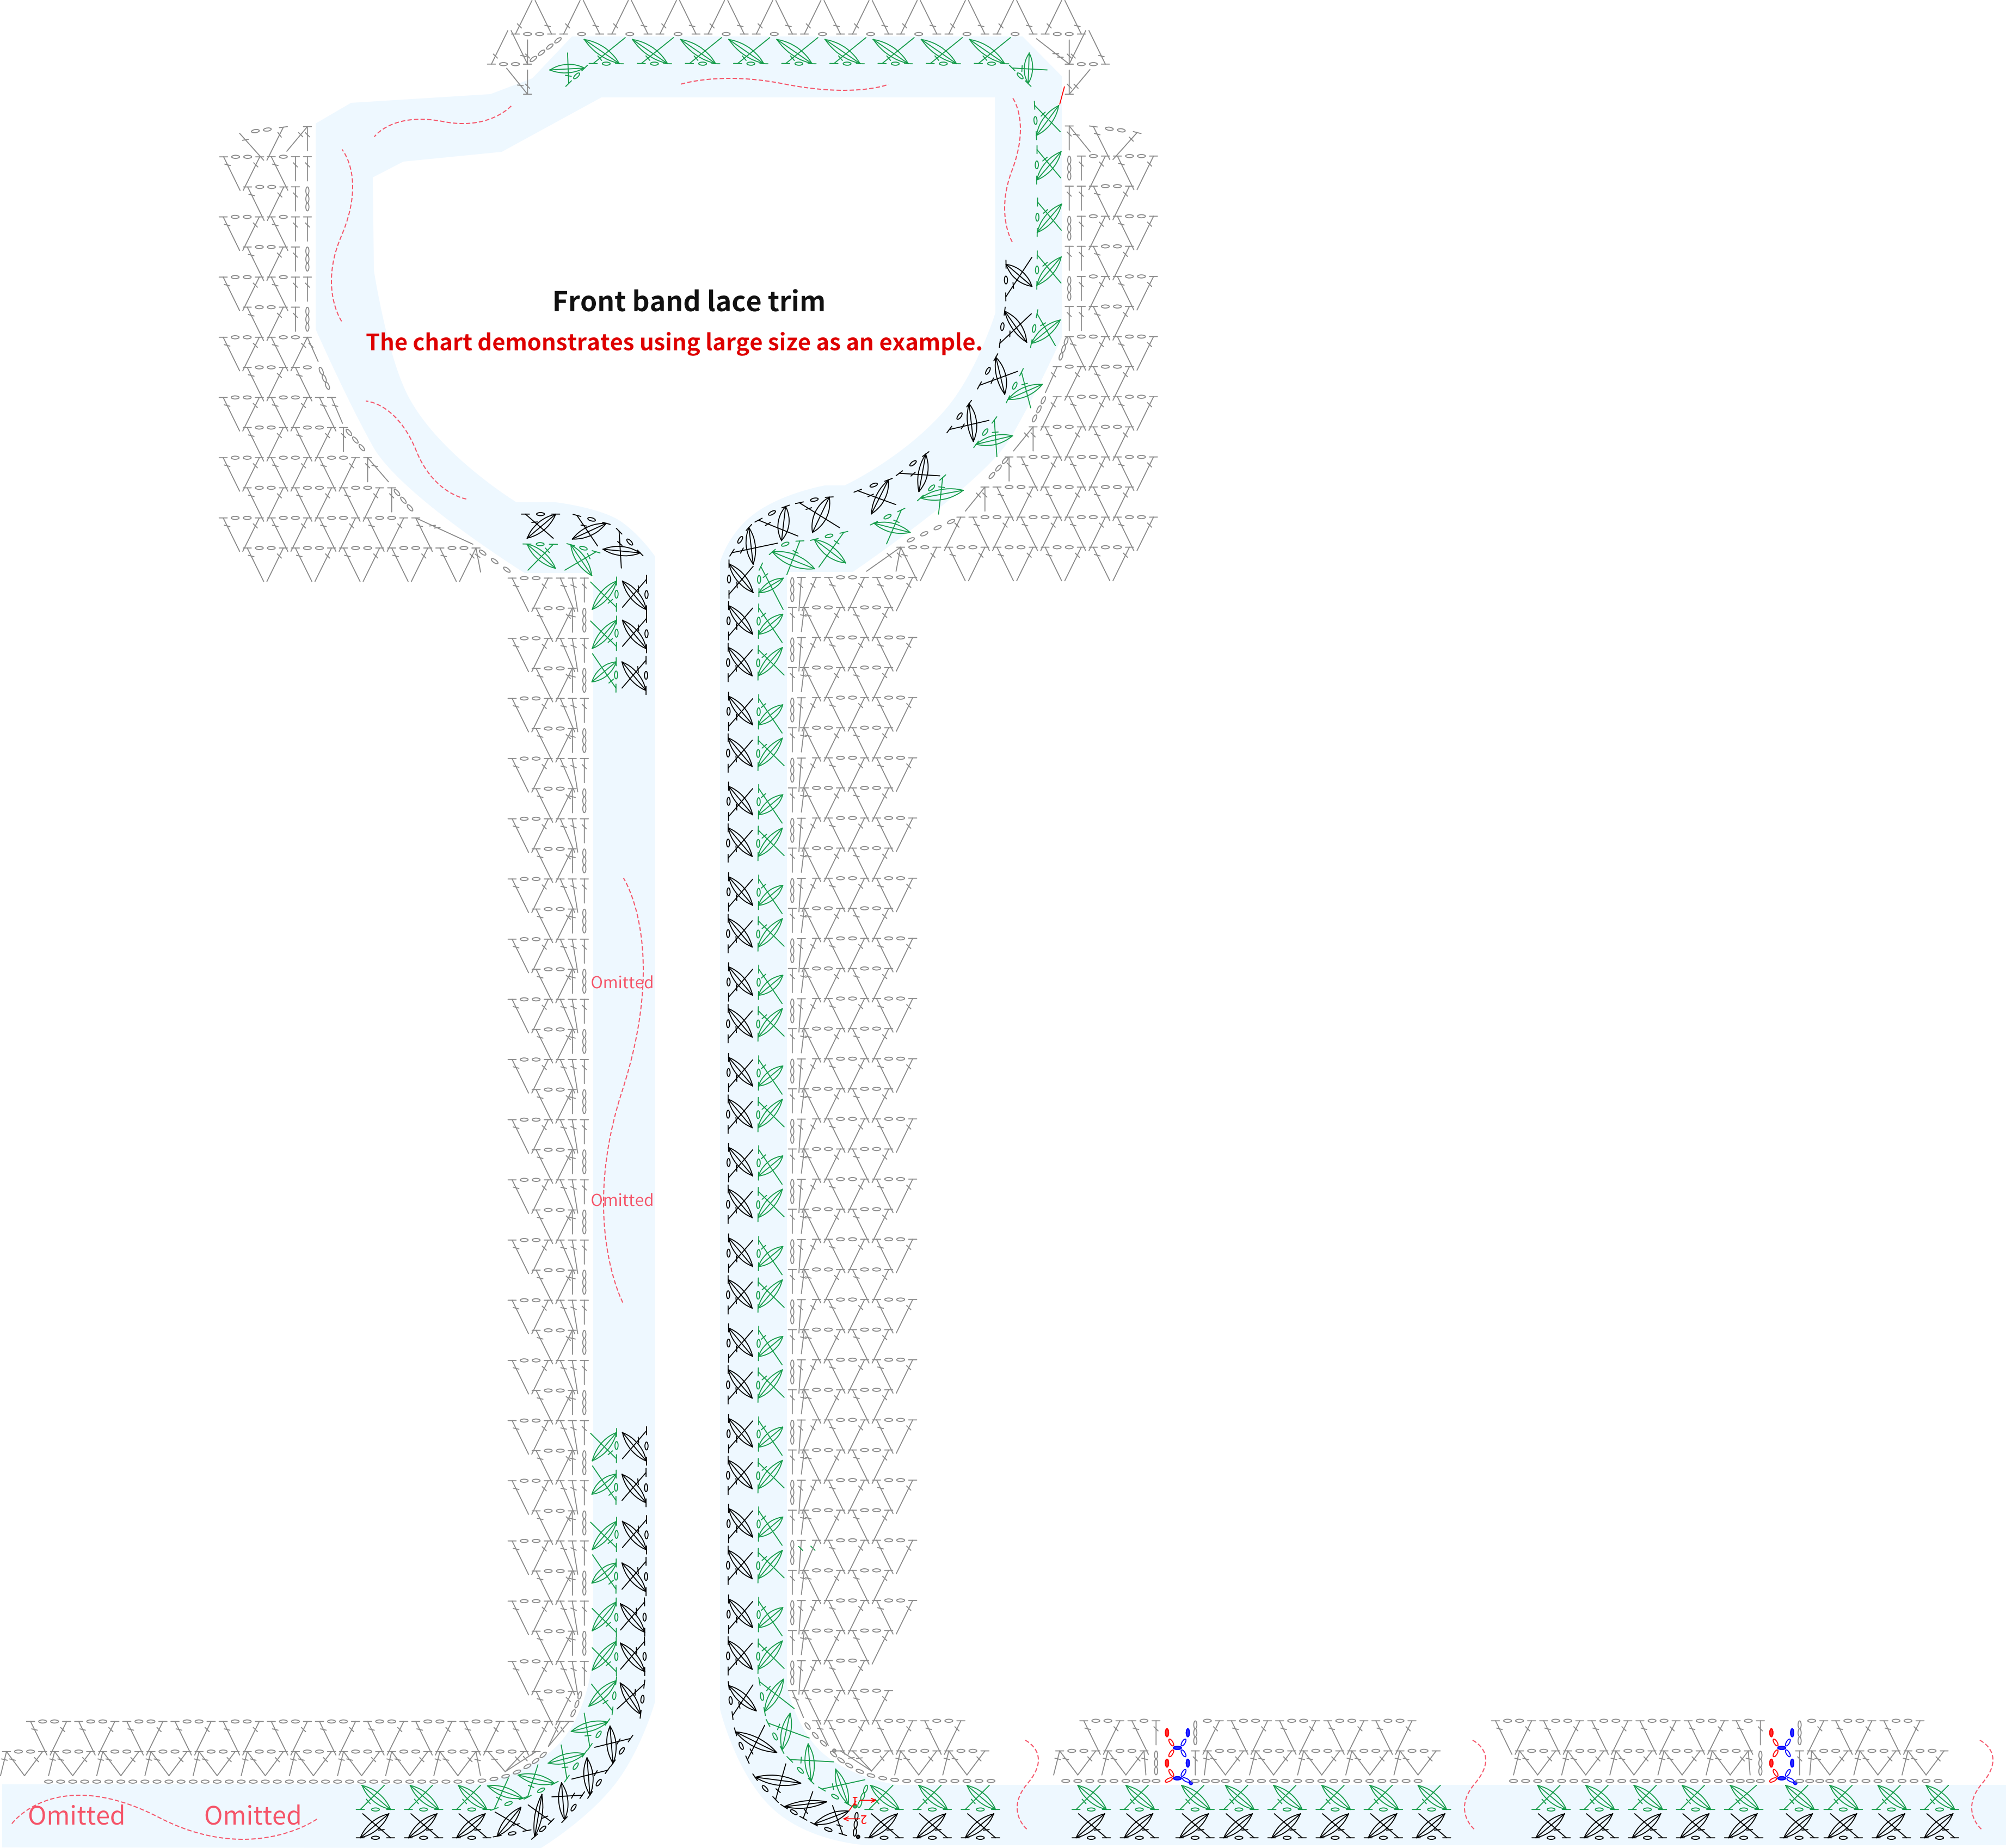
Note: The insertion position for the first round of the lace trim can be referenced from the chart or adjusted according to the actual situation, ensuring that the fabric lays flat and looks beautiful after completion, with natural and smooth curves at the corners. For the second round of the lace trim on the front band, pay attention to increasing stitches at the corners, and the specific insertion position can be determined according to the actual situation.
Part 6 AccessoriesF
The accessories are divided into pockets, decorative edges for the chest area, and buttons.
Step 1 Pockets 68' 18''
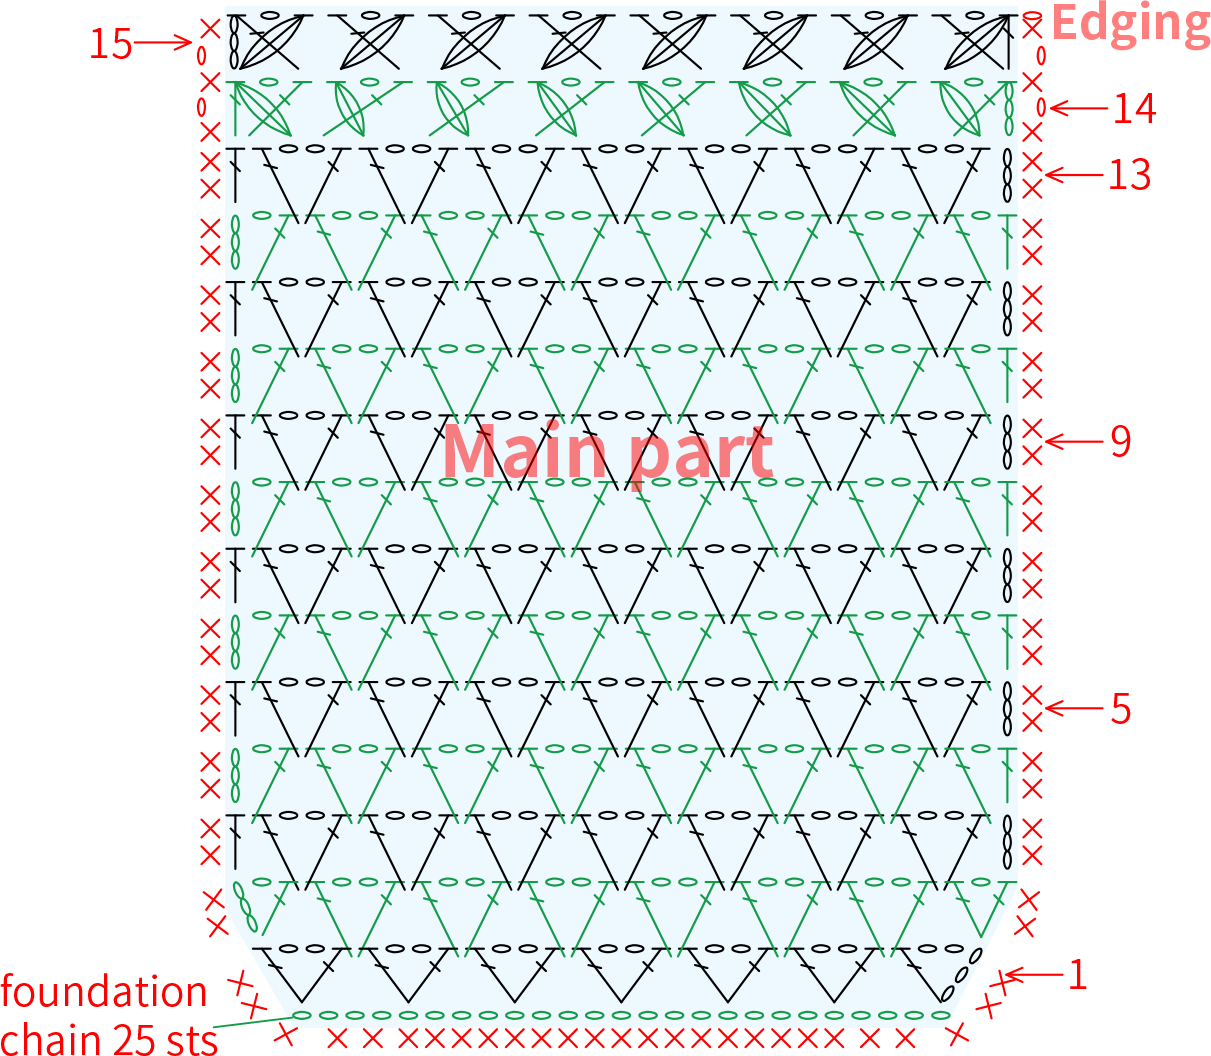
The pocket is made with 2 pieces. We will start from foundation chain, work back and forth for the main part. Change colors for the last 2 rows. After completion, crochet slip stitches for decoration, then move on to crochet the edging. Finally, sew it onto the corresponding position. Please refer to the video demonstration for specifics.
Note: End with crocheting the edging, leave a 1m yarn tail for sewing together for the Field Impression, and break yarn and weave in ends for other tails.
Step 2 Chest decorative edges and Buttons 81' 11''
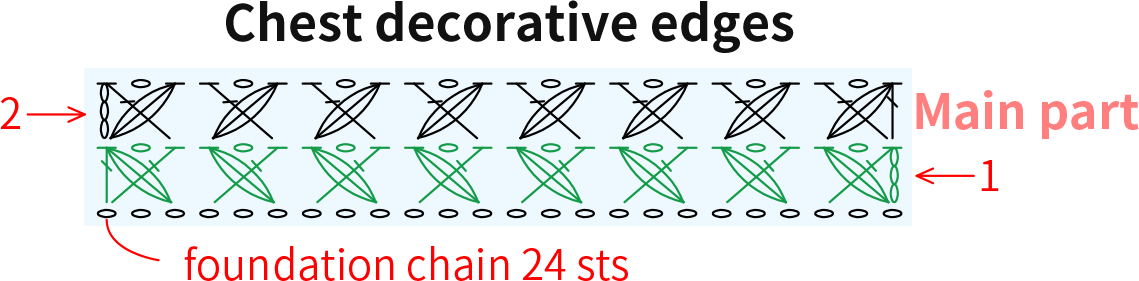
The chest decorative edges, a total of 2, are worked back and forth in rows from the foundation chain for the main part, then add slip stitches for decoration. After completion, sew them onto the corresponding positions. Finally, sew buttons onto the corresponding positions. Please refer to the video demonstration for specifics.
Note: Leave a 50cm tail for the ending Field Impression yarn for sewing, and break yarn and weave in ends for the other tails.
Made by the community





