Clothes
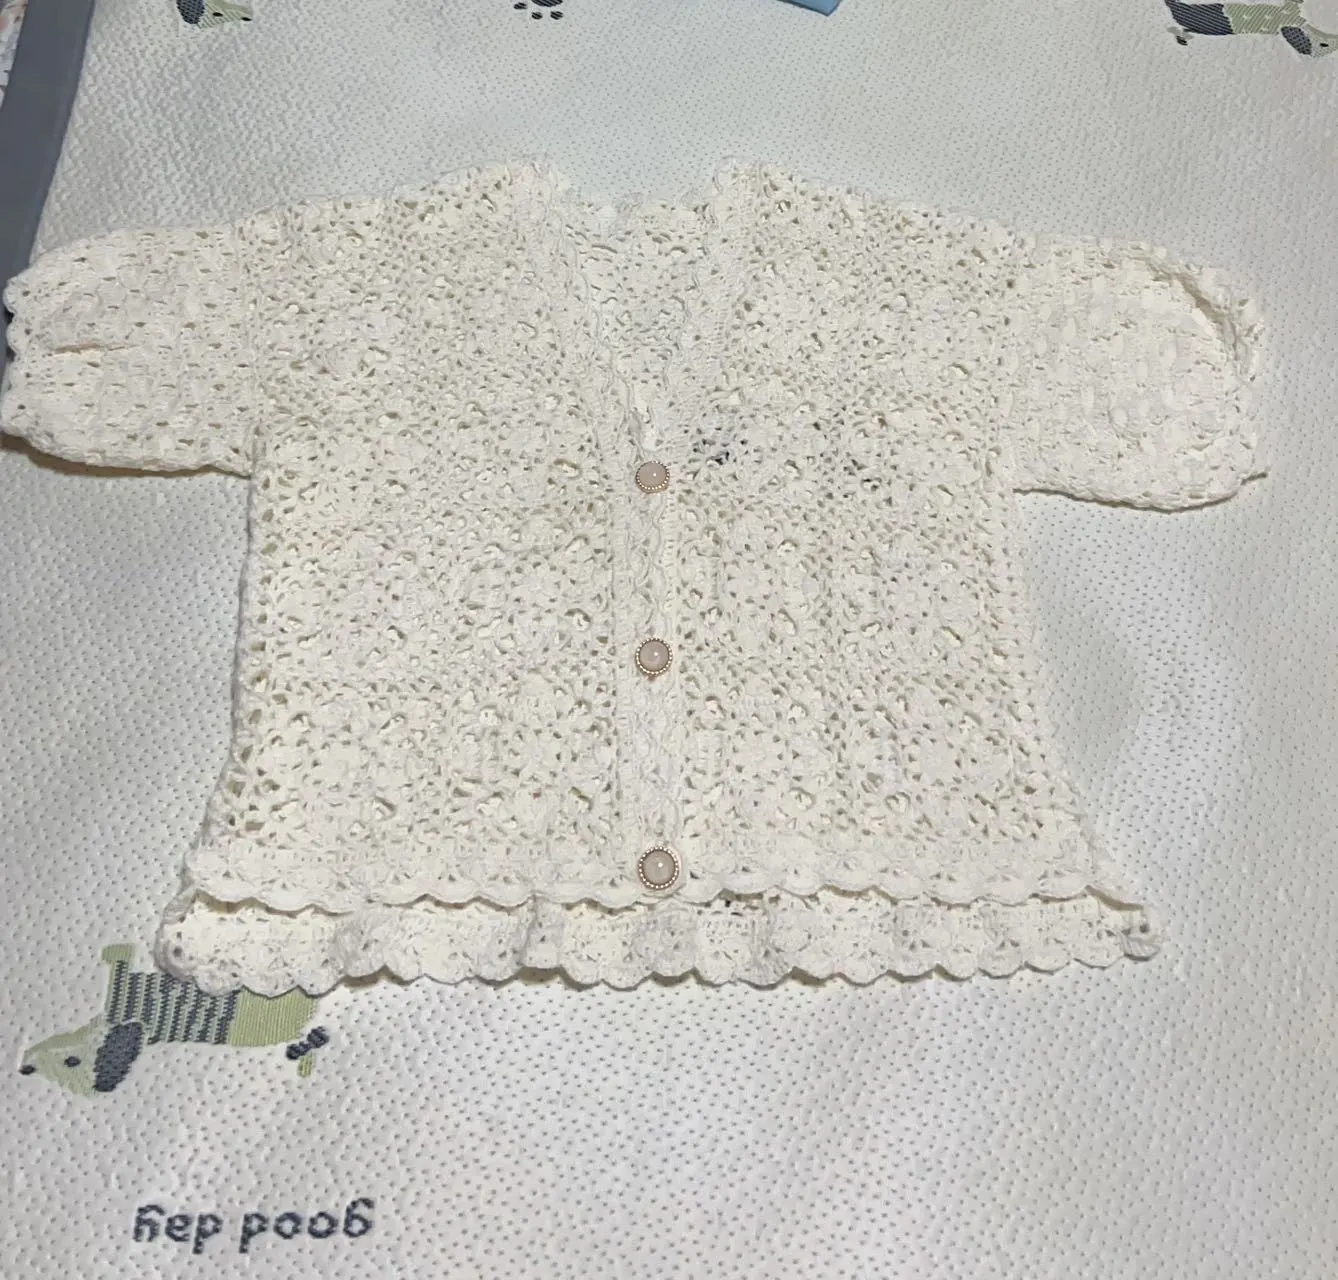
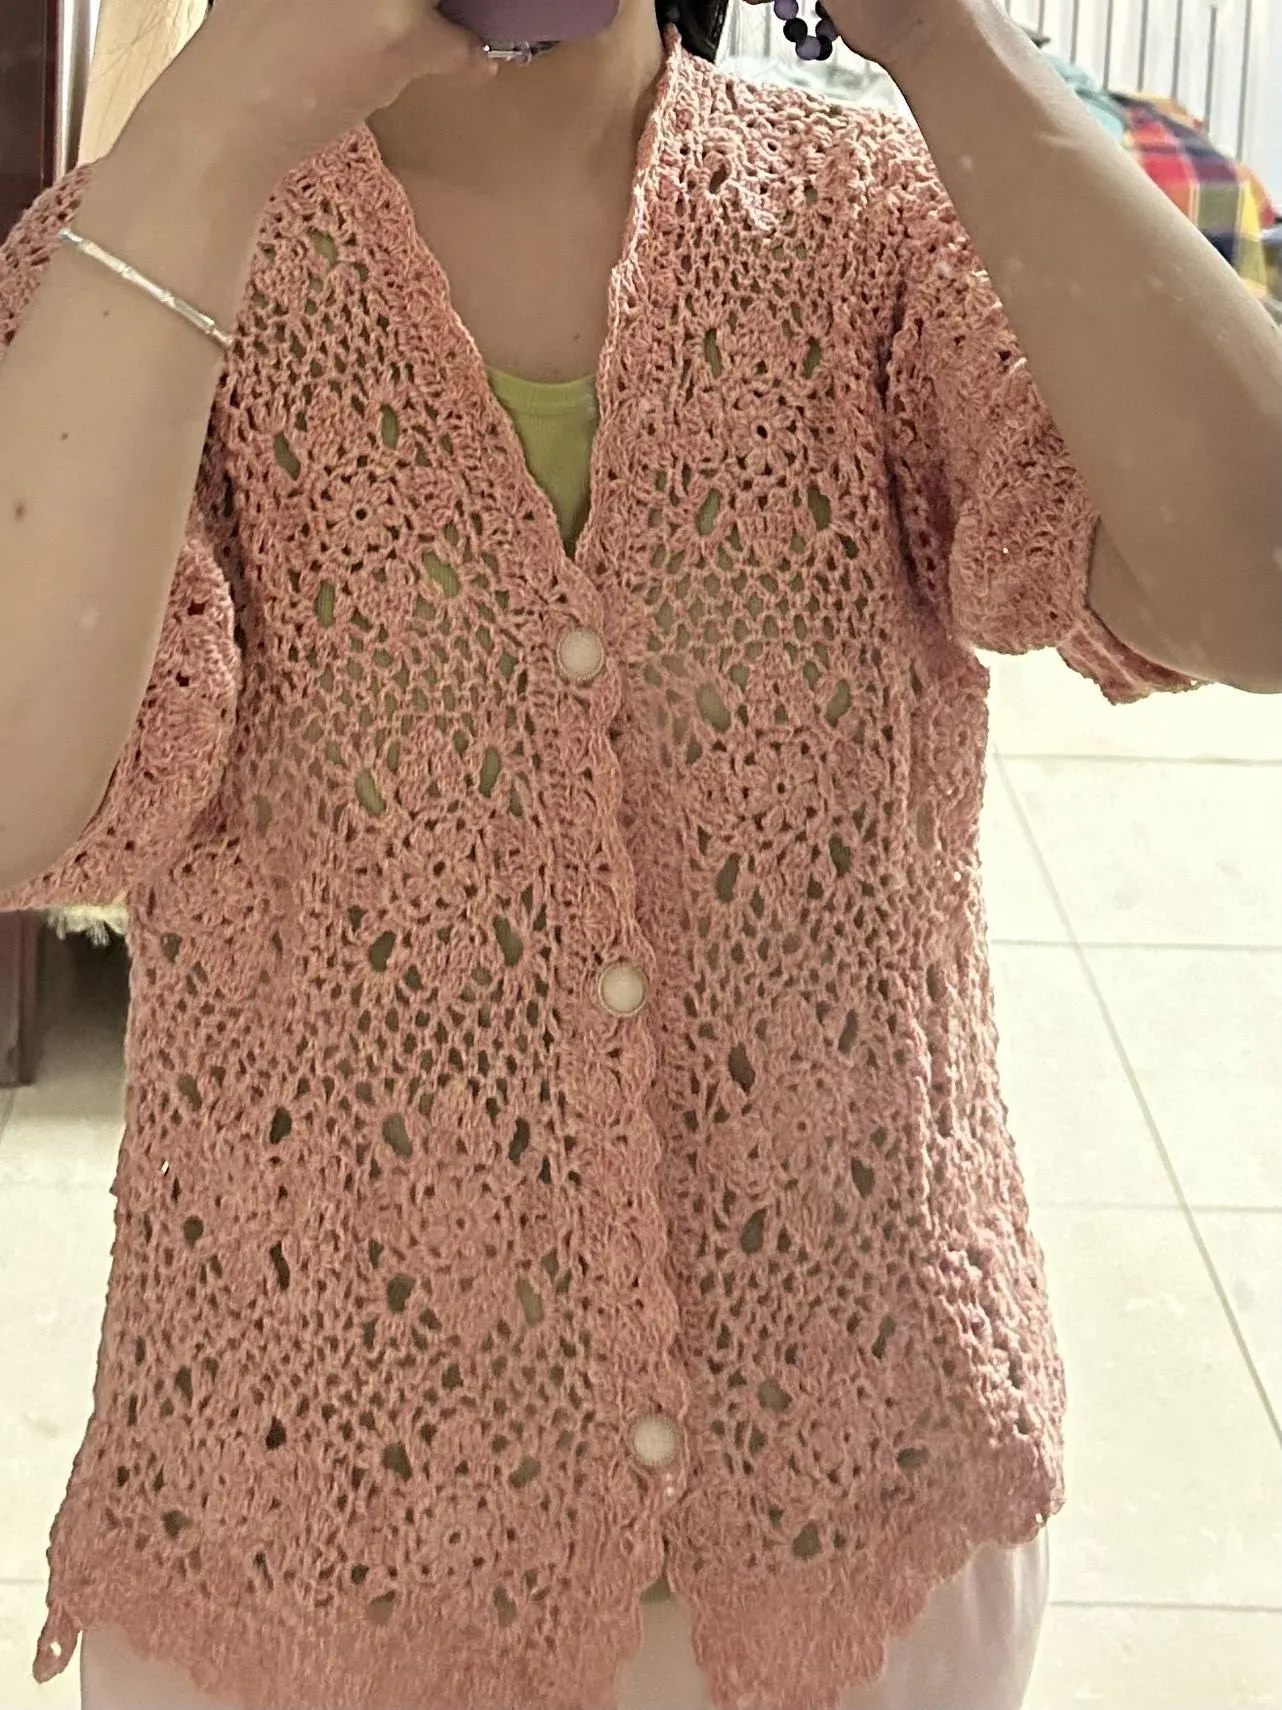
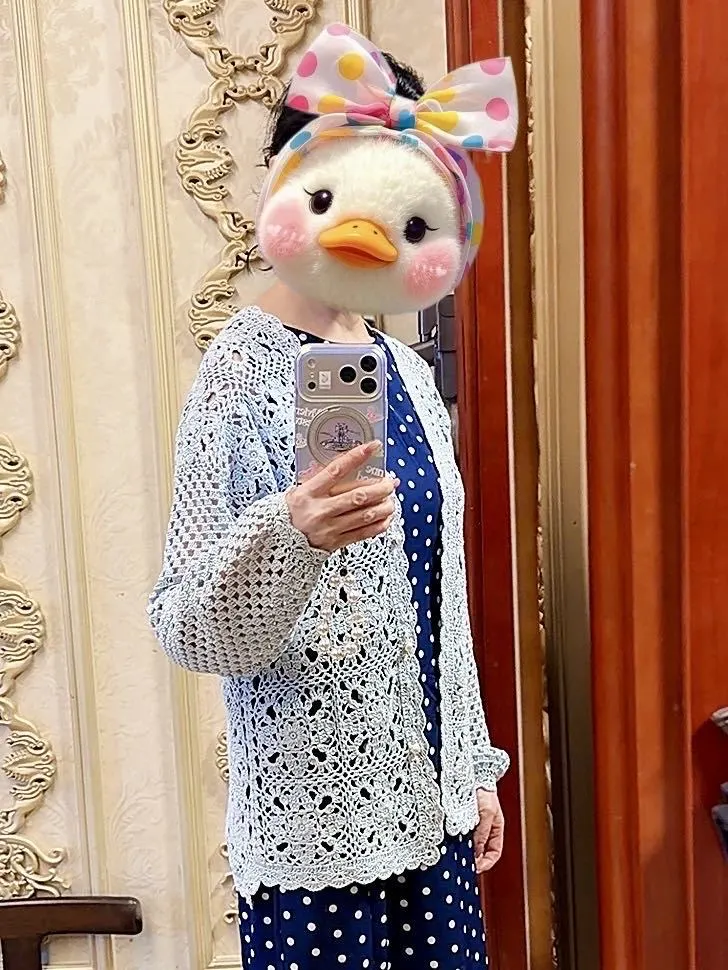
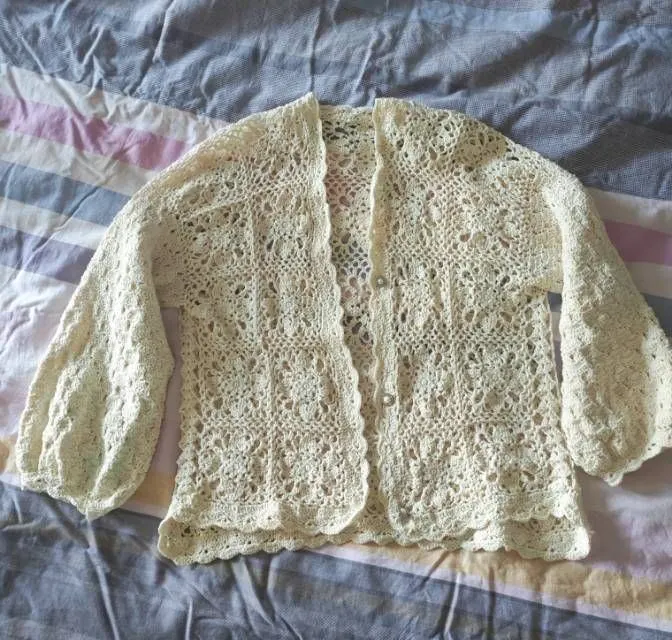
Whispering Grace Cardigan
Project preview
See the finished project
Pattern format
Instructions
Watch and follow
Video tutorial
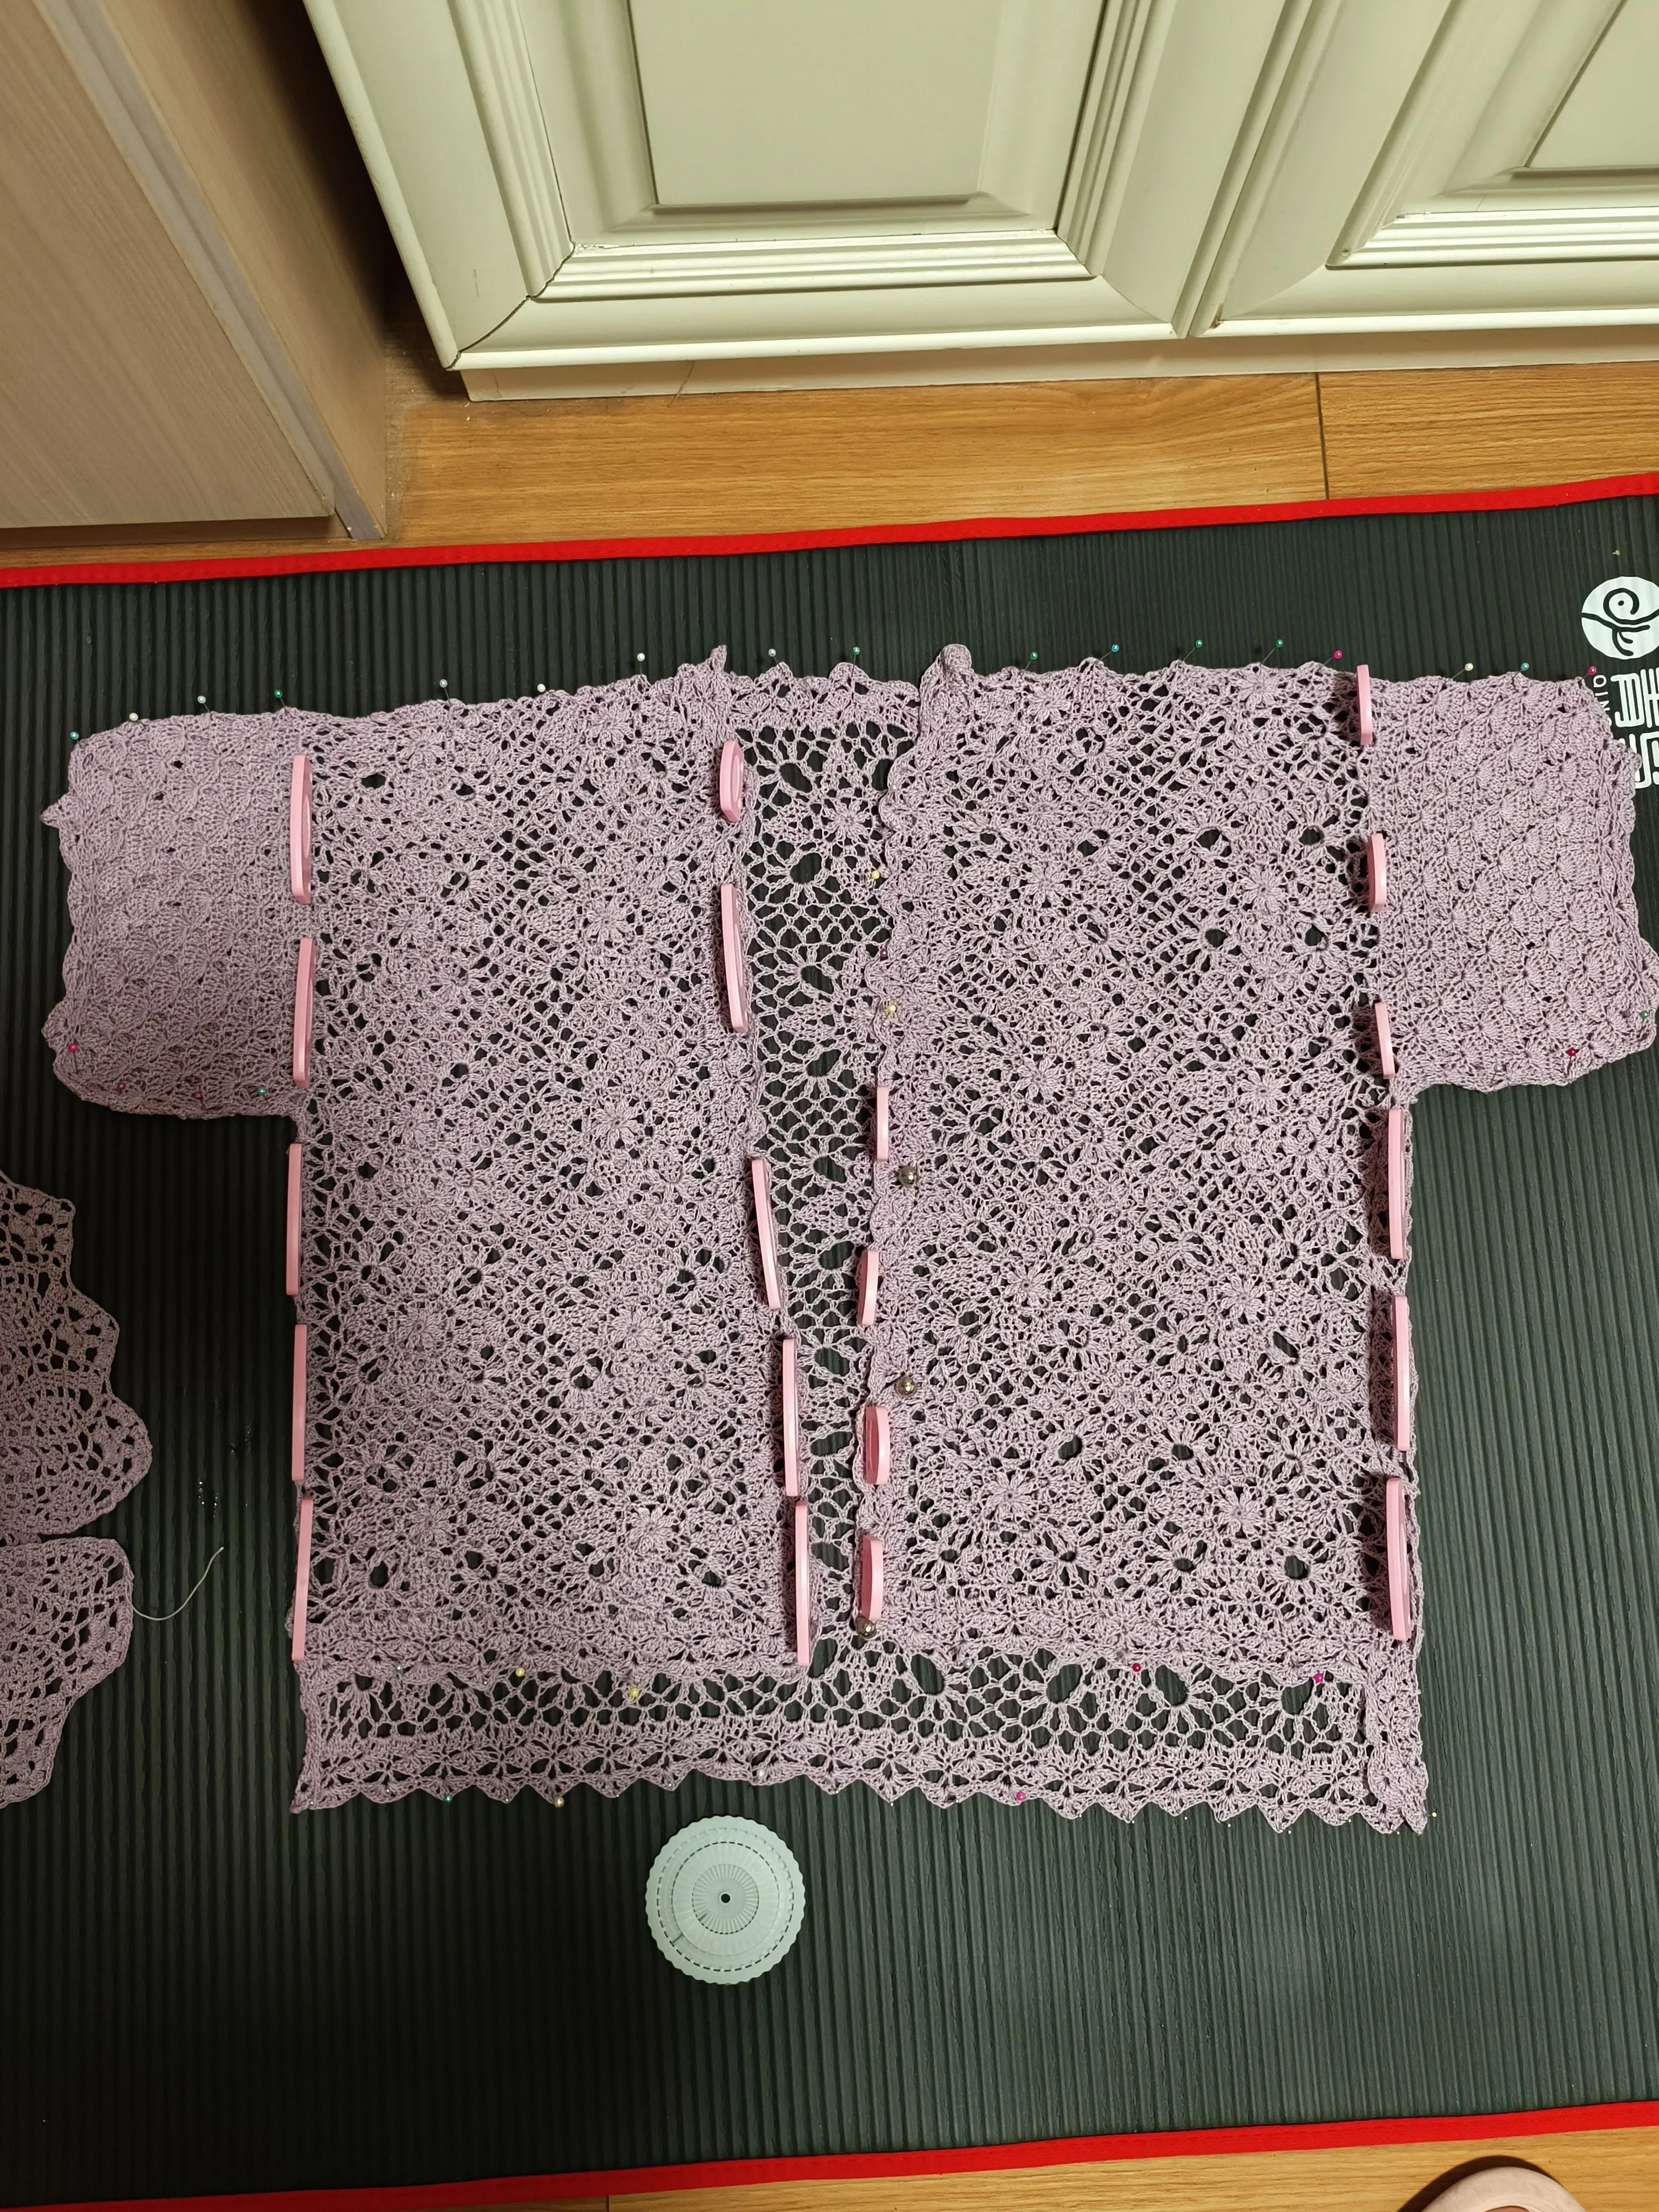
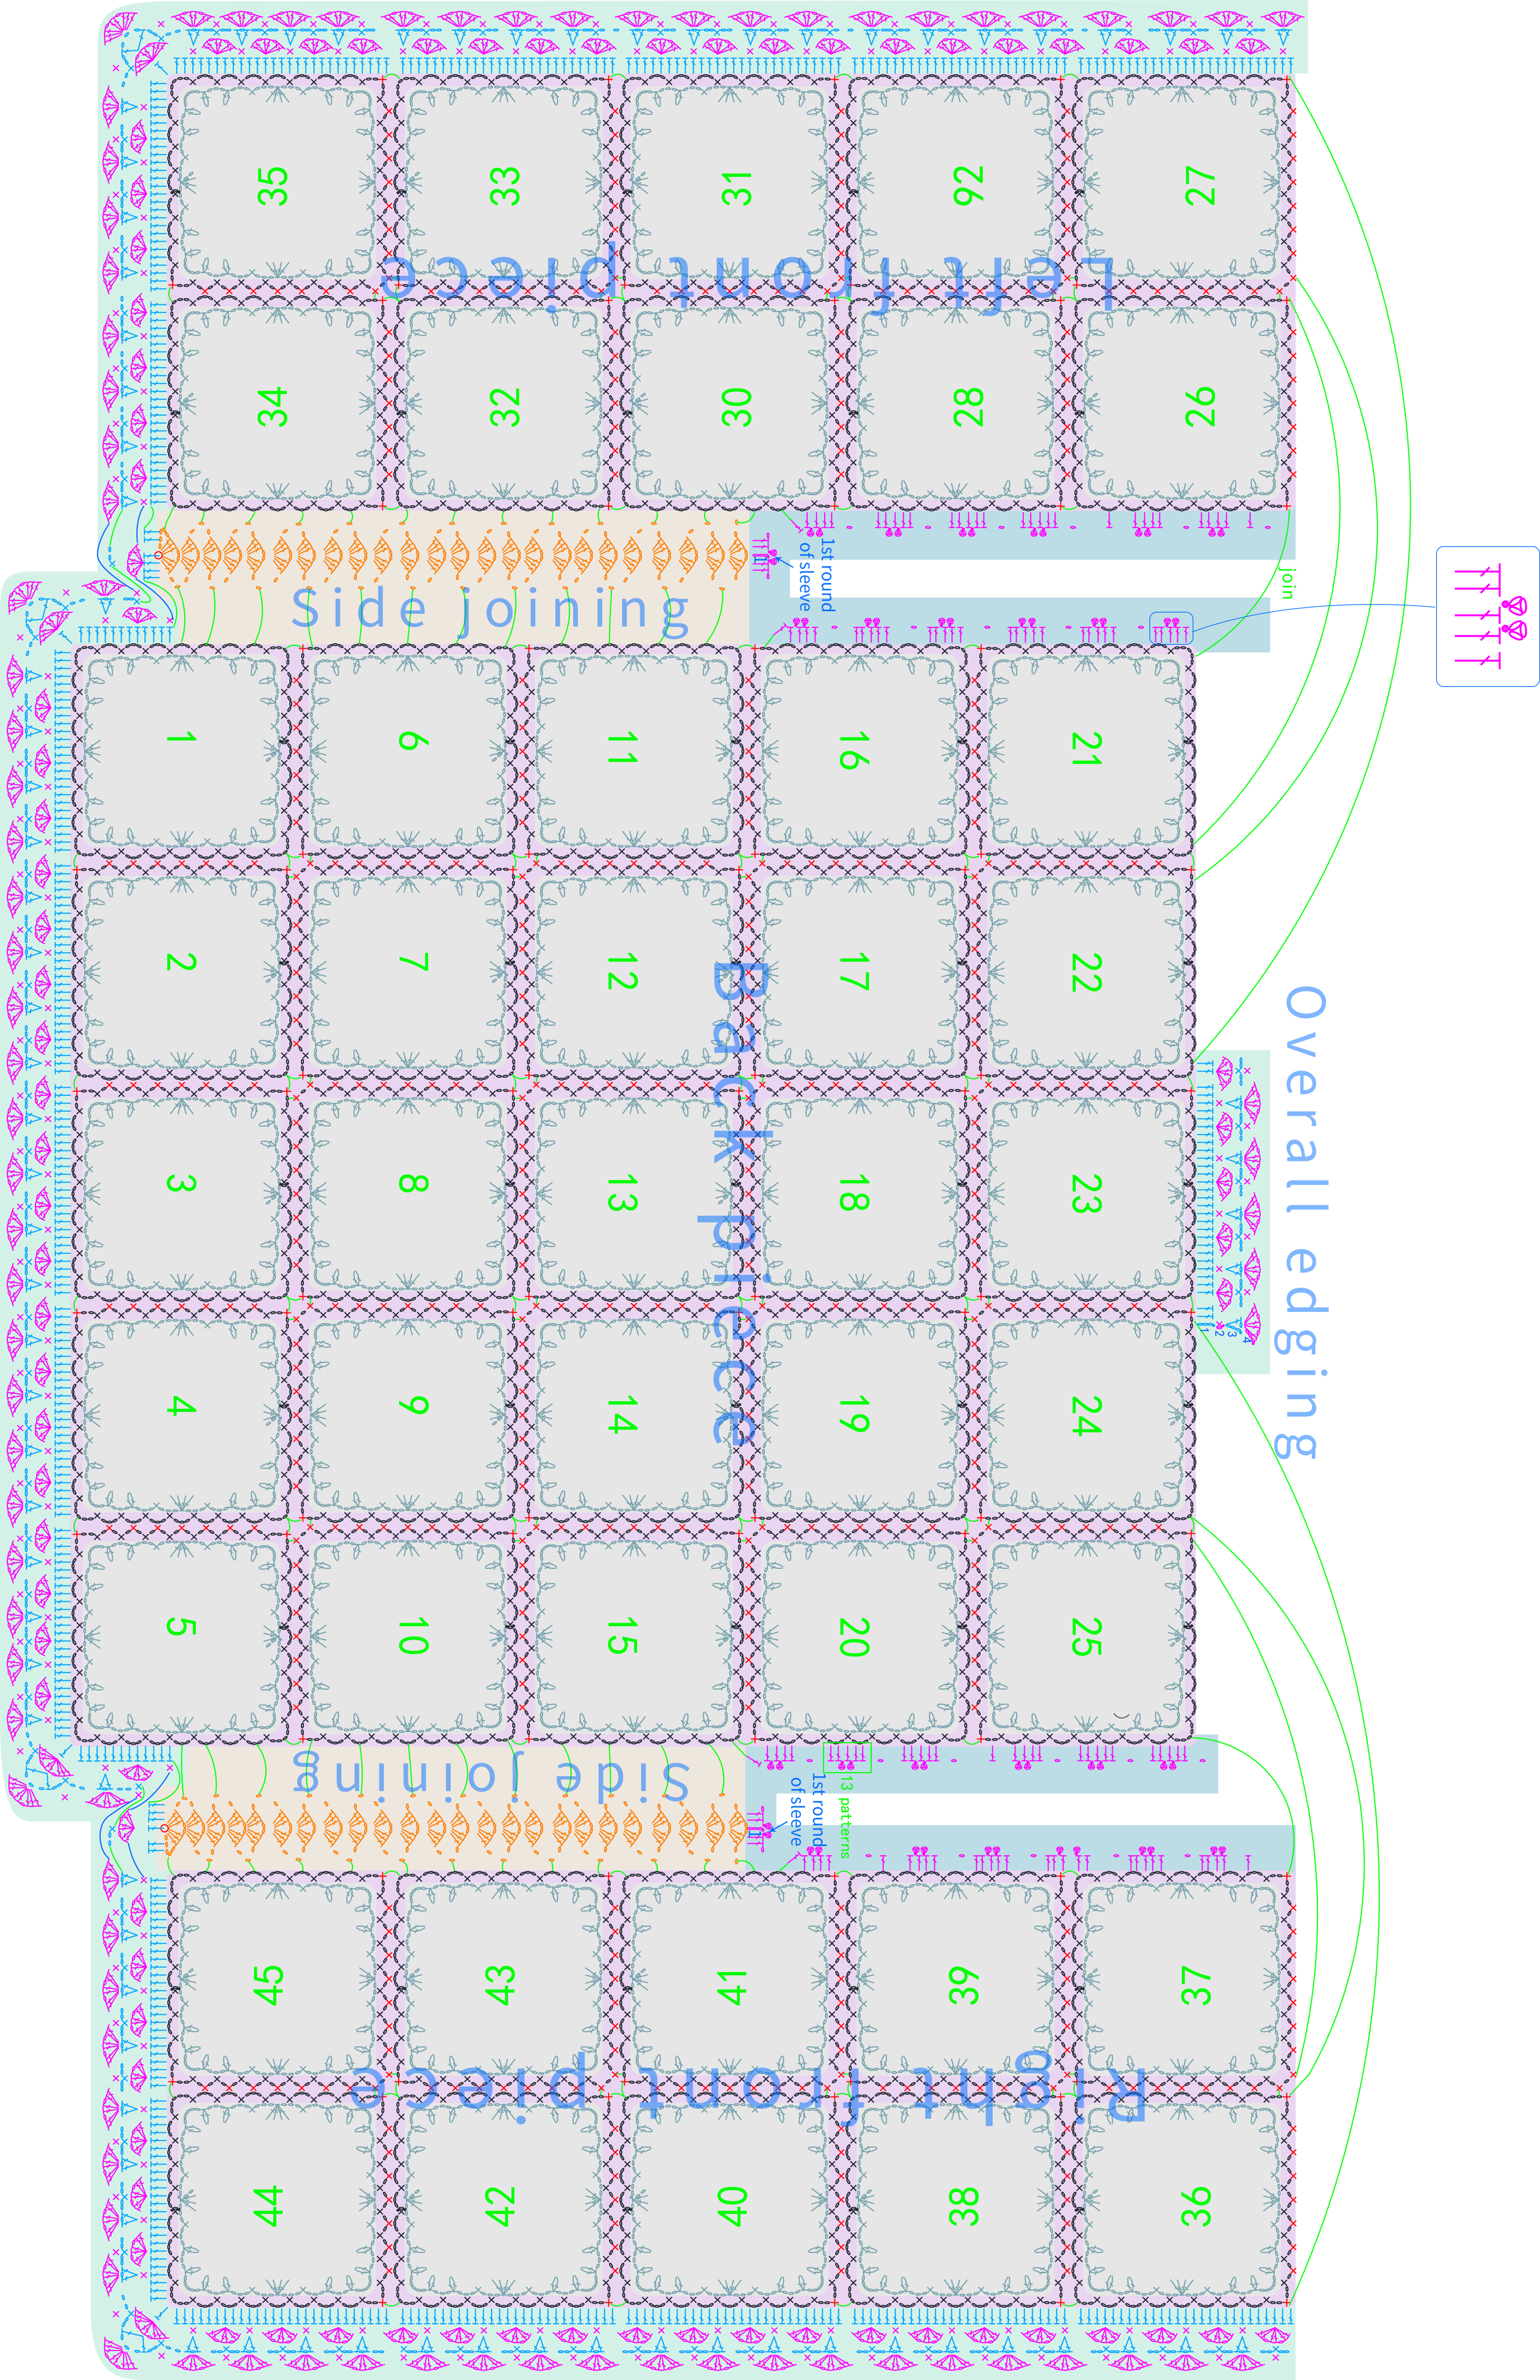
The cardigan include back piece, left and right front pieces, sides joining, sleeves and the overall edging. After completing the motifs for the back piece, continue crocheting the right and left front pieces on both sides. Once done, join them at the sides. Then crochet the sleeves, which can be short or long. After that, crochet the border and add buttons.
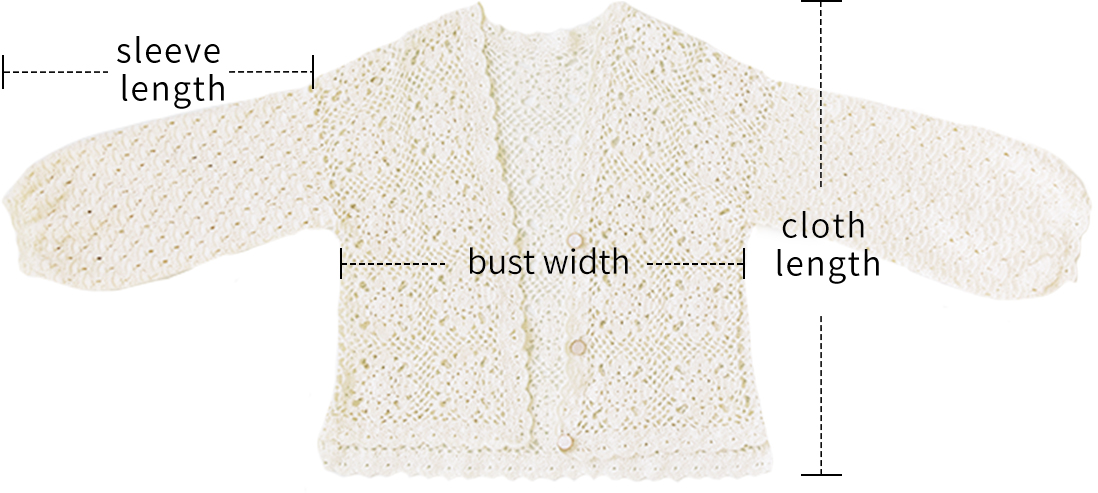

The handcrafted measurements may have an error of 1 to 2 cm. Due to variations in individual tension, the size of the sample is for reference only.
Materials: Susan's Family Combed 3# Lace
Hook: 2.5 mm crochet hook

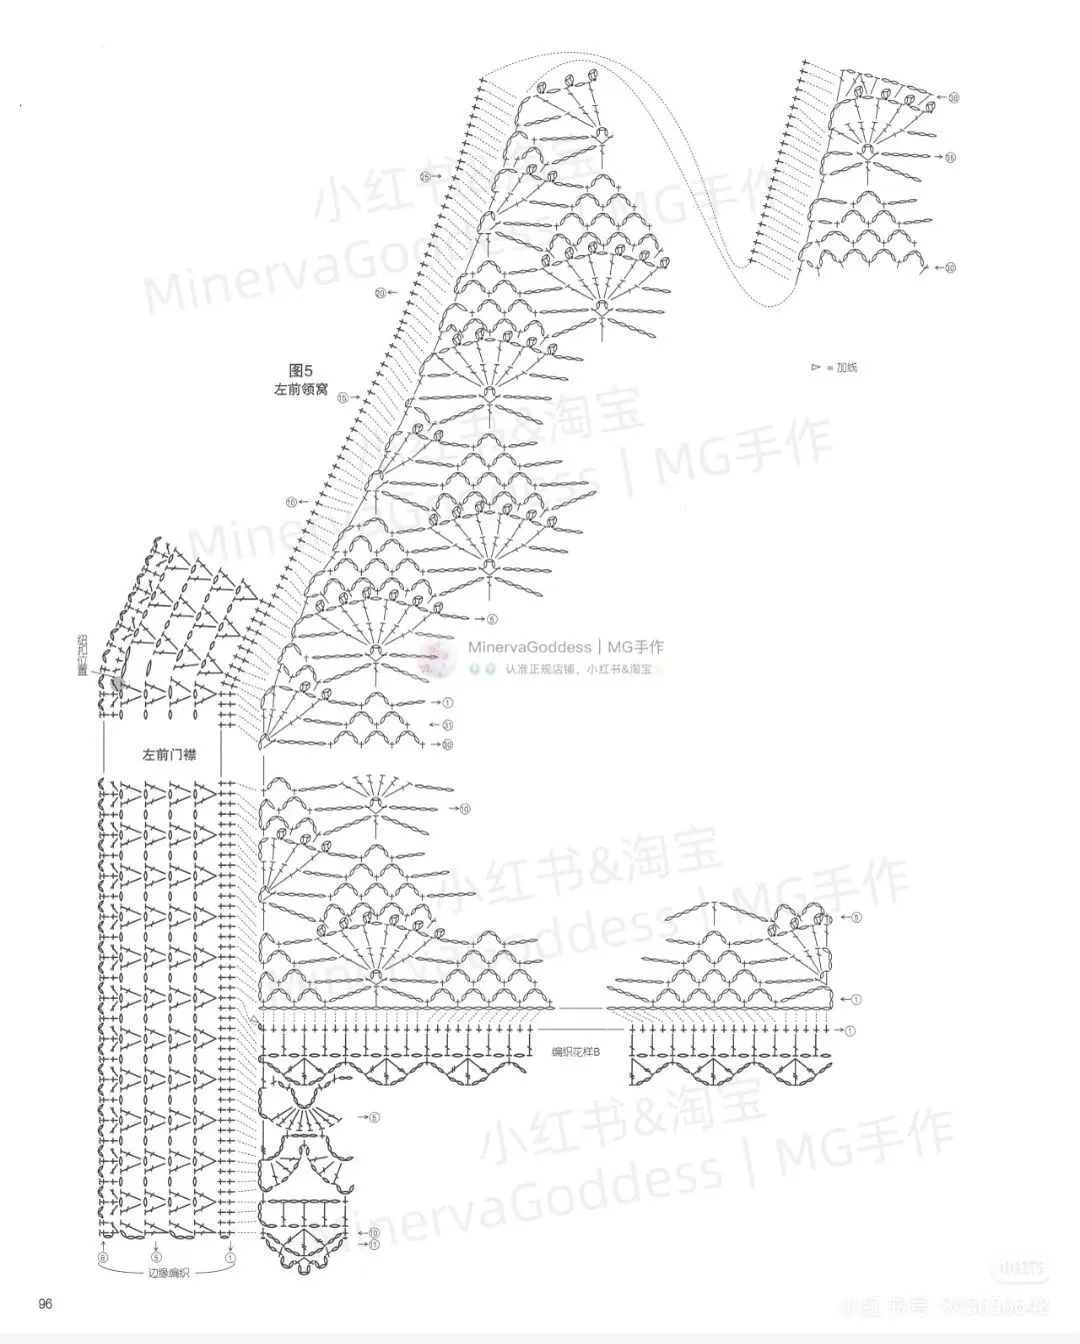
Note: This pattern is making in Chinese crochet pattern terms, and the stitch name is written using American terminology. All measurements in charts are in cm.
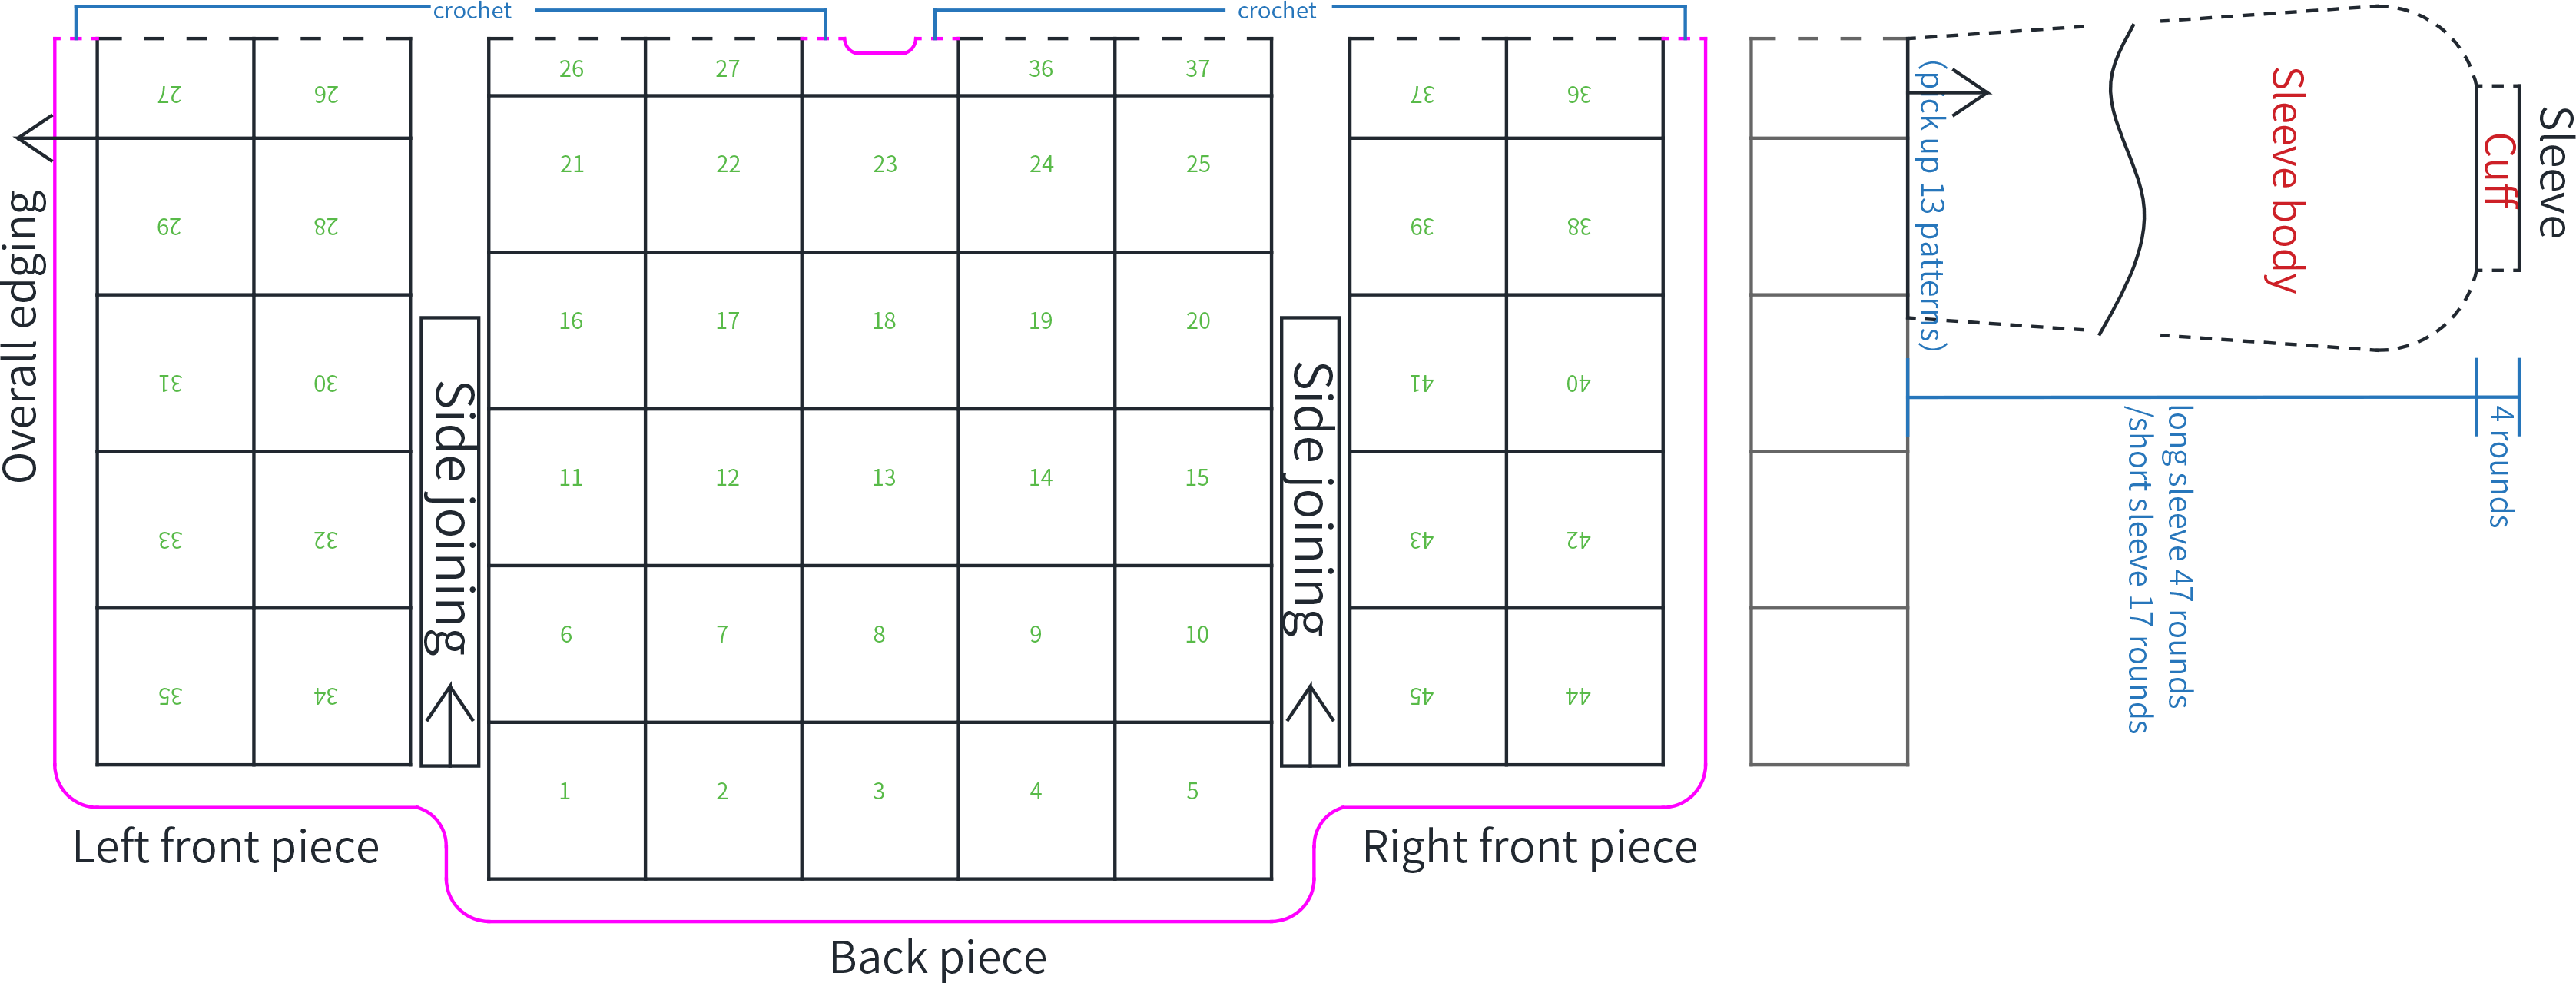
Chart Key









Group Key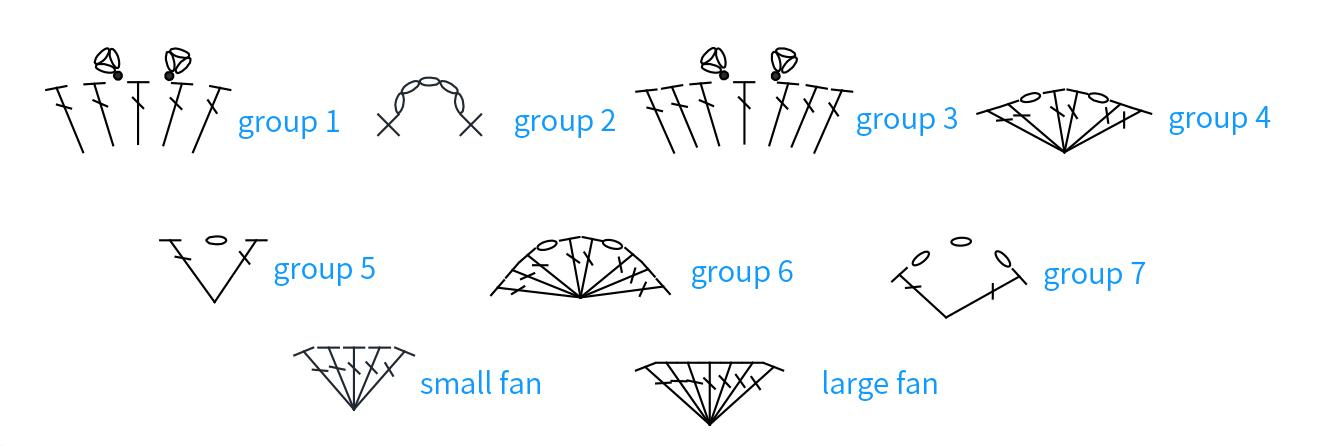

Step 1 Back piece, left and right front piecesA 01' 05''
The back piece, left and right front pieces all is joined by motifs, after the back piece, go on with the left and right front pieces on each side. The method is same as the back piece. Please refer to the video demonstration for more details.
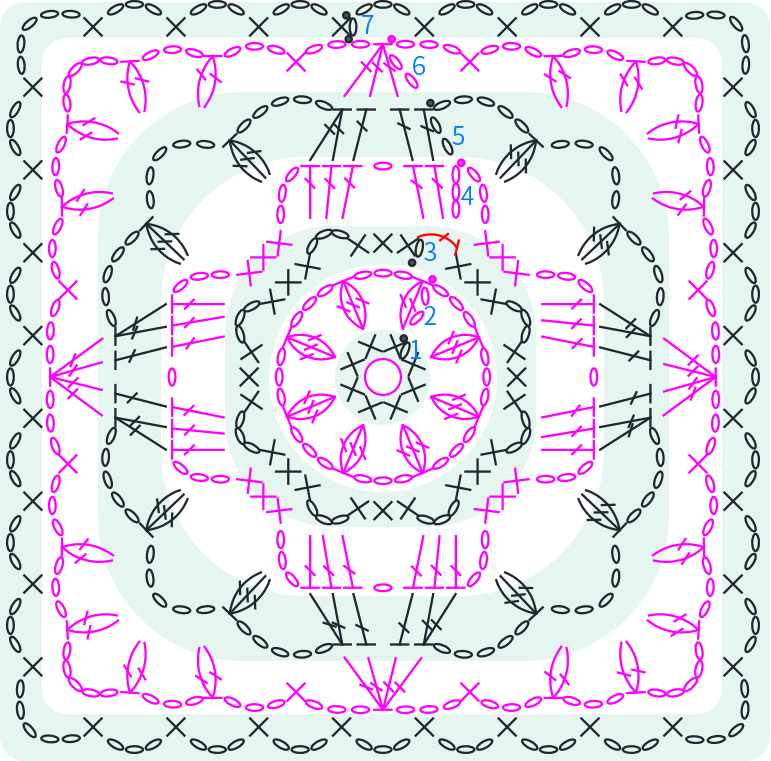
Step 2 Sides joiningB 39' 03''
Sides joining is working back and forth in rows, between back and front pieces. it involves left and right sides. Before joining, confirm the correct position first. Please refer to the video demonstration for more details.
Step 4 Overall edgingD 79' 59''
Note:
① Here, left and right refer to the left and right when wearing the garment.
② The motif on the far left of the back piece is the only complete motif. The rest of the motifs are crocheted from left to right, bottom-up, and joined in the last round as they correspond.
③ After completing the first full motif, measure the size; the edge should be about 9 cm. If there's a significant difference, adjust your tension and re-crochet.
④ The beginning and ending join positions for the side seams are fixed, but the middle join positions can be adjusted as needed, ensuring the fabric stays flat.
⑤ The entry position for the double crochet in the first round of the sleeve body can be adjusted to avoid large gaps.
⑥ For the overall edging, the entry position for the double crochet in the first round and the number of stitches skipped between motifs in the second round can be adjusted, making sure the corner stitches remain unchanged and the fabric stays flat.
⑦ After completing everything, steam block to open up the connections between motifs.
SleevesC 50' 36''
Sleeves come in short and long varieties. Each sleeve is divided into the sleeve body and the cuff. Sleeve body is worked in rounds at the armhole, after that, work the cuff. Please refer to the video demonstration for more details.
Short sleeve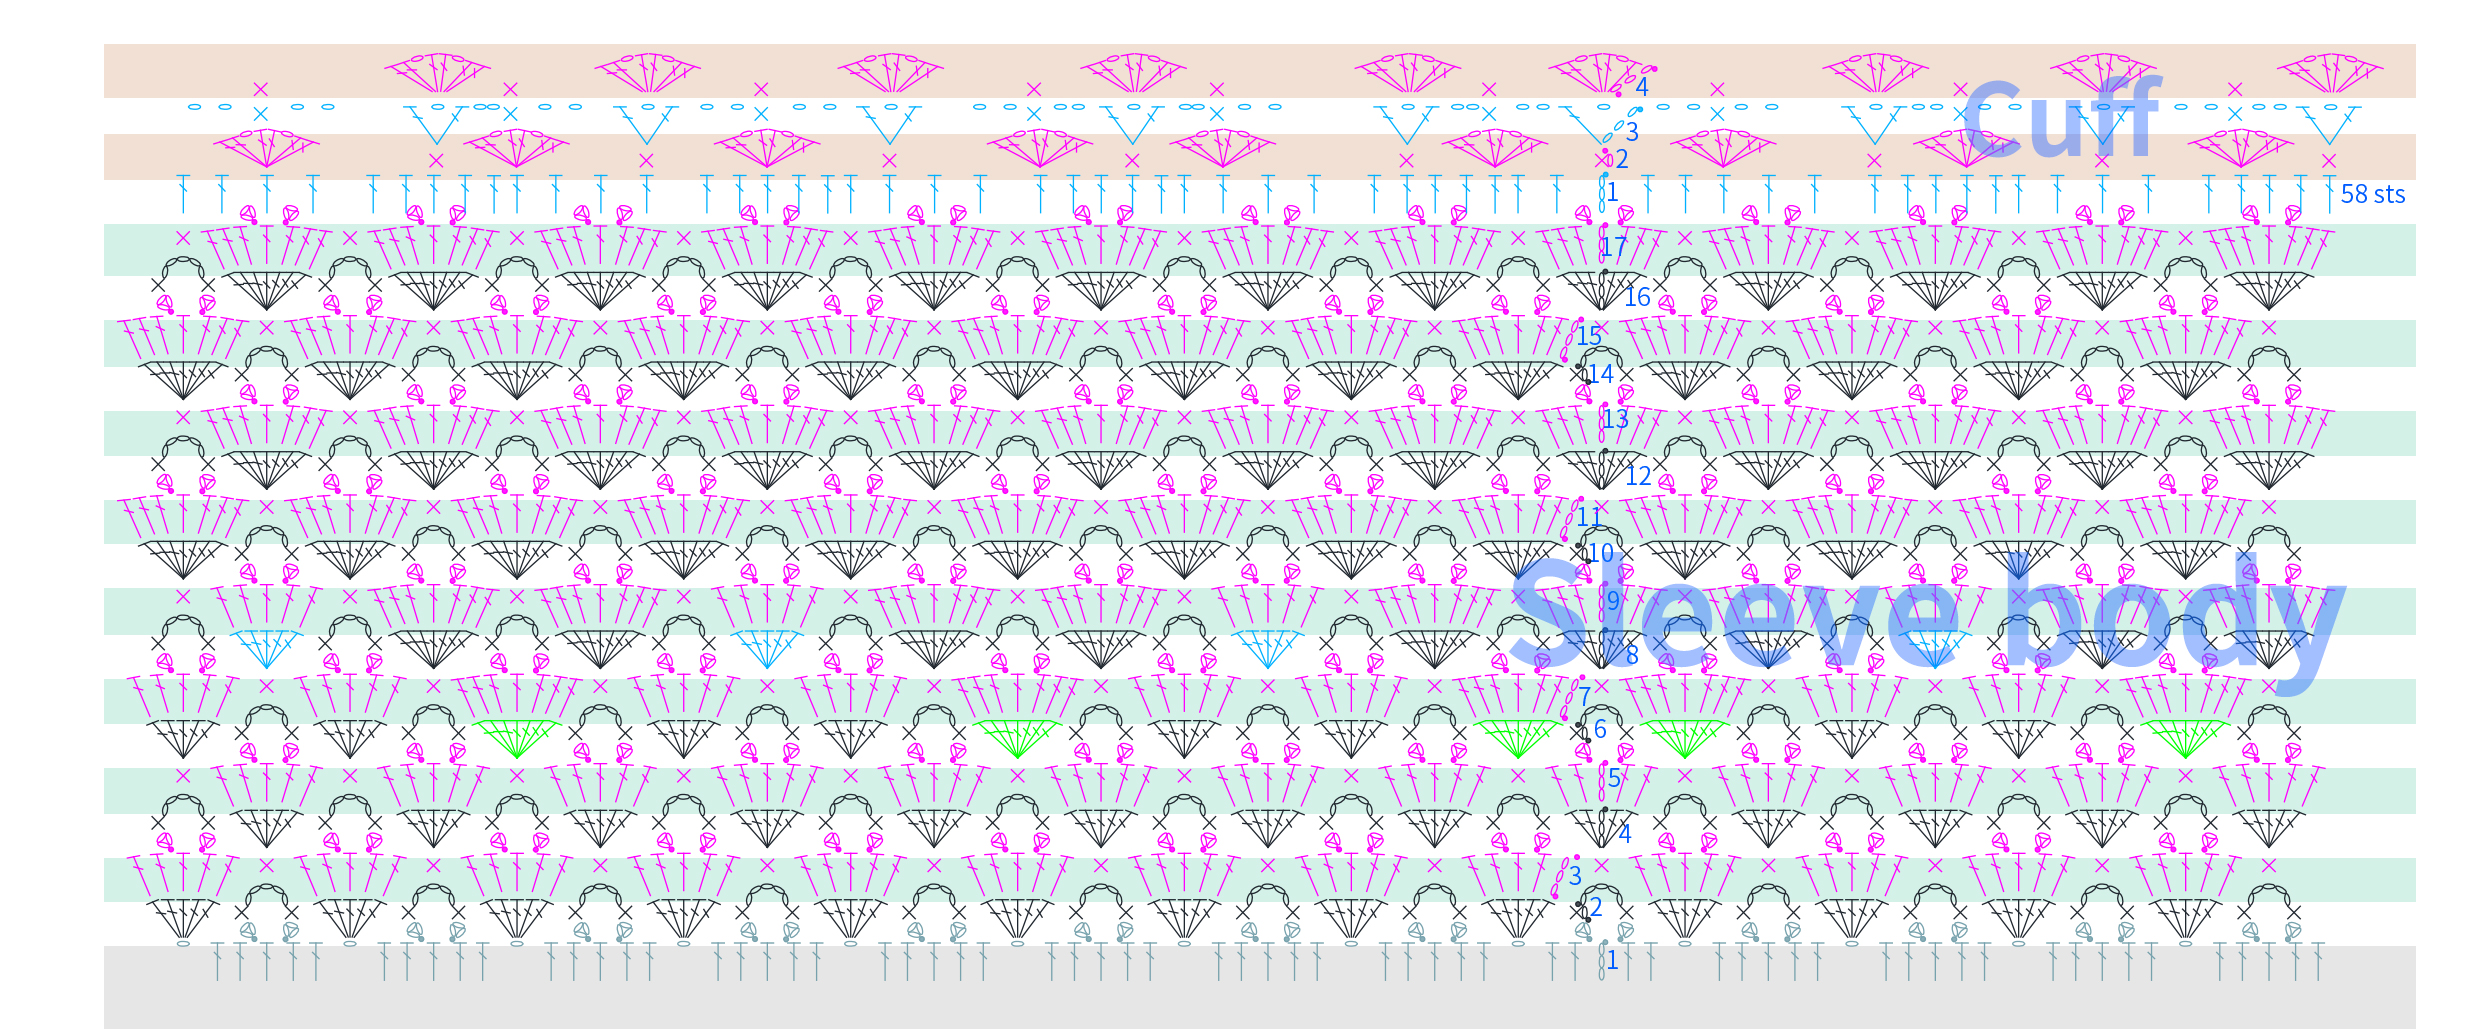
Long sleeve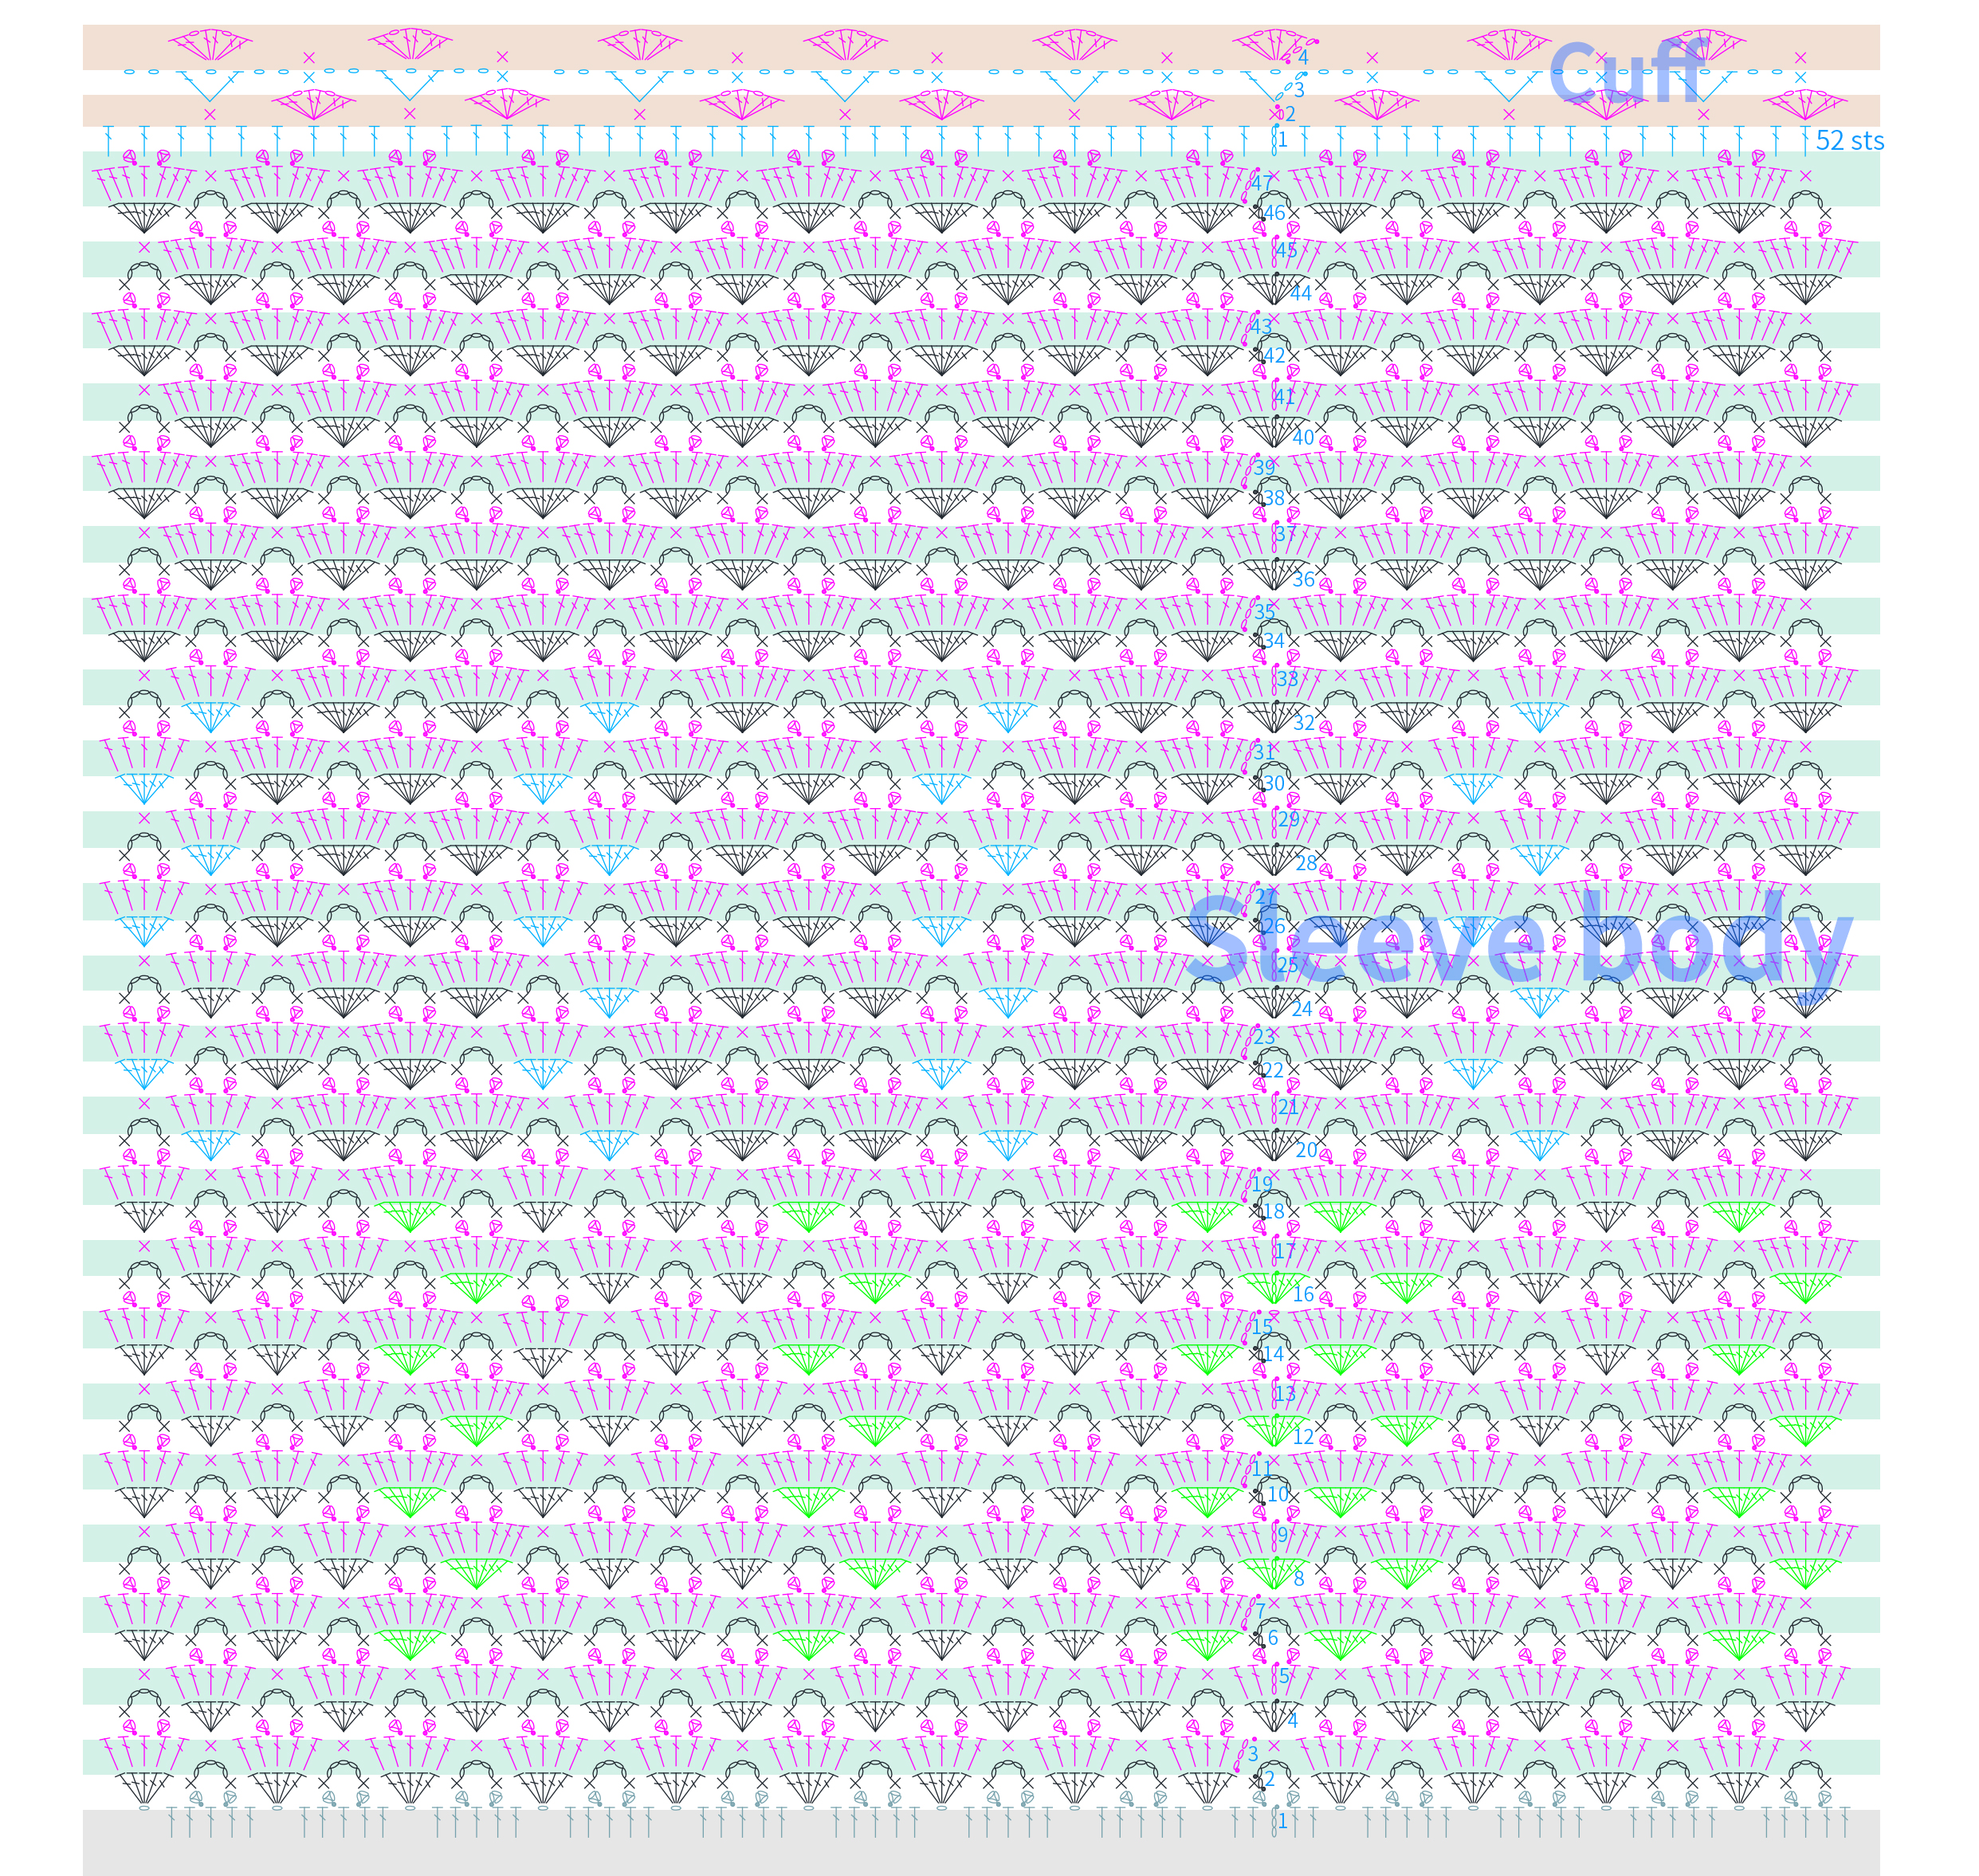
Made by the community