Bag
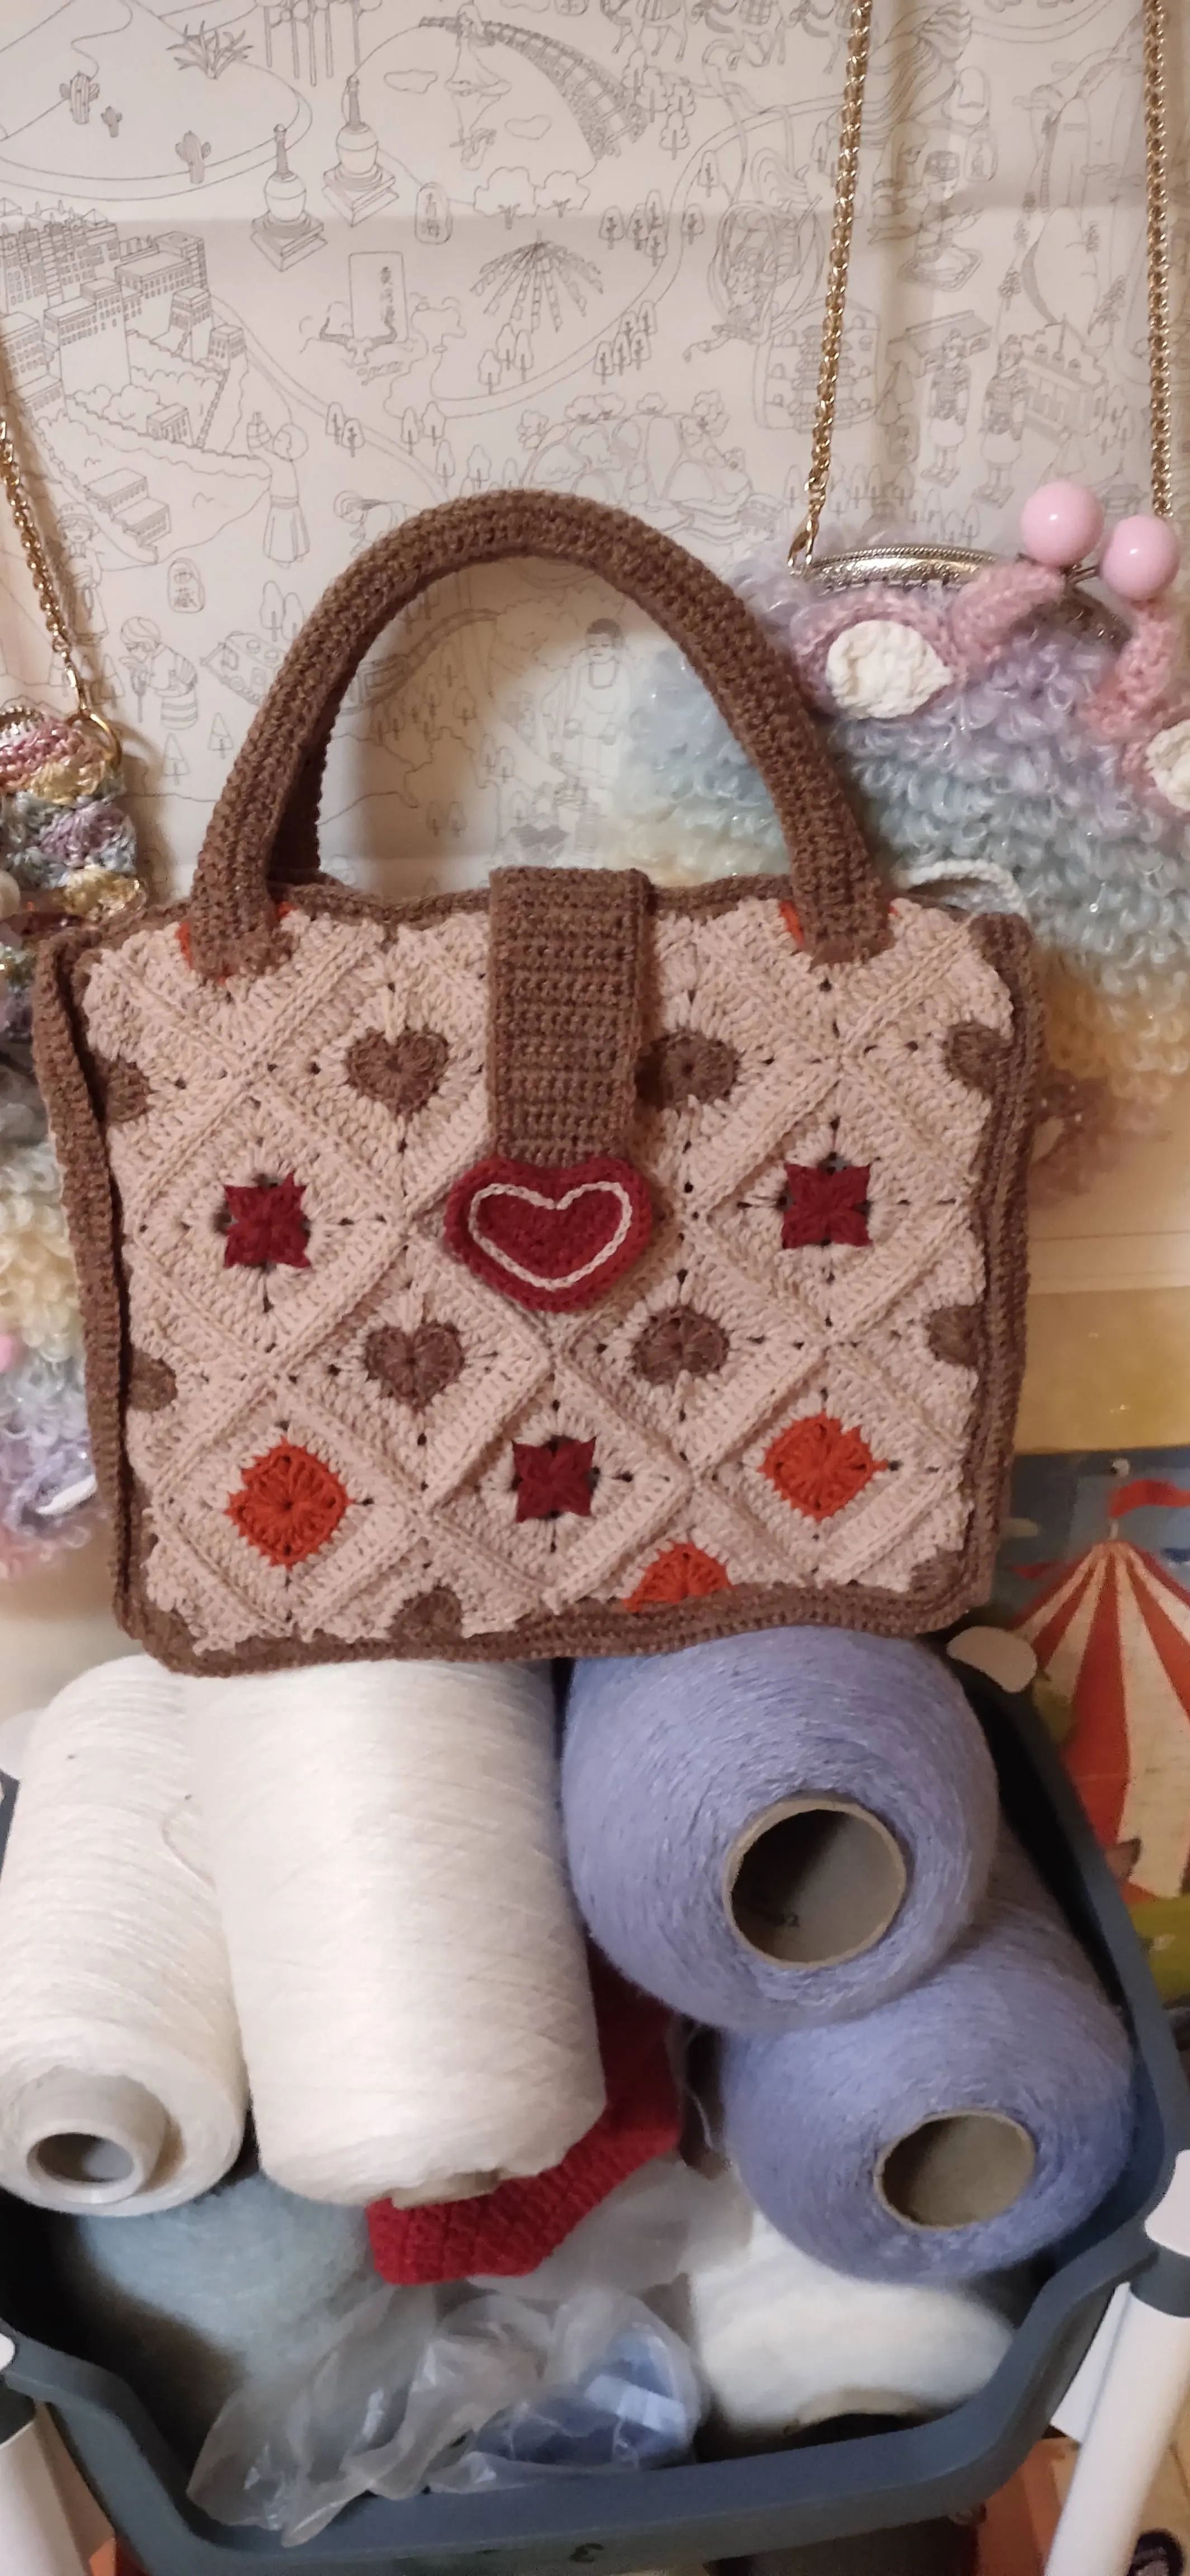
Wonderland Bag
Project preview
See the finished project
Pattern format
Instructions
This bag consists of the main body and accessories. First, make the main body, then create the accessories and attach them.
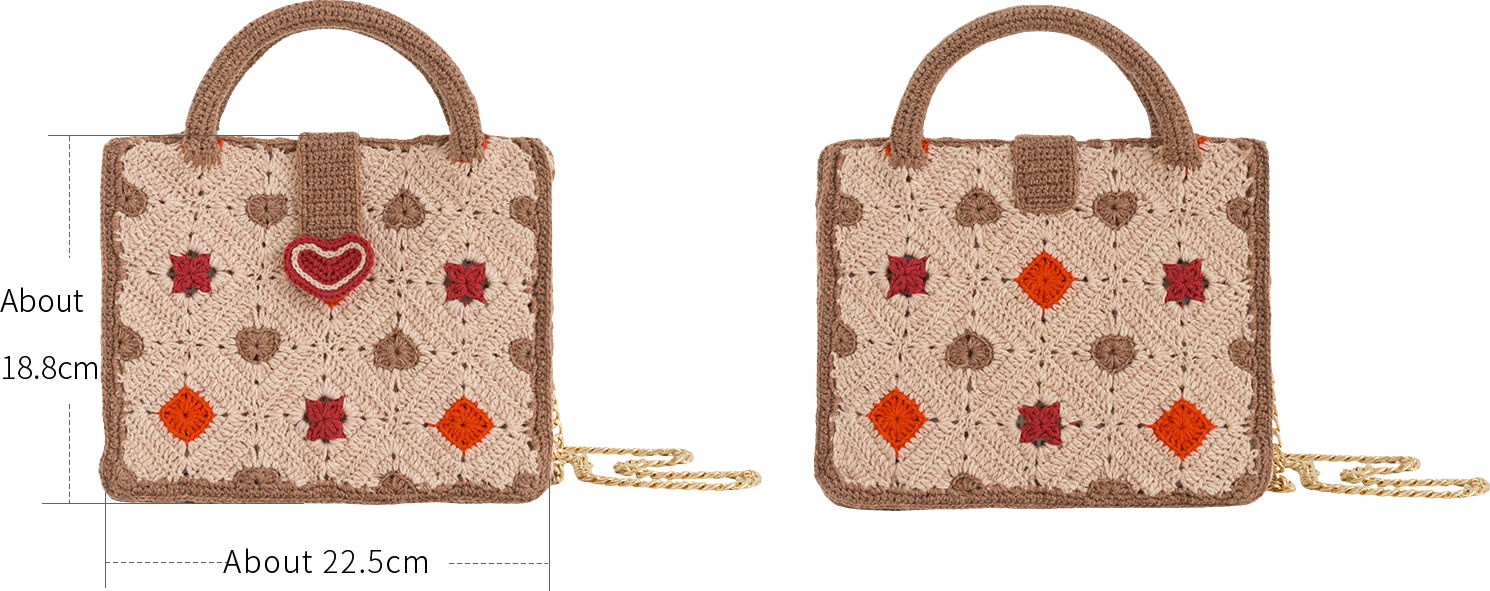
Note: Hand-measured, with an error margin of 1-2 cm.
Due to variations in individual tension, the size of the sample is for reference only.
Materials: Shetland and 4-Ply Combed Cotton & Acrylic Fibre Hand Knitting Yarn
Hook: 2.0 mm crochet hook
Chart Key












ABBREVIATIONS
HRow
RRound
CHchain
Xsingle crochet
Fdouble crochet
A = sc2togsingle crochet 2 stitches together
W = sc3-in-13 single crochets into the same stitch
Kskip
Dao2start in 2nd CH from the hook
turnturn the piece

Note: This pattern is making in Chinese crochet pattern terms, and the stitch name is written using American terminology. All measurements in charts are in cm.
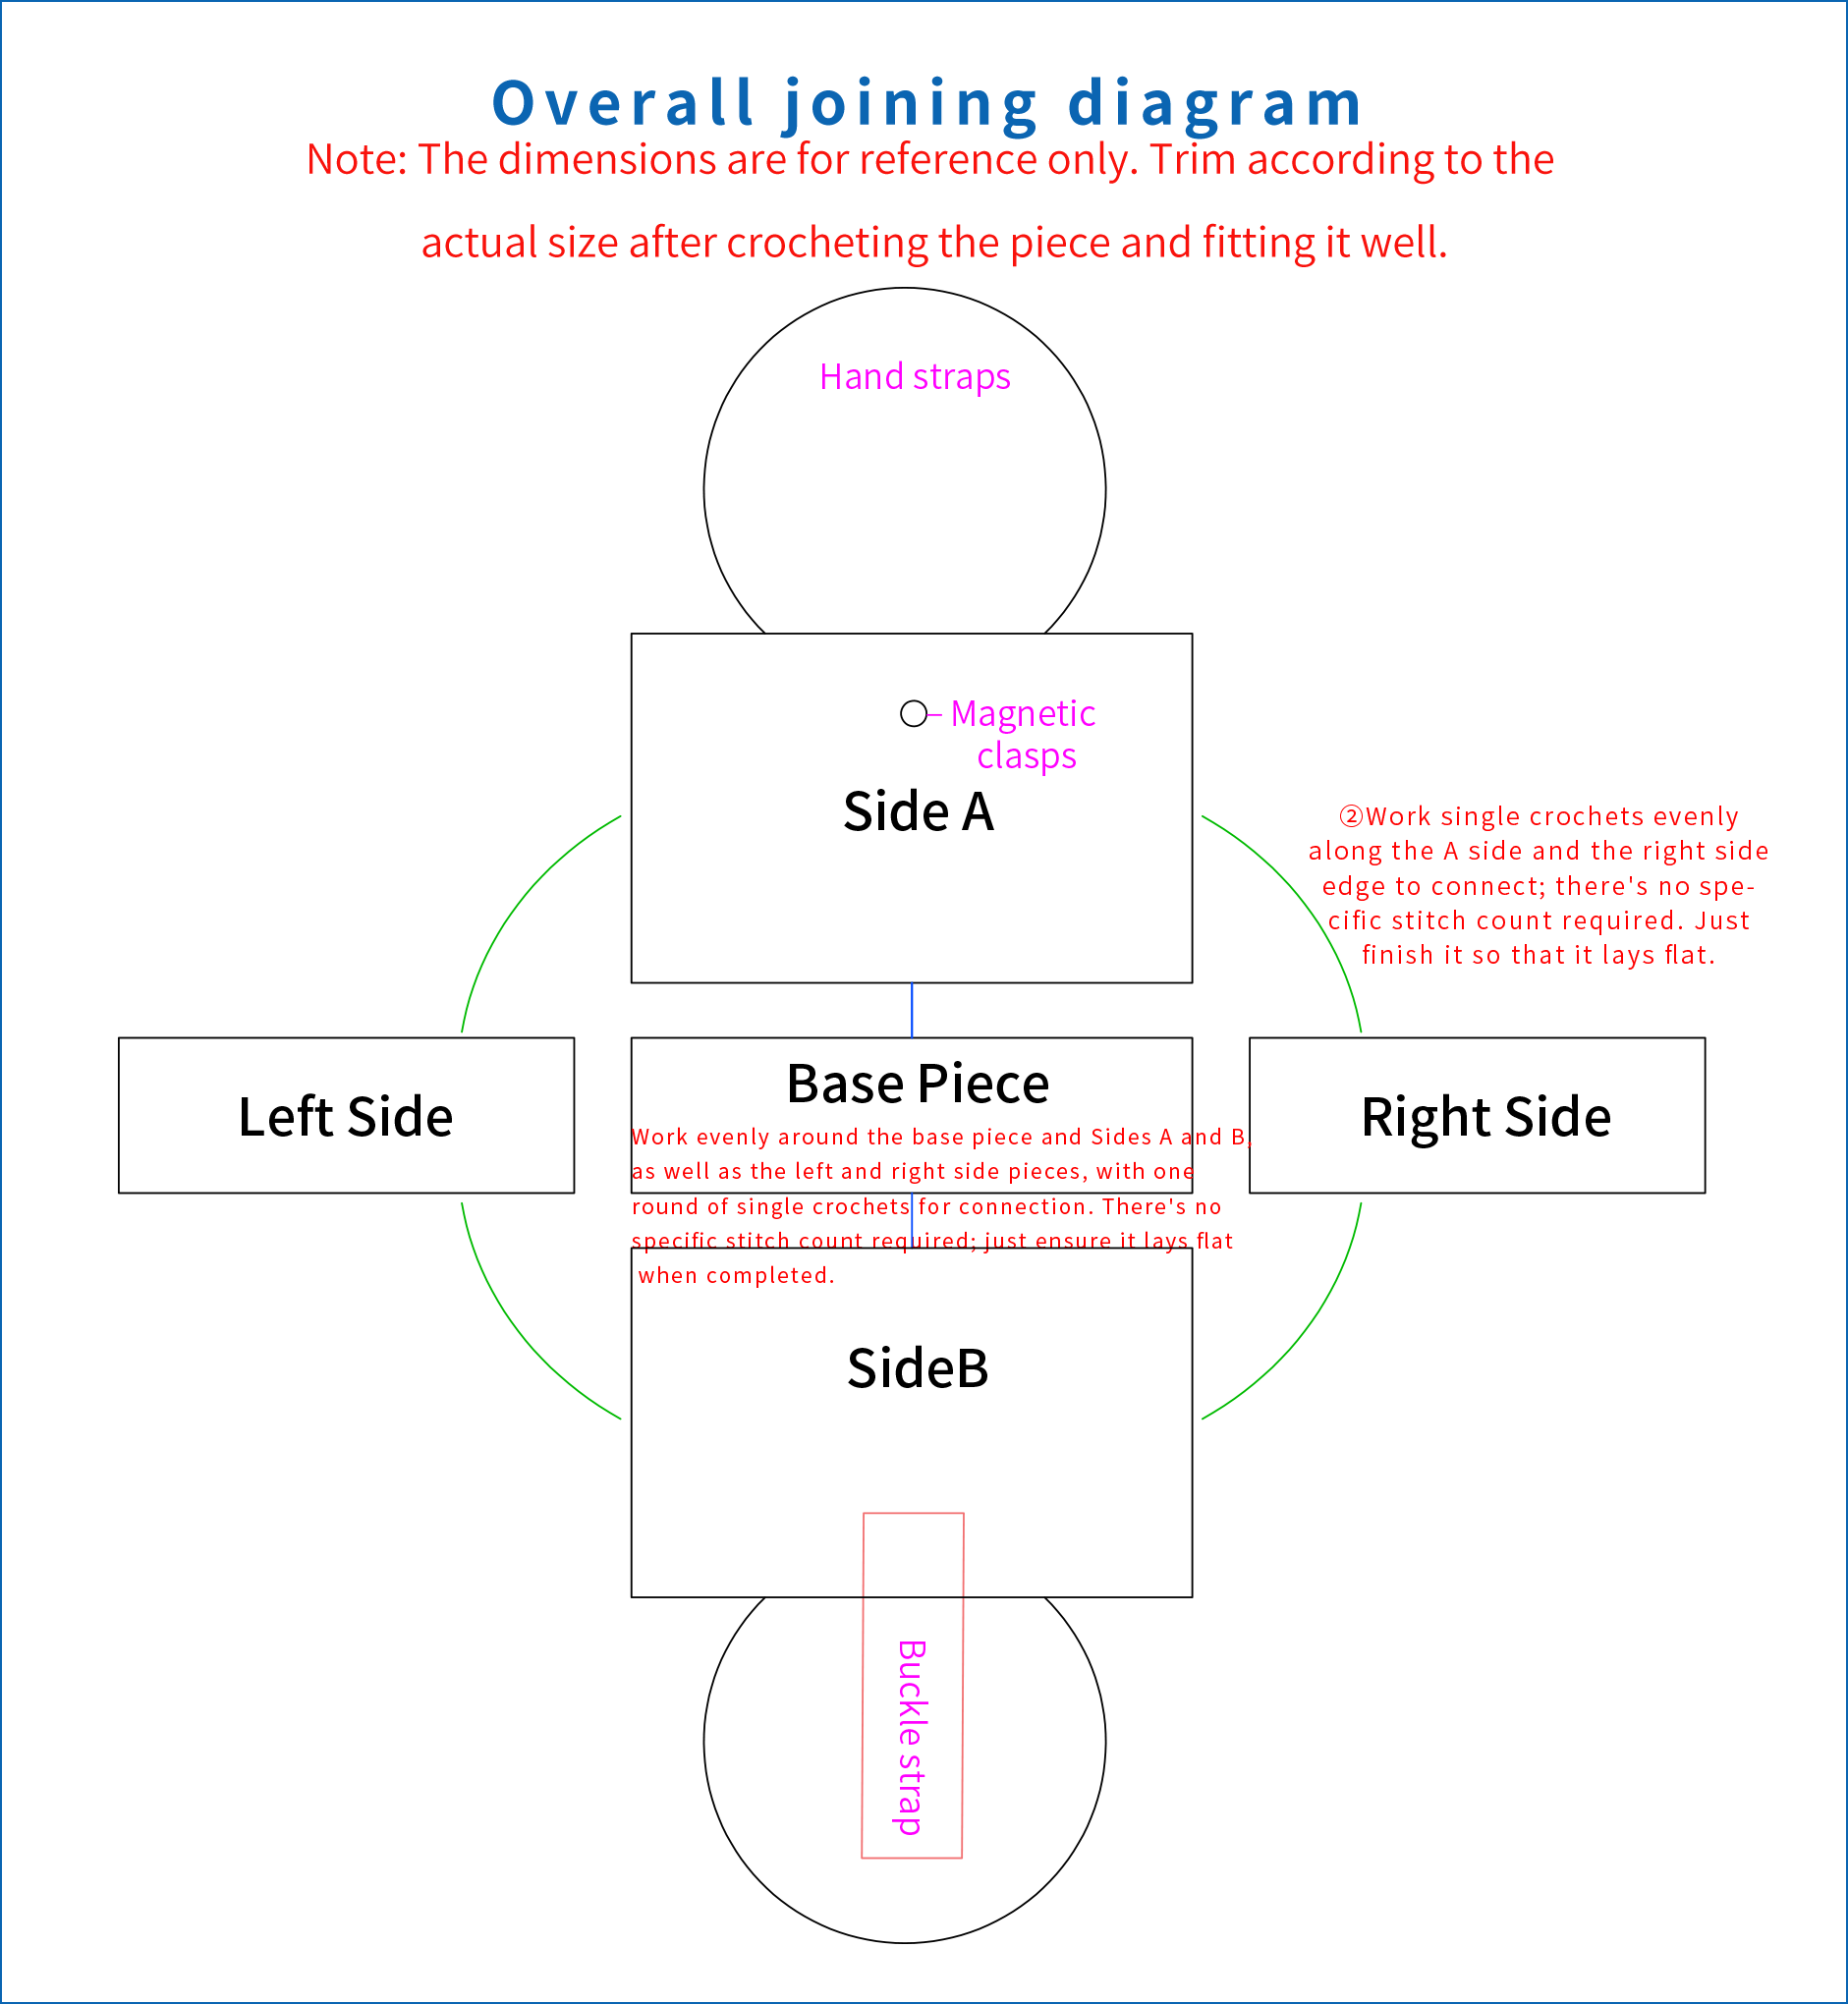
The workpiece consists of the A side, B side, left and right side pieces, and the base piece.
Part 1 Body
Step 1 Sides A and B
Both sides A and B are made in the same way, consisting of motifs sewn together. First, crochet all the motifs before sewing them together. The motifs all start with a magic ring, and you crochet around the ring.
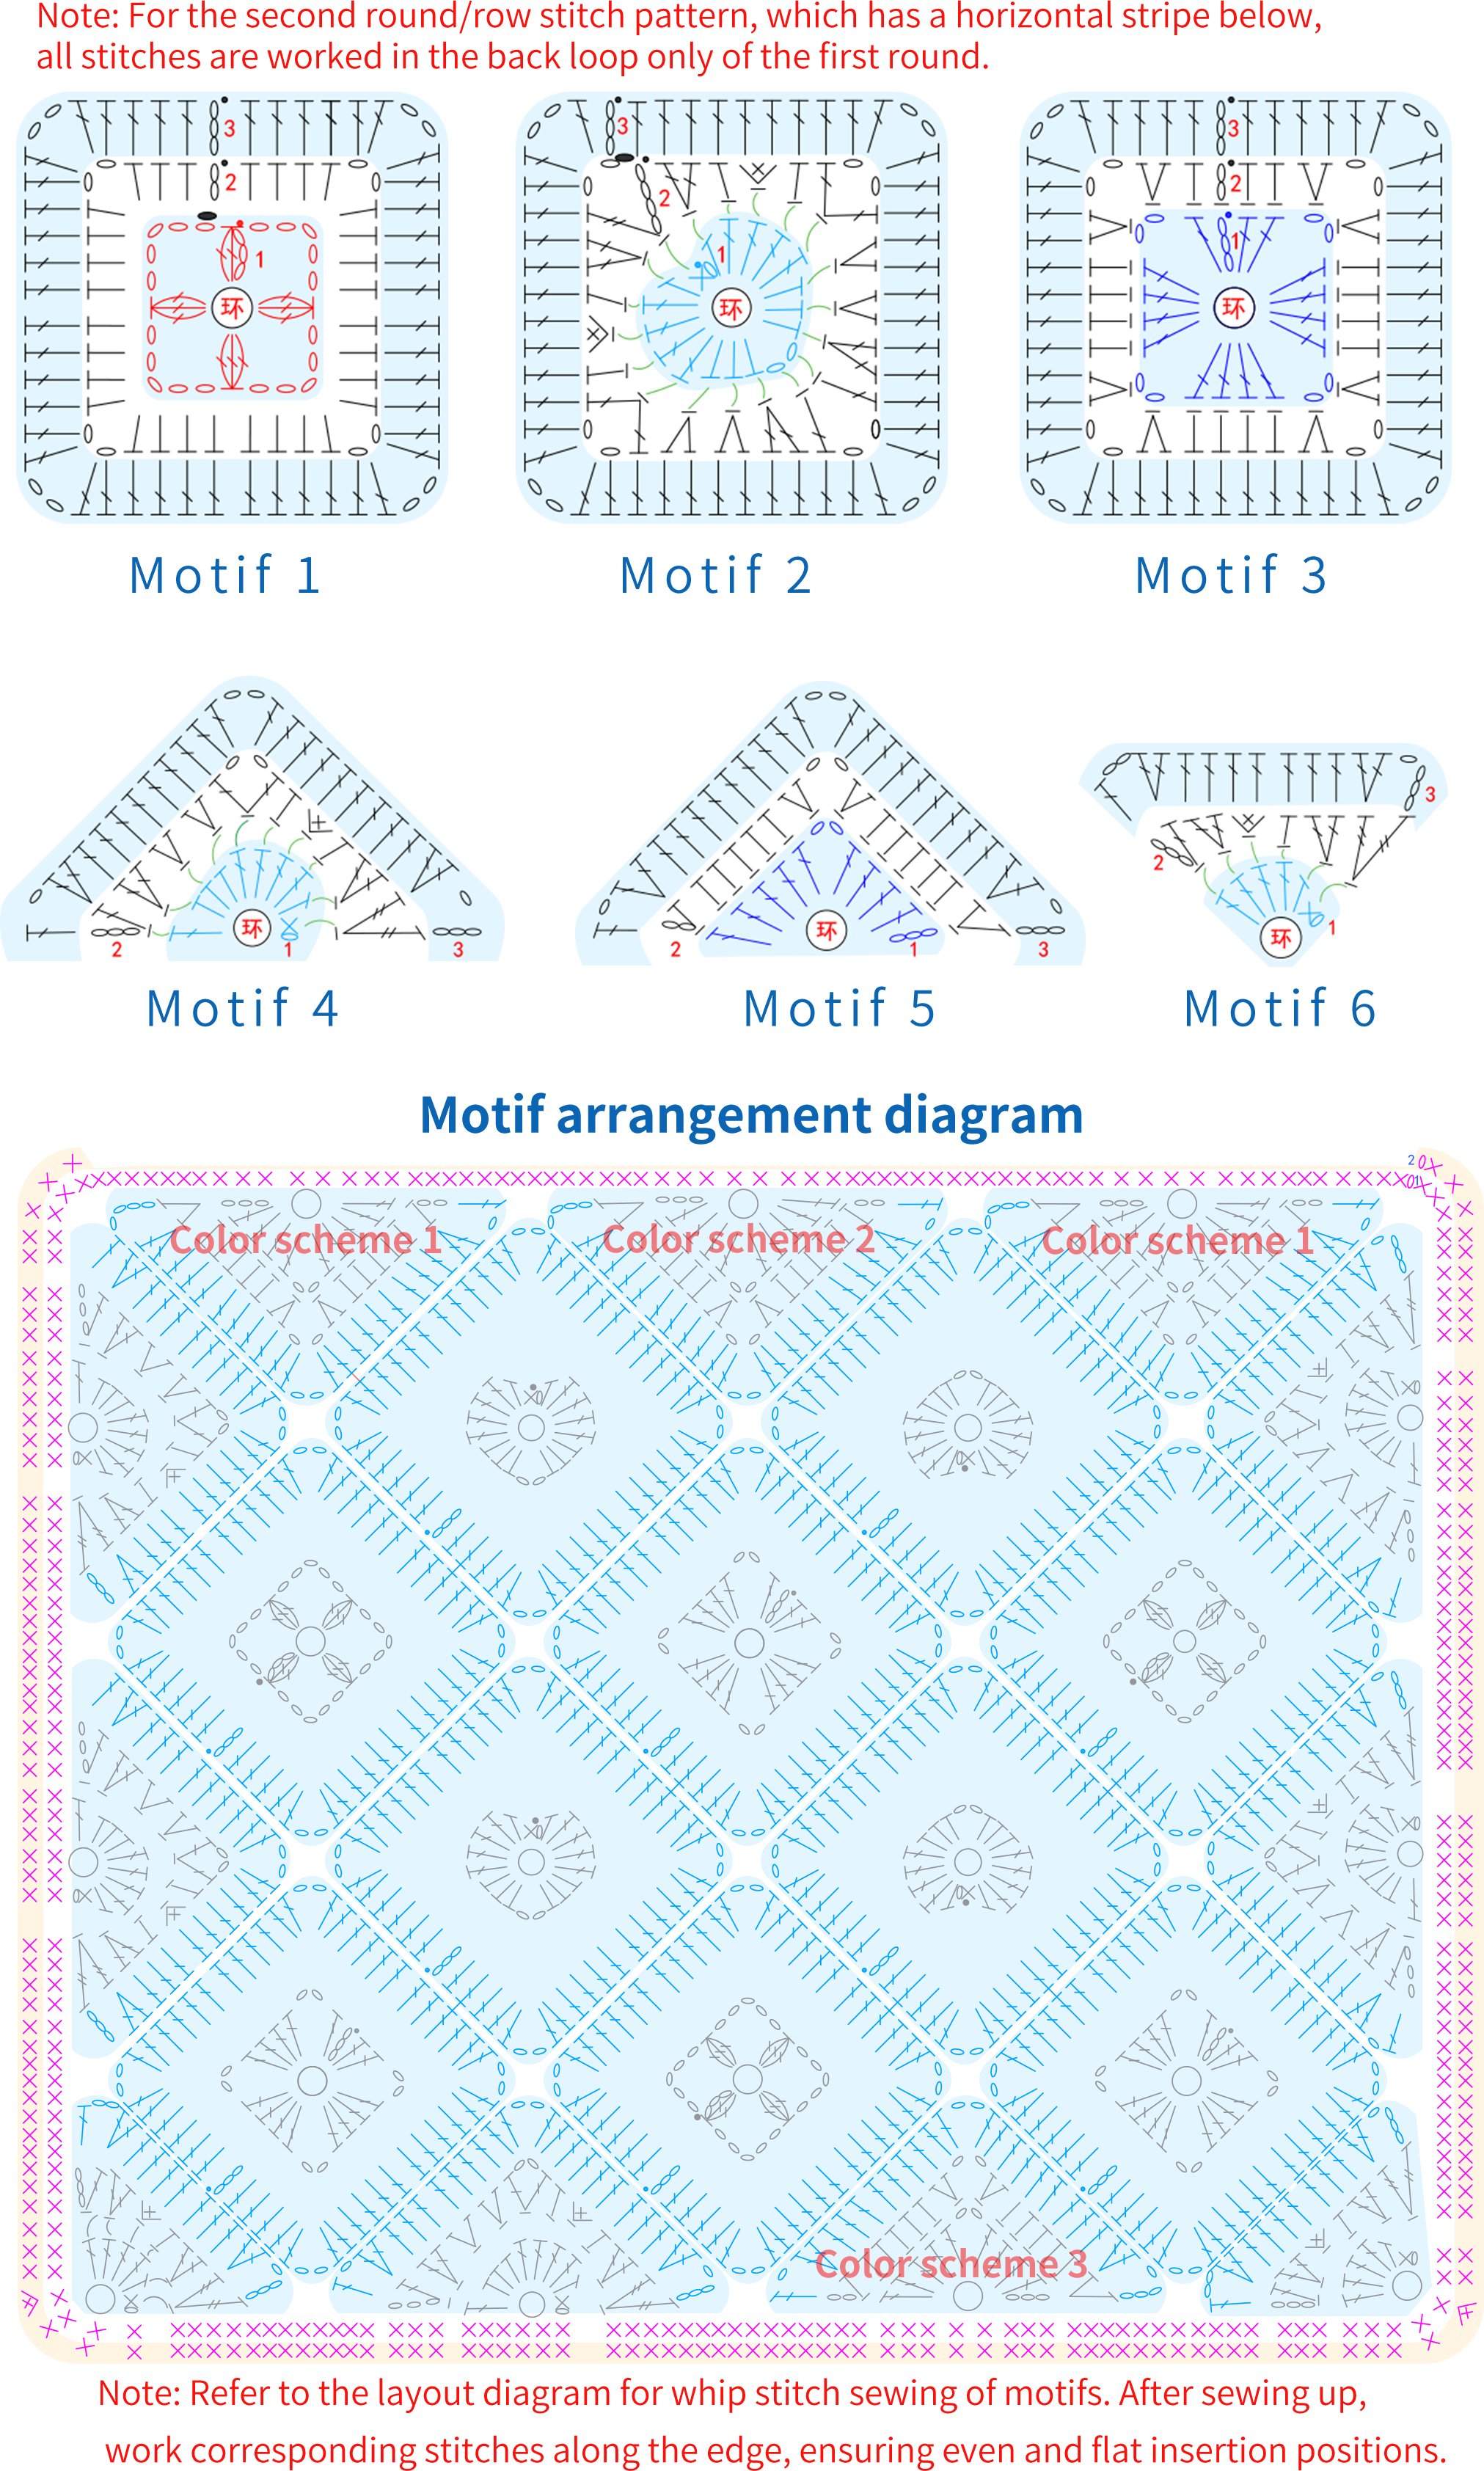
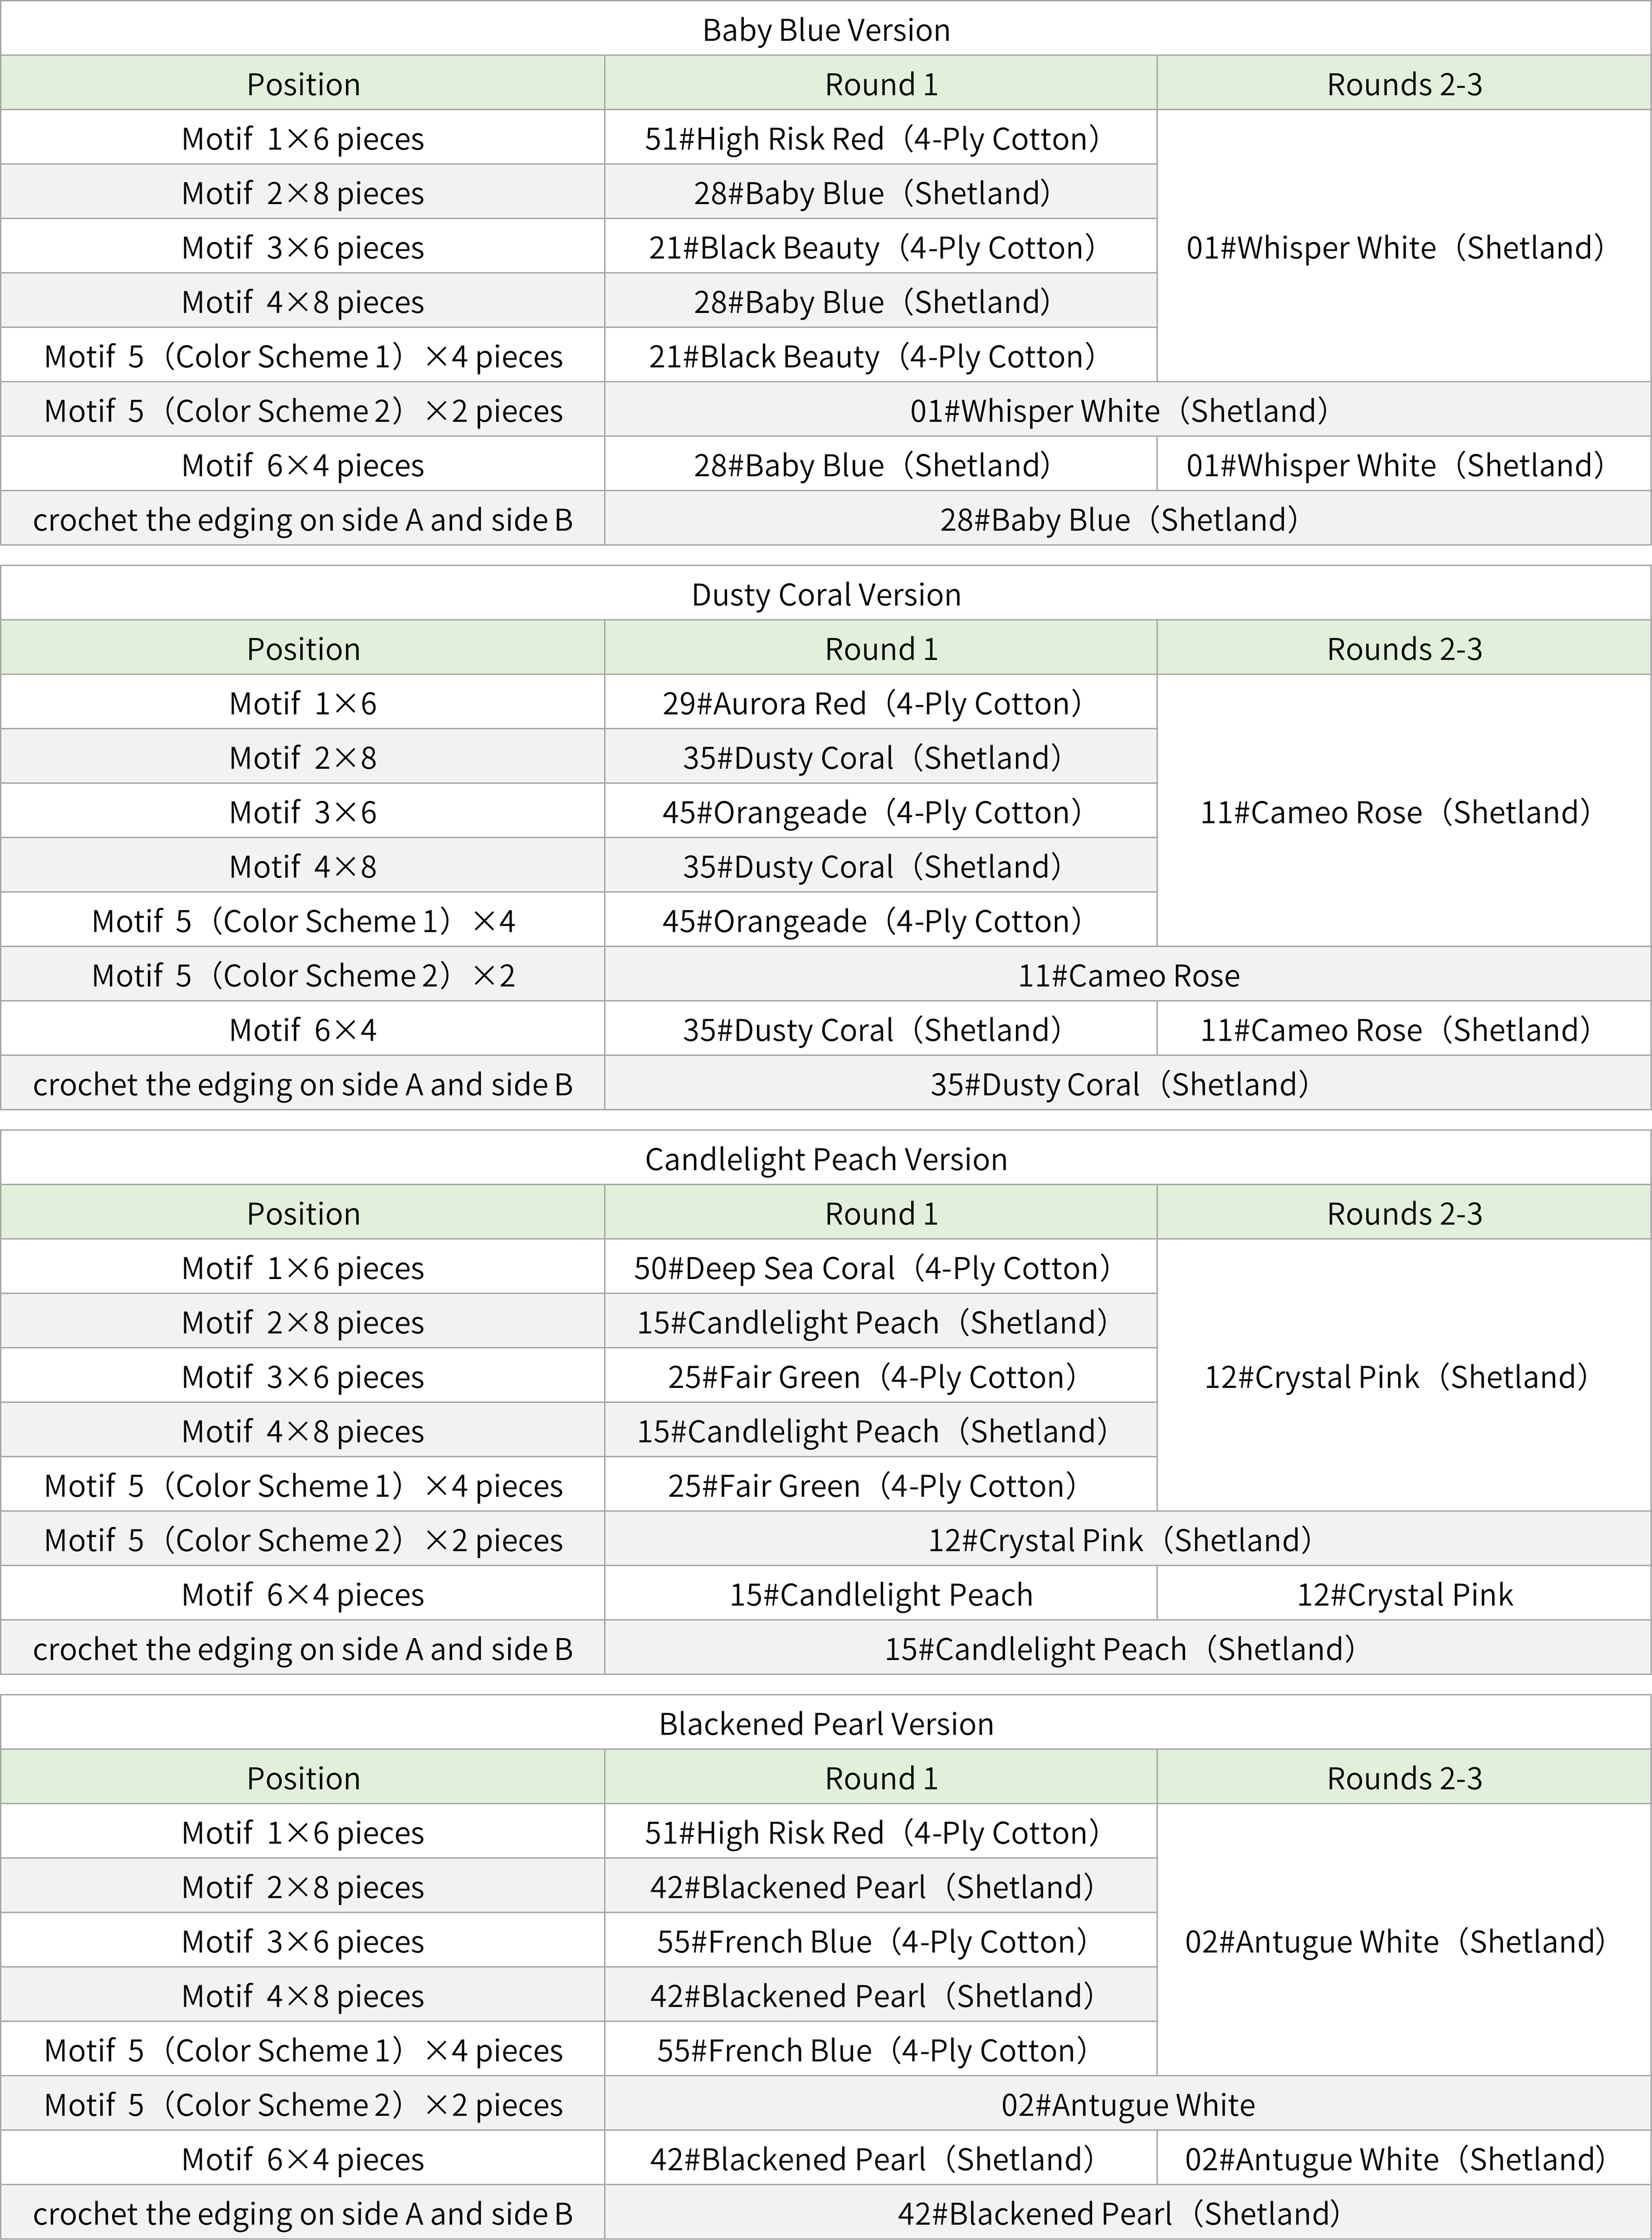
Step 2 Left 、right side pieces and the base piece
The crocheting method for the left and right side pieces and the base piece is roughly the same: all start with a foundation chain and are crocheted along the starting chain.


Note: 3CH doesn't count as 1 stitch.
Step 3 Grid board and lining fabric
After completing all the crocheting, refer to the joining diagram for connecting and crocheting. Once done, sew together the mesh panel and the lining fabric.
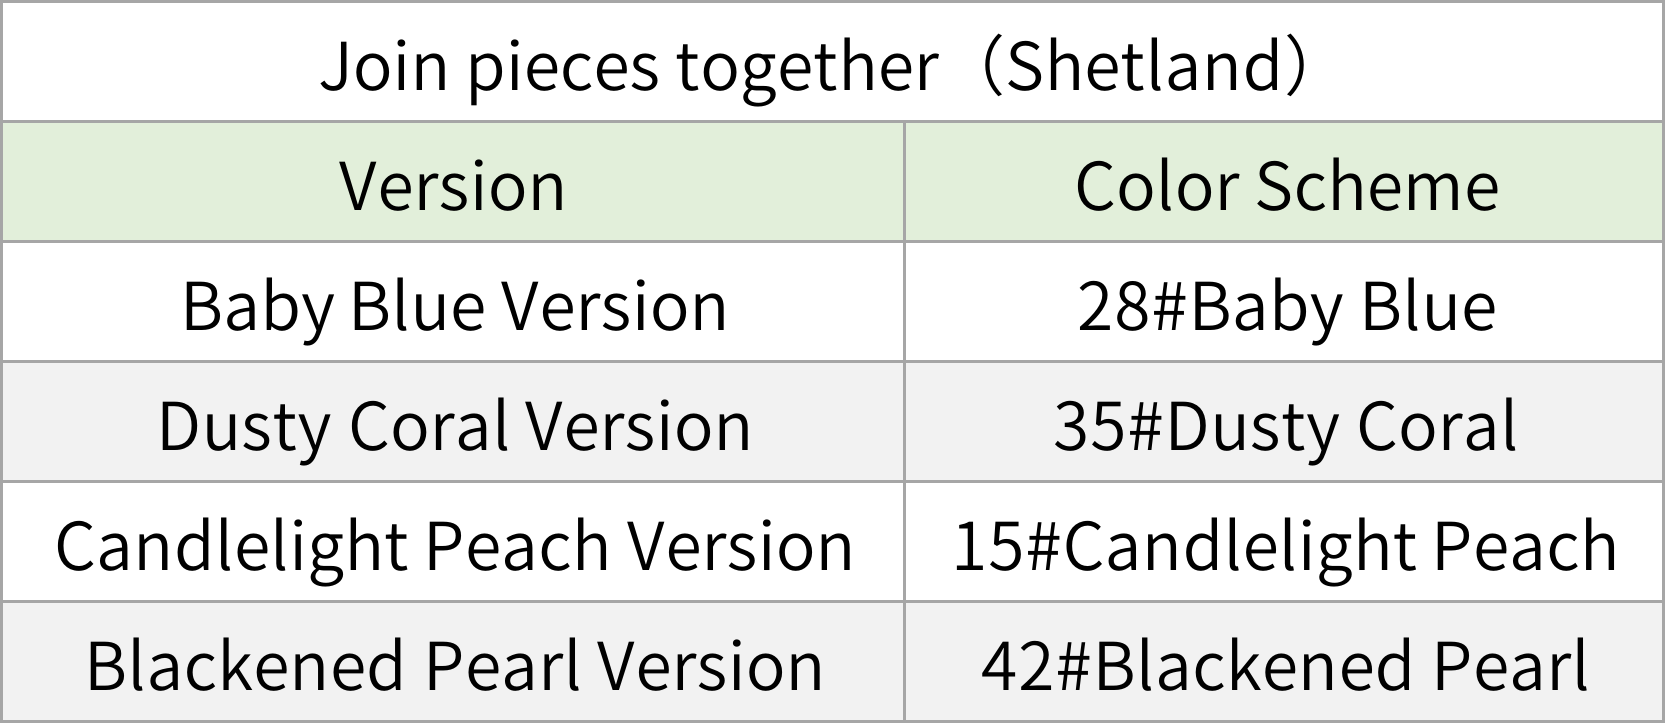
Assembly steps:
1. First, cut 2 grid boards about 8×21cm, then secure them to the 4 corners of panels A and B with thread separately. Then cut another grid board about 7.5×21cm and secure it to the 4 corners of the base piece with thread.
2. Cut 2 pieces of lining fabric about 8×19cm and sew them onto the left and right side pieces separately.
3. Cut a piece of lining fabric about 47×23cm and sew it along the edges of panels A, B, and the base piece in one round.
4. Finally, crochet the edging along the edges, see the overall assembly diagram for specific locations.
Part 2 Accessories
The accessories are divided into buckle straps, hand straps, D-rings, and bag straps.
Step 1 Buckle strap
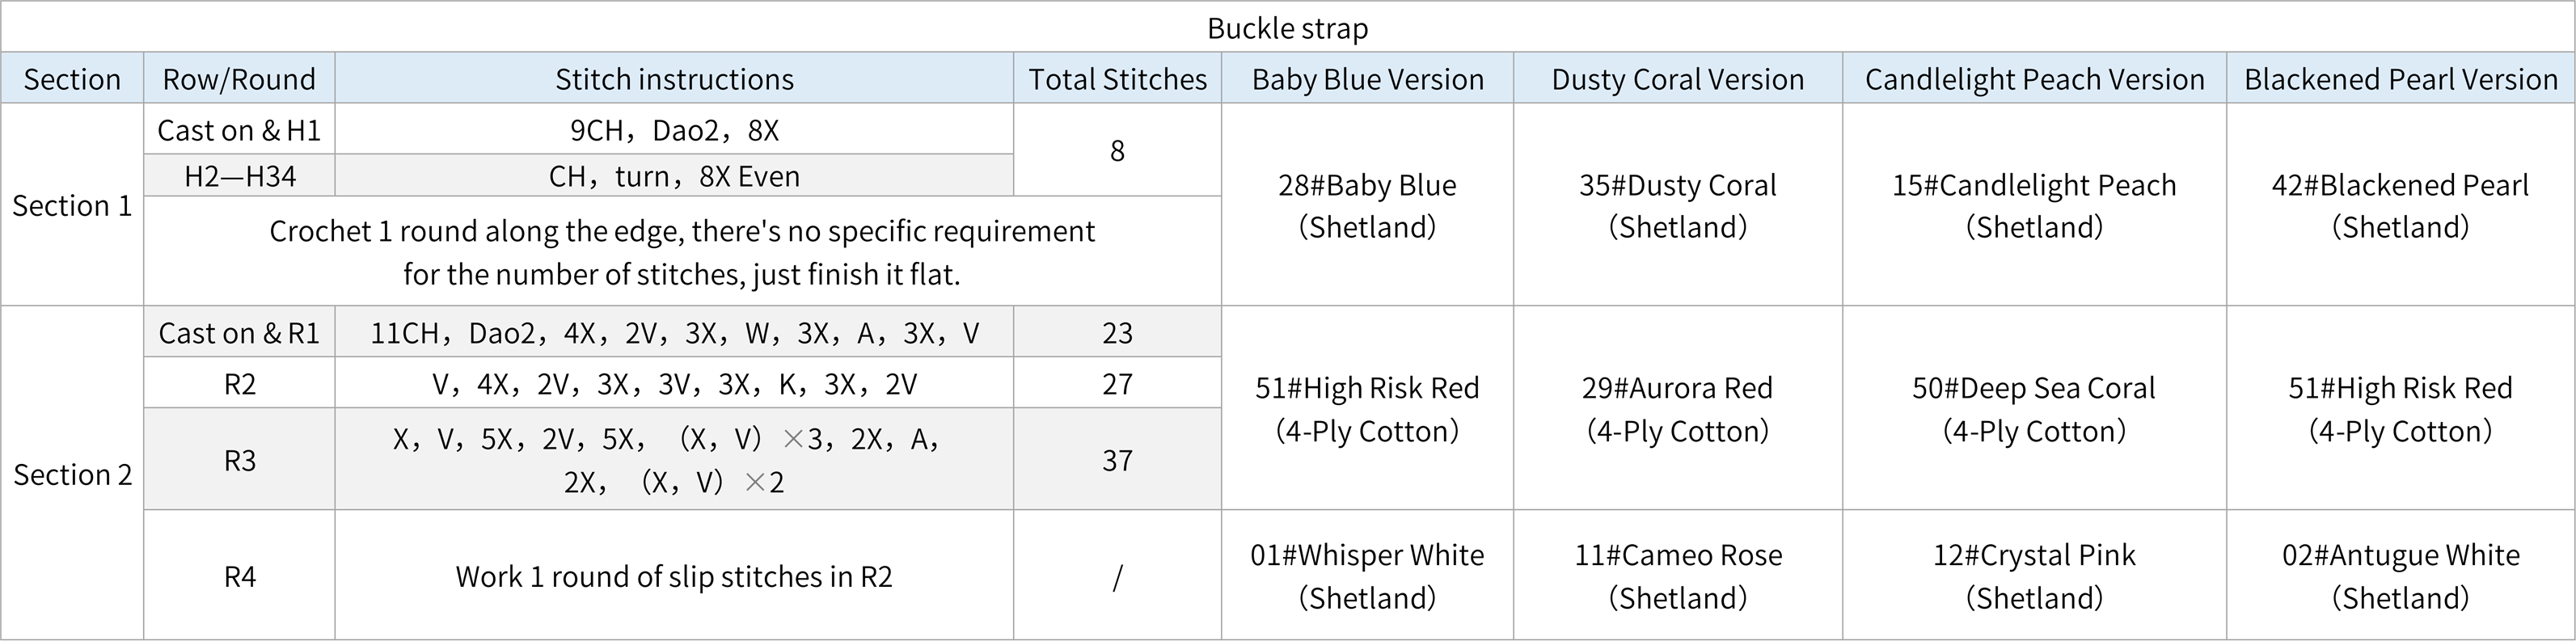
First, crochet the buckle strap, which is divided into two sections. Both sections start with a foundation chain and are crocheted along the edge of the starting chain.
Step 2 Hand straps
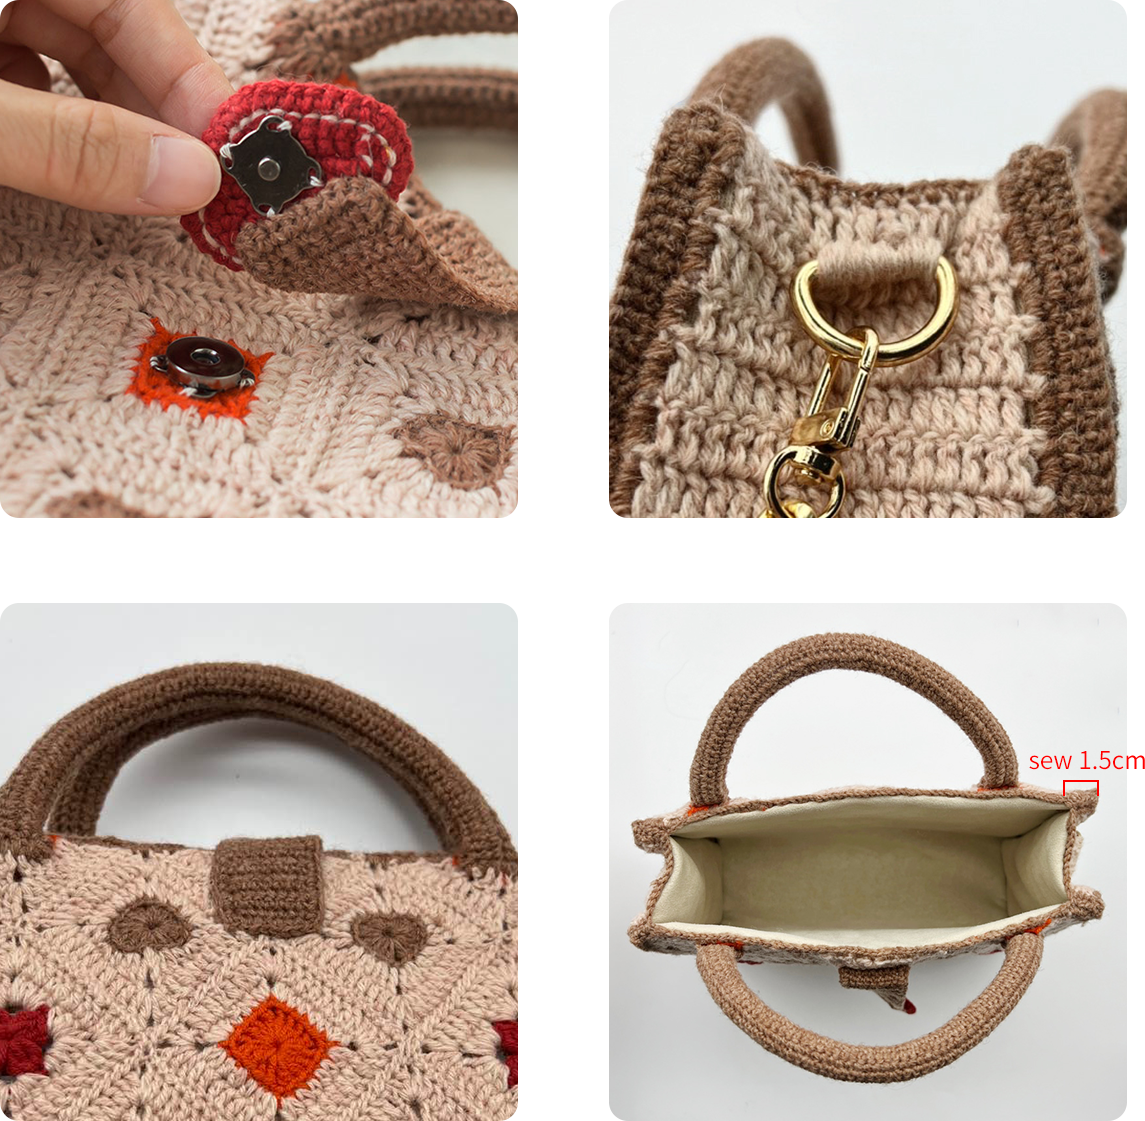
The hand straps are identical, both starting with a foundation chain and worked back and forth in rows along the starting chain. After completing the crochet work, wrap and sew together with cotton rope. Finally, sew them onto the corresponding positions of side A and side B.

Step 3 D-ring and strap
Sew one D-ring on each side, and finally attach the finished product to the chain.
Made by the community