Clothes
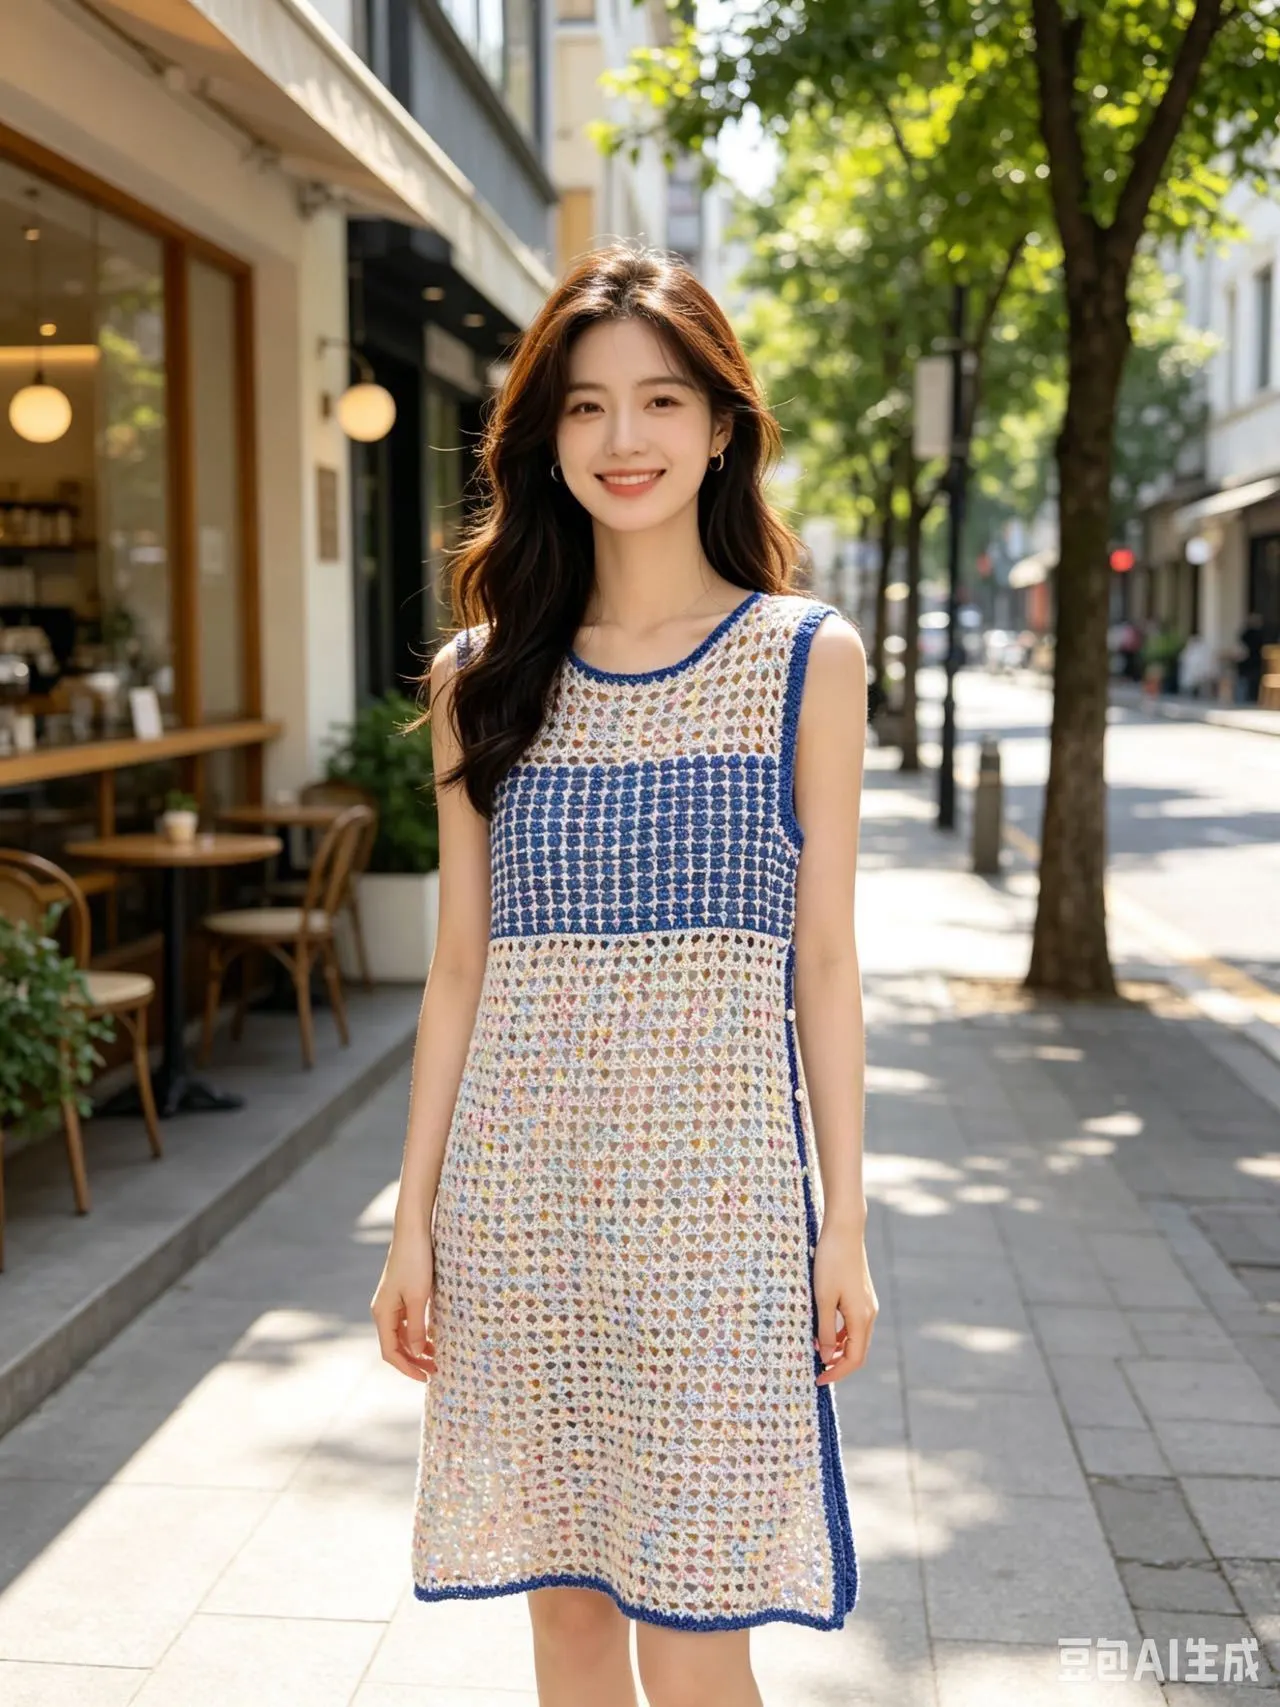
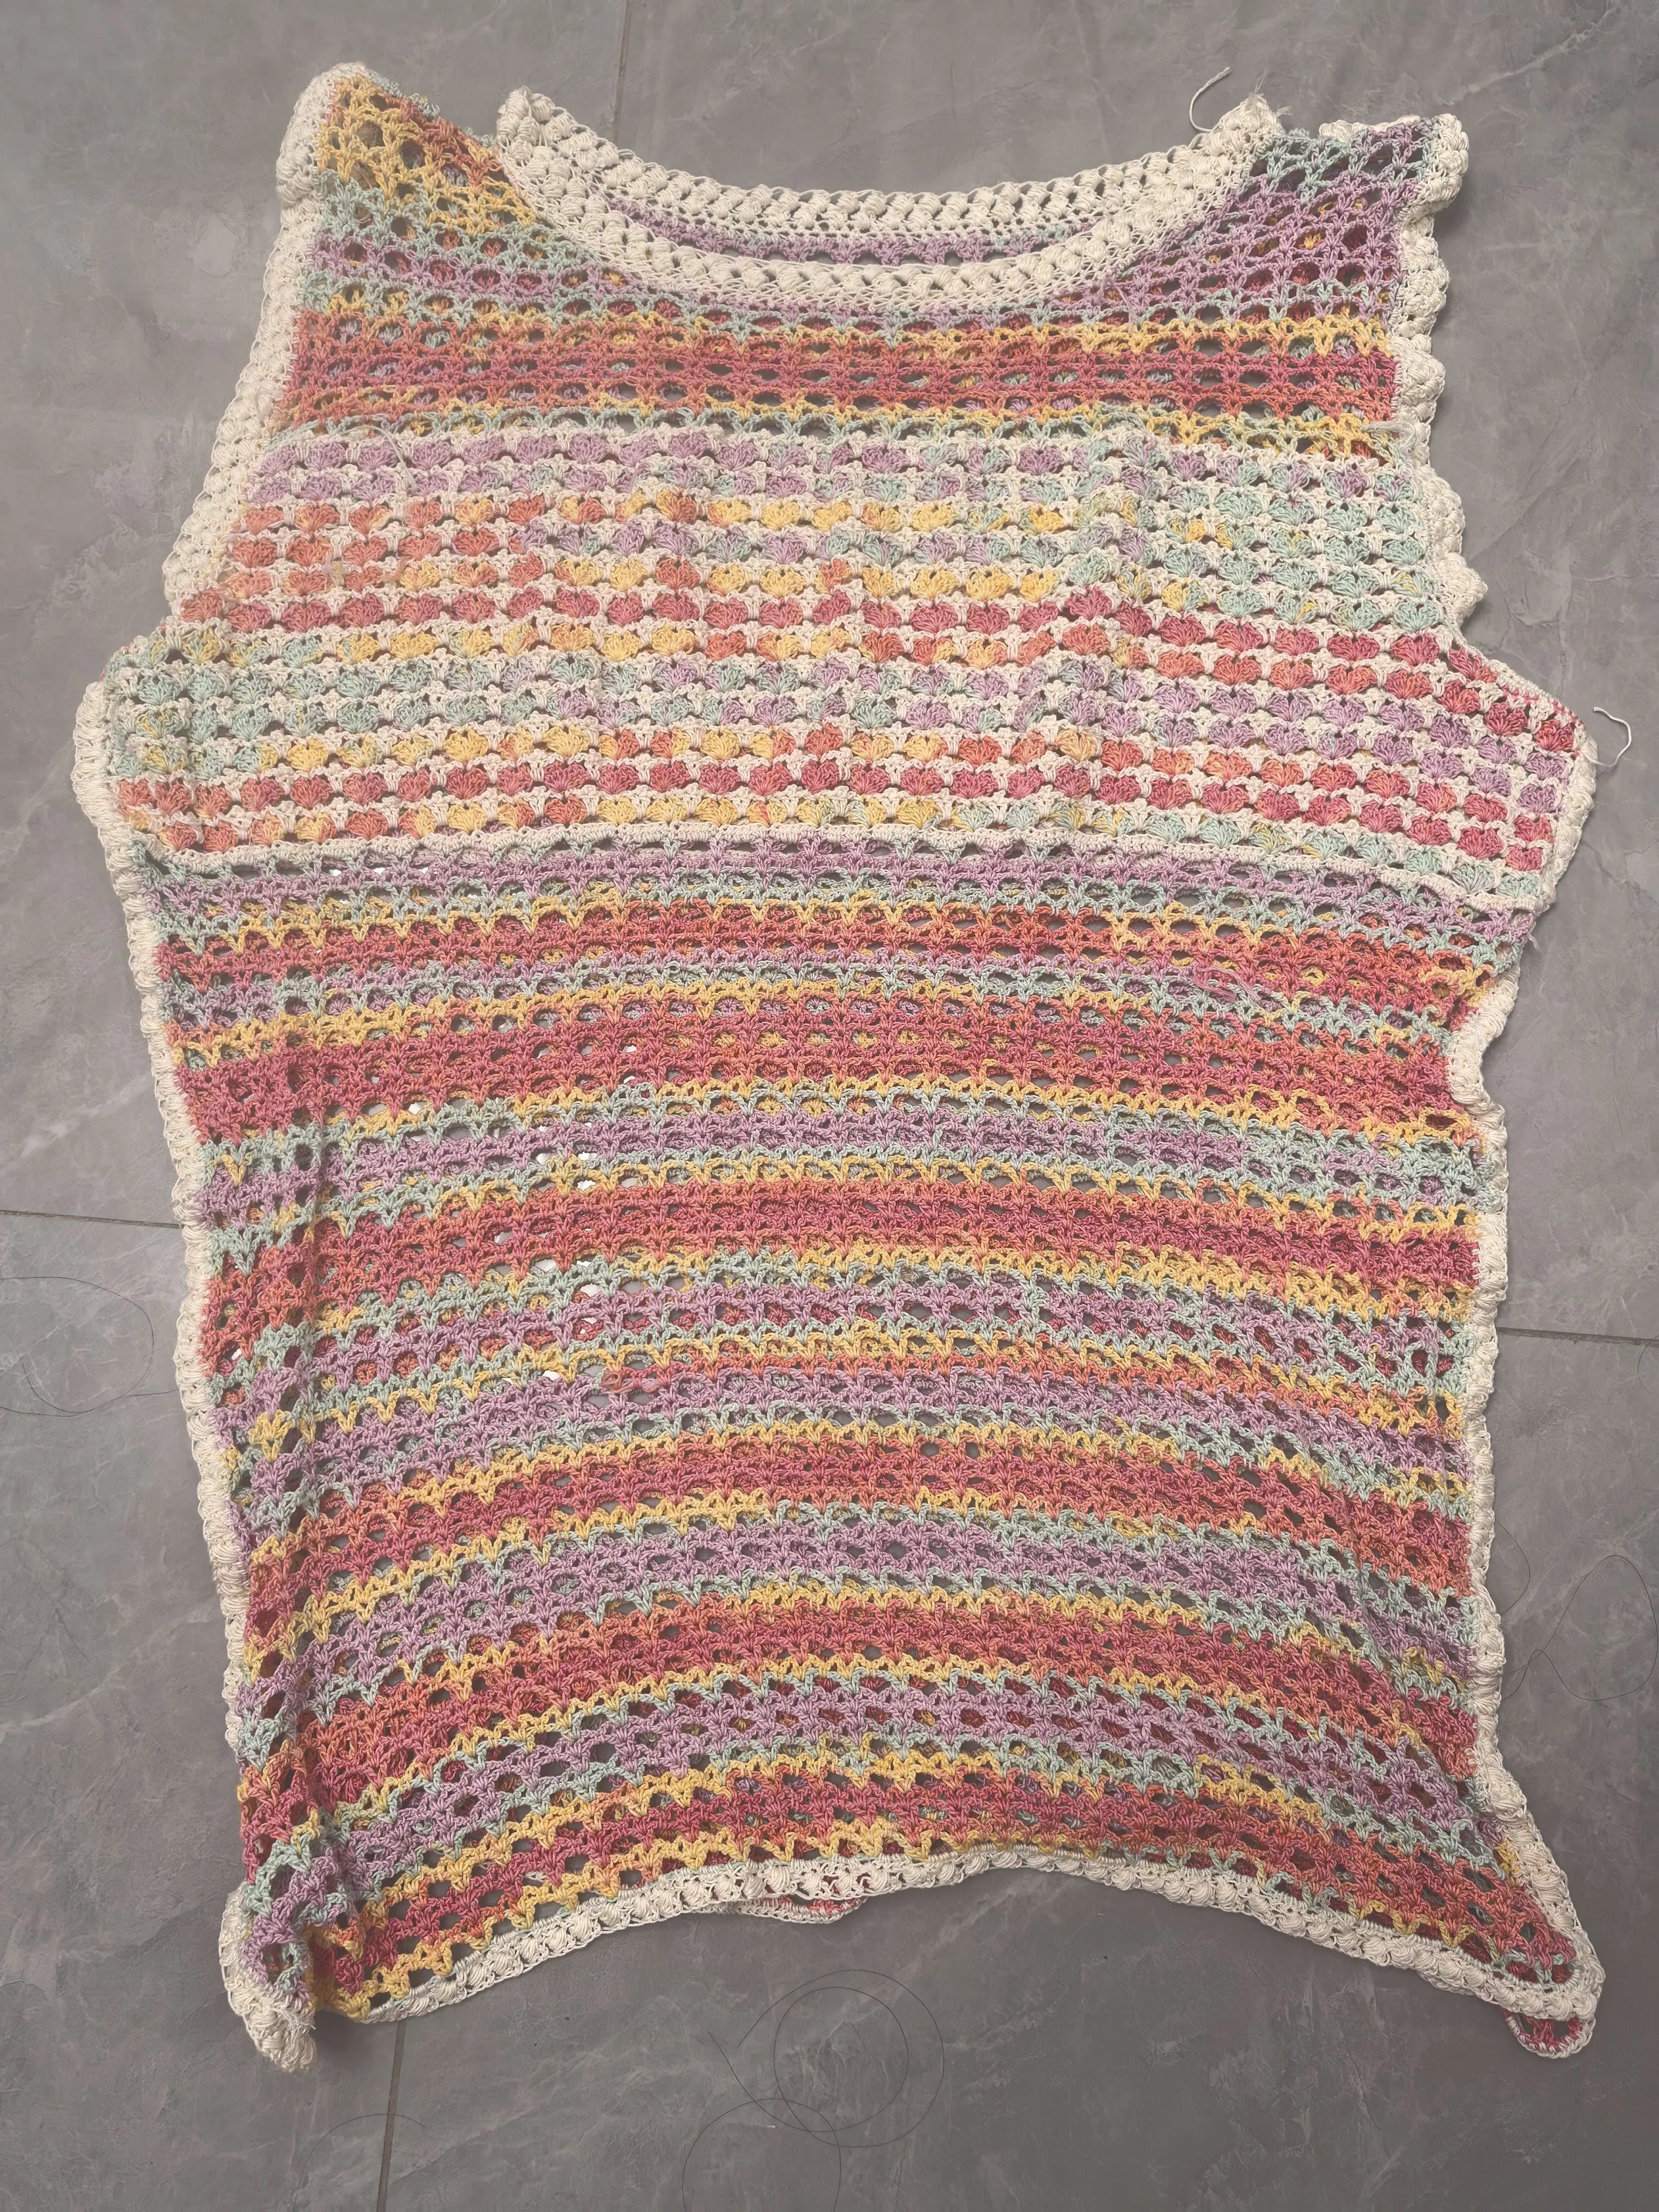
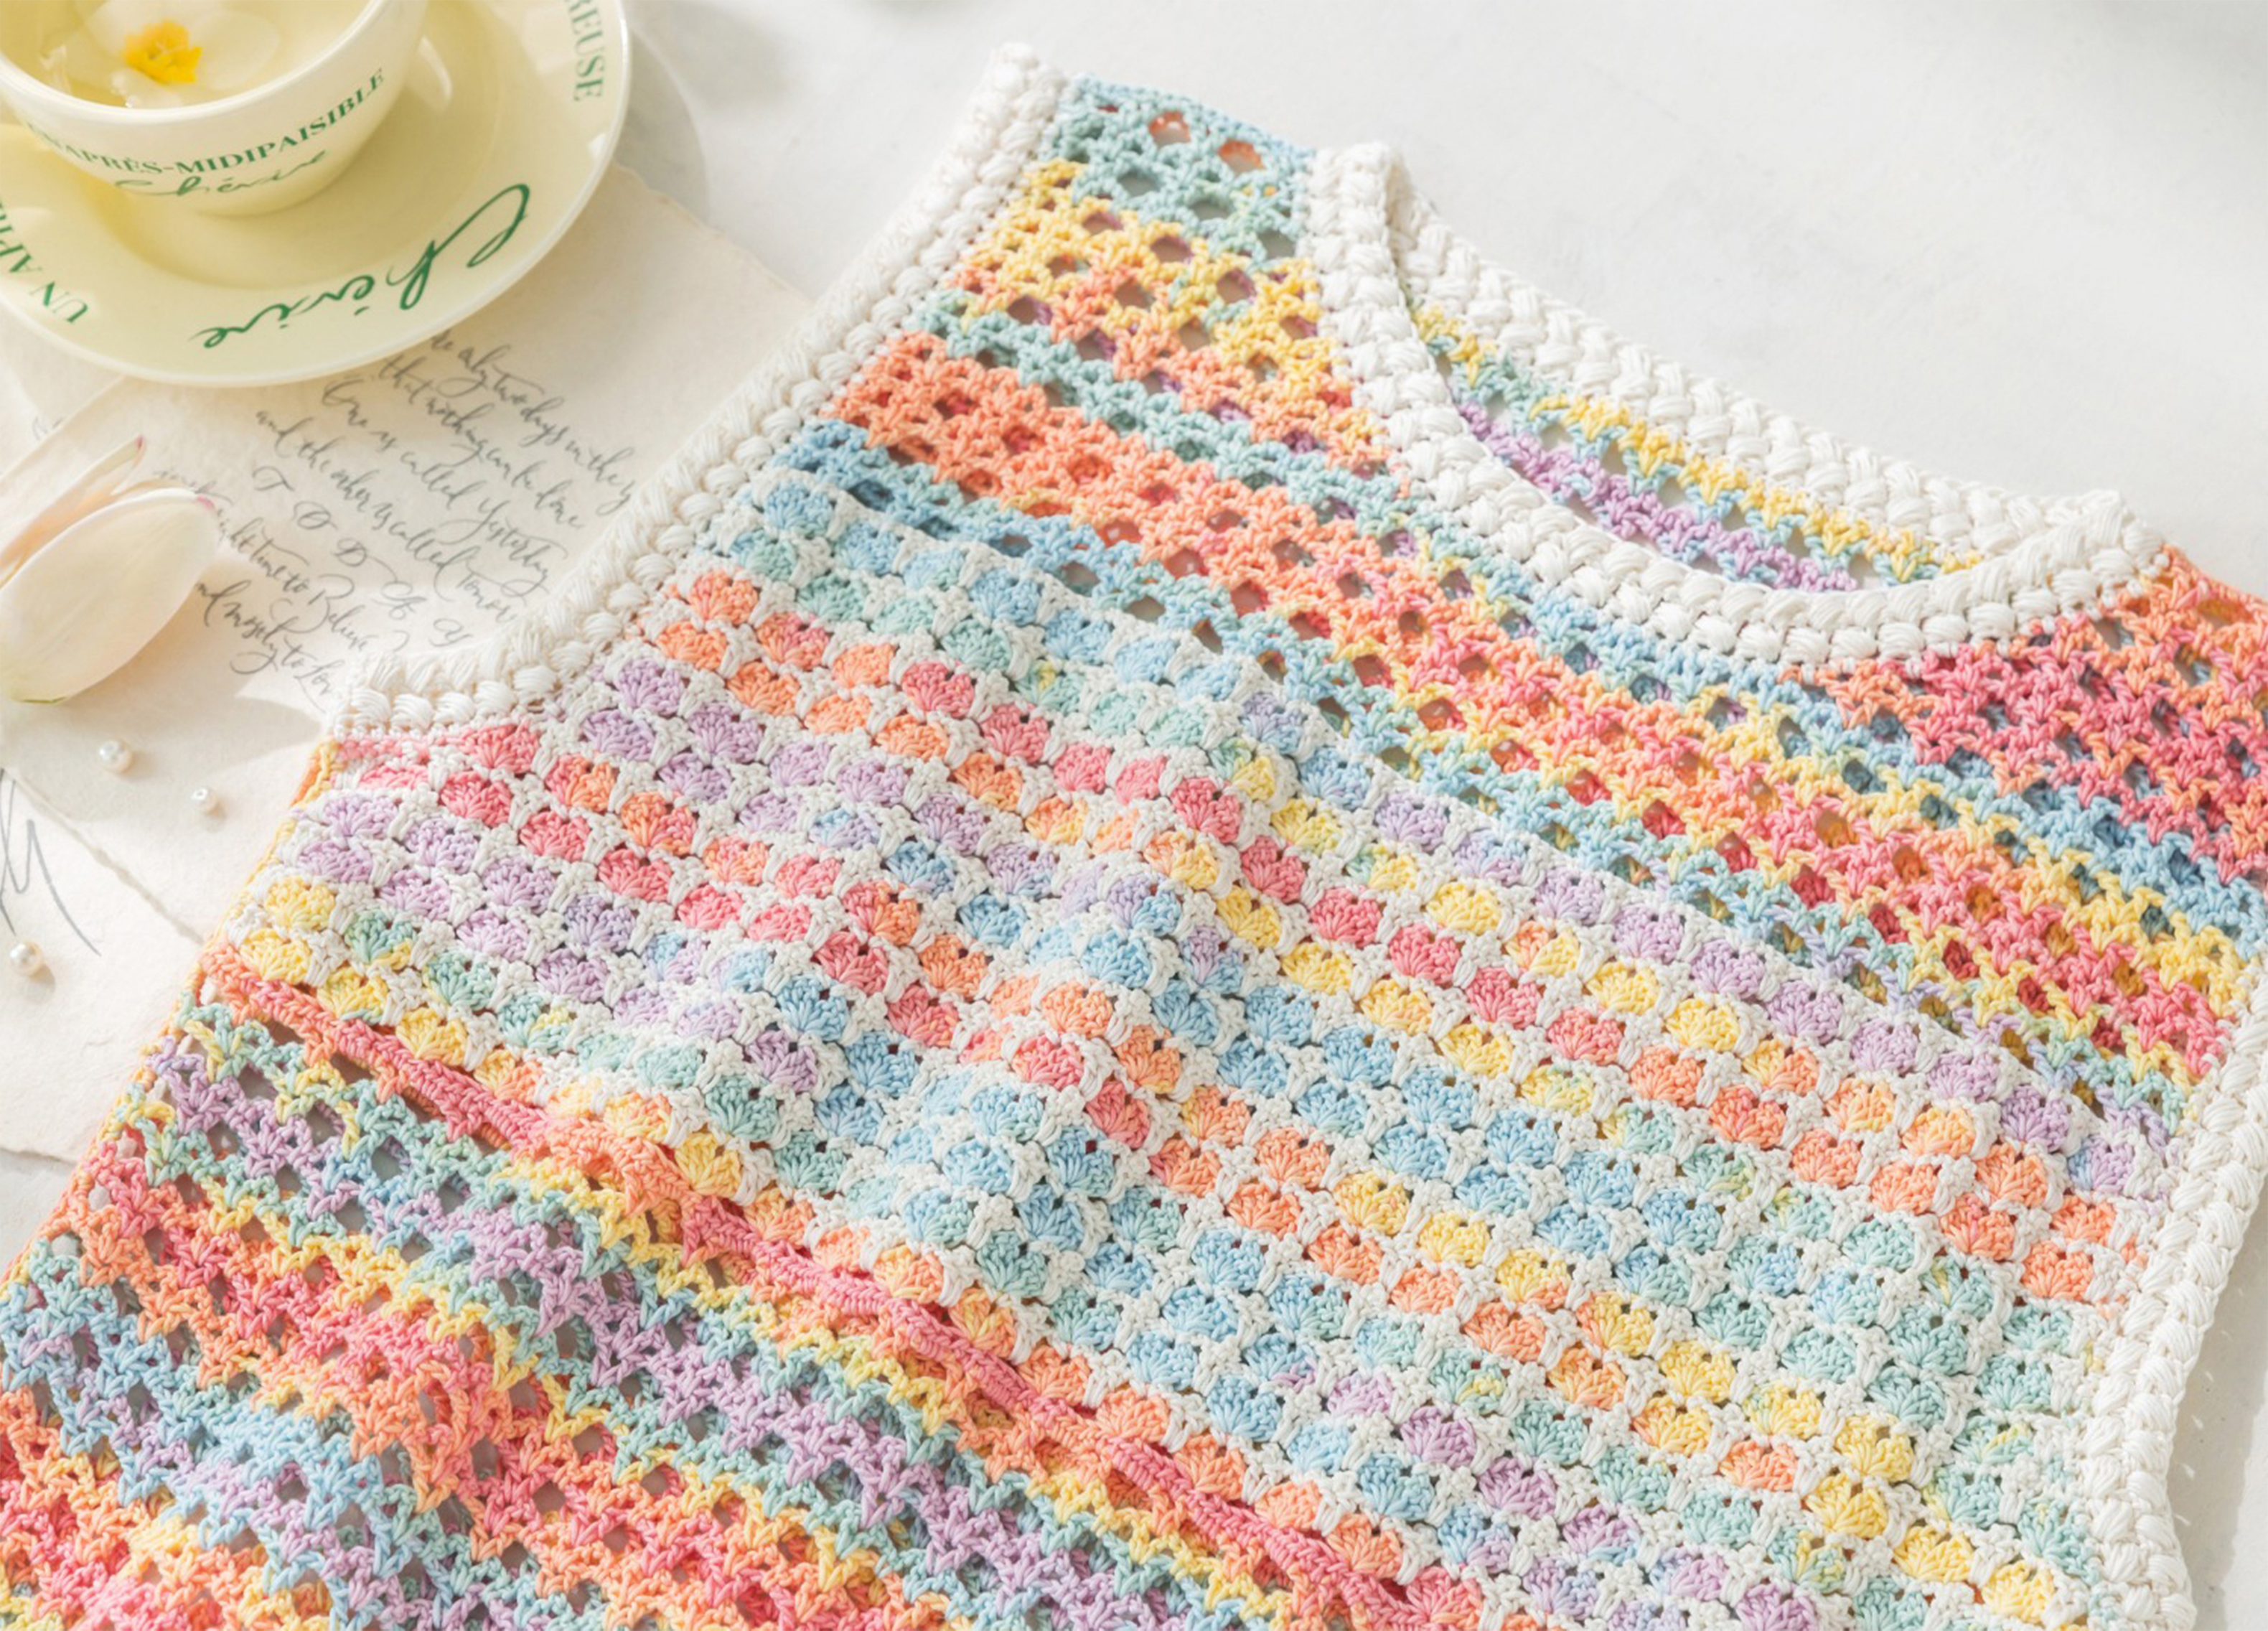
YuYou Hollow Pullover Sweater
Project preview
See the finished project
Pattern format
Instructions
Watch and follow
Video tutorial
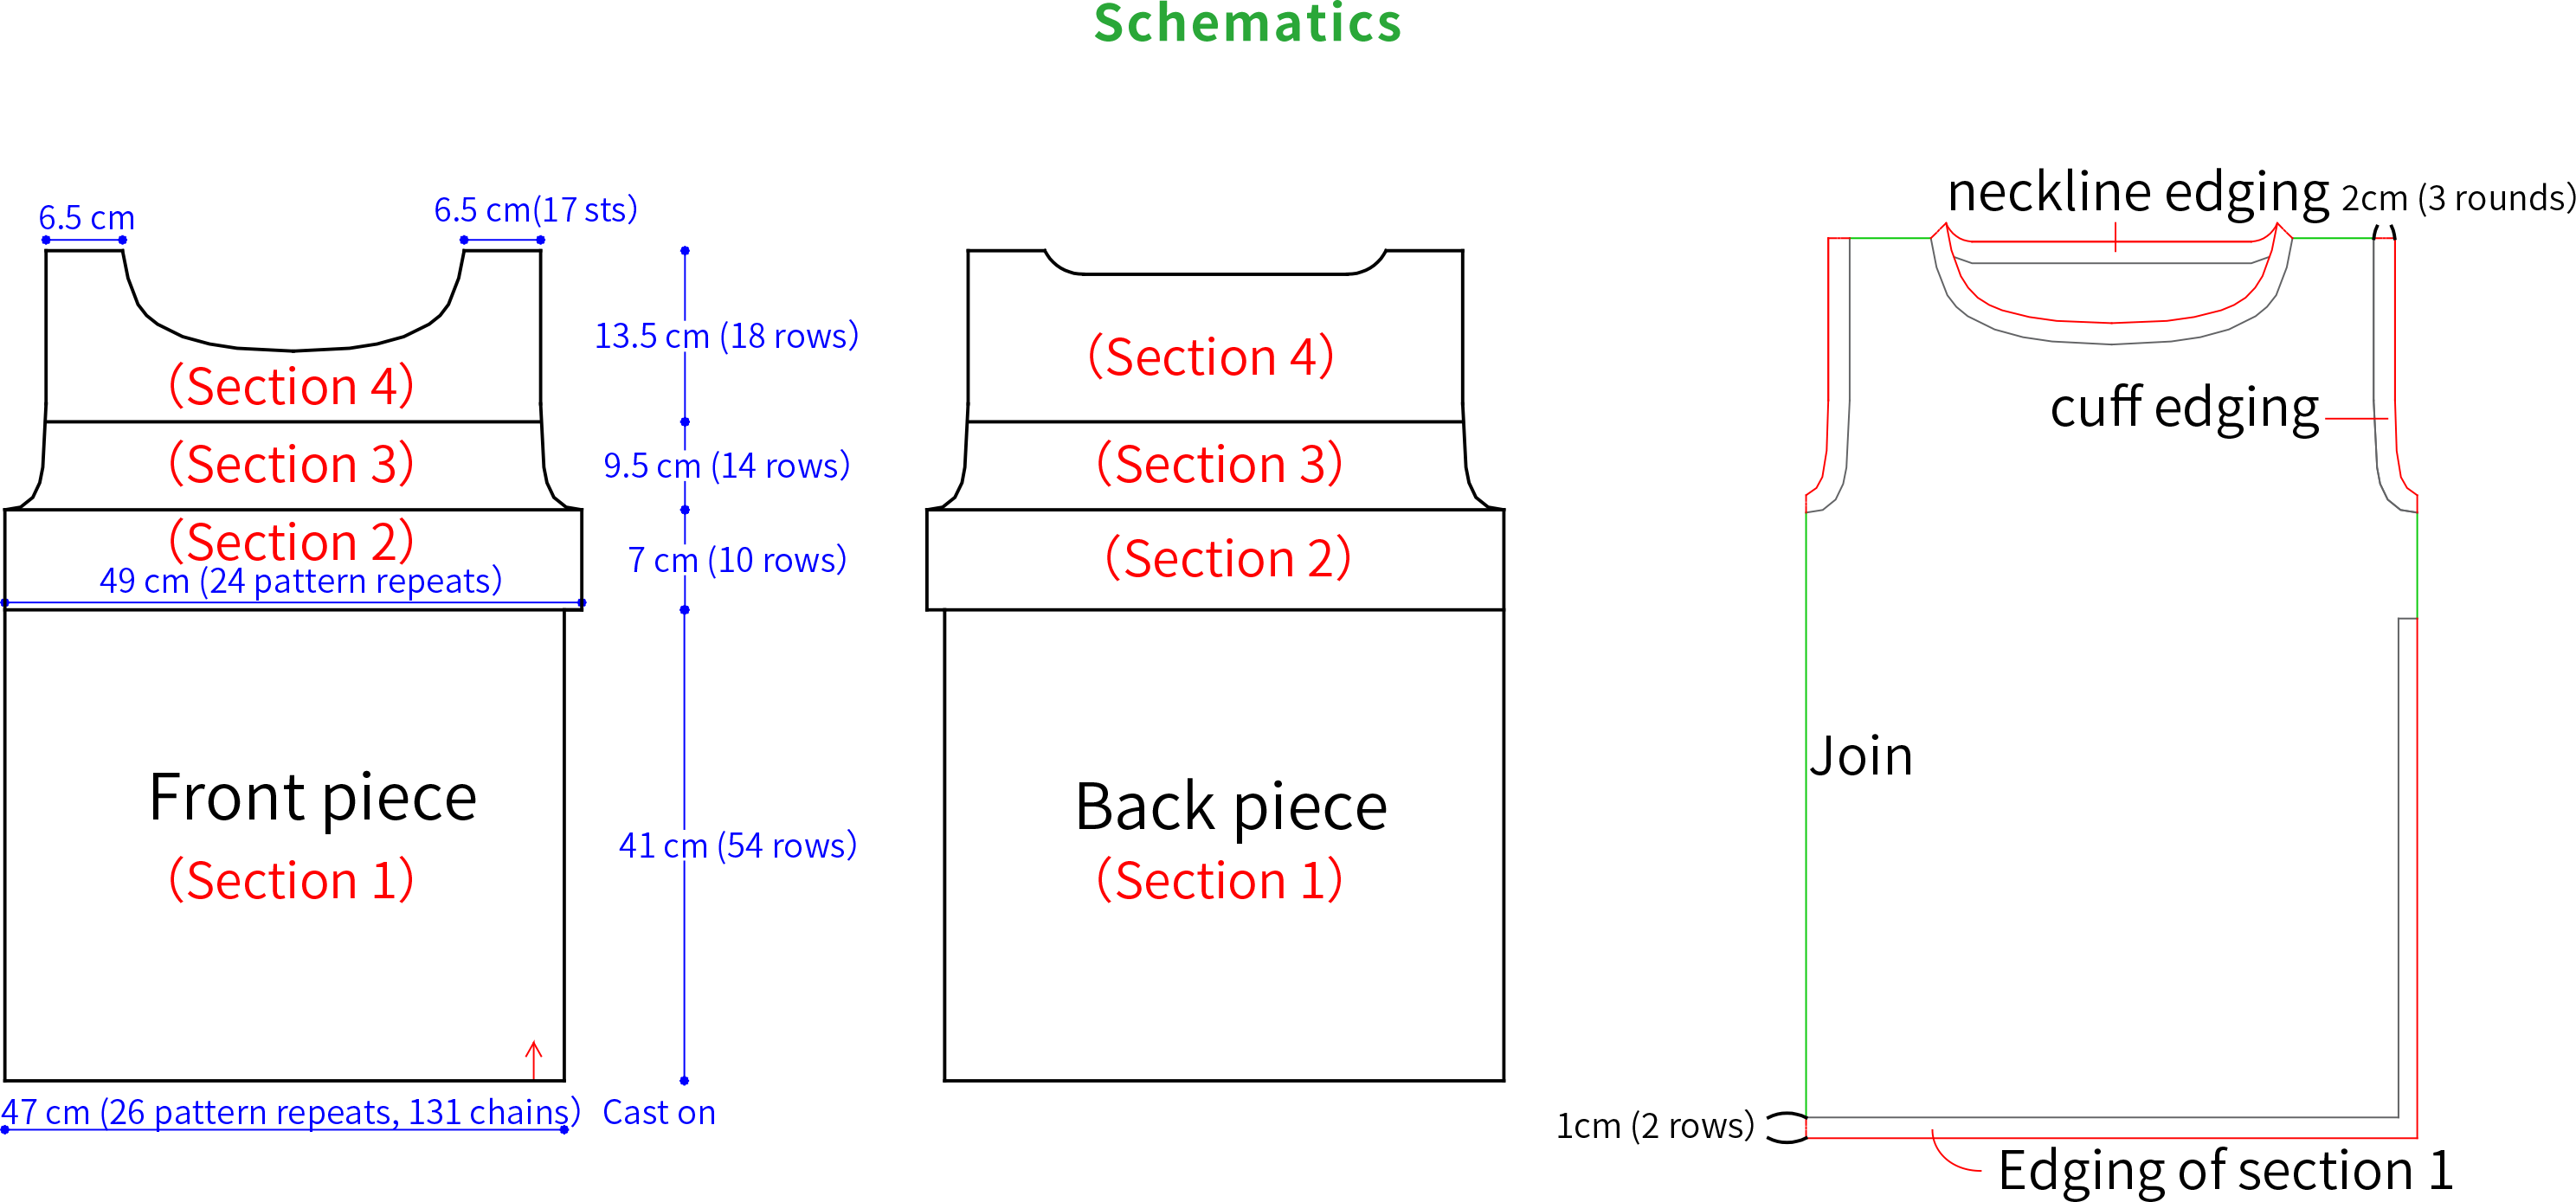
The pullover has several styles and sizes. The crochet technique is similar. It's divided into the back piece and the front piece, join, edging and the buttons. First, finish crocheting and join the front and back pieces. Then, edging around. Lastly, sew the buttons.
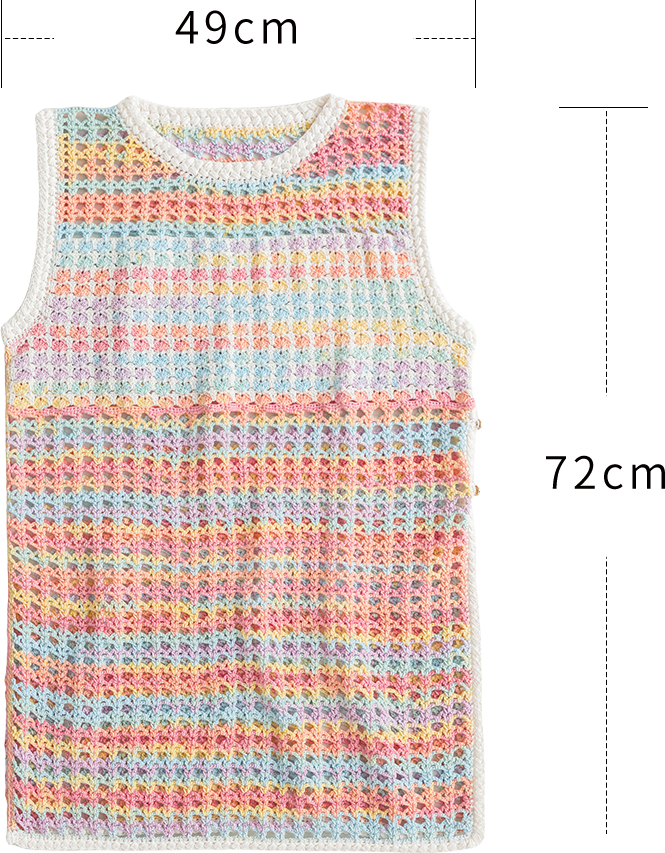
The handcrafted measurements may have an error of 1 to 2cm. Due to variations in individual tension, the size of the sample is for reference only.
Materials: Susan's Family Fancy Dyed Lace,Susan's Family Combed 3 Ply Lace )
Hook: 3.0mm crochet hook
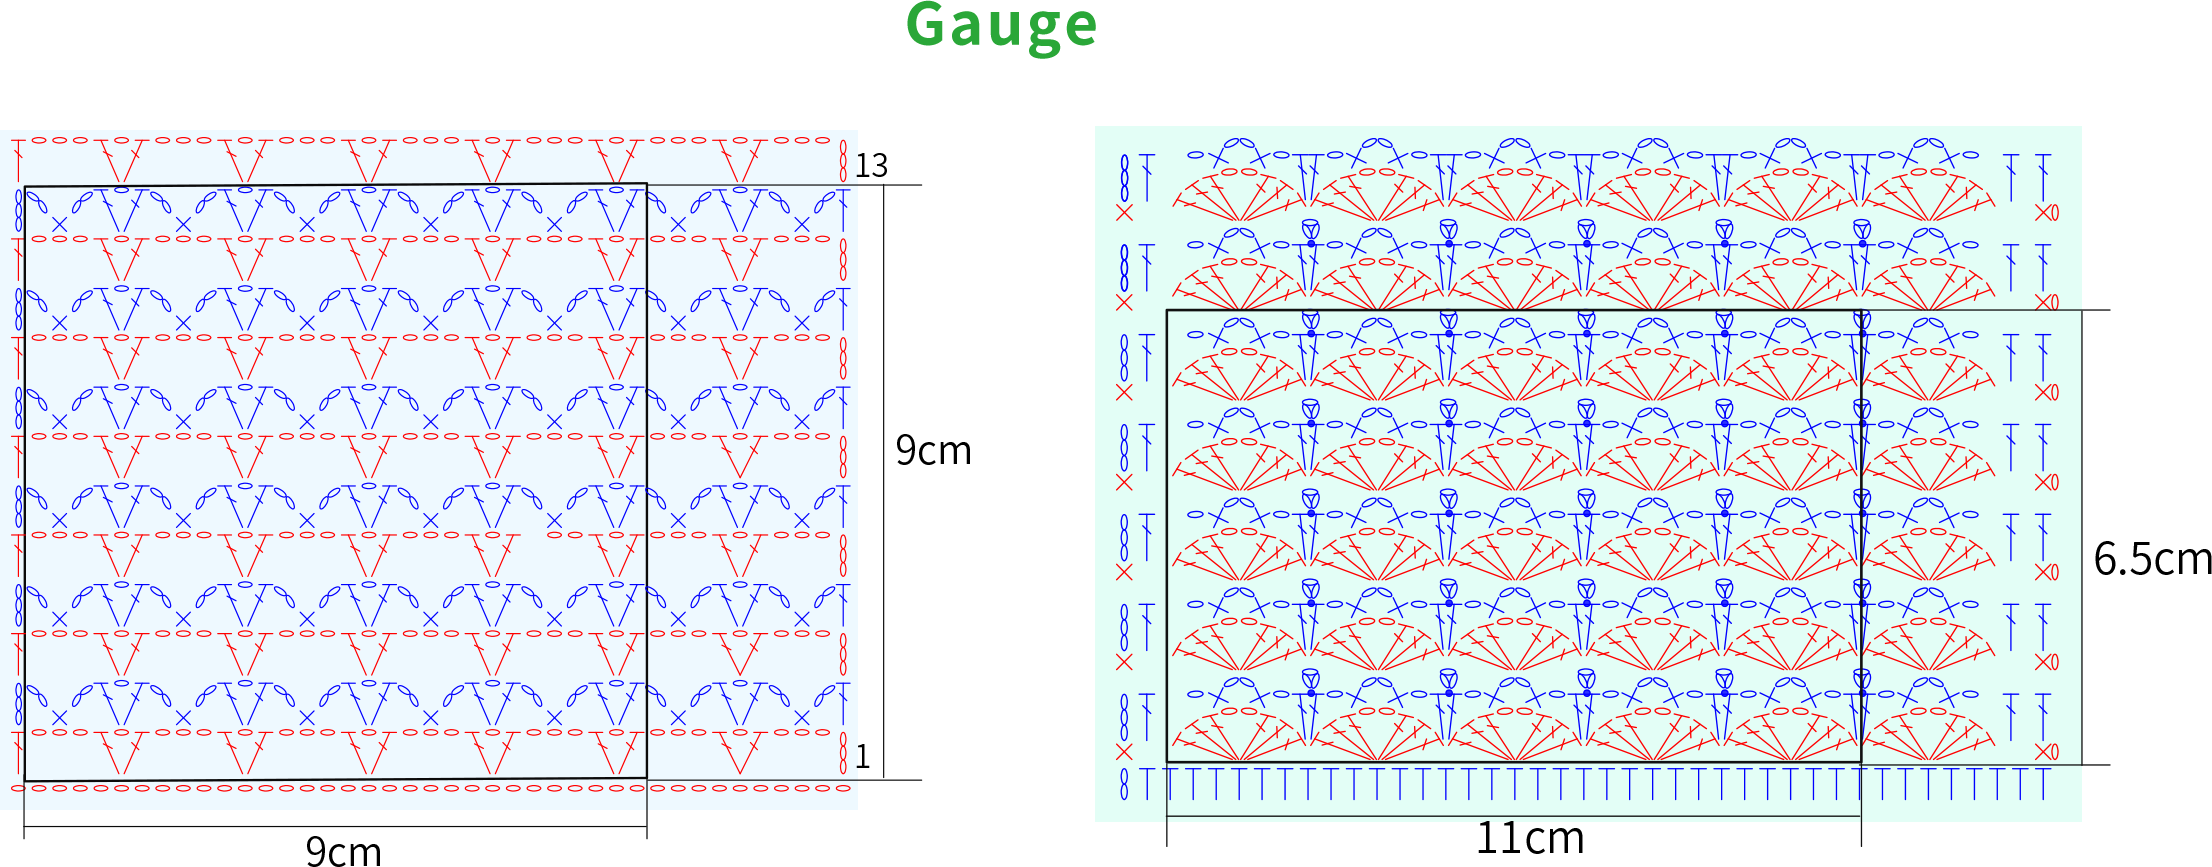
Chart Key









Part 1 Back pieceA 01' 22''
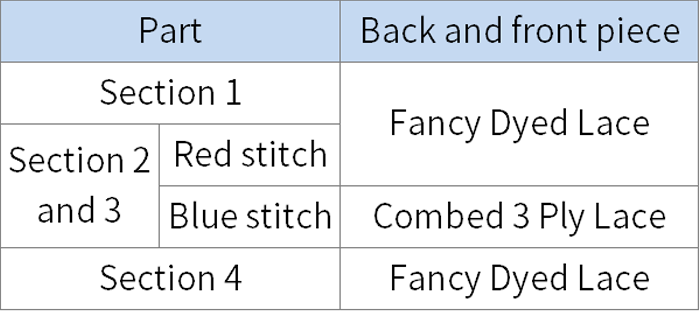
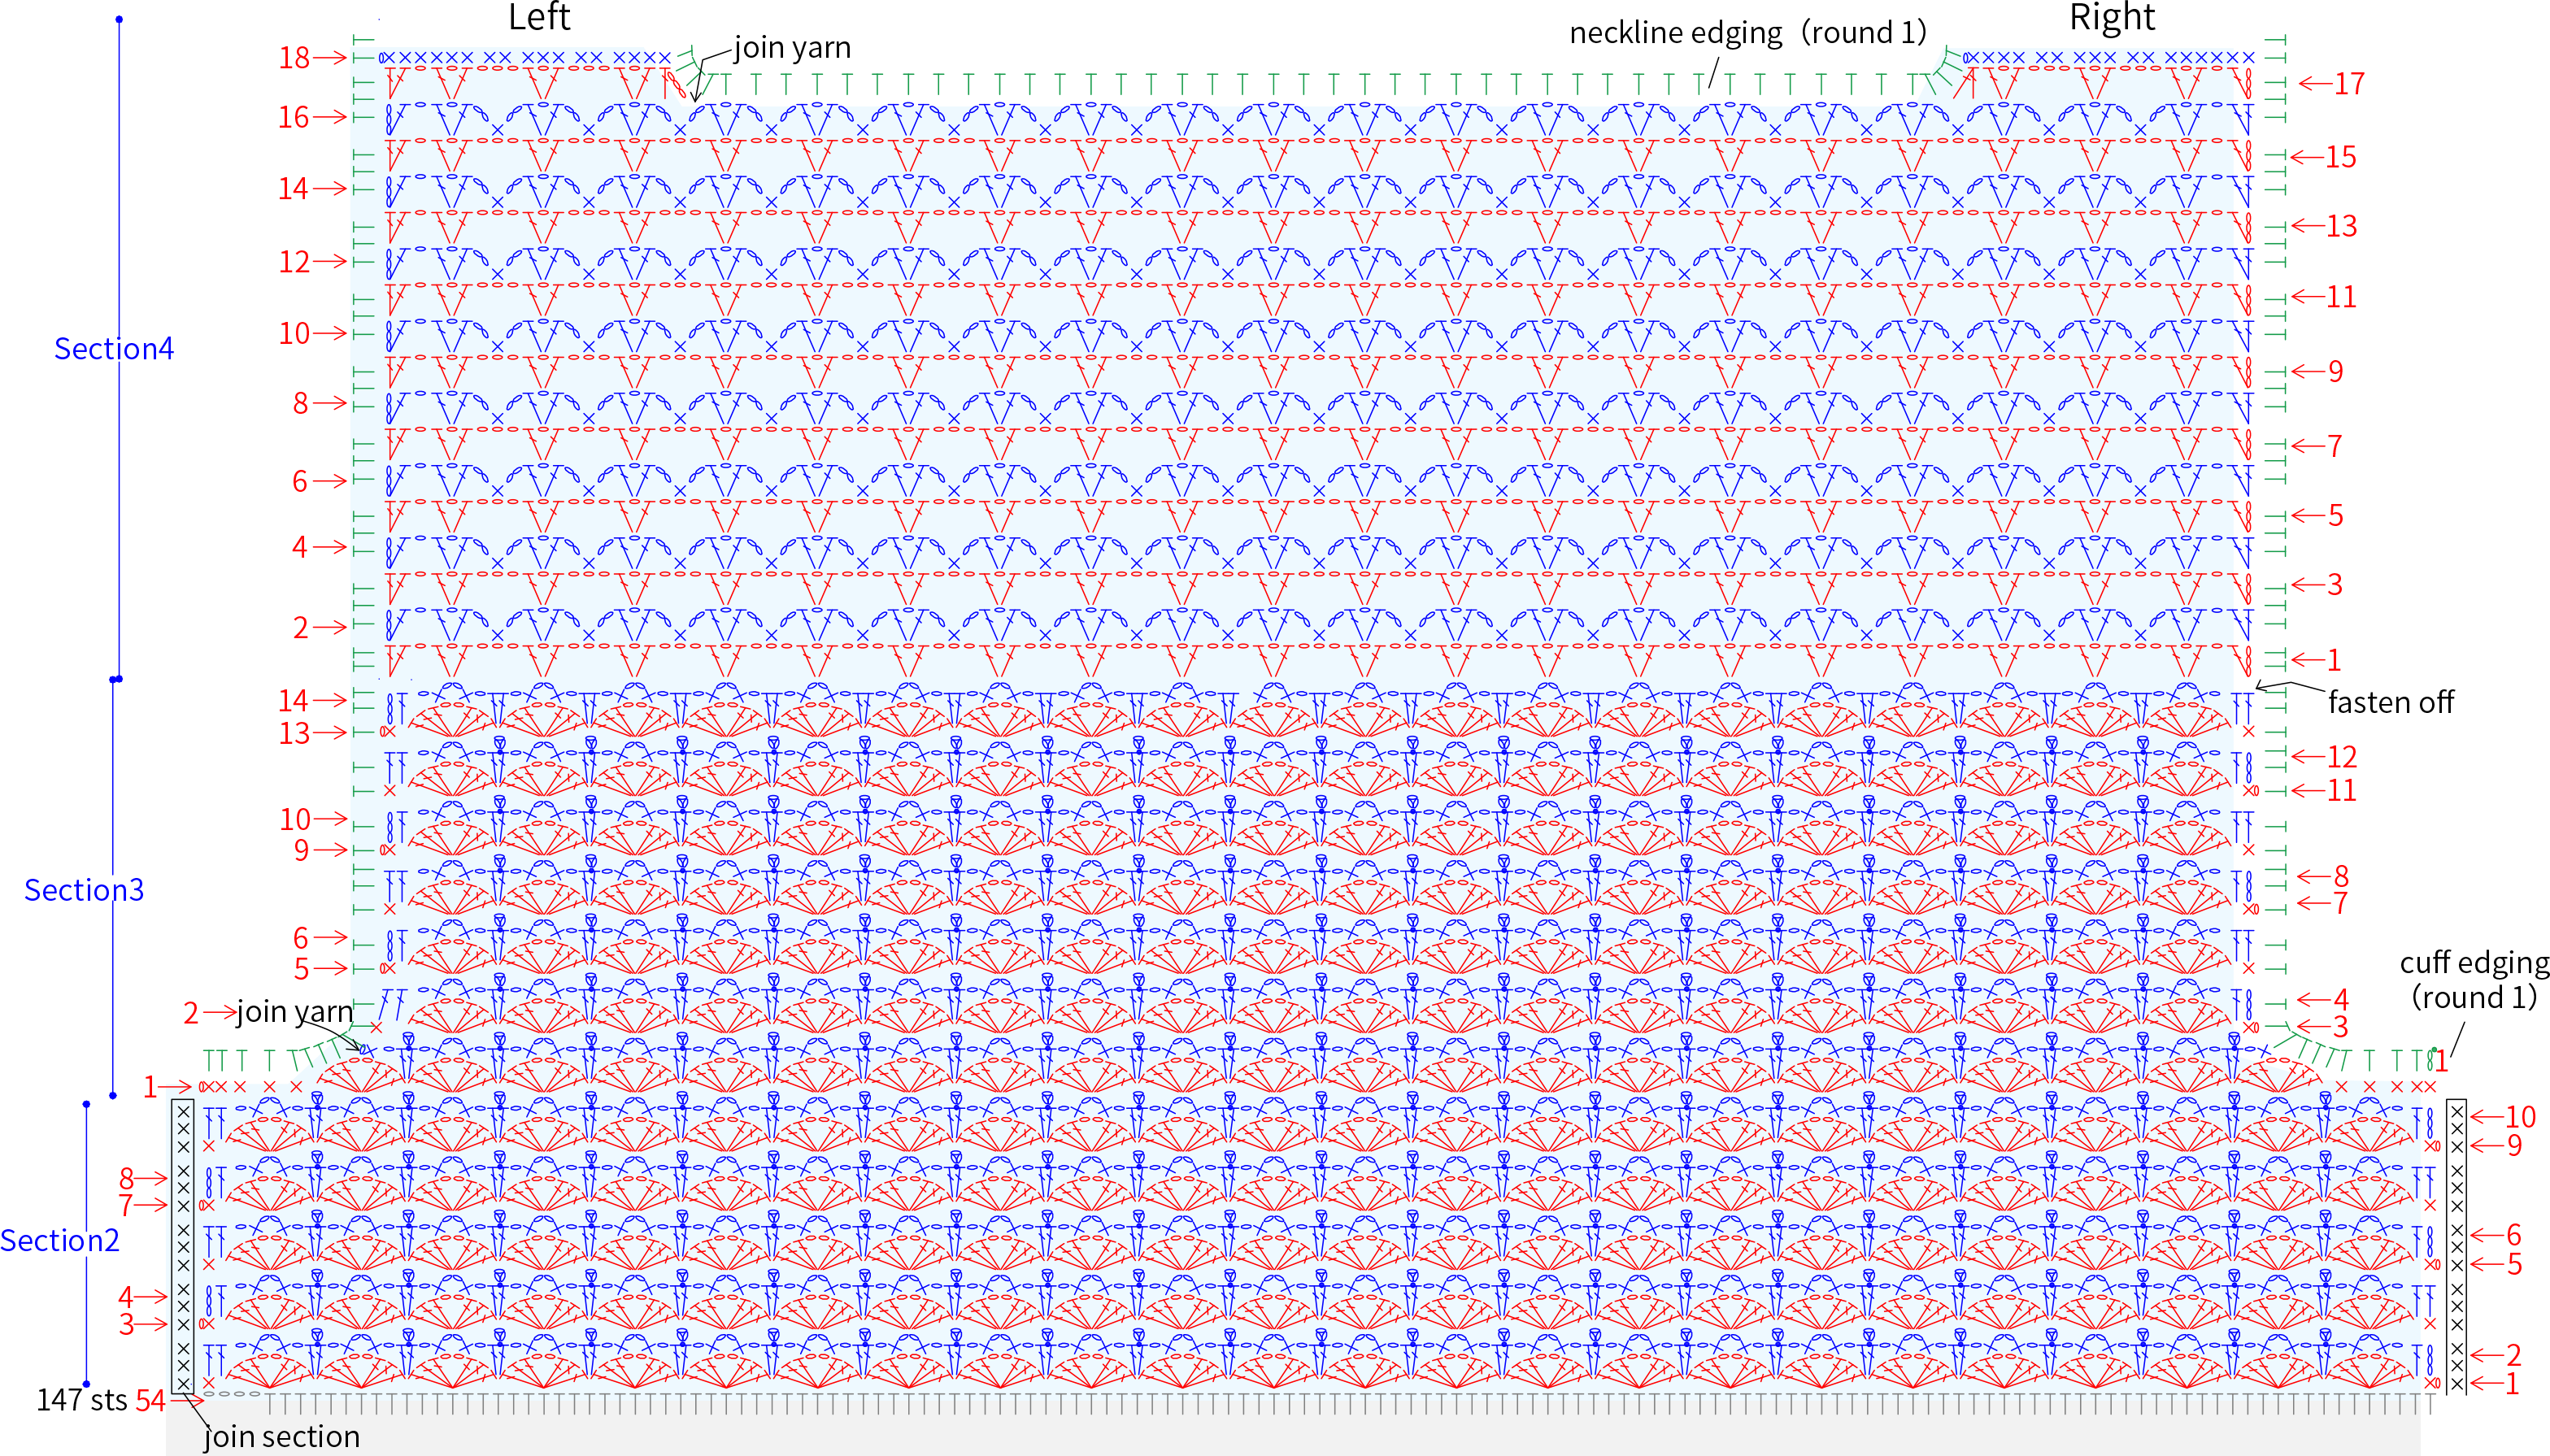
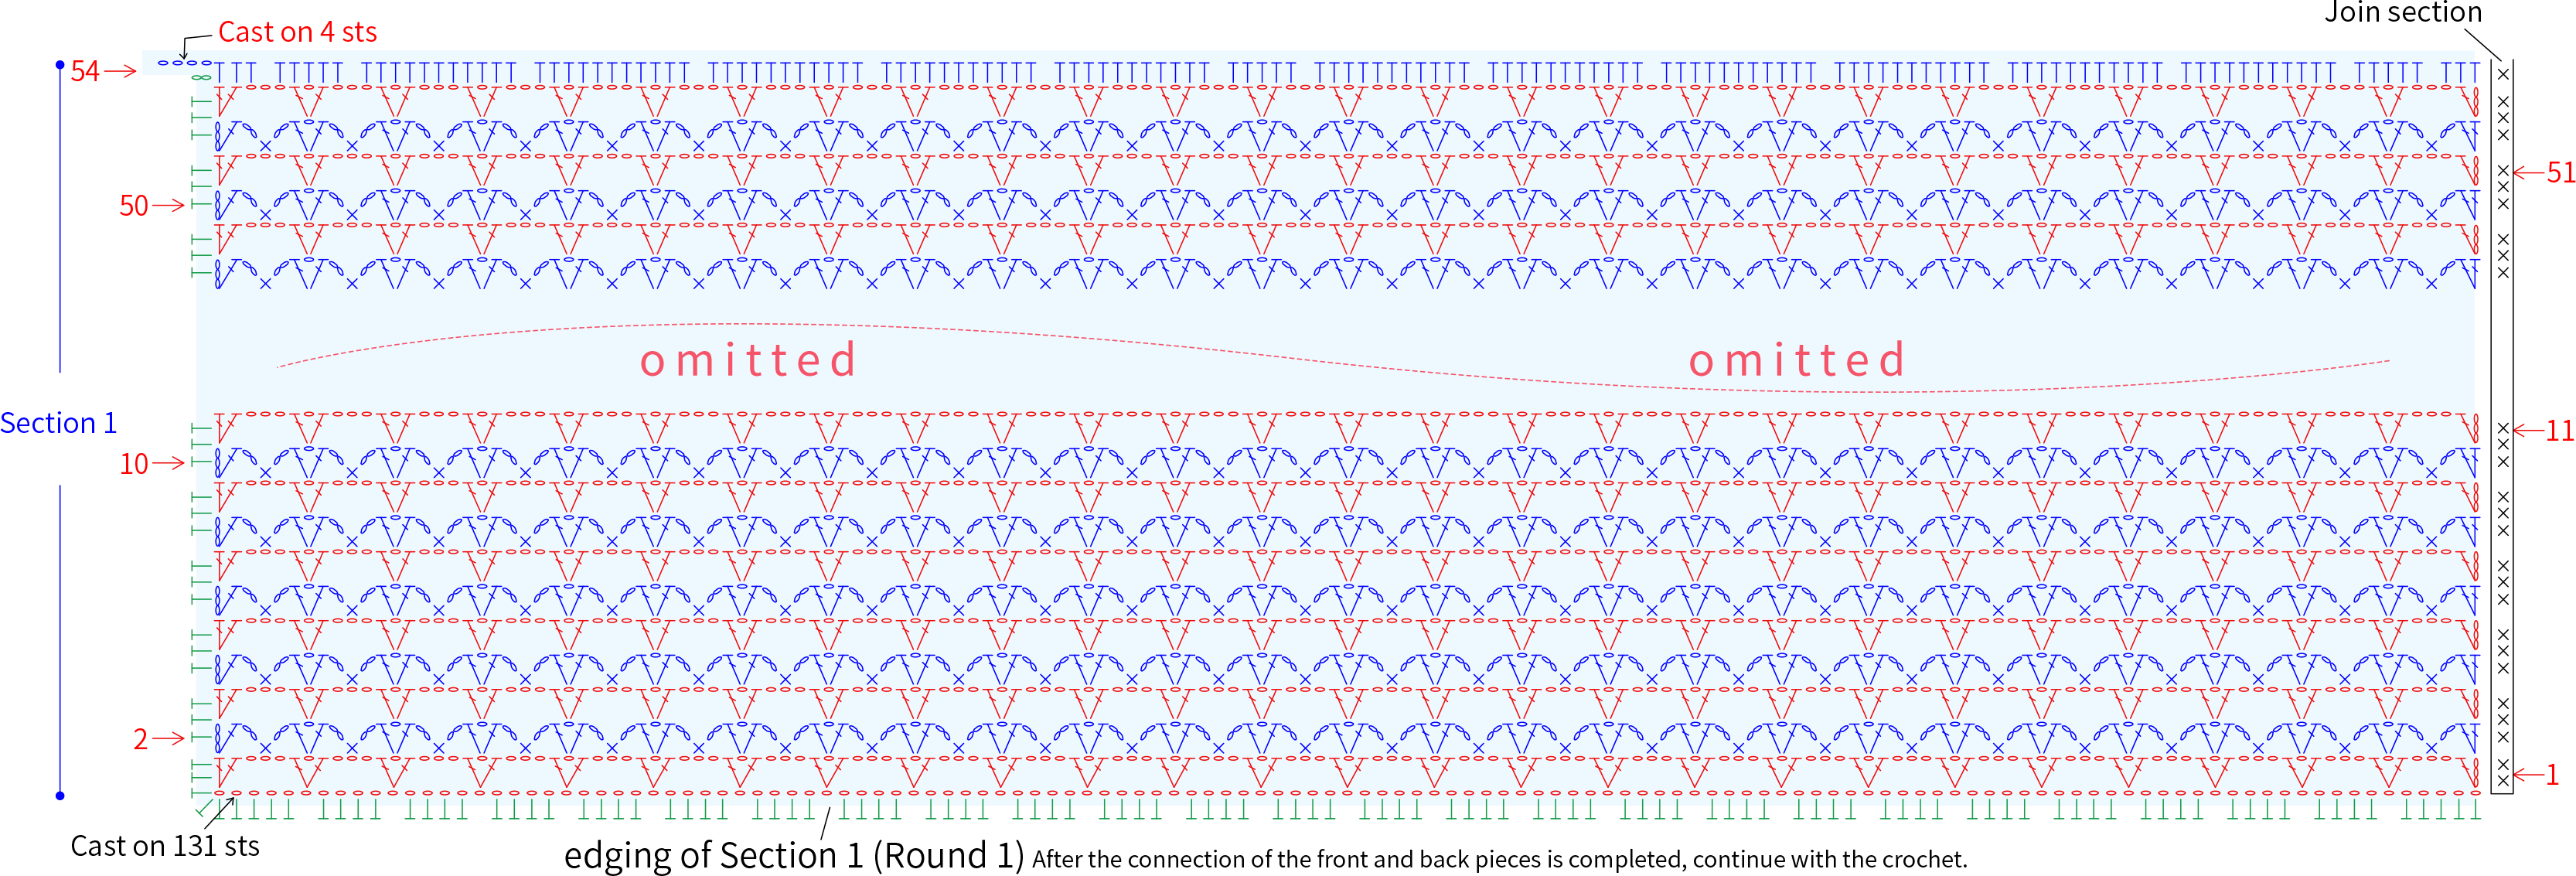
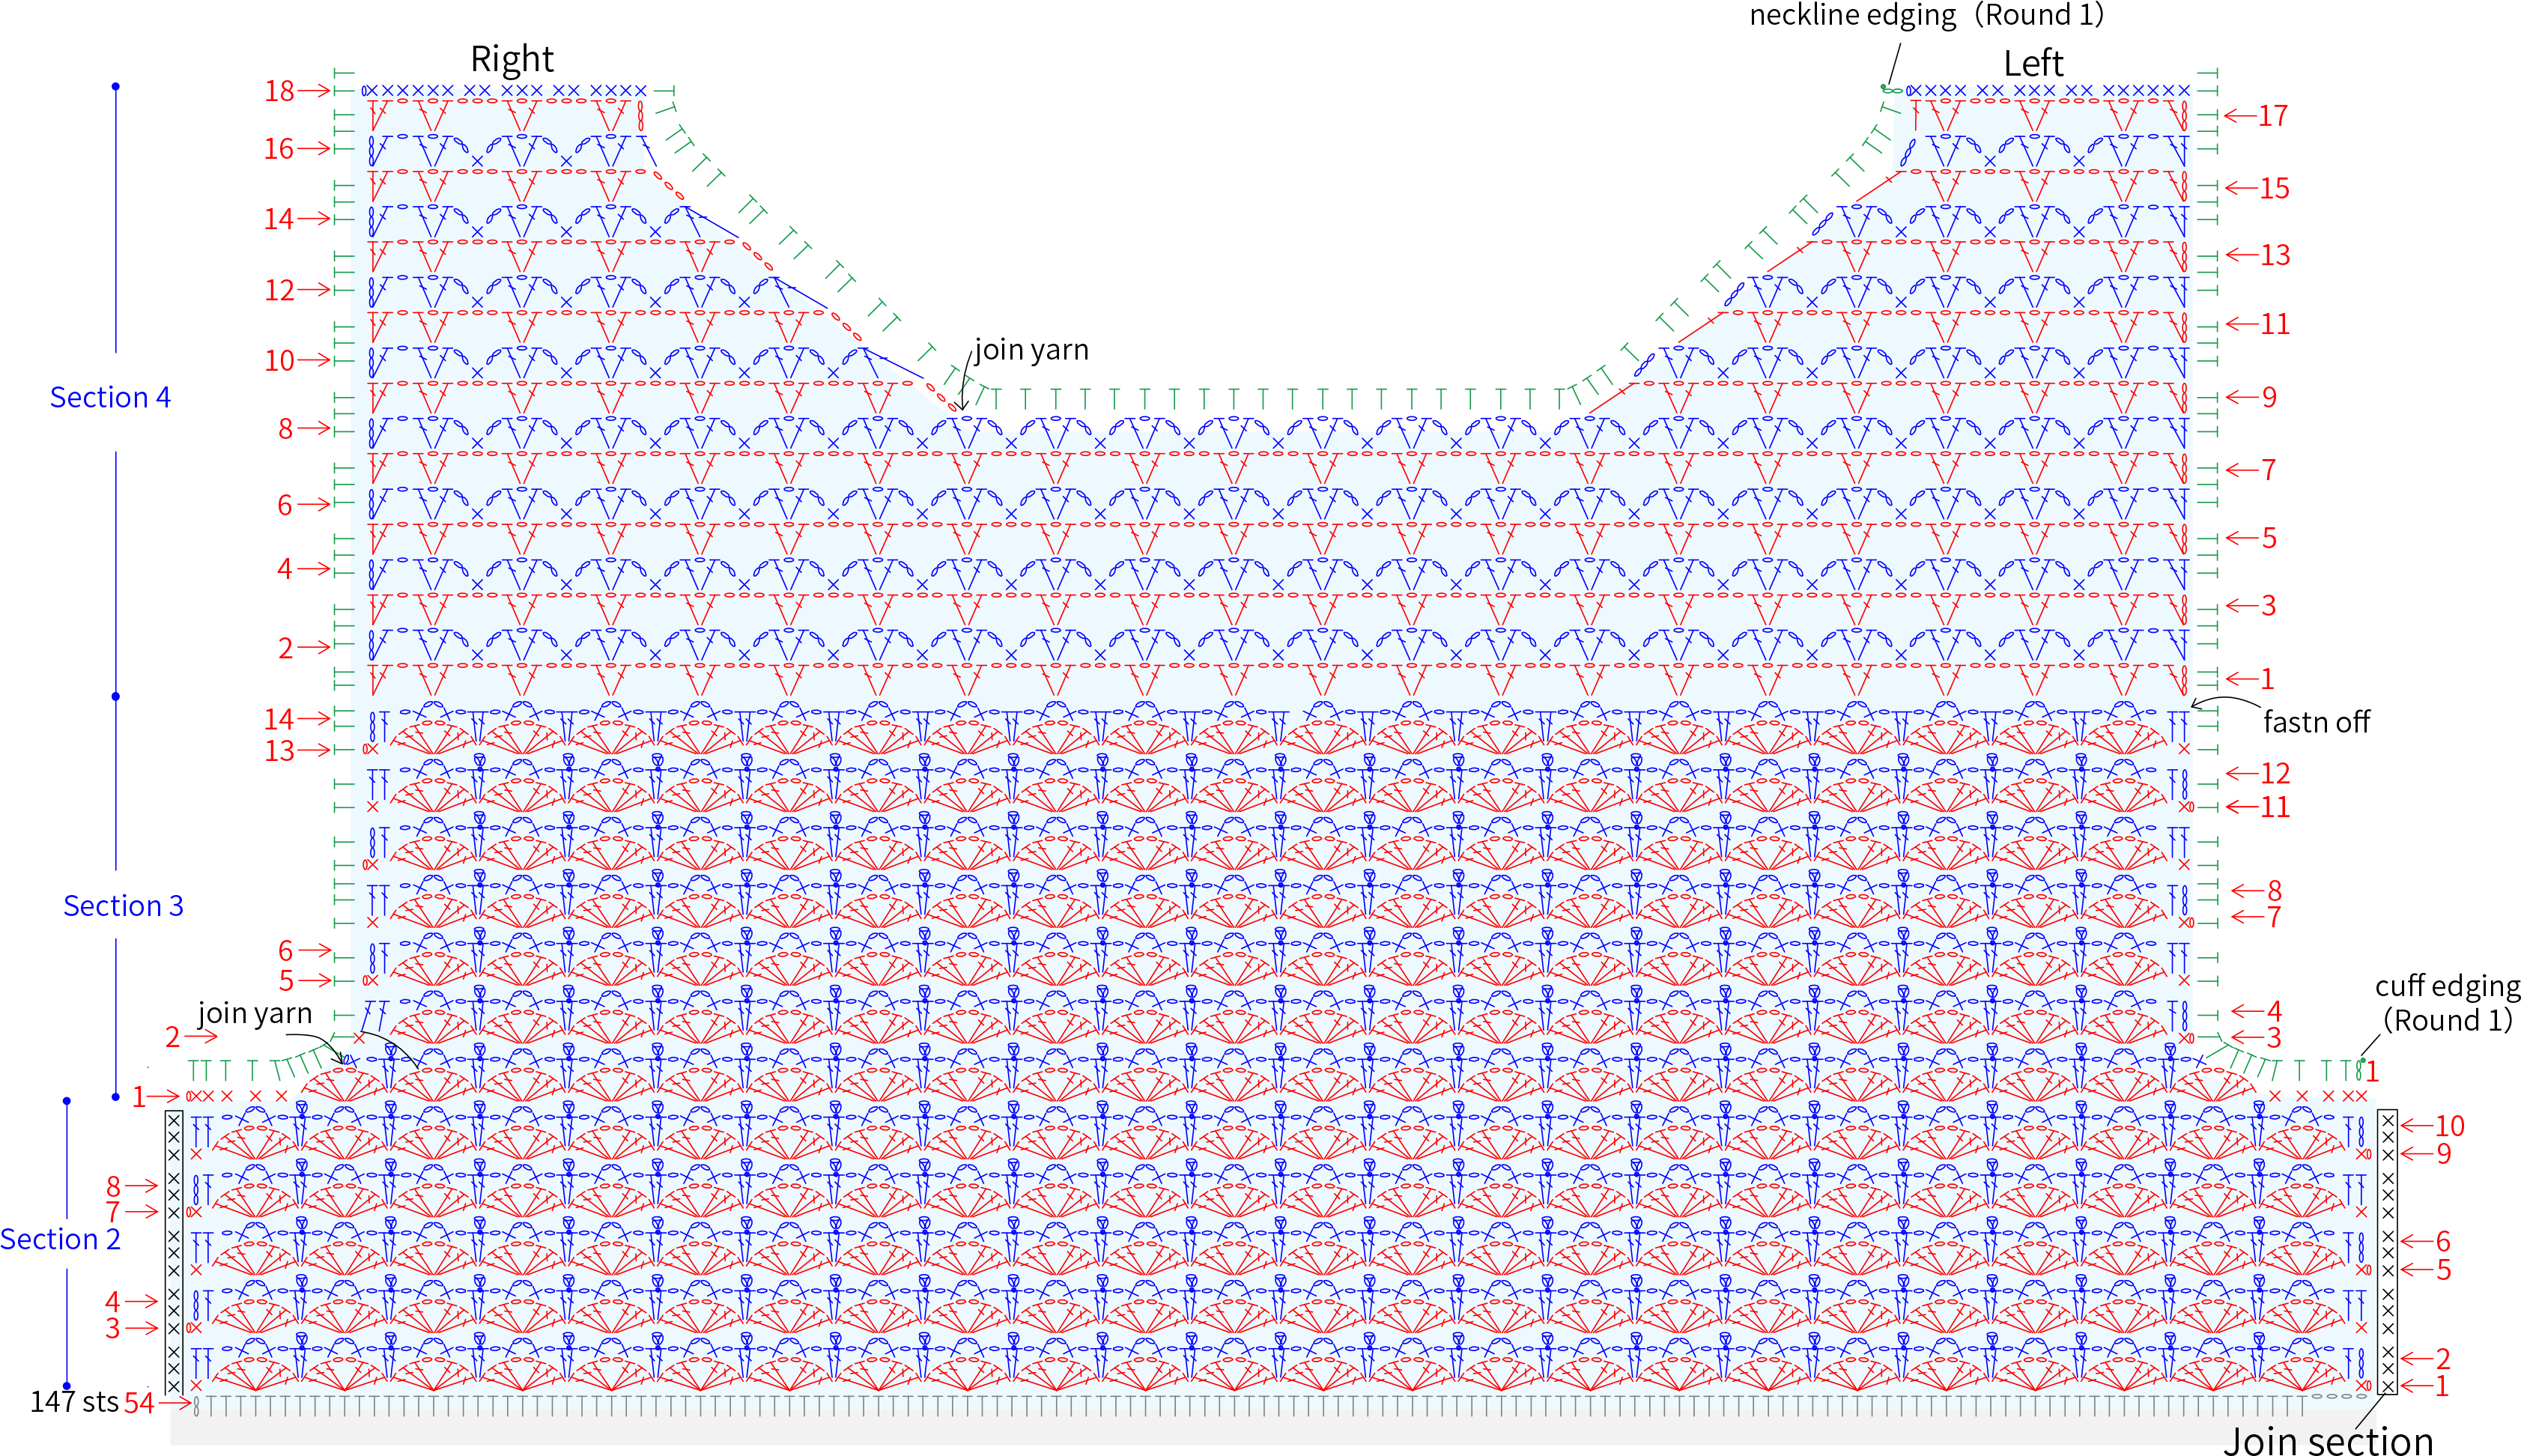
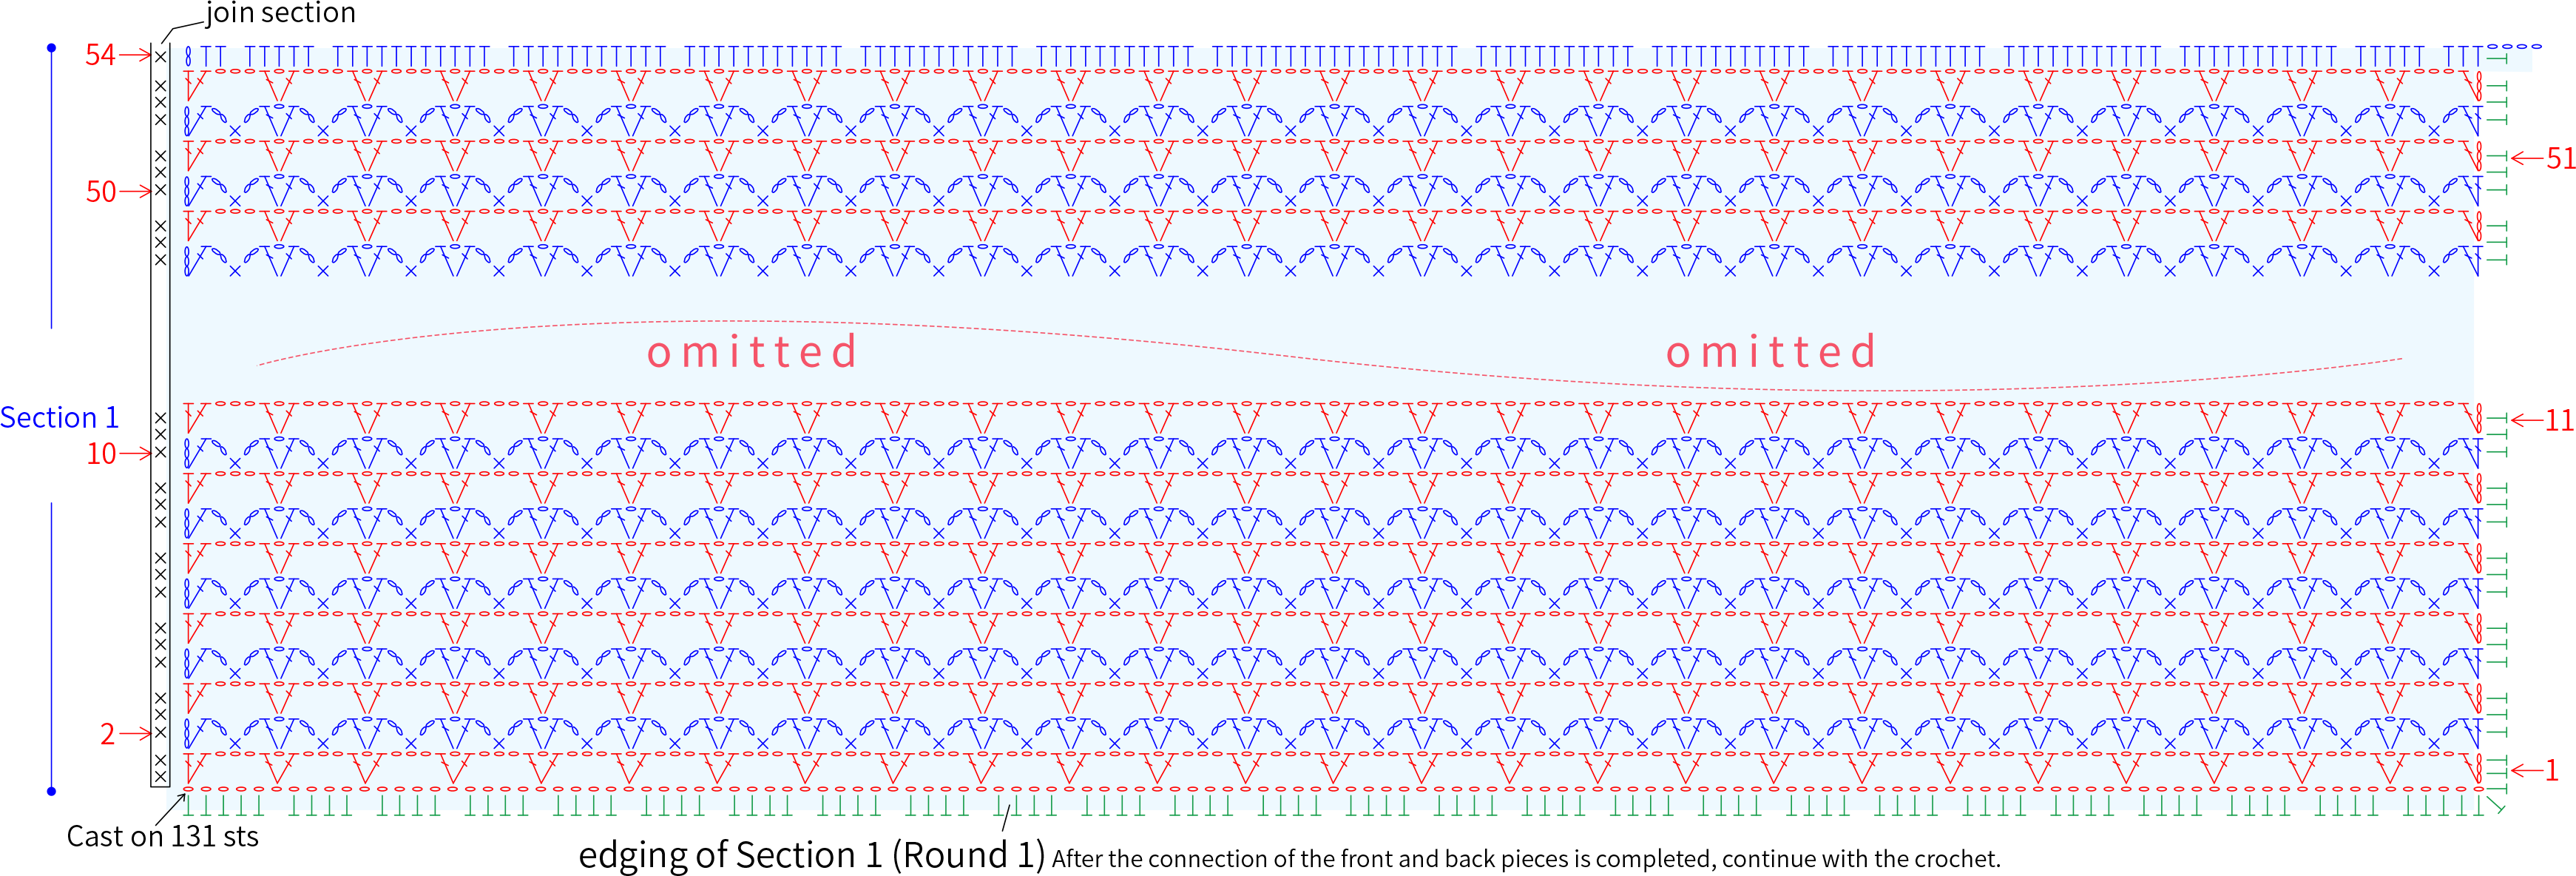
The back piece divided into Section 1 A1 , Section 2 A2 , Section 3 and Section 4 A3 . Section 1 begins with a foundation chain. Work back and forth in rows. Once done, move on to Section 2, 3 and 4. Please refer to the video demonstration for more details.
Part 2 Front piece, join the front
and back pieces A 27' 39''
After completing the front piece, join it to the corresponding position on the back piece. Please refer to the video demonstration for more details.
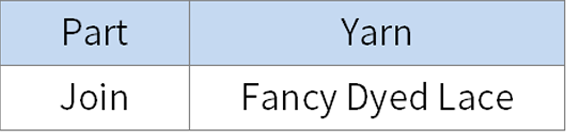
Note:
1. Note: Leave a 50cm yarn tail at the end of both left and right shoulders. The shoulders are directly connected using a slip stitch seam.
2. For the pattern chart's designated connection points, work single crochets on both the front and back pieces first, then connect them using a slip stitch.
3. The number of stitches for the first round (or row) of the edging can be adjusted. Just ensure that the fabric lays flat, and the final stitch count is an even number.
Part 3 Edging and buttonsC 33' 43''
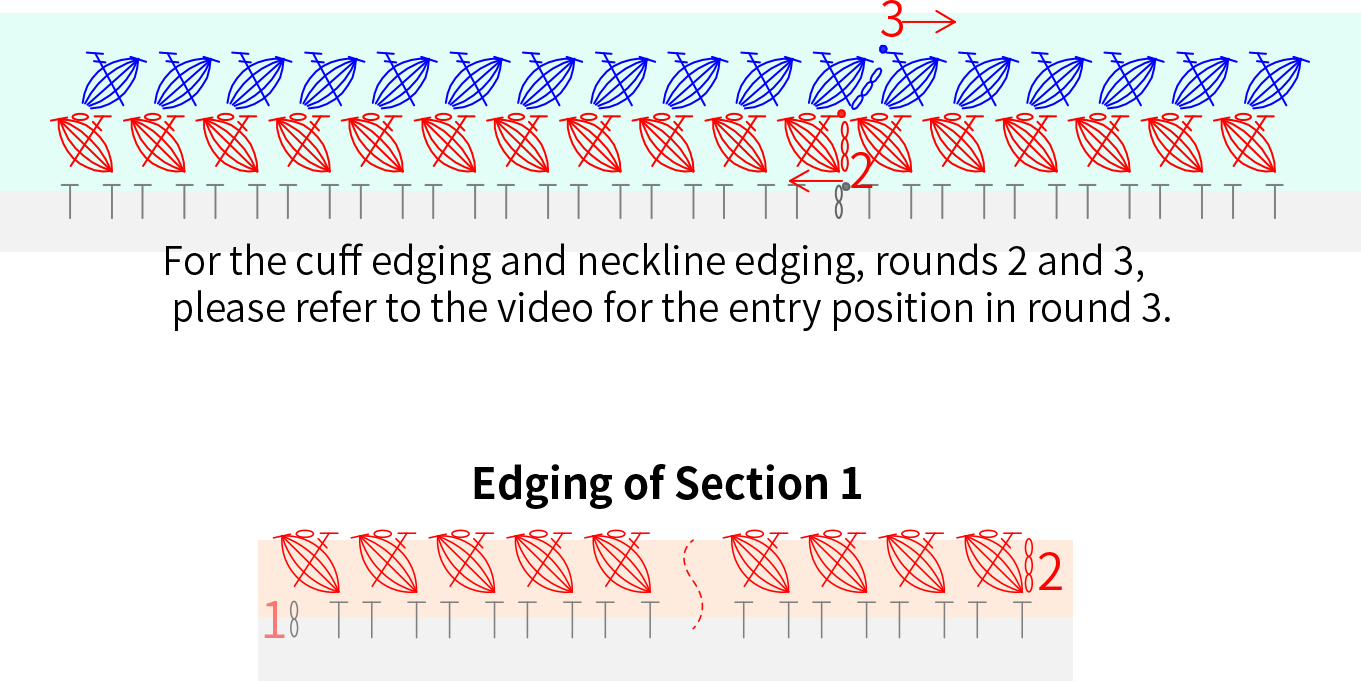
Edging includes the cuffs edging, the neckline edging and the edging of Section 1. For the cuffs and neckline, crochet back and forth in rounds. Section 1 is worked back and forth in rounds. Please refer to the video demonstration for more details.

Note:
1. For the edging of Section 1, leave a 20cm yarn tail at both the start and end.
2. There are a total of 4 buttonholes which need to be crocheted separately, crochet about 7 chain stitches, then leave a yarn tail at the end for sewing and securing in place.

Made by the community