Clothes
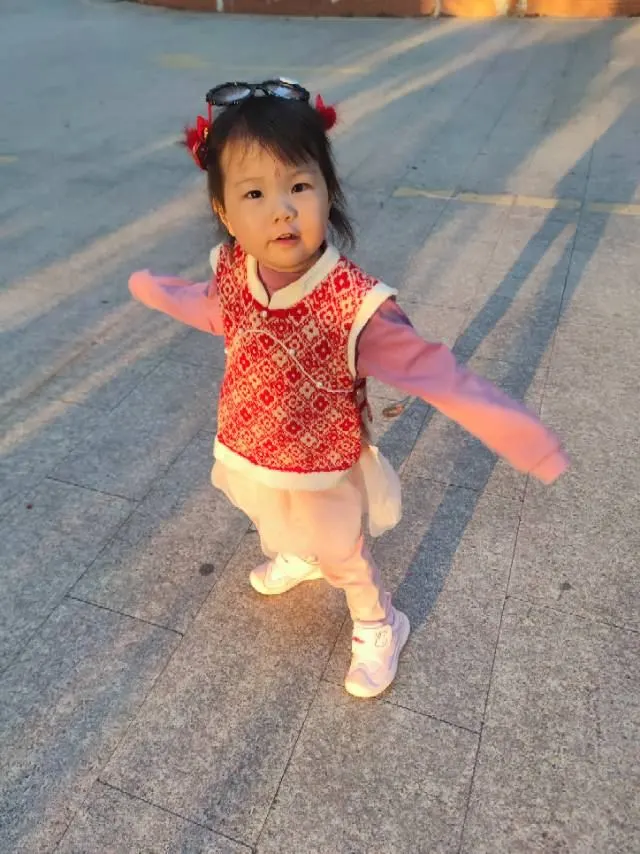
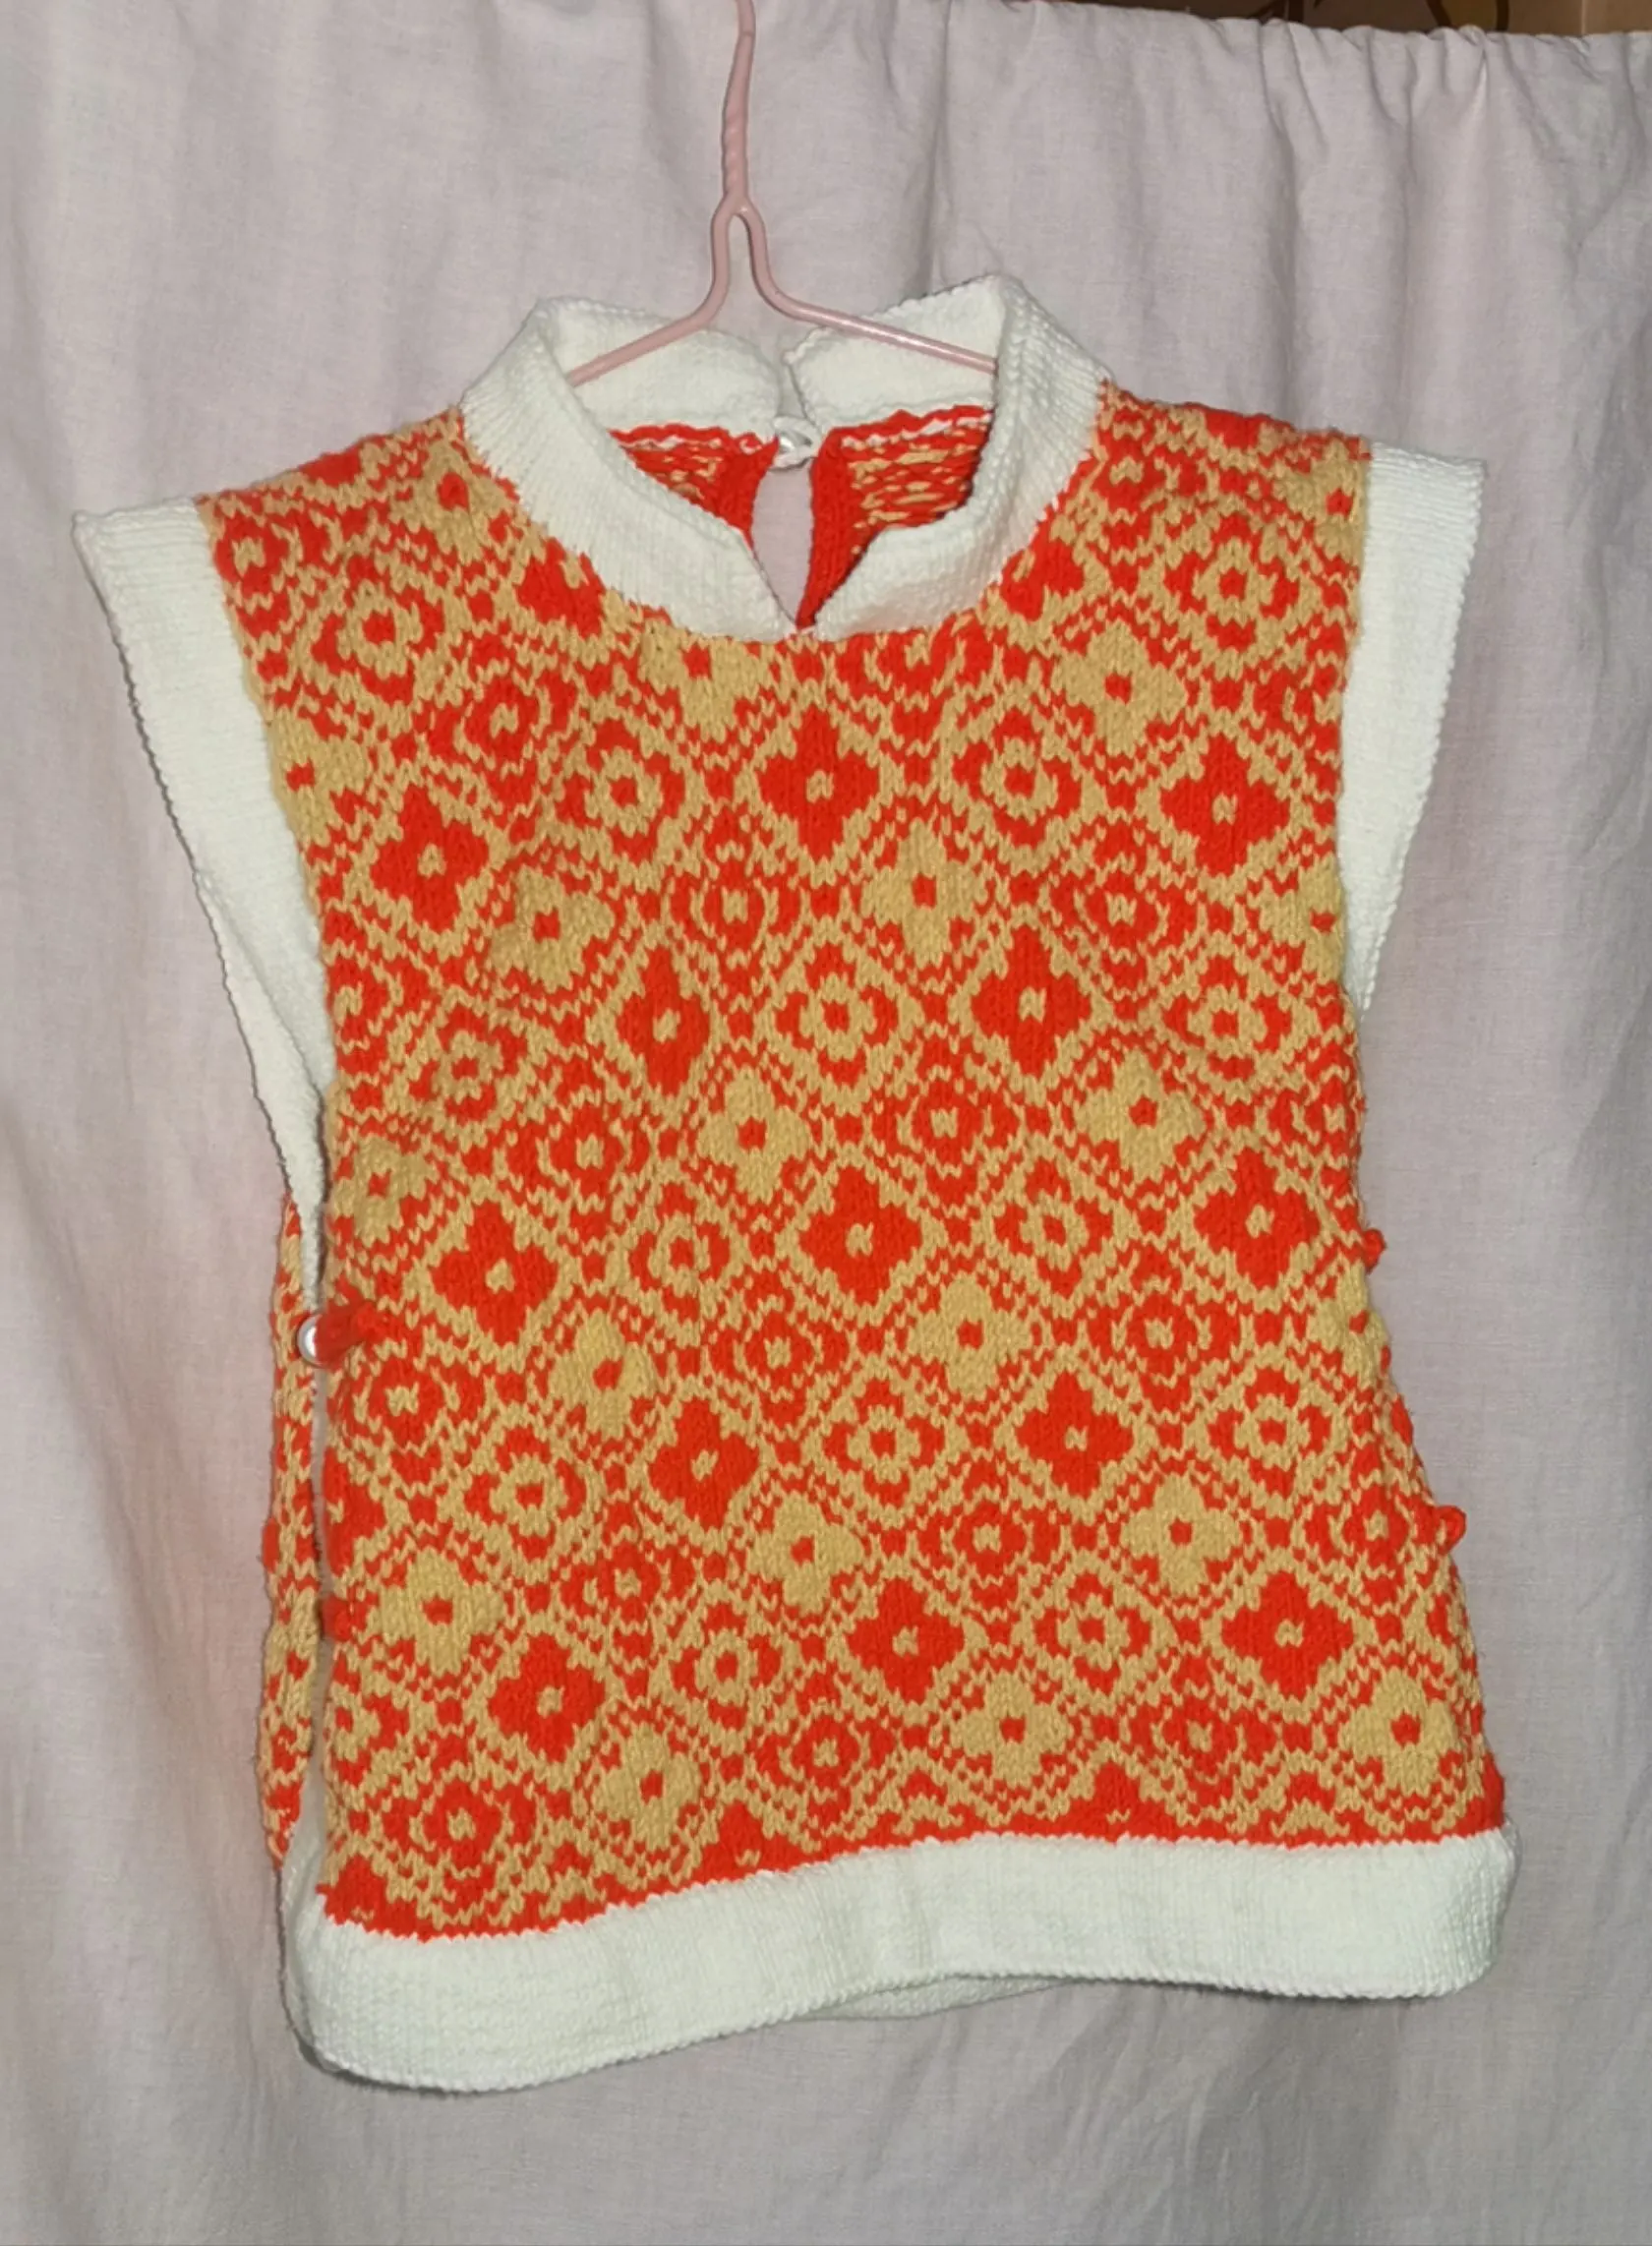
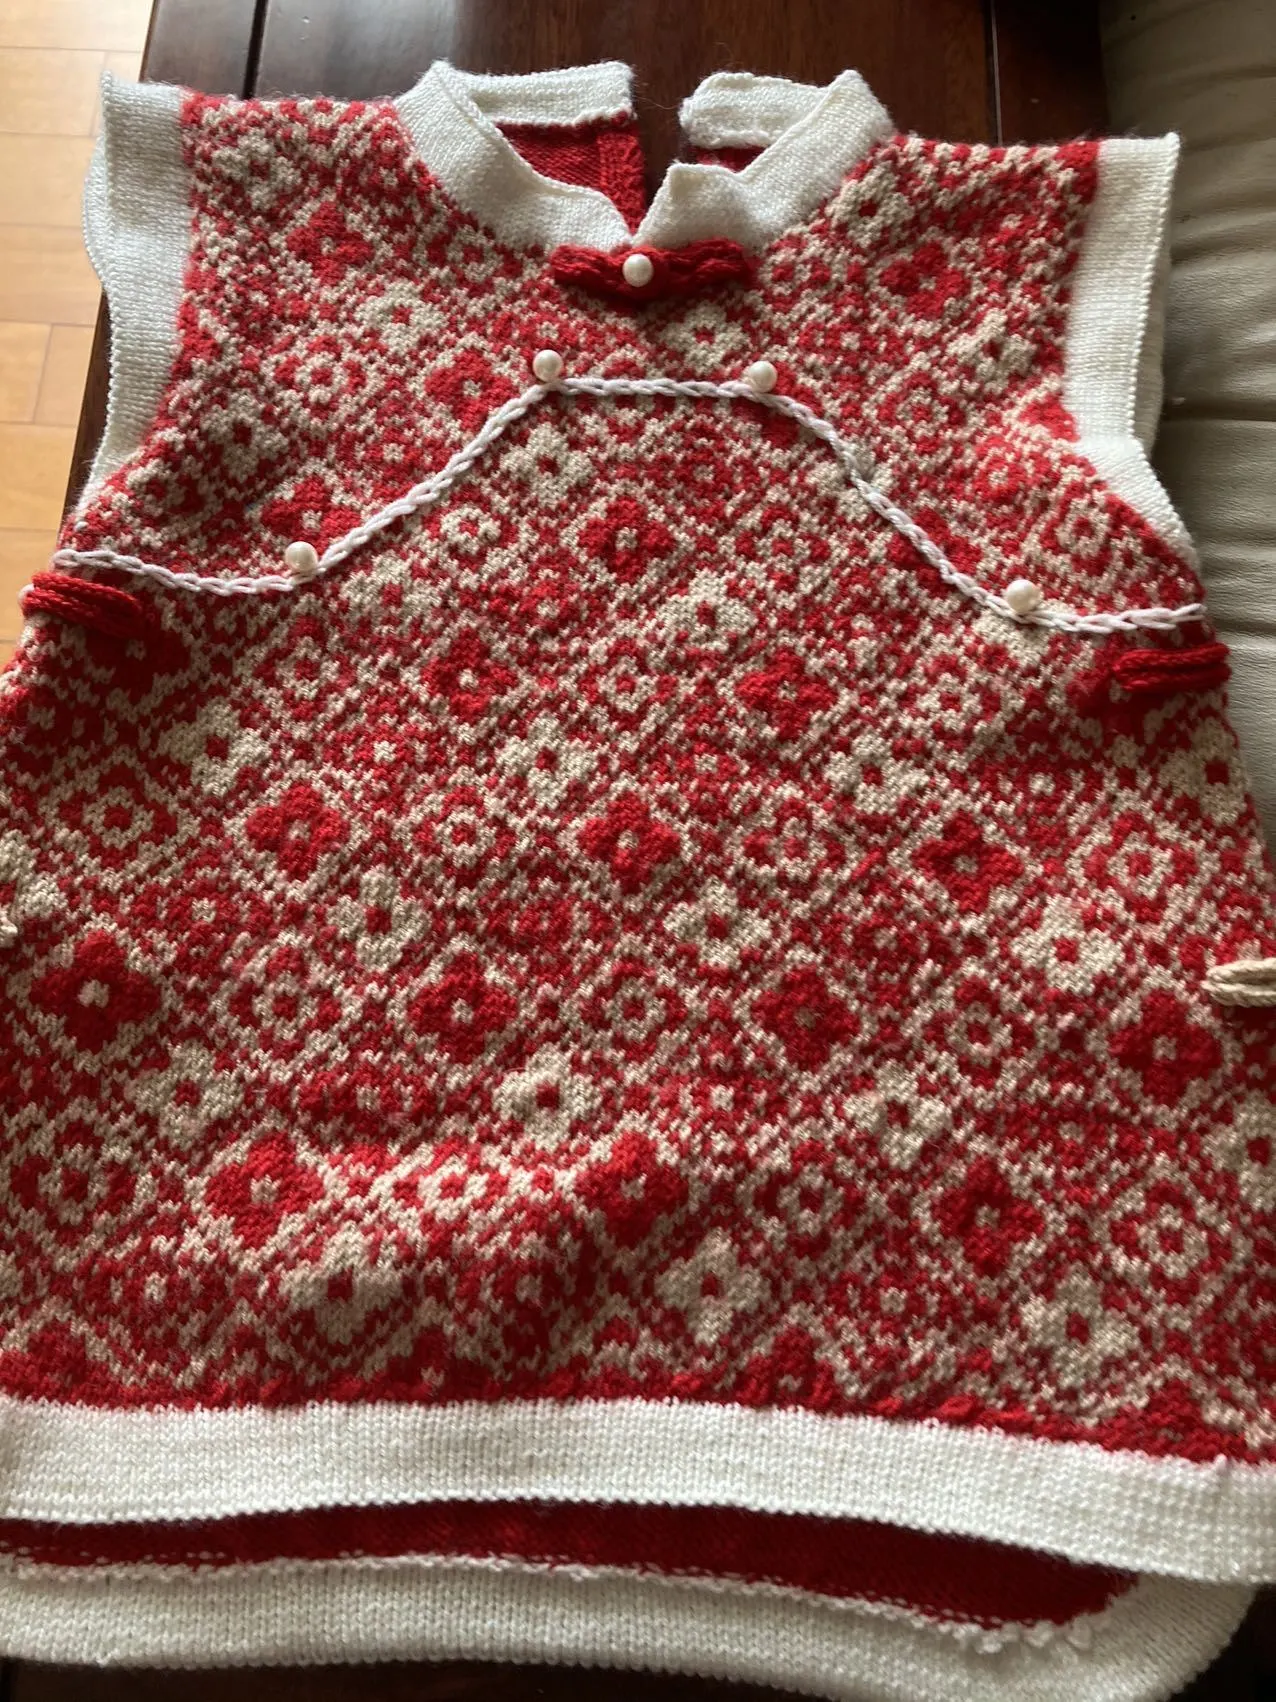
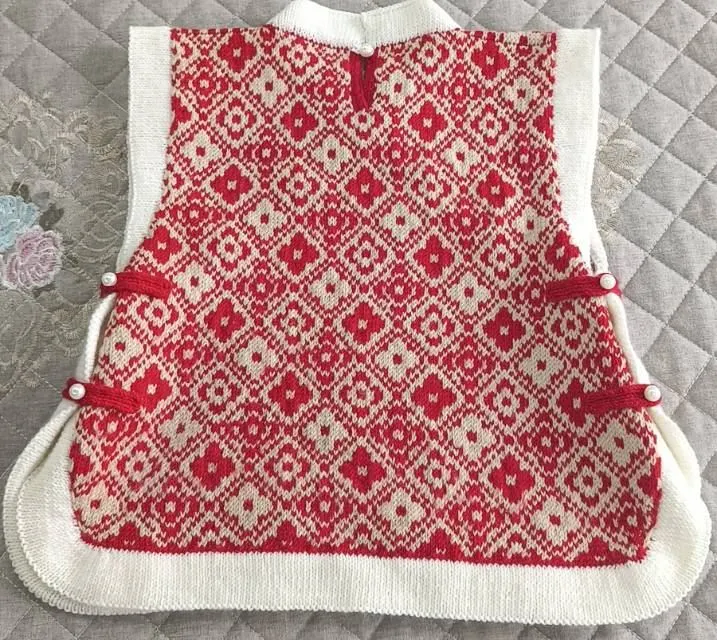
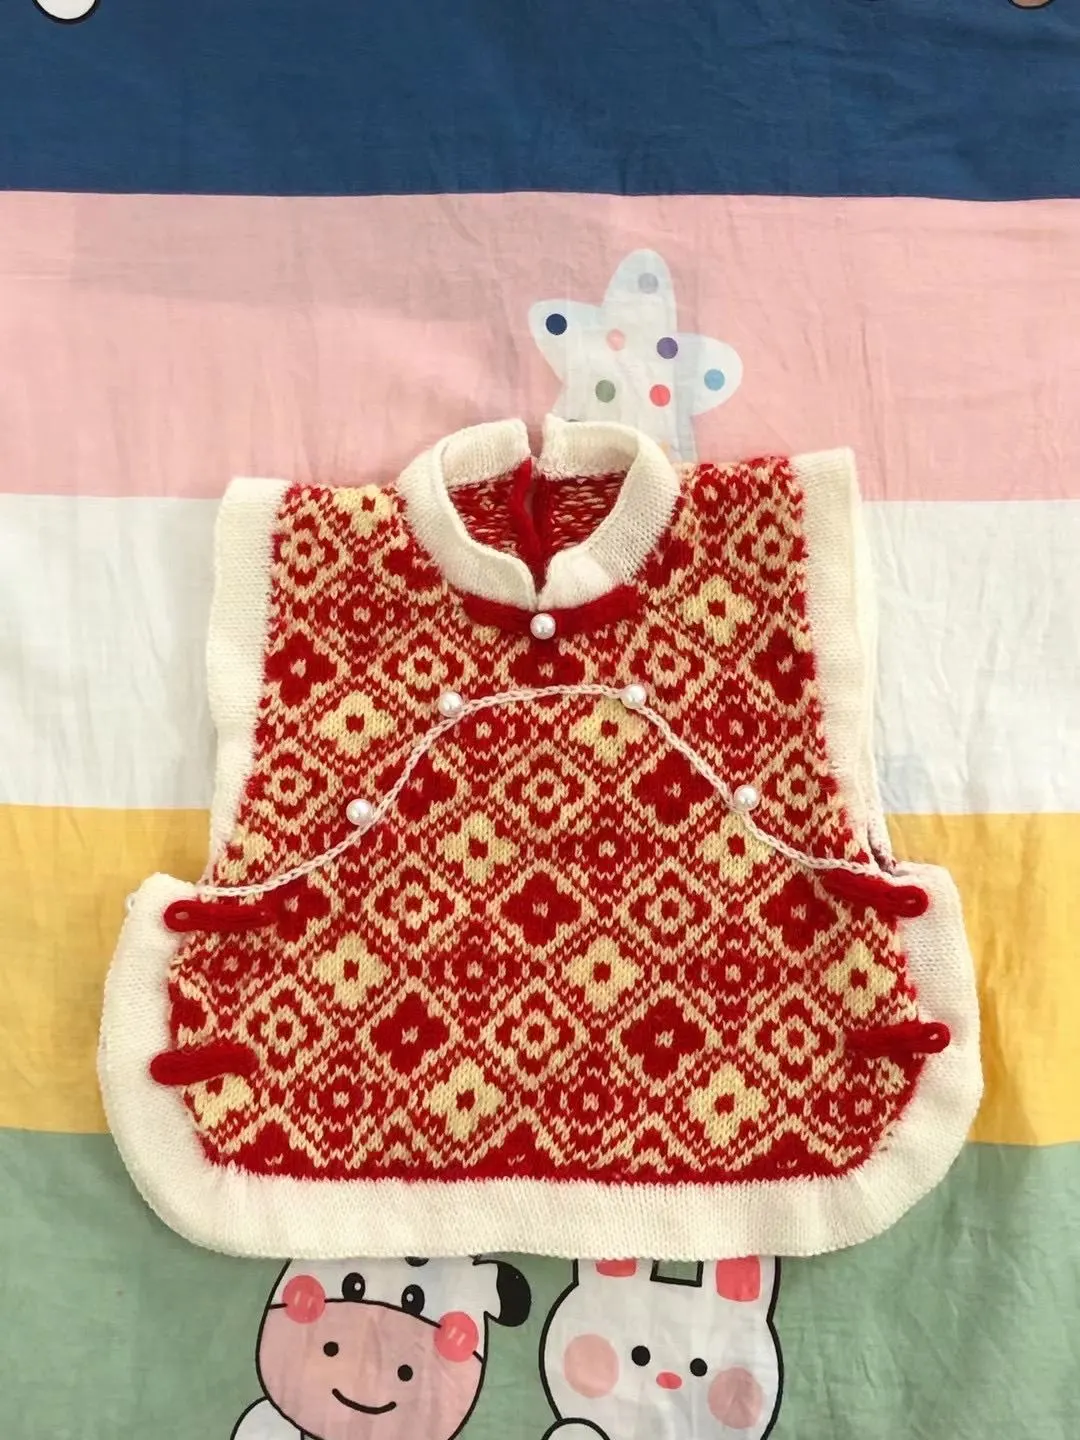
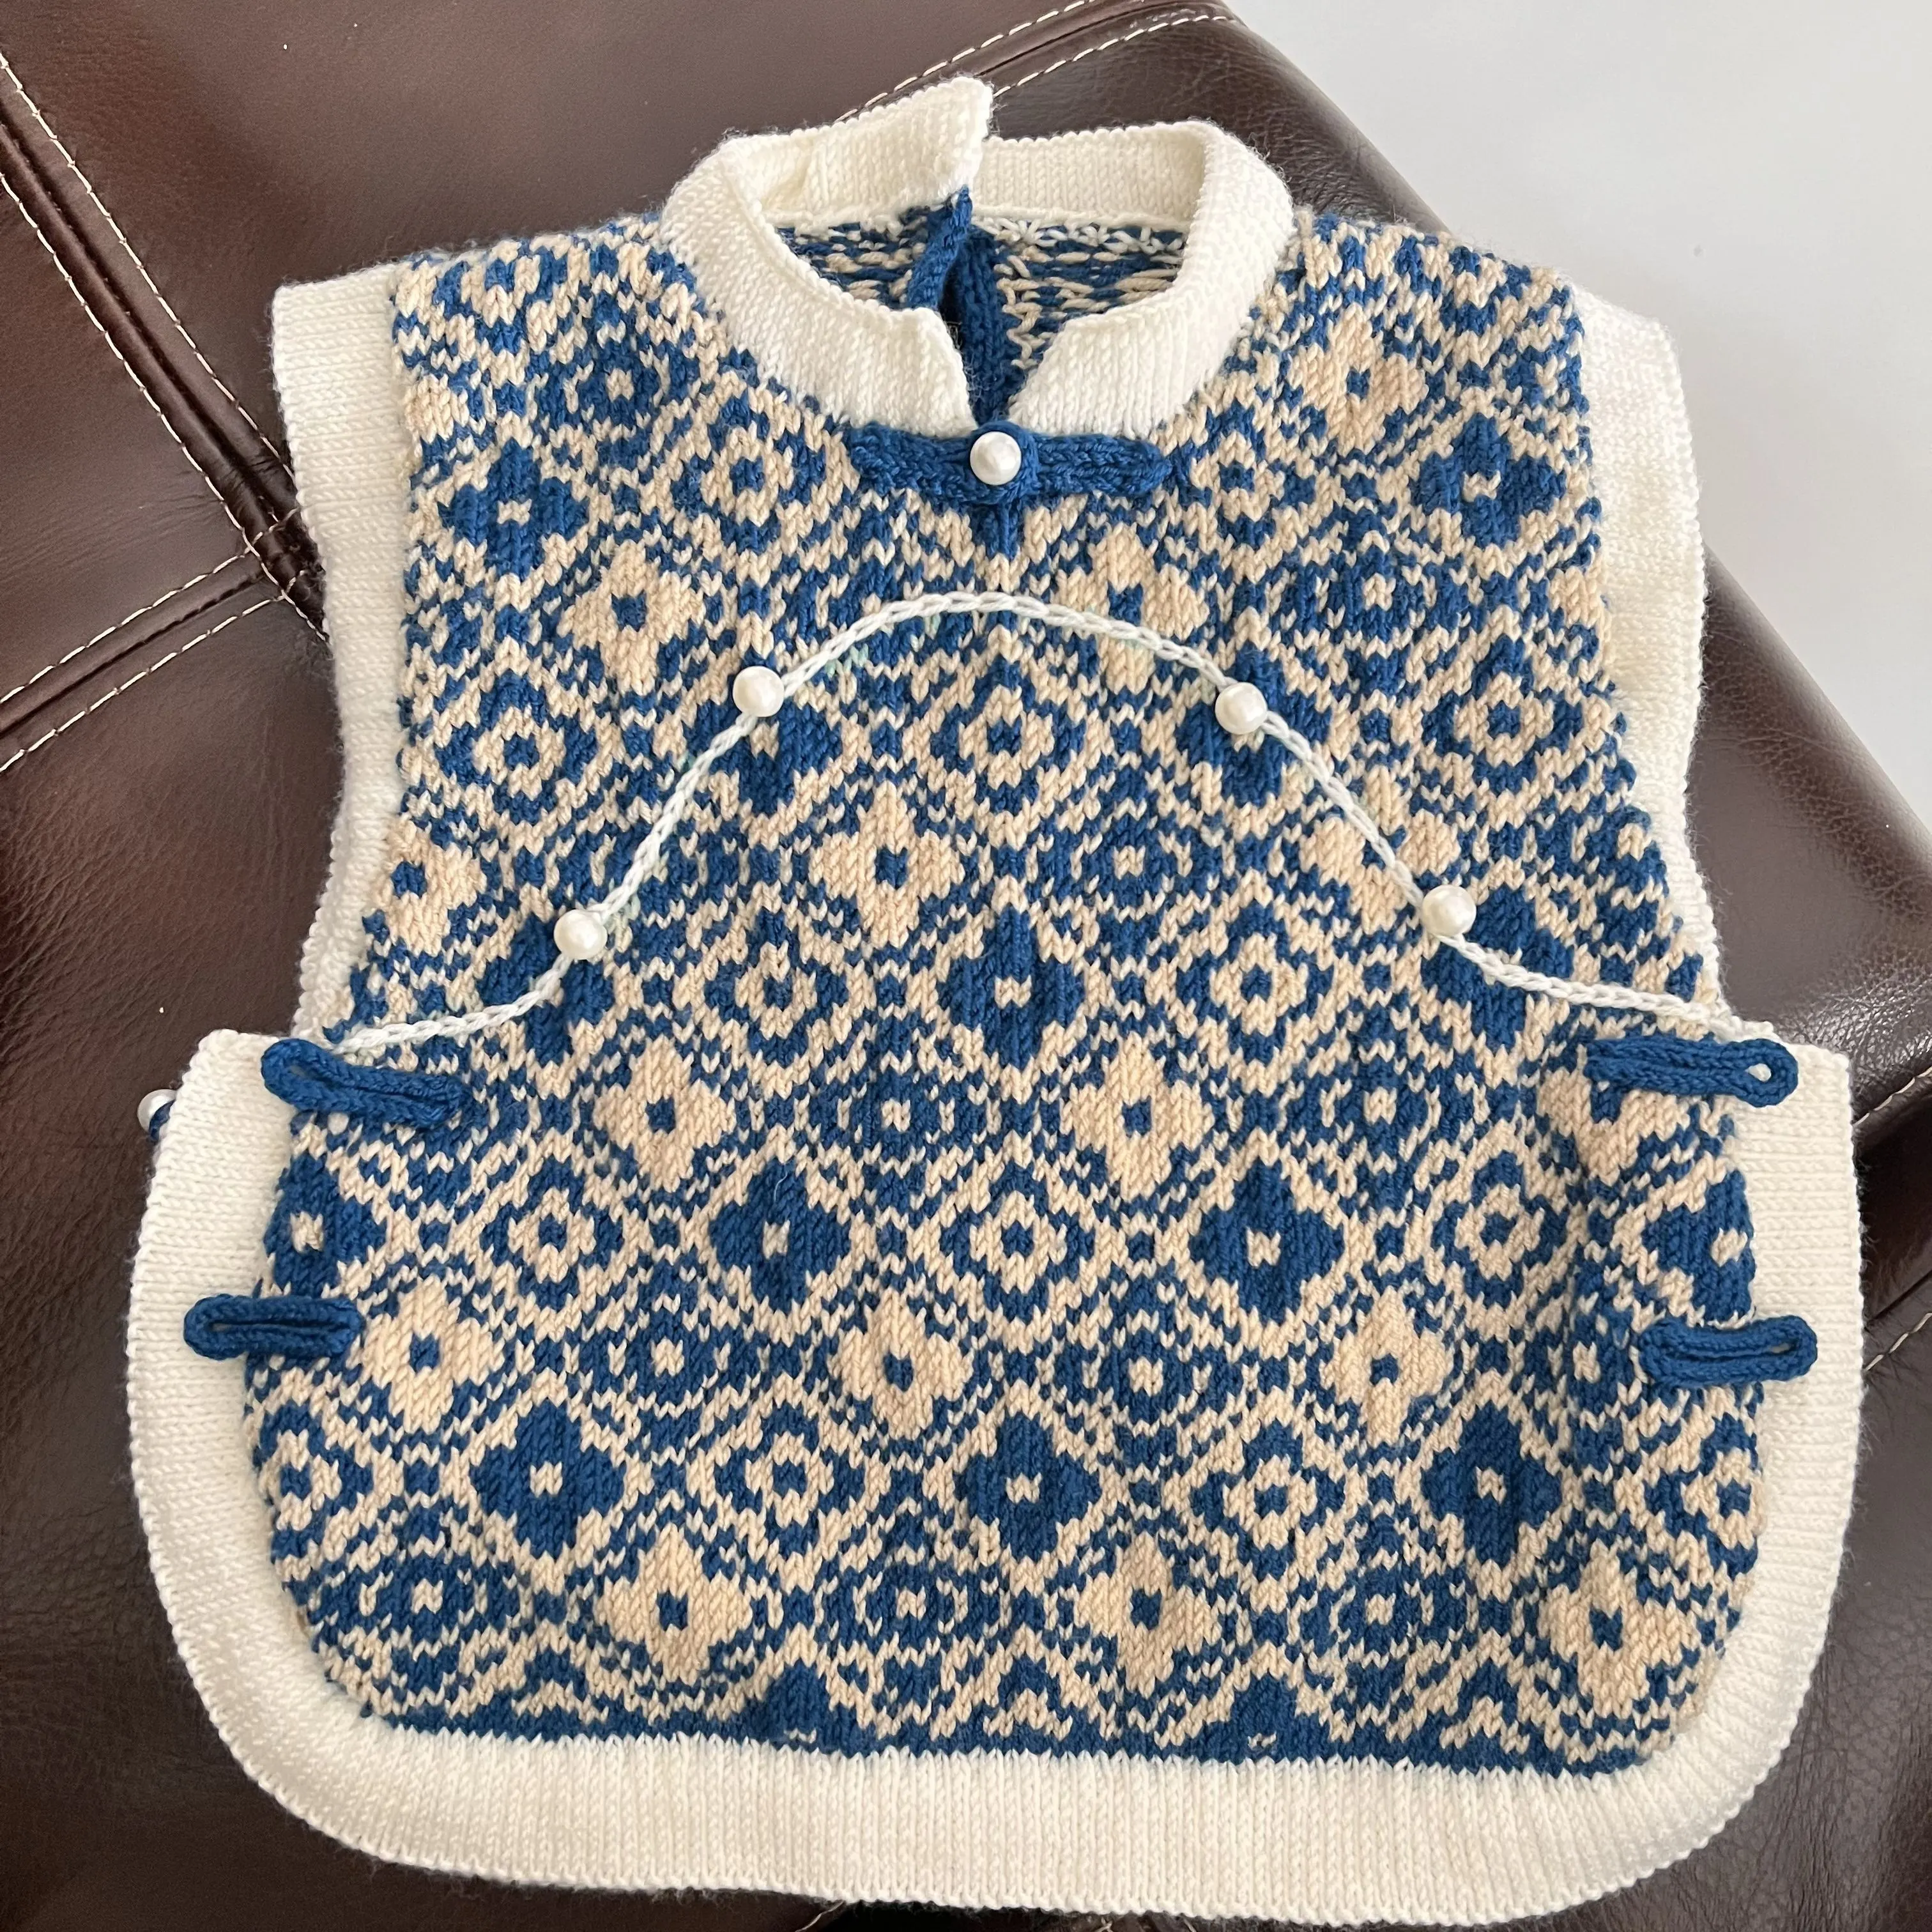
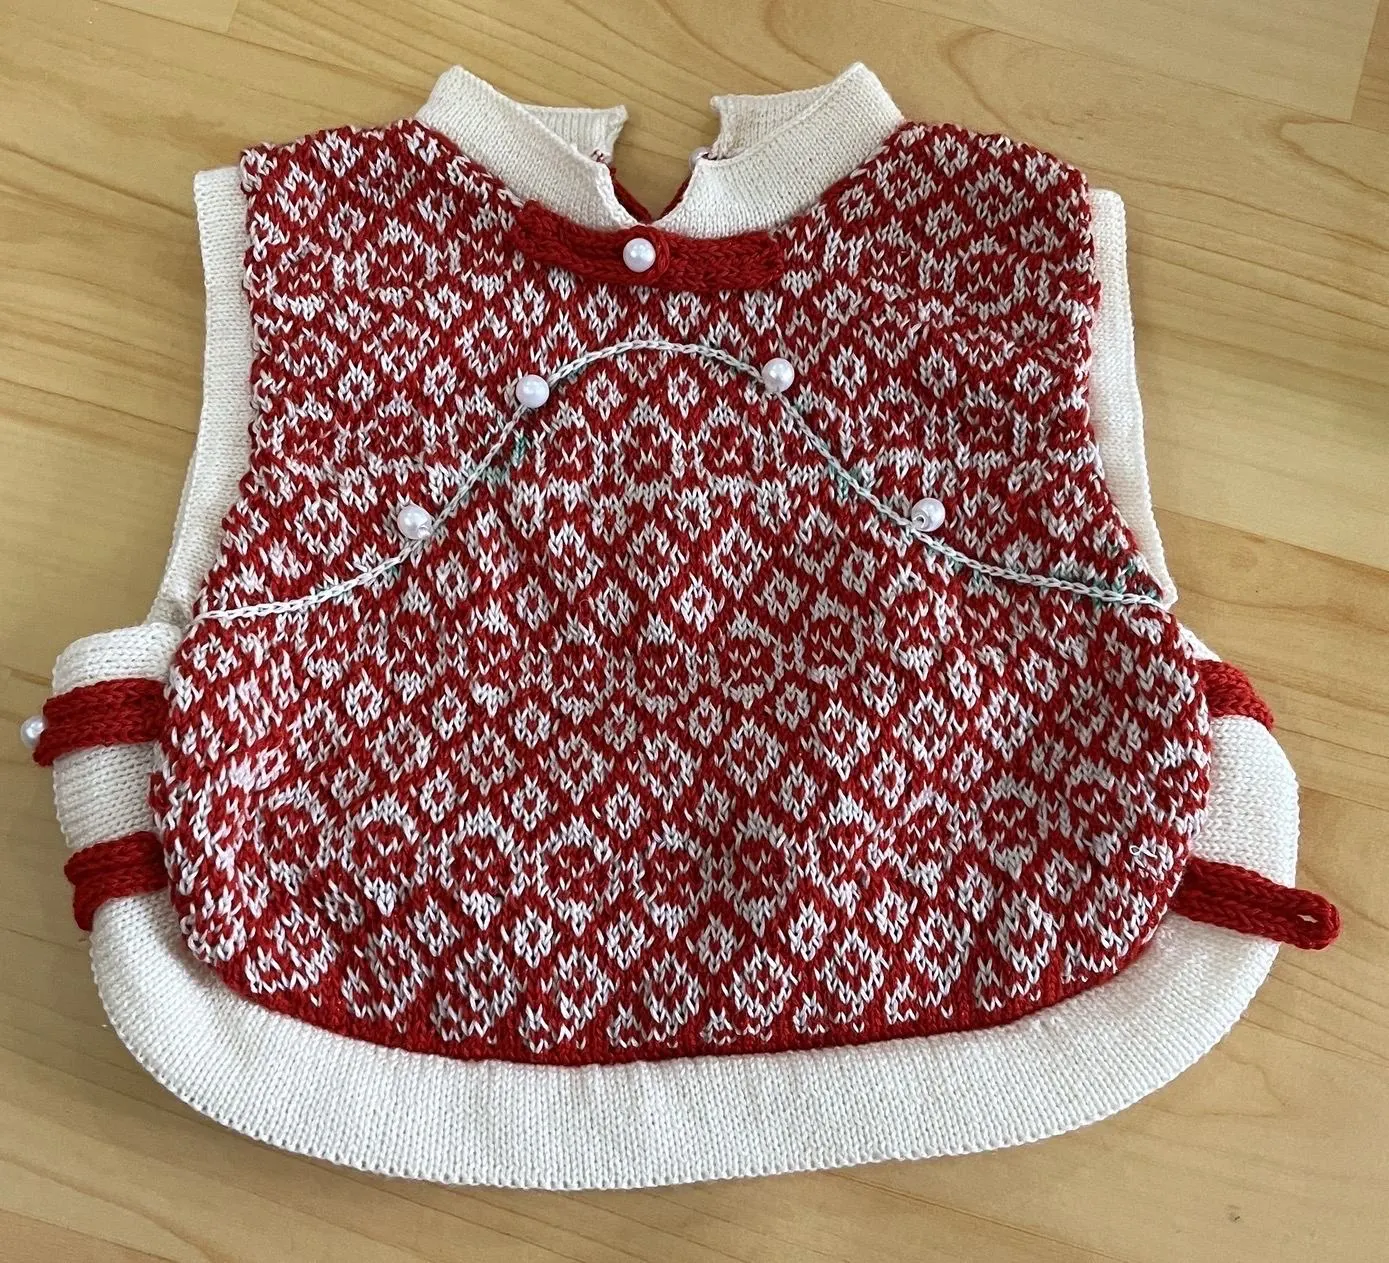
Blessed Bud Kid Waistcoat
Project preview
See the finished project
Pattern format
Instructions
Watch and follow
Video tutorial
This vest is made up of the front body, back body, collar, sleeve cuff, hem, and decorations. First, complete the front and back pieces and the knitting and sewing of these three edges separately, then proceed with the making and securing of the decorations.
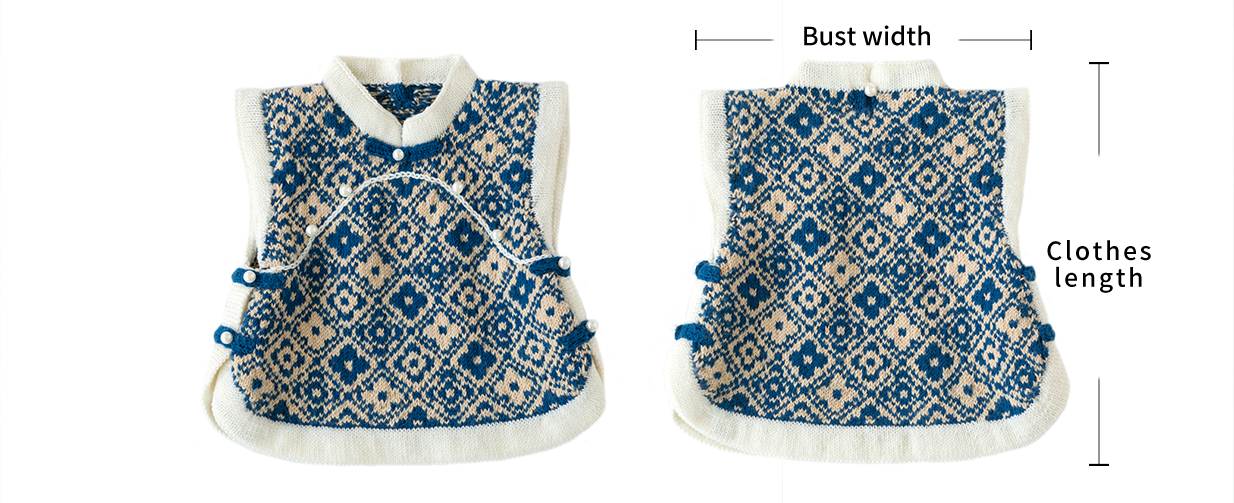
Size of below 90 cm:
bust width: 31 cm, cloth length: 31.5 cm

Note: This pattern is making in Chinese crochet pattern terms, and the stitch name is written using American terminology. All measurements in charts are in cm.
The handcrafted measurements may have an error of 1 to 2 cm. Due to variations in individual tension, the size of the sample is for reference only.
Materials: Susan's Family 4-Ply Combed Merino
Needles: 9#-3.75 mm, 10#-3.25 mm circular needle

Garment Structure Diagram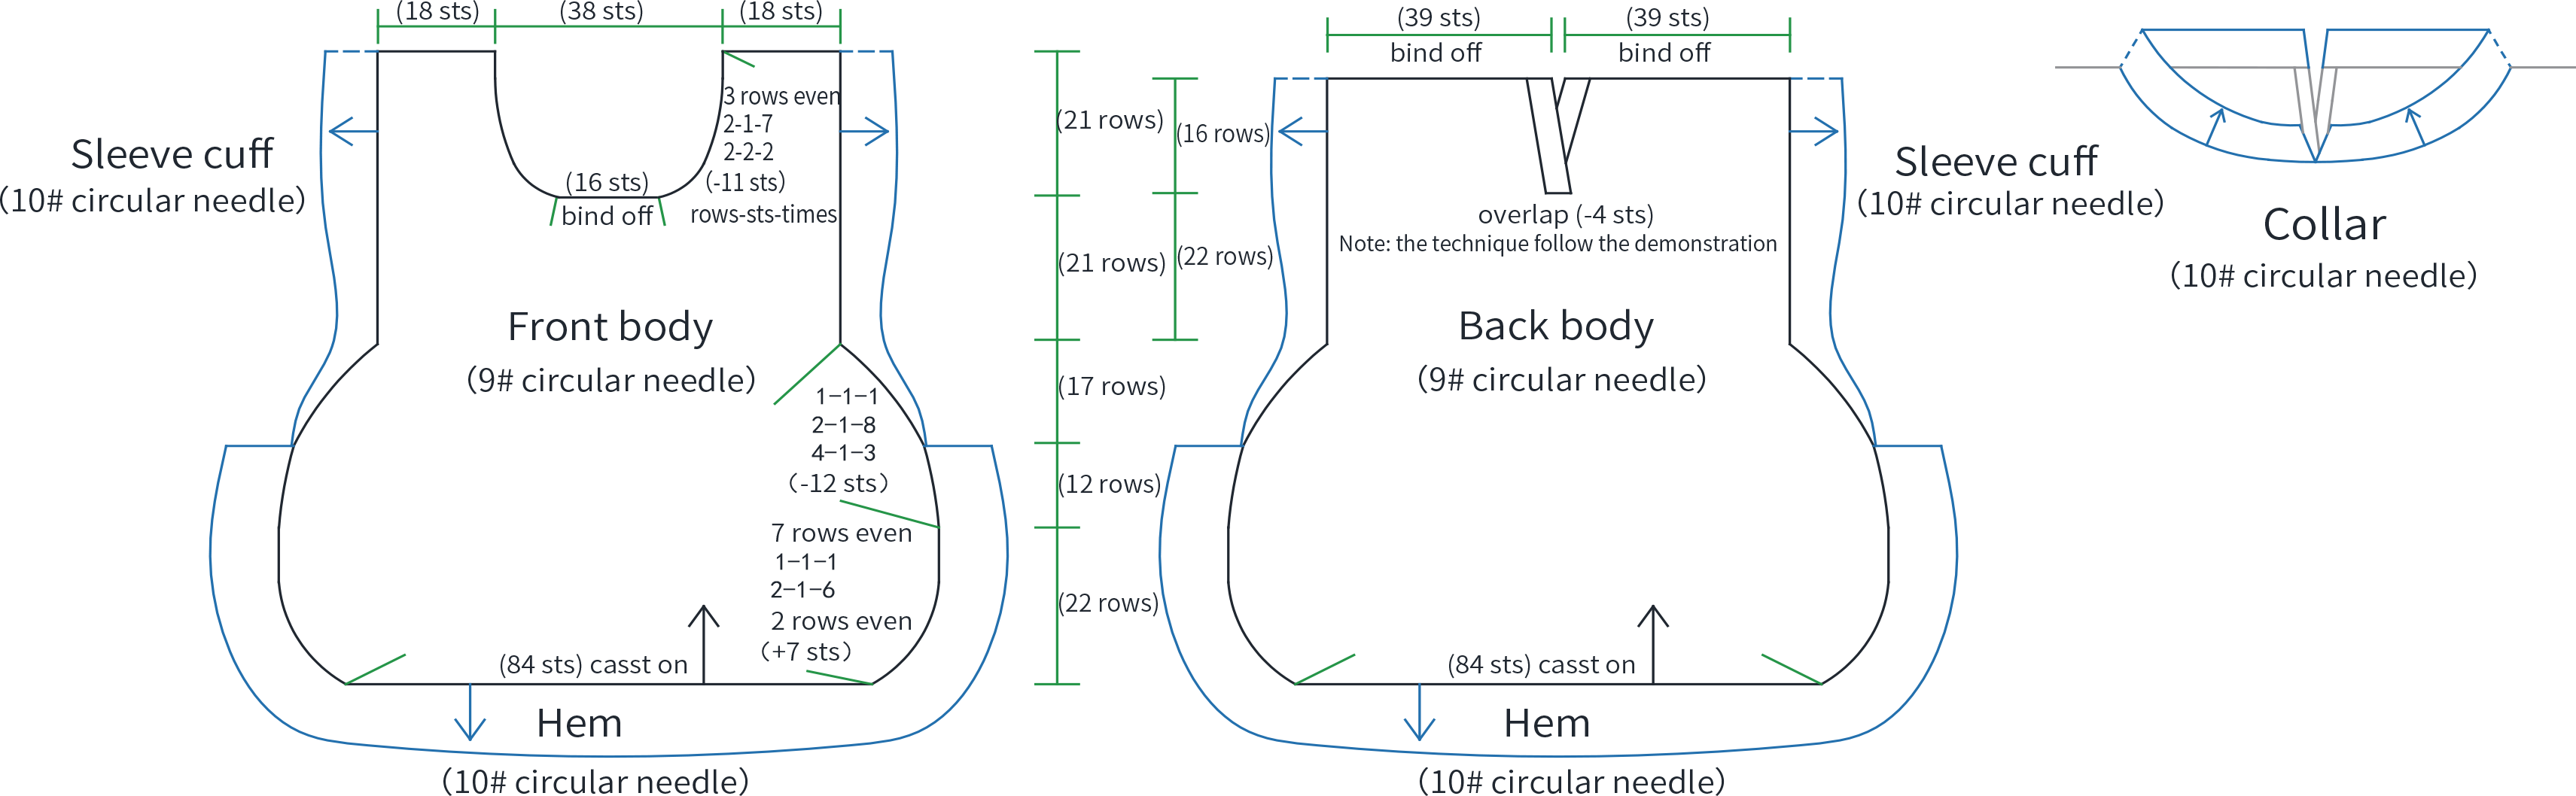
Chart Key


Note: The chart represent the right side of fabric, so check the key to see how to work a certain symbol on the right side and on the wrong side.

Part 1 Front body 00' 59'' (Part 1)
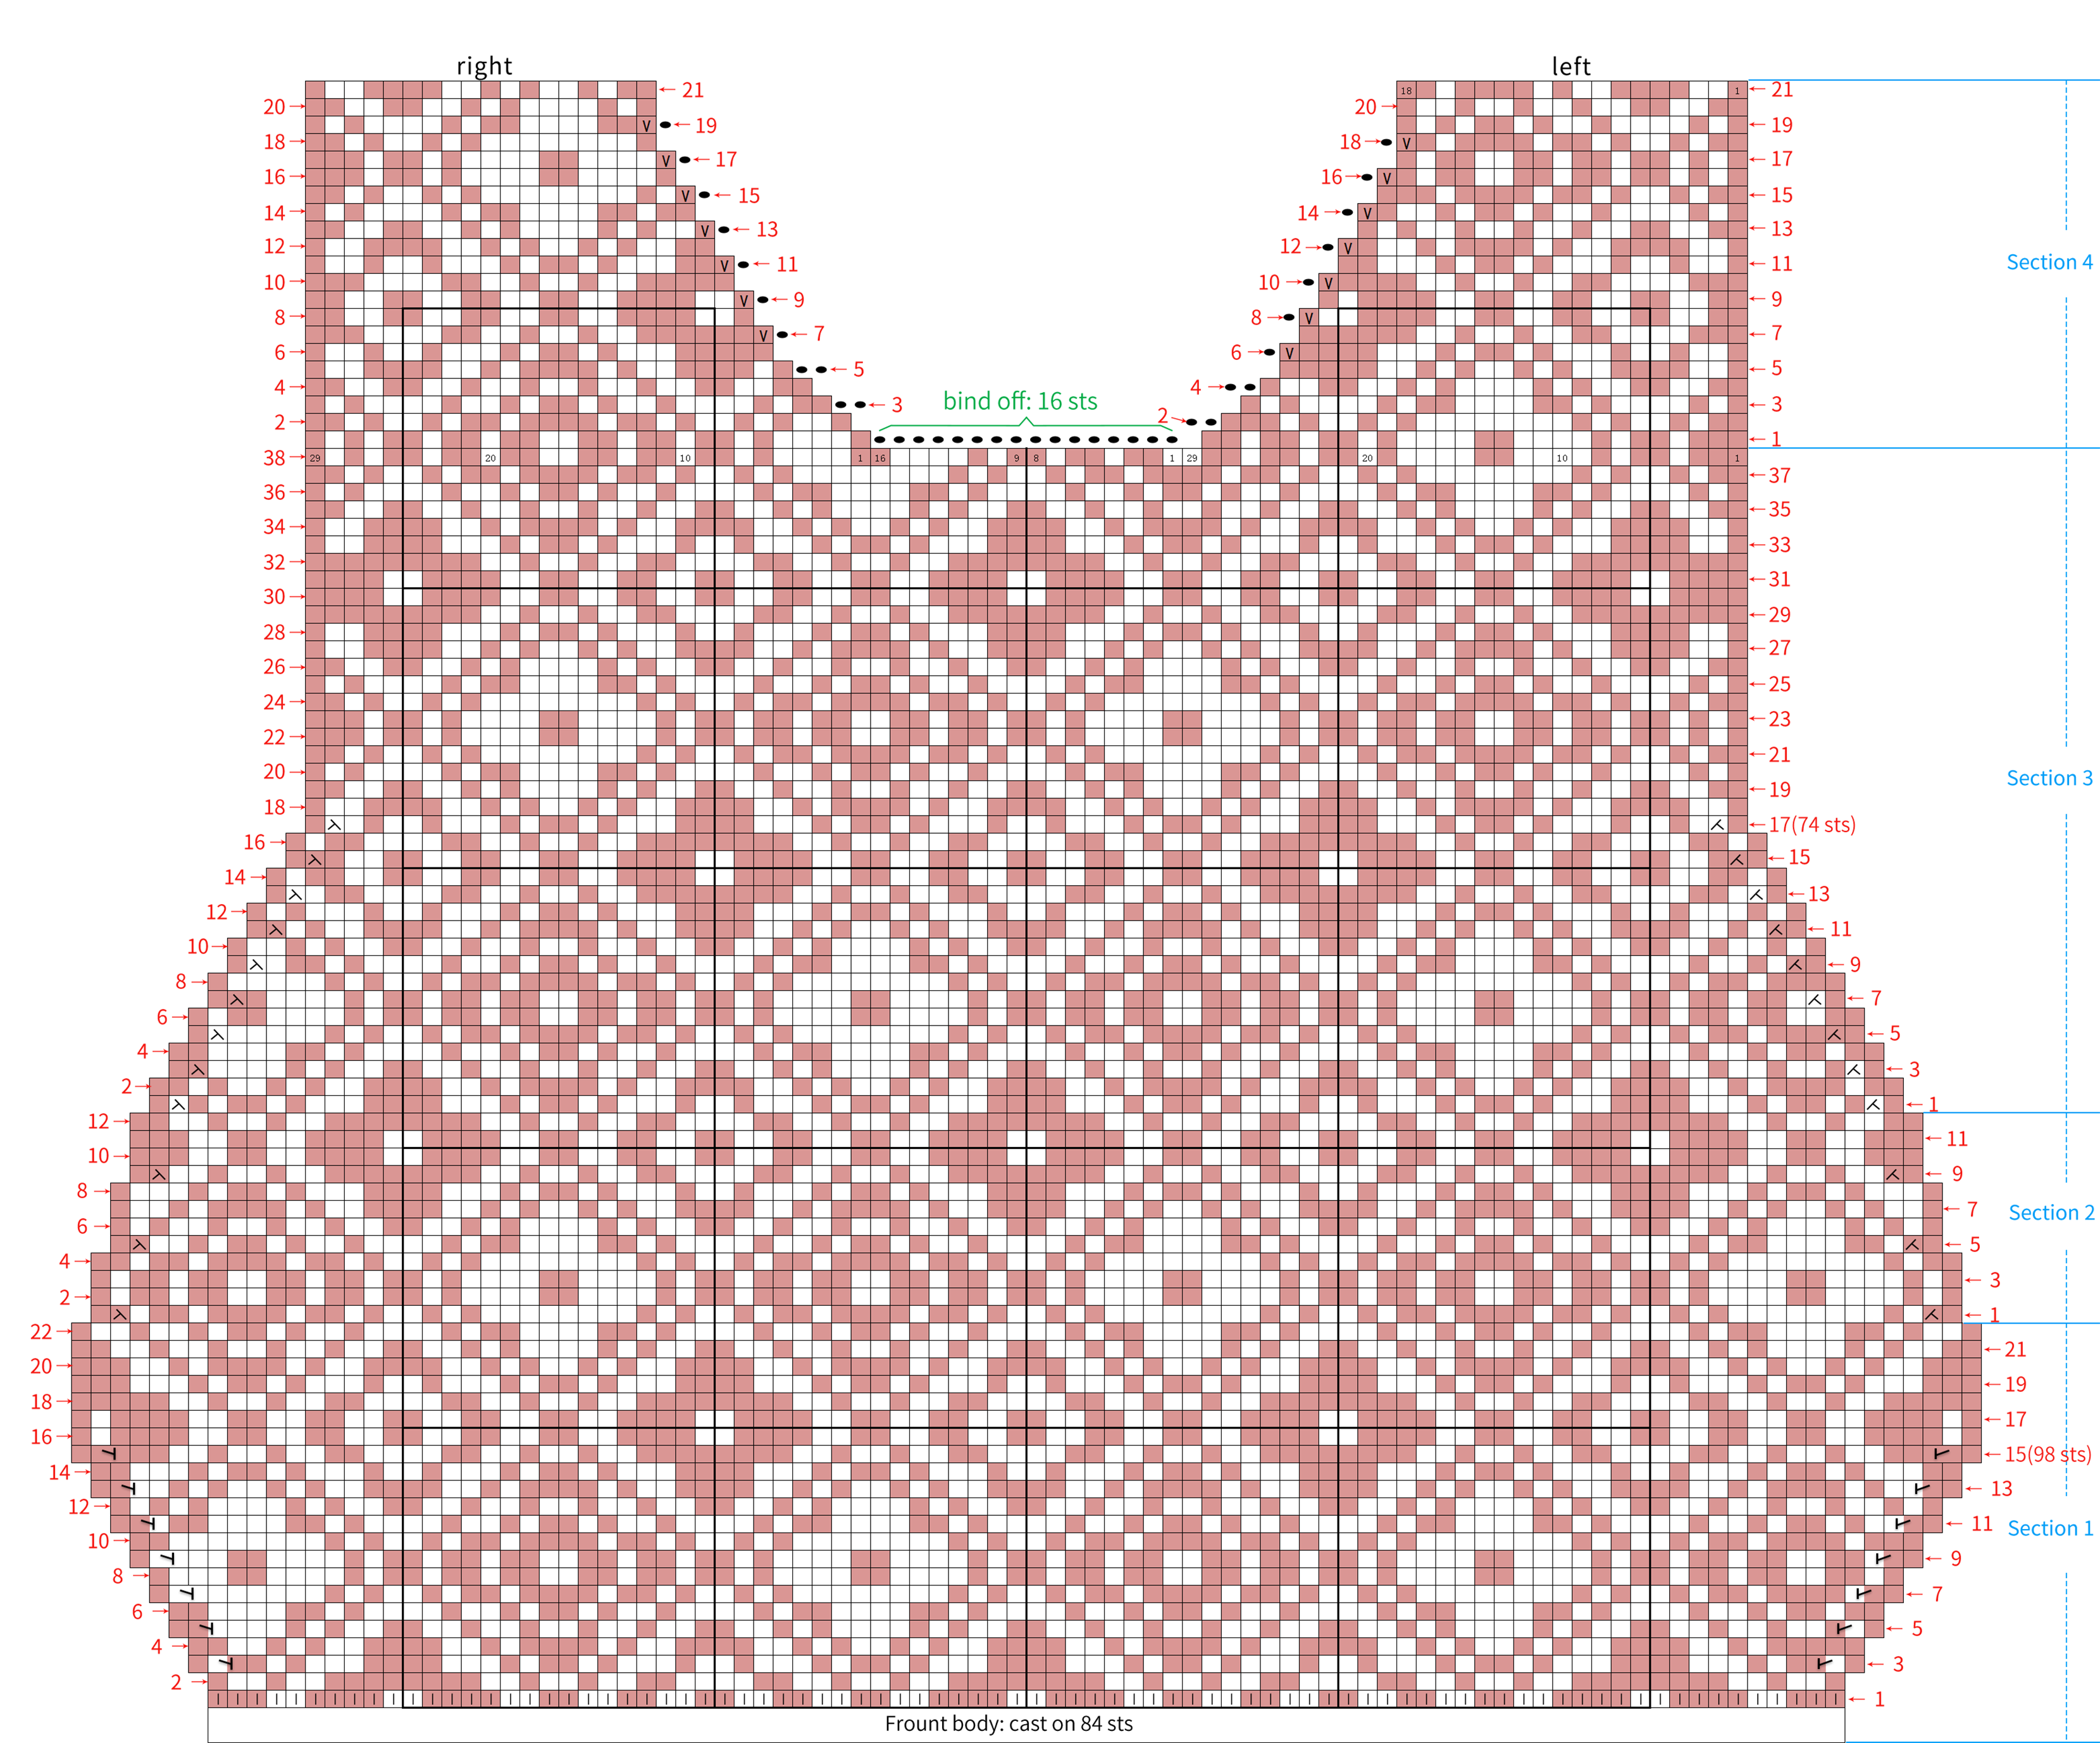
The front body starts with the cable cast on technique, then switches colors alternating yarns to work a Jacquard pattern in rows. It's divided into four sections: Some rows in Section 1 A1 require increases on both sides; in Section 2 A2 and some rows of Section 3, requires decreases on both sides, but the decrease sequence is different. The remaining rows in Section 3 are worked even; Section 4 A3 involves shaping the neckline by working the left and right sides separately. Please refer to the video demonstration for specifics.
Note:
1, After finishing Section 1, measure the gauge. The gauge is: 16 sts, 16 rows = 5.1 cm × 4.8 cm.
2, The left and right in the tutorial refer to the actual left and right when worn.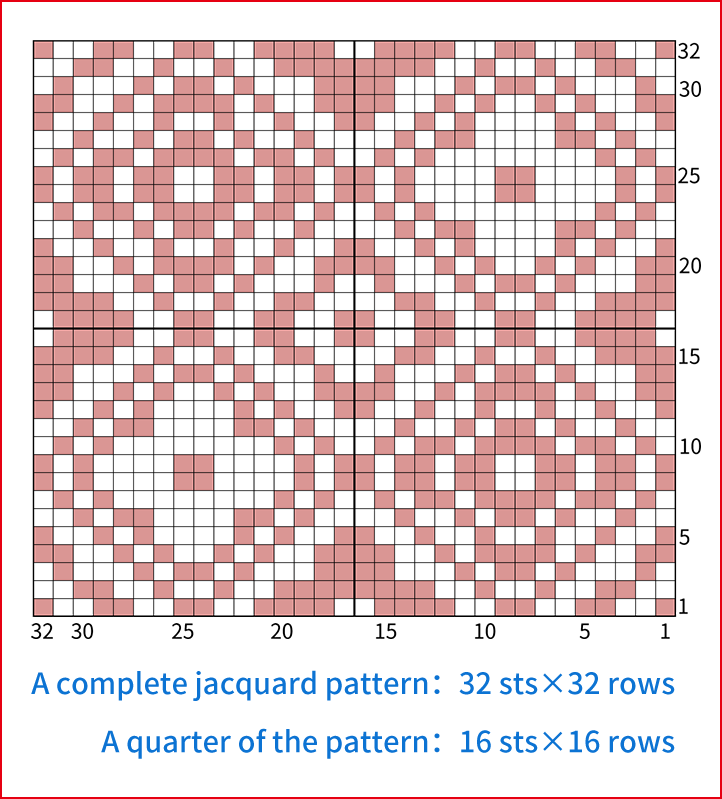
Part 2 Back body and JoinB 49' 55'' (Part 1)
The back body is also divided into four sections. Sections 1 and 2 are identical to the front body; Section 3 is the same as the front body overall, except for the rows of work evenly. For Section 4 need to create an opening in the middle and work the left and right sides separately, with some stitches overlapping in the middle. Finally, join it with the front body and bind off. Please refer to the video demonstration for specifics.
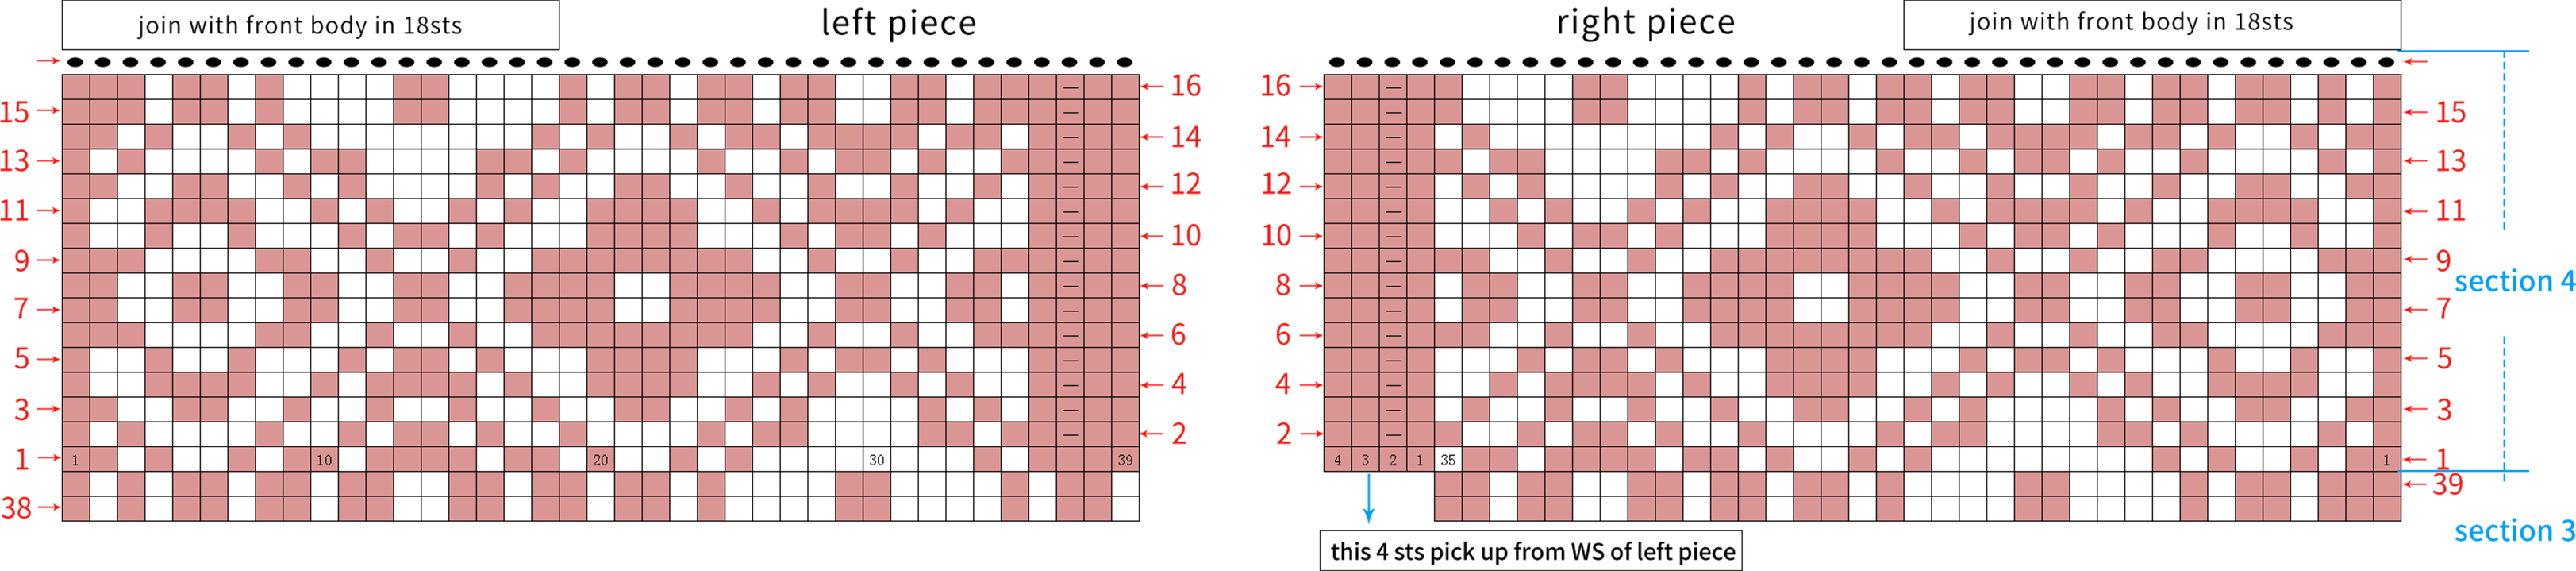
Note:
Back body Sections 1 and 2, as well as the first 38 rows of Section 3, are identical to the front body. After finishing those 38 rows, work one more Row 39, then proceed to Section 4.
Part 3 Collar 00' 12'' (Part 2)
The collar is divided into the left collar C1 and the right collar C2 . Both sides are worked separately and sewn up on the wrong side once completed. For specifics, please refer to the video demonstration.
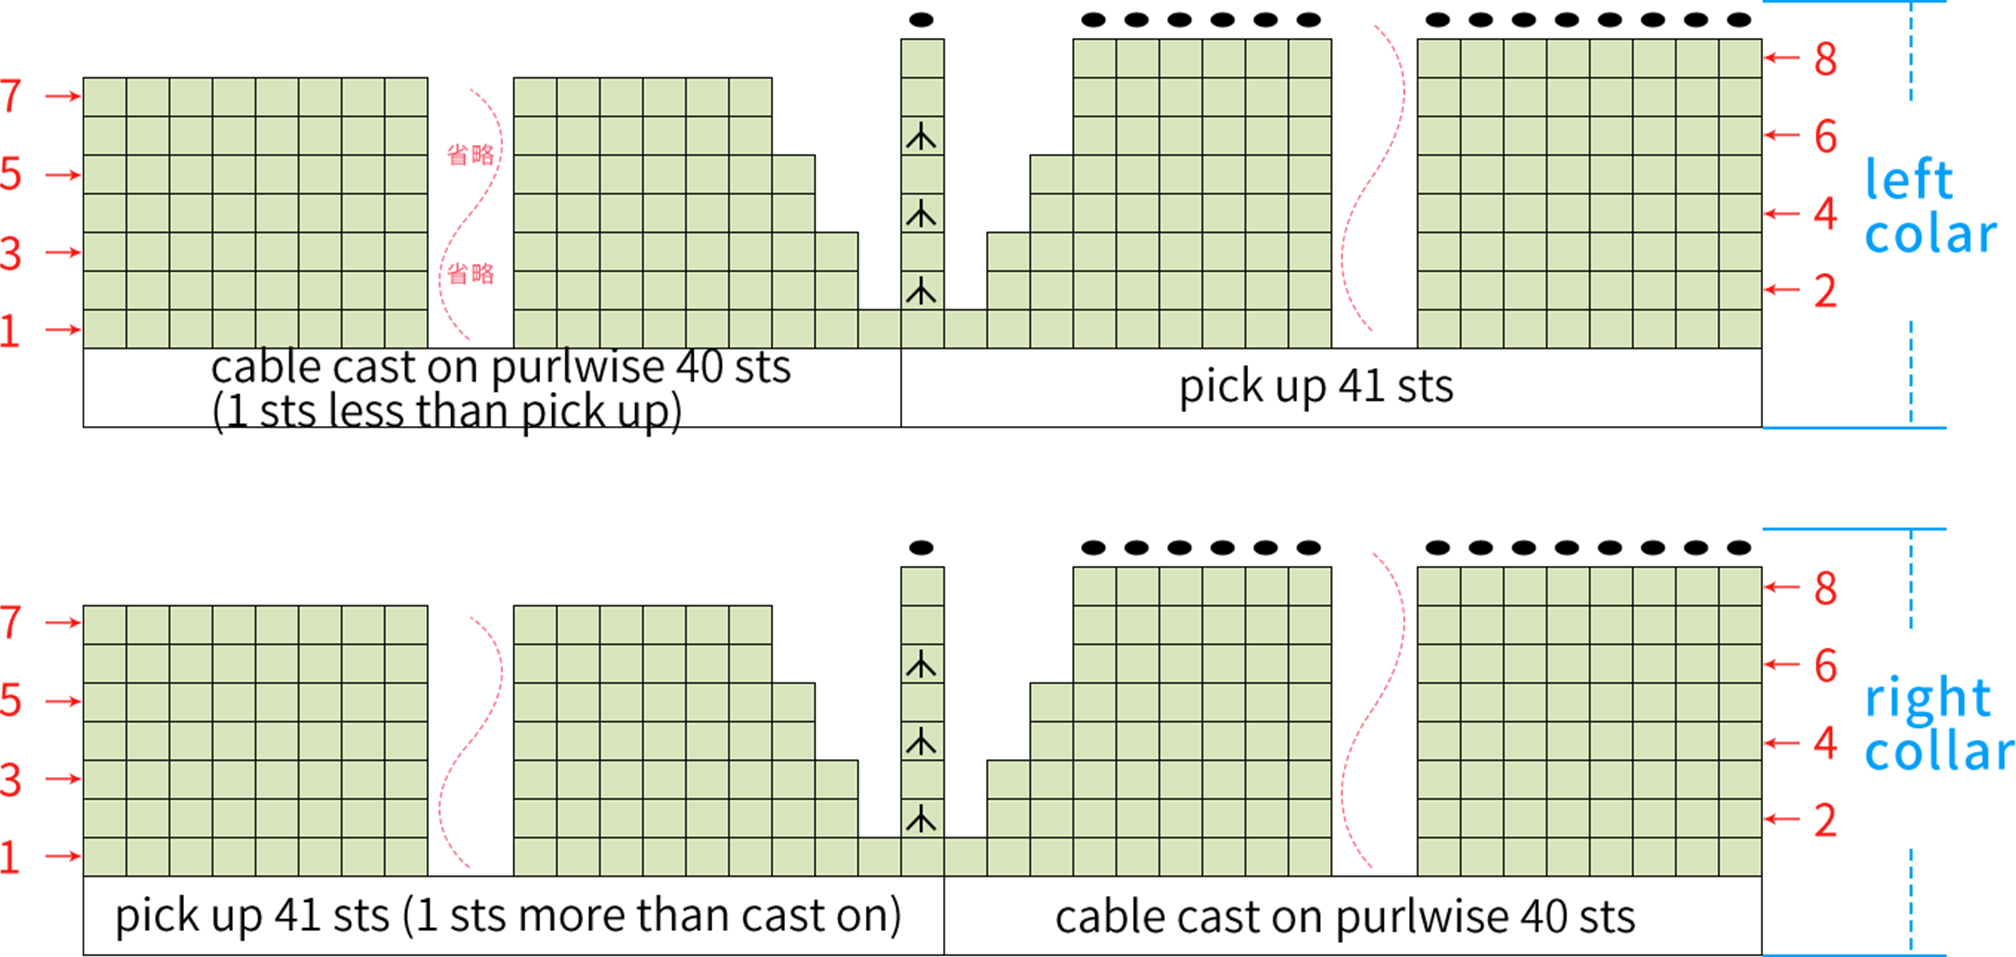
Rule for picking up sts in each collar Row 1: From the back body, picking up 4 sts for every 5 braids, about 16 sts in all. From the front body, picking up 5 sts for every 4 braids, about 25 sts in all.
Note: The sts amount and rule for picking up on the collar Row 1 are for reference only. Adjust as needed.
Part 4 Sleeve Cuff 24' 48'' (Part 2)
The cuff edges on both sides are worked in the same way, divided into section 1 D1 and section 2 D2 . After finishing, bind off and sew with body on the wrong side D3 . Please refer to the video demonstration for specifics.
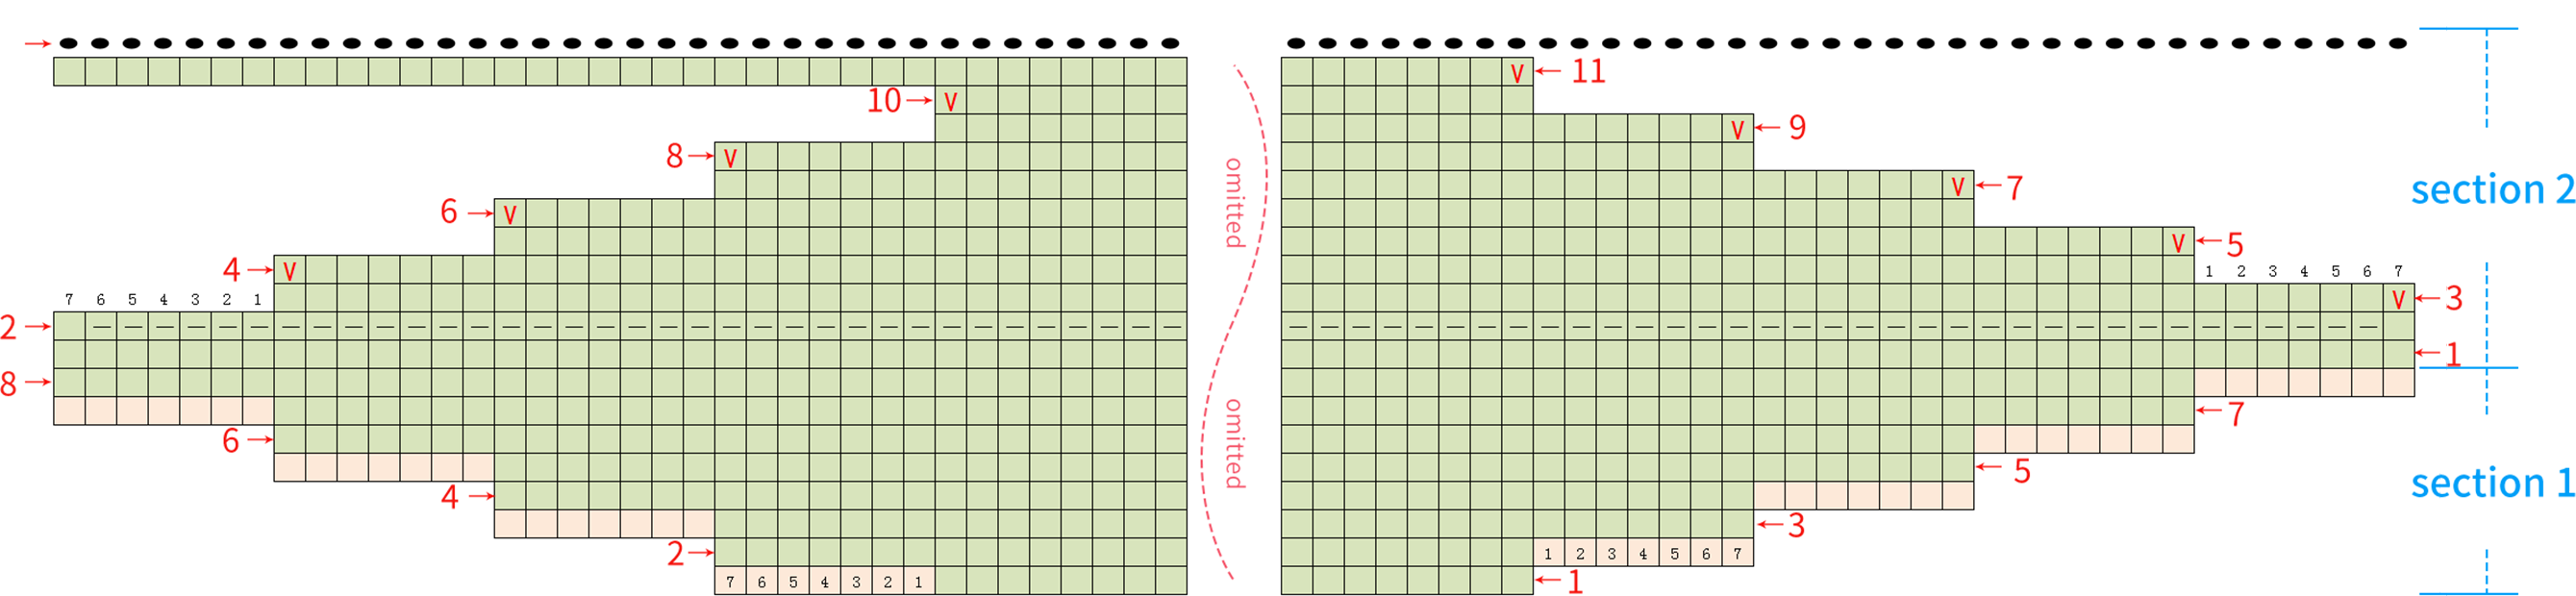
Sleeve cuff pattern: First, mark out the boundary between body Section 2 and Section 3. Then, use stitch markers to separate the middle approximately 50 rows (27 rows on the front body, 23 rows on the back body). On each side, place a stitch marker approximately every 8 rows. In the middle 50 rows, pick up about 5 sts every 6 rows. On each side, pick up about 7 sts every 8 rows. For sections less than 8 rows, pick up evenly.
Note: The sts amount and rule for picking up are for reference only. Adjust as needed.
Part 5 HemE 39' 44'' (Part 2)
The hem of the front and back bodies are worked in the same way, divided into first and second sections. After finishing, bind off and sew together on the wrong side. Please refer to the video demonstration for specifics.
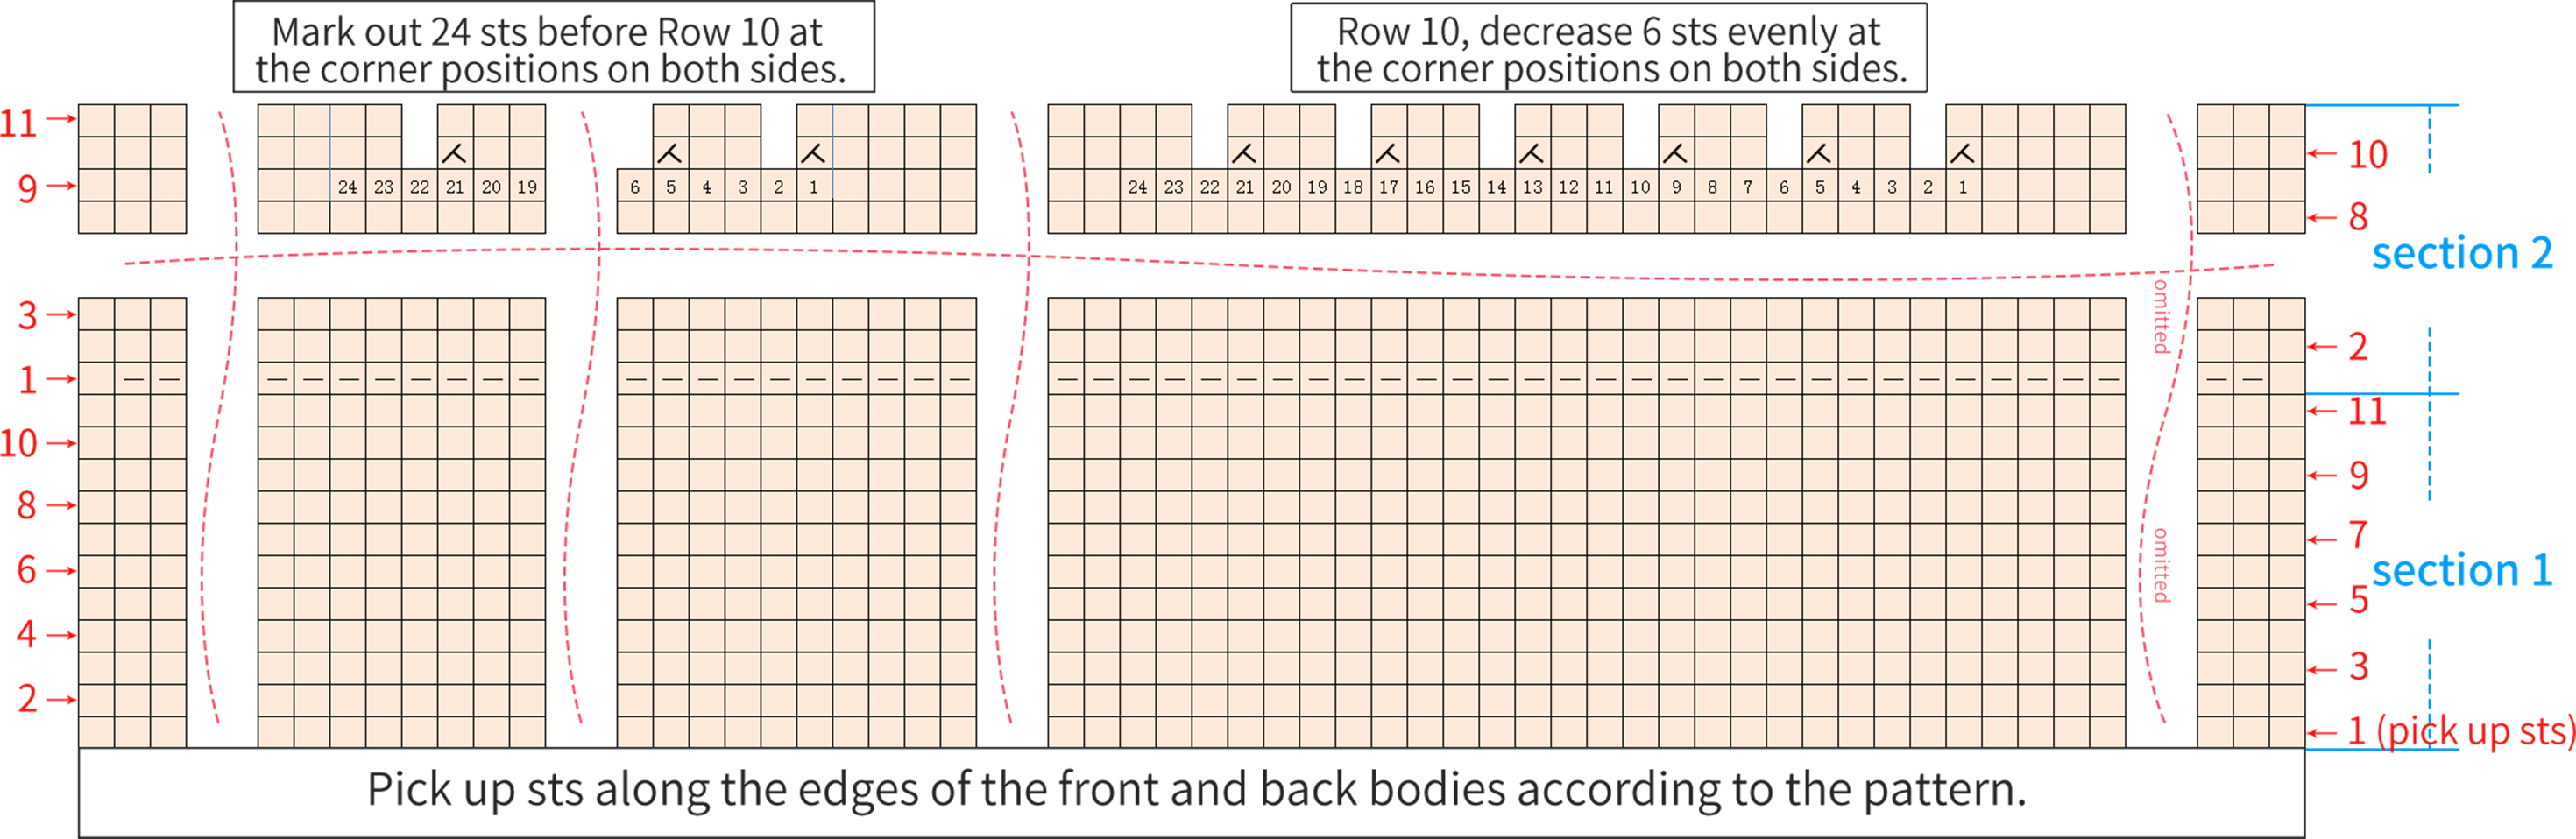
Hem pattern: First, refer to the video tutorial and mark the corner areas, picking up more stitches in these corners. Then, mark the areas about 10 stitches away from the corners on both sides, and pick up about 10 stitches in each of these two areas. For the remaining side edges of Body Section 1 and Section 2, pick up 7 stitches for every 8 rows overall. In the remaining starting point areas, pick up about 4 stitches continuously and then skip 1 stitch..
Note: The sts amount and rule for picking up are for reference only. Adjust as needed.
Part 6 Decorations
First, make and secure the Chinese-style Buttons, then embroider the curved line on the front body, and secure the pearl buttons. Finally, secure the button and buttonhole separately at the back of the collar.
Step 1 Chinese-style ButtonsF1 49' 58'' (Part 2)
Chinese-style buttons are in pairs, one half has a pearl button at the top, the other half has a buttonhole. Please refer to the video demonstration for specifics.
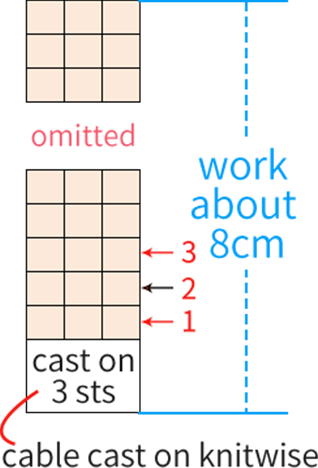
Note: Leave long yarn tails at the beginning and end for sewing. Please refer to the video tutorial for the details.
Step 2 Curved line and button decorationF2 58' 30'' (Part 2)
First, draw the curved line on the front body, then embroider it, and finally sew on the buttons. For specifics, please refer to the video demonstration.
Step 3 Button on back collar and buttonholeF3 63' 06'' (Part 2)
First, sew a button on the right side of the collar edge. Then, make a button loop on the other side. For details, please refer to the video demonstration.
Made by the community