Home / Hanging
Seasons Window Dreamcatcher-Peach Blossom
Project preview
See the finished project
Pattern format
Instructions
Watch and follow
Video tutorial
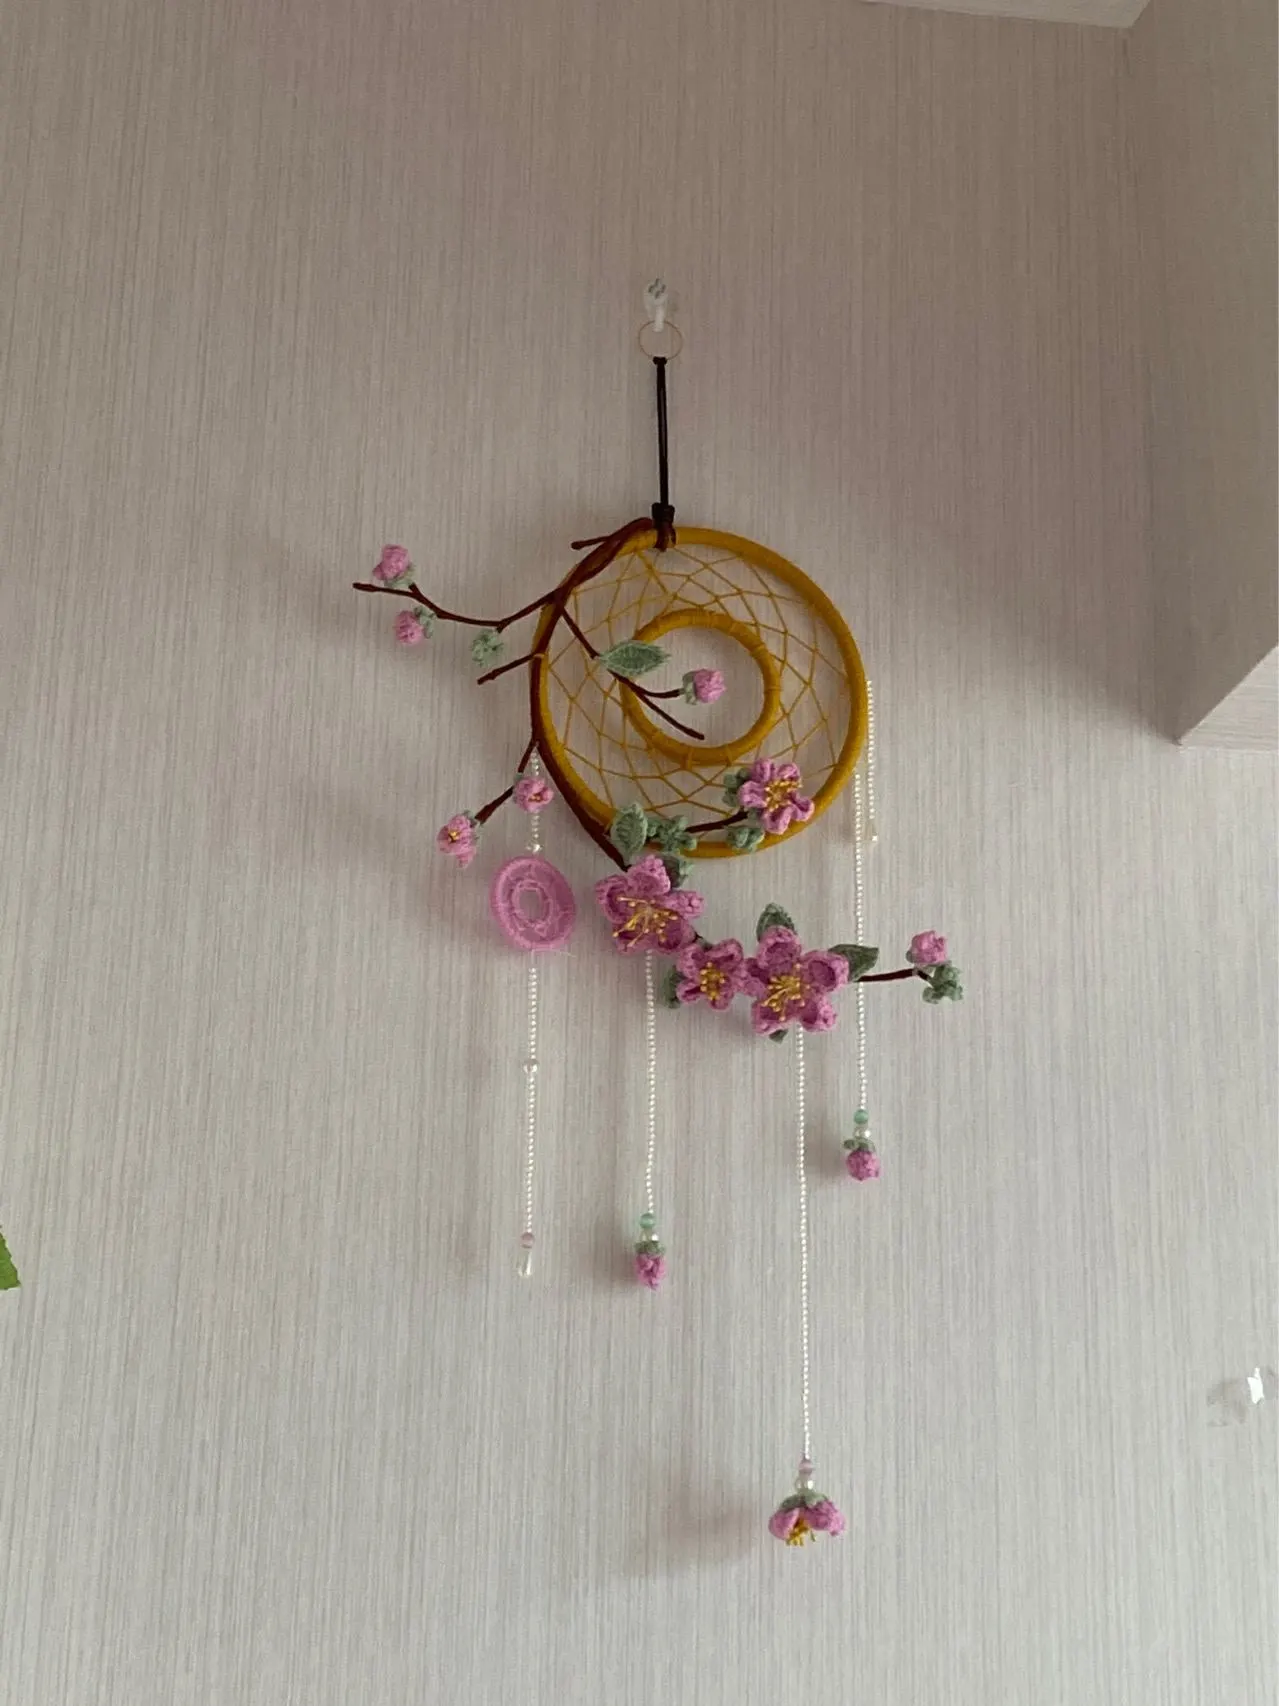
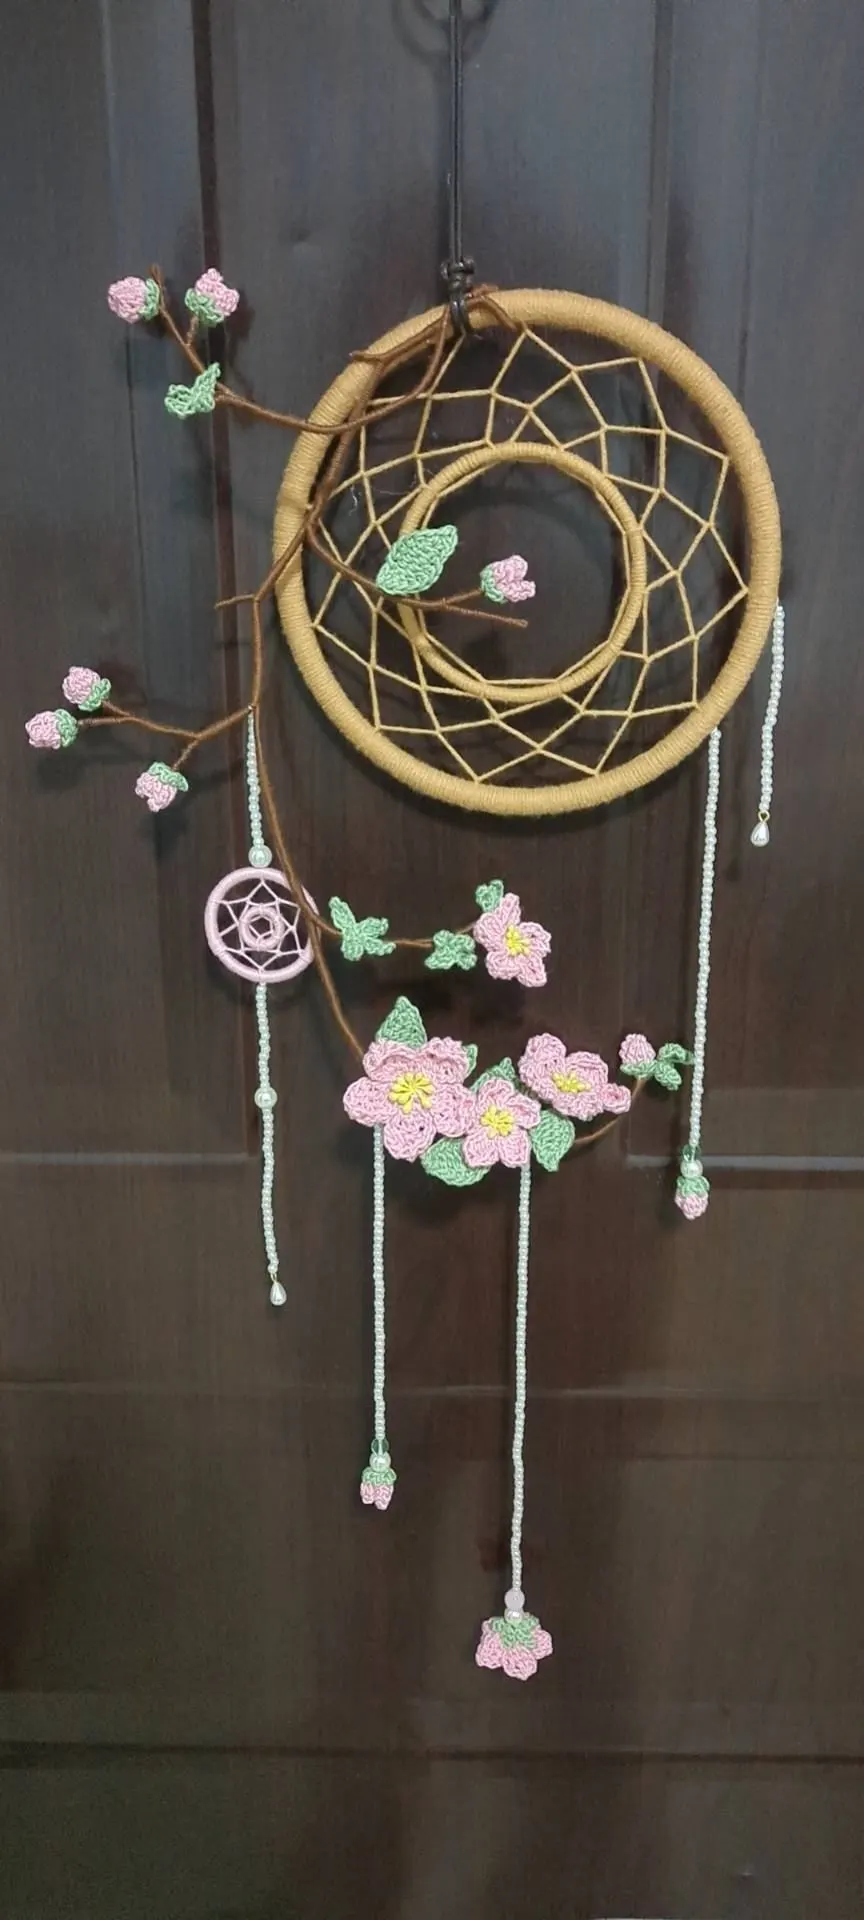
It consists of the dream catcher, peach blossom branches and accessories. First make the dream catchers, then make the branches and proceed with assembly, finally make and attach the accessories.
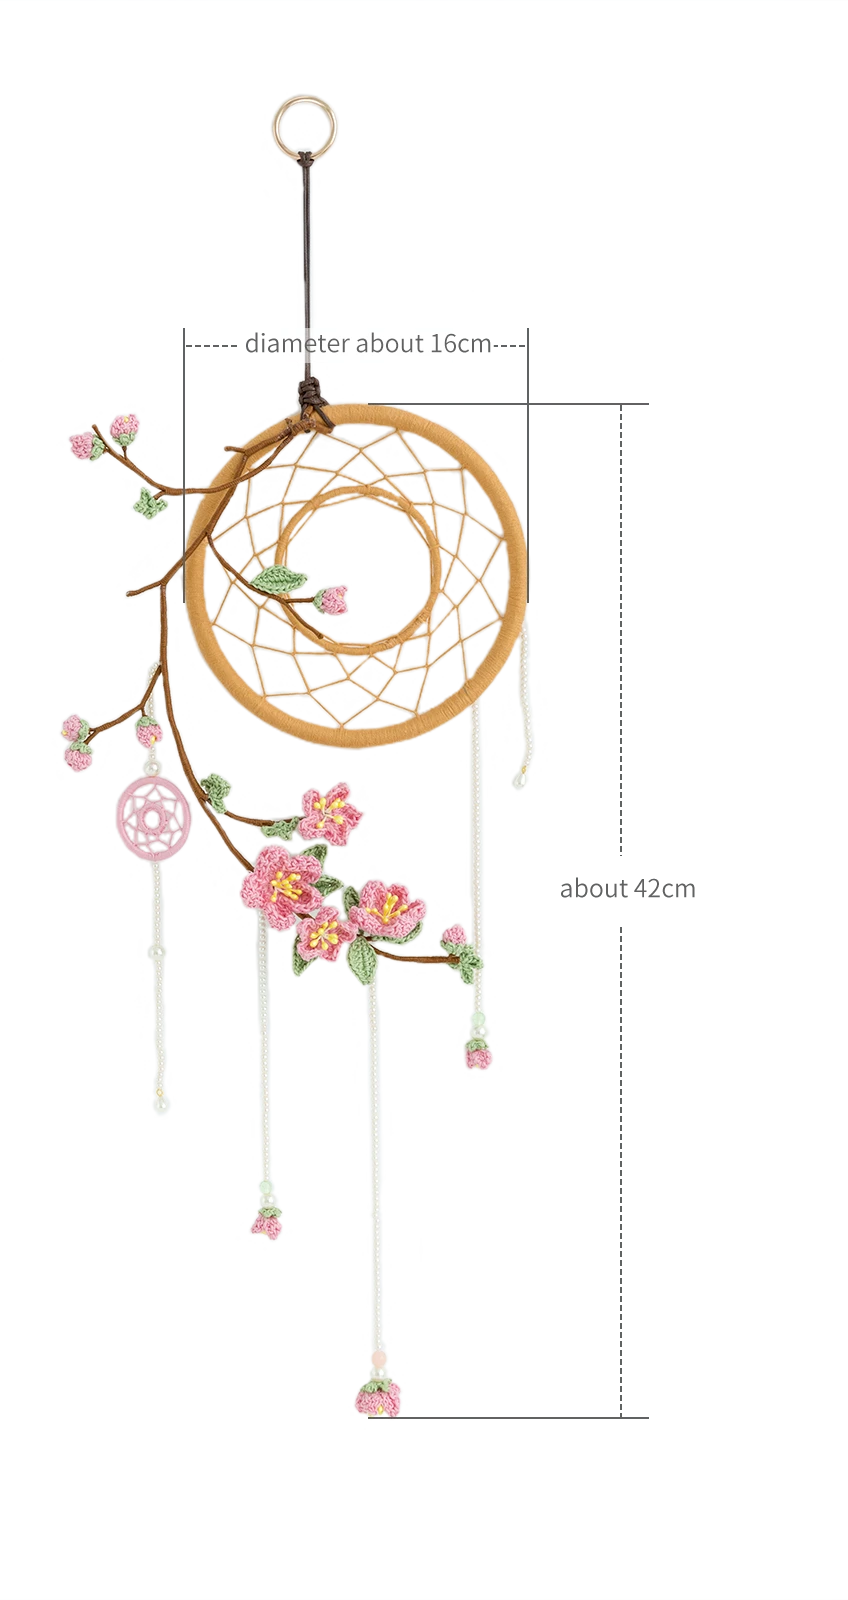
Due to variations in individual tension, the size of the sample is for reference only.
Materials: Susan's Family Combed 3# Lace, 4-Ply Combed Cotton & Acrylic Fibre Hand Knitting Yarn
Hook: 1.75 mm crochet hook
Chart Key










Note: 1, This pattern is making in Chinese crochet pattern terms, and the stitch name is written using American terminology. All measurements in charts are in cm.

Part 1 Dream catcher 00' 11'' (SA1868)
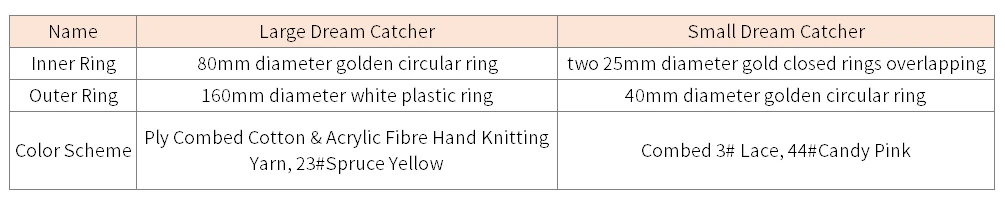
There are two sizes of dream catchers, and the making method is similar. They are all composed of an inner and outer ring. First, yarn over the inner ring, then yarn over the outer ring. After completing, don’t cut the yarn, and finally wrap the yarn in the middle to connect. Please refer to the video demonstration for more details.
Part 2 Peach blossom branchesA 01' 00'' (SA1868)
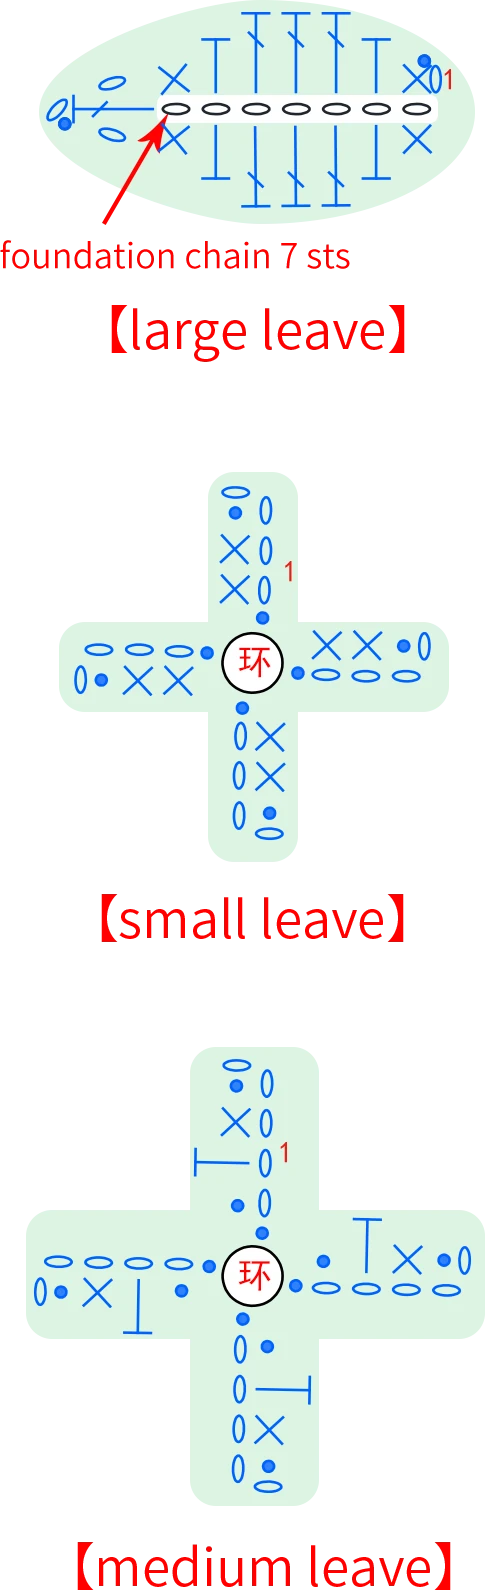
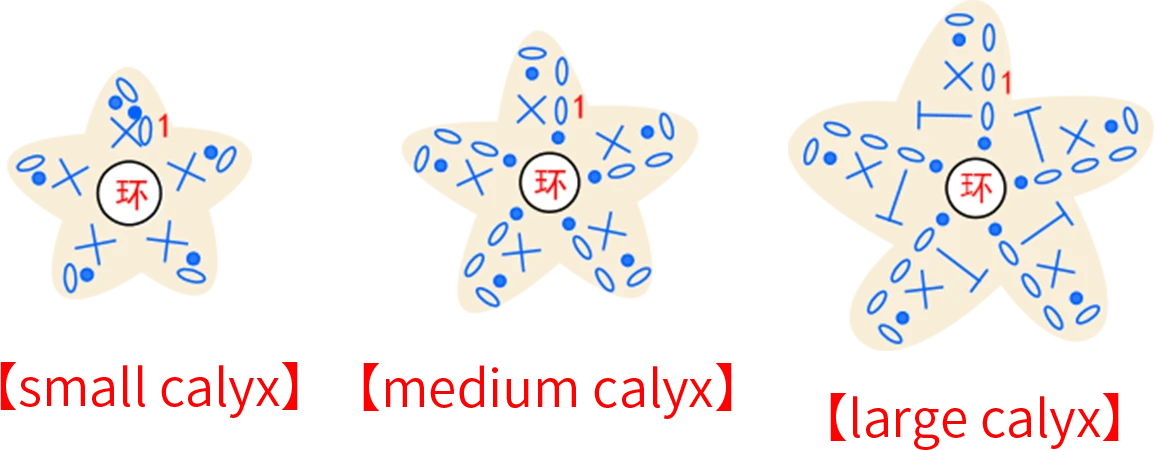
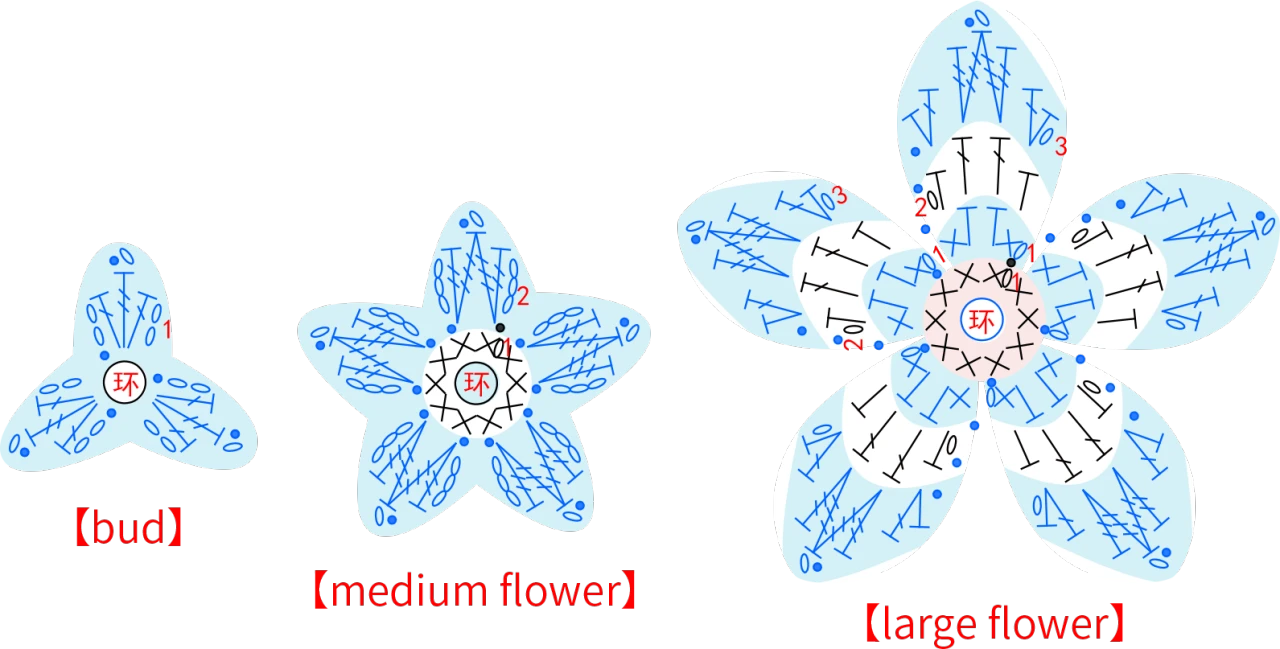
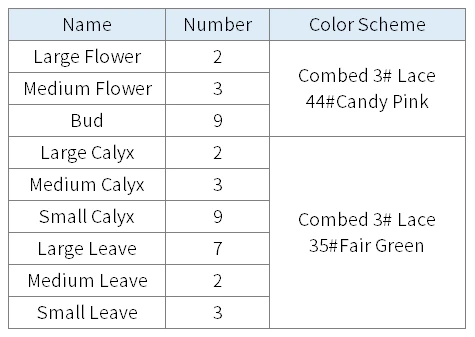
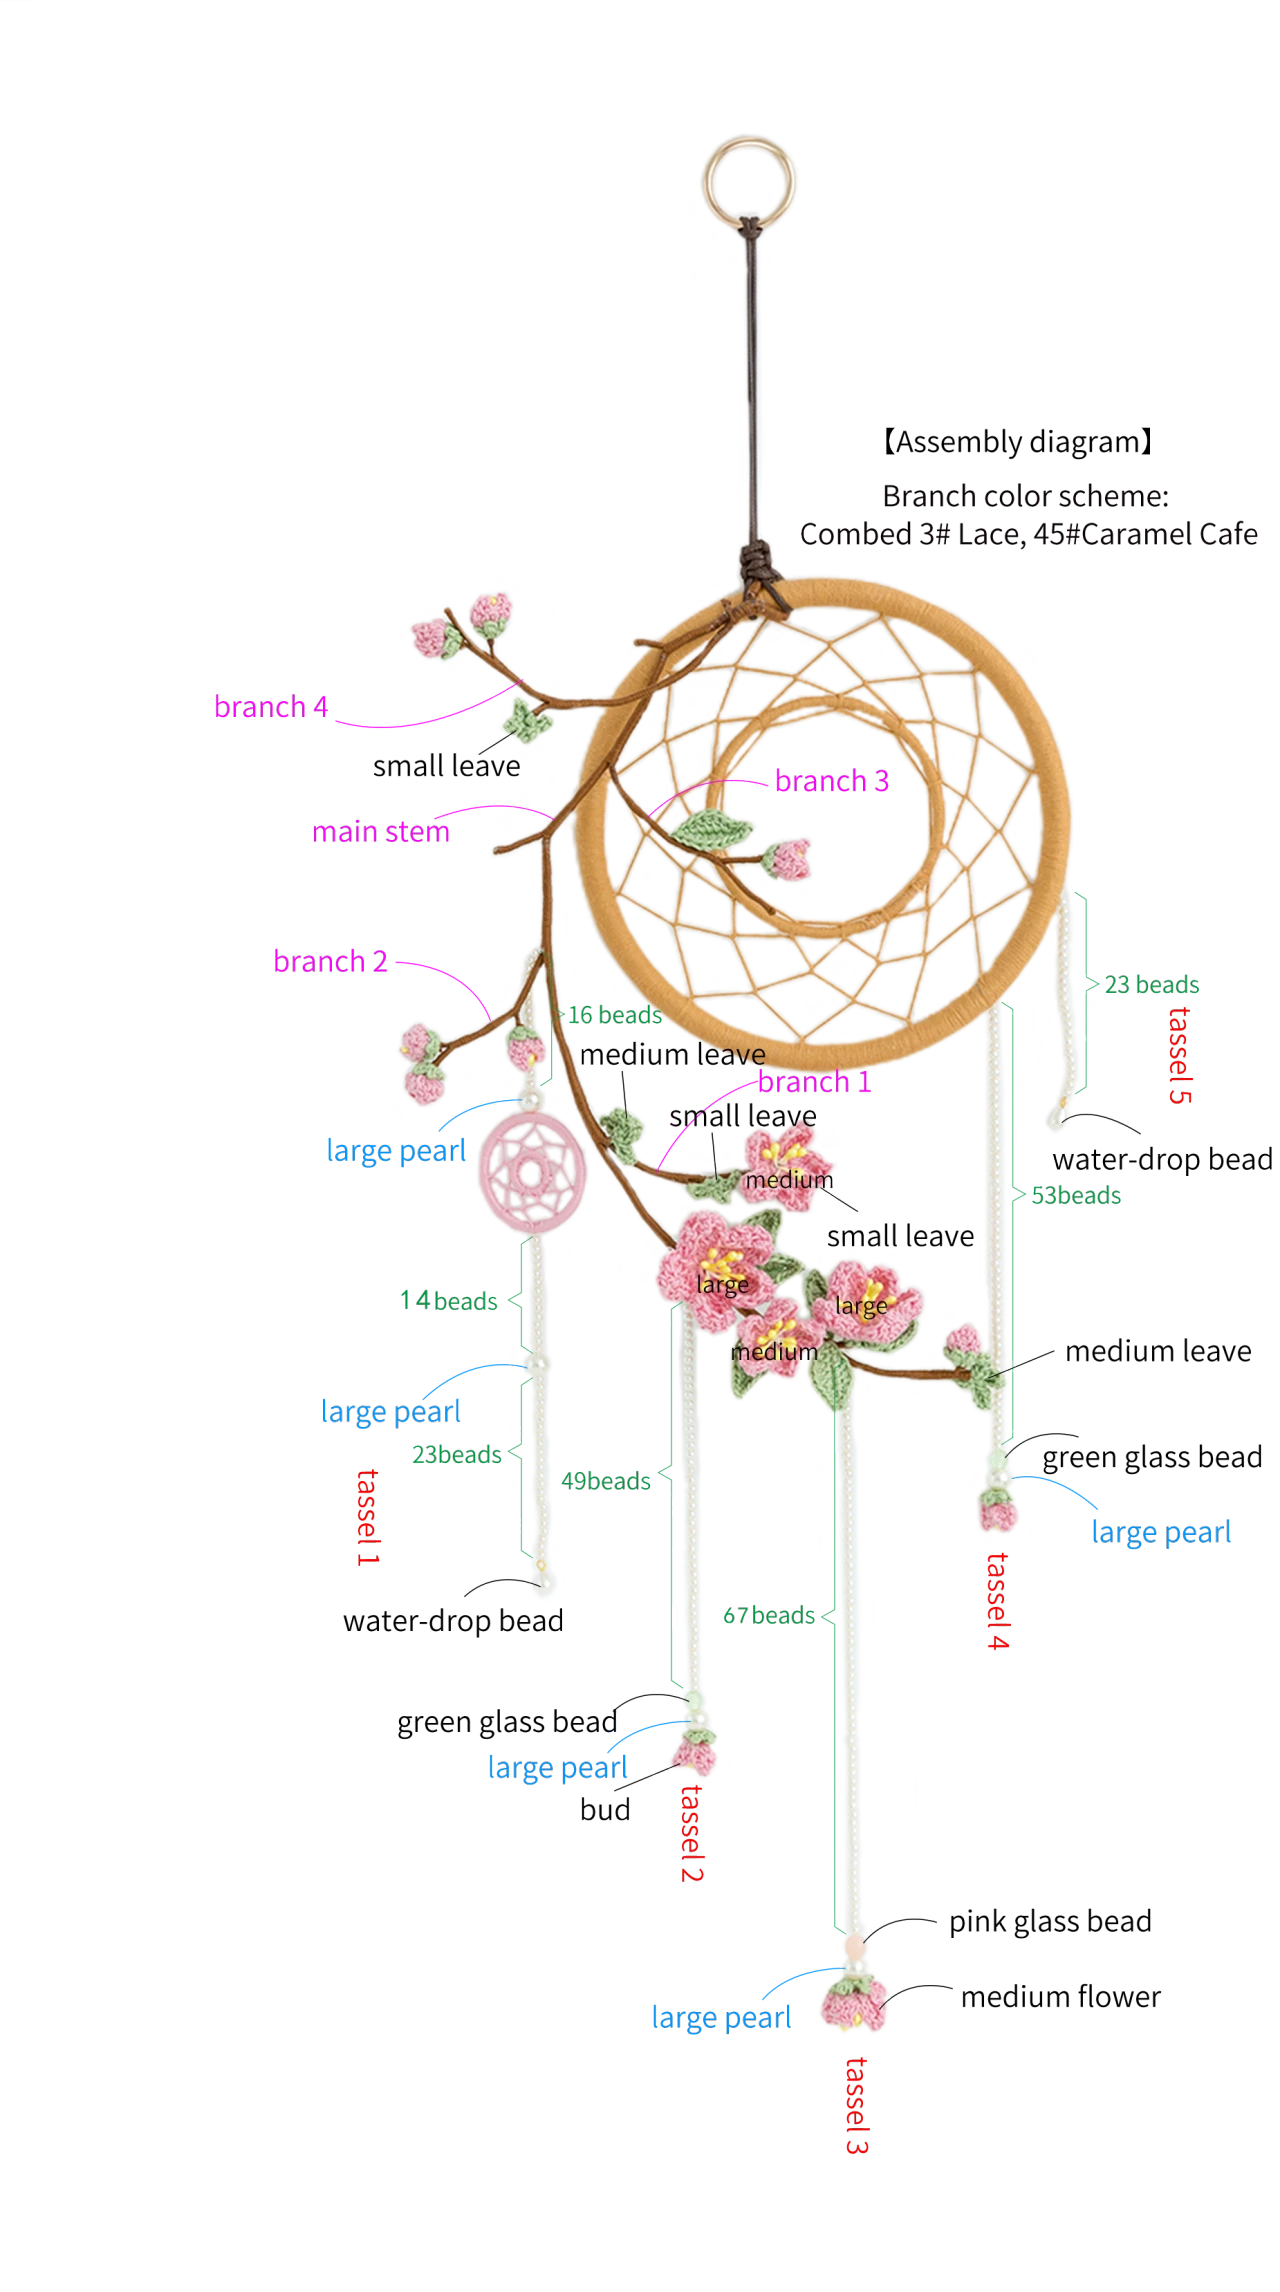
They consist of flowers, buds, calyxes, and leaves. First, crochet the corresponding pieces, after completing, refer to the assembly diagram to assemble the branches and attach them to the corresponding position on the dream catcher. Please refer to the video demonstration for more details.
Note:
①When crocheting flowers, buds, and leaves, wrap thin wire in the first round.
②After completing the flower bud, leave about 15cm of yarn tail for sewing.
Part 3 AccessoriesB 65' 47'' (SA1868)
Accessories including the tassels and hanging rope. Install the tassels (sewing thread) in numerical order from left to right, and finally attach the hanging rope. Please refer to the video demonstration for more details.
Made by the community