Home / Blanket
Bunny Patchwork Blanket
Project preview
See the finished project
Pattern format
Instructions
Watch and follow
Video tutorial
| Style | Yarn | Color |
|---|---|---|
| Ballad Blue Version | Morandi 6# |  08#Misted Yellow x 1 08#Misted Yellow x 1 14#Misty Rose x 1 14#Misty Rose x 1 19#Ashley Blue x 1 19#Ashley Blue x 1 22#Ballad Blue x 10 22#Ballad Blue x 10 |
Ballad Blue Version
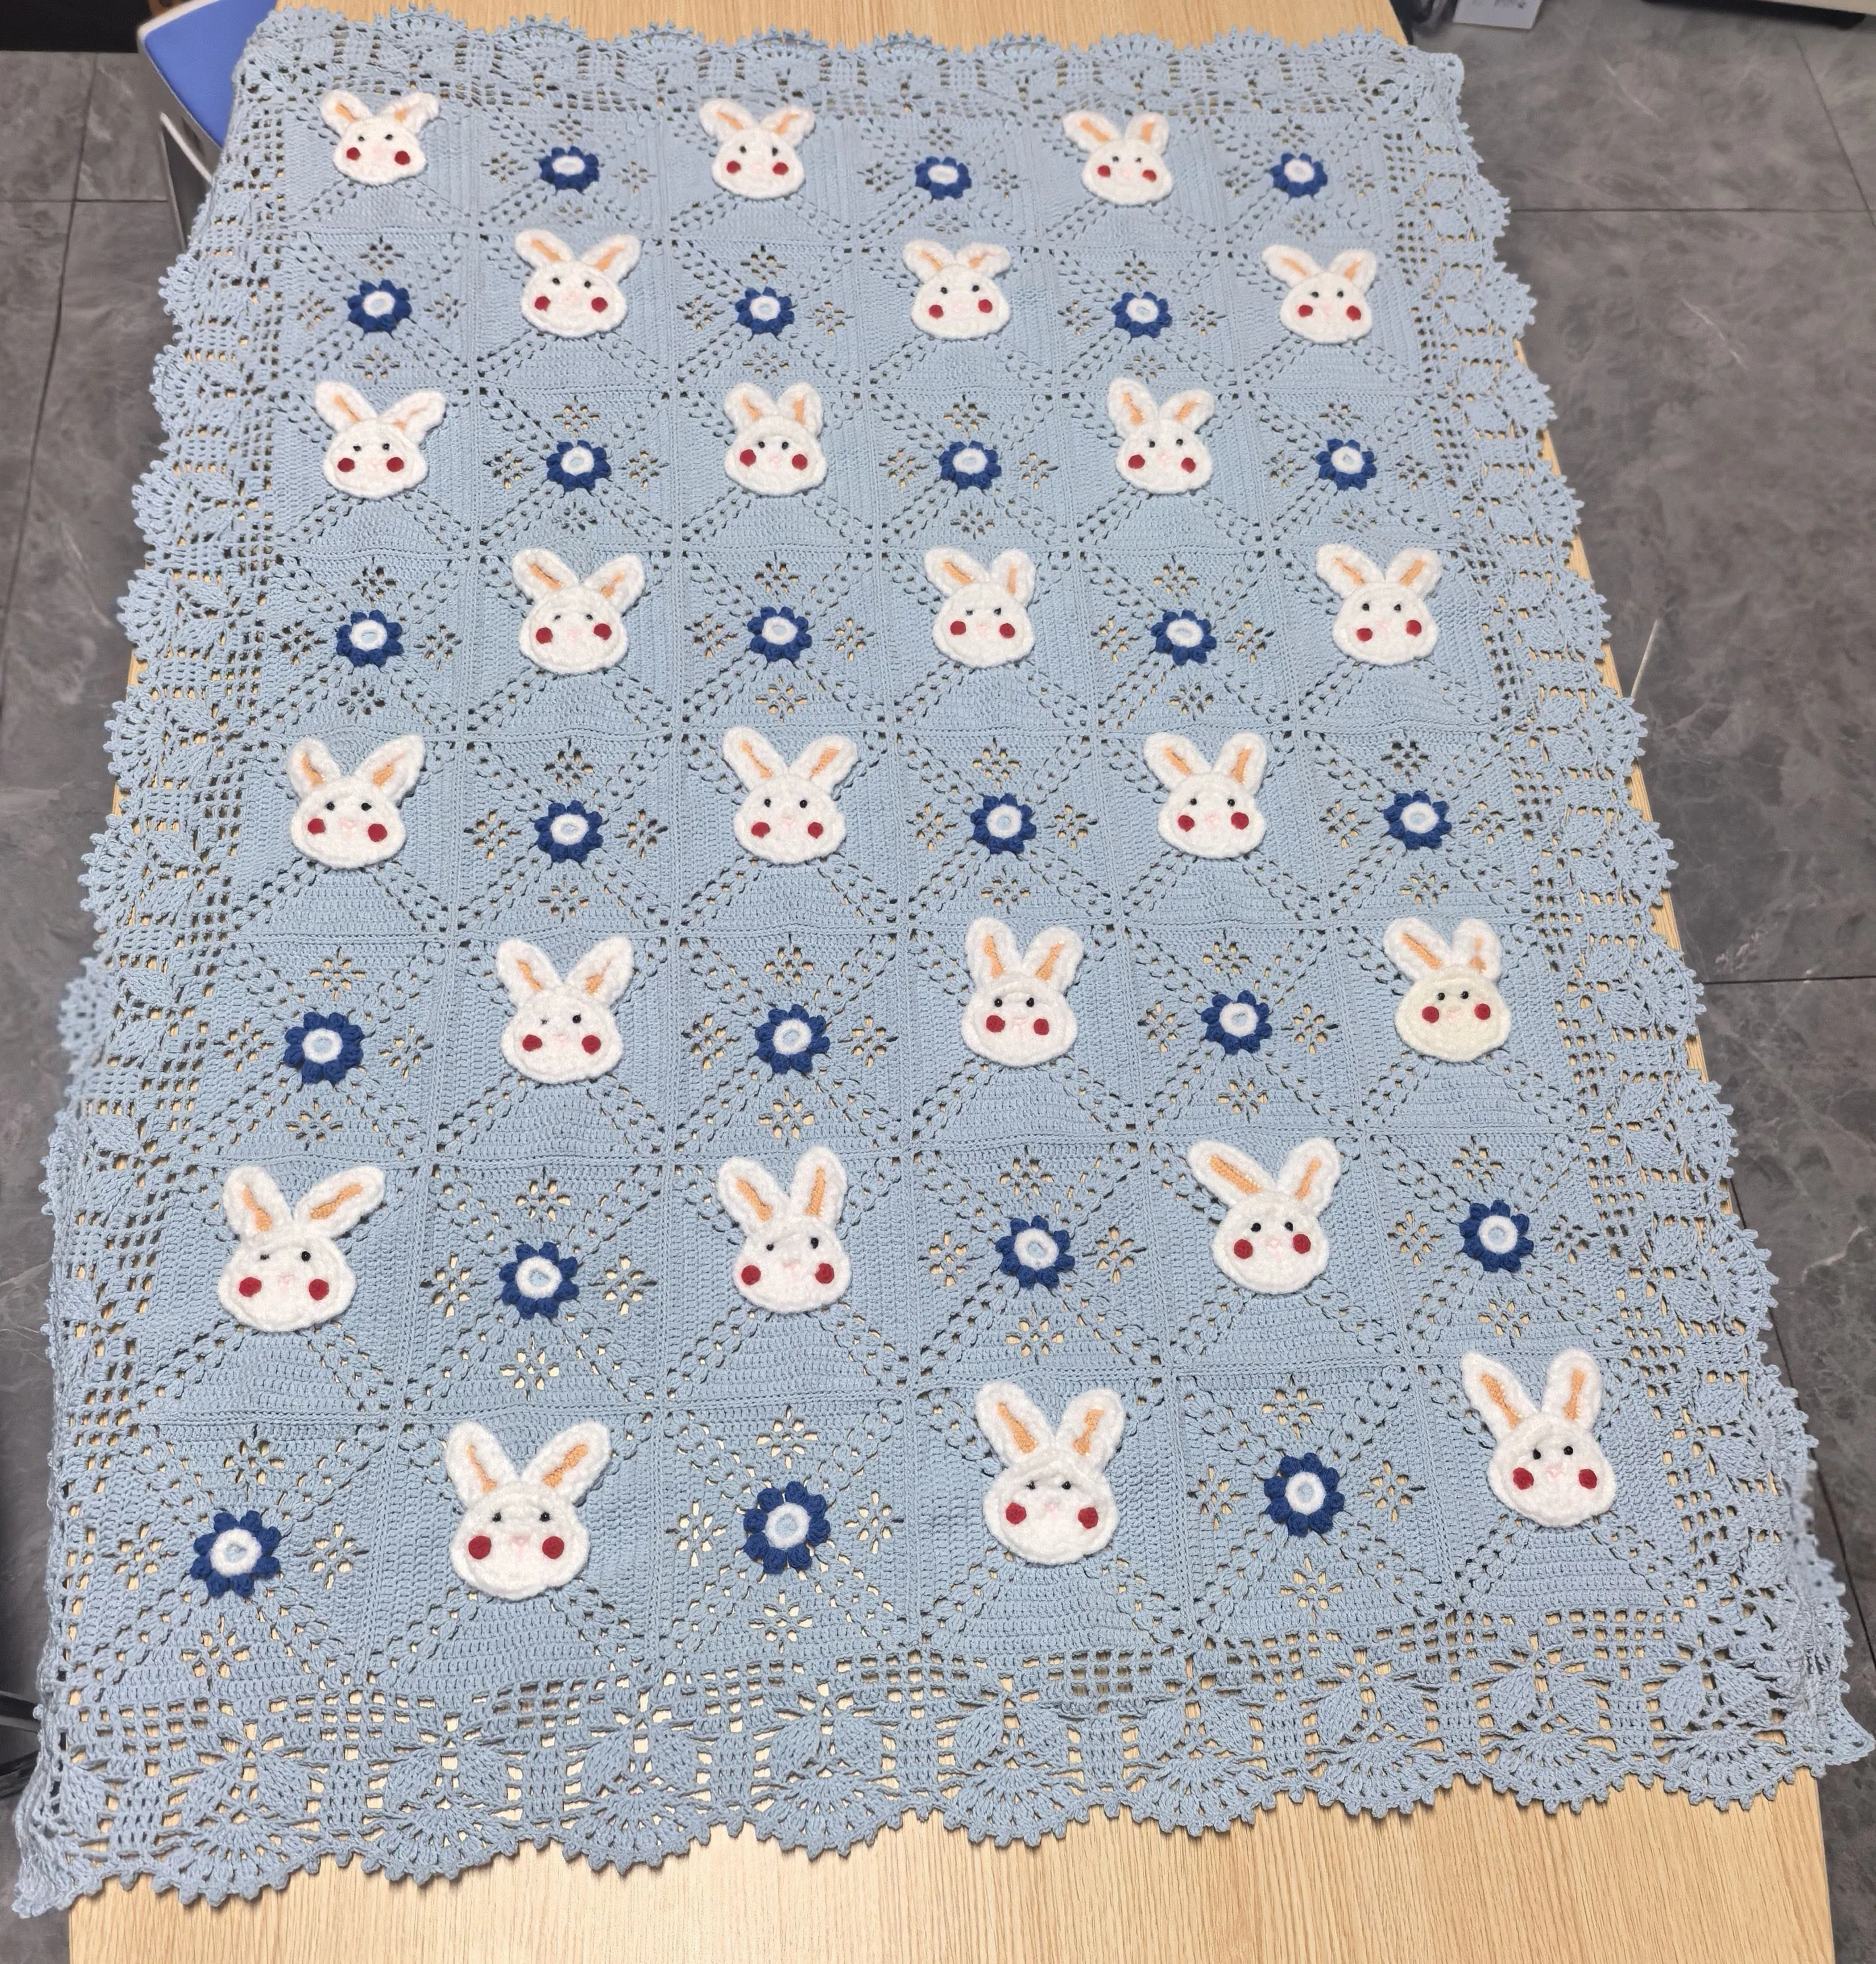
08#Misted Yellow x 114#Misty Rose x 119#Ashley Blue x 122#Ballad Blue x 10This blanket consists of three parts: motifs, joining together, and crocheting the border. First, crochet the corresponding number of motifs, then proceed with joining them together, and finally crochet the border along the outer edge.
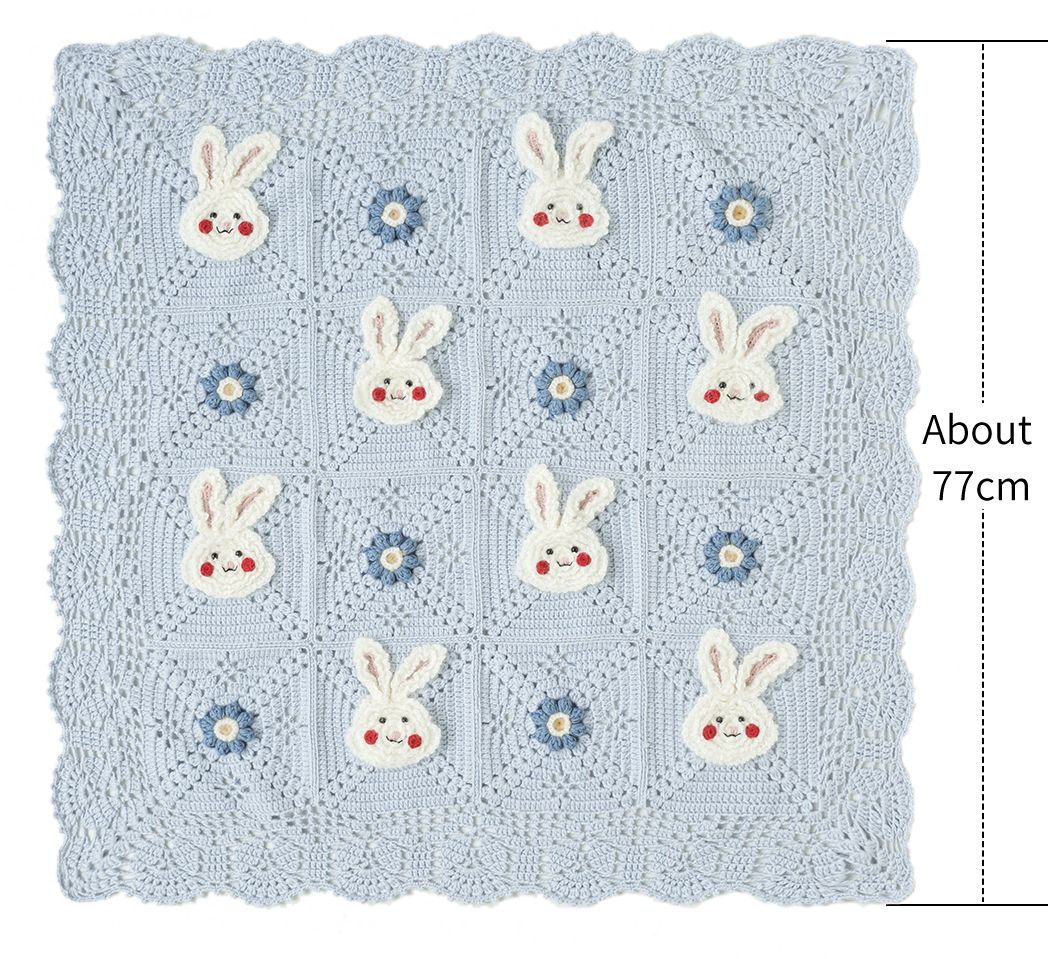
Due to variations in individual tension, the size of the sample is for reference only.
Materials: 4-Ply Combed Cotton & Acrylic Fibre Hand Knitting Yarn & Morandi 6# & South African Soft Mohair Mixed Hand-Knitting Yarn
Crochet Hook: 3.50 mm Crochet Hook

Chart Key













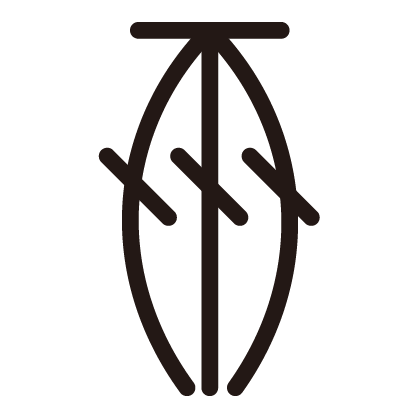

Note:
This pattern is making in Chinese crochet pattern terms, and the stitch name is written using American terminology. All measurements in charts are in cm.

Part 1 Motif A
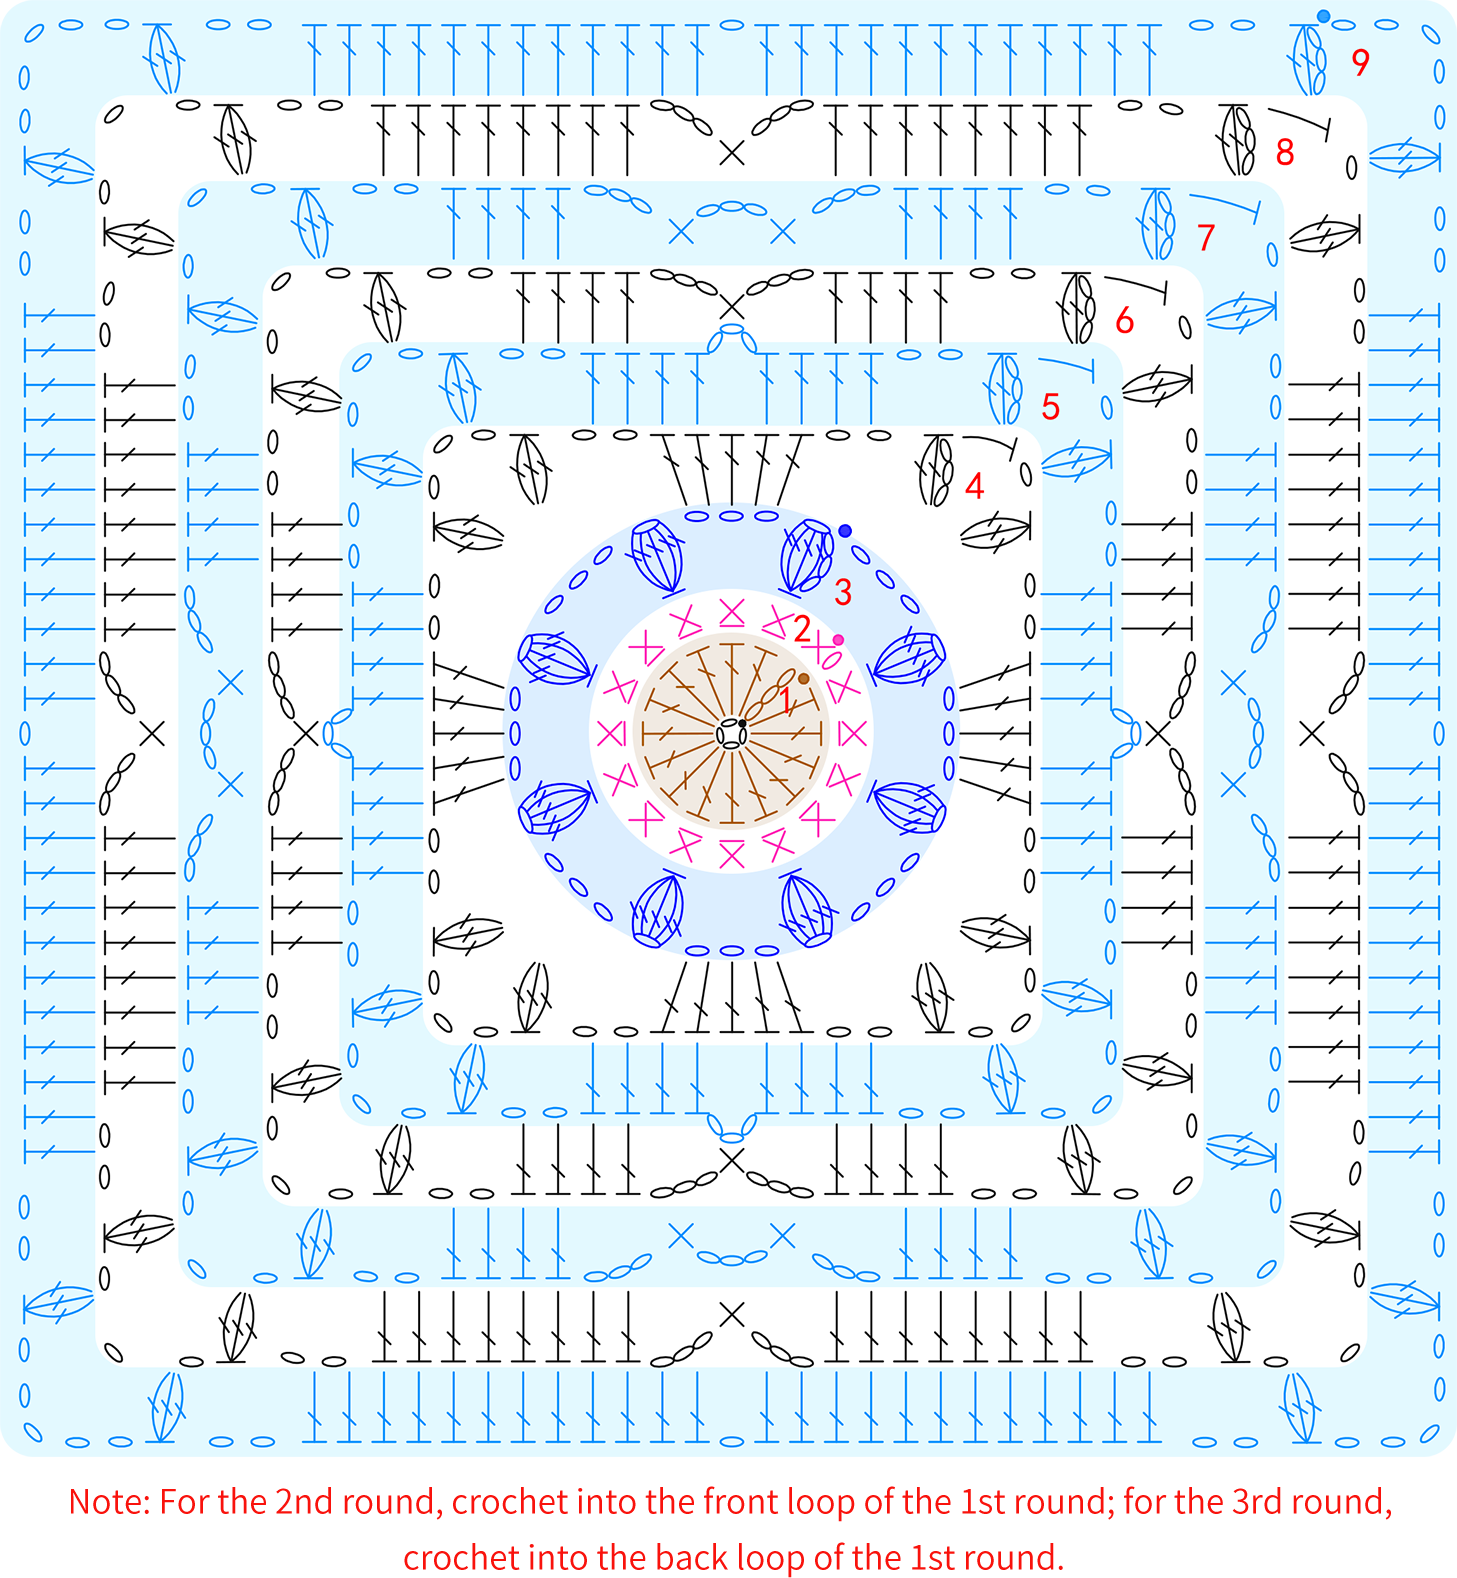
The motif includes two types: flower motifs and rabbit motifs.
Step 1 Flower Motifs × 8A1 00' 44''
The flower motif starts with a chain ring method and is crocheted in rounds counterclockwise. Color changes are required during the process. Please refer to the video demonstration for more details.
| Flower Motifs color Schemes | ||
| Round | Yarn | Color |
| R1 | Morandi 6# | 08#Misted Yellow |
| R2 | South African Soft Mohair Mixed Hand-Knitting Yarn (Twist 2 strands together into 1 strand) |
01#Whisper White |
| R3 | Morandi 6# | 19#Ashley Blue |
| R4-9 | 22#Ballad Blue | |
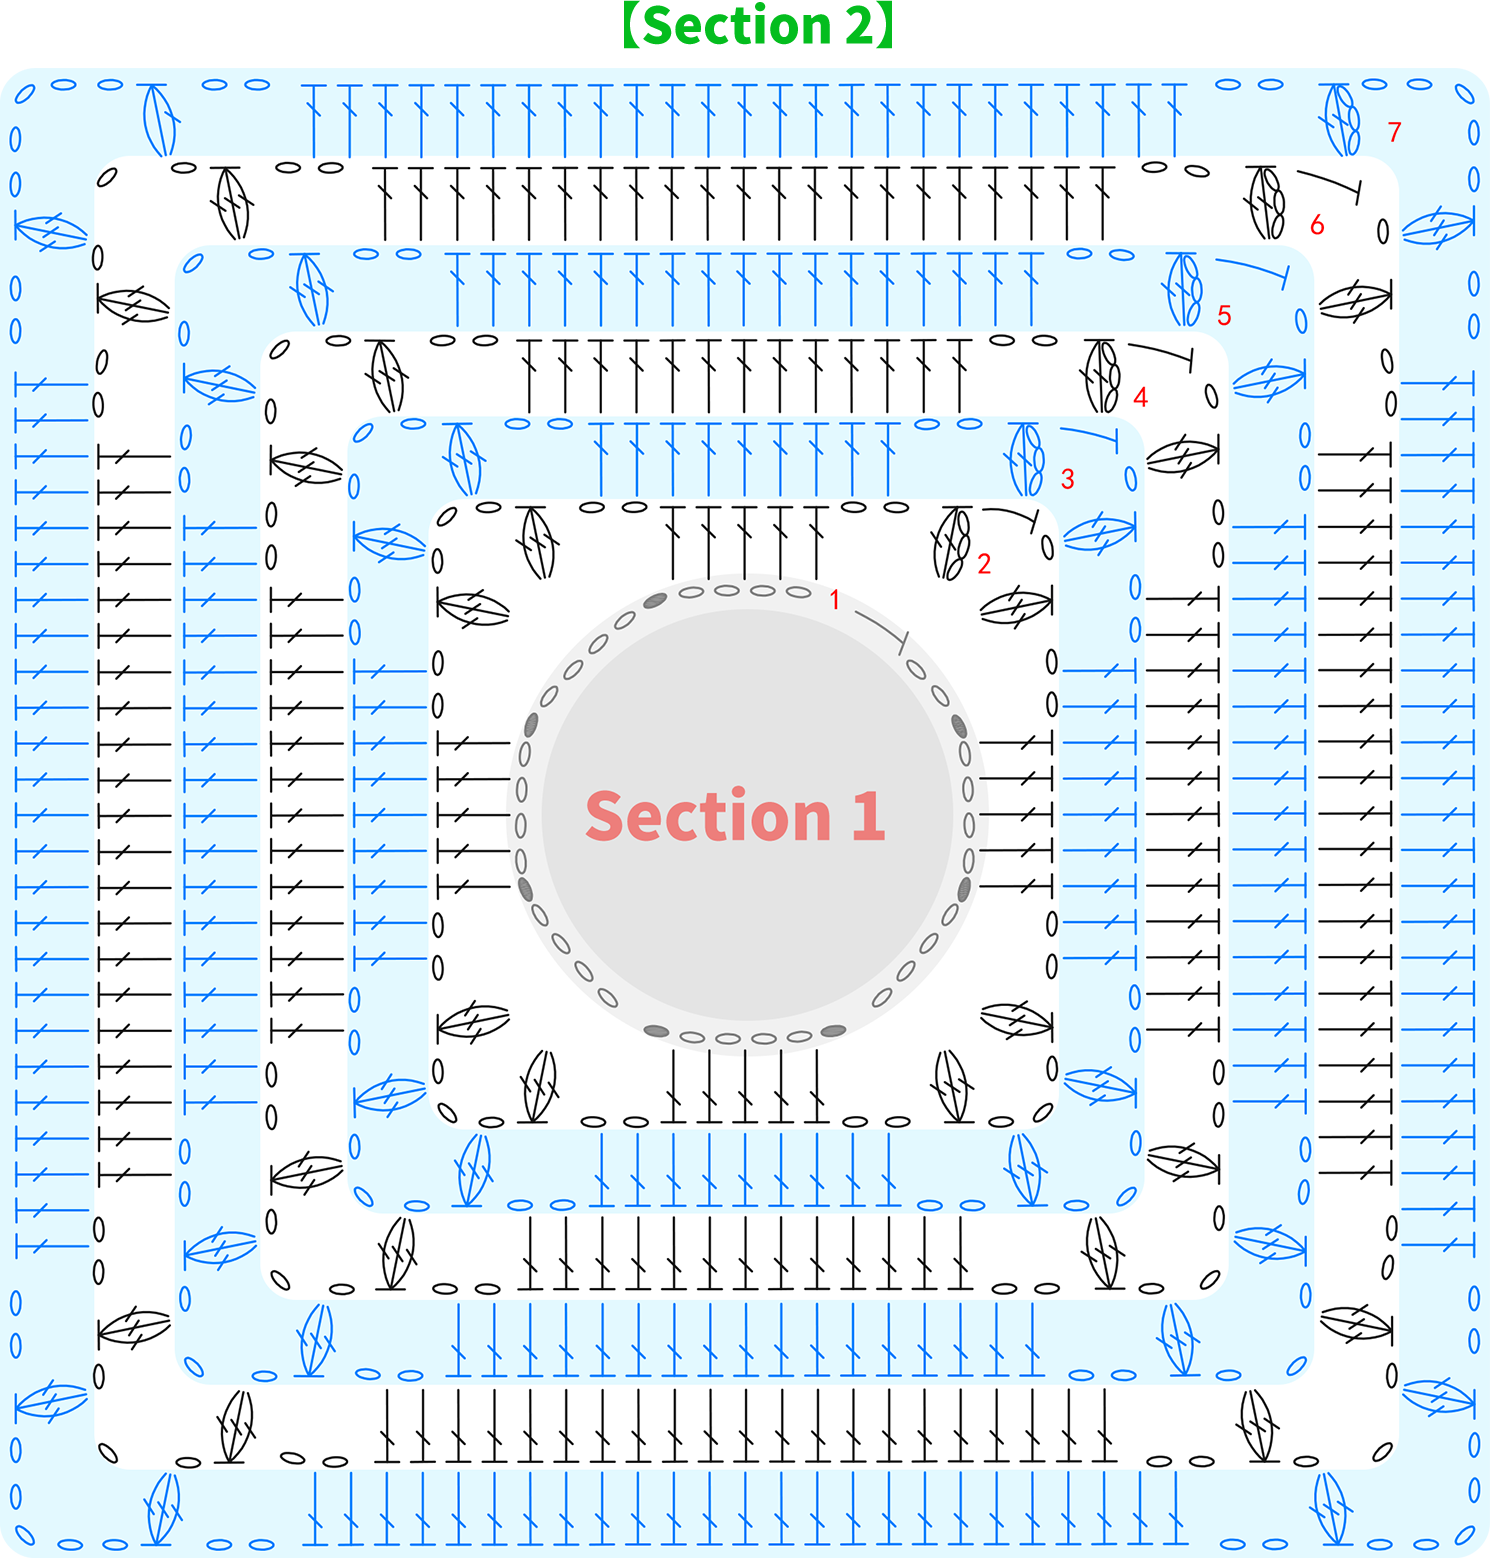
Step 2 Bunny Motifs ×8A2 29' 17''
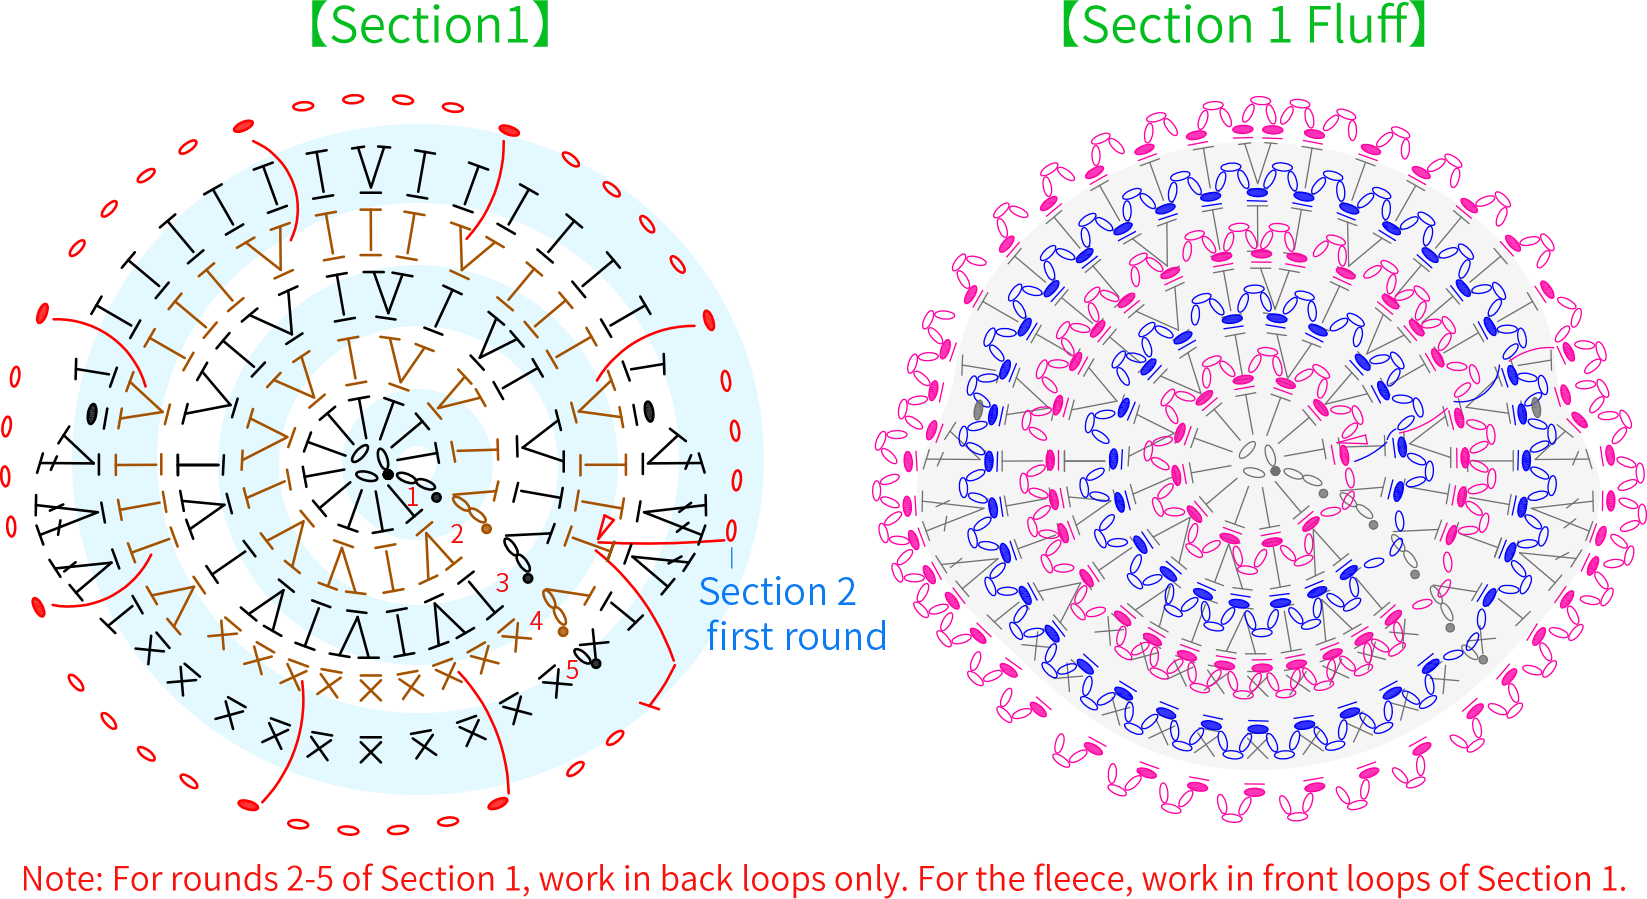
The rabbit motif includes Section 1, Section 2, and decorations. Section 1 uses the chain ring method, crocheting in rounds counterclockwise from the starting point. After completing Section 1, pick up stitches on the wrong side and continue with Section 2. Finally, make the decorations (fuzz for Section 1, nose, mouth, eyes, blush, and ears). Please refer to the video demonstration for more details.
| Bunny Motifs Color Scheme | ||||
| Part | Round | Yarn | Color | |
| Section 1 | R 1-5 | South African Soft Mohair Mixed Hand-Knitting Yarn (Twist 2 strands together into 1 strand) |
01#Whisper White | |
| Section 2 | R 1-7 | Morandi 6# | 22#Ballad Blue | |
| Decoration | Fuzz | South African Soft Mohair Mixed Hand-Knitting Yarn (1 strand) |
01#Whisper White | |
| Eyes | ||||
| Nose | Morandi 6# | 14#Misty Rose | ||
| Mouth | 4-Ply Combed Cotton & Acrylic Fibre Hand Knitting Yarn | 21#Black Beauty(Take 1 strand) | ||
| Blush | 29#Aurora Red | |||
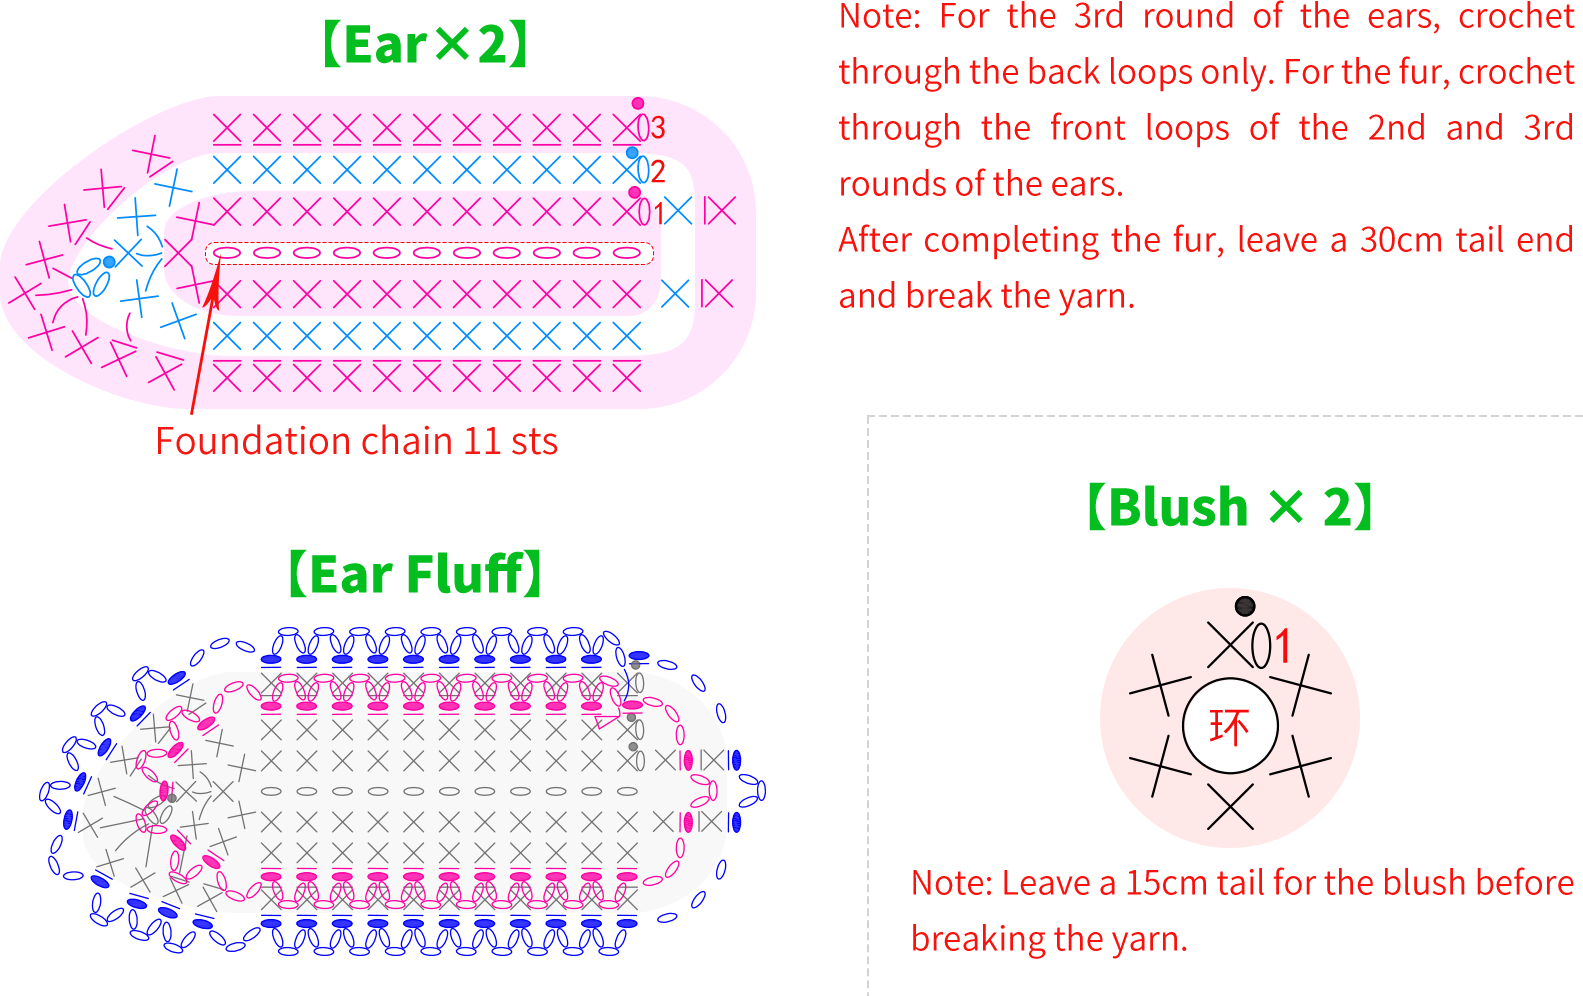
| Ears | Cast on - R 1 | Morandi 6# | 14#Misty Rose | |
| R 2-3 | South African Soft Mohair Mixed Hand-Knitting Yarn(Twist 2 strands together into 1 strand) | 01#Whisper White | ||
| Fuzz | South African Soft Mohair Mixed Hand-Knitting Yarn(1 strand) | |||
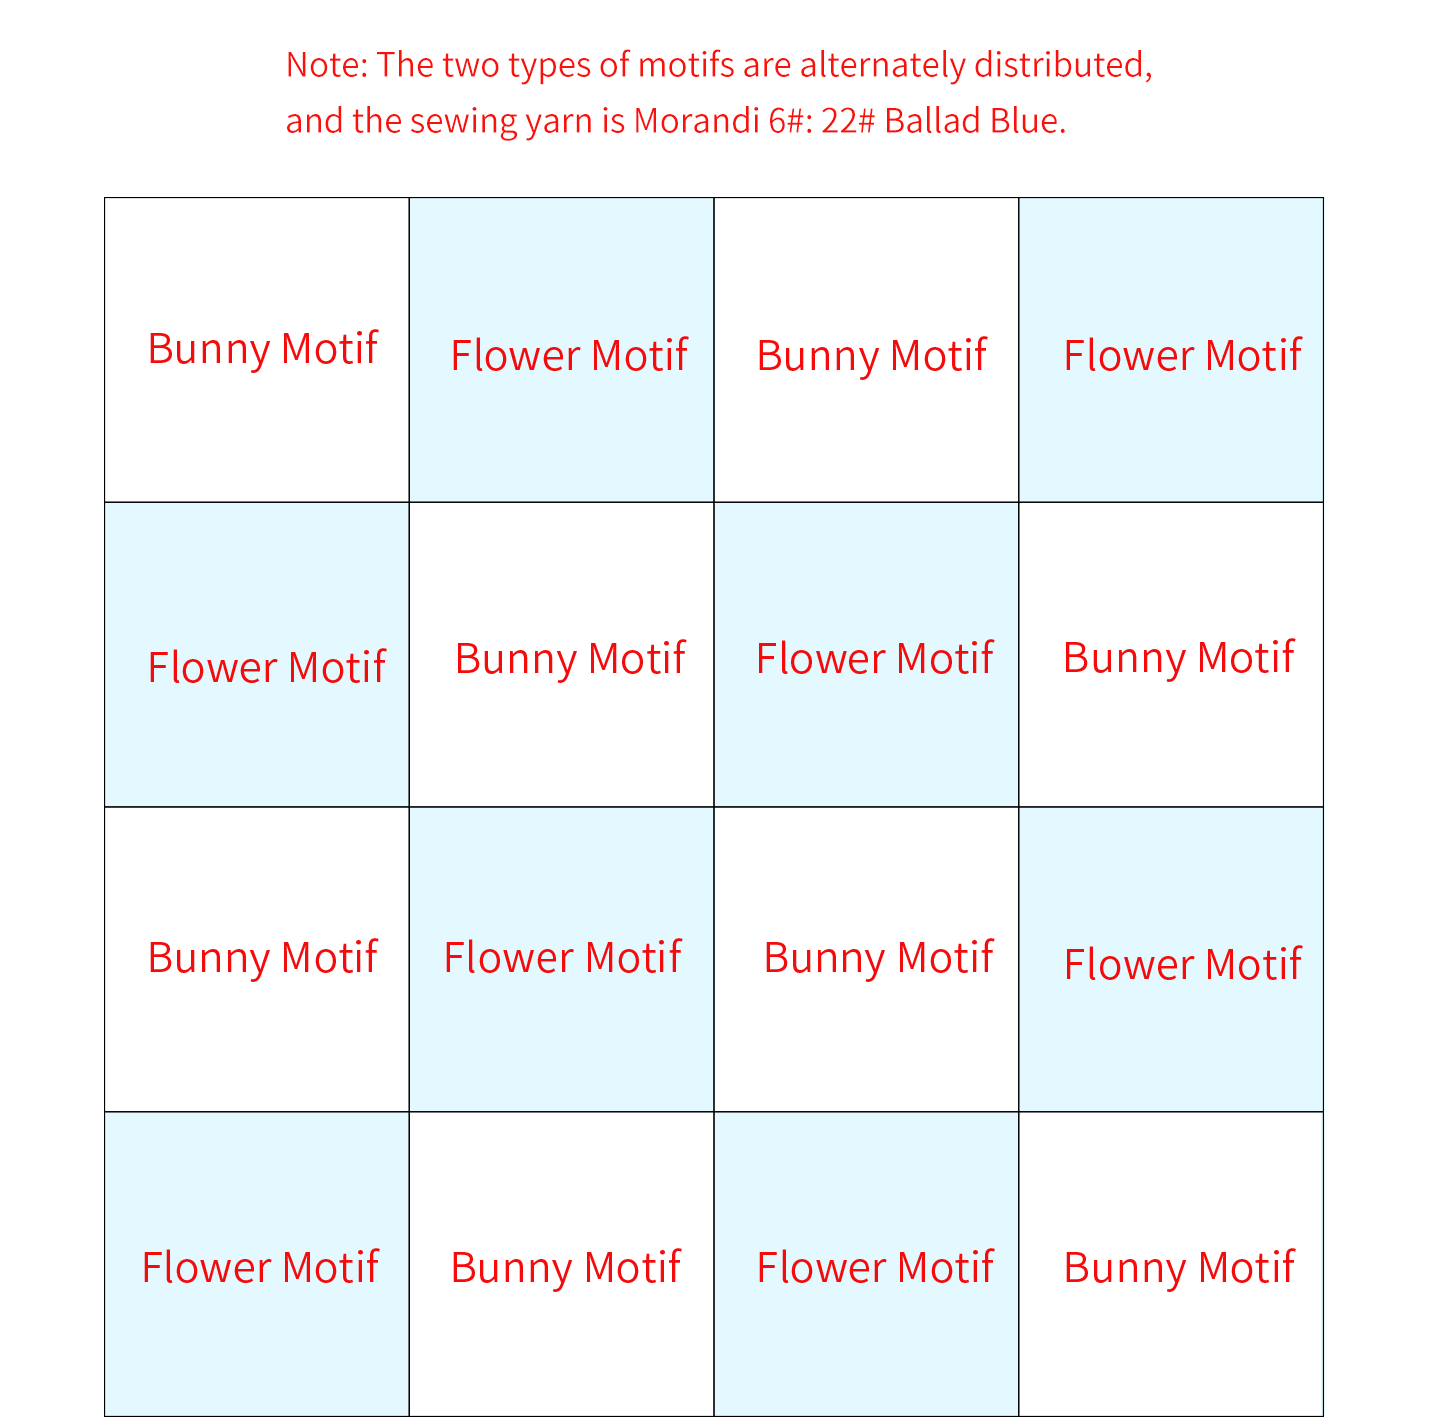
Part 2 SewingB 71' 03''
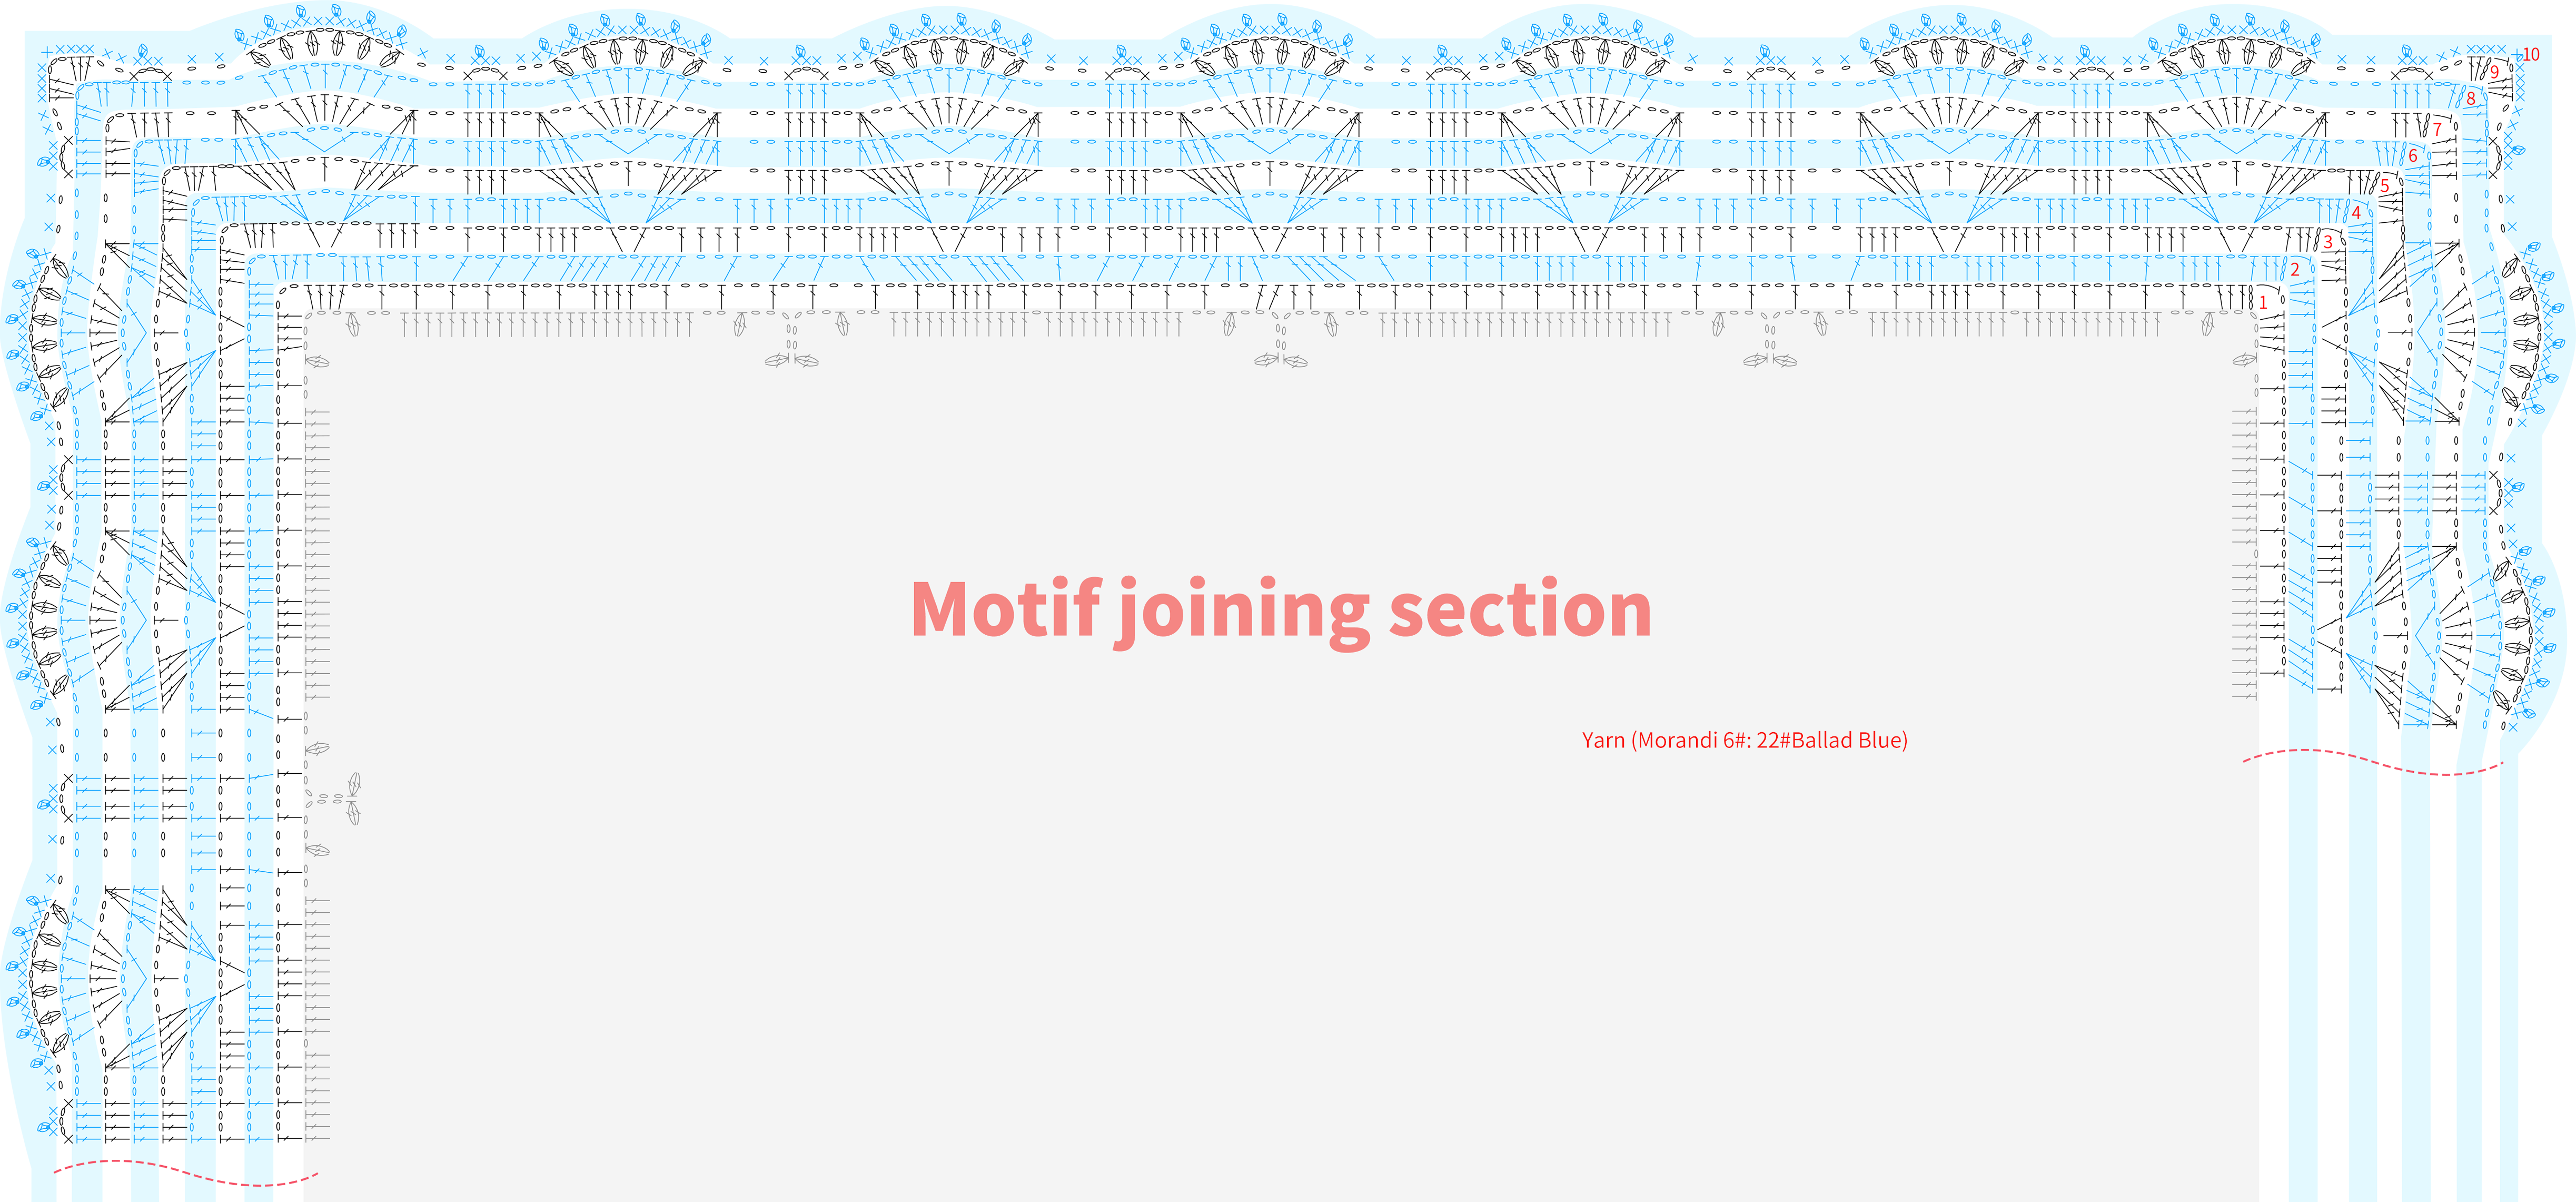
Part 3 Crochet the edgingC 79' 37''
After completing the motif joining, crochet the edging along the outermost edge. Please refer to the video demonstration for more details.
Made by the community