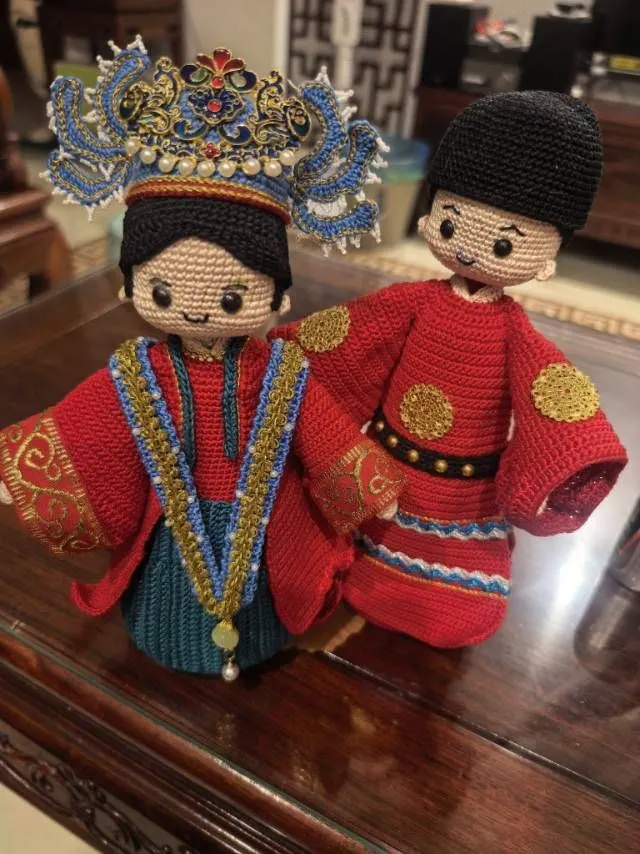
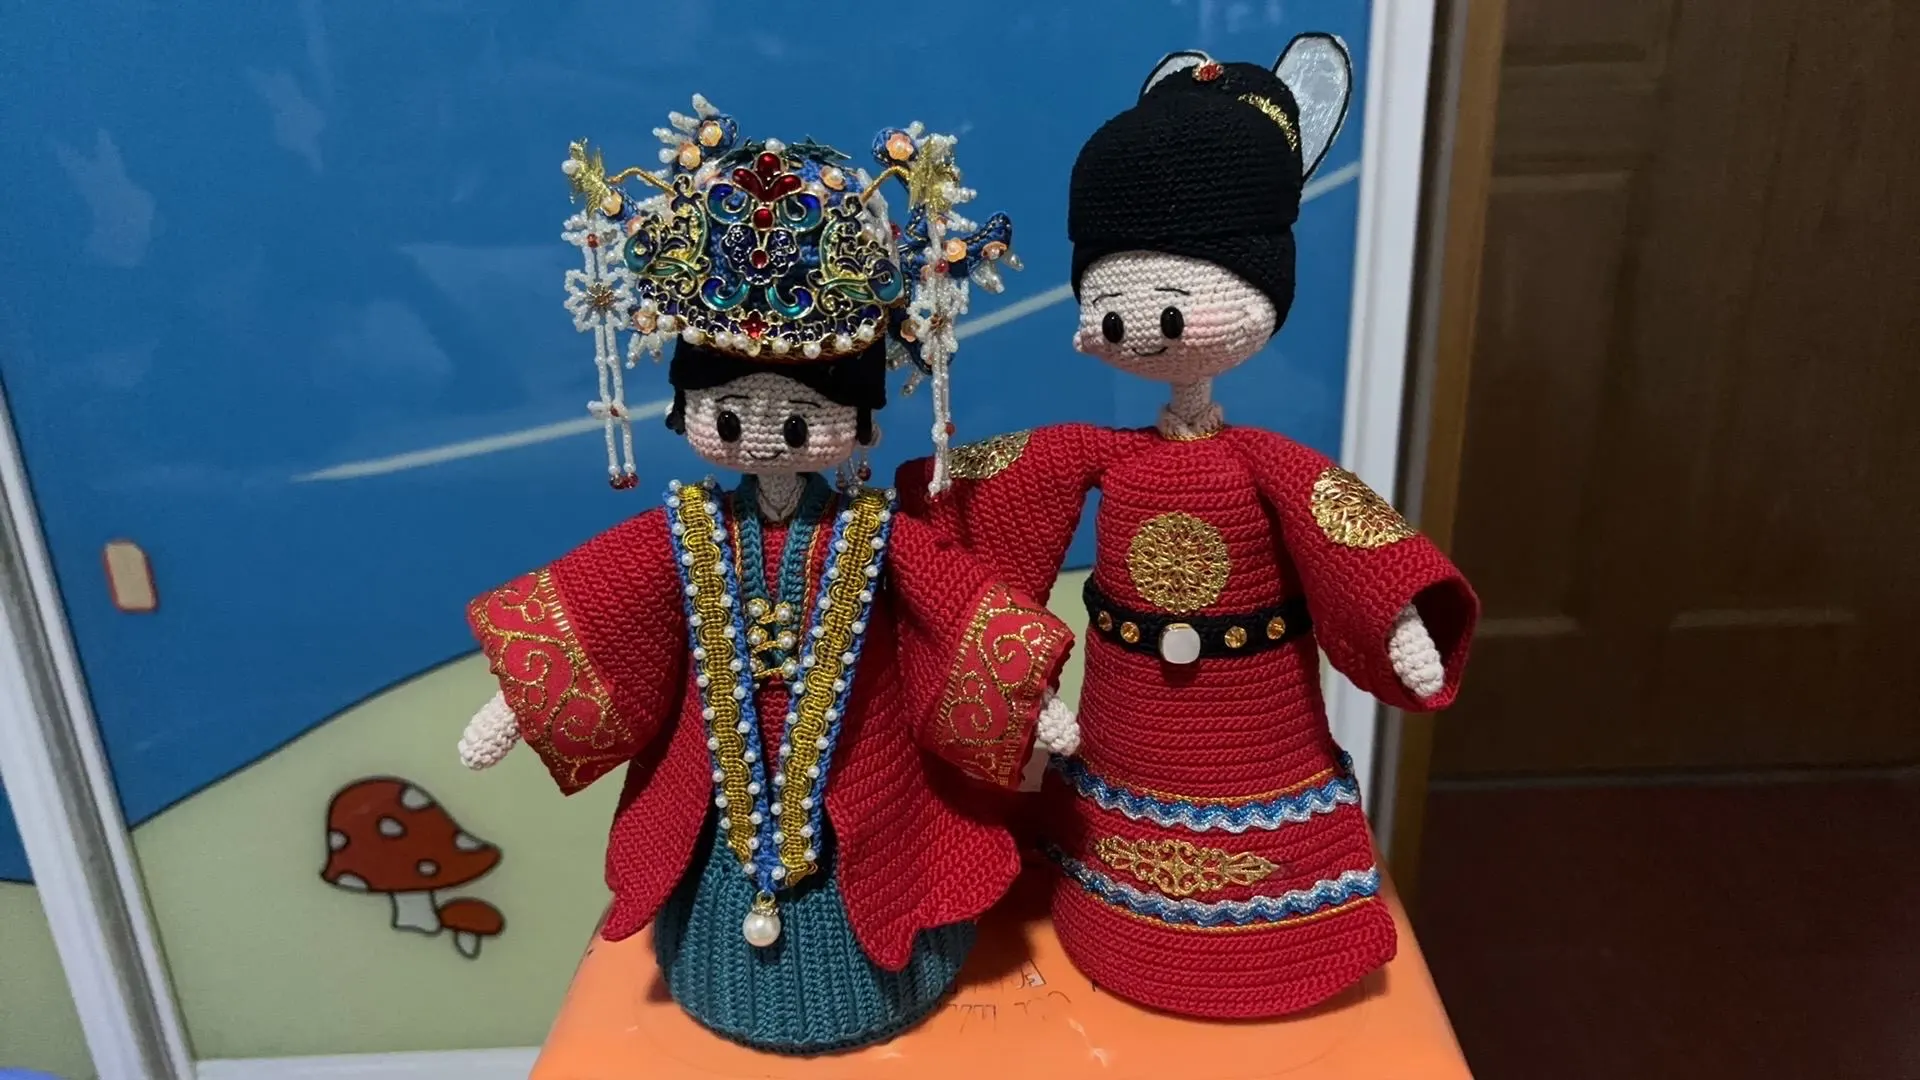
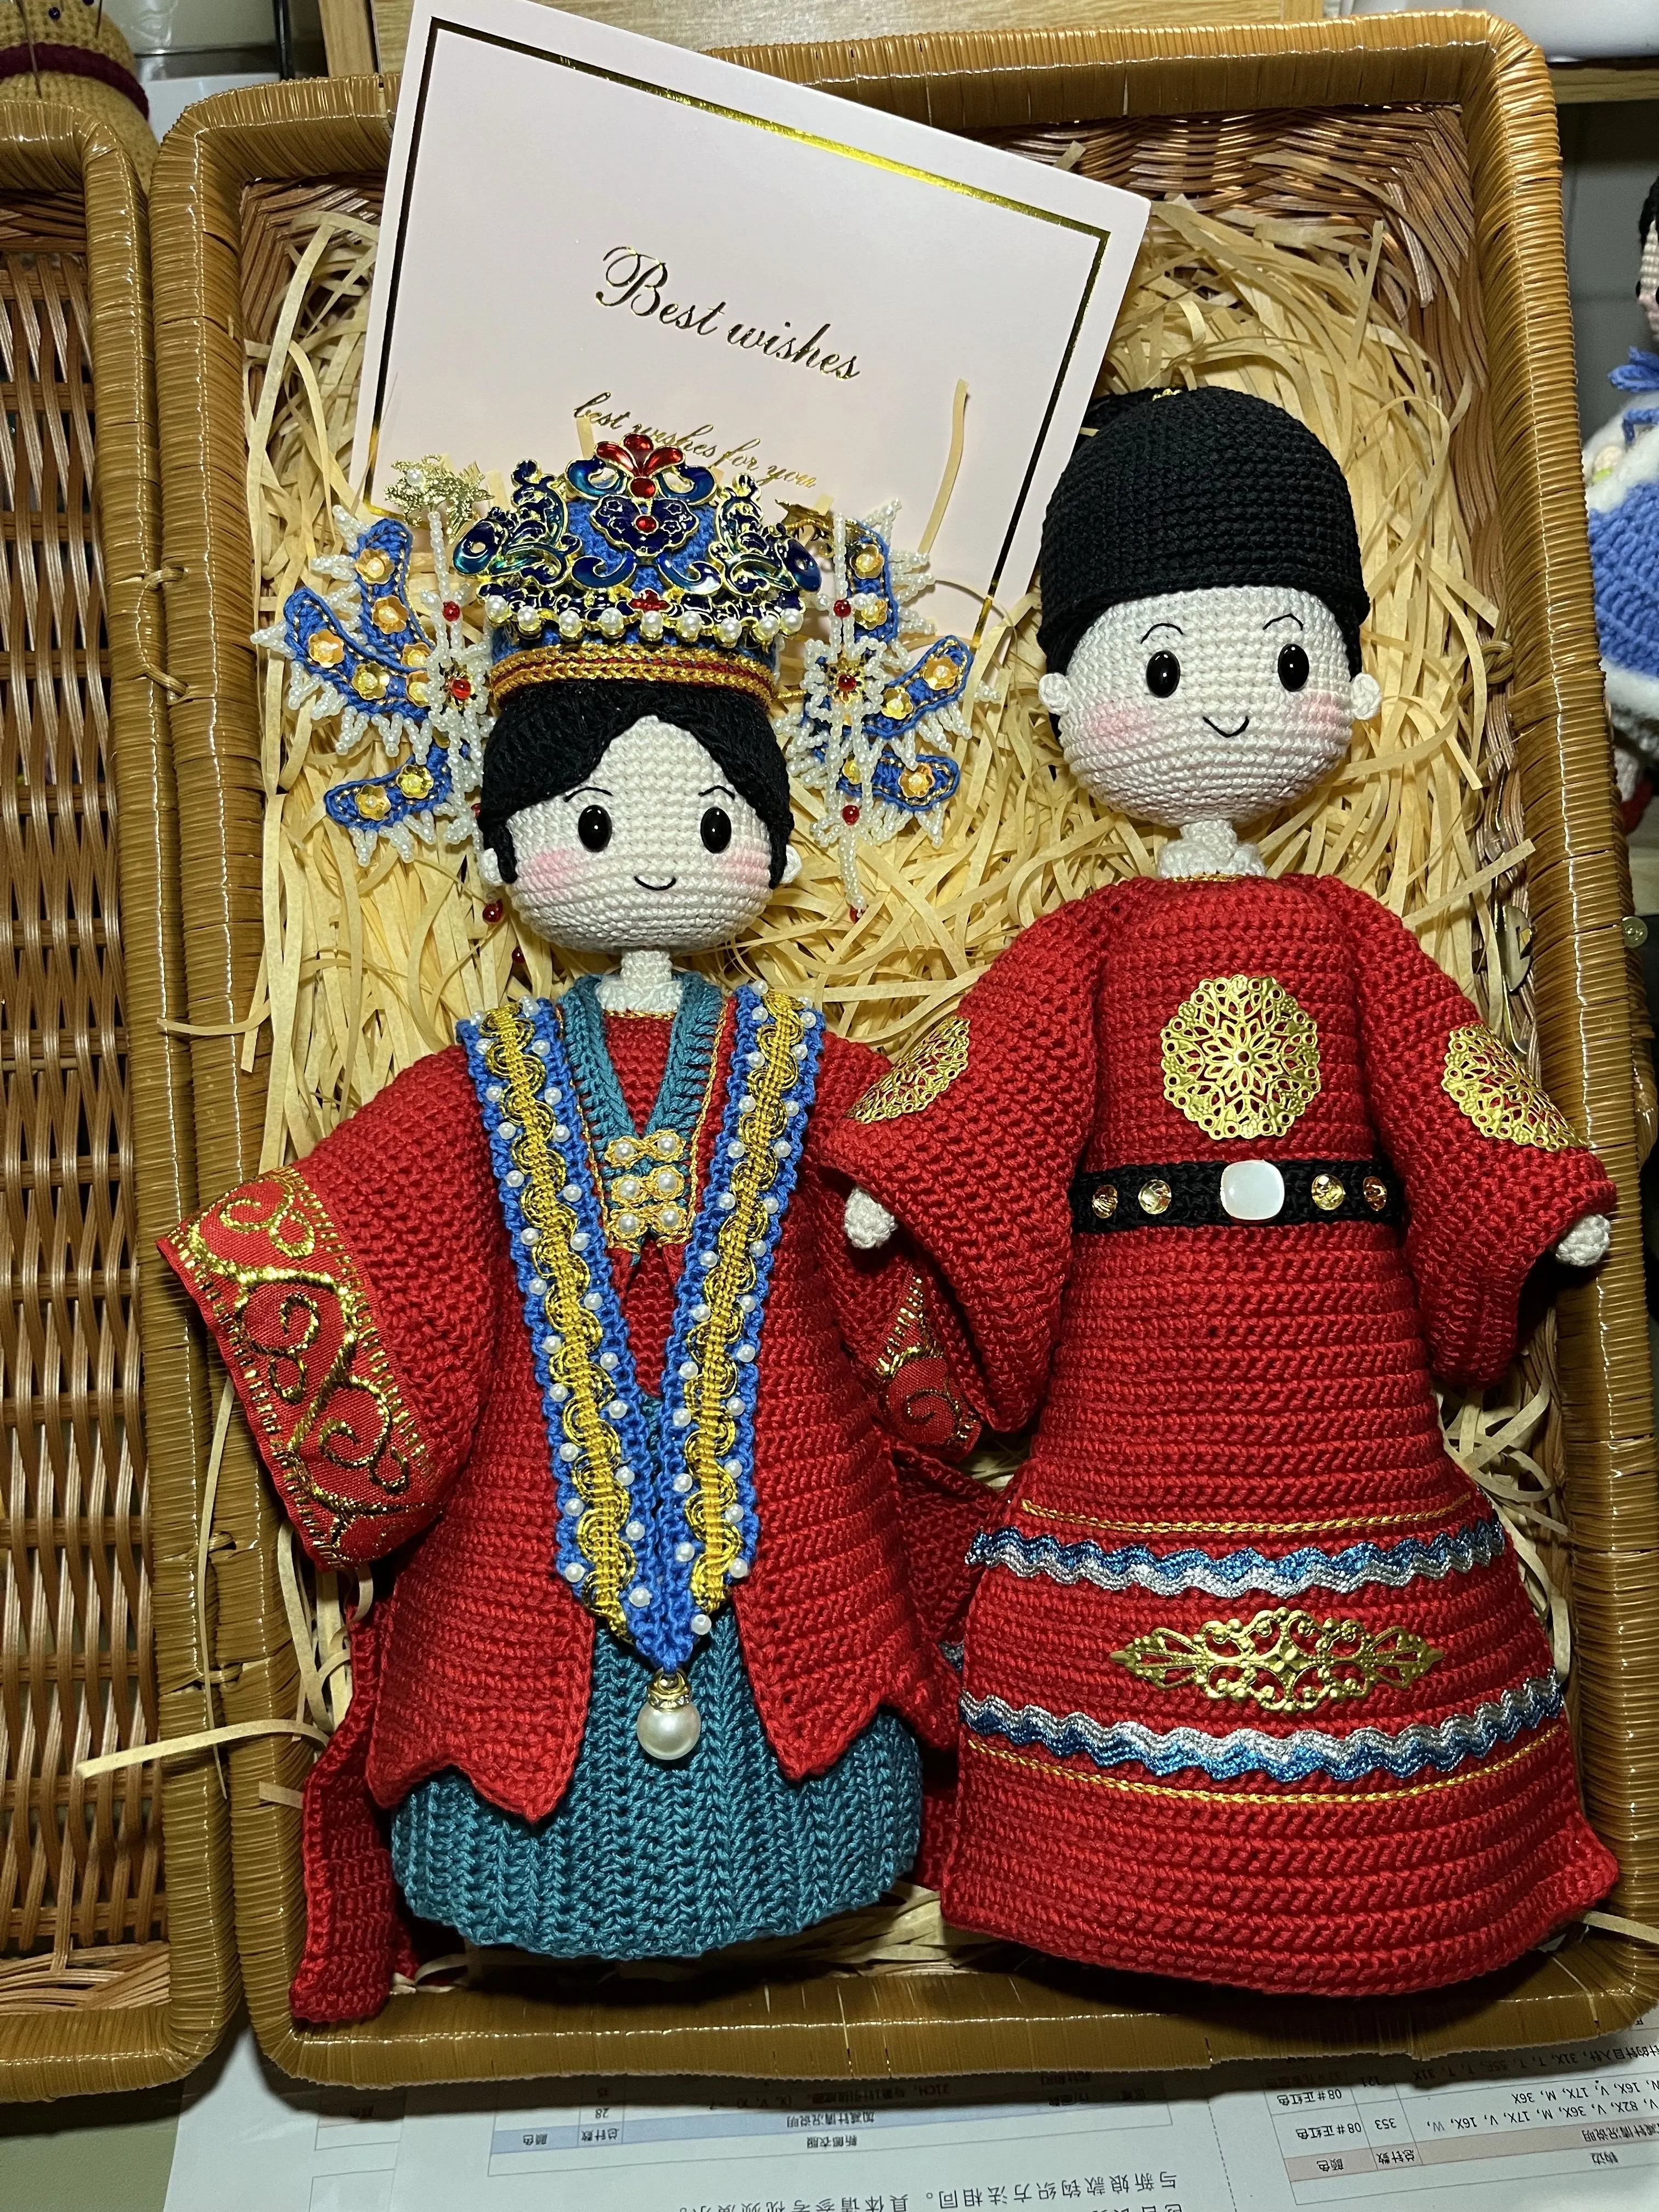
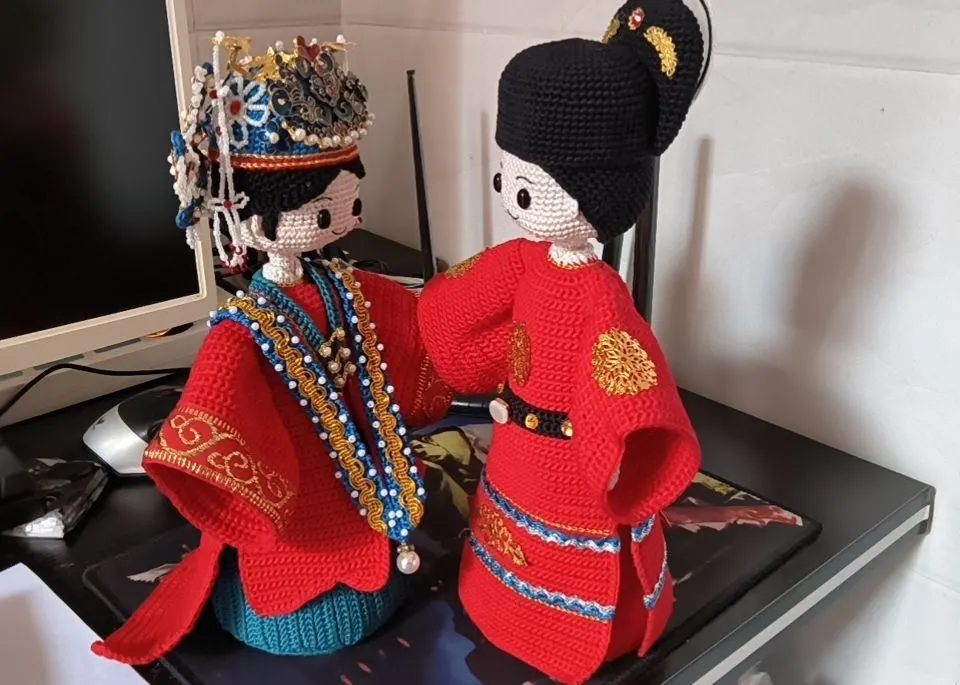
Doll
Ancient Chinese Wedding Couple Dolls
Project preview
See the finished project
Pattern format
Instructions
Watch and follow
Video tutorial
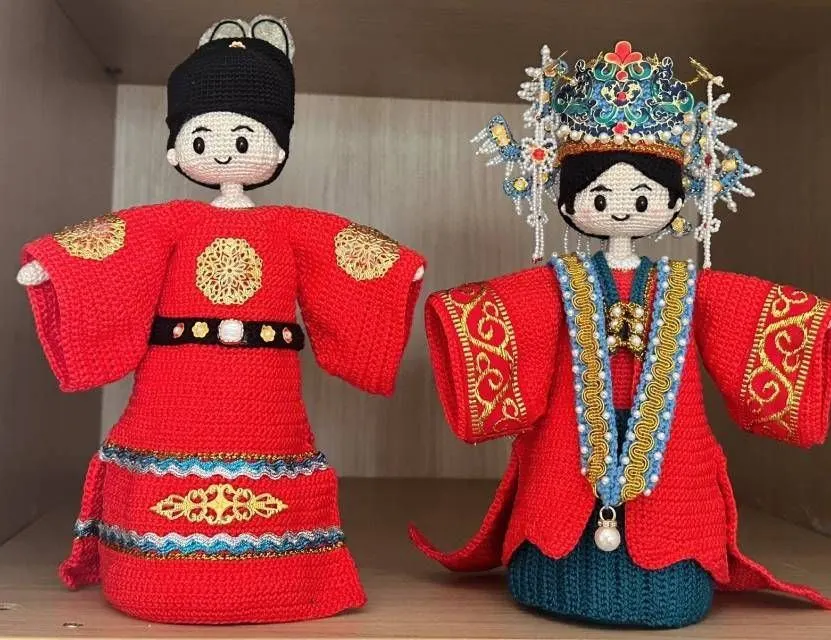
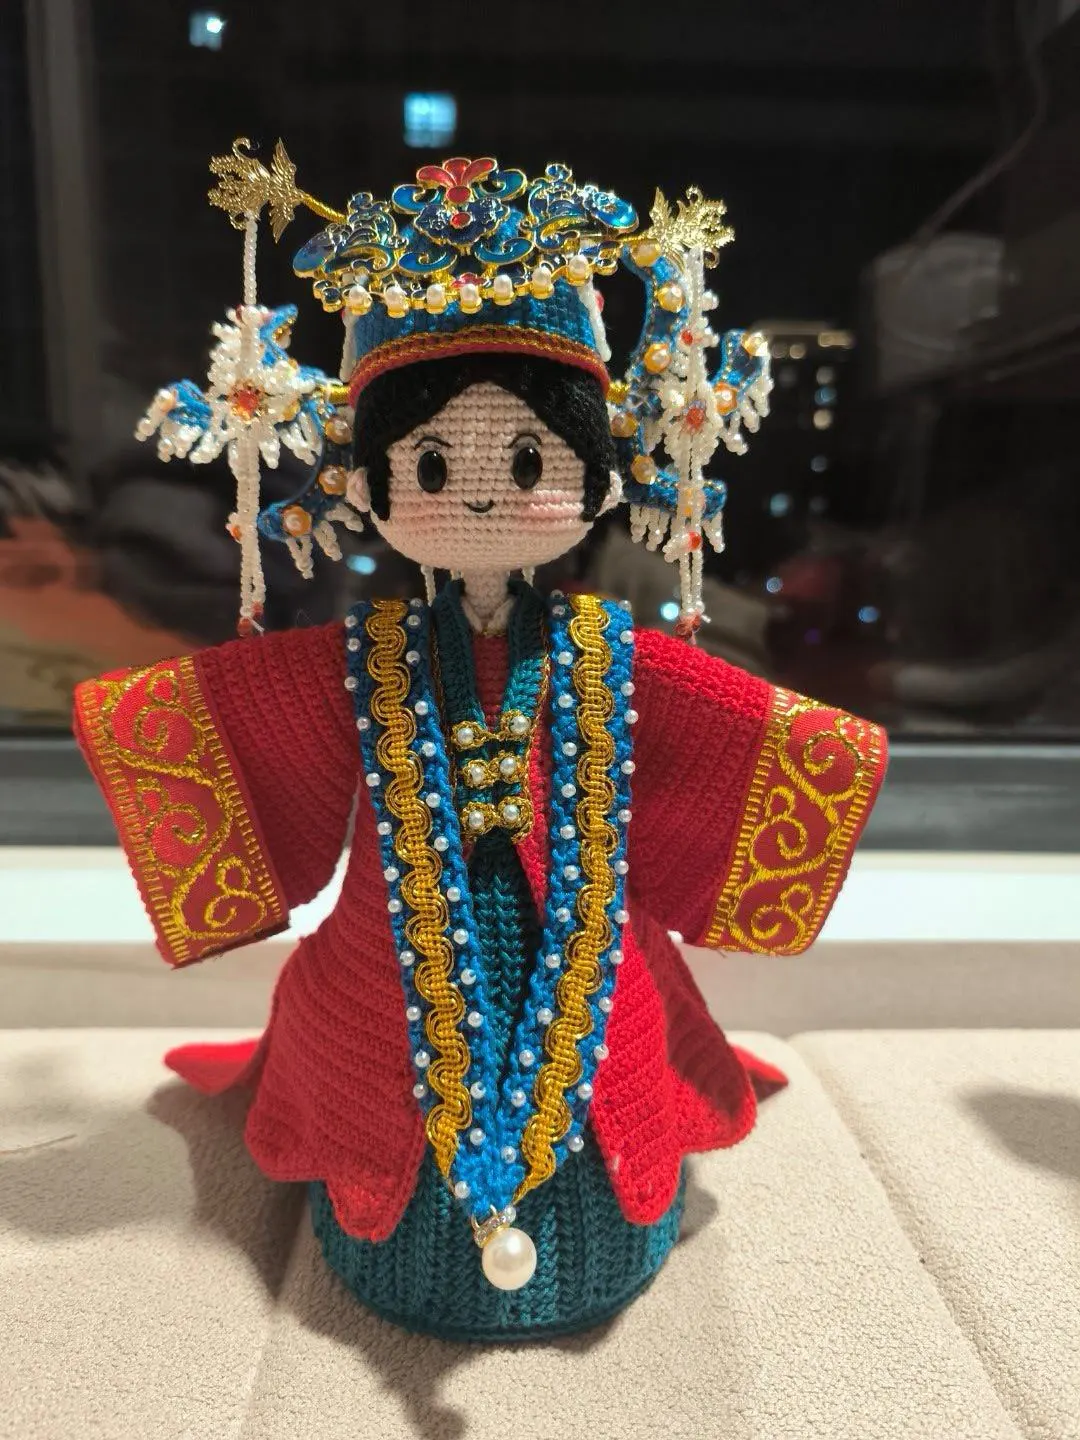
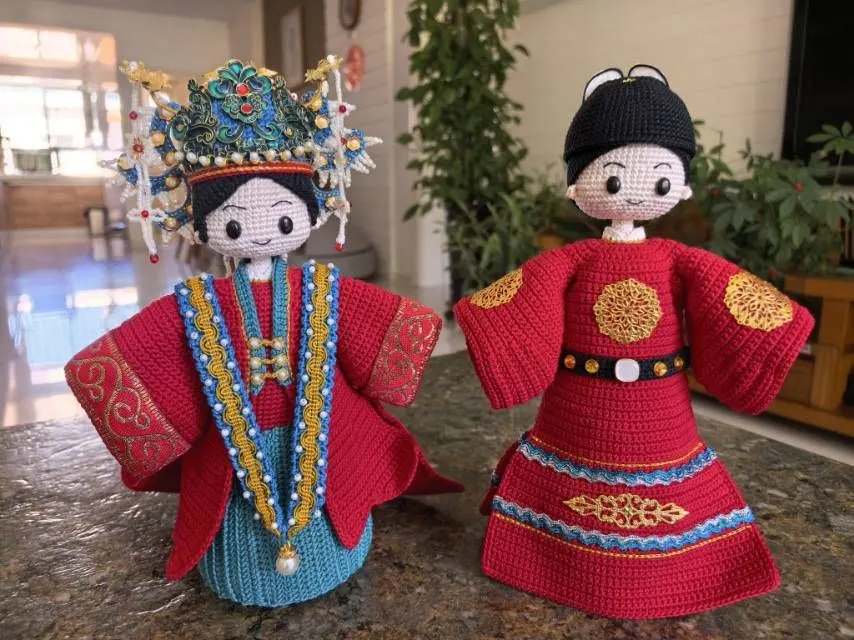
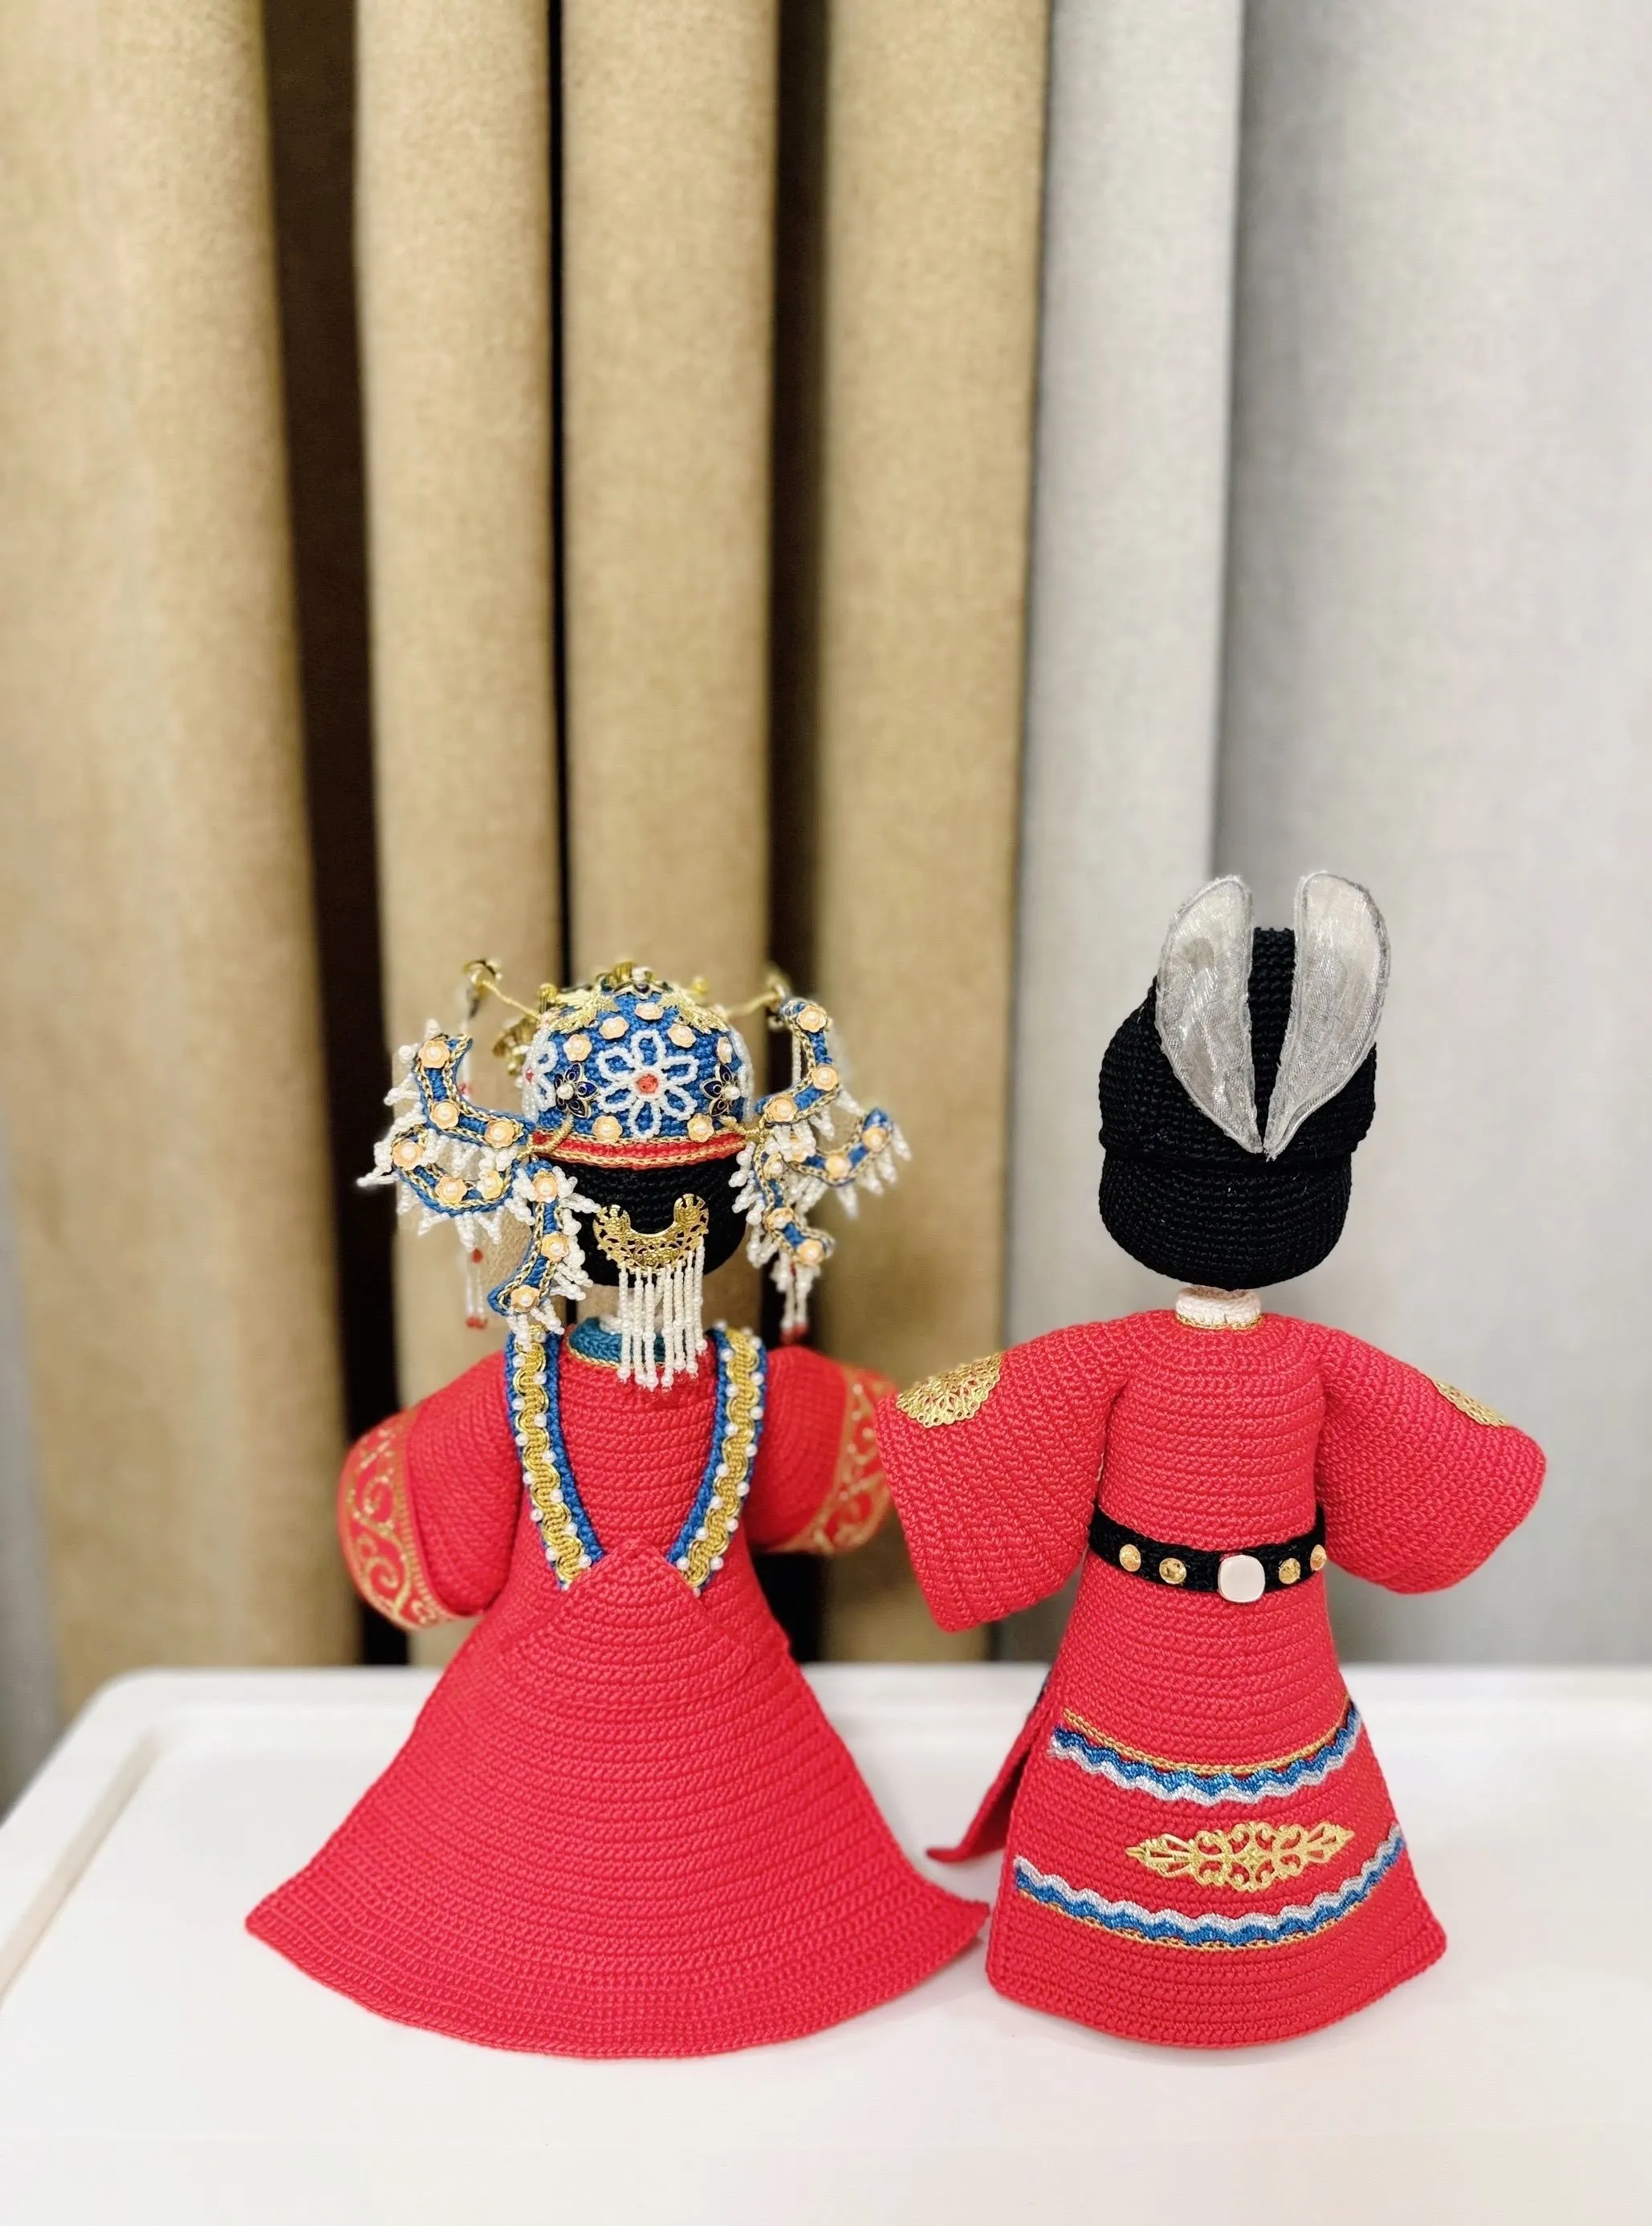
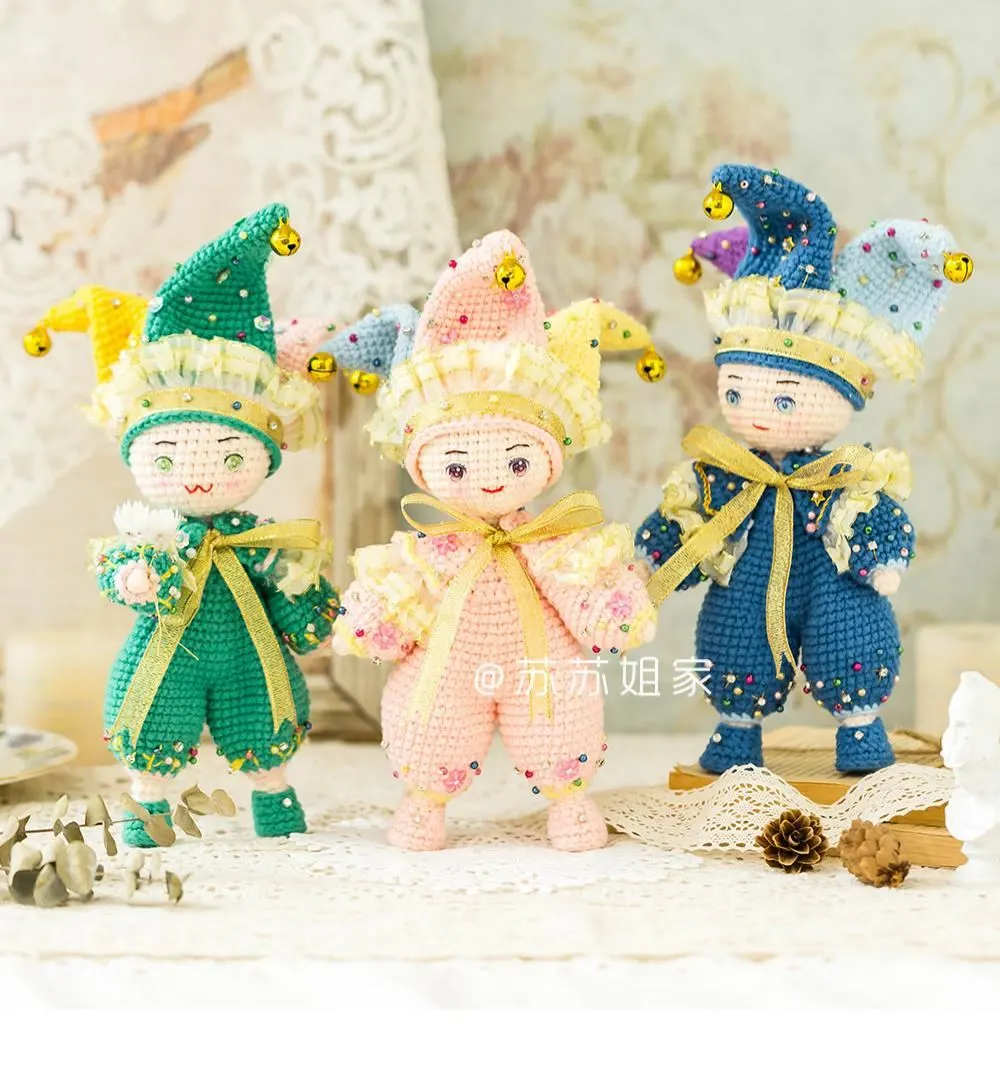
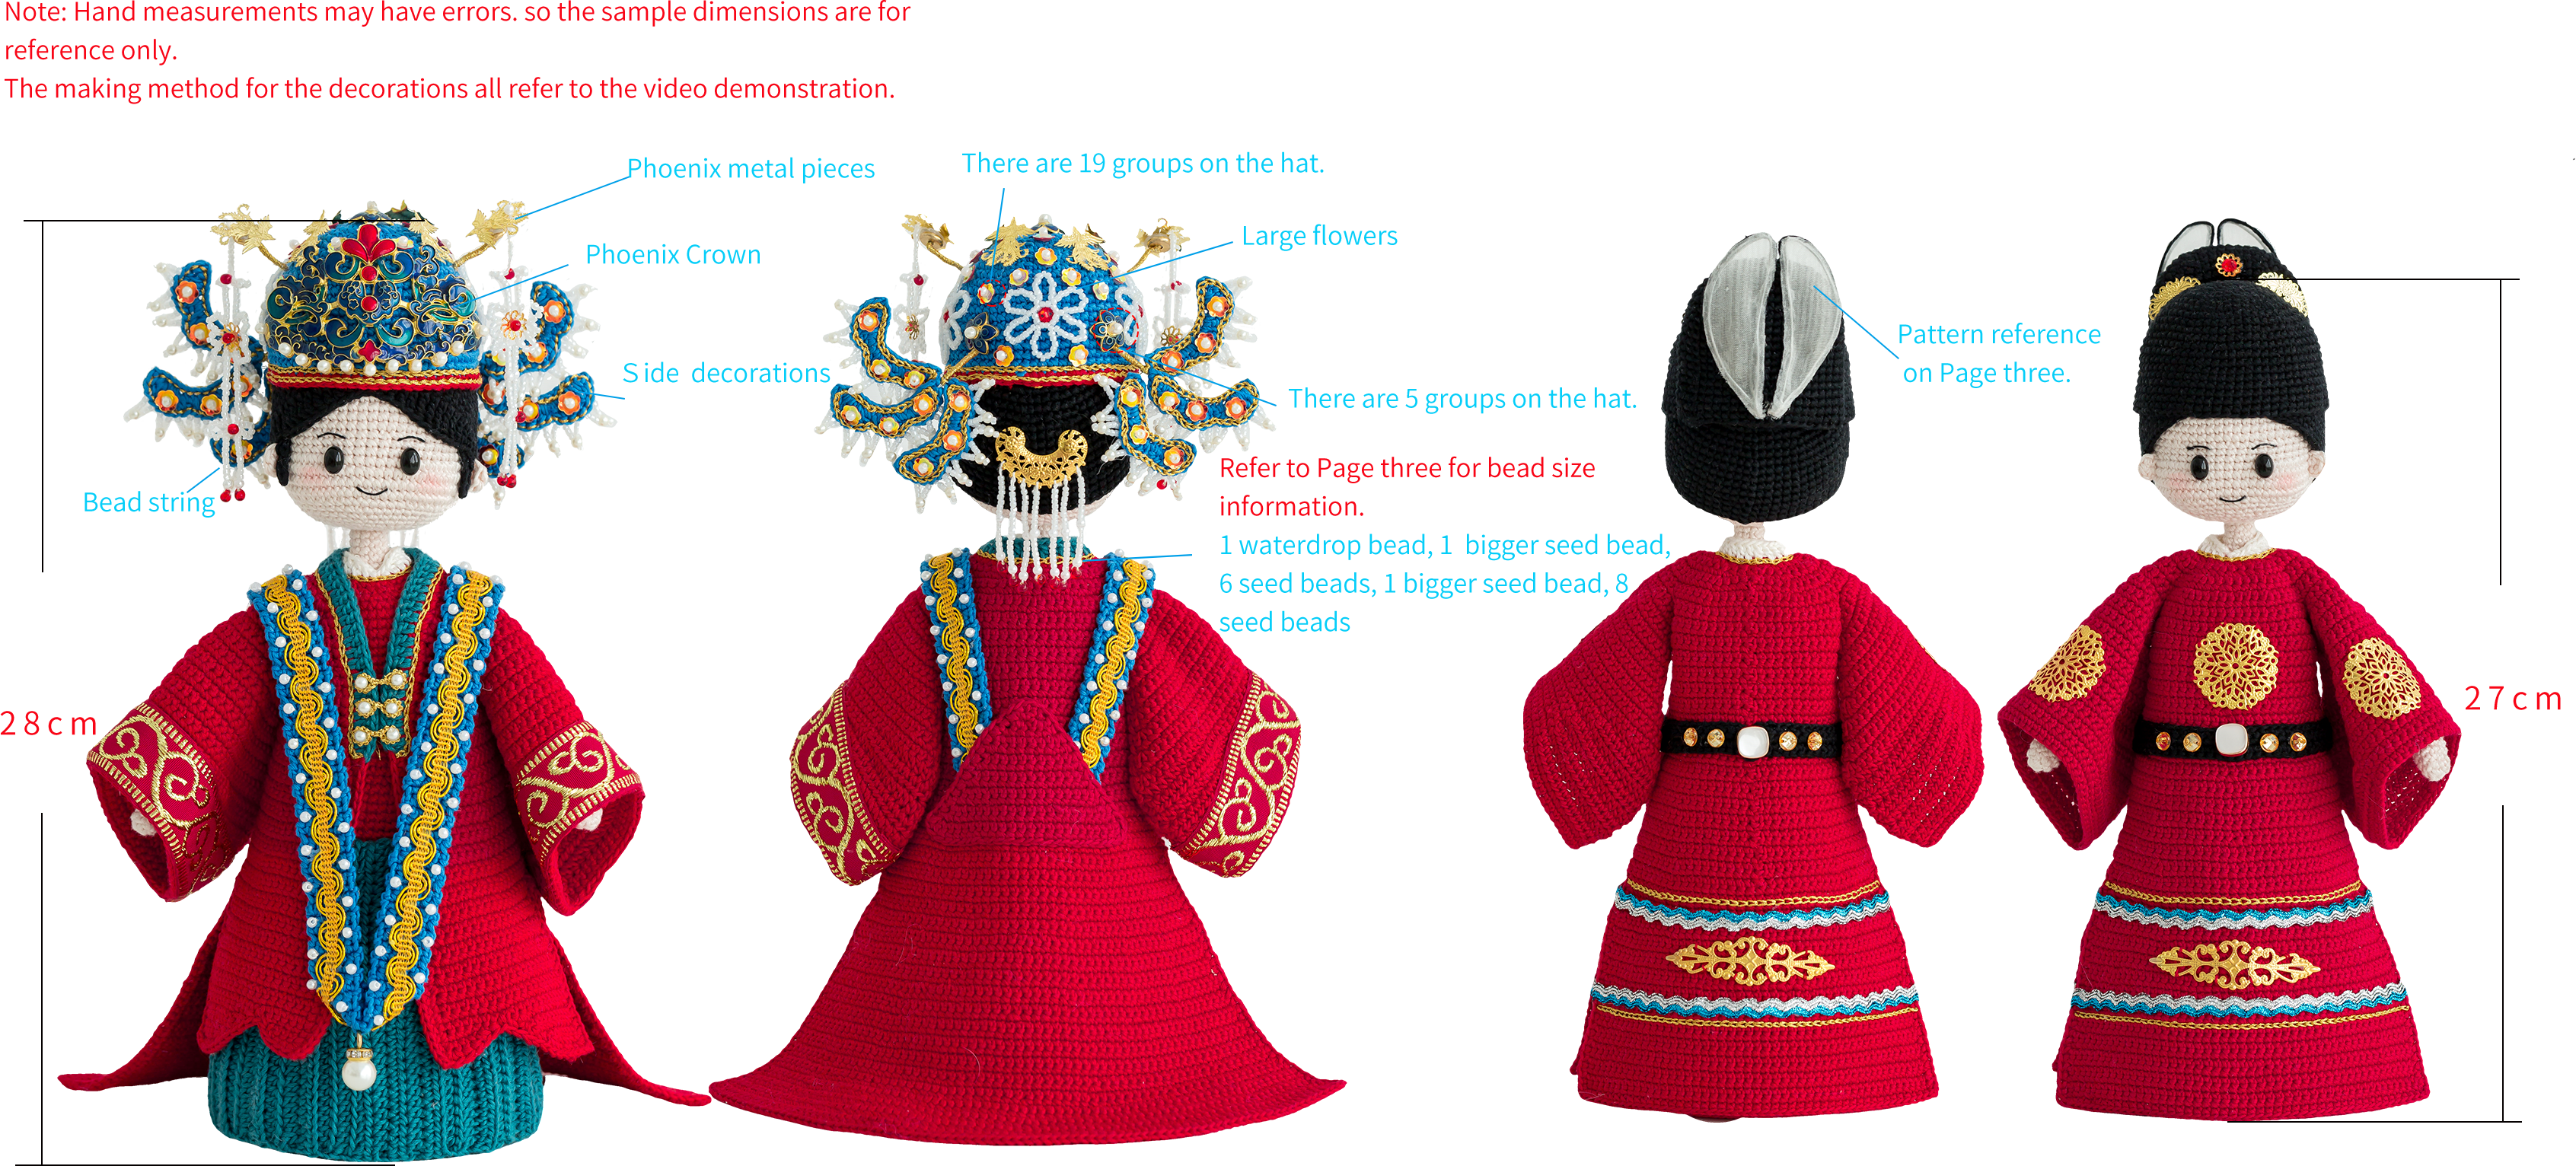
It includes the bride and groom. Both are made up of the main body, the wig, the hat, the clothes and the decorative accessories.
Note: 1. When crocheting in rounds, you need to start with a standing chain and end by joining with a slip stitch and tightening. The turning chain for single crochet and the joining slip stitch do not count as a stitch.
2. If you want the glued positions to be more secure, you can use a glue stick.
The handcrafted measurements may have an error of 1 to 2 cm. Due to variations in individual tension, the size of the sample is for reference only.
Materials: Susan's Family Combed 3# Lace & Golden thread
Hook: 1.75 mm crochet hook
This pattern is making in Chinese crochet pattern terms, and the stitch name is written using American terminology. All measurements in charts are in cm.

ABBREVIATIONS
Note:
1. This pattern is written using American terminology. All measurements in charts are in cm.
2. Working in joined round
When crocheting in rounds without further guidance, working in closed rounds, start each round with a set number of beginning chains and close with a slip stitch. The beginning chain preceding a single crochet and the slip stitch used for joining rounds are not included in the total stitches.

Part 1 Main bodyA
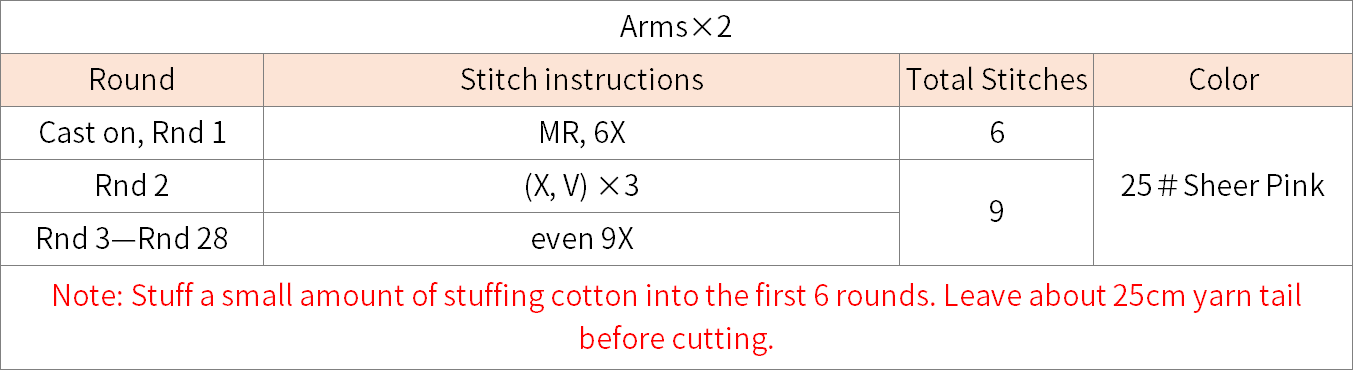
Step 1 ArmsA1 01' 41'' (Part 1)
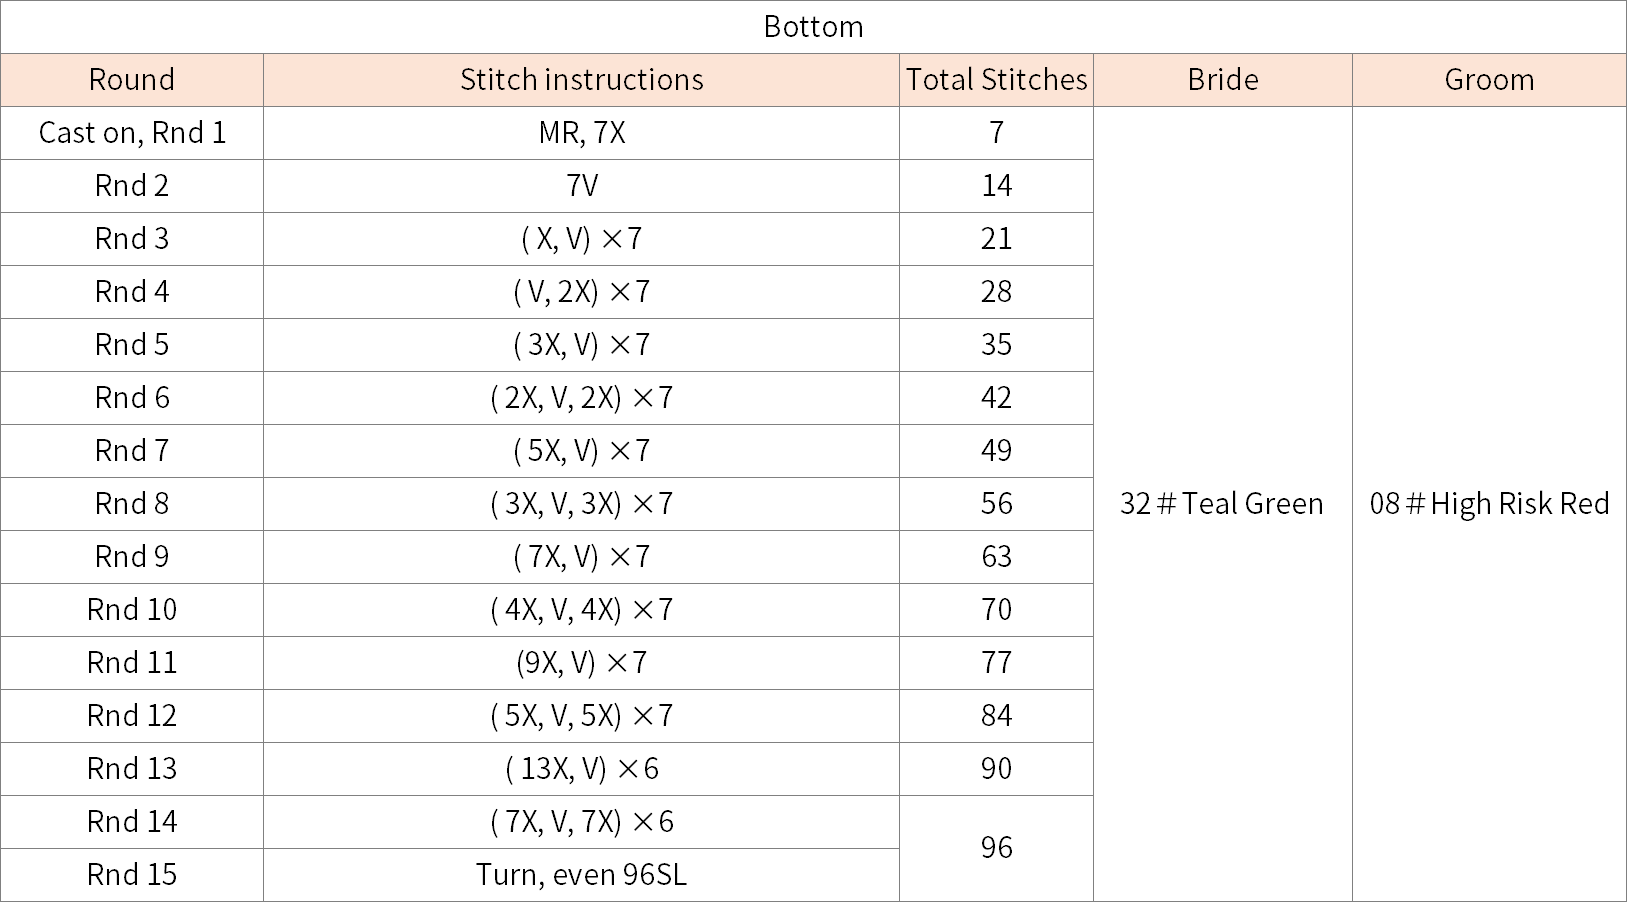
Step 2 BottomA2 06' 51'' (Part 1)
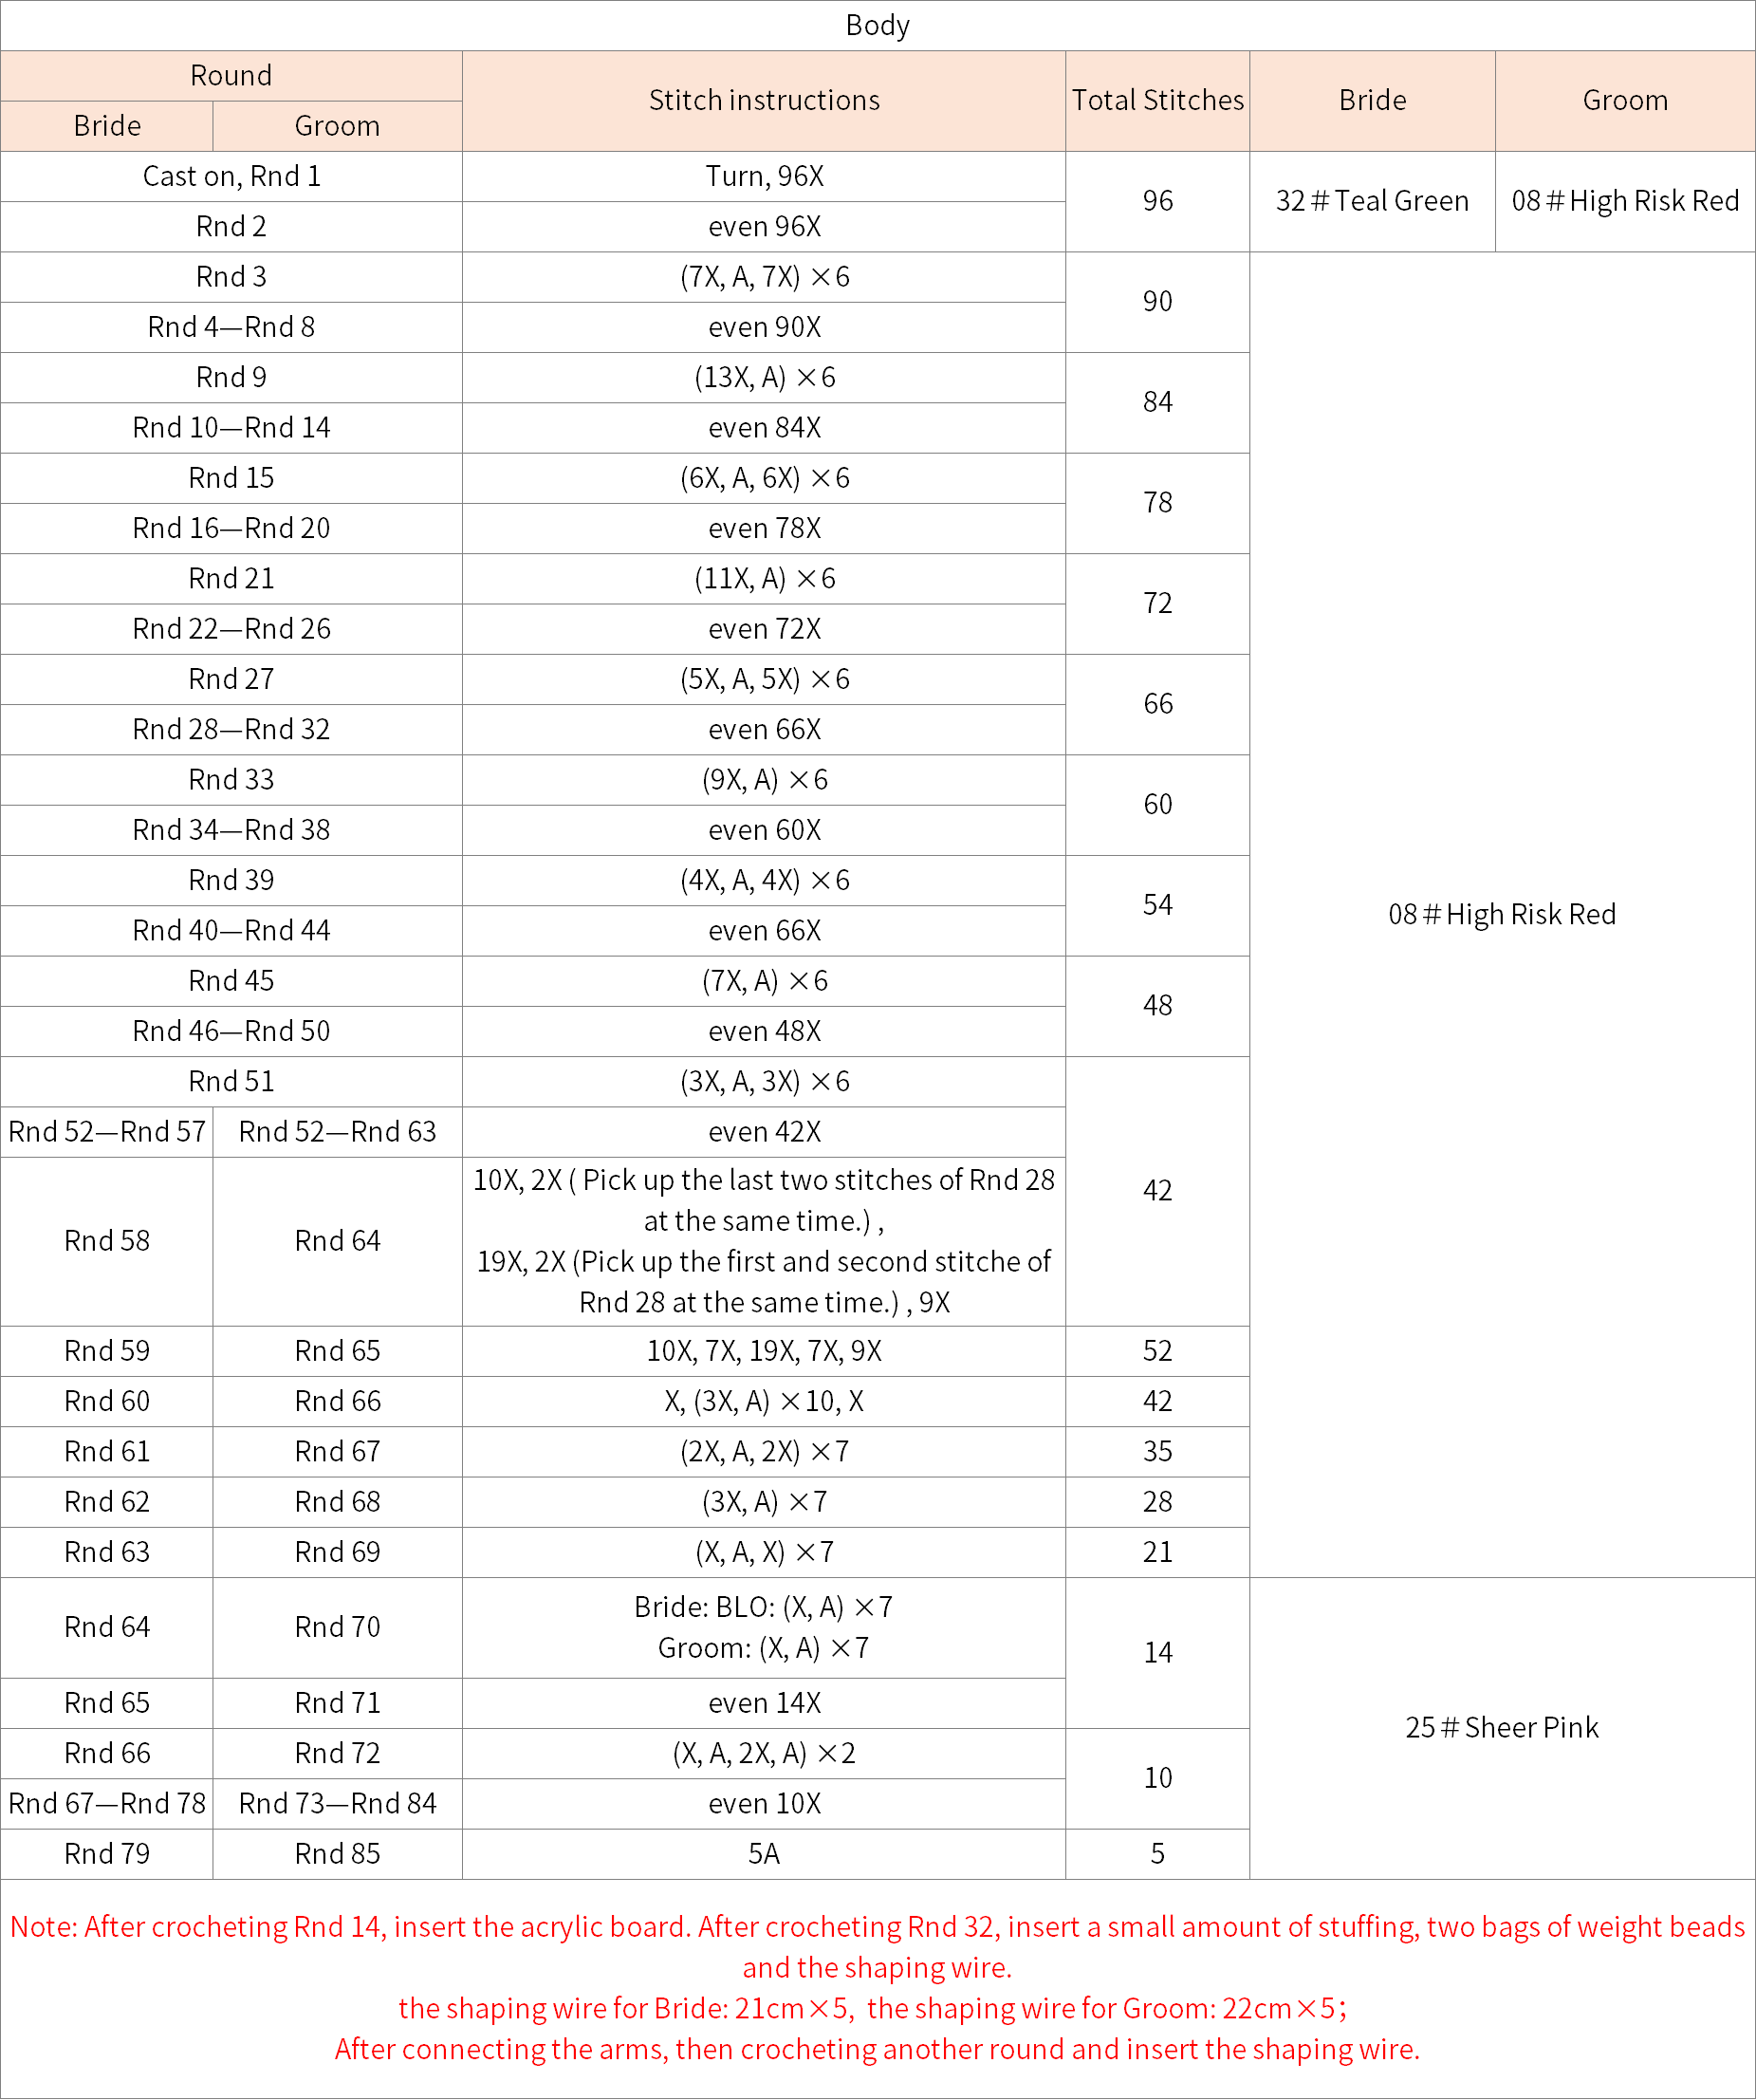
Step 3 BodyA3 20' 42'' (Part 1)
After the bottom is done, continue crocheting upwards for the body. While crocheting, you need to insert an acrylic board, the filling cotton, the weight beads and the shaping wire inside. Then, connect the arms. Please refer to the video demonstration for more details.
Step 4 Head, Facial featuresA4 45' 33'' (Part 1)
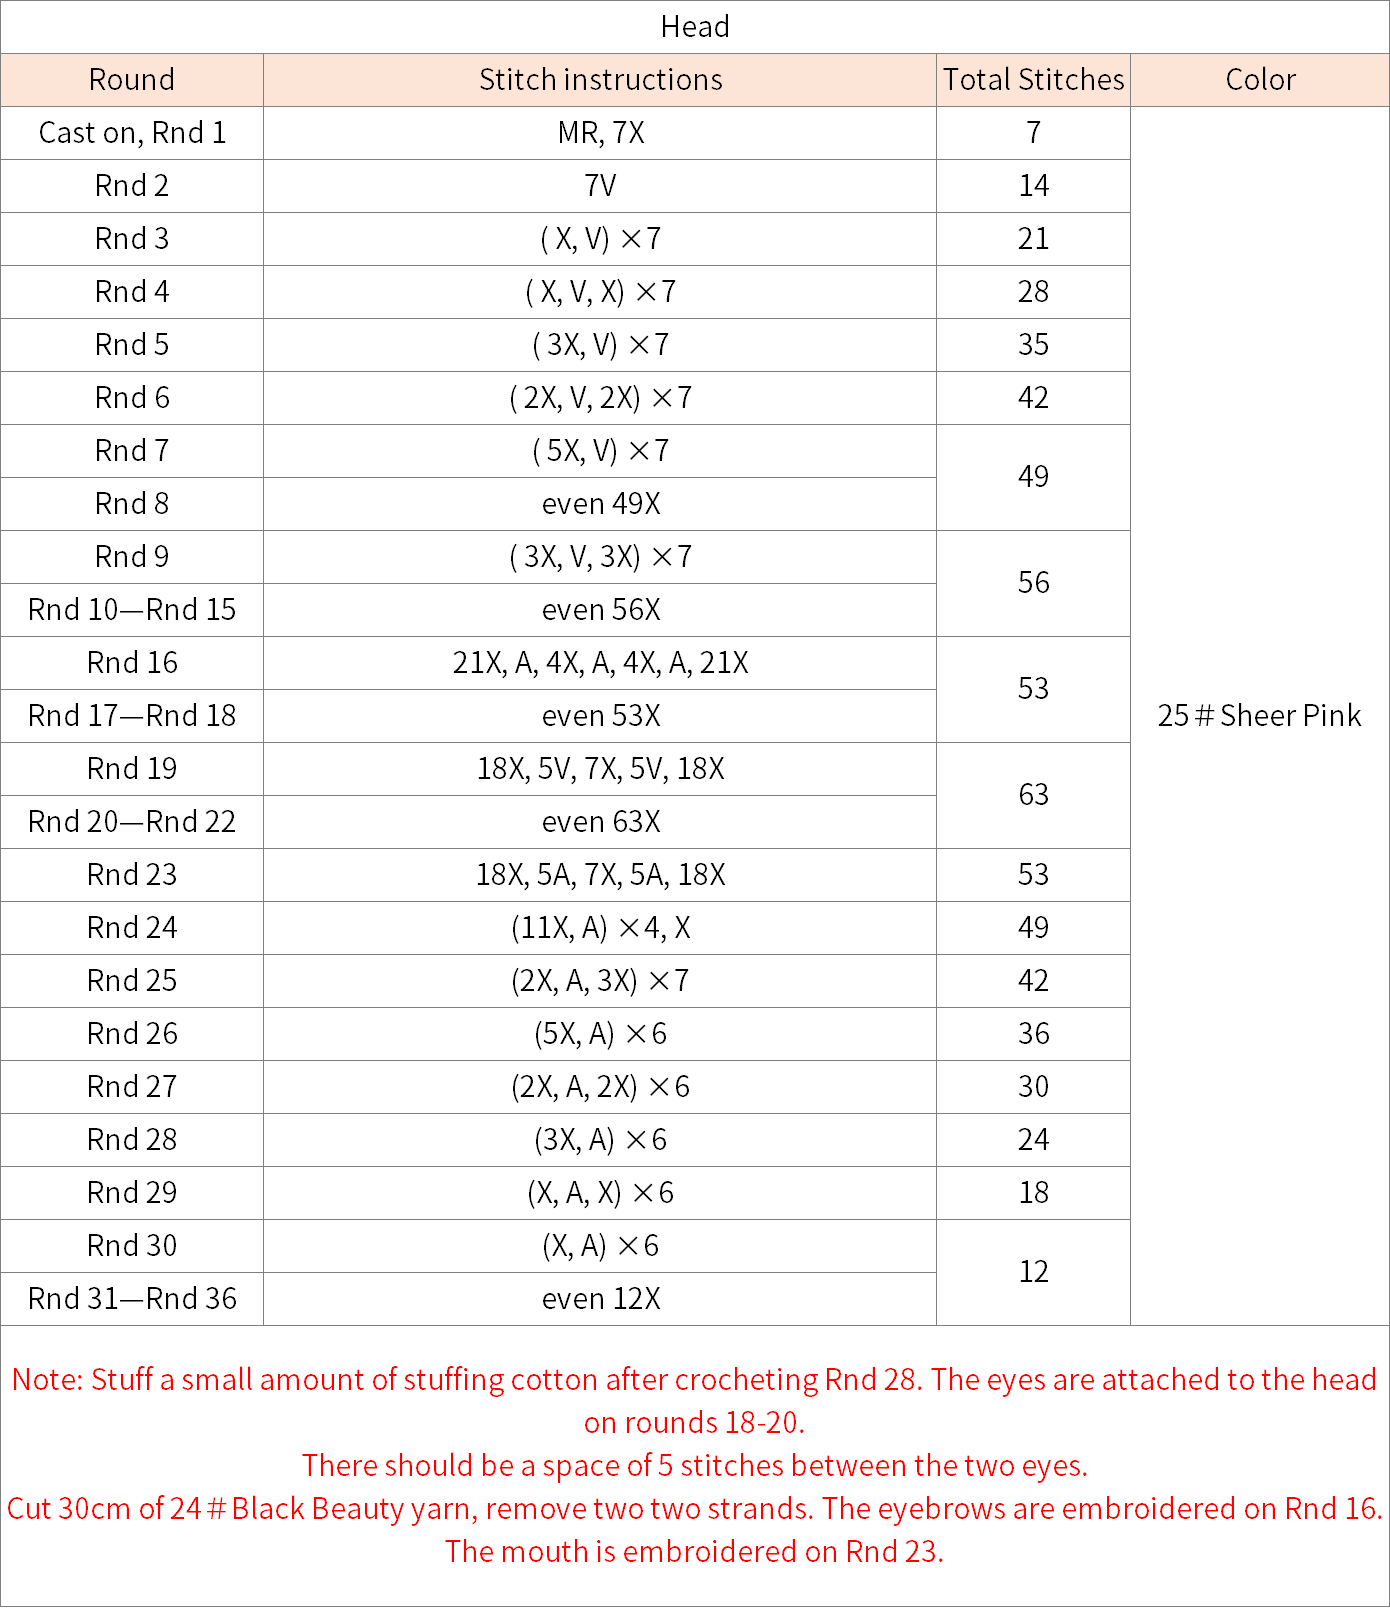

Part 2 Bride's temple-hairB 53' 50'' (Part 1)

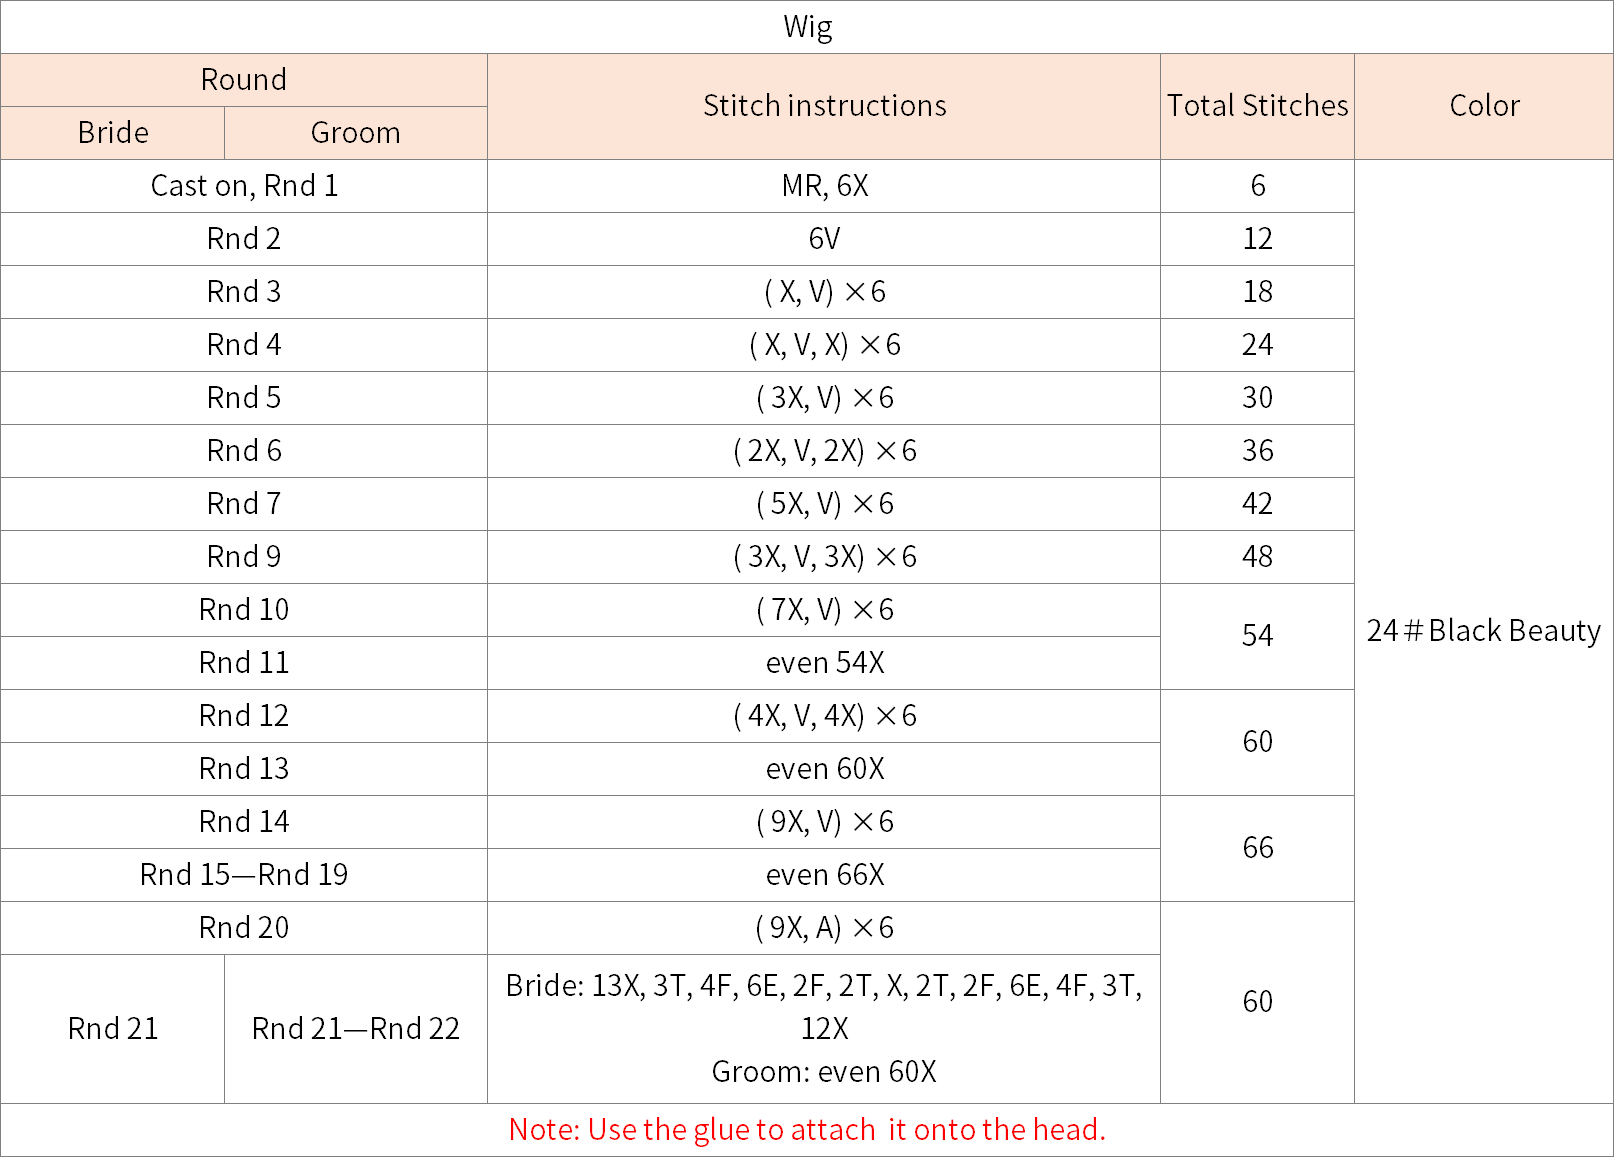
Part 3 WigC 00' 27'' (Part 2)
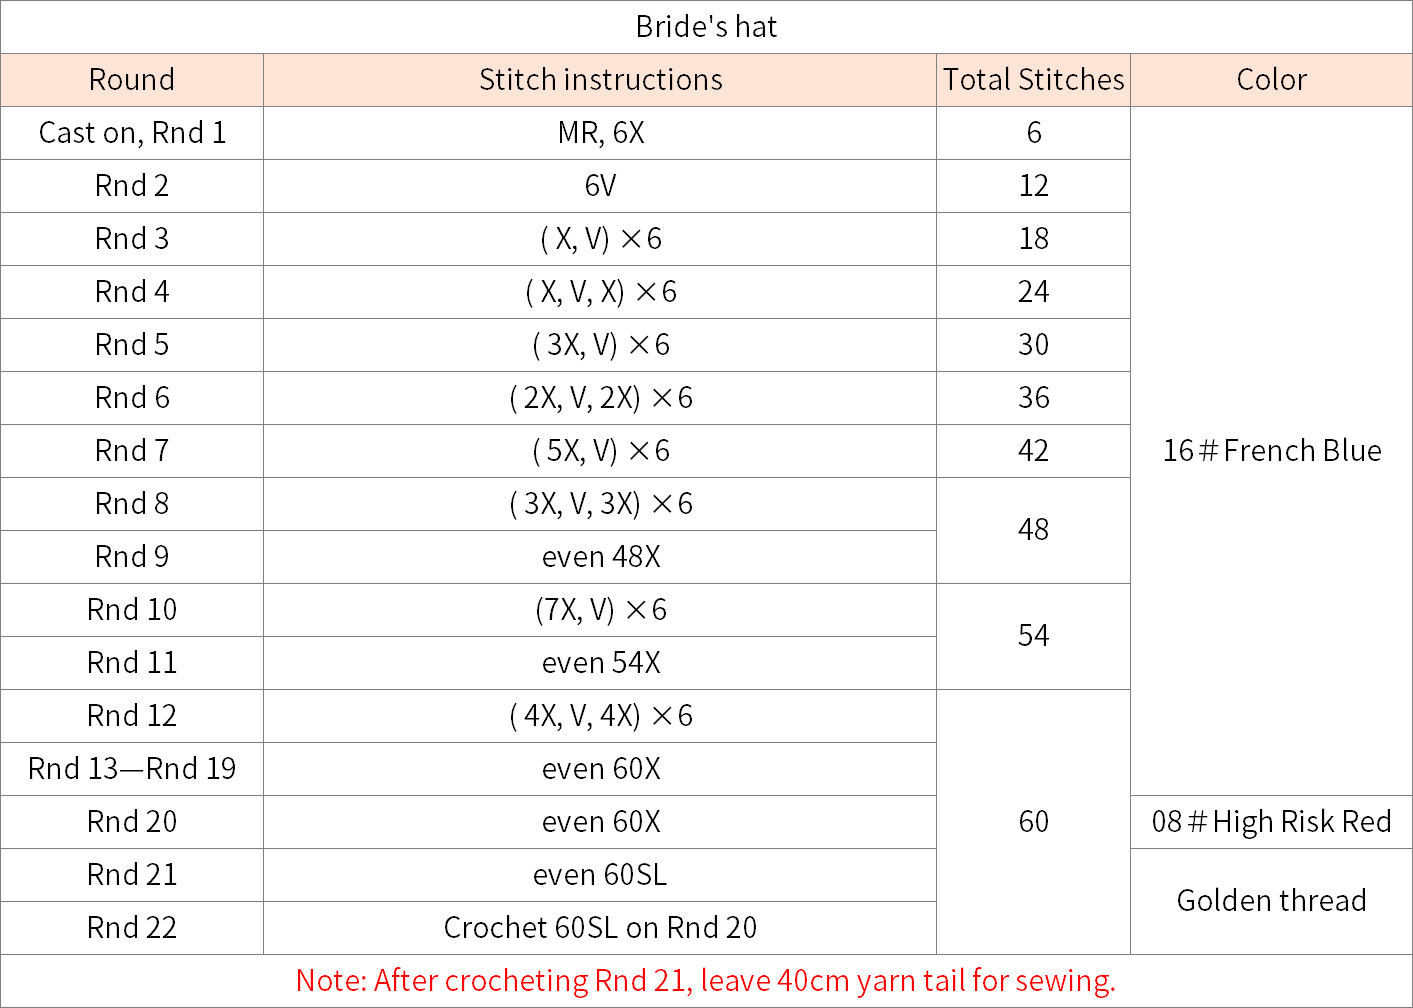
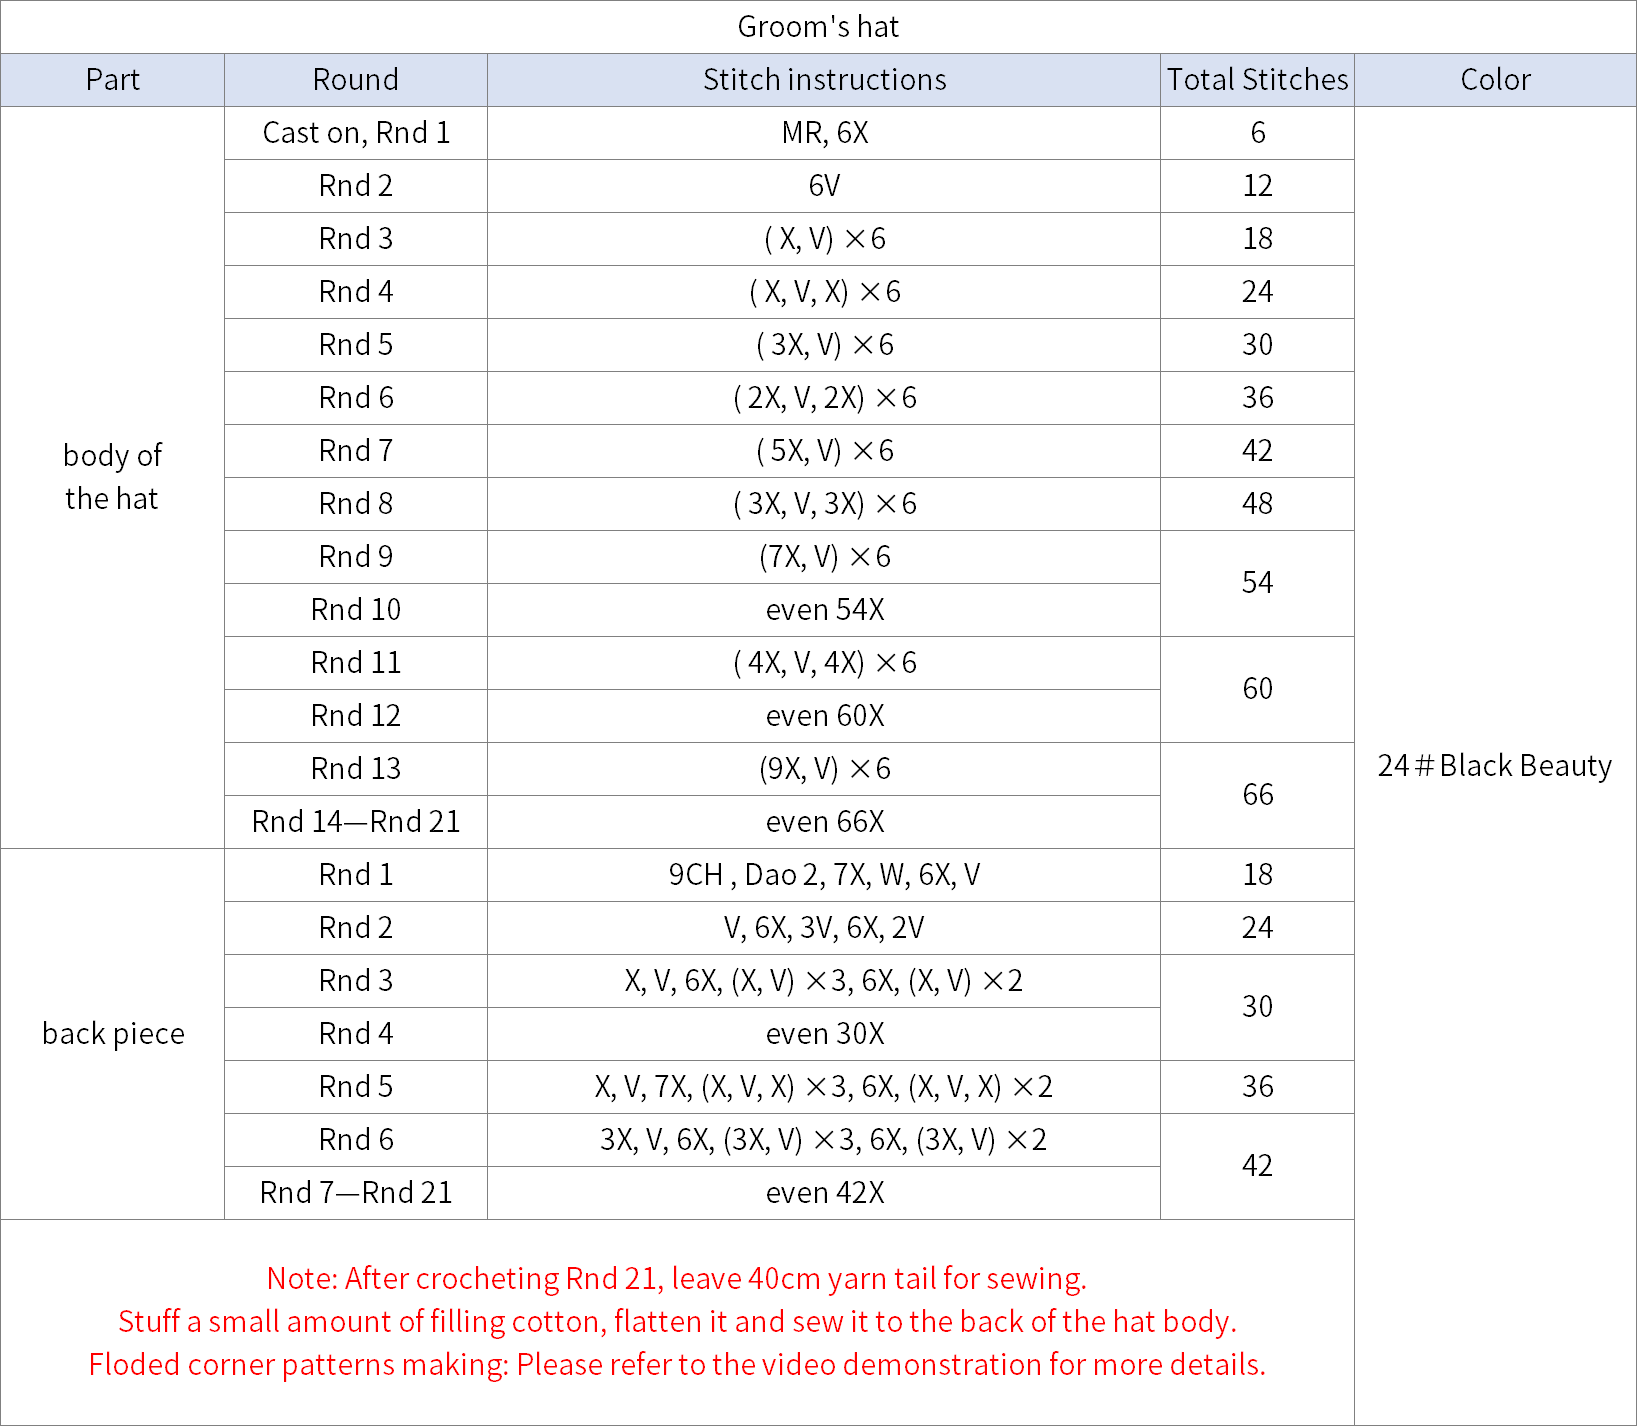
Part 4 HatD 33' 58'' (Part 2)
Part 5 Head accessoryE 13' 14'' (Part 2)
Side decorations 33' 34'' (Part 2)
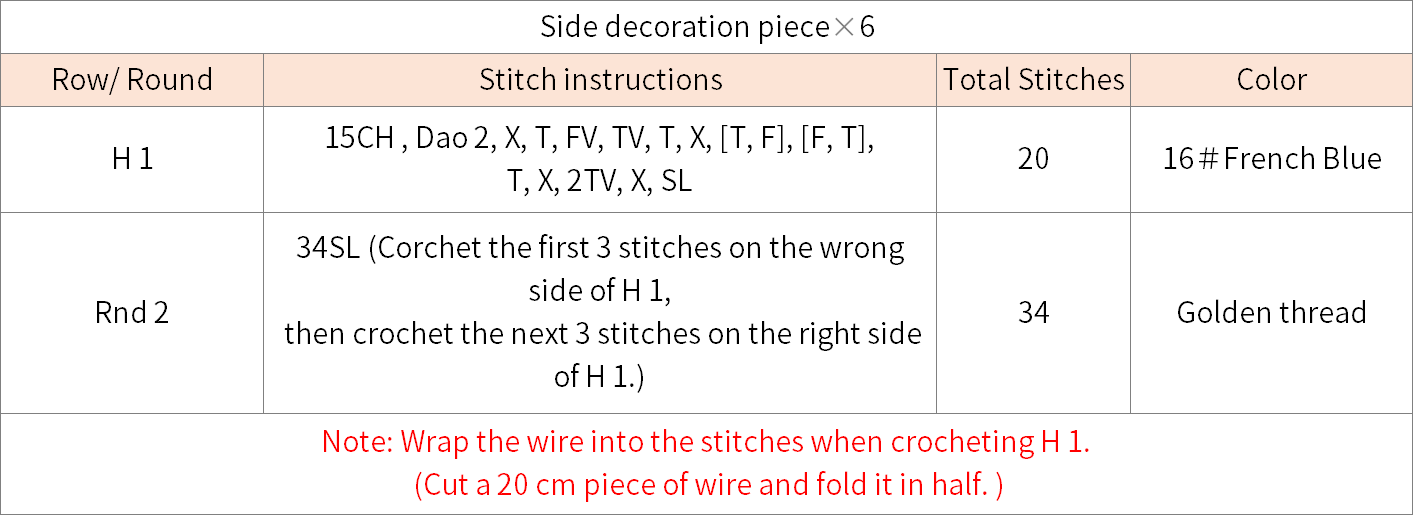
Part 6 Bride's costumeF 00' 09'' (Part 3)
It includes the collar, the skirt, the dress, the triangle fabric piece, the button straps, and the cape.
Step 1 CollarF1
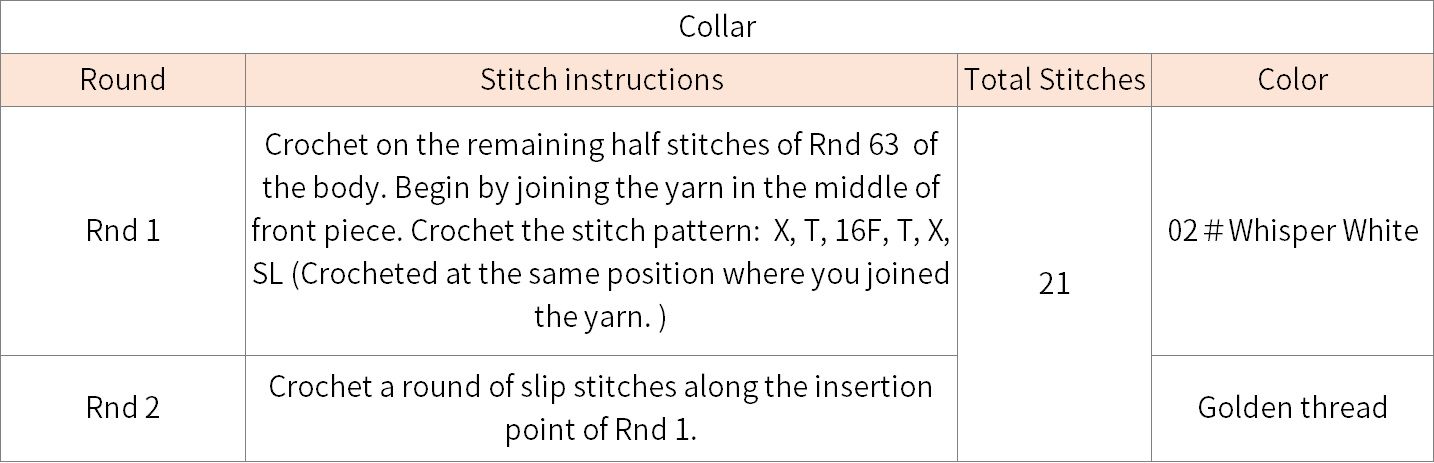
Step 2 SkirtF2
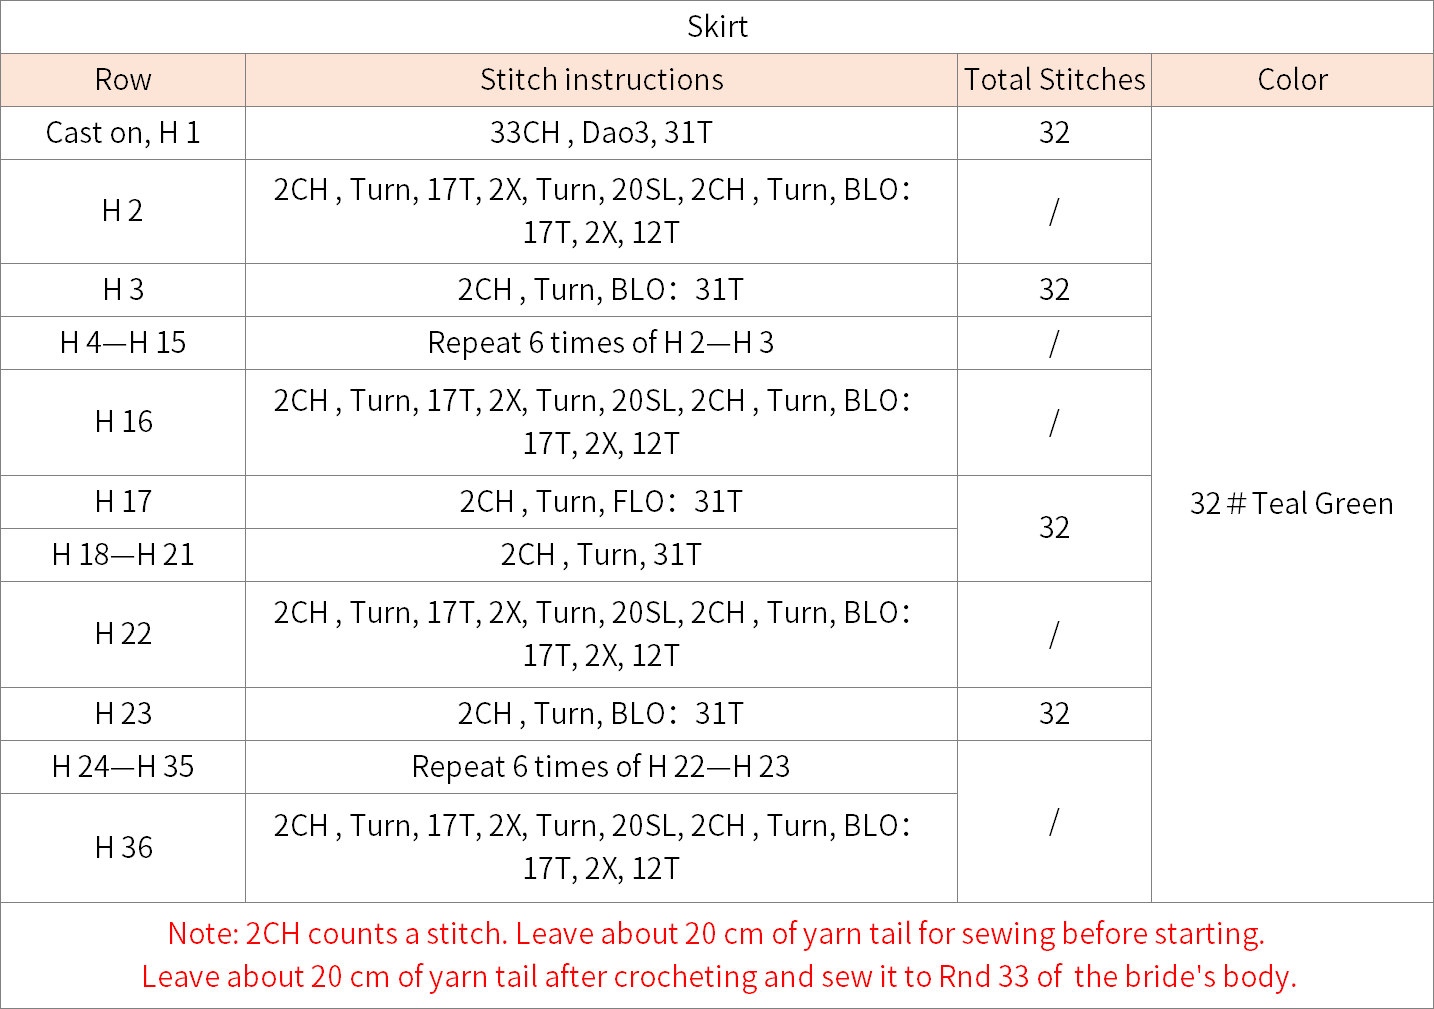
Step 3 DressF3
The clothing consists of the top, the left front piece, the right front piece, the back piece, the edging and the sleeves.
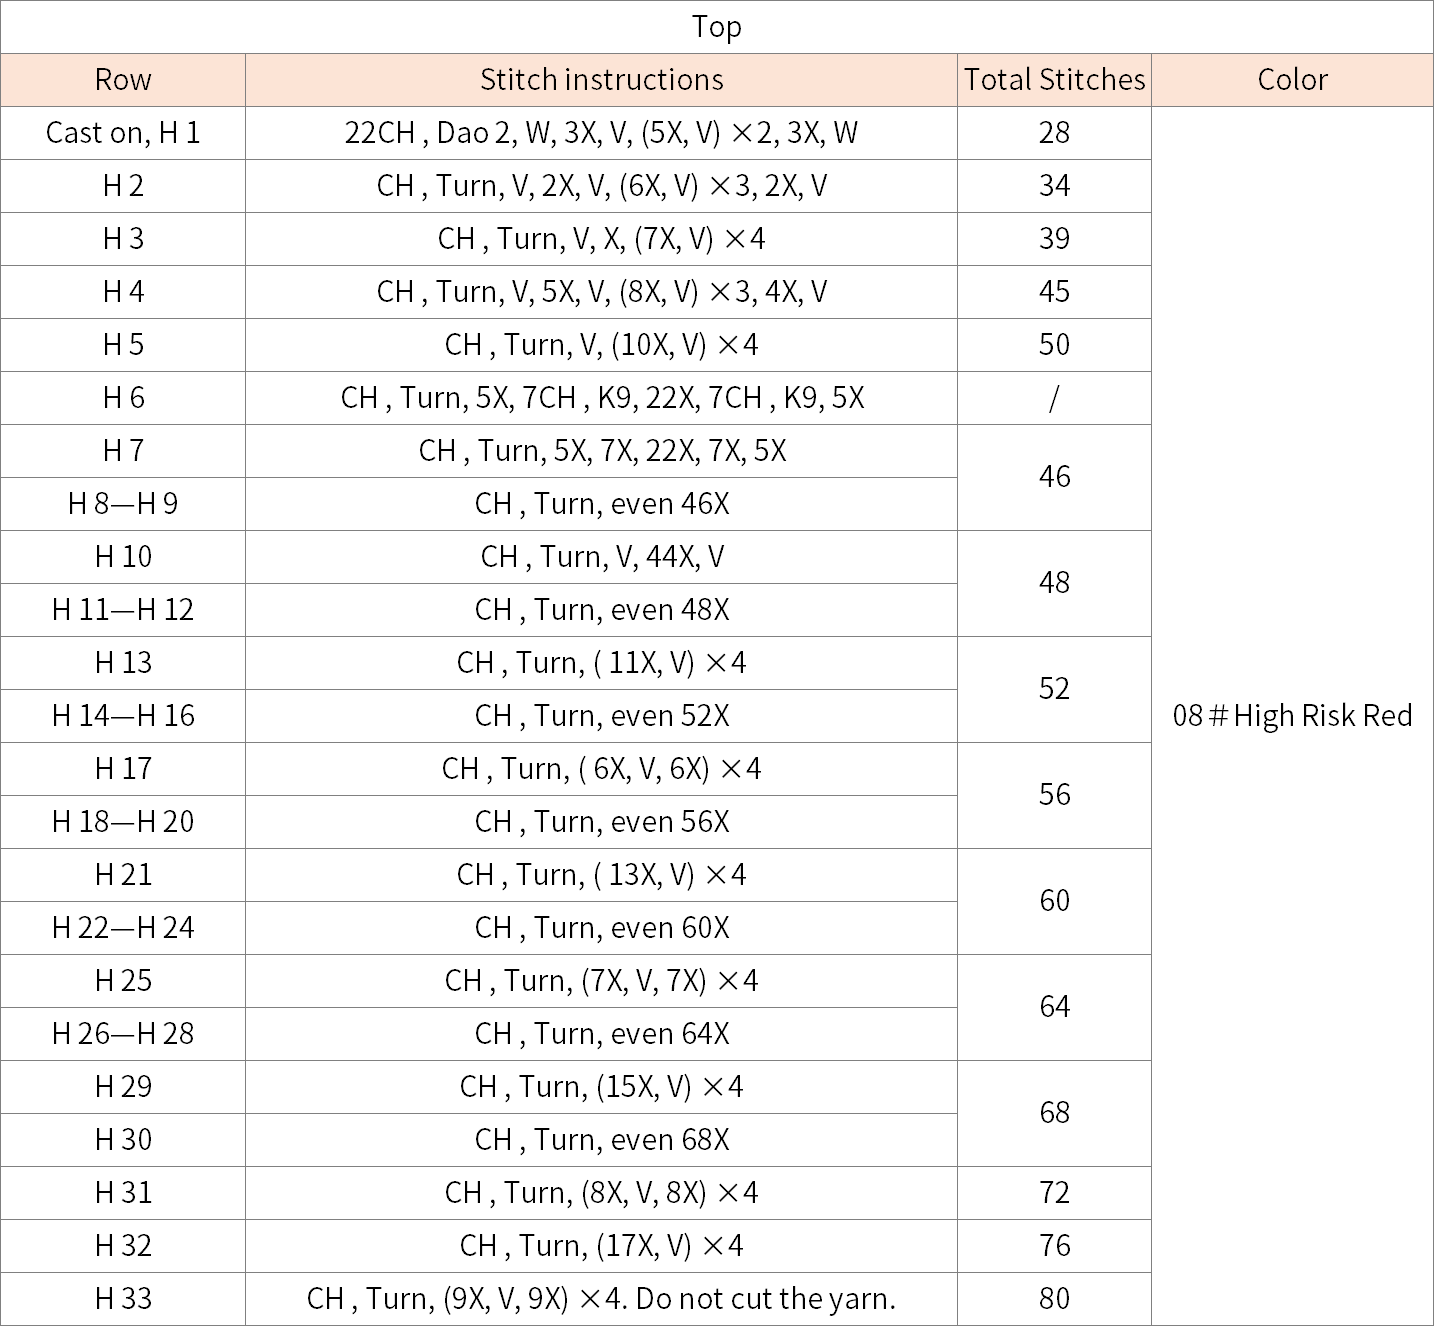
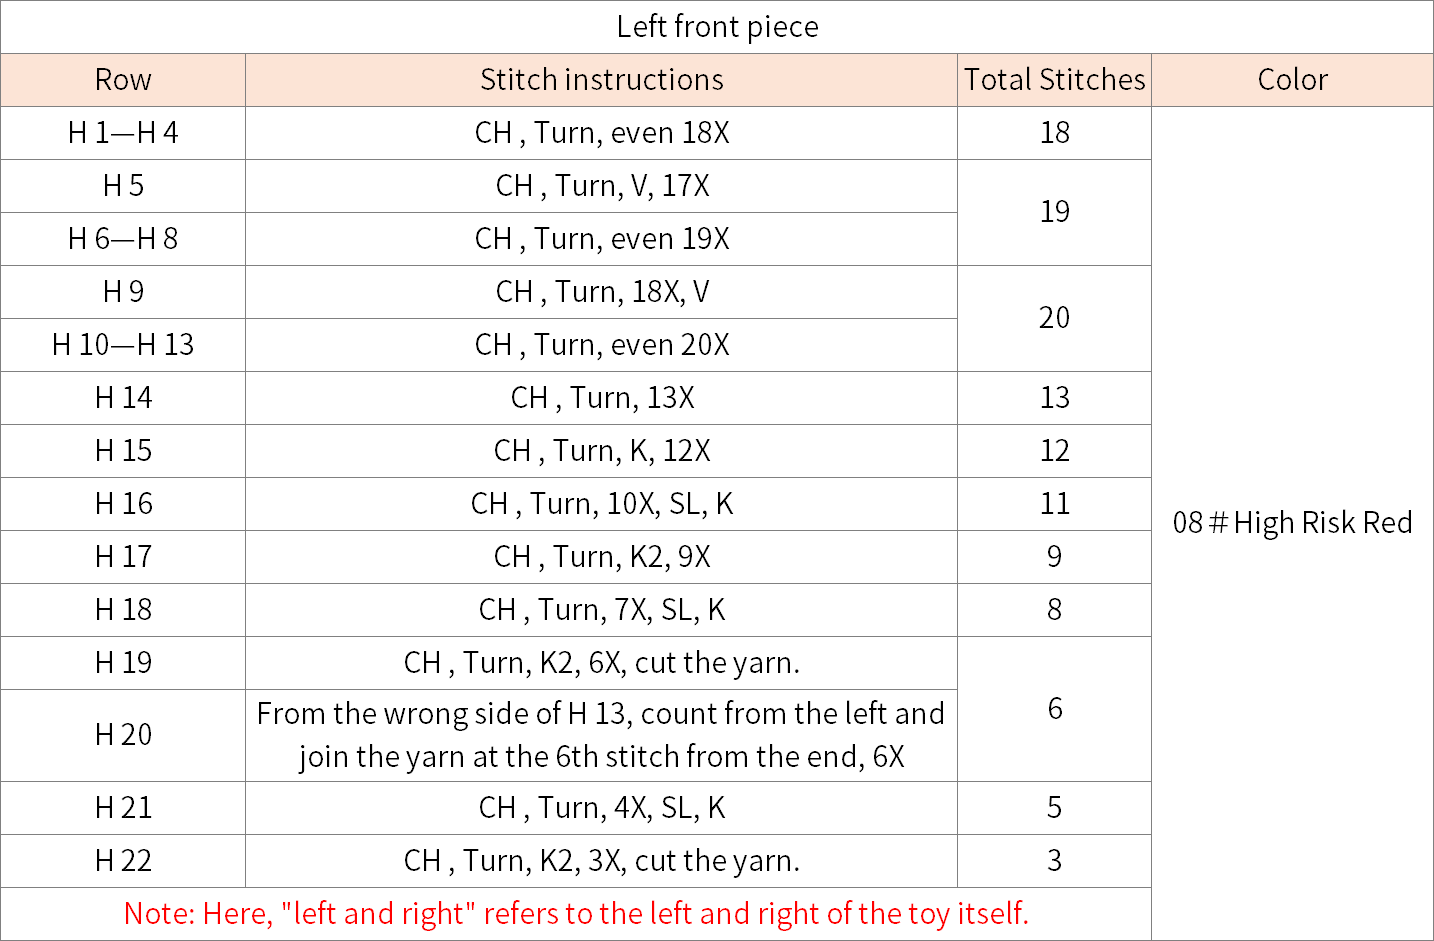
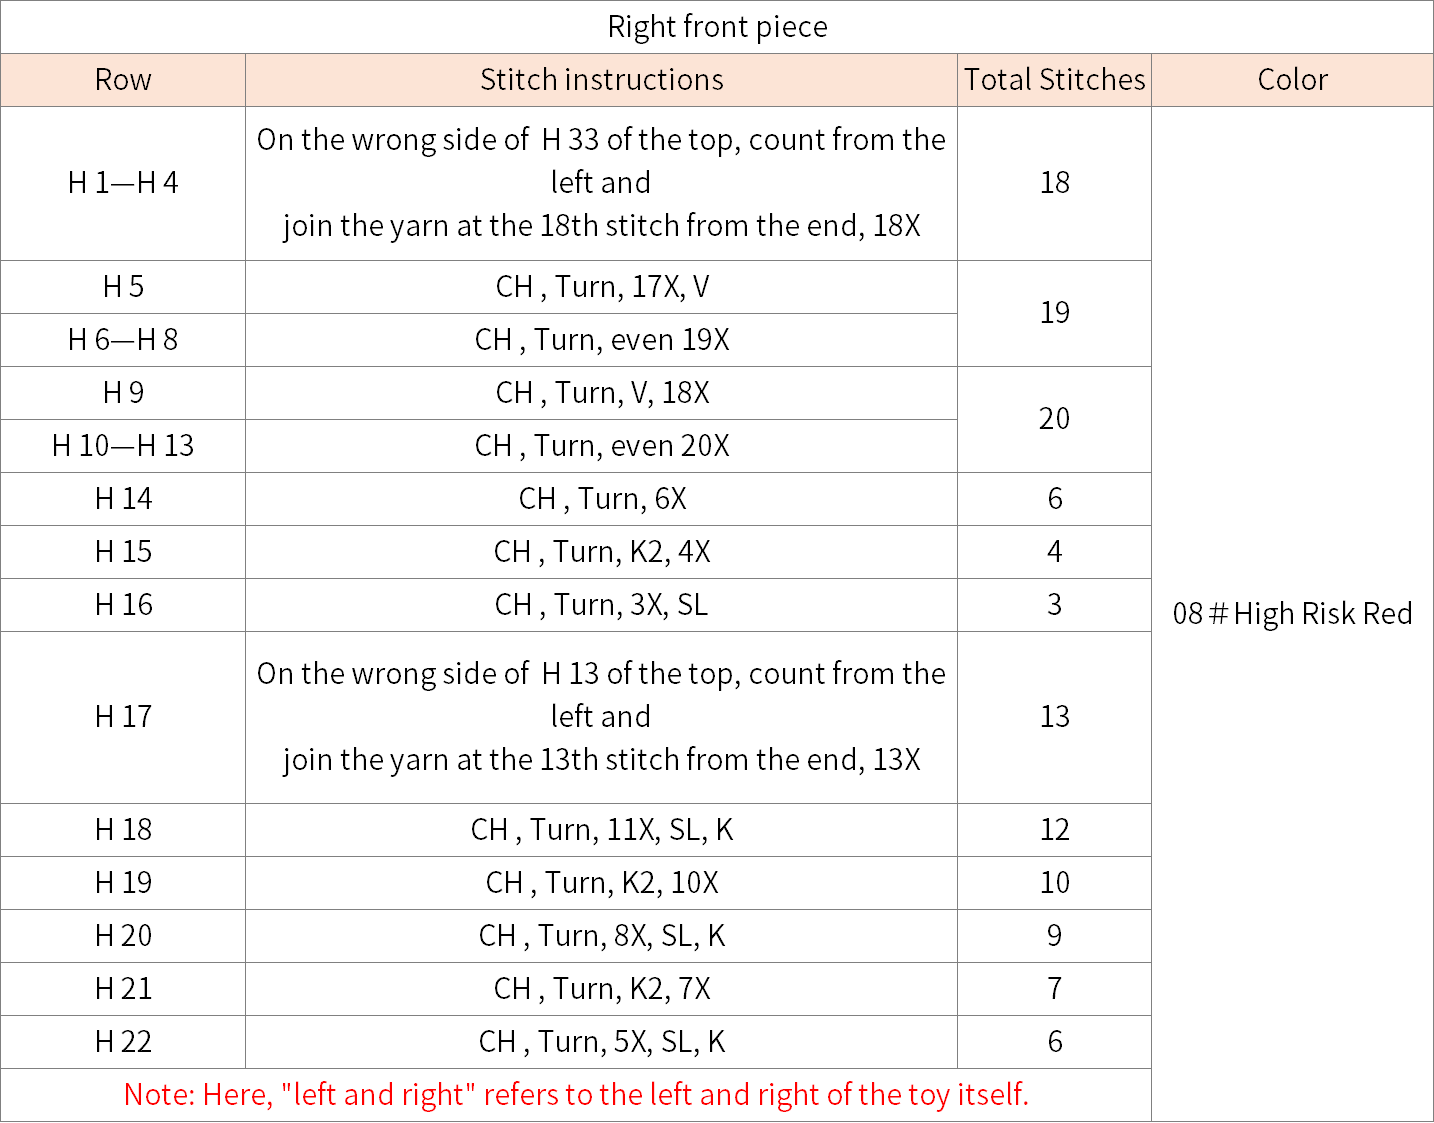
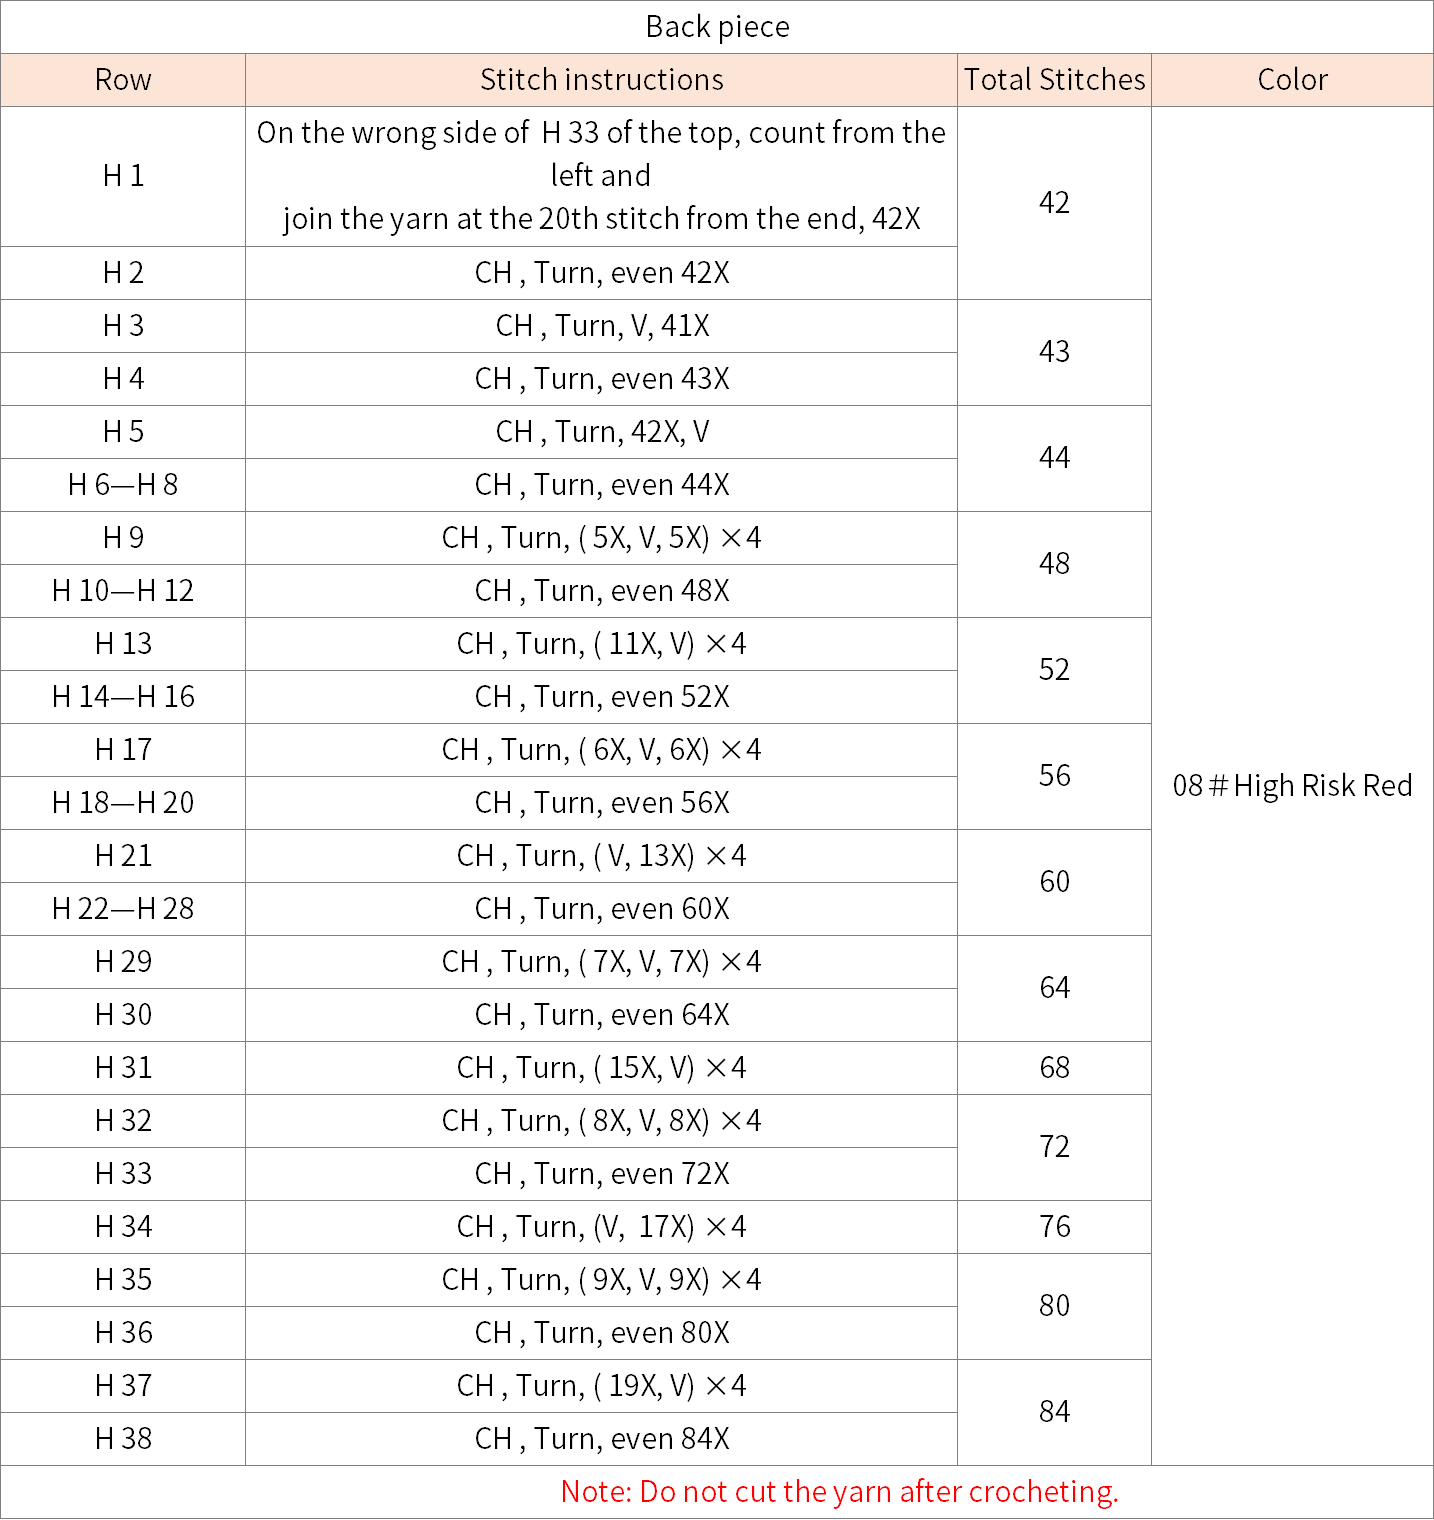
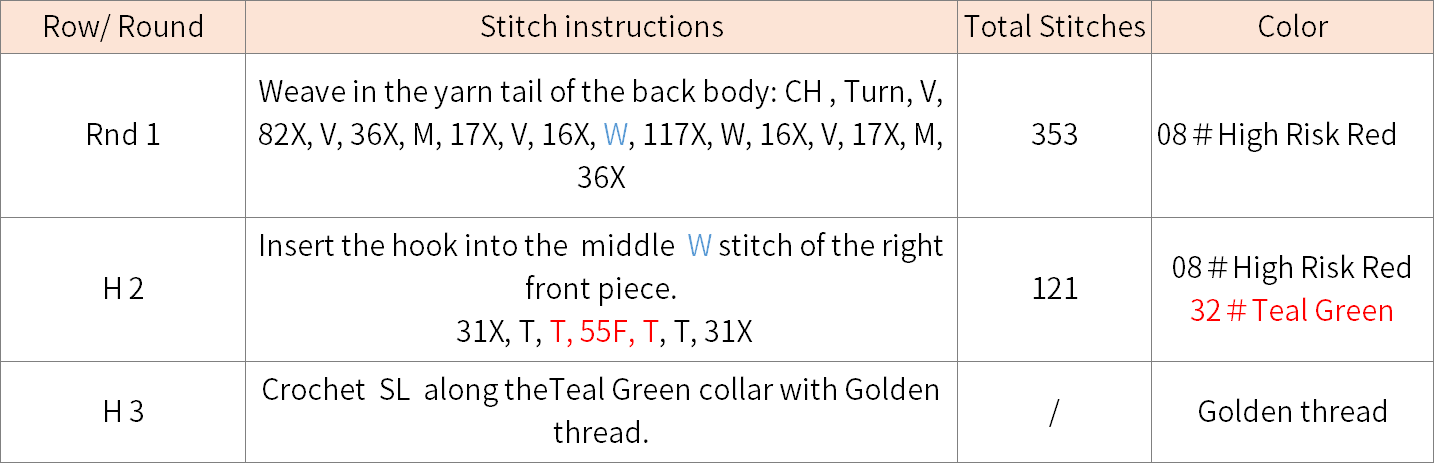
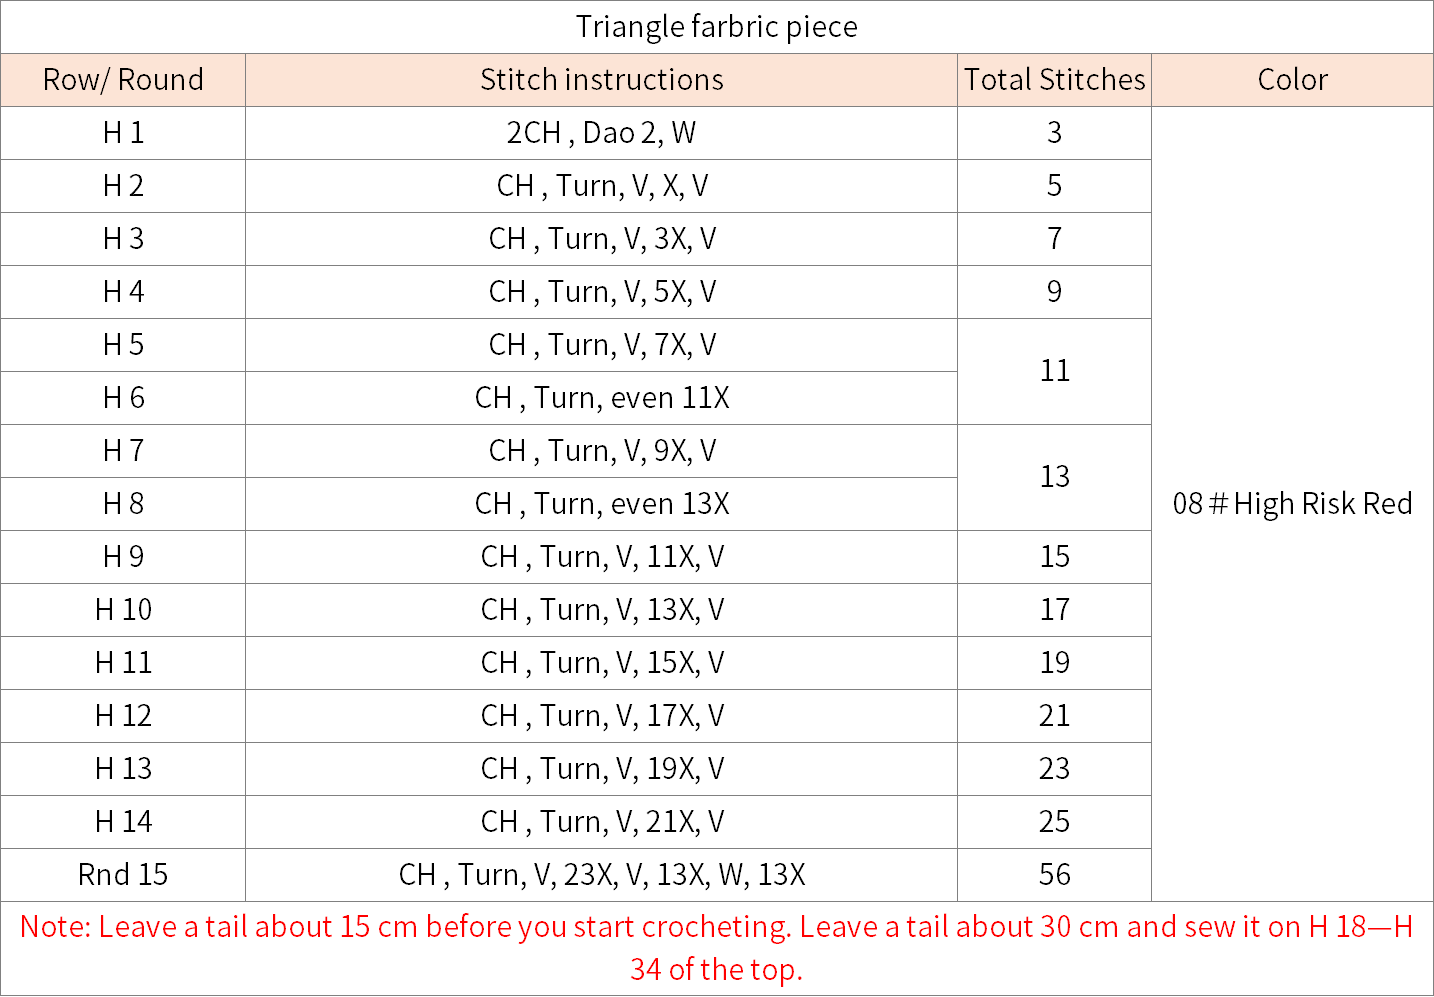
Note: Join the yarn from the middle of " W " to crochet H 2.
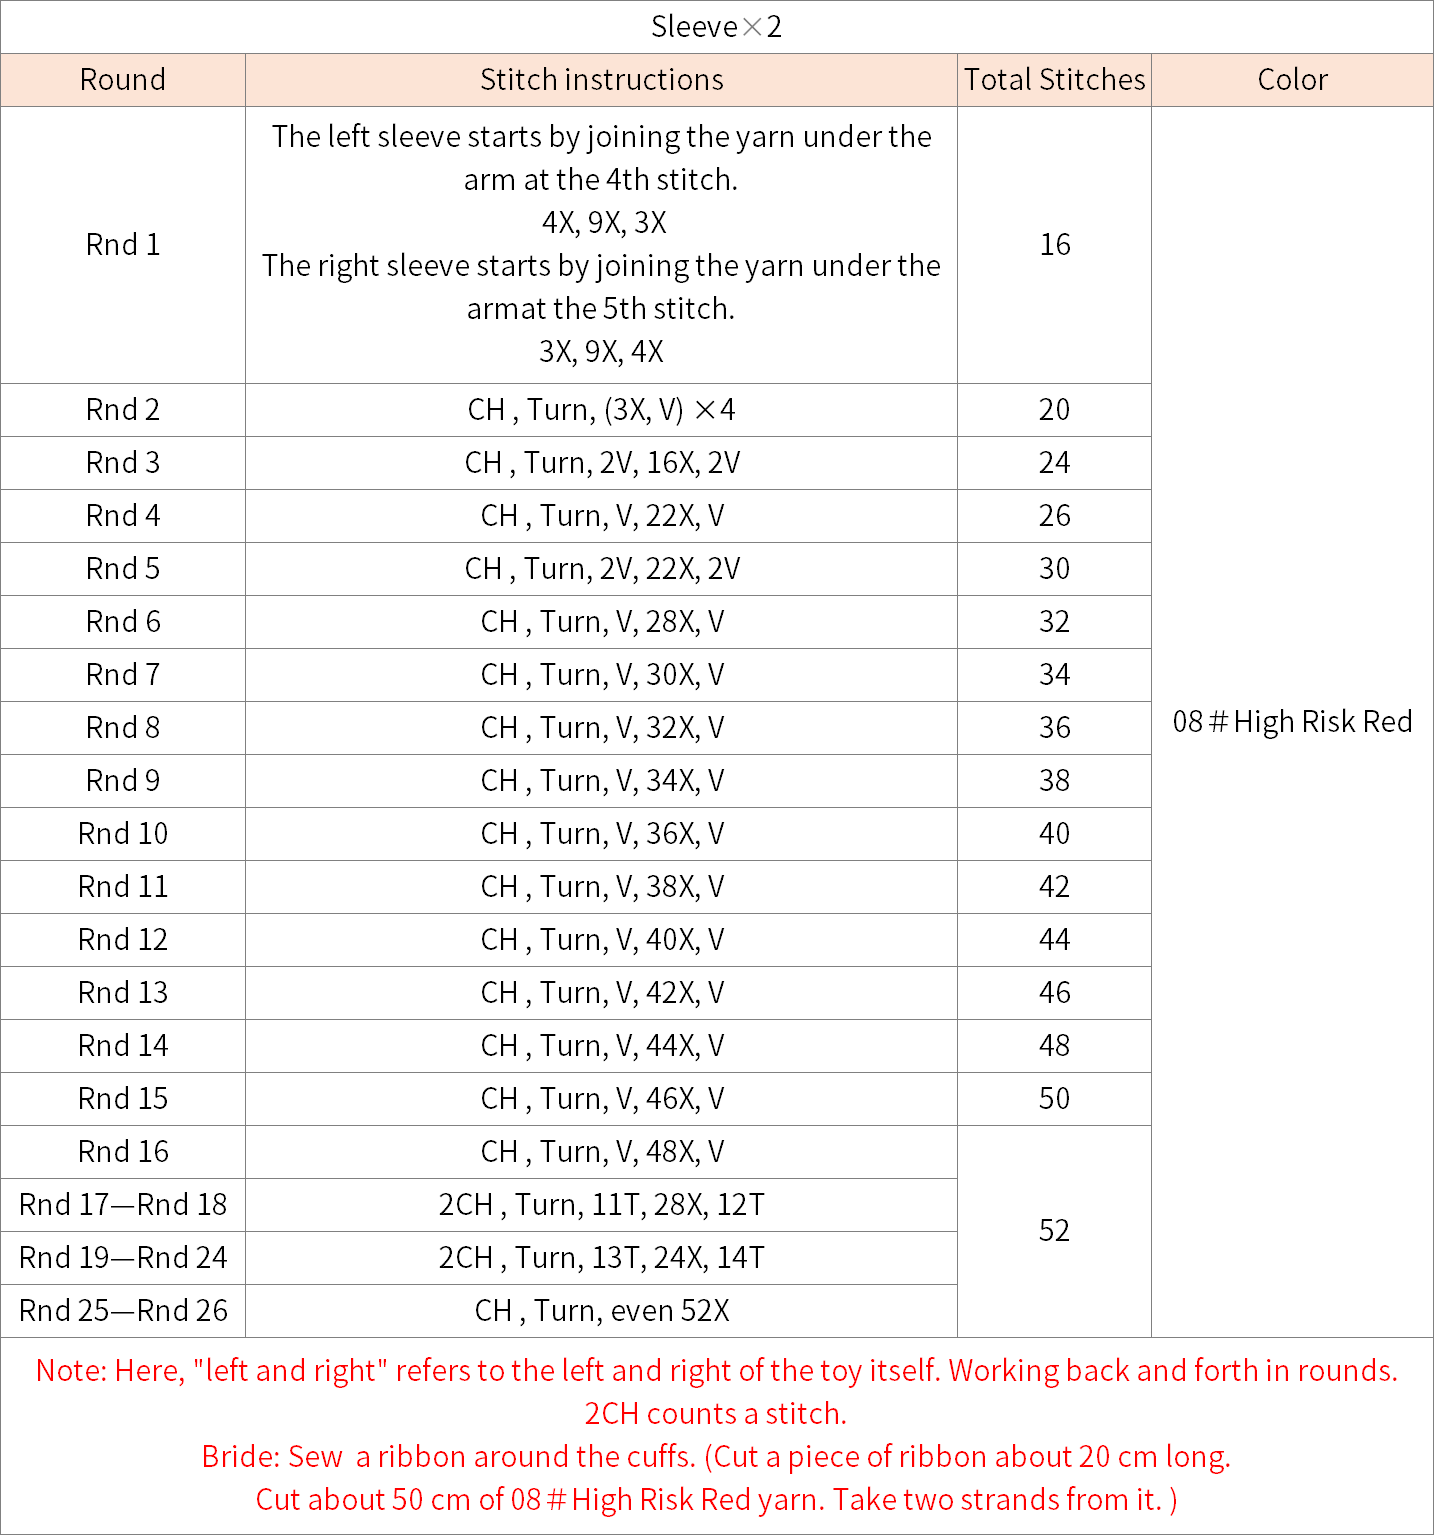
Step 4 Triangle fabric pieceF4
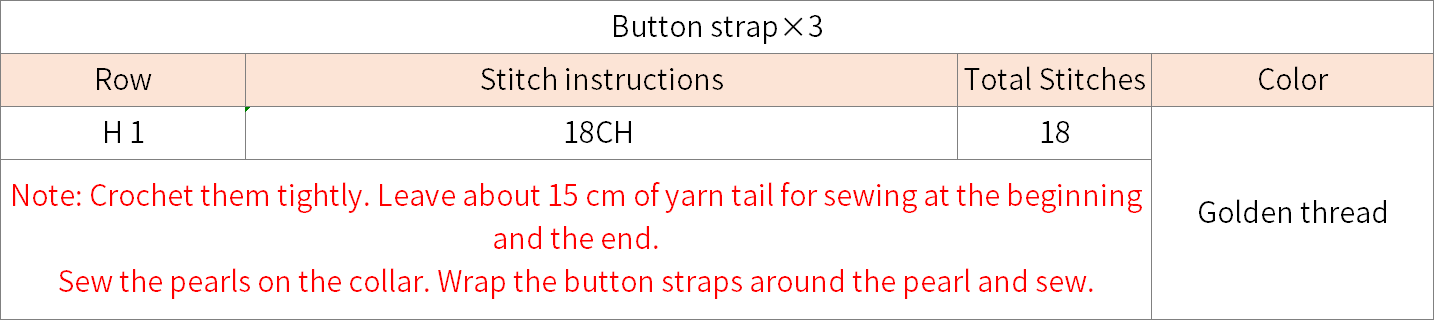
Step 5 Button strapsF5
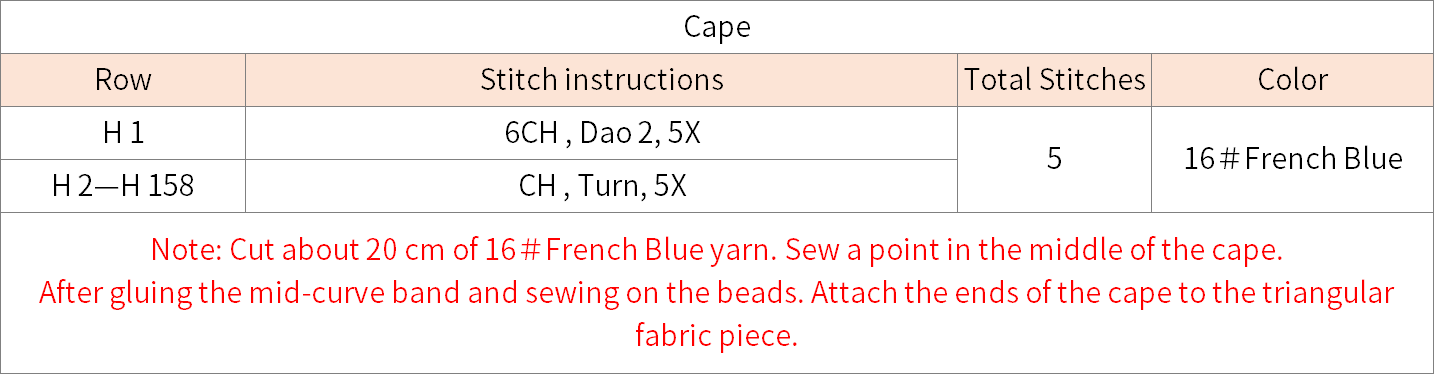
Step 6 CapeF6
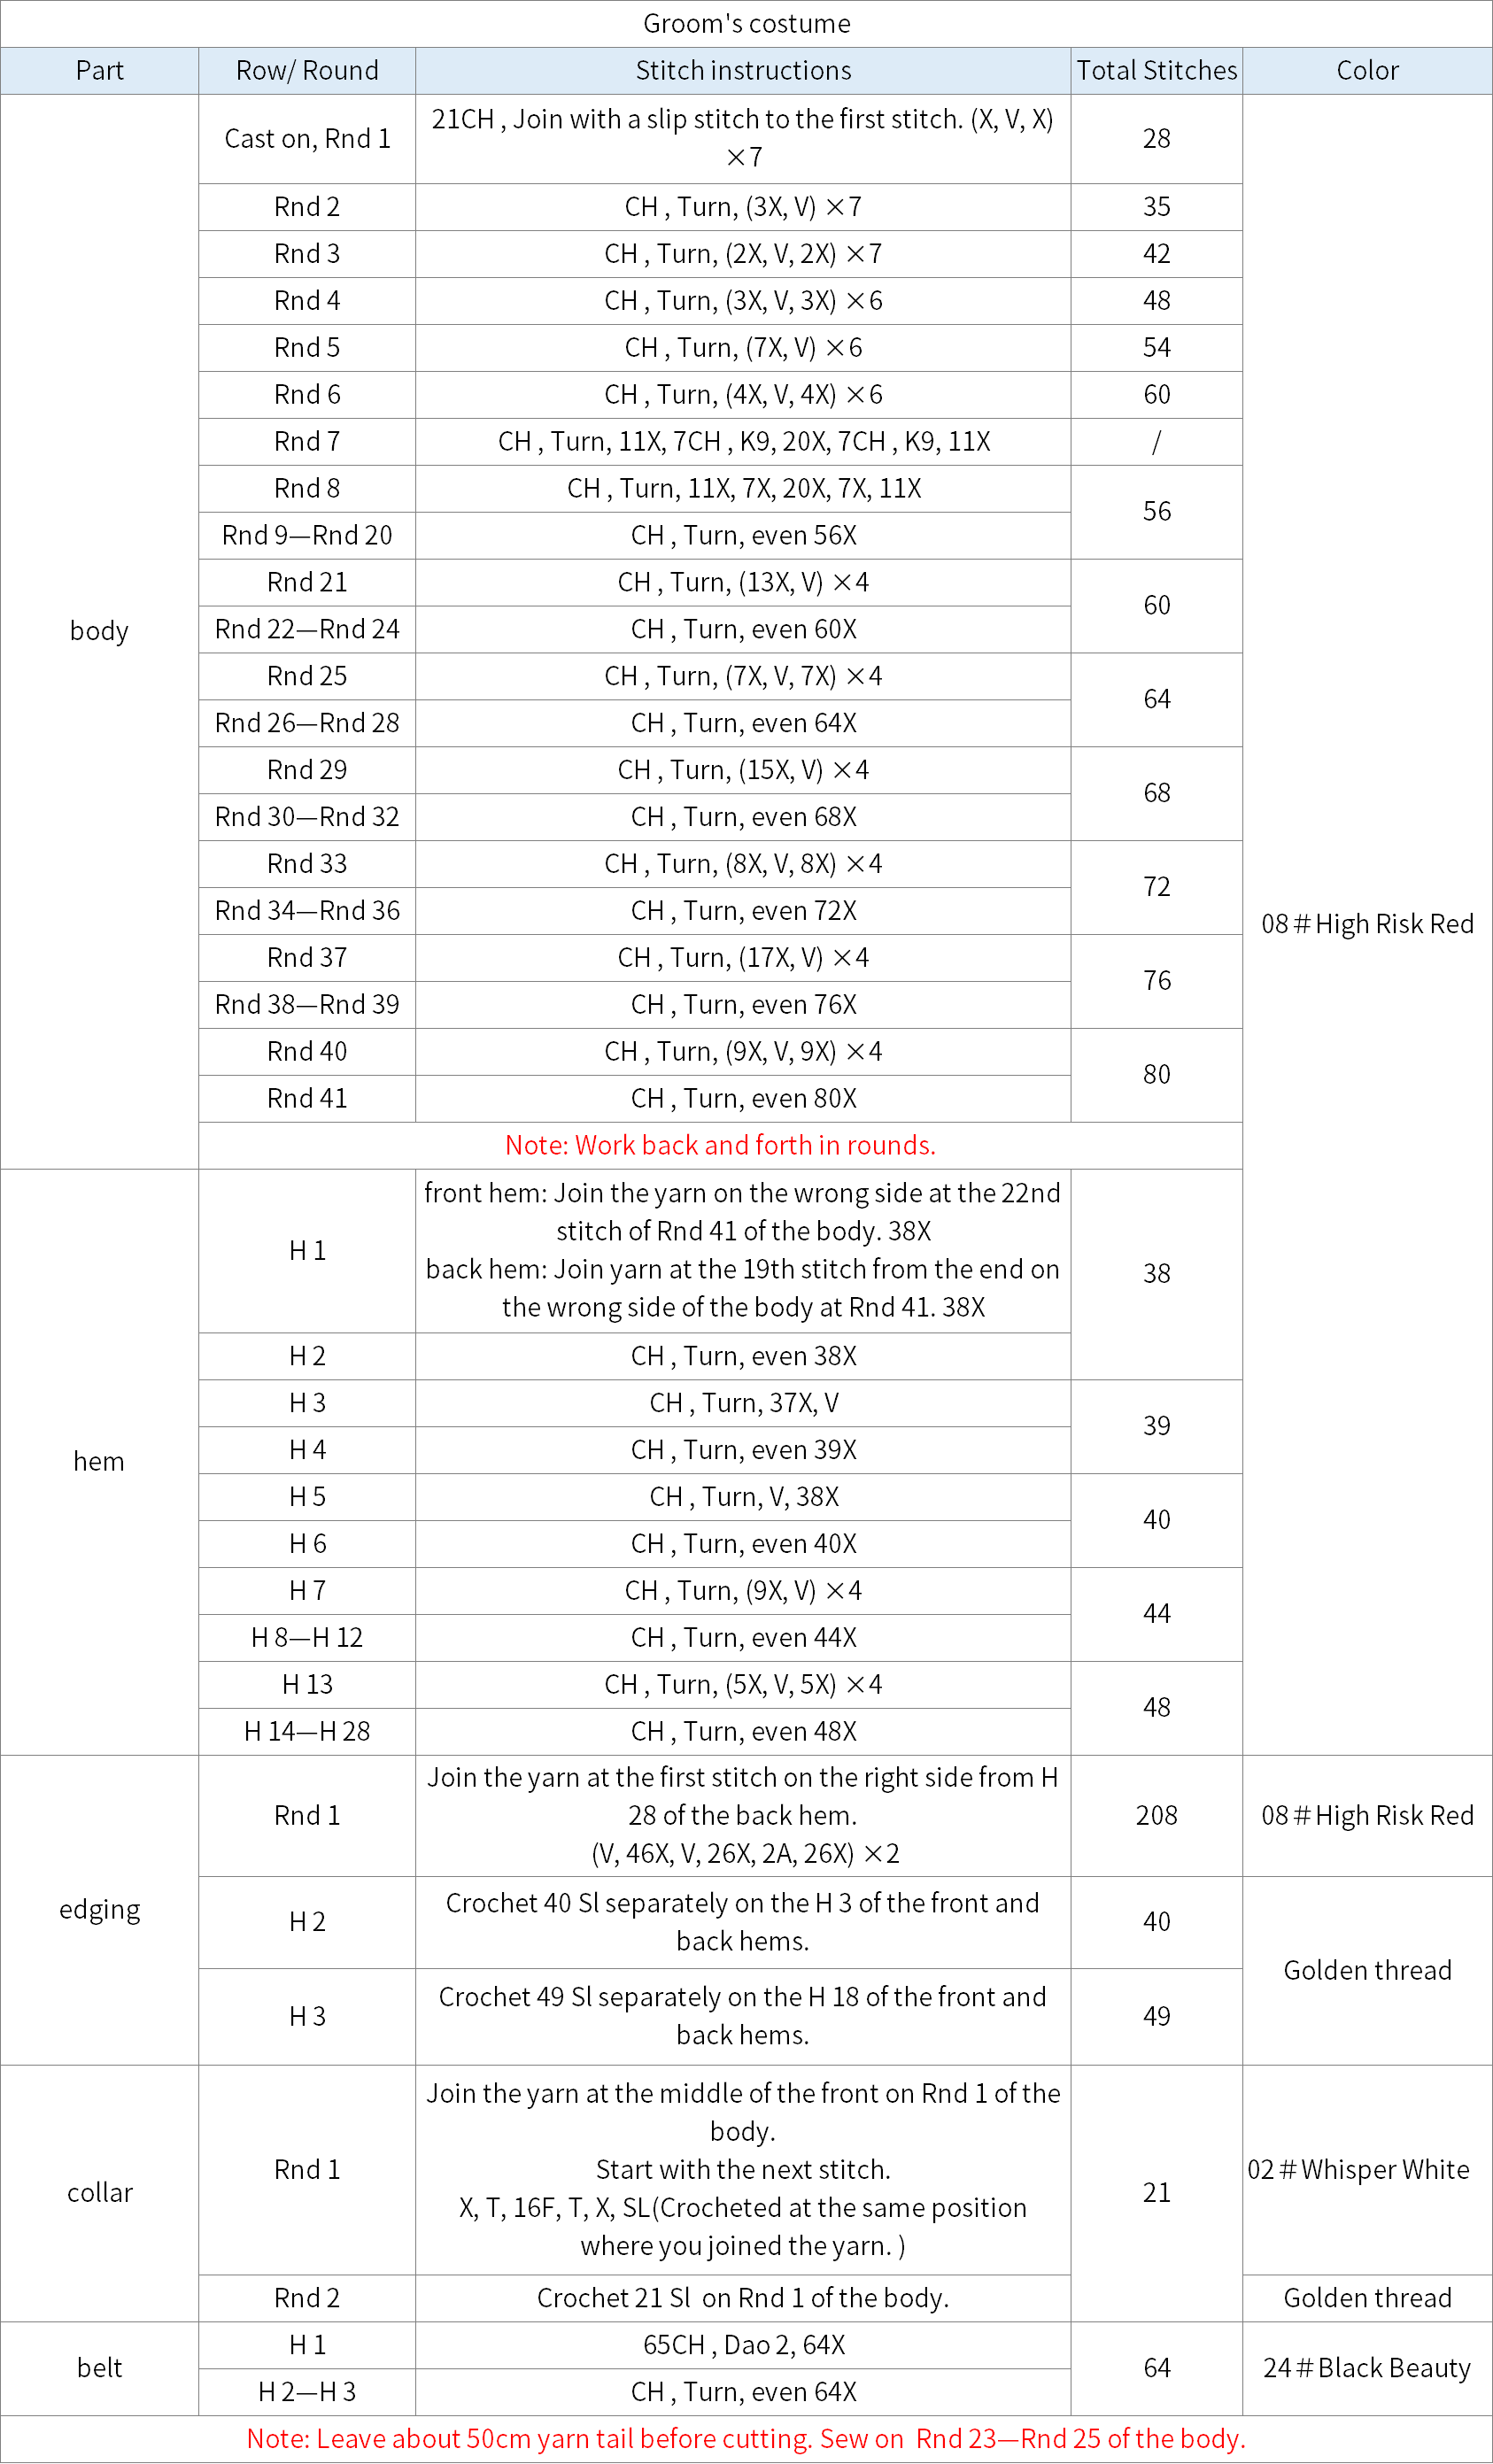
Part 7 Groom’s costumeG 26' 35'' (Part 3)
It consists of the body, the hem, the edging, the sleeves and the collar. The method of crocheting sleeves and collar is the same as the bride's. Please refer to the video demonstration for more details.

Made by the community