Accessories / Ornament
Animal Silhouette
Project preview
See the finished project
Pattern format
Instructions
Watch and follow
Video tutorial
| Style | Yarn | Color |
|---|---|---|
| Garden Oasis Version | 4-Ply Combed Cotton & Acrylic Fibre Hand Knitting Yarn | 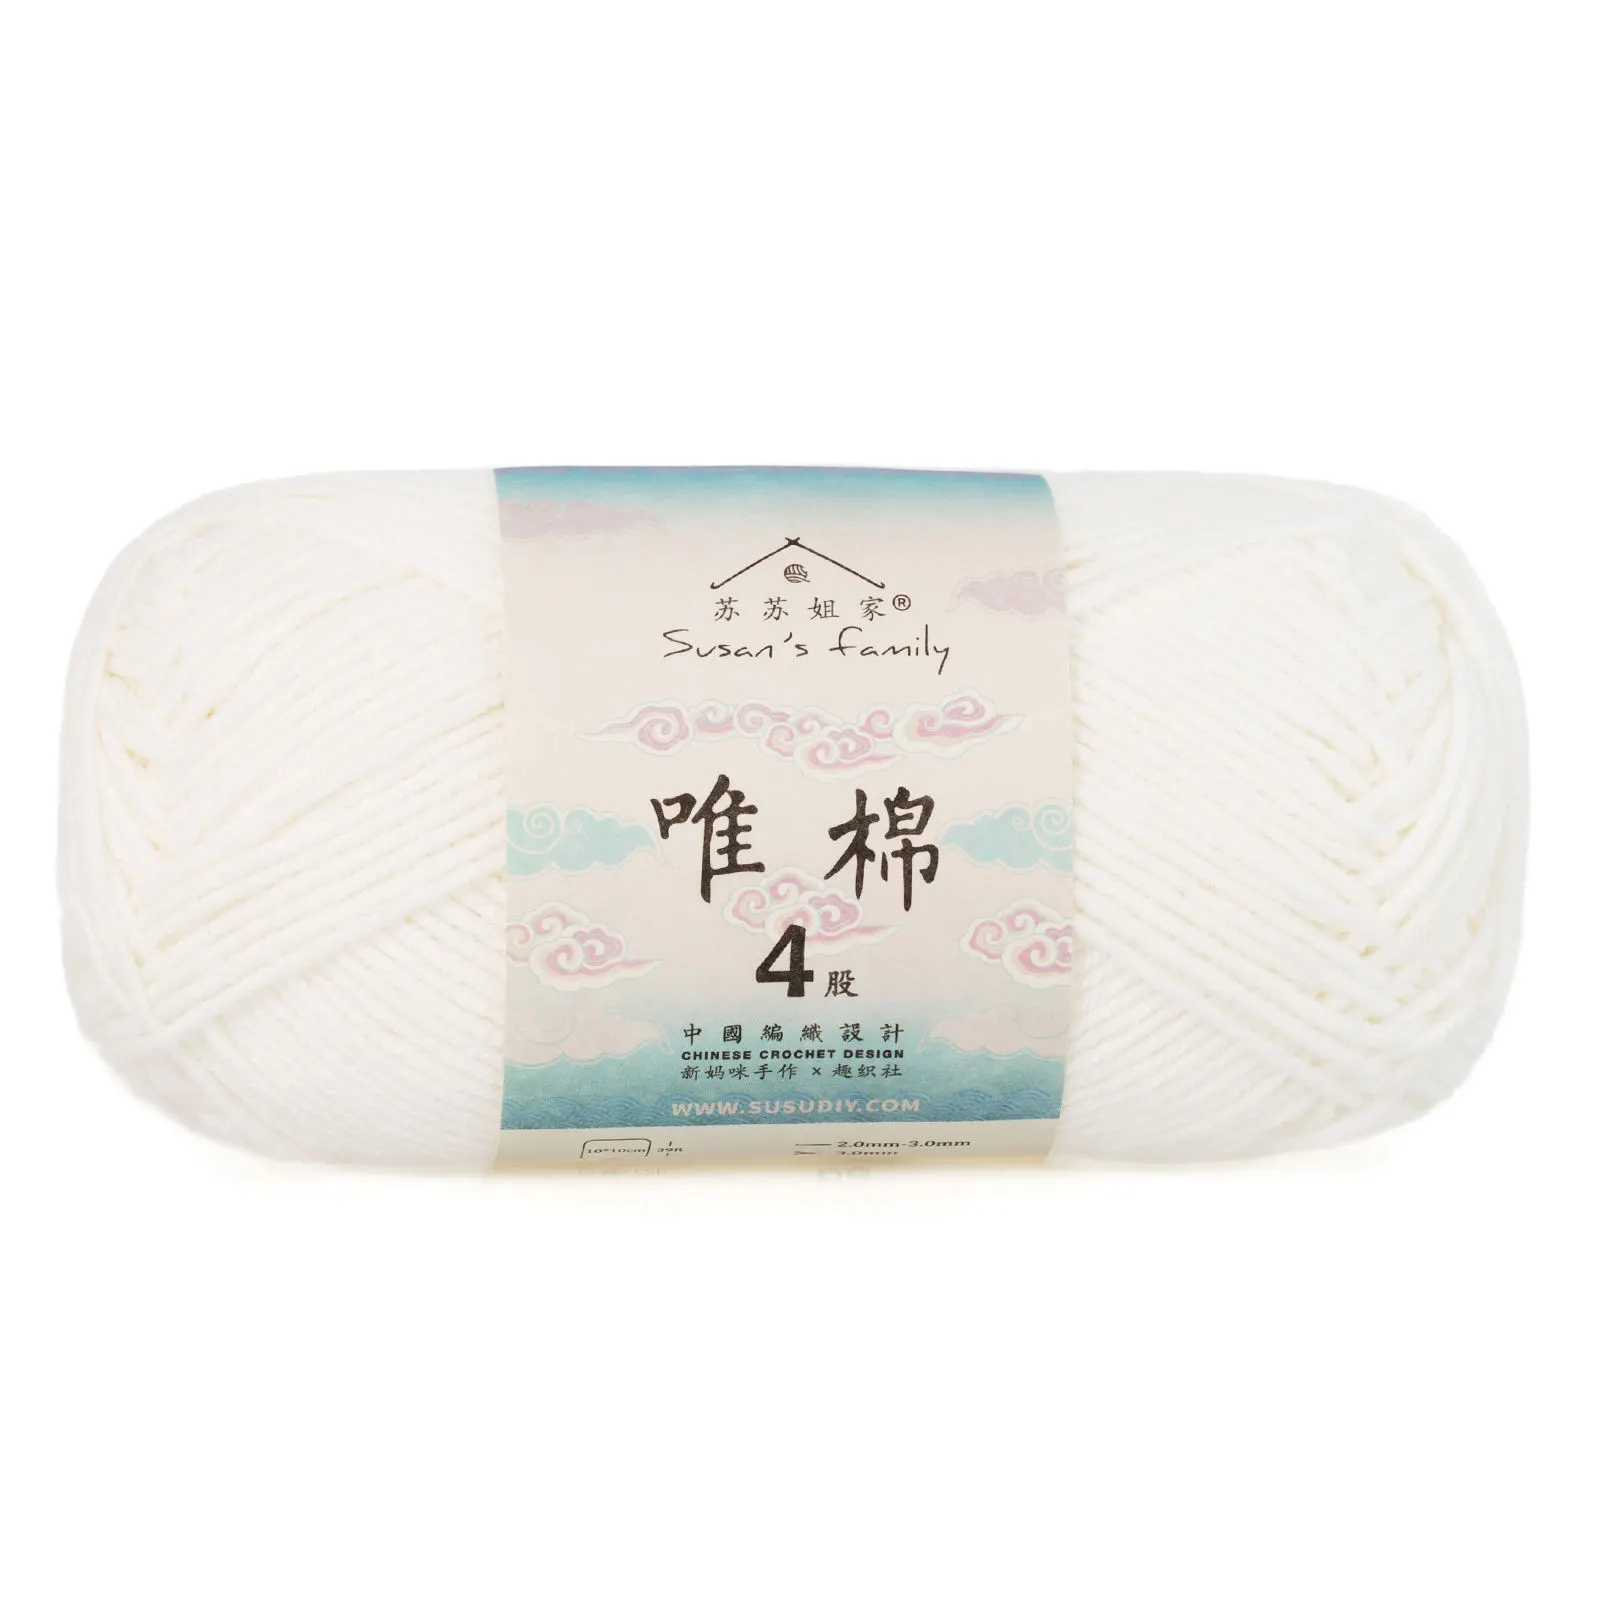 06#Bright White x 1 06#Bright White x 1 401#Garden Oasis x 1 401#Garden Oasis x 1 |
| Azure Ink Version | 4-Ply Combed Cotton & Acrylic Fibre Hand Knitting Yarn | 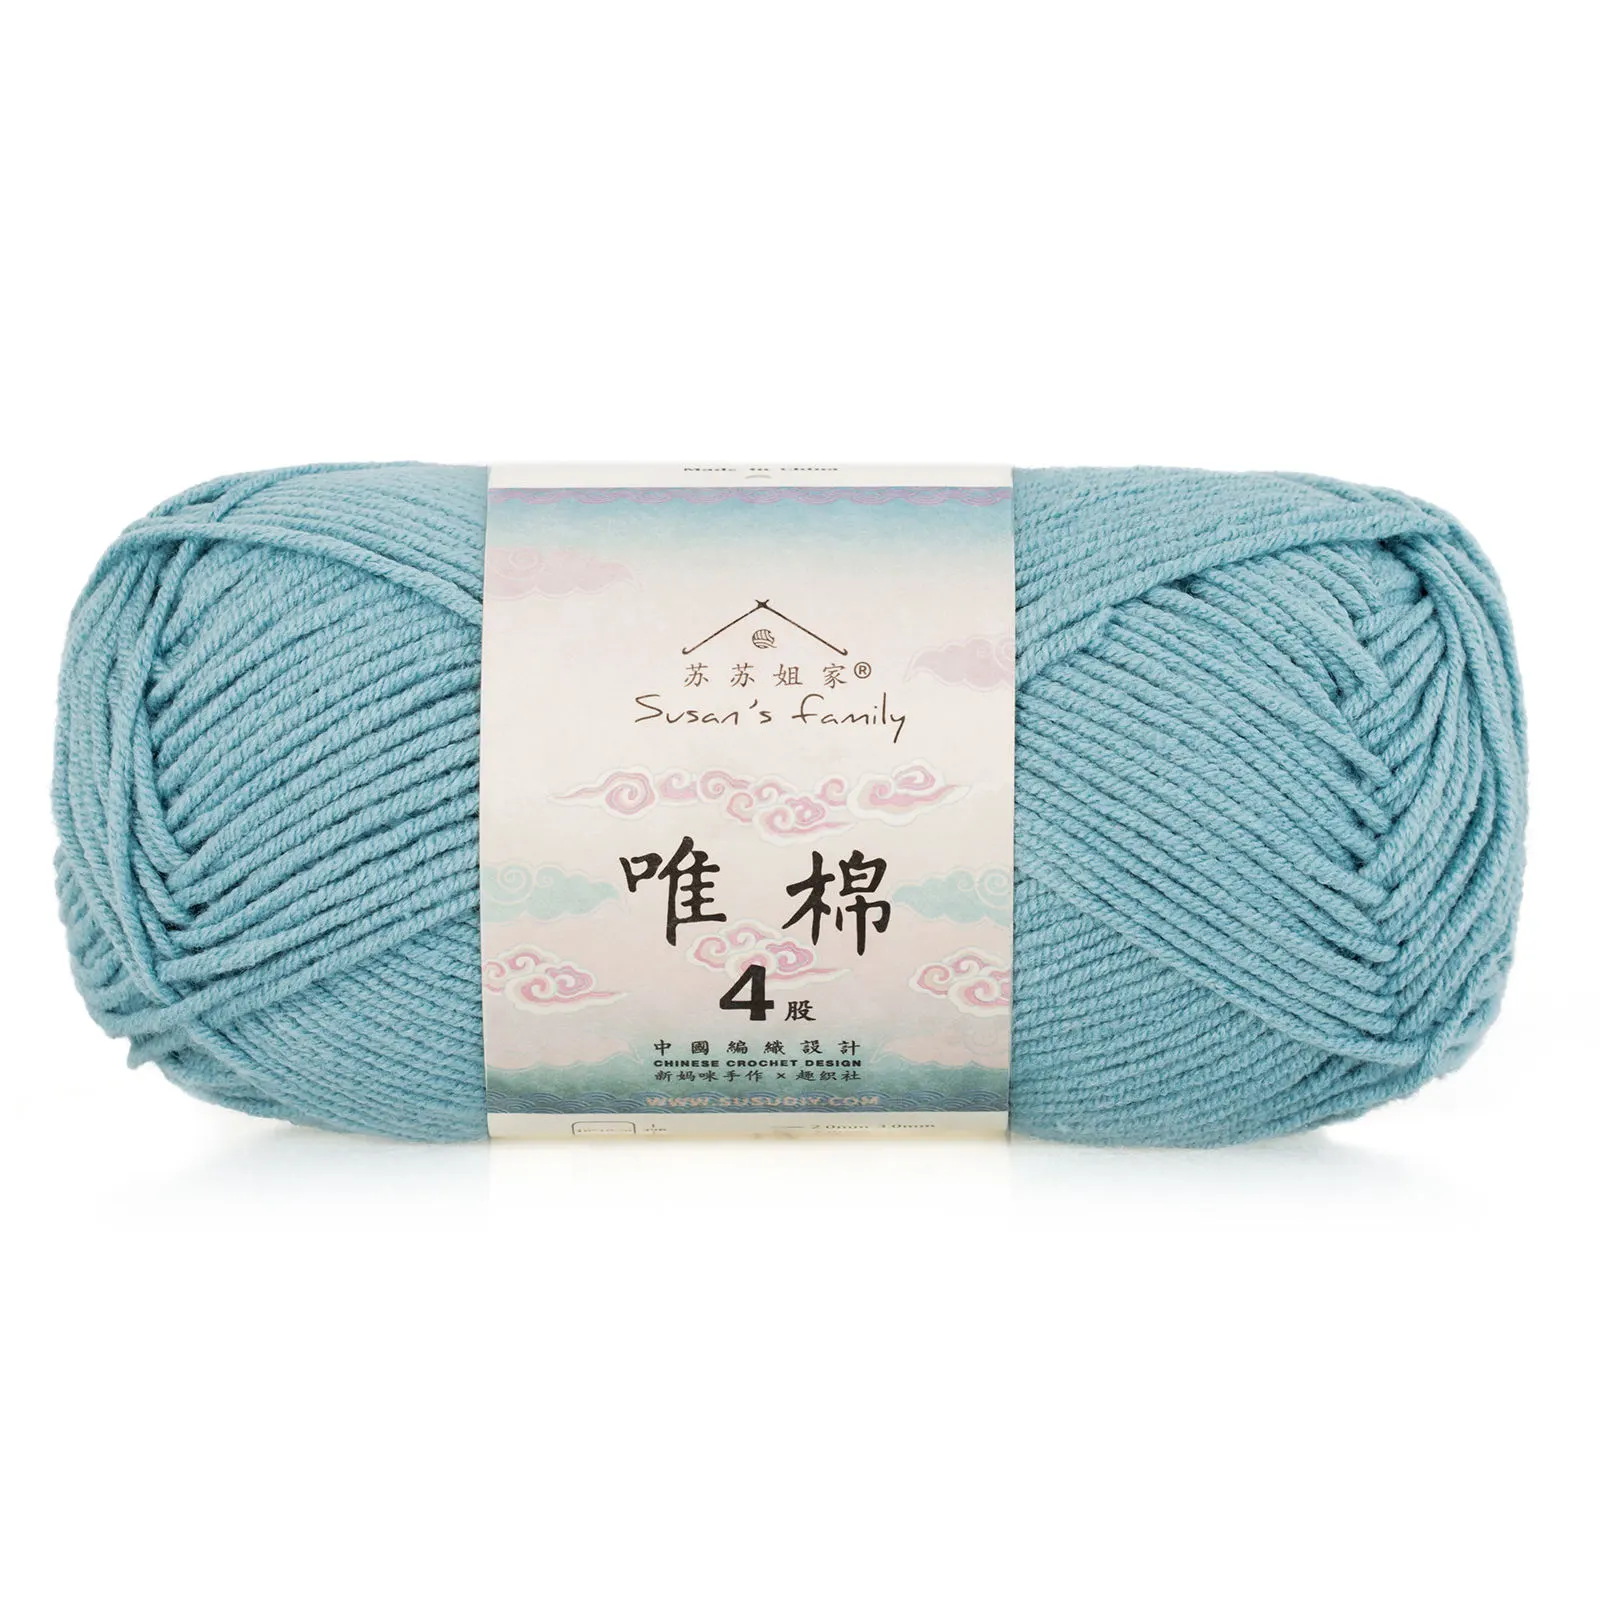 17#Marine Blue x 1 17#Marine Blue x 1 406#Azure Ink x 1 406#Azure Ink x 1 |
| Garden Oasis & Red Version | 4-Ply Combed Cotton & Acrylic Fibre Hand Knitting Yarn |  51#High Risk Red x 1401#Garden Oasis x 1 51#High Risk Red x 1401#Garden Oasis x 1 |
| Rainbow Version | 4-Ply Combed Cotton & Acrylic Fibre Hand Knitting Yarn | 51#High Risk Red x 1 412#Rainbow x 1 412#Rainbow x 1 |
| Emerald Trail Version | 4-Ply Combed Cotton & Acrylic Fibre Hand Knitting Yarn |  411#Emerald Trail x 1 411#Emerald Trail x 1 |
Garden Oasis Version
Azure Ink Version
Garden Oasis & Red Version
Rainbow Version
Emerald Trail Version
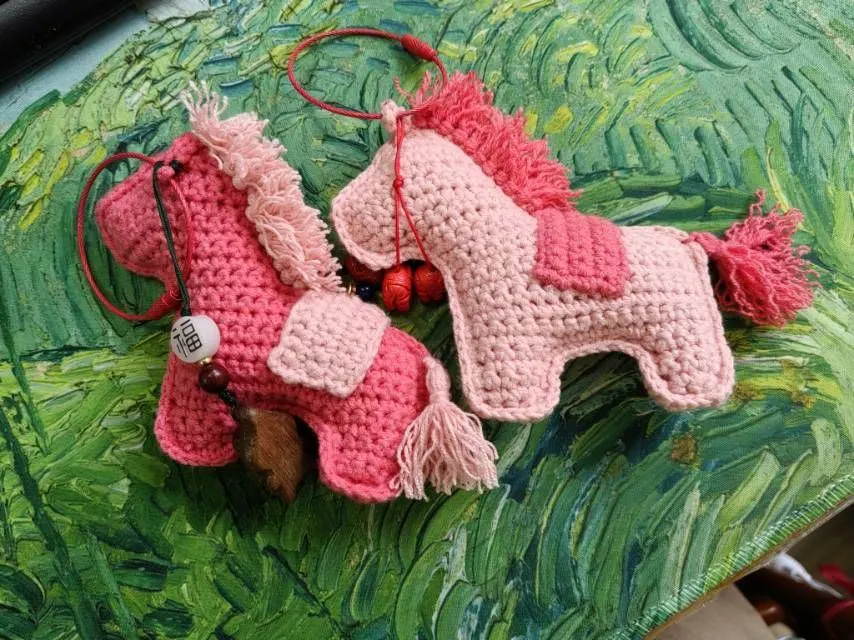
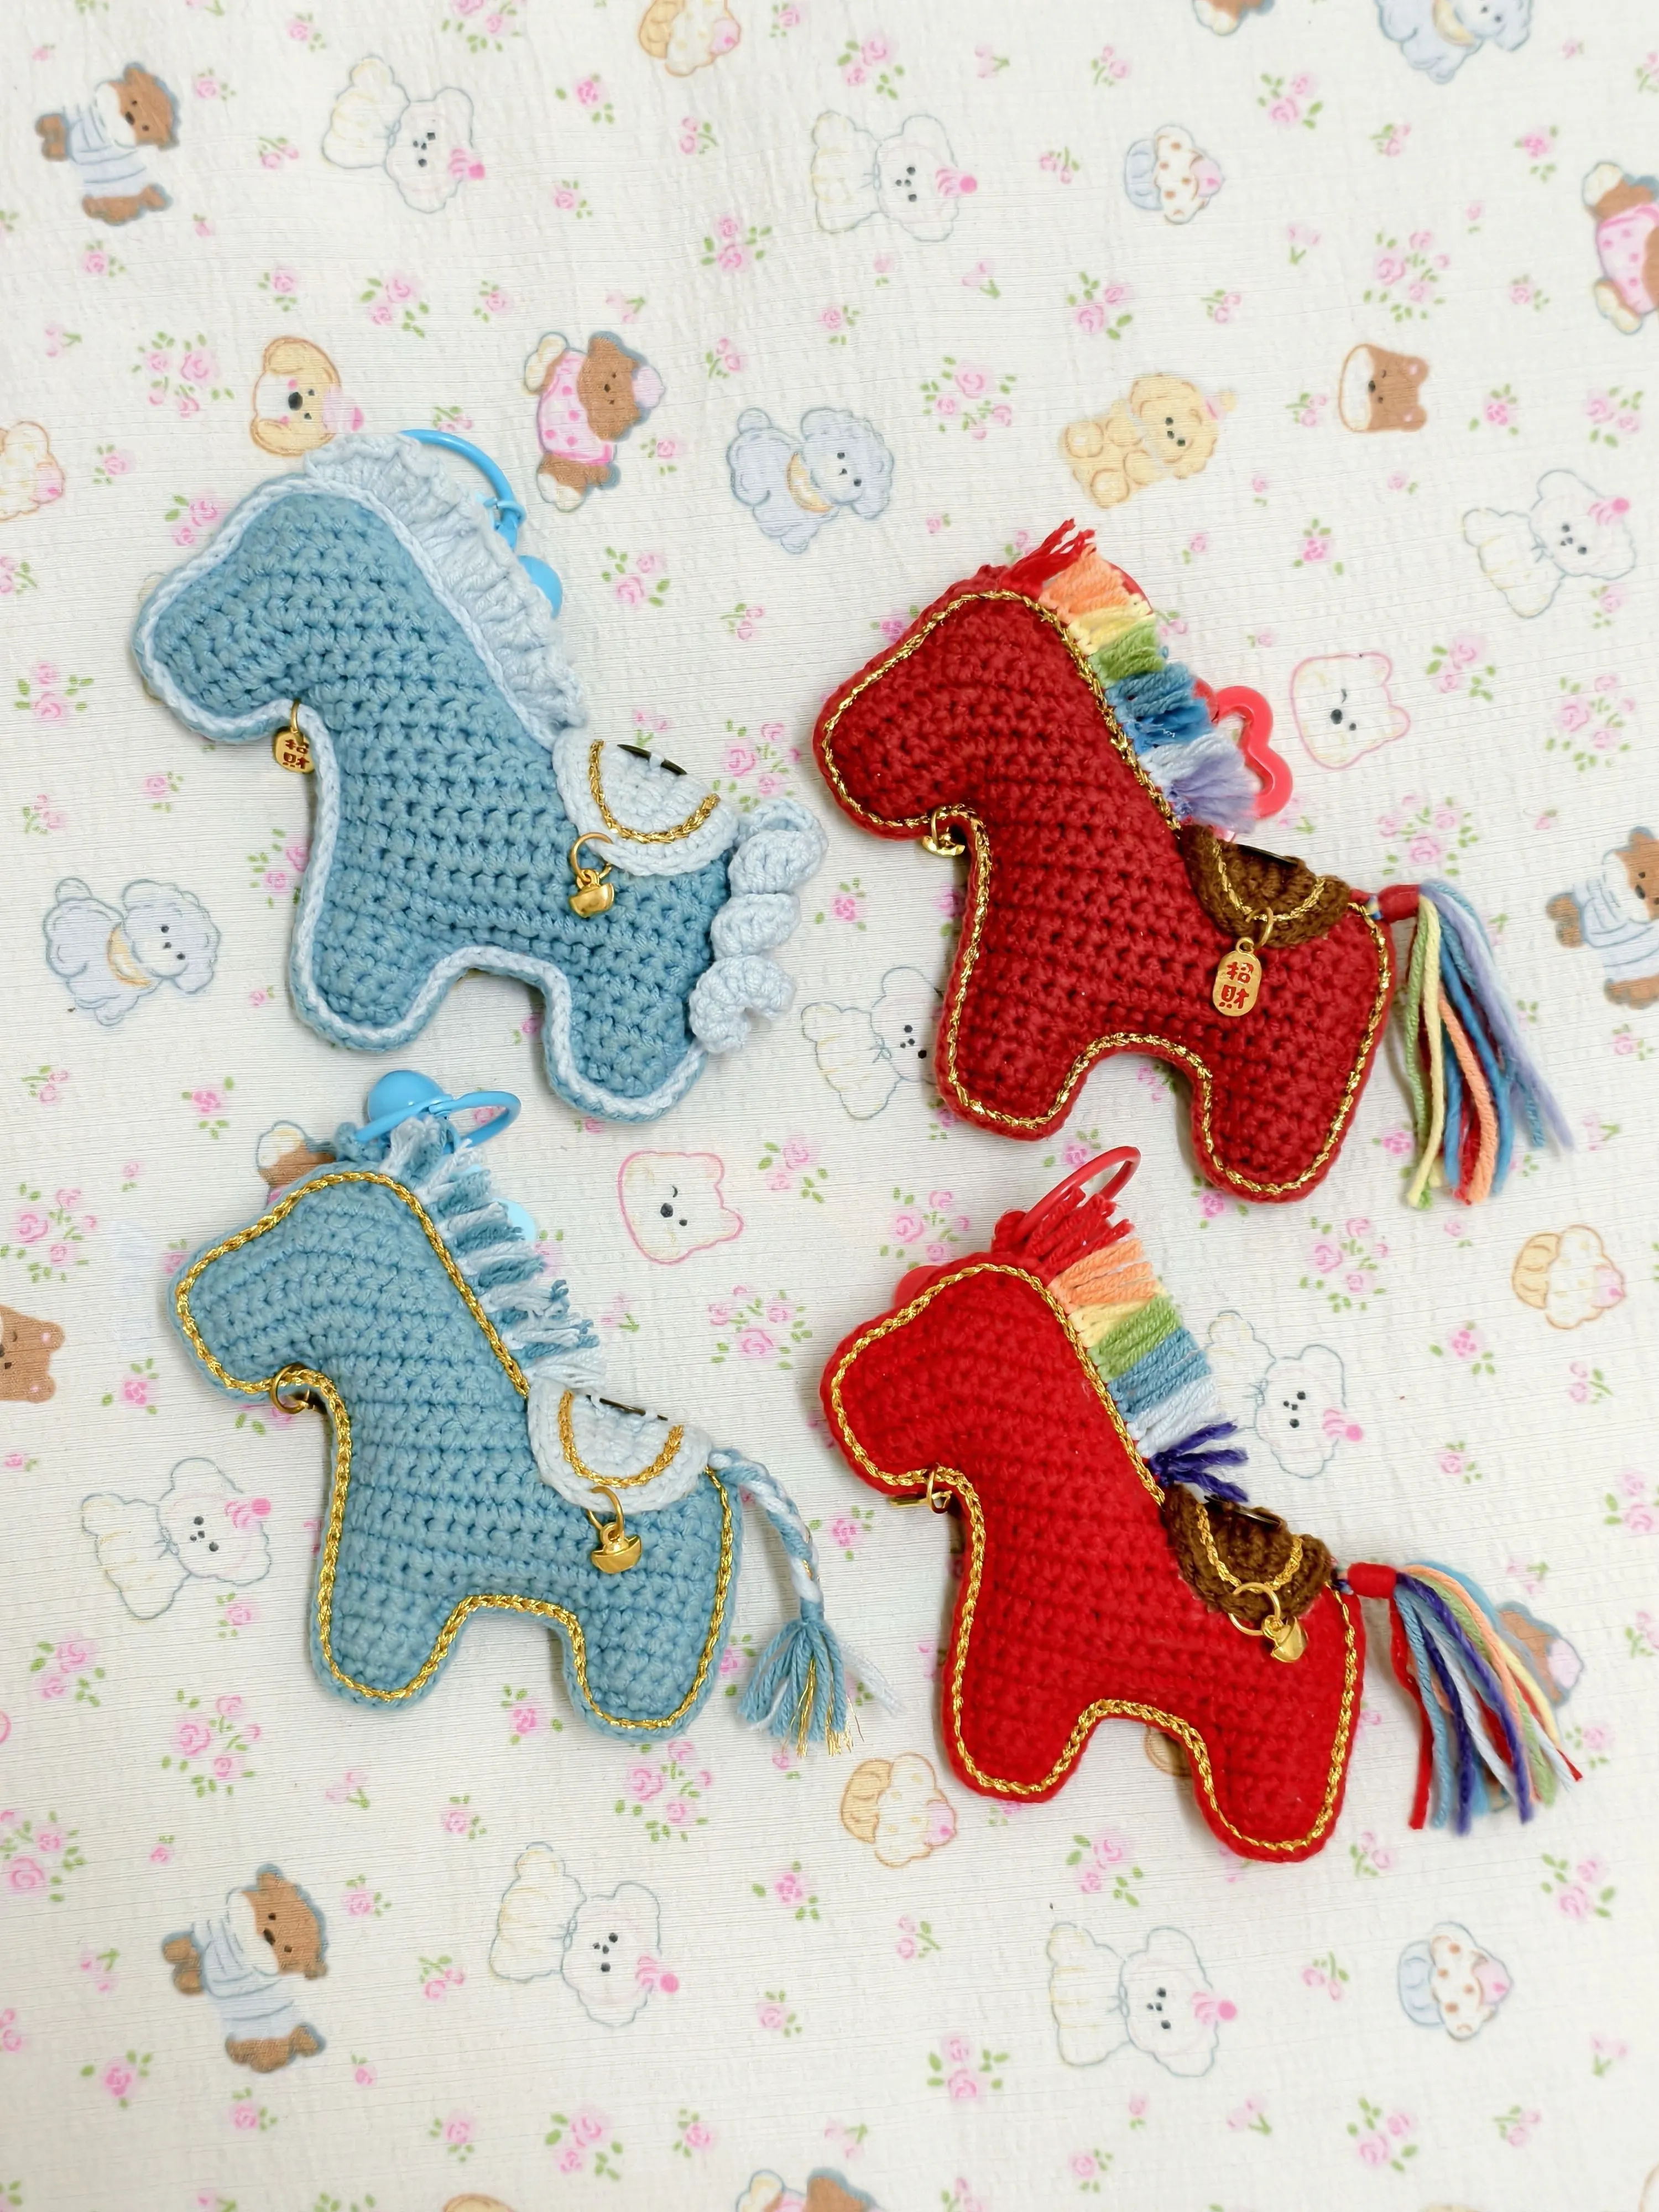
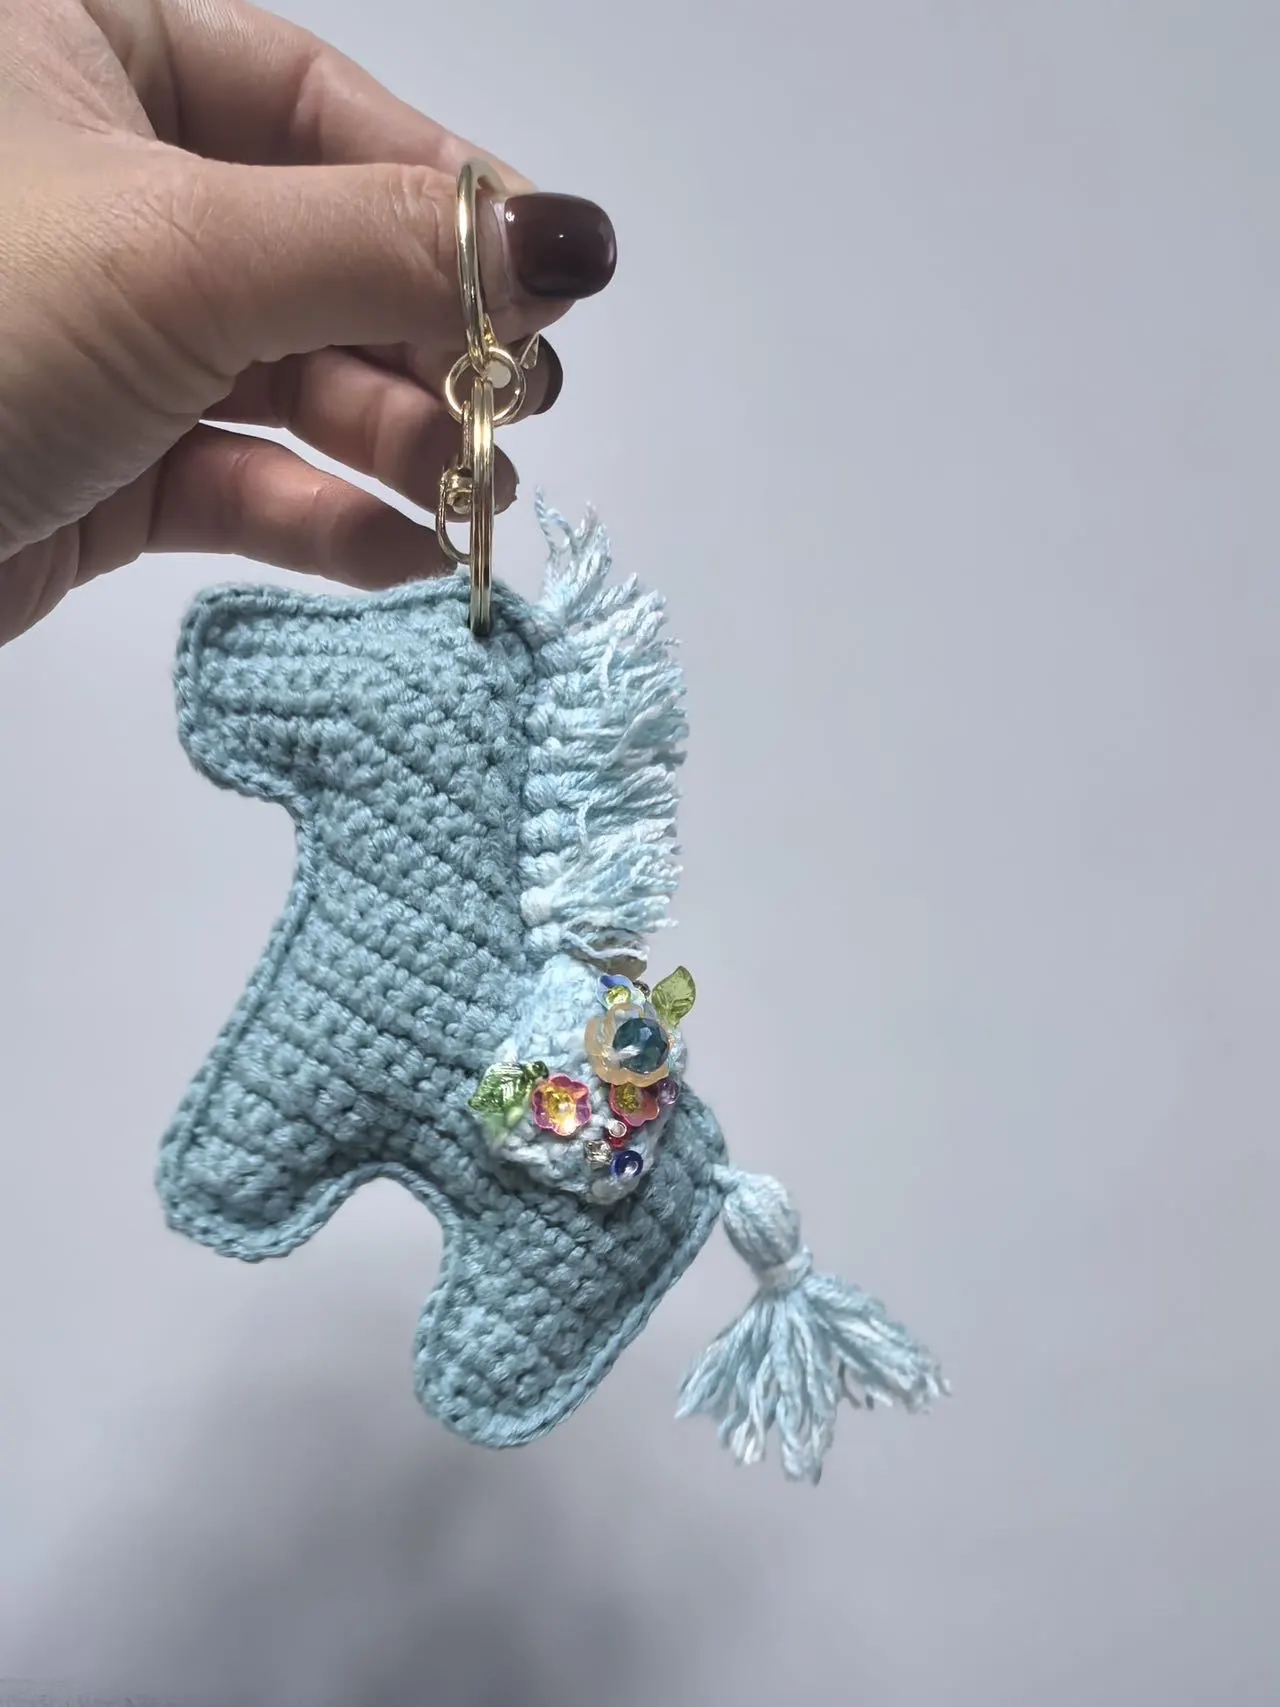
This hanging ornament comes in 3 different animal shapes: alpaca, horse, and elephant. Each animal has two color schemes, and the ornament is divided into main part and accessories. The accessories vary slightly depending on the animal shape, and you can choose to attach a hanging loop or keyring based on your needs.
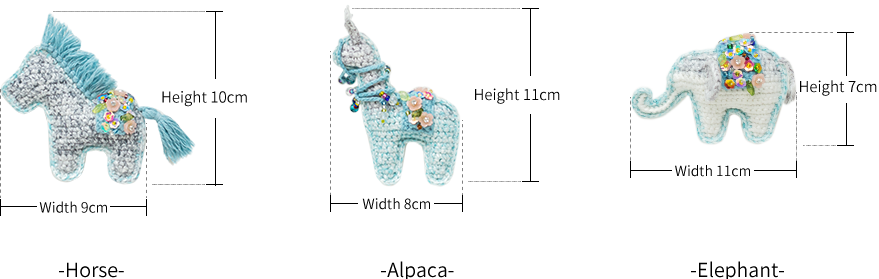
Note: Hand-measured, with a possible error of 1-2 cm.
Due to varying tension among individuals, the sample size is for reference only.
Yarn: 4-Ply Combed Cotton Yarn
Tool: 1.75mm Regular Crochet Hook or 4+ Crochet Hook











Note:
1. This pattern is making in Chinese crochet pattern terms, and the stitch name is written using American terminology. All measurements in charts are in cm.

Part 1 Main Part
Each hanging ornament is made by joining together two identical pieces.
Step 1 Pieces 01' 12''
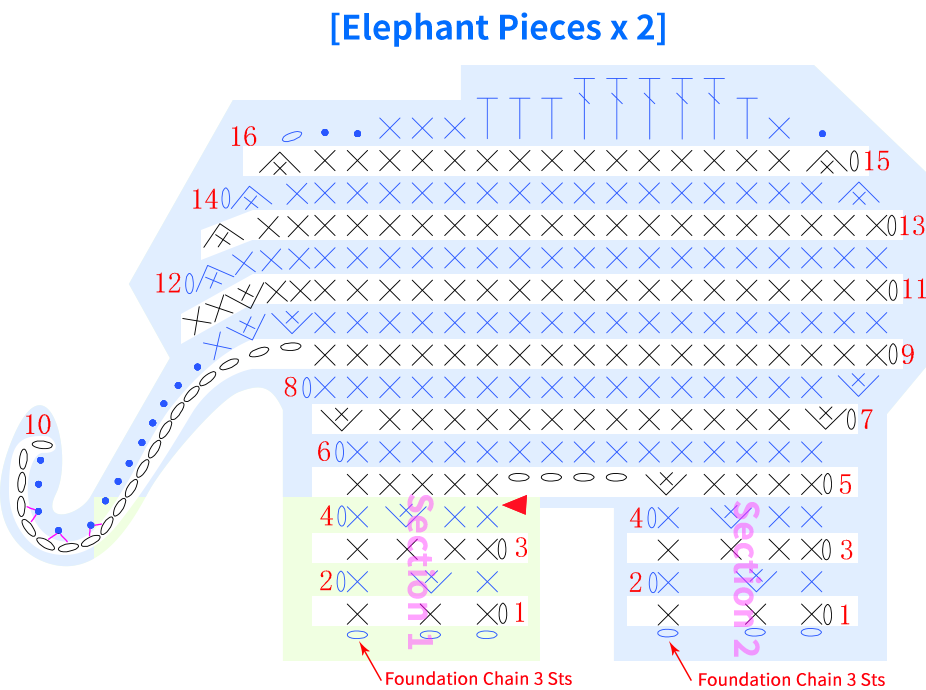
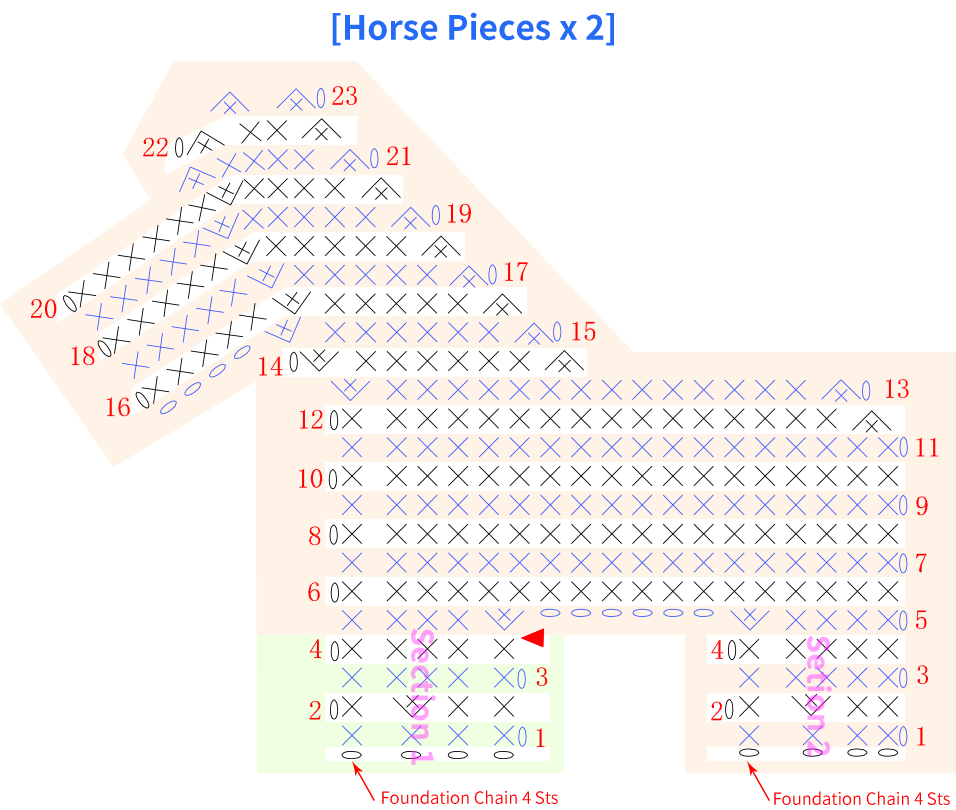
Each piece is divided into 2 sections to complete, starting with a chain stitch and working back and forth along the foundation chain. After crocheting several rows in section 2, join it with section 1 and work back and forth on the remaining parts. Please refer to the video demonstration for details.
Note: 1. The video demonstrates using the elephant as an example; the crocheting method for other animals is the same as the elephant.
2. There are no restrictions on the yarn for the main part—you can use solid color or variegated yarn.
3. If using variegated yarn with multiple color sections, the finished effect will vary depending on the starting position of the edging.
A1 Section 1 of Elephant Piece A2 Section 2 of Elephant Piece
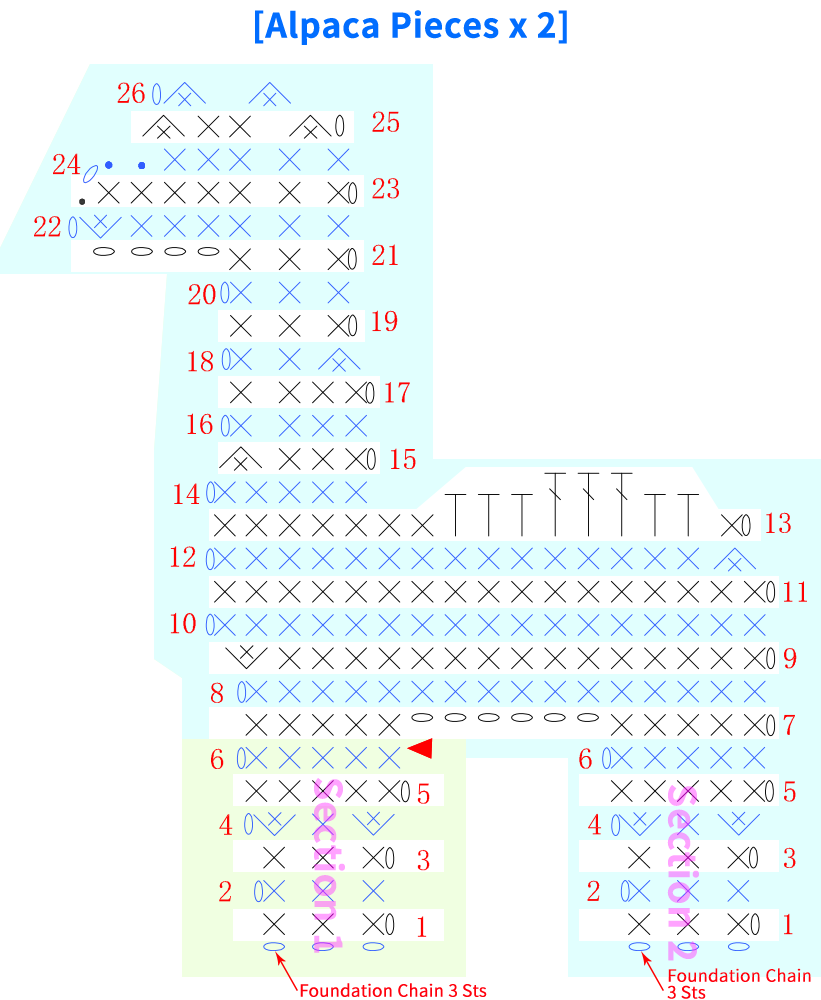
Step 2 Joining (Using the Same Yarn as the Main Part) 23' 18''
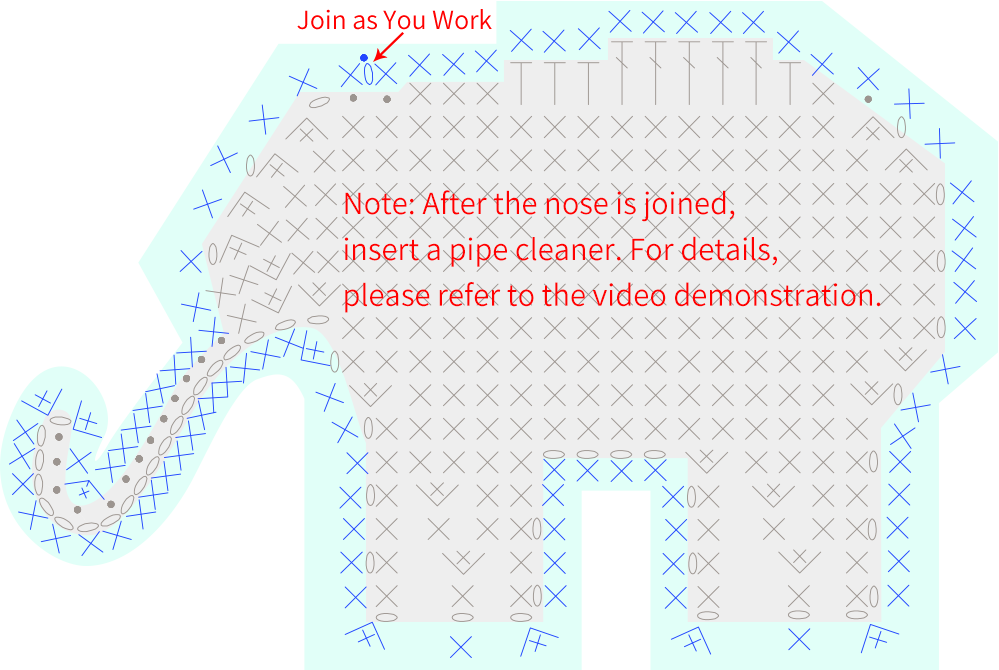
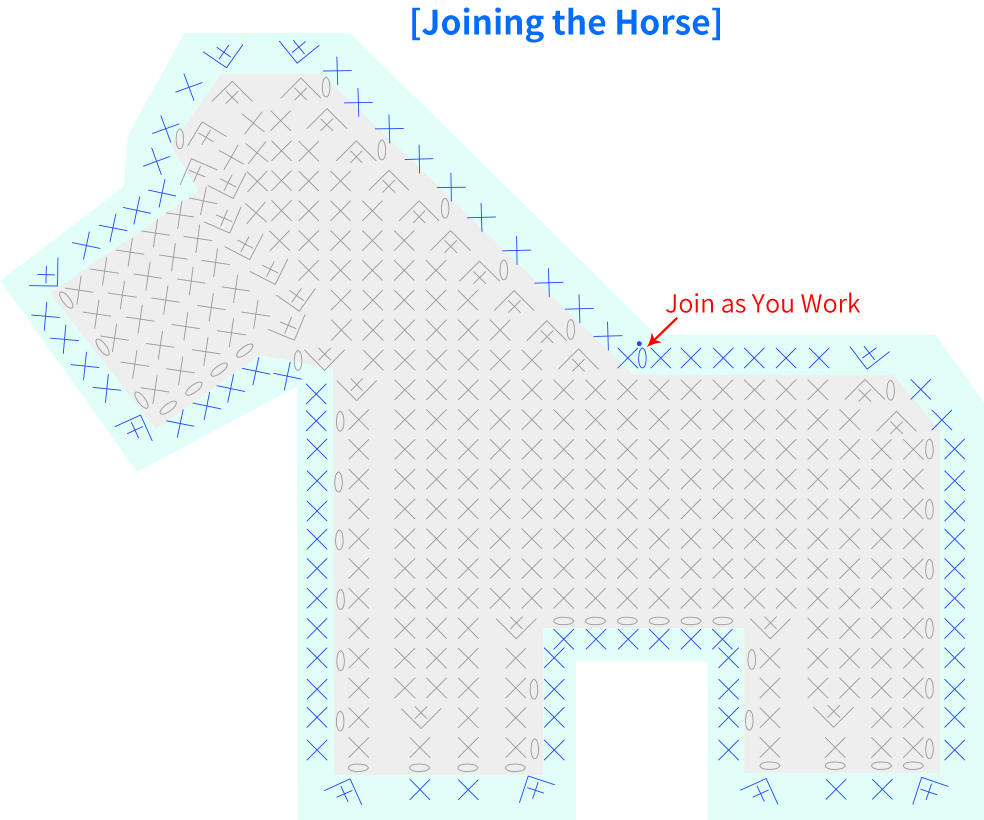
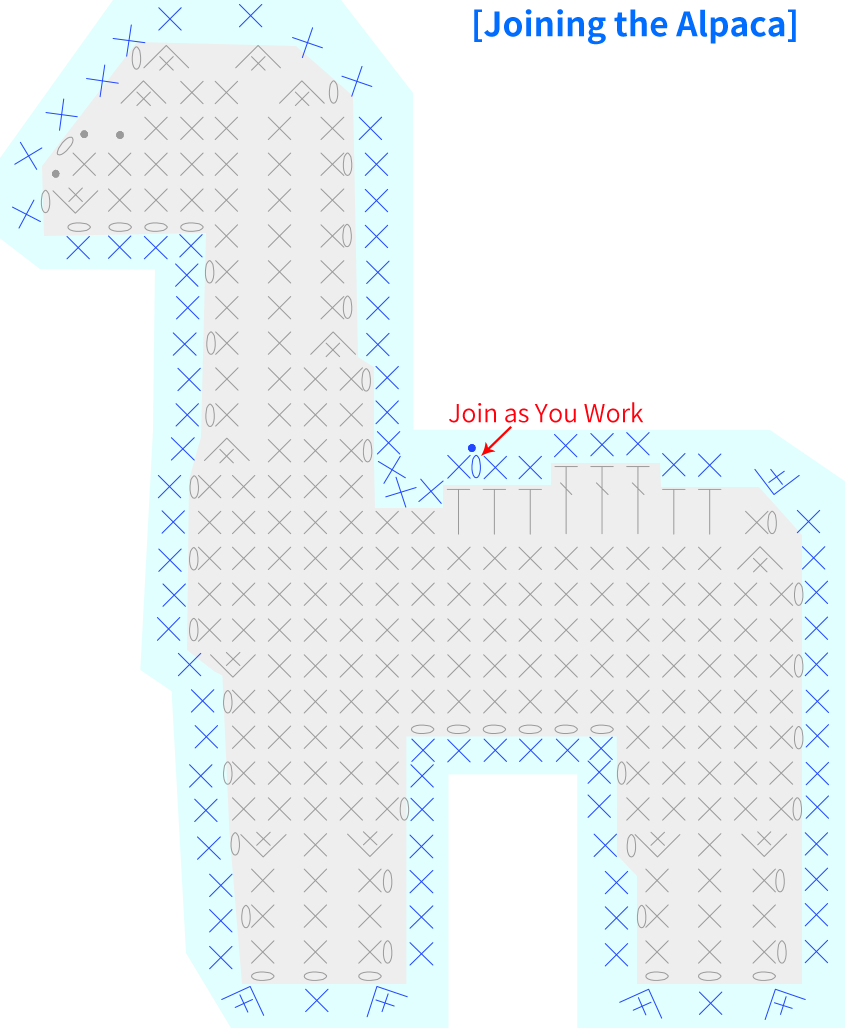
Align the two pieces and work and join counterclockwise along the edge of the fabric until the right side of the animal's back, then stuff through the opening. Please refer to the video demonstration for details.
Joining the Elephant A3
Part 2 Accessories
Step 1 Elephant Ears B1 & Tail B2 38' 31''
Ears are made with a chain cast on, then crocheted back and forth along the first chain of the foundation chain. After completing, sew them onto the corresponding position of the head. For the tail, join the yarn at the designated spot and crochet chain stitches. Please refer to the video demonstration for details.
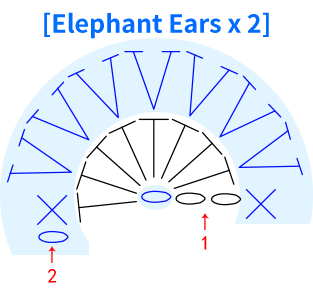

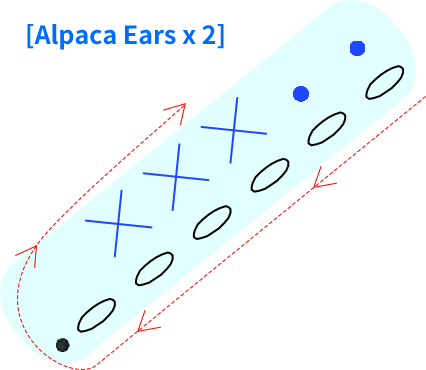
Step 2 Alpaca Ears C1 (Using the Same Yarn as the Main Part) & Reins C2 (Using a Different Yarn from the Main Part, Remove 2 Strands) 46' 11''
Ears are made with a chain cast on, then sewn onto the designated spots and worked back and forth. The reins consist of two different lengths of chain braids—one long braid attached to the alpaca's neck and another attached to the alpaca's muzzle. Once attached, add decorative elements by sewing. For details, please refer to the video demonstration.
Step 3 Horsehair D1 & Tail D2 (With a Different Yarn than the Main Part) 60' 44''
The horsehair is a row of short tassels (2 strands, about 1.5cm long) at the corresponding position on the horse's back, and the tail is a long tassel (final length about 4cm). Please refer to the video demonstration for details.
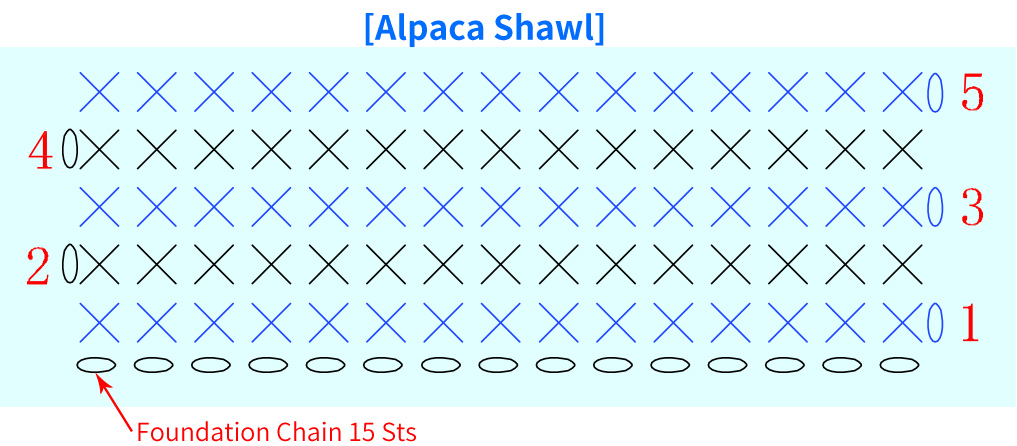
Step 4 Shawl E (With a Different Yarn than the Main Part) 68' 45''
Start with a foundation chain, work back and forth in single crochet even, then leave a 30 cm yarn tail and break the yarn. Finally, sew on the corresponding decorations (sewing thread) on the right side of the piece. Please refer to the video demonstration for details.
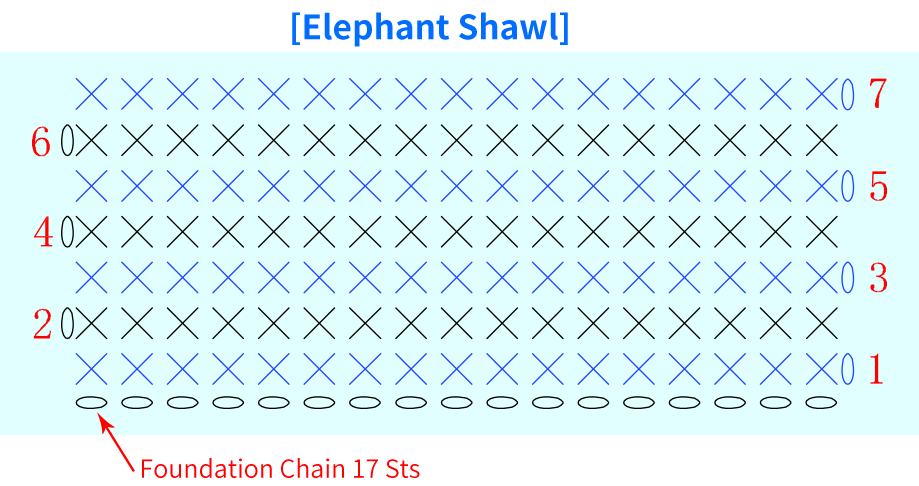
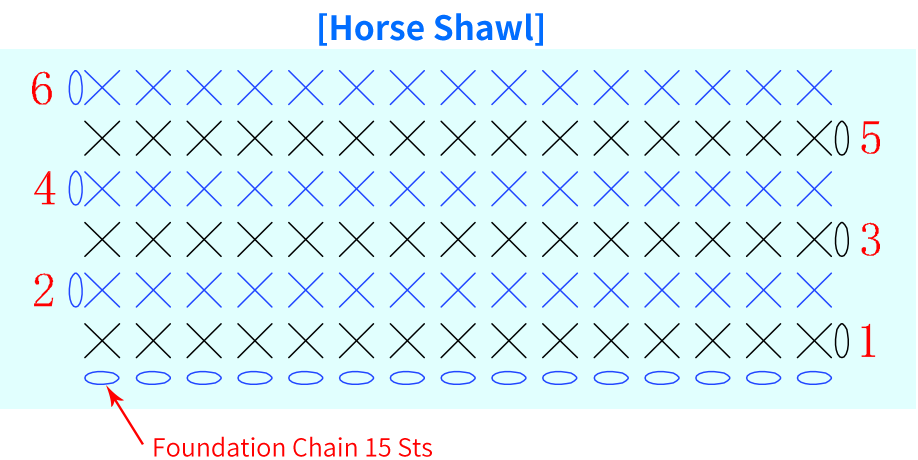
Step 5 Hanging Loop F1 & Keyring F2 (Using the Same Yarn as the Main Part) 75' 28''
Depending on the hanging ornament's purpose, you can choose to attach a hanging loop or a keyring. The attachment position is always at the head end of the animal, on the stitch near the cape. For the keyring, first crochet a Shrimp Stitch (30cm), then make a knot (0.5cm). Finally, sew the keyring onto the corresponding position of the ornament. Please refer to the video demonstration for details.
Made by the community