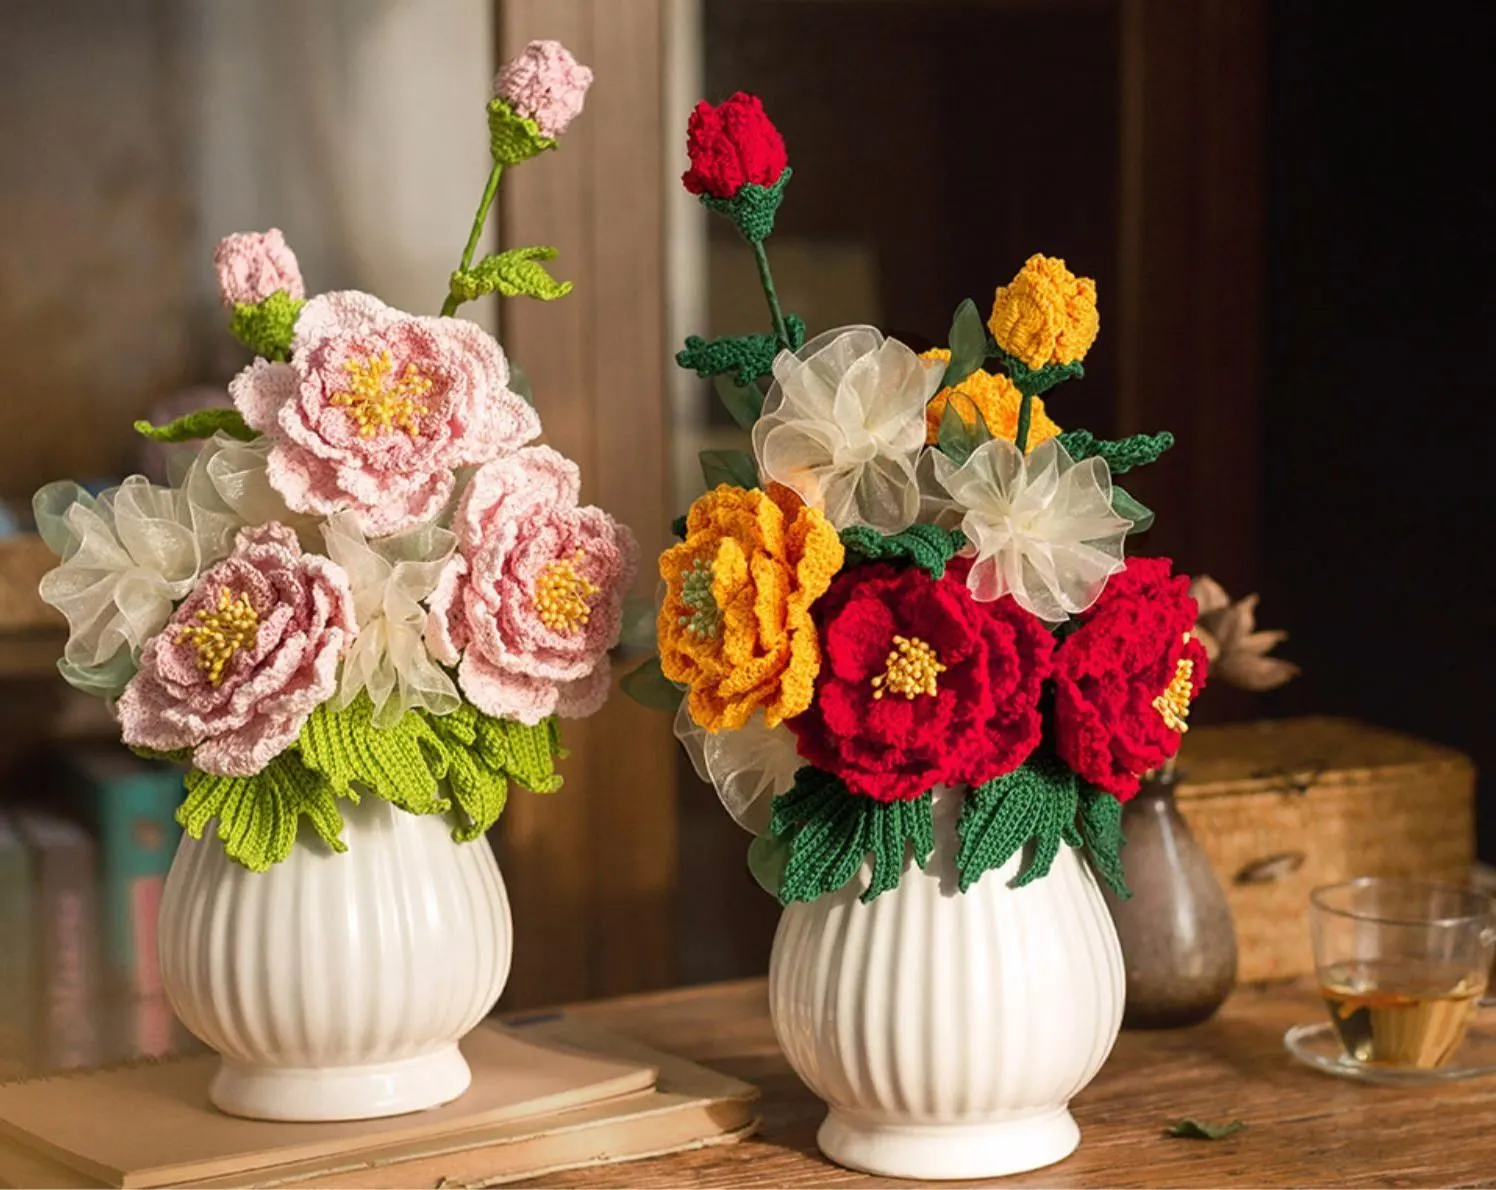
Flowers
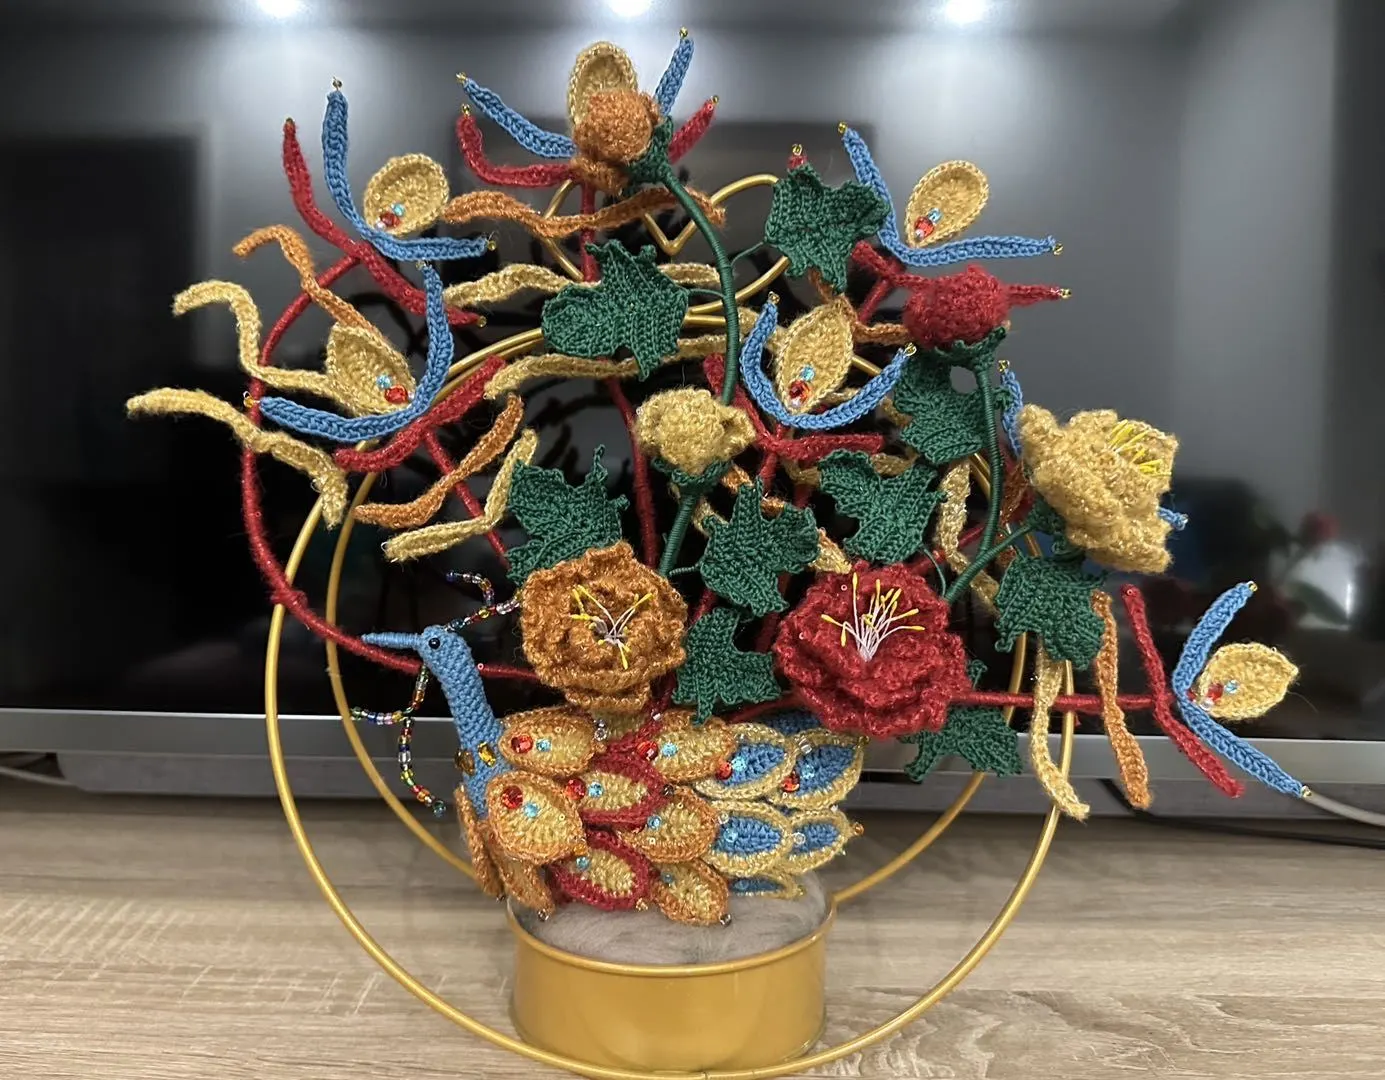
Auspicious Bird Bouquet-Phoenix Glory
Project preview
See the finished project
Pattern format
Instructions
Watch and follow
Video tutorial
The bouquet includes the phoenix main piece, feathers, feather branches, peony branches, assembly, and packaging.

The handcrafted measurements may have an error of 1 to 2 cm. Due to variations in individual tension, the size of the sample is for reference only.
Materials: Susan's Family Sequin Mohair (2 strands held together), Combed 3# Lace (1 strand).
Hook: 2.00 mm crochet hook

Chart Key












ABBREVIATIONS
XX stitch single crochet
V = sc2-in-12 single crochets into the same stitch
A = sc2toginvisible single crochet 2 stitches together
2 strs tog2 strands held together
RRound
Note:
1. This pattern is making in Chinese crochet pattern terms, and the stitch name is written using American terminology. All measurements in charts are in cm.
2. Working in joined round
When crocheting in rounds without further guidance, working in closed rounds, start each round with a set number of beginning chains and close with a slip stitch. The beginning chain preceding a single crochet and the slip stitch used for joining rounds are not included in the total stitches.
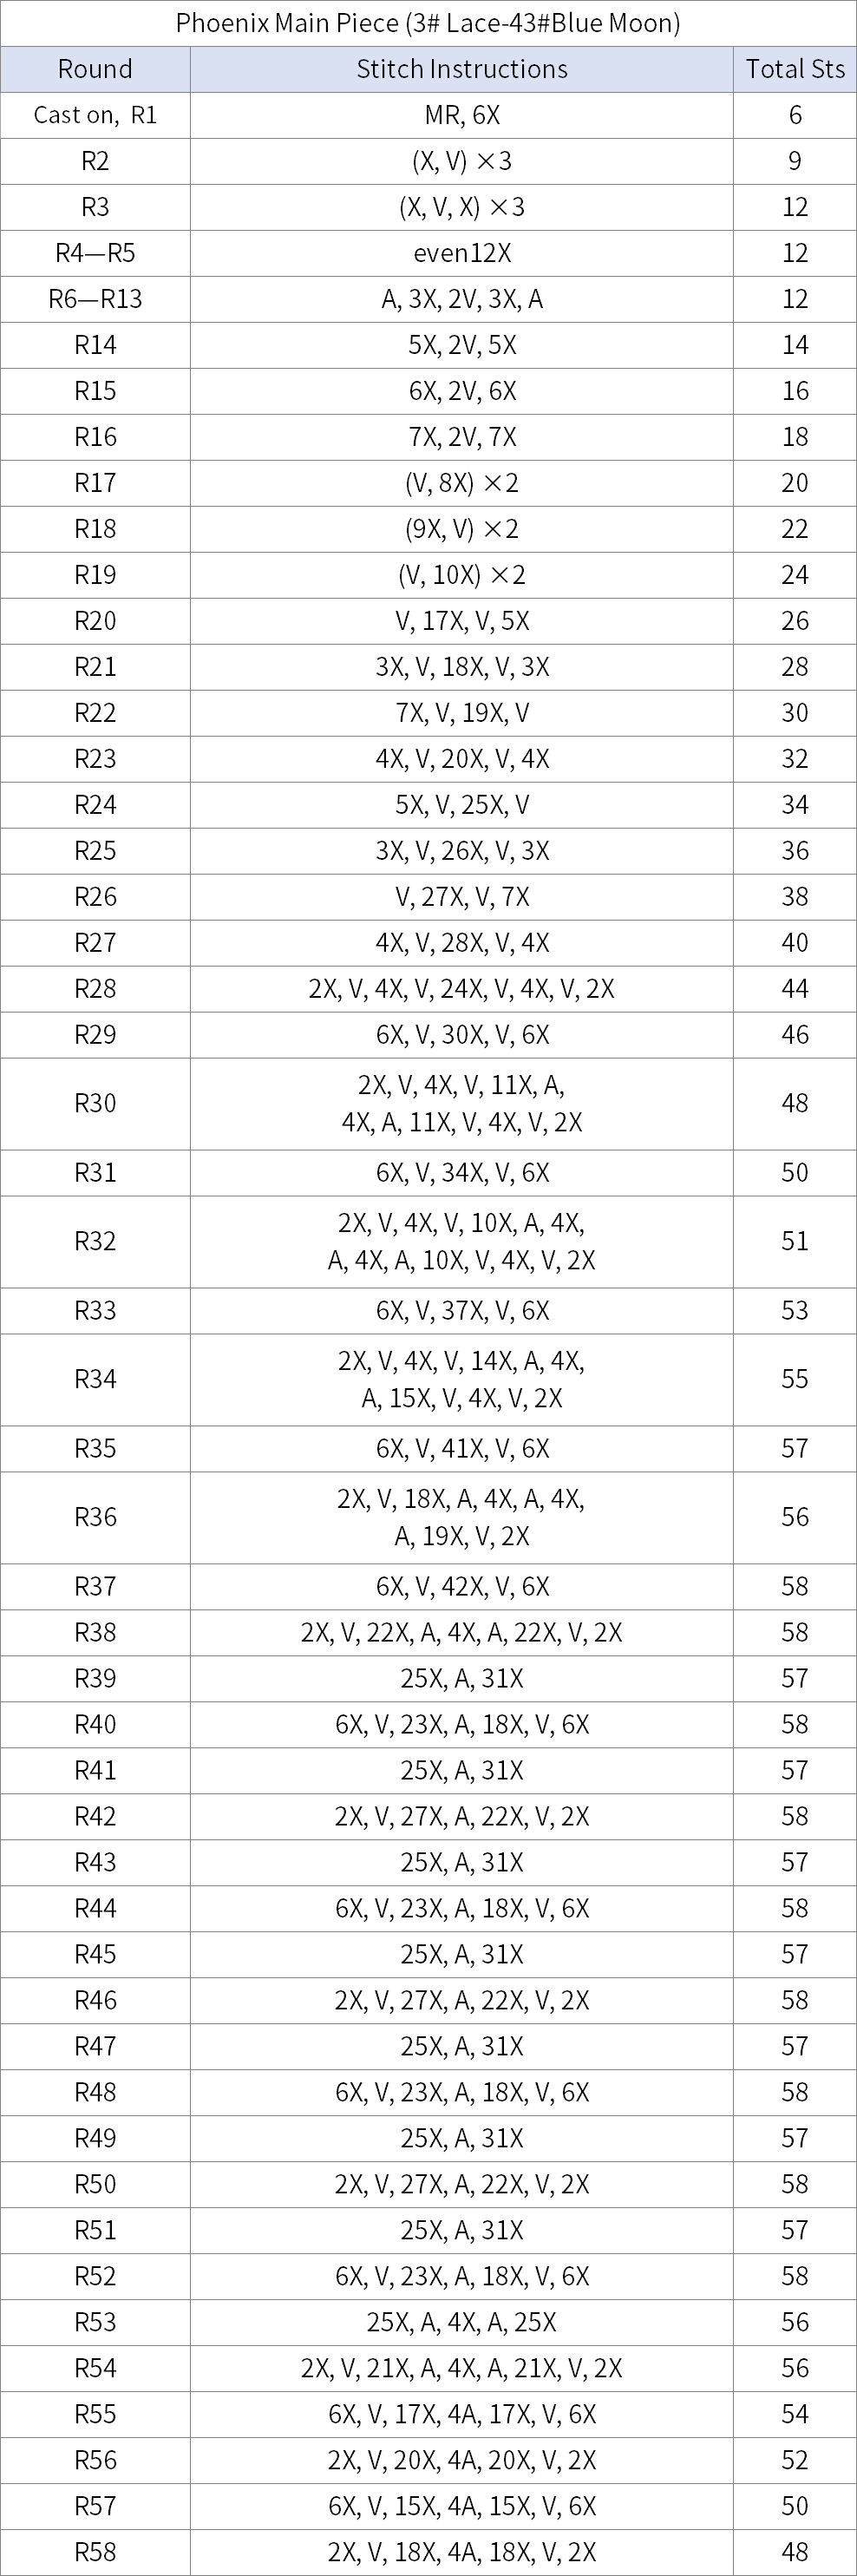
Part 1 Phoenix Main PieceA
The main piece of the phoenix includes the phoenix body, facial features, and decorations.
Step 1 Phoenix BodyA1 01' 04'' (Part 1)
The phoenix body is started with the adjustable magic ring, and work in rounds counterclockwise. During the process, you need to add shaping wire and fiberfill. Please refer to the video demonstration for specifics.
Step 2 Facial FeaturesA2 16' 03'' (Part 1)
Facial features include the mouth and eyes. Please refer to the video demonstration for specifics.
Step 3 DecorationsA3 21' 44'' (Part 1)
The decoration above and below the mouth is completed by threading beads onto wire. Please refer to the video demonstration for specifics.
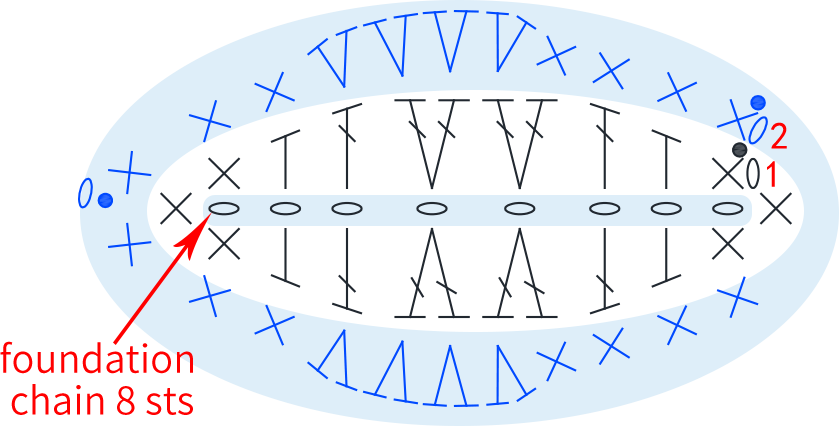
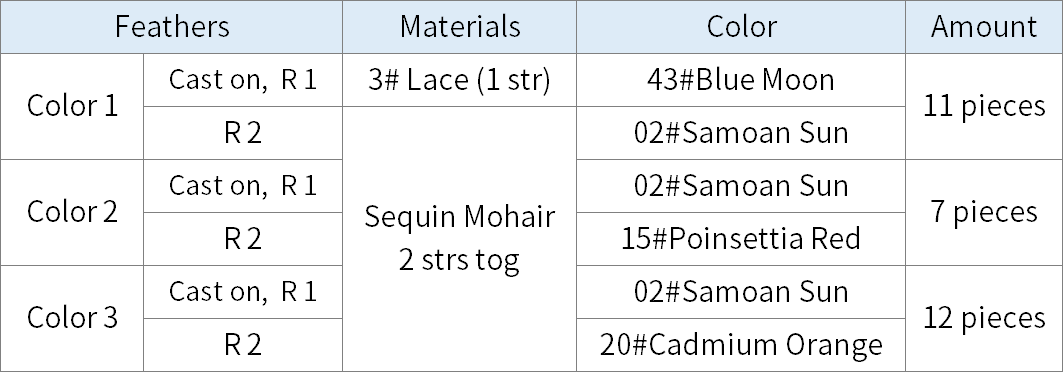
Part 2 FeathersB 26' 38'' (Part 1)
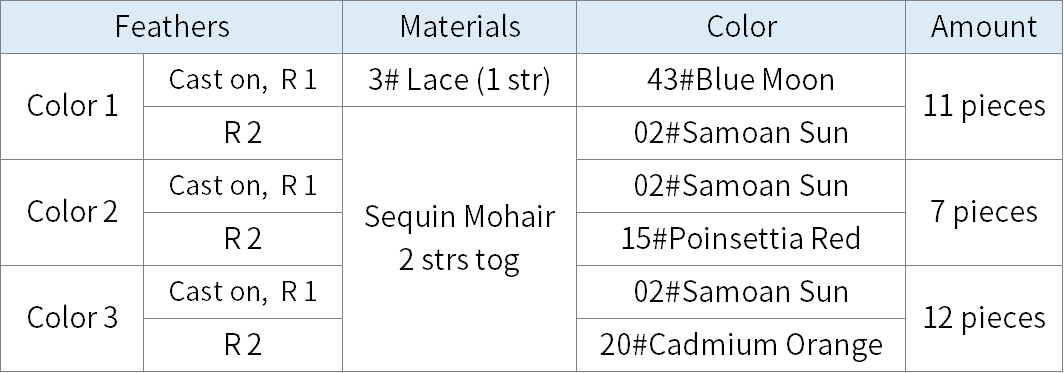
The feather starts with a foundation chain and work in rounds counterclockwise along the chains. When crocheting the second round, you need to weave in thin wire and add beads. Please refer to the video demonstration for details.
Part 3 Feather BranchesC
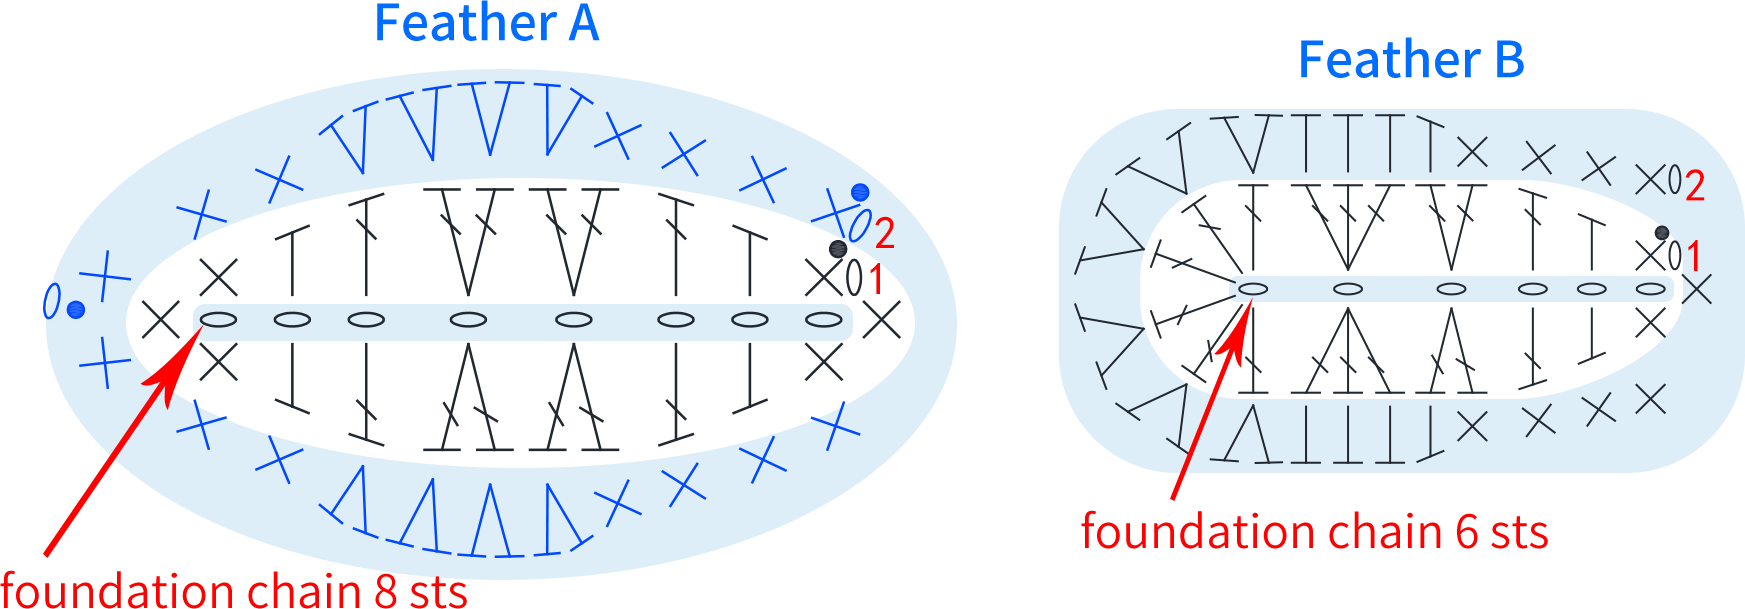
The feather branch includes feather A, feather B, and the branches. Crochet each part separately and then assemble them together.
Step 1 Feather AC1 and Feather BC2 38' 36'' (Part 1)
For Feather A and Feather B, we will start with a foundation chain, then crochet in rounds counterclockwise, wrapping the wire as we go. Please refer to the video demonstration for details.

Step 2 BranchesC3 44' 18'' (Part 1)
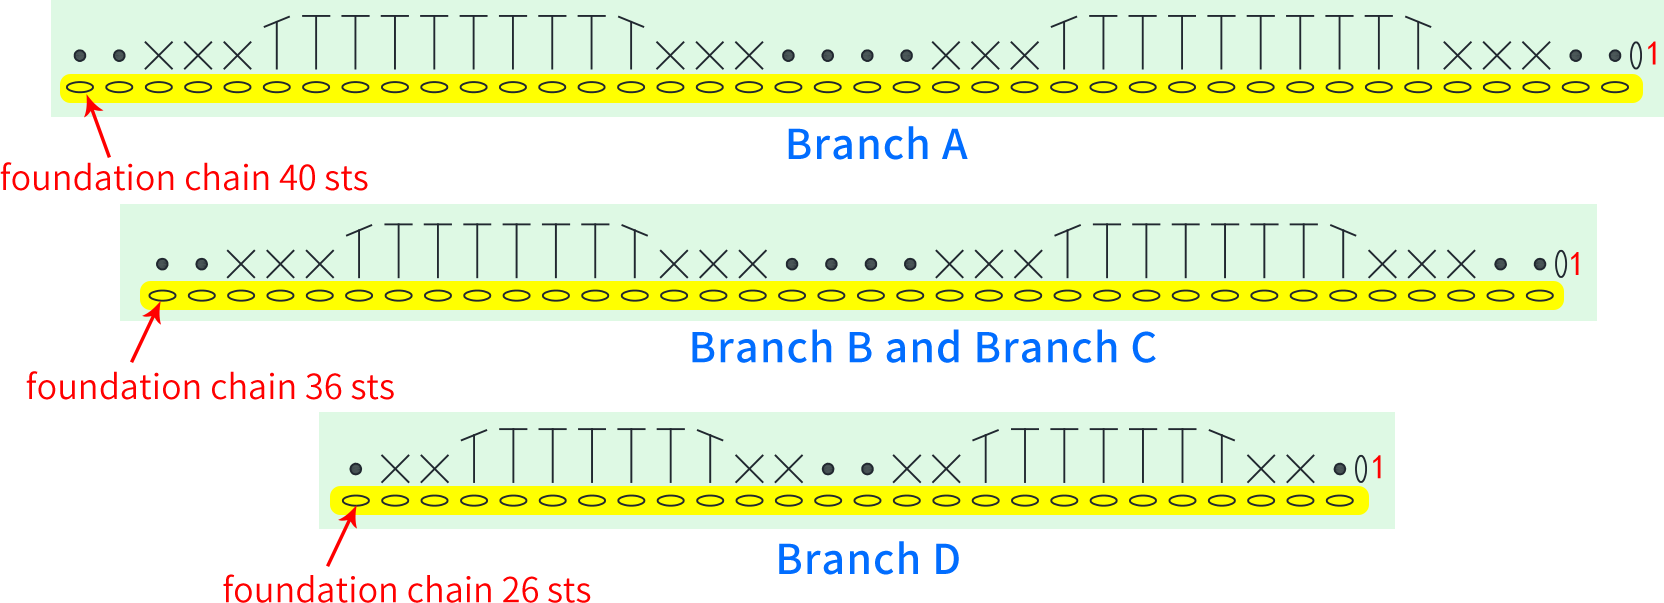
There are four types of feather branches: Branch A, Branch B, Branch C, and Branch D. The crochet method is the same for all, but the stitch count differs. During the process, wire needs to be added to all of them, and beads need to be added to Branch A and Branch B. Please refer to the video demonstration for details.
Step 3 AssembleC4 51' 18'' (Part 1)
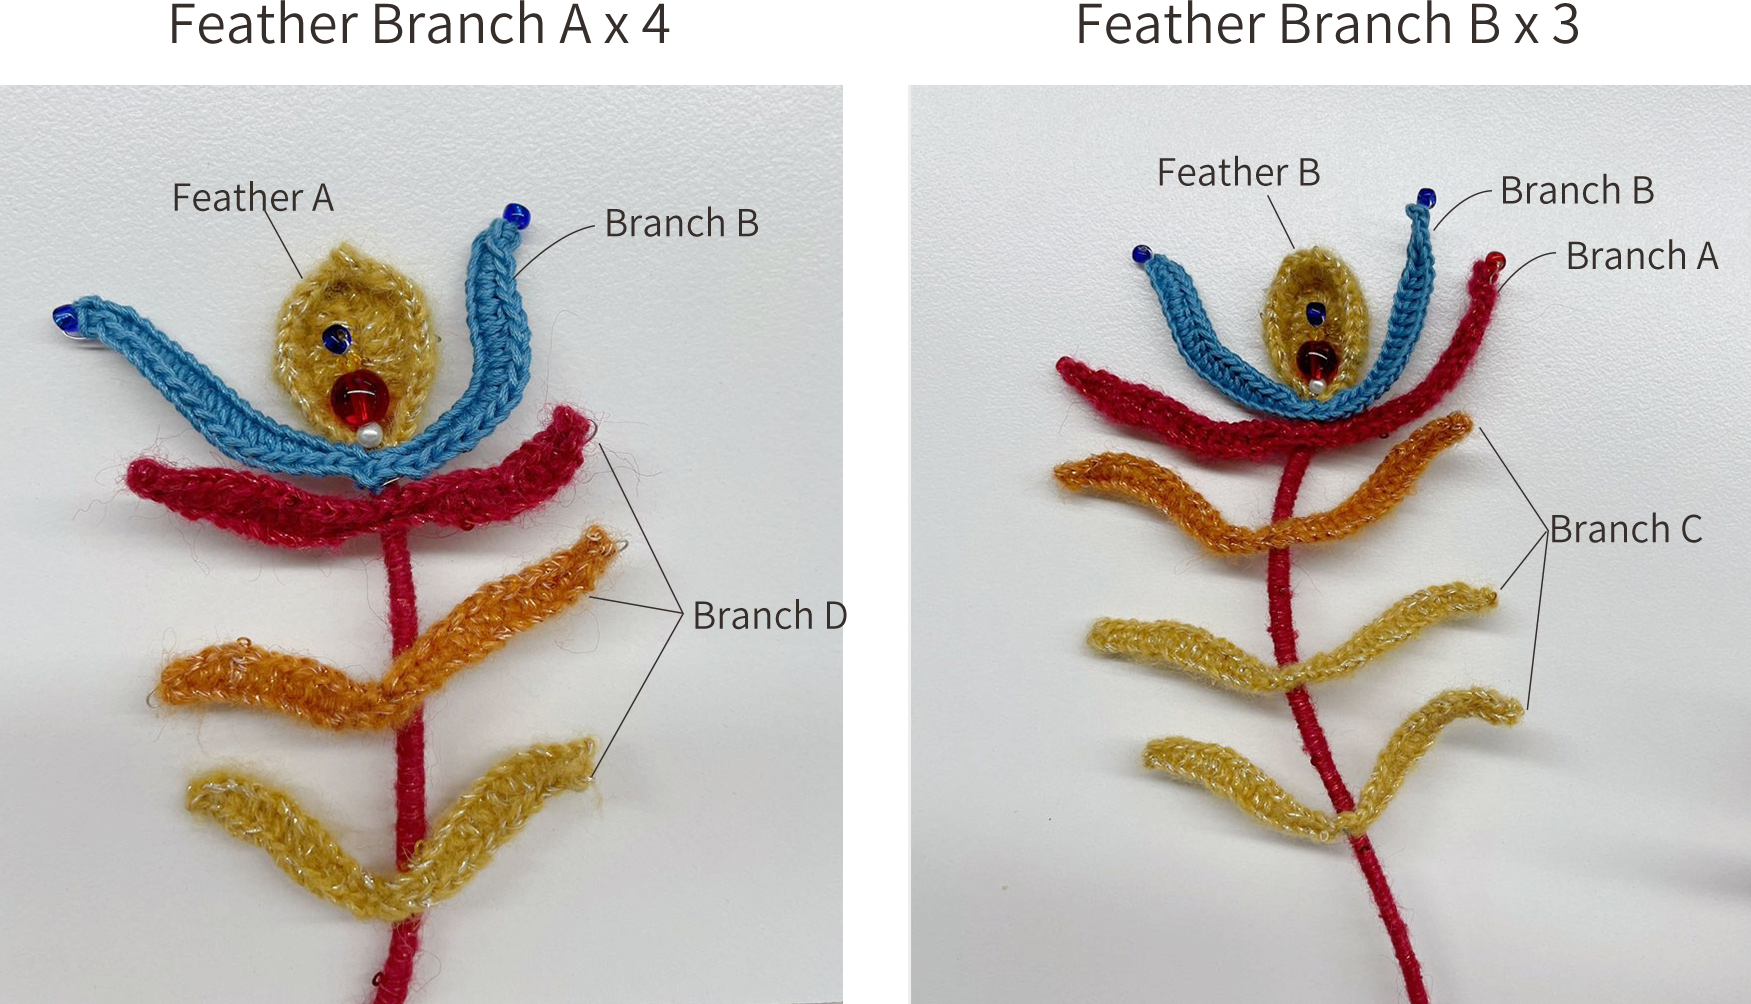
The feather branches include Feather Branch A and Feather Branch B. The assembly method is the same, but the size and quantity of the feathers and branches differ. Please refer to the video demonstration for specifics.
Part 4 Peony BranchesD
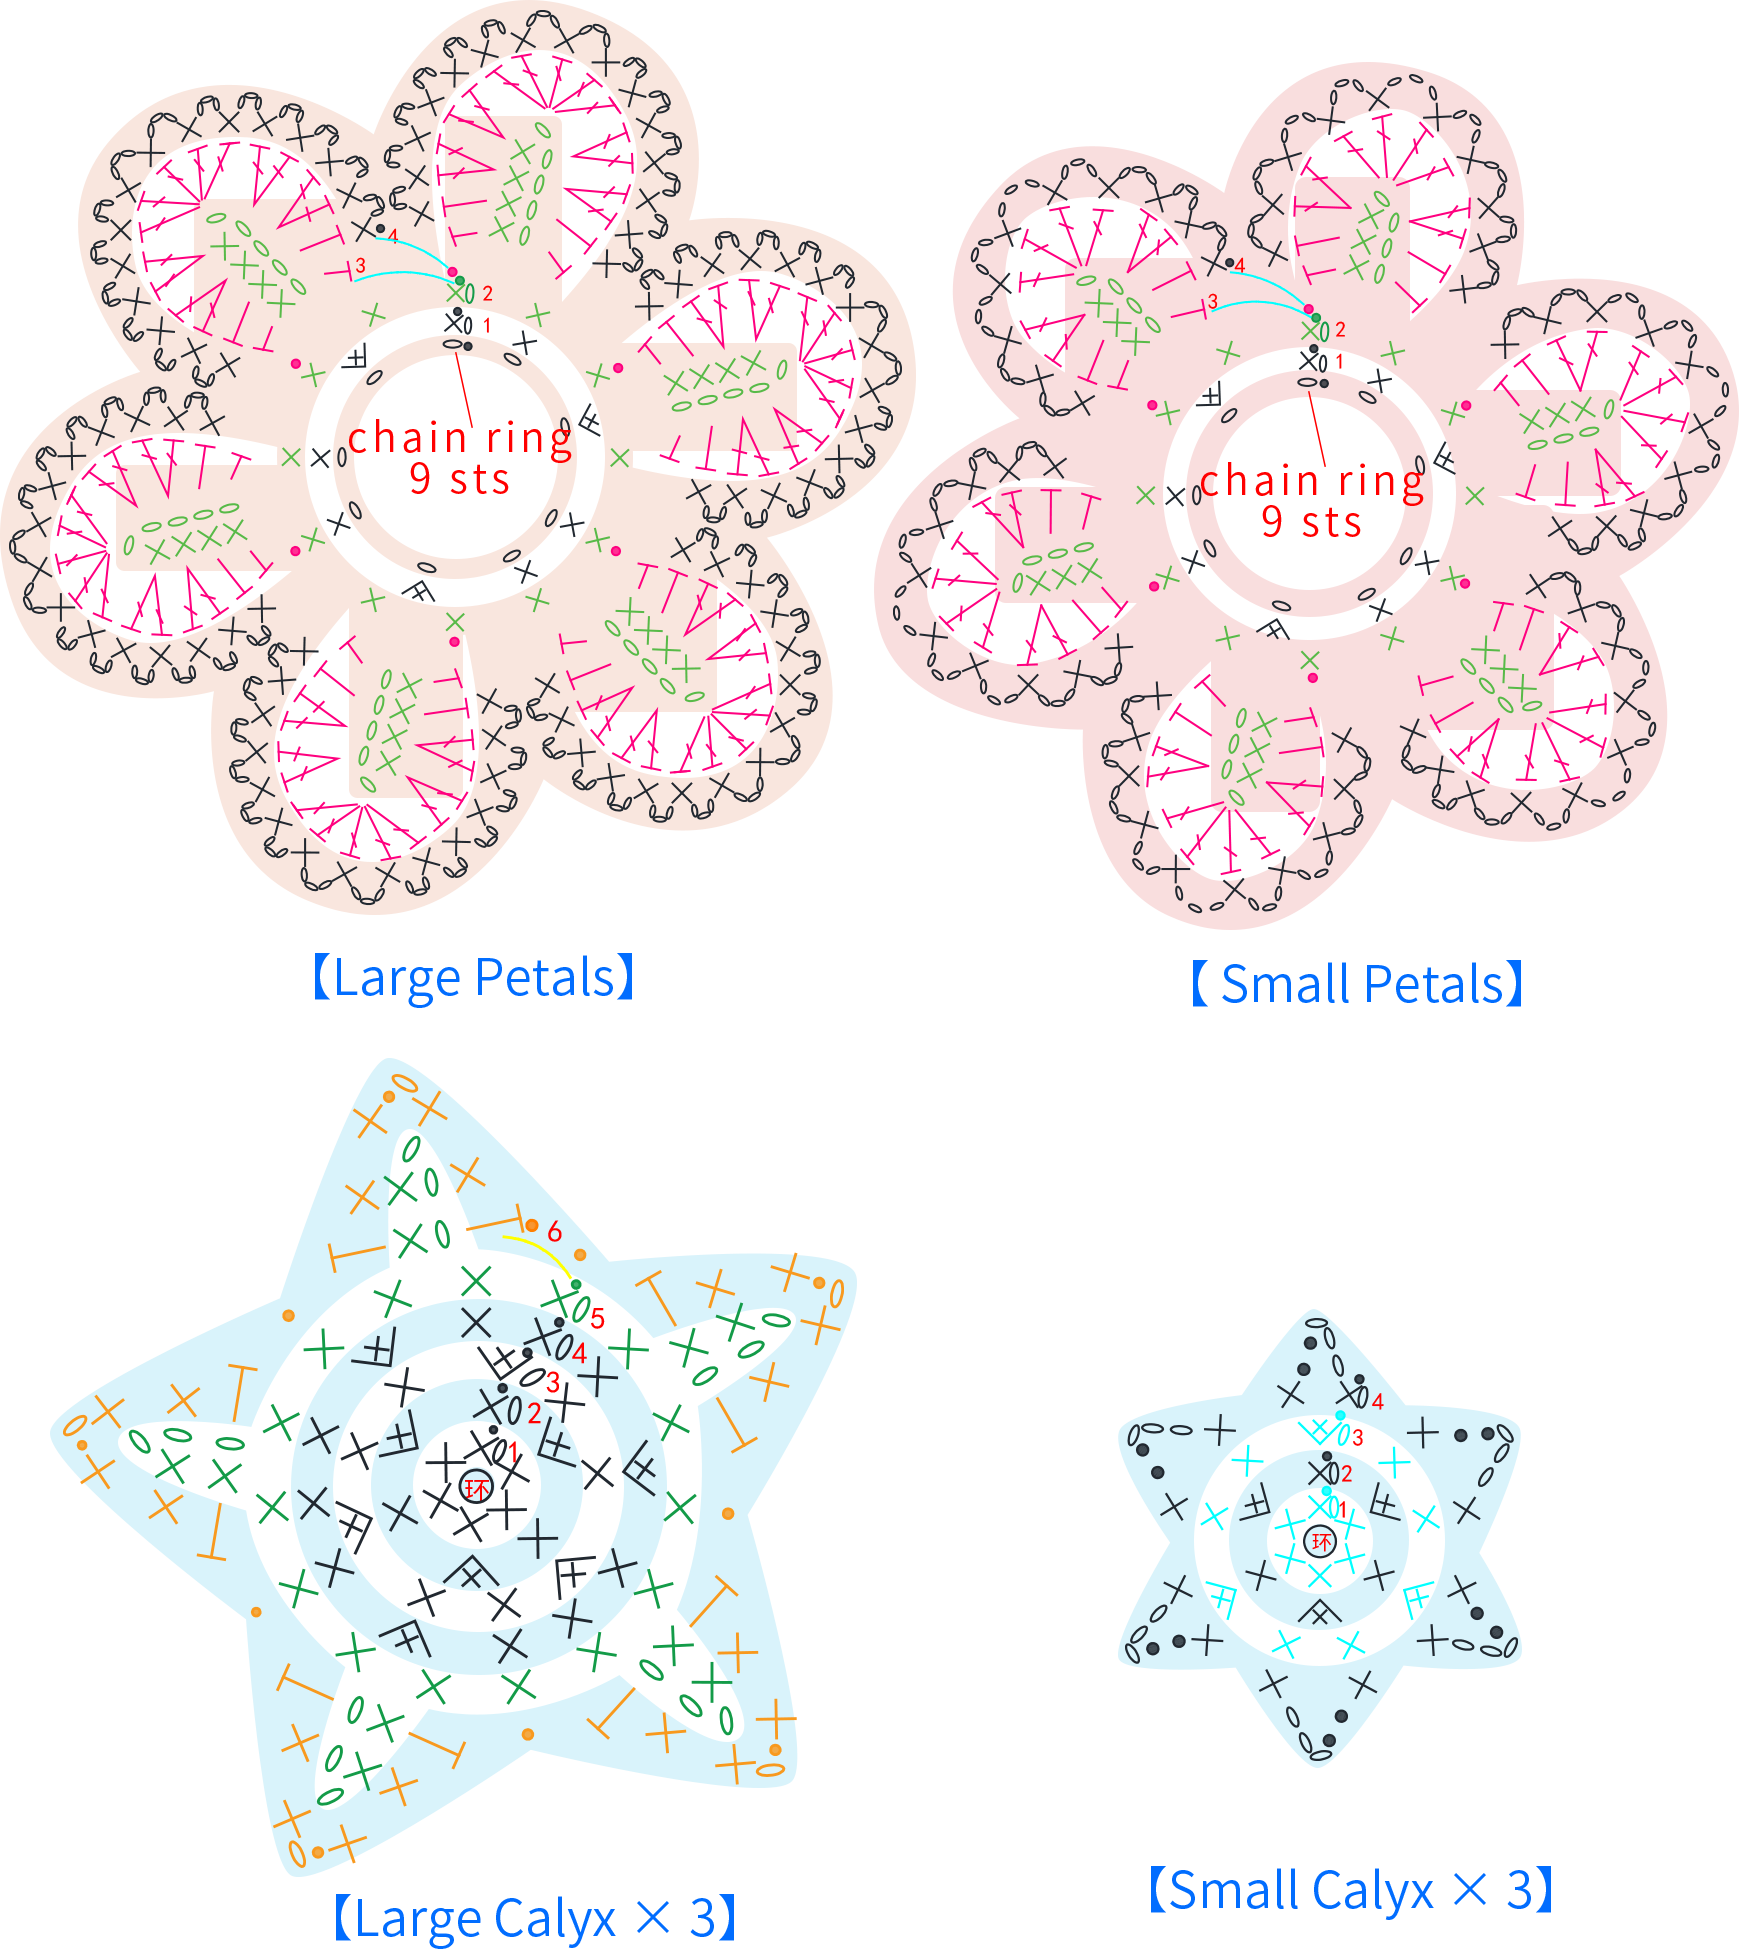
The peony flower branch includes large flowers, small flowers, and leaves. Crochet them separately and then assemble.
Step 1 Large FlowersD1 and Small FlowersD2 00' 25'' (Part 2)
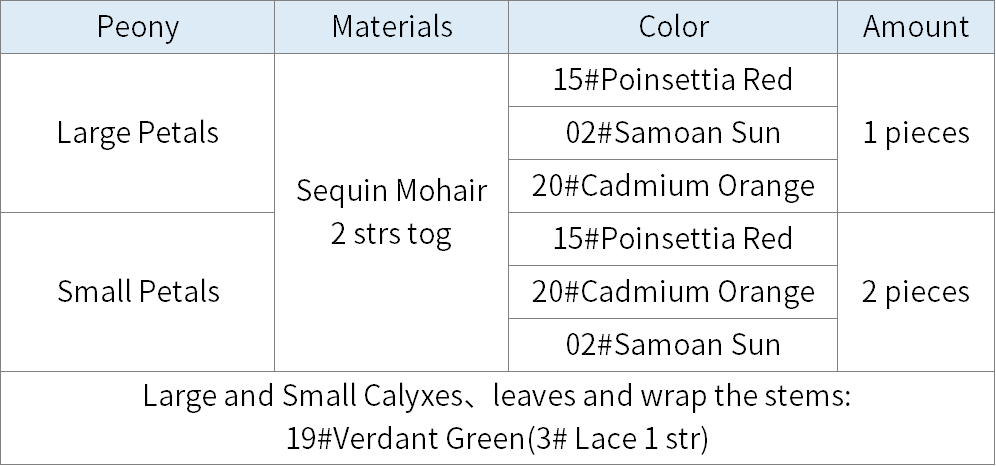
The large flowers include large calyces, large petals, and small petals; the small flowers include small calyces and small petals. The calyces are started with a magic ring and crocheted in rounds counterclockwise. The petals are made using the chain ring method, and each is crocheted separately before assembling. Please refer to the video demonstration for details.
Step 2 LeavesD3 28' 46'' (Part 2)
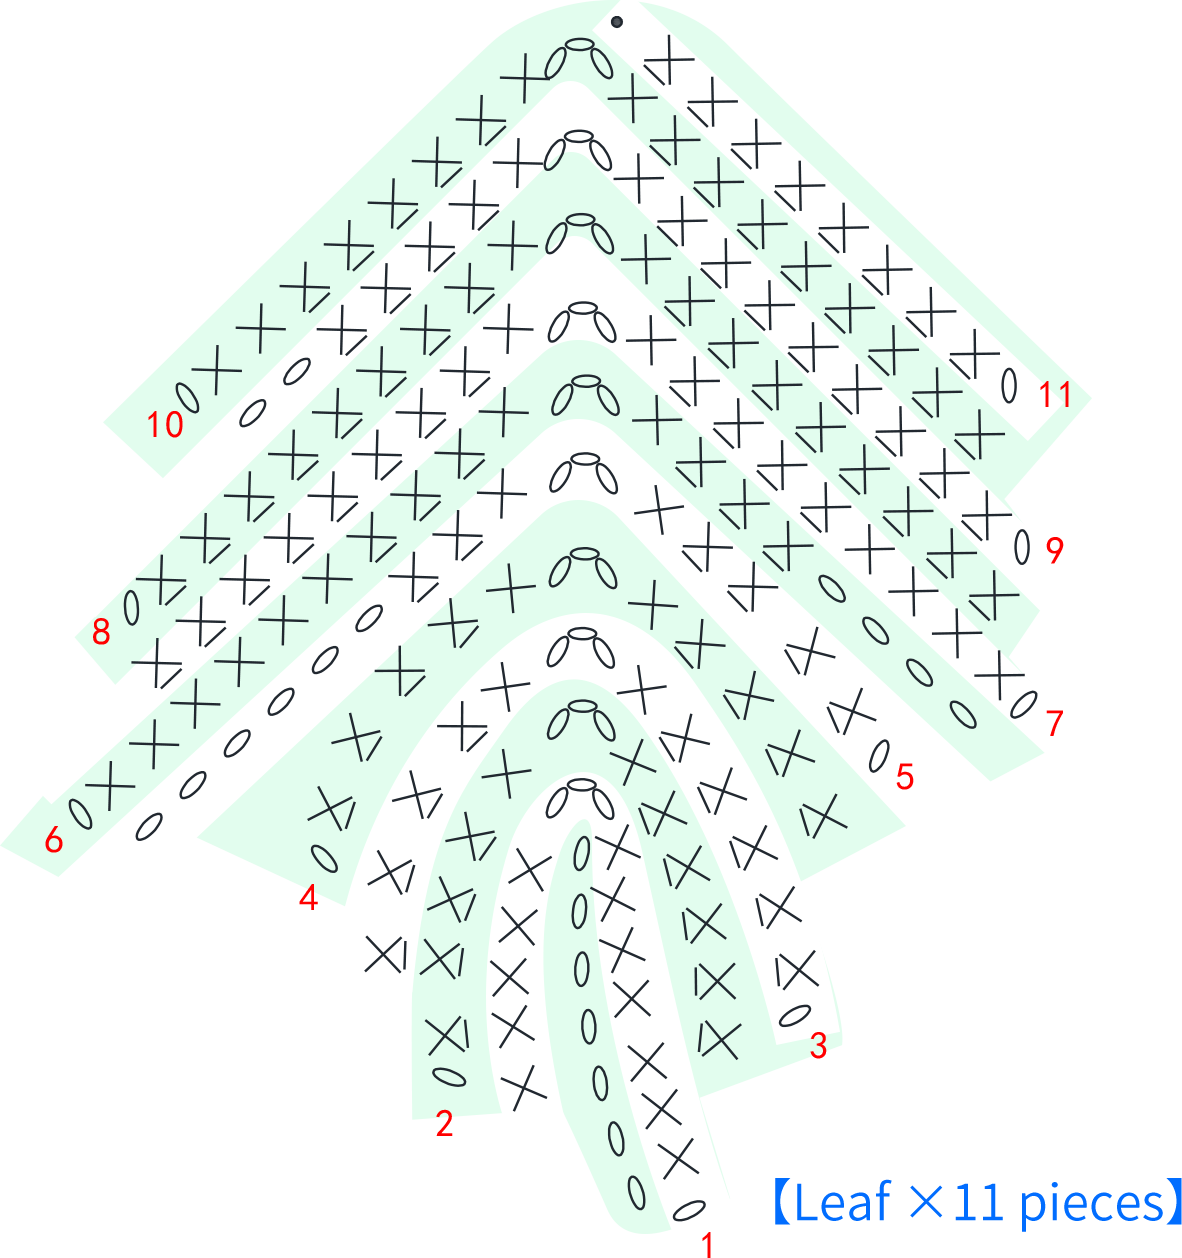
The leaf starts with a foundation chain, working back and forth in rows along the chain. Please refer to the video demonstration for details.
Step 3 AssembleD4 44' 38'' (Part 2)
The peony flower branches include Branch One, Branch Two, and Branch Three. The assembly method is identical, but the number of flowers and leaves differs. Please refer to the video demonstration for specifics.

Part 5 AssemblyE 50' 18'' (Part 2)
First, insert the flower branches into the main body of the phoenix, then attach the feathers and other elements. Please refer to the video demonstration for specifics.
Part 6 PackagingF 56' 16'' (Part 2)
Once everything is completed, proceed with the packaging. Please refer to the video demonstration for specifics.
Made by the community