Clothes
Bamboo Rain
Project preview
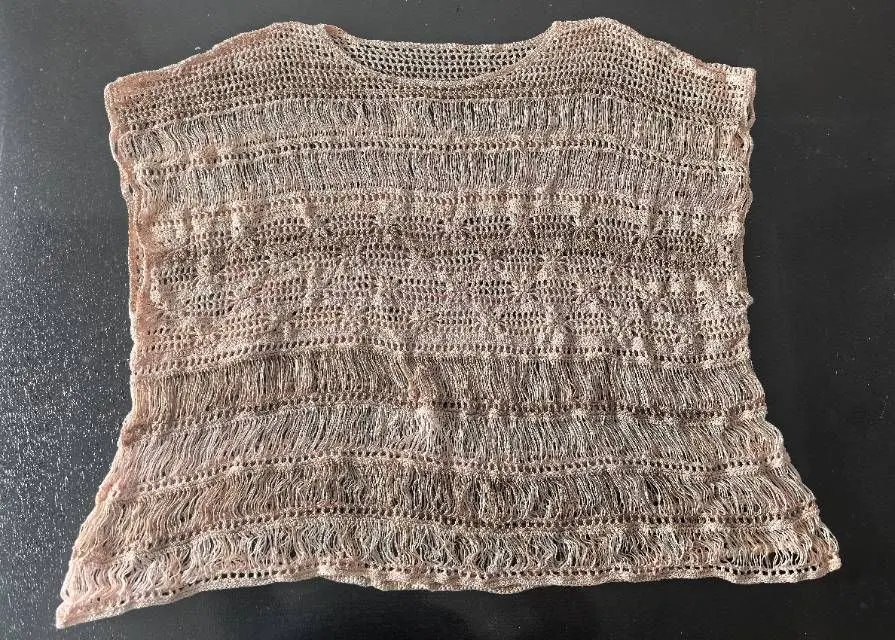
See the finished project
Pattern format
Instructions
Watch and follow
Video tutorial
| Style | Yarn | Color |
|---|---|---|
| Frost Rain Version | Combed 5# Lace Variegated |  503#Frost Rain 503#Frost Rain |
| Frost Rain Version | Combed 5# Lace Variegated | 503#Frost Rain x 4 |
| Orchid Bloom Version | Combed 5# Lace |  48#Orchid Bloom x 4 48#Orchid Bloom x 4 |
| Orchid Bloom Version | Combed 5# Lace | 48#Orchid Bloom x 5 |
| Cloud Dancer Version | Combed 5# Lace |  01# Cloud Dancer x 5 01# Cloud Dancer x 5 |
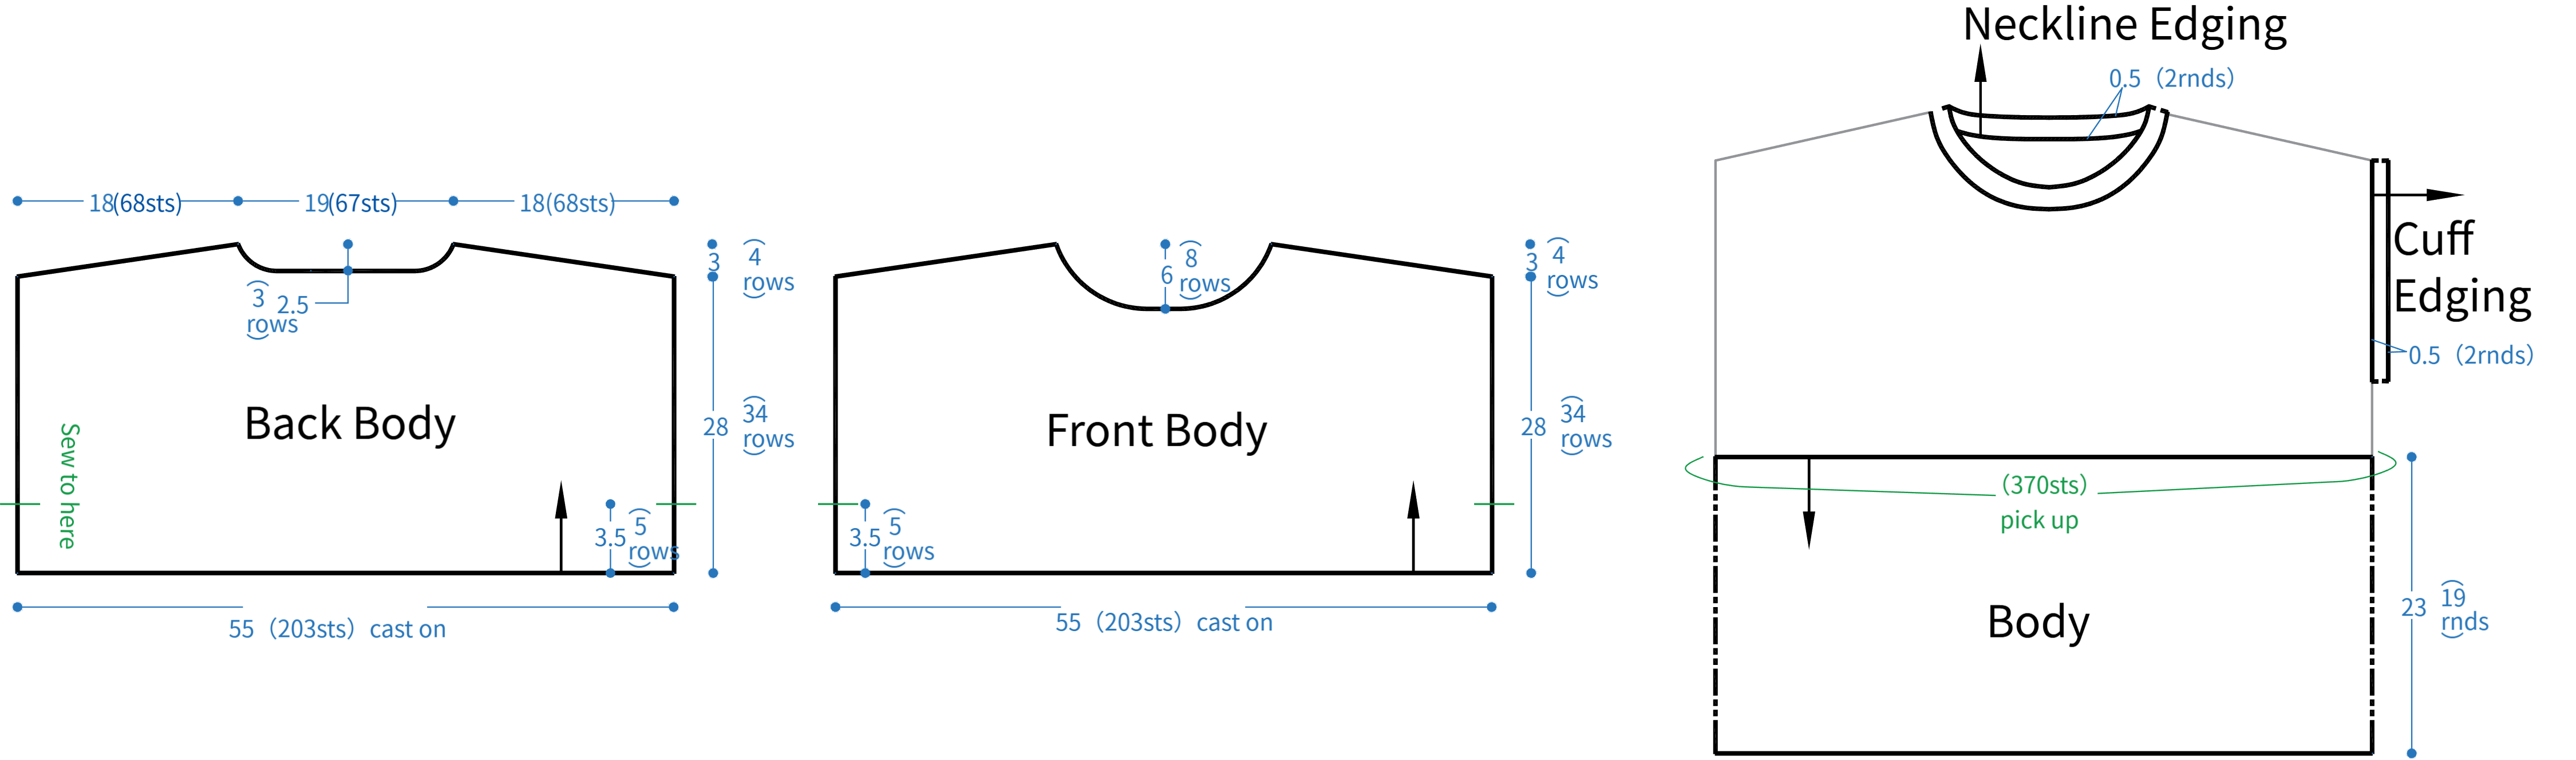
This cardigan consists of the front body, back body, sewing, body, and edging. First, complete the front and back bodies separately, then sew the shoulders and side seams together. After sewing is done, crochet the body along the lower edges of the front and back bodies, and finally crochet the edging at the corresponding positions.
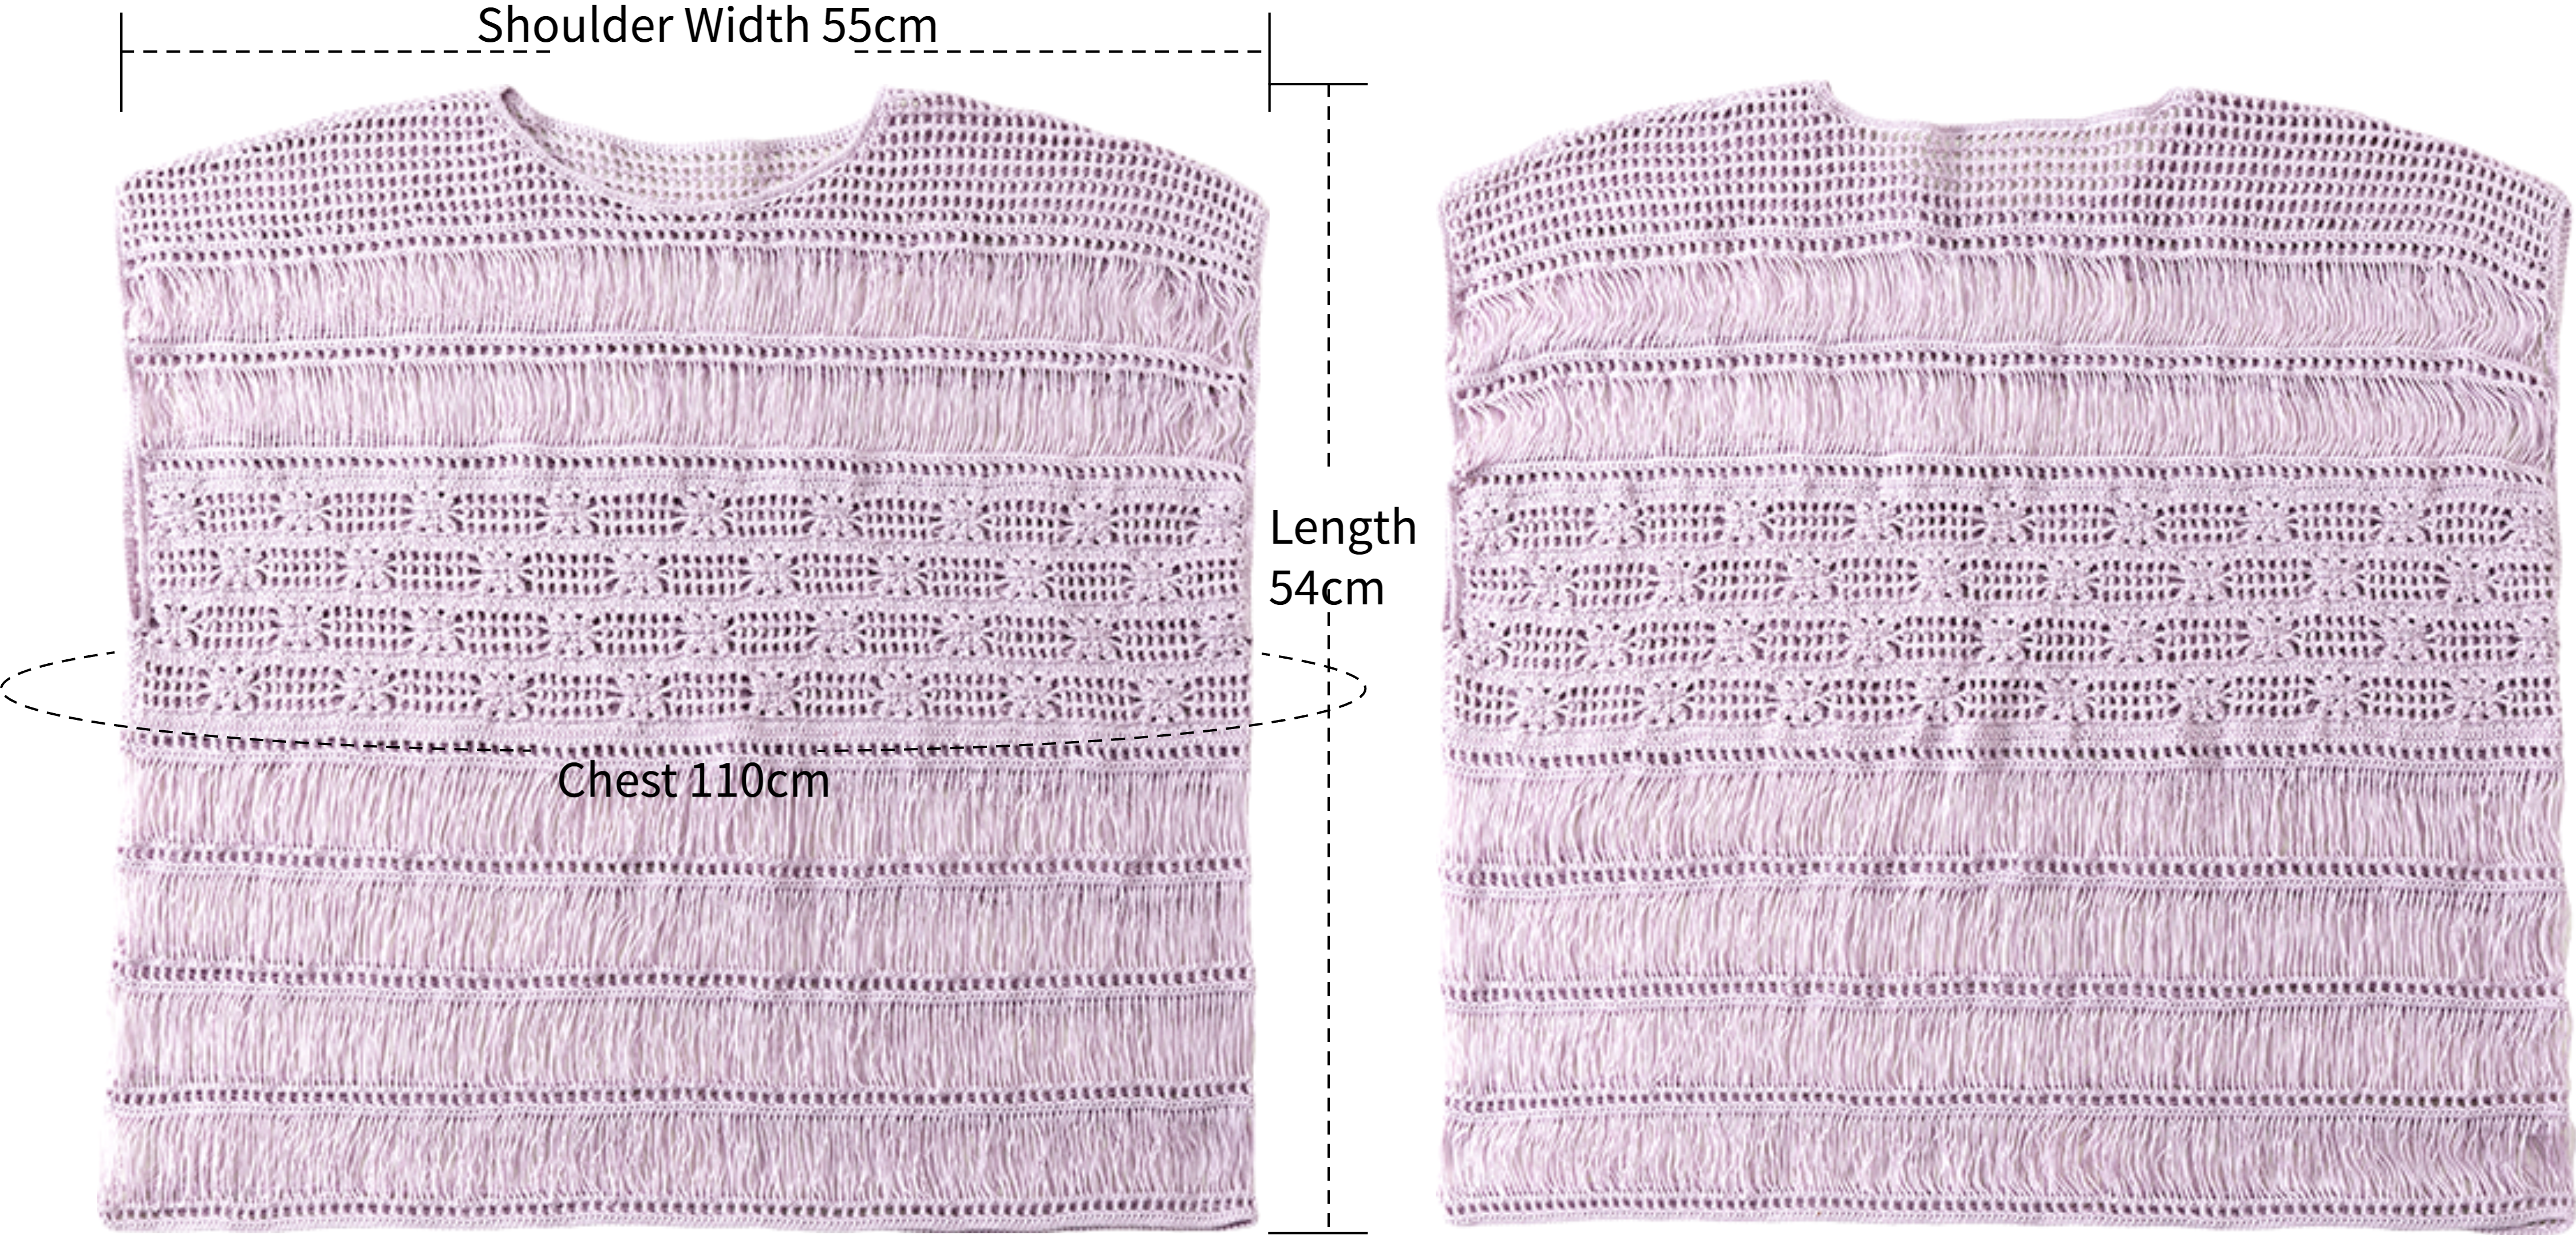
Note: Hand-measured, with a possible error of 1-2 cm. Due to differences in individual tension, the sample size is for reference only.
Yarn : Combed 5# Lace. Tools: 2.0 mm crochet hook.

The tutorial demonstrates using the extra-large size as an example; for other sizes, please refer to the corresponding pattern.
Structure Diagram
Gauge Swatch
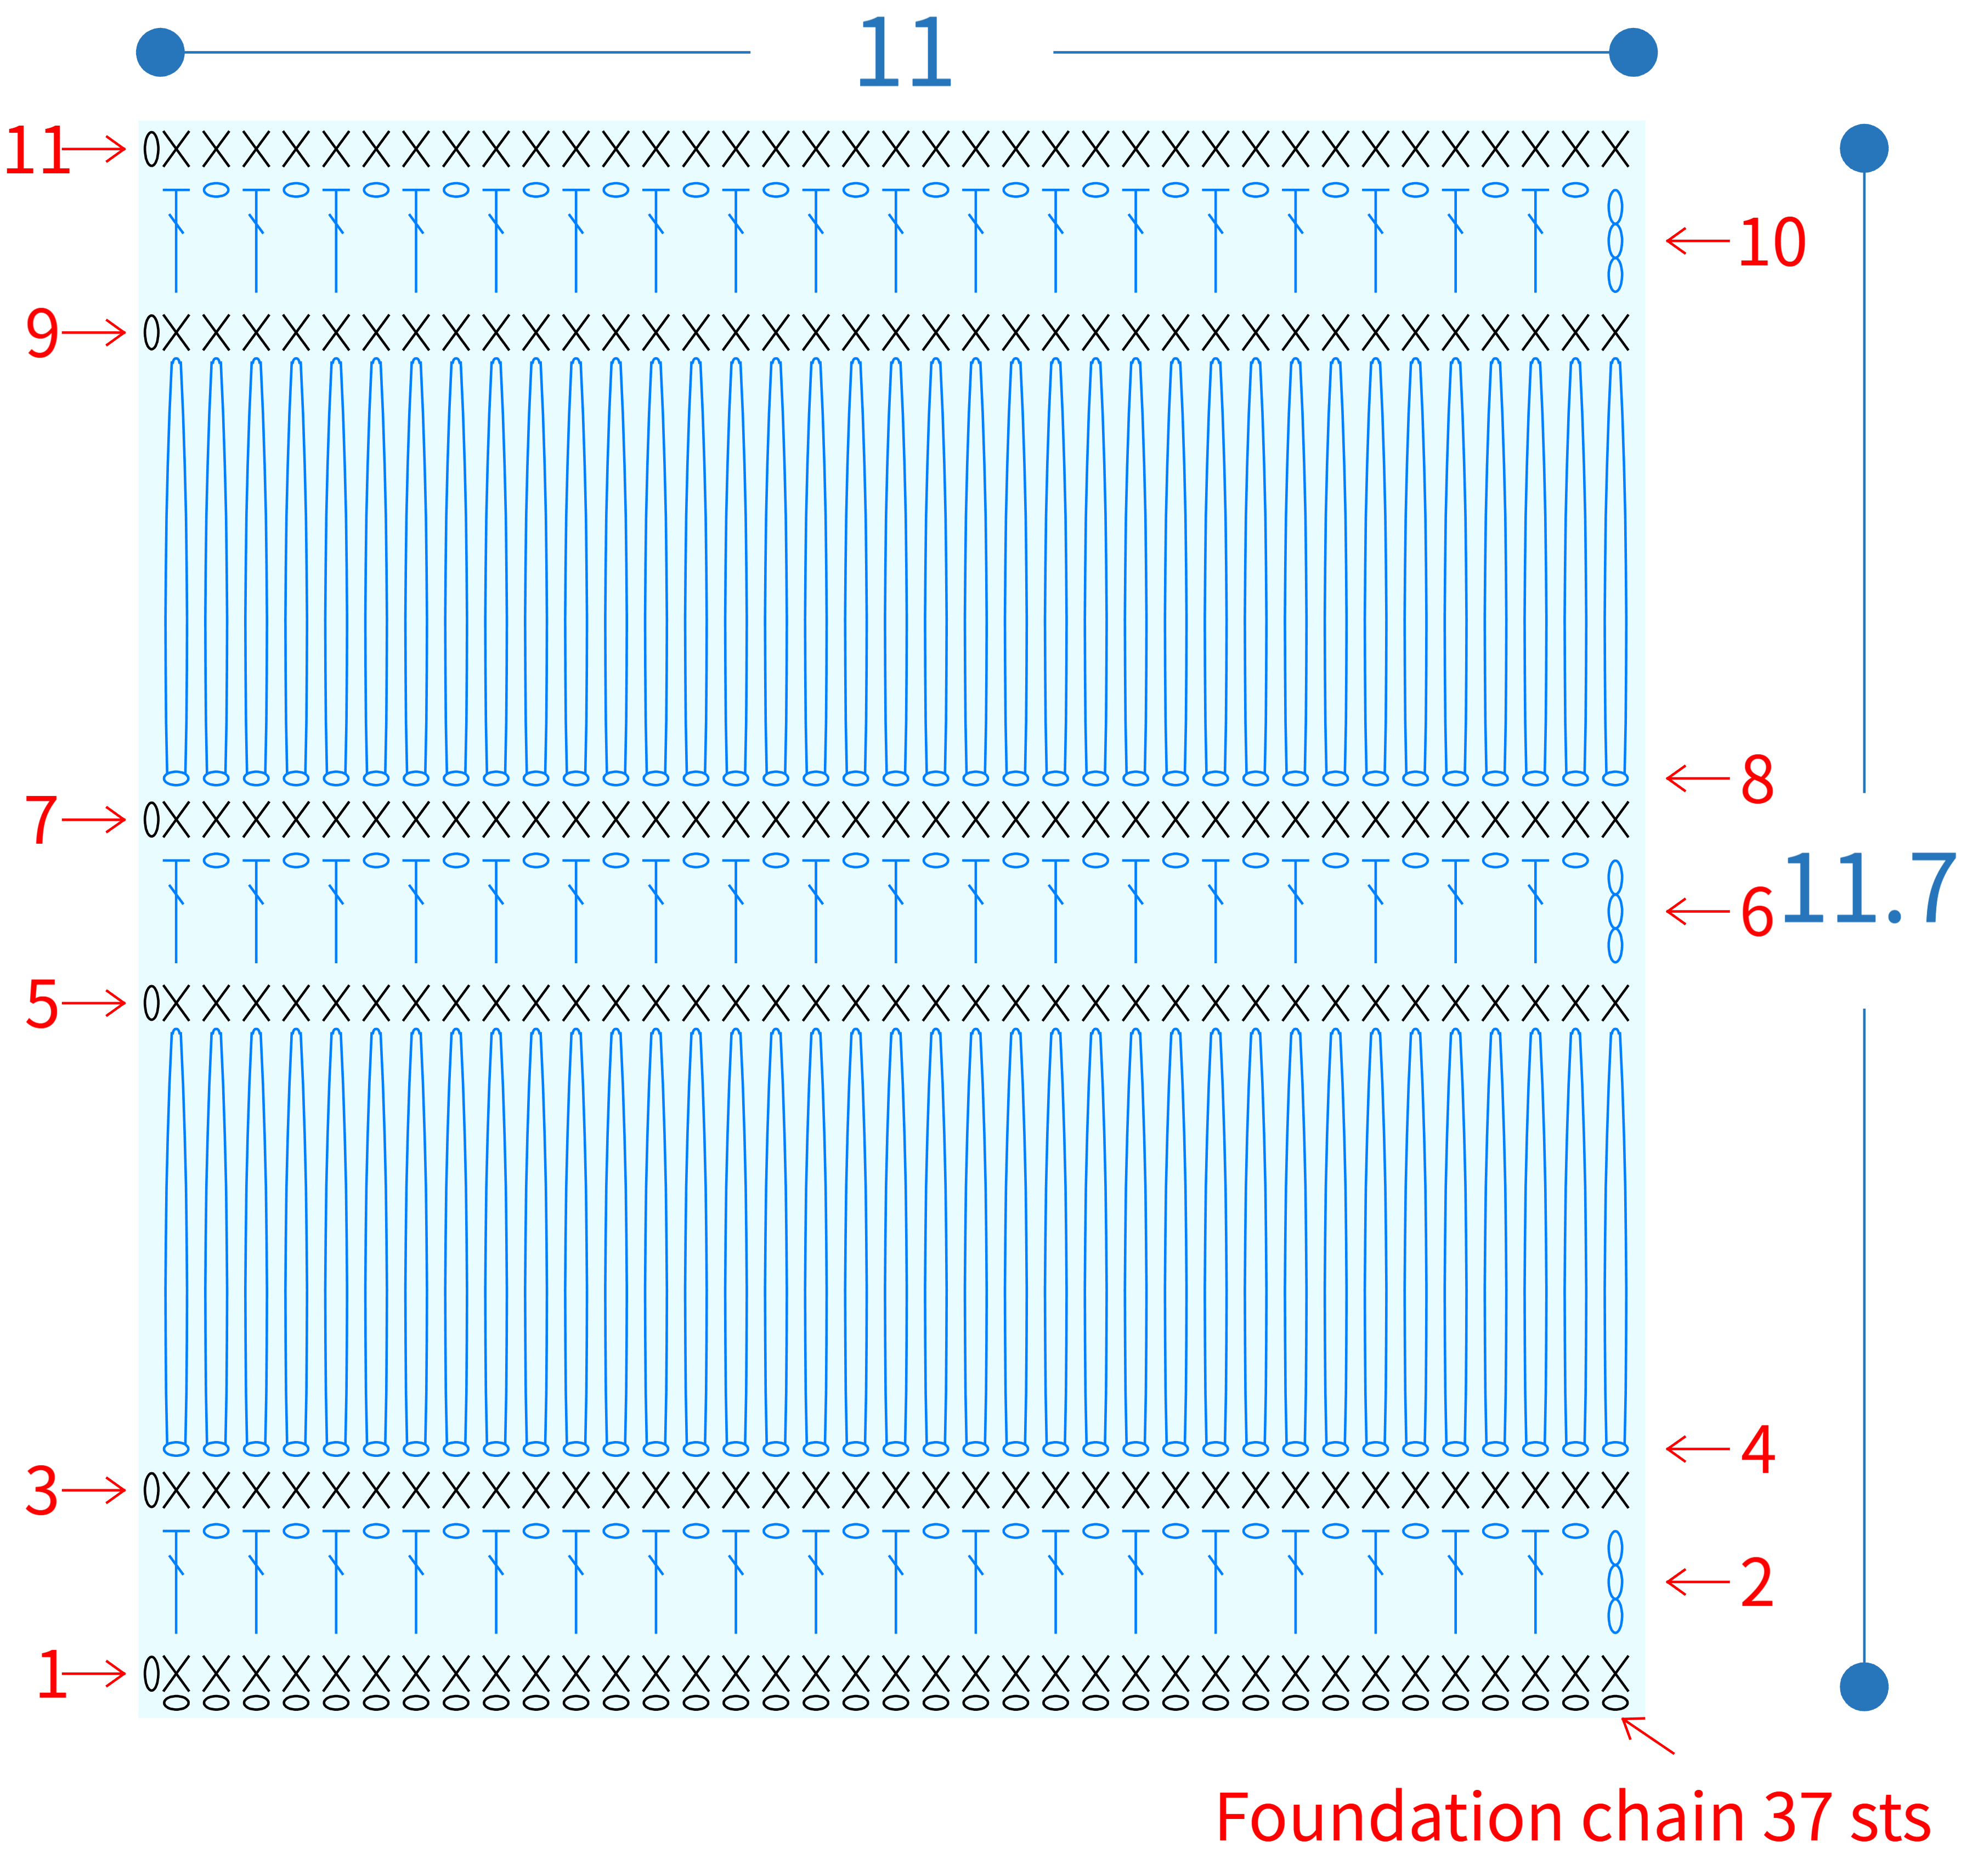
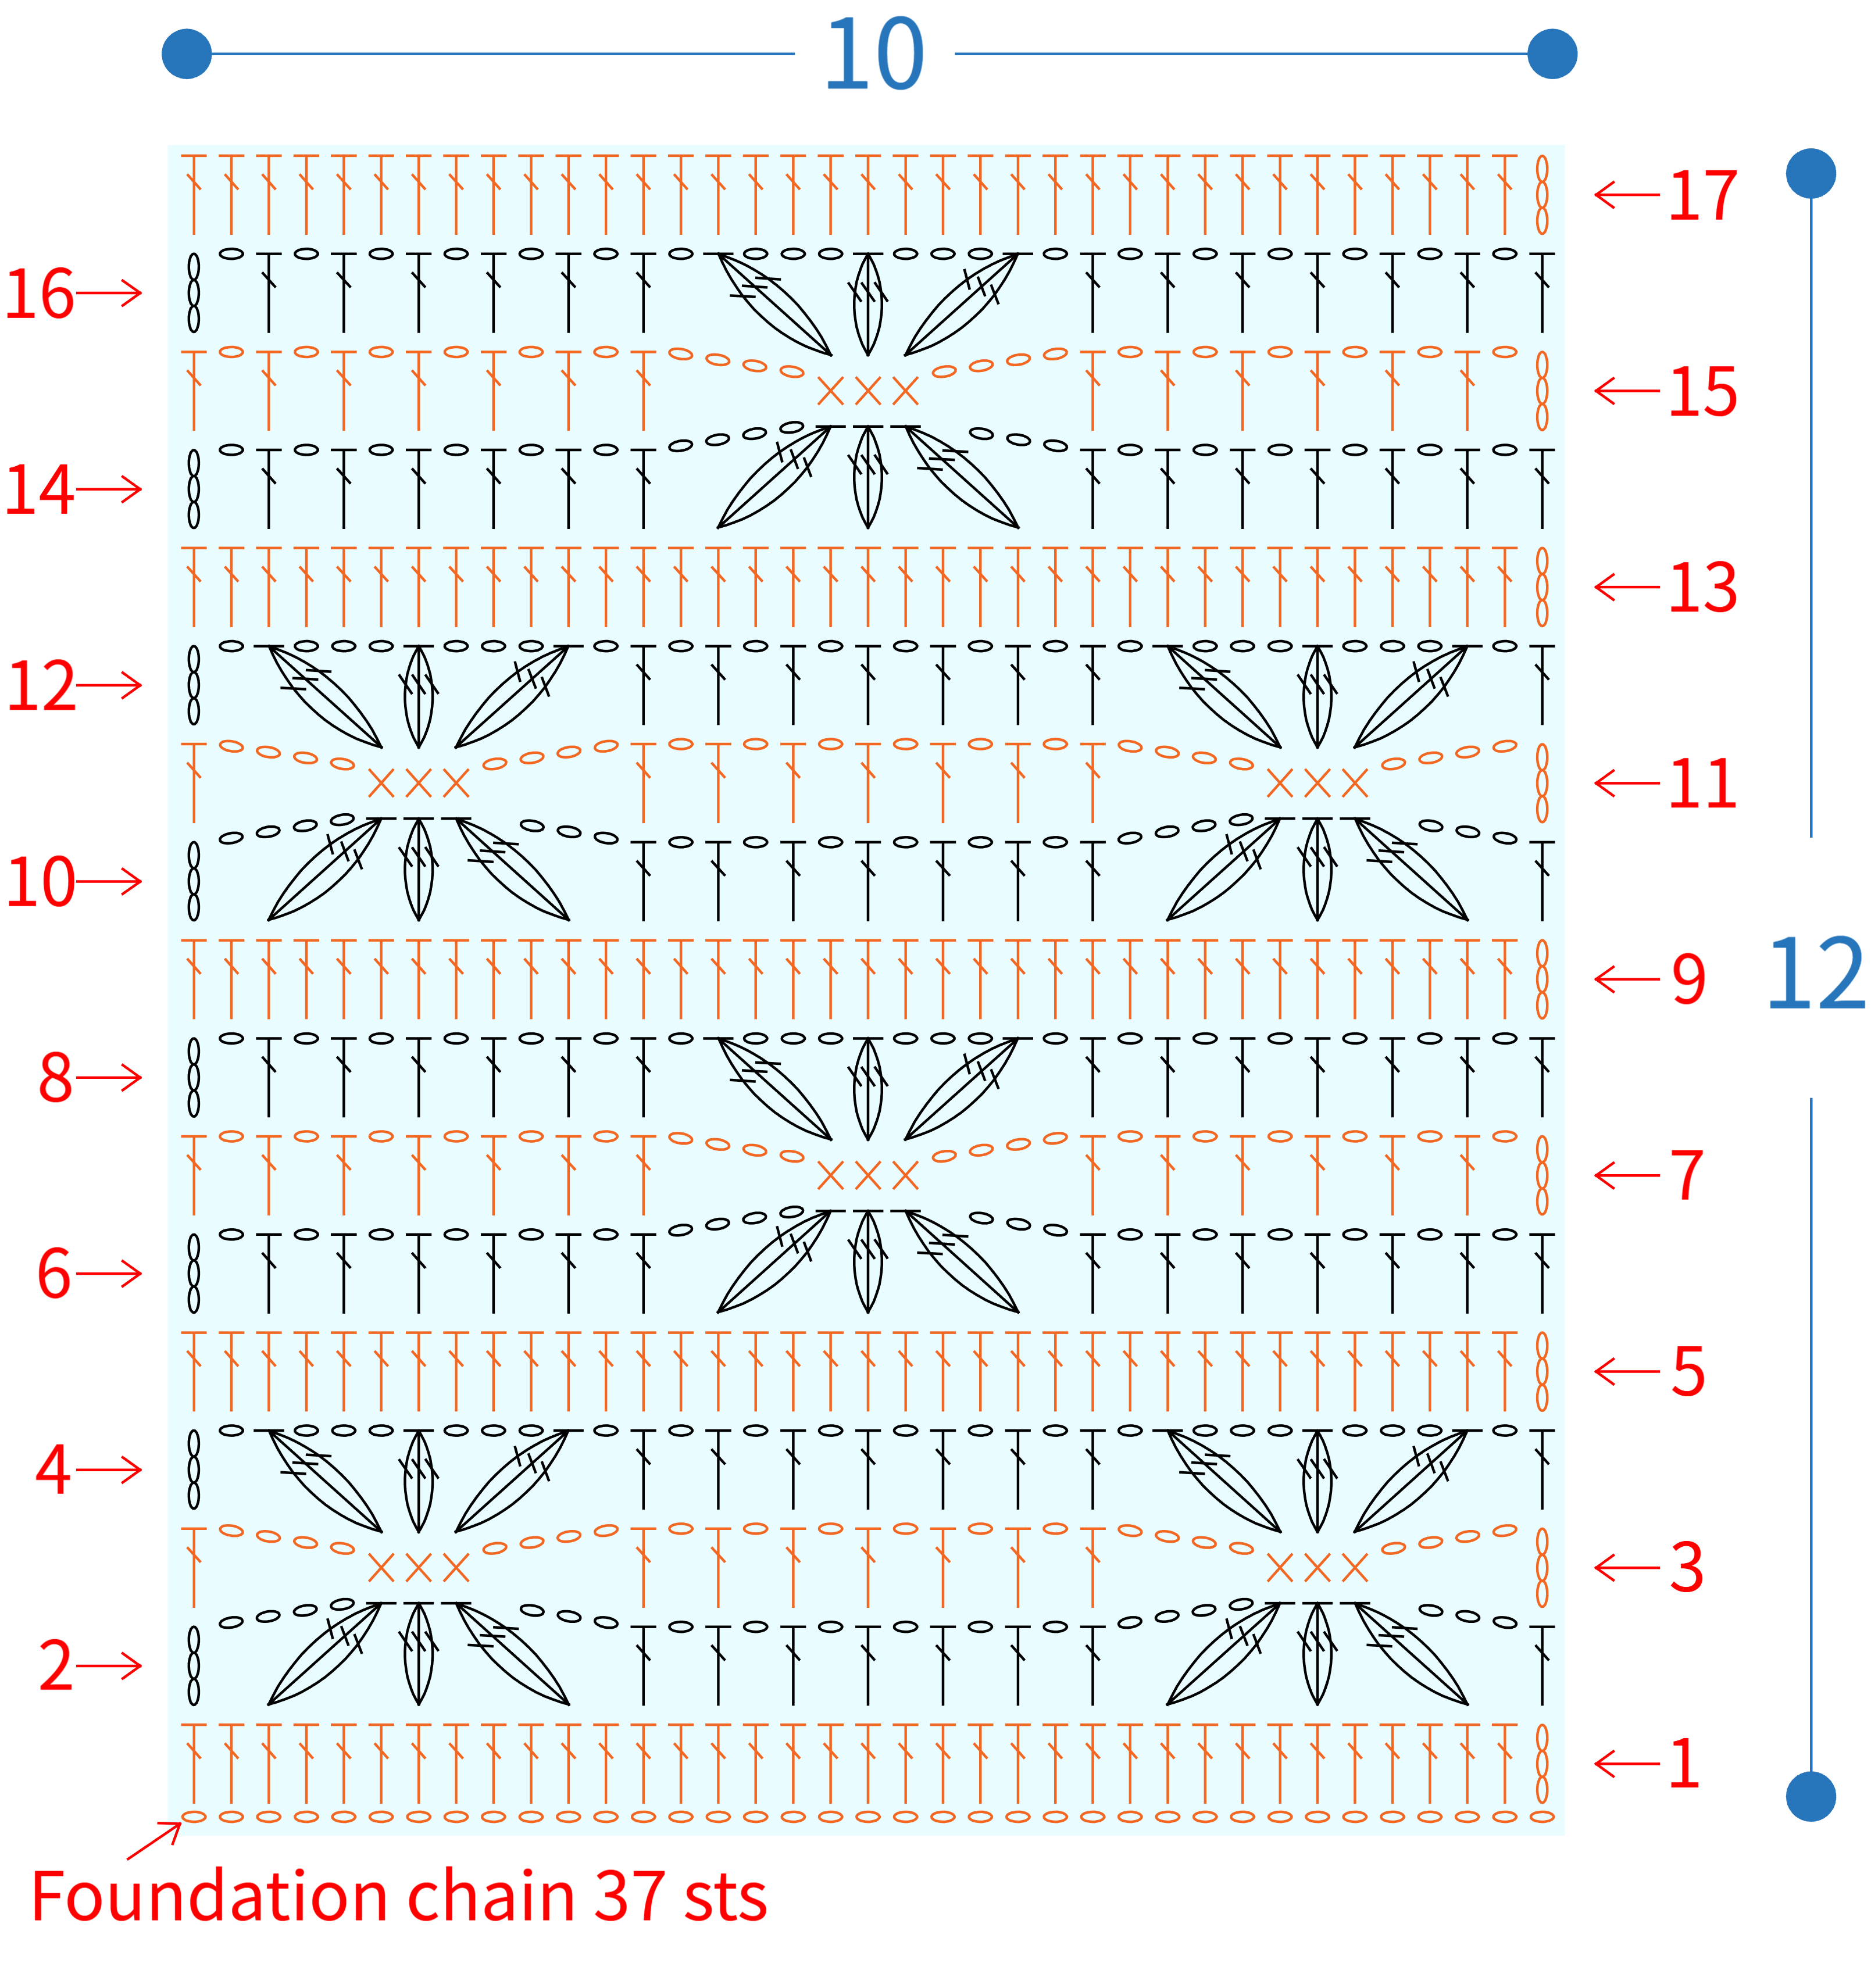





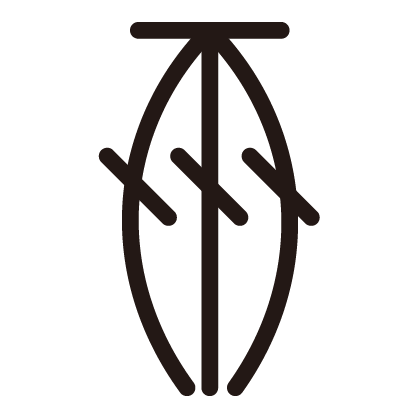


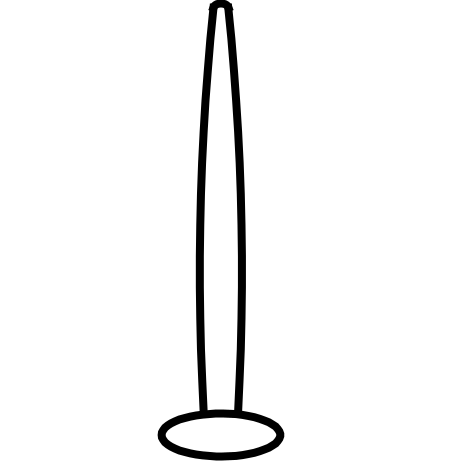
Note: 1. This pattern is making in Chinese crochet pattern terms, and the stitch name is written using American terminology. All measurements in charts are in cm.

PART 1 Front Body A 01' 34''
The front body is divided into the chest piece and the shoulder - part section. First, crochet the chest piece, which is divided into section 1 and section 2. Crochet section 1 first, then crochet section 2 on top of section 1. Once the chest piece is complete, crochet the shoulder - part section. Please refer to the video demonstration for more details.
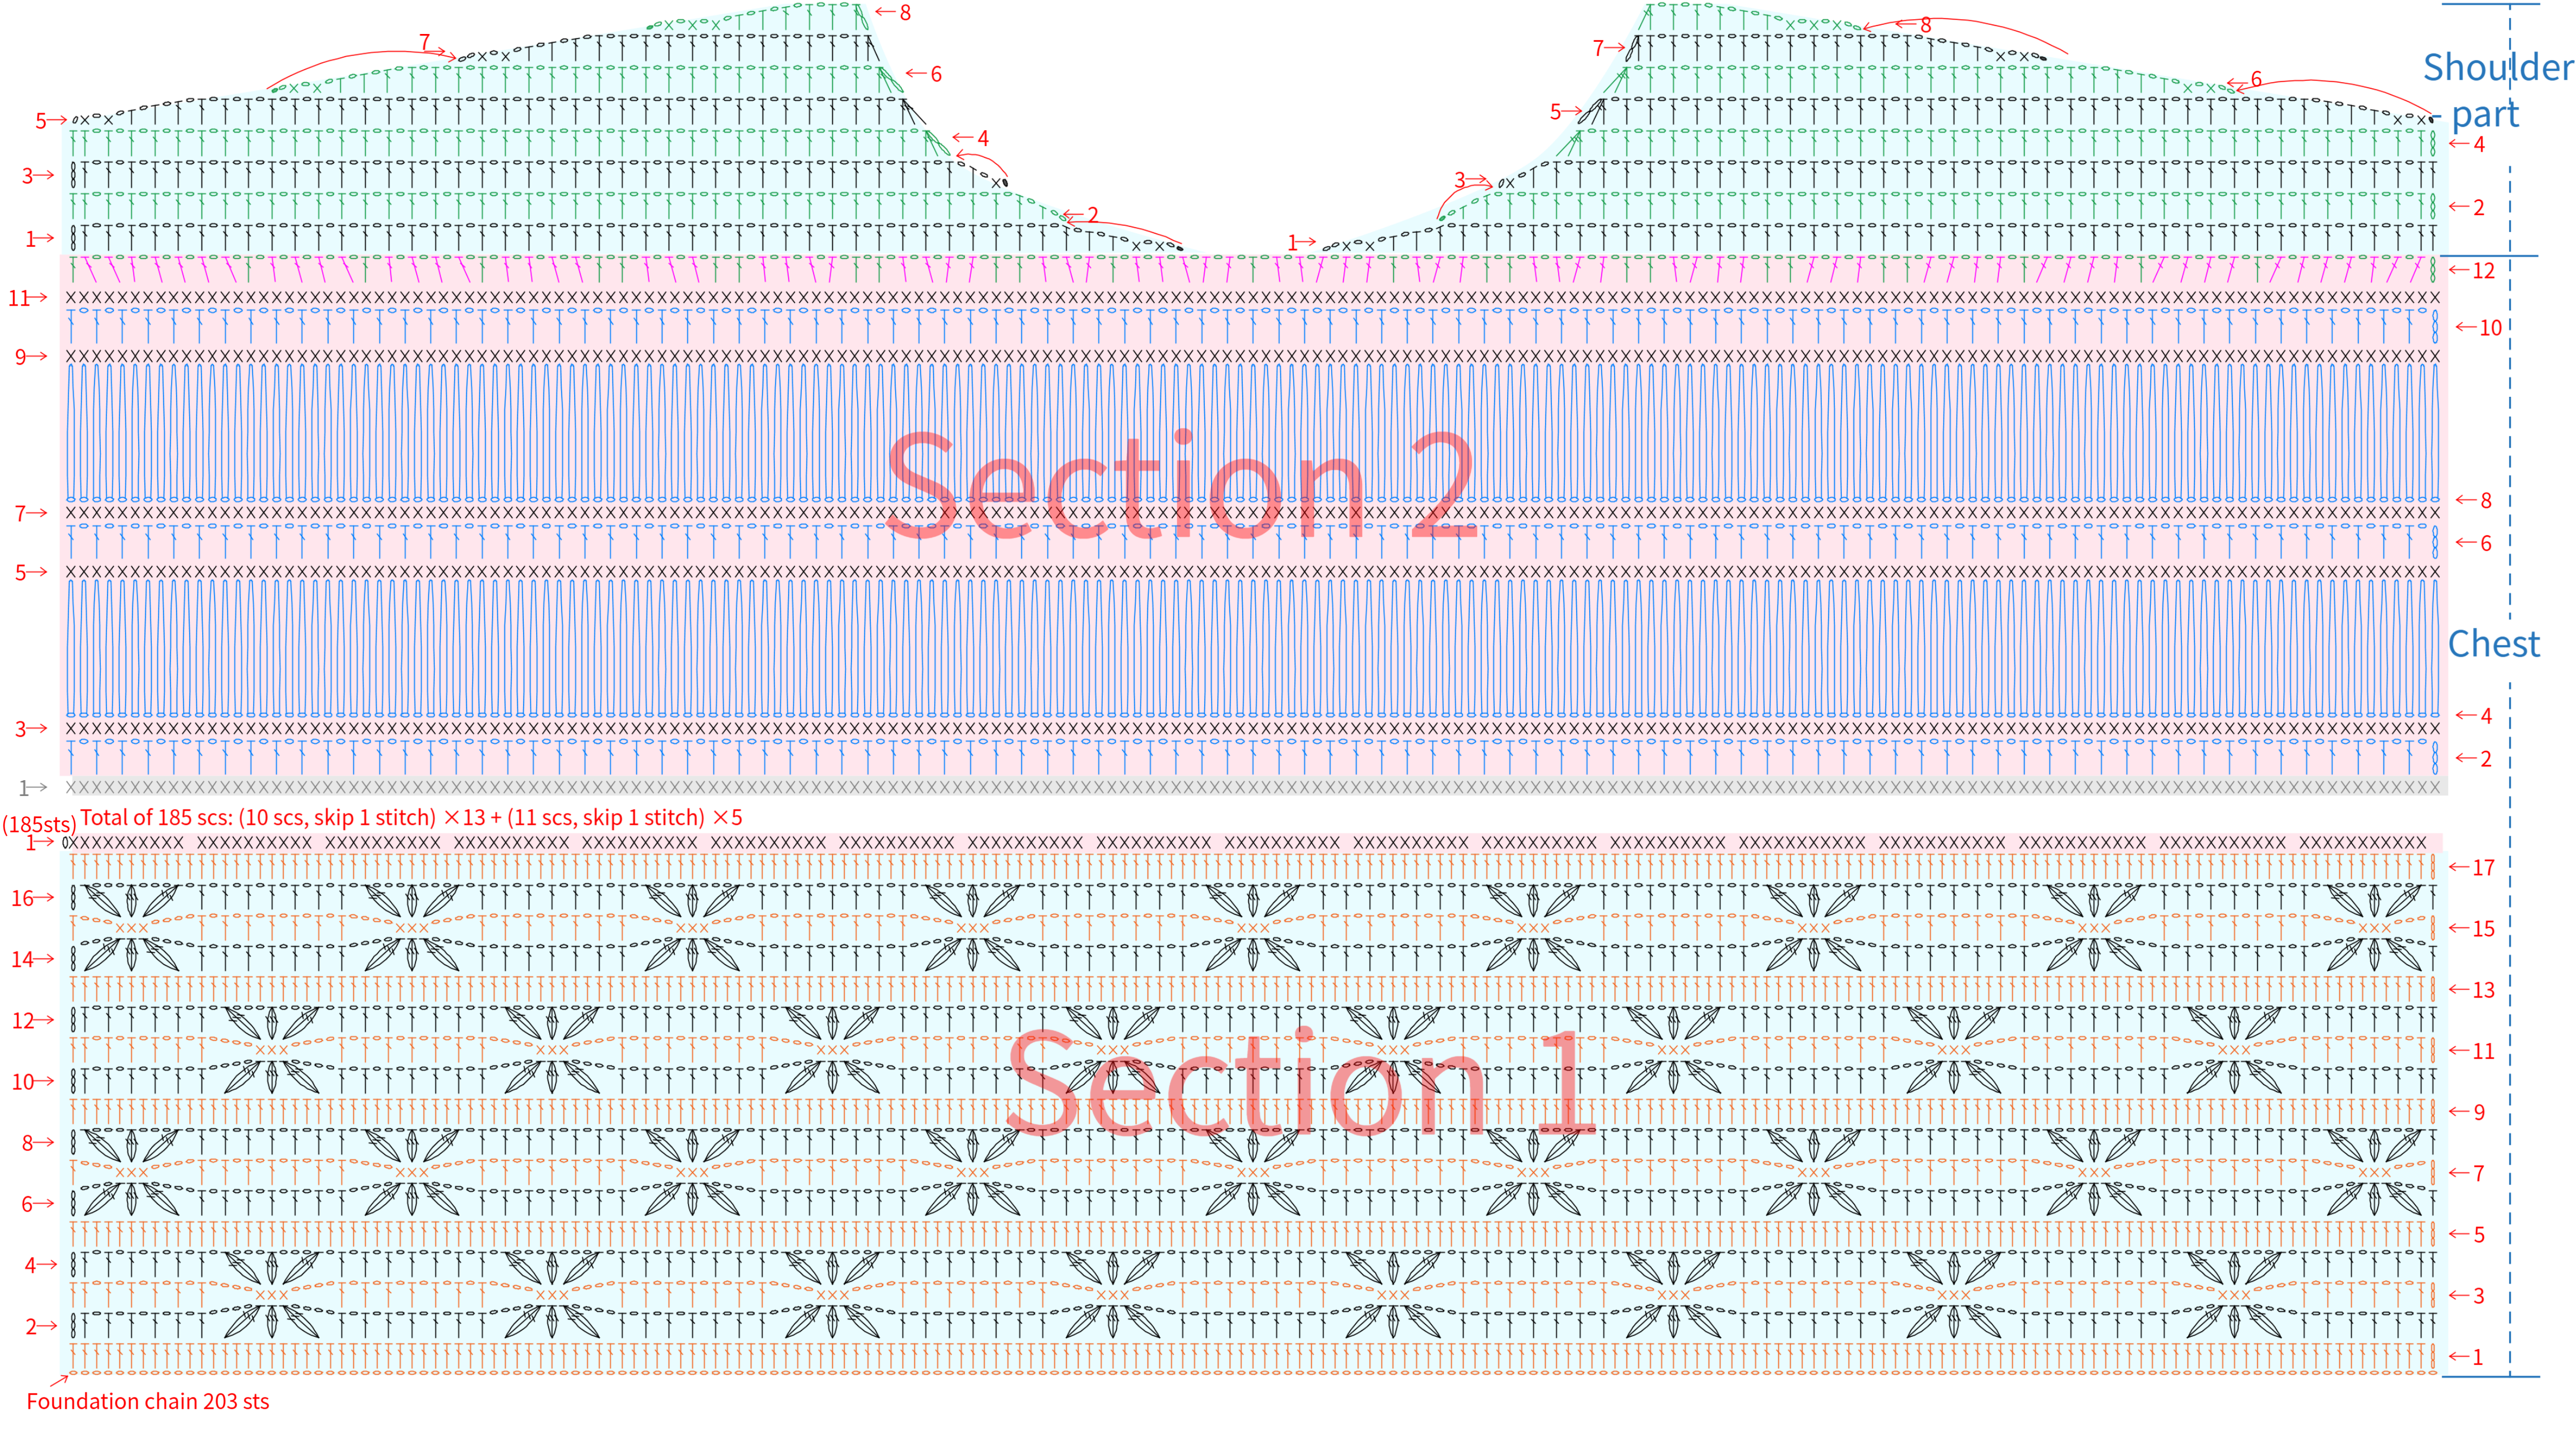
Note: After completing row 5, the height should be approximately 3.5 cm. If there's a significant difference, adjust your tension and re-crochet to avoid affecting the finished size.
PART 2 Back Body B 46' 57''
The back body is divided into chest piece and shoulder - part section. First, crochet the chest piece, which is divided into sections 1, 2, and 3. Start with section 1, then crochet sections 2 and 3 on top of section 1. Once the chest piece is complete, proceed to crochet the shoulder - part section. Please refer to the video demonstration for more details.
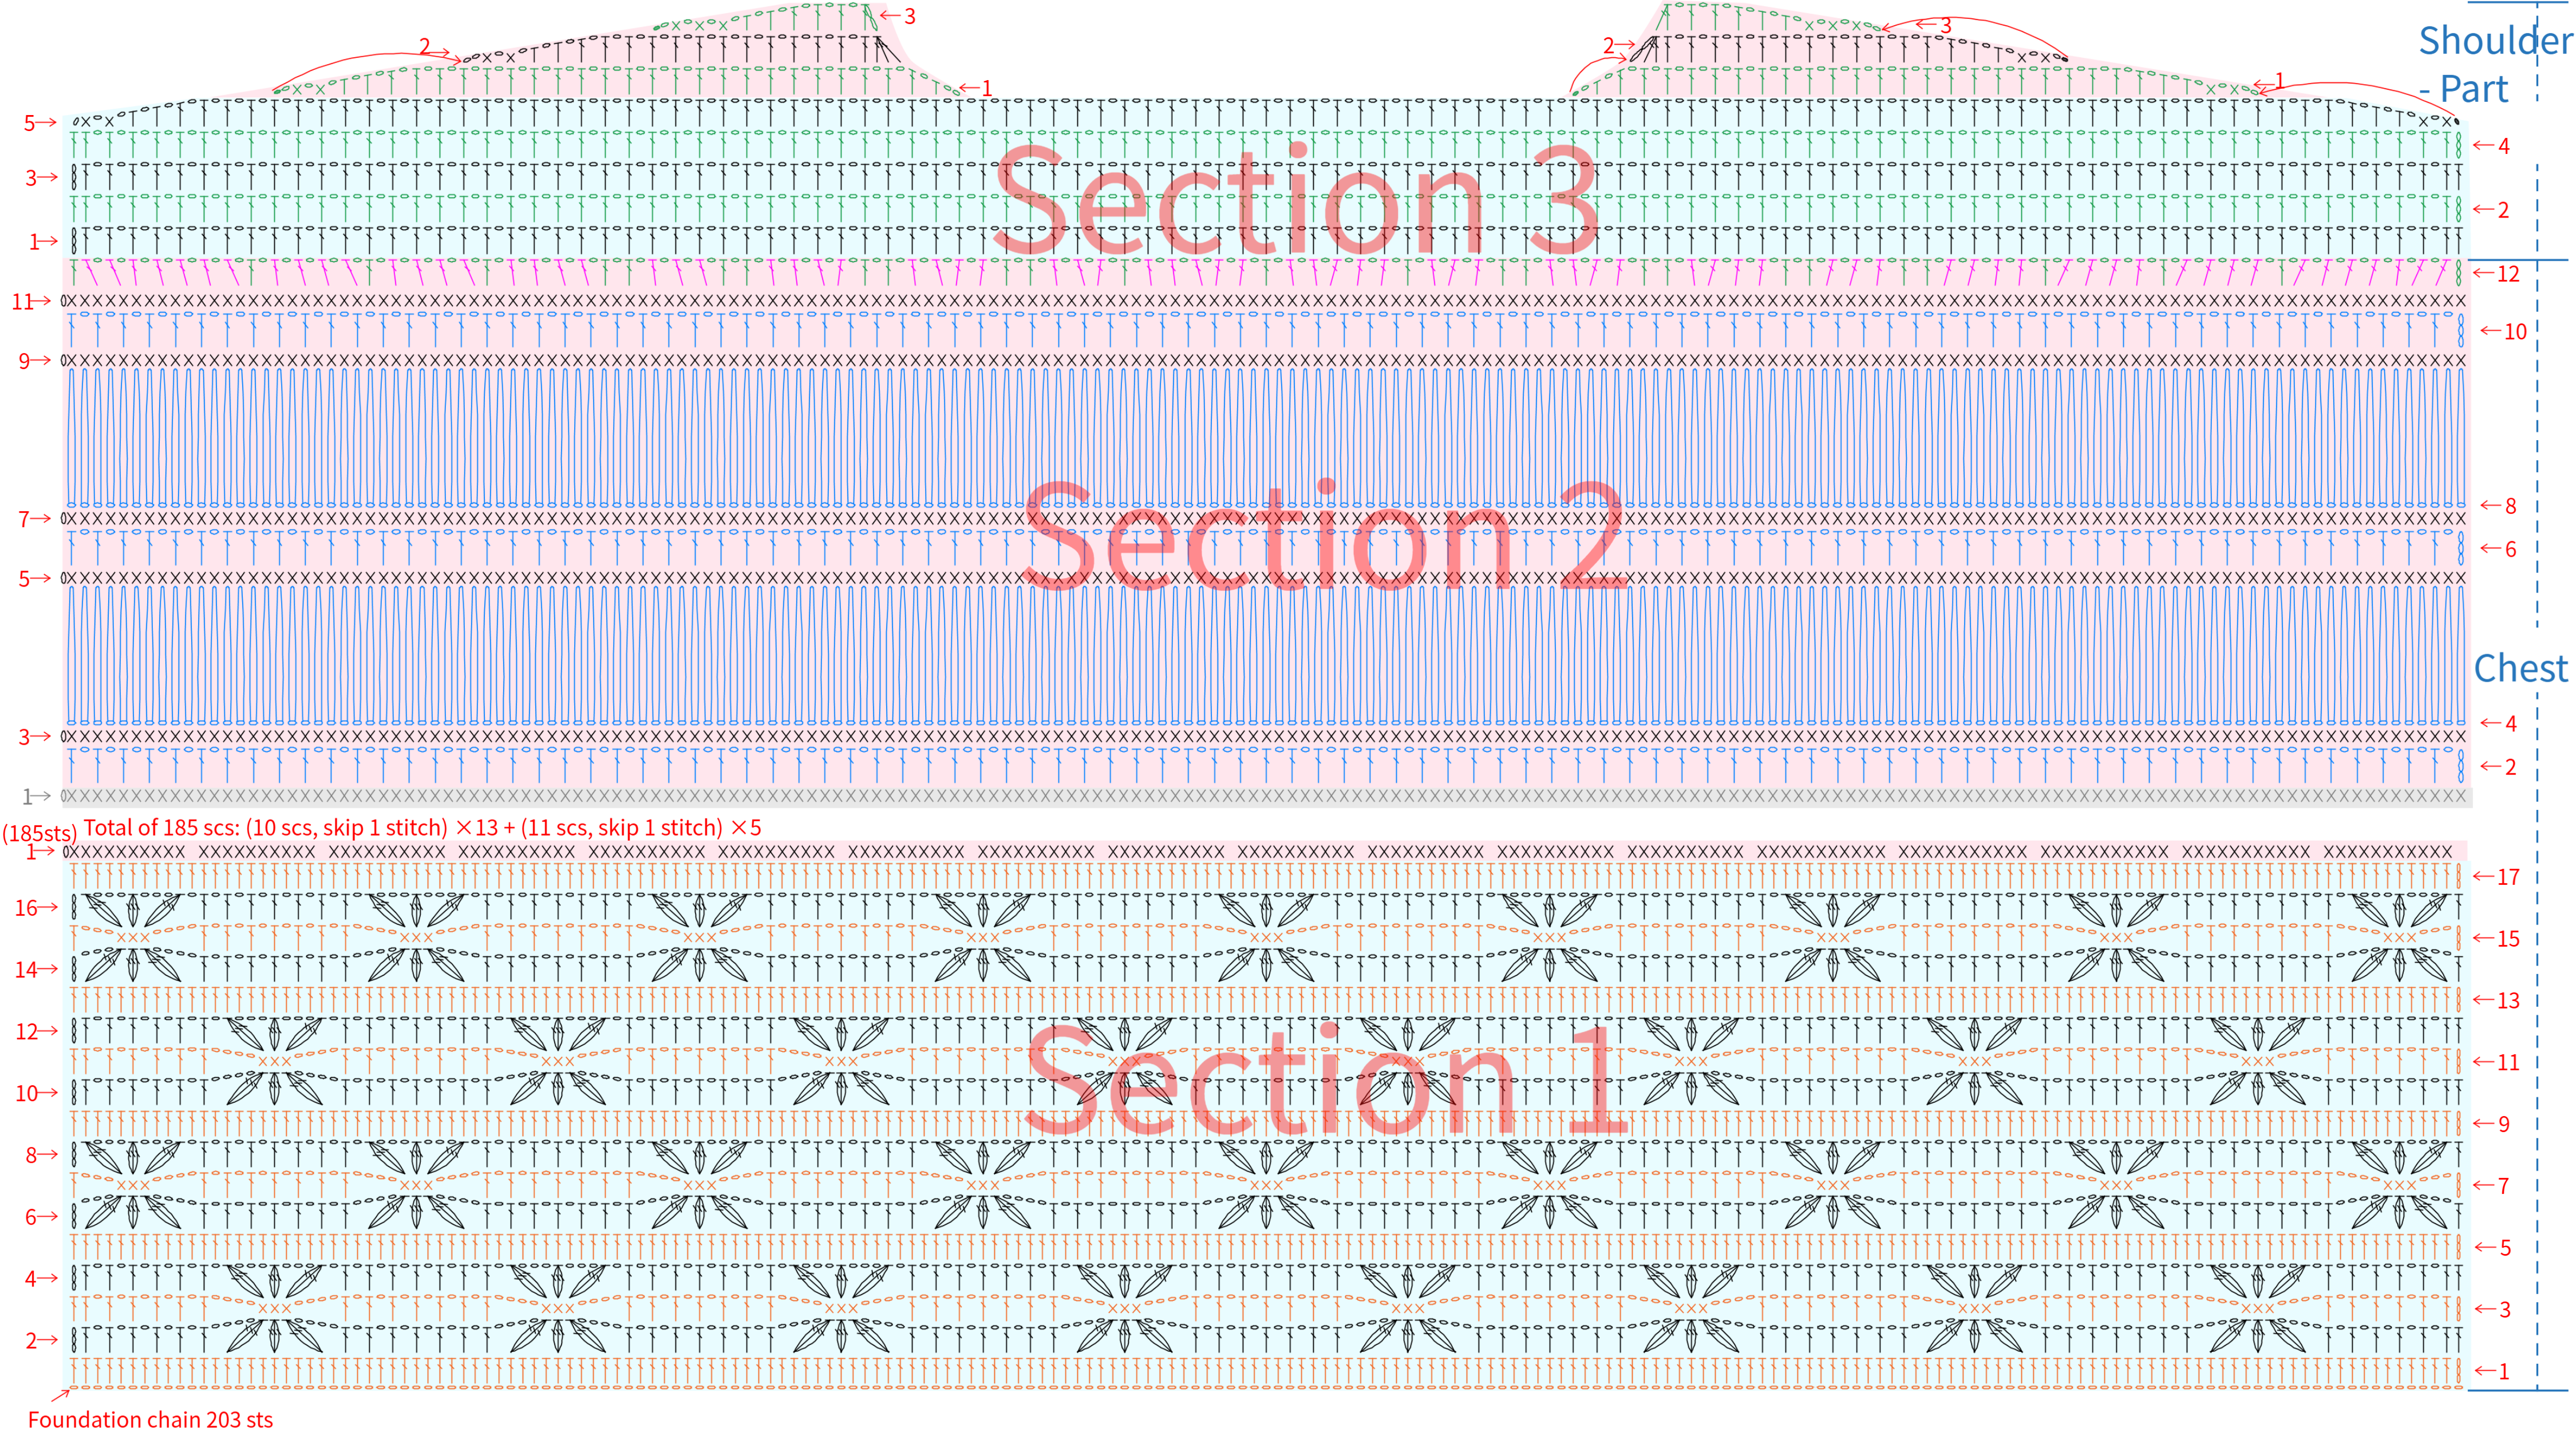
PART 3 Sewing C 47' 40''
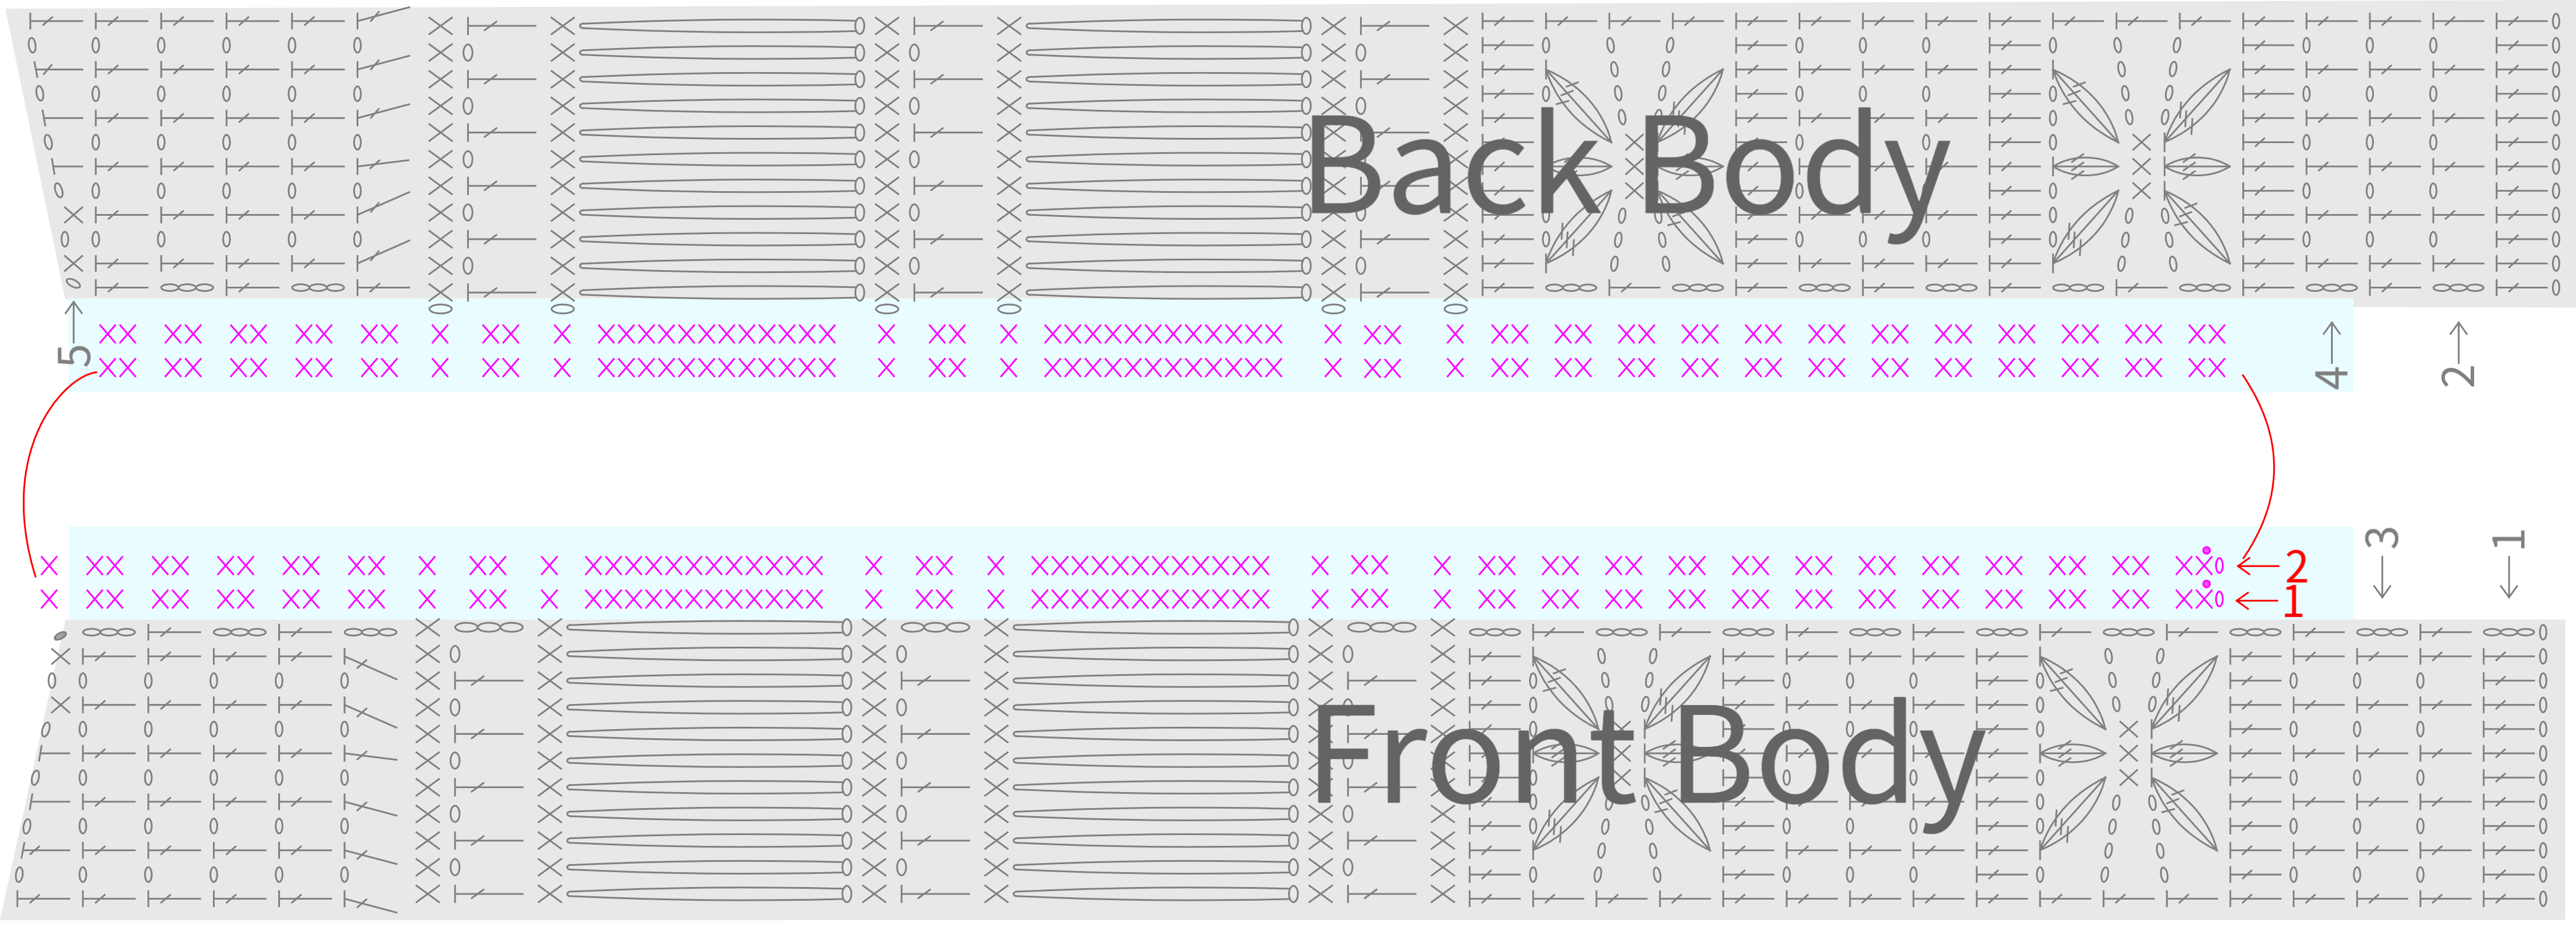
Sewing is divided into shoulder seams and side seams. With the wrong sides together, match up the overlapping parts of the front and back bodies at the shoulders and the first 5 rows of the side edges of the chest pieces. The joining method is done on the right side by picking up corresponding stitches from the edges of the front and back bodies and crocheting 1 chain stitch followed by 1 slip stitch.Please refer to the video demonstration for more details.
PART 4 Body D 57' 15''
Work the body in rows below the front and back bodies, crocheting in rounds. Please refer to the video demonstration for more details.
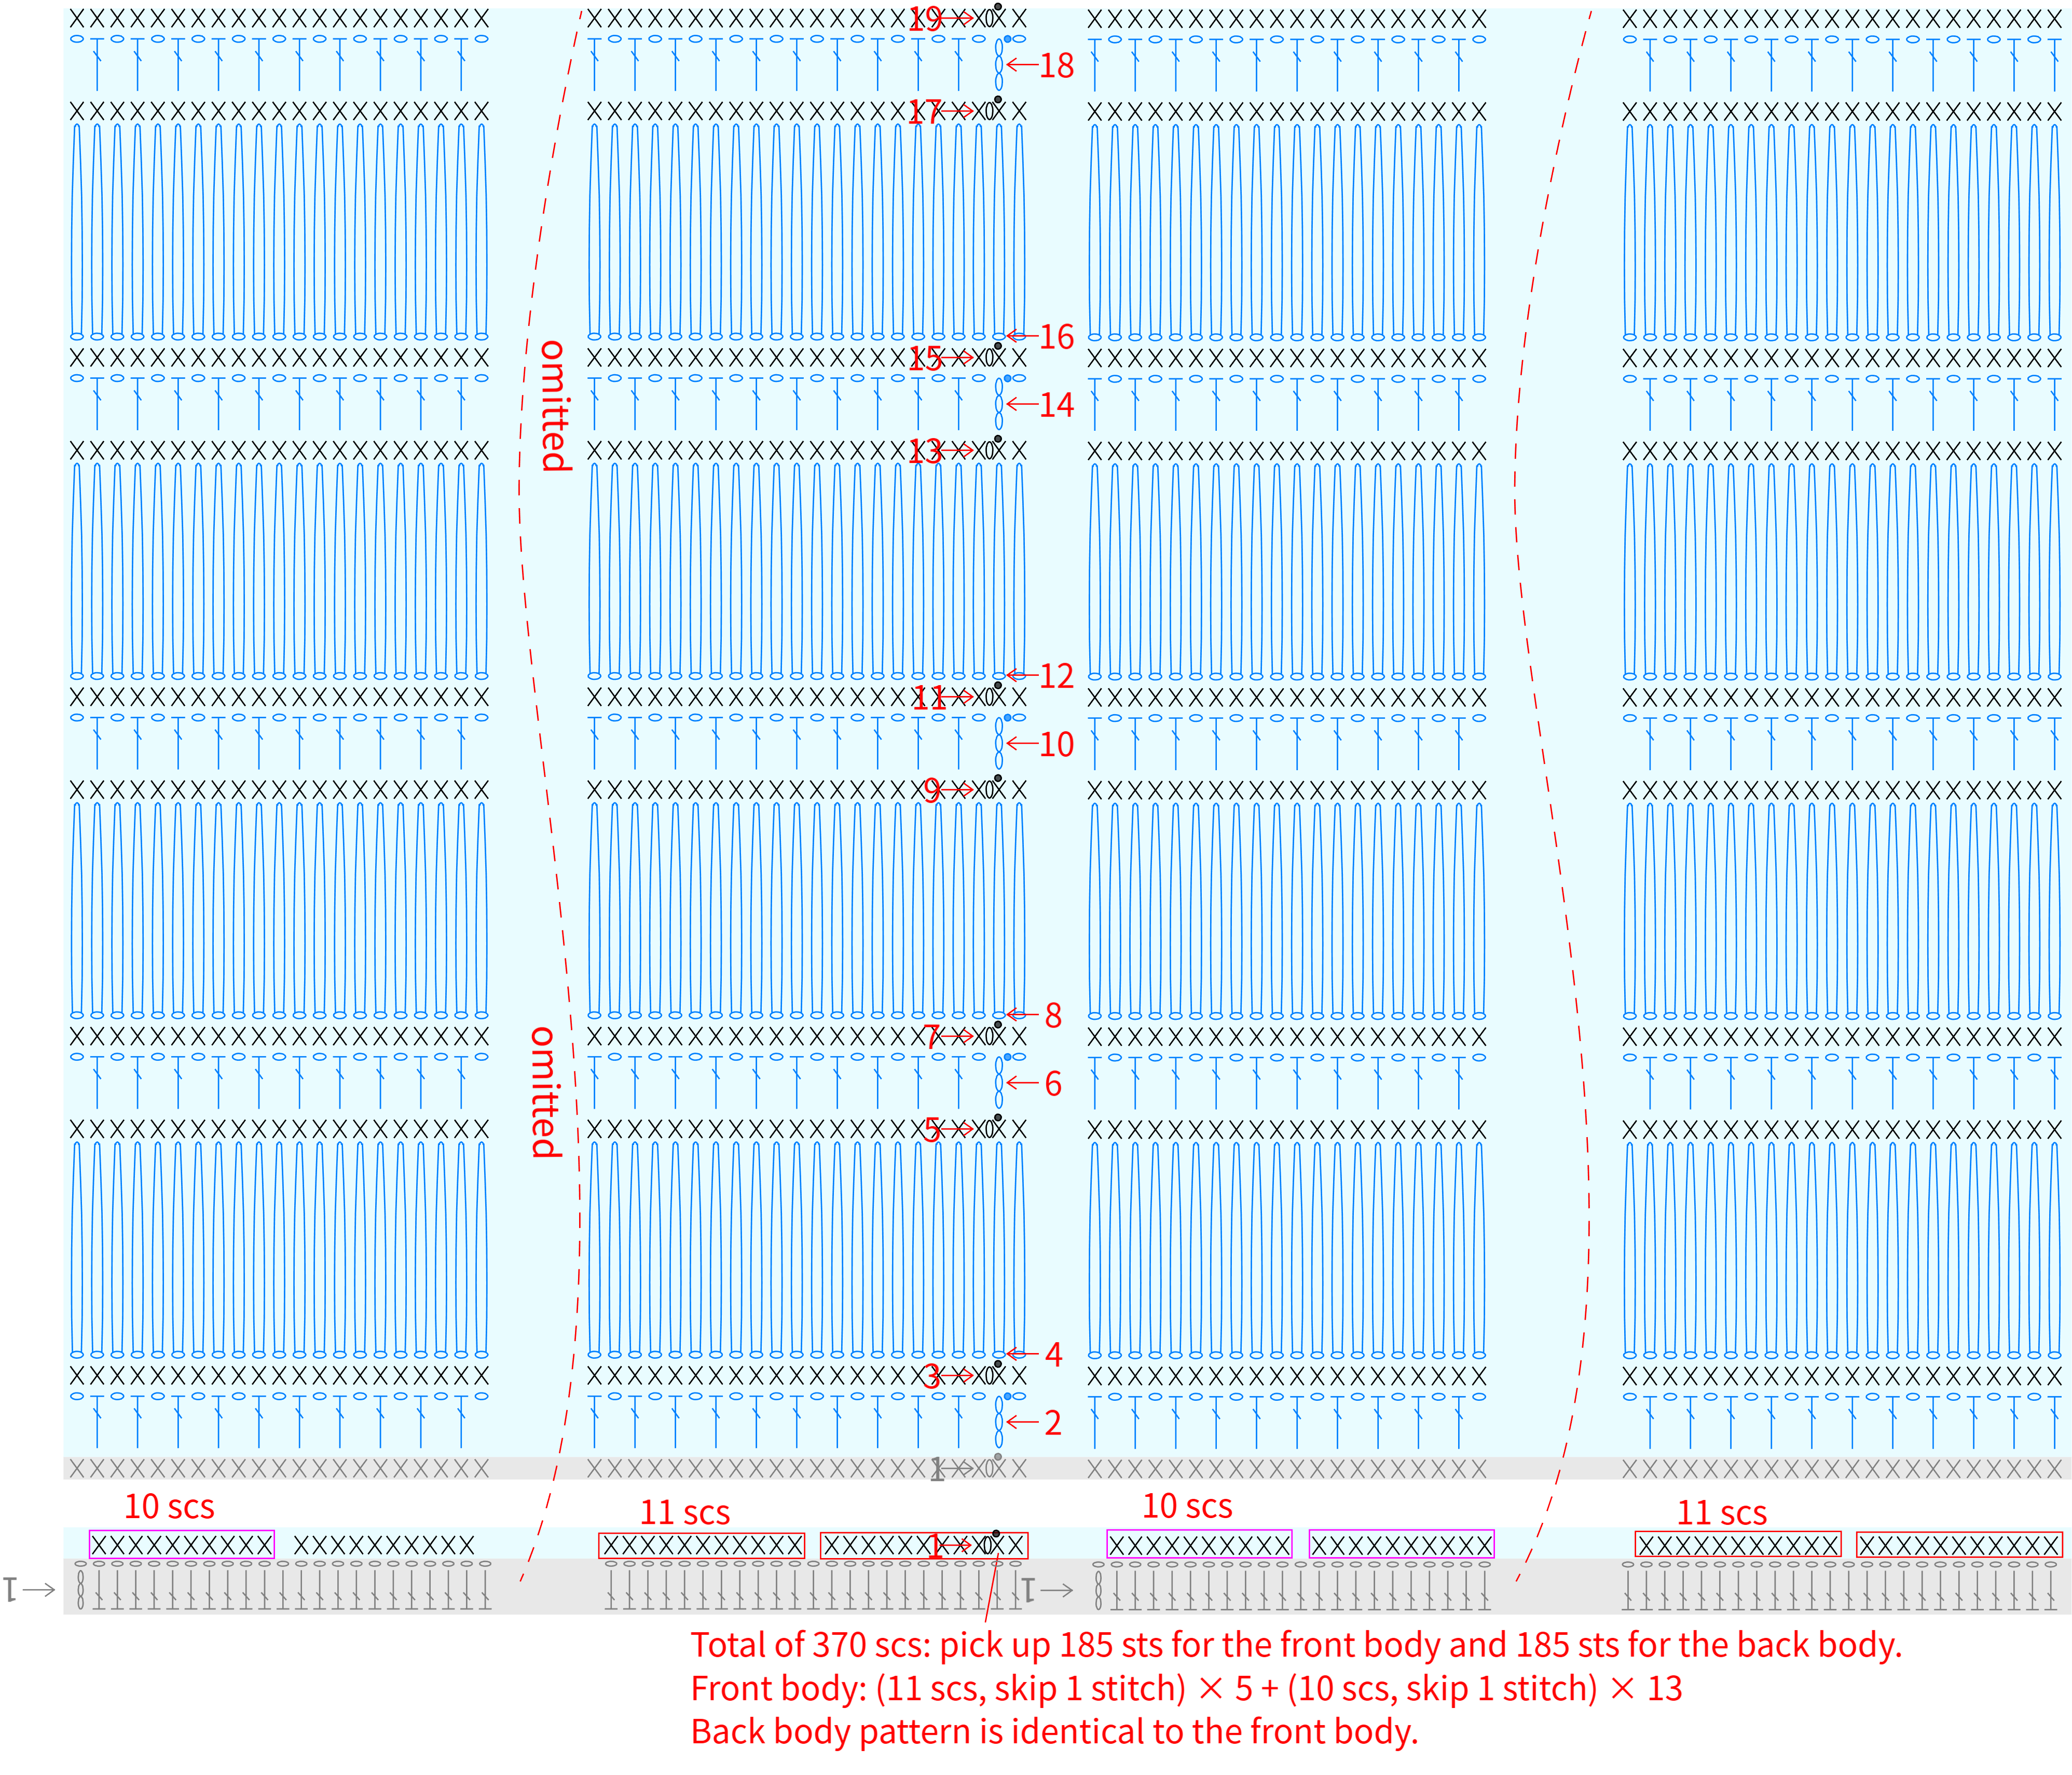
PART 5 Edging E 65' 13''
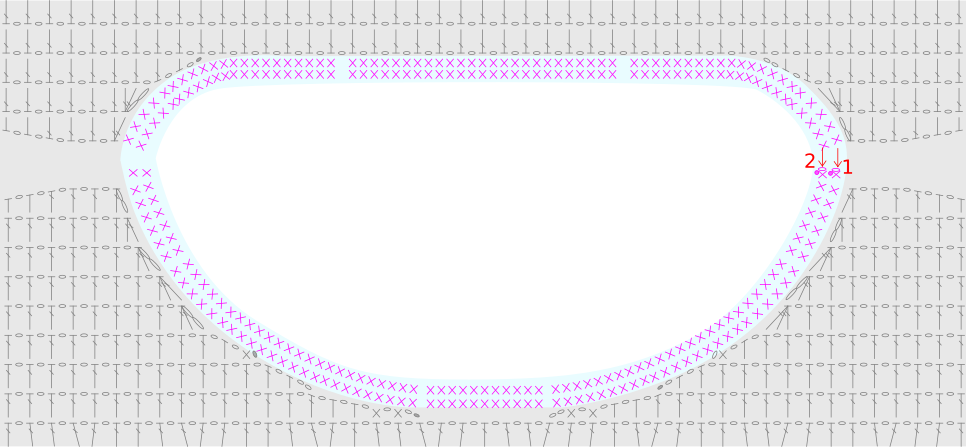
The edging is divided into neckline edging and cuff edging. For the neckline edging, work in rounds counterclockwise around the neckline of the front and back bodies. For the cuff edging, work in rounds counterclockwise around the armhole space left above the side seams. Please refer to the video demonstration for more details.
Neckline Edging
Cuff Edging
Made by the community