
Clothes
Bloomline Lace Top
Project preview
See the finished project
Pattern format
Instructions
Watch and follow
Video tutorial
| Style | Yarn | Color |
|---|---|---|
| Primrose Yellow-Small Size | Cloud Impression | 08#Primrose Yellow |
| Lavender-Small Size | Cloud Impression | 07#Lavender |
| Pale Pinkish Purple-Small Size | Cloud Impression | 01#Pale Pinkish Purple |
| Distant Mountains-Small Size | Cloud Impression | 05#Distant Mountains |
| Mineral Green-Small Size | Cloud Impression | 11#Mineral Green |
| Luminary Green-Small Size | Cloud Impression | 04#Luminary Green |
Primrose Yellow-Small Size
Lavender-Small Size
Pale Pinkish Purple-Small Size
Distant Mountains-Small Size
Mineral Green-Small Size
Luminary Green-Small Size
This product is divided into the back piece, front piece, the connection of front and back pieces, sleeves and ties. First, make the front and back pieces, then connect the front and back pieces, next create the sleeves and attach them, and finally crochet the ties, which are attached to the front band and sleeves.
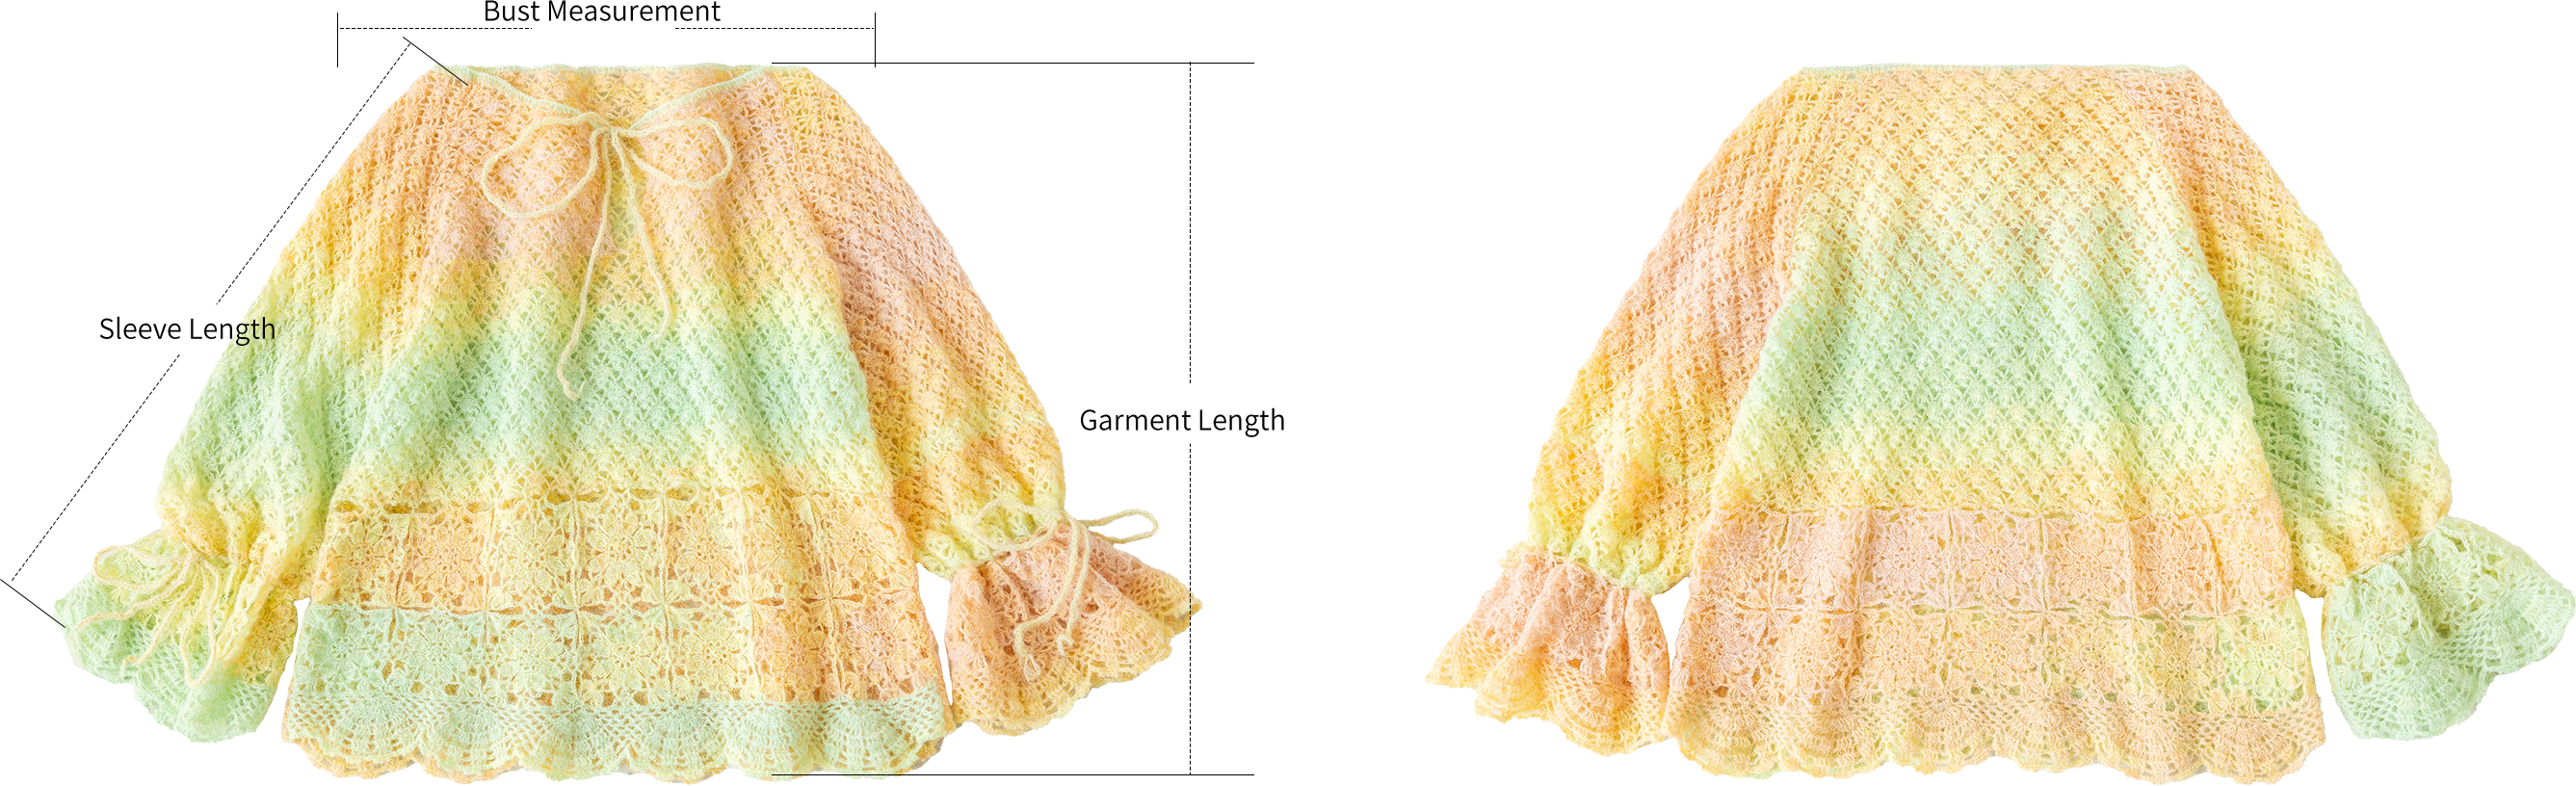
Bust measurement 44 cm, Sleeve length 48 cm, Garment length 53 cm
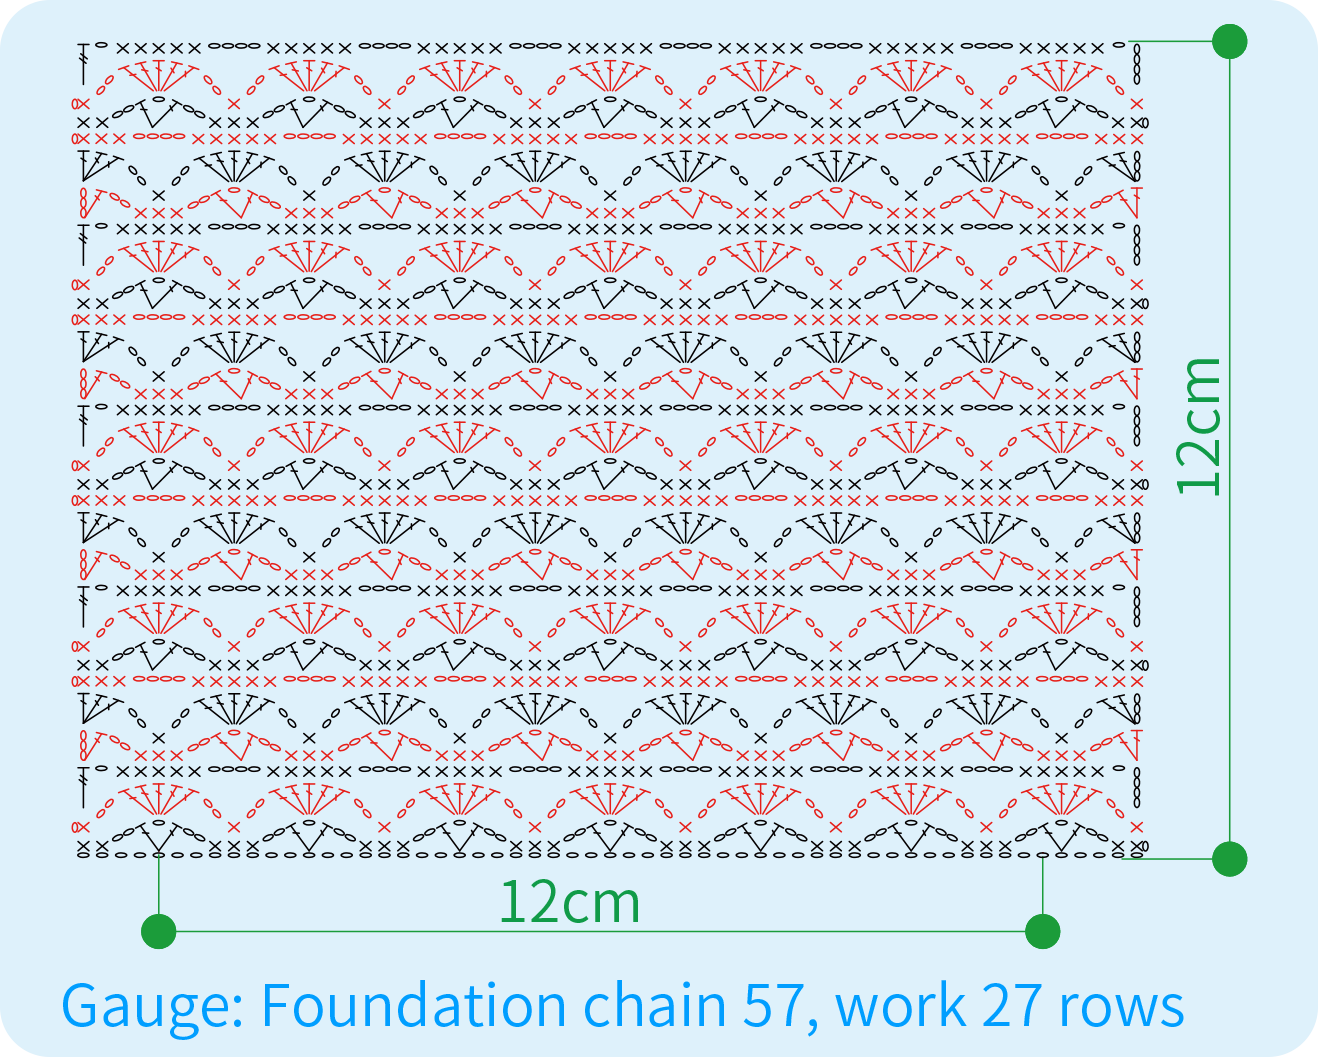
The handcrafted measurements may have an error, the size of the sample is for reference only.
Materials: Cloud Impression
Tool: 2.50 mm crochet hook
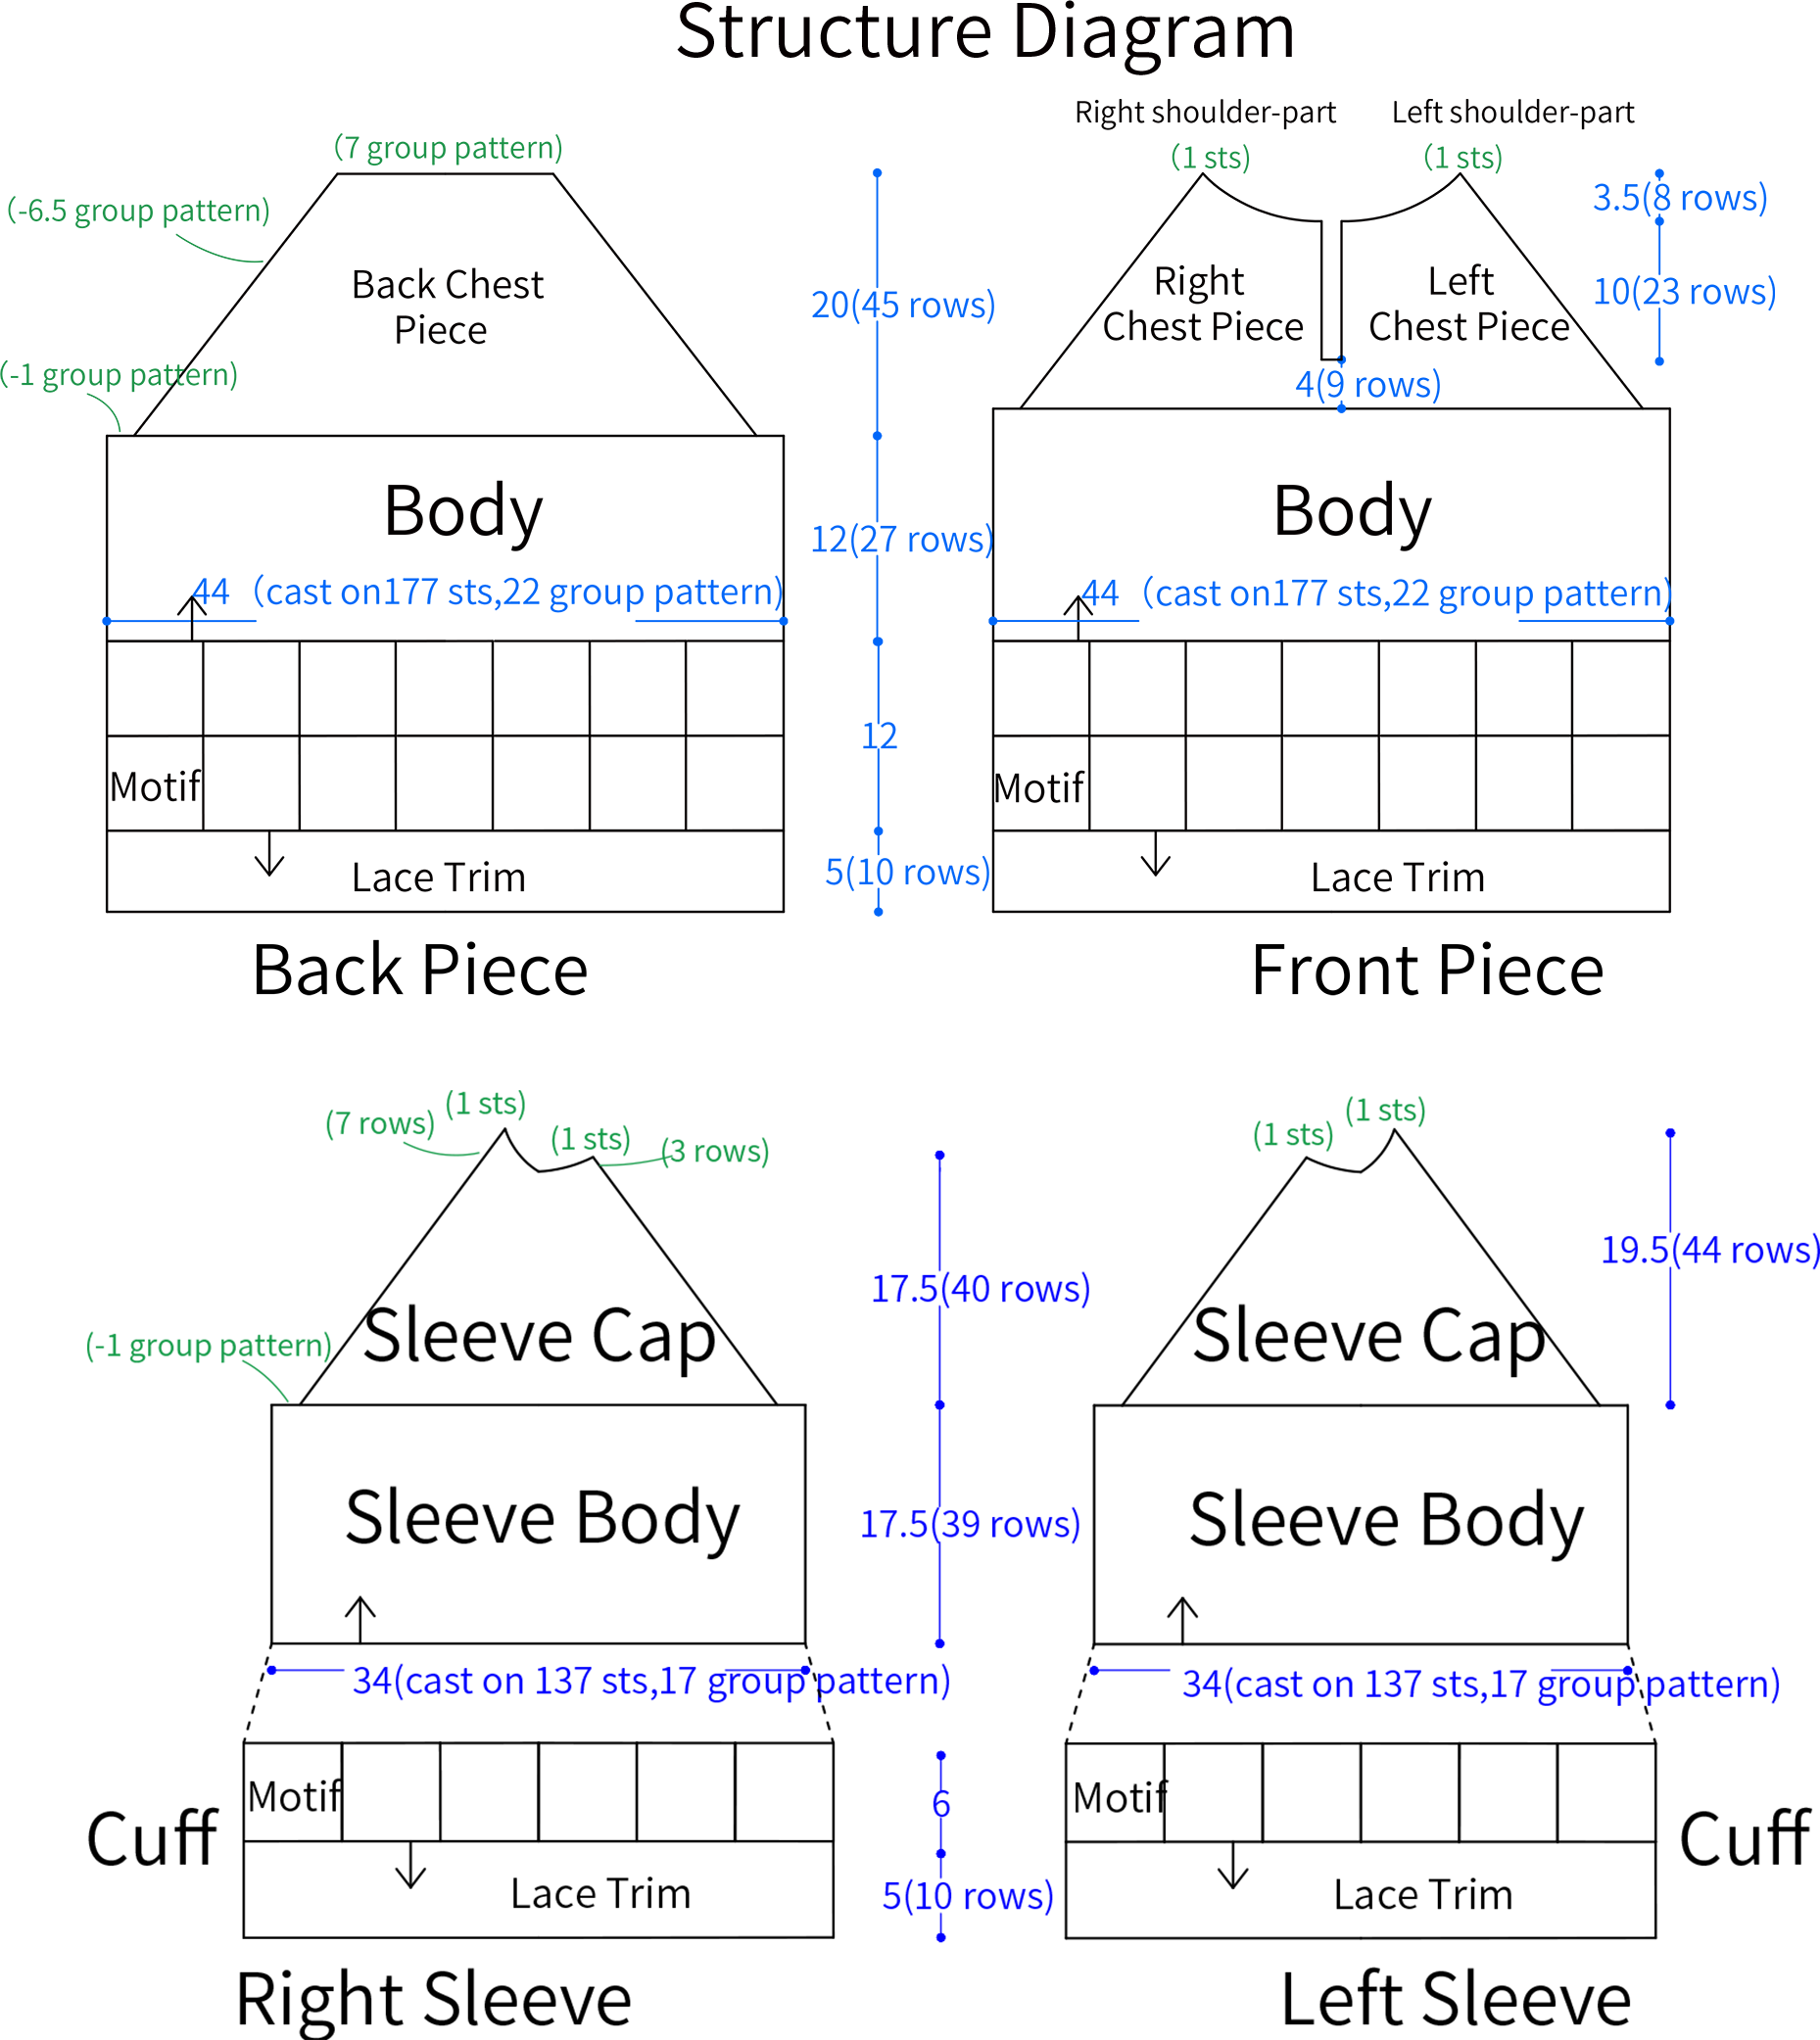


Chart Key











Note:
1. This pattern is making in Chinese crochet pattern terms, and the stitch name is written using American terminology. All measurements in charts are in cm.
Part 1 Back Piece A
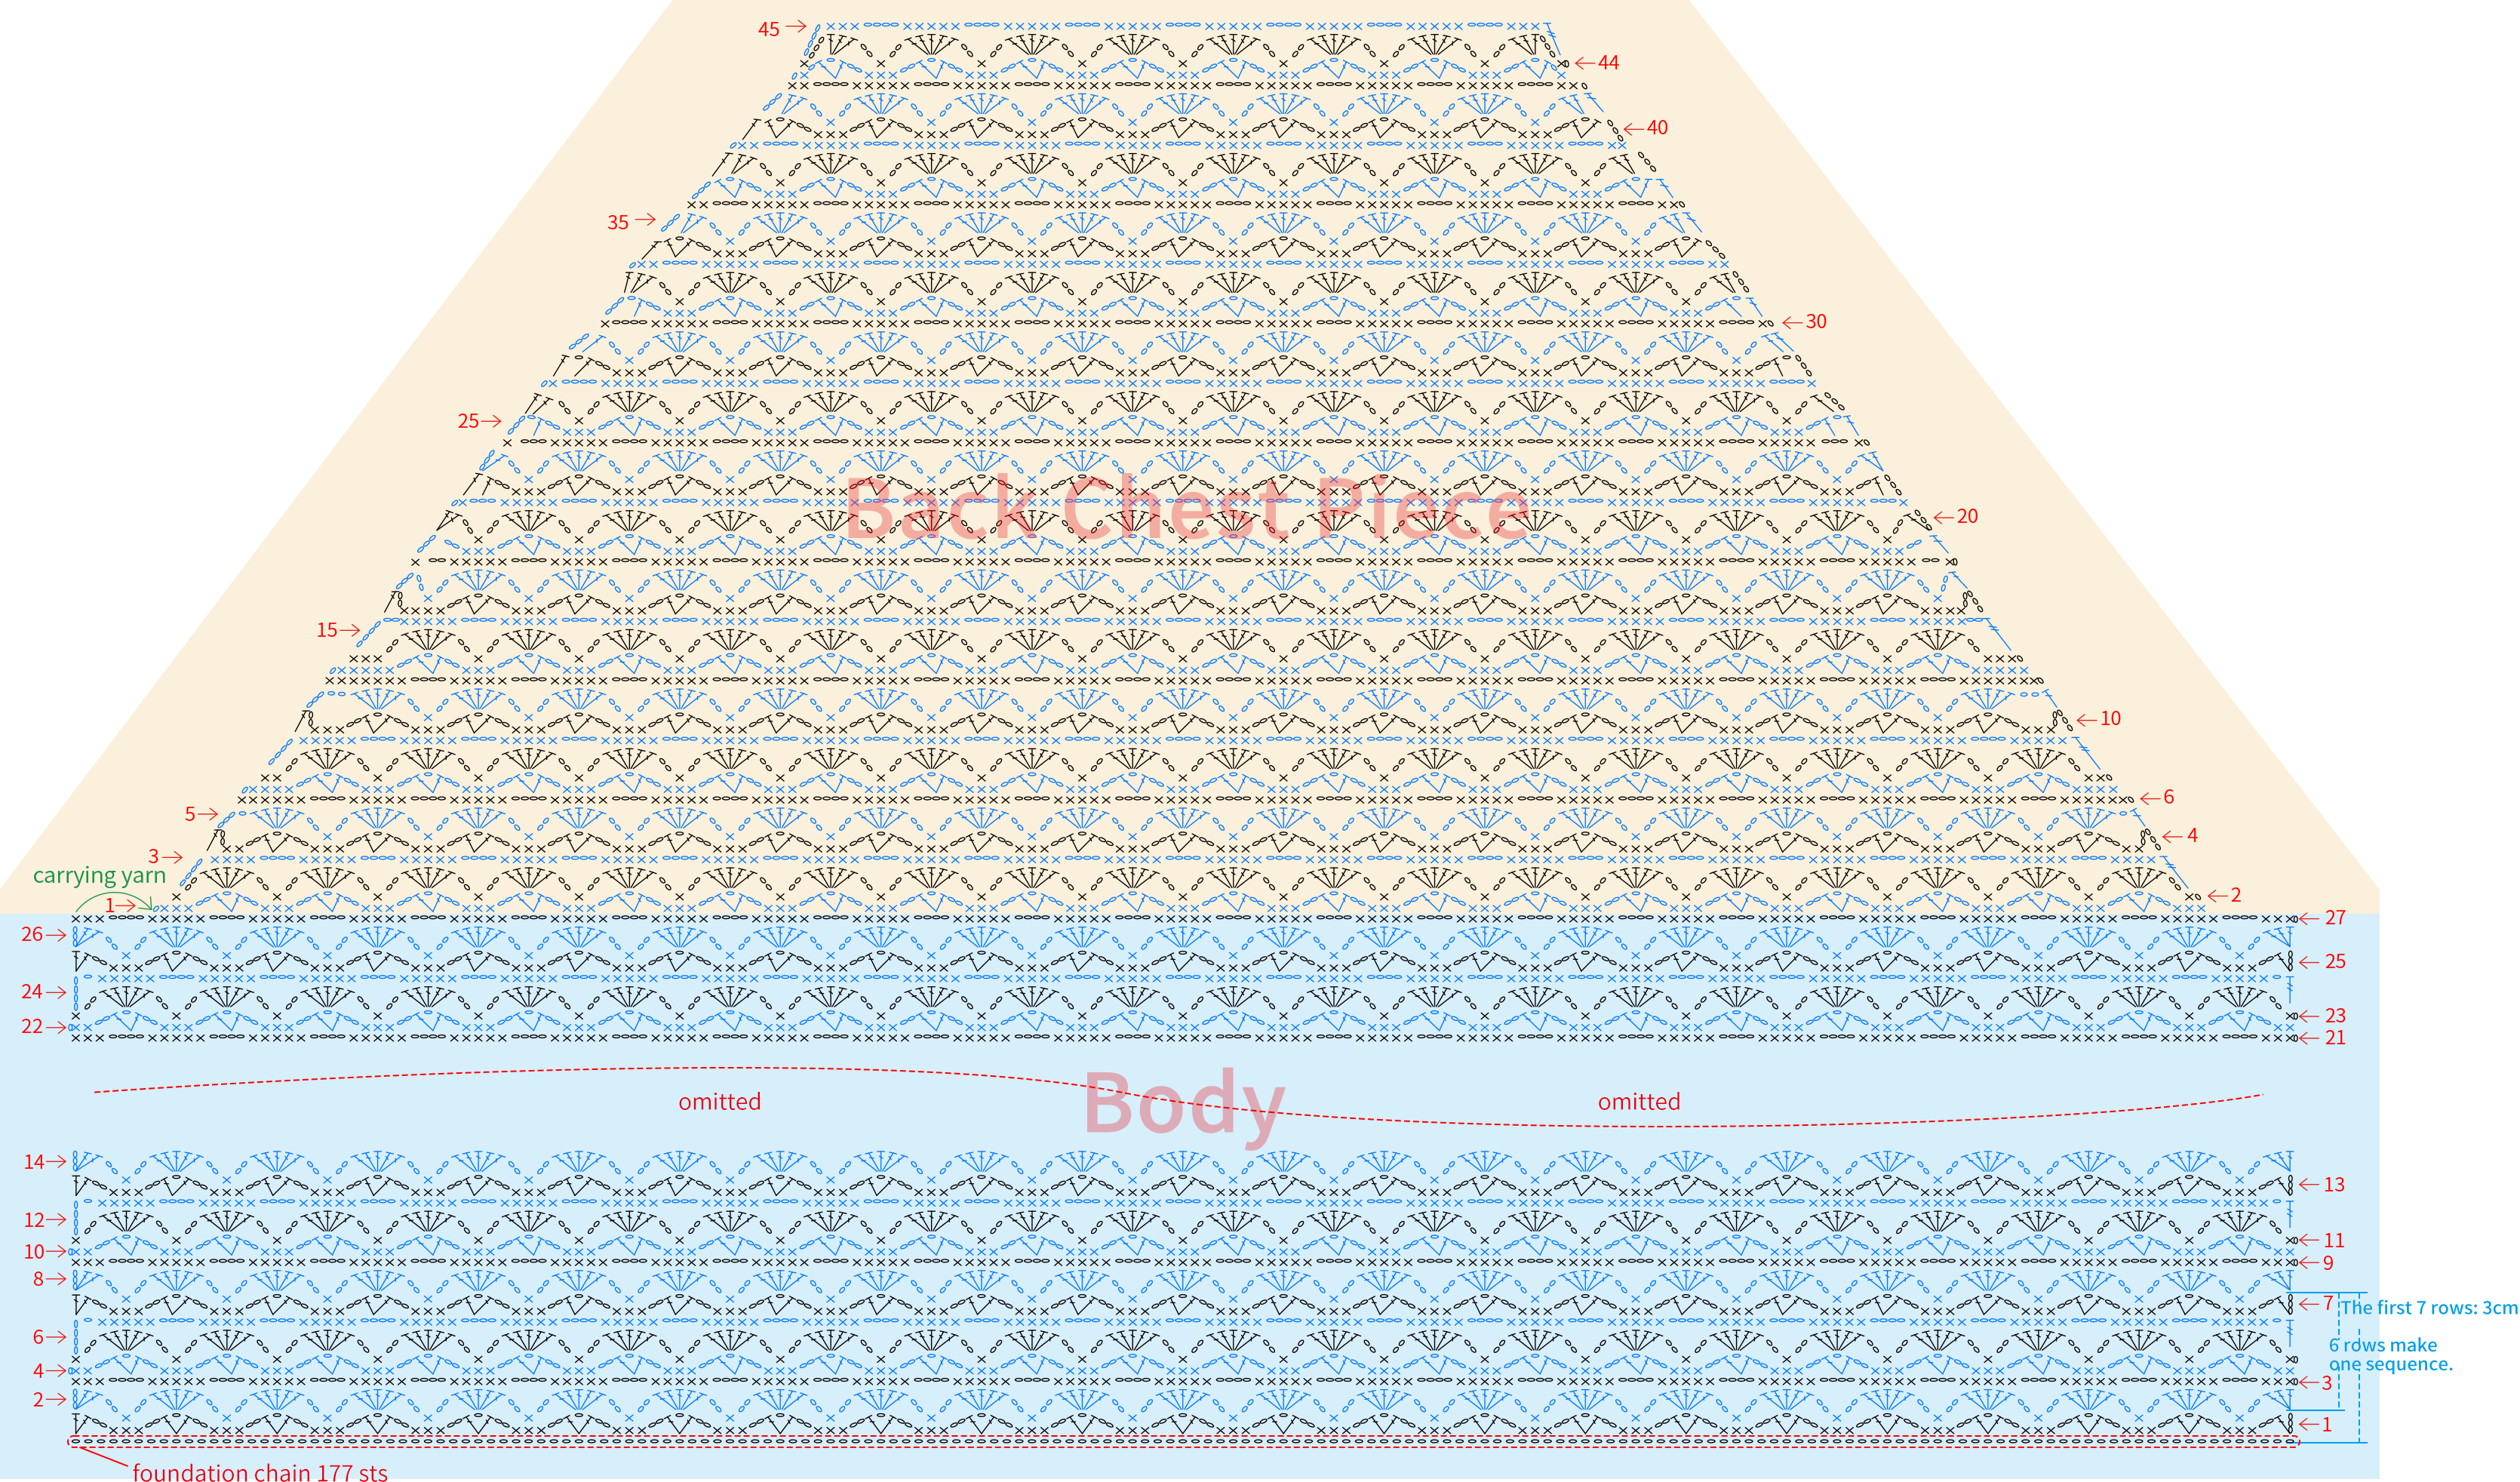
The back piece is divided into the body, back chest piece, and hem.
Step 1 BodyA1Back Chest PieceA2 01' 55''
The body is started with a chain stitch and worked back and forth. After completion, crochet the back chest piece. Please refer to the video demonstration for more details.
Note: The finished product is knitted with segment-dyed yarn. The starting position of the yarn will result in a different final appearance. You can choose the starting yarn tail based on your preference.
Step 2 HemA3 22' 02''
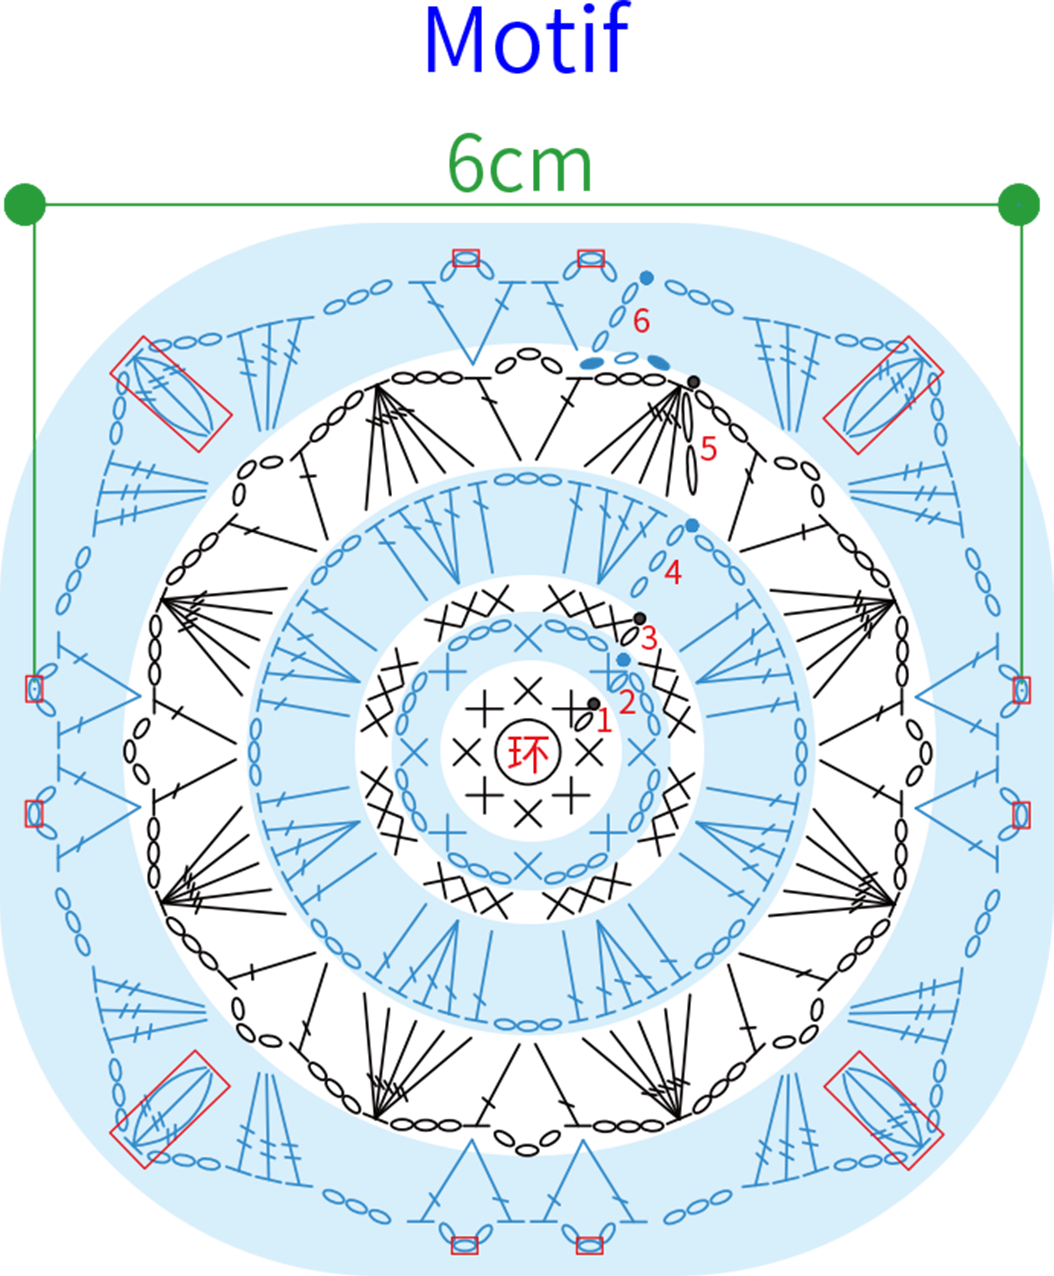
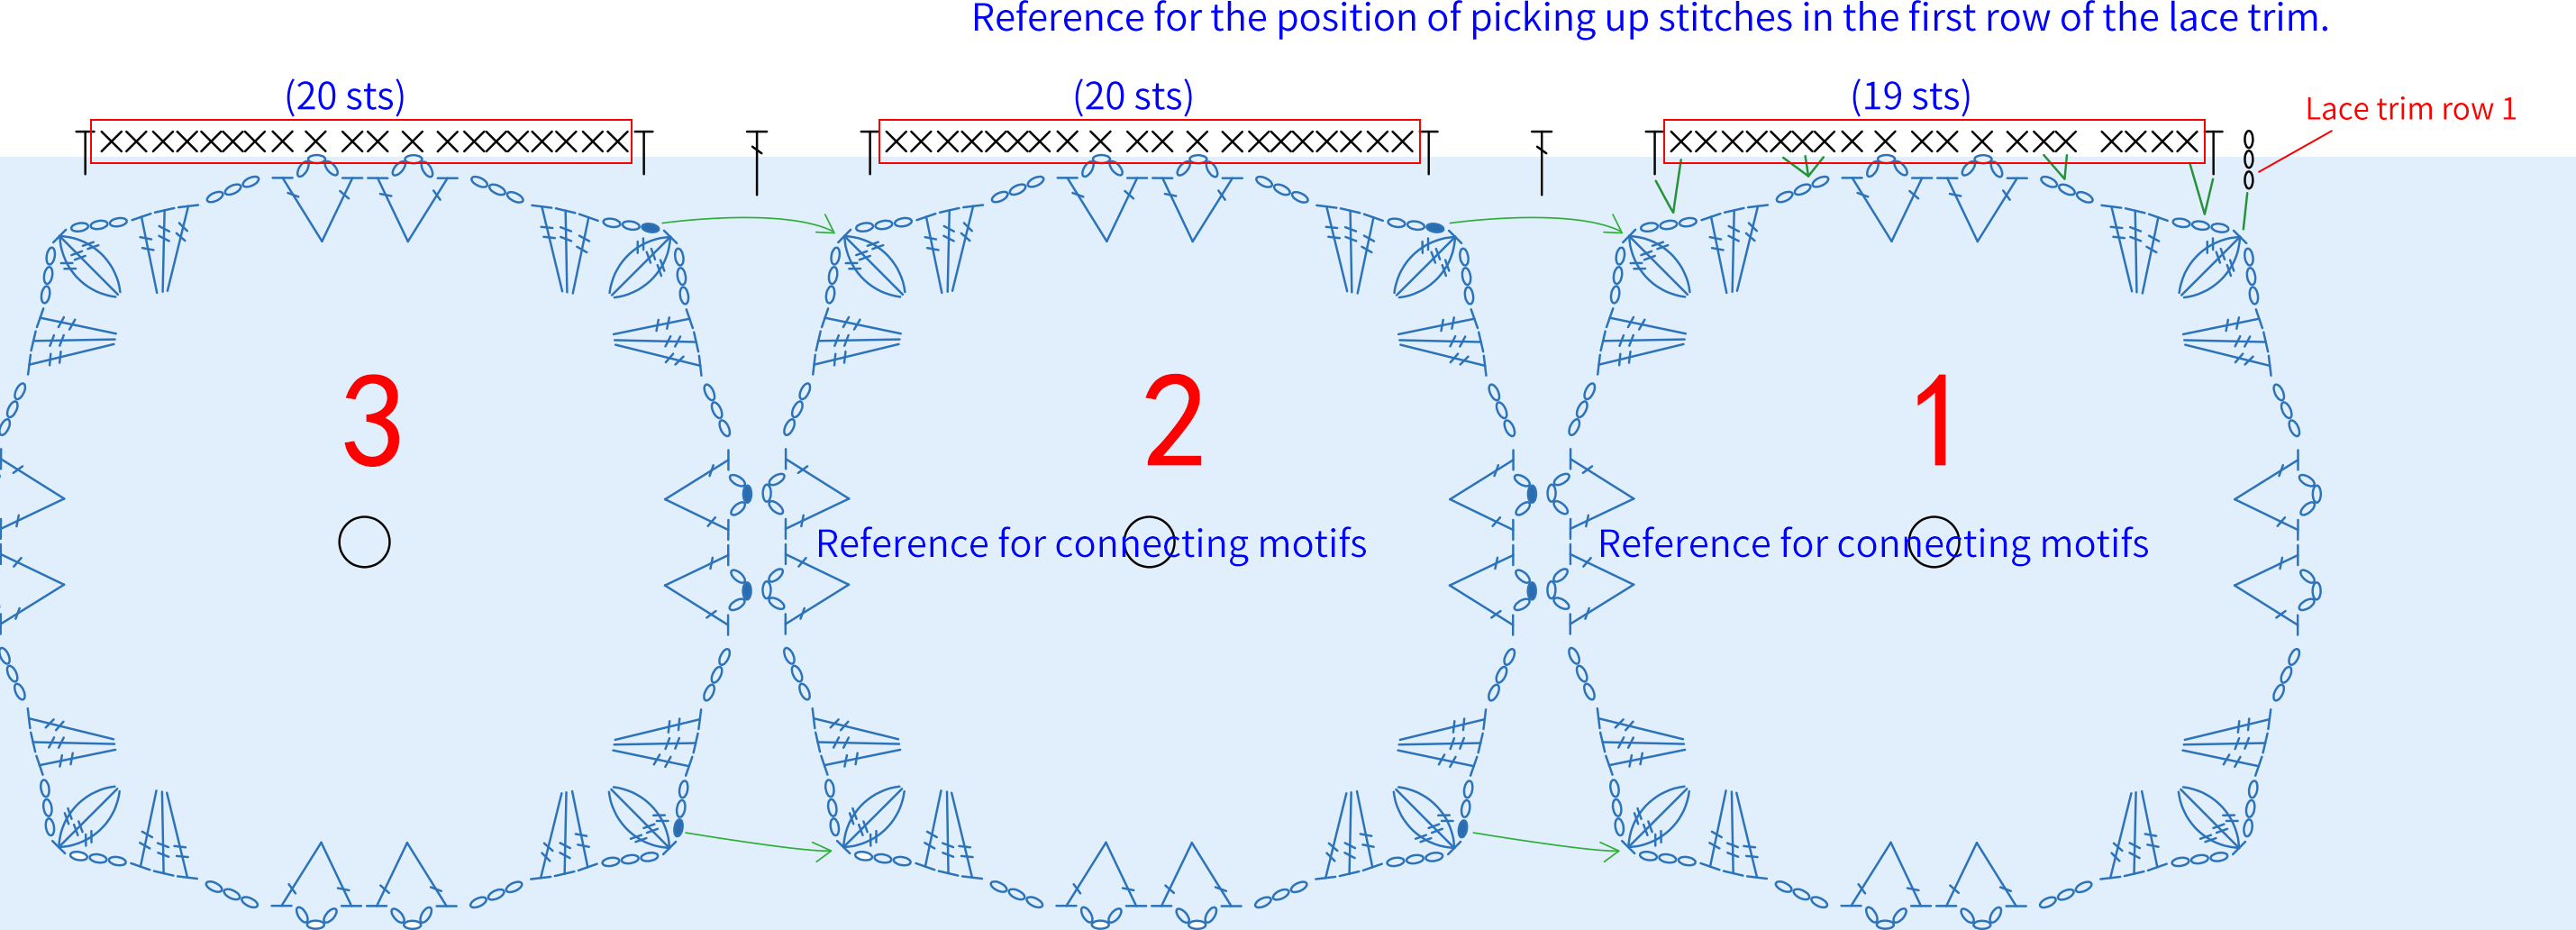
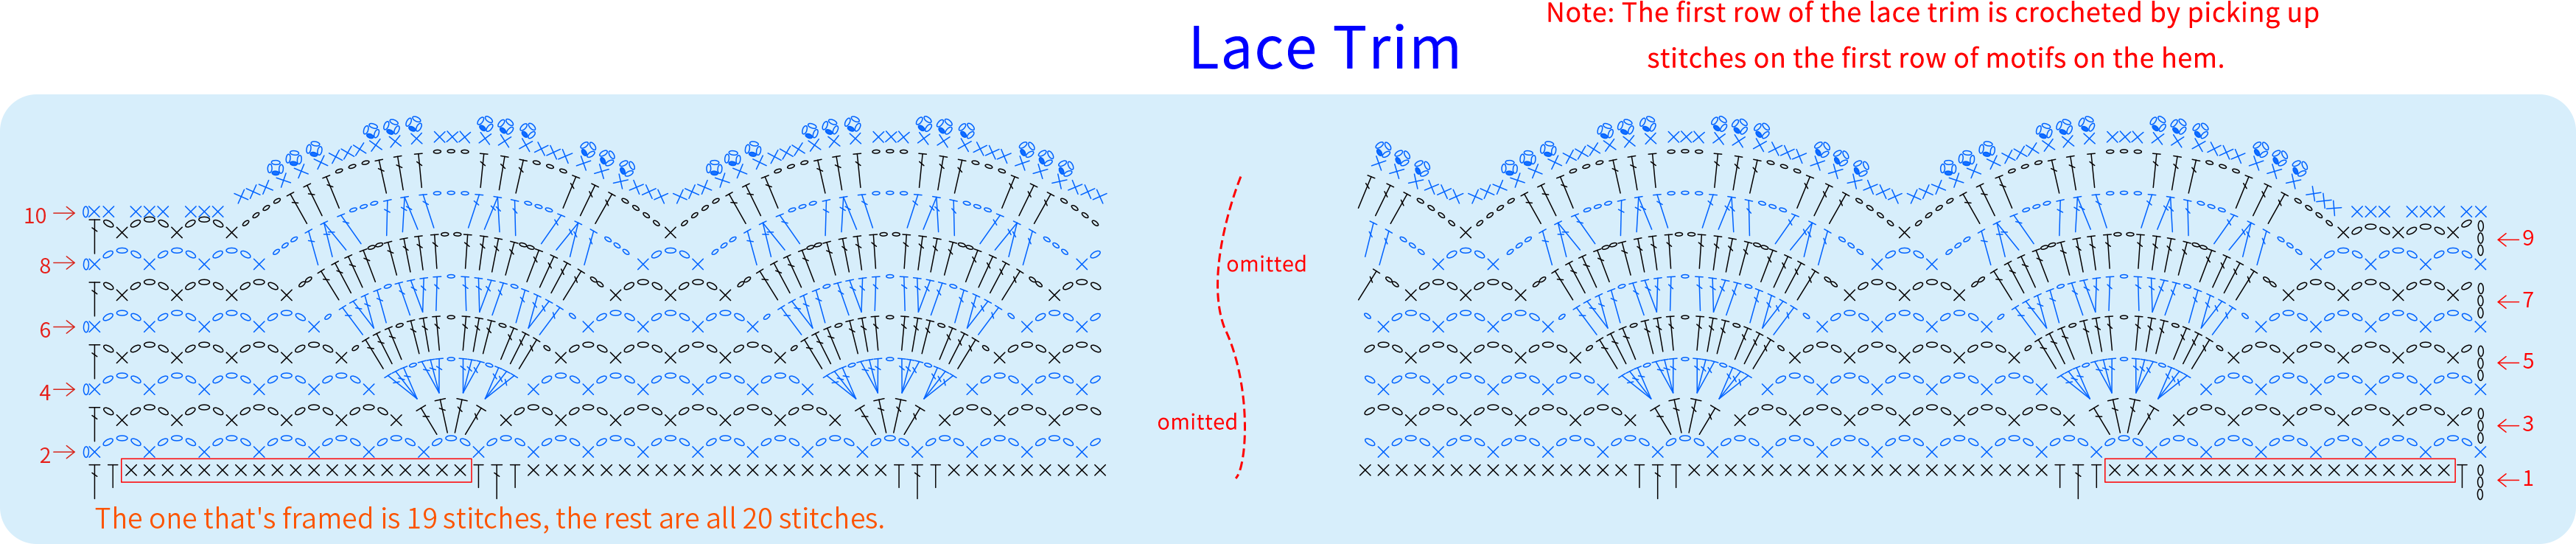
The hem is divided into the first motif, the remaining motifs, and the border. First, make the first complete motif, then work the remaining motifs while joining them simultaneously. Finally, crochet the border. Please refer to the video demonstration for more details
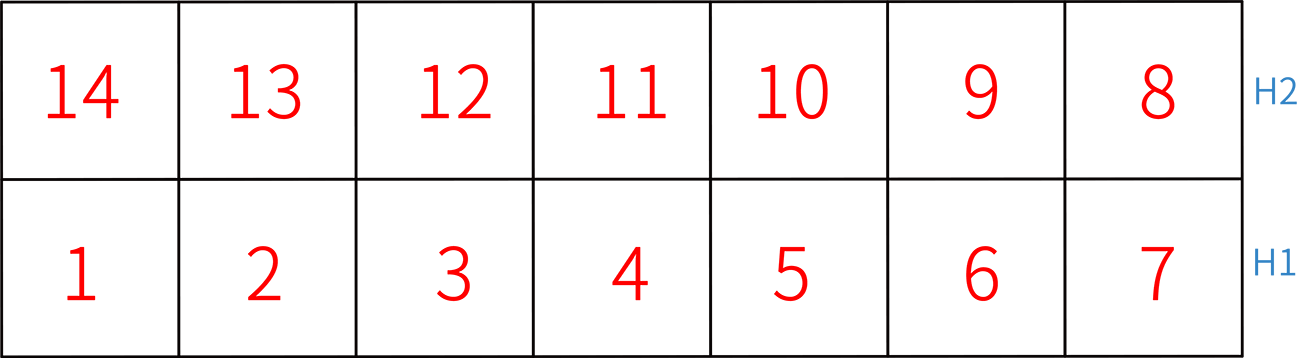
Note: For individual motif charts, when working and joining simultaneously, perform the connection at the highlighted stitch position.
Part 2 Front PieceB 60' 06''
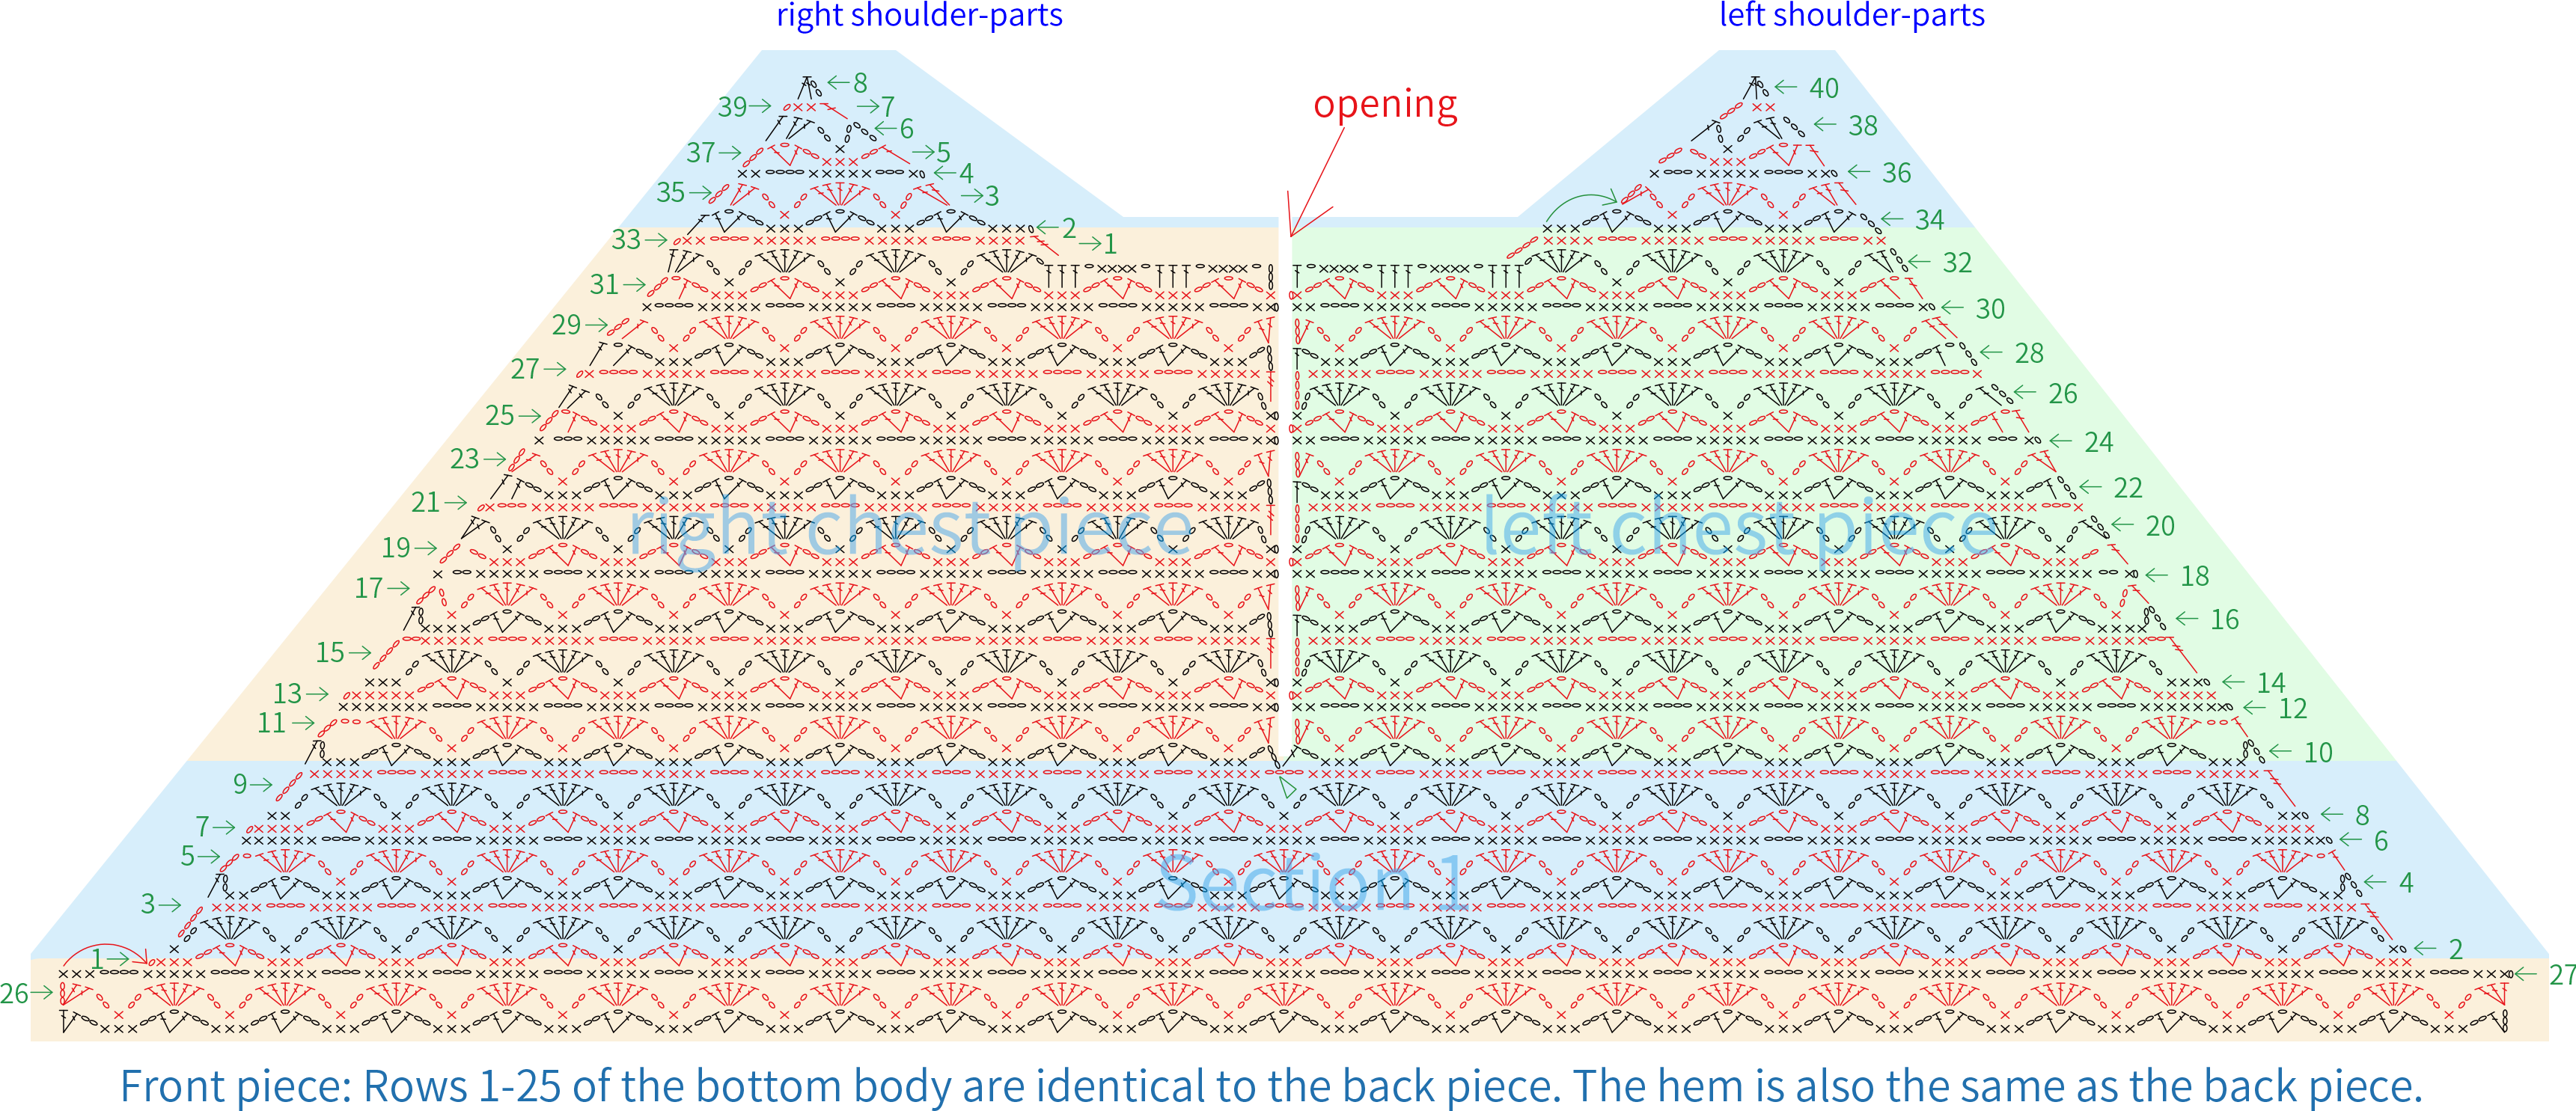
The front piece is divided into the body, chest piece, shoulder-parts, and hem. The chest piece is divided into Section 1 and Section 2, and Section 2 is further divided into the left and right chest pieces. Please refer to the video demonstration for more details.
Part 3 Connecting front and back piecesC 64' 47''
The front and back pieces are connected using single crochet and chain stitches. Please refer to the video demonstration for more details.

Part 4 SleeveD 69' 28''
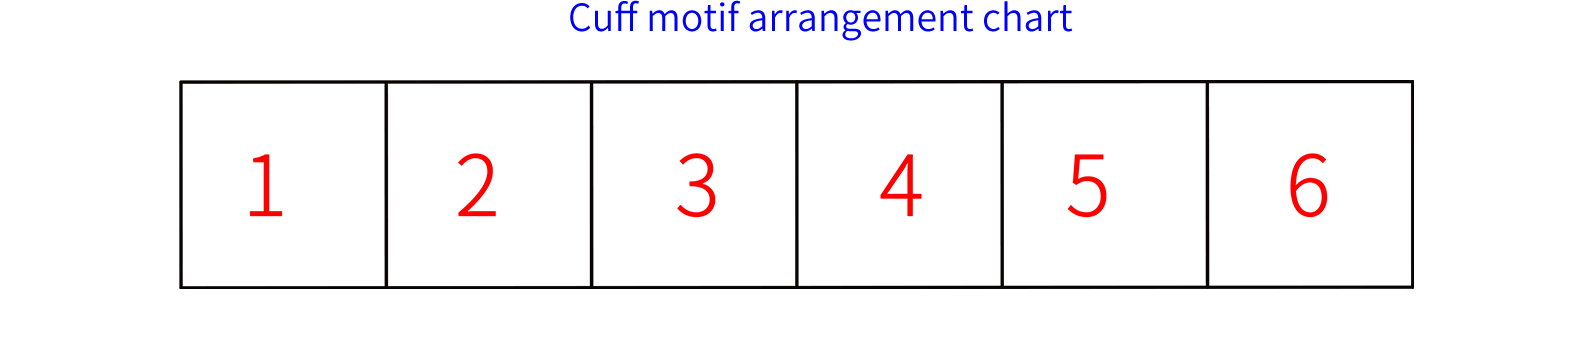
The sleeve is divided into the sleeve body, sleeve cap, and cuff. The cuff is made up of motifs and lace trim. First, complete the sleeve, then connect it to the front and back pieces. Finally, crochet the tie and assemble it in the corresponding position. Please refer to the video demonstration for more details.
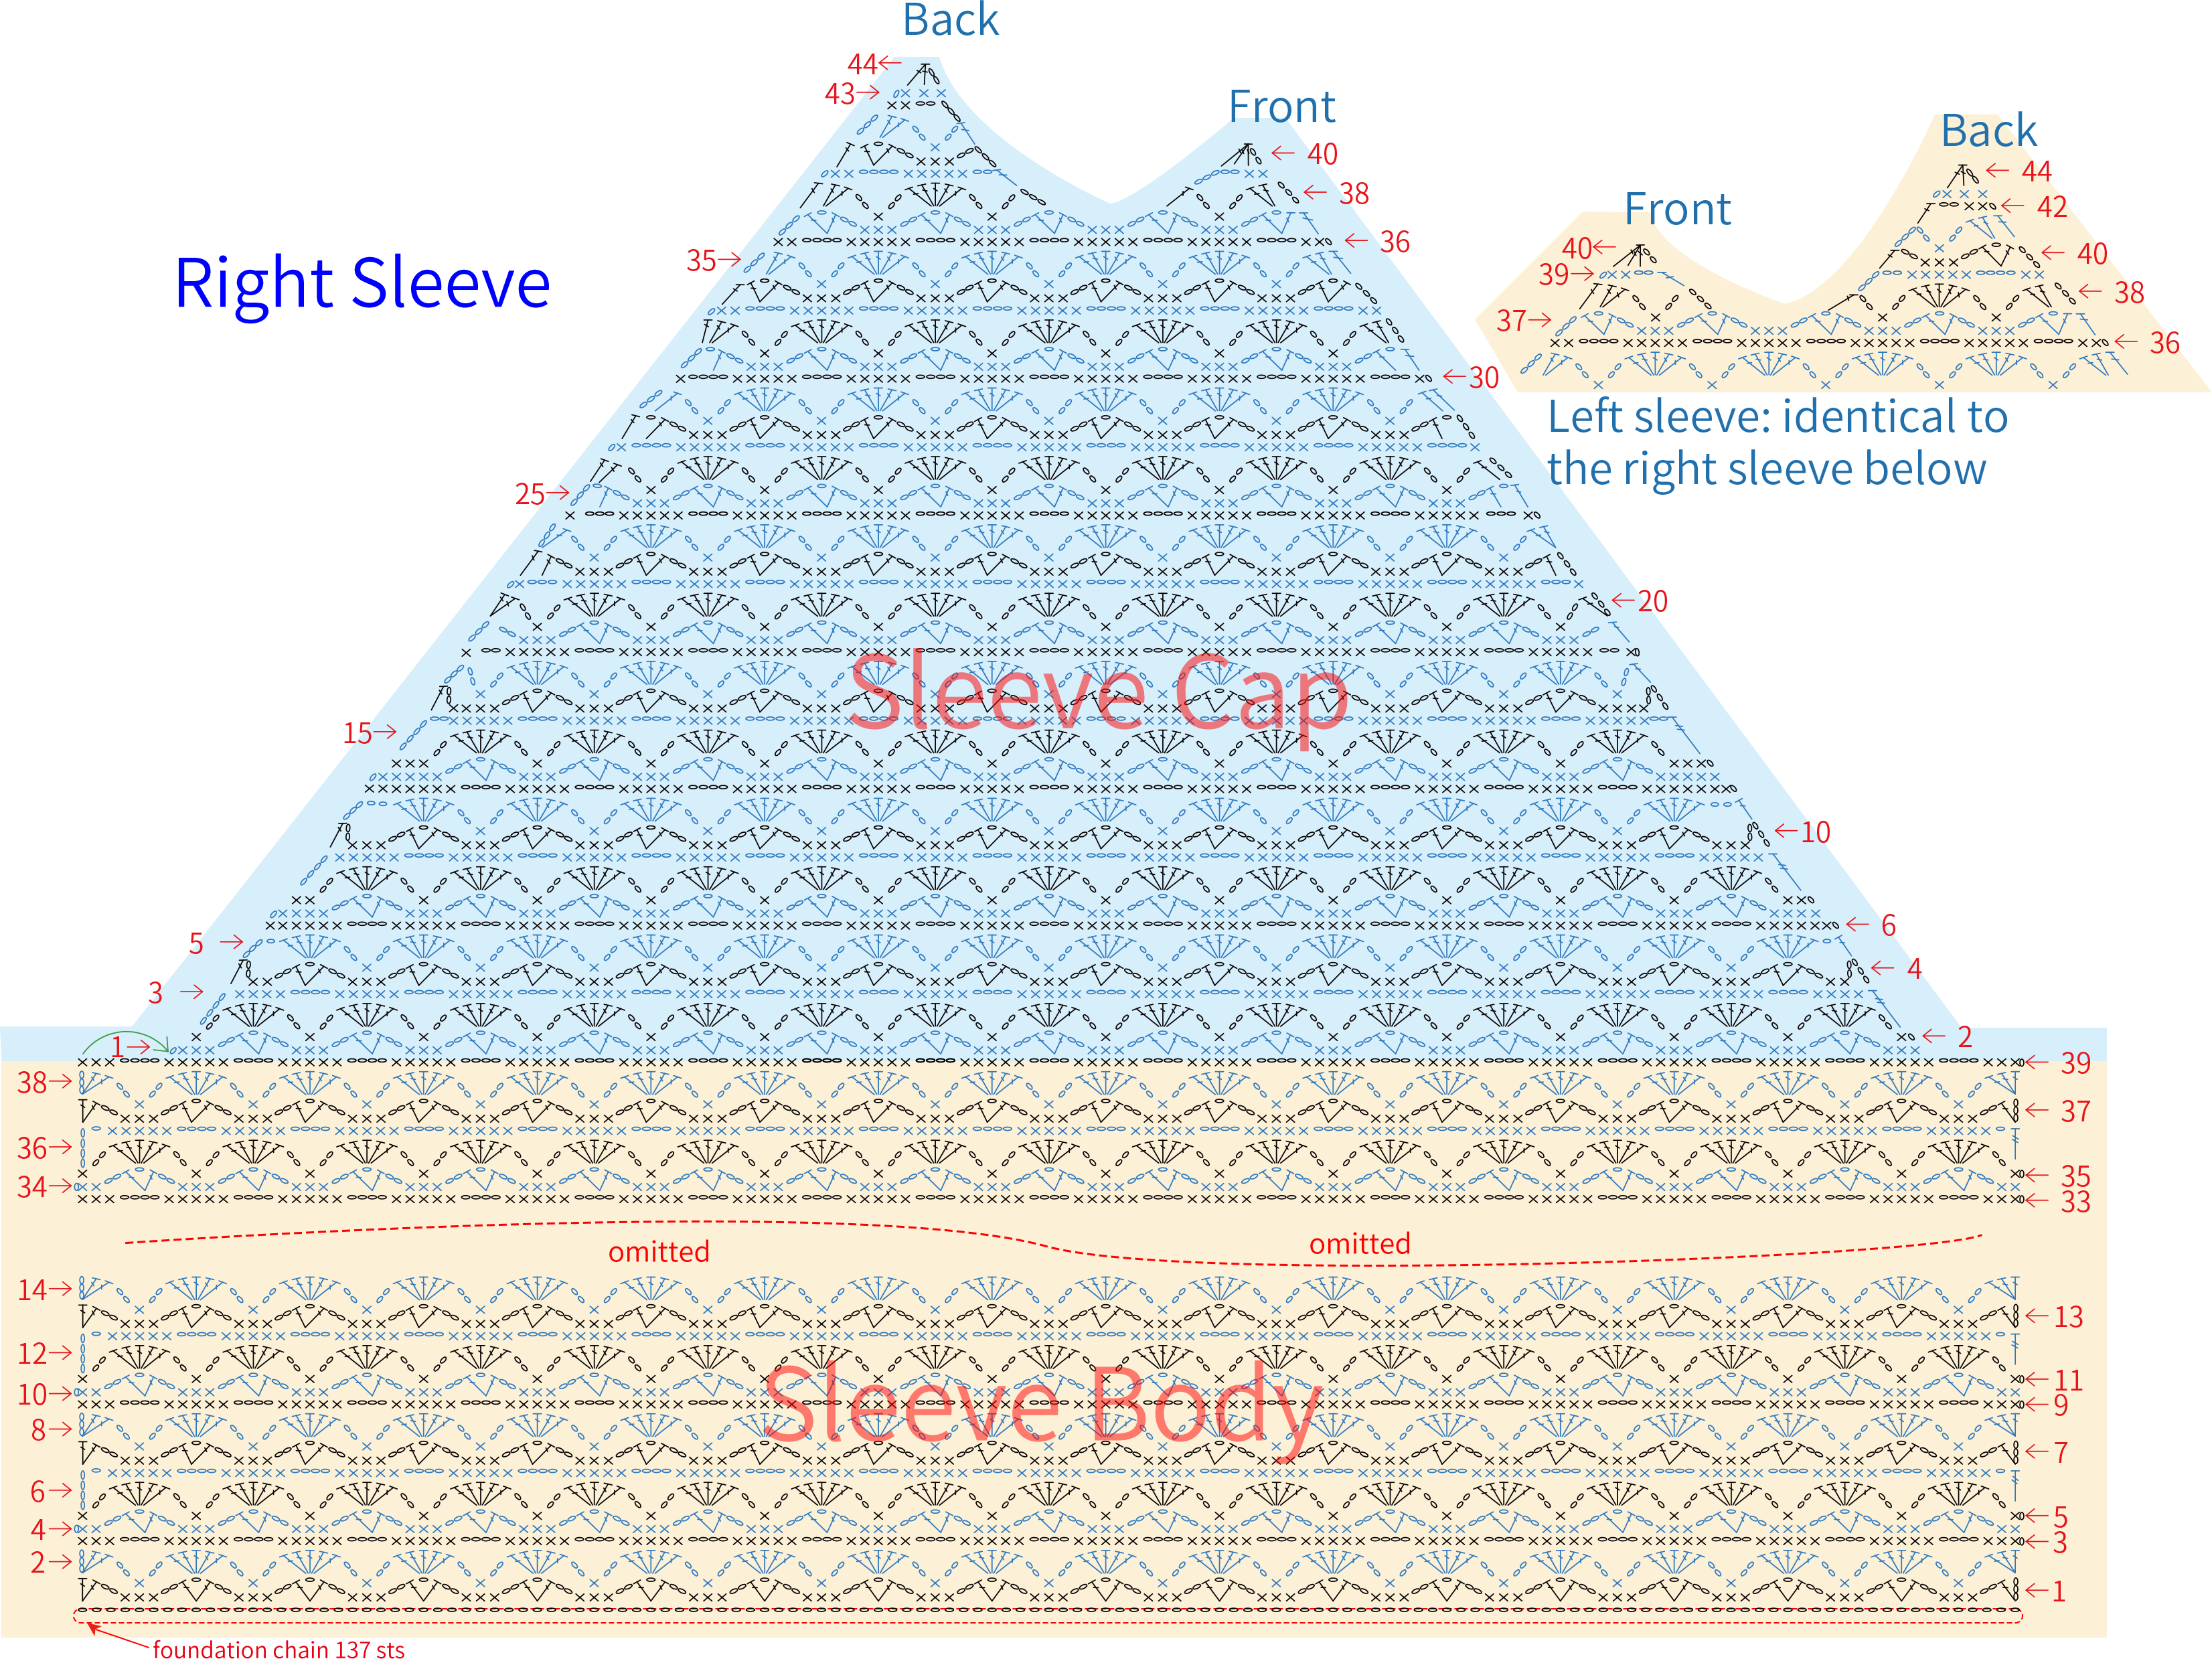
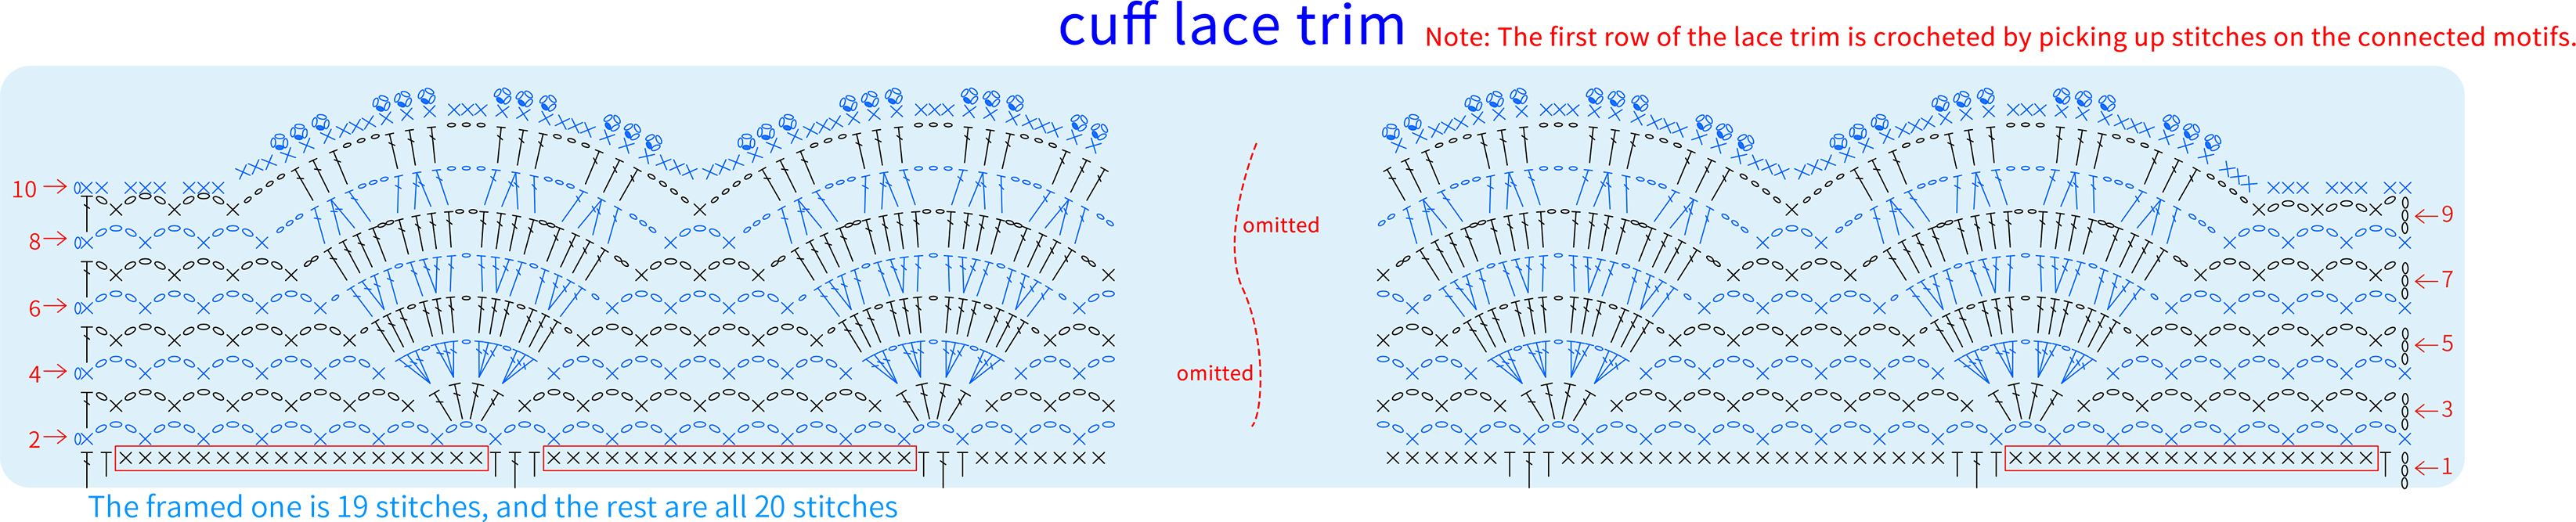
Note: The motif chart is identical to the back piece motif chart. For individual motifs: When working and joining simultaneously, connect at the highlighted stitch positions. Pay attention that when connecting motifs, you also need to connect to the starting point of the sleeve body.
Part 5 Edging and TiesE 71' 29''
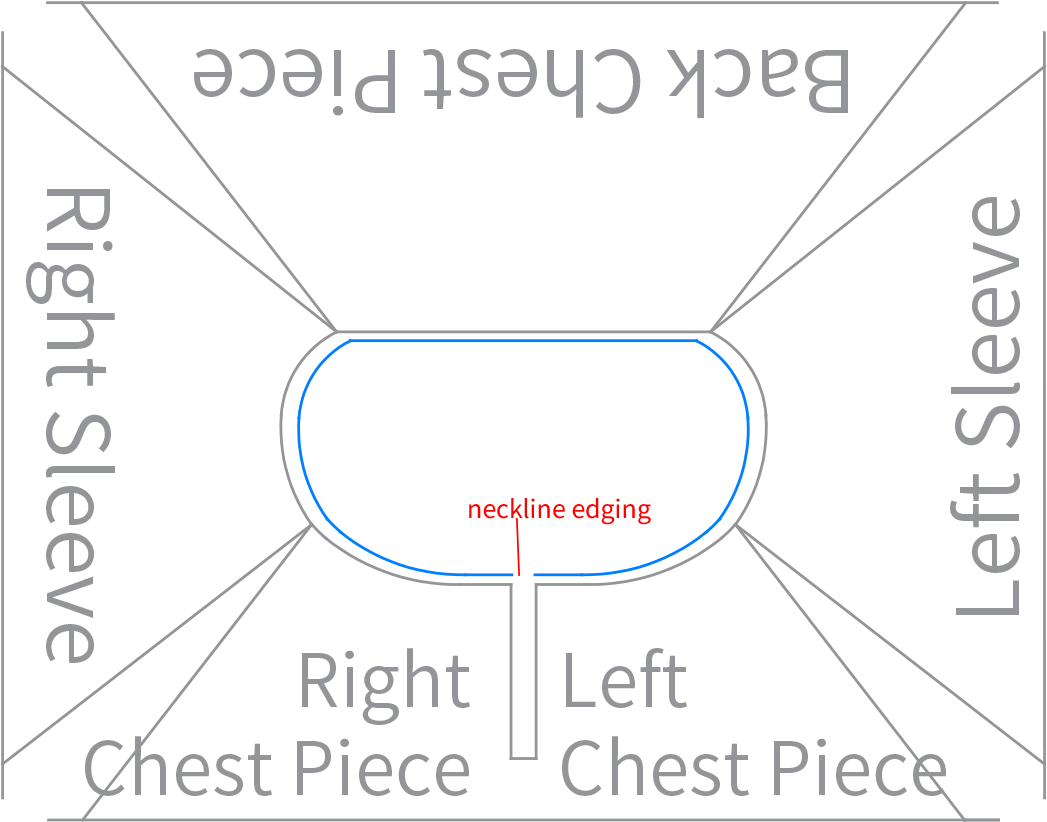
The edging is crocheted at the neckline position, then crochet the ties last, and assemble them in the corresponding positions. Please refer to the video demonstration for more details.

Note:
1. There is no requirement for the number of edging stitches, just make sure the fabric piece lays flat.
2. Neckline ties x 2 (50 cm), cuff ties x 2 (90 cm), work two strands of yarn as one strand.
Made by the community




