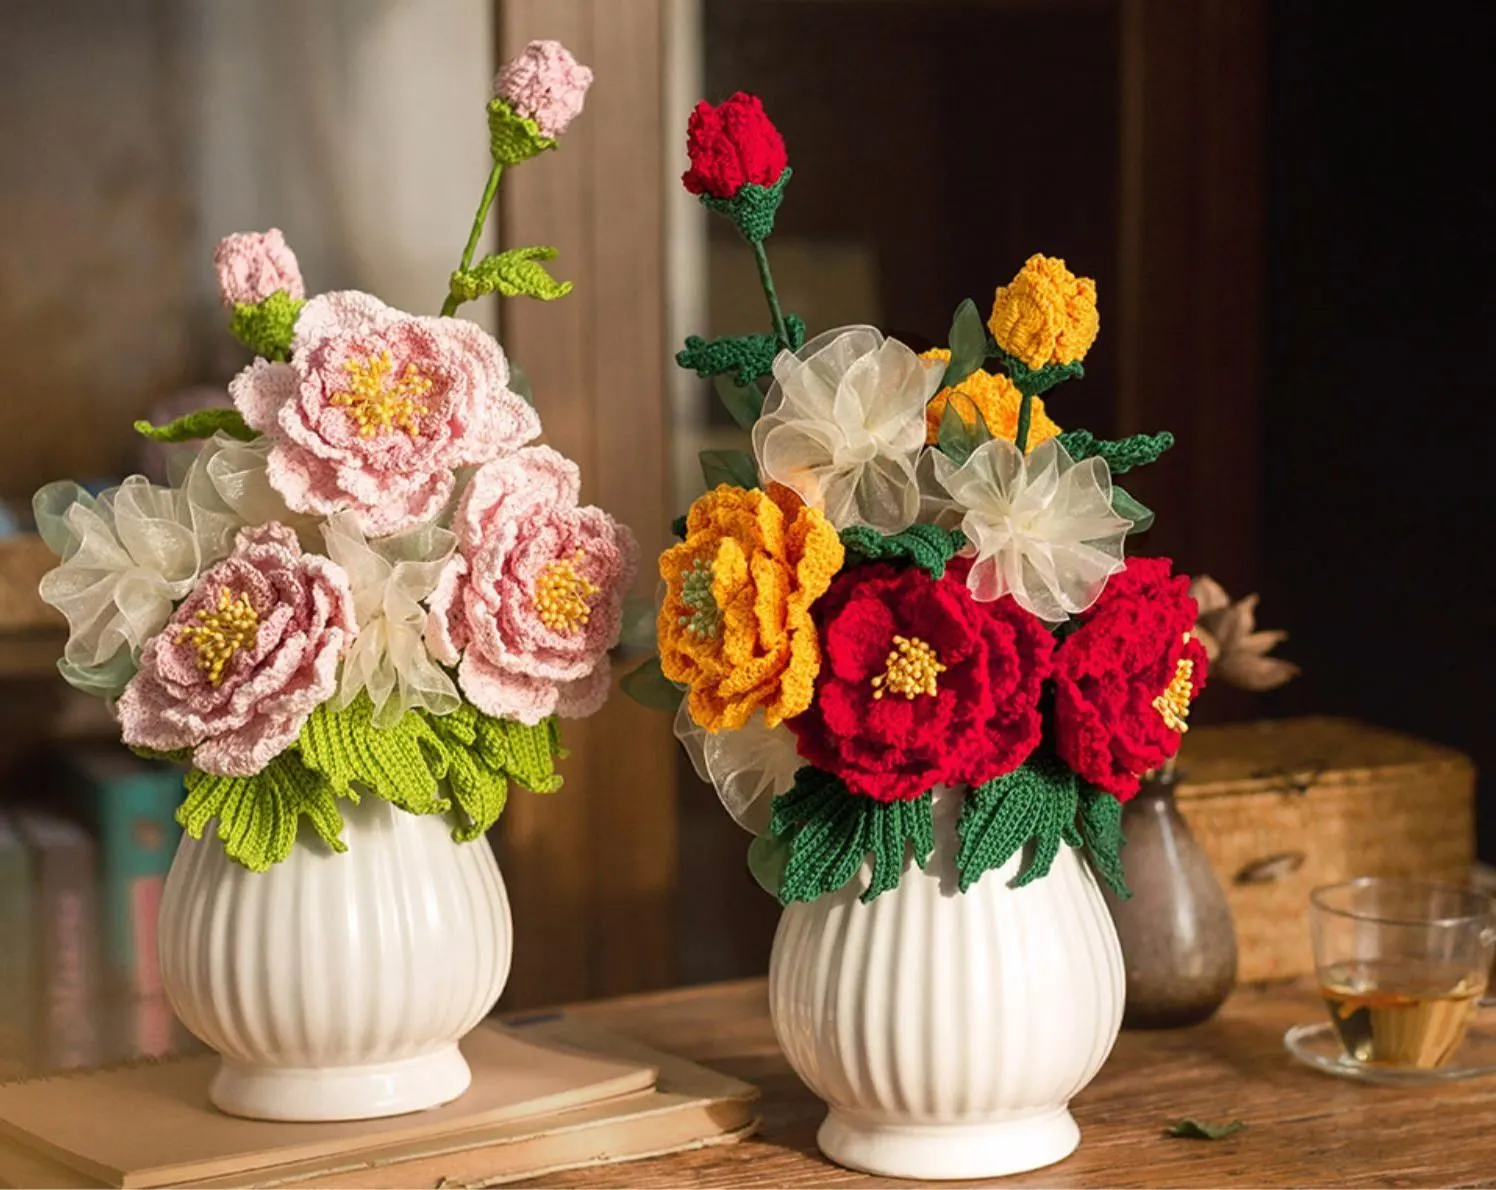
Flowers
Blossoming Bond Bouquet
Project preview
See the finished project
Pattern format
Instructions
Watch and follow
Video tutorial
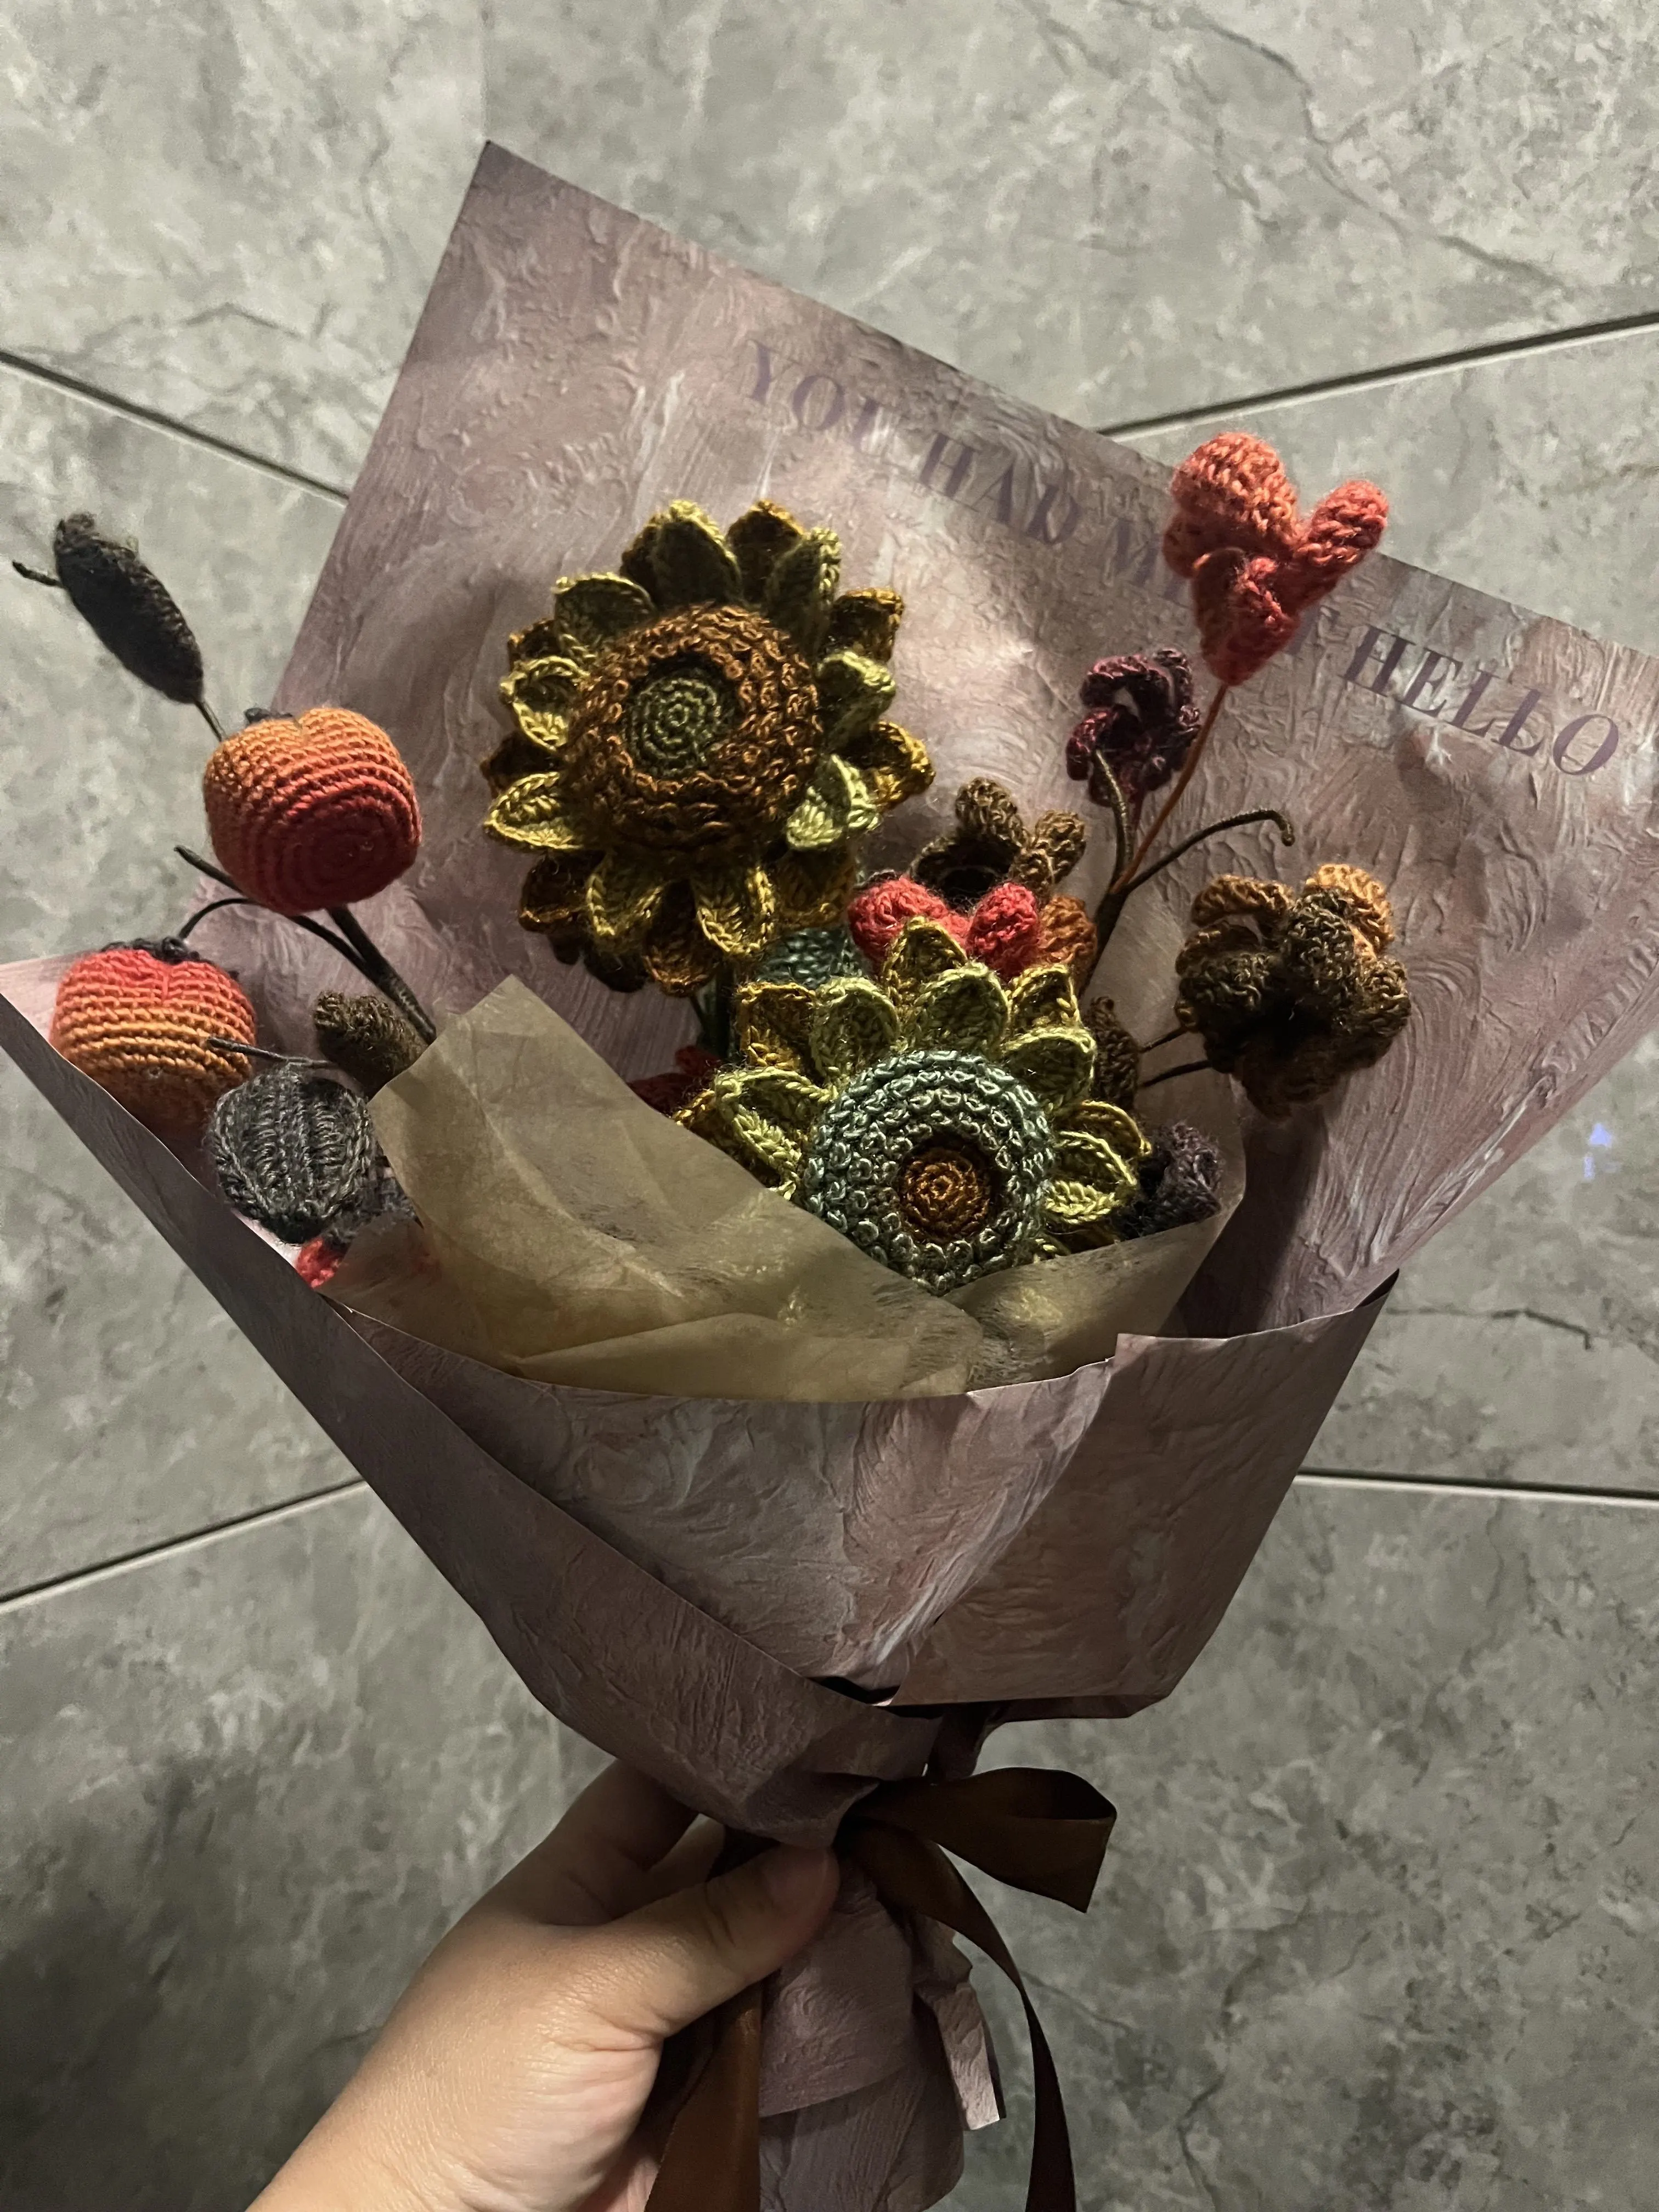
This bouquet consists of persimmon branches, sunflower branches, and maple leaf branches. First, make each type of flower branch separately. After completing, assemble the flower branches. Finally, package them.
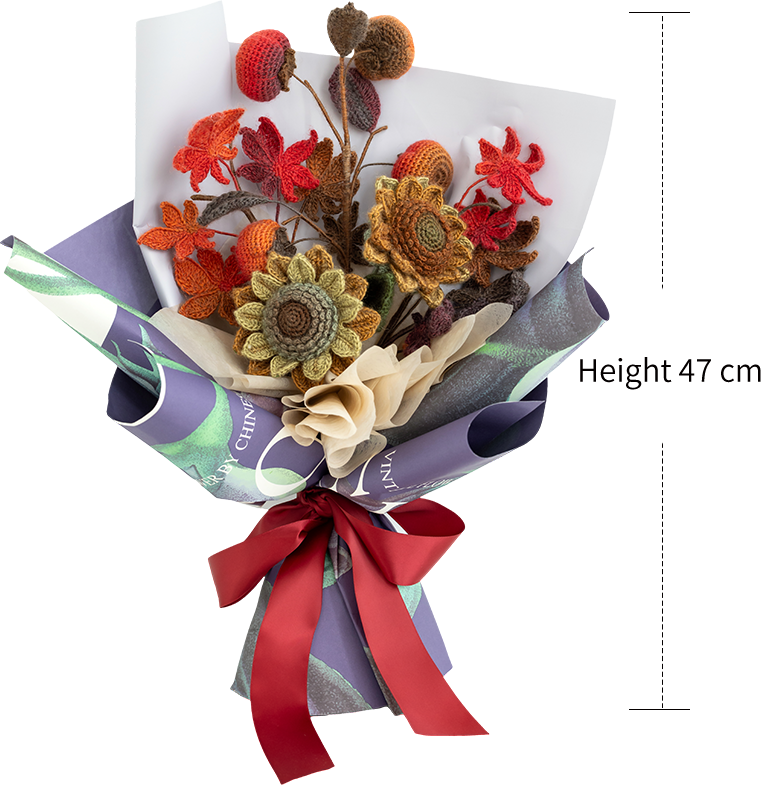
Due to variations in individual tension, the size of the sample is for reference only.
Materials: Susan's Family Monet Impression
Hook: 2.00 mm crochet hook
Monet Impression is variegated yarn. The starting color segments of this yarn are different and the effect when crocheted will also vary slightly.
Chart Key









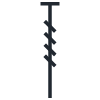



 =
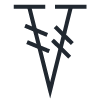
=
ABBREVIATIONS
MRadjustable magic ring
Dao2start in 2nd CH from the hook
RRound
Xsingle crochet
V = sc2-in-12 single crochets into the same stitch
CHchain
Fdouble crochet
[...]in the same stitch
(...)×6crochet item in the parentheses six times
FLOfront loop only
BLOback loop only
Kskip
SLslip stitch

Note: 1, This pattern is making in Chinese crochet pattern terms, and the stitch name is written using American terminology. All measurements in charts are in cm.

Part 1 Persimmon BranchA
Each branch consists of the persimmons, the calyx, and the leaves. Crochet them first, then assemble them into the branch.
Color: 07#Late Fall. You can to follow the color scheme of the finished product or freely matched according to personal preference.
Step 1 Persimmon × 4 01' 34'' (Part 1)
The persimmons start with a magic ring. Work along the magic ring and crochet in spirals. When you finish, pull to shape it. Please refer to the video demonstration for more details.
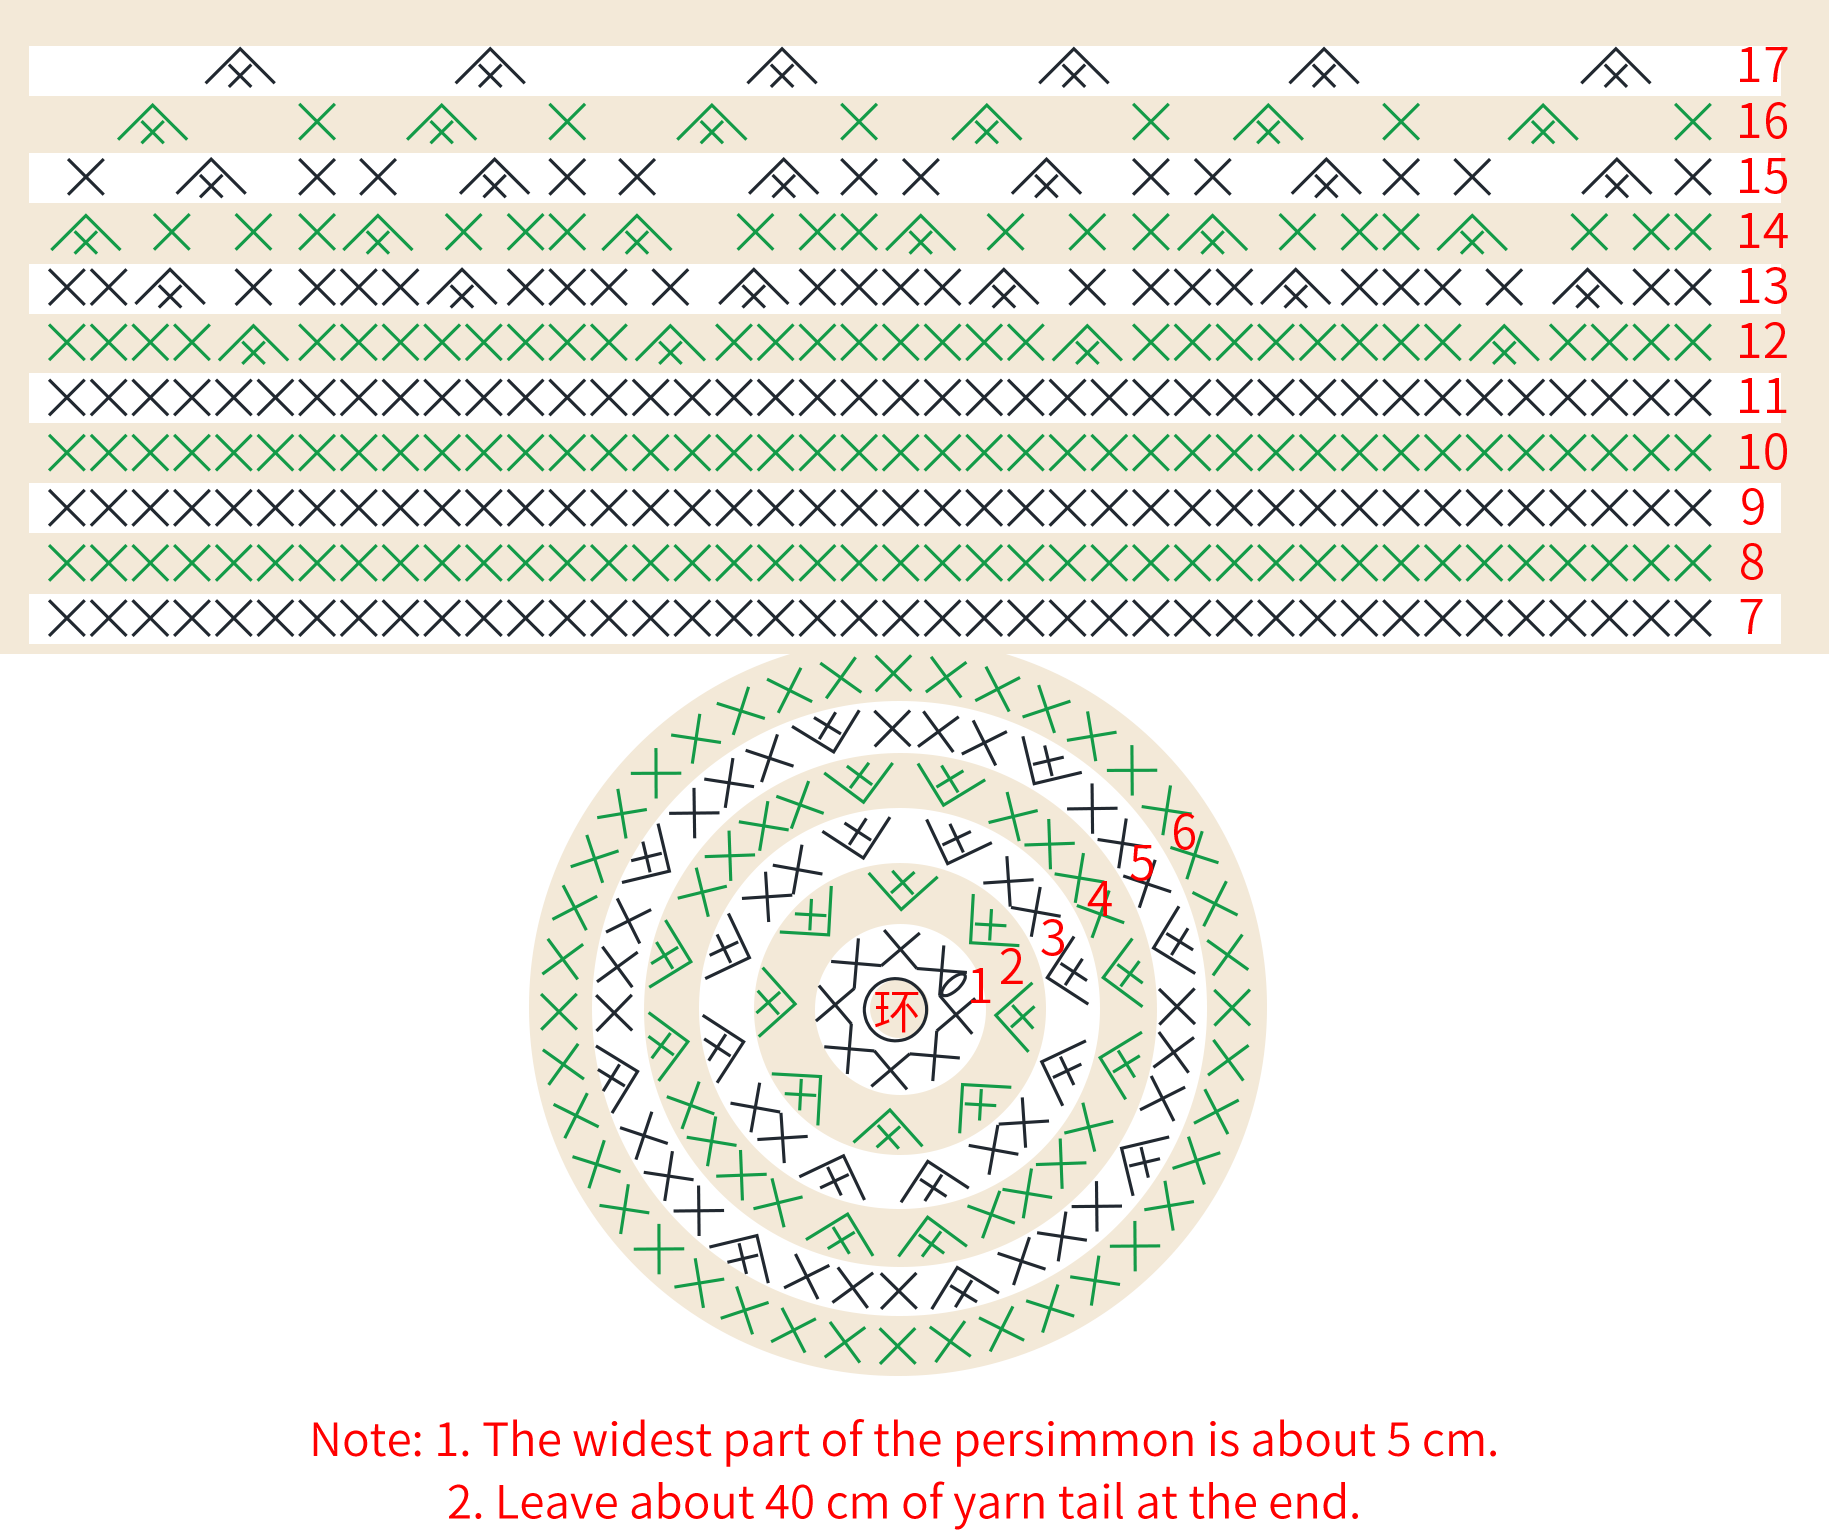
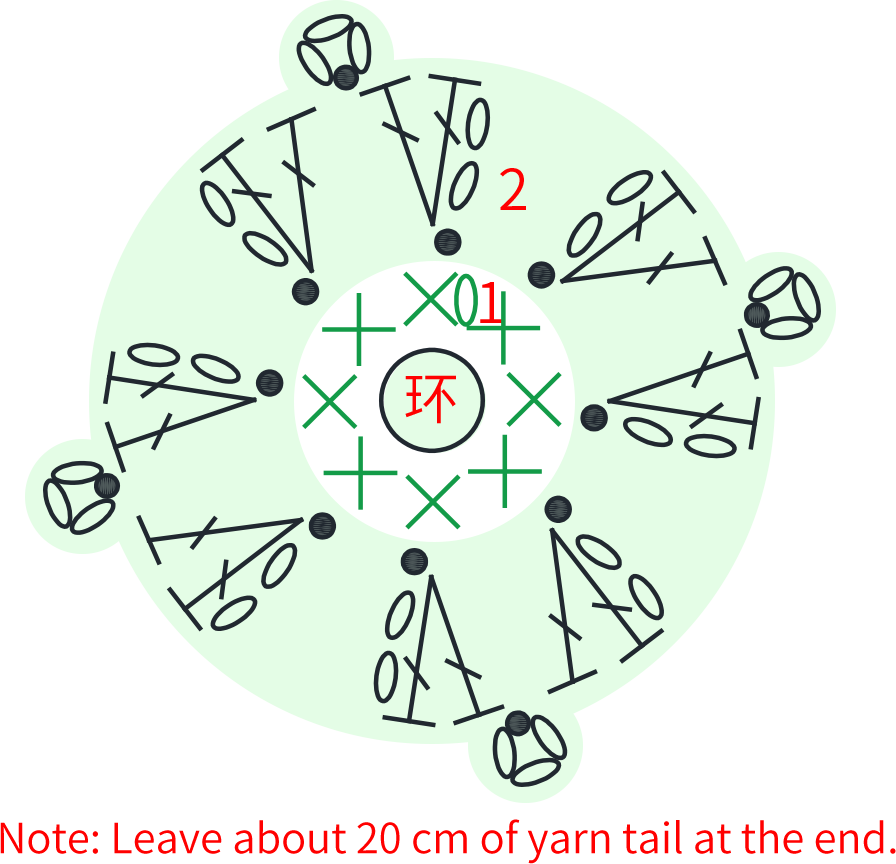
Step 2 Persimmon Calyx × 4 24' 41'' (Part 1)
The calyx starts with a magic ring. Crochet in rounds around the magic ring. Please refer to the video demonstration for more details.
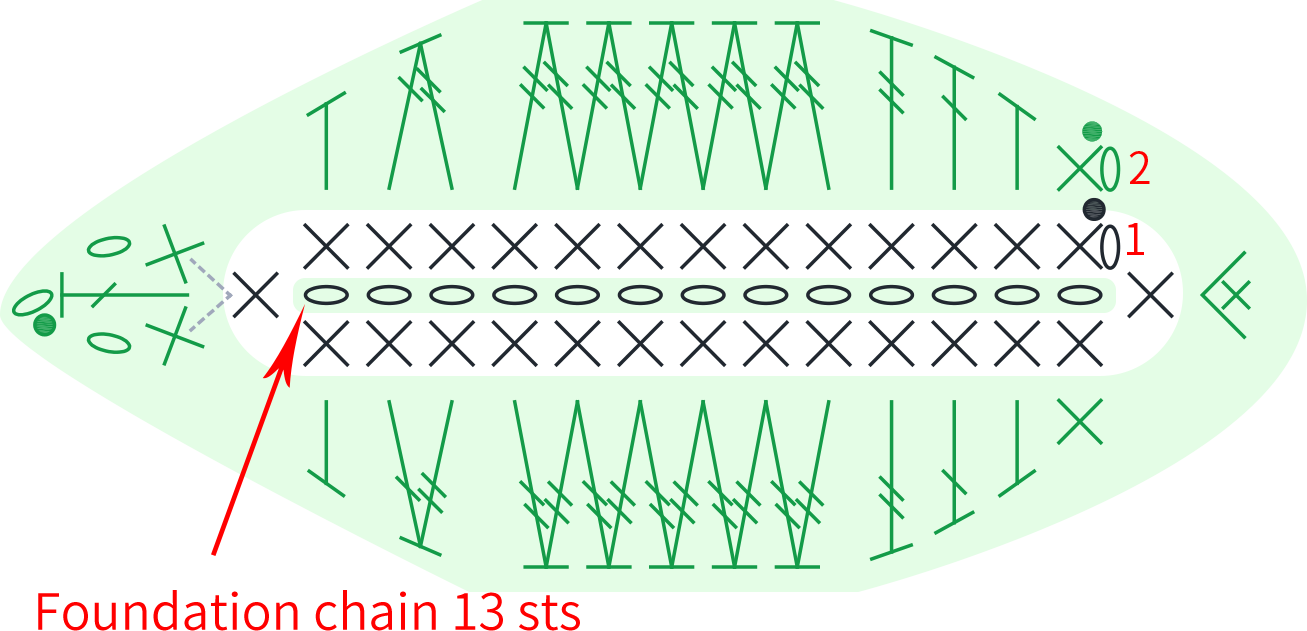
Step 3 Leaves × 3 31' 10'' (Part 1)
The leaves start with a foundation chain. Crochet in rounds around the foundation chain. In the second round, wrap the thin wire while crocheting. Please refer to the video demonstration for more details.
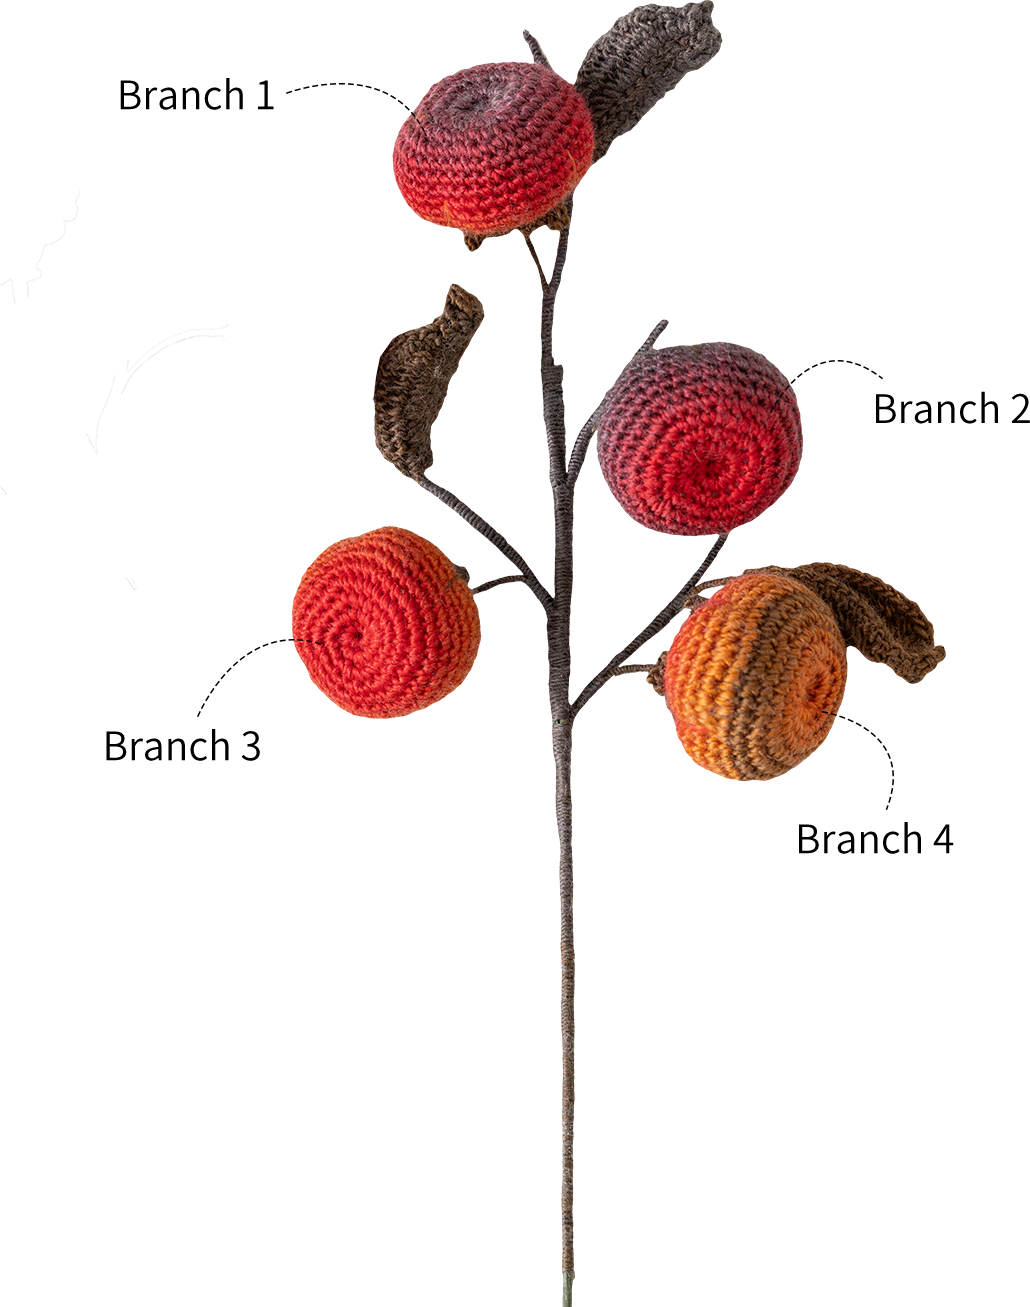
Step 4 Assembling 47' 27'' (Part 1)
We will refer to all the branches from top to bottom as, Branch 1, Branch 2, Branch 3 and Branch 4. First, complete all the branches, then assemble them onto the flower stem. Please refer to the video demonstration for more details.
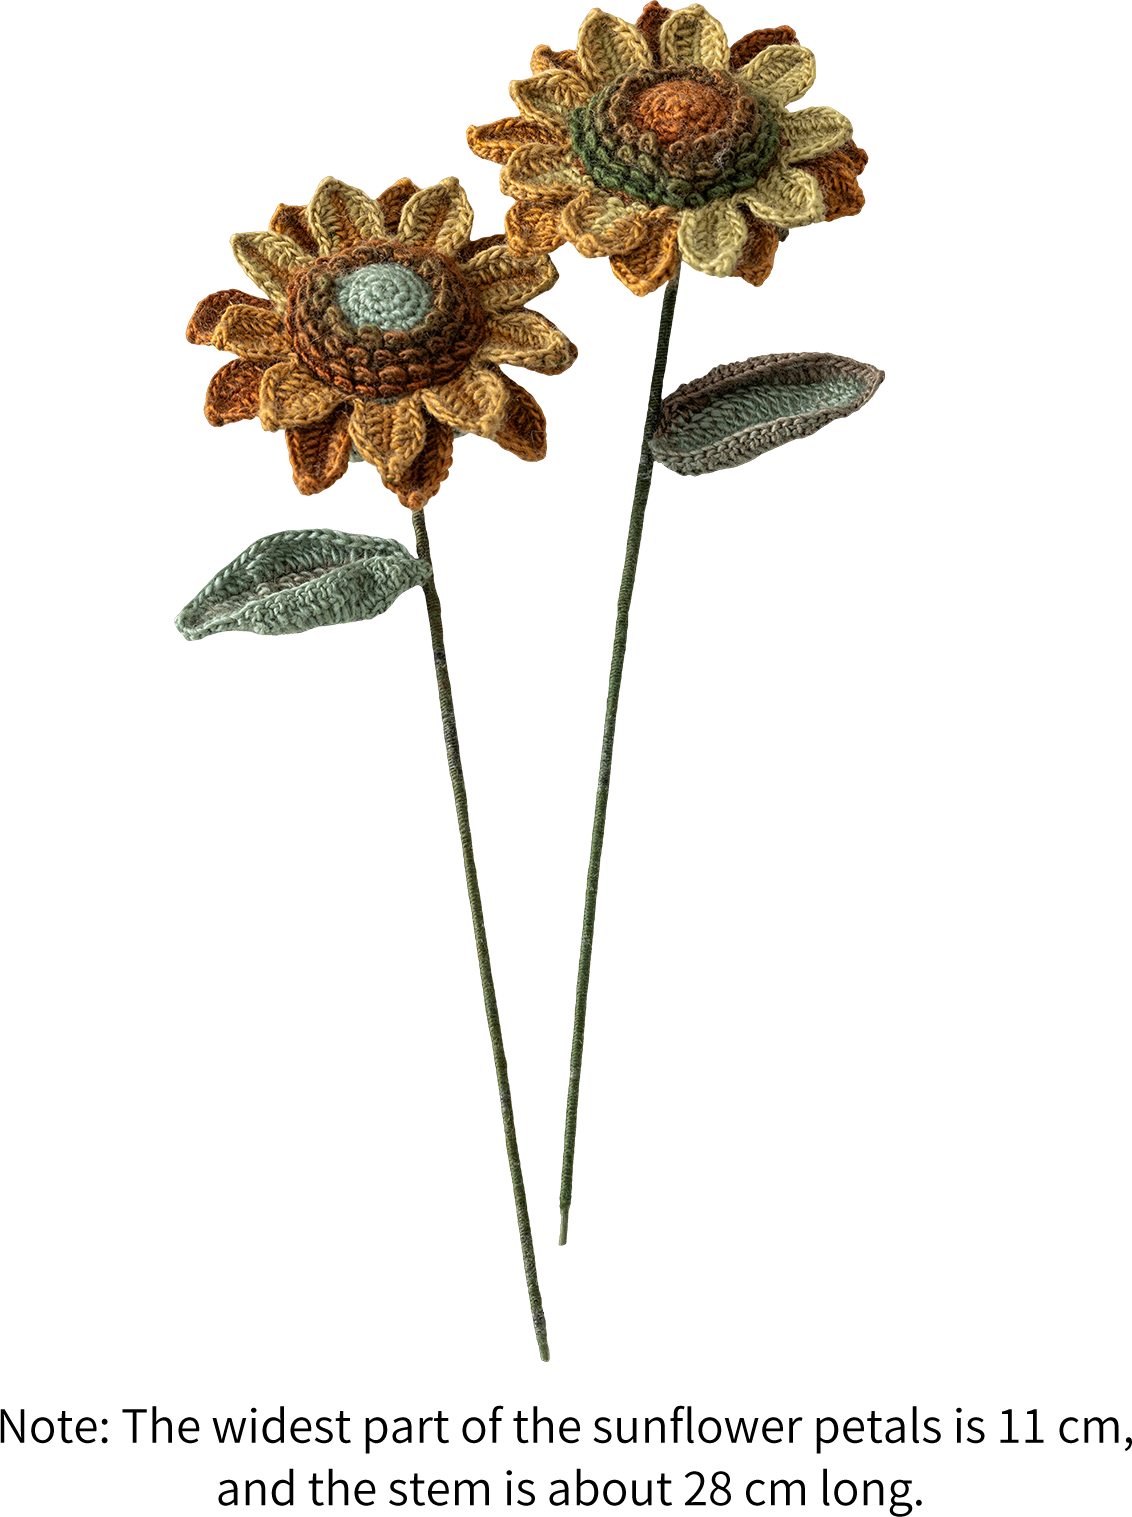
Part 2 Sunflower Branches × 2B 00' 07'' (Part 2)
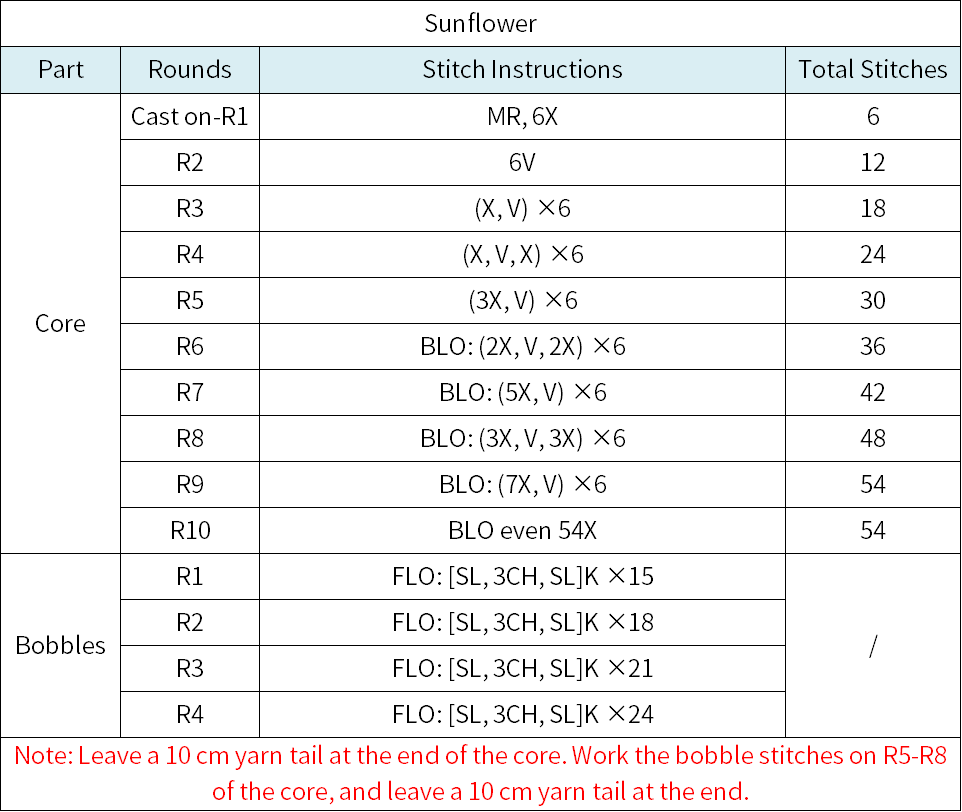
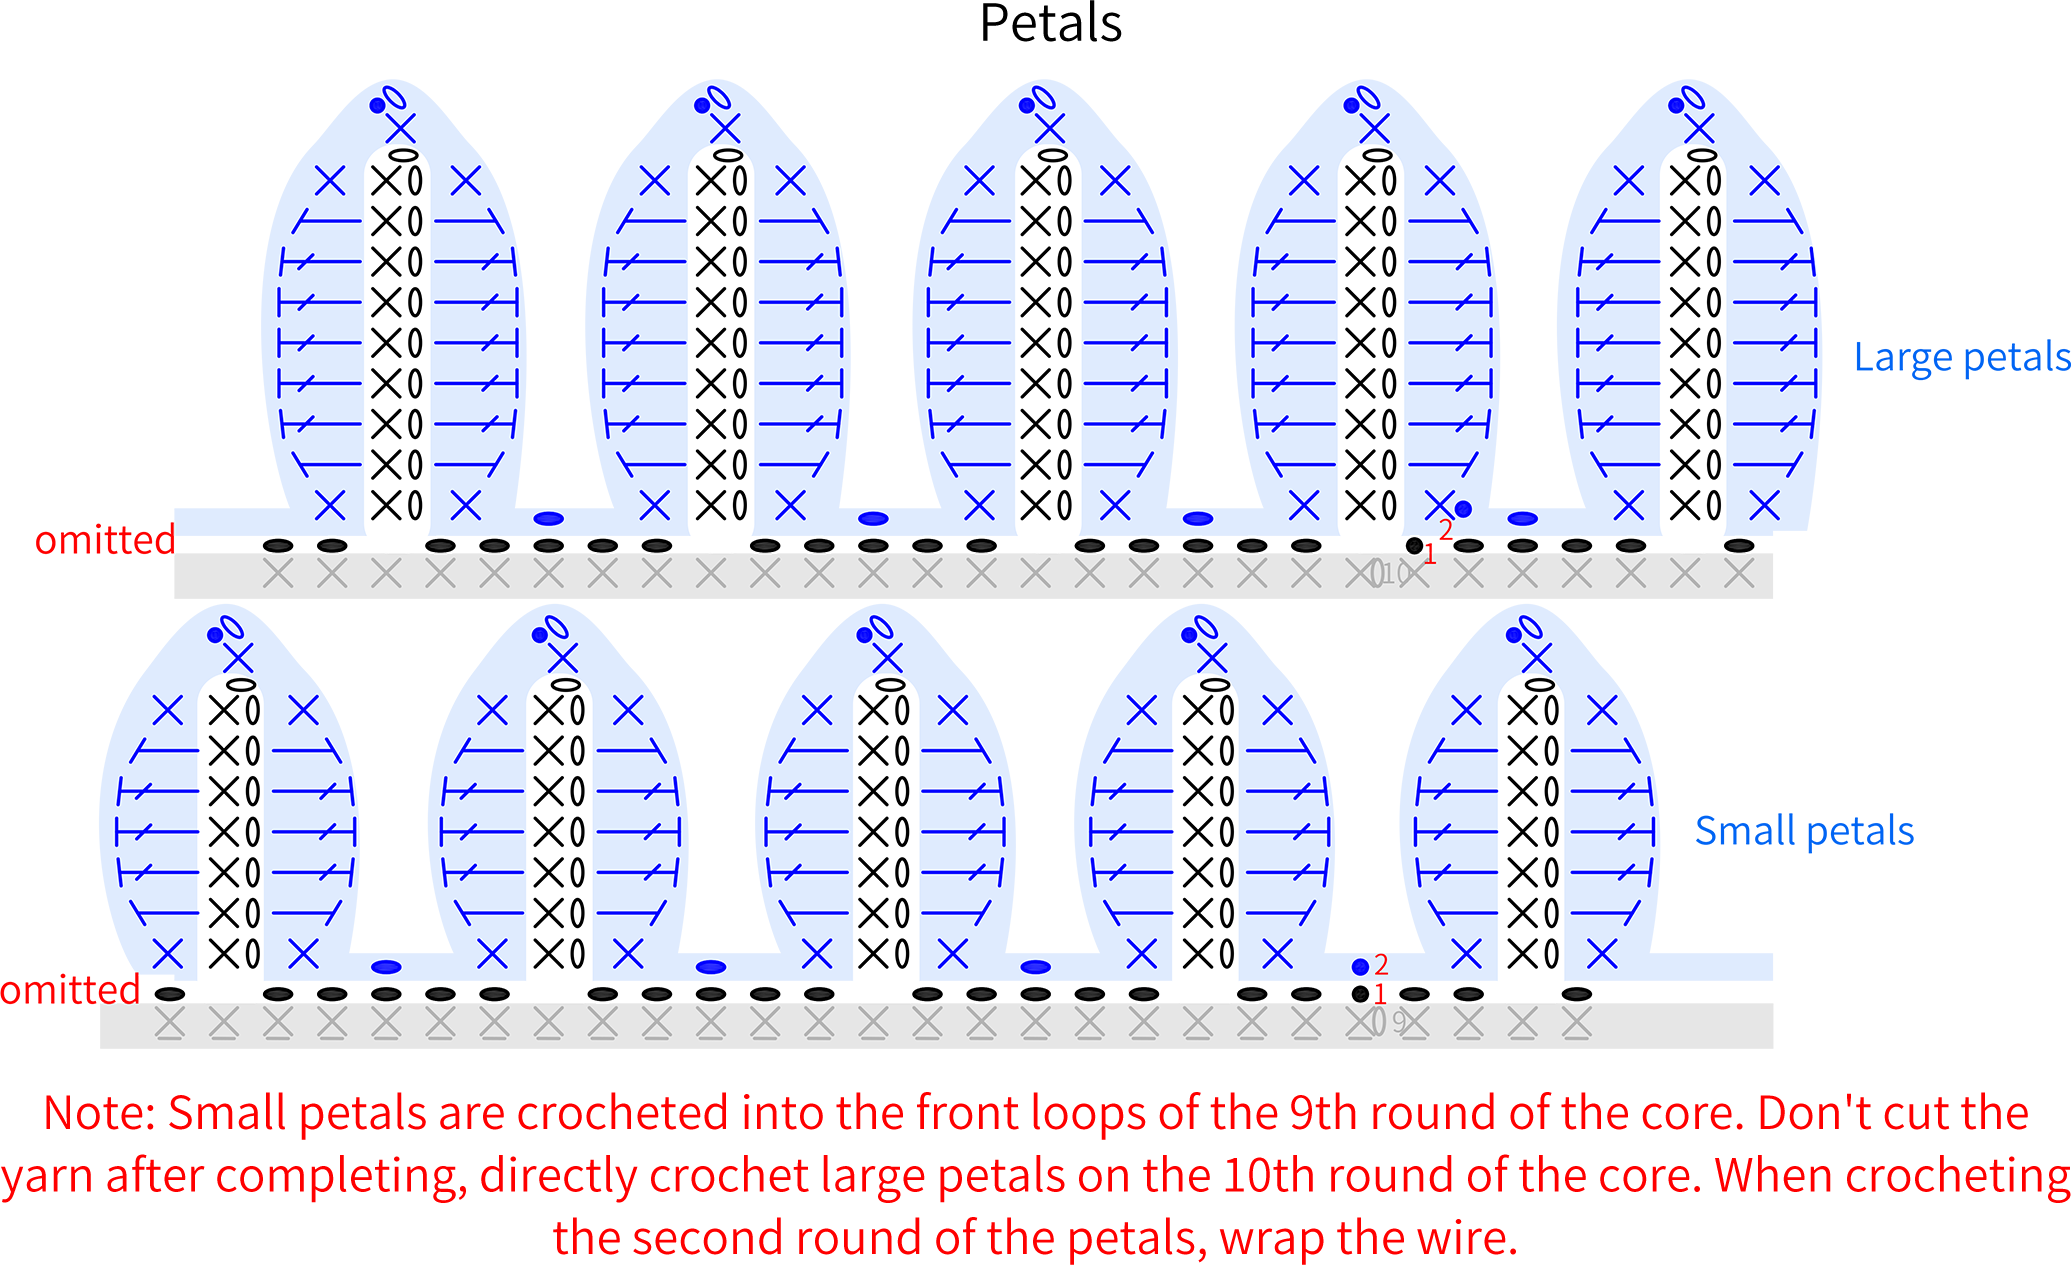
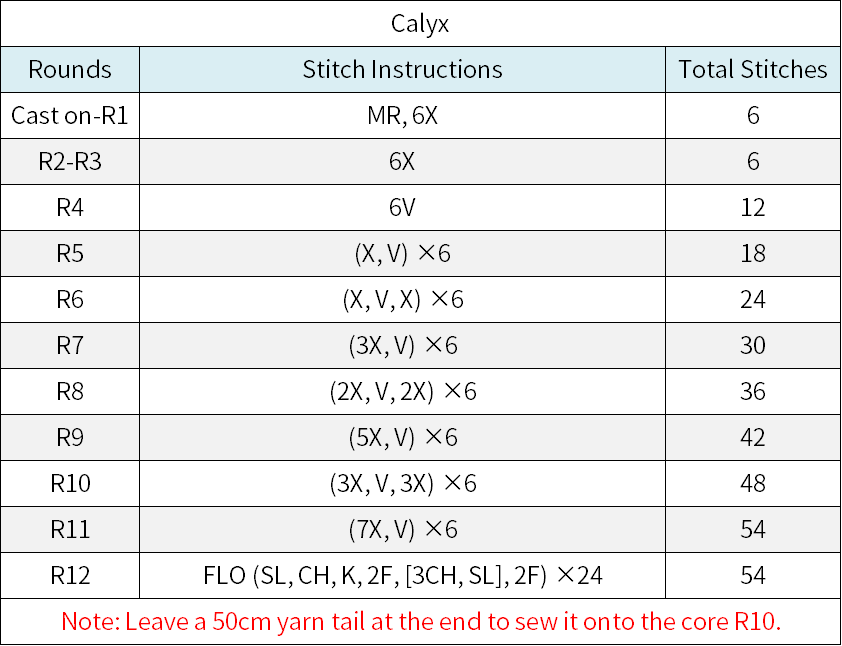
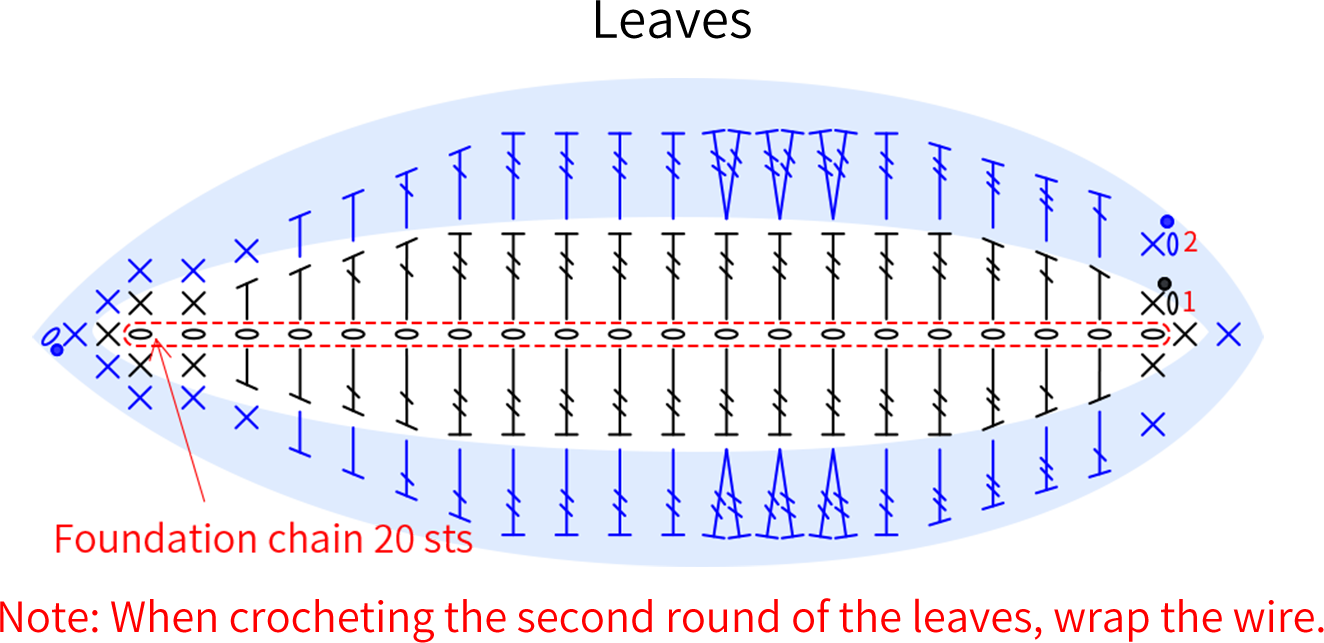
Each branch is divided into the core, bobbles, petals, calyx, and leaves. The core start with a magic ring and crochet in rounds counterclockwise. Once completed, crochet bobbles on it. Then crochet the petals. Next, crochet the calyx and leaves. Finally, assemble with the stem. Please refer to the video demonstration for more details.
Color: 10#Woods. You can to follow the color scheme of the finished product or freely matched according to personal preference.
Part 3 Maple Leaf Branches × 2C 46' 49'' (Part 2)
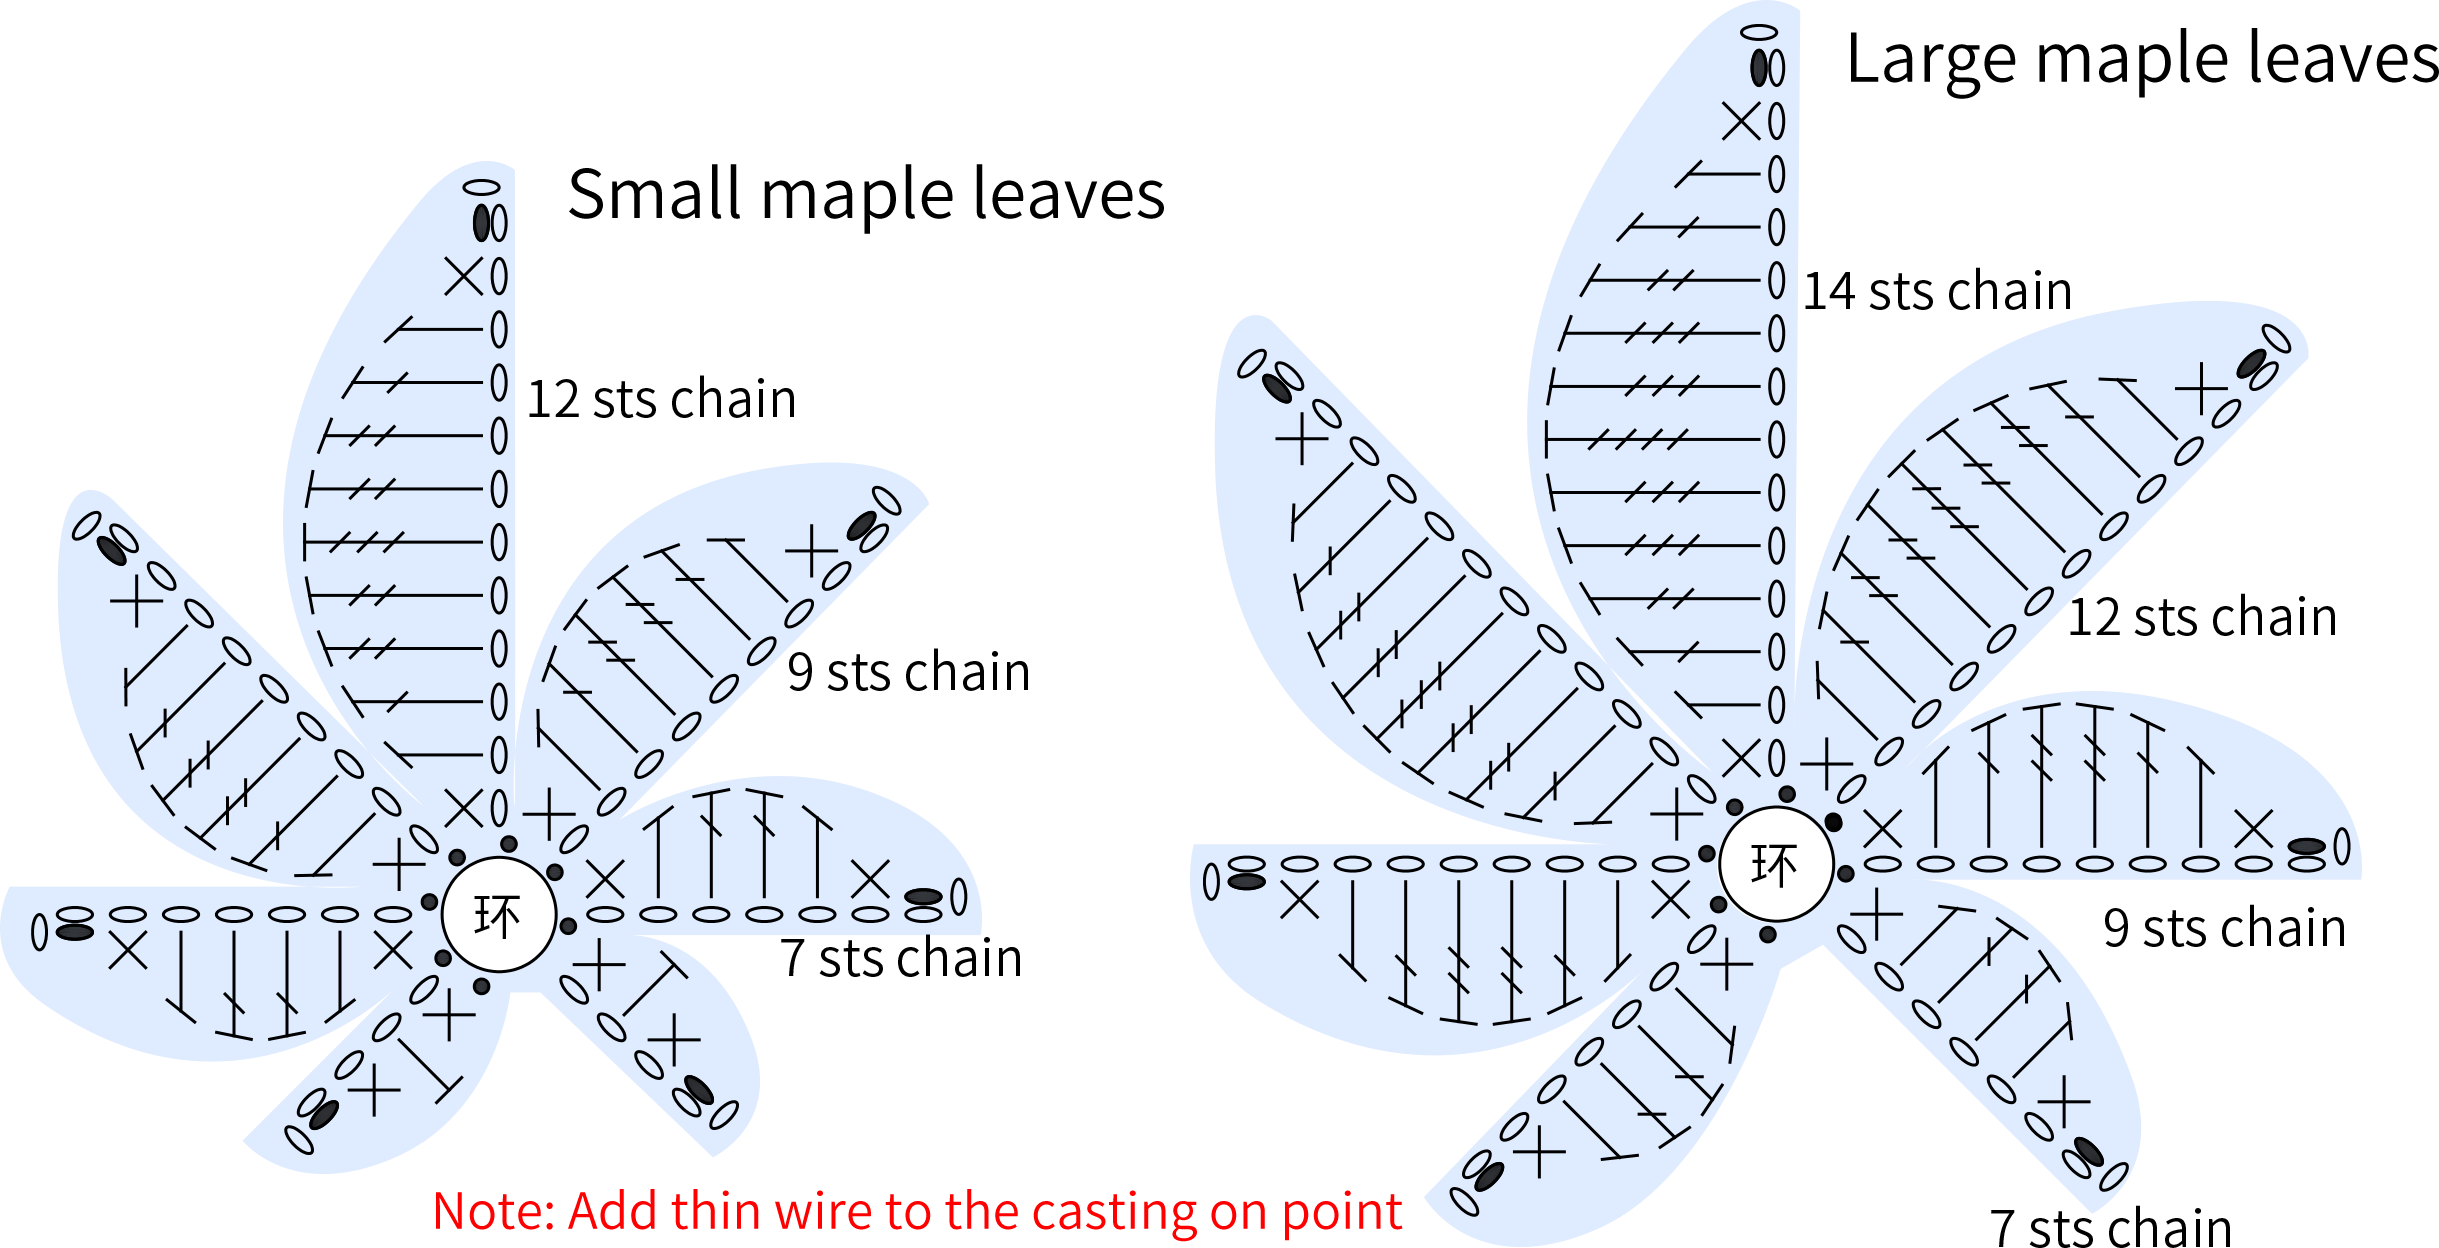
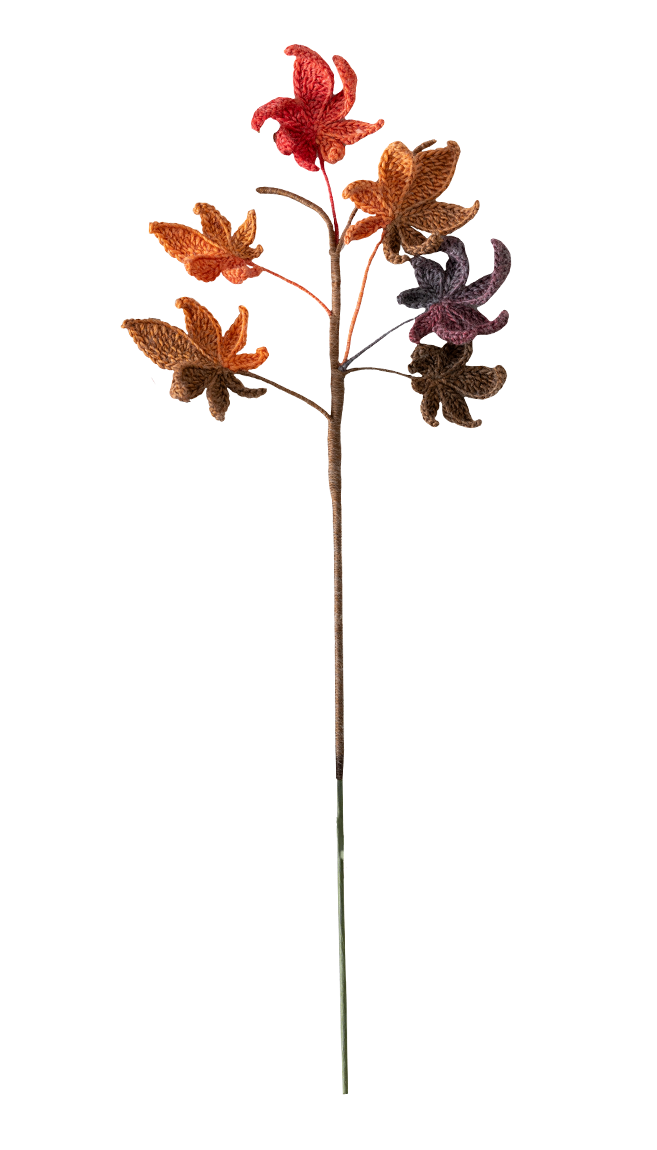
Each branch consists of six maple leaves and one stem. There are two sizes of maple leaves. A complete branch includes 2 small maple leaves and 4 large maple leaves. Start by making the maple leaves. Once completed, assemble them with the stem. Please refer to the video demonstration for more details.
Note: After casting on, add thin wire. Once completed, use a shaping solution spraying on the wrong side.
Color: 7#Late Fall. You can to follow the color scheme of the finished product or freely matched according to personal preference.
Part 4 Assembly and Packaging
Made by the community