Clothes
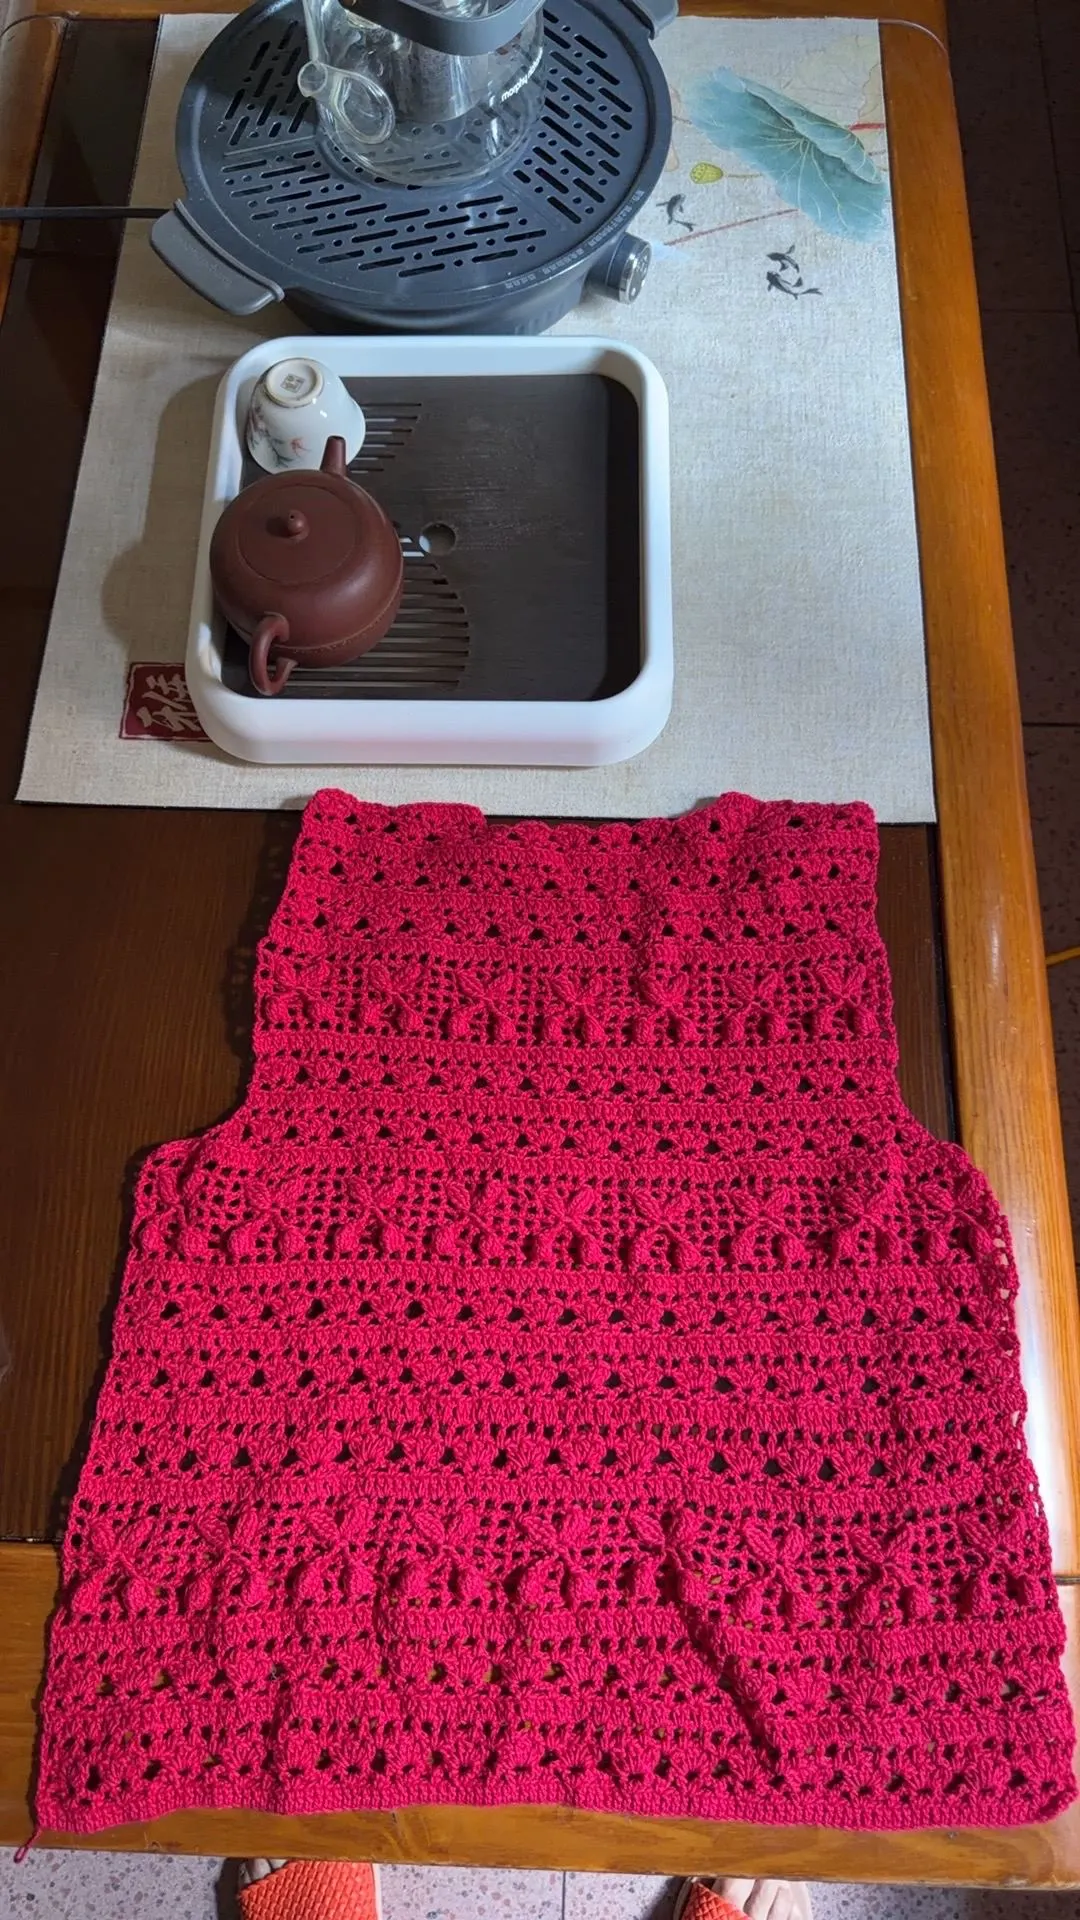
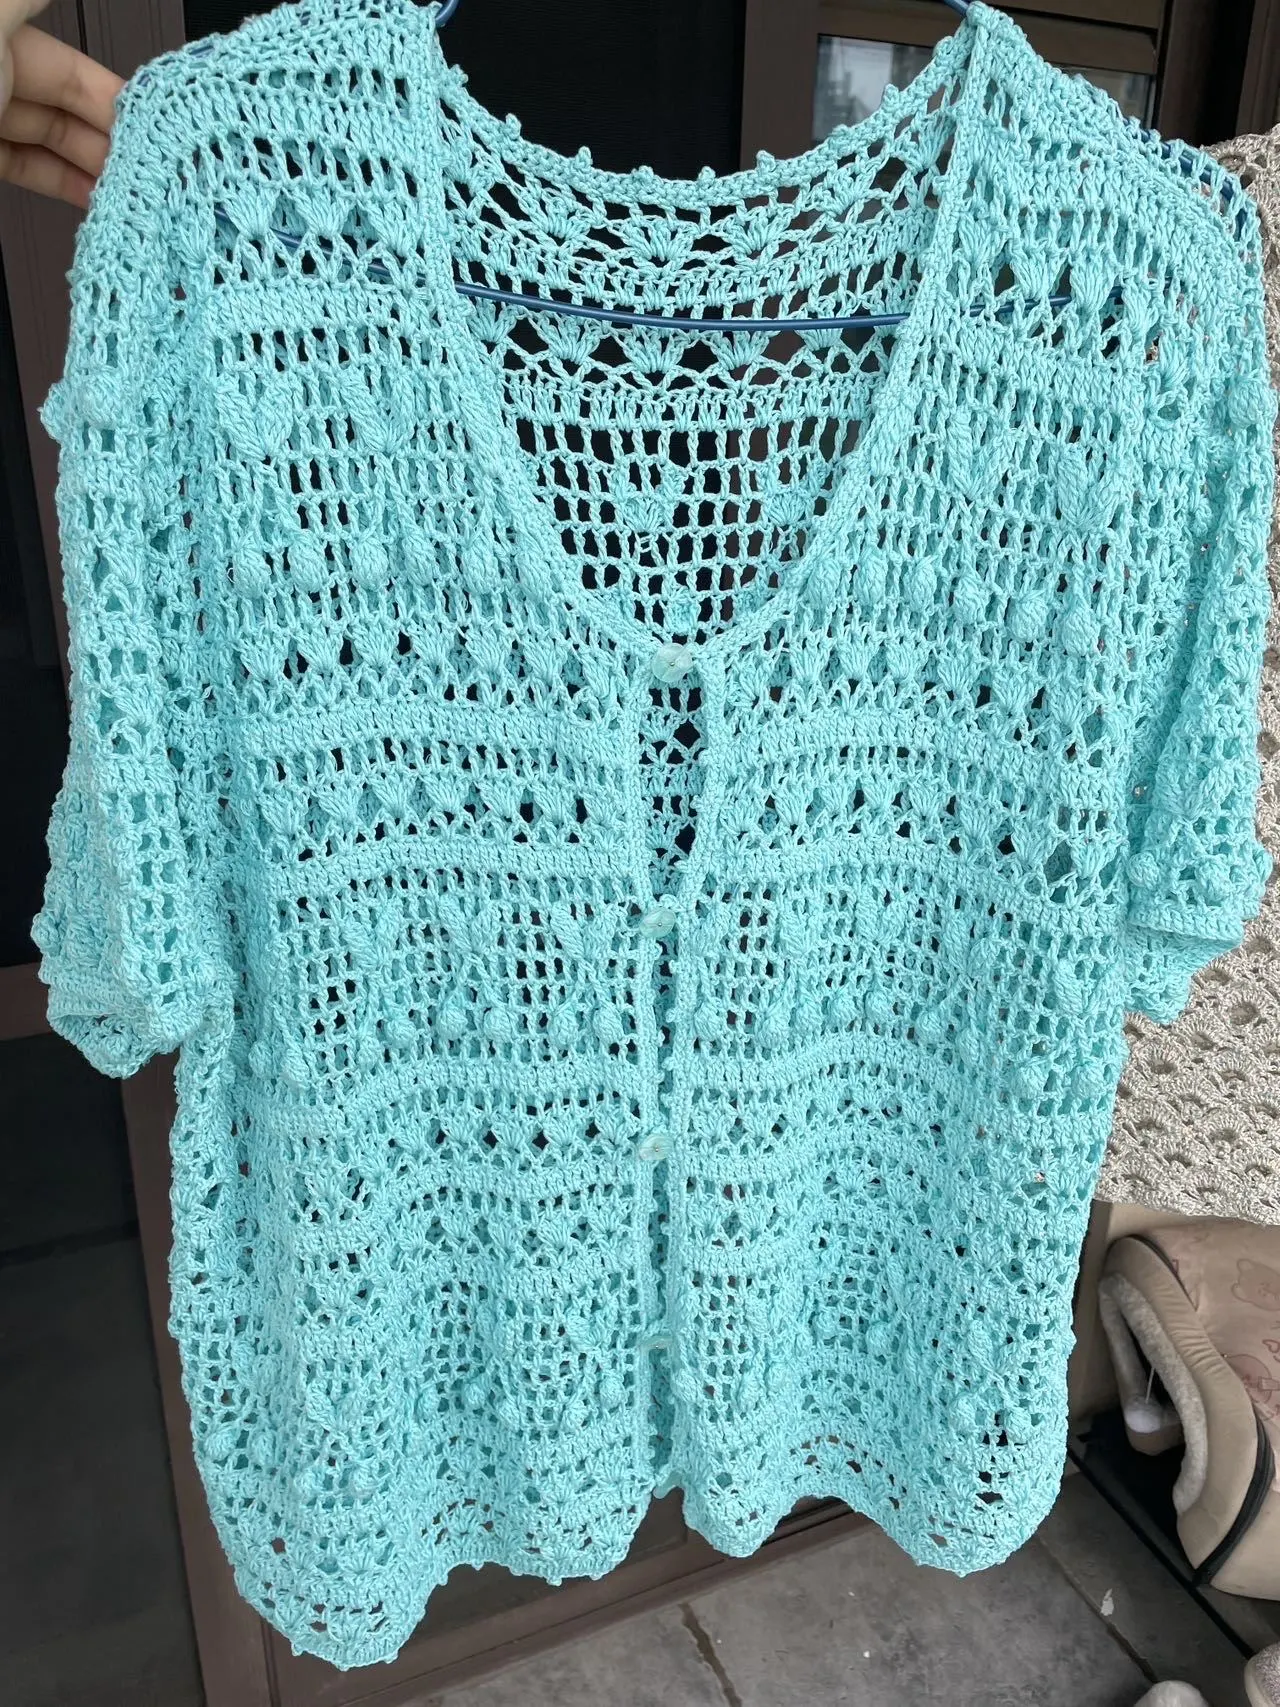
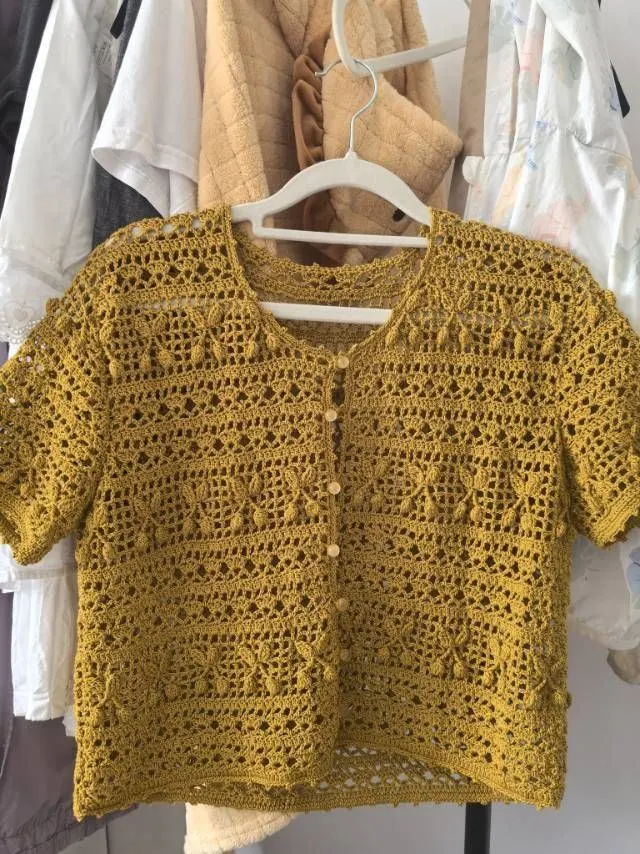
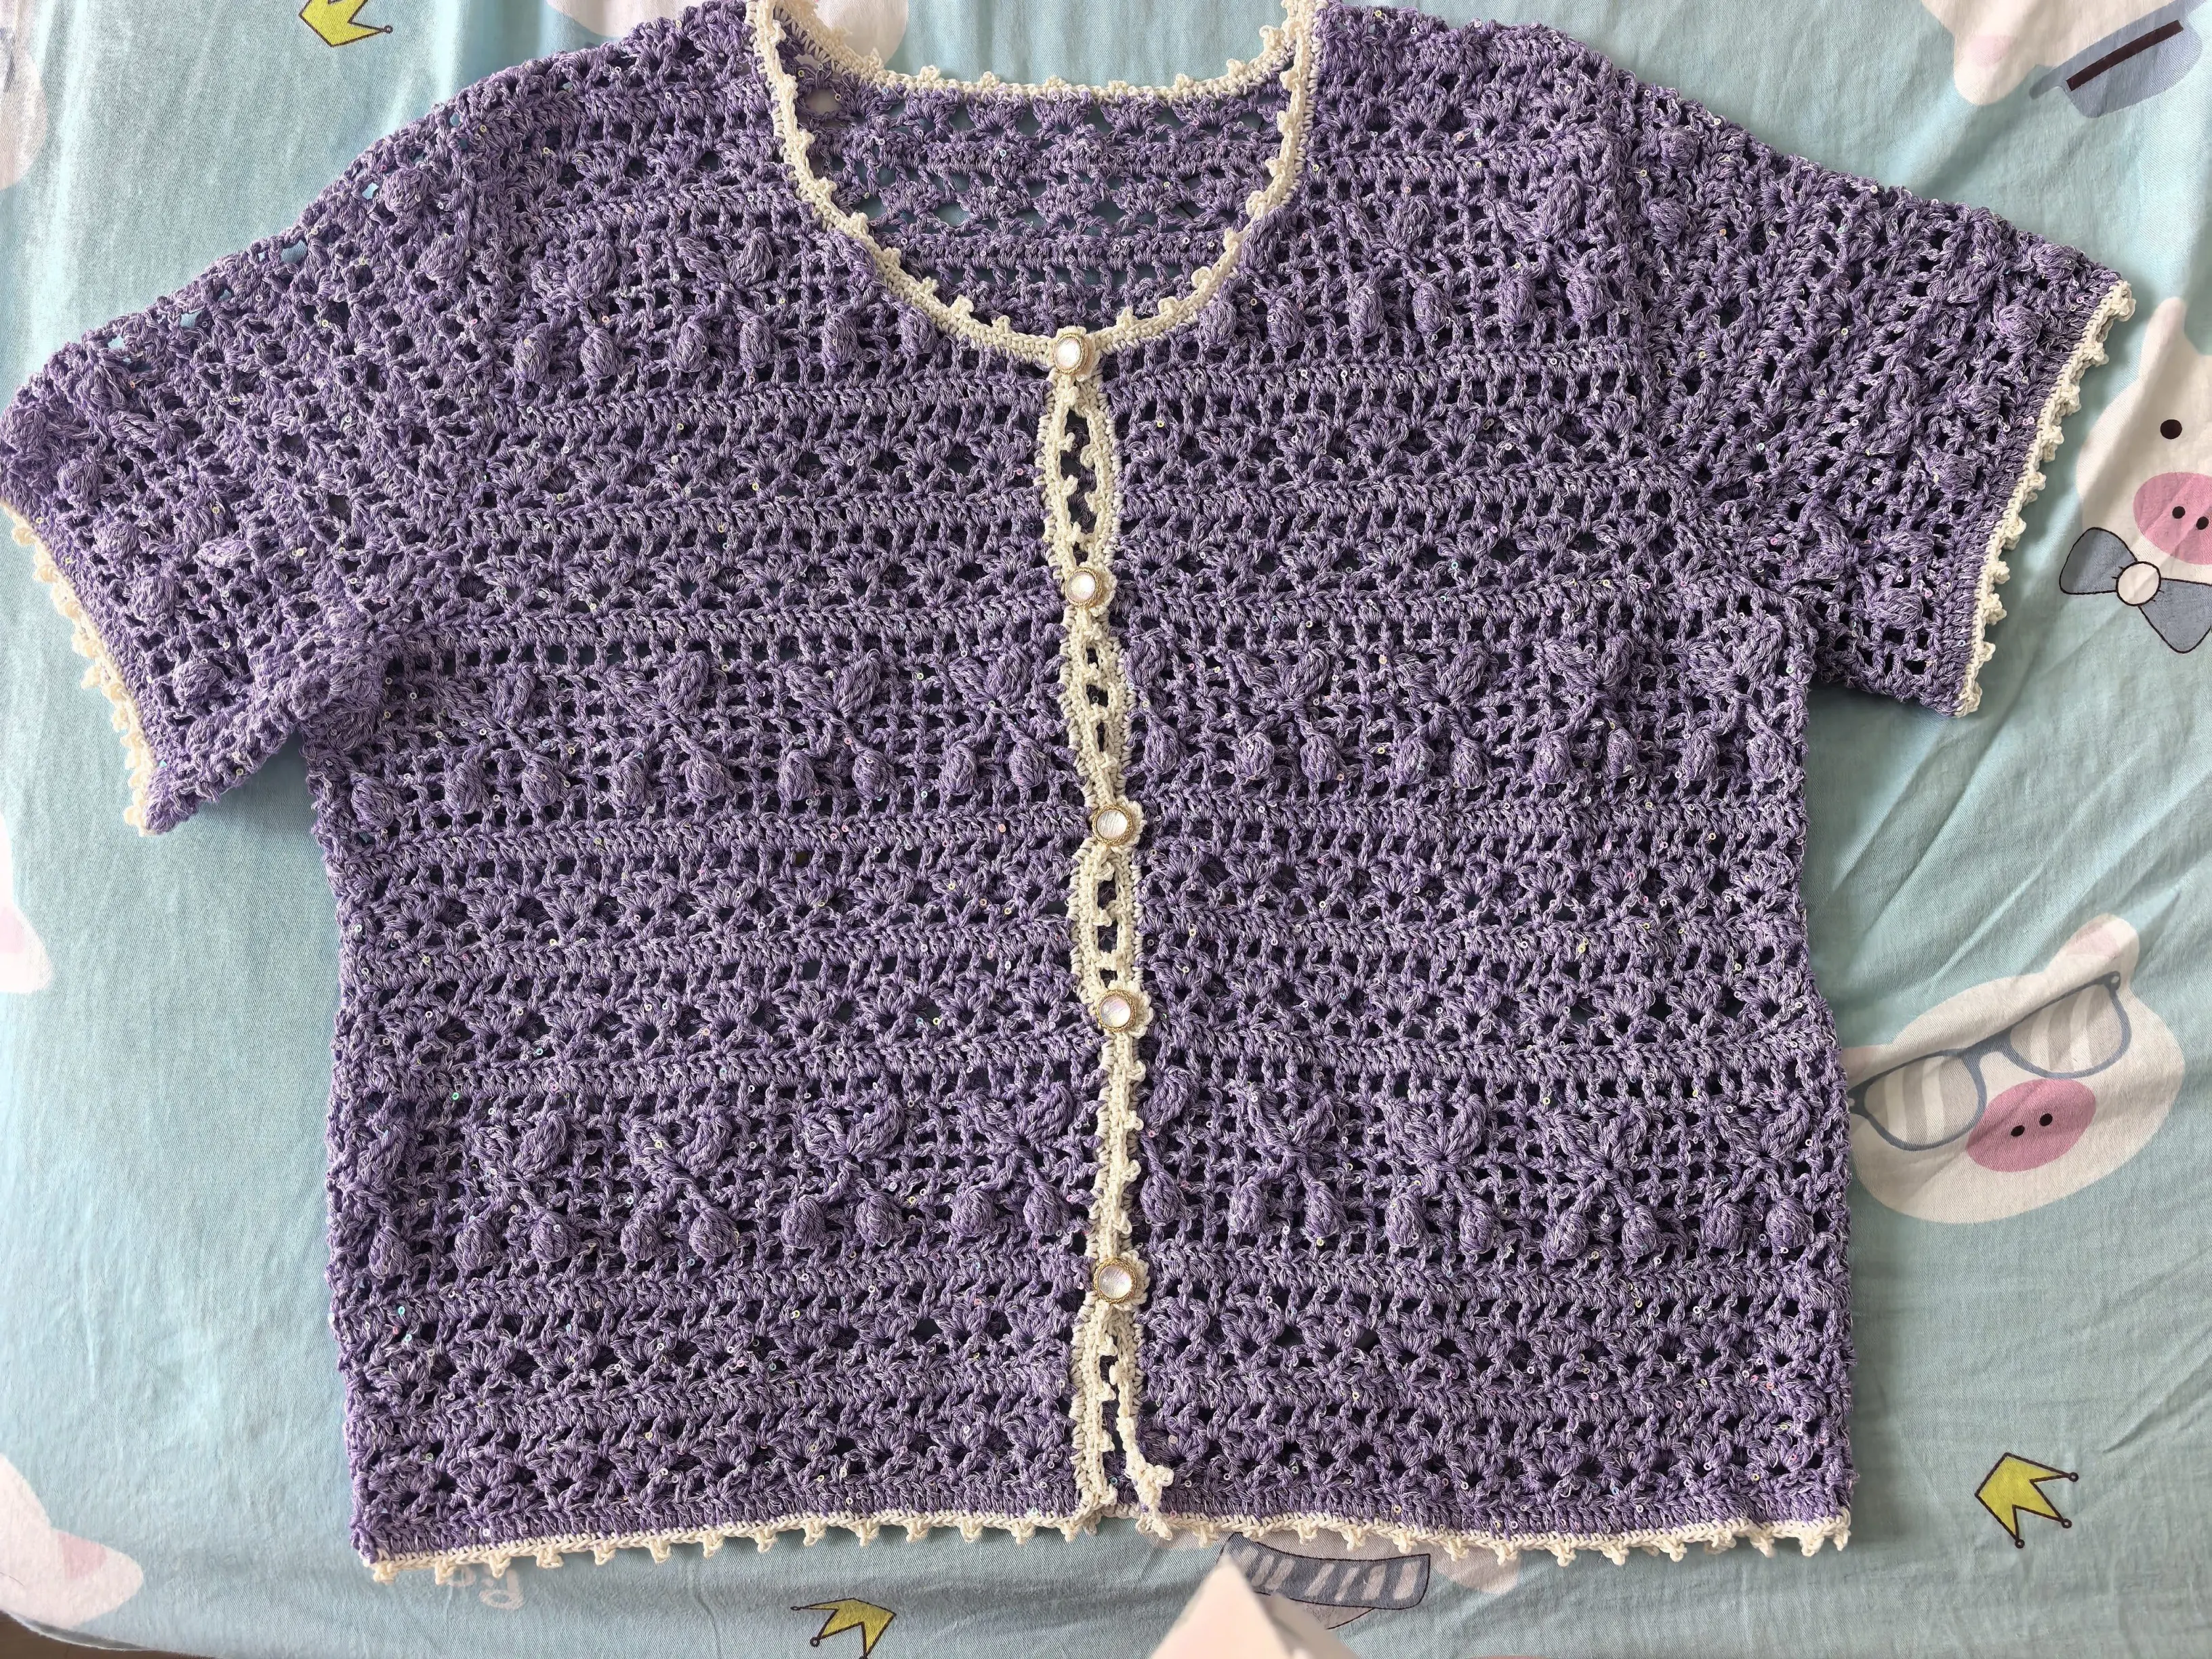
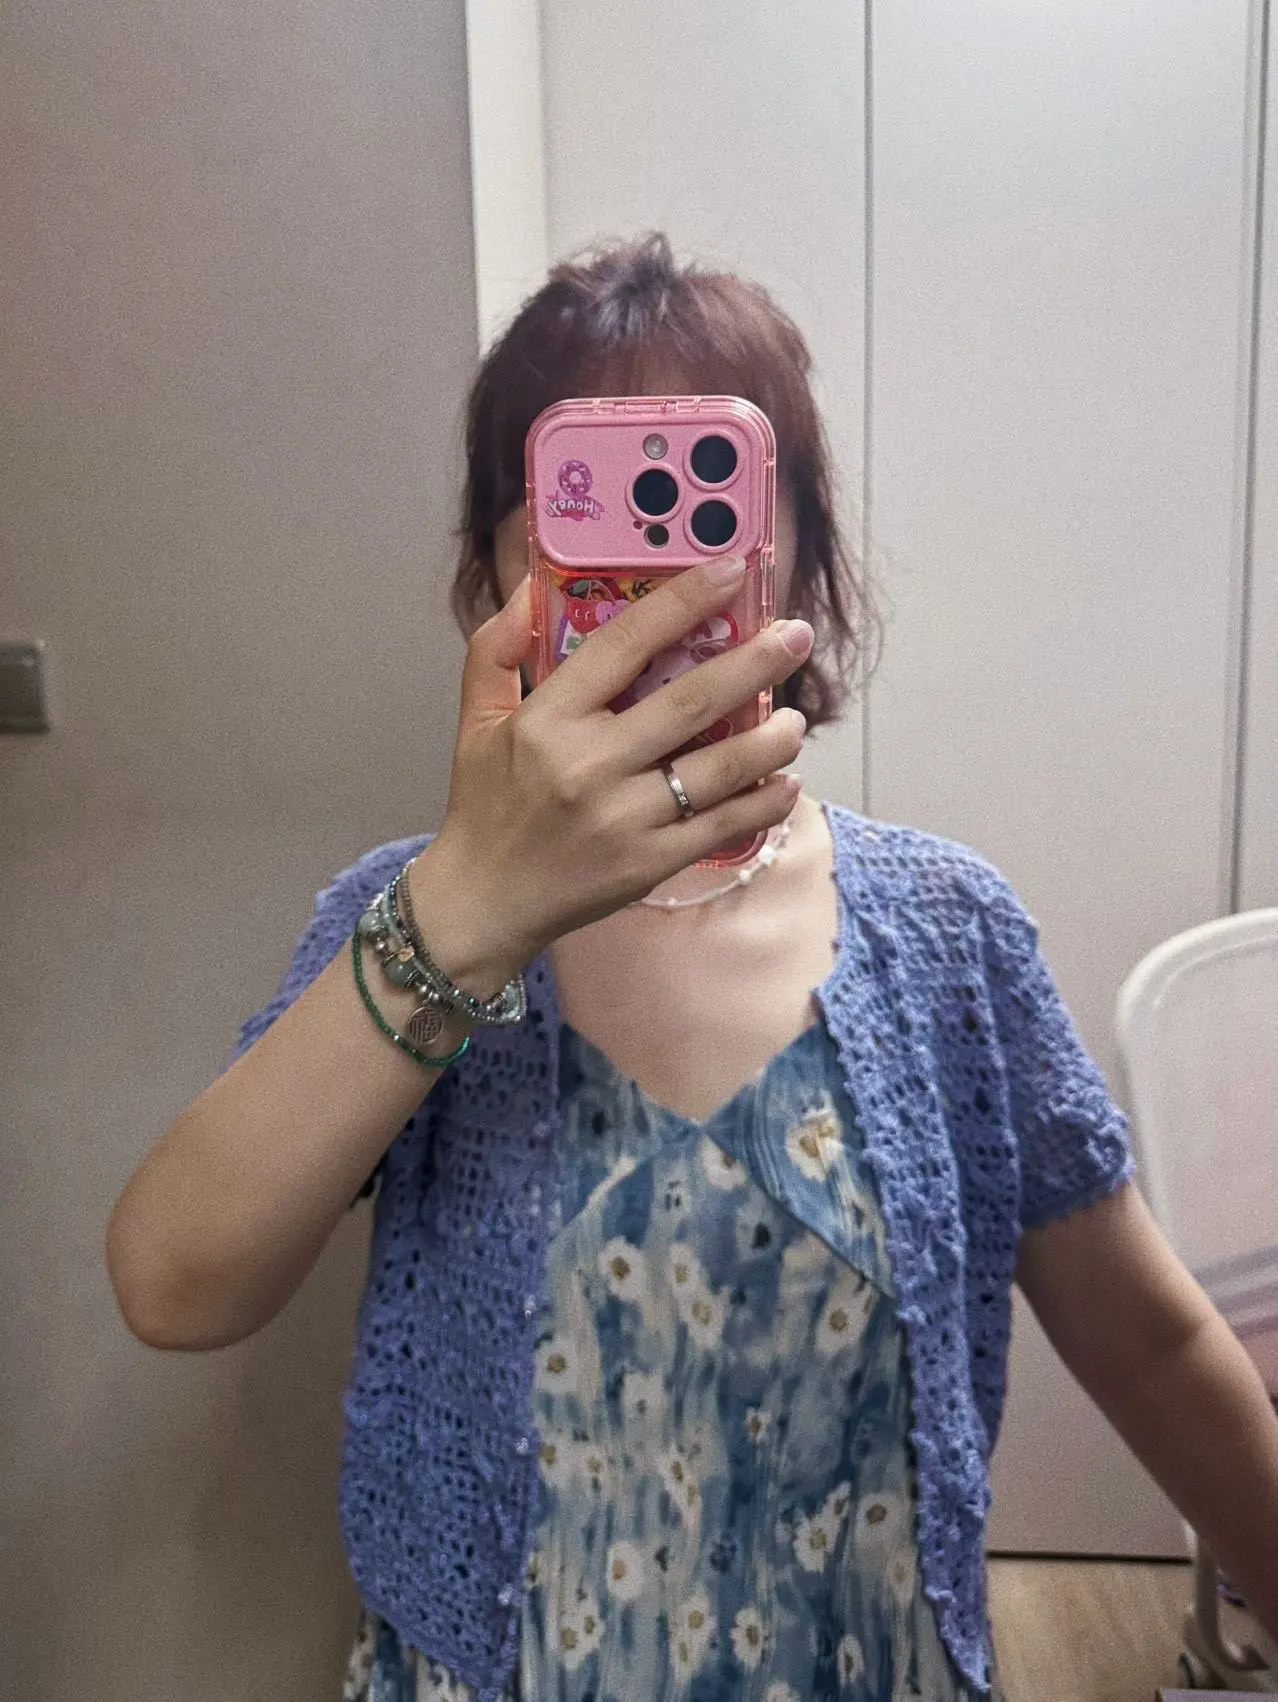
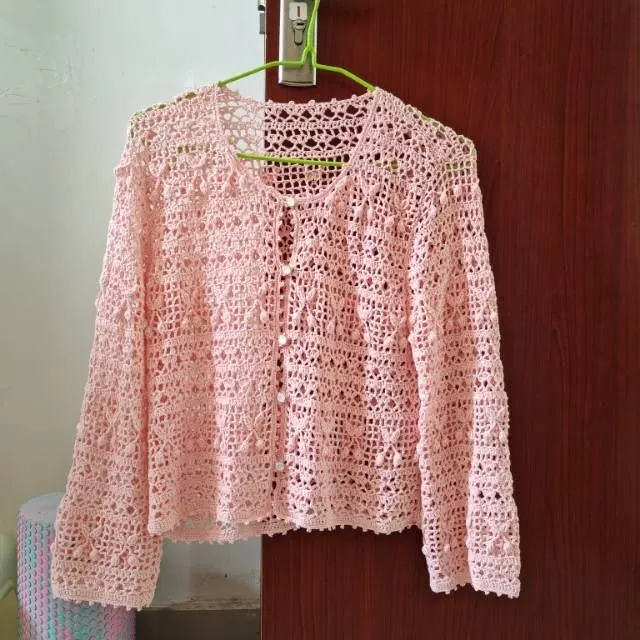
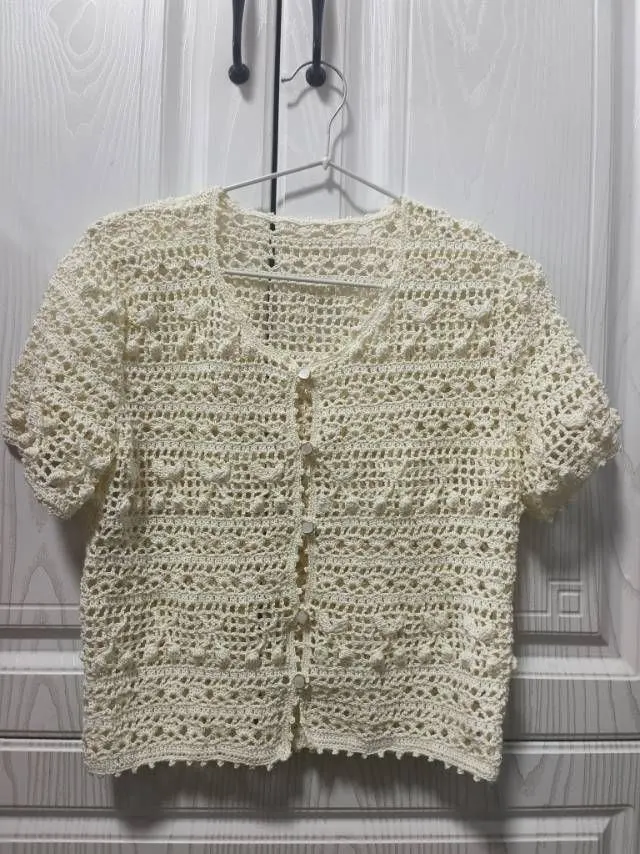
Cherry Cardigan
Project preview
See the finished project
Pattern format
Instructions
| Style | Yarn | Color |
|---|---|---|
| Floral Brocade Red Version | Velvet Merino |  22#Burnt Ochre |
| Floral Brocade Blue Version | Velvet Merino |  12#Baby Blue |
| South African Soft Mohair Mixed Hand-Knitting Yarn |  09#Sky Blue |
This cardigan comes in two styles: long sleeves and short sleeves, and is available in two sizes: large and small. The crocheting method is identical for all versions, with only the stitch count varying. Each piece consists of a back piece, front pieces, sleeves, connections, edging, and buttons. First, make each fabric piece separately; once completed, join them together, add the edging, and sew on the buttons.
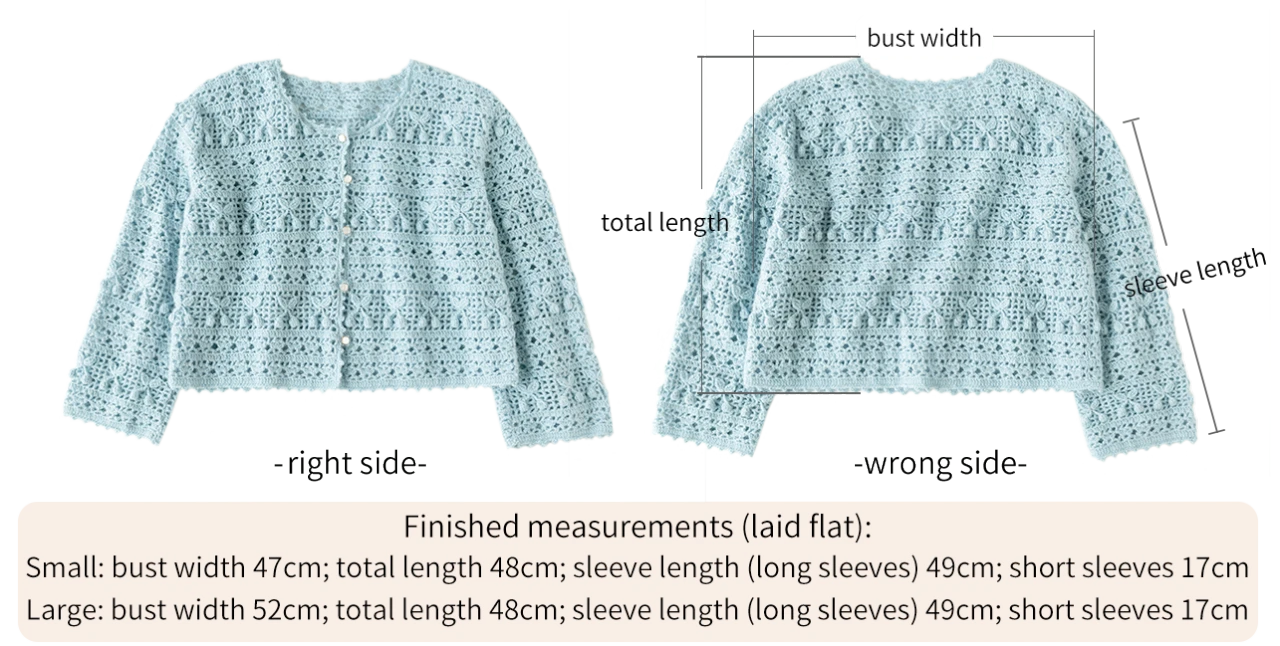
Note: Hand-measured, with an error margin of 1-2 cm.
Due to variations in individual tension, the size of the sample is for reference only.
Materials:
Floral Brocade Version: Preshrunk Wool Mixed Hand Knitting Yarn+ South African Soft Mohair Mixed Hand-Knitting Yarn
Lace Version: Combed 3# Lace
Hook: 2.50 mm crochet hook
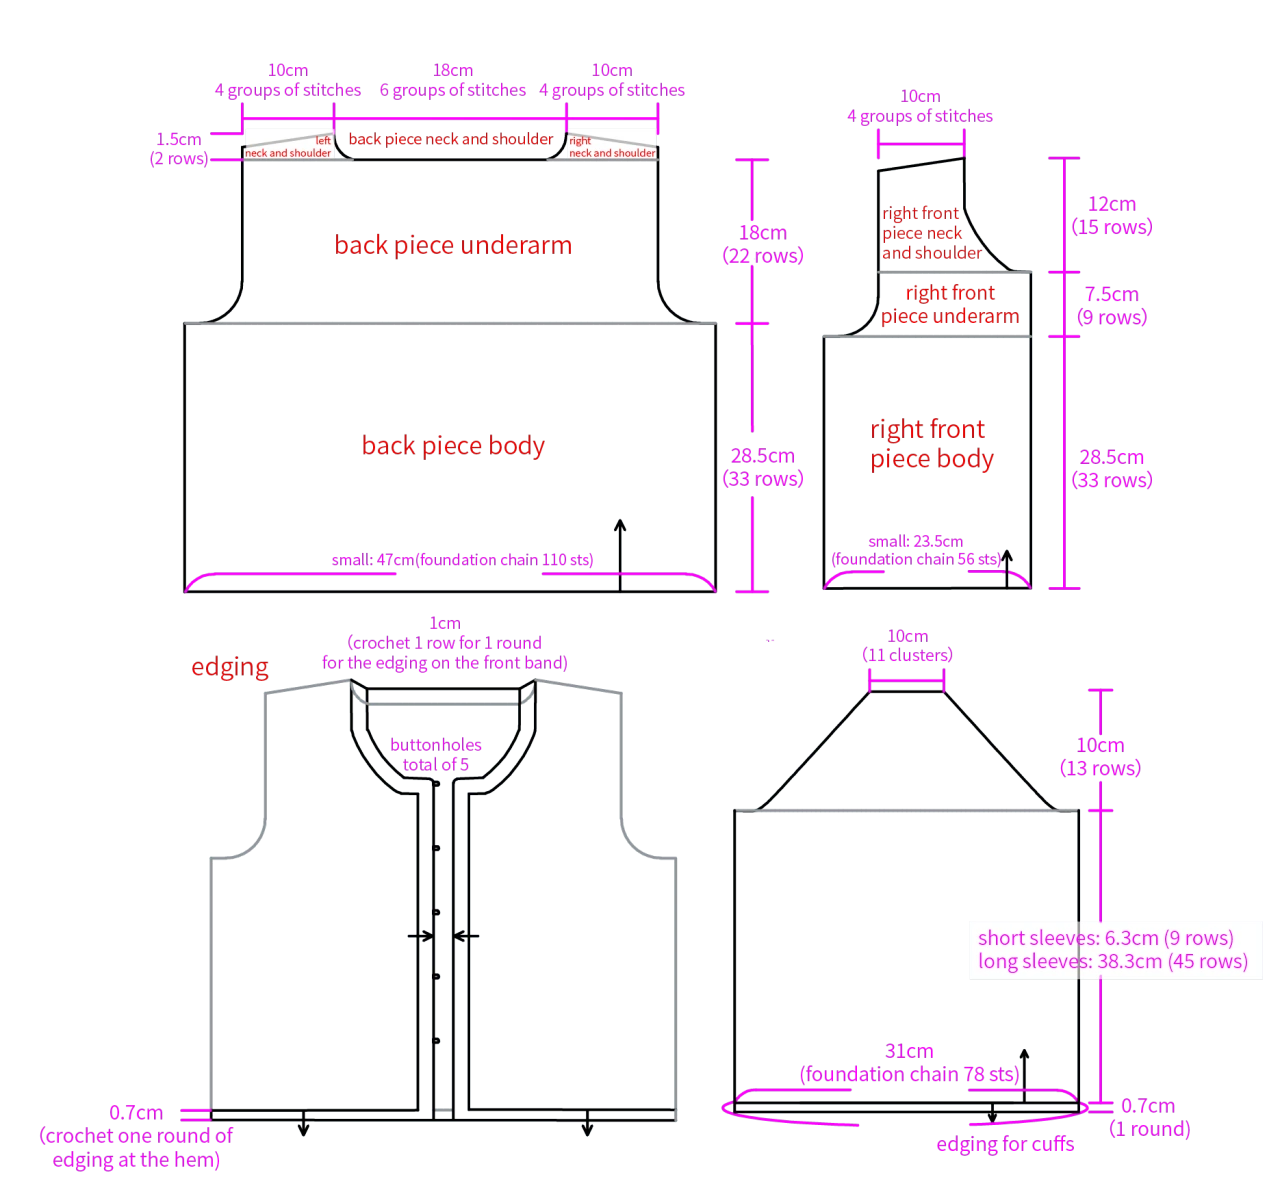

Note: This pattern is making in Chinese crochet pattern terms, and the stitch name is written using American terminology. All measurements in charts are in cm.
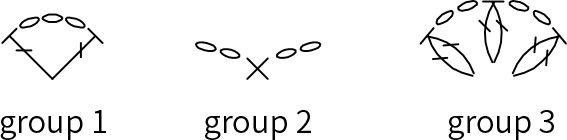
Chart Key







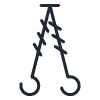

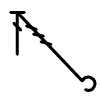
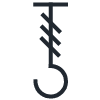


Part 1 Back piece
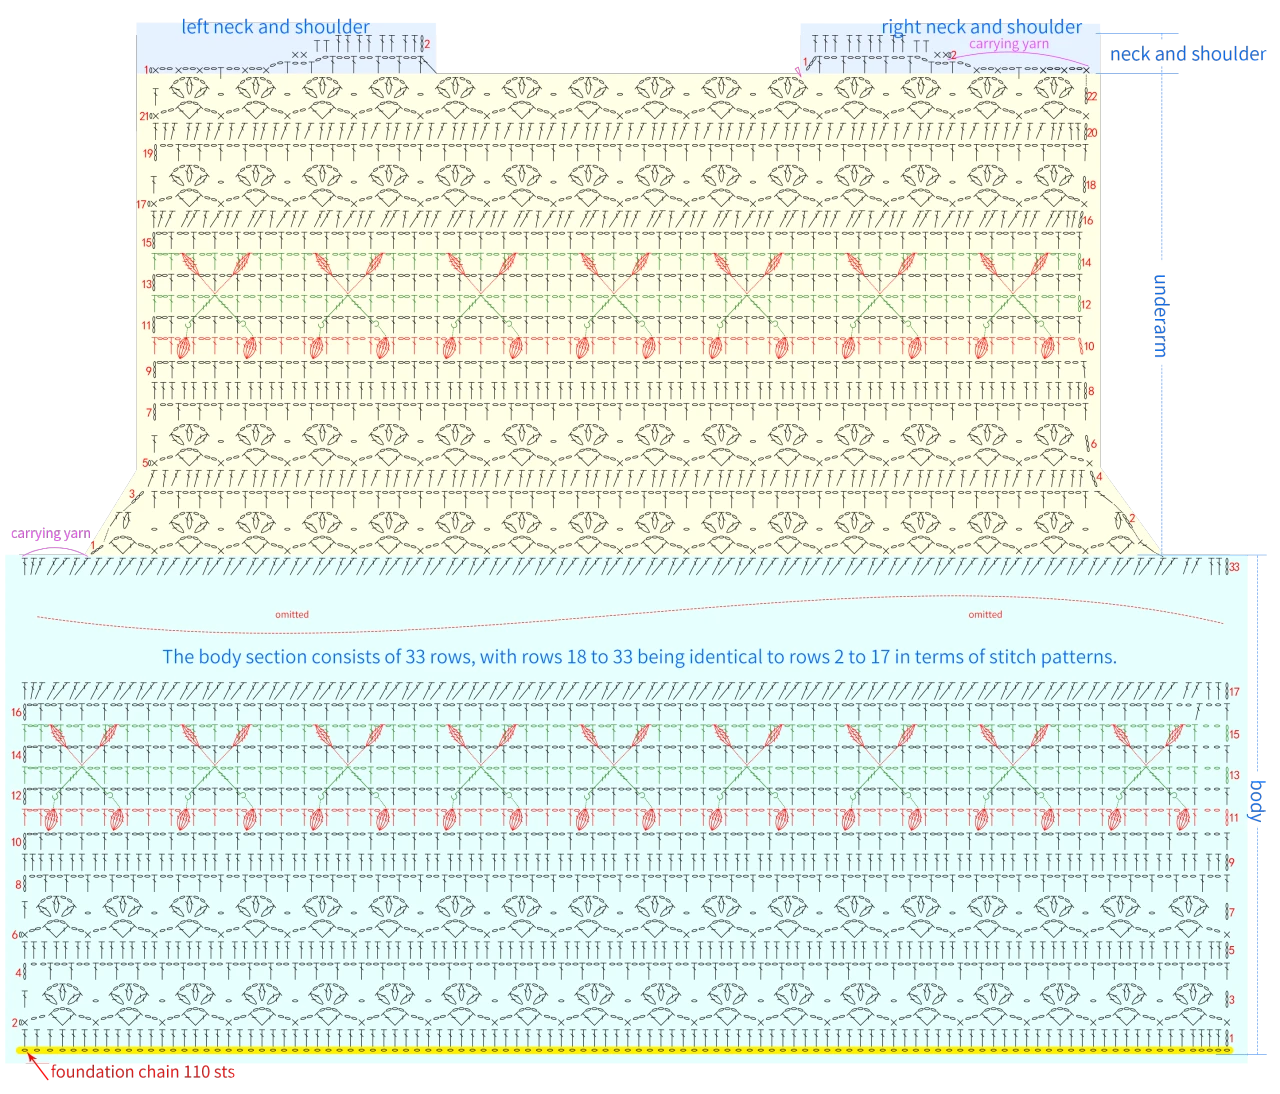
The back piece is divided into three sections: the body, the underarm, and the neck and shoulder. Start the body section with a foundation chain, then work back and forth in rows upward. Please refer to the video demonstration for more details.
Part 2 Front pieces
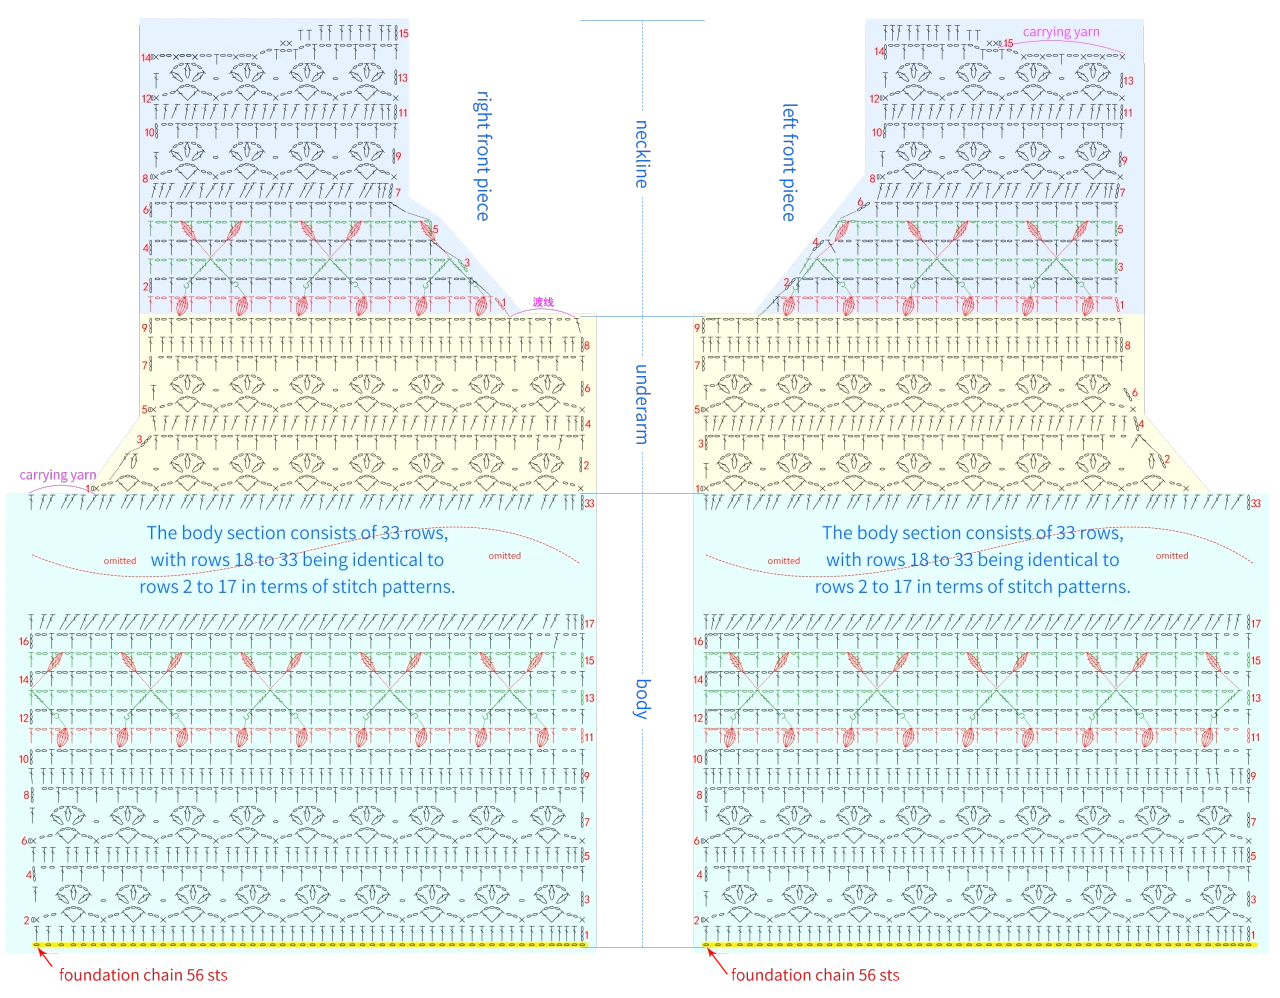
The front pieces, including both the left front piece and right front piece, is divided into three sections: body, underarm, and neck and shoulder. Similarly, start with a foundation chain and work back and forth in rows upward. Please refer to the video demonstration for more details.
Note: The front piece on the left side when worn is referred to as the left front piece, and the other piece is called the right front piece.
Part 3 Sleeve × 2
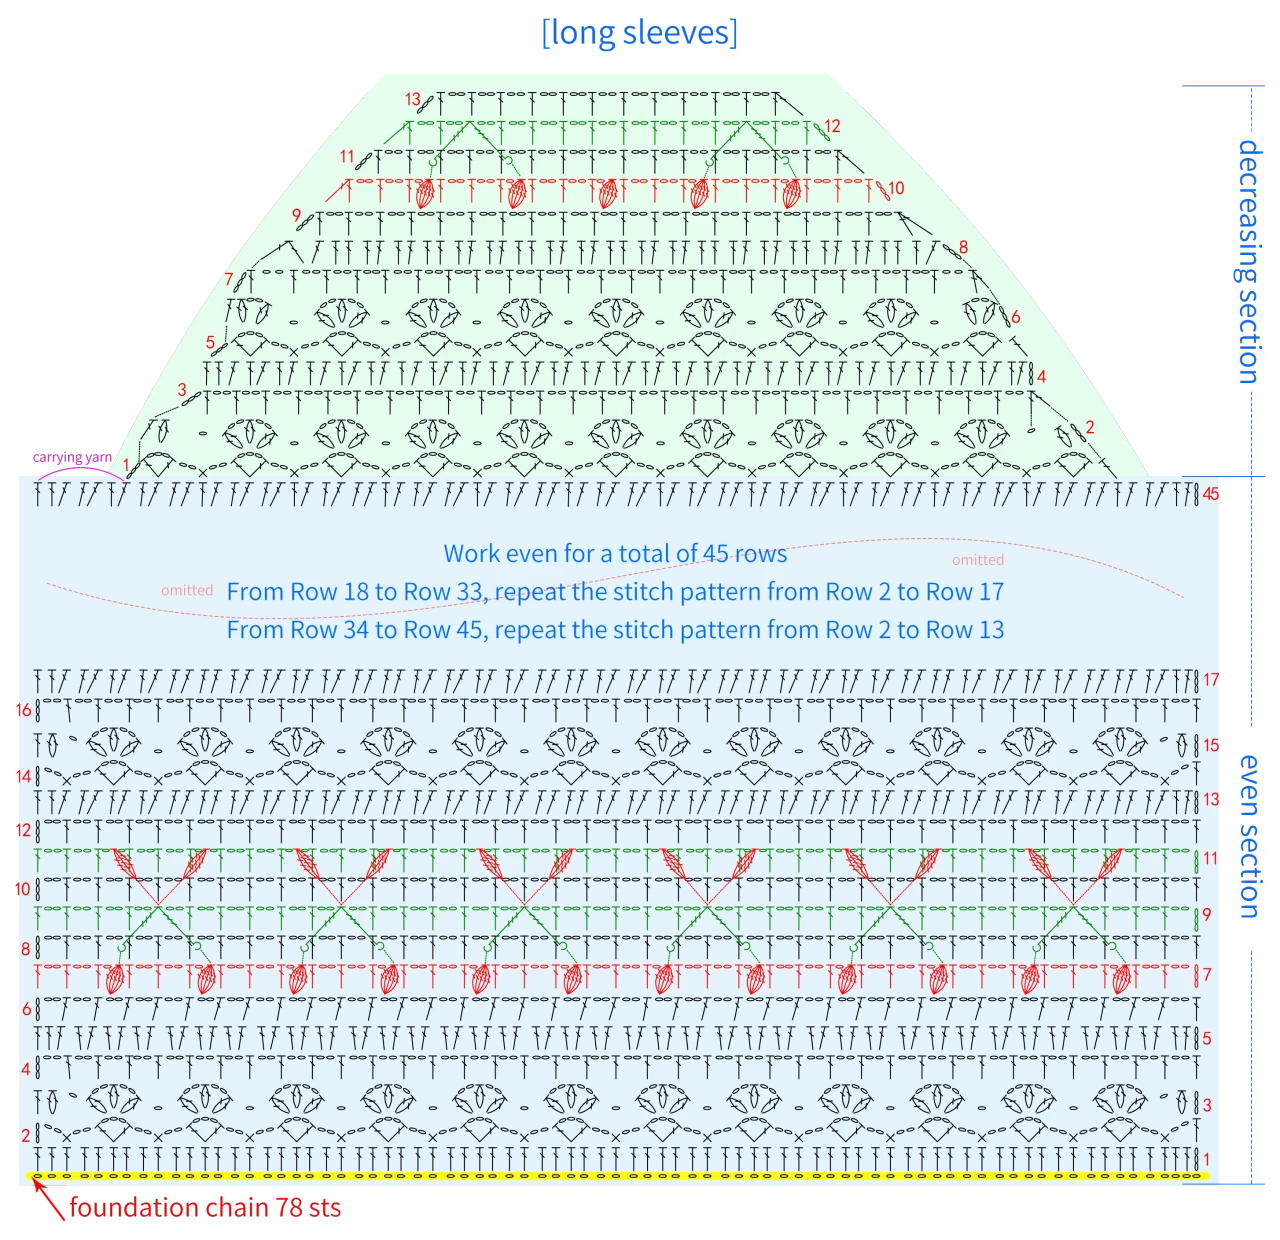
The crocheting method for both sleeves is identical, starting with a foundation chain and working back and forth in rows upward. Please refer to the video demonstration for more details.
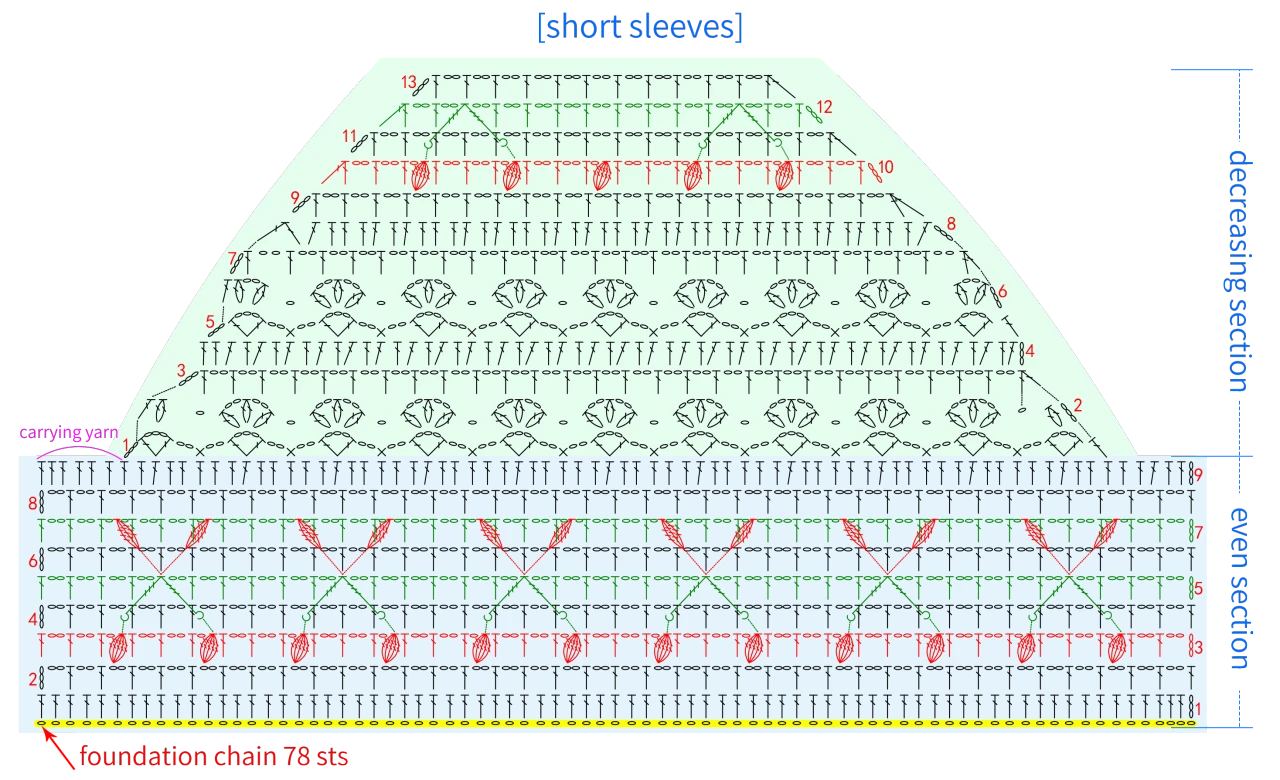
Part 4 Connections
All connections are made on the wrong side of the piece. First, connect the front pieces (left and right) to the back piece, then attach the sleeves to the underarm areas.
Step 1 Connect the front and back pieces
The connection of the front and back pieces includes the connection of the body sections and the neck and shoulder sections. Please refer to the video demonstration for more details.
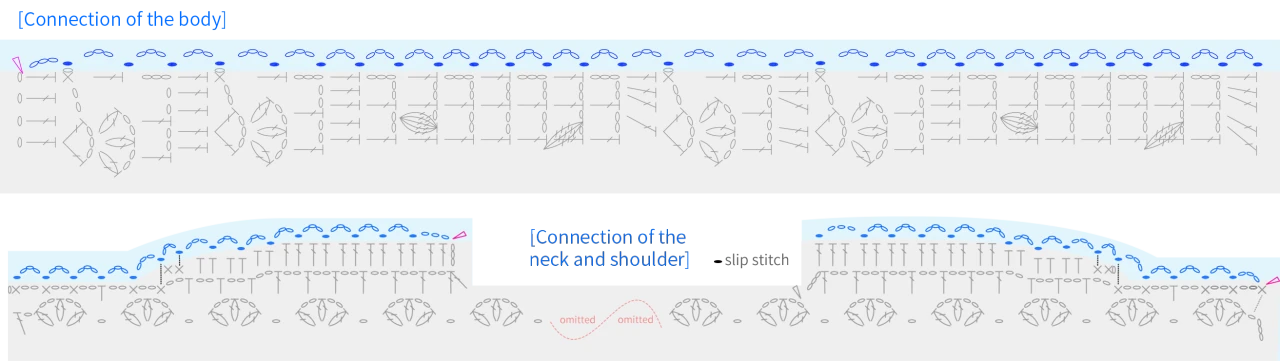
Step 2 Connect the sleeves
First, refer to the connection schematic of the sleeve to connect the sleeve pieces into a tube shape. Then connect it to the underarm positions of the front and back pieces. Both connections are made using slip stitches and chain stitches. Please refer to the video demonstration for specifics.
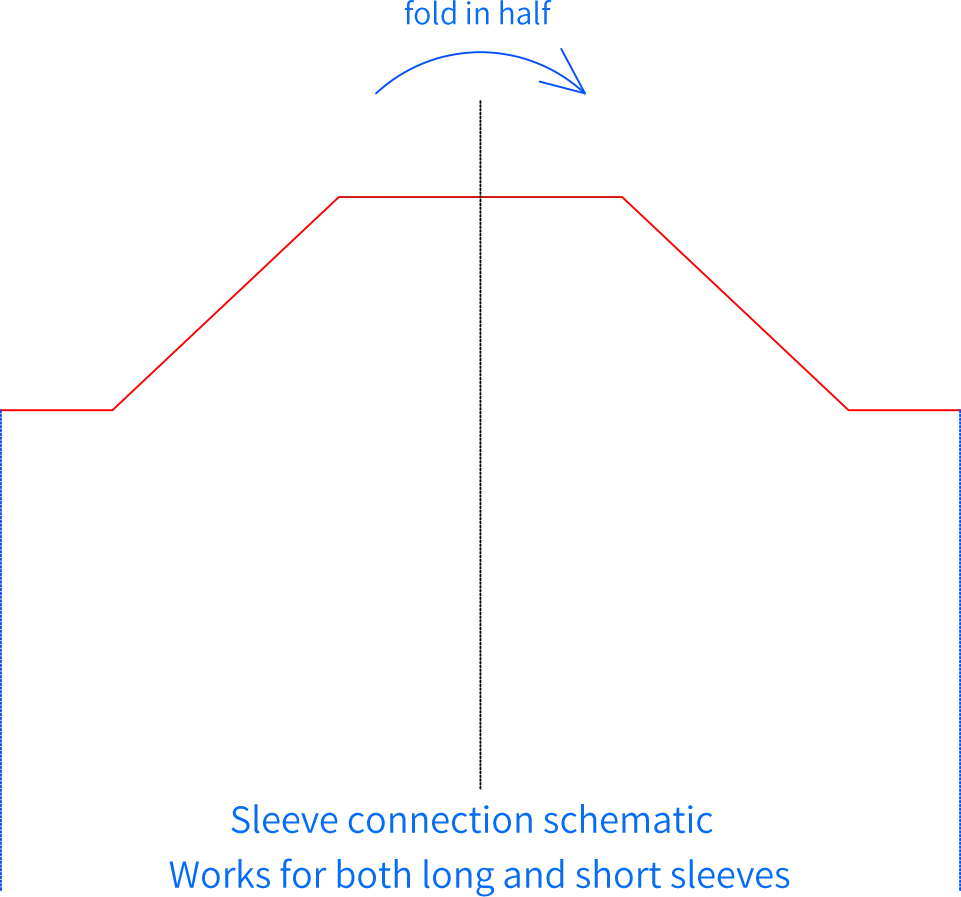
Note:
1. After folding in half, first join the dashed line sections on both sides;
2. Then attach the red solid line section to the underarm section.
Part 5 Edging
Including the edging for the body and the cuffs.
Step 1 Body edging
Begin at the bottom of the right front piece and crochet along the edge all the way to the bottom of the left front piece. Then continue crocheting along the hem of the body until you reach the bottom of the left front piece. When you reach the right front piece, you need to crochet buttonholes (a total of 5 buttonholes) at the same time. Please refer to the video demonstration for specifics.
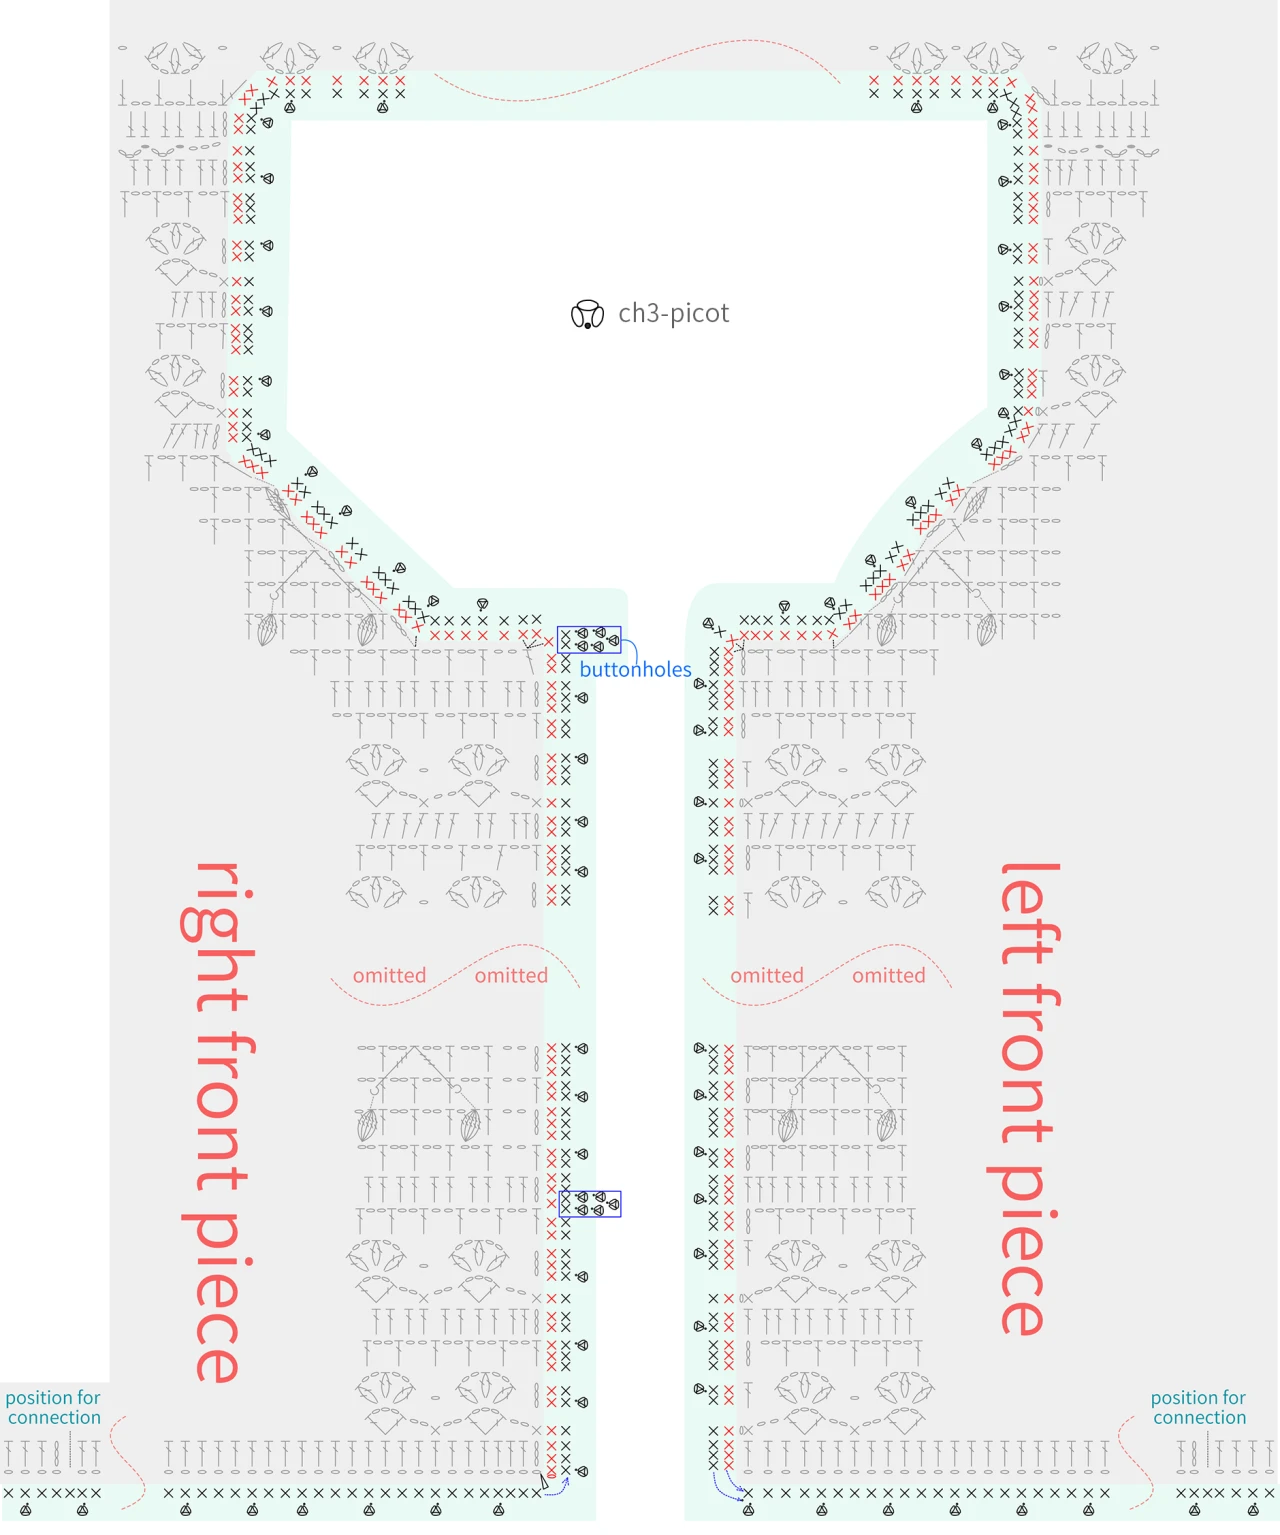
Note:
1. The single crochets for the edging can be adjusted as needed to keep the piece flat.
2. The number of picot stitches and single crochets can also be adjusted according to the actual stitch count.
3. The positions of the first and last buttonholes are fixed, while the three buttonholes in the middle should be roughly evenly spaced.
Step 2 Cuffs edging
The crochet method for the cuffs and the hem is identical, both worked with a sequence of single crochets and picot stitches. Please refer to the video demonstration for specifics.

Note: The number of picot stitches and single crochets can be adjusted according to the actual stitch count.
Step 3 Sew on buttons
Lay the two front pieces flat and align them. Sew buttons on the right front piece in positions that are symmetrical to the buttonholes; sew a total of 5 buttons. (For the Lace Version, use Combed 3# Lace; for the Floral Brocade Version, use the Preshrunk Wool Mixed Hand Knitting Yarn.) Please refer to the video demonstration for specifics.
Made by the community